These yogurt popsicles are such a multitasker that you can enjoy them for breakfast, dessert, or any time in between! You just need 3 ingredients to make this healthy treat.
There’s something about fresh, fruity popsicles that make me feel like a kid again! These vegan yogurt popsicles took me right back to my childhood in a whole new way. They’re like your childhood fudge popsicles in texture, but reinvented with a healthier twist.
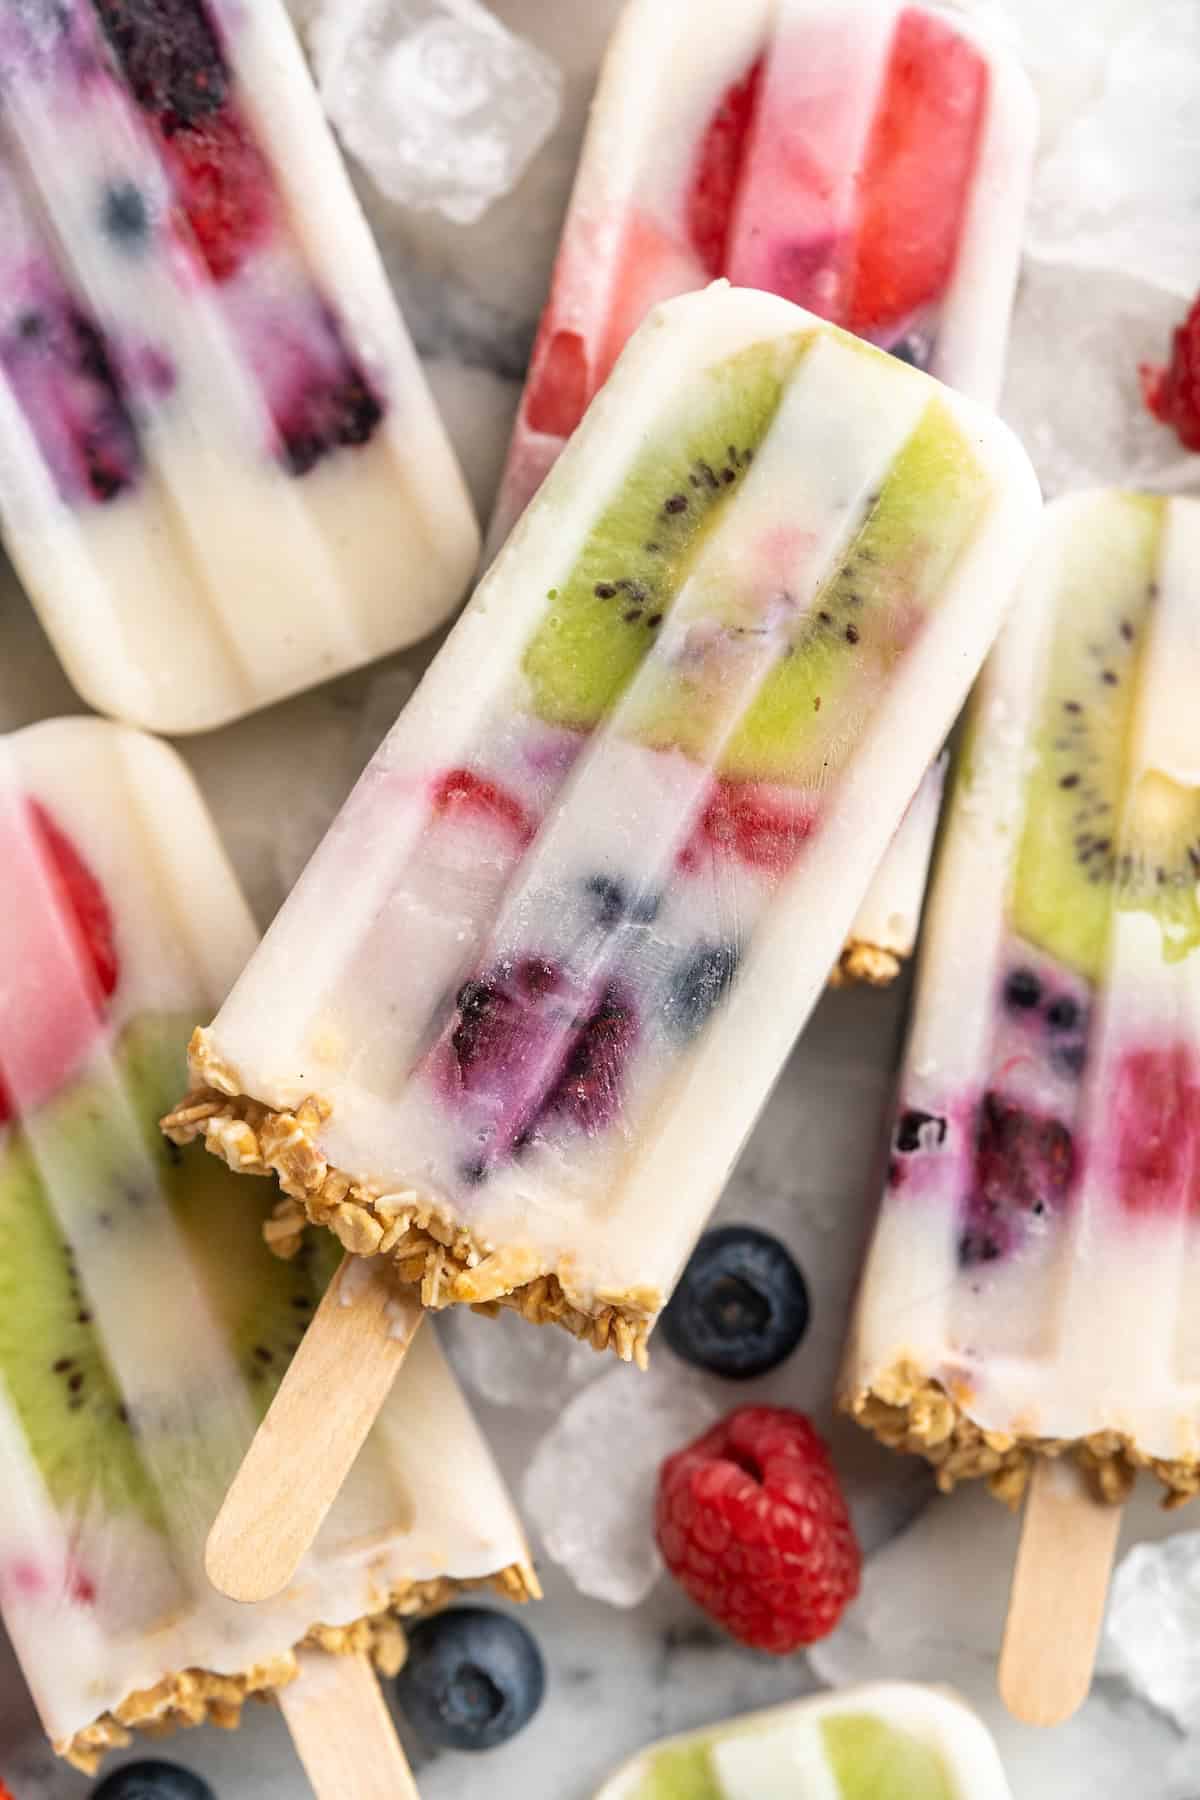
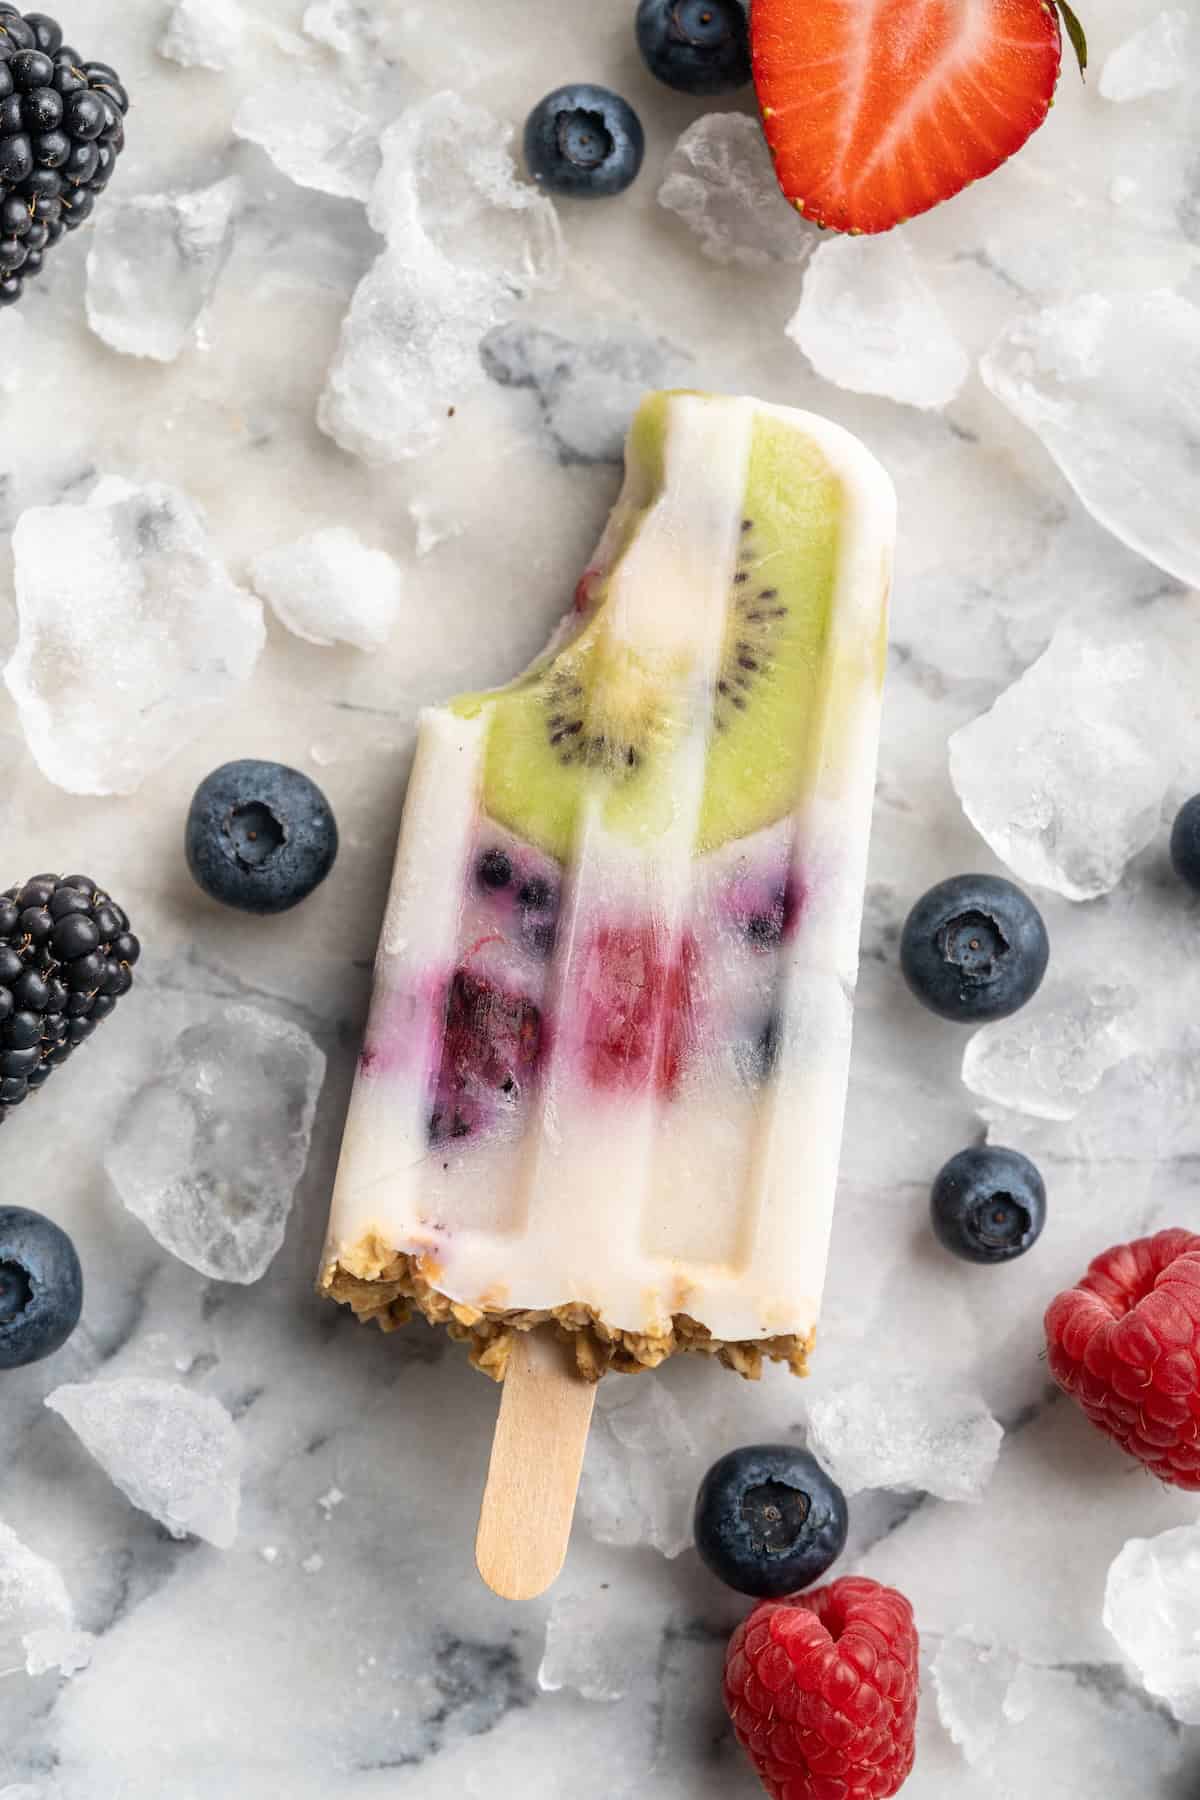
The base of these yogurt parfait pops is—you guessed it!— vegan yogurt , which gives them a thick, rich texture. Granola adds some nice crunch and flavour, and fresh fruit brings some extra sweetness without adding sugar. You really can have these for breakfast, but they’re so delicious, you’ll want to eat them the rest of the day too!
Why You’ll Love These Yogurt Popsicles
- Nutritious and delicious . Packed with vegan yogurt, fresh fruit, and granola, these popsicles offer a perfect balance of flavour and nutrients.
- Easy to make . They are also incredibly simple to prepare with just 3 ingredients. Kids love helping with this recipe, too!
- Kid-friendly . Sneak some extra nutrition into your kids’ day without them even realizing it in a fun a fun and healthy way.
Notes on Ingredients
Scroll down to the recipe card to find the ingredient quantities and recipe instructions.
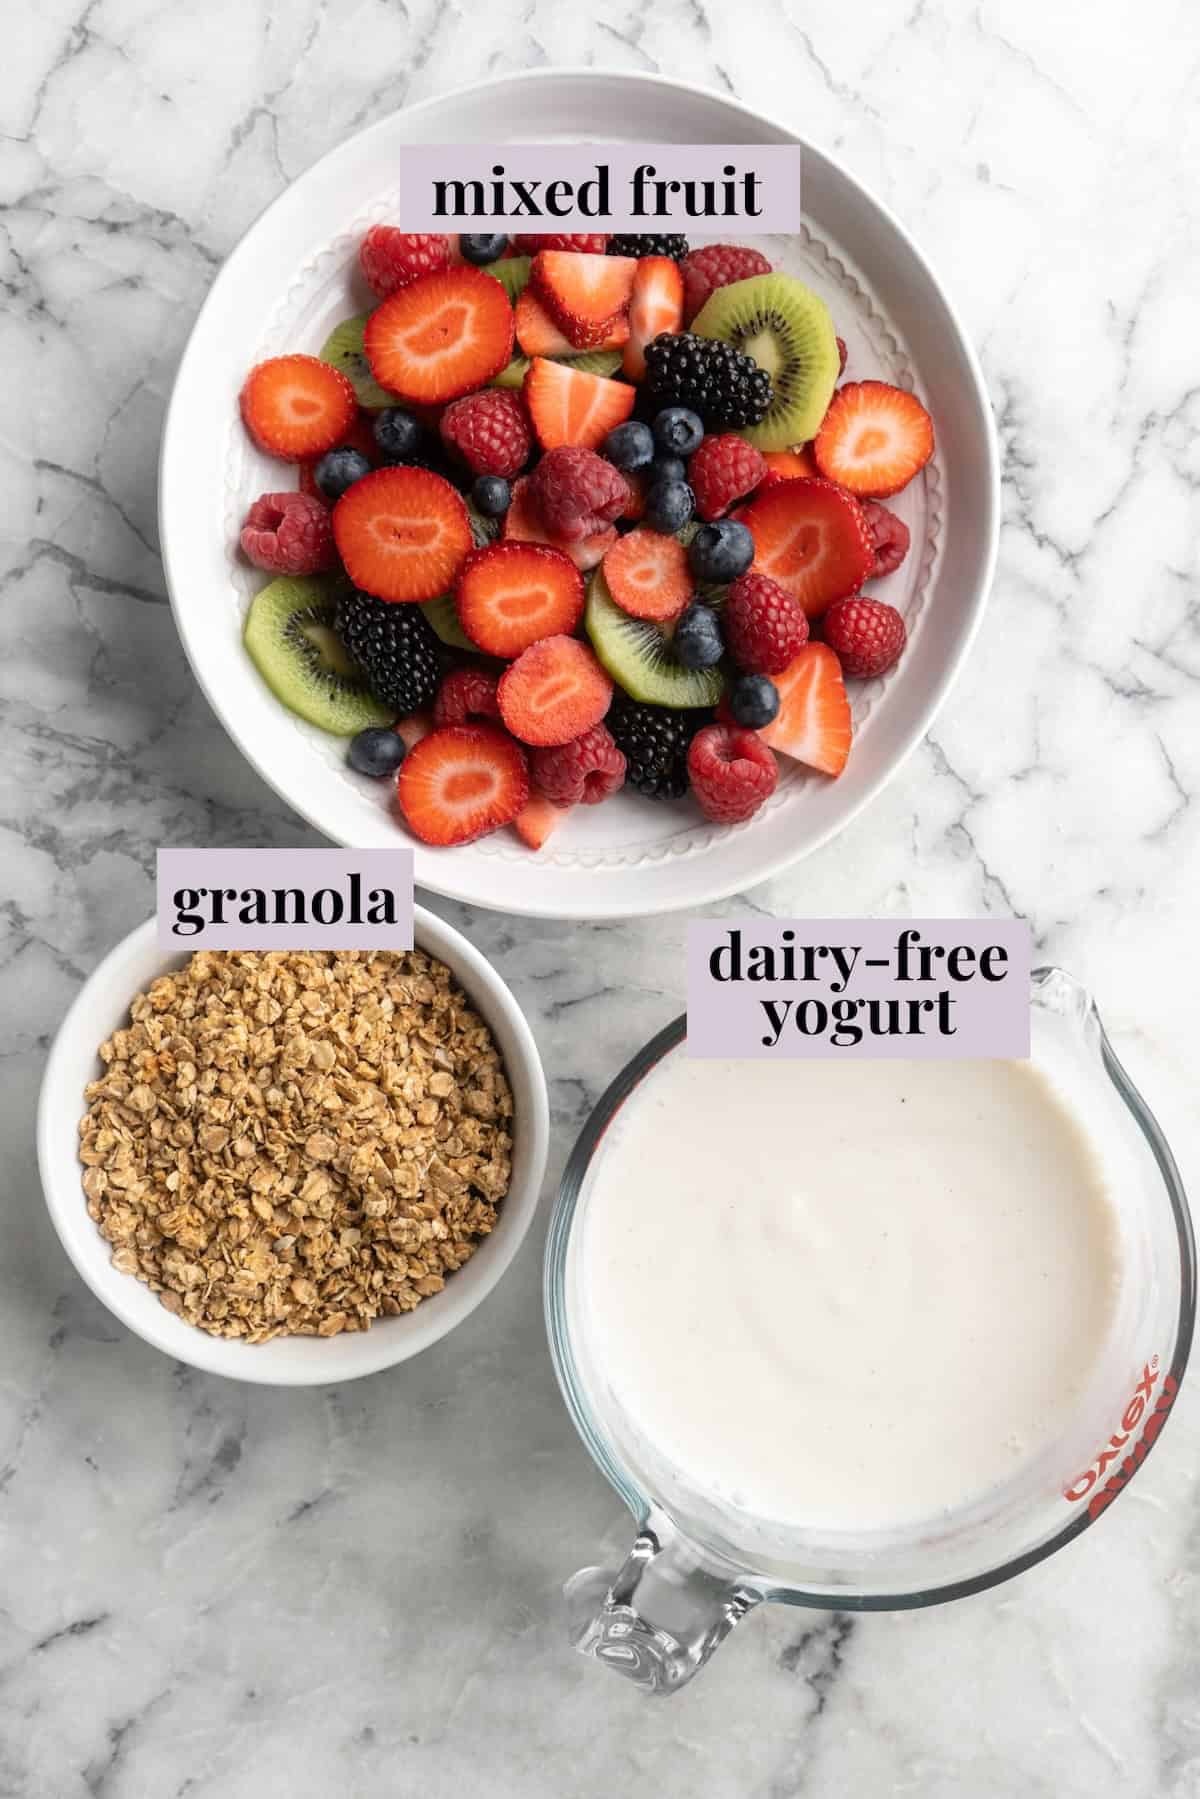
- Dairy-free yogurt – Any flavour or variety you like, or try this homemade vegan yogurt recipe . If you use plain yogurt, you may want to add some additional maple syrup for sweetness.
- Mixed fruit – I used strawberries, raspberries, blueberries, and kiwis.
- Granola – Any variety! I love this pumpkin granola recipe .
How to Make Yogurt Popsicles
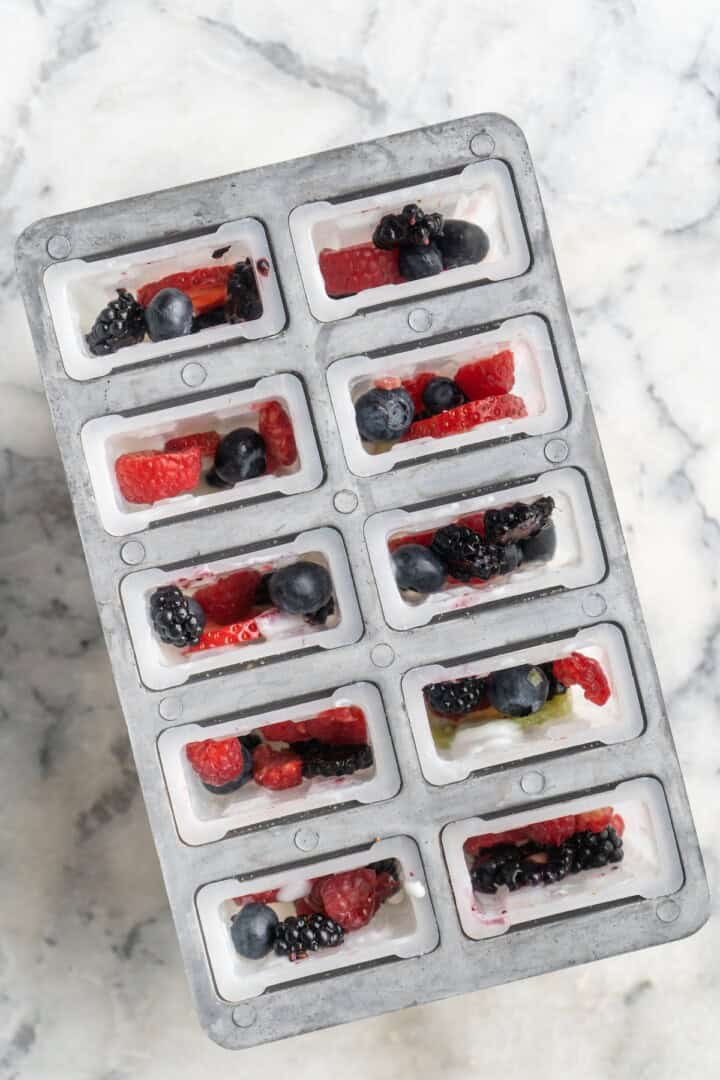
Add yogurt and fruit.
- Assemble . Spoon the yogurt into the popsicle molds, alternating with the fruit, and then finish with a layer of granola. Push down slightly.
- Freeze . Add the sticks to the popsicle molds and freeze for a minimum of 6 hours, or as instructed in your popsicle mold manual.
- Serve . Set on the counter for a few minutes, then unmold and serve!
Tips for Success
- Freeze completely before removing popsicles . Make sure you give the popsicles enough time to freeze completely. Different shapes of molds can have different freezing times.
- Dip mold in hot water to remove easily . If you have trouble getting the popsicles out, dip the mold in hot water to loosen them up a bit. If you yank the stick too hard, you might end up just removing the stick and leaving the yogurt popsicle in the mold!
- Use fresh, ripe fruit . The flavour and texture of the popsicles really depend on the flavour of the fruit you use.
- Have fun! Using different flavours of yogurt, fruits, and granola will change the taste and appearance of these yogurt parfait popsicles. Make this recipe your own!

How to Store
To keep your popsicles fresh, I recommend leaving them in the mold until just before serving. If you need to remove them from their molds ahead of time, wrap each popsicle individually in parchment paper or plastic wrap before placing them in an airtight container or freezer bag. They’ll last for 3 to 4 weeks in the freezer.
More Frozen Treats
- Vegan Ice Cream
- 3-Ingredient Frozen Yogurt Granola Cups
- Chocolate Avocado Ice Cream
- Strawberry Granita
- 2-Ingredient Vegan Blueberry Ice Cream
Ingredients
- 2 cups vegan yogurt
- 1 cup mixed fruit , I used strawberries, raspberries, blueberries and sliced kiwis
- ½ cup granola
Instructions
- Line the yogurt and the mixed fruit bowl (I put my kiwis in a separate plate) beside the popsicle container. Spoon the yogurt into the popsicle container, then some fruit, alternating like a parfait.
- Leave some space at the top of each mold. Top it off equally with the granola, pushing down slightly so it sticks into the yogurt.
- Stick your popsicle sticks inside and freeze for at least 6 hours, covering according to your popsicle container’s instructions.
- Remove and enjoy! I like to let it sit on the counter for a few minutes first so removal is easier. Alternatively you can dip it in hot water for about 10 seconds and then remove. Serve and enjoy!
Notes

Yogurt Popsicles
Ingredients
- 2 cups vegan yogurt
- 1 cup mixed fruit I used strawberries, raspberries, blueberries and sliced kiwis
- ½ cup granola
Instructions
- Line the yogurt and the mixed fruit bowl (I put my kiwis in a separate plate) beside the popsicle container. Spoon the yogurt into the popsicle container, then some fruit, alternating like a parfait.
- Leave some space at the top of each mold. Top it off equally with the granola, pushing down slightly so it sticks into the yogurt.
- Stick your popsicle sticks inside and freeze for at least 6 hours, covering according to your popsicle container’s instructions.
- Remove and enjoy! I like to let it sit on the counter for a few minutes first so removal is easier. Alternatively you can dip it in hot water for about 10 seconds and then remove. Serve and enjoy!
Notes
Nutrition
Yogurt Popsicles https://jessicainthekitchen.com/vegan-yogurt-parfait-breakfast-popsicles/ September 23, 2024
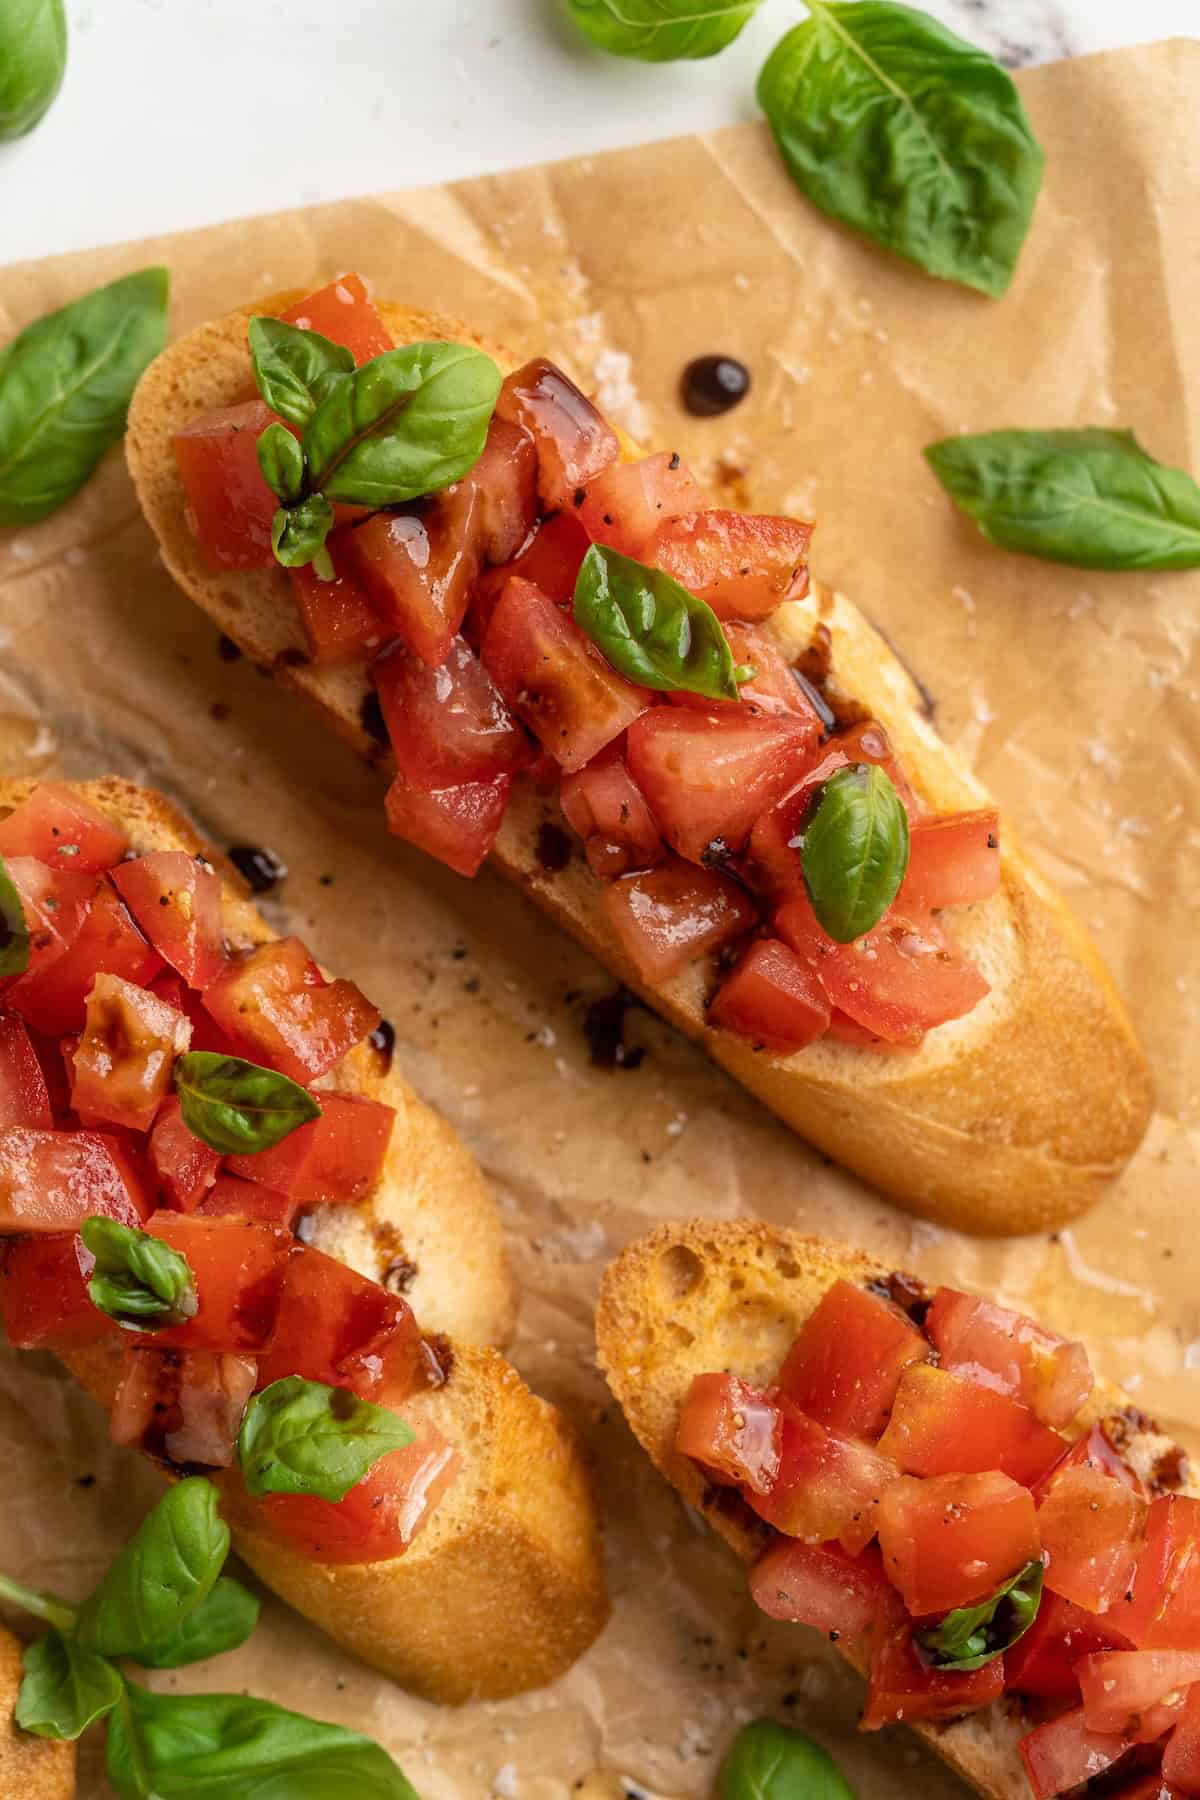
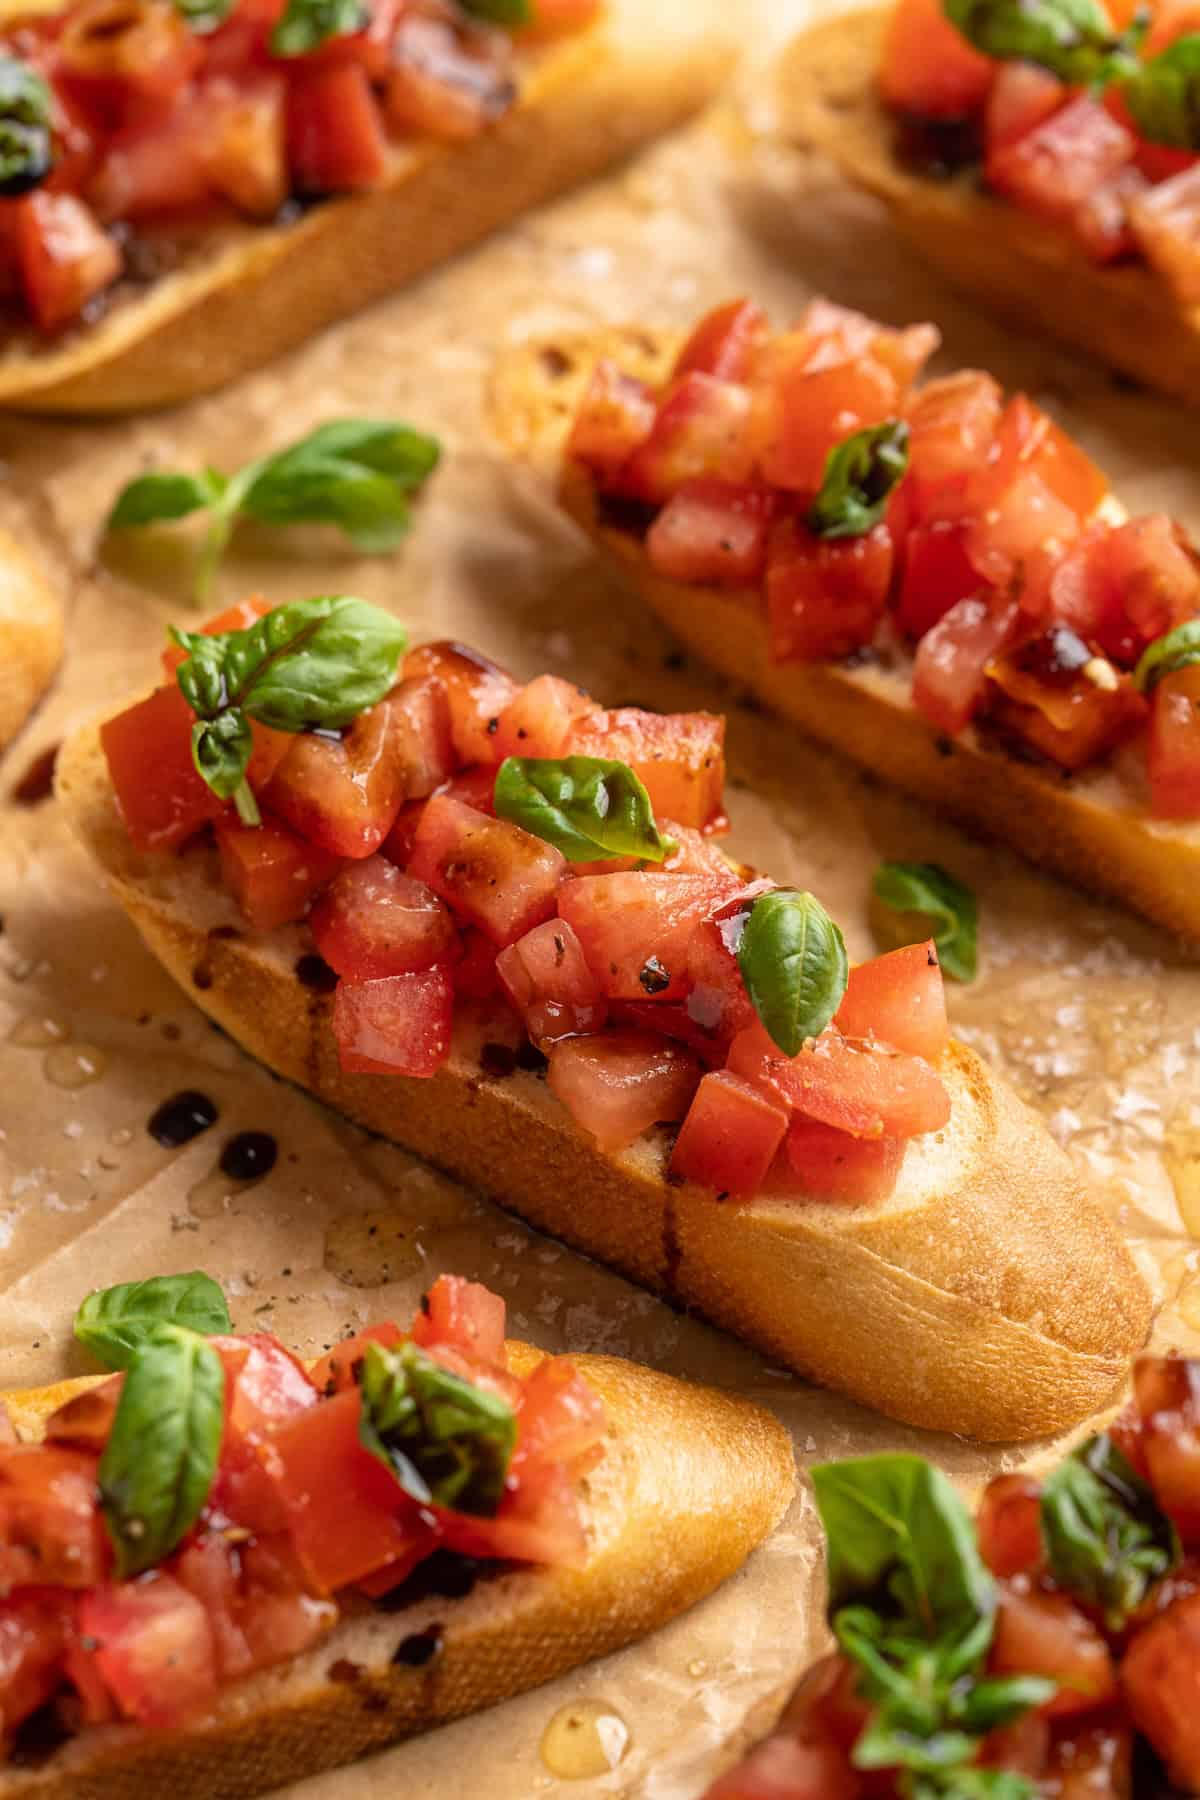
With juicy fresh tomatoes and an irresistible sweet-and-tangy balsamic glaze, this classic bruschetta recipe is always a crowd-pleasing appetiser!
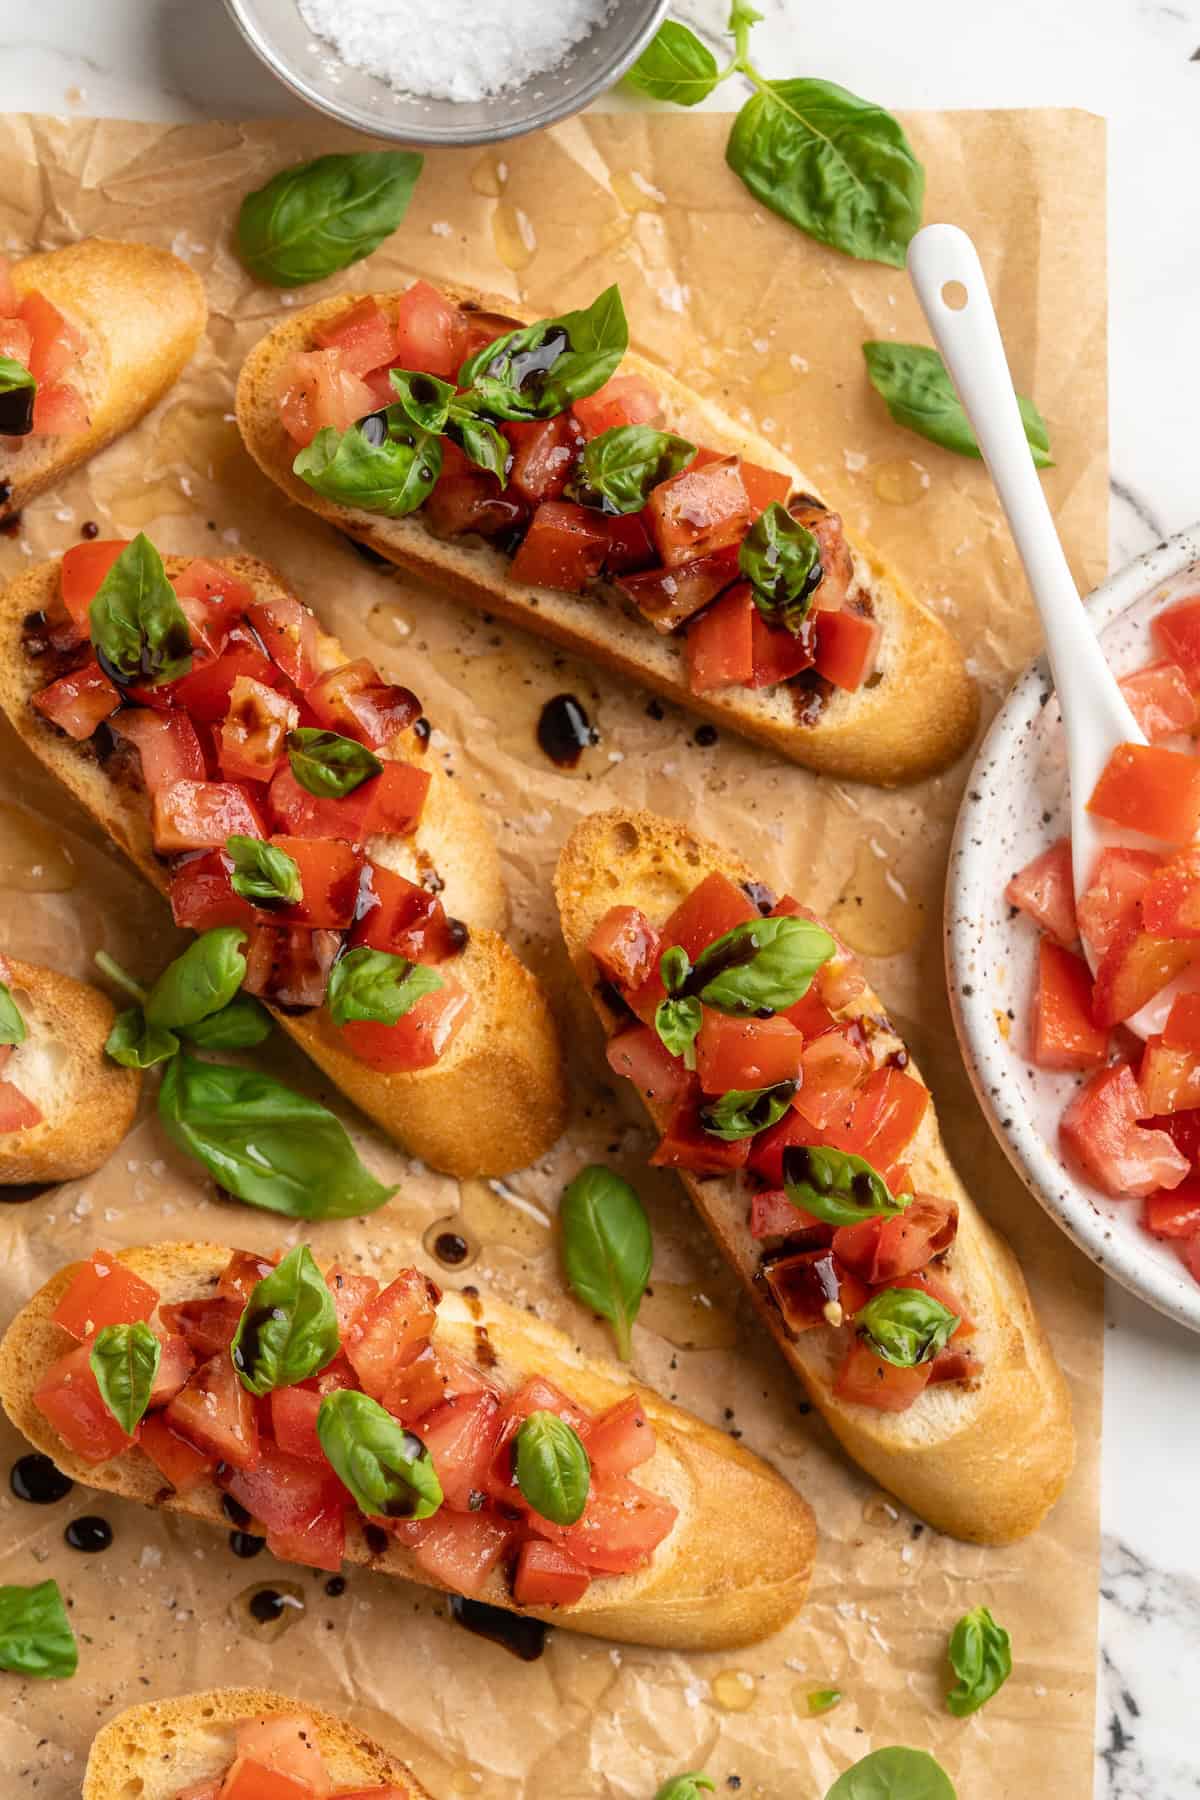
When you’re entertaining, the best recipes are the kind that wow your guests, while being incredibly easy to make. This tomato bruschetta recipe definitely qualifies—it comes together in just 15 minutes and the combination of ripe tomatoes, syrupy balsamic glaze, and crusty bread makes it impossible to eat just one!
Why You’ll Love This Classic Bruschetta Recipe
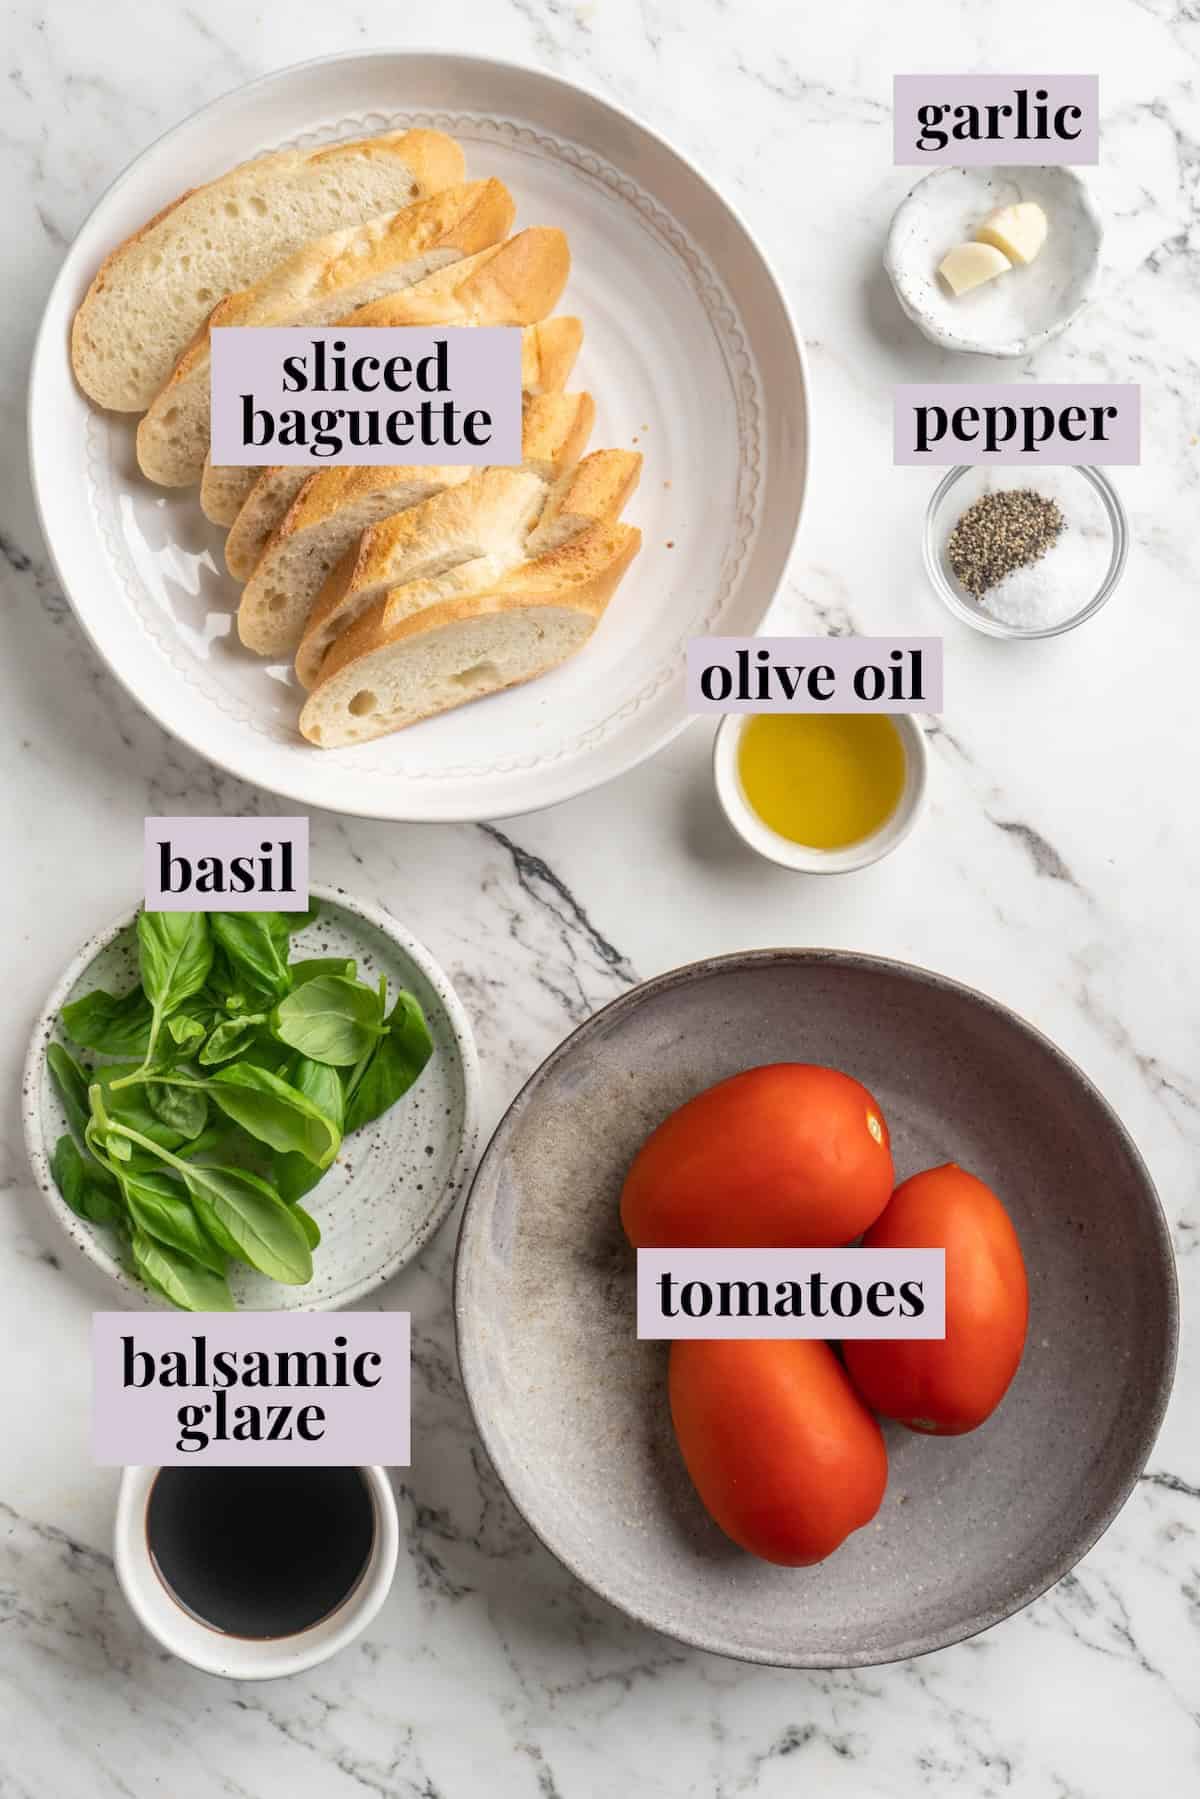
- Simple flavours shine . To make the base of this recipe, all you need are excellent ingredients: fresh tomatoes, delicious bread, good olive oil, and some garlic. Then, the balsamic glaze brings it all together!
- Easy to make—and easy to make ahead . You can prep the tomato portion of this bruschetta recipe ahead of time, but even if you don’t it still only takes 15 minutes from start to finish.
- Versatile . Bruschetta is a classic party snack, but it doesn’t have to be limited to that! Sometimes I’ll make bruschetta for a light lunch or dinner, too.
Notes on Ingredients
Scroll down to the recipe card to find the ingredient quantities and recipe instructions.
Tomato Bruschetta:
- Tomatoes – Bruschetta is a great opportunity to use some of those beautiful heirloom tomatoes you see at the farmers’ market. Any variety will work as long as it’s ripe and juicy!
- Olive oil – Use a good, fruity extra-virgin olive oil if you have one.
- Fine sea salt and ground black pepper
- Bread – I like to use my Garlic and Rosemary Focaccia Bread , but Olive Bread would be fantastic too.
- Garlic
Balsamic Glaze:
- Balsamic vinegar – You’ll be cooking the vinegar down into a glaze, so you don’t need to start with an expensive syrupy vinegar.
- Sugar
- Sea salt and ground black pepper
- Herbs – Basil is the classic herb used with bruschetta. However, so many herbs pair well with tomatoes that it’s hard to go wrong.
How to Make Classic Bruschetta
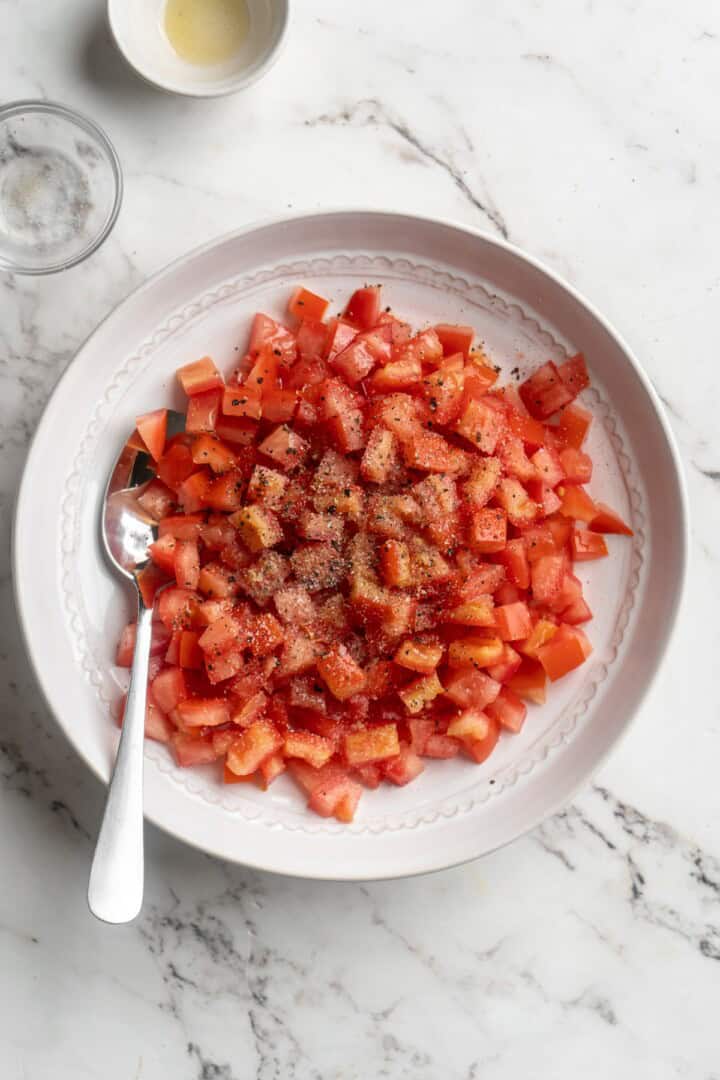
Dress tomatoes.
- Make the topping . Toss the diced tomatoes with the oil, salt, and pepper.
- Toast the bread . Slice focaccia and toast for about 3 minutes. Rub the cut sides of the garlic over the top of the bread to infuse it with garlicky flavour.
- Make the glaze . Add all of the ingredients into a heavy pan and bring to a boil over medium-high. Cook until thickened, about 5 minutes.
- Assemble . Spoon the bruschetta topping over the bread and drizzle the glaze on top. Add the herbs and serve.
Tips for Success
- Make a bruschetta bar for assemble-your-own . If you anticipate that your platter of bruschetta will be sitting out for a bit, you might want to have your guests make their own bruschetta to keep the bread from getting soggy. In that case, toast the bread, rub it with garlic, and set it on a tray; place the tomato mixture in a bowl and drizzle the glaze over the top.
- Don’t make the tomato topping too far in advance . Tomatoes have a tendency to get mealy in the fridge, so I don’t recommend making the tomato topping for this classic bruschetta recipe more than half a day ahead of time.
- Get the right level of toasty-ness for the focaccia . Toasting is important because it helps the bread stand up to the juicy tomatoes. But if the focaccia is too hard, it can be difficult to eat. You want to strike a good balance between soft and crispy.
Variations
- Caprese bruschetta . Layer slices of fresh vegan mozzarella (I like the soft kind made with cashews!) under the tomatoes.
- Tomato peach bruschetta . Swap half the tomatoes with peaches. The two go together quite well!
- Roasted tomato bruschetta . Instead of raw tomatoes, use roasted tomatoes for some caramelised flavour and a more jammy texture.
How to Store
Keep the focaccia in an airtight container at room temperature for 2 to 3 days. Refrigerate the tomato topping for 2 to 3 days and the balsamic glaze for up to a month.
More Vegan Appetiser Ideas
- Vegan Cranberry Meatballs
- Buffalo Cauliflower Wings (10 Ingredients)
- Roasted Garlic White Bean Dip (Vegan, Ridiculously Yummy)
- Vegan Arancini Fried Rice Balls (With Air Fryer Option)
- Perfect Homemade Hummus
Ingredients
Bruschetta:
- 3 firm medium tomatoes
- 2 tablespoons olive oil
- 1 teaspoon fine sea salt
- ¼ teaspoon ground black pepper
- 1 vegan focaccia loaf
- 1 clove of garlic , cut in half
Balsamic Glaze:
- ½ cup balsamic vinegar
- 2 tablespoons sugar
- ½ teaspoon fine sea salt
- ¼ teaspoon ground black pepper
- herbs , for garnish
Instructions
Bruschetta
- Dice tomatoes into small cubes, and place in a bowl with olive oil, salt, and pepper. Toss to coat, and set aside.
- Slice focaccia loaf into slices as a base for bruschetta. Toast the slices for about 3 minutes until toasted. Brush the fresh hot slices with garlic.
- Top with the tomato mixture, then balsamic glaze. Serve immediately.
Balsamic Glaze
- In a pot over medium high heat, heat all the ingredients and stir. Watch carefully – the glaze should begin to thicken after 5 minutes and you want it thick enough to stick to the back of a spoon, but not to thicken into a glob. It becomes overly thick very quickly, so watch carefully.
- Once glaze has thickened, remove from heat. Pour over the bruschetta. Top with herbs.
- The glaze can be stored in the refrigerator once it has cooled down for at least a month.
