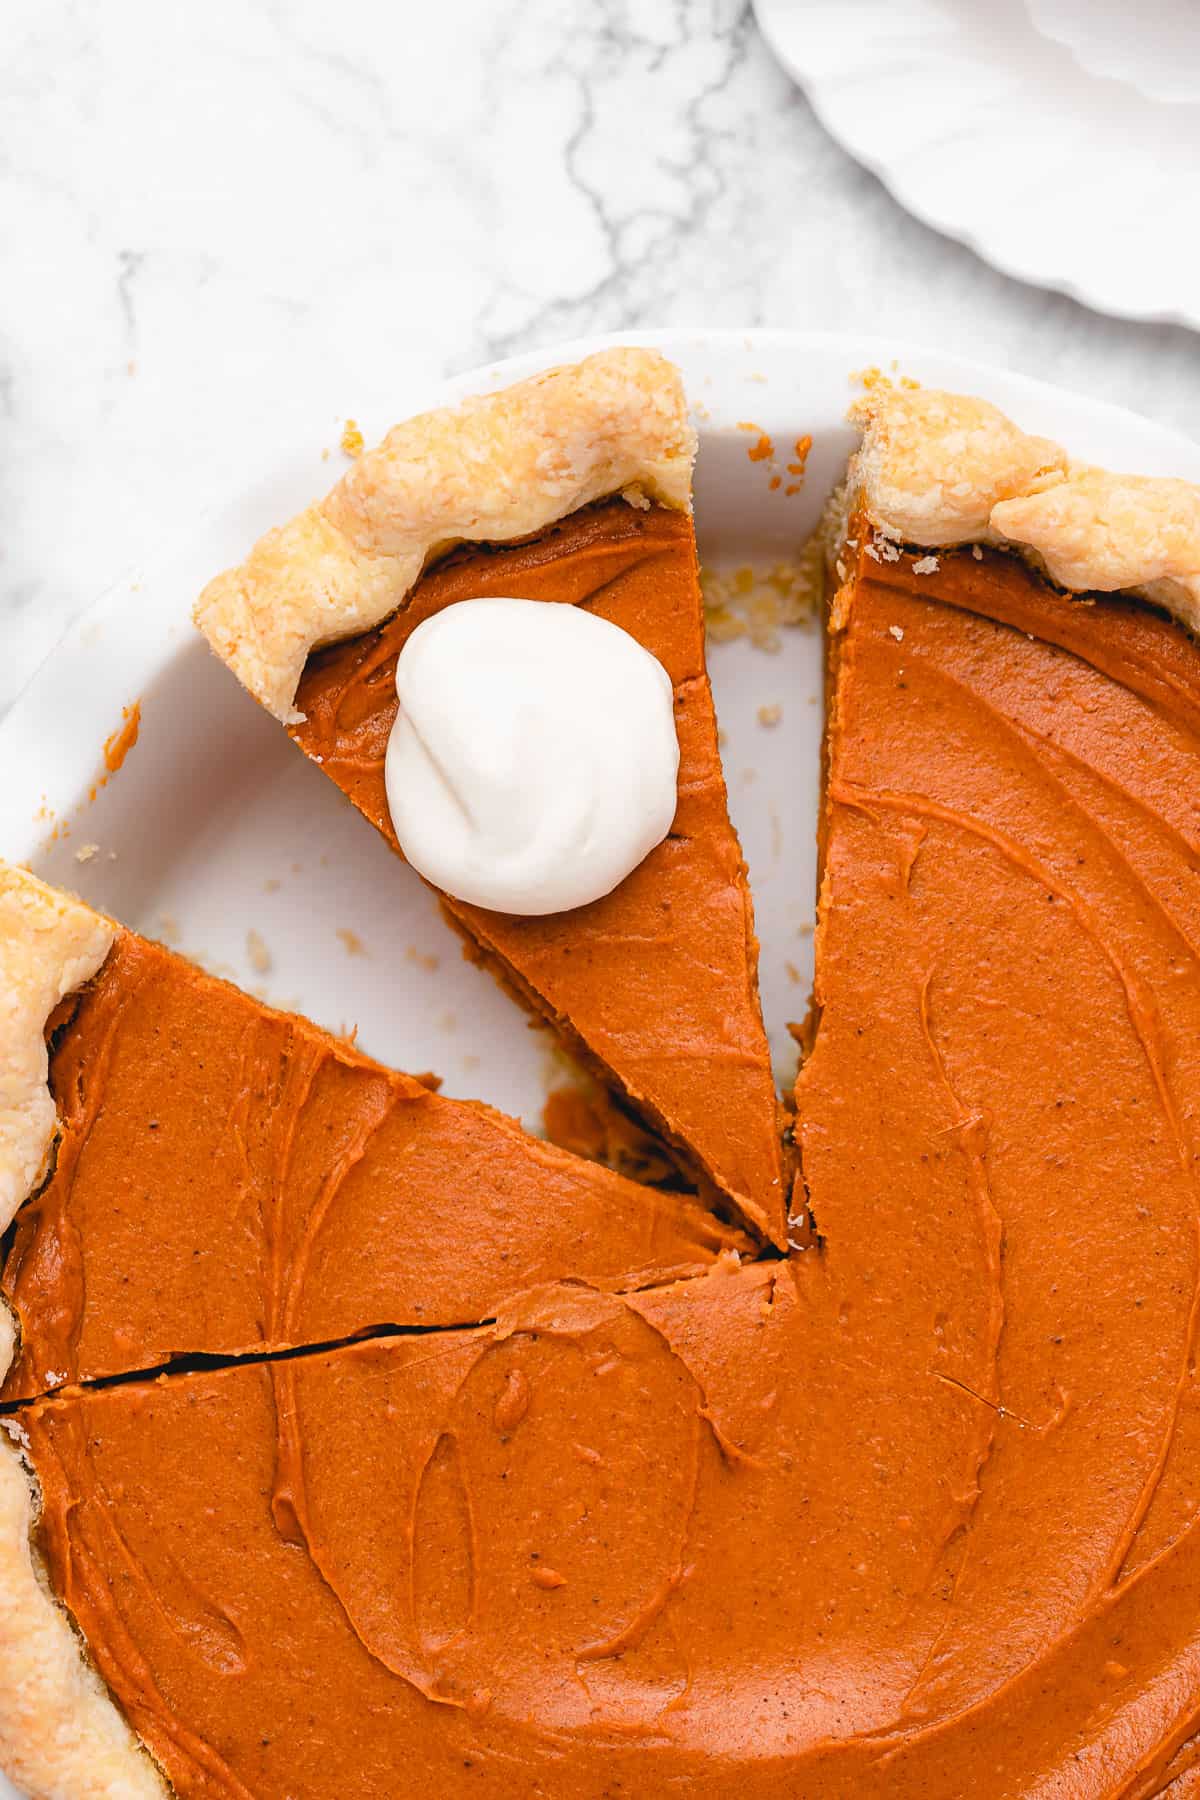
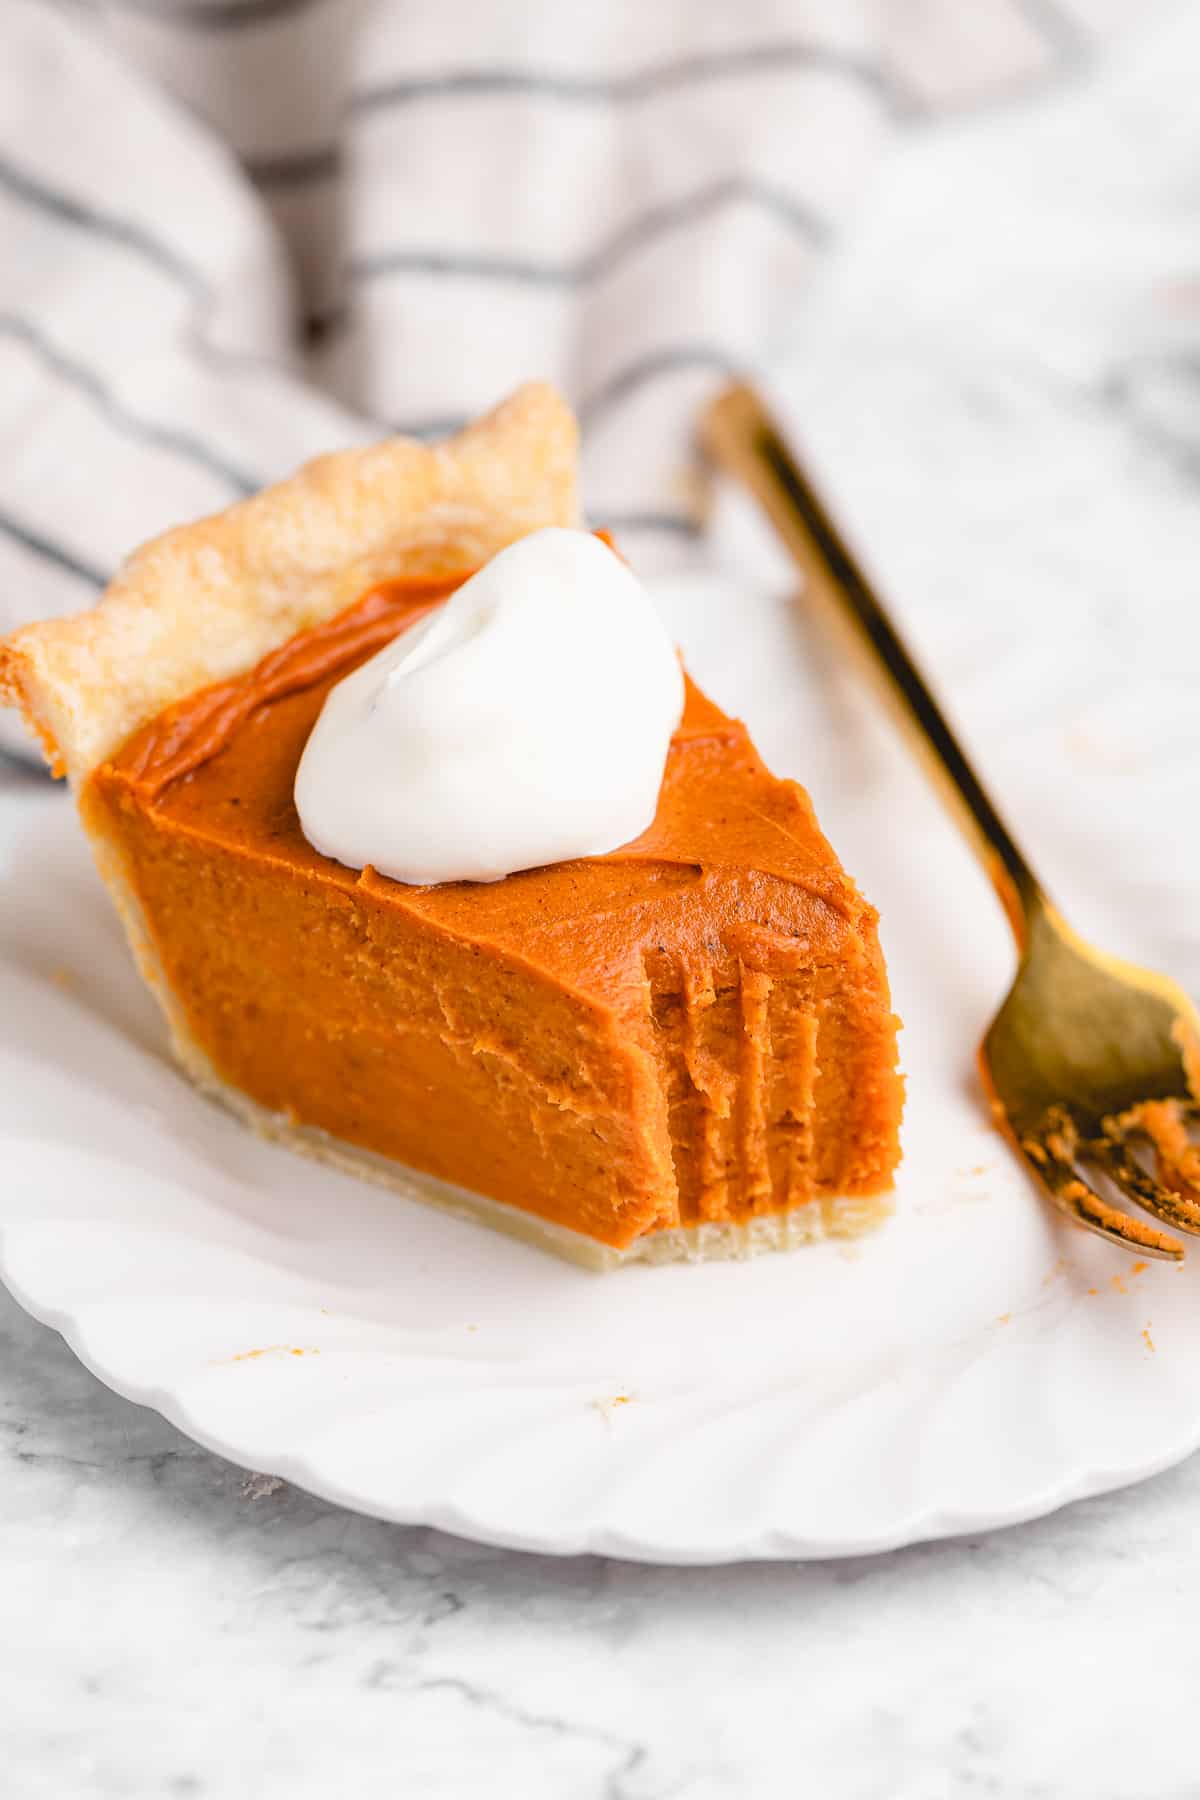
This easy vegan sweet potato pie tastes and bakes JUST like the classic. You’re going to love the rich, smooth texture and cozy flavors of sweet potatoes and spice, baked in a buttery, flaky vegan pie crust. Made with simple ingredients, it’s a perfect plant-based pie for your holiday table!
If you enjoy my pumpkin pie recipe , I can’t wait for you to try sweet potato pie. It’s similar, the main difference being the main ingredient. I make my vegan sweet potato pie recipe with freshly roasted sweet potatoes, vegan butter, warm spices, and thick and creamy coconut milk. It’s an egg-free, dairy-free version of a Southern classic, and so easy to make from scratch. This pie is destined for a seat at your Thanksgiving dessert table!
What Makes This Vegan Sweet Potato Pie So Special
- A fun alternative to pumpkin pie . Sweet potato pie shares a similar profile to classic pumpkin pie (lots of cozy spices!), and it’s rich and creamy even without the eggs or dairy.
- Easy to make . This sweet potato pie recipe couldn’t be easier to make. My recipe uses cornstarch instead of ingredients like tofu to thicken the filling. You can even speed it up using the blender !
- Great for making ahead . If you want to make your holiday prep even easier, bake your pie up to 2 to 3 months in advance and freeze it.
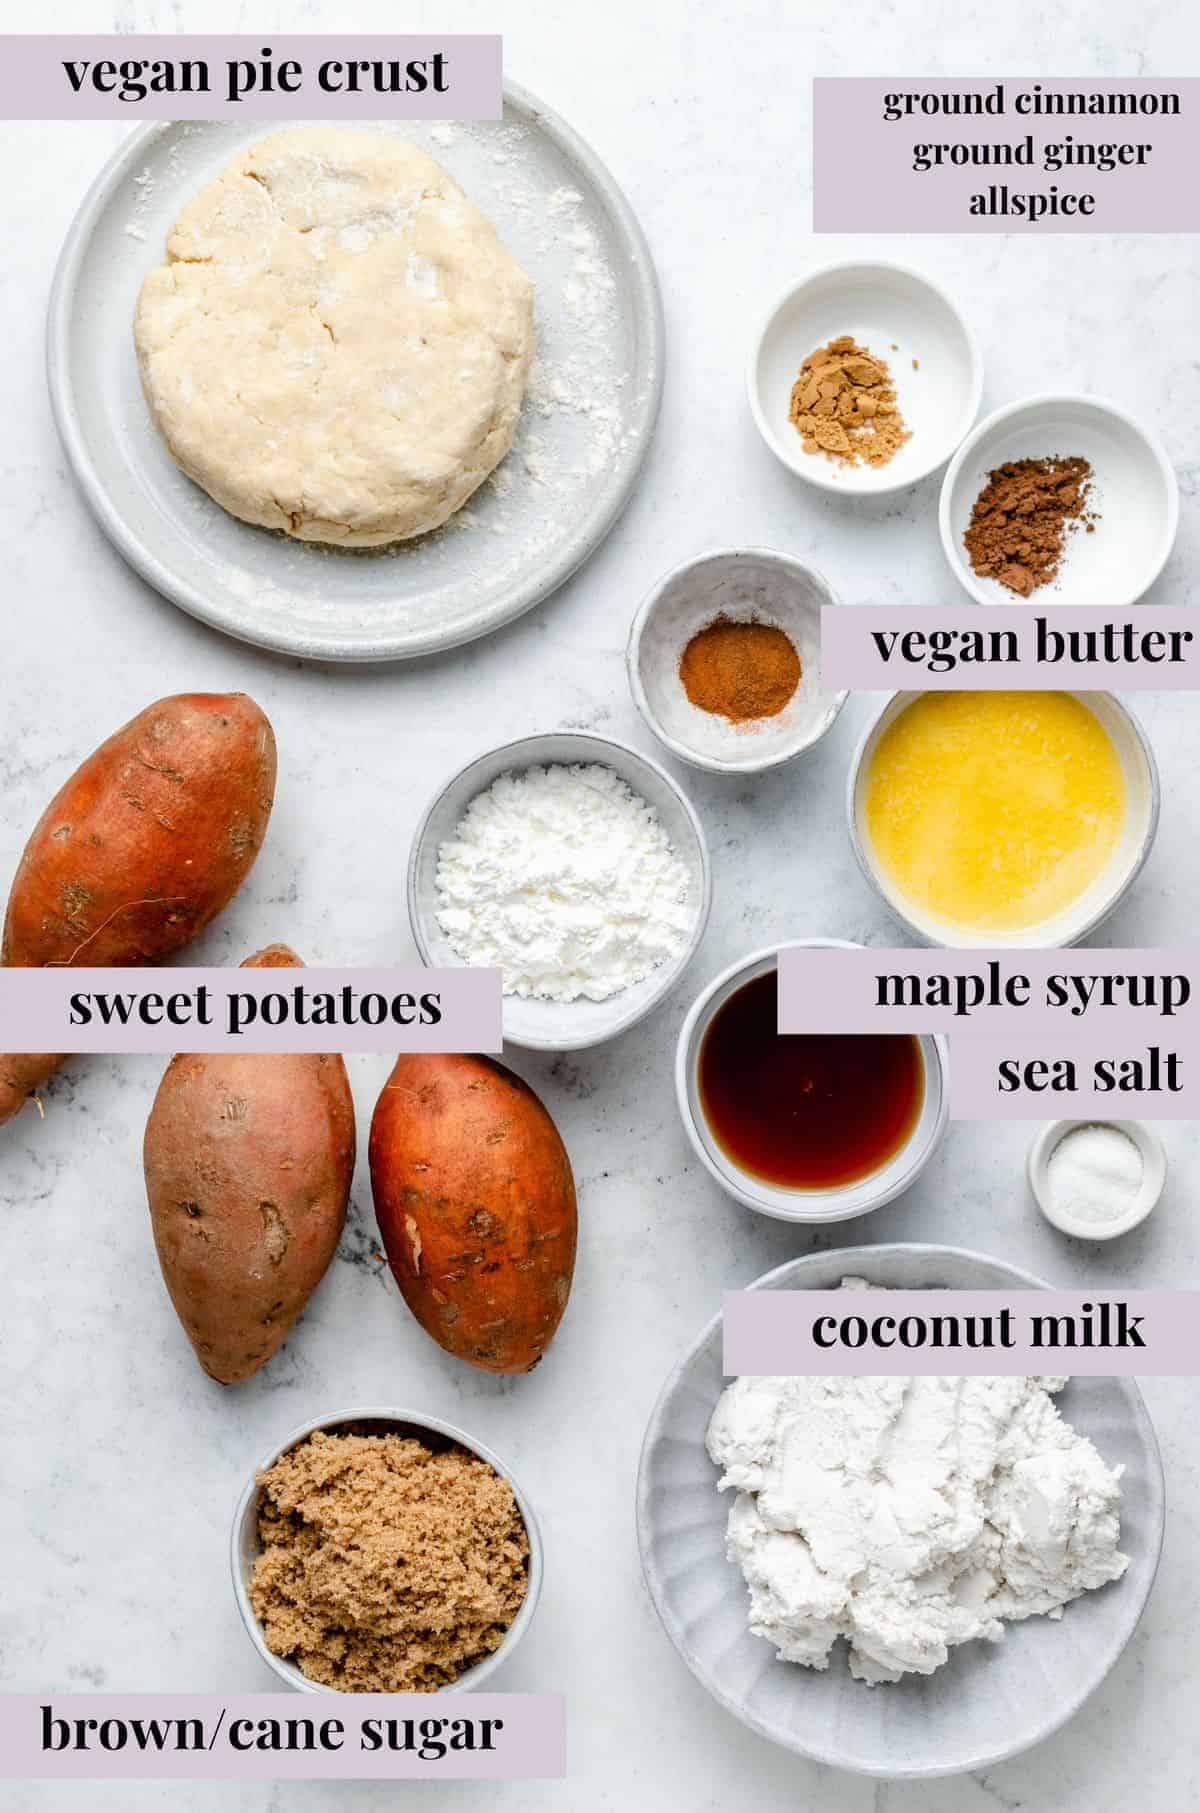
Notes on the Ingredients
Scroll down to the recipe card to find the ingredient quantities and recipe instructions.
- Sweet potatoes – Garnet sweet potatoes are my favourite type to use, but any sweet potatoes will work. Roasting the sweet potatoes brings out their best flavor.
- Coconut milk – You want to ensure you’re using the one from the can since it’s nice and thick and will yield the texture that you’re looking for!
- Melted vegan butter – Regular butter is standard in sweet potato pie, so I wanted to make this swap. You can use coconut oil or another oil instead, but I highly recommend vegan butter for that classic taste.
- Ground cinnamon, ground ginger, allspice – My favourite spices to use in this pie. You could also add nutmeg.
- Maple syrup – You can use agave or another thick liquid sweetener instead.
- Sea salt – My preferred salt; if you’re using table salt, reduce it since it’s finer in texture.
- Cane sugar – You could also use organic white sugar here, too. I recommend cane sugar or brown sugar for more depth of flavour.
- Cornstarch – The perfect thickener for the filling. I have not tested arrowroot starch, but you can test if you’d prefer to use that.
- Vanilla extract – I love adding this to my pies to tie everything together.
- Vegan pie crust – This can be homemade or store-bought. See the next section for details.
The Perfect Vegan Pie Crust
My vegan pie crust is my go-to for all of my pies, and I also have a gluten-free vegan pie crust that works wonderfully in this old-fashioned vegan sweet potato pie recipe. You’ll need to par-bake the pie crust before you can fill it. This helps the crust hold up against the creamy sweet potato pie filling.
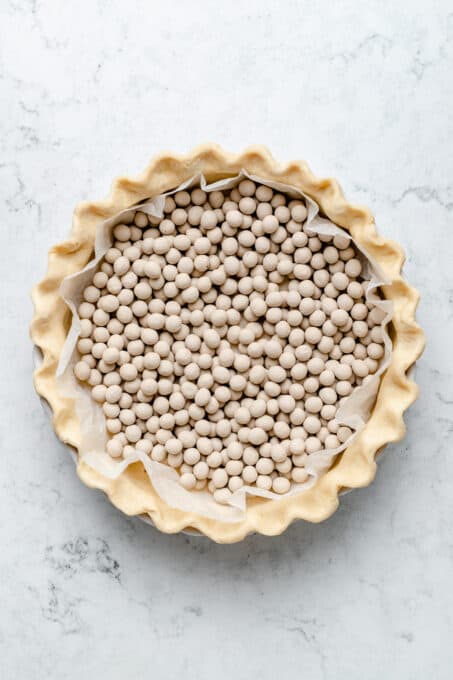
Line the crust with pie weights.
- Prepare the pie crust. Roll out and press the crust into a pie plate.
- Dock the crust. Prick the bottom of the crust all over with a fork. Afterward, line the crust with parchment paper and fill it with pie weights.
- Bake. Pre-bake pie crust at 350ºF for 10 minutes. Remove from the oven and let cool.
If you use your preferred store-bought vegan pie dough, refer to the directions on the package to know how to thaw and parbake the crust.
How to Make Vegan Sweet Potato Pie

Roast the sweet potatoes.
- Bake the sweet potatoes . Wash, scrub, and dry your sweet potatoes well. Then, rub them lightly with olive oil and add them to a lined baking sheet. Prick the potatoes all over with a fork. Roast the sweet potatoes at 400ºF for 50-60 minutes, or until they’re easy to pierce with a fork. Leave the potatoes to cool outside of the oven.
- Puree the sweet potatoes. Next, peel the sweet potatoes and place them into a food processor. Blend until fully smooth.

Rest the batter.
- Make the filling . Now, combine the sweet potato puree in a large bowl with the rest of the pie ingredients. Or, do what I do, and add the pie ingredients to the sweet potato puree in the food processor (one less dish to wash!). Mix or blend everything until smooth.
- Rest . Leave your sweet potato pie filling to rest for 15-30 minutes on the counter, with a kitchen towel covering the container. This allows the flavours to meld together. Your pie will taste even better for it.
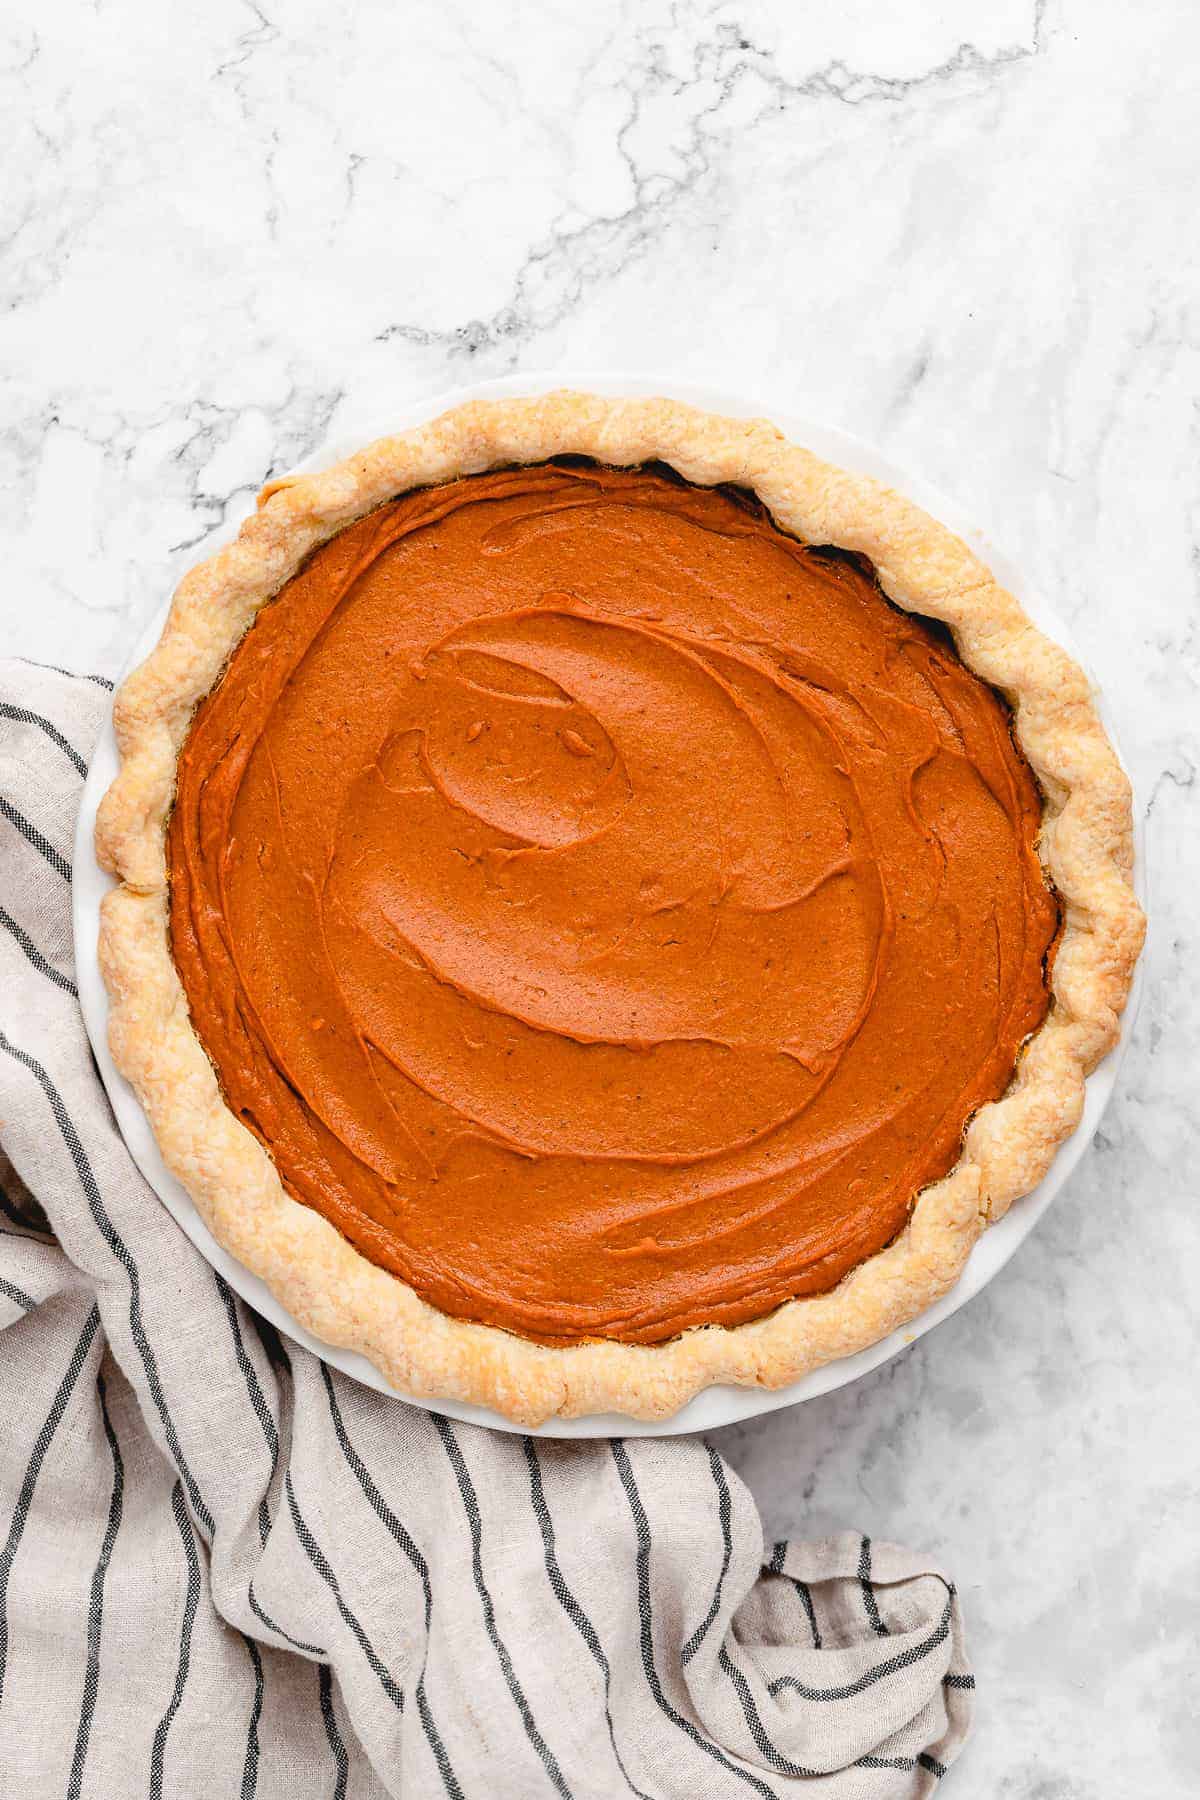
- Bake . Lower the oven temperature to 350°F to bake the pie. Pour the batter into the cooled and pre-baked pie crust, and tap the pie plate lightly on the counter to remove any air bubbles. Bake for 60 minutes, or until the center is slightly wobbly.
- Cool and chill . Remove from the oven and let cool completely on a wire rack. Move the sweet potato pie to your fridge and let it chill for at least 4 to 6 hours, ideally overnight. Remove, cut the pie, and serve with a dollop of vegan coconut whipped cream .
Tips for the Best Pie
- Make no substitutes . I recommend making this recipe just like I have. Substitutions can be extremely tempting, but this is foolproof and has been tested so many times that you don’t need to. The only substitutions I’ll “allow” would be using agave nectar instead of maple syrup and coconut sugar for the cane sugar, as I’ve tested both of these with good results.
- Use a store-bought crust for a shortcut . You’ll want to be very careful about checking the ingredients, but if they’re vegan-friendly, go for it!
- Let the dough chill . If you’re making a pie crust from scratch, let the dough chill for 45 minutes to an hour before working with it. This will ensure that it does not begin to shrink when you bake it.
- Allow the pie to cool . Things can get pretty messy if you try to serve this vegan sweet potato pie recipe right away! Give it those 6 hours (2 on the countertop, 4 in the fridge), and then you can reheat slices if necessary. That way, the flavours are absolutely outstanding.

Serving Suggestions
Serve slices of vegan sweet potato pie with a scoop of vegan ice cream for a delicious after-dinner treat. This pie makes an excellent addition to a Thanksgiving or Christmas dessert spread with mince pies , homemade apple crisp , and soft-baked vegan pumpkin cookies . Get a pot of spiced mulled wine simmering or cozy up with a hot chocolate , and enjoy!
How to Store
- Refrigerate. Store vegan sweet potato pie wrapped in the pie dish or in an airtight container in the refrigerator for up to 3 days.
- Freeze. You can keep your pie in the freezer in an airtight container for 2-3 months. Wrap the pie in Saran Wrap, then in foil, and then place it in a freezer-safe zipped plastic bag. Make sure to let it thaw in the fridge overnight before serving.
More Vegan Holiday Dessert Recipes
- Pecan Pie
- Vegan Apple Pie
- Pumpkin Dump Cake
- Vegan Pumpkin Cheesecake
- Apple Cranberry Crisp
Ingredients
- 2 pounds garnet sweet potatoes , (907g) results in about 3 cups of cooked sweet potato puree
- ¾ cup coconut milk from the can , the thick creamy white portion only (172g) *check notes on how to get it from the can
- ¼ cup melted vegan butter
- 2 teaspoons cinnamon
- 1 teaspoon ground ginger
- ½ teaspoon allspice
- ¼ cup maple syrup , (68g)
- ½ cup cane sugar , (100g)
- ½ teaspoon sea salt
- ¼ cup cornstarch , (38g)
- ½ teaspoon vanilla extract
1 Vegan Pie Crust (my own linked here)
Instructions
Make the Pie Crust and Set Aside
- Preheat the oven to 350°F/180°C.
- Prepare pie crust. Prick the bottom with a fork lightly, then add pie weights into a parchment paper onto pie crust. Pre-bake pie crust for 10 minutes.
- Remove from the oven and let cool fully. Set aside.
Sweet Potato Pie Filling
- Preheat the oven to 400°F/200°C.
- Place the sweet potatoes on foil or parchment or silicone lined baking sheet, stab them all over with a fork and lightly oil the sweet potatoes. Bake for 50-60 minutes until fully cooked. Remove from the oven and allow to cool slightly.
- Remove the skin from the sweet potatoes (it should easily come off) and place the sweet potatoes into a food processor. Blend until fully smooth and a puree.
- In a large bowl, add the pureed sweet potato and add all the pie ingredients. Alternatively, you can add the pie ingredients over the sweet potato puree in the food processor (to avoid another bowl).
- Mix/blend everything together well until cornstarch is completely whisked out.
- Leave this to set for 15-30 minutes on the counter with a kitchen towel covering the container to allow ingredients to completely meld together. To me, it tastes even better when ingredients are left to sit a bit.
- Lower the temperature to 350°F/180°C. Pour the batter into the cooled and pre-baked pie crust. Tap lightly on the counter to remove any air bubbles. Bake for 60 minutes in the oven on the lower shelf or highest shelf depending on your oven (furthest away from heat). The center should be slightly wobbly.
- Remove from the oven carefully and let set and cool completely on a wire rack.
- Move the pie to your fridge and let it finish setting in the fridge for at least 4 to 6 hours, ideally overnight. Remove and cut the pie and serve. Dollop each slice with delicious vegan coconut whipped cream. Enjoy!
Notes
- Calories do not include for the pie crust (separate calories are on pie crust recipe).
- Refrigerate : Store vegan sweet potato pie wrapped in the pie dish or in an airtight container in the refrigerator for up to 3 days.
- Freeze : You can keep your pie in the freezer in an airtight container for 2-3 months. Wrap the pie in saran wrap, then in foil, and then place in a freezer-safe zipped plastic bag. Make sure to let it thaw in the fridge overnight before serving.

Vegan Sweet Potato Pie
Ingredients
- 2 pounds garnet sweet potatoes (907g) results in about 3 cups of cooked sweet potato puree
- ¾ cup coconut milk from the can the thick creamy white portion only (172g) *check notes on how to get it from the can
- ¼ cup melted vegan butter
- 2 teaspoons cinnamon
- 1 teaspoon ground ginger
- ½ teaspoon allspice
- ¼ cup maple syrup (68g)
- ½ cup cane sugar (100g)
- ½ teaspoon sea salt
- ¼ cup cornstarch (38g)
- ½ teaspoon vanilla extract
1 Vegan Pie Crust (my own linked here)
Instructions
Make the Pie Crust and Set Aside
- Preheat the oven to 350°F/180°C.
- Prepare pie crust. Prick the bottom with a fork lightly, then add pie weights into a parchment paper onto pie crust. Pre-bake pie crust for 10 minutes.
- Remove from the oven and let cool fully. Set aside.
Sweet Potato Pie Filling
- Preheat the oven to 400°F/200°C.
- Place the sweet potatoes on foil or parchment or silicone lined baking sheet, stab them all over with a fork and lightly oil the sweet potatoes. Bake for 50-60 minutes until fully cooked. Remove from the oven and allow to cool slightly.
- Remove the skin from the sweet potatoes (it should easily come off) and place the sweet potatoes into a food processor. Blend until fully smooth and a puree.
- In a large bowl, add the pureed sweet potato and add all the pie ingredients. Alternatively, you can add the pie ingredients over the sweet potato puree in the food processor (to avoid another bowl).
- Mix/blend everything together well until cornstarch is completely whisked out.
- Leave this to set for 15-30 minutes on the counter with a kitchen towel covering the container to allow ingredients to completely meld together. To me, it tastes even better when ingredients are left to sit a bit.
- Lower the temperature to 350°F/180°C. Pour the batter into the cooled and pre-baked pie crust. Tap lightly on the counter to remove any air bubbles. Bake for 60 minutes in the oven on the lower shelf or highest shelf depending on your oven (furthest away from heat). The center should be slightly wobbly.
- Remove from the oven carefully and let set and cool completely on a wire rack.
- Move the pie to your fridge and let it finish setting in the fridge for at least 4 to 6 hours, ideally overnight. Remove and cut the pie and serve. Dollop each slice with delicious vegan coconut whipped cream. Enjoy!
Video
Notes
- Calories do not include for the pie crust (separate calories are on pie crust recipe).
- Refrigerate : Store vegan sweet potato pie wrapped in the pie dish or in an airtight container in the refrigerator for up to 3 days.
- Freeze : You can keep your pie in the freezer in an airtight container for 2-3 months. Wrap the pie in saran wrap, then in foil, and then place in a freezer-safe zipped plastic bag. Make sure to let it thaw in the fridge overnight before serving.
Nutrition
Vegan Sweet Potato Pie https://jessicainthekitchen.com/vegan-sweet-potato-pie/ November 18, 2021
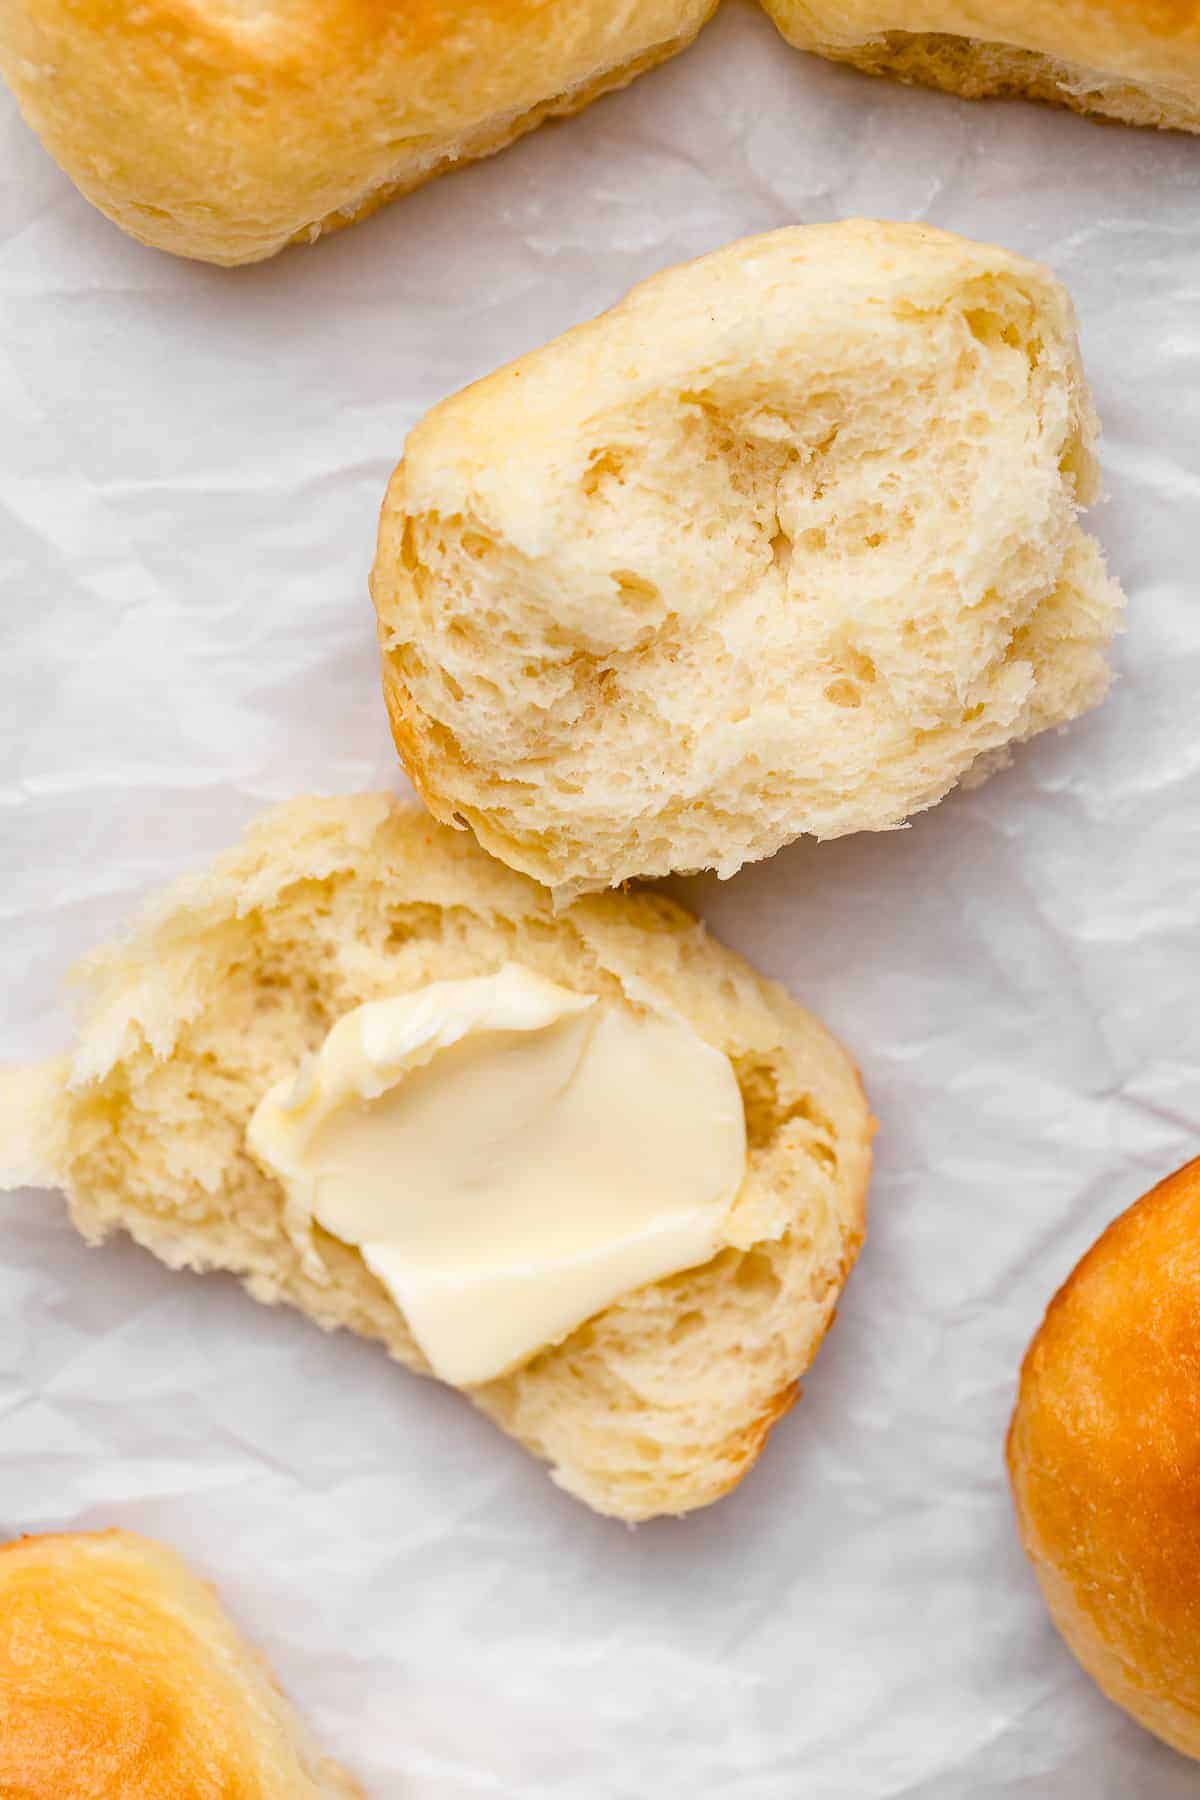
These fluffy Vegan Dinner Rolls are a must make and SUCH a crowd favorite! They are soft, buttery and so easy to make. I share easy step by step tips to guide you through, and show you how to freeze them so you can enjoy fresh dinner rolls every time!

Vegan Dinner Rolls
Hello fluffy, pillowy soft dinner rolls! I can’t believe it’s taken me this long to upload a dinner rolls recipe but I’m so happy it’s finally here. These Dinner Rolls recipe actually uses an enriched dough! Meaning I used (vegan) milk in here instead of water for the liquid along with butter and a touch of sugar to help give this dough the royal treatment. I also love that although these dinner rolls are made with no dairy or eggs, you don’t miss it at all! Everyone that we’ve had try these came back for seconds and thirds (okay, even fourths).
Although these are a side dish, after one bite they will be a front and centre “want” of everyone at the table. I can’t wait for you to try these!
Notes on the Ingredients
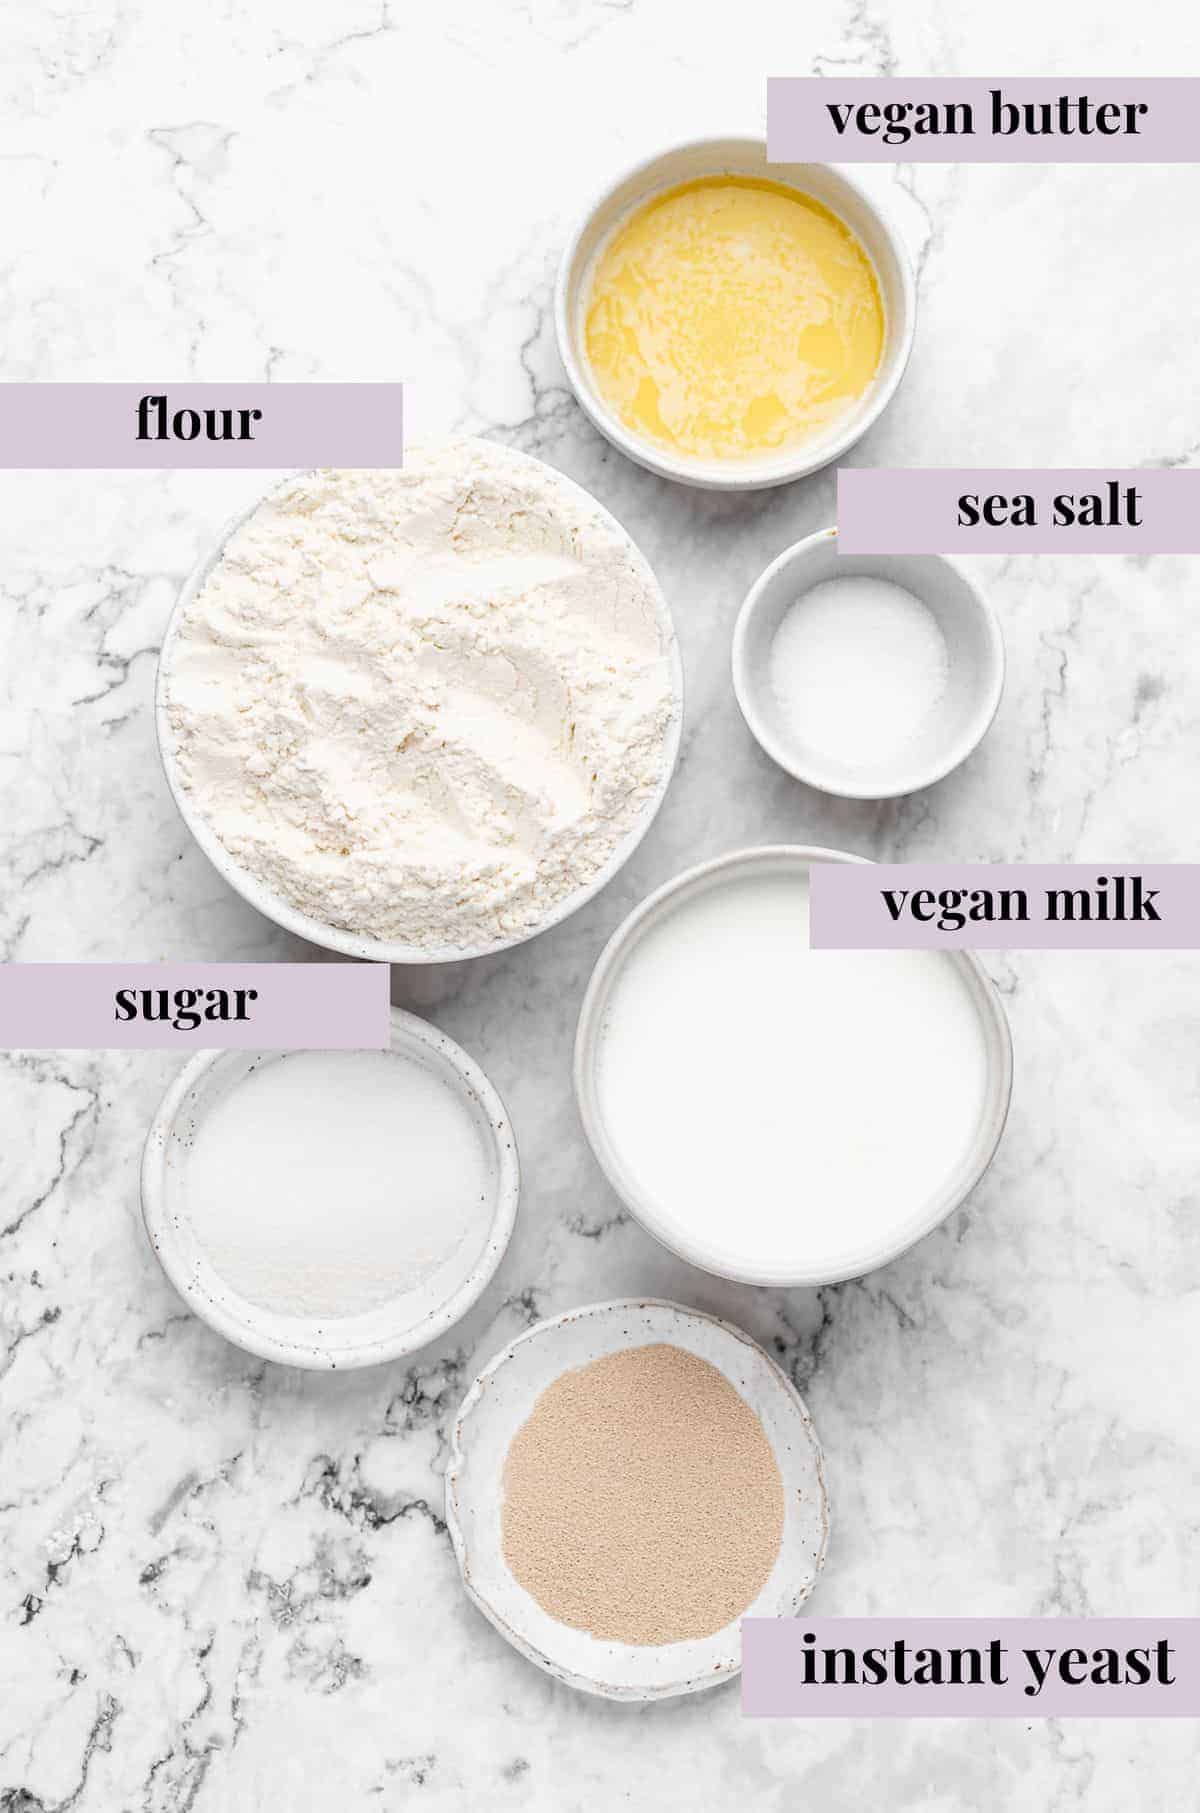
all purpose flour – I love using all purpose flour here, but if you’re feeling adventurous/you’re a pro you can always try a bread flour here!
instant yeast – My go to for this. Ensure your yeast is fresh !
sea salt – What’s dinner rolls without sea salt?! This balances out the other ingredients and gives the bread flavour.
vegan milk – You want to ensure your milk isn’t too hot to kill your yeast, but not too cold not to activate it. You want it warm enough to touch but not burning (if your hand can’t handle it, neither can the yeast). I highly recommend getting a thermometer if you plan to do more baking!
melted vegan butter – This adds flavour, moisture and flakiness to the dough. You can swap is for olive oil, but it’ll lose that buttery flavour.
How to Make Vegan Dinner Rolls (Step by Step)
Please note that this is important information on the ingredients and instructions and the FULL recipe with amounts and details can be found DOWN BELOW (scroll to it) in the recipe card.
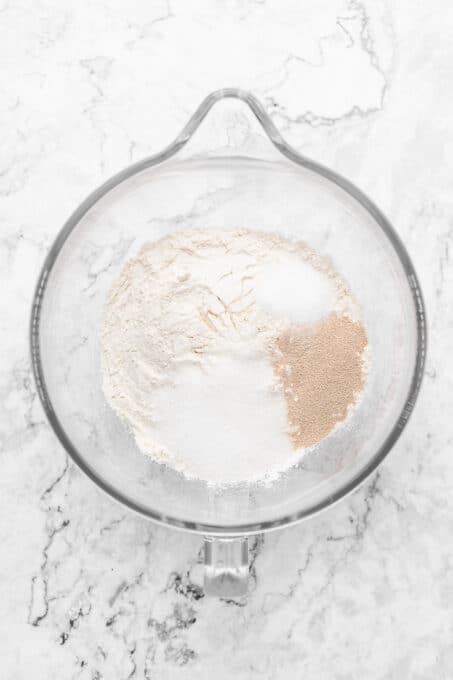
In the bowl of a stand mixer, add the flour, sugar, yeast, and salt. Whisk the ingredients together.
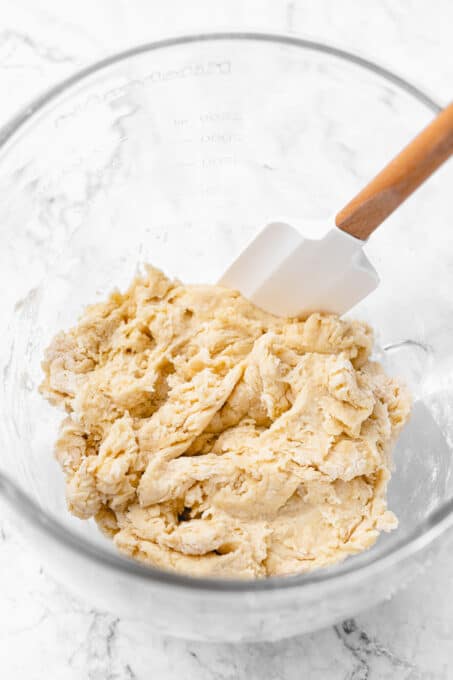
Create a well in the centre of the flour. Slowly add the warm milk and vegan butter to the dry ingredients, and then mix together with a spatula until just incorporated. The dough should look shaggy.
Using your dough hook, knead the dough for about 5-6 minutes on the first or second speed. The dough might be sticky at first, but you can add up to 2 tablespoons of flour while kneading to make it easier to manage. You want the end dough ball to be smooth, with slight dimples with a bit of tension formed.
Lightly grease the bowl of the dough with some additional oil and place the dough ball back into the bowl. Cover the bowl with a kitchen towel and let it sit for at least 2 hours on the counter in a WARM area. If your kitchen is too cold, you can place it in your OFF oven with the pilot light on which will provide enough residual heat for it to rise. The dough should rise and double in size.
Punch down the dough and fold over.
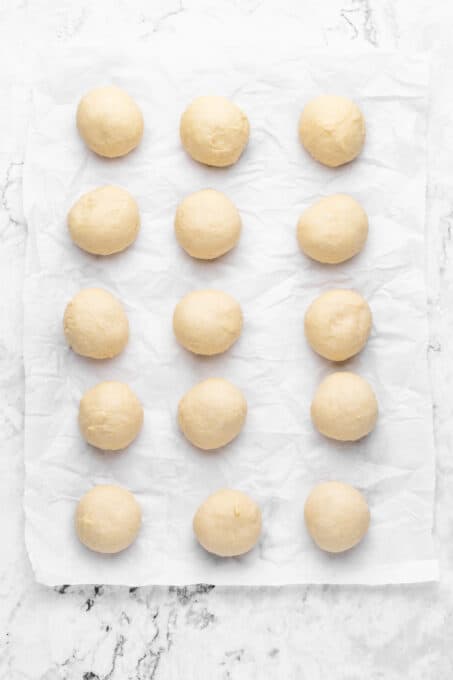
Divide the dough into 15 equal balls and roll each into a ball. I like to weigh the dough, then split the figure into 15 for equally round balls. Using your fingers, pinch and pull the undersides to shape each ball round. Now would be a great time to check out the video in this post for clarification! But you essentially want to make them as round as possible with the seam on the underside so it isn’t visible.
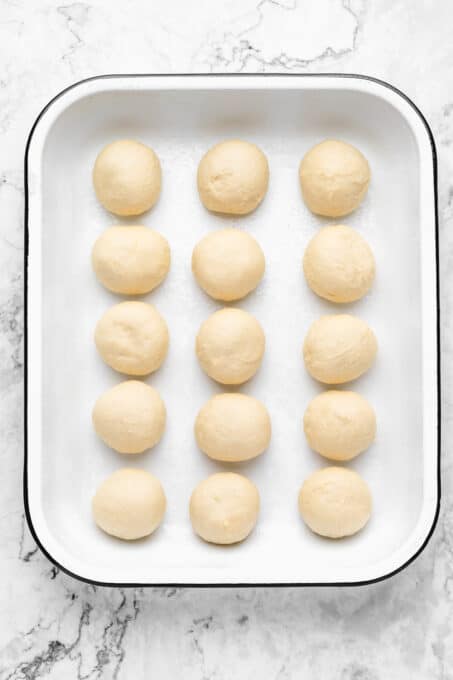
Grease a 9×13 container with some vegan butter lightly. Line up the balls evenly beside each other.
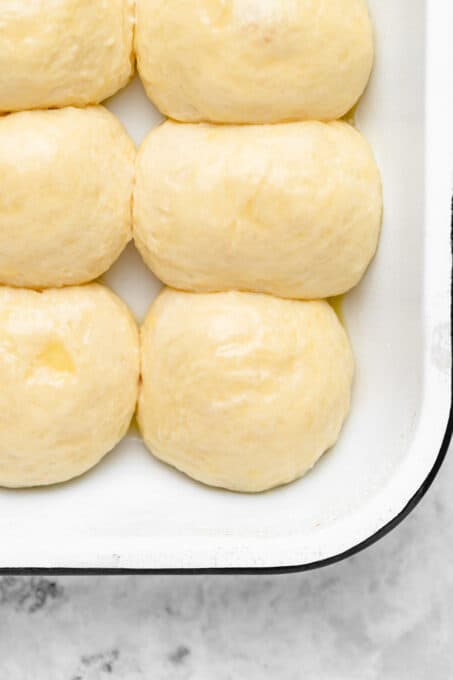
Cover with a light kitchen towel and allow the balls to proof/rise for another 1 hour. The dough balls with touch – and you want them to!
You can also begin preheating your oven to 400°F/200°C within the last 20 minutes so it’s ready when they’re done rising.
Using a silicone brush/pastry brush, brush the 3 tablespoons vegan butter over the top of the rolls.
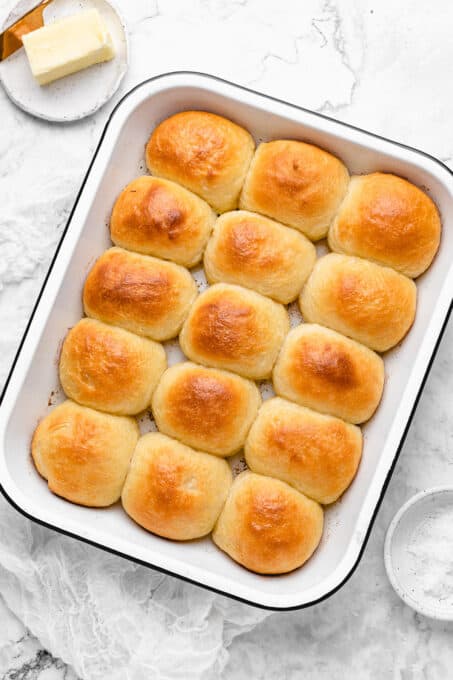
Bake your rolls for 15 minutes in the oven. Remove from oven. You can leave them to cool mainly in the pan, or move them to a cooling rack after about 5 minutes. The rolls soften completely after resting for about 15 minutes.
Slice, tear, slather in butter, and enjoy!
- Rise Time – I know it’s tempting to skip the rise time, but let me count the ways it makes a massive difference! These rolls do need both rise times, so just start them early so you can set them and forget them!
- These separate rises actually help to make these pretty foolproof and help create their beautiful rounded shape. You don’t want to skimp on rising time or skip either, because they result in the ultimate end product.
- Always have some bench flour with you in a small container while kneading the dough – which just means extra flour. If you live in a humid climate like me, you may end up needing up to an extra ¼ cup flour while kneading. If not, perhaps only 2 tablespoons extra. The recipe is designed in a way that it’ll still turn out incredible either way.
- Speaking of kneading, kneading here is key. Kneading helps to work the gluten, which is crucial for the texture and pull of these rolls. I always set a timer while kneading, and throw on a show so the time goes by faster. To knead, you want to fold the dough over onto itself, then push into a ball. Fold and push. You want to really work at it because those ten minutes of needing will make all the difference. If you have a stand mixer, you can use this too of course!
- Always test that your yeast is still working and fresh! I have a post on how to ensure your yeast is still good to help with that.
- Lastly, use a scale to weigh out your ingredients. It makes such a difference with accuracy and also comes in handy if you want to create equal sized rolls. Each dough ball weighed 49.4 g for me.
- I don’t recommend skimping on the vegan butter in this recipe. I like to think of it as the natural dough conditioner, and it helps to yield these incredibly soft rolls.
How to Freeze These Dinner Rolls
Line the rolls up on a baking sheet once fully cooked. Place in your freezer and flash freeze for about an hour. Once the hour has passed, you can stack the rolls in a freezer safe bag so they won’t stick.To thaw, bring to room temperature, then lightly toast in your toaster oven, on your stovetop, or in your air fryer .
Related Recipes
- No Knead Bread (Dutch Oven Bread)
- Vegan Burger Buns
- Vegan Mayo
- Garlic Parmesan Rolls (Vegan) (coming soon!)
- Focaccia Bread
Ingredients
- 3 cups all purpose flour + extra for kneading , (360g)
- 2 tablespoons granulated sugar , (25g) or liquid such as maple syrup or agave
- 2 ¼ teaspoons instant yeast , about 1 packet
- 1 teaspoon sea salt
- 1 cup vegan milk , not hot – warm to touch ranging between 110 to 120°F (240mL)
- ¼ cup melted vegan butter , olive oil or any oil (56g)
For top:
- 3 tablespoons melted vegan butter , (42g)12
Instructions
- In the bowl of a stand mixer, add the flour, sugar, yeast, and salt. Whisk the ingredients together.
- Create a well in the centre of the flour. Slowly add the warm milk and vegan butter to the dry ingredients, and then mix together with a spatula until just incorporated. The dough should look shaggy.
- Using your dough hook, knead the dough for about 5-6 minutes on the first or second speed. The dough might be sticky at first, but you can add up to 2 tablespoons of flour while kneading to make it easier to manage. You want the end dough ball to be smooth, with slight dimples with a bit of tension formed.
- Lightly grease the bowl of the dough with some additional oil and place the dough ball back into the bowl. Cover the bowl with a kitchen towel and let it sit for at least 2 hours on the counter in a WARM area. If your kitchen is too cold, you can place it in your OFF oven with the pilot light on which will provide enough residual heat for it to rise. The dough should rise and double in size.
- Punch down the dough and fold over.
- Divide the dough into 15 equal balls and roll each into a ball. I like to weigh the dough, then split the figure into 15 for equally round balls. Using your fingers, pinch and pull the undersides to shape each ball round. Now would be a great time to check out the video in this post for clarification! But you essentially want to make them as round as possible with the seam on the underside so it isn’t visible.
- Grease a 9×13 container with some vegan butter lightly. Line up the balls evenly beside each other.
- Cover with a light kitchen towel and allow the balls to proof/rise for another 1 hour. The dough balls with touch – and you want them to!
- You can also begin preheating your oven to 400°F/200°C within the last 20 minutes so it’s ready when they’re done rising.
- Using a silicone brush/pastry brush, brush the 3 tablespoons vegan butter over the top of the rolls.
- Bake your rolls for 15 minutes in the oven. Remove from oven. You can leave them to cool mainly in the pan, or move them to a cooling rack after about 5 minutes. The rolls soften completely after resting for about 15 minutes.
- Slice, tear, slather in butter, and enjoy!
Notes
- Rise Time – I know it’s tempting to skip the rise time, but let me count the ways it makes a massive difference! These rolls do need both rise times, so just start them early so you can set them and forget them!
- These separate rises actually help to make these pretty foolproof and help create their beautiful rounded shape. You don’t want to skimp on rising time or skip either, because they result in the ultimate end product.
- Always have some bench flour with you in a small container while kneading the dough – which just means extra flour. If you live in a humid climate like me, you may end up needing up to an extra ¼ cup flour while kneading. If not, perhaps only 2 tablespoons extra. The recipe is designed in a way that it’ll still turn out incredible either way.
- Speaking of kneading, kneading here is key. Kneading helps to work the gluten, which is crucial for the texture and pull of these rolls. I always set a timer while kneading, and throw on a show so the time goes by faster. To knead, you want to fold the dough over onto itself, then push into a ball. Fold and push. You want to really work at it because those ten minutes of needing will make all the difference. If you have a stand mixer, you can use this too of course!
- Always test that your yeast is still working and fresh! I have a post on how to ensure your yeast is still good to help with that.
- Lastly, use a scale to weigh out your ingredients. It makes such a difference with accuracy and also comes in handy if you want to create equal sized rolls. Each dough ball weighed 49.4 g for me.
- I don’t recommend skimping on the vegan butter in this recipe. I like to think of it as the natural dough conditioner, and it helps to yield these incredibly soft rolls.
