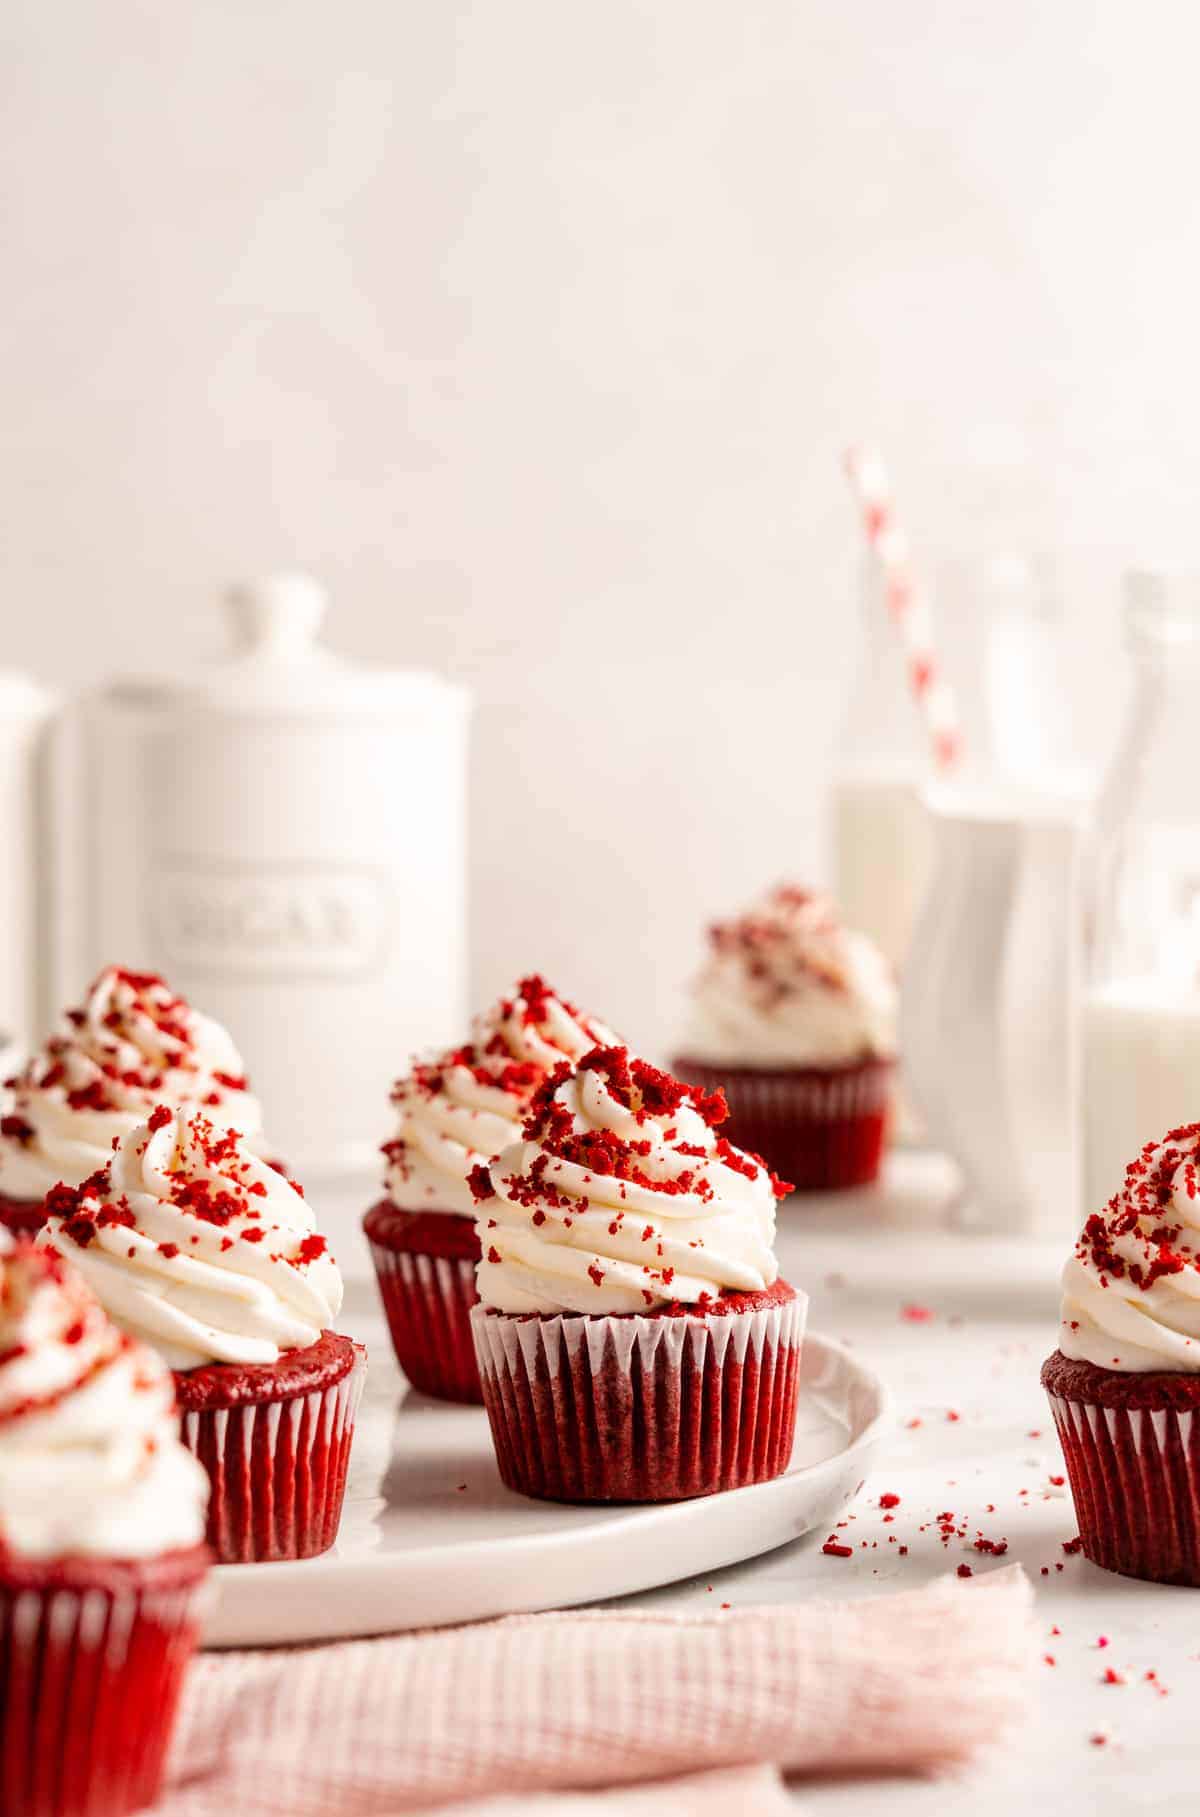
These vegan Red Velvet Cupcakes are here to add a festive touch to your next party! They pair a moist, deep red chocolate cake with swirls of rich vegan cream cheese frosting.
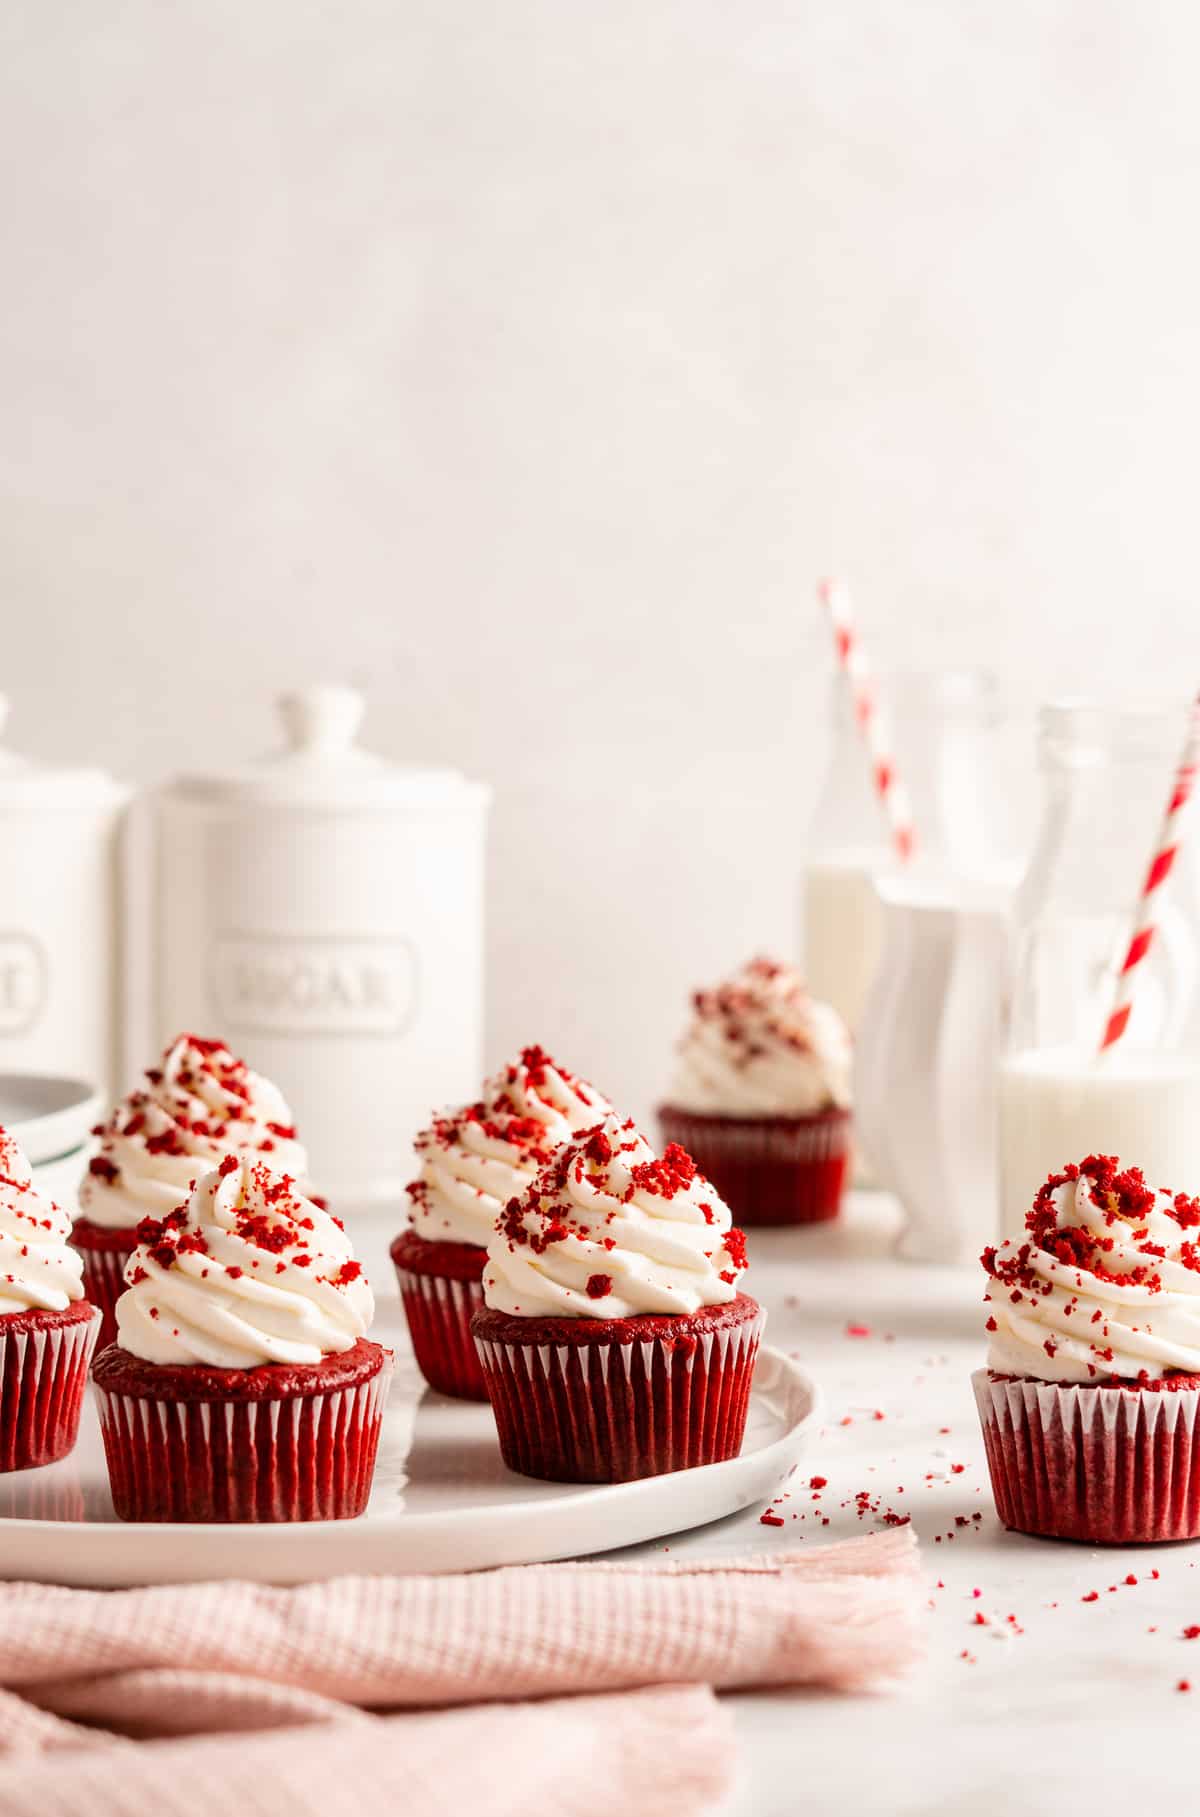
When we think about holiday baked goods, we usually think about Christmas cookies, but these vegan red velvet cupcakes are made for the holidays. The bright red cake and snowy white frosting remind me of Santa! Of course, you don’t have to limit red velvet cupcakes to holiday celebrations—they’re a perfectly portioned treat that you can enjoy anytime the craving strikes!
Making vegan red velvet cupcakes isn’t all that different from the traditional version—it’s just a matter of using different ingredients! Just like the classic recipe, this one includes vinegar to help give your cupcakes a little extra lift so they’re supremely light and fluffy. It also helps balance the sweetness, which is important when you’re topping your cupcakes with rich cream cheese frosting . Make sure you use a vegan cream cheese that tastes good on its own and has a nice, creamy texture—if it tastes off or has a gummy texture, it’s not going to make a good frosting either!
Notes on Ingredients
Please note that this is important information on the ingredients and instructions and the FULL recipe with amounts and details can be found DOWN BELOW (scroll to it) in the recipe card.
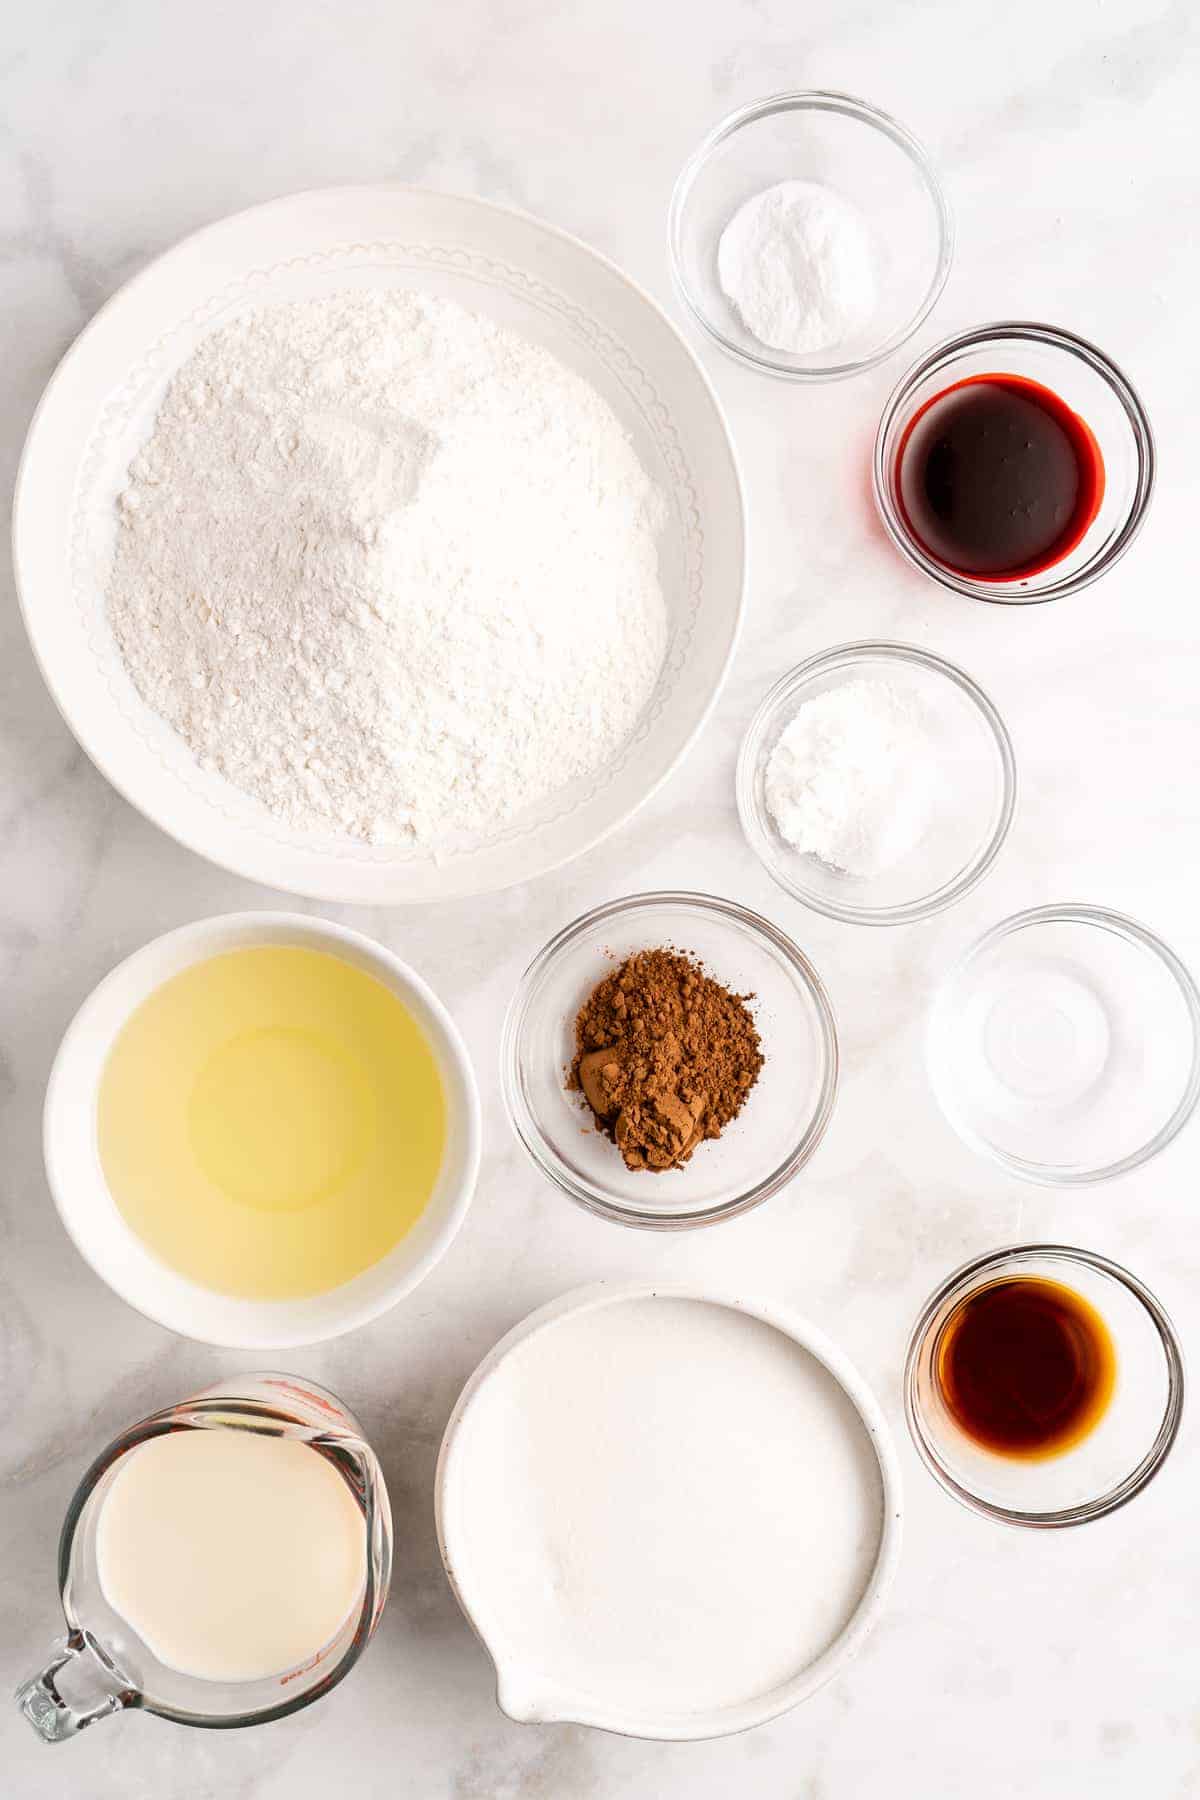
For the cupcakes:
- Apple cider vinegar or regular vinegar – This is used to make vegan buttermilk.
- Soy milk or other vegan milk
- White granulated sugar
- All-purpose flour
- Unsweetened cocoa powder
- Baking powder
- Sea salt
- Oil – Any neutral-flavored oil you like to bake with will work here.
- Vanilla extract
- Liquid red food colouring – Make sure you buy one that is vegan! A good example is AmeriColor or Chefmaster. You can also buy natural food colouring (I like the 365 one from Whole Foods) but note that it won’t be as bright in colour, more a brown/purple shade. It’ll still taste delicious! Long story short, you’re trying to avoid ingredients such as cochineal and carmine.
- Baking soda
- White vinegar – This gives the cake a light, airy texture.
For the frosting:
- V egan cream cheese – Make sure the cream cheese is room temperature.
- Sea salt
- V egan butter sticks – The butter needs to be at room temperature too.
- V anilla extract or vanilla paste
- P owdered sugar – This is also known as confectioners’ sugar.
- C ornstarch
How to Make Vegan Red Velvet Cupcakes
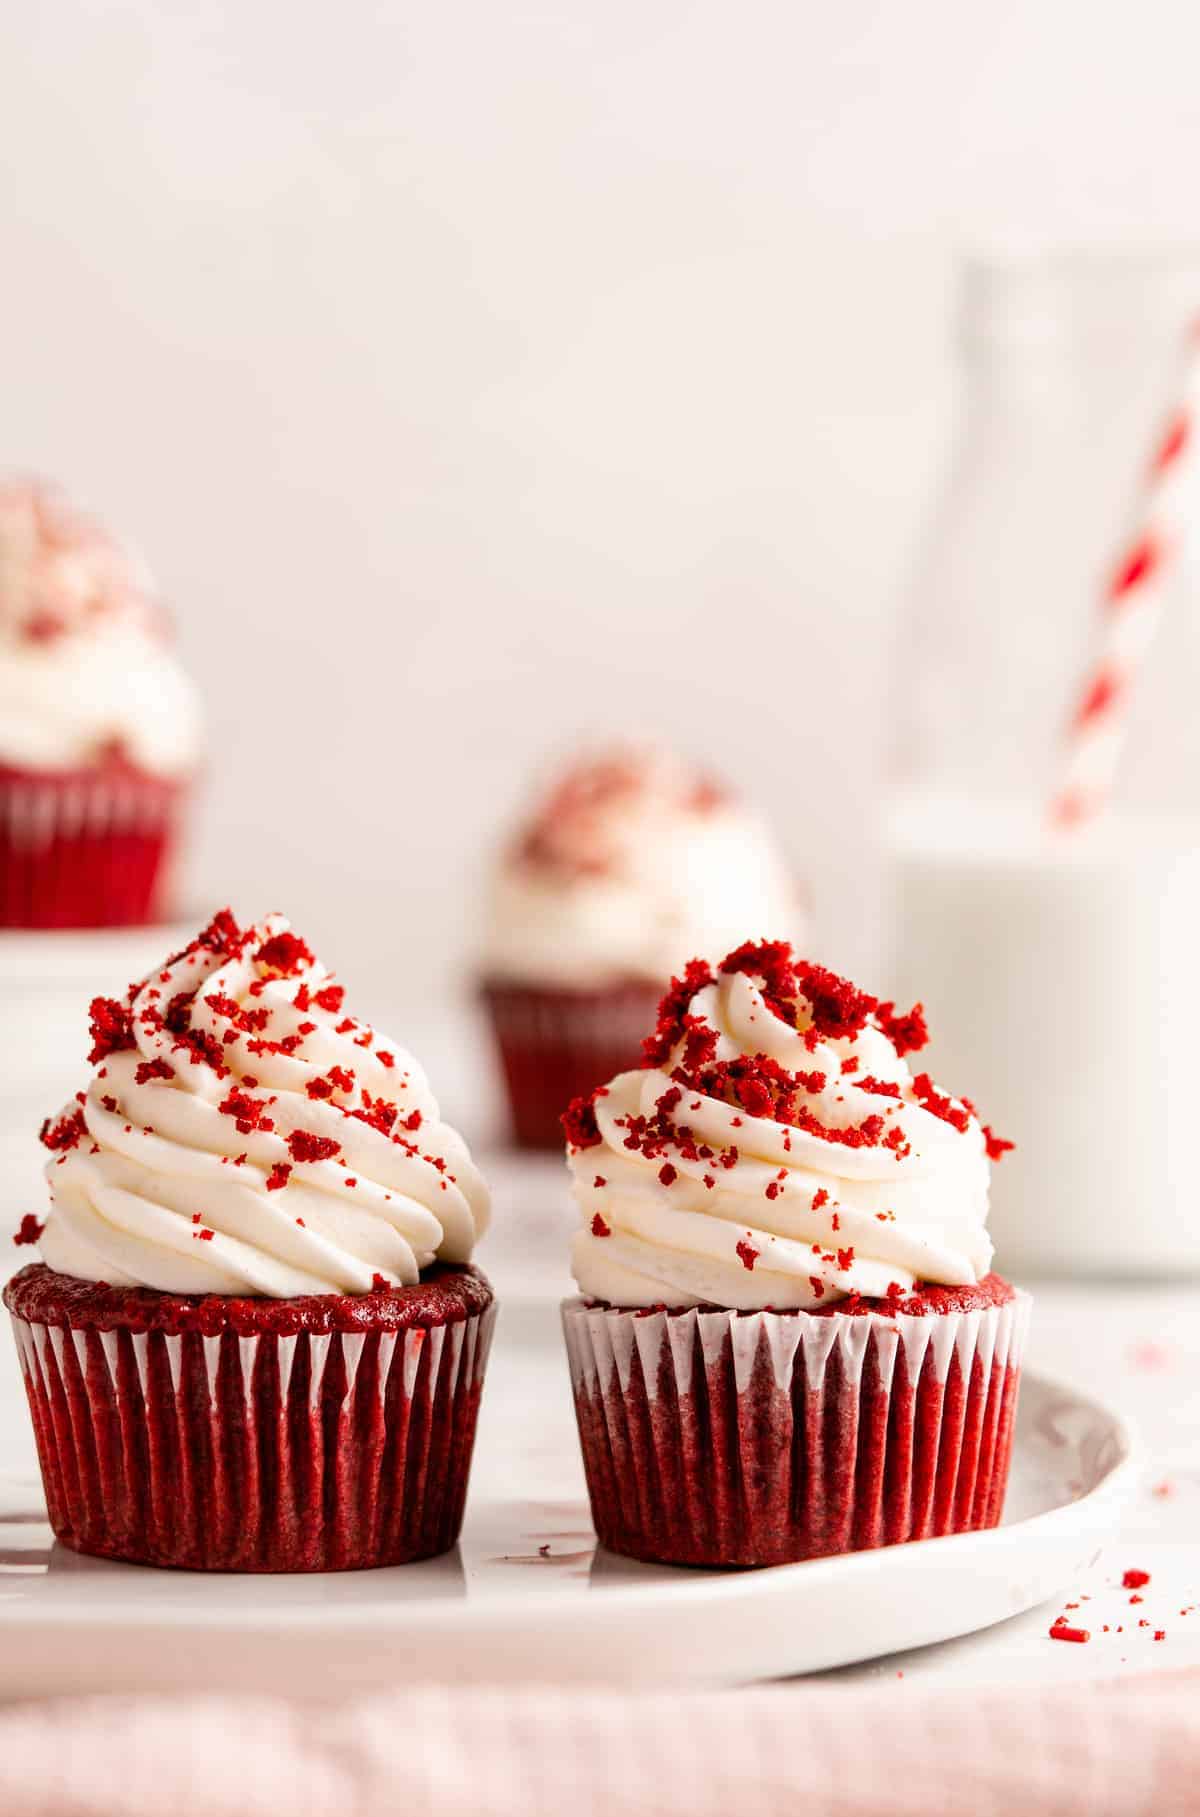
In a world filled with over-the-top, elaborately decorated and filled cupcakes, this recipe is an absolute breeze! I top mine with crumbs for a minimalist look, but mini chocolate chips are an excellent option, too.
Prepare . Line muffin cups with cupcake liners and p reheat the oven to 350°F/180°C.
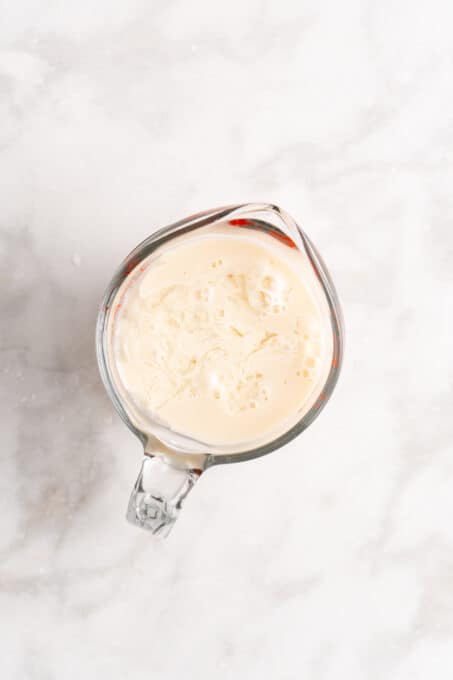
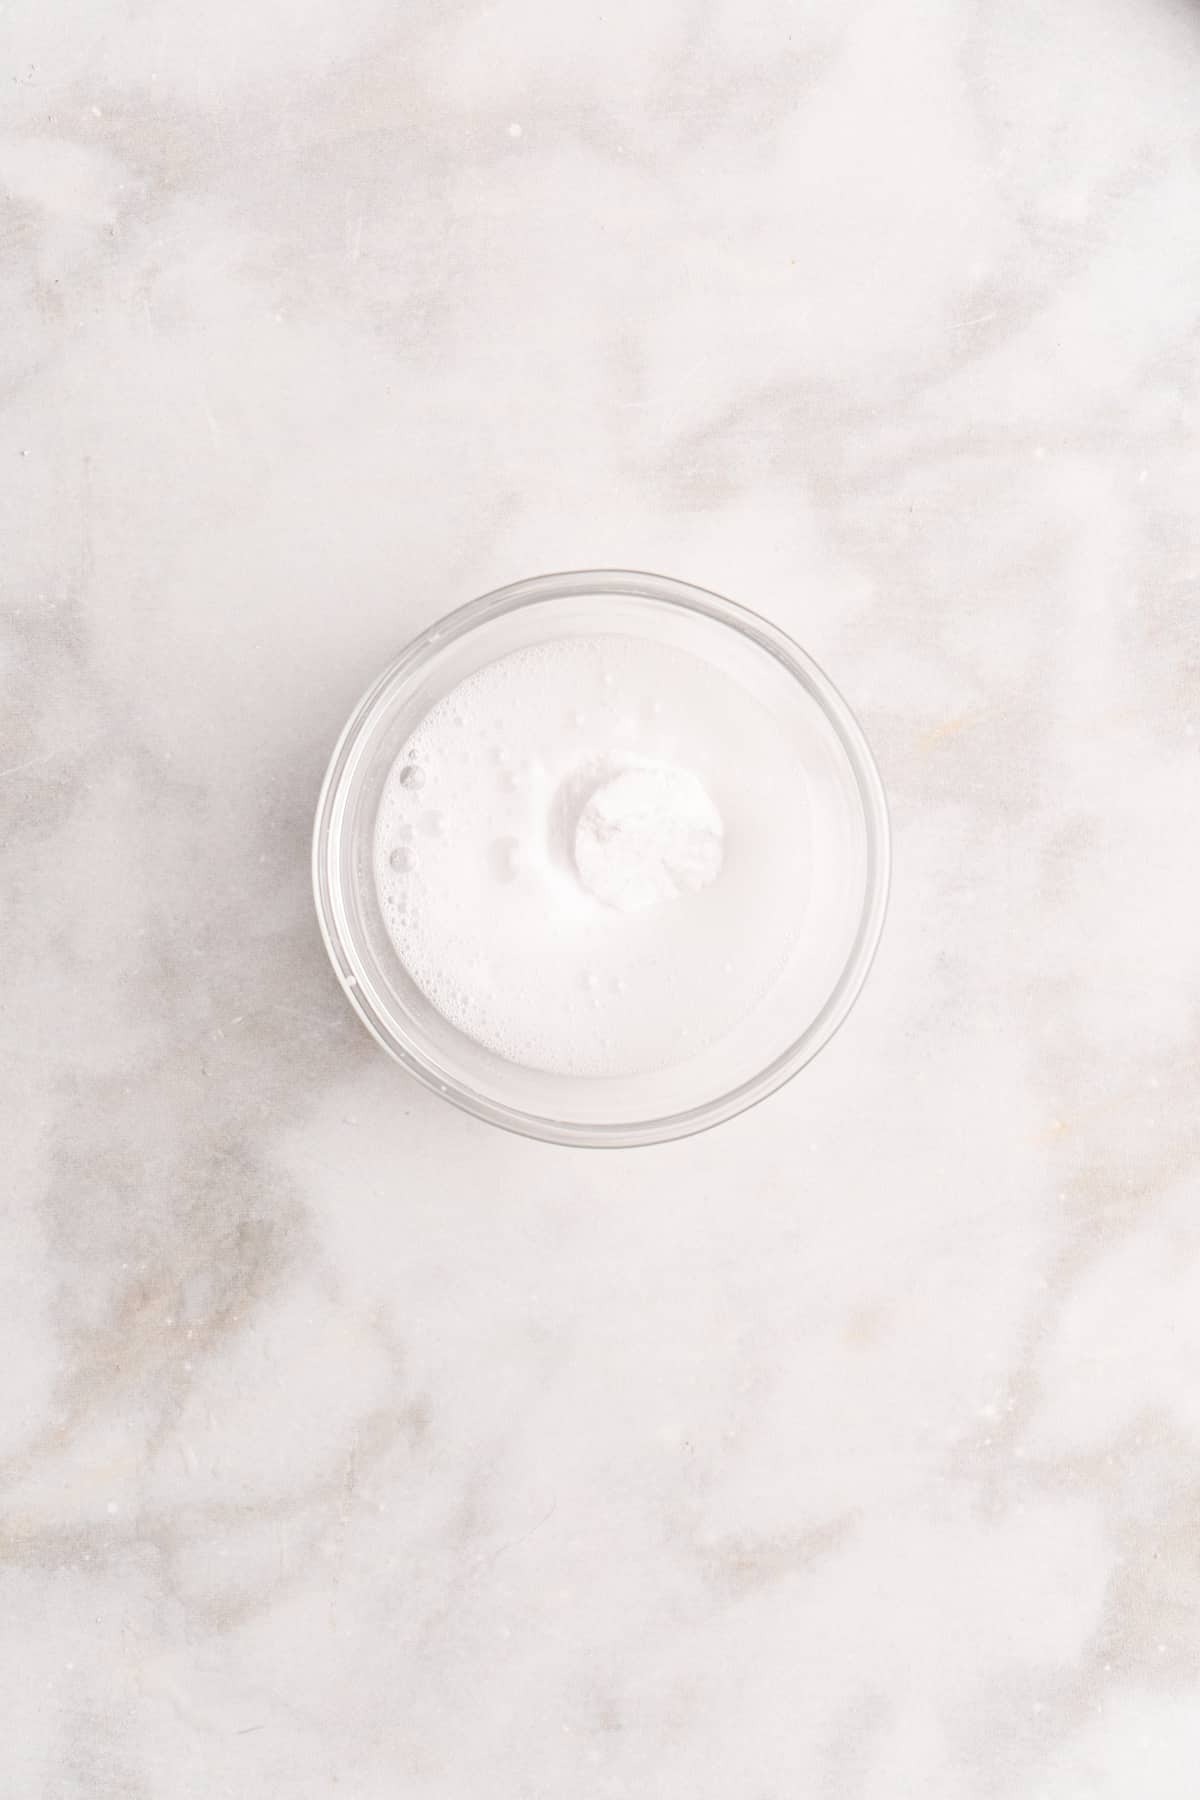
Make the buttermilk. In a jar, combine the tablespoon of vinegar and room temperature vegan milk. This will curdle and form buttermilk.
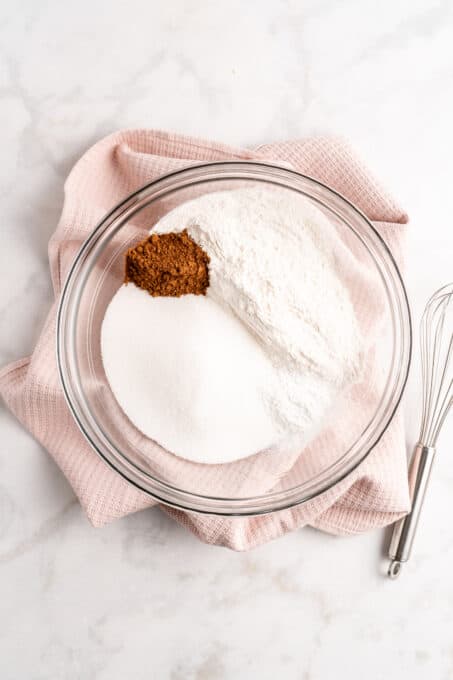
Mix the dry ingredients. In a large mixing bowl, whisk together the sugar, flour, cocoa powder, baking powder, and salt.
Add the remaining ingredients. To the dry mixture, add the oil, buttermilk, vanilla, red food colouring, and warm milk. Beat with an electric mixer on medium speed until just combined (about a minute), scraping down the sides of the bowl as necessary.
Combine the vinegar and baking soda. In a small bowl, mix together the white vinegar and baking soda. (It will fizz.) Stir into the batter.
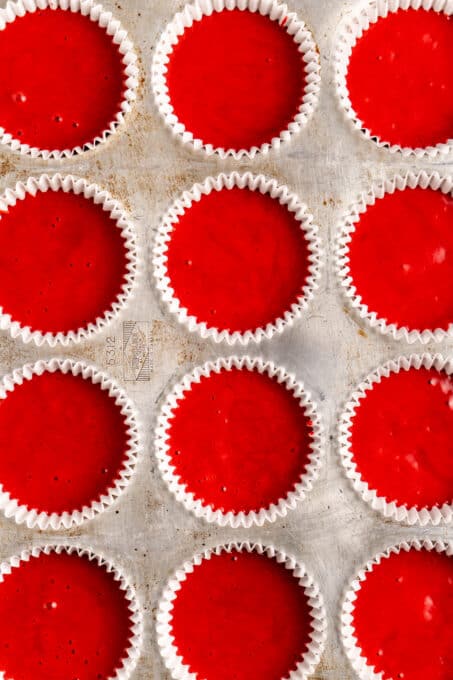
Fill the cupcake pans. Working quickly, divide the batter evenly between 24 cupcake liners; they should be about two-thirds full. Tap the cupcake pan on the counter a few times to remove any excess air bubbles before baking.
Bake. Place the pans in center of the middle rack in your oven and bake for 18 to 19 minutes.
Cool. Remove the cupcake pans from the oven and let the cupcakes cool in the pans for about 5 minutes, then transfer to a wire rack to cool completely.
Make the frosting. Beat the butter and cream cheese together in the bowl of a stand mixer for about 2 minutes, or until fluffy and well-mixed. Add in the vanilla and the pinch of salt, then beat in a cup of powdered sugar and all of the cornstarch until incorporated. Add the remaining powdered sugar a cup at a time until the frosting has reached the desired consistency.
Frost and serve. Transfer the frosting to a piping bag and pipe onto the cupcakes, or use an offset spatula to frost them the old-fashioned way. Garnish as desired and serve.

Tips for Success
These tips will help you make perfect red velvet cupcakes!
- Don’t over-mix. You only need to beat the batter until the ingredients are just combined. Any more than this will affect the texture of the cake.
- Make extra frosting if needed. Do you want big swirly poufs of frosting like the cupcakes they sell in fancy bakeries? You might want to make an extra half batch of the frosting.
- Getting the right frosting consistency. Using 4 cups of powdered sugar and chilling the frosting for at least 4 hours will help you get the perfect consistency for piping.
How to Store
You can store these cupcakes in an airtight container for up to 3 days. Let them come to room temperature before serving.
Can This Recipe Be Frozen?
Yes, you can freeze any extra cupcakes! Place them on a baking sheet, then put this directly in the freezer. Once the frosting is frozen solid, you can wrap the cupcakes individually or place them together in an airtight container. The cupcakes can be frozen for up to 3 months, then thawed in the refrigerator before serving.
Related Recipes
- Vegan Red Velvet Cake
- Red Velvet Brownies
- Vegan Cream Cheese Frosting
Ingredients
Red Velvet Cupcakes
- 1 tablespoon apple cider vinegar , or regular vinegar
- 1 cup soy milk , or other vegan milk, 240mL, room temperature
- 2 cups white granulated sugar , 400g
- 3 cups all-purpose flour , 360g
- 2 tablespoons unsweetened cocoa powder , 16g
- 2 teaspoons baking powder
- 1 teaspoon sea salt
- ¾ cup oil , 150g
- 1 teaspoon vanilla extract
- 1 oz. liquid red food colouring , bright red
- 1 cup warm soy milk , 240mL
- 2 teaspoons baking soda
- 1 teaspoon white vinegar
Vegan Cream Cheese Frosting
- 8 ounces vegan cream cheese* , bring to room temperature
- ½ cup vegan butter sticks , bring to room temperature, 4 ounces
- 1 teaspoon vanilla extract , or vanilla paste
- 1 pinch sea salt
- 3 to 4 cups powdered sugar , sifted, 480g for 4 cups
- 1/4 cup cornstarch , sifted32g
Instructions
- Red Velvet Cupcakes
- Line muffin cups with cupcake liners.
- Preheat the oven to 350°F/180°C.
- In a jar, add the tablespoon of vinegar and room temperature vegan milk together to curdle to form a buttermilk. Set aside.
- In a large bowl, add the sugar, flour, cocoa powder, baking powder and sea salt. Using a whisk, whisk all the ingredients together, removing any clumps that may form.
- Pour in the oil, the buttermilk mix from earlier, the vanilla extract and the red food colouring.
- Heat up that additional milk in the microwave for 40 seconds (or on stove top until warm, not boiling). You want it warm enough to dissolve but not boiling.
- Add it to the bowl on top of everything. Beat on medium speed of electric mixer for no more than 1 minute on medium speed, scraping down the sides of the bowl once in between to ensure that everything is incorporated. You want to mix until just combined.
- In a small bowl, mix together the 2 teaspoons of white vinegar and baking soda. Yes, it will fizz! Add it to the cake batter and stir well to combine, for about 30 more seconds.
- Working quickly, divide the batter evenly between 24 cupcake liners (about ⅔ ‘s full). You can use an ice cream scoop to help! Tap the cupcake pan on the counter three times (lift and tap down slightly) to remove any excess air bubbles before baking.
- Place the pan in the middle rack of your oven and in the center of that rack. Bake for 18-19 minutes until fully cooked. Remove from the oven and let them cool in the pans for about 5 minutes, then remove onto a wire rack to cool completely.
- After cooled, frost with vegan cream cheese frosting and some red velvet crumbs. Enjoy!
- Vegan Cream Cheese Frosting
- In the bowl of a mixer, beat the butter and cream cheese together for about 2 minutes until fully incorporated.
- Add in the vanilla extract or paste and the pinch of salt.
- Add in a cup of sifted powdered sugar and all of the sifted cornstarch. Mix for about 1 minute or until incorporated. Add in the powdered sugar 1 cup at a time until the frosting has reached the desired thickness.
- Place the frosting wrapped or covered into the fridge for at least 4 hours or overnight, until being used. You can enjoy it right away, but it will thicken up beautifully in the fridge.
- You can apply it immediately to cooled cupcakes, then place in the fridge (or cupcakes on counter if you live in a cool climate/air conditioned home), or place the frosting itself in the fridge for now, then apply to the cupcakes later. Enjoy!
Notes
These vegan Red Velvet Cupcakes are here to add a festive touch to your next party! They pair a moist, deep red chocolate cake with swirls of rich vegan cream cheese frosting.
When we think about holiday baked goods, we usually think about Christmas cookies, but these vegan red velvet cupcakes are made for the holidays. The bright red cake and snowy white frosting remind me of Santa! Of course, you don’t have to limit red velvet cupcakes to holiday celebrations—they’re a perfectly portioned treat that you can enjoy anytime the craving strikes!
Making vegan red velvet cupcakes isn’t all that different from the traditional version—it’s just a matter of using different ingredients! Just like the classic recipe, this one includes vinegar to help give your cupcakes a little extra lift so they’re supremely light and fluffy. It also helps balance the sweetness, which is important when you’re topping your cupcakes with rich cream cheese frosting . Make sure you use a vegan cream cheese that tastes good on its own and has a nice, creamy texture—if it tastes off or has a gummy texture, it’s not going to make a good frosting either!
Notes on Ingredients
Please note that this is important information on the ingredients and instructions and the FULL recipe with amounts and details can be found DOWN BELOW (scroll to it) in the recipe card.
For the cupcakes:
- Apple cider vinegar or regular vinegar – This is used to make vegan buttermilk.
- Soy milk or other vegan milk
- White granulated sugar
- All-purpose flour
- Unsweetened cocoa powder
- Baking powder
- Sea salt
- Oil – Any neutral-flavored oil you like to bake with will work here.
- Vanilla extract
- Liquid red food colouring – Make sure you buy one that is vegan! A good example is AmeriColor or Chefmaster. You can also buy natural food colouring (I like the 365 one from Whole Foods) but note that it won’t be as bright in colour, more a brown/purple shade. It’ll still taste delicious! Long story short, you’re trying to avoid ingredients such as cochineal and carmine.
- Baking soda
- White vinegar – This gives the cake a light, airy texture.
For the frosting:
- V egan cream cheese – Make sure the cream cheese is room temperature.
- Sea salt
- V egan butter sticks – The butter needs to be at room temperature too.
- V anilla extract or vanilla paste
- P owdered sugar – This is also known as confectioners’ sugar.
- C ornstarch
How to Make Vegan Red Velvet Cupcakes
In a world filled with over-the-top, elaborately decorated and filled cupcakes, this recipe is an absolute breeze! I top mine with crumbs for a minimalist look, but mini chocolate chips are an excellent option, too.
Prepare . Line muffin cups with cupcake liners and p reheat the oven to 350°F/180°C.
Make the buttermilk. In a jar, combine the tablespoon of vinegar and room temperature vegan milk. This will curdle and form buttermilk.
Mix the dry ingredients. In a large mixing bowl, whisk together the sugar, flour, cocoa powder, baking powder, and salt.
Add the remaining ingredients. To the dry mixture, add the oil, buttermilk, vanilla, red food colouring, and warm milk. Beat with an electric mixer on medium speed until just combined (about a minute), scraping down the sides of the bowl as necessary.
Combine the vinegar and baking soda. In a small bowl, mix together the white vinegar and baking soda. (It will fizz.) Stir into the batter.
Fill the cupcake pans. Working quickly, divide the batter evenly between 24 cupcake liners; they should be about two-thirds full. Tap the cupcake pan on the counter a few times to remove any excess air bubbles before baking.
Bake. Place the pans in center of the middle rack in your oven and bake for 18 to 19 minutes.
Cool. Remove the cupcake pans from the oven and let the cupcakes cool in the pans for about 5 minutes, then transfer to a wire rack to cool completely.
Make the frosting. Beat the butter and cream cheese together in the bowl of a stand mixer for about 2 minutes, or until fluffy and well-mixed. Add in the vanilla and the pinch of salt, then beat in a cup of powdered sugar and all of the cornstarch until incorporated. Add the remaining powdered sugar a cup at a time until the frosting has reached the desired consistency.
Frost and serve. Transfer the frosting to a piping bag and pipe onto the cupcakes, or use an offset spatula to frost them the old-fashioned way. Garnish as desired and serve.
Tips for Success
These tips will help you make perfect red velvet cupcakes!
- Don’t over-mix. You only need to beat the batter until the ingredients are just combined. Any more than this will affect the texture of the cake.
- Make extra frosting if needed. Do you want big swirly poufs of frosting like the cupcakes they sell in fancy bakeries? You might want to make an extra half batch of the frosting.
- Getting the right frosting consistency. Using 4 cups of powdered sugar and chilling the frosting for at least 4 hours will help you get the perfect consistency for piping.
How to Store
You can store these cupcakes in an airtight container for up to 3 days. Let them come to room temperature before serving.
Can This Recipe Be Frozen?
Yes, you can freeze any extra cupcakes! Place them on a baking sheet, then put this directly in the freezer. Once the frosting is frozen solid, you can wrap the cupcakes individually or place them together in an airtight container. The cupcakes can be frozen for up to 3 months, then thawed in the refrigerator before serving.
Related Recipes
- Vegan Red Velvet Cake
- Red Velvet Brownies
- Vegan Cream Cheese Frosting
Ingredients
Red Velvet Cupcakes
- 1 tablespoon apple cider vinegar , or regular vinegar
- 1 cup soy milk , or other vegan milk, 240mL, room temperature
- 2 cups white granulated sugar , 400g
- 3 cups all-purpose flour , 360g
- 2 tablespoons unsweetened cocoa powder , 16g
- 2 teaspoons baking powder
- 1 teaspoon sea salt
- ¾ cup oil , 150g
- 1 teaspoon vanilla extract
- 1 oz. liquid red food colouring , bright red
- 1 cup warm soy milk , 240mL
- 2 teaspoons baking soda
- 1 teaspoon white vinegar
Vegan Cream Cheese Frosting
- 8 ounces vegan cream cheese* , bring to room temperature
- ½ cup vegan butter sticks , bring to room temperature, 4 ounces
- 1 teaspoon vanilla extract , or vanilla paste
- 1 pinch sea salt
- 3 to 4 cups powdered sugar , sifted, 480g for 4 cups
- 1/4 cup cornstarch , sifted32g
Instructions
- Red Velvet Cupcakes
- Line muffin cups with cupcake liners.
- Preheat the oven to 350°F/180°C.
- In a jar, add the tablespoon of vinegar and room temperature vegan milk together to curdle to form a buttermilk. Set aside.
- In a large bowl, add the sugar, flour, cocoa powder, baking powder and sea salt. Using a whisk, whisk all the ingredients together, removing any clumps that may form.
- Pour in the oil, the buttermilk mix from earlier, the vanilla extract and the red food colouring.
- Heat up that additional milk in the microwave for 40 seconds (or on stove top until warm, not boiling). You want it warm enough to dissolve but not boiling.
- Add it to the bowl on top of everything. Beat on medium speed of electric mixer for no more than 1 minute on medium speed, scraping down the sides of the bowl once in between to ensure that everything is incorporated. You want to mix until just combined.
- In a small bowl, mix together the 2 teaspoons of white vinegar and baking soda. Yes, it will fizz! Add it to the cake batter and stir well to combine, for about 30 more seconds.
- Working quickly, divide the batter evenly between 24 cupcake liners (about ⅔ ‘s full). You can use an ice cream scoop to help! Tap the cupcake pan on the counter three times (lift and tap down slightly) to remove any excess air bubbles before baking.
- Place the pan in the middle rack of your oven and in the center of that rack. Bake for 18-19 minutes until fully cooked. Remove from the oven and let them cool in the pans for about 5 minutes, then remove onto a wire rack to cool completely.
- After cooled, frost with vegan cream cheese frosting and some red velvet crumbs. Enjoy!
- Vegan Cream Cheese Frosting
- In the bowl of a mixer, beat the butter and cream cheese together for about 2 minutes until fully incorporated.
- Add in the vanilla extract or paste and the pinch of salt.
- Add in a cup of sifted powdered sugar and all of the sifted cornstarch. Mix for about 1 minute or until incorporated. Add in the powdered sugar 1 cup at a time until the frosting has reached the desired thickness.
- Place the frosting wrapped or covered into the fridge for at least 4 hours or overnight, until being used. You can enjoy it right away, but it will thicken up beautifully in the fridge.
- You can apply it immediately to cooled cupcakes, then place in the fridge (or cupcakes on counter if you live in a cool climate/air conditioned home), or place the frosting itself in the fridge for now, then apply to the cupcakes later. Enjoy!
Notes

Vegan Red Velvet Cupcakes
Ingredients
Red Velvet Cupcakes
- 1 tablespoon apple cider vinegar or regular vinegar
- 1 cup soy milk or other vegan milk, 240mL, room temperature
- 2 cups white granulated sugar 400g
- 3 cups all-purpose flour 360g
- 2 tablespoons unsweetened cocoa powder 16g
- 2 teaspoons baking powder
- 1 teaspoon sea salt
- ¾ cup oil 150g
- 1 teaspoon vanilla extract
- 1 oz. liquid red food colouring bright red
- 1 cup warm soy milk 240mL
- 2 teaspoons baking soda
- 1 teaspoon white vinegar
Vegan Cream Cheese Frosting
- 8 ounces vegan cream cheese* bring to room temperature
- ½ cup vegan butter sticks bring to room temperature, 4 ounces
- 1 teaspoon vanilla extract or vanilla paste
- 1 pinch sea salt
- 3 to 4 cups powdered sugar sifted, 480g for 4 cups
- 1/4 cup cornstarch sifted32g
Instructions
- Red Velvet Cupcakes
- Line muffin cups with cupcake liners.
- Preheat the oven to 350°F/180°C.
- In a jar, add the tablespoon of vinegar and room temperature vegan milk together to curdle to form a buttermilk. Set aside.
- In a large bowl, add the sugar, flour, cocoa powder, baking powder and sea salt. Using a whisk, whisk all the ingredients together, removing any clumps that may form.
- Pour in the oil, the buttermilk mix from earlier, the vanilla extract and the red food colouring.
- Heat up that additional milk in the microwave for 40 seconds (or on stove top until warm, not boiling). You want it warm enough to dissolve but not boiling.
- Add it to the bowl on top of everything. Beat on medium speed of electric mixer for no more than 1 minute on medium speed, scraping down the sides of the bowl once in between to ensure that everything is incorporated. You want to mix until just combined.
- In a small bowl, mix together the 2 teaspoons of white vinegar and baking soda. Yes, it will fizz! Add it to the cake batter and stir well to combine, for about 30 more seconds.
- Working quickly, divide the batter evenly between 24 cupcake liners (about ⅔ ‘s full). You can use an ice cream scoop to help! Tap the cupcake pan on the counter three times (lift and tap down slightly) to remove any excess air bubbles before baking.
- Place the pan in the middle rack of your oven and in the center of that rack. Bake for 18-19 minutes until fully cooked. Remove from the oven and let them cool in the pans for about 5 minutes, then remove onto a wire rack to cool completely.
- After cooled, frost with vegan cream cheese frosting and some red velvet crumbs. Enjoy!
- Vegan Cream Cheese Frosting
- In the bowl of a mixer, beat the butter and cream cheese together for about 2 minutes until fully incorporated.
- Add in the vanilla extract or paste and the pinch of salt.
- Add in a cup of sifted powdered sugar and all of the sifted cornstarch. Mix for about 1 minute or until incorporated. Add in the powdered sugar 1 cup at a time until the frosting has reached the desired thickness.
- Place the frosting wrapped or covered into the fridge for at least 4 hours or overnight, until being used. You can enjoy it right away, but it will thicken up beautifully in the fridge.
- You can apply it immediately to cooled cupcakes, then place in the fridge (or cupcakes on counter if you live in a cool climate/air conditioned home), or place the frosting itself in the fridge for now, then apply to the cupcakes later. Enjoy!
Video
Notes
Nutrition
Vegan Red Velvet Cupcakes https://jessicainthekitchen.com/vegan-red-velvet-cupcakes/ December 18, 2021
Roasting garlic is the best way to bring out its sweet, caramelized flavour. Once you know how to roast garlic, you’ll be using it in all of your cooking! Roasted garlic is super simple to make, easy to store, and delicious in loads of dishes. You’ll see!
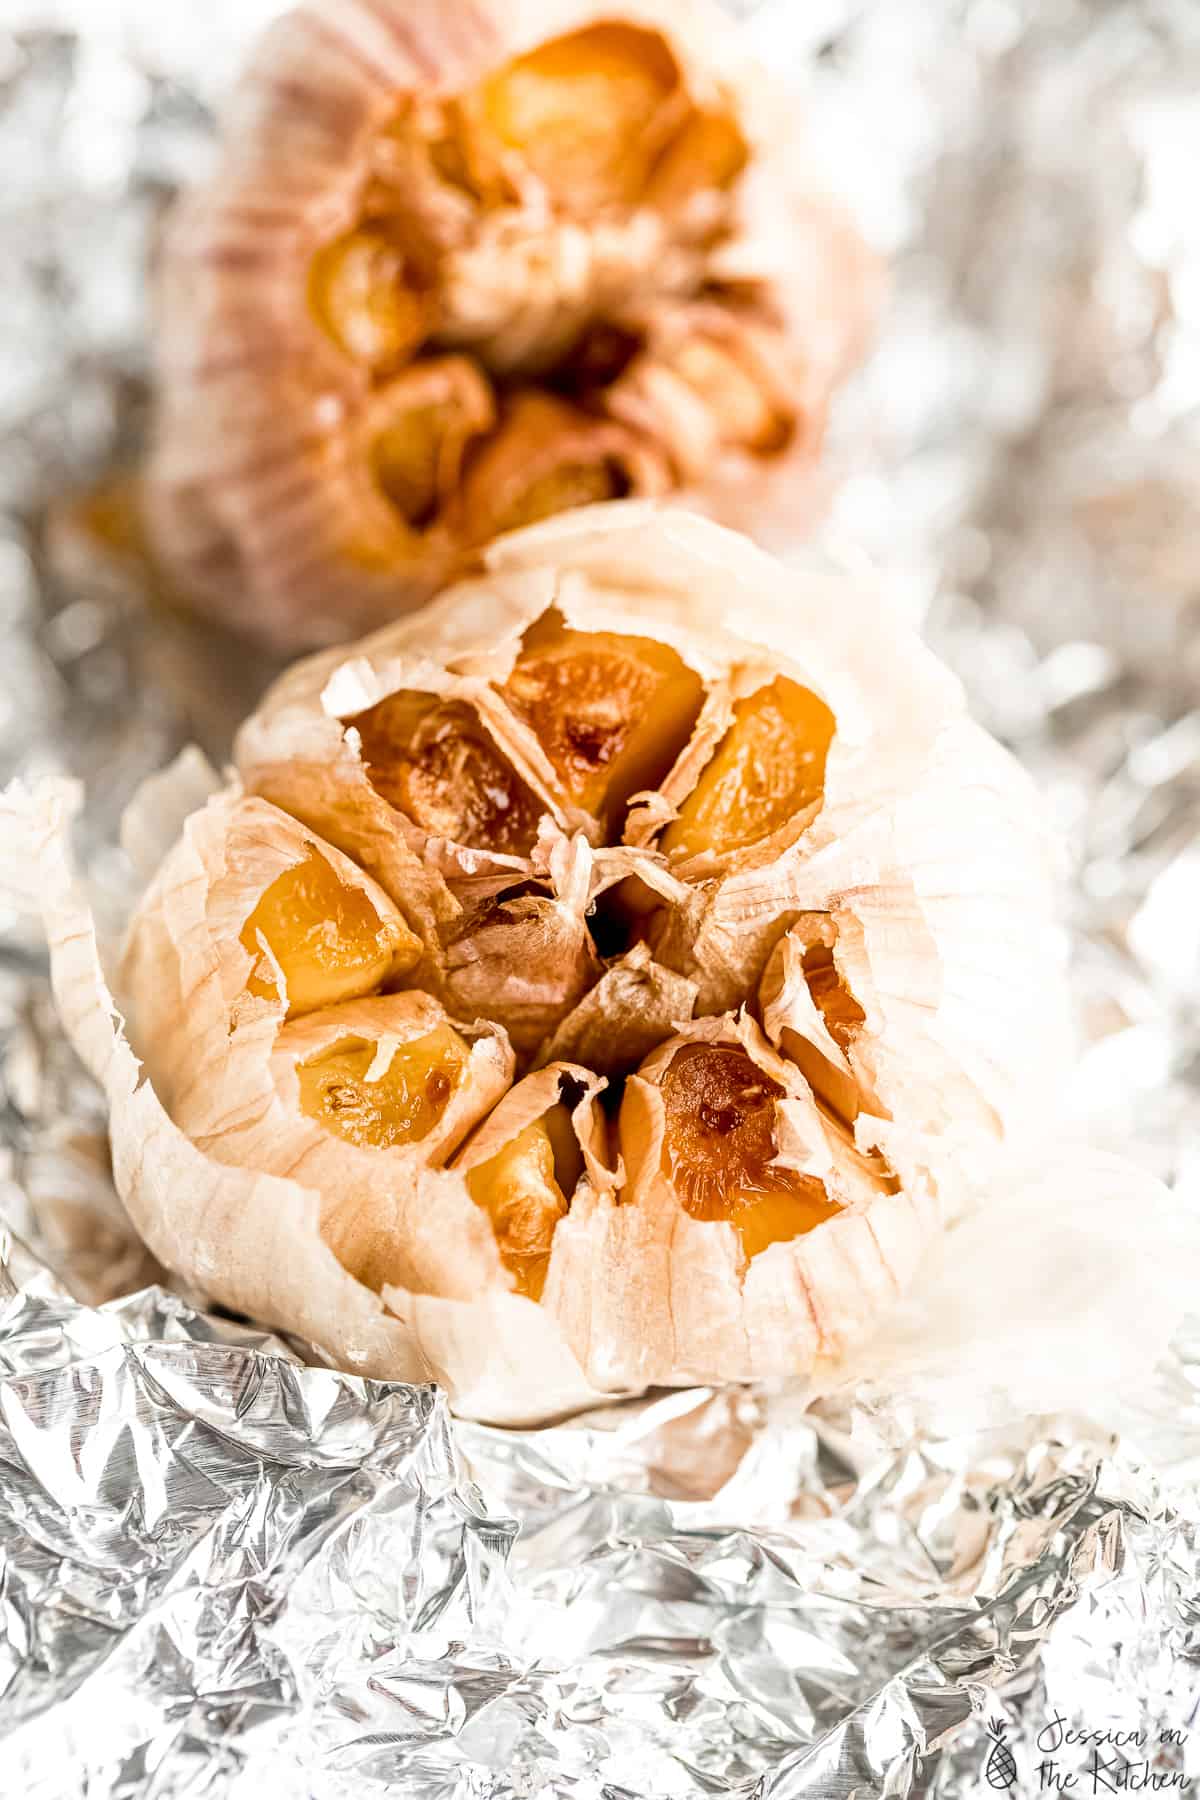
Oven-roasted garlic is easily one of my top five favourite foods! As if garlic wasn’t incredible enough, roasting brings out its flavours like you wouldn’t believe. What does roasted garlic taste like? So glad you asked. Imagine rich, buttery cloves with the smooth, mellow flavours of garlic. That harsh, pungent bite of raw garlic is gone, and in its place is garlic that’s softened, caramelized, and something you can add to countless recipes or spread over toast on its own.
Why You Should Roast Garlic in the Oven
- It’s SO easy. I’ll show you how to roast a garlic bulb in the oven using the easiest method. All you need is aluminum foil and good-quality olive oil.
- An easy way to deepen the flavours. While you can use regular garlic in recipes where I call for roasted garlic (like baba ghanoush ), roasted garlic just adds that much more flavour.
- It stores like a dream. Roasted garlic lasts a long time in the fridge, and you can roast several heads of garlic at once, keeping them on hand for whenever you need them.
Roasting Garlic Bulbs vs. Garlic Cloves
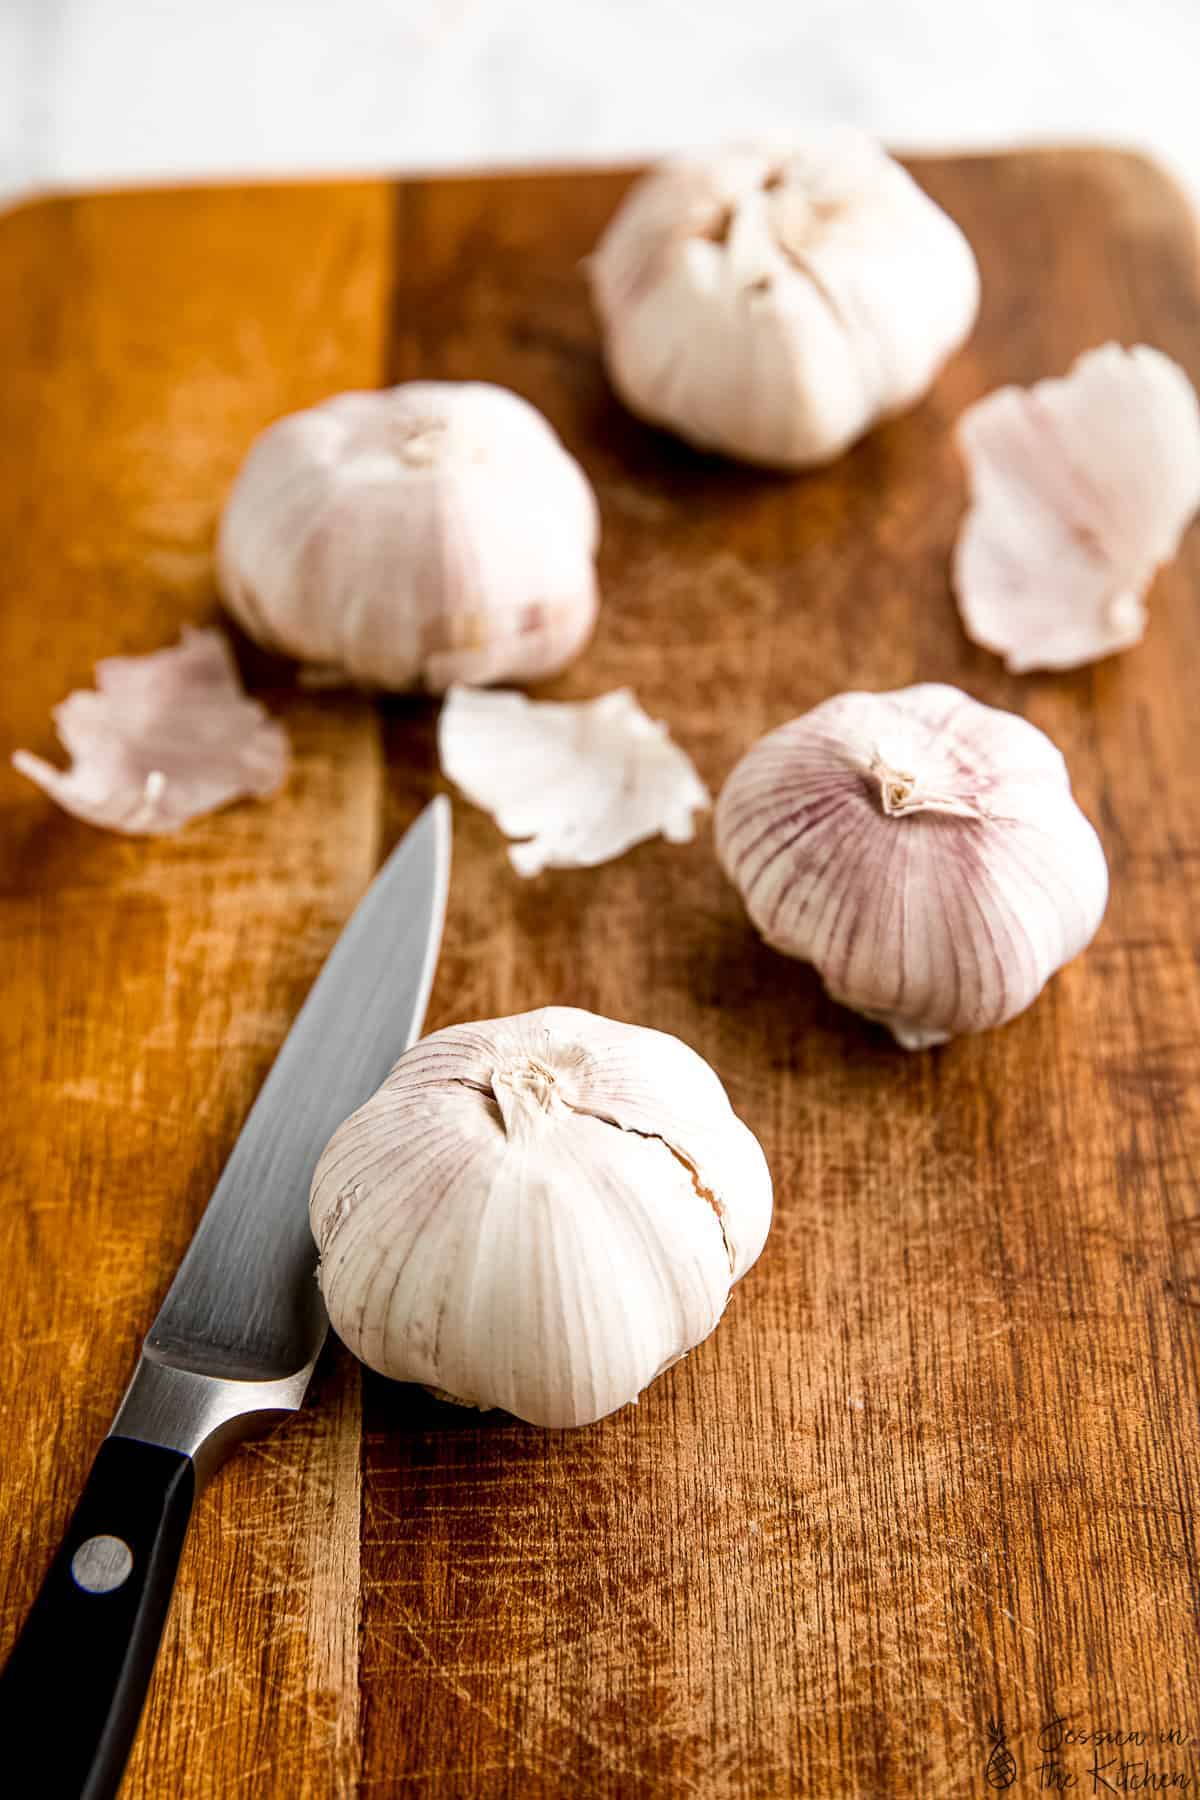
I love roasting whole garlic bulbs with the skin on. It saves the time it takes to peel the garlic, plus, I find it further locks in the flavour. Of course, if you’d like to roast garlic cloves without the skins instead, that’s more than fine, too. Either way, for this simple recipe, you will need:
- Garlic – Make sure to use fresh garlic. Look for firm, plump bulbs that are heavy for their size without any green shoots sprouting up. The papery skin should be tight, not shriveled. If the cloves inside are mushy, that’s a sign that your garlic has gone off, and you’ll need to seek out a fresh bulb.
- Olive oil – A high-quality olive oil adds a rich flavor to your roasted garlic.
How to Roast Garlic
Roasting garlic is so easy. I think the hardest part is waiting for it to be done! These are the quick steps to follow to get your fresh garlic ready for the oven.
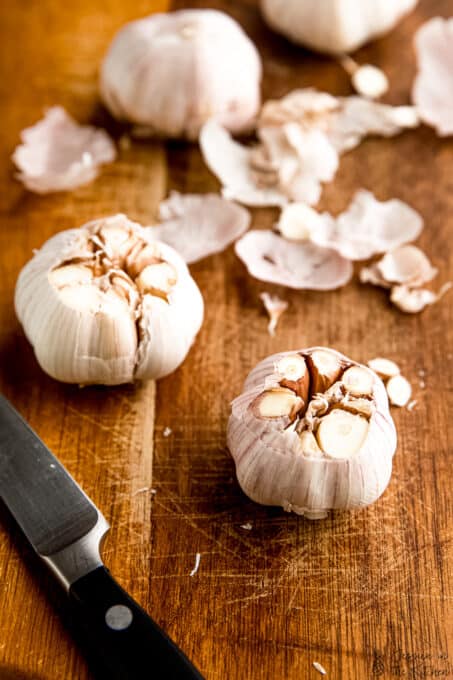
- Prepare the garlic for roasting. Preheat your oven to 450°F/230°C. Cut the top off of the garlic head, exposing all of the garlic cloves inside. Next, place the garlic head onto a piece of foil and drizzle olive oil over the top.
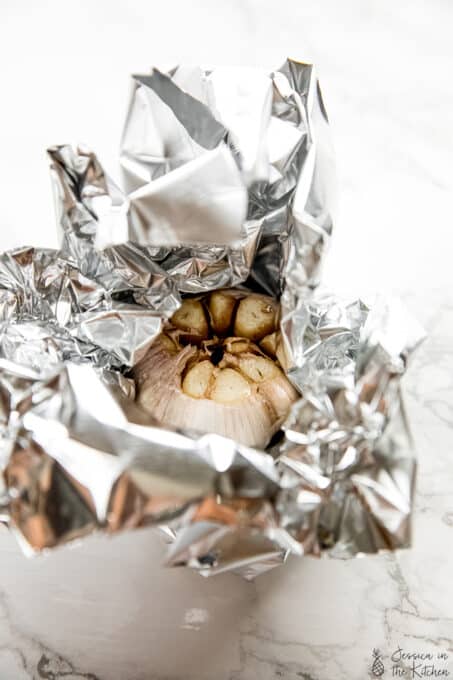
- Seal the garlic in the foil. Now, fold the foil up and around the garlic. Make sure it’s tightly sealed.
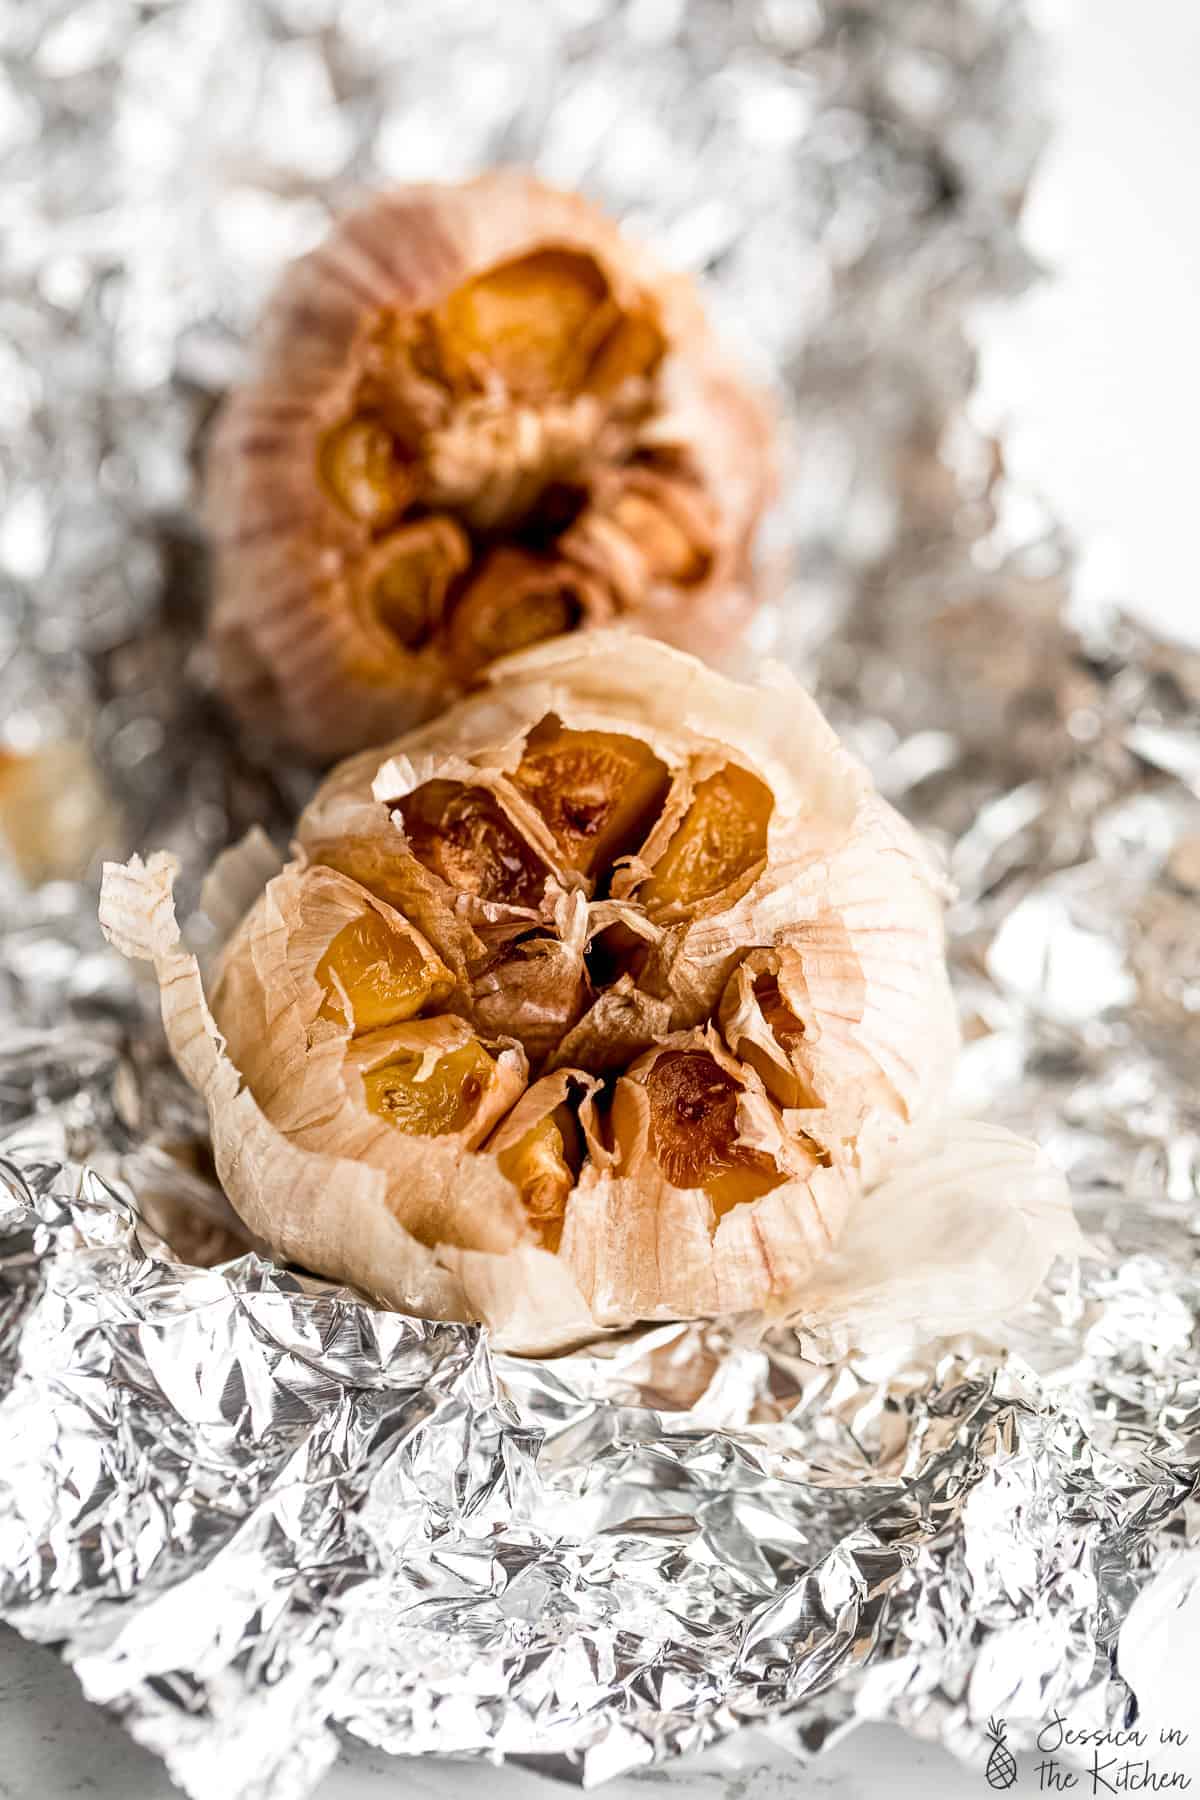
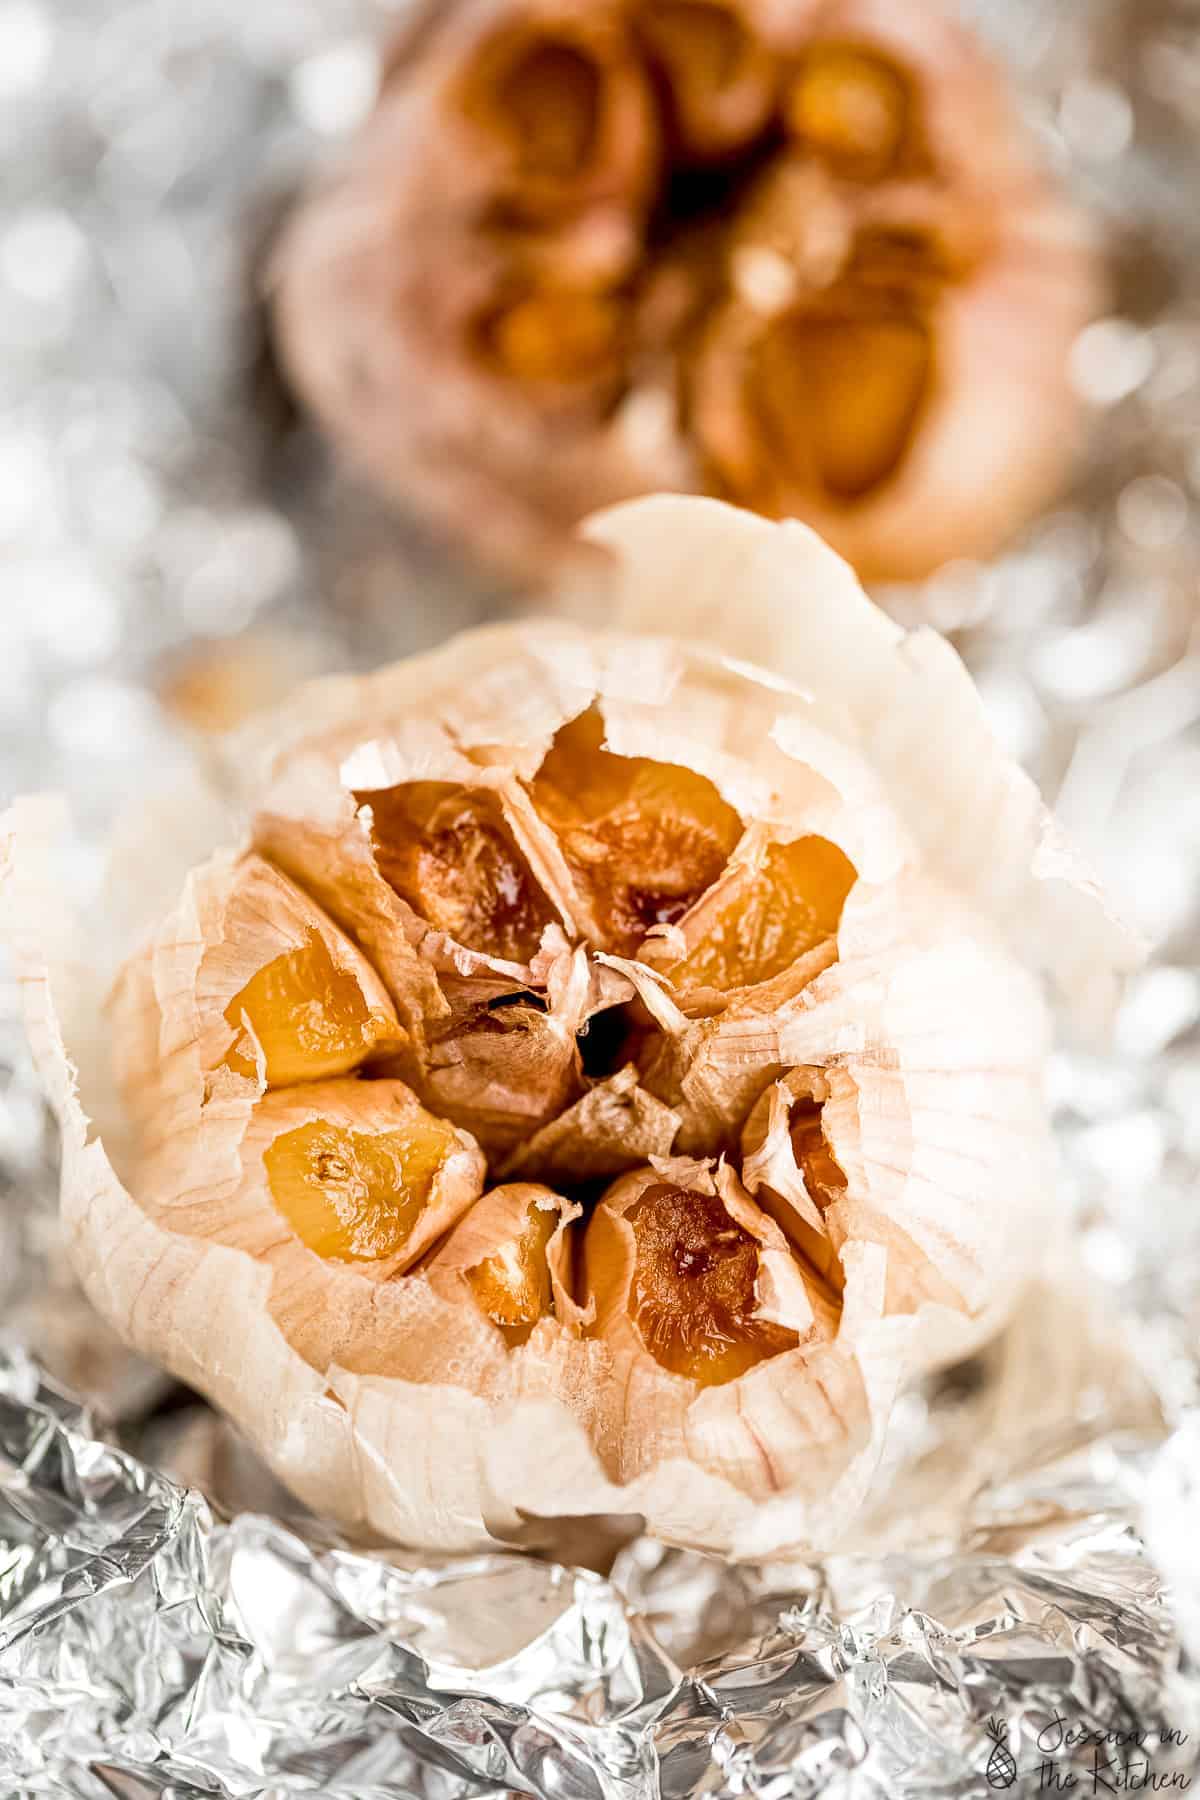
- Roast . Place the wrapped garlic head directly onto the rack in your oven. Roast for about 45 minutes, or until you peek inside to find that the cloves are lightly browned, tender, and velvety.
Use the Air Fryer
If you own an air fryer , you can use it to roast whole garlic bulbs, too. Prepare the bulbs in foil as written. Air fry the garlic at 380°F/193°C for about 25 minutes. Afterward, leave the garlic to cool inside the closed air fryer for 5-10 minutes before removing it. Check out my air fryer roasted garlic for detailed instructions.
Cooling and Peeling Roasted Garlic
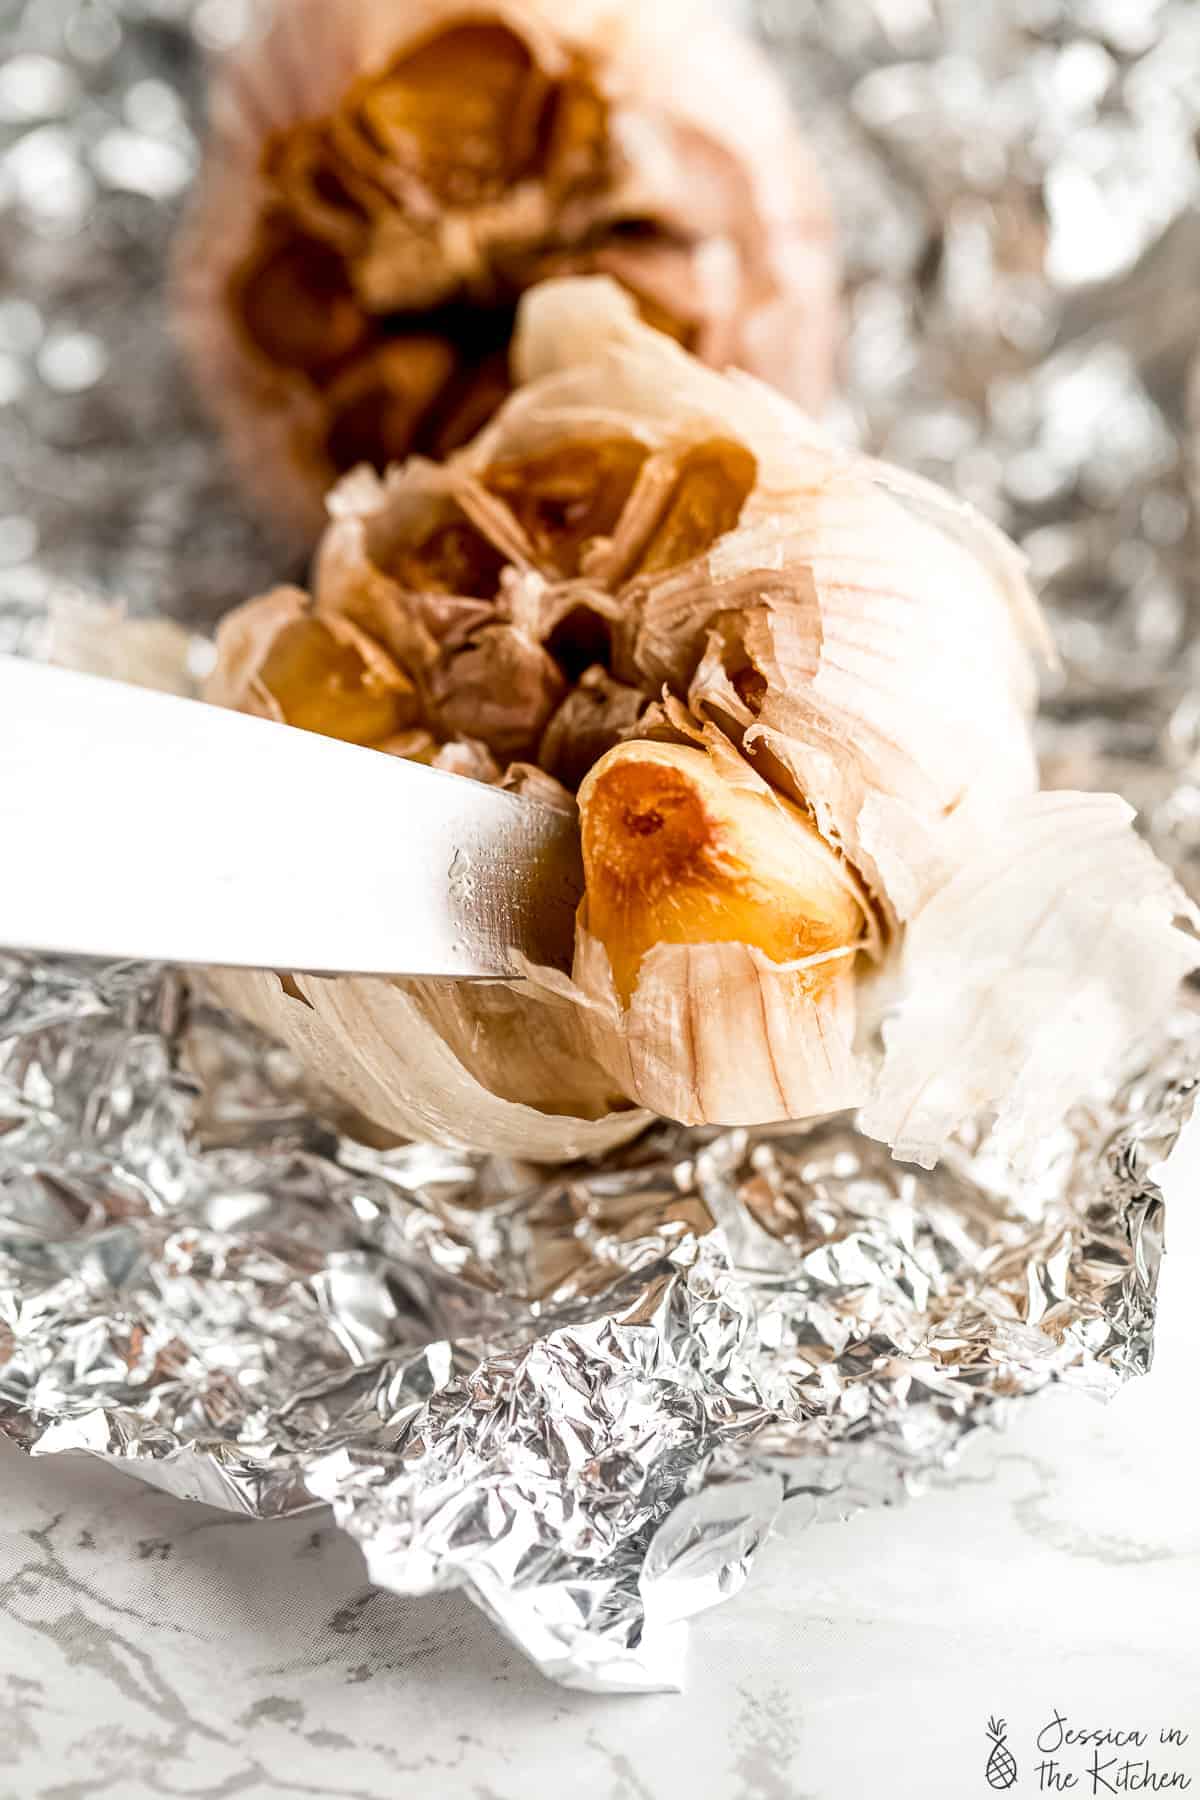
Let the garlic cool for at least 10 minutes, or until you can comfortably touch it. If you’d like to keep the roasted cloves whole, carefully peel away the skins. Alternatively, squeeze the cloves out of the skins and into a small bowl. You can mash them with a fork to use the roasted garlic as a paste.
Success Tips
- Use fresh garlic. Or if not, ensure you don’t have any rotten garlic cloves in the bunch. If you cut the garlic head and see any cloves that are brown, remove them before roasting.
- Don’t rush it. I know we all look for shortcuts, but just like caramelised onions , there isn’t really a way to speed up the garlic roasting process that doesn’t cut corners on the end result. The good news is that if you make a bunch of roasted garlic all at the same time, you’ll have it on hand when you need it!
- Putting your roasted garlic to use. My favourite way to use roasted garlic is to slather it on a piece of crusty bread. You can also spread it on sandwiches, burgers, and crackers, or stir it into jarred pasta sauce.
Ways to Use Roasted Garlic in Recipes
Sweet, caramelized oven-roasted garlic is delicious mashed and spread over roasted garlic bread , or, if you’re looking for a recipe that uses roasted garlic, here are a few to try:
- Use it in the sauce for my garlic alfredo pasta .
- Add roasted garlic paste to this homemade roasted garlic tomato sauce .
- Combine roasted garlic, fresh basil leaves, olive oil, walnuts, and vegan parmesan to make easy homemade basil pesto .
- Build the flavours in a cozy roasted cauliflower soup .
- Blend roasted garlic into authentic homemade hummus or white bean dip .
How to Store Roasted Garlic
- Refrigerate. You can store roasted garlic in the refrigerator in an airtight container for about 4 days.
- Freeze it for later. Freezing is the best way to store roasted garlic so you have it on hand when you need it! To freeze, you can spread the roasted cloves on a baking sheet. Once they are frozen, store them in a sealed plastic bag. You can also mash the roasted garlic and freeze it in an ice cube tray. Store the cubes in a sealed plastic bag or an airtight container and thaw them as needed. Roasted garlic can be frozen for up to 3 months.
More Easy Roasting Recipes
- Balsamic Roasted Vegetables
- Crispy Roasted Chickpeas
- Garlic Roasted Potatoes
- Maple Glazed Roasted Carrots
- Whole Roasted Cauliflower
Ingredients
- 1 head of garlic , or more
- 1 teaspoon olive oil , per head
Instructions
- Preheat oven to 450 ° F/ 230° C.
- Cut off the top of the head of garlic, with the cloves still connected, but just enough to expose them a bit. You want all the cloves slightly exposed.
- Place in some foil and drizzle a little bit of olive oil over the top.
- Wrap the foil around the garlic, and roast for 45 minutes in the oven until your cloves are soft and velvety.
- Remove from oven, and allow them to cool for about 5-10 minutes until cooled to touch.
- Remove softened cloves from the skin if using in a recipe with a knife or a tiny spoon or squeeze the cloves out. If not using immediately, refrigerate for up to 4 days (or freeze). Enjoy!
Notes
- Use fresh garlic. Or if not, ensure you don’t have any rotten garlic cloves in the bunch.
- I know we all look for shortcuts (I get it, trust me), but just like caramelised onions, there is basically no way to speed up the roasted garlic process. You could technically heat up cloves with the skin still on until they’re black, but I’ve found that just sticking a head of roasted garlic into your oven is the easiest way to get it done. Plus chances are, you’re going to want more than you need so you can use it in other recipes.
- To store: Refrigerate in an airtight container for up to 4 days.
- To freeze: Spread the roasted cloves on a baking sheet. Once frozen, store in a sealed plastic bag. You can also mash roasted garlic and freeze it in an ice cube tray. Store the cubes in a sealed plastic bag or airtight container and thaw them as needed. Roasted garlic can be frozen for up to 3 months.
