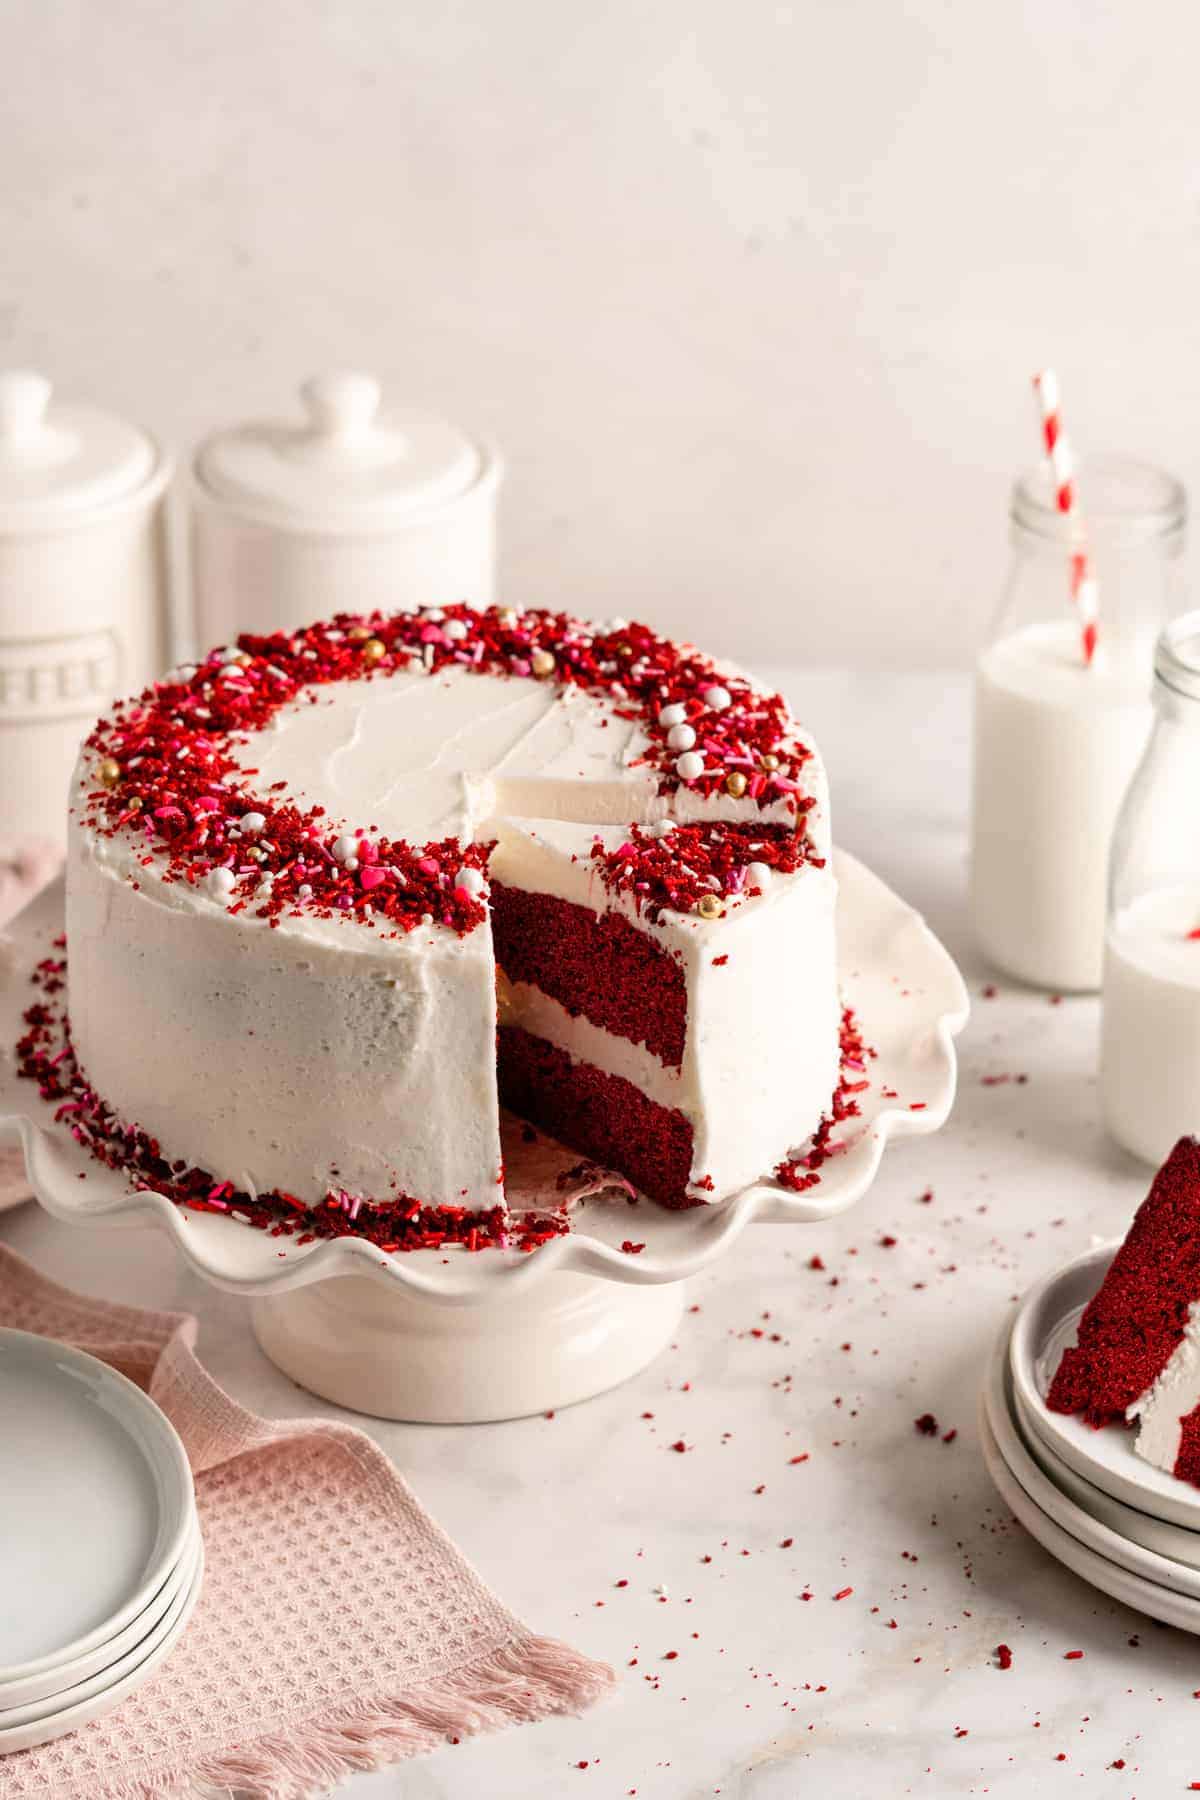
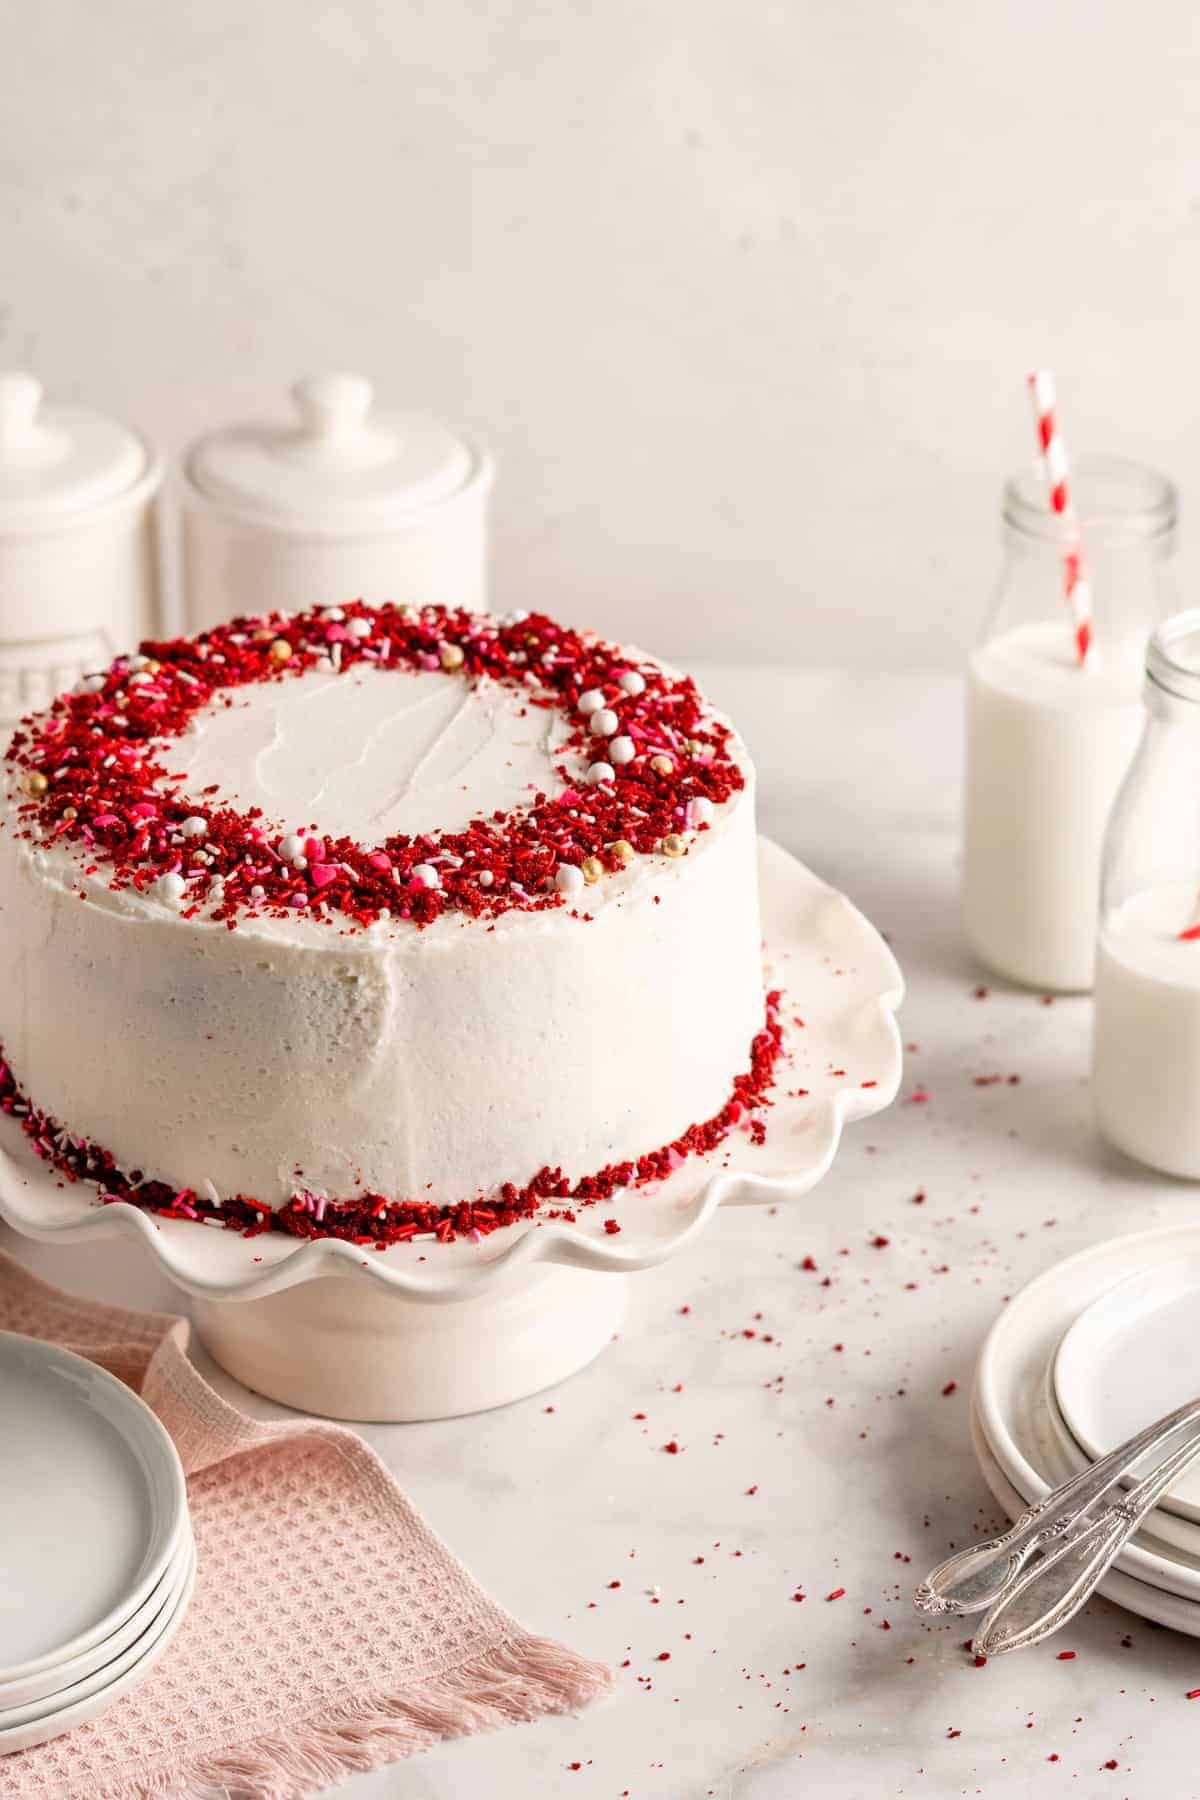
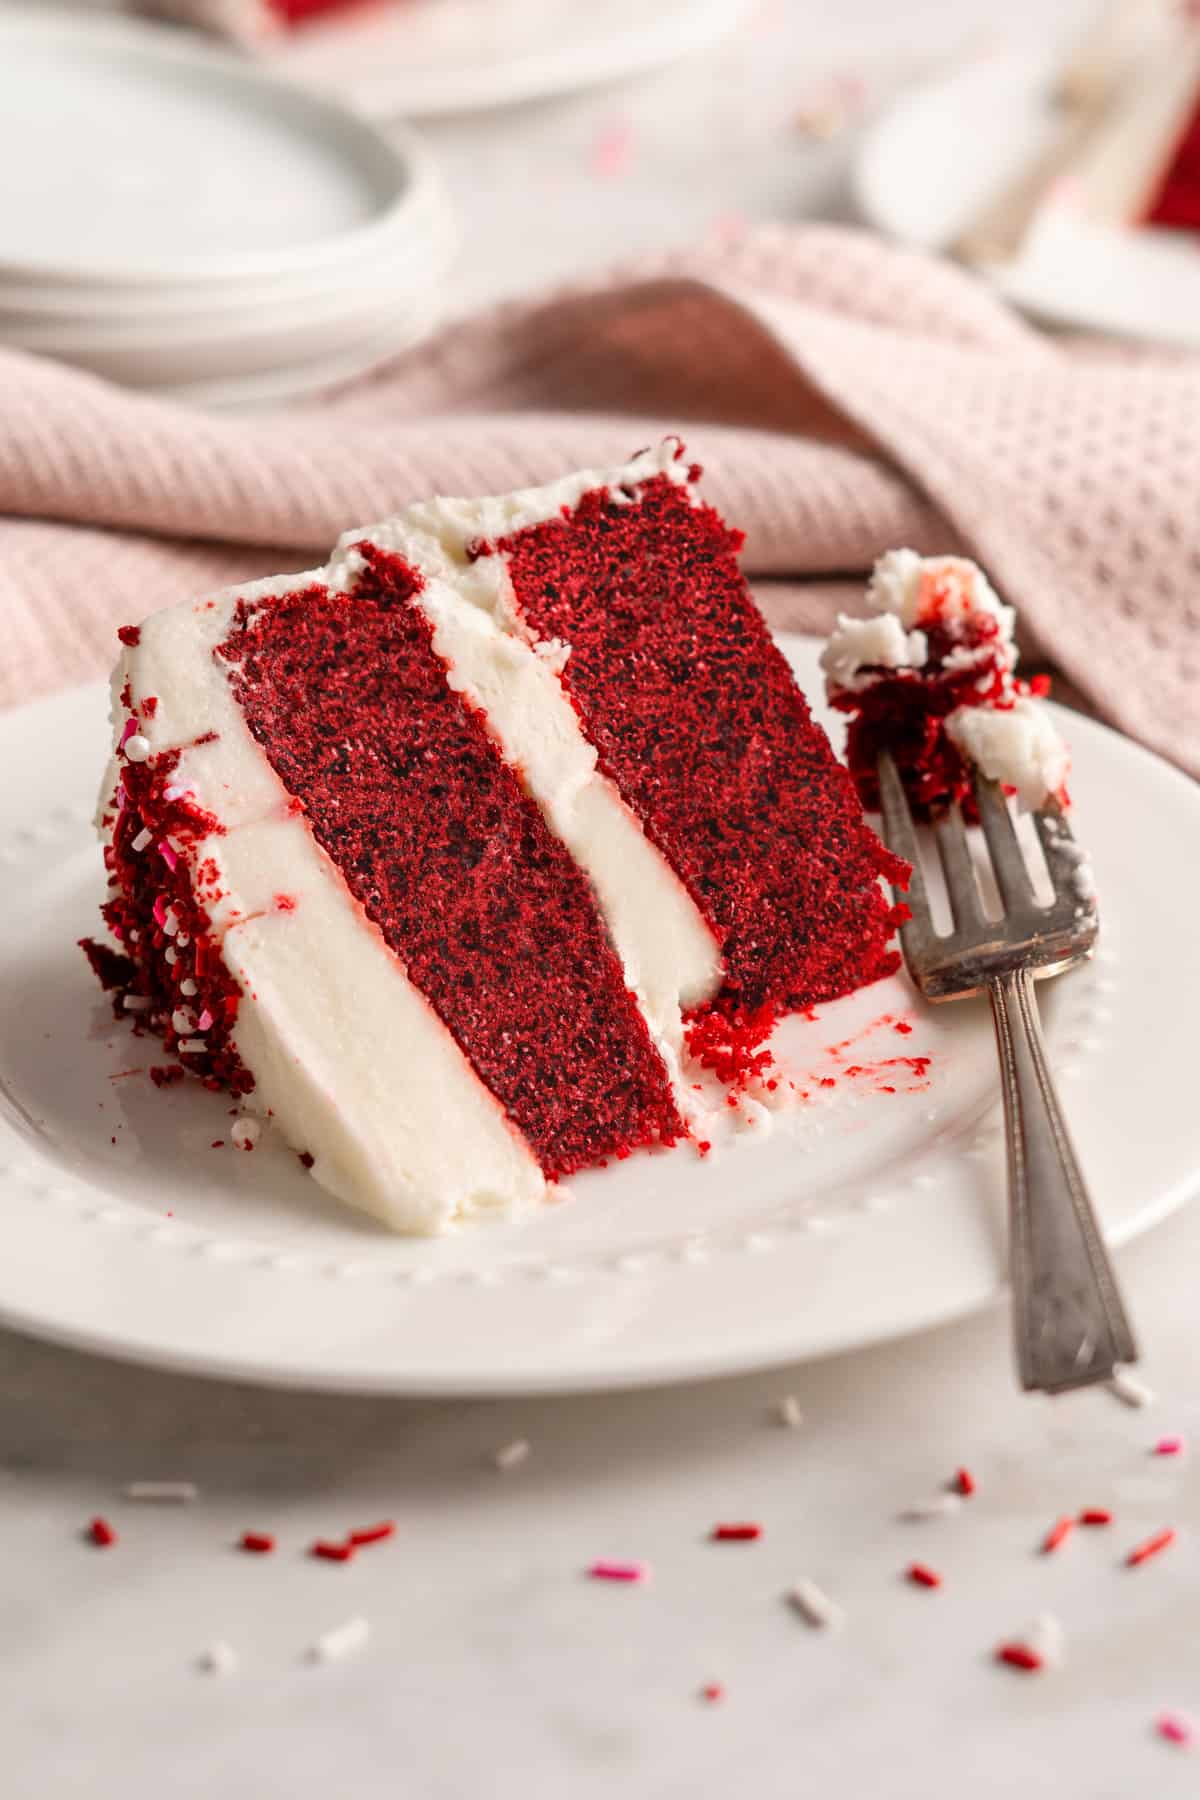
This vegan Red Velvet Cake is worthy of a celebration, but simple enough to make any day of the week! A moist chocolate cake with a vivid red colour is topped with vegan cream cheese frosting for a plant-based version of the Southern classic.
Red velvet cake may be something you figured you’d have to give up when switching to a plant-based diet. There’s the cream cheese frosting , which is essential for any red velvet cake worth its salt, but then there’s also the fact that the colouring traditionally used in this cake is usually extracted from beetles. (Yikes, right?)
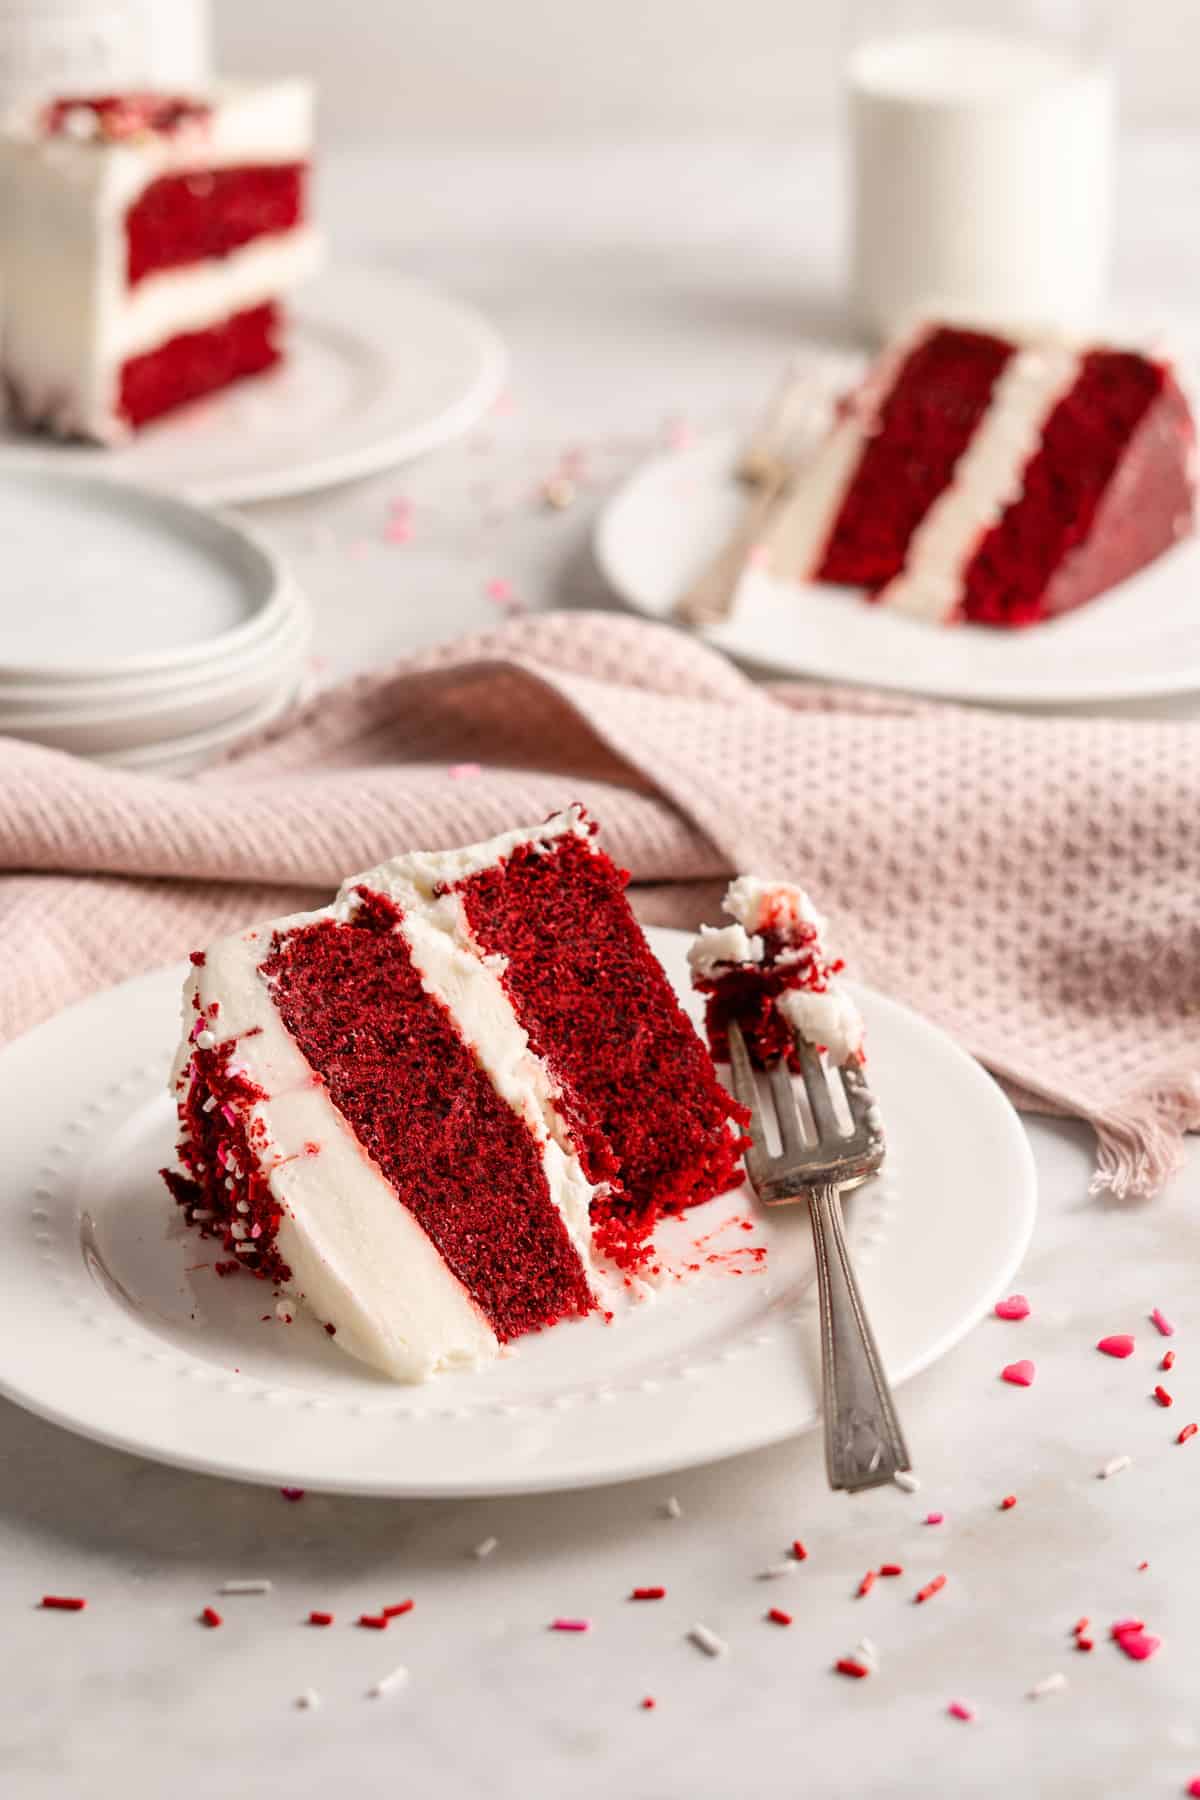
Well, I have good news for you: vegan red velvet cake is possible and it’s amaaaazing ! This recipe is perfect for a holiday get-together or a birthday, but it’s surprisingly easy to make so you can totally whip it up on a weekend afternoon when you have a hankering for something sweet. The cake layers are a lovely deep red colour, moist and tender, and they have a subtle chocolate flavor thanks to the addition of cocoa powder. Plus that quintessential baking soda + vinegar addition for red velvet cake. This is the perfect foil for the rich, sweet cream cheese frosting, which you might just want to eat with a spoon!
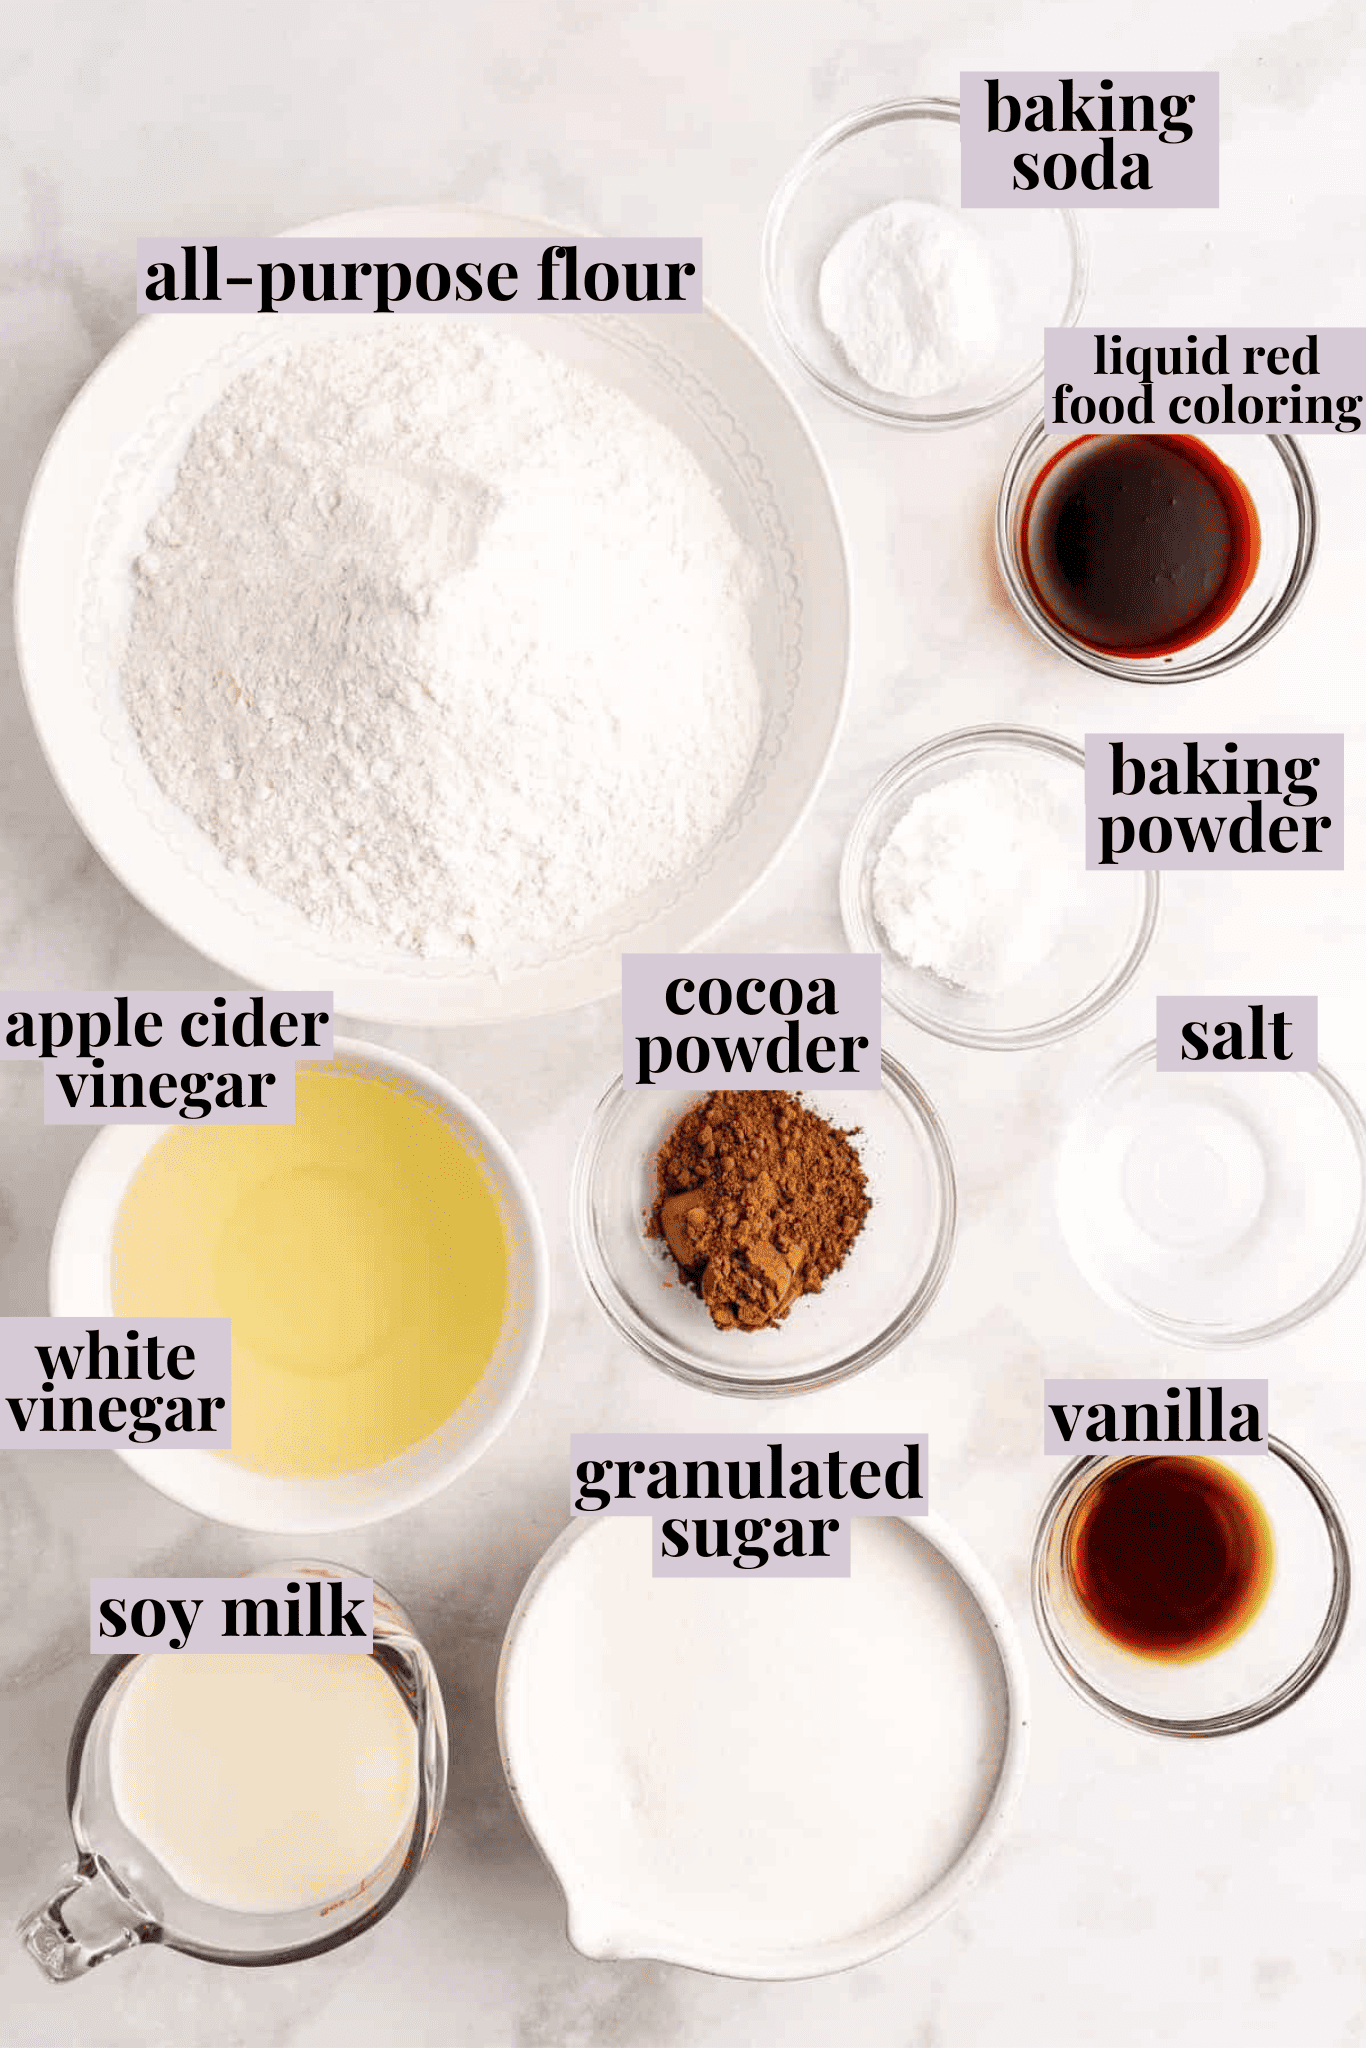
Notes on Ingredients
Please note that this is important information on the ingredients and instructions and the FULL recipe with amounts and details can be found DOWN BELOW (scroll to it) in the recipe card.
For the cake:
- Apple cider vinegar or regular vinegar – You’ll use this to make a vegan buttermilk.
- Soy milk or other vegan milk
- White granulated sugar
- All-purpose flour
- Unsweetened cocoa powder – Don’t use cocoa mix—it’s not the same! Cocoa mix has added sugar.
- Baking powder
- Sea salt
- Oil – Use a neutral-flavored cooking oil.
- Vanilla extract
- Liquid red food colouring – Make sure you buy one that is vegan! A good example is AmeriColor or Chefmaster. You can also buy natural food colouring (I like the 365 one from Whole Foods) but note that it won’t be as bright in colour, more a brown/purple shade. It’ll still taste delicious! Long story short, you’re trying to avoid ingredients such as cochineal and carmine.
- Baking soda
- White vinegar – This gives red velvet cake a light, airy texture.
For the frosting:
- V egan cream cheese – This should be room temperature so it’s easy to whip up into a creamy frosting.
- V anilla extract or vanilla paste
- Vegan butter sticks – Your butter should be room temperature too!
- Sea salt
- P owdered sugar – Also known as confectioners’ sugar.
- Cornstarch
How to Make Vegan Red Velvet Cake
Once you’ve gathered up the ingredients, it’s time to roll up your sleeves and start baking! Here’s what you’ll need to do.
Prepare. Grease and flour two 9-inch cake pans and line them with parchment paper. Preheat the oven to 350°F/180°C.
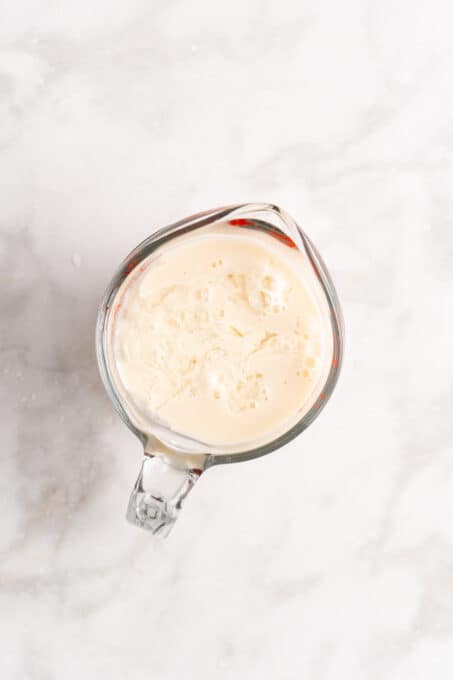
Make the buttermilk. Combine the tablespoon of vinegar and room temperature vegan milk in a jar; this will curdle the milk and it will thicken.
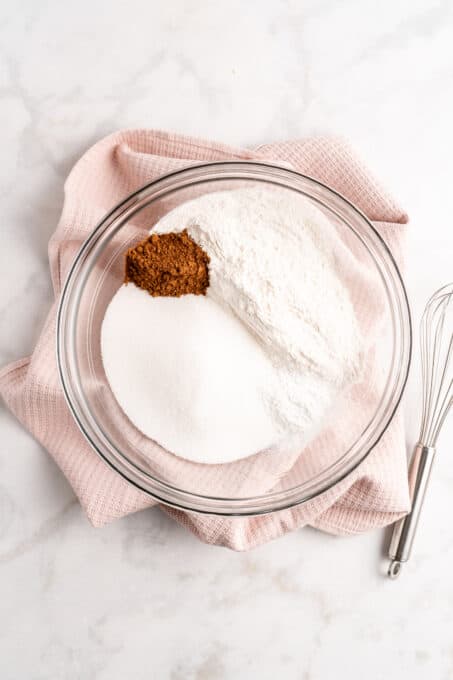
Mix the dry ingredients. In a large mixing bowl, whisk the sugar, flour, cocoa powder, baking powder, and sea salt.
Add the wet ingredients. Pour in the oil, buttermilk, vanilla extract, red food colouring, and warm milk. Beat with an electric mixer on medium speed for no more than 1 minute, scraping down the sides of the bowl as needed.
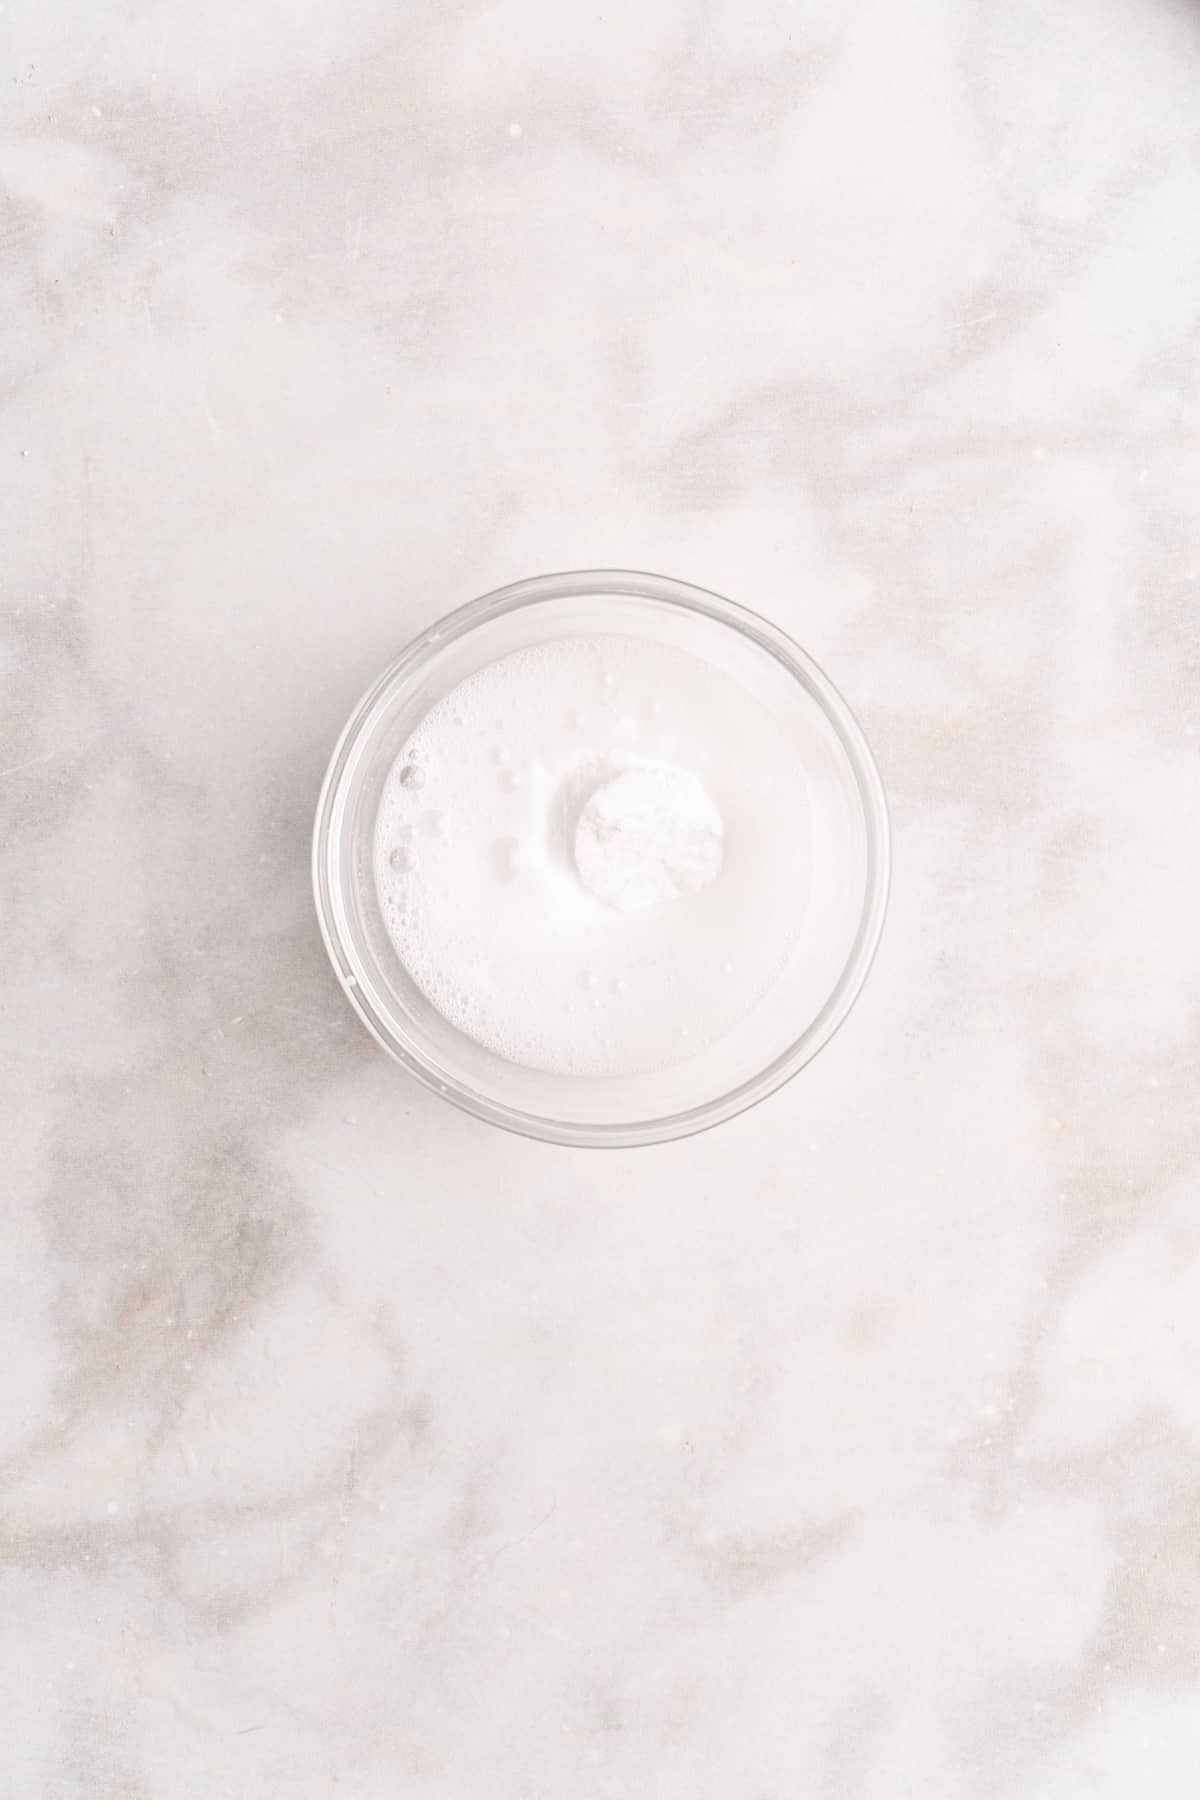
Combine the vinegar and baking soda . In a small bowl, mix together the white vinegar and baking soda. (It will fizz.) Pour into the cake batter and stir to incorporate.

Fill the cake pans. Divide the batter evenly between the cake pans and lightly tap them on the counter a few times to remove any air bubbles.
Bake. Place the pans in the center of the middle rack of your oven and bake for about 25 minutes, or until the centers of the cakes are baked through.
Cool. Let the cakes cool in the pans for 10 minutes, then carefully remove them and let them finish cooling on wire racks.
Make the frosting. Beat the butter and cream cheese together in the bowl of a stand mixer for about 2 minutes until fully incorporated. Add in the vanilla and a pinch of salt, then beat in a cup of powdered sugar and all of the cornstarch until well-combined. Add the remaining powdered sugar a cup at a time until the frosting has reached the desired consistency.
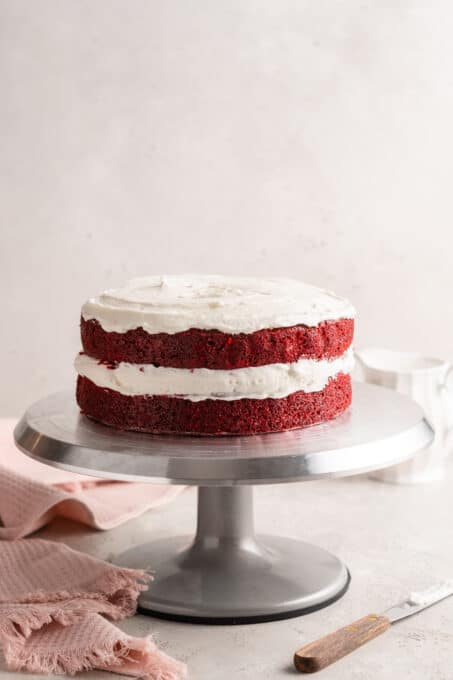
Assemble and frost the cake. After the cakes have cooled, a pply a thick layer of frosting to the top of one cake and stack the other on top. U se an offset spatula to spread a thin layer of frosting over the sides and top of the cake. It should be thin enough that you can see the cake (and crumbs) through it. This is called a crumb coat and it’s used to help “catch” any stray crumbs so they don’t show through in the final layer of frosting. Once the crumb coat is dry to the touch, frost the cake again. Store the cake in the refrigerator until you’re ready to serve.
Tips for Success
Here are some suggestions for a perfect red velvet layer cake.
- Don’t over-mix. Once the ingredients are incorporated, stop mixing! Stirring too much will ruin the texture of the cake.
- Chill the frosting. While you can use the frosting right away, I recommend refrigerating it for at least 4 hours, which helps it solidify a bit so it’s easier to work with.
- Be patient . Don’t frost the cake until the layers are completely cool. A warm cake will melt the frosting and result in a big mess!
How to Store
Store red velvet cake covered in the refrigerator for up to 3 days. I recommend letting it come to room temperature before serving.
Can This Recipe Be Frozen?
To freeze this cake whole, place it on a plate or baking sheet lined with parchment or wax paper. Place it directly in the freezer, uncovered, until the frosting is solid. Once the frosting is hardened, you can quickly wrap the cake with plastic wrap, followed by a layer of foil, and freeze it for up to 3 months. Let it thaw in the refrigerator before serving. If you’re freezing leftovers, you can simply place the cake slices in an airtight container.
Related Recipes
- Red Velvet Cupcakes
- Vegan Chocolate Cake
- Red Velvet Brownies
- Vegan Cream Cheese Frosting
Ingredients
- 1 tablespoon apple cider vinegar , or regular vinegar
- 1 cup soy milk , or other vegan milk, room temperature, (240mL),
- 2 cups white granulated sugar , (400g)
- 3 cups all-purpose flour , (360g)
- 2 tablespoons unsweetened cocoa powder , (16g)
- 2 teaspoons baking powder
- 1 teaspoon sea salt
- ¾ cup oil , (150g)
- 1 teaspoon vanilla extract
- 1 oz. liquid red food colouring , (bright red)
- 1 cup warm soy milk , (240mL)
- 2 teaspoons baking soda
- 1 teaspoon white vinegar
Vegan Cream Cheese Frosting
- 8 ounces vegan cream cheese* , bring to room temperature
- ½ cup vegan butter sticks , bring to room temperature, (4oz/113g)
- 1 teaspoon vanilla extract , or vanilla paste
- pinch sea salt
- 3 – 4 cups powdered sugar , sifted, (480g for 4 cups)
- 1/4 cup cornstarch , sifted, (32g)
Instructions
- Grease and flour two 9” cake pans and line with parchment paper. It’s essential so that the cake doesn’t stick.
- Preheat the oven to 350°F/180°C.
- In a jar, add the tablespoon of vinegar and room temperature vegan milk together to curdle to form a buttermilk. Set aside.
- In a large bowl, add the sugar, flour, cocoa powder, baking powder and sea salt. Using a whisk, whisk all the ingredients together, removing any clumps that may form.
- Pour in the oil, the buttermilk mix from earlier, the vanilla extract and the red food colouring.
- Heat up that additional milk in the microwave for 40 seconds (or on stove top until warm, not boiling). You want it warm enough to dissolve but not boiling.
- Add it to the bowl on top of everything. Beat on medium speed of electric mixer for no more than 1 minute on medium speed, scraping down the sides of the bowl once in between to ensure that everything is incorporated. You want to mix until just combined.
- In a small bowl, mix together the white vinegar and baking soda. Yes, it will fizz! Add it to the cake batter and stir well to combine, for about 30 more seconds. Working quickly, divide the batter evenly between the cake pans and place them in the preheated oven.
- Tap the pans on the counter three times lightly to remove any air bubbles.
- Place the pans in the middle rack of your oven and in the center of that rack. Bake for 25 minutes until fully baked.
- Remove from the oven and allow to cool in the pan for about 10 minutes, then carefully remove them to a wire rack to finish cooling completely.
- After cooled, frost with vegan cream cheese frosting and some red velvet crumbs. Enjoy!
- Since Red Velvet can be very messy with crumbs going everywhere, it would help to do a crumb coating first to help “glue” down the crumbs before doing the entire cake.
- Using an offset spatula, spread a thin layer of frosting over the sides and top of the cake. It should be thin enough that you can see the cake (and crumbs) through it. Get your frosting as smooth as you can and let it dry slightly until it crusts over a little bit and is dry to the touch. Sometimes placing it in the fridge for 30 minutes helps too.
- After the coat is dry, you can apply the final layer of frosting.
- Vegan Cream Cheese Frosting
- In the bowl of a mixer, beat the butter and cream cheese together for about 2 minutes until fully incorporated.
- Add in the vanilla extract or paste and the pinch of salt.
- Add in a cup of sifted powdered sugar and all of the sifted cornstarch. Mix for about 1 minute or until incorporated. Add in the powdered sugar 1 cup at a time until the frosting has reached the desired thickness.
- Place the frosting wrapped or covered into the fridge for at least 4 hours or overnight, until being used. You can enjoy it right away, but it will thicken up beautifully in the fridge.
- You can apply it immediately to a cooled cake, then place in the fridge, or place the frosting itself, then apply to the cake later. Enjoy!
Notes
This vegan Red Velvet Cake is worthy of a celebration, but simple enough to make any day of the week! A moist chocolate cake with a vivid red colour is topped with vegan cream cheese frosting for a plant-based version of the Southern classic.
Red velvet cake may be something you figured you’d have to give up when switching to a plant-based diet. There’s the cream cheese frosting , which is essential for any red velvet cake worth its salt, but then there’s also the fact that the colouring traditionally used in this cake is usually extracted from beetles. (Yikes, right?)
Well, I have good news for you: vegan red velvet cake is possible and it’s amaaaazing ! This recipe is perfect for a holiday get-together or a birthday, but it’s surprisingly easy to make so you can totally whip it up on a weekend afternoon when you have a hankering for something sweet. The cake layers are a lovely deep red colour, moist and tender, and they have a subtle chocolate flavor thanks to the addition of cocoa powder. Plus that quintessential baking soda + vinegar addition for red velvet cake. This is the perfect foil for the rich, sweet cream cheese frosting, which you might just want to eat with a spoon!
Notes on Ingredients
Please note that this is important information on the ingredients and instructions and the FULL recipe with amounts and details can be found DOWN BELOW (scroll to it) in the recipe card.
For the cake:
- Apple cider vinegar or regular vinegar – You’ll use this to make a vegan buttermilk.
- Soy milk or other vegan milk
- White granulated sugar
- All-purpose flour
- Unsweetened cocoa powder – Don’t use cocoa mix—it’s not the same! Cocoa mix has added sugar.
- Baking powder
- Sea salt
- Oil – Use a neutral-flavored cooking oil.
- Vanilla extract
- Liquid red food colouring – Make sure you buy one that is vegan! A good example is AmeriColor or Chefmaster. You can also buy natural food colouring (I like the 365 one from Whole Foods) but note that it won’t be as bright in colour, more a brown/purple shade. It’ll still taste delicious! Long story short, you’re trying to avoid ingredients such as cochineal and carmine.
- Baking soda
- White vinegar – This gives red velvet cake a light, airy texture.
For the frosting:
- V egan cream cheese – This should be room temperature so it’s easy to whip up into a creamy frosting.
- V anilla extract or vanilla paste
- Vegan butter sticks – Your butter should be room temperature too!
- Sea salt
- P owdered sugar – Also known as confectioners’ sugar.
- Cornstarch
How to Make Vegan Red Velvet Cake
Once you’ve gathered up the ingredients, it’s time to roll up your sleeves and start baking! Here’s what you’ll need to do.
Prepare. Grease and flour two 9-inch cake pans and line them with parchment paper. Preheat the oven to 350°F/180°C.
Make the buttermilk. Combine the tablespoon of vinegar and room temperature vegan milk in a jar; this will curdle the milk and it will thicken.
Mix the dry ingredients. In a large mixing bowl, whisk the sugar, flour, cocoa powder, baking powder, and sea salt.
Add the wet ingredients. Pour in the oil, buttermilk, vanilla extract, red food colouring, and warm milk. Beat with an electric mixer on medium speed for no more than 1 minute, scraping down the sides of the bowl as needed.
Combine the vinegar and baking soda . In a small bowl, mix together the white vinegar and baking soda. (It will fizz.) Pour into the cake batter and stir to incorporate.
Fill the cake pans. Divide the batter evenly between the cake pans and lightly tap them on the counter a few times to remove any air bubbles.
Bake. Place the pans in the center of the middle rack of your oven and bake for about 25 minutes, or until the centers of the cakes are baked through.
Cool. Let the cakes cool in the pans for 10 minutes, then carefully remove them and let them finish cooling on wire racks.
Make the frosting. Beat the butter and cream cheese together in the bowl of a stand mixer for about 2 minutes until fully incorporated. Add in the vanilla and a pinch of salt, then beat in a cup of powdered sugar and all of the cornstarch until well-combined. Add the remaining powdered sugar a cup at a time until the frosting has reached the desired consistency.
Assemble and frost the cake. After the cakes have cooled, a pply a thick layer of frosting to the top of one cake and stack the other on top. U se an offset spatula to spread a thin layer of frosting over the sides and top of the cake. It should be thin enough that you can see the cake (and crumbs) through it. This is called a crumb coat and it’s used to help “catch” any stray crumbs so they don’t show through in the final layer of frosting. Once the crumb coat is dry to the touch, frost the cake again. Store the cake in the refrigerator until you’re ready to serve.
Tips for Success
Here are some suggestions for a perfect red velvet layer cake.
- Don’t over-mix. Once the ingredients are incorporated, stop mixing! Stirring too much will ruin the texture of the cake.
- Chill the frosting. While you can use the frosting right away, I recommend refrigerating it for at least 4 hours, which helps it solidify a bit so it’s easier to work with.
- Be patient . Don’t frost the cake until the layers are completely cool. A warm cake will melt the frosting and result in a big mess!
How to Store
Store red velvet cake covered in the refrigerator for up to 3 days. I recommend letting it come to room temperature before serving.
Can This Recipe Be Frozen?
To freeze this cake whole, place it on a plate or baking sheet lined with parchment or wax paper. Place it directly in the freezer, uncovered, until the frosting is solid. Once the frosting is hardened, you can quickly wrap the cake with plastic wrap, followed by a layer of foil, and freeze it for up to 3 months. Let it thaw in the refrigerator before serving. If you’re freezing leftovers, you can simply place the cake slices in an airtight container.
Related Recipes
- Red Velvet Cupcakes
- Vegan Chocolate Cake
- Red Velvet Brownies
- Vegan Cream Cheese Frosting
Ingredients
- 1 tablespoon apple cider vinegar , or regular vinegar
- 1 cup soy milk , or other vegan milk, room temperature, (240mL),
- 2 cups white granulated sugar , (400g)
- 3 cups all-purpose flour , (360g)
- 2 tablespoons unsweetened cocoa powder , (16g)
- 2 teaspoons baking powder
- 1 teaspoon sea salt
- ¾ cup oil , (150g)
- 1 teaspoon vanilla extract
- 1 oz. liquid red food colouring , (bright red)
- 1 cup warm soy milk , (240mL)
- 2 teaspoons baking soda
- 1 teaspoon white vinegar
Vegan Cream Cheese Frosting
- 8 ounces vegan cream cheese* , bring to room temperature
- ½ cup vegan butter sticks , bring to room temperature, (4oz/113g)
- 1 teaspoon vanilla extract , or vanilla paste
- pinch sea salt
- 3 – 4 cups powdered sugar , sifted, (480g for 4 cups)
- 1/4 cup cornstarch , sifted, (32g)
Instructions
- Grease and flour two 9” cake pans and line with parchment paper. It’s essential so that the cake doesn’t stick.
- Preheat the oven to 350°F/180°C.
- In a jar, add the tablespoon of vinegar and room temperature vegan milk together to curdle to form a buttermilk. Set aside.
- In a large bowl, add the sugar, flour, cocoa powder, baking powder and sea salt. Using a whisk, whisk all the ingredients together, removing any clumps that may form.
- Pour in the oil, the buttermilk mix from earlier, the vanilla extract and the red food colouring.
- Heat up that additional milk in the microwave for 40 seconds (or on stove top until warm, not boiling). You want it warm enough to dissolve but not boiling.
- Add it to the bowl on top of everything. Beat on medium speed of electric mixer for no more than 1 minute on medium speed, scraping down the sides of the bowl once in between to ensure that everything is incorporated. You want to mix until just combined.
- In a small bowl, mix together the white vinegar and baking soda. Yes, it will fizz! Add it to the cake batter and stir well to combine, for about 30 more seconds. Working quickly, divide the batter evenly between the cake pans and place them in the preheated oven.
- Tap the pans on the counter three times lightly to remove any air bubbles.
- Place the pans in the middle rack of your oven and in the center of that rack. Bake for 25 minutes until fully baked.
- Remove from the oven and allow to cool in the pan for about 10 minutes, then carefully remove them to a wire rack to finish cooling completely.
- After cooled, frost with vegan cream cheese frosting and some red velvet crumbs. Enjoy!
- Since Red Velvet can be very messy with crumbs going everywhere, it would help to do a crumb coating first to help “glue” down the crumbs before doing the entire cake.
- Using an offset spatula, spread a thin layer of frosting over the sides and top of the cake. It should be thin enough that you can see the cake (and crumbs) through it. Get your frosting as smooth as you can and let it dry slightly until it crusts over a little bit and is dry to the touch. Sometimes placing it in the fridge for 30 minutes helps too.
- After the coat is dry, you can apply the final layer of frosting.
- Vegan Cream Cheese Frosting
- In the bowl of a mixer, beat the butter and cream cheese together for about 2 minutes until fully incorporated.
- Add in the vanilla extract or paste and the pinch of salt.
- Add in a cup of sifted powdered sugar and all of the sifted cornstarch. Mix for about 1 minute or until incorporated. Add in the powdered sugar 1 cup at a time until the frosting has reached the desired thickness.
- Place the frosting wrapped or covered into the fridge for at least 4 hours or overnight, until being used. You can enjoy it right away, but it will thicken up beautifully in the fridge.
- You can apply it immediately to a cooled cake, then place in the fridge, or place the frosting itself, then apply to the cake later. Enjoy!
Notes

Vegan Red Velvet Cake
Ingredients
- 1 tablespoon apple cider vinegar or regular vinegar
- 1 cup soy milk or other vegan milk, room temperature, (240mL),
- 2 cups white granulated sugar (400g)
- 3 cups all-purpose flour (360g)
- 2 tablespoons unsweetened cocoa powder (16g)
- 2 teaspoons baking powder
- 1 teaspoon sea salt
- ¾ cup oil (150g)
- 1 teaspoon vanilla extract
- 1 oz. liquid red food colouring (bright red)
- 1 cup warm soy milk (240mL)
- 2 teaspoons baking soda
- 1 teaspoon white vinegar
Vegan Cream Cheese Frosting
- 8 ounces vegan cream cheese* bring to room temperature
- ½ cup vegan butter sticks bring to room temperature, (4oz/113g)
- 1 teaspoon vanilla extract or vanilla paste
- pinch sea salt
- 3 - 4 cups powdered sugar sifted, (480g for 4 cups)
- 1/4 cup cornstarch sifted, (32g)
Instructions
- Grease and flour two 9” cake pans and line with parchment paper. It’s essential so that the cake doesn’t stick.
- Preheat the oven to 350°F/180°C.
- In a jar, add the tablespoon of vinegar and room temperature vegan milk together to curdle to form a buttermilk. Set aside.
- In a large bowl, add the sugar, flour, cocoa powder, baking powder and sea salt. Using a whisk, whisk all the ingredients together, removing any clumps that may form.
- Pour in the oil, the buttermilk mix from earlier, the vanilla extract and the red food colouring.
- Heat up that additional milk in the microwave for 40 seconds (or on stove top until warm, not boiling). You want it warm enough to dissolve but not boiling.
- Add it to the bowl on top of everything. Beat on medium speed of electric mixer for no more than 1 minute on medium speed, scraping down the sides of the bowl once in between to ensure that everything is incorporated. You want to mix until just combined.
- In a small bowl, mix together the white vinegar and baking soda. Yes, it will fizz! Add it to the cake batter and stir well to combine, for about 30 more seconds. Working quickly, divide the batter evenly between the cake pans and place them in the preheated oven.
- Tap the pans on the counter three times lightly to remove any air bubbles.
- Place the pans in the middle rack of your oven and in the center of that rack. Bake for 25 minutes until fully baked.
- Remove from the oven and allow to cool in the pan for about 10 minutes, then carefully remove them to a wire rack to finish cooling completely.
- After cooled, frost with vegan cream cheese frosting and some red velvet crumbs. Enjoy!
- Since Red Velvet can be very messy with crumbs going everywhere, it would help to do a crumb coating first to help “glue” down the crumbs before doing the entire cake.
- Using an offset spatula, spread a thin layer of frosting over the sides and top of the cake. It should be thin enough that you can see the cake (and crumbs) through it. Get your frosting as smooth as you can and let it dry slightly until it crusts over a little bit and is dry to the touch. Sometimes placing it in the fridge for 30 minutes helps too.
- After the coat is dry, you can apply the final layer of frosting.
- Vegan Cream Cheese Frosting
- In the bowl of a mixer, beat the butter and cream cheese together for about 2 minutes until fully incorporated.
- Add in the vanilla extract or paste and the pinch of salt.
- Add in a cup of sifted powdered sugar and all of the sifted cornstarch. Mix for about 1 minute or until incorporated. Add in the powdered sugar 1 cup at a time until the frosting has reached the desired thickness.
- Place the frosting wrapped or covered into the fridge for at least 4 hours or overnight, until being used. You can enjoy it right away, but it will thicken up beautifully in the fridge.
- You can apply it immediately to a cooled cake, then place in the fridge, or place the frosting itself, then apply to the cake later. Enjoy!
Video
Notes
Nutrition
Vegan Red Velvet Cake https://jessicainthekitchen.com/vegan-red-velvet-cake/ February 12, 2024
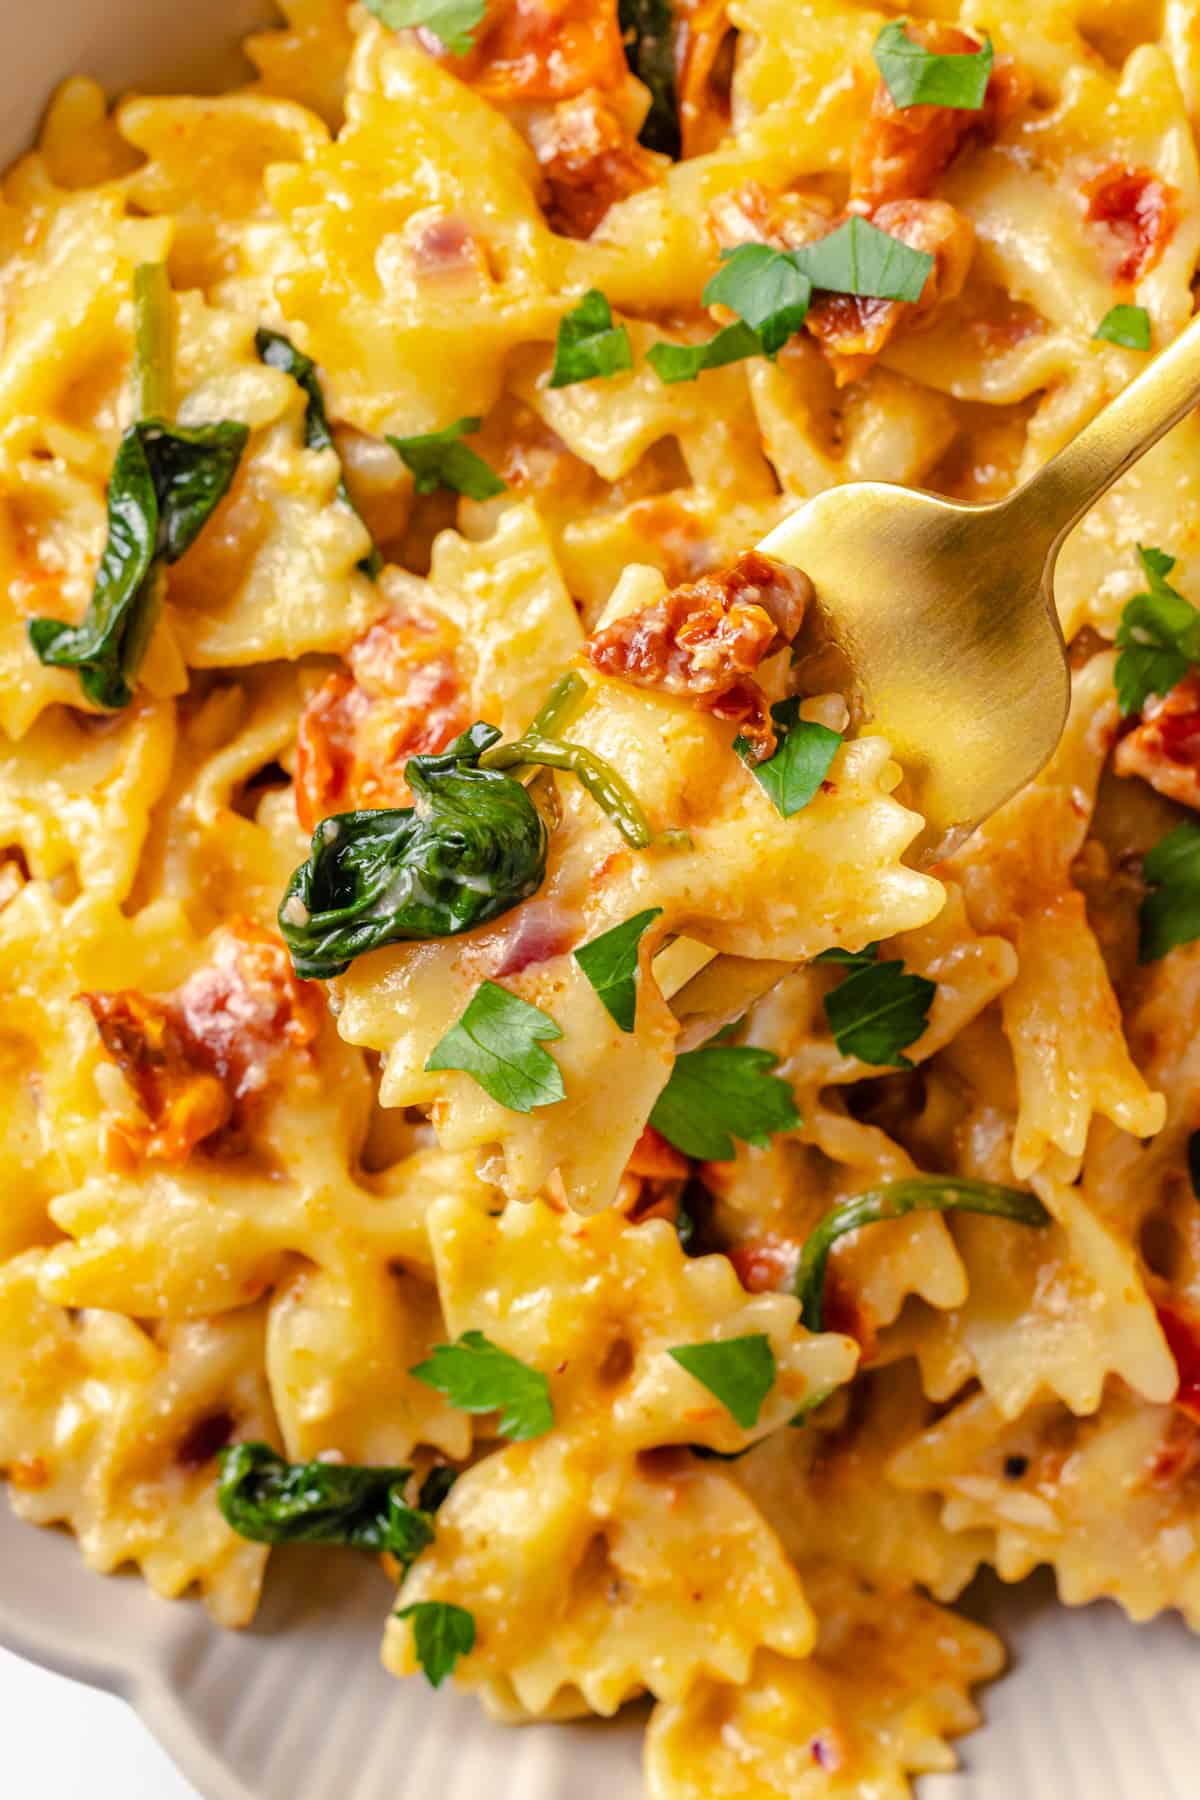
With sweet, chewy sun-dried tomatoes, spinach, and a fabulously creamy sauce, this sun-dried tomato pasta recipe tastes like it came from your favourite restaurant—but it’s easy to make at home!

Vegan sun-dried tomato pasta is the perfect weeknight dinner if you ask me. It brings restaurant-quality flavour to the table with minimal effort on your part—here, sun-dried tomatoes are a heavy-hitter that gives this easy pasta notes of sweetness and umami. Plus, they have that irresistible chewy texture!
You’ll be pleasantly surprised by how short the ingredient list is for this recipe. Like lemon pasta , each item on the list plays an important role in the dish, and when you put it all together, magic happens!

Why You’ll Love This Sun-Dried Tomato Pasta Recipe
- Creamy without cream . This sun-dried tomato pasta is completely vegan, but still has that creamy, indulgent texture without any dairy thanks to a roux and the starchy cooking water.
- Restaurant-quality taste at home . Sun-dried tomatoes add a concentrated burst of flavour that takes this pasta to the next level. Combined with spinach, fresh parsley, and cheesy nutritional yeast , you’ll feel like you’re having dinner at a high-end restaurant.
- Quick and easy . With just a handful of basic ingredients, you can have this delicious pasta on the table in less than 30 minutes.
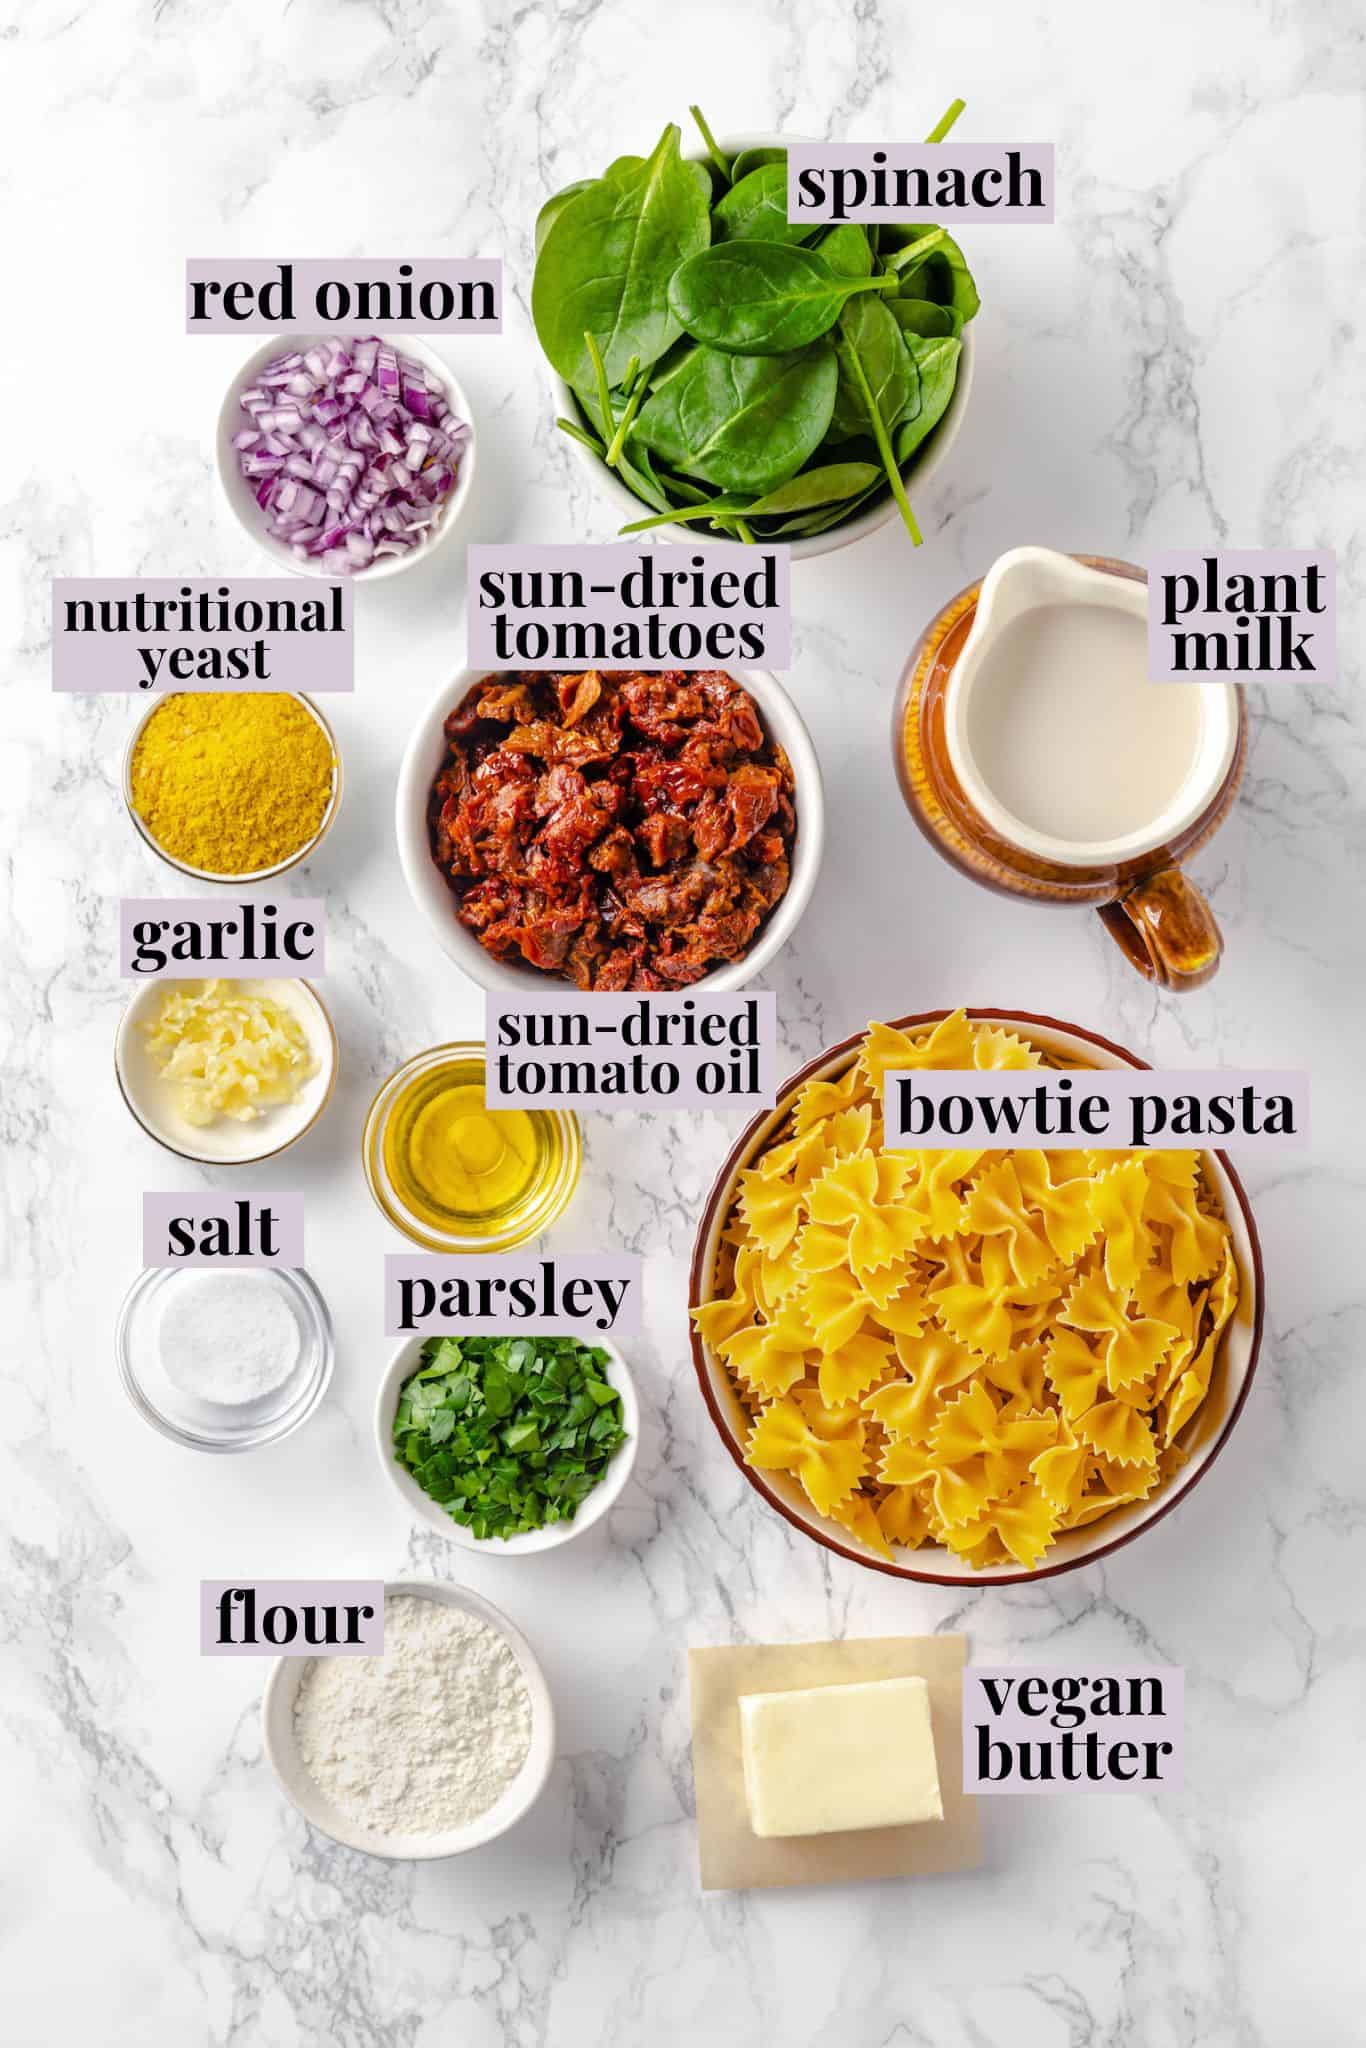
Notes on Ingredients
Scroll down to the recipe card to find the ingredient quantities and recipe instructions.
- Bowtie pasta – Or another shape you like.
- Vegan butter – You can use homemade vegan butter or store-bought.
- Red onion – This adds some depth to the flavour of this dish.
- Salt
- Garlic
- Sun-dried tomatoes – Buy oil-packed tomatoes; you’ll need both the sun-dried tomatoes themselves and the oil from the jar for this recipe.
- Flour
- Plant milk – Use an unsweetened, unflavoured plant milk.
- Nutritional yeast – For cheesy flavour.
- Spinach – Baby spinach wilts into the pasta without having to add a lot of extra cooking time.
- Fresh parsley
How to Make Sun-Dried Tomato Pasta
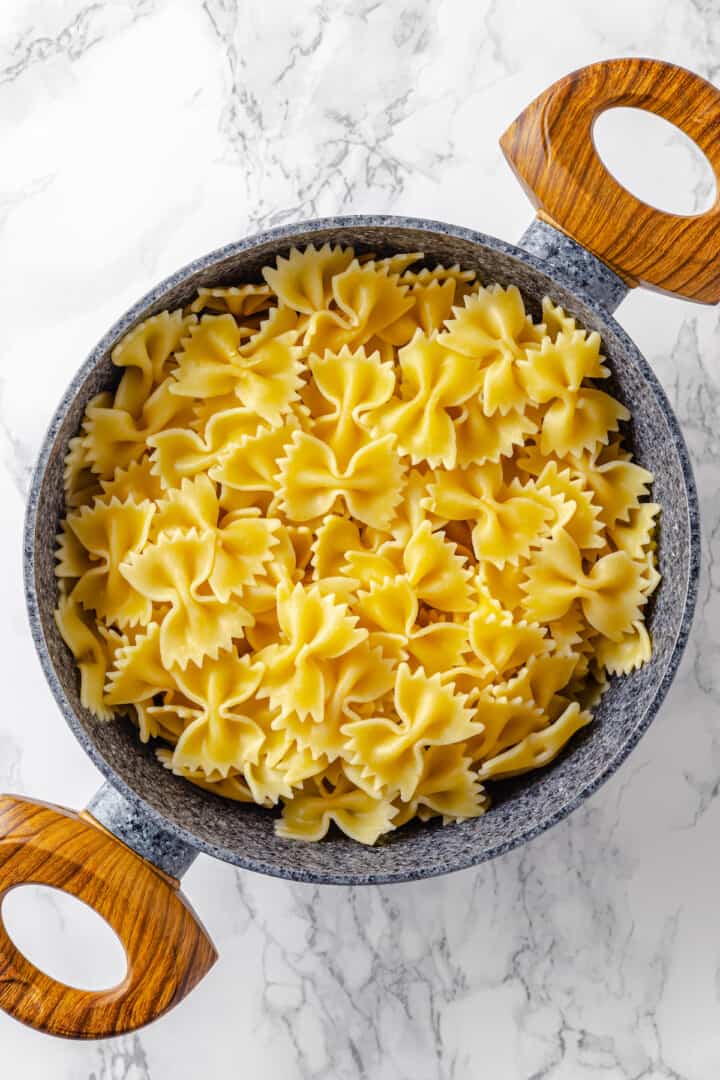
- Cook the pasta. Follow the package directions and cook the pasta in a pot of salted water. Reserve 1 cup of the cooking water, then drain.
- Sauté the veggies. While the pasta cooks, melt the butter in a large skillet set over medium heat. Add the sun-dried tomato oil, followed by the onion. Season with salt and cook until translucent. Stir the garlic and cook until fragrant, then add the sun-dried tomatoes and cook for another minute.

- Build the sauce. Stir in the flour and cook for 1 minute, then slowly whisk in the plant milk. Reduce the heat to low and cook, stirring frequently, until the sauce thickens. Stir in the nutritional yeast and spinach and cook until the spinach wilts. Remove from the heat.
- Put it all together. Stir the pasta into the sauce, adding the cooking water a little at a time, if needed.
- Serve. Divide the pasta onto plates or into bowls and serve warm with the fresh parsley for garnish.

Tips for Success
- Don’t forget to save the cooking water . The starch in the pasta water will help thicken the sauce and make it adhere better to the noodles.
- Make sure the flour is golden brown . If you add the plant milk before the flour cooks, your sun-dried tomato pasta will have a raw flour flavour.
- Cook the pasta al dente . The pasta will continue to cook and absorb liquid when added to the sauce, so be sure to cook it al dente (slightly firm) so it doesn’t become too soft.
Variations
- Add a protein . Vegan chicken , white beans, or chickpeas are all great options to add some protein to this sun-dried tomato pasta.
- Make it cheesy . For extra cheesy flavour, serve this pasta with grated plant-based Parmesan or homemade vegan Parmesan cheese .
- Add veggies . Feel free to get creative and add additional vegetables like mushrooms, broccoli, or zucchini.
- Spice it up . Add a pinch of red pepper flakes for some heat.
- Make it gluten-free . This recipe can be made gluten-free by using gluten-free pasta and a measure-for-measure gluten-free flour blend .
Serving Suggestions
Pair this vegan sun-dried tomato pasta with a simple green salad and creamy vegan avocado dressing to keep things light, or opt for homemade roasted garlic bread to soak up any sauce at the bottom of the bowl!
How to Store Leftovers
Transfer leftover sun-dried tomato pasta to an airtight container and refrigerate it for up to 4 days. Reheat it in the microwave or on the stovetop with a splash of plant milk to bring back the creamy texture.
Can I Freeze This Recipe?
Freezing pasta can make it a bit mushy, but if you don’t mind this, you can freeze sun-dried tomato pasta in an airtight container or freezer bag for up to 3 months. Let it thaw in the refrigerator, then reheat according to the instructions above.
More Vegan Pasta Recipes
- Pumpkin Alfredo Pasta
- Vegan Cajun Chicken Pasta
- Miso Butter Pasta
- Creamy Garlic Mushroom Pasta
- Green Goddess Pasta

Ingredients
- 12 ounces bowtie pasta , 340 grams
- 3 tablespoons vegan butter , 42 grams
- 1 tablespoon oil from sun-dried tomato jar , 15 ml
- 1 red onion , diced
- 1 teaspoon salt , 6 grams
- 2 garlic cloves , minced
- 1 ½ cups sun-dried tomatoes , drained and chopped, 180 grams
- 3 tablespoons flour , 21 grams
- 2 cups plant milk , 473 ml
- ¼ cup nutritional yeast , 15 grams
- 2 cups spinach , 60 grams
- ¼ cup chopped fresh parsley , 15 grams
Instructions
- Cook the pasta per the package’s instructions (don’t forget to salt the pasta water). Reserve 1 cup ( 237 ml ) of pasta water and then drain.
- While the pasta is cooking, melt the butter in a large, heavy-bottomed skillet over medium heat. Add the sun-dried tomato oil. Add the onion, season with salt, and sauté until translucent. Add the garlic and sauté until fragrant. Add the sun-dried tomatoes and sauté for 1 minute.
- Stir in the flour and cook for 1 minute. Gradually whisk in the plant milk. Turn the heat to low and cook, stirring frequently, until the sauce has thickened. Stir in the nutritional yeast and spinach. Cook, stirring frequently, until the spinach has wilted. Turn off the heat.
- Stir the pasta into the sauce. Stir until the sauce coats every noodle. If the sauce is too thick and/or is having a hard time adhering to the pasta, stir in a bit of pasta water, 1/4 cup ( 59 ml ) at a time, to loosen it up.
- Serve warm garnished with fresh parsley.
