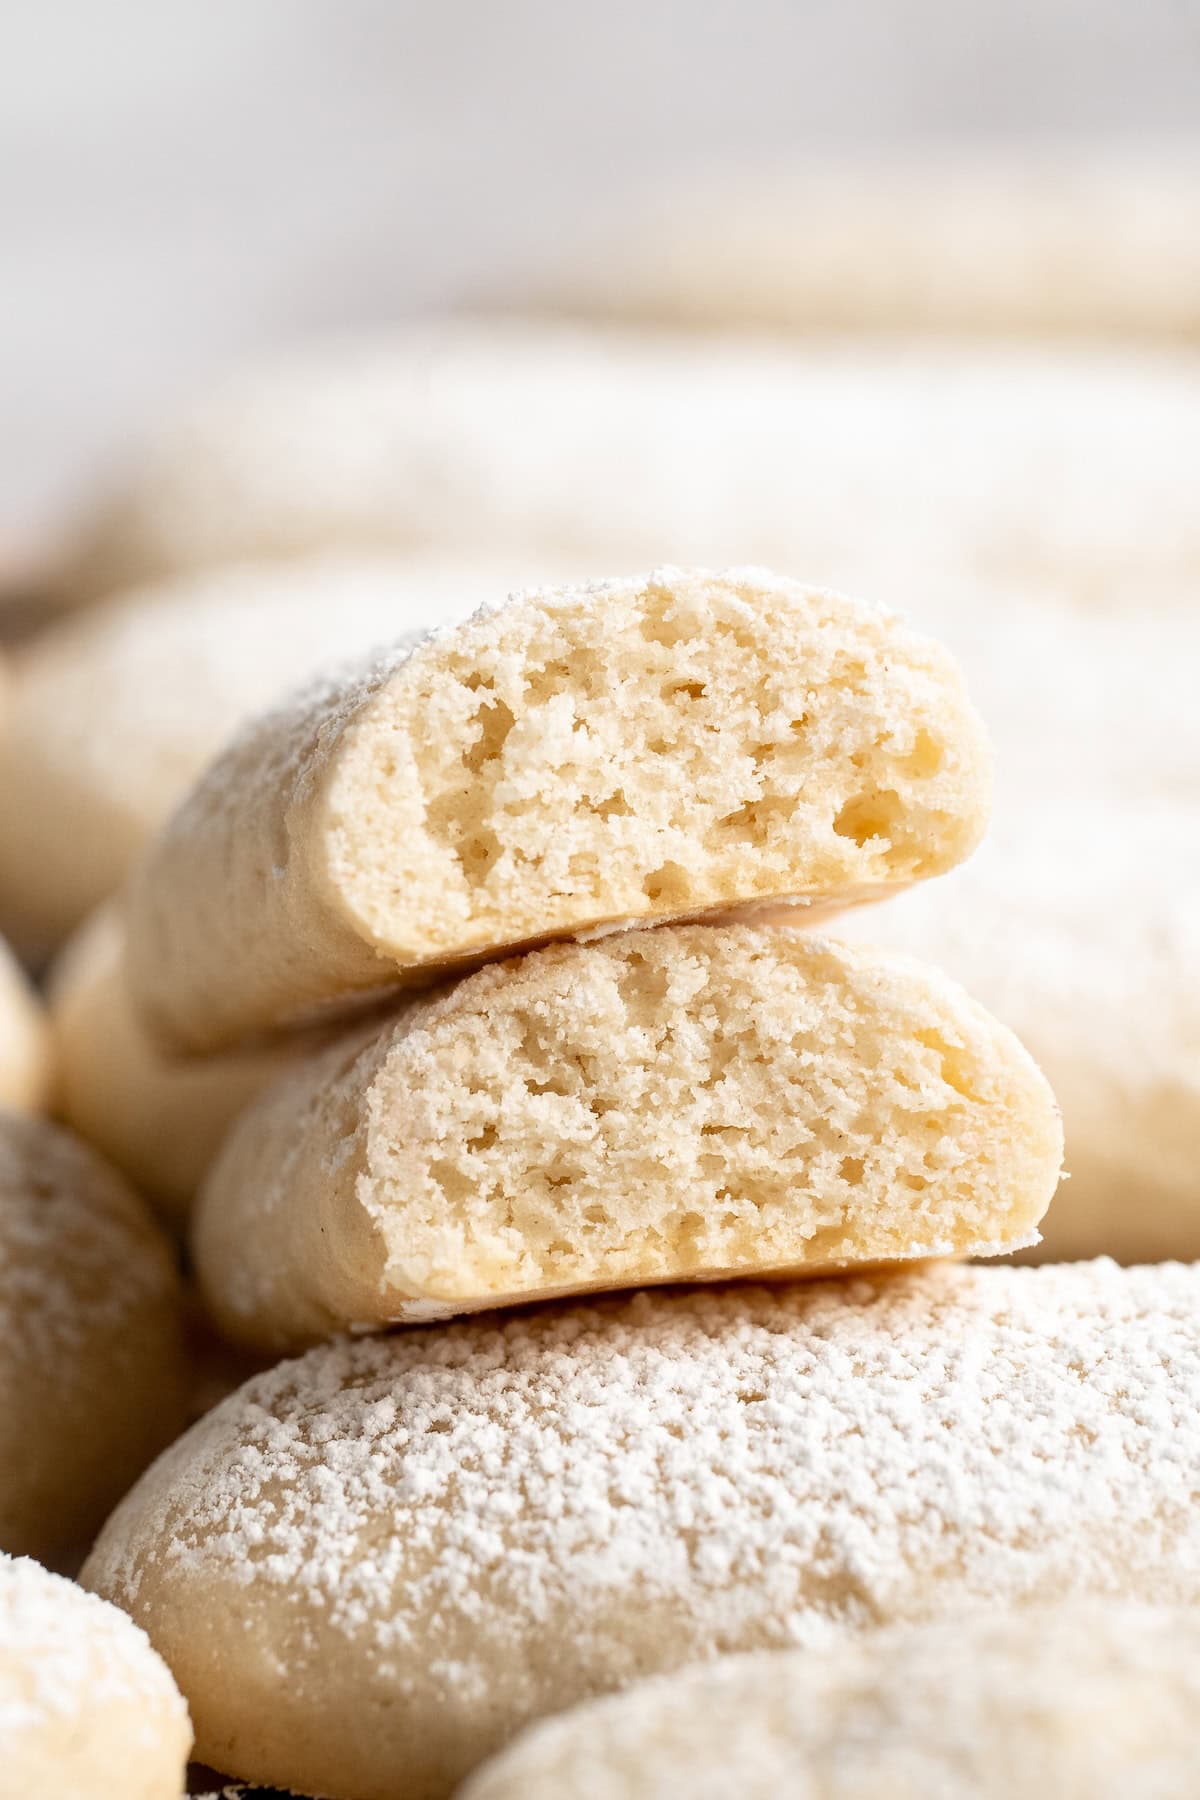
These vegan ladyfingers have the same perfect sponge cake texture and delicate vanilla flavour as the traditional version, but they’re made without the eggs thanks to aquafaba!
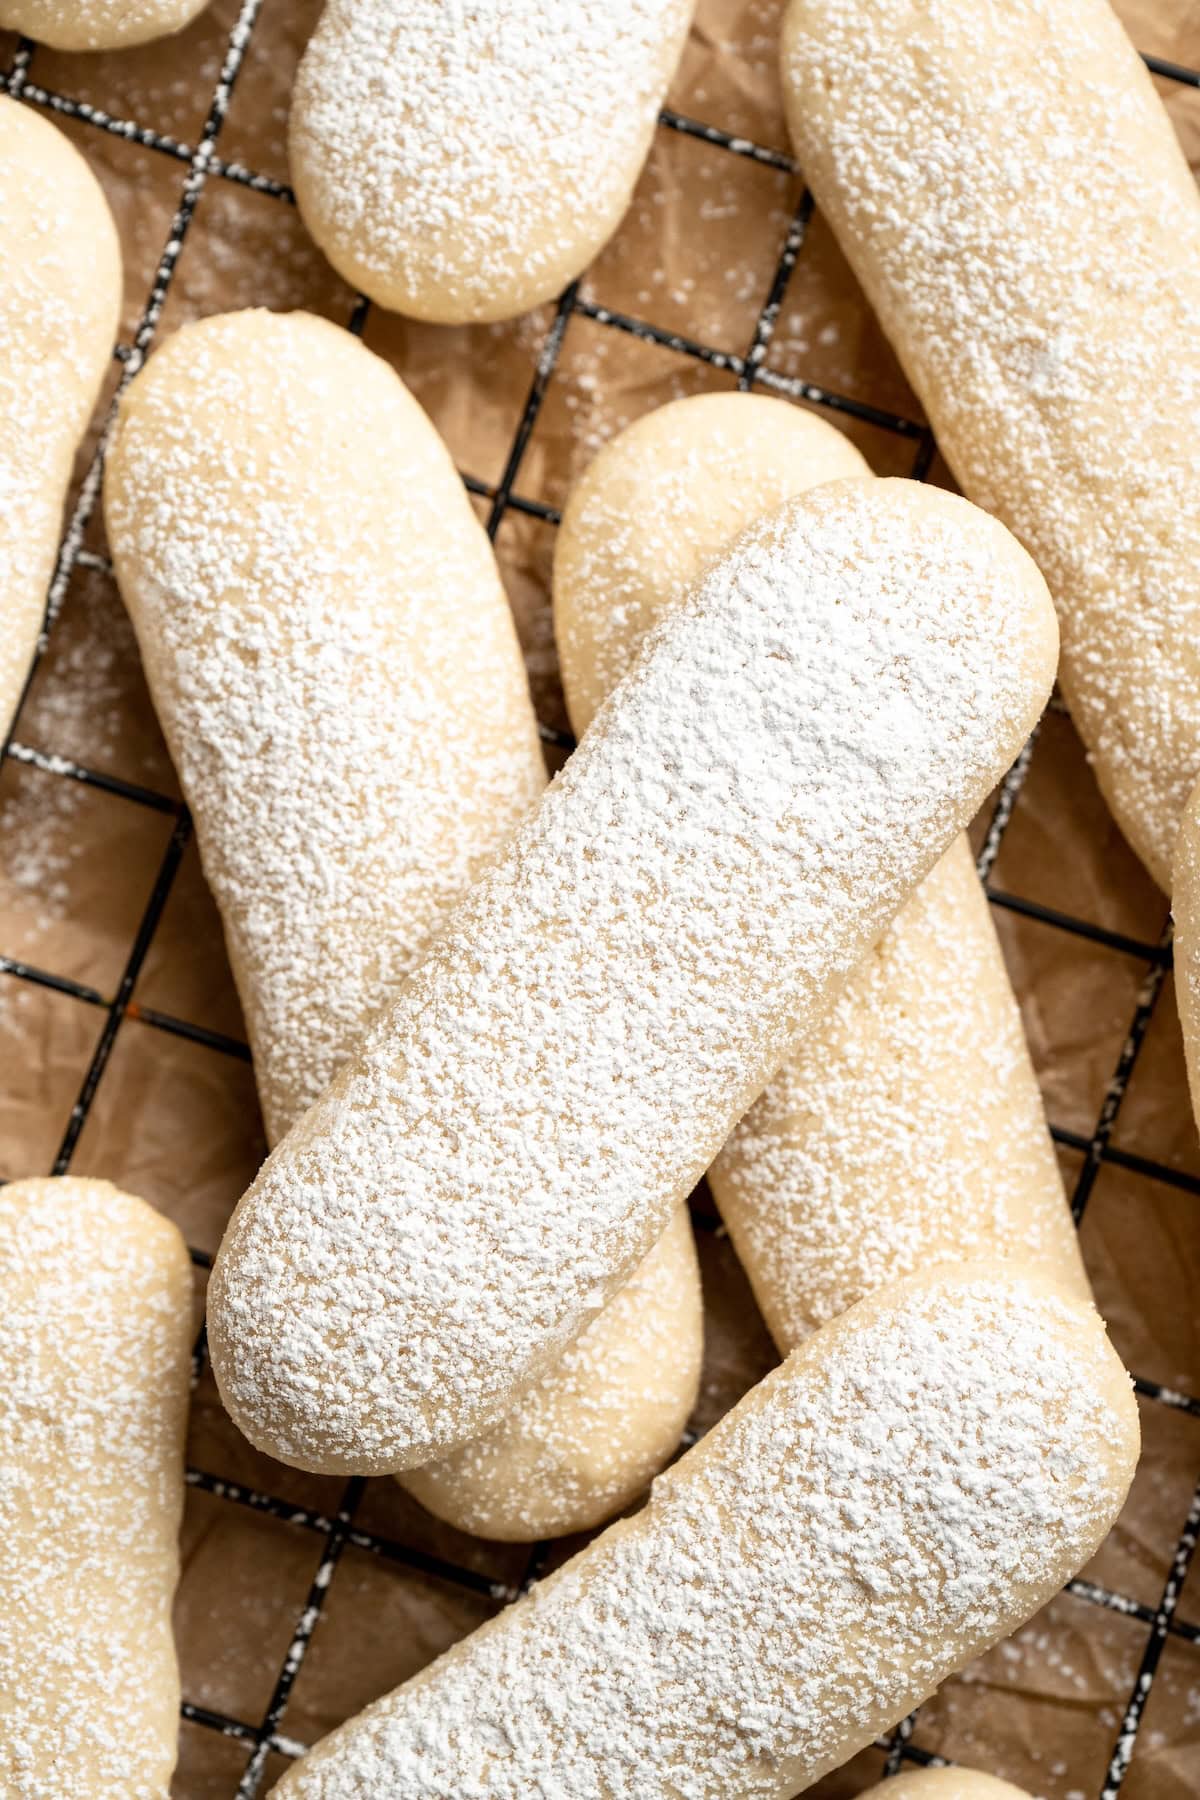
When I shared my Vegan Tiramisu recipe, readers loved it—but they also loved the vegan ladyfingers component of the recipe on its own. And you know what? So did I! I’ve made them on their own too; they’re perfect as a little sweet treat with a cup of coffee, or you can use them in other recipes, like a vegan Charlotte cake. Since it took me a while to perfect that vegan ladyfinger recipe, it felt like a shame to bury them in a post about tiramisu. They deserve a post of their own!
Why I’m Over the Moon for These Vegan Ladyfingers
Here’s why I adore this recipe and know you will too!
- That perfect ladyfinger texture . Traditional ladyfingers get their texture from eggs, which obviously isn’t an option for a vegan ladyfinger recipe. While there are a lot of egg substitutes out there, I knew that only aquafaba was up to the challenge of creating that light, airy texture.
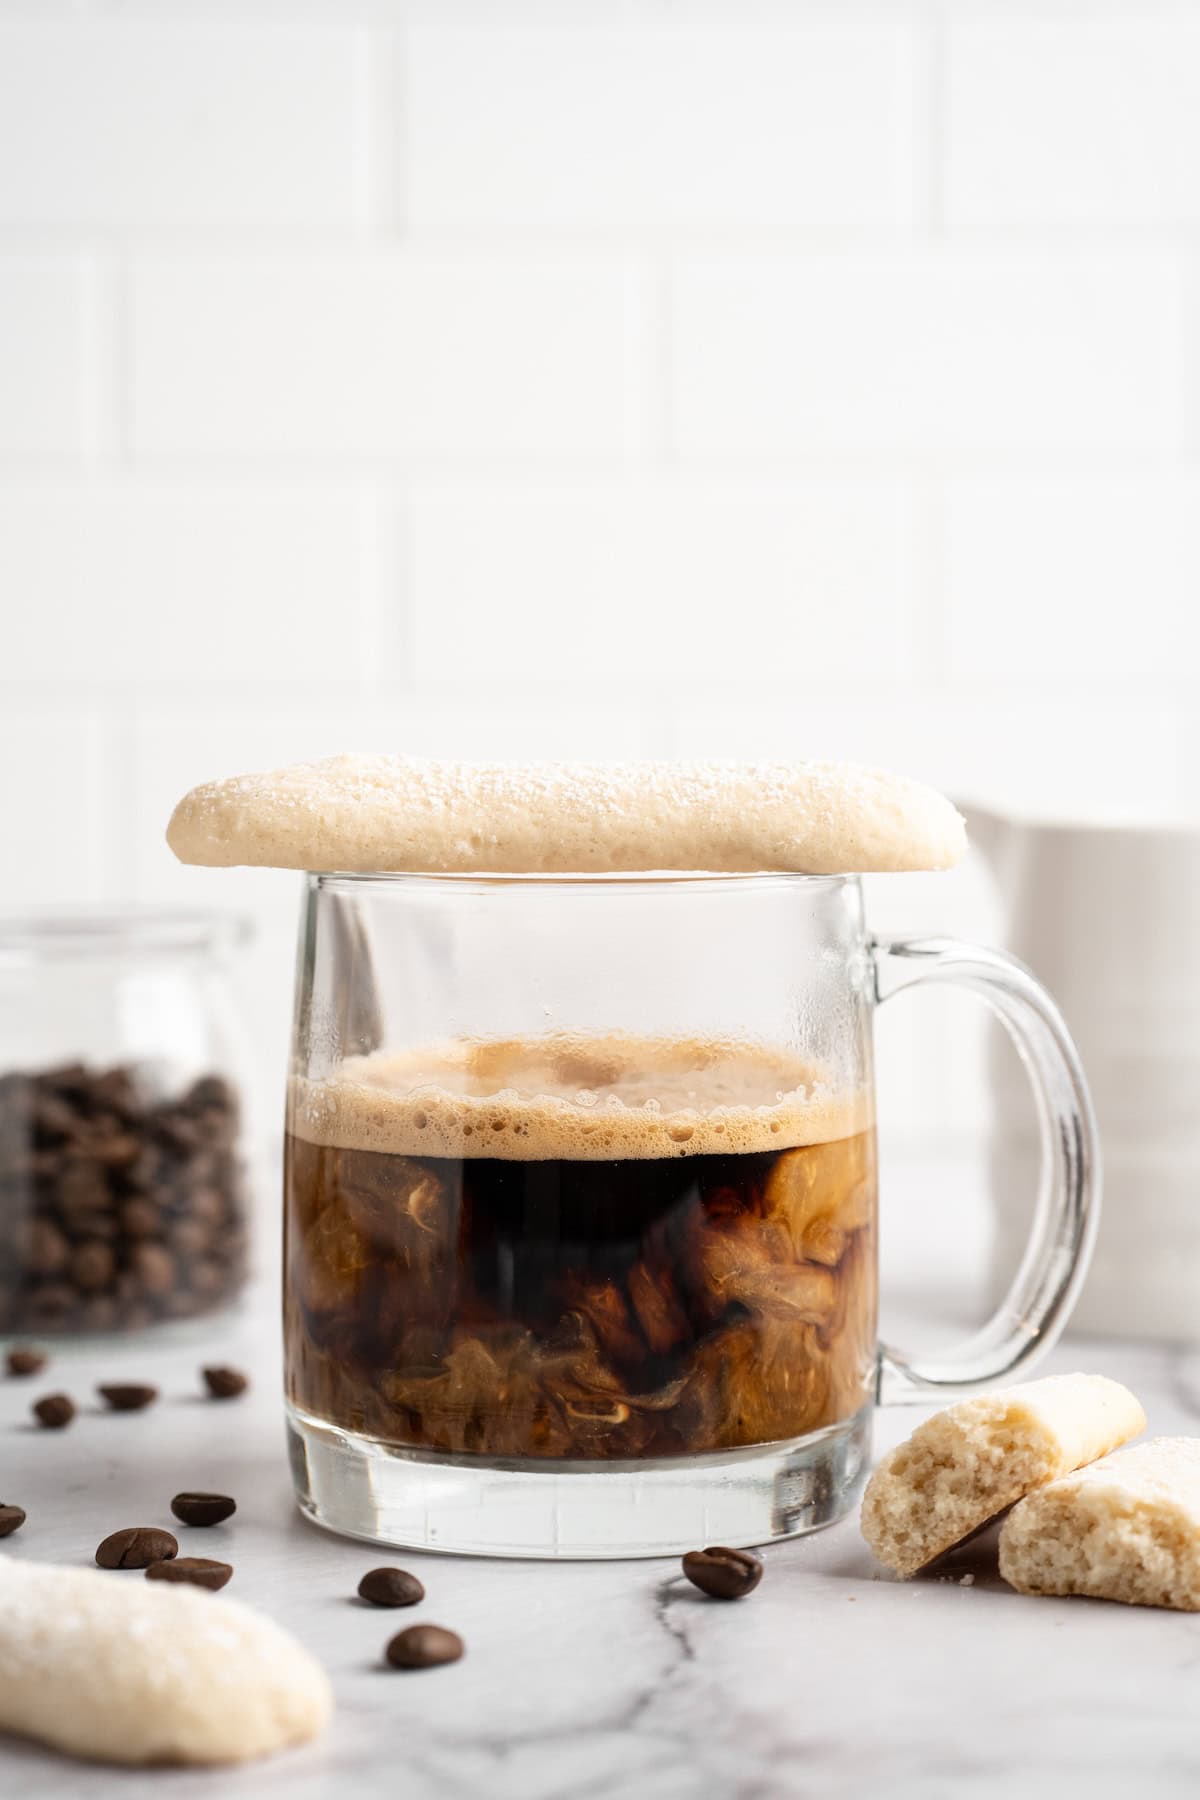
- Simple sweet treat . Sometimes you just want a little taste of something sweet after dinner, or to go with your afternoon Dirty Chai Latte . Ladyfingers are perfect for that!
- Fun baking project . This isn’t quite as easy as making Vegan Sugar Cookies , but it is a recipe you’ll love if you enjoy baking. The ladyfingers are piped onto the baking sheet, similar to Aquafaba Meringue , just in a different shape!
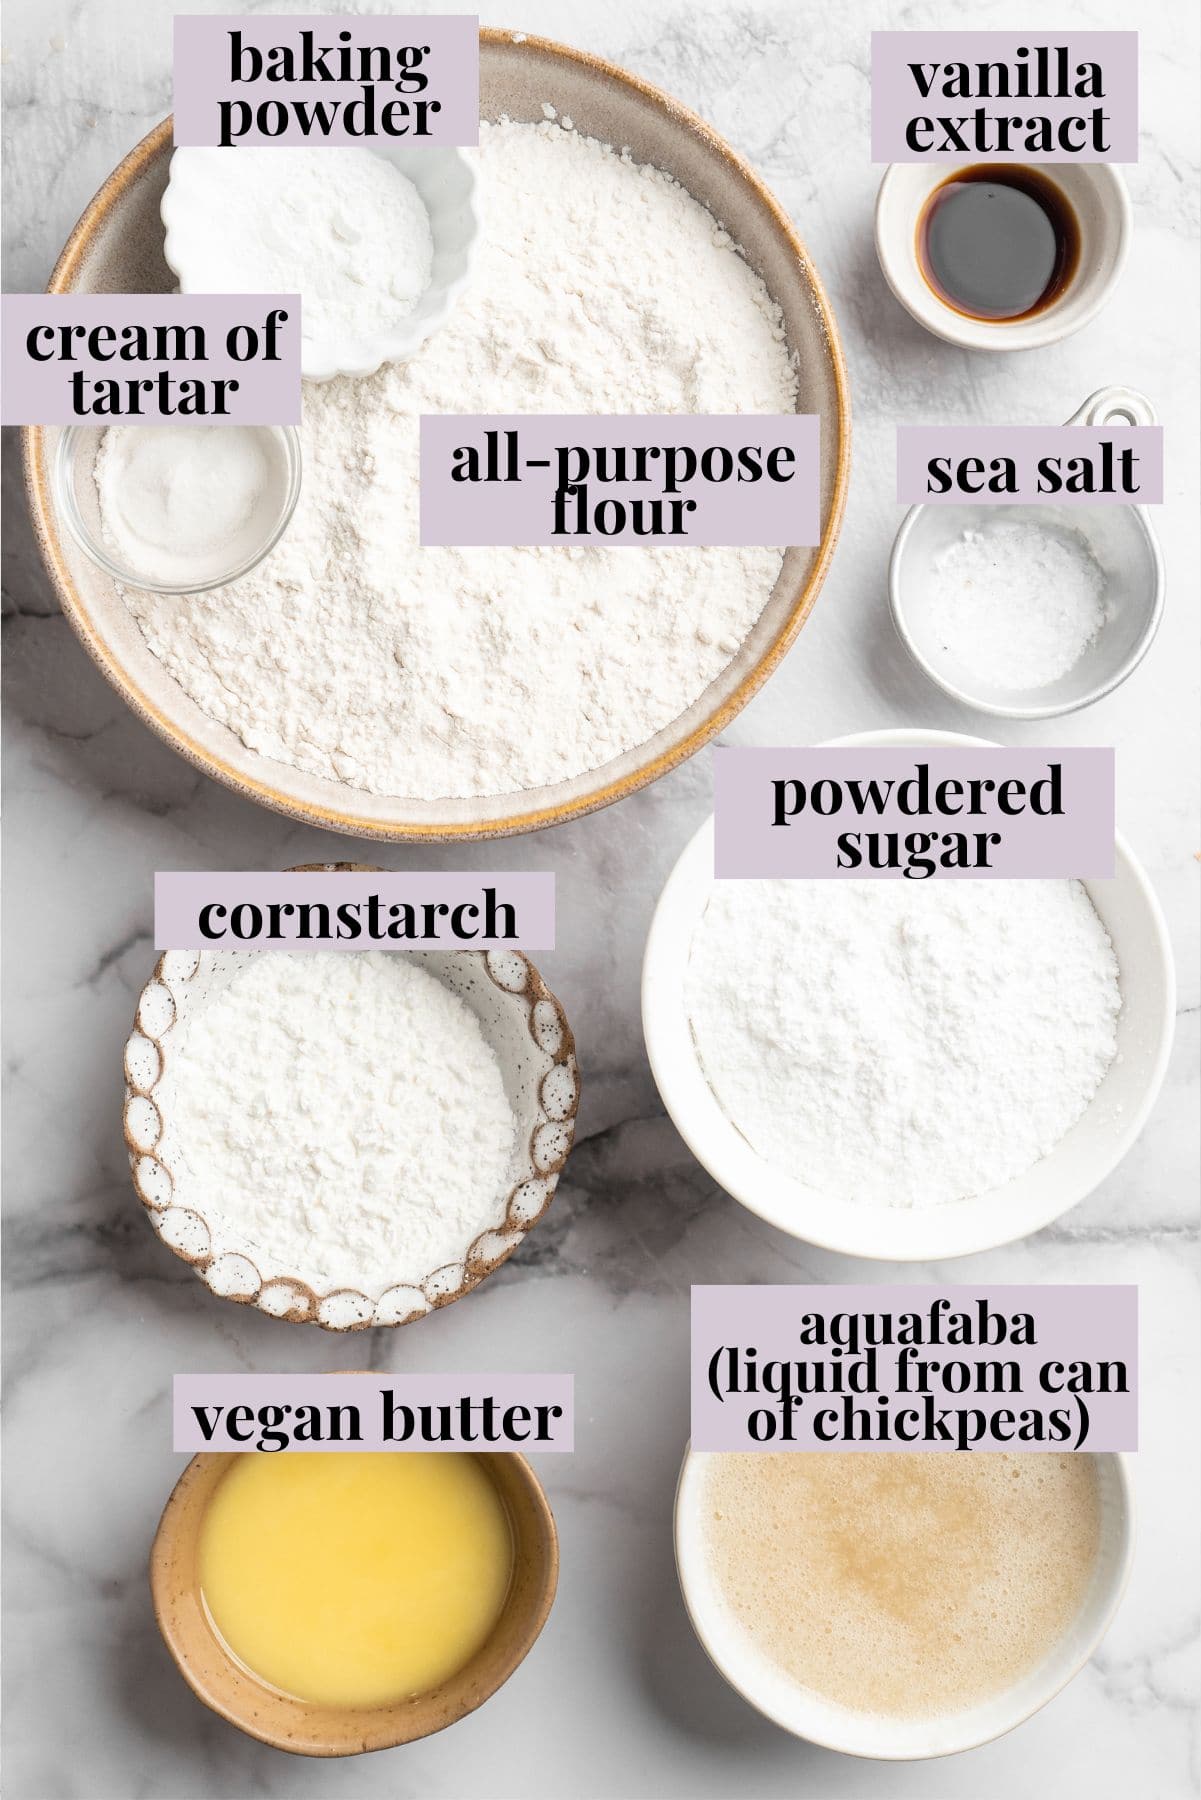
Notes on Ingredients
Here’s a look at the key ingredients that make this vegan ladyfinger recipe work. Scroll down to the recipe card to find the ingredient quantities and recipe instructions.
- All-purpose flour – Or a 1:1 gluten-free flour formulated for baking.
- Cornstarch – This helps give the ladyfingers structure and contributes to their texture.
- Sea salt
- Baking powder
- Aquafaba – This whips into a consistency similar to egg whites.
- Cream of tartar – Stabilizes the aquafaba and improves its volume.
- Powdered sugar – Here’s how to make Homemade Powdered Sugar .
- Vanilla extract – You can swap in almond extract for a slightly different flavour.
- Vegan butter – I love my homemade Vegan Butter , but you can also use store-bought butter for this recipe.
What Is Aquafaba?
How to Make Vegan Ladyfingers
Here’s a visual overview of the steps involved in making this vegan ladyfinger recipe.
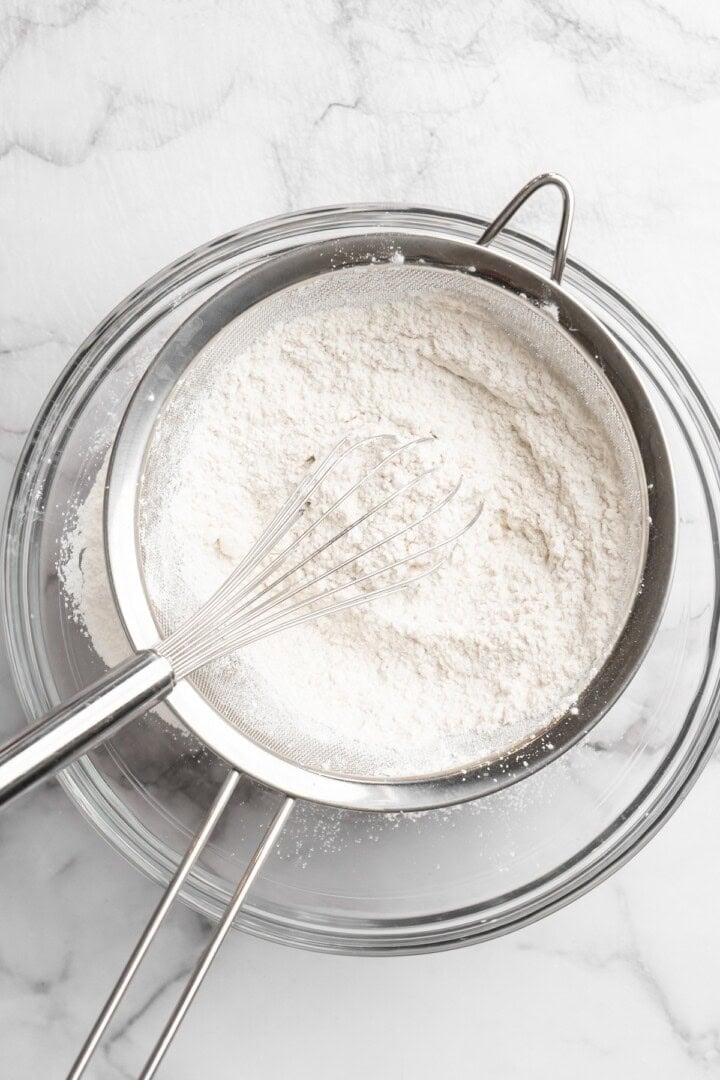
Sift the dry ingredients.
- Prepare . Preheat your oven to 350°F and line two baking sheets with parchment paper.
- Mix the dry ingredients . Sift the flour, cornstarch, salt, and baking powder into a bowl, then stir everything together.
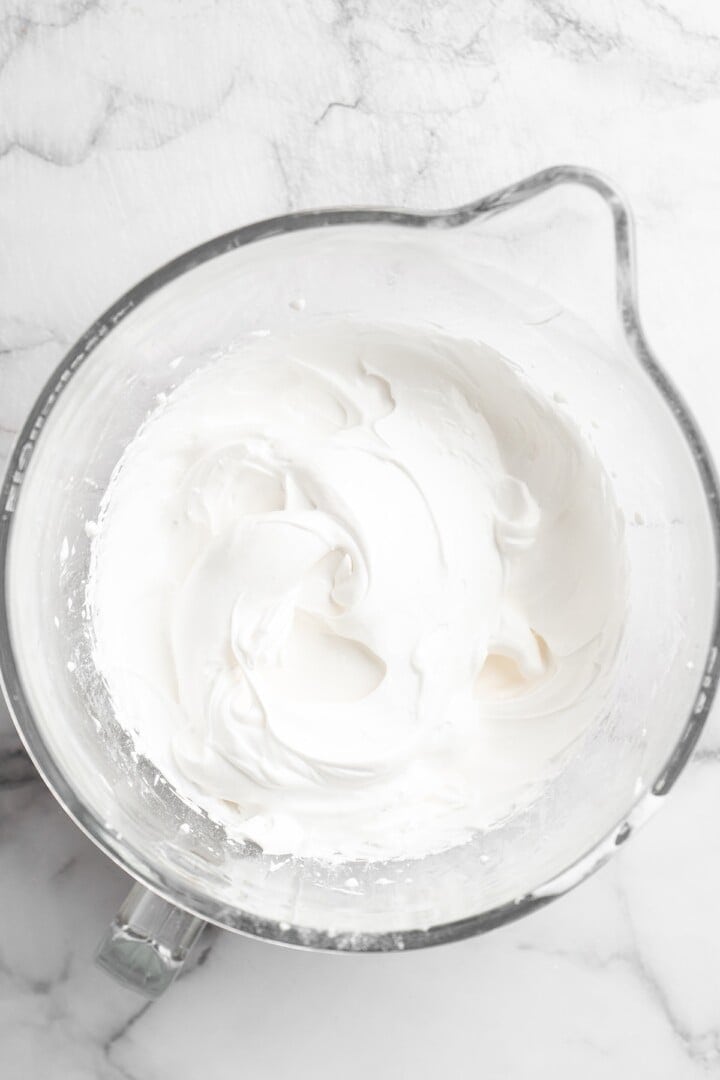
- Whip the aquafaba . Whip the aquafaba and cream of tartar in a stand mixer set to medium speed for a few seconds, then increase to high speed and continue to whip until stiff peaks form.
Beat in the powdered sugar.
- Add the powdered sugar . Reduce the mixer speed to low and slowly beat in the powdered sugar. Return the speed to high and whip until shiny ribbons form.
- Add the vanilla and butter . Reduce the speed again and beat in the vanilla and butter. Once they’re incorporated, whip on high for 1 minute.
Combine the dry ingredients and aquafaba mixture.
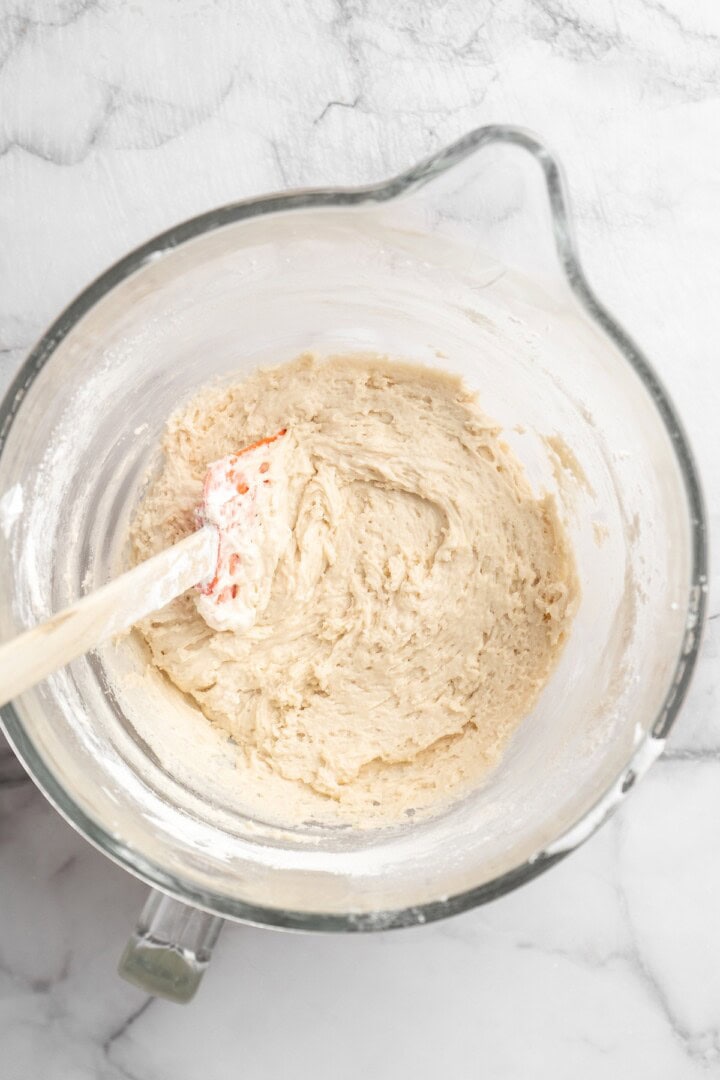
- Finish the batter . Use a spatula to fold the sifted flour mixture into the aquafaba mixture in three additions.
- Pipe the batter . Transfer the batter to a piping bag or zip-top bag with a corner snipped off. Pipe 3-inch ladyfingers onto the baking sheets, leaving an inch of space between each.

Bake.
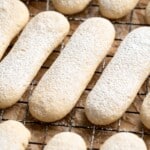
- Bake . Place the pans in the oven and bake for 15 minutes, or until the edges are golden and the centers are set. Cool on the baking sheets for 5 minutes, then transfer to a wire rack to finish cooling.
Tips for Success
These additional tips will help you get perfect vegan ladyfingers!
- Make sure your mixing bowl is clean . The mixing bowl and whisk need to be completely clean and free of grease before whipping the aquafaba; even small traces of oil can prevent it from reaching stiff peaks.
- Use room temperature aquafaba . Cold aquafaba may take longer to whip and it doesn’t achieve the same volume as room temperature aquafaba.
- Fold gently . Be gentle when folding the dry ingredients into the aquafaba to avoid deflating the mixture. You don’t want flat, dense ladyfingers!
Serving Suggestions
Aside from eating as-is with a dusting of powdered sugar, layering into tiramisu, or using for Charlotte cakes, you can make your vegan ladyfingers into little sandwich cookies by spreading jam or vegan chocolate hazelnut spread onto the bottom of one ladyfinger and gently pressing another to sandwich the filling between them.
How to Store
- Room temperature : Let the ladyfingers cool completely, then place them in an airtight container with parchment paper between the layers. Store in a cool, dry place for 2 to 3 days.
- Freezer : Freeze the ladyfingers on a parchment-lined baking sheet, then place them in an airtight container or freezer bag and freeze for up to 2 months. Thaw at room temperature before serving.
More Vegan Treats and Sweets
- Brownie Cookies
- Vegan Vanilla Cupcakes
- Seven Layer Bars
- Buttermilk Pie
Ingredients
- 2 cups all-purpose flour , ( 240 g)
- ¼ cup cornstarch , ( 32g )
- ½ teaspoon sea salt , 3g
- 2 teaspoons baking powder , 9g
- ½ cup aquafaba , ( 120 g) the liquid from a can of unsalted chickpeas
- ¼ teaspoon cream of tartar , 0.75g
- 1 cup powdered sugar , ( 120 g)
- 1 ½ teaspoons vanilla extract , 7g
- ¼ cup vegan butter , melted and fully cooled – 56g
Instructions
- Preheat the oven to 350°F/180°C, and line two baking sheets with parchment paper. If you have only one baking sheet, that’s also fine, you can reuse the same one once the first set of lady fingers is done.
- In a medium bowl, sift together the flour, cornstarch, salt, and baking powder. Stir to combine and set aside.
- Pour the aquafaba and the cream of tartar in the bowl of a very clean and wiped dry stand mixer and whip on high speed with the wire whip attachment until stiff peaks are formed. Start on medium for a few seconds, then move up to high speed. This should take about 2-3 minutes to get stiff peaks.
- Reduce the stand mixer speed to low, and slowly add the powdered sugar. When all the powdered sugar is added in, turn the speed back to high, and whip until the mixture is shiny. It may not be completely stiff but in nice ribbons.
- Reduce the mixer to low and slowly add the vanilla and butter, mixing until well combined. Increase speed back to high for about a minute until everything is combined, then turn off the stand mixer.
- Remove the bowl from the stand mixer and add the sifted flour mixture in three additions, folding gently with a rubber spatula until just combined and no flour pockets remain, being careful not to deflate the aquafaba.
- Transfer the batter to a zip-top bag with a corner cut off or a piping bag with a large round tip (I cut a wide corner to get that inch out). Pipe the mixture into thick lines about 3 inches long and an inch wide on the prepared baking sheets, leaving at least an inch between each cookie.
- Bake for 15 minutes, until the edges are golden and the cookies are set in the center. Remove from the oven and cool for 5 minutes on the baking sheets, then transfer to a wire rack to cool completely.
Notes
- Room temperature : Let the ladyfingers cool completely, then place them in an airtight container with parchment paper between the layers. Store in a cool, dry place for 2 to 3 days.
- Freezer : Freeze the ladyfingers on a parchment-lined baking sheet, then place them in an airtight container or freezer bag and freeze for up to 2 months. Thaw at room temperature before serving.
Vegan Ladyfingers
Ingredients
- 2 cups all-purpose flour ( 240 g)
- ¼ cup cornstarch ( 32g )
- ½ teaspoon sea salt 3g
- 2 teaspoons baking powder 9g
- ½ cup aquafaba ( 120 g) the liquid from a can of unsalted chickpeas
- ¼ teaspoon cream of tartar 0.75g
- 1 cup powdered sugar ( 120 g)
- 1 ½ teaspoons vanilla extract 7g
- ¼ cup vegan butter melted and fully cooled - 56g
Instructions
- Preheat the oven to 350°F/180°C, and line two baking sheets with parchment paper. If you have only one baking sheet, that’s also fine, you can reuse the same one once the first set of lady fingers is done.
- In a medium bowl, sift together the flour, cornstarch, salt, and baking powder. Stir to combine and set aside.
- Pour the aquafaba and the cream of tartar in the bowl of a very clean and wiped dry stand mixer and whip on high speed with the wire whip attachment until stiff peaks are formed. Start on medium for a few seconds, then move up to high speed. This should take about 2-3 minutes to get stiff peaks.
- Reduce the stand mixer speed to low, and slowly add the powdered sugar. When all the powdered sugar is added in, turn the speed back to high, and whip until the mixture is shiny. It may not be completely stiff but in nice ribbons.
- Reduce the mixer to low and slowly add the vanilla and butter, mixing until well combined. Increase speed back to high for about a minute until everything is combined, then turn off the stand mixer.
- Remove the bowl from the stand mixer and add the sifted flour mixture in three additions, folding gently with a rubber spatula until just combined and no flour pockets remain, being careful not to deflate the aquafaba.
- Transfer the batter to a zip-top bag with a corner cut off or a piping bag with a large round tip (I cut a wide corner to get that inch out). Pipe the mixture into thick lines about 3 inches long and an inch wide on the prepared baking sheets, leaving at least an inch between each cookie.
- Bake for 15 minutes, until the edges are golden and the cookies are set in the center. Remove from the oven and cool for 5 minutes on the baking sheets, then transfer to a wire rack to cool completely.
Notes
- Room temperature : Let the ladyfingers cool completely, then place them in an airtight container with parchment paper between the layers. Store in a cool, dry place for 2 to 3 days.
- Freezer : Freeze the ladyfingers on a parchment-lined baking sheet, then place them in an airtight container or freezer bag and freeze for up to 2 months. Thaw at room temperature before serving.
Nutrition
Vegan Ladyfingers https://jessicainthekitchen.com/vegan-ladyfingers/ June 27, 2025
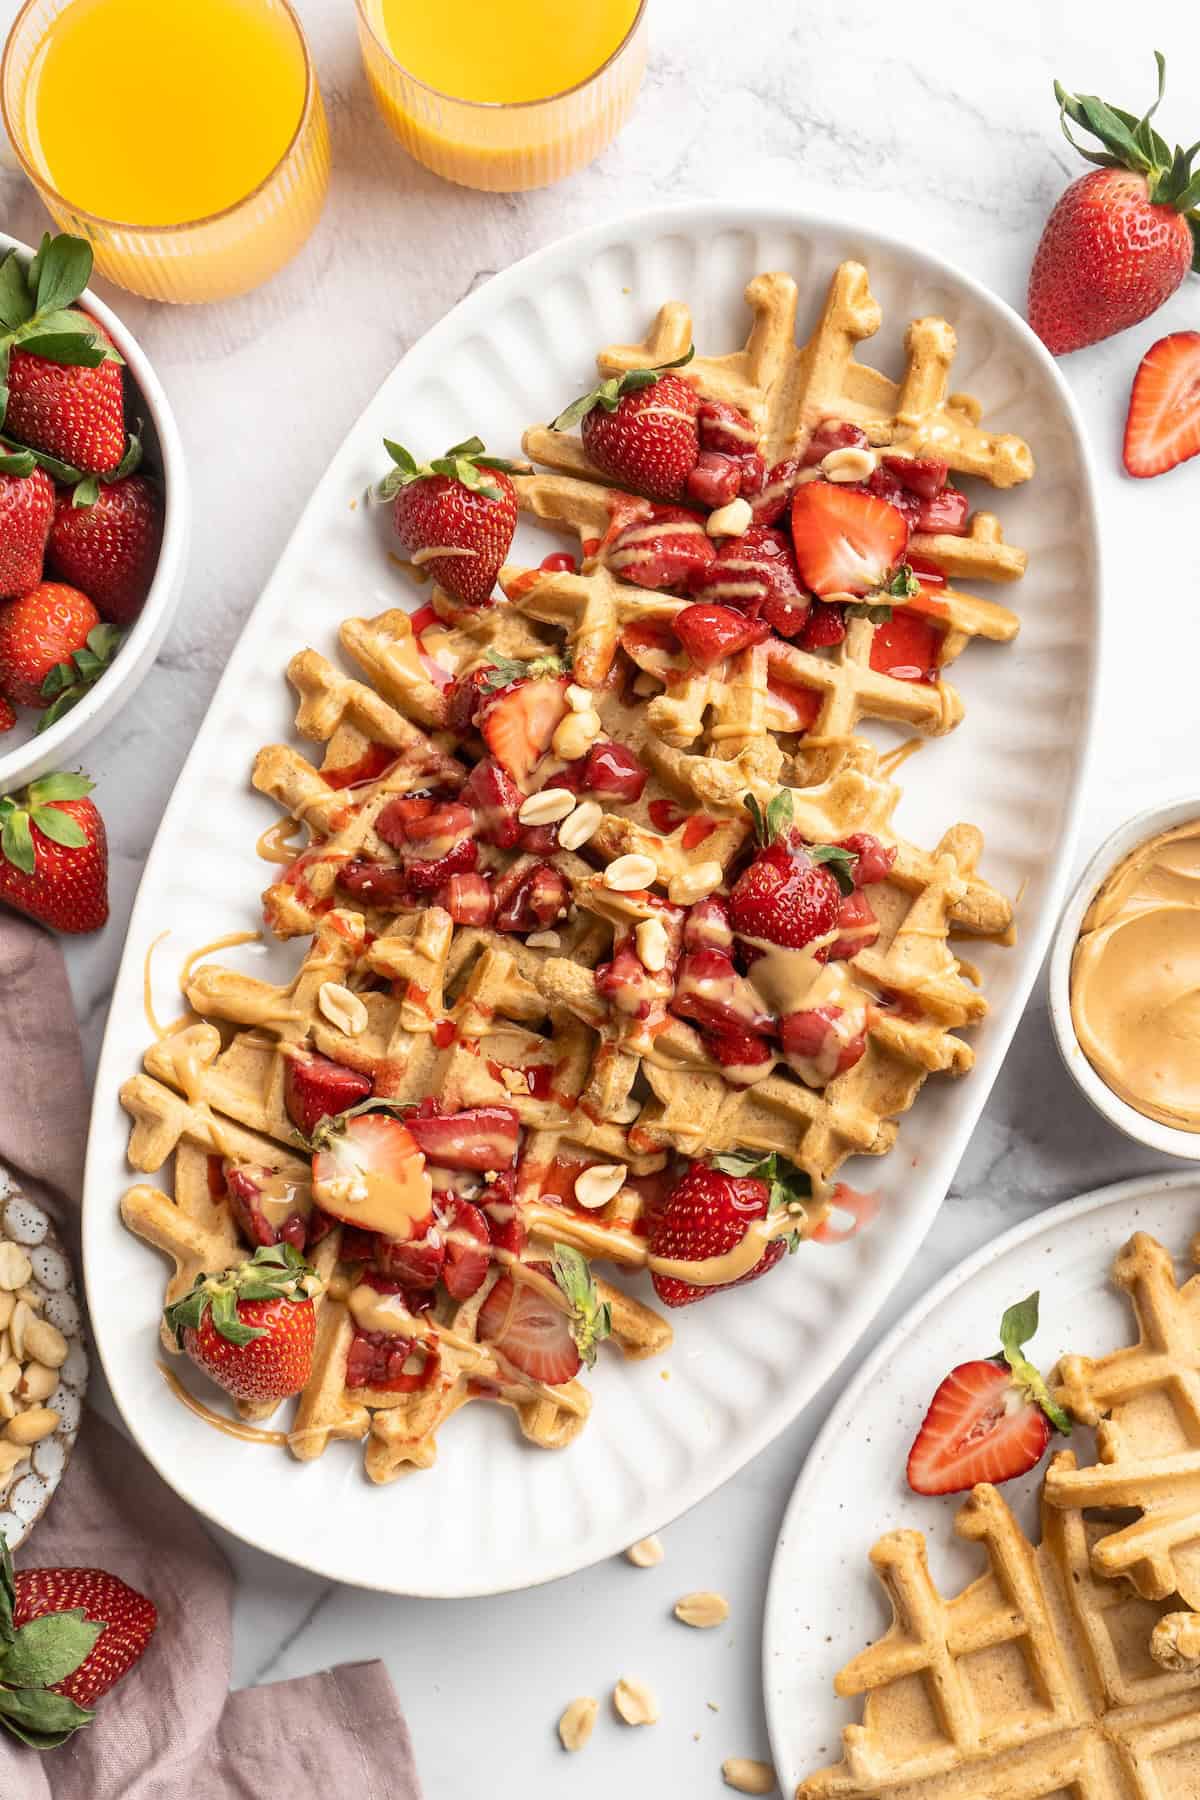
Your inner child will be delighted to have these peanut butter and strawberry jelly waffles for breakfast! They’re gluten-free, vegan, and made without refined sugar, so the adult you will also be happy to indulge.
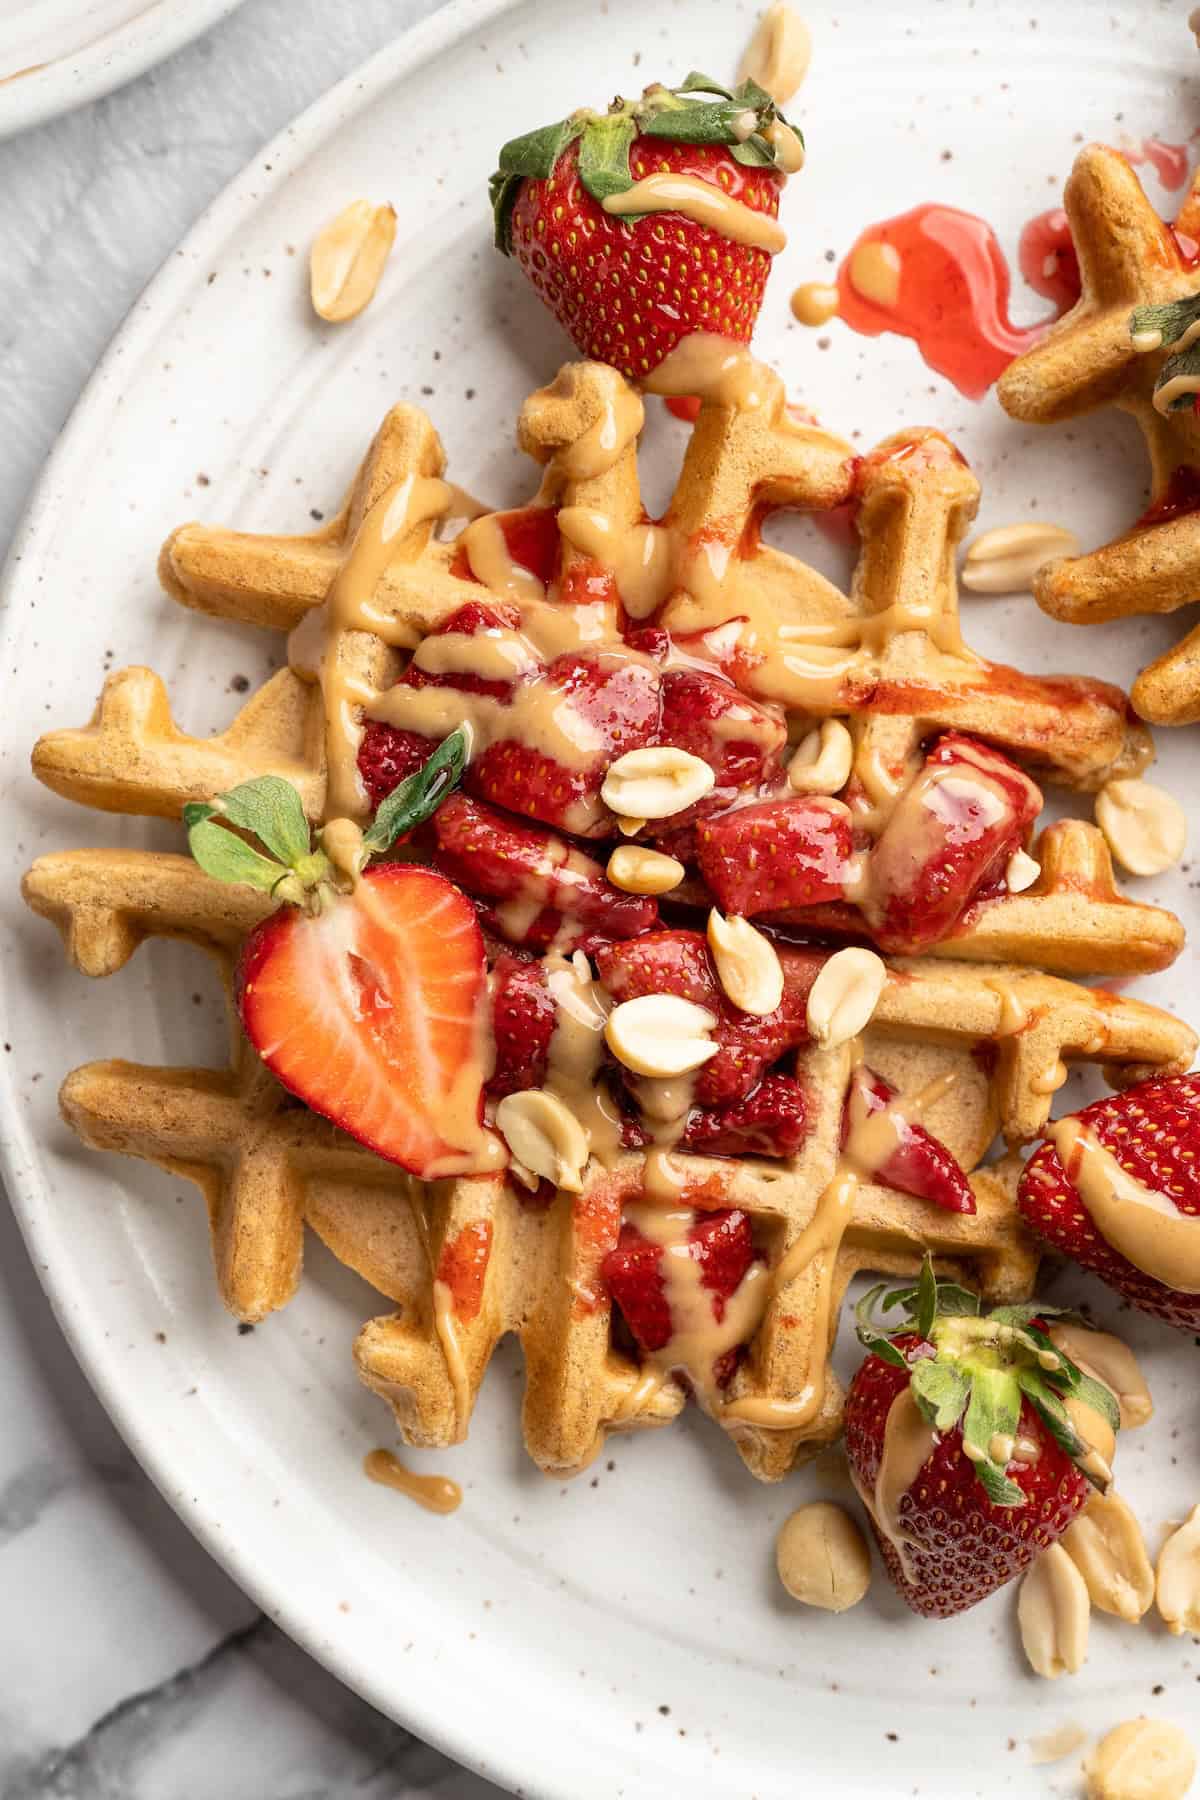
I was a PB & J sandwich kind of kid, and truth be told, I’m a PB & J sandwich adult too. The jelly was my favourite part, and I always ALWAYS had to have Strawberry Jam , no other flavour would do. So naturally, these peanut butter waffles come complete with a jammy strawberry compote for the jelly component. This recipe is straight up comfort food, made with wholesome ingredients. That’s a win in my book!
You Need These Peanut Butter and Strawberry Jelly Waffles in Your Life
If it was up to me, I’d have these peanut butter and jelly waffles for breakfast everyday, and a PB & J sandwich on fluffy Gluten-Free Sandwich Bread for lunch and dinner. (Told you I was that kind of kid.) Here’s why I love them and you will too!
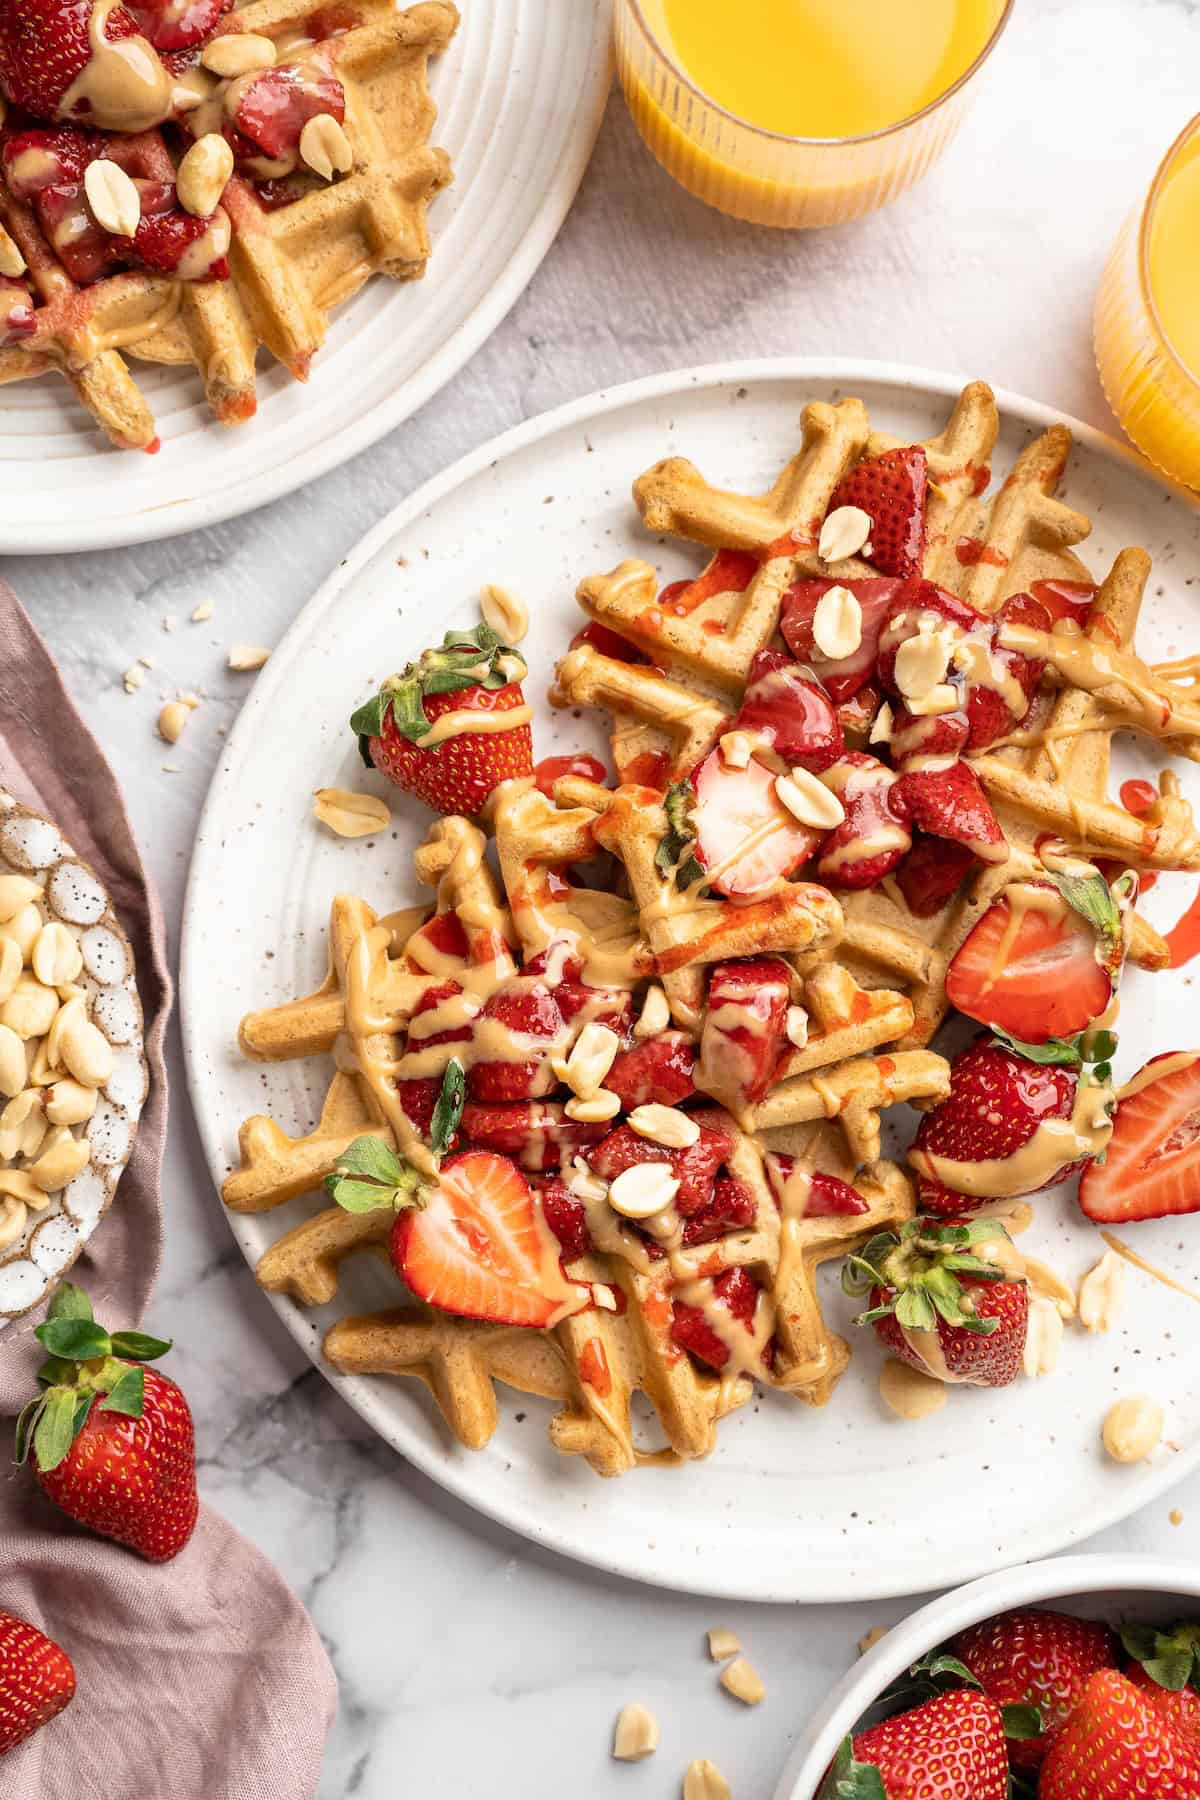
- That perfect waffle texture . The edges of the waffles are golden brown and crisp, while the interior is light and fluffy. Ground oats make the most fabulous waffles! (My Lemon Poppyseed Waffles are made with oat flour too.)
- Real strawberry flavour . The jelly compote is made with glorious strawberries reduced with maple syrup and a bit of lemon juice to make the flavour pop.
- Great for meal prep . Both the peanut butter waffles and the strawberry jelly compote will last several days in the fridge or a few months in the freezer so you can have a tasty breakfast ready to go anytime!
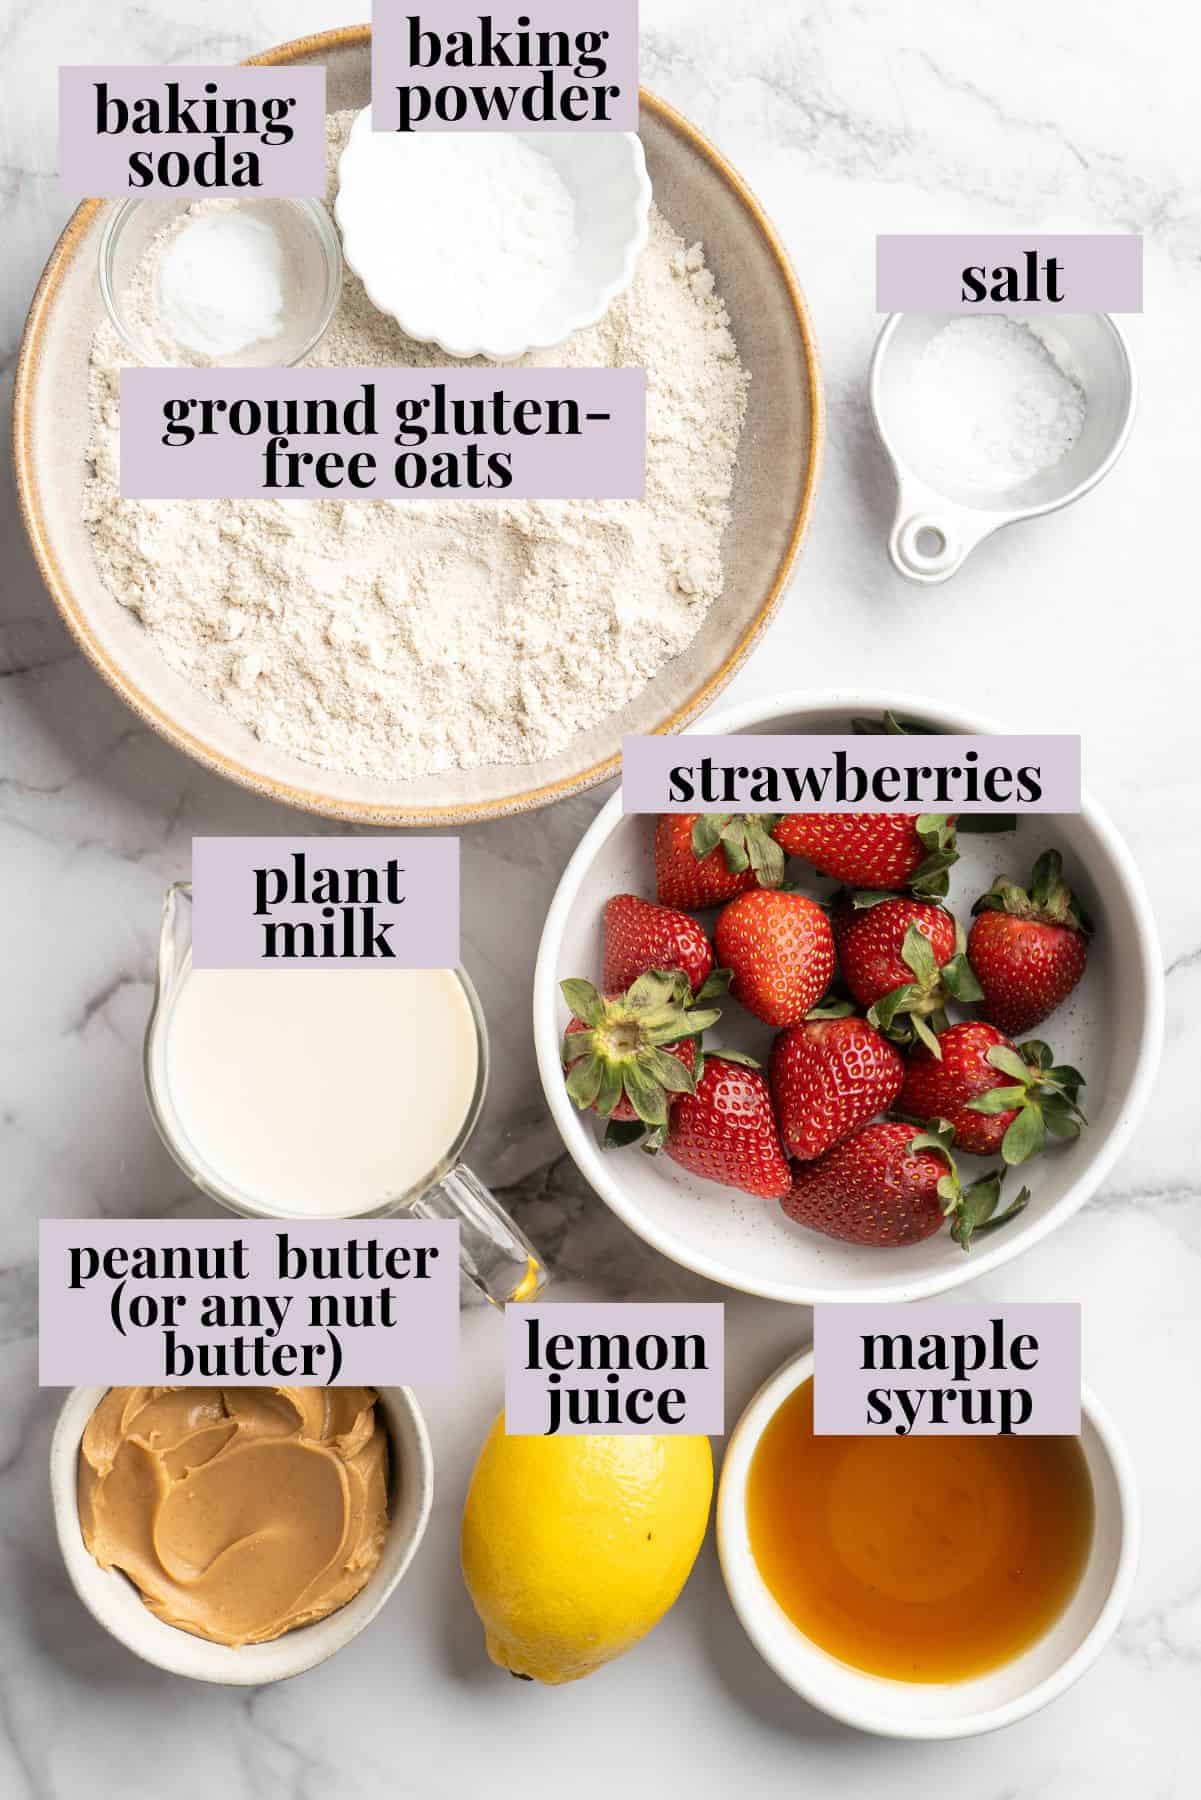
Notes on Ingredients
The ingredient list for these peanut butter and jelly waffles is surprisingly short! Scroll down to the recipe card to find the ingredient quantities and recipe instructions.
For the Peanut Butter Waffles:
- O ats – If you’re on a gluten-free diet, make sure the oats you use are certified gluten-free. Grind the oats in your food processor to make them into a flour.
- Baking powder
- Baking soda
- Salt
- Plant milk – You can use any unflavoured, unsweetened plant milk you have on hand.
- Maple syrup
- Peanut butter – I use my Homemade Peanut Butter . But another nut butter, like Homemade Pecan Butter or Almond Butter , would also work.
For the Strawberry Jelly Compote:
- S trawberries – Make sure they’re juicy, deeply red, and ripe for the best flavour!
- Lemon juice
- Maple syrup – Date Syrup or agave nectar would also work.
How to Make Peanut Butter and Strawberry Jelly Waffles
Here’s a brief step-by-step guide to making these waffles, but the full written instructions are in the printable recipe card.
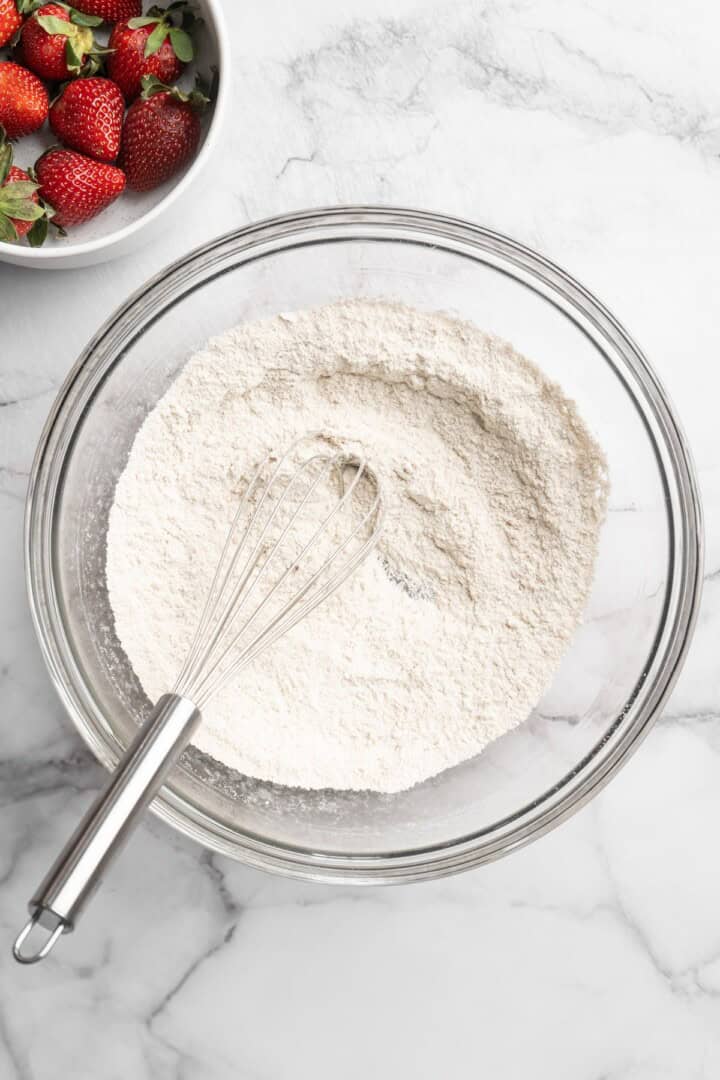
Whisk the dry ingredients together.
- Prepare . Preheat your waffle maker according to the manufacturer’s instructions.
- Mix the dry ingredients . Whisk the ground oats, baking powder, baking soda, and salt in a mixing bowl.
- Finish the batter . Whisk in the milk, maple syrup, and peanut butter. If your mixing bowl doesn’t have a spout, you can transfer the batter to a large liquid measuring cup so you can easily pour it into the waffle maker.
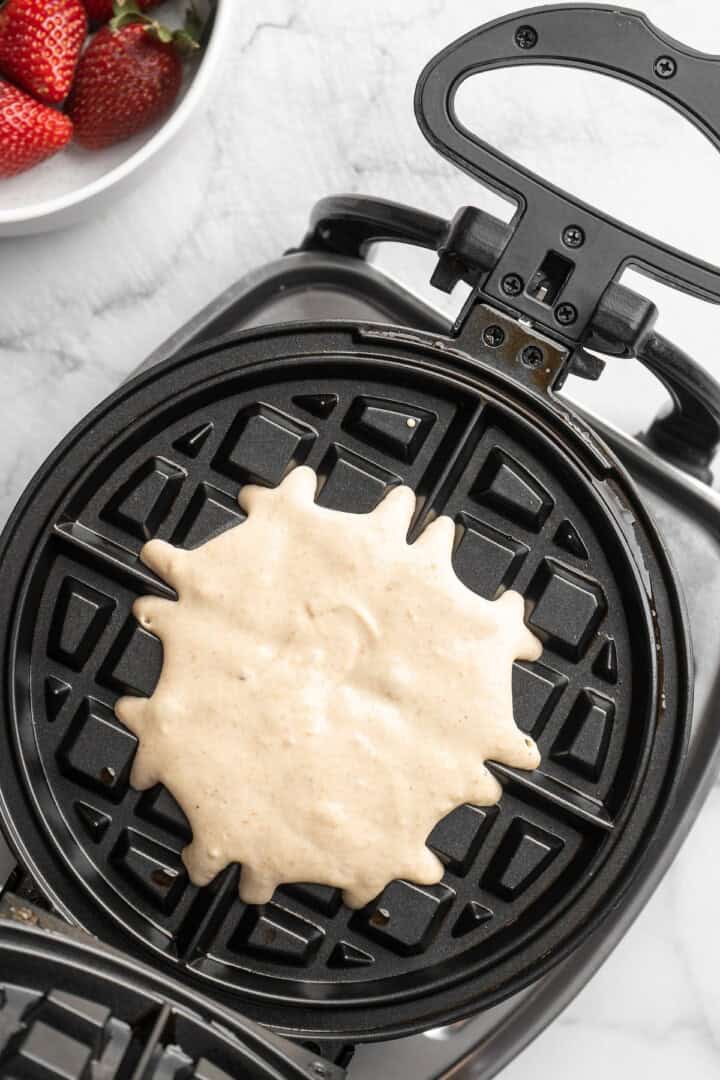
Pour the batter into the waffle maker.
- Make the waffles . Pour the batter into the waffle maker and cook; follow the manufacturer’s directions for the amount of batter and cooking time, but note that sometimes oat flour waffles take a bit longer.
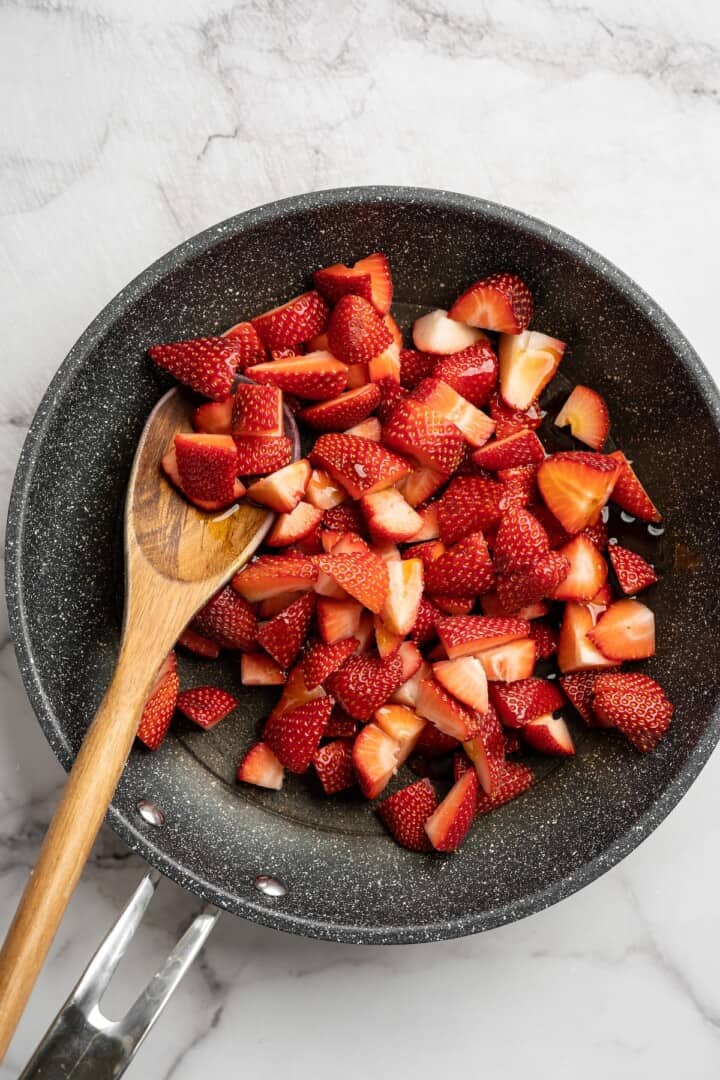
Add the compote ingredients to a pan.
- Make the compote . Bring all the ingredients to a boil in a saucepan over high heat. Reduce to medium and simmer for 10 minutes, or until the mixture is jammy. Place the pan in an ice bath to stop the cooking.
- Serve . Plate the waffles and top with the strawberry jelly compote.
Tips and Variations
- Make it nut-free . You can use sunflower seed butter instead of peanut butter to make these waffles nut-free.
- Try another fruit . You can use this same method to make a compote with raspberries, blackberries, blueberries, peaches, etc. Use what’s in season and switch things up!
- Let the batter sit a little bit . If you have time, let the batter sit for 10 minutes; this will allow the oat flour to fully hydrate and help your waffles get fabulously fluffy.
- Set the cooked waffles on a wire rack . Instead of plating them right away, you can transfer the cooked waffles to a wire rack; this keeps the bottoms from steaming on the plate and getting mushy if you’re not eating them immediately.
Serving Suggestions
Round out your breakfast with a side of Tofu Bacon , Fluffy Tofu Scramble , or my crispy Hash Brown Recipe . Or for a little extra indulgence, add a dollop of Coconut Whipped Cream on top of your peanut butter waffles!
How to Store and Reheat
- Refrigerator : Both the peanut butter waffles and the compote will last up to 4 days in the fridge; refrigerate them in separate airtight containers.
- Freezer : Freeze the waffles and strawberry jelly compote in separate freezer bags or airtight containers for up to 3 months. Thaw the compote in the refrigerator before serving. (The waffles can be reheated from frozen.)
- To reheat : You can reheat the waffles in your toaster, toaster oven, or air fryer for maximum crispiness. The microwave also works, but the waffles will be softer.
More Vegan Waffle Recipes
- Pumpkin Waffles
- Vegan Waffles
- Crispy Mac and Cheeze Waffles
- Low Carb Vegan Waffles
Ingredients
- 1 ¼ cups ground gluten free oats , ground in a food processor or in a coffee grinder ( 150 g)
- 1 teaspoon baking powder , 4 g
- ½ teaspoon baking soda , 3 g
- ½ teaspoon salt , 3 g
- 1 ¼ cups plant milk , 300 ml
- 1 tablespoon maple syrup , 20 g
- 3 tablespoons peanut butter , or any nut butter ( 48 g)
Strawberry Jelly Compote:
- 1 ½ cup strawberries , de-stemmed and chopped ( 225 g)
- 3 teaspoons lemon juice , 15 ml
- 4 tablespoons maple syrup , 80 g
Instructions
- Preheat waffle maker according to directions.
- In a large bowl, add the ground oats, baking powder, baking soda and salt.
- Add the milk, maple syrup then peanut butter and whisk together with a whisk until just combined. Pour it all into a liquid measuring cup for easy pouring.
- In heated waffle maker, pour ⅓ of the batter and cook until ready (according to waffle maker’s indication – mine has a light that lights up when cooked through on max heat after about 3-4 minutes – these may take a bit longer than regular waffles to cook since they are made with oats instead of flour).
Strawberry Jelly Compote
- This can be made while the waffles are being made or in advance.
- In a pan over high heat, add all the ingredients for the compote, stirring with a wooden spoon or spatula. Allow to come to a boil, then reduce to medium heat, simmering for about 10 minutes, stirring often.
- When reduced to your liking, remove from heat and place in an ice bath or freezer to stop cooking for about 3 minutes.
- Pour from pan into a container to store it in, or straight over waffles.
- Enjoy!
Notes
- Refrigerator : Both the peanut butter waffles and the compote will last up to 4 days in the fridge; refrigerate them in separate airtight containers.
- Freezer : Freeze the waffles and strawberry jelly compote in separate freezer bags or airtight containers for up to 3 months. Thaw the compote in the refrigerator before serving. (The waffles can be reheated from frozen.)
- To reheat : You can reheat the waffles in your toaster, toaster oven, or air fryer for maximum crispiness. The microwave also works, but the waffles will be softer.
