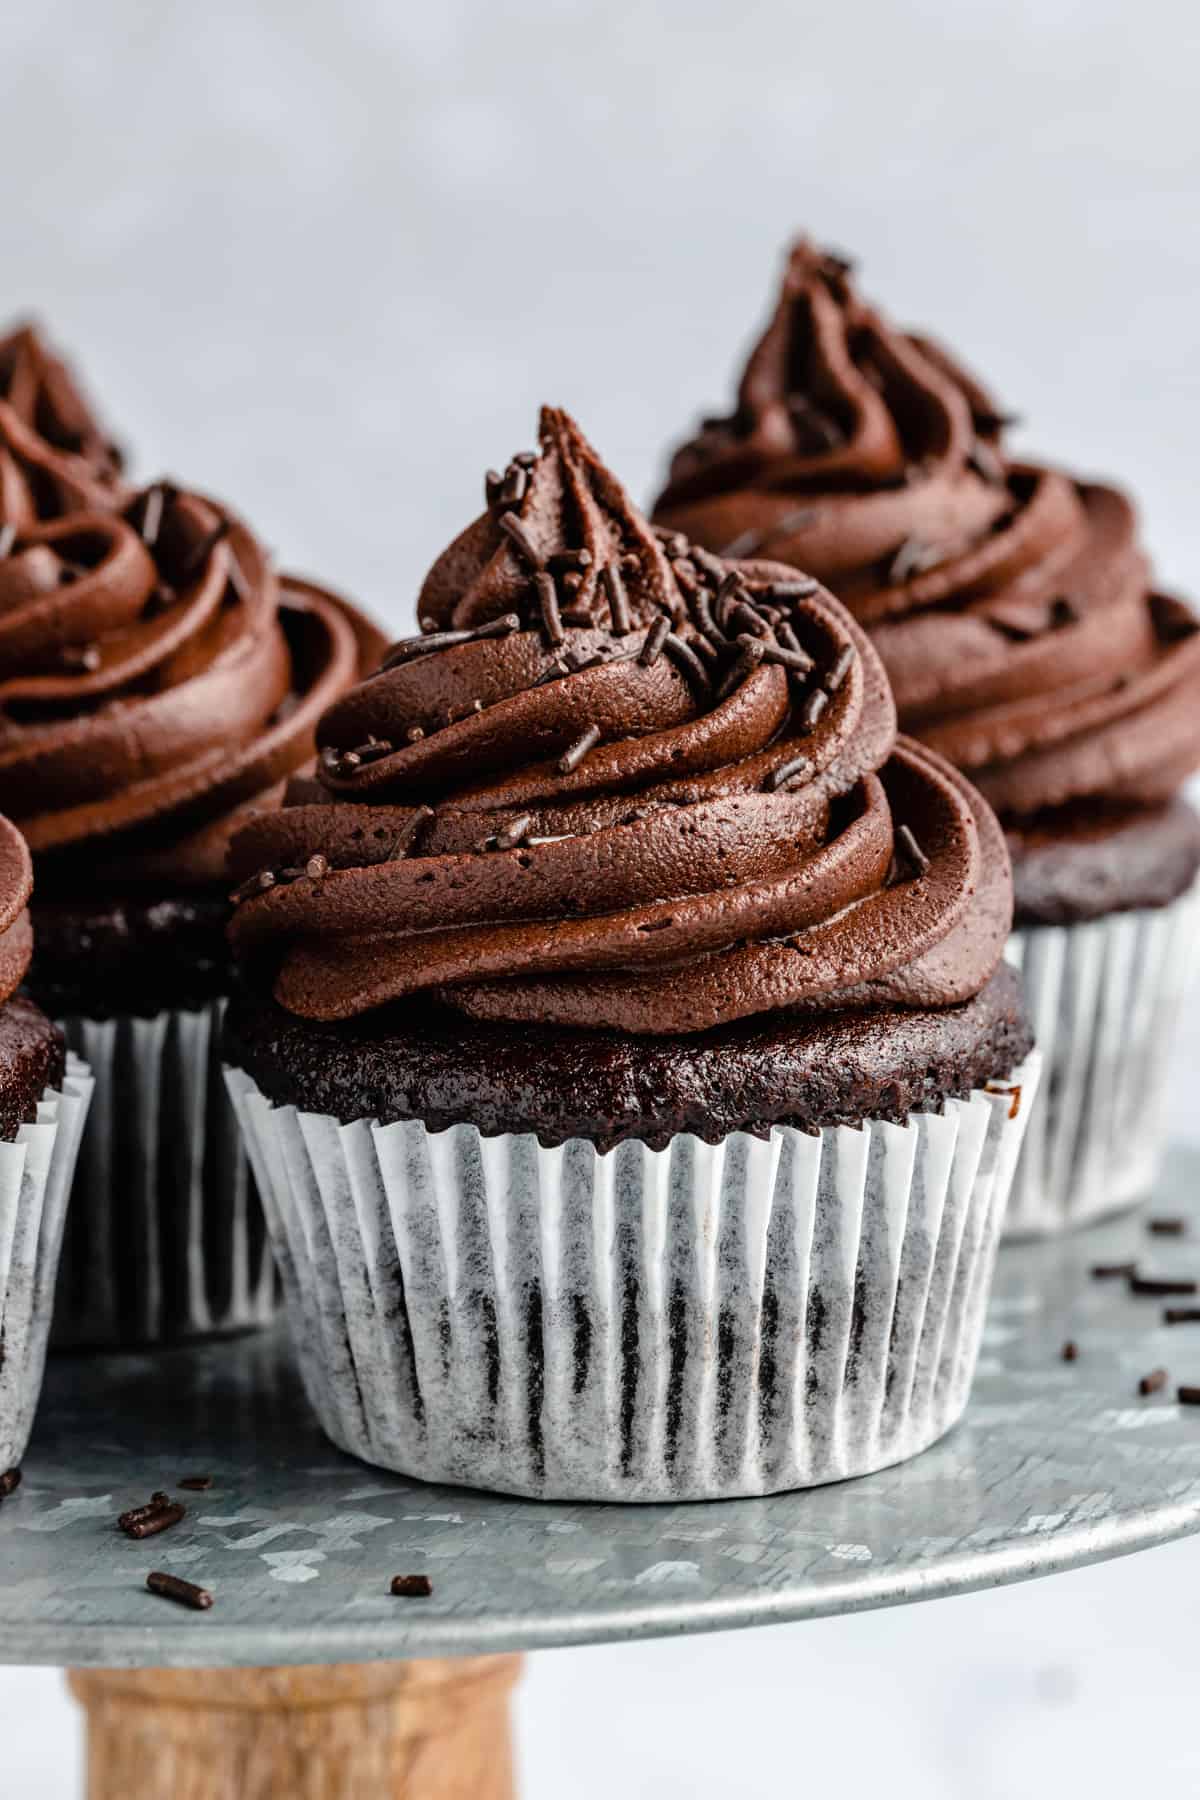
This is the best vegan chocolate frosting that’s velvety, decadent, and so creamy! With only 6 ingredients, it’s easy and fool-proof to make. Spread this vegan buttercream on all of your favourite cakes and cupcakes. It’s perfect for piping, too.
Once you’ve whipped up a bowl of silky smooth, dairy-free chocolate frosting, use it to decorate a batch of fudgy vegan chocolate cupcakes ! Also, try my 4-ingredient vegan buttercream .
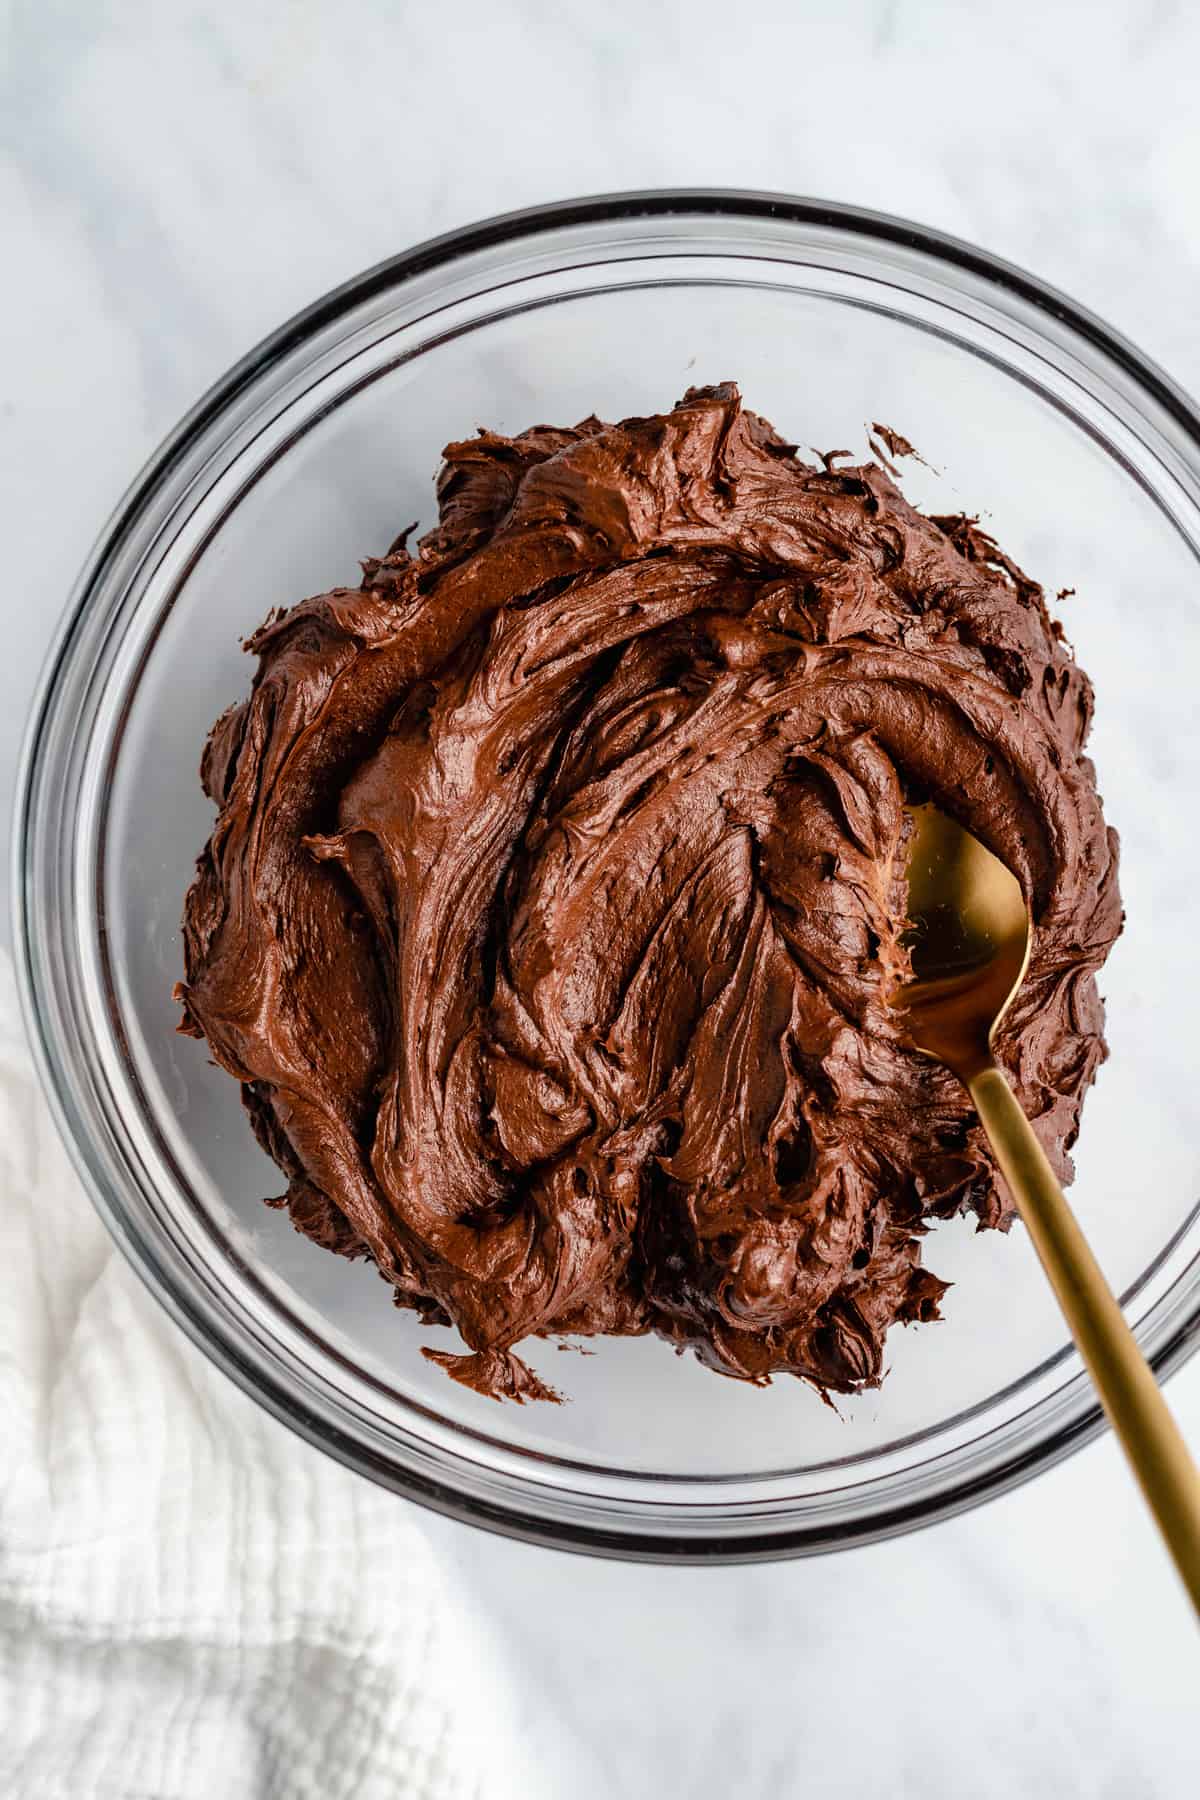
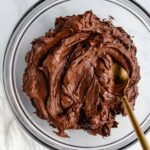
Everything tastes better covered in vegan chocolate frosting. Sometimes I’m in the mood for a simple vegan cream cheese frosting , but nothing beats creamy, fluffy chocolate buttercream made with totally dairy-free ingredients, with all the fudgy sweetness. I’ve been using this chocolate frosting recipe for over 10 years in my vegan chocolate cake recipe . It’s velvety, smooth, chocolatey, and simple to make. P.S. Try not to eat the whole thing before it reaches your cakes, okay?!
What Makes This Vegan Chocolate Buttercream So Good
- Diary-free ingredients. This recipe uses vegan butter and dairy-free milk, mixed with powdered sugar and cocoa powder. That’s it! There are no fancy ingredients, and the texture is smooth and creamy as ever.
- Ready in 10 minutes. And fool-proof, too. The method is also almost exactly the same as making traditional buttercream frosting. All you need is your mixer to create a thick, stable vegan chocolate frosting in minutes.
- Perfect for decorating. I tested many versions of this recipe to make a rich, decadent vegan frosting that’s spreadable AND pipeable. No droopy, weepy, or melted frosting, here!
Notes on the Ingredients
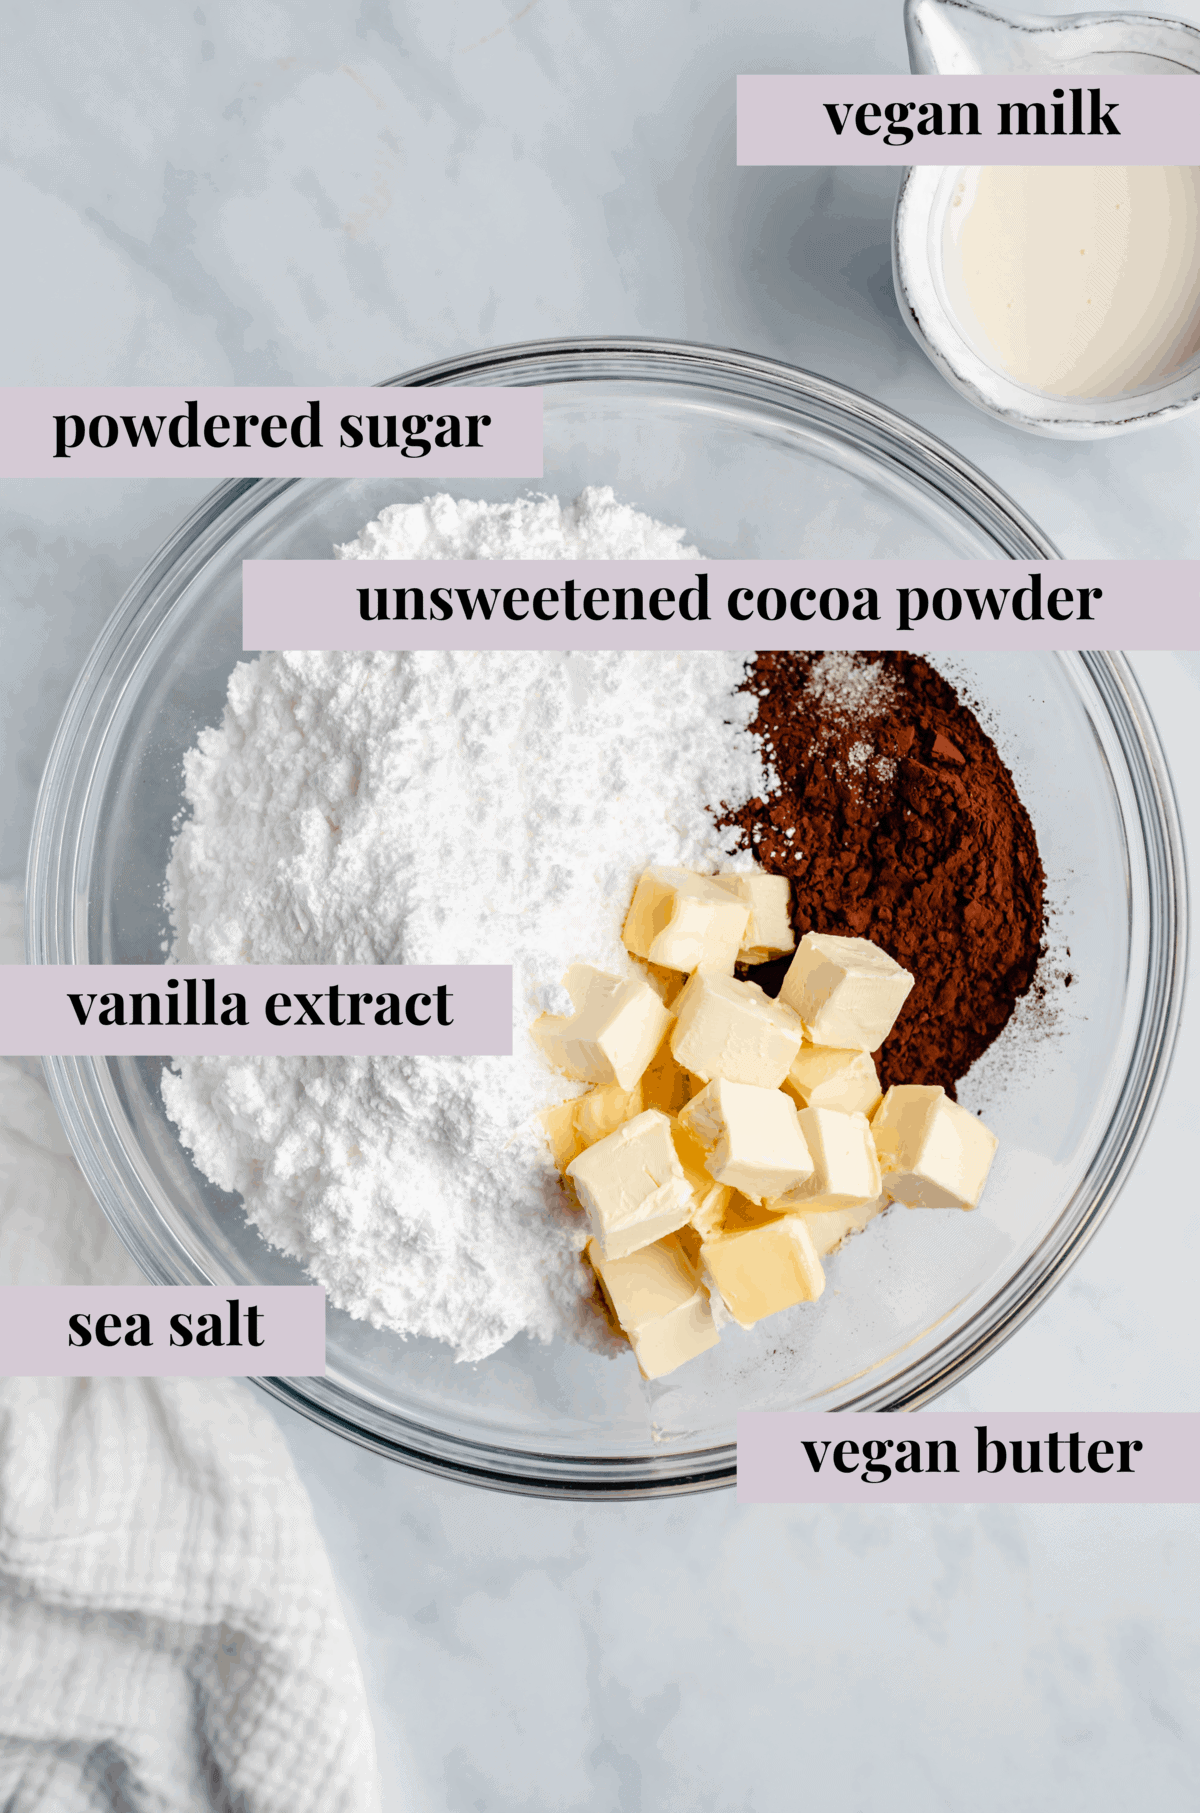
These are the simple ingredients you’ll need to make this fudgy vegan chocolate frosting from scratch. Scroll to the recipe card below the post for the printable recipe with the amounts.
- Unsweetened Cocoa Powder – I recommend using a high-quality unsweetened cocoa powder. This is where all the chocolate flavour comes from!
- Unsalted Vegan Butter – It’s also okay if you use salted vegan butter, just skip the salt below!
- Vanilla Extract – You could also use a different flavouring if you want to add an almond extract, orange extract, or even a chocolate extract.
- Sea Salt – If you’re using kosher or table salt, use less so the frosting doesn’t turn out oversalted.
- Powdered Sugar – Also called confectioner’s sugar (it’s the same thing). You can make your own by just blending any sugar into a fine powder using your blender before adding it to the frosting!
- Vegan Milk – Your choice! Almond, oat, soy milk, all work here. You’ll only need a little to get the perfect consistency.
How to Make Vegan Chocolate Frosting (Step by Step Instructions)
Making vegan chocolate frosting is as easy as whipping the ingredients until they’re smooth, creamy, and fluffy. Afterward, you can adapt the consistency of the frosting as needed. Here’s a quick look at the process:
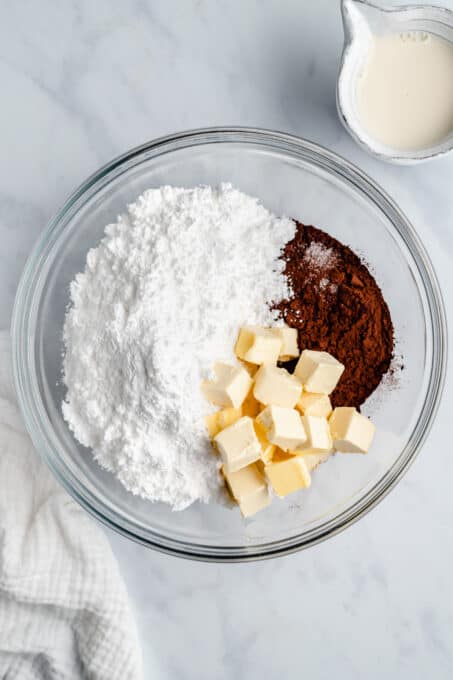
Combine the ingredients.
- Combine the ingredients. First, add the cocoa powder, vegan butter, most of the powdered sugar, vanilla extract, sea salt, and half the vegan milk to the bowl of an electric stand mixer or a hand mixer .
- Mix slowly, then increase the speed. Start mixing at a slow speed, gradually increasing speed until it’s very thick and smooth.
- Adjust the consistency. Add the rest of the powdered sugar a bit at a time until it reaches your desired thickness and consistency. If needed, add in the other half of the milk about 1 tablespoon at a time.
Tips for the Best Vegan Frosting
- Sift the powdered sugar and cocoa powder. Sifting the dry ingredients before making your vegan frosting breaks up lumps. This makes such a tremendous difference to the creamy consistency of the frosting.
- Soften the butter first. Just like butter is the backbone of buttercream recipes, vegan butter gives structure to this vegan chocolate buttercream. The vegan butter should be soft enough to spread but not runny.
- Keep whipping. For the fluffiest frosting, you want to whip the air into the mixture. I prefer using a stand mixer or hand mixer for this recipe, as this can take about 5 minutes.
- Avoid an overly thick frosting. You don’t want the frosting to be runny, but you also want it to spread easily across the top of the cake. If your frosting is too thick, try mixing in a splash of milk.
- For an even richer frosting, similar to vegan chocolate ganache, mix in melted vegan chocolate.
Mix in more powdered sugar, a little at a time, until the consistency thickens. You can also try chilling the frosting in the fridge to help it stiffen up.
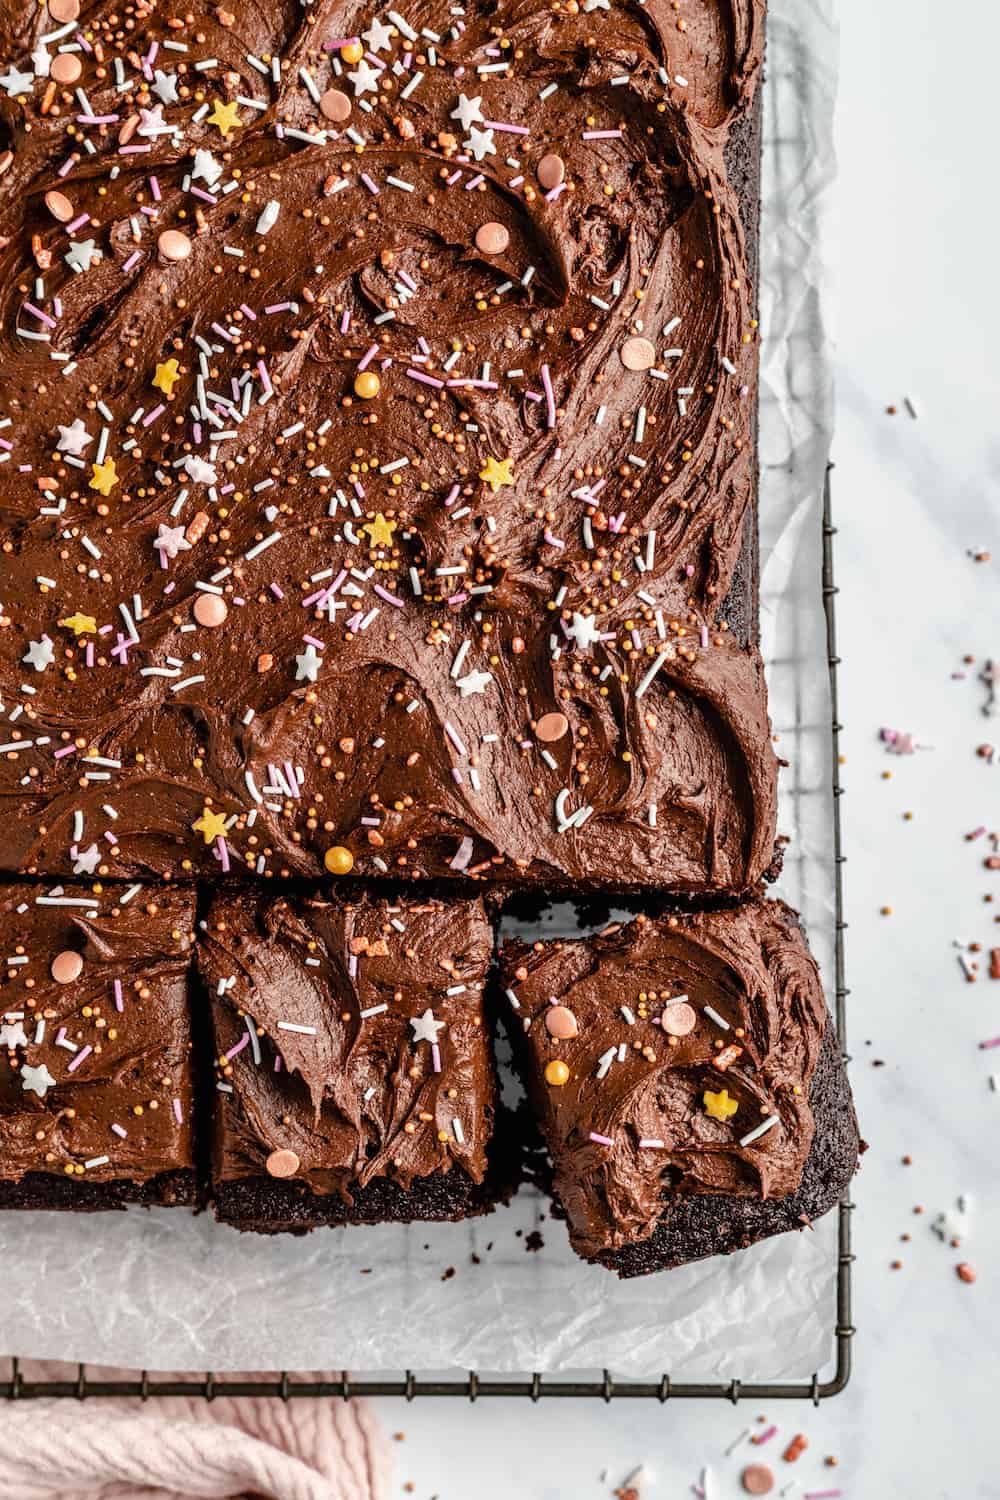
Yes! This vegan frosting is pipeable and spreadable. See the section below for easy ways to use it.
Ways to Use Your Vegan Chocolate Frosting
- Cakes and cupcakes. Spread or pipe this frosting onto a vegan chocolate sheet cake or vanilla sheet cake . I also love to swirl it onto my chocolate mug cake and vanilla cupcakes !
- Brownies and bars. Use this to frost a batch of fudgy vegan brownies .
- Cookies. Chocolate frosting takes these decadent, gooey s’mores cookies even more over the top. Or, spread this frosting over chewy peanut butter cookies .
- As a dip. Pair a bowl of fluffy chocolate frosting with fresh strawberries, sliced apples, or vegan lady fingers for dipping.
Storage and Freezing
- Store at room temperature. With its stable, plant-based ingredients, you can store this vegan frosting at room temperature for up to 3 days. If you want to store it longer than that, keep it in the fridge for a couple of weeks or the freezer for up to 3 months.
- Freeze it. Freeze the frosting in an airtight container or sturdy freezer bag. Let it thaw overnight in the fridge before you plan to use it for the smoothest, ready-to-use vegan frosting.
More Vegan Dessert Recipes
- Chocolate Lava Cake
- Avocado Chocolate Mousse
- Chocolate Mousse Pie
- Double Chocolate Chunk Cookies
- Brownie Cookies
Ingredients
- 1 cup unsweetened cocoa powder
- ½ cup unsalted vegan butter , (softened) or if using salted, don’t use the sea salt below
- 1 teaspoon vanilla extract
- pinch of sea salt
- 2 ½ to 3 cups powdered sugar
- ⅓ cup vegan milk , plus 1 tablespoon extra if needed for consistency
Equipment
- Stand mixer
Instructions
- Add the cocoa powder, vegan butter, 2 ½ cups of the powdered sugar, vanilla extract, sea salt and half the vegan milk to the bowl of an electric stand mixer or a hand mixer.
- Start mixing it together at slow speed, gradually increasing speed until it’s very thick and smooth.
- Add the ½ cup of the extra powdered sugar at a time until it reaches your desired thickness and consistency. If needed, add in the other half of the milk about 1 tablespoon at a time.
Notes
- Sift Your Powdered Sugar : Be sure to sift your powdered sugar before making your vegan frosting! This makes such a tremendous difference to the creamy consistency of the frosting.
- Soften First: Make sure your vegan butter is soft enough to spread but not runny. This is the base for the vegan chocolate frosting texture.
- Keep Whipping: For the fluffiest frosting, you want to whip the air into the mixture. I prefer using a stand mixer because this can take about 5 minutes!
- To Avoid Thick Frosting : You don’t want the frosting to be runny, but you also want it to spread easily across the top of the cake. If your frosting turns out to be too thick, try adding a splash of milk to it.
Vegan Chocolate Frosting (6 Ingredients)
Equipment
- Stand mixer
Ingredients
- 1 cup unsweetened cocoa powder
- ½ cup unsalted vegan butter (softened) or if using salted, don’t use the sea salt below
- 1 teaspoon vanilla extract
- pinch of sea salt
- 2 ½ to 3 cups powdered sugar
- ⅓ cup vegan milk plus 1 tablespoon extra if needed for consistency
Instructions
- Add the cocoa powder, vegan butter, 2 ½ cups of the powdered sugar, vanilla extract, sea salt and half the vegan milk to the bowl of an electric stand mixer or a hand mixer.
- Start mixing it together at slow speed, gradually increasing speed until it’s very thick and smooth.
- Add the ½ cup of the extra powdered sugar at a time until it reaches your desired thickness and consistency. If needed, add in the other half of the milk about 1 tablespoon at a time.
Video
Notes
- Sift Your Powdered Sugar : Be sure to sift your powdered sugar before making your vegan frosting! This makes such a tremendous difference to the creamy consistency of the frosting.
- Soften First: Make sure your vegan butter is soft enough to spread but not runny. This is the base for the vegan chocolate frosting texture.
- Keep Whipping: For the fluffiest frosting, you want to whip the air into the mixture. I prefer using a stand mixer because this can take about 5 minutes!
- To Avoid Thick Frosting : You don’t want the frosting to be runny, but you also want it to spread easily across the top of the cake. If your frosting turns out to be too thick, try adding a splash of milk to it.
Nutrition
Vegan Chocolate Frosting (6 Ingredients) https://jessicainthekitchen.com/vegan-chocolate-frosting-recipe/ March 11, 2021
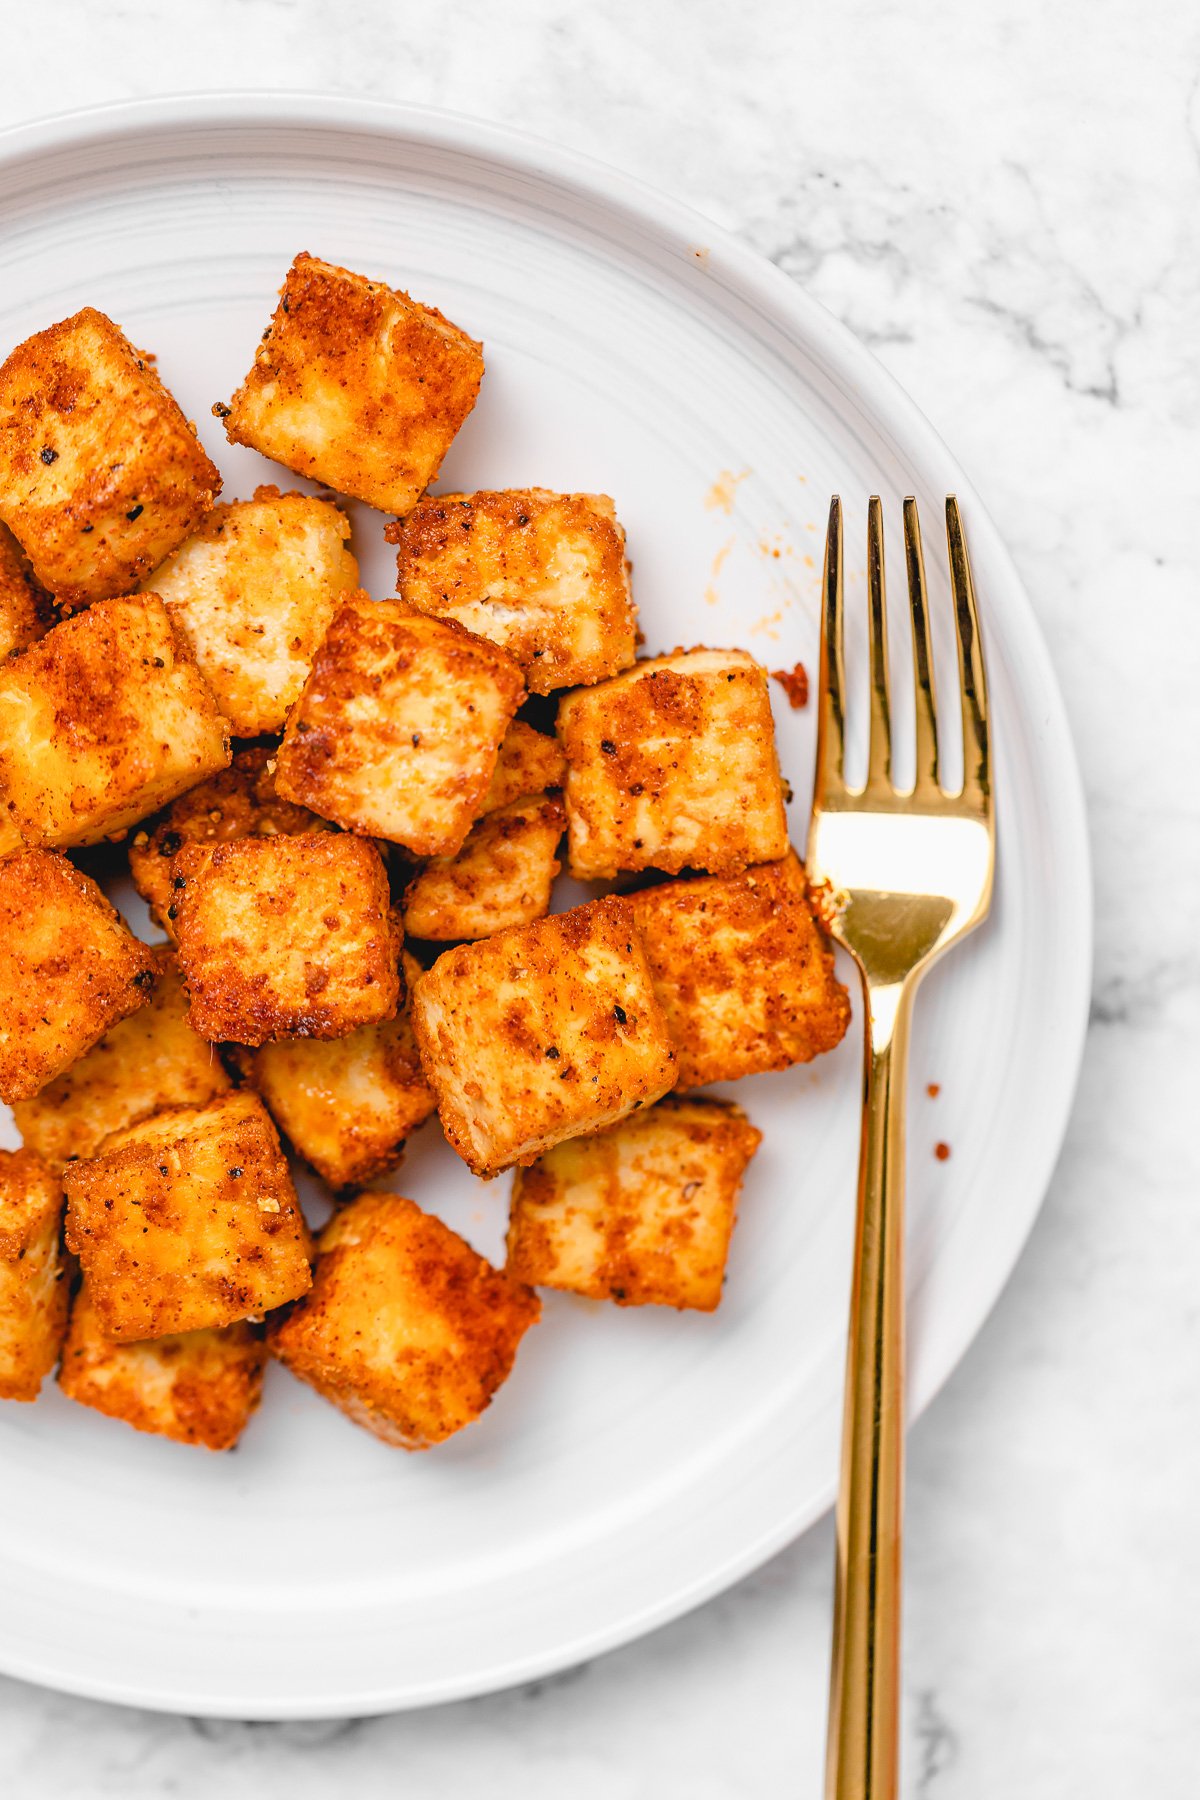
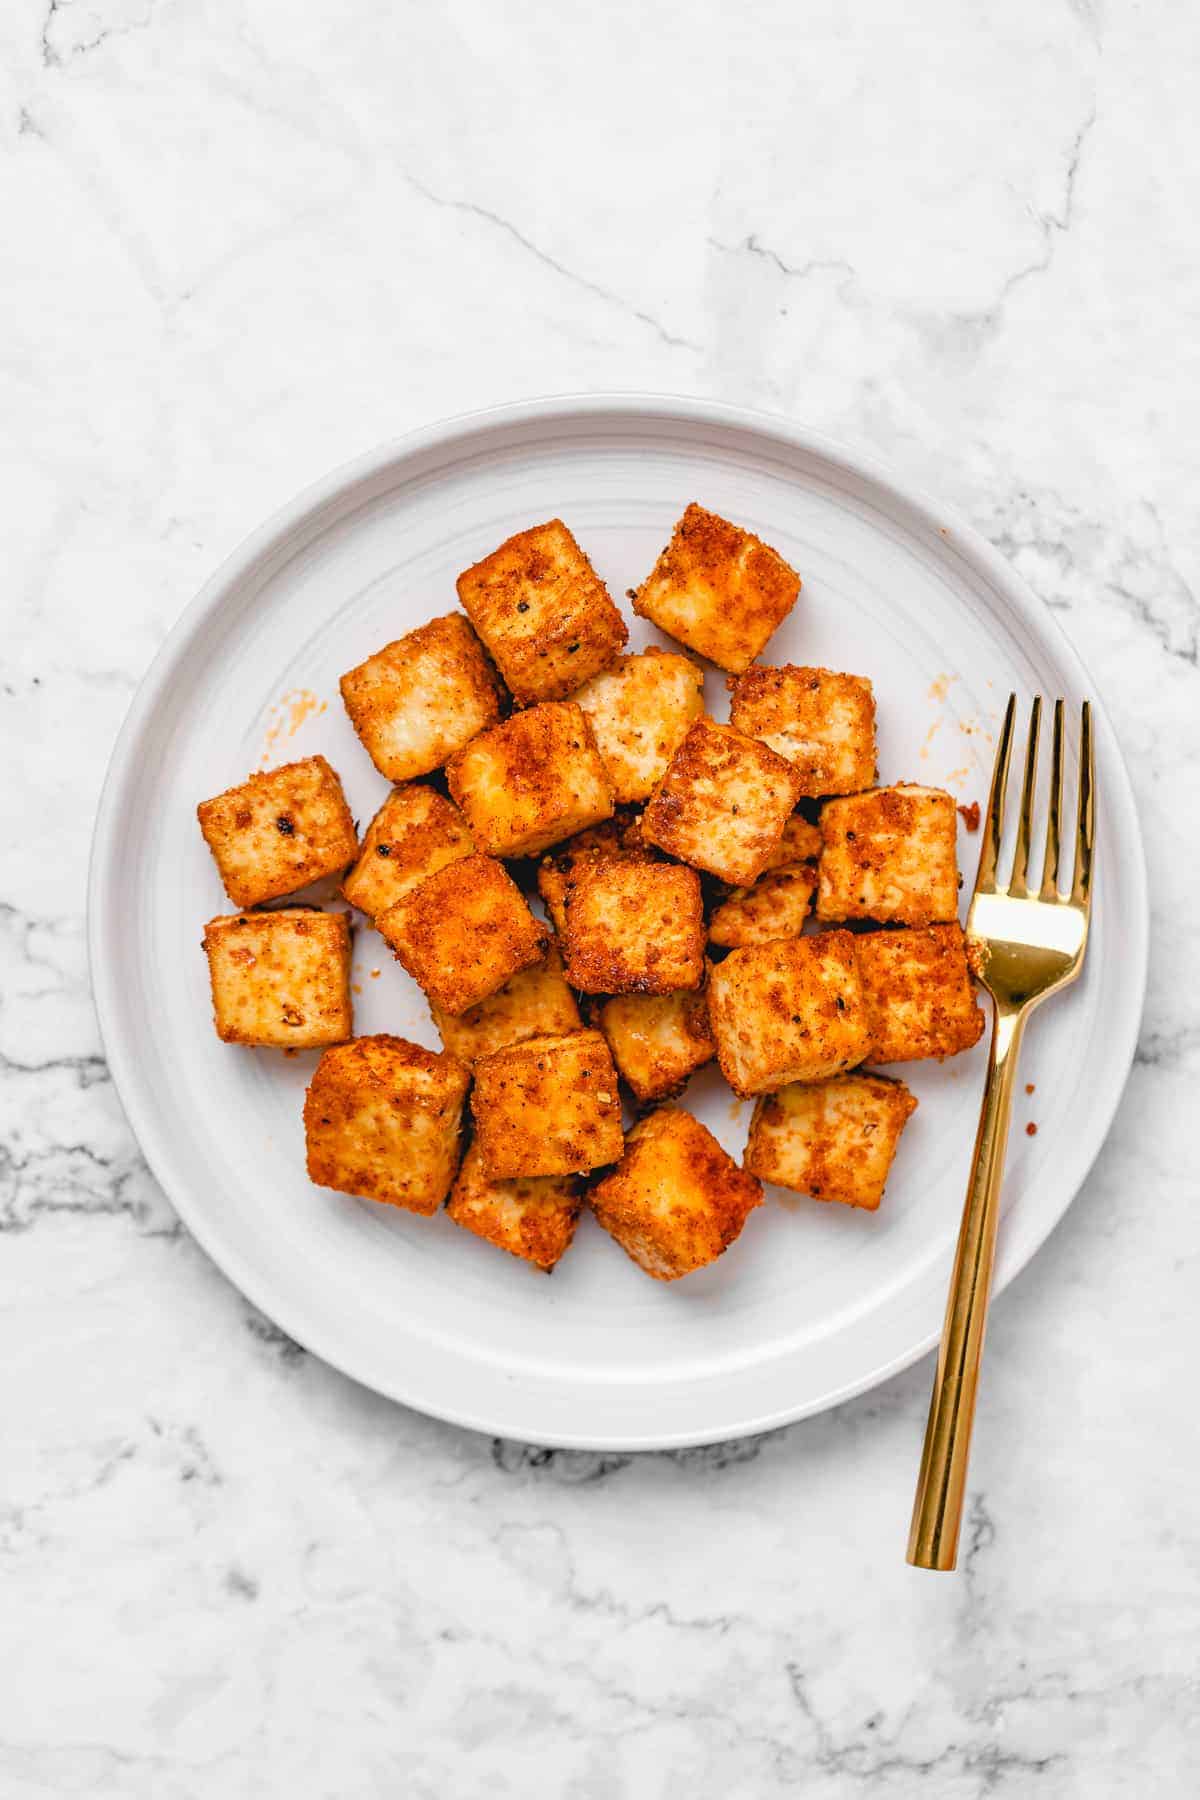
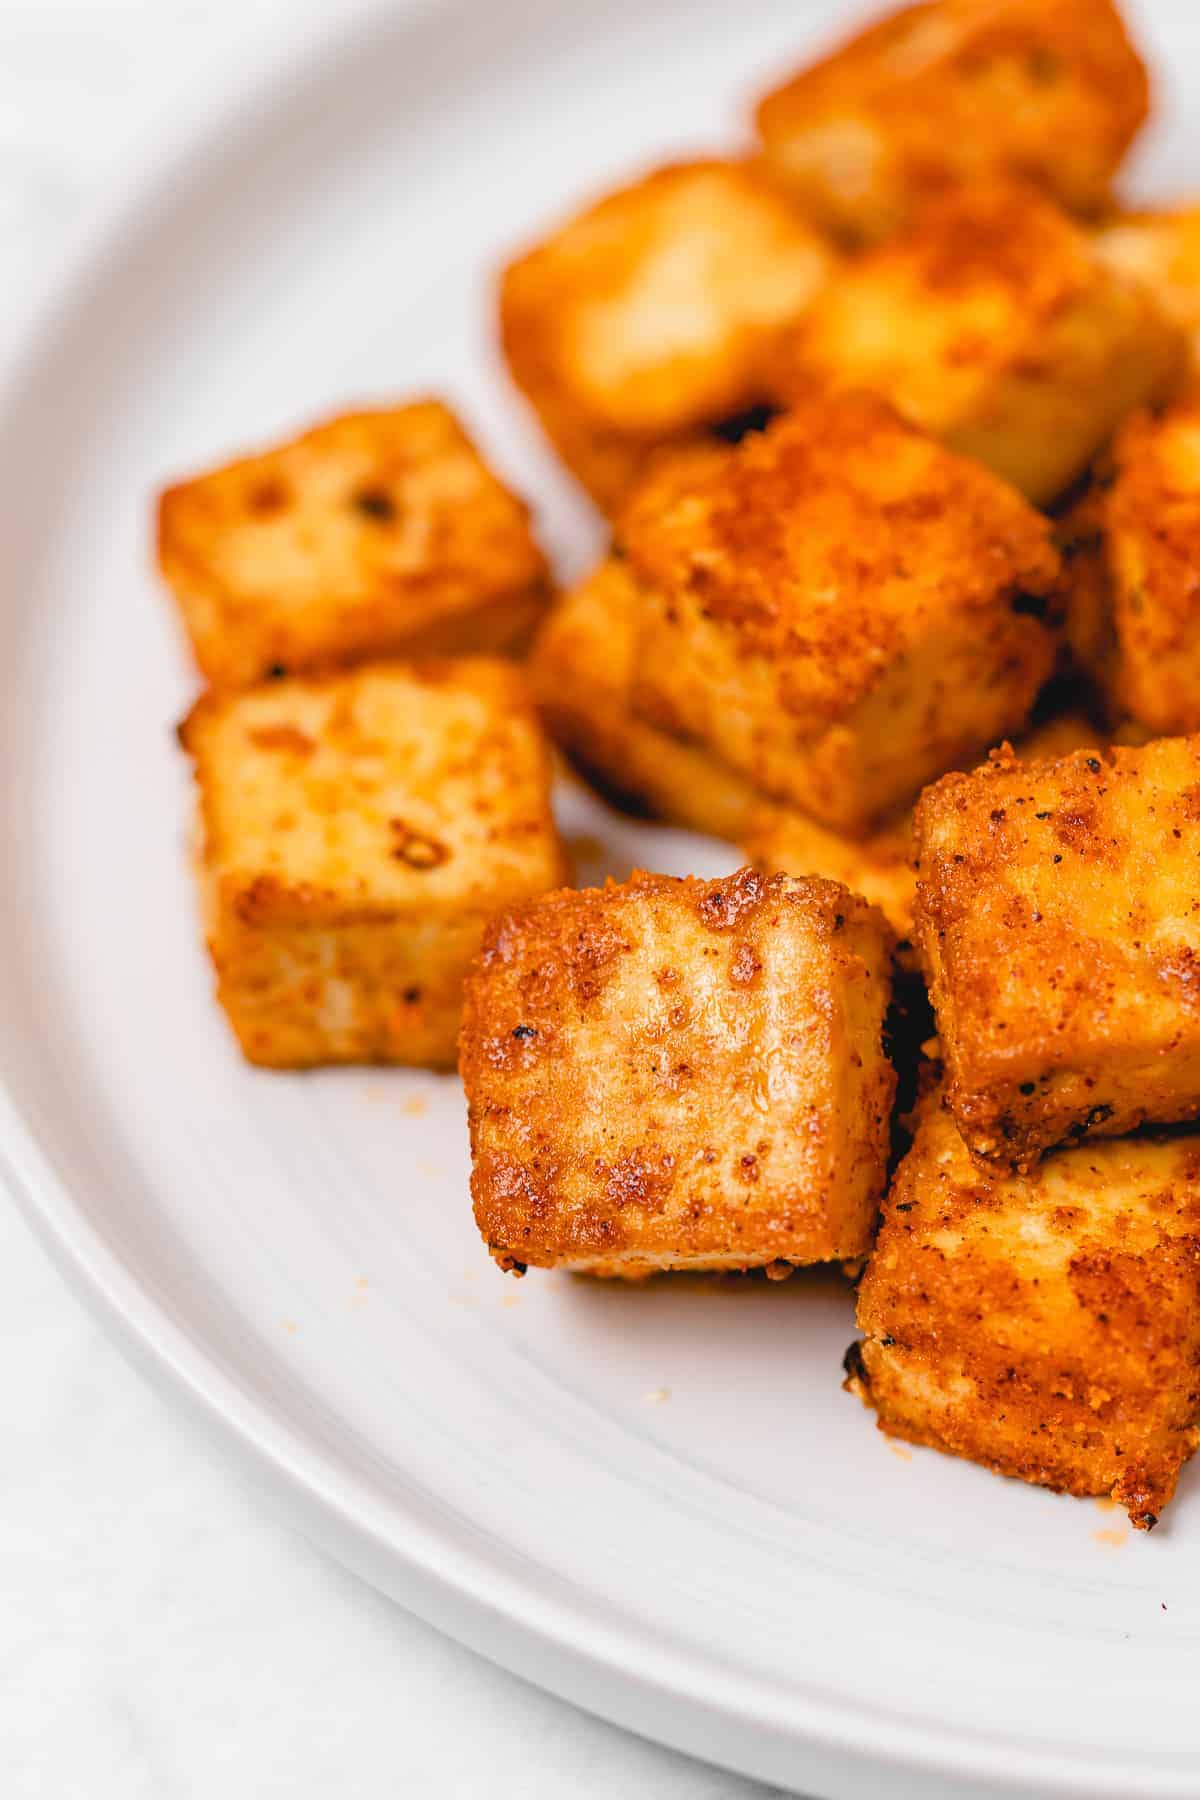
This easy baked tofu is one of the easiest and best tofu dishes you’ll ever make! It’s perfect for meal prep, has a great texture and flavour, and comes out beautifully crispy in just 20 minutes.
Tofu is one of the best vegan proteins out there, and this baked tofu is the easiest way to make crispy tofu with minimal work! As I type this, I realize: how do we not have a baked tofu recipe on the blog already?! I have every other way to make tofu: Air fryer tofu , tofu in a divine orange sauce , stovetop crisped up tofu — even slow cooker tofu !
Why This Crispy Baked Tofu Recipe Works So Well
- Simple method. I’ll show you how to press tofu (a crucial step), how to marinate it, and then bake it so it’s crispy.
- The ultimate meal prep recipe. Cook once, and enjoy this baked tofu in so many meals! I include easy ideas below.
- Customize it any way you’d like. Change up your tofu marinade and seasonings, and you’ll never run out of ways to prepare this recipe. It’s as versatile as it is delicious.
What is Tofu?
If you’re new here, you may not know that tofu is a loved ingredient in these parts. I have a long and thorough Tofu 101 post that explains what tofu is, the right type for any recipe, how it’s made, and so many tips on how best to prepare it.
I mentioned baking tofu and gave a quick go-to recipe, but I know that a full recipe is always way more helpful for you guys.
Ways to Use It In Recipes
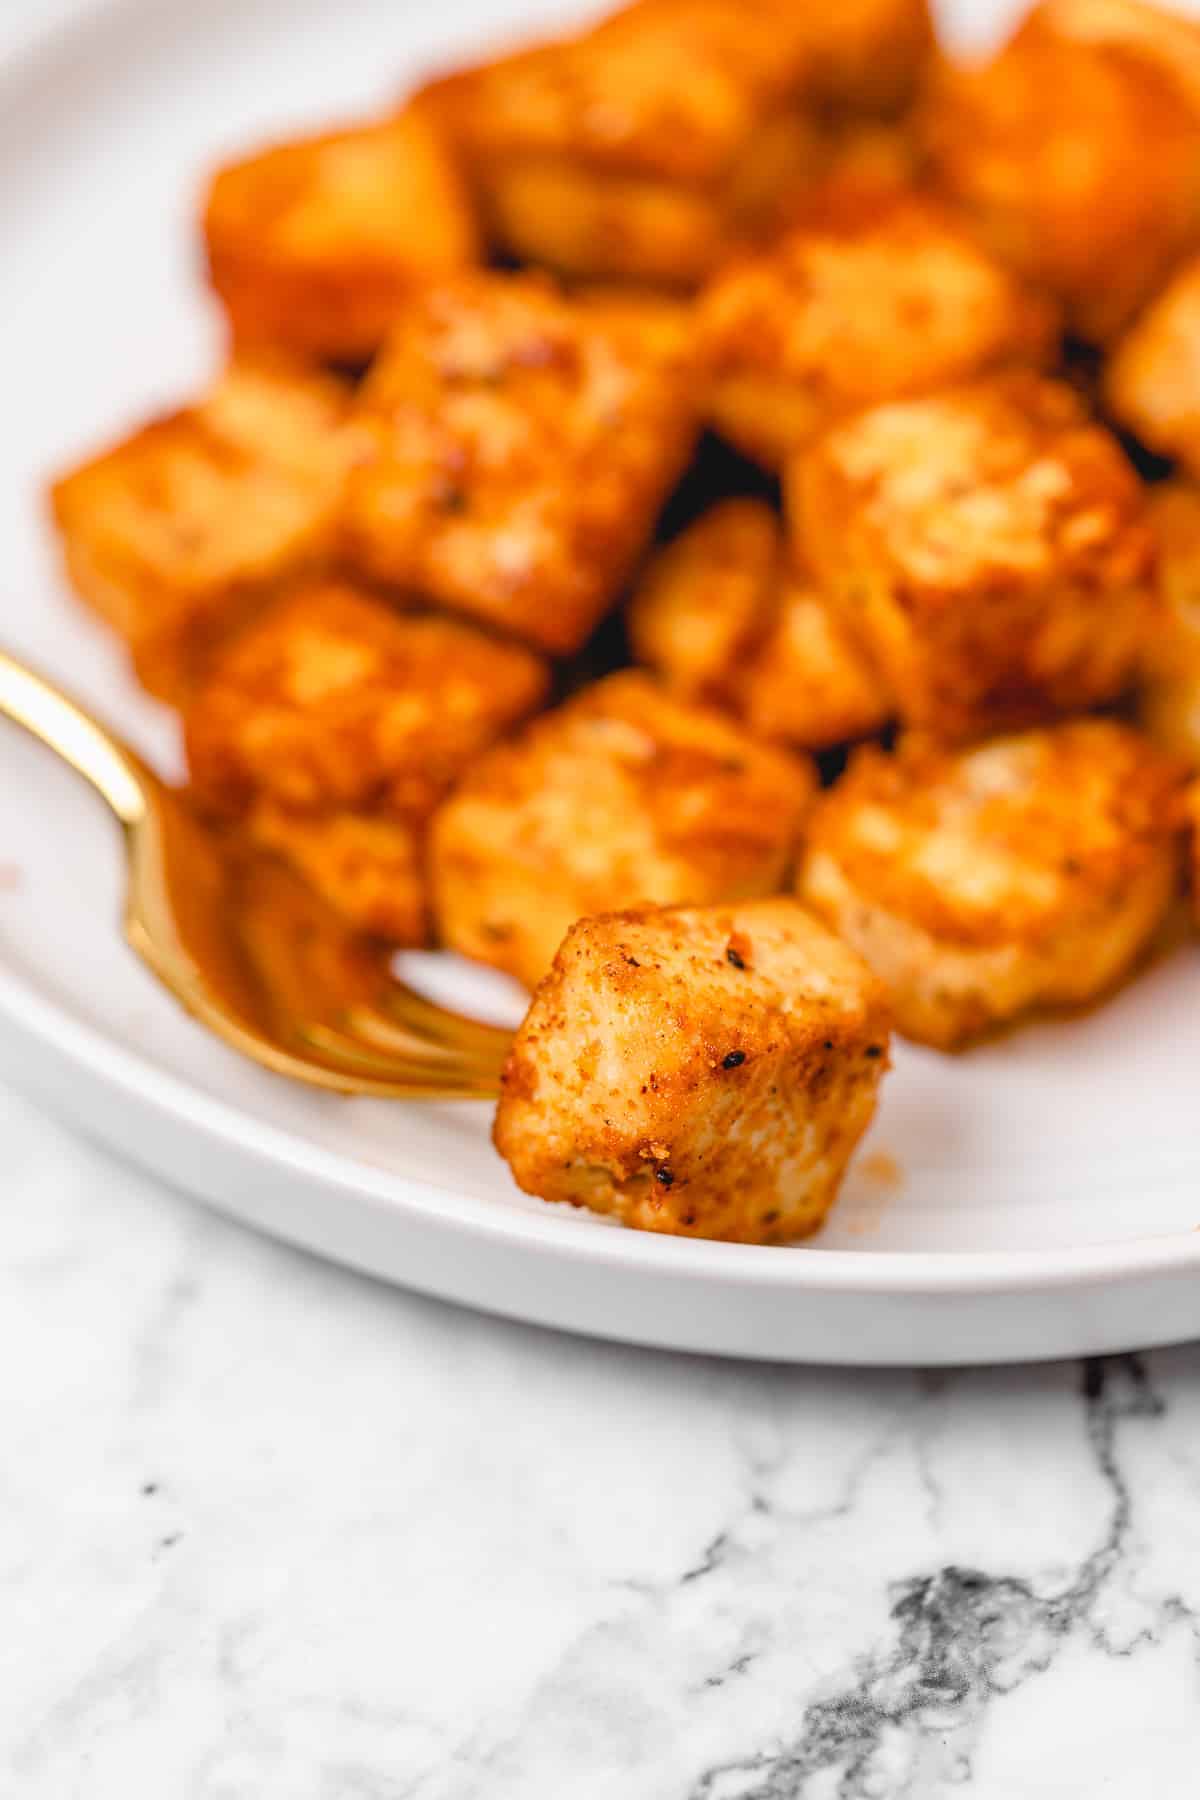
This baked tofu couldn’t be easier to make. It’s as simple as pressing the tofu, marinating it, and baking it. It’s the ultimate meal prep recipe. You can make so much of it at once and enjoy it in a multitude of ways:
- By itself
- Tossed in a delicious Thai peanut sauce
- As a main ingredient with a side of rice or baked potatoes
- On a salad
- In a sandwich
- And so many more ways!

Notes on the Ingredients
- Tofu – I always use firm or extra firm for baked tofu. Be careful not to use silken tofu here — I made this mistake for years! Firm or extra firm ensures a divine texture and tofu that holds properly.
- Light soy sauce – I love using light soy sauce so that I can get more marinade, without too much soy sauce saltiness overpowering it. I’ll also use liquid aminos or even tamari because it really gives the inside of the crispy baked tofu a great flavour. It soaks right in and takes like a minute to marinate. You could be like my husband and marinate overnight, too.
- Oil – I love using olive oil for the marinade here. You can also keep the recipe oil-free and still get crunchy baked tofu.
- Cornstarch – My not-so-secret ingredient for crispy tofu! It helps to wick out excess moisture to help the baked tofu texture.
- Mix of seasonings – I love a mix of garlic powder, onion powder, paprika, sea salt, and black pepper. Feel free to use your favorites, of course! You could even use our Jamaican Jerk sauce.
Try These Other Seasoning Ideas
- Use a marinade. Try marinating the tofu for even more flavor. This is great to do in advance.
- Make it spicy. Make spicy Korean gochujang tofu or add a pinch of cayenne pepper, chili flakes, or chili powder to the seasoning you’re using.
- Add a sauce afterward. Once you’ve crisped the tofu in the oven, toss it with sweet and sour sauce or teriyaki sauce .
How to Make Baked Tofu
First, be sure to press your firm tofu before you chop it up! Chop the pressed tofu into any shape you please. Sometimes I enjoy this recipe with cute triangles, but my husband prefers strips. Just watch that the strips don’t burn if they are thin.
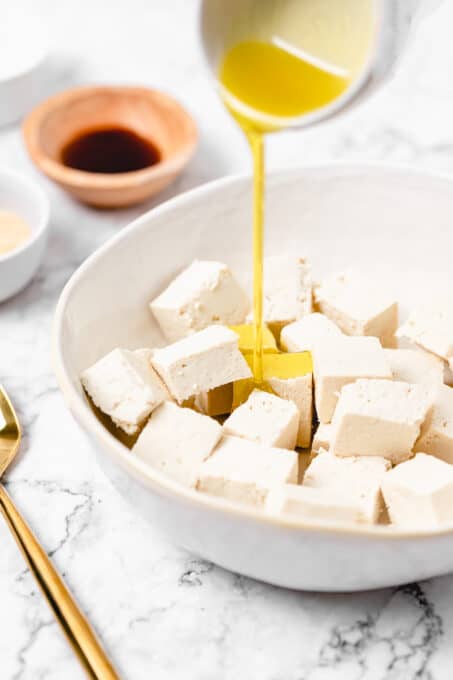
Toss with oil and soy sauce.
- Add marinade. Then, mix the chopped tofu with your light soy sauce and olive oil. Toss to coat everything evenly.
- Season the tofu. Now, add in your other seasonings — I prefer a mix of cornstarch, garlic powder, onion powder, paprika, sea salt, and black pepper — and toss again. It should cling to the firm tofu.
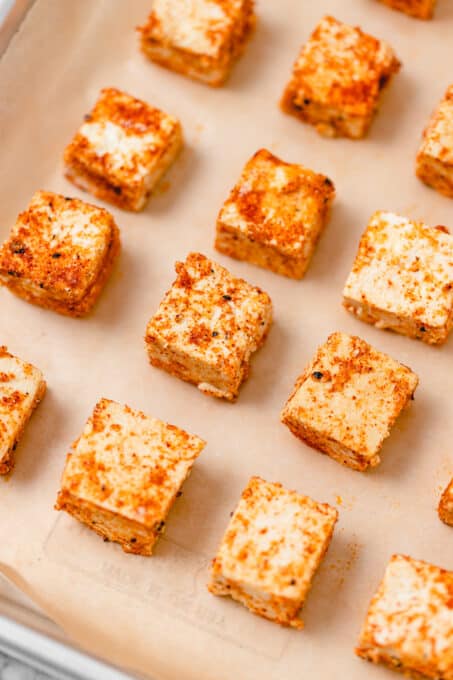
Spread in an even layer.
- Bake. Next, spread the marinated tofu pieces on a baking sheet with parchment paper. Bake at 400ºF for 20 minutes until they’re golden brown and crispy, flipping halfway through cooking. Let the baked tofu cool briefly before adding to salads, soups, or just popping it in your mouth plain!
- Press the tofu first. If you’ve had soggy baked tofu before, it could be because it wasn’t pressed enough before chopping! Every tofu press is different, but you usually need at least 12 minutes to get all the excess water out.
- Keep it oil-free. I love to use a little olive oil in my marinades. If you’re trying to ditch the oil, skip it! It shouldn’t greatly change the crispy texture.
- Use firm or extra firm. Silken tofu is delicious, but this isn’t the recipe for it. If you want firm cubes of tofu, you’ll need to use firm or extra firm. Either works!
- Leave space between the tofu pieces. The key to crispy oven-baked tofu that rivals the texture of fried tofu is to leave ample room on the pan. If you overcrowd the baking pan, the tofu will steam rather than crisp.
Storing and Reheating
- Refrigerate. Store this baked tofu in an airtight container in the fridge. It’ll be ready to use in meals for up to 4 days.
- Reheat. Warm leftovers in the oven or toaster to revive the crispiness. You could also use your air fryer .
- Freeze. Freezing can make cooked tofu more chewy, but if you don’t mind the change in texture, you can freeze your baked tofu for up to 3 months. Thaw it in the fridge and crisp it back up in the oven for best results.
More Easy Tofu Recipes
- General Tso Tofu
- Crispy Cajun Tofu Salad with Maple Mustard Dressing
- Vegan Thai Red Curry
- Orange Glazed Tofu
Ingredients
- 1 lb block extra firm tofu , pressed for 30 minutes then cut into 1” cubes, (16 oz.)
- ½ tablespoon light soy sauce , or liquid aminos
- 1 tablespoon olive oil or any oil
- 2 teaspoons cornstarch
- 1 teaspoon garlic powder
- ½ teaspoon onion powder
- 1 teaspoon paprika
- ½ teaspoon sea salt
- ¼ teaspoon ground black pepper
Instructions
- Preheat oven to 400°F/200°C. Line a baking sheet with a silicone mat and set it aside.
- In a medium size bowl place the pressed and cubed tofu. Add in liquid aminos and olive oil and toss to coat. Add in all of the other seasoning ingredients (the cornstarch, garlic powder, onion powder, paprika, sea salt and black pepper) and toss to thoroughly combine.
- Place tofu on lined baking sheet, ensuring to give each piece space so that it doesn’t touch. Cook for 20 minutes, shaking and flipping the tofu at 10 minutes, then continuing to cook.
- Remove after tofu is cooked. Allow to cool for a few minutes then serve. Enjoy!
Notes
- Press the tofu first: If you’ve had soggy baked tofu before, it could be because it wasn’t pressed enough before chopping! Every tofu press is different, but you usually need at least 12 minutes to get all the excess water out.
- Keep it oil-free: I love to use a little olive oil in my marinades. If you’re trying to ditch the oil, skip it! It shouldn’t greatly change the crispy texture.
- Use firm or extra firm: Silken tofu is delicious, but this isn’t the recipe for it. If you want firm cubes of tofu, you’ll need to use firm or extra firm. Either works!
