Learn how to make a flaky Vegan Apple Pie from scratch! There’s no better way to use up those freshly-picked apples than to make a homemade apple pie!
I don’t think there’s a fall dessert that is any more classic than a sweet apple pie. Missing out on apple pie would be like missing out on fall. What else would you place next to the Vegan Pumpkin Pie and Pecan Pie at Thanksgiving?!
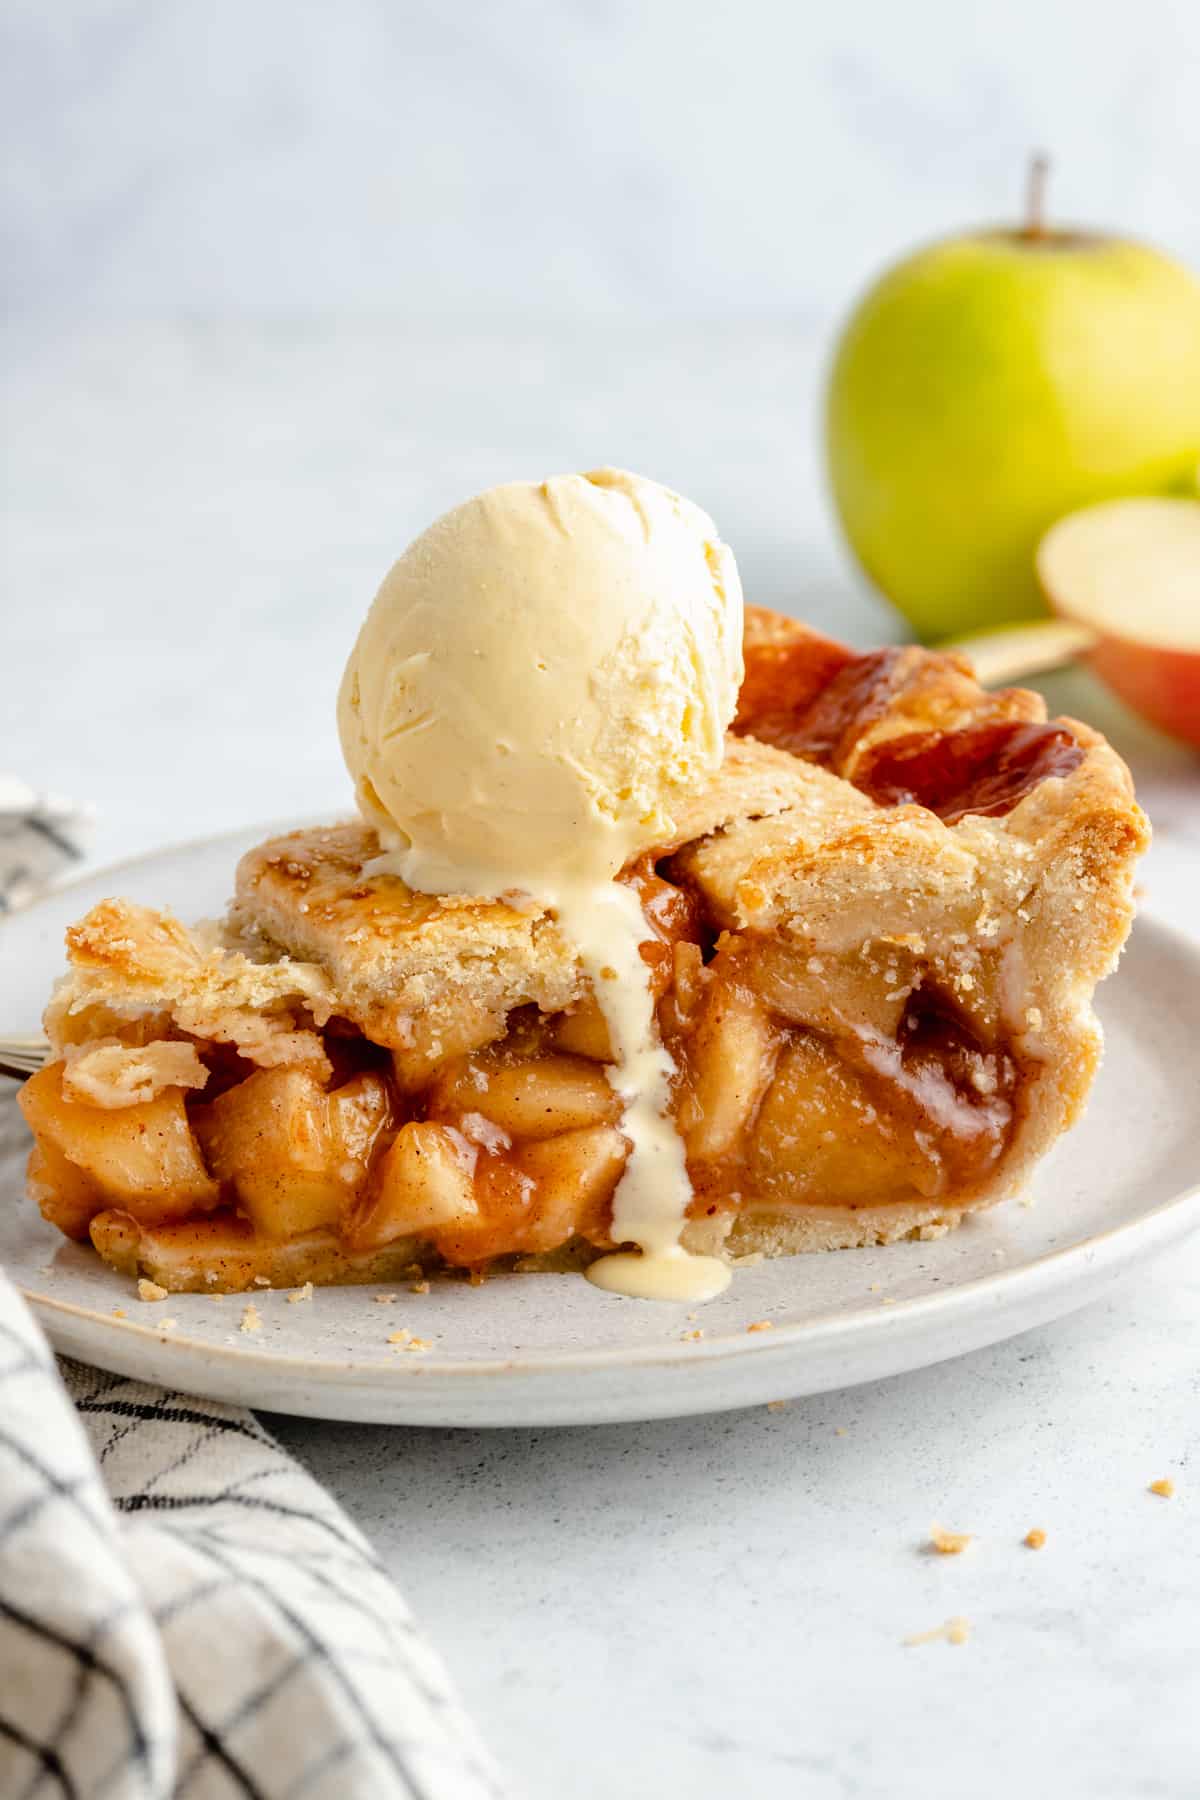
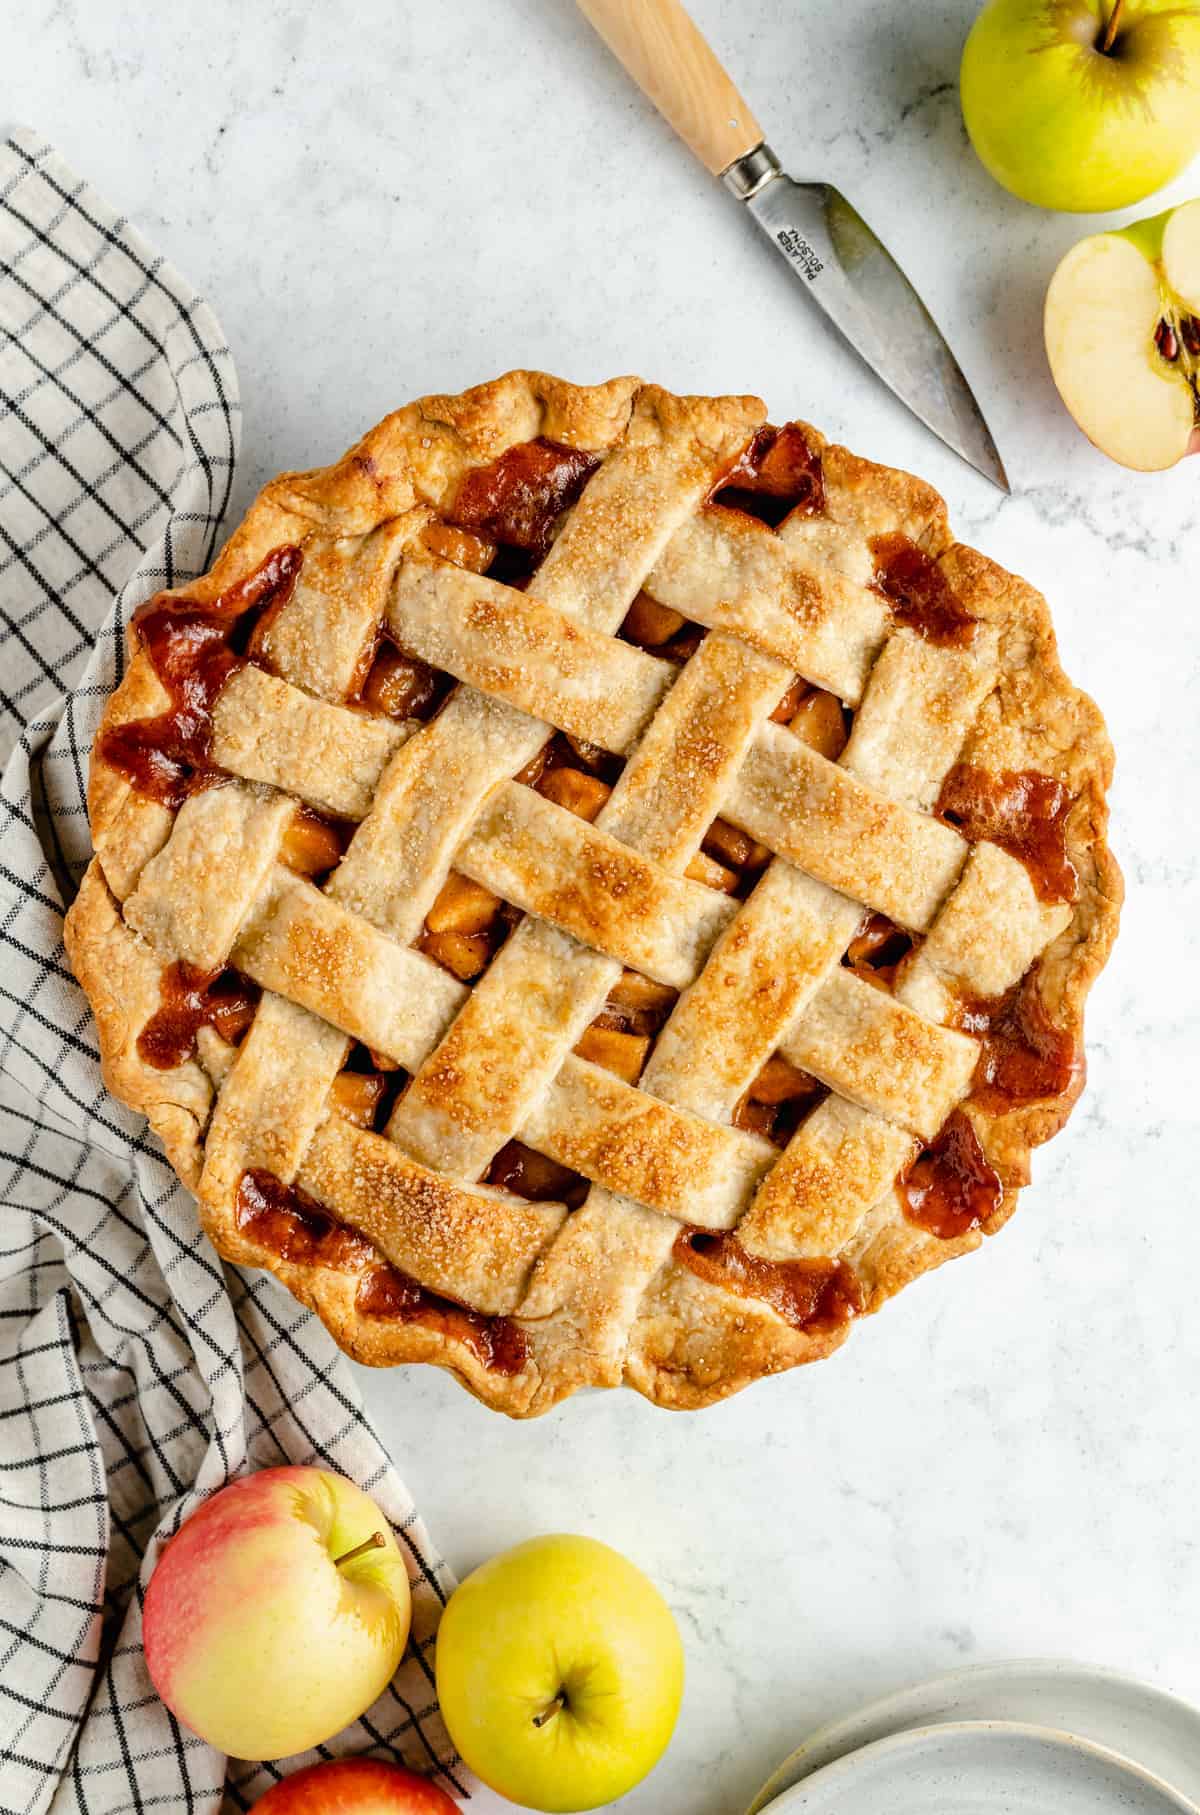
Whether it’s Thanksgiving or not, though, enjoying a slice of apple pie fresh from the oven is a must at least once in the next few months. This vegan version has an ultra-flaky, “buttery” crust and a sweet cinnamon-nutmeg apple filling. Yum!

Notes on Ingredients
I don’t know about you, but I can’t wait any longer so let’s get started! Here’s what to gather up for a vegan apple pie:
- Pie Crust: Use 2x this Homemade Vegan Pie Crust – one for the base and the other for the top lattice work.
- Apples: I used a mix of 1/3 golden delicious and 2/3 honey crisp. Ideally you’re looking for some tartness, and a lot of sweetness/neutral apples if you can’t find these specific types. If you do switch this up, increase or decrease the sugar accordingly.
- Lemon Juice: This balances out the sweetness of the apples and really boosts all the flavours.
- Sugar: I like to use cane sugar in this recipe, brown sugar works too!
- Spices: Use a mix of ground cinnamon and nutmeg.
- Salt: I like to use sea salt in this pie.
- Butter: Use whatever brand of vegan butter that you like.
- Vanilla Extract: For a touch of extra sweet flavor.
- Cornstarch Slurry: Mix cornstarch and water to create a cornstarch slurry.
Can I Use Frozen Pie Crustfor Apple Pie?
Sure! Sometimes I like to make my Vegan Pie Crust ahead of time and freeze it until I’m ready to make the actual apple pie. It saves a lot of time!
What Kind of Apples are Best for Apple Pie?
I used a mix of 1/3 golden delicious and 2/3 honey crisp apples for this recipe. Those are my favorites, but you can also use granny smith or gala apples if you want. You could also do all honey crisp, all gala, etc, if you don’t want to do a mix.

How to Make Vegan Apple Pie
Please note that this is important information on the ingredients and instructions and the FULL recipe with amounts and details can be found DOWN BELOW (scroll to it) in the recipe card.
Make the Filling
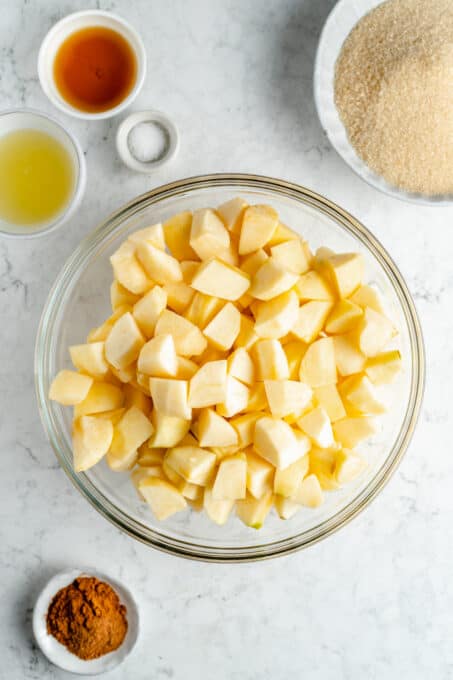
Combine the Filling Ingredients: In a large bowl, add in your chopped apple pies. Pour over the lemon juice, sugar, ground cinnamon, nutmeg and sea salt and stir to combine thoroughly.
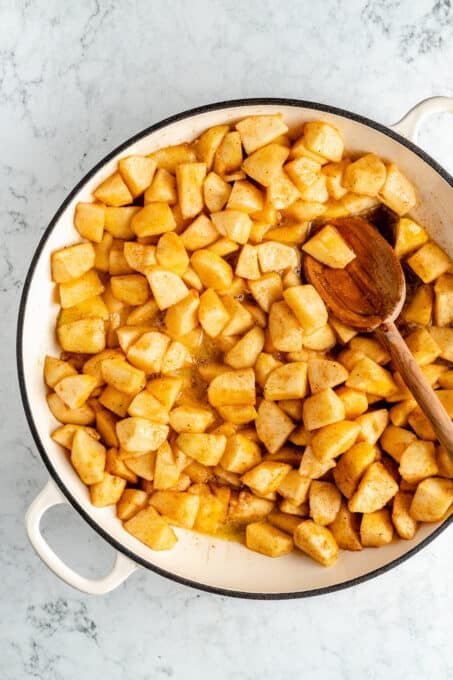
Melt the Butter: Heat a large pan to medium heat. Melt the vegan butter. Once melted and slightly sizzling, add in the apple mixture.
Cook the Apples: Reduce heat to medium low and cook down the apples for 7-8 minutes, until slightly tender, stirring occasionally. At the end of the 7-8 minutes, add in the cornstarch slurry and the vanilla extract and stir for one minute then remove from the heat.
Let Cool: Remove pan from heat and allow the apples to cool, about 15-20 minutes. You can preheat your oven in the meantime and/or make your pie crust while it’s cooking. Remember you need two – one for the base, and another for the top.
Make the Vegan Apple Pie
Preheat Your Oven to 425°F/220°C: Shape out your pie crust for your base into your pie dish, crimping the edges.

Fill the Pie Crust: Add the apples into the base of the pie crust (using a 9” pie dish). Using a spatula, smooth over the top.

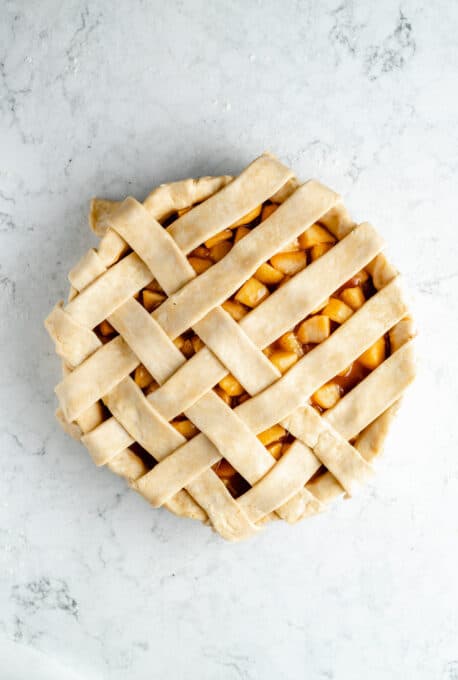
Prepare the Second Layer of Pie Crust: Remove the second pie crust from the fridge for about 5 to 10 minutes, or according to the recipe you’re using or directions of the pie crust. Using a rolling pin , roll out the second pie crust into a disc. Slice into thin rectangular strips.
Form the Lattice: Layer them in a lattice work pattern on top of the pie crust vertically, and then alternating every strip, add a horizontal strip until the entire top is evenly covered. Snip off the edges and pinch down into the bottom pie crust to connect them seamlessly.
Use a Vegan Egg Wash: Brush with a vegan egg wash such as a vegan egg replacement like just egg. Sprinkle some extra sugar all over the top of the pie.
Bake the Pie: Place your pie in the oven on a baking sheet and bake for 15 minutes at 425°F/220°C. Then reduce heat to 350°F/180°C and bake for 45 minutes. Watch your pie crust during the last 30 minutes – if it starts to brown, be sure to tent it with foil all around the pie.
Let the Pie Cool: Remove your pie and allow to cool completely; at room temperature for at least 2 hours, and then in the fridge for at least 4 hours but preferably overnight. Slice into it, serve with some ice cream, and enjoy!
Tips for Success
Whew! That was a lot of reading, I know, but you won’t believe how quickly this pie comes together. Here are some tips to think about on making a vegan apple pie before you get started:
- Lemon Juice to Sugar Ratio Notes: This sugar and lemon juice combination is specifically for this combination of sturdy sweet and sturdy tart apples. If you’re using only tart apples, you’ll want to reduce the lemon juice and possibly increase the sugar. If you’re using only sweet apples, reduce the sugar and use the same amount of lemon juice.
- Can I Use a Store-Bought Crust? Potentially. You’ll want to be very careful about checking the ingredients, but if they’re vegan-friendly, go for it!
- Let the Dough Chill: If you’re making a pie crust from scratch, let the dough chill for 45 minutes to an hour before working with it. This will ensure that it does not begin to shrink when you bake it.
- Let the Pie Cool Before Slicing: Things can get pretty messy if you try to serve it right away! Give it those 6 hours (2 on the countertop, 4 in the fridge), and then you can reheat slices if necessary.

Variation Ideas
If you don’t want to make your apple pie the same way every time, you don’t have to! Switching things up can be good. Feel free to add in more/less cinnamon, more/less nutmeg, chopped pecans, dried fruit such as cranberries, etc. Have fun experimenting with add-ins!

How to Store and Reheat Apple Pie
I usually keep my leftover vegan apple pie in the fridge in an airtight container for 4-5 days. To reheat a slice, simply pop it in the microwave for 20-30 seconds, and enjoy. (Don’t forget another scoop of vegan ice cream !)
Can I Freeze This?
Yes! You can keep your apple pie in the freezer in an airtight container for 2-3 months. Make sure to let it thaw in the fridge overnight before reheating again.
Happy Fall!!

Ingredients
- 2 vegan pie crusts , Use one for the base and the other for the top lattice work
- 3 lbs apples , peeled, cored and chopped into large chunks (I used a mix of 1/3 golden delicious and 2/3 honey crisp)
- 2 ½ tablespoons lemon juice
- 1 cup cane sugar
- 2 teaspoons ground cinnamon
- ½ teaspoon nutmeg
- ¼ teaspoon sea salt
- ¼ cup vegan butter
- ½ tbsp vanilla extract
- 1 ½ tablespoons cornstarch
- 1 ½ tablespoons water , mixed together with the cornstarch
Instructions
- In a large bowl, add in your chopped apple pies. Pour over the lemon juice, sugar, ground cinnamon, nutmeg and sea salt and stir to combine thoroughly. Set aside.
- Heat a large pan to medium heat. Melt the vegan butter. Once melted and slightly sizzling, add in the apple mixture.
- Reduce heat to medium low and cook down the apples for 7-8 minutes, until slightly tender, stirring occasionally. At the end of the 7-8 minutes, add in the cornstarch slurry and the vanilla extract and stir for one minute then remove from the heat.
- Remove pan from heat and allow the apples to cool, about 15-20 minutes. You can preheat your oven in the meantime and/or make your pie crust while it’s cooking. Remember you need two – one for the base, and another for the top,
- Preheat your oven to 425°F/220°C. You will lower this later on. Shape out your pie crust for your base into your pie dish, crimping the edges.
- Add the apples into the base of the pie crust (using a 9” pie dish). Using a spatula, smooth over the top.
- Remove the second pie crust from the fridge for about 5 to 10 minutes, or according to the recipe you’re using or directions of the pie crust. Using a rolling pin, roll out the second pie crust into a disc. Slice into thin rectangular strips. Layer them in a lattice work pattern on top of the pie crust vertically, and then alternating every strip, add a horizontal strip until the entire top is evenly covered. Snip off the edges and pinch down into the bottom pie crust to connect them seamlessly.
- Brush with a vegan egg wash such as a vegan egg replacement like just egg. Sprinkle some extra sugar all over the top of the pie.
- Place your pie in the oven on a baking sheet and bake for 15 minutes at 425°F/220°C. Then reduce heat to 350°F/180°C and bake for 45 minutes. Watch your pie crust during the last 30 minutes – if it starts to brown, be sure to tent it with foil all around the pie.
- Remove your pie and allow to cool completely; at room temperature for at least 2 hours, and then in the fridge for at least 4 hours but preferably overnight. Slice into it, serve with some ice cream, and enjoy!
Notes
- Lemon Juice to Sugar Ratio Notes: This sugar and lemon juice combination is specifically for this combination of sturdy sweet and sturdy tart apples. If you’re using only tart apples, you’ll want to reduce the lemon juice and possibly increase the sugar. If you’re using only sweet apples, reduce the sugar and use the same amount of lemon juice.
- Can I Use a Store-Bought Crust? Potentially. You’ll want to be very careful about checking the ingredients, but if they’re vegan-friendly, go for it!
- Let the Dough Chill: If you’re making a pie crust from scratch, let the dough chill for 45 minutes to an hour before working with it. This will ensure that it does not begin to shrink when you bake it.
- Let the Pie Cool Before Slicing: Things can get pretty messy if you try to serve it right away! Give it those 6 hours (2 on the countertop, 4 in the fridge), and then you can reheat slices if necessary.
- Storage: I usually keep my leftover vegan apple pie in the fridge in an airtight container for 4-5 days. You can also freeze it the same way for 2-3 months.
Learn how to make a flaky Vegan Apple Pie from scratch! There’s no better way to use up those freshly-picked apples than to make a homemade apple pie!
I don’t think there’s a fall dessert that is any more classic than a sweet apple pie. Missing out on apple pie would be like missing out on fall. What else would you place next to the Vegan Pumpkin Pie and Pecan Pie at Thanksgiving?!
Whether it’s Thanksgiving or not, though, enjoying a slice of apple pie fresh from the oven is a must at least once in the next few months. This vegan version has an ultra-flaky, “buttery” crust and a sweet cinnamon-nutmeg apple filling. Yum!
Notes on Ingredients
I don’t know about you, but I can’t wait any longer so let’s get started! Here’s what to gather up for a vegan apple pie:
- Pie Crust: Use 2x this Homemade Vegan Pie Crust – one for the base and the other for the top lattice work.
- Apples: I used a mix of 1/3 golden delicious and 2/3 honey crisp. Ideally you’re looking for some tartness, and a lot of sweetness/neutral apples if you can’t find these specific types. If you do switch this up, increase or decrease the sugar accordingly.
- Lemon Juice: This balances out the sweetness of the apples and really boosts all the flavours.
- Sugar: I like to use cane sugar in this recipe, brown sugar works too!
- Spices: Use a mix of ground cinnamon and nutmeg.
- Salt: I like to use sea salt in this pie.
- Butter: Use whatever brand of vegan butter that you like.
- Vanilla Extract: For a touch of extra sweet flavor.
- Cornstarch Slurry: Mix cornstarch and water to create a cornstarch slurry.
Can I Use Frozen Pie Crustfor Apple Pie?
Sure! Sometimes I like to make my Vegan Pie Crust ahead of time and freeze it until I’m ready to make the actual apple pie. It saves a lot of time!
What Kind of Apples are Best for Apple Pie?
I used a mix of 1/3 golden delicious and 2/3 honey crisp apples for this recipe. Those are my favorites, but you can also use granny smith or gala apples if you want. You could also do all honey crisp, all gala, etc, if you don’t want to do a mix.
How to Make Vegan Apple Pie
Please note that this is important information on the ingredients and instructions and the FULL recipe with amounts and details can be found DOWN BELOW (scroll to it) in the recipe card.
Make the Filling
Combine the Filling Ingredients: In a large bowl, add in your chopped apple pies. Pour over the lemon juice, sugar, ground cinnamon, nutmeg and sea salt and stir to combine thoroughly.
Melt the Butter: Heat a large pan to medium heat. Melt the vegan butter. Once melted and slightly sizzling, add in the apple mixture.
Cook the Apples: Reduce heat to medium low and cook down the apples for 7-8 minutes, until slightly tender, stirring occasionally. At the end of the 7-8 minutes, add in the cornstarch slurry and the vanilla extract and stir for one minute then remove from the heat.
Let Cool: Remove pan from heat and allow the apples to cool, about 15-20 minutes. You can preheat your oven in the meantime and/or make your pie crust while it’s cooking. Remember you need two – one for the base, and another for the top.
Make the Vegan Apple Pie
Preheat Your Oven to 425°F/220°C: Shape out your pie crust for your base into your pie dish, crimping the edges.
Fill the Pie Crust: Add the apples into the base of the pie crust (using a 9” pie dish). Using a spatula, smooth over the top.
Prepare the Second Layer of Pie Crust: Remove the second pie crust from the fridge for about 5 to 10 minutes, or according to the recipe you’re using or directions of the pie crust. Using a rolling pin , roll out the second pie crust into a disc. Slice into thin rectangular strips.
Form the Lattice: Layer them in a lattice work pattern on top of the pie crust vertically, and then alternating every strip, add a horizontal strip until the entire top is evenly covered. Snip off the edges and pinch down into the bottom pie crust to connect them seamlessly.
Use a Vegan Egg Wash: Brush with a vegan egg wash such as a vegan egg replacement like just egg. Sprinkle some extra sugar all over the top of the pie.
Bake the Pie: Place your pie in the oven on a baking sheet and bake for 15 minutes at 425°F/220°C. Then reduce heat to 350°F/180°C and bake for 45 minutes. Watch your pie crust during the last 30 minutes – if it starts to brown, be sure to tent it with foil all around the pie.
Let the Pie Cool: Remove your pie and allow to cool completely; at room temperature for at least 2 hours, and then in the fridge for at least 4 hours but preferably overnight. Slice into it, serve with some ice cream, and enjoy!
Tips for Success
Whew! That was a lot of reading, I know, but you won’t believe how quickly this pie comes together. Here are some tips to think about on making a vegan apple pie before you get started:
- Lemon Juice to Sugar Ratio Notes: This sugar and lemon juice combination is specifically for this combination of sturdy sweet and sturdy tart apples. If you’re using only tart apples, you’ll want to reduce the lemon juice and possibly increase the sugar. If you’re using only sweet apples, reduce the sugar and use the same amount of lemon juice.
- Can I Use a Store-Bought Crust? Potentially. You’ll want to be very careful about checking the ingredients, but if they’re vegan-friendly, go for it!
- Let the Dough Chill: If you’re making a pie crust from scratch, let the dough chill for 45 minutes to an hour before working with it. This will ensure that it does not begin to shrink when you bake it.
- Let the Pie Cool Before Slicing: Things can get pretty messy if you try to serve it right away! Give it those 6 hours (2 on the countertop, 4 in the fridge), and then you can reheat slices if necessary.
Variation Ideas
If you don’t want to make your apple pie the same way every time, you don’t have to! Switching things up can be good. Feel free to add in more/less cinnamon, more/less nutmeg, chopped pecans, dried fruit such as cranberries, etc. Have fun experimenting with add-ins!
How to Store and Reheat Apple Pie
I usually keep my leftover vegan apple pie in the fridge in an airtight container for 4-5 days. To reheat a slice, simply pop it in the microwave for 20-30 seconds, and enjoy. (Don’t forget another scoop of vegan ice cream !)
Can I Freeze This?
Yes! You can keep your apple pie in the freezer in an airtight container for 2-3 months. Make sure to let it thaw in the fridge overnight before reheating again.
Happy Fall!!
Ingredients
- 2 vegan pie crusts , Use one for the base and the other for the top lattice work
- 3 lbs apples , peeled, cored and chopped into large chunks (I used a mix of 1/3 golden delicious and 2/3 honey crisp)
- 2 ½ tablespoons lemon juice
- 1 cup cane sugar
- 2 teaspoons ground cinnamon
- ½ teaspoon nutmeg
- ¼ teaspoon sea salt
- ¼ cup vegan butter
- ½ tbsp vanilla extract
- 1 ½ tablespoons cornstarch
- 1 ½ tablespoons water , mixed together with the cornstarch
Instructions
- In a large bowl, add in your chopped apple pies. Pour over the lemon juice, sugar, ground cinnamon, nutmeg and sea salt and stir to combine thoroughly. Set aside.
- Heat a large pan to medium heat. Melt the vegan butter. Once melted and slightly sizzling, add in the apple mixture.
- Reduce heat to medium low and cook down the apples for 7-8 minutes, until slightly tender, stirring occasionally. At the end of the 7-8 minutes, add in the cornstarch slurry and the vanilla extract and stir for one minute then remove from the heat.
- Remove pan from heat and allow the apples to cool, about 15-20 minutes. You can preheat your oven in the meantime and/or make your pie crust while it’s cooking. Remember you need two – one for the base, and another for the top,
- Preheat your oven to 425°F/220°C. You will lower this later on. Shape out your pie crust for your base into your pie dish, crimping the edges.
- Add the apples into the base of the pie crust (using a 9” pie dish). Using a spatula, smooth over the top.
- Remove the second pie crust from the fridge for about 5 to 10 minutes, or according to the recipe you’re using or directions of the pie crust. Using a rolling pin, roll out the second pie crust into a disc. Slice into thin rectangular strips. Layer them in a lattice work pattern on top of the pie crust vertically, and then alternating every strip, add a horizontal strip until the entire top is evenly covered. Snip off the edges and pinch down into the bottom pie crust to connect them seamlessly.
- Brush with a vegan egg wash such as a vegan egg replacement like just egg. Sprinkle some extra sugar all over the top of the pie.
- Place your pie in the oven on a baking sheet and bake for 15 minutes at 425°F/220°C. Then reduce heat to 350°F/180°C and bake for 45 minutes. Watch your pie crust during the last 30 minutes – if it starts to brown, be sure to tent it with foil all around the pie.
- Remove your pie and allow to cool completely; at room temperature for at least 2 hours, and then in the fridge for at least 4 hours but preferably overnight. Slice into it, serve with some ice cream, and enjoy!
Notes
- Lemon Juice to Sugar Ratio Notes: This sugar and lemon juice combination is specifically for this combination of sturdy sweet and sturdy tart apples. If you’re using only tart apples, you’ll want to reduce the lemon juice and possibly increase the sugar. If you’re using only sweet apples, reduce the sugar and use the same amount of lemon juice.
- Can I Use a Store-Bought Crust? Potentially. You’ll want to be very careful about checking the ingredients, but if they’re vegan-friendly, go for it!
- Let the Dough Chill: If you’re making a pie crust from scratch, let the dough chill for 45 minutes to an hour before working with it. This will ensure that it does not begin to shrink when you bake it.
- Let the Pie Cool Before Slicing: Things can get pretty messy if you try to serve it right away! Give it those 6 hours (2 on the countertop, 4 in the fridge), and then you can reheat slices if necessary.
- Storage: I usually keep my leftover vegan apple pie in the fridge in an airtight container for 4-5 days. You can also freeze it the same way for 2-3 months.

Vegan Apple Pie
Ingredients
- 2 vegan pie crusts Use one for the base and the other for the top lattice work
- 3 lbs apples peeled, cored and chopped into large chunks (I used a mix of 1/3 golden delicious and 2/3 honey crisp)
- 2 ½ tablespoons lemon juice
- 1 cup cane sugar
- 2 teaspoons ground cinnamon
- ½ teaspoon nutmeg
- ¼ teaspoon sea salt
- ¼ cup vegan butter
- ½ tbsp vanilla extract
- 1 ½ tablespoons cornstarch
- 1 ½ tablespoons water mixed together with the cornstarch
Instructions
- In a large bowl, add in your chopped apple pies. Pour over the lemon juice, sugar, ground cinnamon, nutmeg and sea salt and stir to combine thoroughly. Set aside.
- Heat a large pan to medium heat. Melt the vegan butter. Once melted and slightly sizzling, add in the apple mixture.
- Reduce heat to medium low and cook down the apples for 7-8 minutes, until slightly tender, stirring occasionally. At the end of the 7-8 minutes, add in the cornstarch slurry and the vanilla extract and stir for one minute then remove from the heat.
- Remove pan from heat and allow the apples to cool, about 15-20 minutes. You can preheat your oven in the meantime and/or make your pie crust while it’s cooking. Remember you need two - one for the base, and another for the top,
- Preheat your oven to 425°F/220°C. You will lower this later on. Shape out your pie crust for your base into your pie dish, crimping the edges.
- Add the apples into the base of the pie crust (using a 9” pie dish). Using a spatula, smooth over the top.
- Remove the second pie crust from the fridge for about 5 to 10 minutes, or according to the recipe you’re using or directions of the pie crust. Using a rolling pin, roll out the second pie crust into a disc. Slice into thin rectangular strips. Layer them in a lattice work pattern on top of the pie crust vertically, and then alternating every strip, add a horizontal strip until the entire top is evenly covered. Snip off the edges and pinch down into the bottom pie crust to connect them seamlessly.
- Brush with a vegan egg wash such as a vegan egg replacement like just egg. Sprinkle some extra sugar all over the top of the pie.
- Place your pie in the oven on a baking sheet and bake for 15 minutes at 425°F/220°C. Then reduce heat to 350°F/180°C and bake for 45 minutes. Watch your pie crust during the last 30 minutes - if it starts to brown, be sure to tent it with foil all around the pie.
- Remove your pie and allow to cool completely; at room temperature for at least 2 hours, and then in the fridge for at least 4 hours but preferably overnight. Slice into it, serve with some ice cream, and enjoy!
Video
Notes
- Lemon Juice to Sugar Ratio Notes: This sugar and lemon juice combination is specifically for this combination of sturdy sweet and sturdy tart apples. If you’re using only tart apples, you’ll want to reduce the lemon juice and possibly increase the sugar. If you’re using only sweet apples, reduce the sugar and use the same amount of lemon juice.
- Can I Use a Store-Bought Crust? Potentially. You’ll want to be very careful about checking the ingredients, but if they’re vegan-friendly, go for it!
- Let the Dough Chill: If you’re making a pie crust from scratch, let the dough chill for 45 minutes to an hour before working with it. This will ensure that it does not begin to shrink when you bake it.
- Let the Pie Cool Before Slicing: Things can get pretty messy if you try to serve it right away! Give it those 6 hours (2 on the countertop, 4 in the fridge), and then you can reheat slices if necessary.
- Storage: I usually keep my leftover vegan apple pie in the fridge in an airtight container for 4-5 days. You can also freeze it the same way for 2-3 months.
Nutrition
Vegan Apple Pie https://jessicainthekitchen.com/vegan-apple-pie-recipe/ September 21, 2021
Vegan Thai Green Curry takes only 15 minutes to prep! This homemade vegan curry is loaded with rich flavors and loads of vegetables, and it’s a definite crowd-pleaser!
I have a huge declaration to make: This Vegan Thai Green Curry equally rivals my Chickpea Curry for the best recipe on my website. I know, HUGE. So, needless to say, you need to add this curry to this week’s meal prep. See if you agree with me!
Okay, with that revealed, let’s dive into the recipe. This Thai Green Curry could not have been easier to make, and it only takes 40 minutes from start to finish!
What is Green Curry?
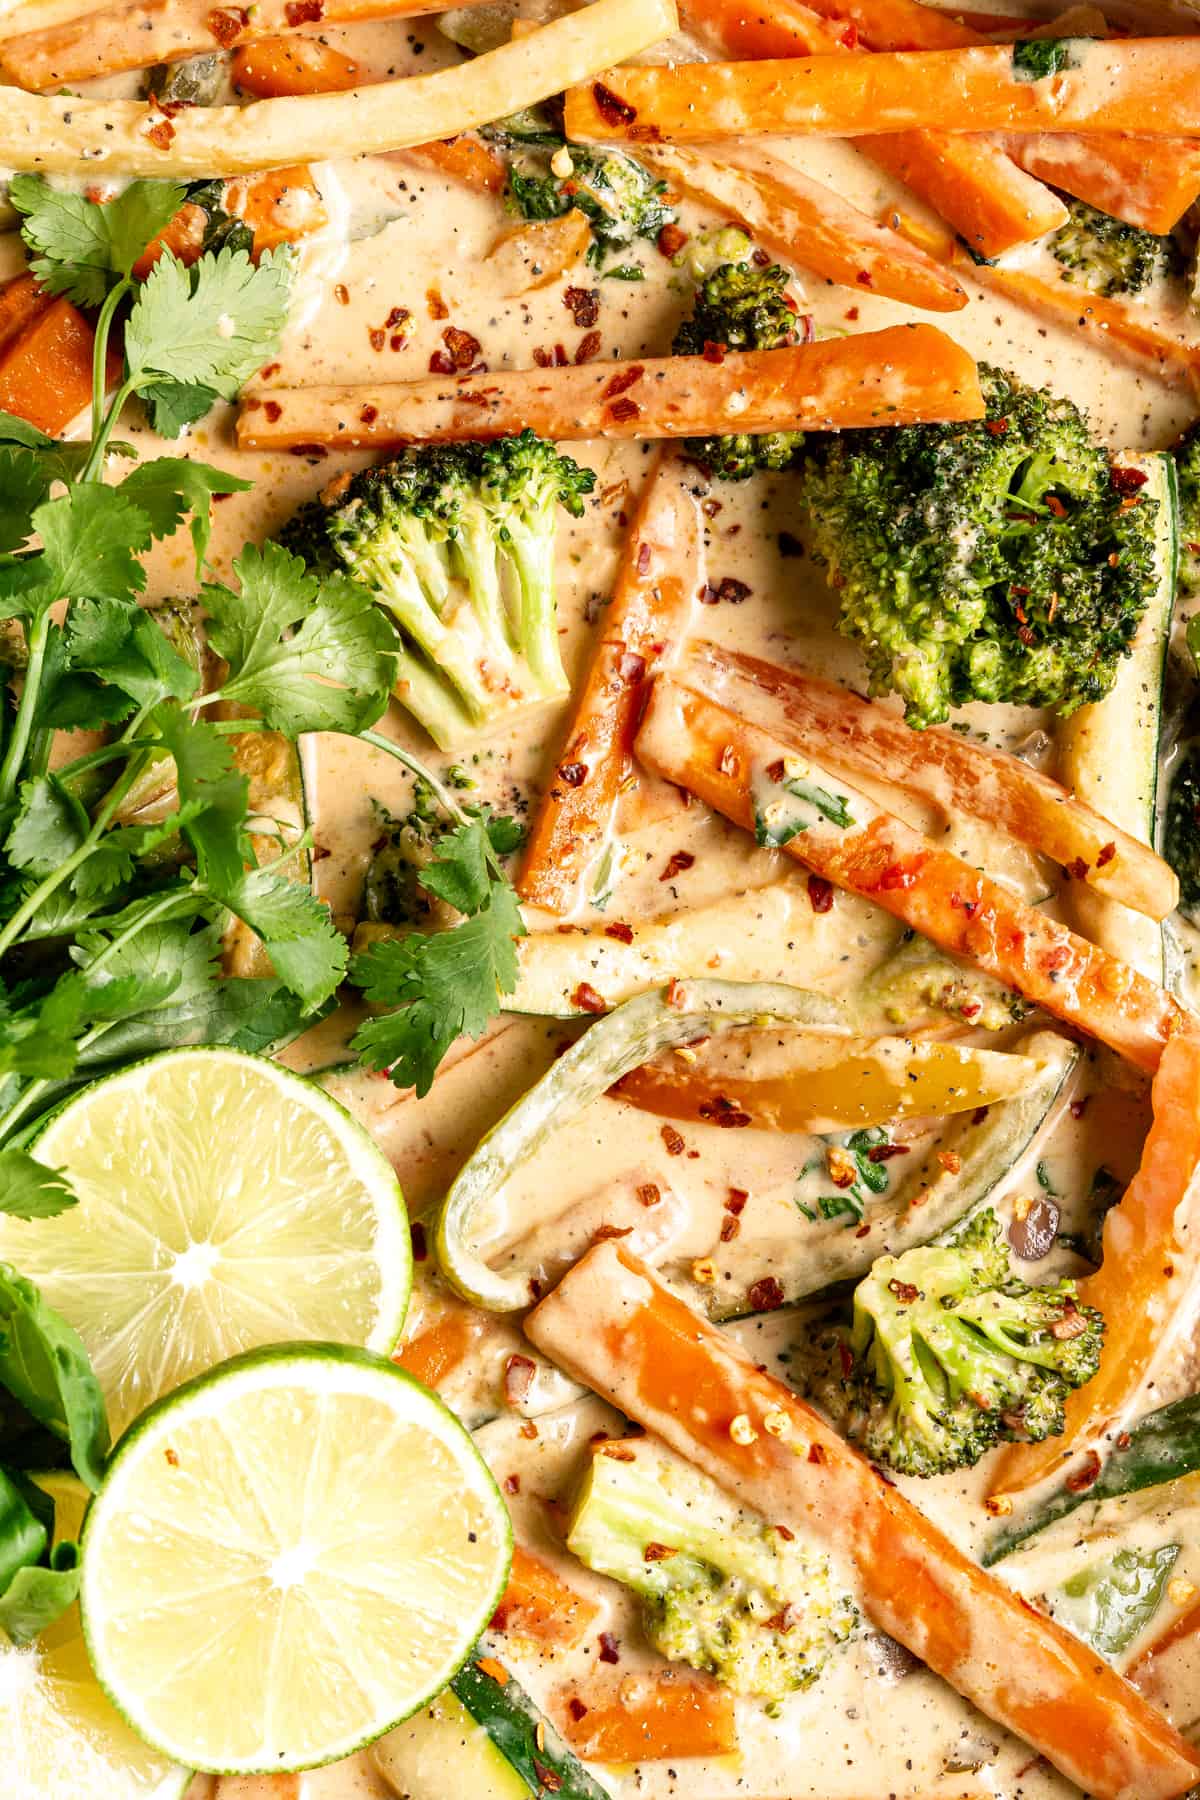
Thai Green Curry is aptly named because it’s, well, green. The curry sauce turns a bright, vibrant shade of green because of the paste and the Thai basil. (BTW, there’s also red and yellow Thai curry.)
Anyway, I love making this green curry because it’s the whole package flavor-wise. It’s spicy, savory, and even a little bit sweet. And, texture-wise, the curry comes out so creamy in the end! Yum.
Notes on Ingredients
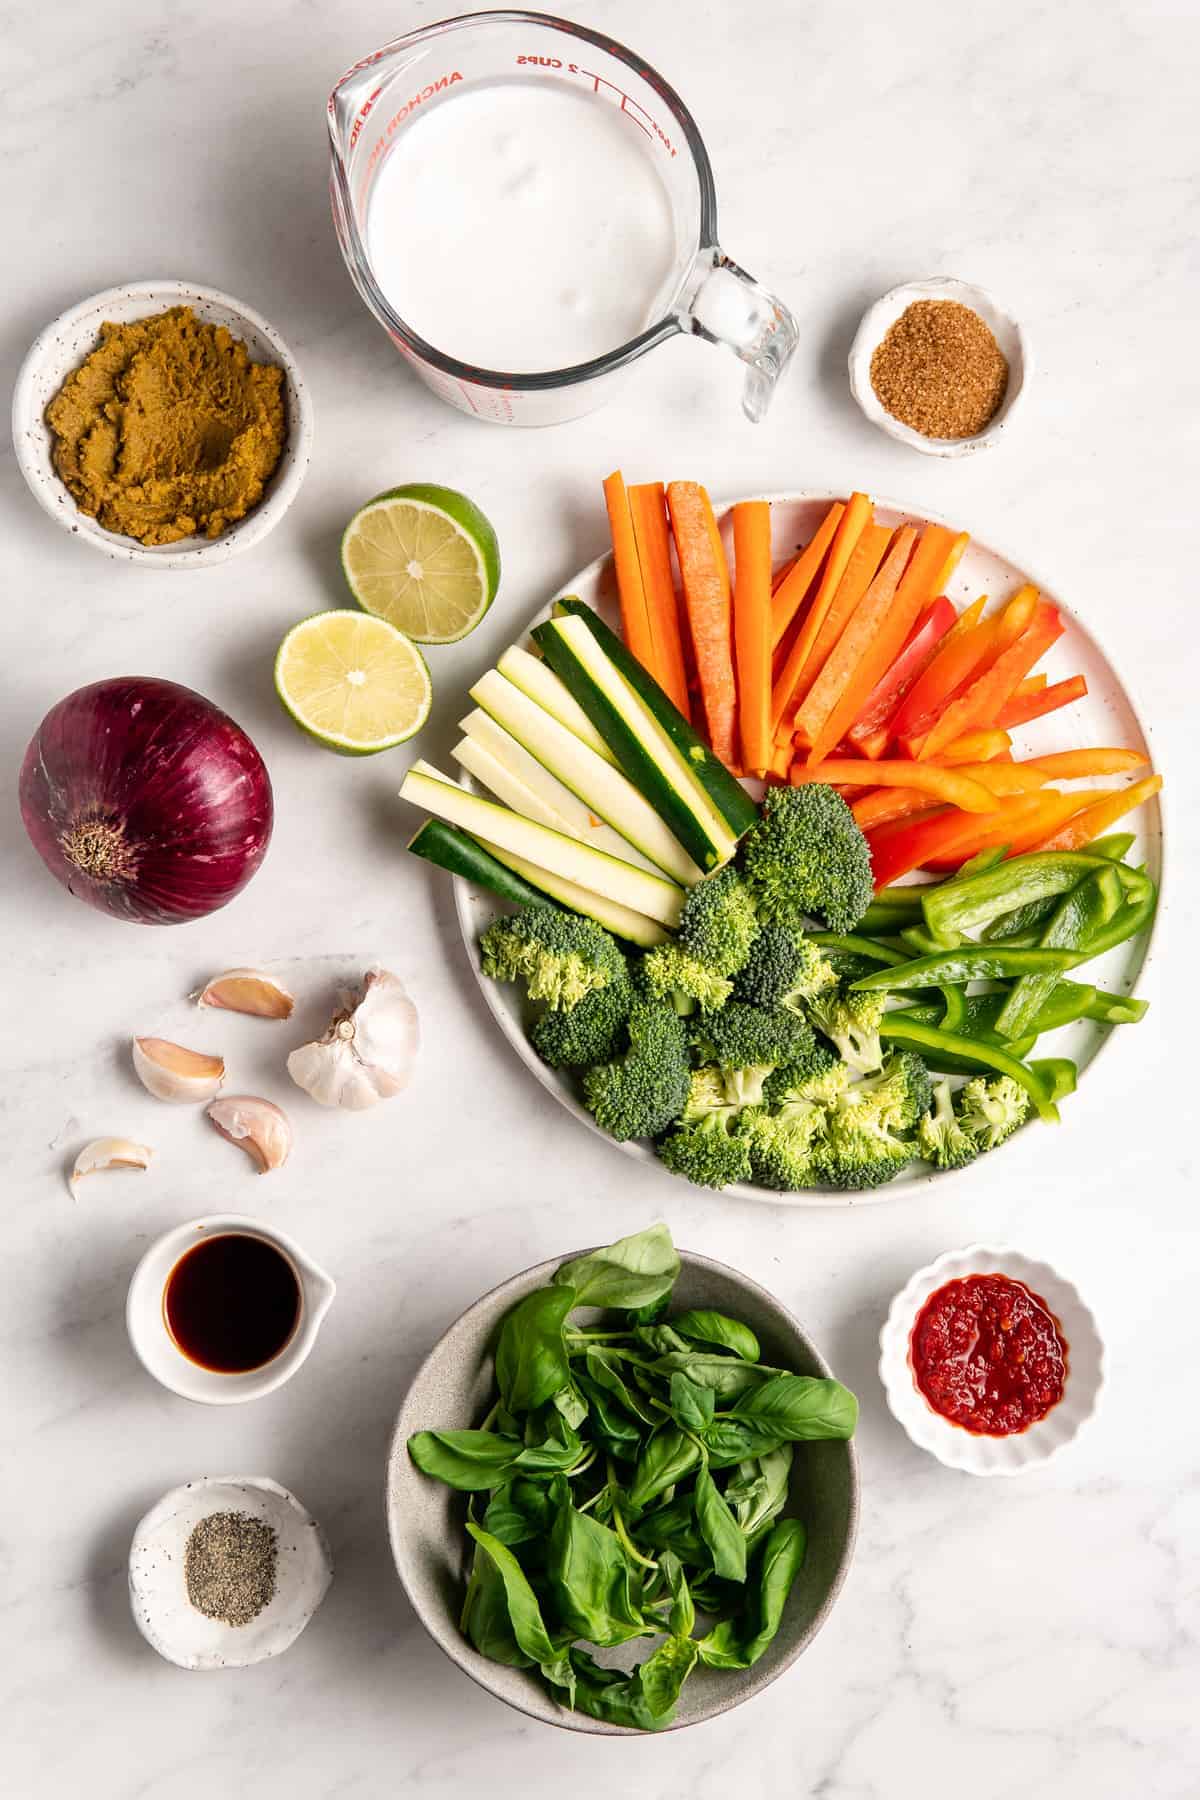
Ready to dig into some spicy-sweet vegan Thai green curry? Me too! Here’s a list of everything that we’ll need to round up:
- Coconut Oil: To sauté the onion in. You can use another cooking oil, if you prefer.
- Green Curry Paste : I use and love this (aff. link) green curry paste ; it’s vegan and gluten free!
- Vegetables: Chop up some red onion, broccoli, red bell pepper, green bell pepper, carrots, and zucchini.
- Garlic: Minced, for added savory flavor.
- Seasoning: Mix sea salt, ground black pepper, and coconut sugar or raw sugar (for a little sweetness).
- Liquid Aminos : Tamari will also work well here.
- Coconut Milk: You can use the full fat version or the lite version, it doesn’t really matter.
- Lime: Tangy lime juice really brings the flavors of this dish together.
- Thai Basil: Make sure to wash and chop it before adding. If you don’t have Thai basil, you can use a subtle mint or parsley!
- Sambal Oelek : You can also use Sriracha for heat, though both ingredients are optional.
- Coconut Flour : Also optional, this is to thicken the curry sauce just slightly.
How to Make Thai Green Curry
Please note that this is important information on the ingredients and instructions and the FULL recipe with amounts and details can be found DOWN BELOW (scroll to it) in the recipe card.
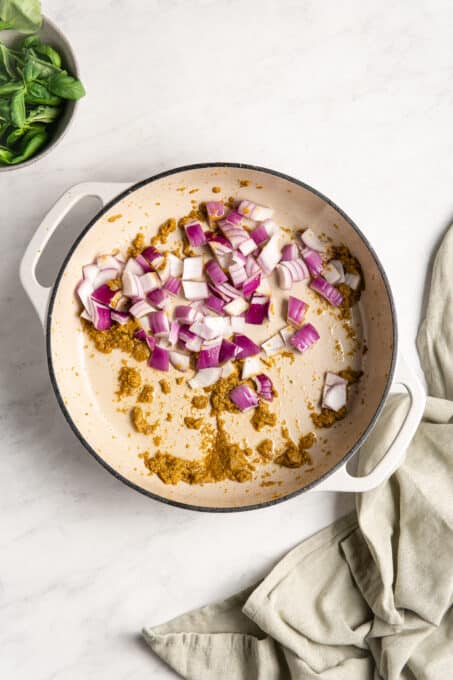
Fry the Curry Paste/Sauté the Onion: In a pan over medium-high heat, heat the coconut oil. Stir in the curry paste to fry it for about a minute. Add in the chopped onion and cook it until the onion is slightly translucent – this should take about 8 minutes.
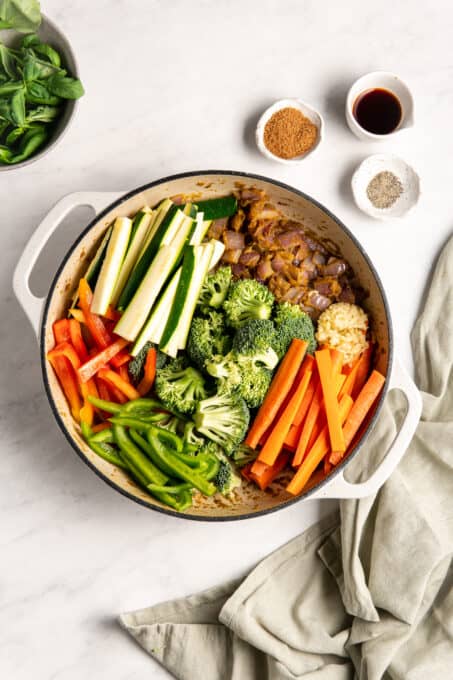
Cook the Vegetables: Add in the garlic, stir together, and then add the rest of the coconut oil. Next add the broccoli, red bell pepper, green bell pepper, carrots and zucchini. Mix in the sea salt, black pepper, coconut sugar, and liquid aminos on top, and stir everything together once more. Reduce the heat to medium and cook down, stirring, until the carrots are tender-crisp (this takes about 10-15 minutes).
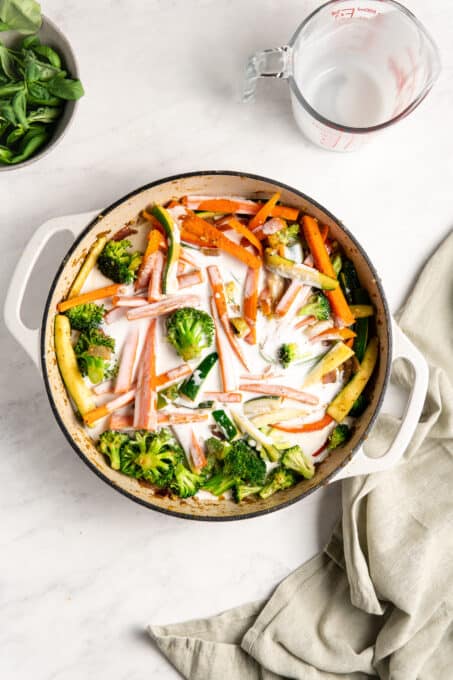
Make the Sauce: Add in the coconut milk, stir, and then let it simmer for about 5 minutes. Squeeze the lime over the dish, stir, and then remove it from the heat.
Garnish: Add in the Thai basil on top and stir in the sambal oelek (or Sriracha), if using. Enjoy!!
Tips for Success
Pretty simple, right? While there is quite a bit of vegetable chopping involved here, there’s nothing else too complicated going on, which is nice.
And, before I forget, I’ve got a couple of tips and tricks that make this dish even easier to prepare/more satisfying:
- Can I Switch Up the Vegetables? Yes! You can use any combination of veggies you want – just use roughly 3 ½ cups of veggies, so that you don’t overcrowd the pan. You could even use another type of greens, such as spinach or kale!
- Is the Lime Necessary? YES! Several readers have told me that this recipe came alive when they did the lime squeeze. Please don’t skip it!! It’s so crucial to bringing out all those delicious flavors. While you’re at it, serve each plate with a half a lime wedge. I promise, your family/spouse/guests will LOVE you for it.
- For More Protein: To add more protein, I usually add a block of baked tofu into the 5 minute simmer section near the end!
- To Make It Creamier: Add a little more coconut milk to the curry sauce to make it creamier. Conversely, add a little less if you want it less creamy.

Serving Suggestions
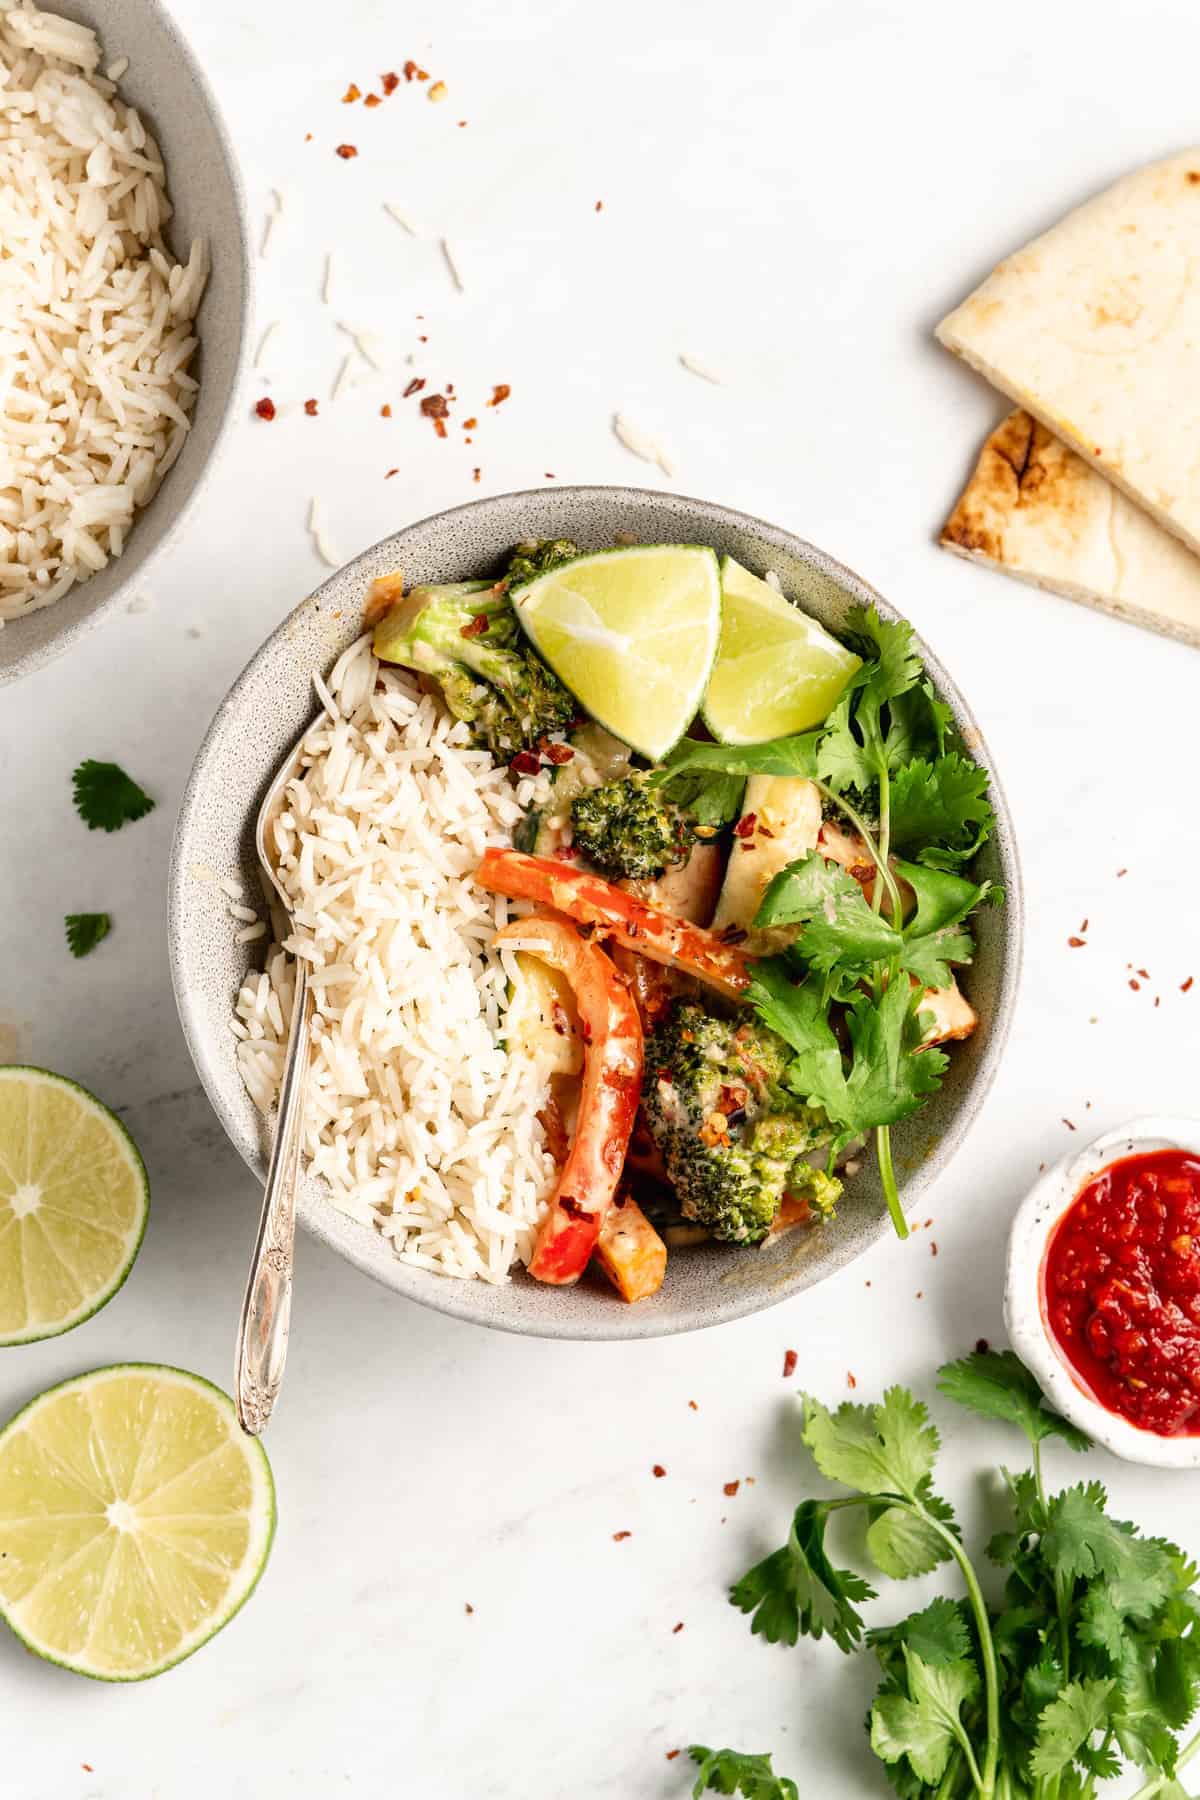
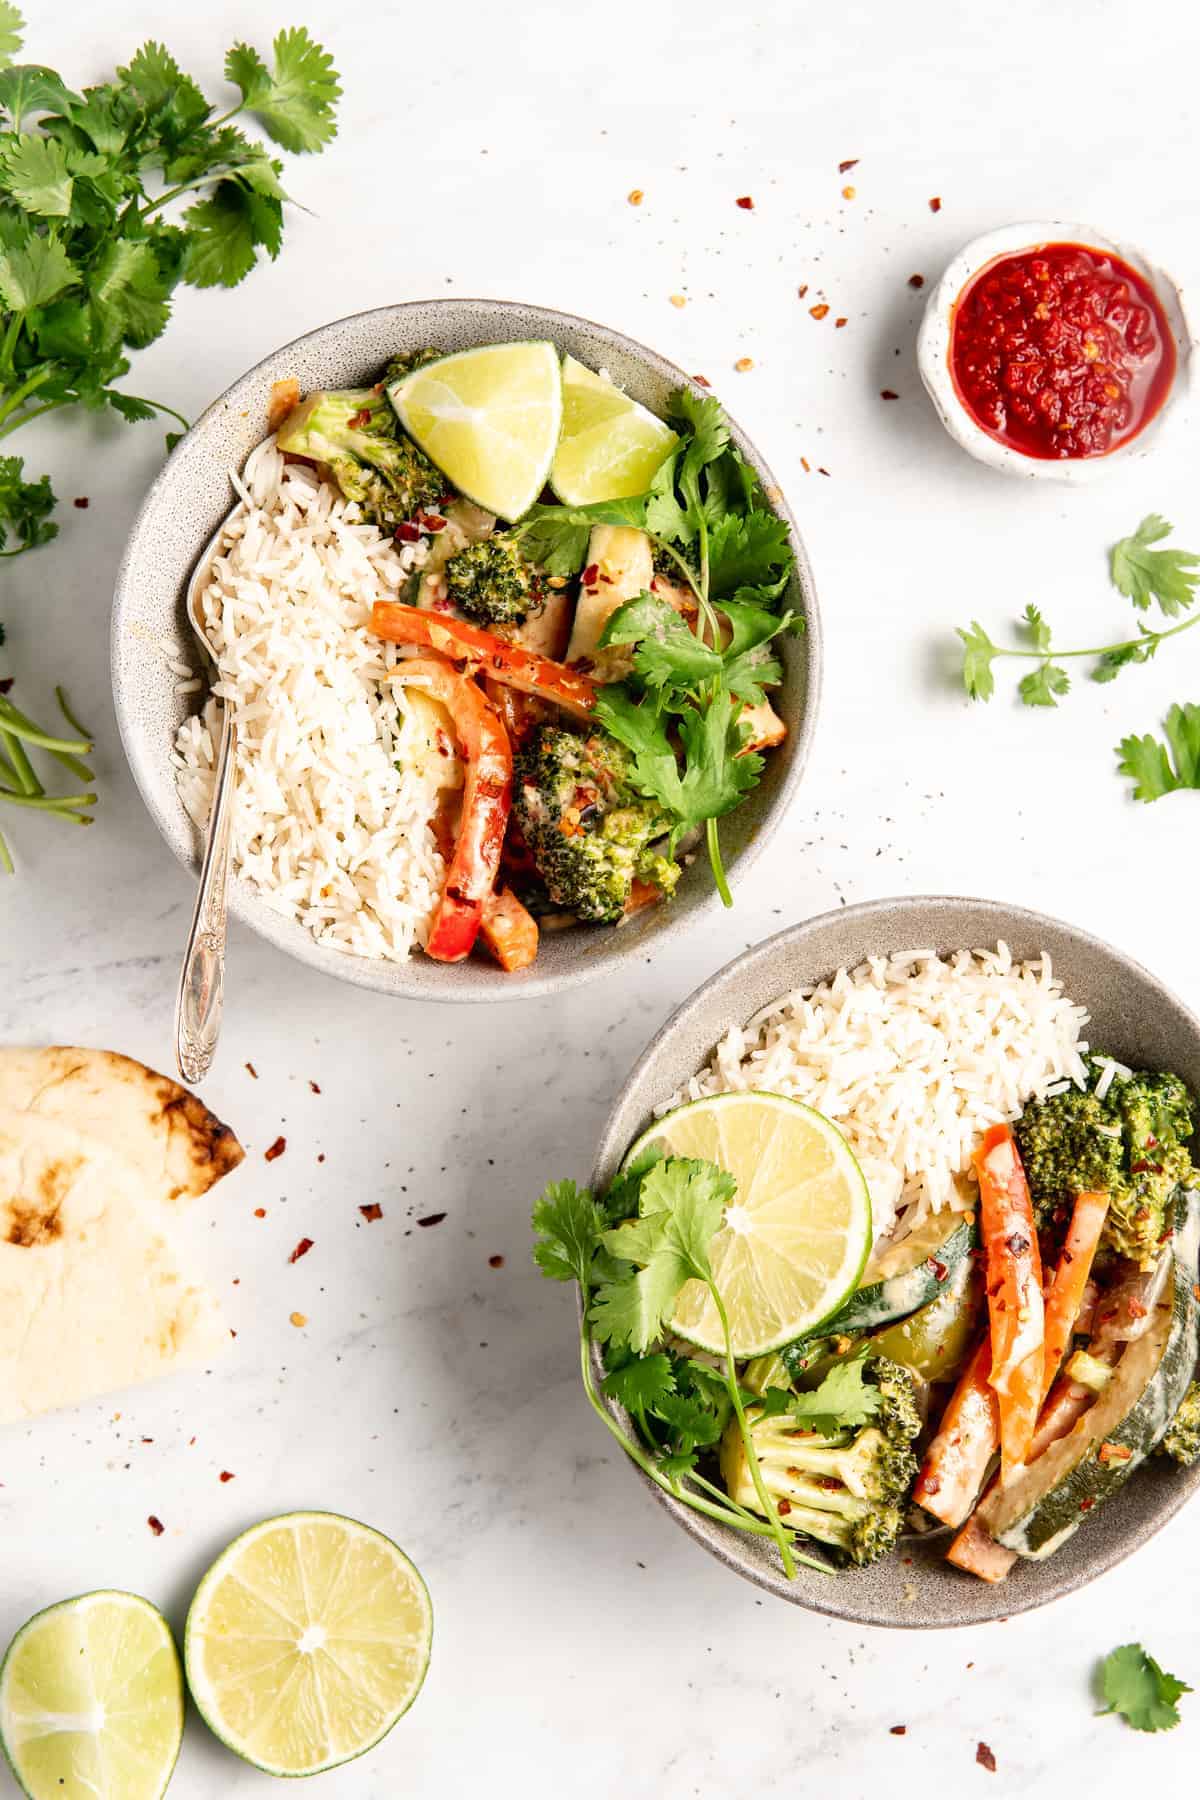
I like to serve this vegan Thai green curry with some basmati rice or naan bread , or both. Any kind of steamed rice (like Jasmine) will work, basmati is just a personal favorite.
You can also eat this curry by itself if you like, though – it’s pretty darn filling!
To say I was in heaven while eating this is SUCH an understatement. Every bite ties into the next beautifully, and I promise you’ll be making this again.
How to Store and Reheat Leftovers
I don’t recommend storing this vegan Thai curry in the fridge for more than 3 days. Make sure to use an airtight container to do so.
When you want to reheat your curry, put it back in the pan, add a splash of coconut milk, and cook over low-medium heat until everything is heated through.
Can I Freeze This?
You can try freezing your curry in an airtight container for up to a month, if you like. The vegetables will most likely lose their crispy texture, but it should still taste good.
Ingredients
Vegan Thai Green Curry Recipe (Vegan & Gluten Free)
- 2 tablespoons coconut oil
- 2 tablespoons green curry paste
- 1 red onion , chopped
- 4 cloves garlic , minced
- 1 head broccoli , chopped
- ½ medium red bell pepper , cut into strips/spears
- ½ medium green bell pepper , cut into strips/spears
- 3 carrots , cut into strips/spears
- 1 zucchini , cut into spears
- ¾ teaspoon sea salt , to taste
- ½ teaspoon ground black pepper , to taste
- 1 tablespoon coconut sugar , or raw sugar
- 1 tablespoon liquid aminos , or tamari or low sodium soy sauce
- 1 can coconut milk , (full fat or lite) 13.5 ounces (383g)
- half a lime
- 1 bunch thai basil , washed and chopped (about 2-3 tablespoons)
- ½ tablespoon sambal oelek , or Sriracha for heat, optional
- 2 teaspoons coconut flour , for slight thickening, optional
Instructions
Vegan Thai Green Curry Recipe (Vegan & Gluten Free)
- In a pan over medium high heat, heat 1 tablespoon of the coconut oil.
- Add in the curry paste to fry it, stirring into the coconut oil, for about 1 minute. Add in the chopped onion and cook until onion is slightly translucent about 8 minutes.
- Add in the garlic, stir together, then the second tablespoon of coconut oil, then add the broccoli, red bell pepper, green bell pepper, carrots and zucchini. Add the sea salt, black pepper, coconut sugar, and liquid aminos on top and stir everything together. Reduce heat to medium and cook down, stirring, until carrots are tender crisp, about 10-15 minutes.
- Add in the coconut milk, stir, and then let it simmer for about 5 minutes. Squeeze the lime over, stir, and then remove from heat.
- Add in the thai basil on top, and stir in the sambal oelek (or Sriracha) if using. Serve with rice, naan bread and a lime wedge. Enjoy!!
Notes
- Can I Switch Up the Vegetables? Yes! You can use any combination of veggies you want – just use roughly 3 ½ cups of veggies, so that you don’t overcrowd the pan. You could even use another type of greens, such as spinach or kale!
- Is the Lime Necessary? YES! Several readers have told me that this recipe came alive when they did the lime squeeze. Please don’t skip it!! It’s so crucial to bringing out all those delicious flavors. While you’re at it, serve each plate with a half a lime wedge. I promise, your family/spouse/guests will LOVE you for it.
- For More Protein: To add more protein, I usually add a block of baked tofu into the 5 minute simmer section near the end!
- To Make It Creamier: Add a little more coconut milk to the curry sauce to make it creamier. Conversely, add a little less if you want it less creamy.
- Adding Coconut Flour: The coconut flour is totally optional, and it just depends on whether you want a slightly thicker curry sauce.
- Storage: You can store this dish in the fridge for no more than 3 days! You can try freezing your curry in an airtight container for up to a month, instead, if you like.
- If You Don’t Have Thai Basil: You can use a subtle mint or parsley.
More Thai Recipes to Try
If you’re a fan of vegan Thai food (or even traditional Thai food!), you’re not going to want to miss any of the following recipes:
- Cashew Thai Quinoa Salad with Peanut Ginger Sauce
- Vegan Thai Red Curry with Tofu
- Thai Peanut Sauce
