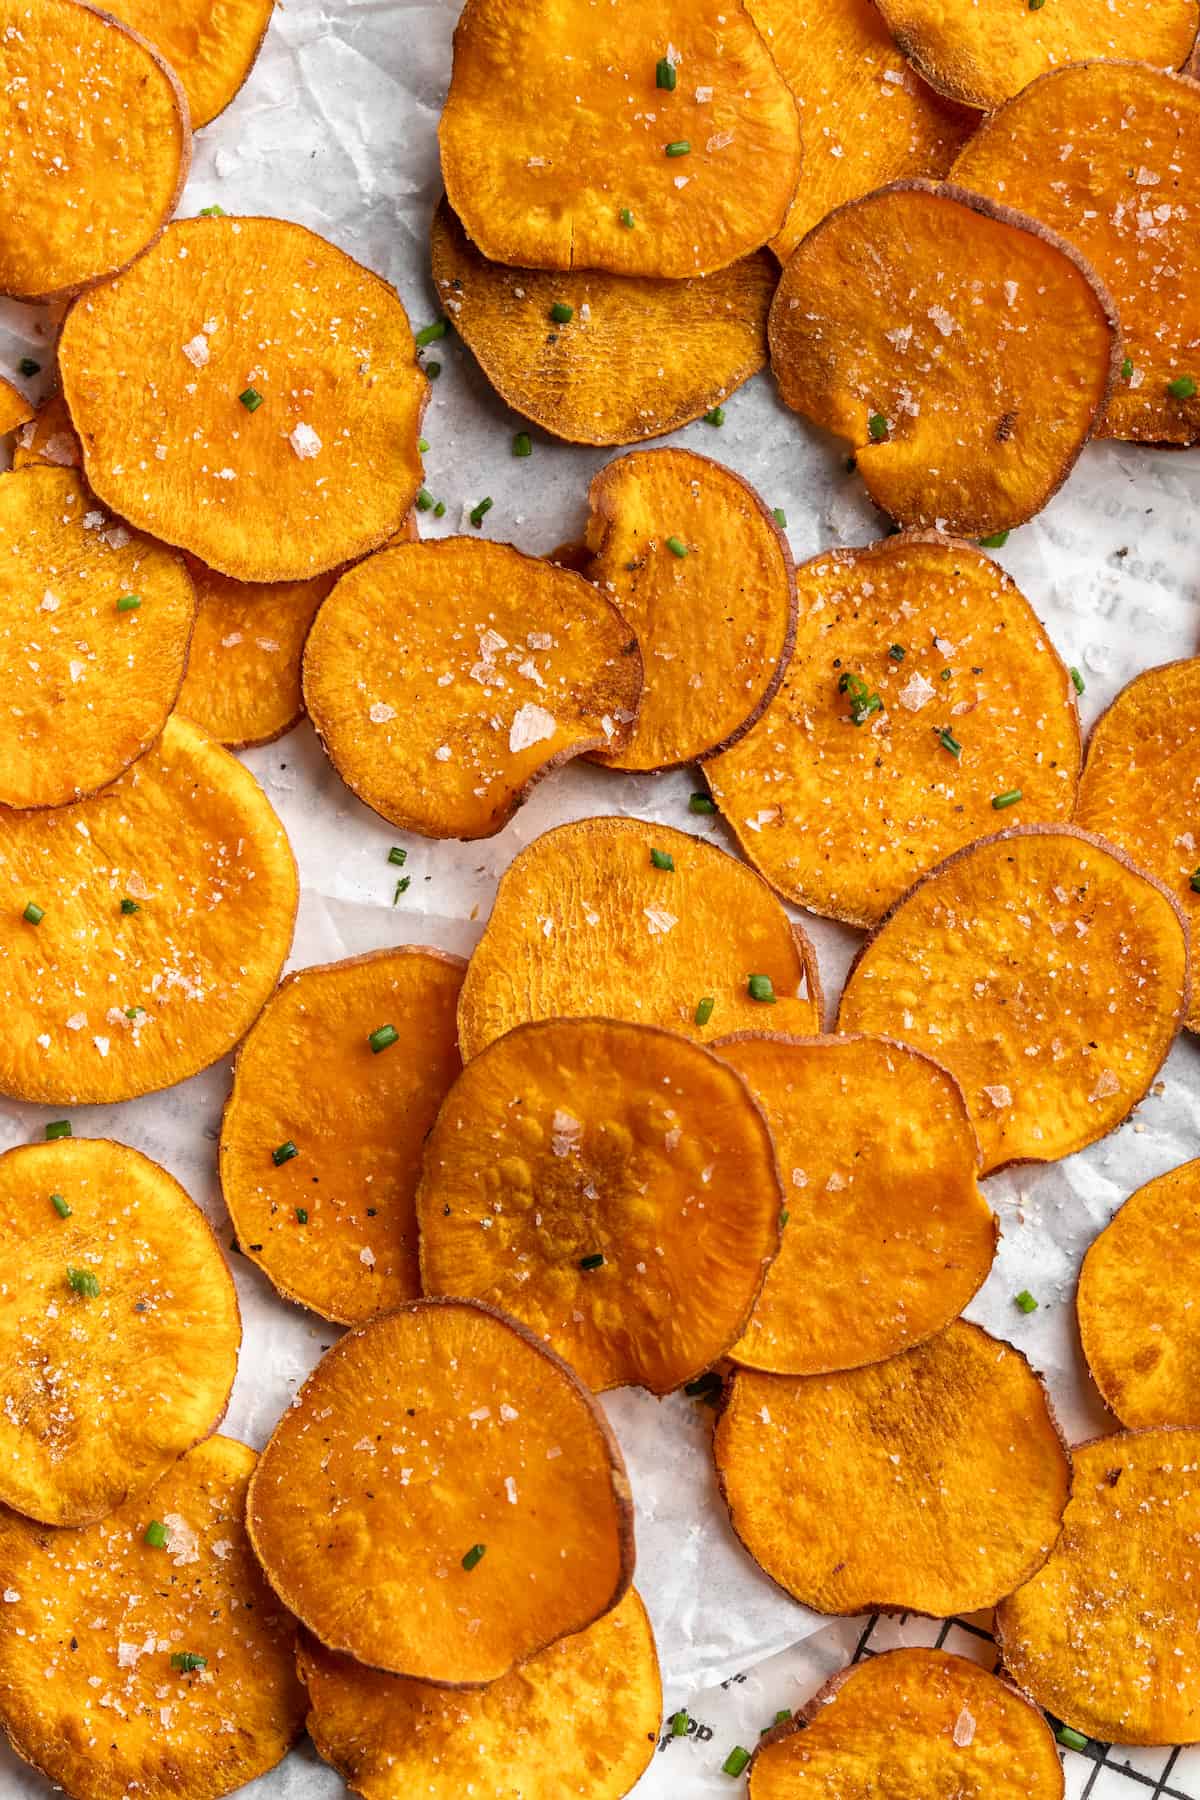
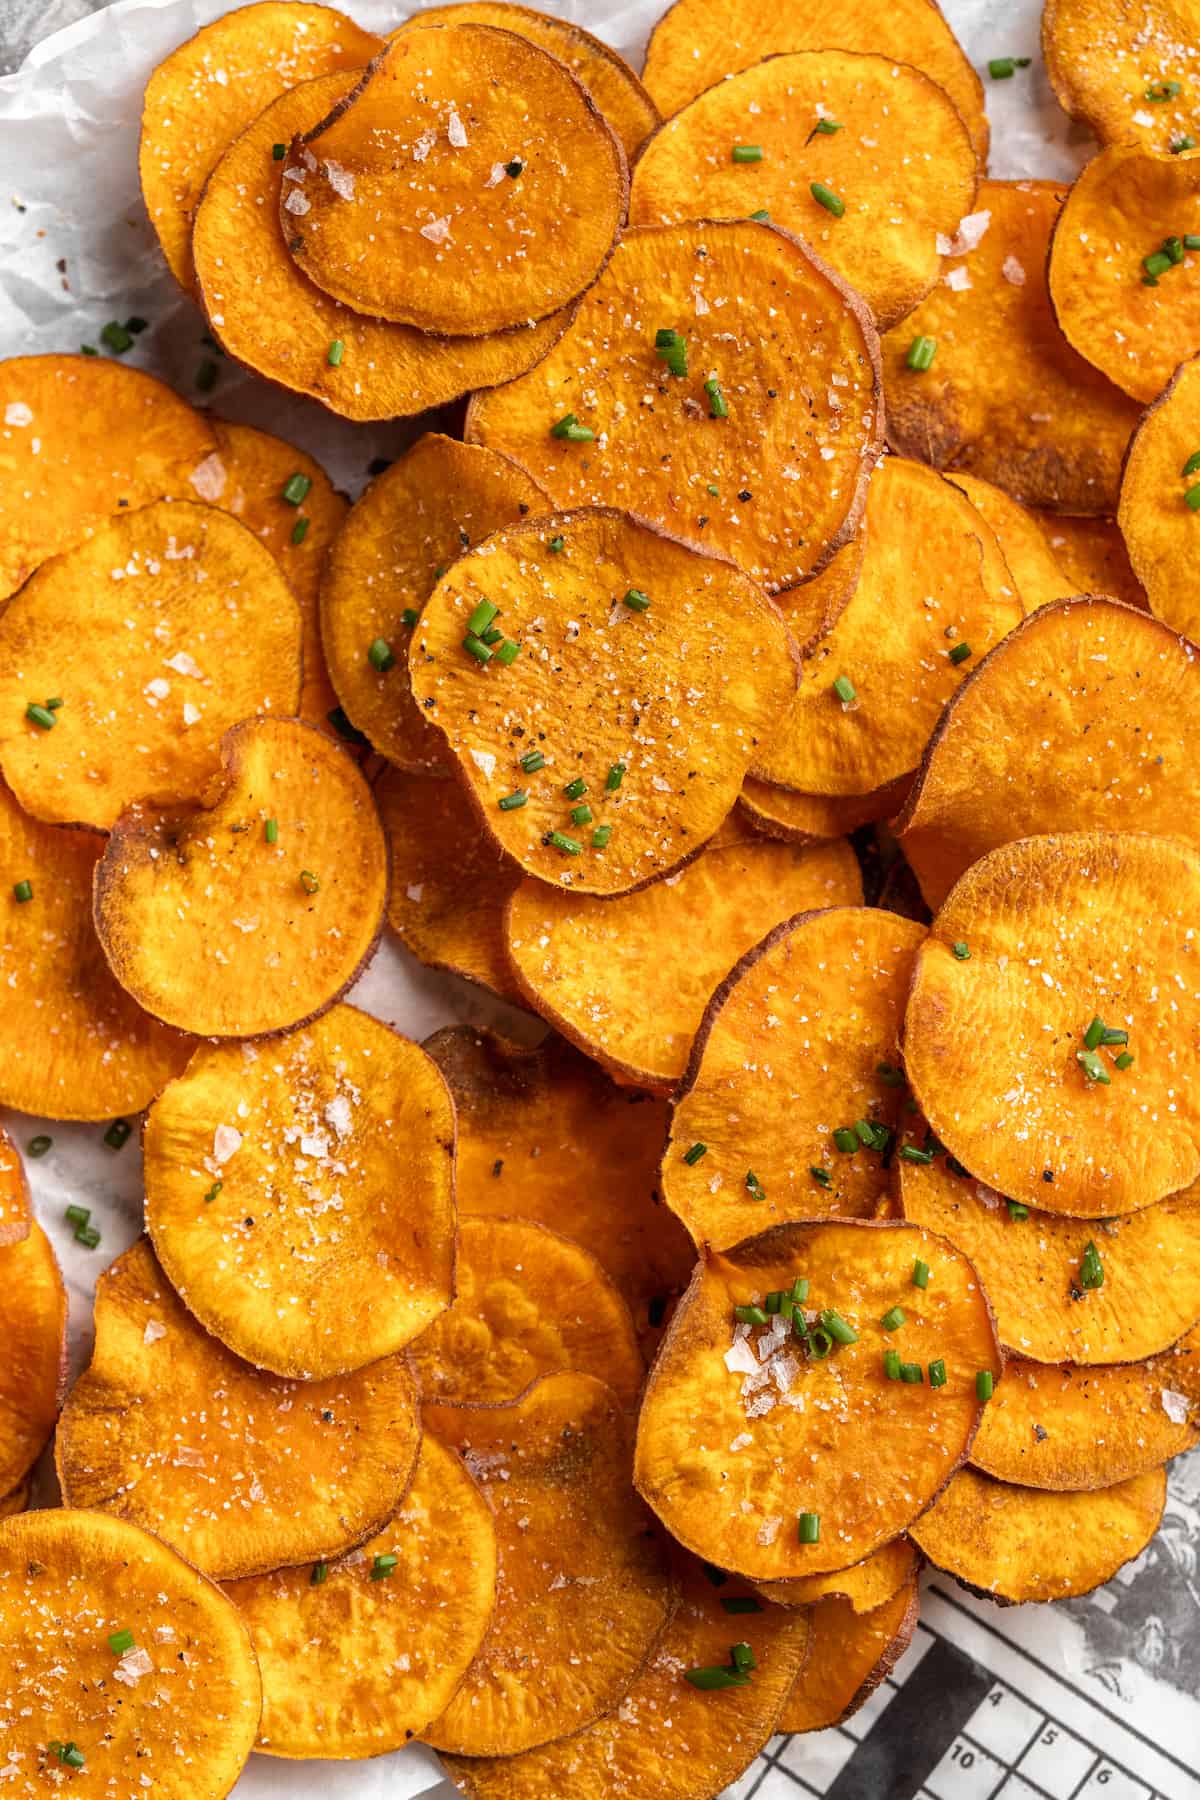
Once you start eating these crispy sweet potato chips , you won’t be able to stop! Finish them with a sprinkle of sea salt and pair them with your favourite dips, serve them as a side for sandwiches, or just snack away.

Homemade chips are one of those things that seems like it should take a lot of work, but they’re really a whole lot easier than you expect. Like my air fryer veggie chips and beet chips , these sweet potato chips take just a few minutes of prep, a little bit of cooking, and the results are SO worth it.
Let me tell you, you will eat these up so quickly, you will be making more very soon. (Just plan on picking up sweet potatoes every time you go grocery shopping from now on!)
The sea salt is the kicker on top of these sweet chips. It adds a delicious contrast and texture to the chips, taking them to the next level.

Why You’ll Love This Sweet Potato Chips Recipe
- A sweet and salty snack . You don’t have to choose between salty chips or sweet candy when you’re snacking on sweet potato chips—you get both flavours!
- Easy to make at home . Homemade sweet potato chips can be made easily in your oven with just a few ingredients.
- Versatile snack option . These chips can be paired with just about any dip, served as an accompaniment to sandwiches, or eaten on their own.
- Budget-friendly . Sweet potatoes are a budget-friendly ingredient that can be easily found at any grocery store.
Notes on Ingredients
Scroll down to the recipe card to find the ingredient quantities and recipe instructions.
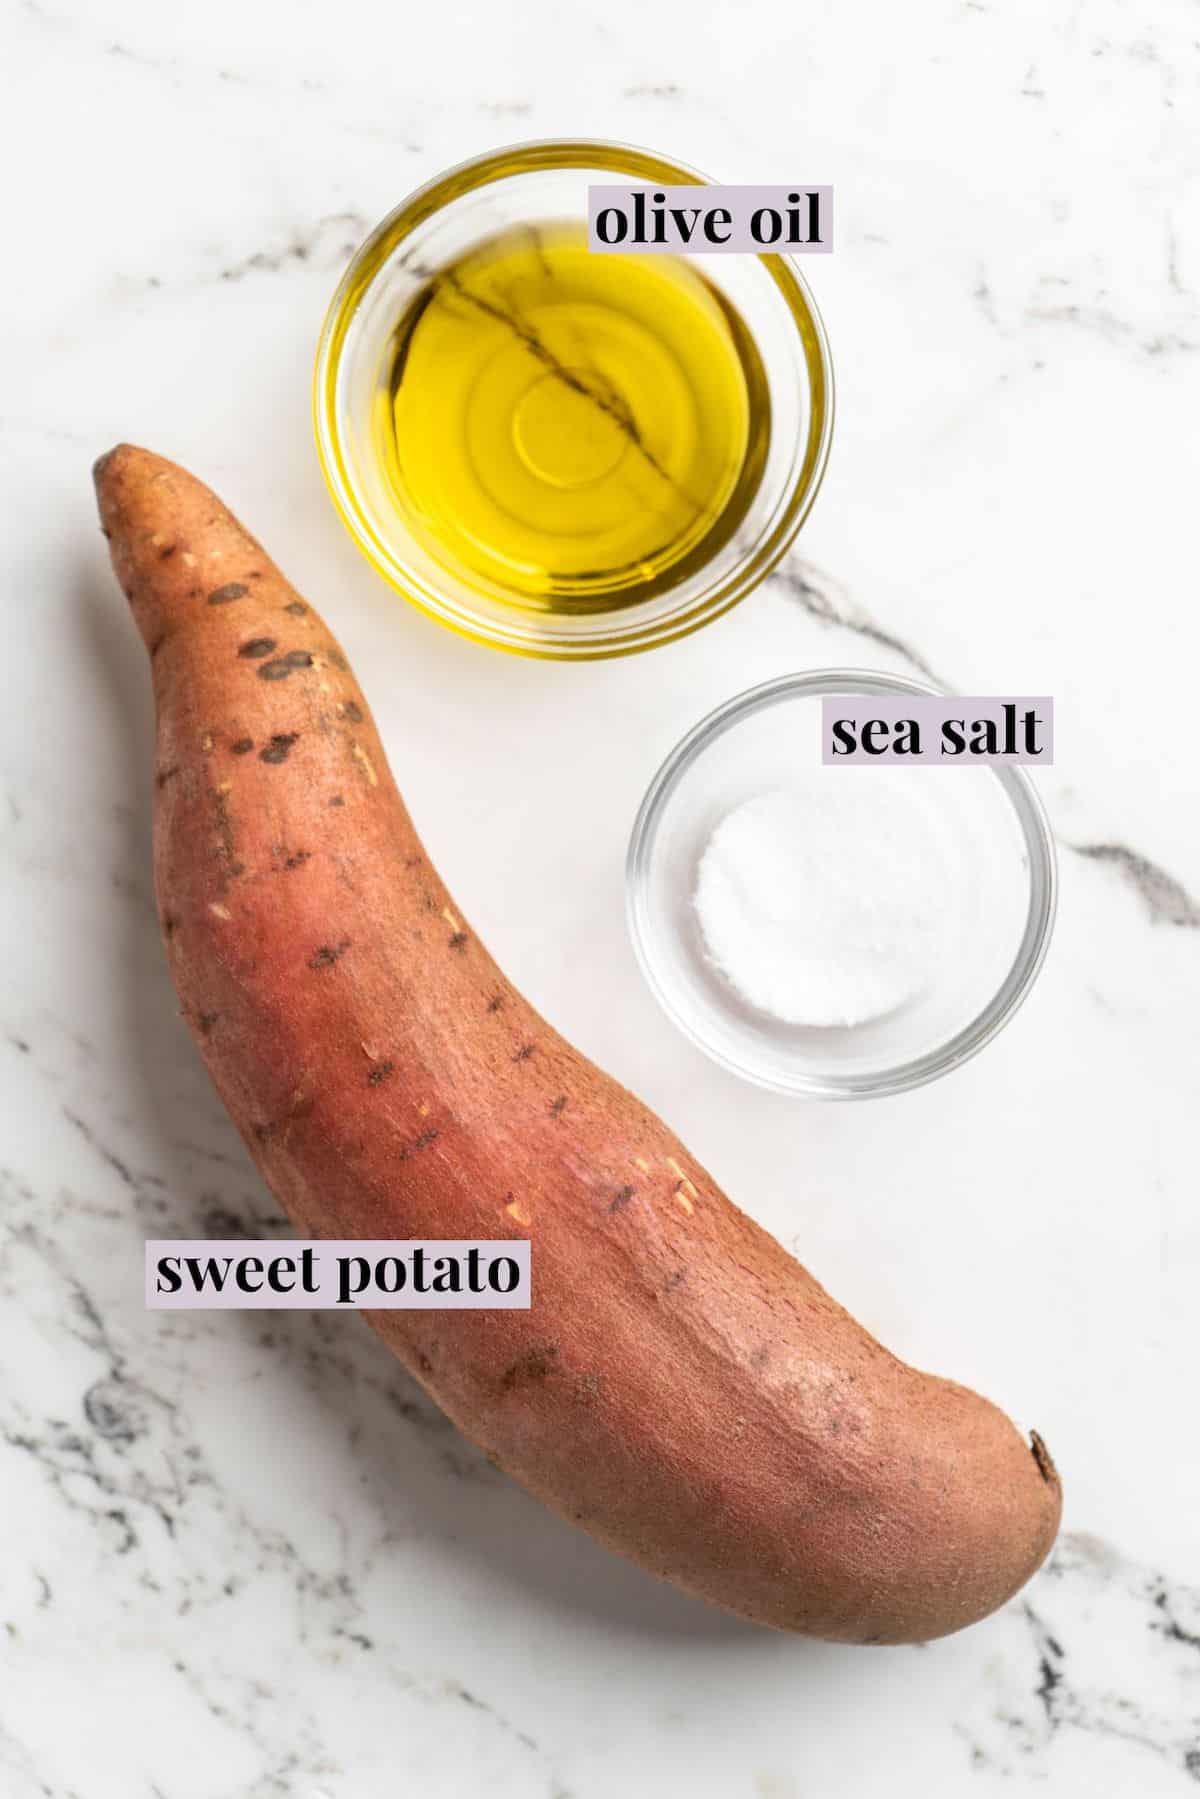
- Sweet potato – You can leave the skin on or peel it off. Even if you don’t usually like sweet potato skin, the potato will be sliced so thinly it probably won’t bother you here!
- Olive oil – You’ll need some for tossing the sweet potato chips and some for making sure they don’t stick to the pan.
- Sea salt – A flaky sea salt adds some nice texture to the chips.
How to Make Sweet Potato Chips
- Prepare . Preheat your oven to 400℉. Cut the sweet potato into 1/8-inch-thick slices.
- Season . Toss the sweet potato slices with olive oil until they’re evenly coated.
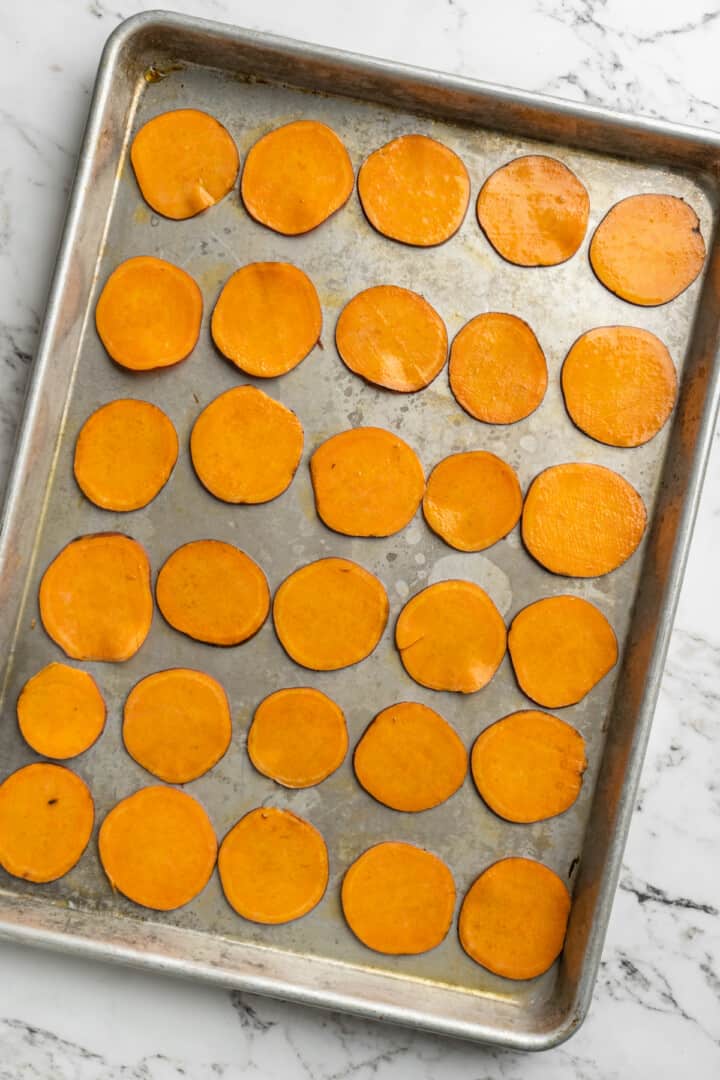
- Arrange on the baking sheet . Coat one or two baking sheets with olive oil. Place the chips on the baking sheet and sprinkle salt over the tops.
- Bake . Set the baking sheets on the racks furthest away from the heat source. Bake for 15 to 20 minutes, flipping the chips once halfway through the cooking time, until they’re crisp and baked through.
- Season and cool . Remove the pans from the oven and sprinkle more sea salt on top of the chips. Allow the sweet potato chips to cool slightly on the baking sheet for at least 5 minutes, then enjoy.
Tips for Success
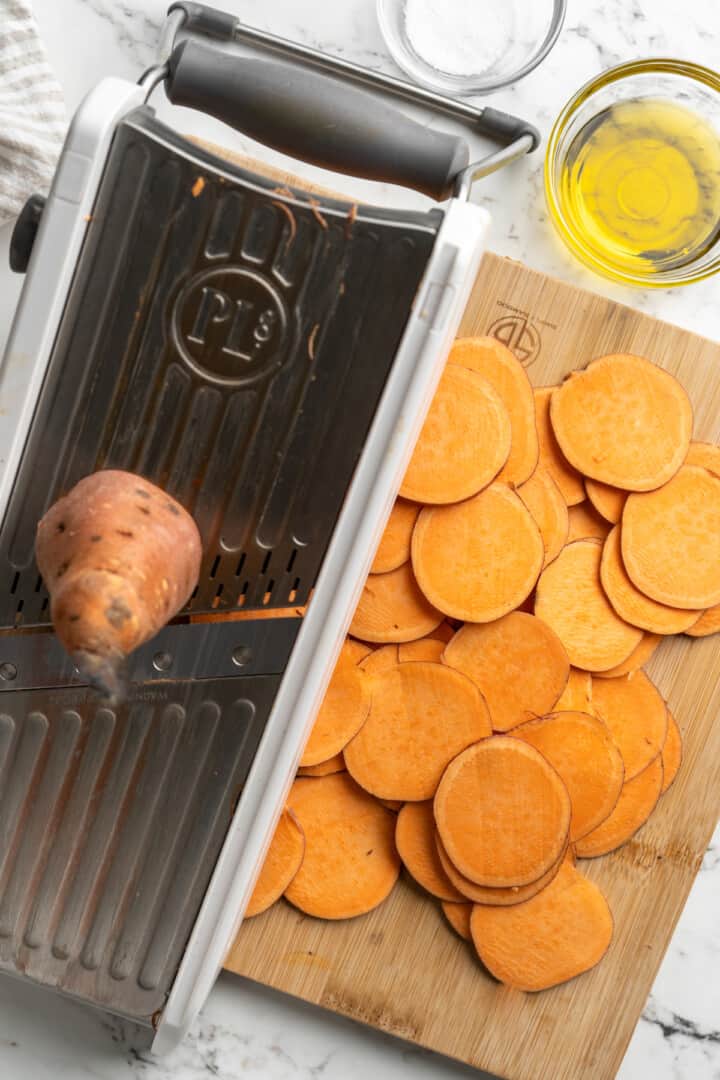
- Use a mandoline slicer . To get thin and evenly sliced sweet potato chips, use a mandoline slicer with a 1/8-inch setting.
- Do not overcrowd the baking sheet . Make sure to leave some space between the sweet potato slices on the baking sheet to ensure they cook evenly and become crispy.
- Monitor closely . Keep an eye on the chips, as they can quickly go from crispy to burnt due to their thinness. To make sure the chips don’t burn, I recommend first checking for doneness at the 10-minute mark.
- Bake longer if needed . The chips will get crispier after cooling. If you find they’re still not crispy after 5 minutes, you can bake them for 5 minutes more; if just the centres are soft, place the pan back in the oven with the door slightly ajar for 5 minutes. (The oven should be turned off when you do this—you just need the residual heat!)
Flavour Ideas for Sweet Potato Chips
As soon as the chips come out of the oven, you can sprinkle on any seasoning you’d like to make these flavoured chips! Here are some ideas:
- Spices . Smoked paprika, garlic powder, cumin, and chili powder are all great options to add some heat and depth of flavour to your chips.
- Herbs . Dried herbs like rosemary or thyme can add a fresh, savoury note to your sweet potato chips. If you’re serving the chips right away, you can also use fresh herbs.
- Vegan cheese . If you plan on eating your chips immediately (versus storing them for later), a sprinkle of freshly grated vegan Parmesan is delicious.
Serving Suggestions
- Dips . These sweet potato chips go well with a variety of dips! Try my vegan spinach artichoke dip , vegan whipped feta dip , or vegan ranch dressing .
- Sandwiches . Add these sweet and salty chips as a side with a vegan BLT sandwich , or your favourite sandwich.
- Burgers . These chips are perfect with vegan quinoa beet burgers .
- On their own . Of course, these sweet potato chips are just as tasty on their own as a snack.
How to Store
Place the cooled sweet potato chips in an airtight container or zip-top bag and store them at room temperature for up to 3 days.
If they get a bit soft during storage, place them on a baking sheet and bake in a preheated oven at 350℉ for about 5 minutes until they’re crispy again.
More Crispy Vegan Snacks
- Homemade Pita Chips
- Cinnamon Apple Chips (Baked)
- Three Ways To Make Kale Chips – Salty, Spicy and Cheesy
- Vegan Cheez-Its

Ingredients
- 1 large sweet potato , washed and dried (about ½ lb)
- 1 tablespoon olive oil , + a little extra to great the cookie sheet
- ⅛ to ¼ teaspoon sea salt , plus a little extra for finishing (if needed)
Instructions
- Preheat the oven to 400℉/200℃.
- Slice off an inch off of both ends of your sweet potato. Run the sweet potato through your mandolin (I used the ⅛" thickness setting) until you have made circular chips out of the entire potato. If you don’t have a mandolin, you can use a very sharp knife to cut similar sized circles but a mandolin is preferred for consistent shaping and crispiness.
- In a bowl, toss the raw sweet potato chips with the 1 tablespoon olive oil until coated.
- Coat one or two baking sheets (depending on how many chips you end up with) with a little bit more olive oil. Place the raw chips on the baking sheet, spreading out so they don’t touch or touch only slightly, and sprinkle with sea salt.
- Place the baking sheets in the racks furthest away from the heat source/in the centre of the oven to prevent burning.
- Bake for 15 to 20 minutes (checking them after 10 minutes, and again after the 15 minute mark to ensure they don’t burn) flipping the chips once halfway, until chips are crisp and cooked through. You want to check as early as 10 minutes since your mandolin might slice slightly thinner than mine and you don’t want them to burn. On one mandolin, this size was ready at 20 minutes. On the other mandolin, it was ready at 15 minutes.
- Sprinkle more sea salt on top as soon as you remove them from the oven (a little goes along way – don’t do more than pinch of ⅛ teaspoon at a time). Allow chips to cool slightly on the baking sheet for about 5 minutes at least – they crisp up even more as they cool so you may not need the extra 5 minutes even if some feel a little soft in the centre. If still not crisp at all after the cooling, bake for those extra 5 minutes. If they need just a little bit more time/the centre is still slightly soft, you can place the pan back inside the now OFF oven with the door slightly open for 5 minutes to help dry out the chips. Serve and enjoy!
Notes
- As soon as chips come out the oven, you can also sprinkle over some paprika, garlic powder or any other seasoning you’d like to make these flavoured chips!
- To store : Place the cooled sweet potato chips in an airtight container or ziplock bag and store them at room temperature for up to 3 days. If they get a bit soft during storage, place them on a baking sheet and bake in a preheated oven at 350℉ for about 5 minutes until they’re crispy again.
Once you start eating these crispy sweet potato chips , you won’t be able to stop! Finish them with a sprinkle of sea salt and pair them with your favourite dips, serve them as a side for sandwiches, or just snack away.
Homemade chips are one of those things that seems like it should take a lot of work, but they’re really a whole lot easier than you expect. Like my air fryer veggie chips and beet chips , these sweet potato chips take just a few minutes of prep, a little bit of cooking, and the results are SO worth it.
Let me tell you, you will eat these up so quickly, you will be making more very soon. (Just plan on picking up sweet potatoes every time you go grocery shopping from now on!)
The sea salt is the kicker on top of these sweet chips. It adds a delicious contrast and texture to the chips, taking them to the next level.
Why You’ll Love This Sweet Potato Chips Recipe
- A sweet and salty snack . You don’t have to choose between salty chips or sweet candy when you’re snacking on sweet potato chips—you get both flavours!
- Easy to make at home . Homemade sweet potato chips can be made easily in your oven with just a few ingredients.
- Versatile snack option . These chips can be paired with just about any dip, served as an accompaniment to sandwiches, or eaten on their own.
- Budget-friendly . Sweet potatoes are a budget-friendly ingredient that can be easily found at any grocery store.
Notes on Ingredients
Scroll down to the recipe card to find the ingredient quantities and recipe instructions.
- Sweet potato – You can leave the skin on or peel it off. Even if you don’t usually like sweet potato skin, the potato will be sliced so thinly it probably won’t bother you here!
- Olive oil – You’ll need some for tossing the sweet potato chips and some for making sure they don’t stick to the pan.
- Sea salt – A flaky sea salt adds some nice texture to the chips.
How to Make Sweet Potato Chips
- Prepare . Preheat your oven to 400℉. Cut the sweet potato into 1/8-inch-thick slices.
- Season . Toss the sweet potato slices with olive oil until they’re evenly coated.
- Arrange on the baking sheet . Coat one or two baking sheets with olive oil. Place the chips on the baking sheet and sprinkle salt over the tops.
- Bake . Set the baking sheets on the racks furthest away from the heat source. Bake for 15 to 20 minutes, flipping the chips once halfway through the cooking time, until they’re crisp and baked through.
- Season and cool . Remove the pans from the oven and sprinkle more sea salt on top of the chips. Allow the sweet potato chips to cool slightly on the baking sheet for at least 5 minutes, then enjoy.
Tips for Success
- Use a mandoline slicer . To get thin and evenly sliced sweet potato chips, use a mandoline slicer with a 1/8-inch setting.
- Do not overcrowd the baking sheet . Make sure to leave some space between the sweet potato slices on the baking sheet to ensure they cook evenly and become crispy.
- Monitor closely . Keep an eye on the chips, as they can quickly go from crispy to burnt due to their thinness. To make sure the chips don’t burn, I recommend first checking for doneness at the 10-minute mark.
- Bake longer if needed . The chips will get crispier after cooling. If you find they’re still not crispy after 5 minutes, you can bake them for 5 minutes more; if just the centres are soft, place the pan back in the oven with the door slightly ajar for 5 minutes. (The oven should be turned off when you do this—you just need the residual heat!)
Flavour Ideas for Sweet Potato Chips
As soon as the chips come out of the oven, you can sprinkle on any seasoning you’d like to make these flavoured chips! Here are some ideas:
- Spices . Smoked paprika, garlic powder, cumin, and chili powder are all great options to add some heat and depth of flavour to your chips.
- Herbs . Dried herbs like rosemary or thyme can add a fresh, savoury note to your sweet potato chips. If you’re serving the chips right away, you can also use fresh herbs.
- Vegan cheese . If you plan on eating your chips immediately (versus storing them for later), a sprinkle of freshly grated vegan Parmesan is delicious.
Serving Suggestions
- Dips . These sweet potato chips go well with a variety of dips! Try my vegan spinach artichoke dip , vegan whipped feta dip , or vegan ranch dressing .
- Sandwiches . Add these sweet and salty chips as a side with a vegan BLT sandwich , or your favourite sandwich.
- Burgers . These chips are perfect with vegan quinoa beet burgers .
- On their own . Of course, these sweet potato chips are just as tasty on their own as a snack.
How to Store
Place the cooled sweet potato chips in an airtight container or zip-top bag and store them at room temperature for up to 3 days.
If they get a bit soft during storage, place them on a baking sheet and bake in a preheated oven at 350℉ for about 5 minutes until they’re crispy again.
More Crispy Vegan Snacks
- Homemade Pita Chips
- Cinnamon Apple Chips (Baked)
- Three Ways To Make Kale Chips – Salty, Spicy and Cheesy
- Vegan Cheez-Its
Ingredients
- 1 large sweet potato , washed and dried (about ½ lb)
- 1 tablespoon olive oil , + a little extra to great the cookie sheet
- ⅛ to ¼ teaspoon sea salt , plus a little extra for finishing (if needed)
Instructions
- Preheat the oven to 400℉/200℃.
- Slice off an inch off of both ends of your sweet potato. Run the sweet potato through your mandolin (I used the ⅛" thickness setting) until you have made circular chips out of the entire potato. If you don’t have a mandolin, you can use a very sharp knife to cut similar sized circles but a mandolin is preferred for consistent shaping and crispiness.
- In a bowl, toss the raw sweet potato chips with the 1 tablespoon olive oil until coated.
- Coat one or two baking sheets (depending on how many chips you end up with) with a little bit more olive oil. Place the raw chips on the baking sheet, spreading out so they don’t touch or touch only slightly, and sprinkle with sea salt.
- Place the baking sheets in the racks furthest away from the heat source/in the centre of the oven to prevent burning.
- Bake for 15 to 20 minutes (checking them after 10 minutes, and again after the 15 minute mark to ensure they don’t burn) flipping the chips once halfway, until chips are crisp and cooked through. You want to check as early as 10 minutes since your mandolin might slice slightly thinner than mine and you don’t want them to burn. On one mandolin, this size was ready at 20 minutes. On the other mandolin, it was ready at 15 minutes.
- Sprinkle more sea salt on top as soon as you remove them from the oven (a little goes along way – don’t do more than pinch of ⅛ teaspoon at a time). Allow chips to cool slightly on the baking sheet for about 5 minutes at least – they crisp up even more as they cool so you may not need the extra 5 minutes even if some feel a little soft in the centre. If still not crisp at all after the cooling, bake for those extra 5 minutes. If they need just a little bit more time/the centre is still slightly soft, you can place the pan back inside the now OFF oven with the door slightly open for 5 minutes to help dry out the chips. Serve and enjoy!
Notes
- As soon as chips come out the oven, you can also sprinkle over some paprika, garlic powder or any other seasoning you’d like to make these flavoured chips!
- To store : Place the cooled sweet potato chips in an airtight container or ziplock bag and store them at room temperature for up to 3 days. If they get a bit soft during storage, place them on a baking sheet and bake in a preheated oven at 350℉ for about 5 minutes until they’re crispy again.

Sweet Potato Chips
Ingredients
- 1 large sweet potato washed and dried (about ½ lb)
- 1 tablespoon olive oil + a little extra to great the cookie sheet
- ⅛ to ¼ teaspoon sea salt plus a little extra for finishing (if needed)
Instructions
- Preheat the oven to 400℉/200℃.
- Slice off an inch off of both ends of your sweet potato. Run the sweet potato through your mandolin (I used the ⅛" thickness setting) until you have made circular chips out of the entire potato. If you don’t have a mandolin, you can use a very sharp knife to cut similar sized circles but a mandolin is preferred for consistent shaping and crispiness.
- In a bowl, toss the raw sweet potato chips with the 1 tablespoon olive oil until coated.
- Coat one or two baking sheets (depending on how many chips you end up with) with a little bit more olive oil. Place the raw chips on the baking sheet, spreading out so they don’t touch or touch only slightly, and sprinkle with sea salt.
- Place the baking sheets in the racks furthest away from the heat source/in the centre of the oven to prevent burning.
- Bake for 15 to 20 minutes (checking them after 10 minutes, and again after the 15 minute mark to ensure they don’t burn) flipping the chips once halfway, until chips are crisp and cooked through. You want to check as early as 10 minutes since your mandolin might slice slightly thinner than mine and you don’t want them to burn. On one mandolin, this size was ready at 20 minutes. On the other mandolin, it was ready at 15 minutes.
- Sprinkle more sea salt on top as soon as you remove them from the oven (a little goes along way - don’t do more than pinch of ⅛ teaspoon at a time). Allow chips to cool slightly on the baking sheet for about 5 minutes at least - they crisp up even more as they cool so you may not need the extra 5 minutes even if some feel a little soft in the centre. If still not crisp at all after the cooling, bake for those extra 5 minutes. If they need just a little bit more time/the centre is still slightly soft, you can place the pan back inside the now OFF oven with the door slightly open for 5 minutes to help dry out the chips. Serve and enjoy!
Notes
- As soon as chips come out the oven, you can also sprinkle over some paprika, garlic powder or any other seasoning you’d like to make these flavoured chips!
- To store : Place the cooled sweet potato chips in an airtight container or ziplock bag and store them at room temperature for up to 3 days. If they get a bit soft during storage, place them on a baking sheet and bake in a preheated oven at 350℉ for about 5 minutes until they’re crispy again.
Nutrition
Sweet Potato Chips https://jessicainthekitchen.com/sweet-potato-chips/ January 29, 2024
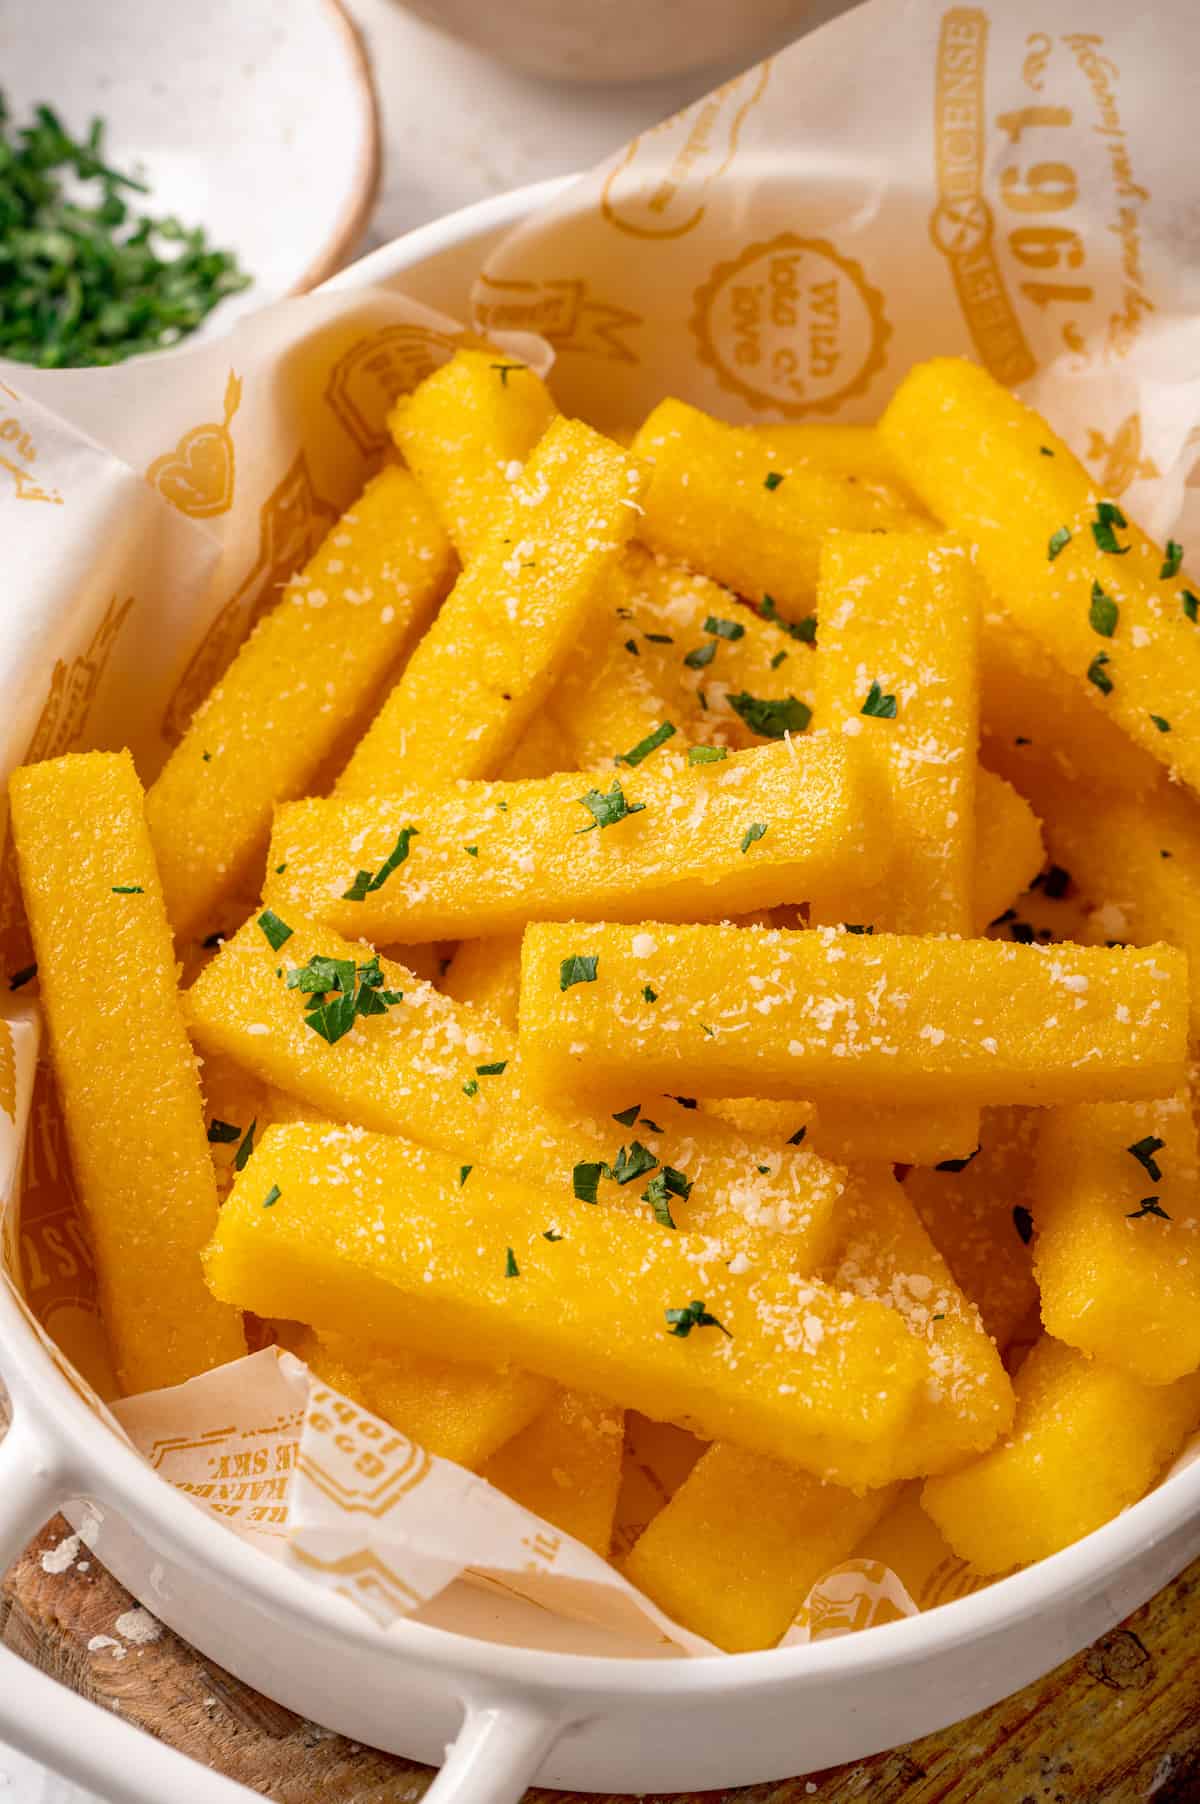
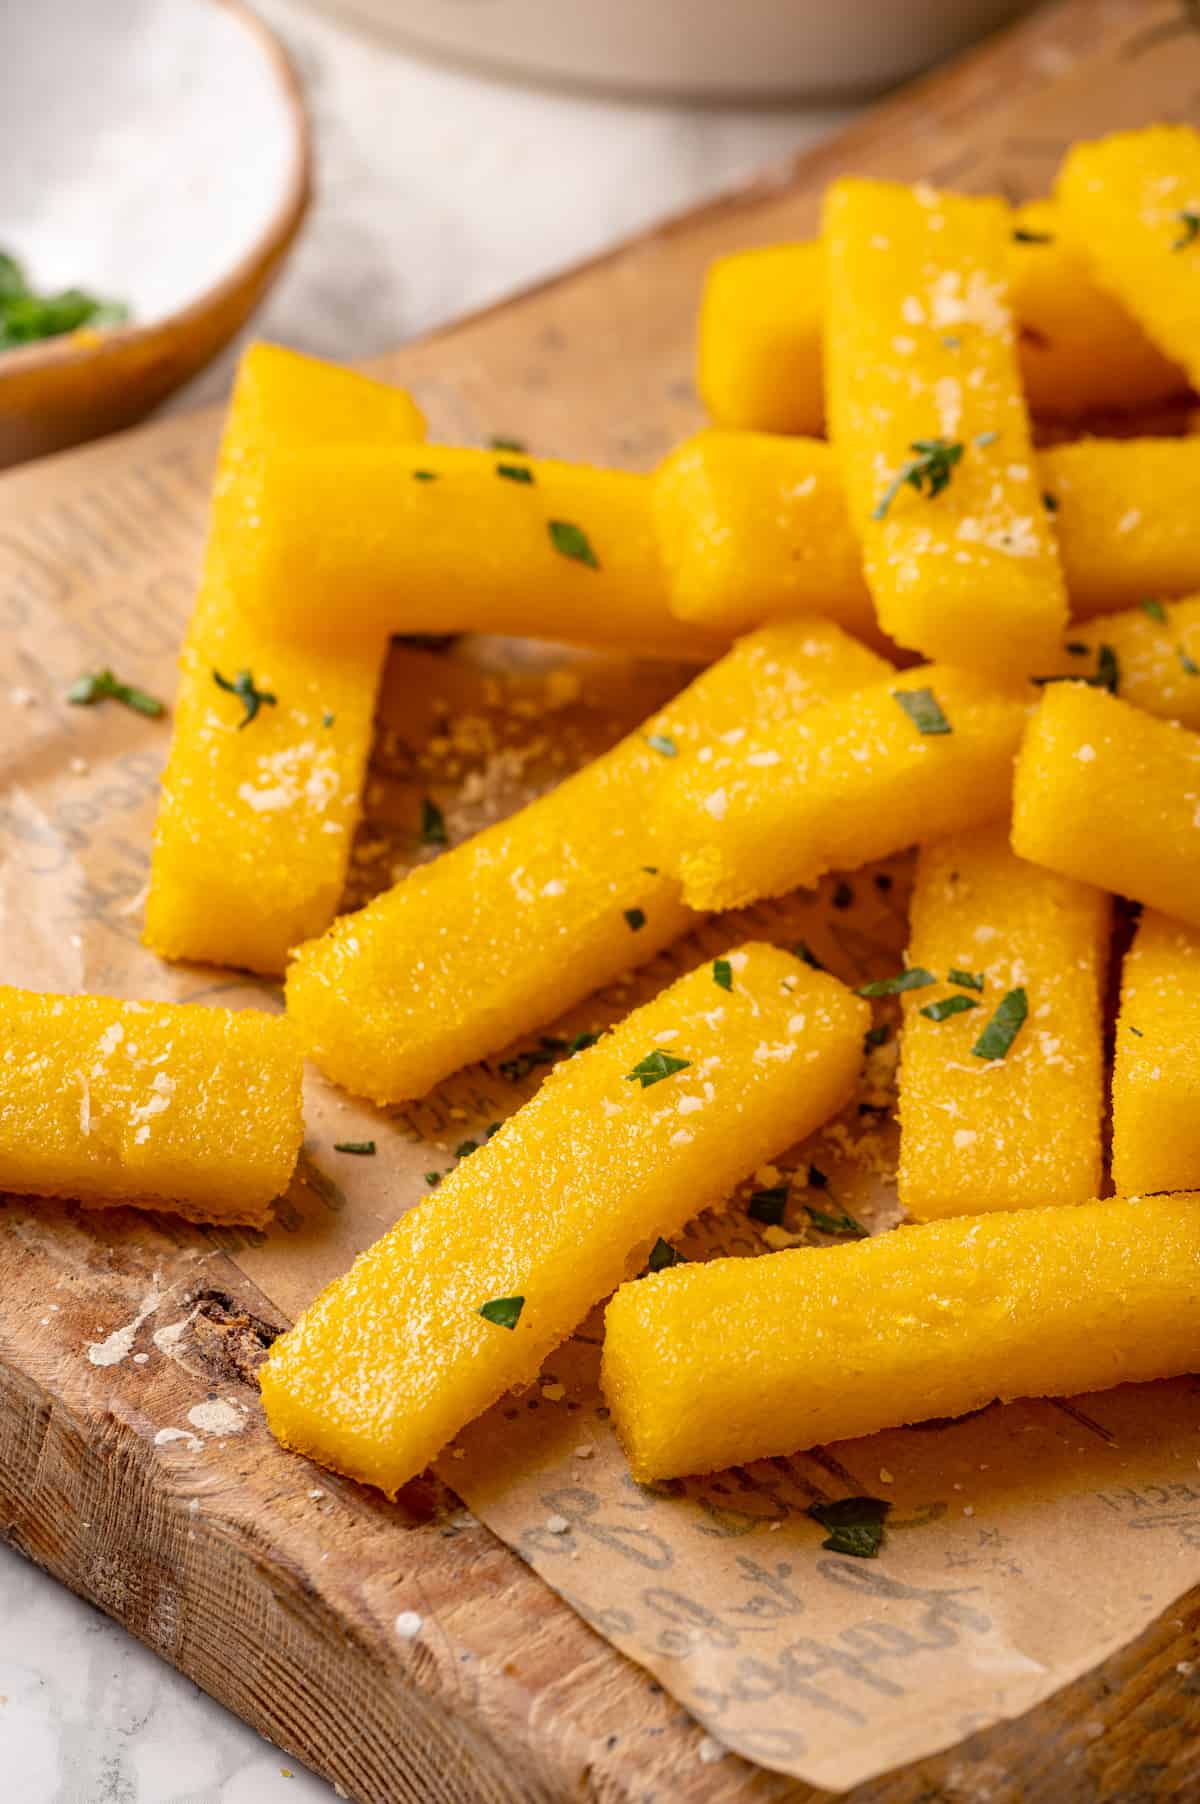
This fried polenta recipe gives you a whole new way to enjoy polenta! Homemade polenta is cooled, cut into strips, then fried to crispy perfection. Pair these polenta fries with your favourite dipping sauce and dig in!
Fried polenta is a game-changer, friends. Imagine taking that creamy, comforting bowl of polenta and transforming it into a crispy, snackable delight. That’s exactly what we’re doing here! It’s like a magic trick, only it’s one you can eat—and honestly, isn’t that the best kind of magic?
I love using leftover polenta to make crispy polenta, but leftovers really aren’t enough to satisfy a polenta fry craving, which is where this recipe comes in. You’ll make a whole batch of polenta just for fries!
Trust me, once you’ve tasted crispy-on-the-outside, creamy-on-the-inside, absolutely divine crispy fried polenta, you’re going to want to make this recipe all the time!
Why You’ll Love This Fried Polenta Recipe
- The crispiest exterior . These polenta fries are seriously crispy! In fact, I’d say the outside is much crispier than French fries and more like the exterior you get on fried homemade falafel or arancini .
- Creamy inside . While the exterior of these fries is divinely crispy-crunchy, the inside is still creamy. The combination of textures makes fried polenta irresistible!
- Versatile flavour options . This recipe is great on its own, but it also acts as a blank canvas for flavourful additions. You can add herbs, spices, or vegan cheese to the polenta before frying to give it an extra punch of flavour. I share some ideas below!
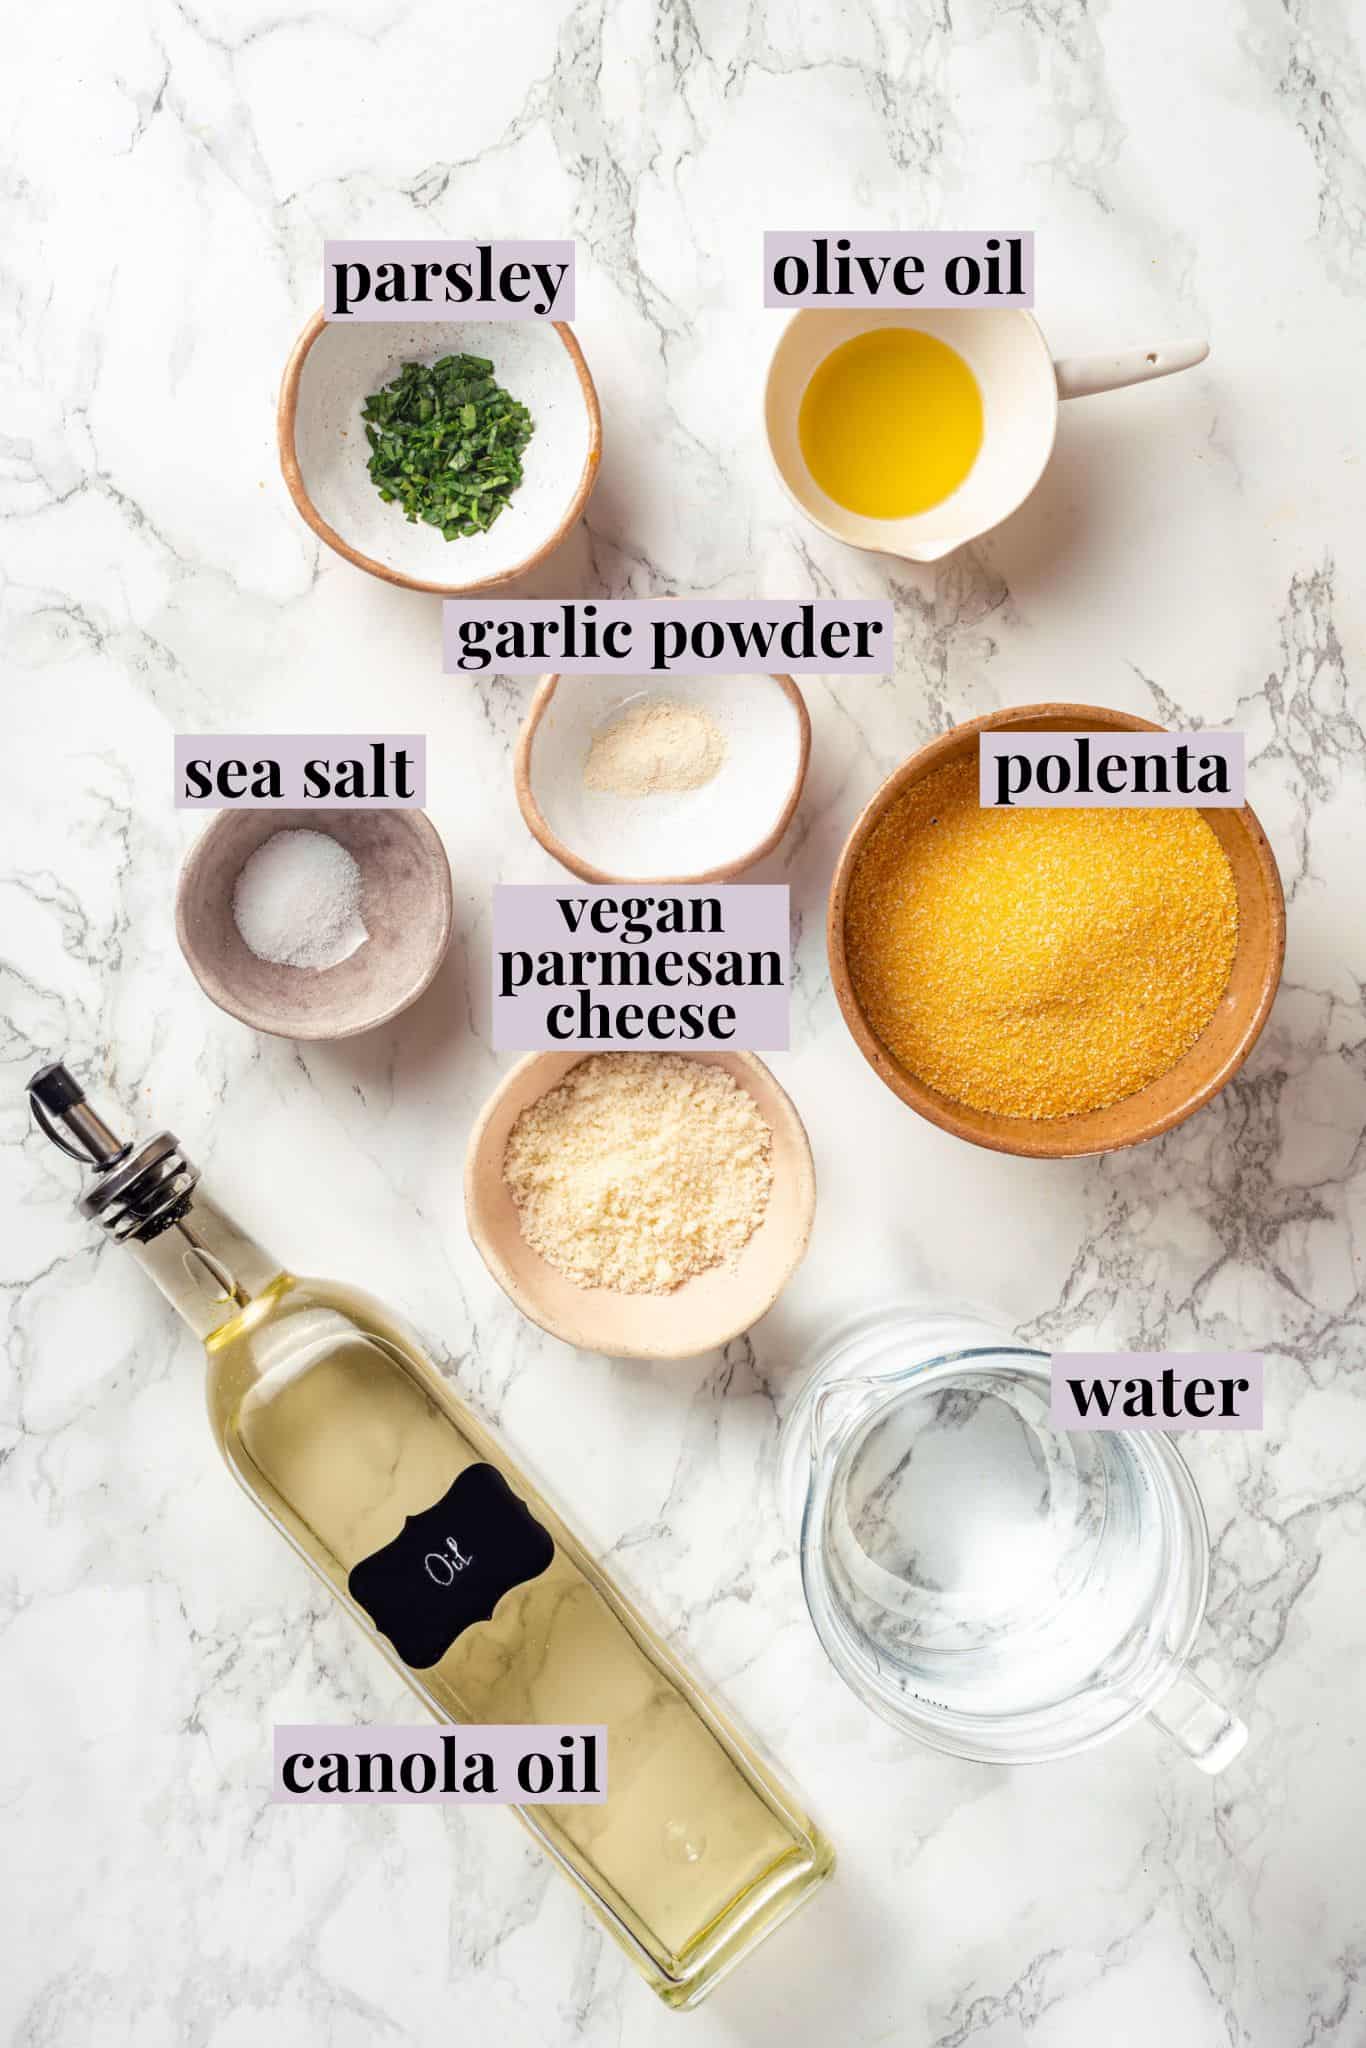
Notes on Ingredients
Scroll down to the recipe card to find the ingredient quantities and recipe instructions.
- Water
- Salt
- Polenta – You’ll need dry polenta grains, not the polenta that comes in a tube.
- Garlic powder – This adds savoury flavour to the polenta fries.
- Olive oil
- Canola oil – Or another oil you like to use for frying.
- Vegan Parmesan cheese – I find that store-bought vegan Parmesan sticks to the fried polenta better than homemade vegan Parmesan cheese , but you can use either.
- Chopped fresh parsley – For garnish.
Is Polenta the Same as Grits?
Some brands, like Bob’s Red Mill, do label their polenta as grits. That said, there is a difference between the two, although you can use them interchangeably.
Polenta and grits are both made from ground cornmeal, but they come from different types of corn. Grits are made from white corn, while polenta is usually made from yellow corn. The other main difference between polenta and grits is the texture. Grits are usually finer and smoother, while polenta is coarser and has a more pronounced texture.
How to Make Fried Polenta
- Prep. Liberally grease a square baking pan with olive oil.
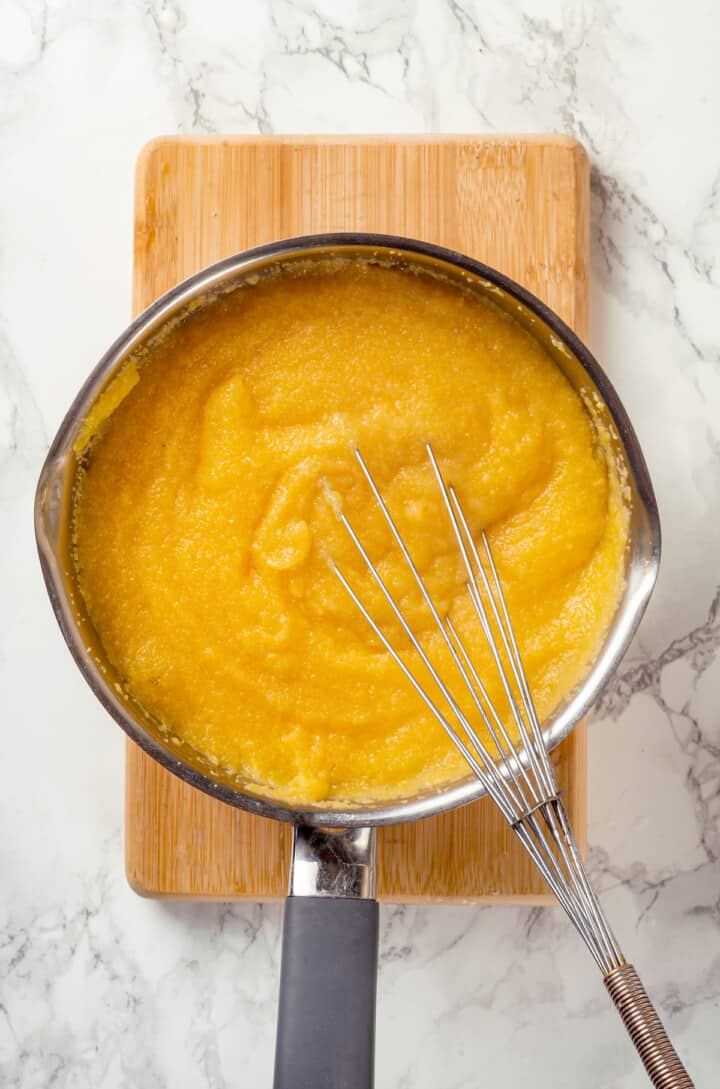
- Cook the polenta. Bring 3 cups of water to a rolling boil in a pot. Salt the water, then whisk in the polenta. Continue to whisk until the polenta absorbs the water. Stir in another cup of water, along with the garlic powder and olive oil, then reduce the heat to low and simmer until the polenta thickens.
- Cool. Pour the polenta into the prepared pan and smooth it into an even layer with a rubber spatula. Cool to room temperature.
- Prepare to fry. Heat the canola oil in a 2-quart pot set over medium-high heat until the oil reaches 375°F. Line a plate with paper towels.
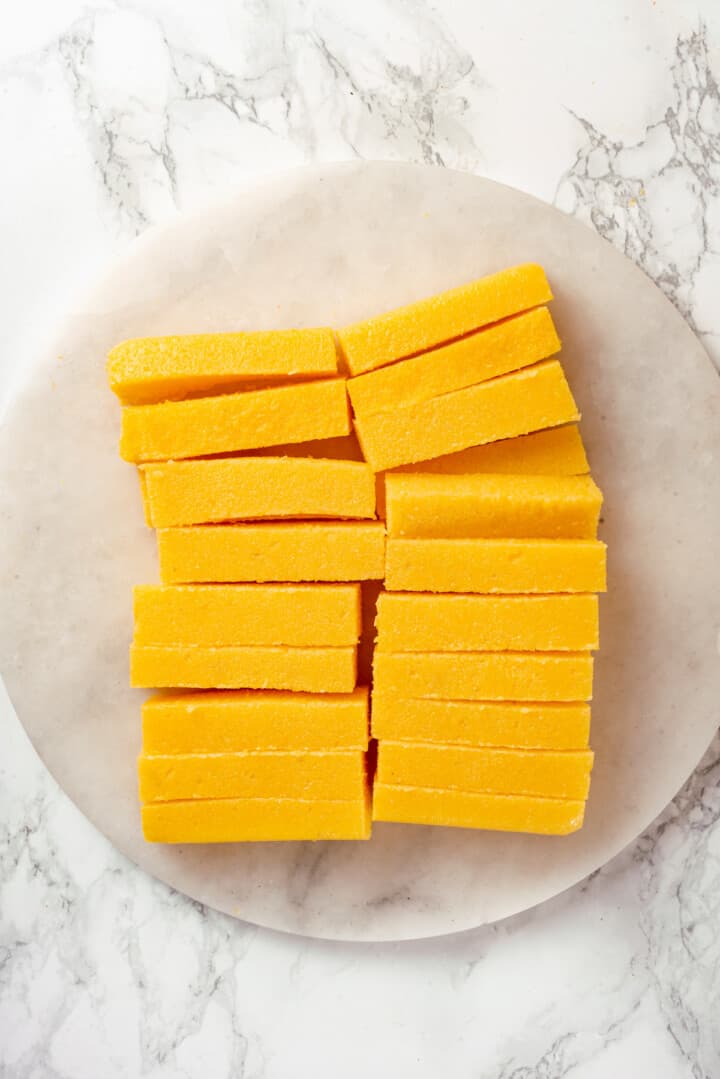
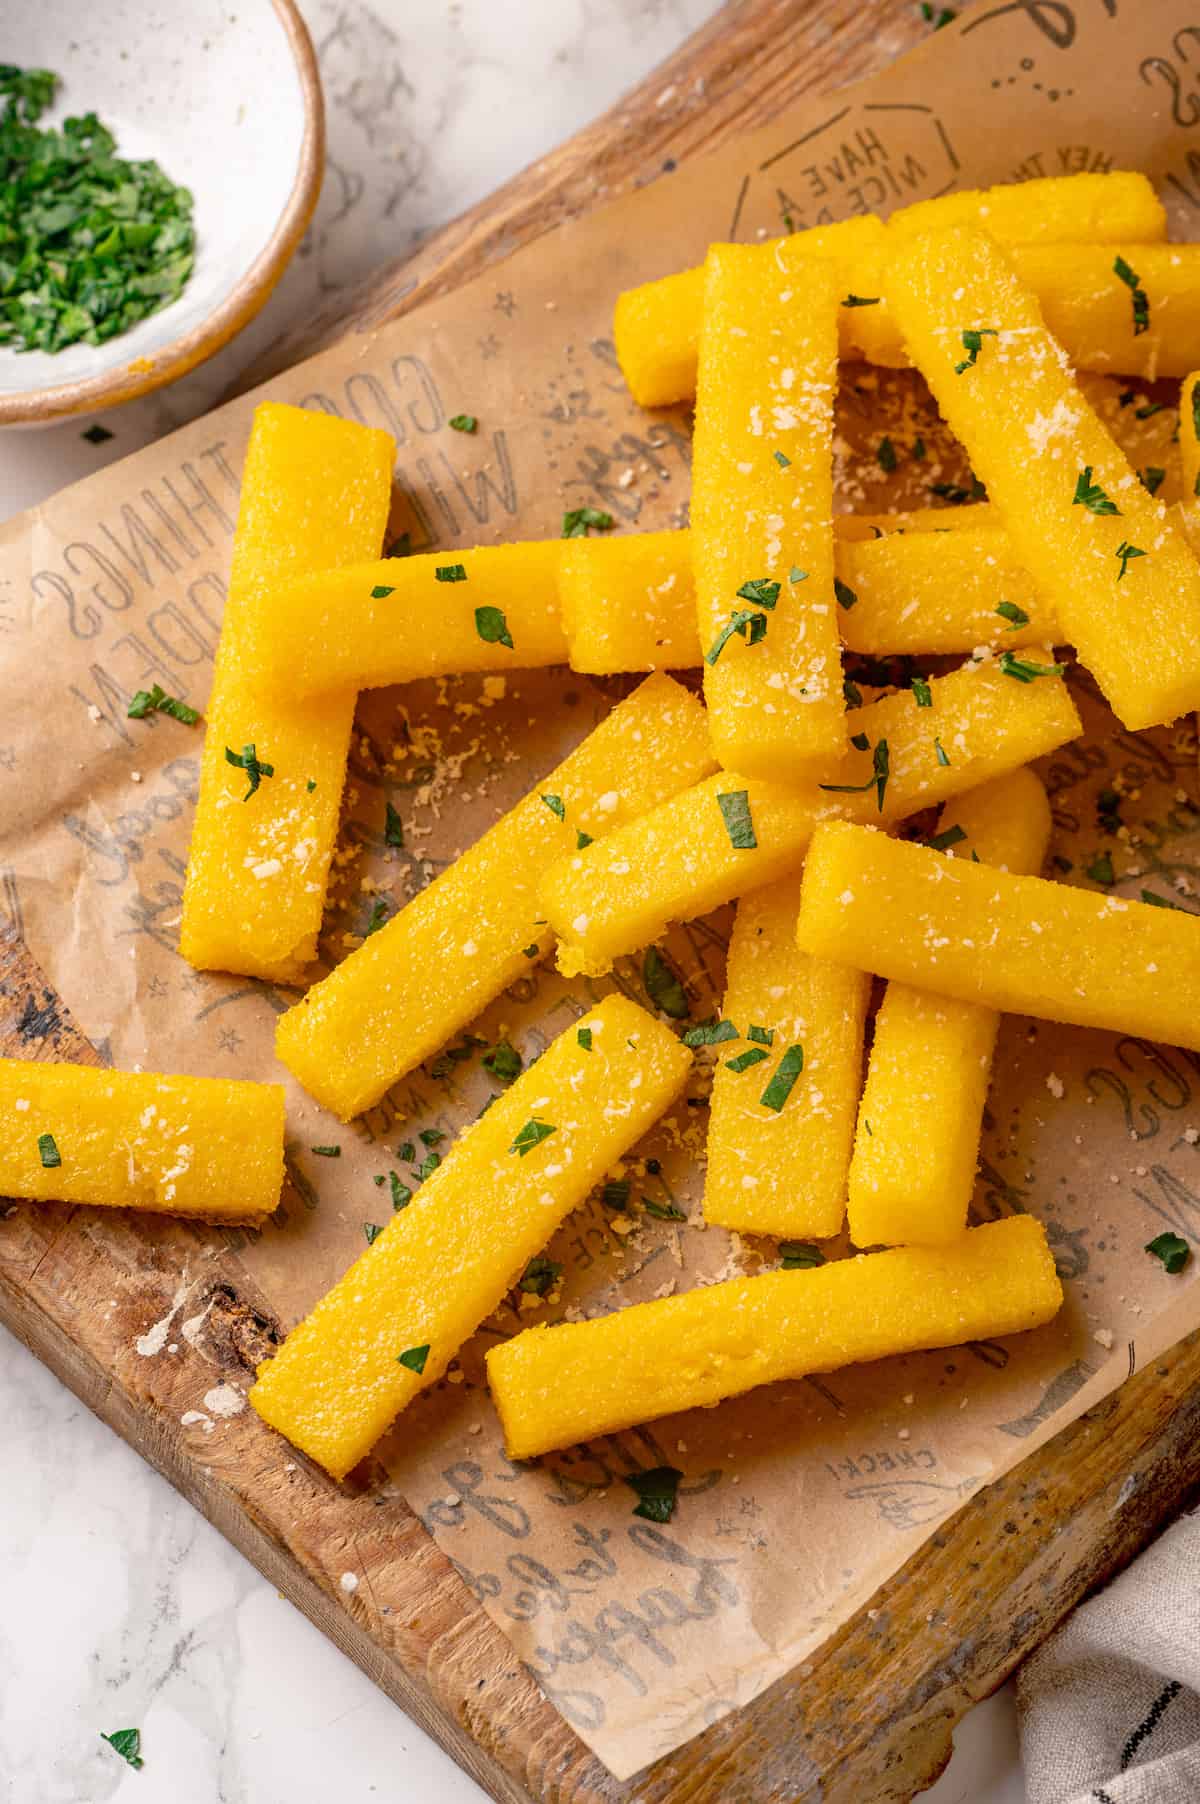
- Cut. Turn out the cooled polenta onto a cutting board. Cut it into strips about 3 inches long and ½ inch thick.
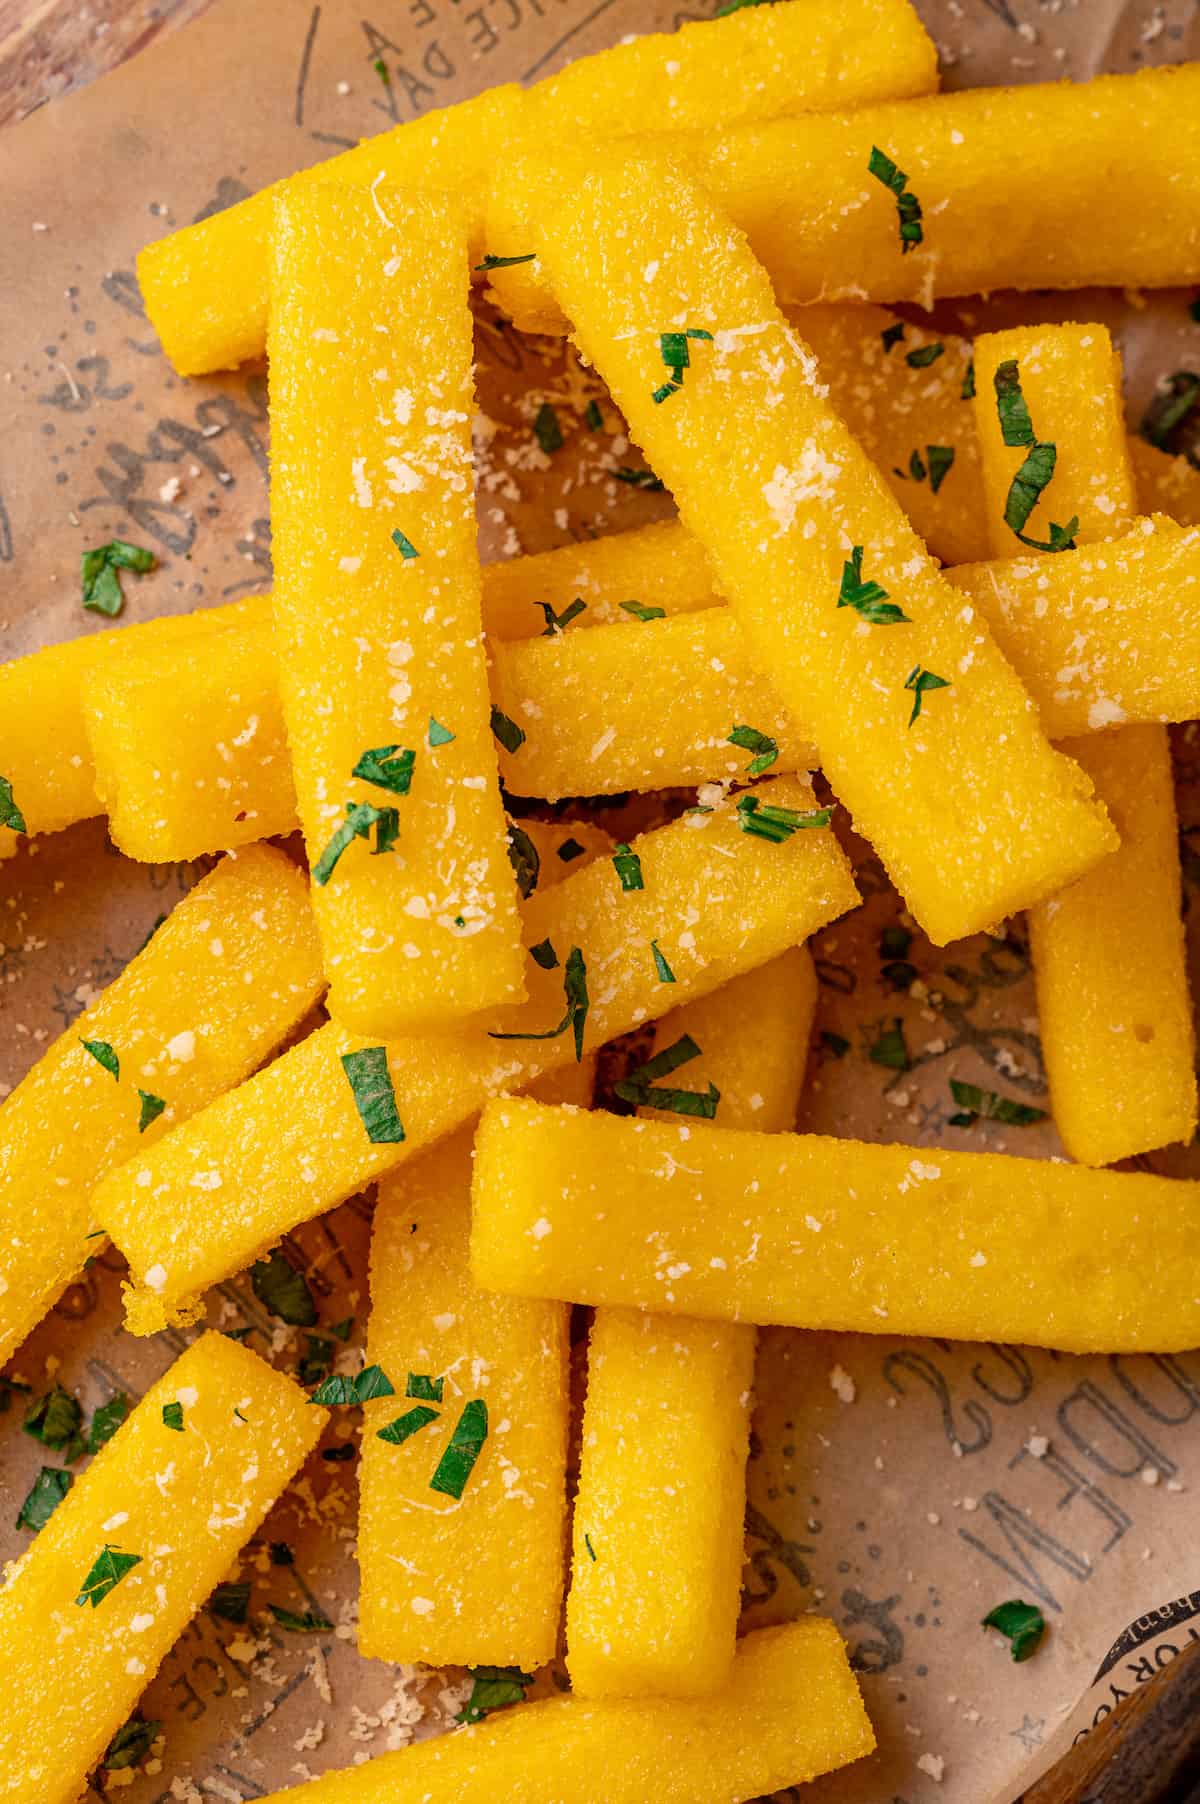
- Fry. Fry the polenta strips in the oil for 3 minutes, flipping them with a spider skimmer every 30 seconds or so. Transfer the fried polenta to the prepared plate.
- Serve. Sprinkle the polenta fries with vegan Parmesan and fresh parsley before serving.
Tips for Success
- Use a deep pot . The polenta may spatter as it cooks, so I like to use a deep pot so I don’t have to worry about making a mess on the stovetop!
- Don’t skip cooling the polenta . Warm polenta will not hold its shape when cut or fried, resulting in a crumbly mess. To avoid this, make sure your polenta is fully cooled before cutting and frying it.
- Keep an eye on the oil temperature . Use a candy thermometer to monitor the oil temperature and adjust the heat as needed to keep it between 375°F and 380°F.
- Don’t overcrowd the pot . Frying too much polenta at once can cause it to stick together or cool down the oil, making your fries soggy. It’s best to fry in batches, making sure the oil returns to temperature between each batch.
Variations
- Add herbs . While I garnished the fries with fresh parsley, you can also fold fresh or dried herbs into the polenta mixture itself. This adds more herbaceous flavour in every bite! Rosemary, basil, and thyme are all delicious options.
- Stir in vegan bacon . For a savoury twist, whip up some vegan bacon crumbles and mix it into the polenta before frying.
- Spice things up . Add cayenne pepper or chili powder to give your fries an extra kick.
- Add cheese . Fold vegan Parmesan or cheddar into the polenta, or use nutritional yeast , which also adds a cheesy flavour.
Serving Suggestions
I like to serve polenta fries as a side for a caprese sandwich , chopped cheese sandwich , or quinoa burgers . And don’t forget to serve your fried polenta with a dipping sauce! Marinara sauce , ranch dressing , or even spicy arrabbiata sauce are excellent for dipping.
How to Store Leftovers
Keep leftovers in an airtight container in the refrigerator for up to 3 days. To reheat, place the fries on a baking sheet and bake at 350°F for 10-15 minutes until crispy again. The air fryer also works well!
Can I Freeze This Recipe?
Yes, you can freeze your fried polenta for later. Place it in an airtight container or freezer bag and store in the freezer for up to 3 months. When ready to eat, thaw in the fridge overnight and reheat as instructed above.
Alternatively, you can also freeze the uncooked polenta strips and fry them straight from the freezer. Just add a couple of extra minutes to the frying time.

More Tasty Vegan Side Dishes
- Pineapple Fried Rice
- Maple Brussels Sprouts with Apples and Pecans
- Broccoli Cheese Rice Casserole
- Air Fryer Green Beans
- Lemon Garlic Grilled Zucchini
Ingredients
- 4 cups water , 946 ml
- ½ teaspoon salt , 3 grams
- 1 cup polenta , 140 grams
- ½ teaspoon garlic powder , 2 grams
- 1 tablespoon olive oil , 15 milliliters
- 1 liter canola oil
- ⅓ cup vegan Parmesan cheese , 30 grams
- ¼ cup chopped fresh parsley , 15 grams
Instructions
- Grease a 9X9-inch baking pan liberally with olive oil.
- Bring 3 cups of water to a rolling boil in a pot. Salt the water. Whisk in the polenta. Keep whisking until it absorbs the water. Stir in one more cup of water along with the garlic powder and olive oil. Reduce the heat to a low and simmer until the polenta has thickened nicely.
- Pour the polenta into the prepared baking pan and smooth it into an even layer with a rubber spatula. Allow the polenta to cool to room temperature.
- Pour the canola oil into a 2-quart pot. Heat it over medium-high heat until it reaches 375°F (190°F). Use a candy thermometer to check the temperature. Line a plate with paper towels.
- Once the polenta has set, turn it out onto a cutting board and cut it into equal-sized strips (about 3 inches long by ½ inch thick).
- Fry the polenta strips for 3 minutes, flipping them with a spider skimmer every 30 seconds or so. Do not crowd the oil. Fry in batches if you need to (be sure to bring the oil back to temperature between batches). Remove the fried polenta from the hot oil with a spider skimmer and transfer them to the prepared plate.
- Serve the polenta fries warm sprinkled with vegan Parmesan and fresh parsley.
Notes
- The nutritional information does not include the oil for frying, as most of it is discarded.
- To store : Keep your leftover fried polenta in an airtight container in the refrigerator for up to 3 days. To reheat, place on a baking sheet and bake at 350°F for 10-15 minutes until crispy again. The air fryer also works well!
- To freeze after frying : Place fried polenta in an airtight container or freezer bag and store in the freezer for up to 3 months. When ready to eat, thaw in the fridge overnight and reheat as instructed above.
- To freeze before frying : You can also freeze the uncooked polenta strips and fry them straight from the freezer. Just add a couple of extra minutes to the frying time.
