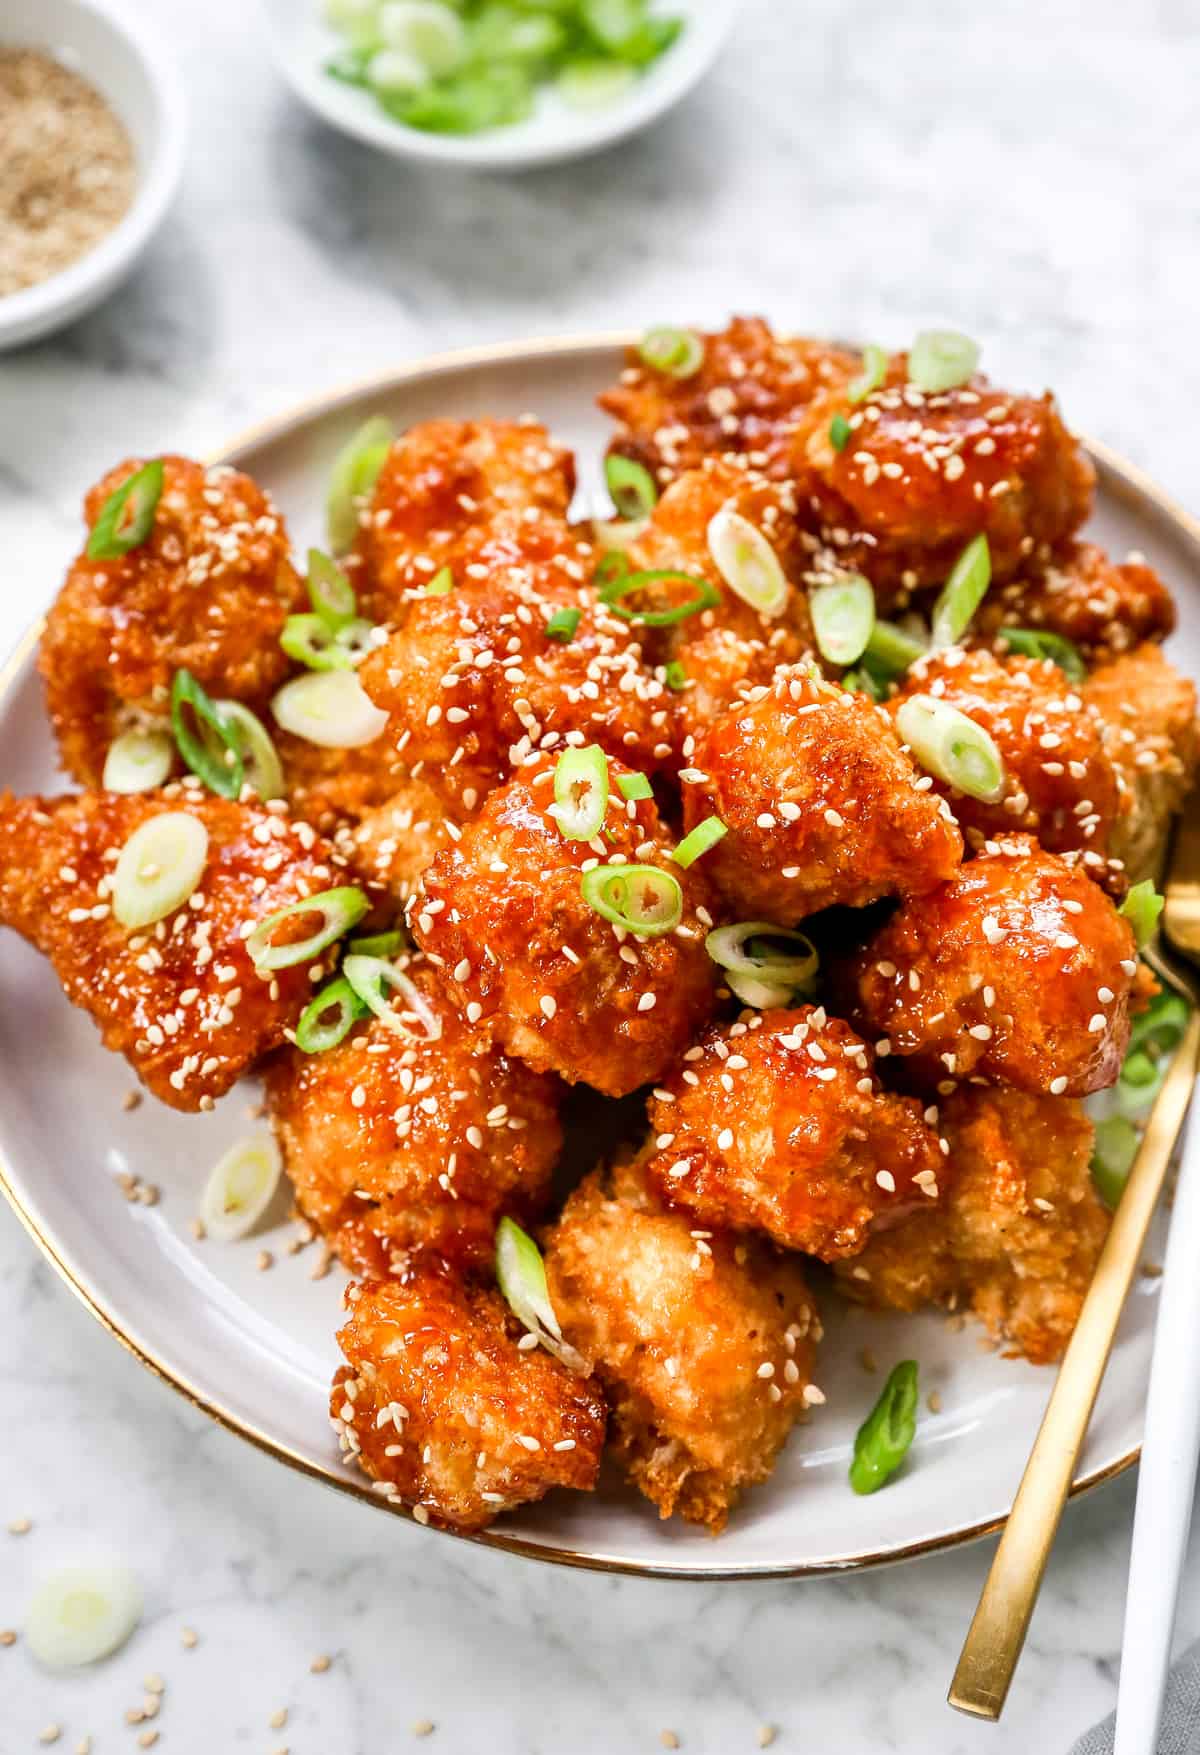
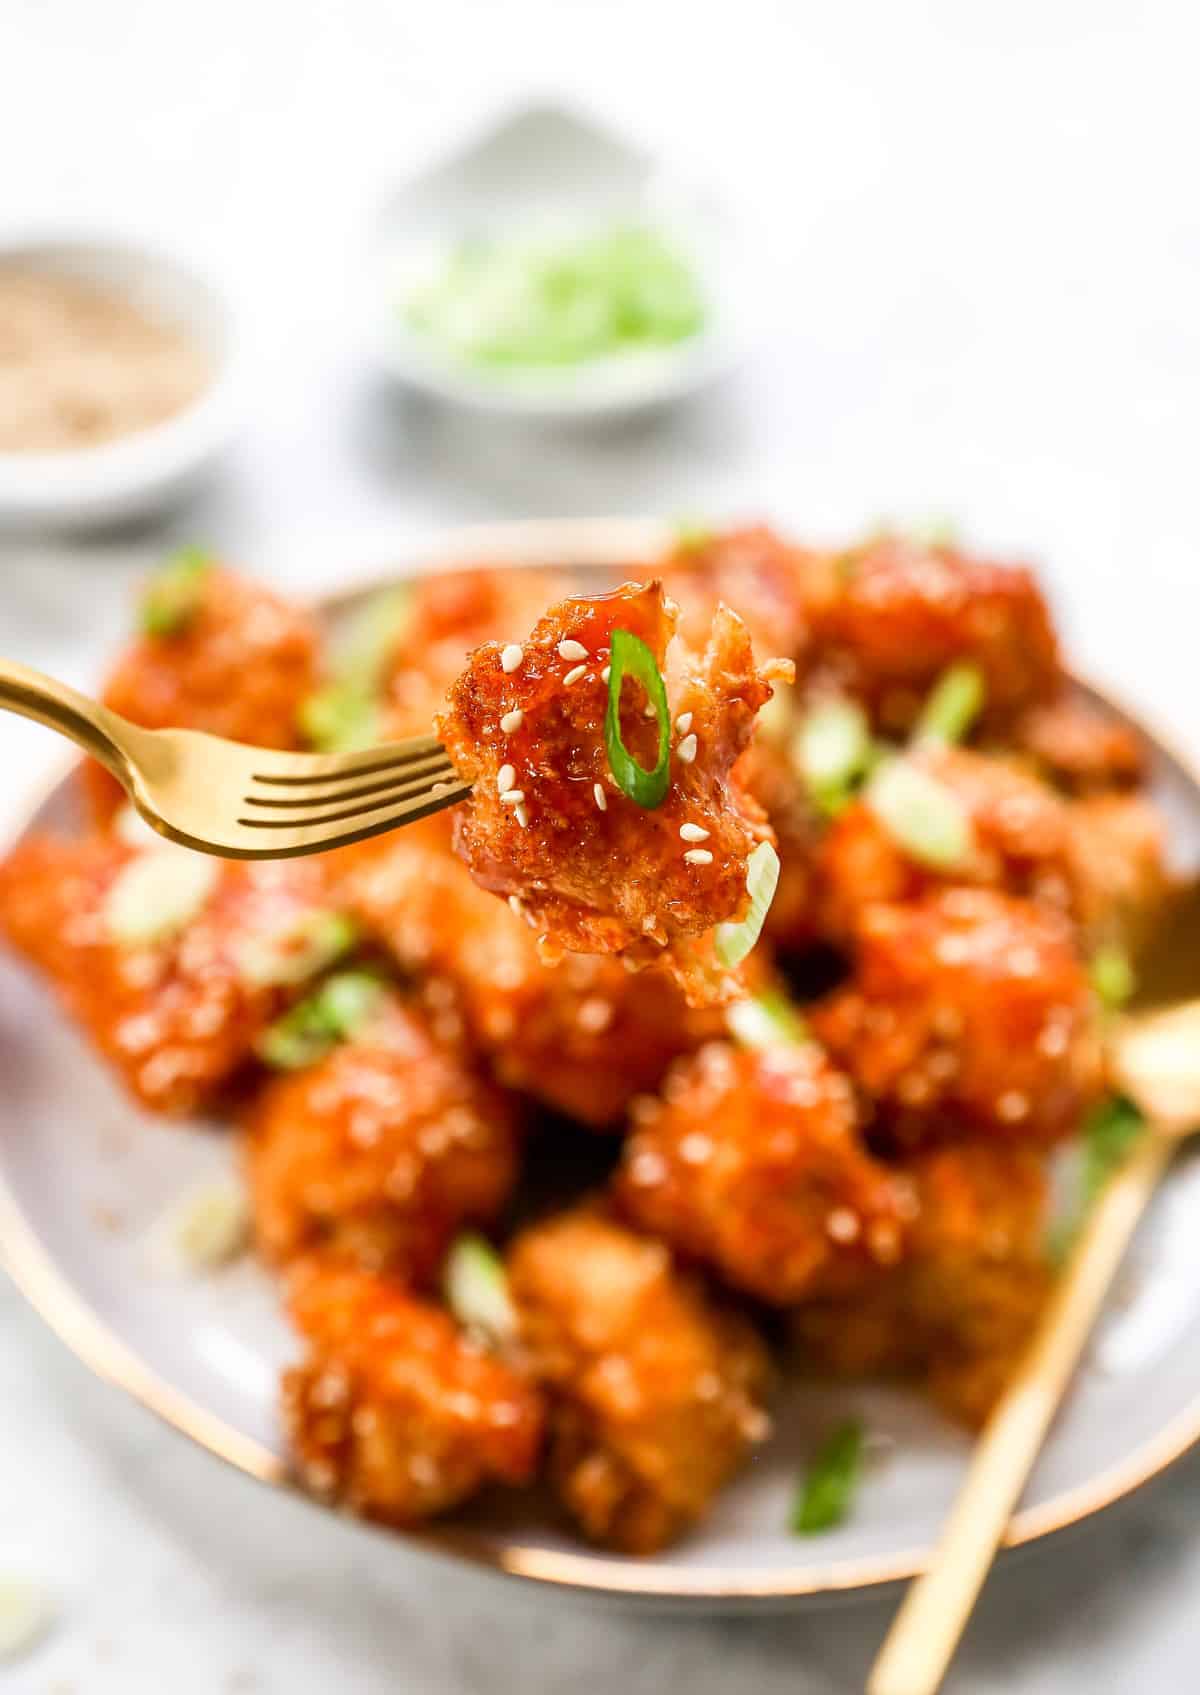
This Sweet and Sour Cauliflower Wings recipe is a twist on a popular takeout order! They’re crispy, crunchy and coated in a sweet and sour sauce with just a few ingredients. Learn how to make these in HALF the time!!
I first made this sauce 10 years ago during Jessiker Bakes days & have been trying to find every way that I can use it since then (hello sweet and sour tofu !). 10 years later (and after a little tweaking) I’m so happy to add this to one of my favourite veggies, cauliflower!
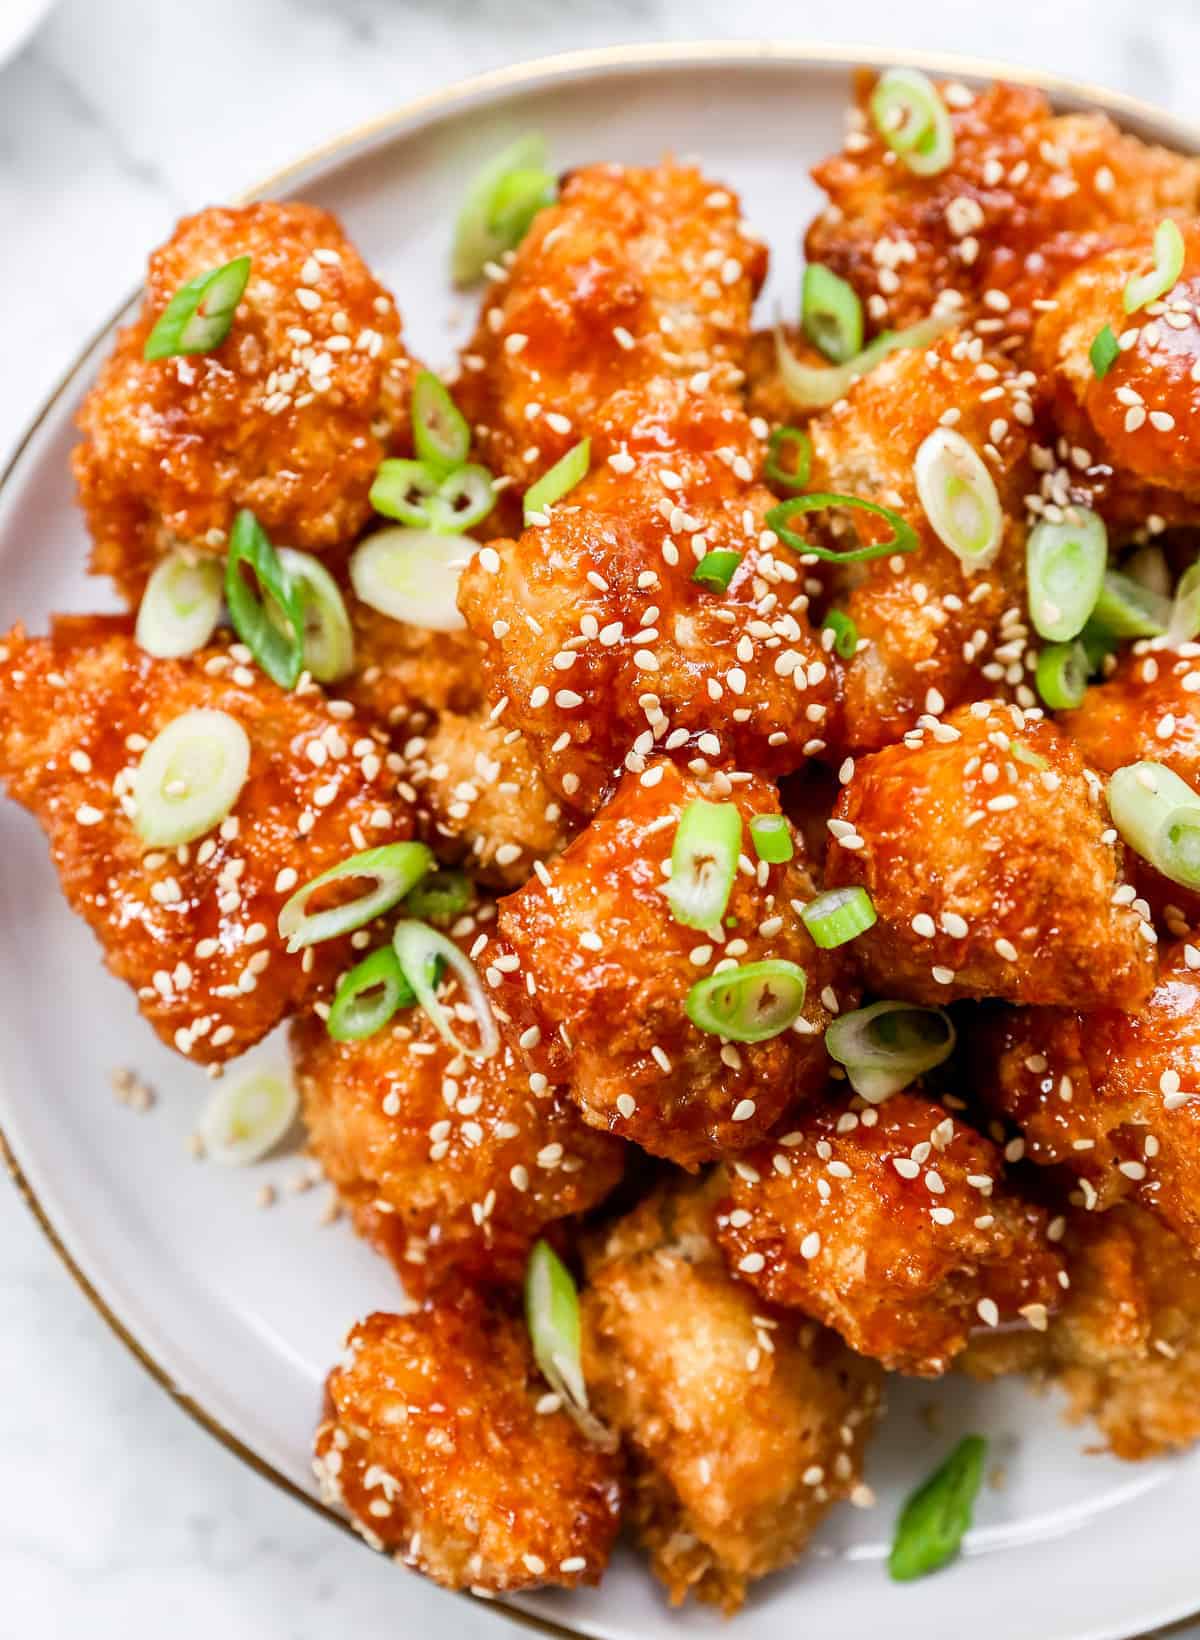
This sweet and sour cauliflower wings recipe hits all the notes. Tangy, sweet and savoury. If the 100+ 5-star reviews on my sweet and sour tofu is any indication, you’ll love this version, especially if you can’t eat tofu. It’s definitely another great addition to your game-day options, or for a great vegan dinner recipe.
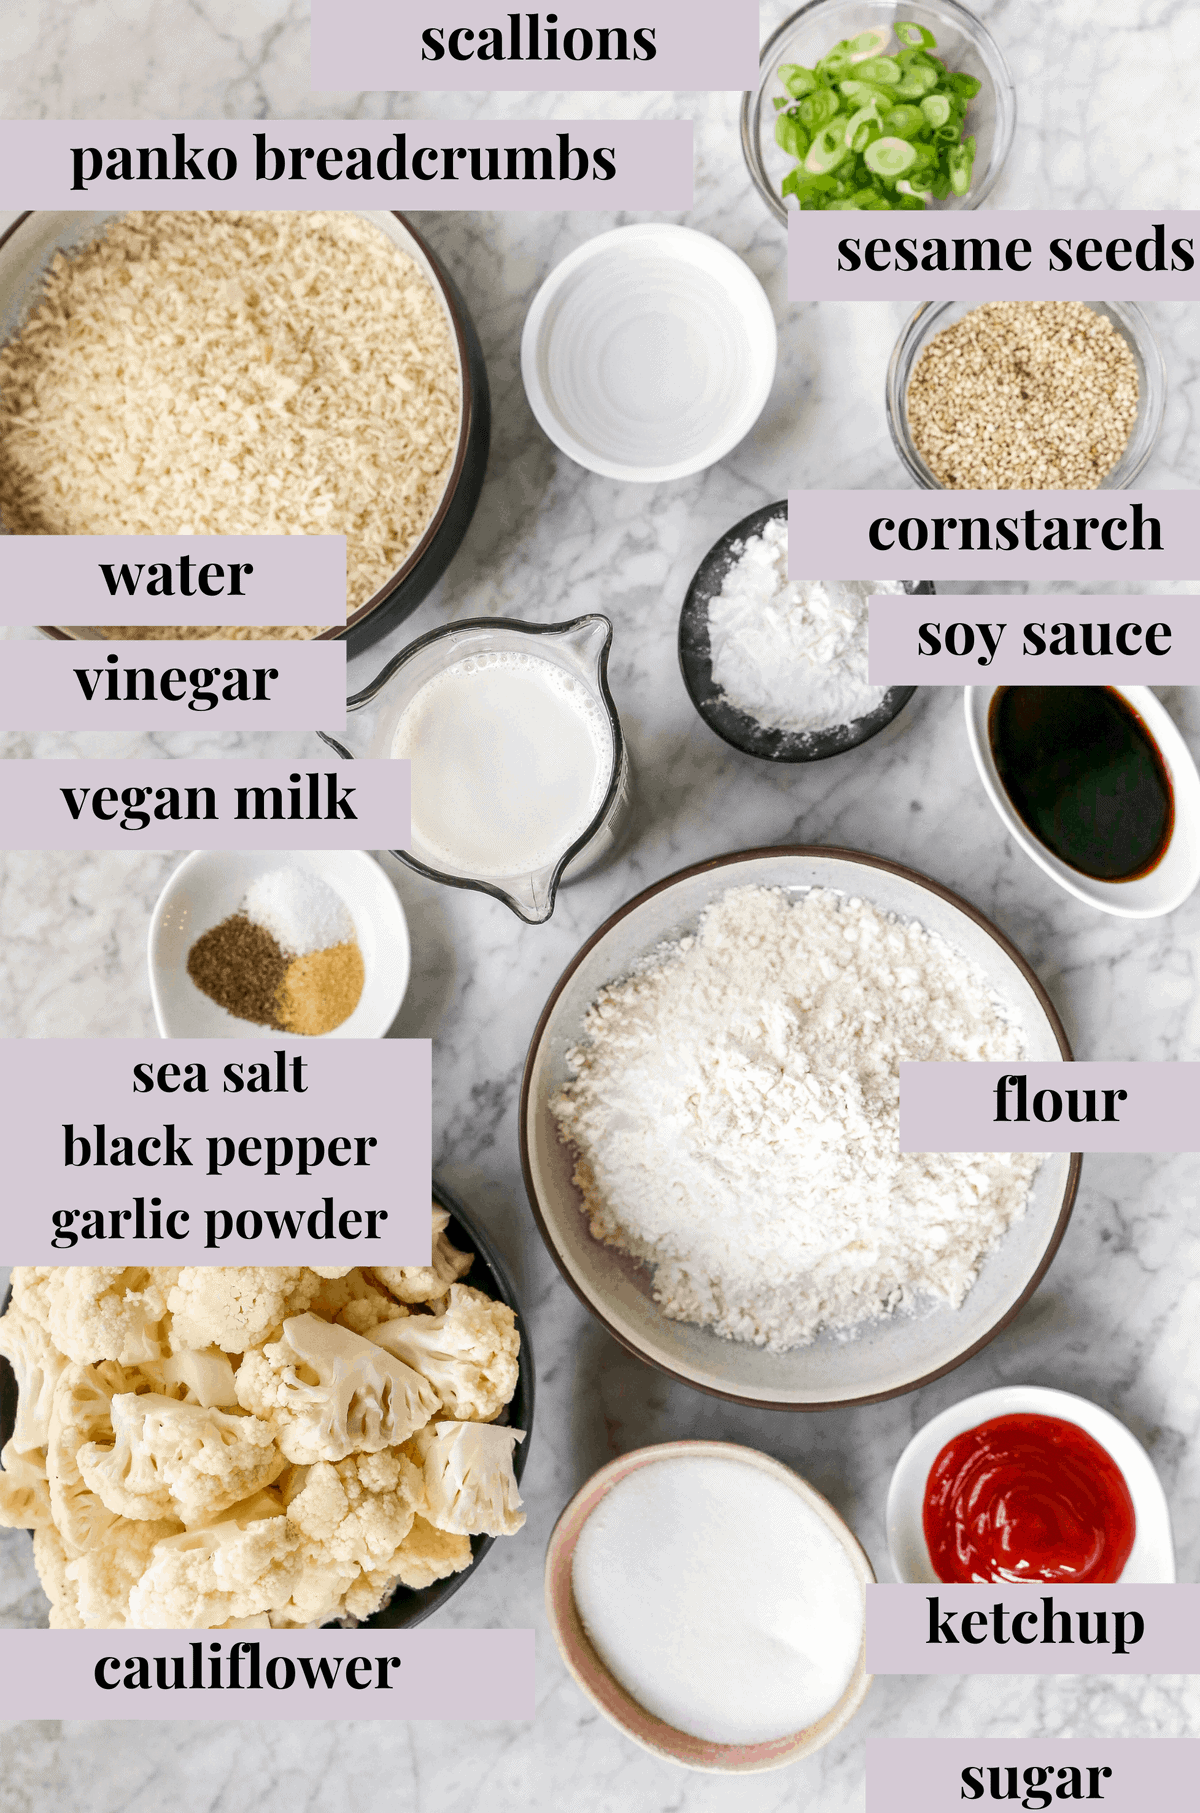
Notes on Ingredients
This recipe calls for standard dredging and will be absolutely easy for all cooking levels.
Cauliflower: If you’re using a large cauliflower head instead of medium, definitely double it! It’s hard for me to guess the size of yours, so size up your ingredients accordingly!
Sweet and Sour Sauce: Using ingredients that you enjoy are important. I prefer the subtle taste of rice wine vinegar but white vinegar works well too.
Flour, breadcrumbs: these work perfectly any version of these ingredients! Regular or gluten free flour or breadcrumbs – the choice is up to you.
Vegan milk: For the vegan milk, any kind will work. If you want the best battering result, might I suggest a thicker one like soy milk or cashew milk?
Seasonings: There is a lot of flavour in the sauce so basic seasonings like garlic powder, black pepper and sea salt go a long way.
How to make Sweet and Sour Cauliflower Wings (Step by Step)
Here are some step by step instructions on how to make this sweet and sour cauliflower wings recipe.
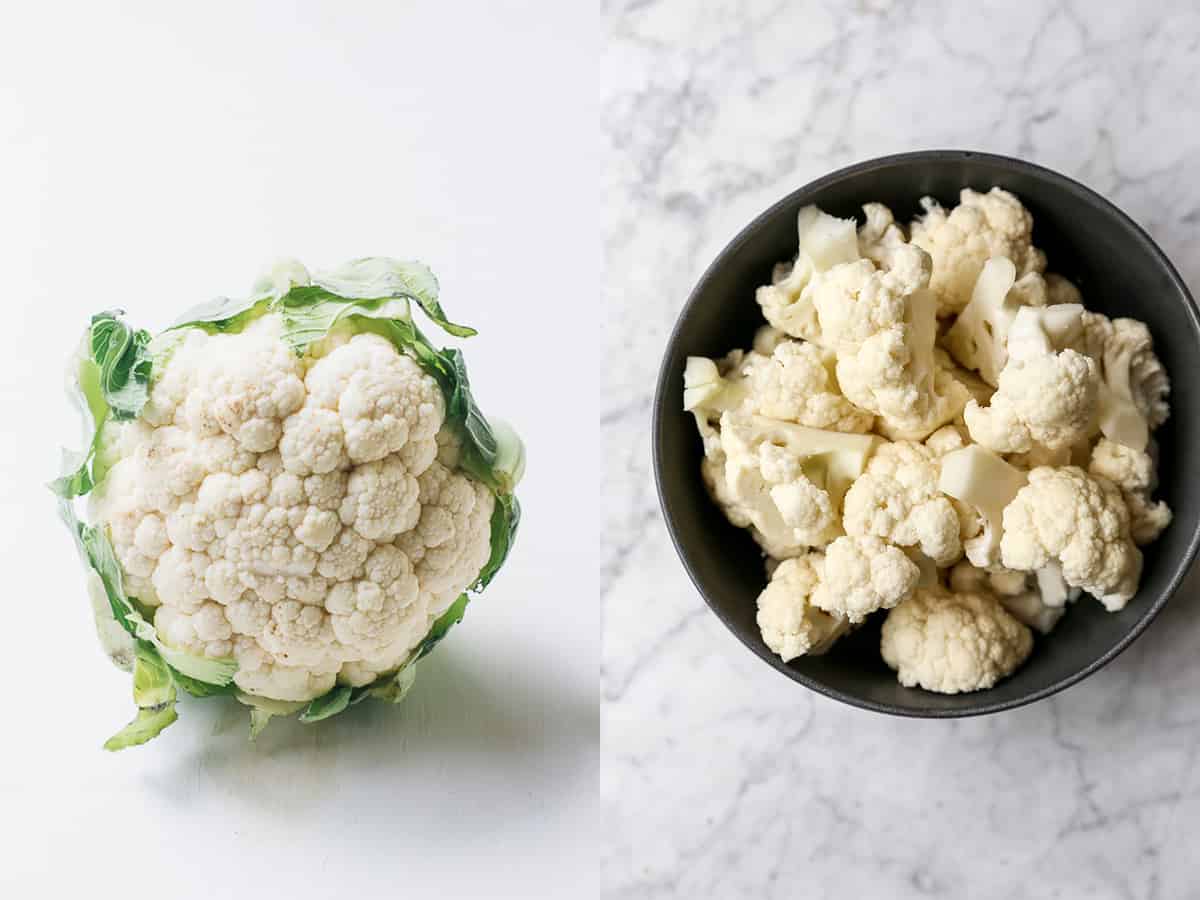
Using a knife, remove florets from the cauliflower (aka cut off the leaves and don’t use the stems). Chop the cauliflower into smaller pieces to resemble the size of the wings.
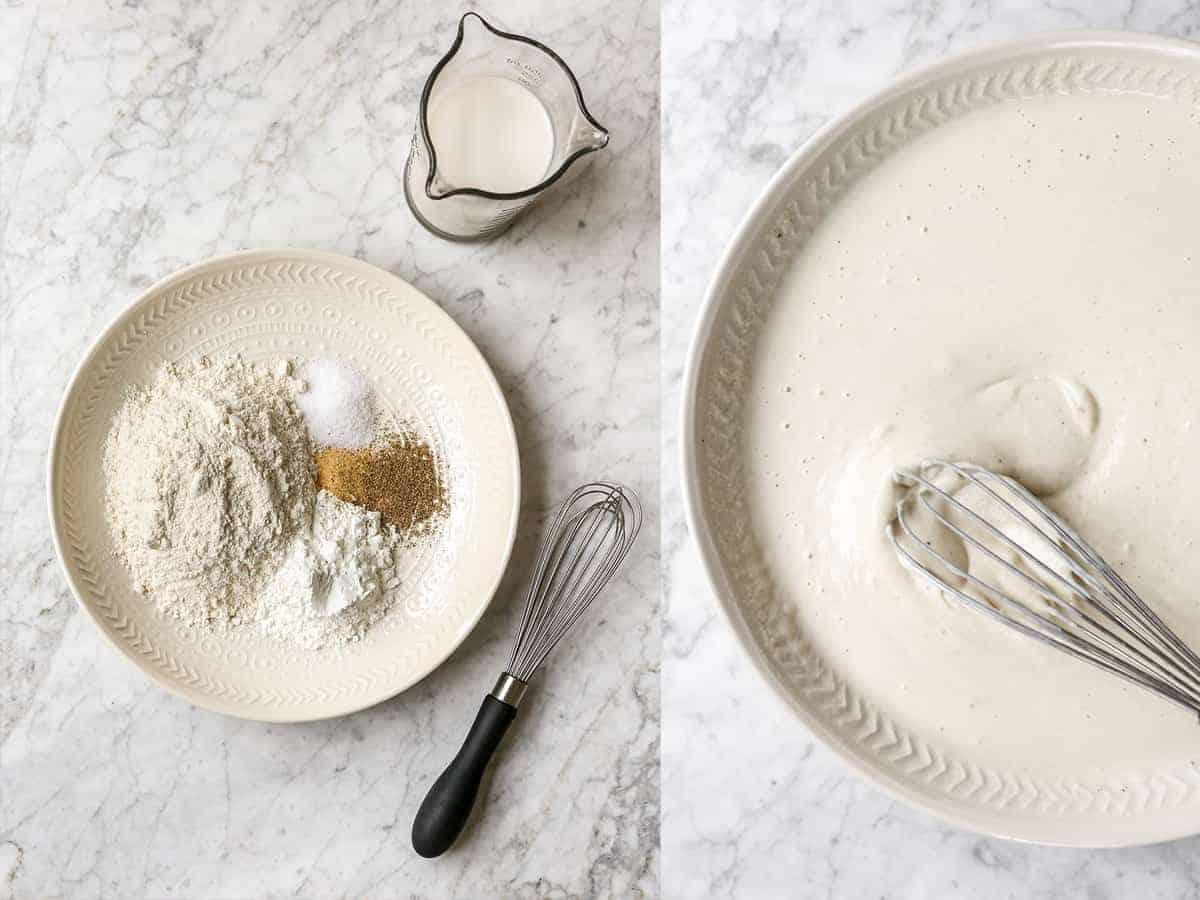
In a bowl, whisk the flour, vegan milk and sea salt, ground black pepper and garlic powder in a bowl to make the batter. If the batter is too thick, feel free to thin it out with some more milk and vice versa.
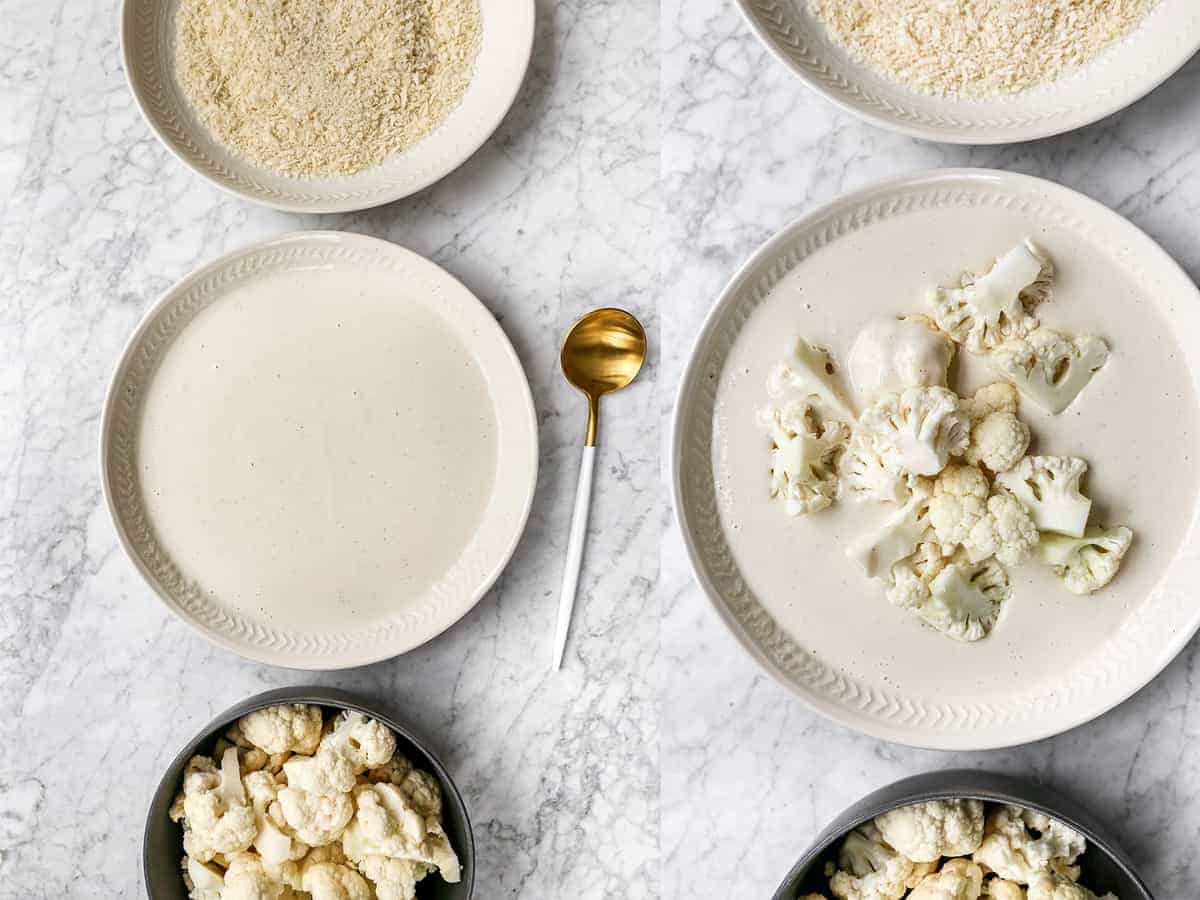
In a separate bowl, place the breadcrumbs. Line it up beside the batter bowl and the cauliflower (for a dredging station). Toss the cauliflower in the batter mixture (you can add them all at once), using a spatula or spoon to coat them all.
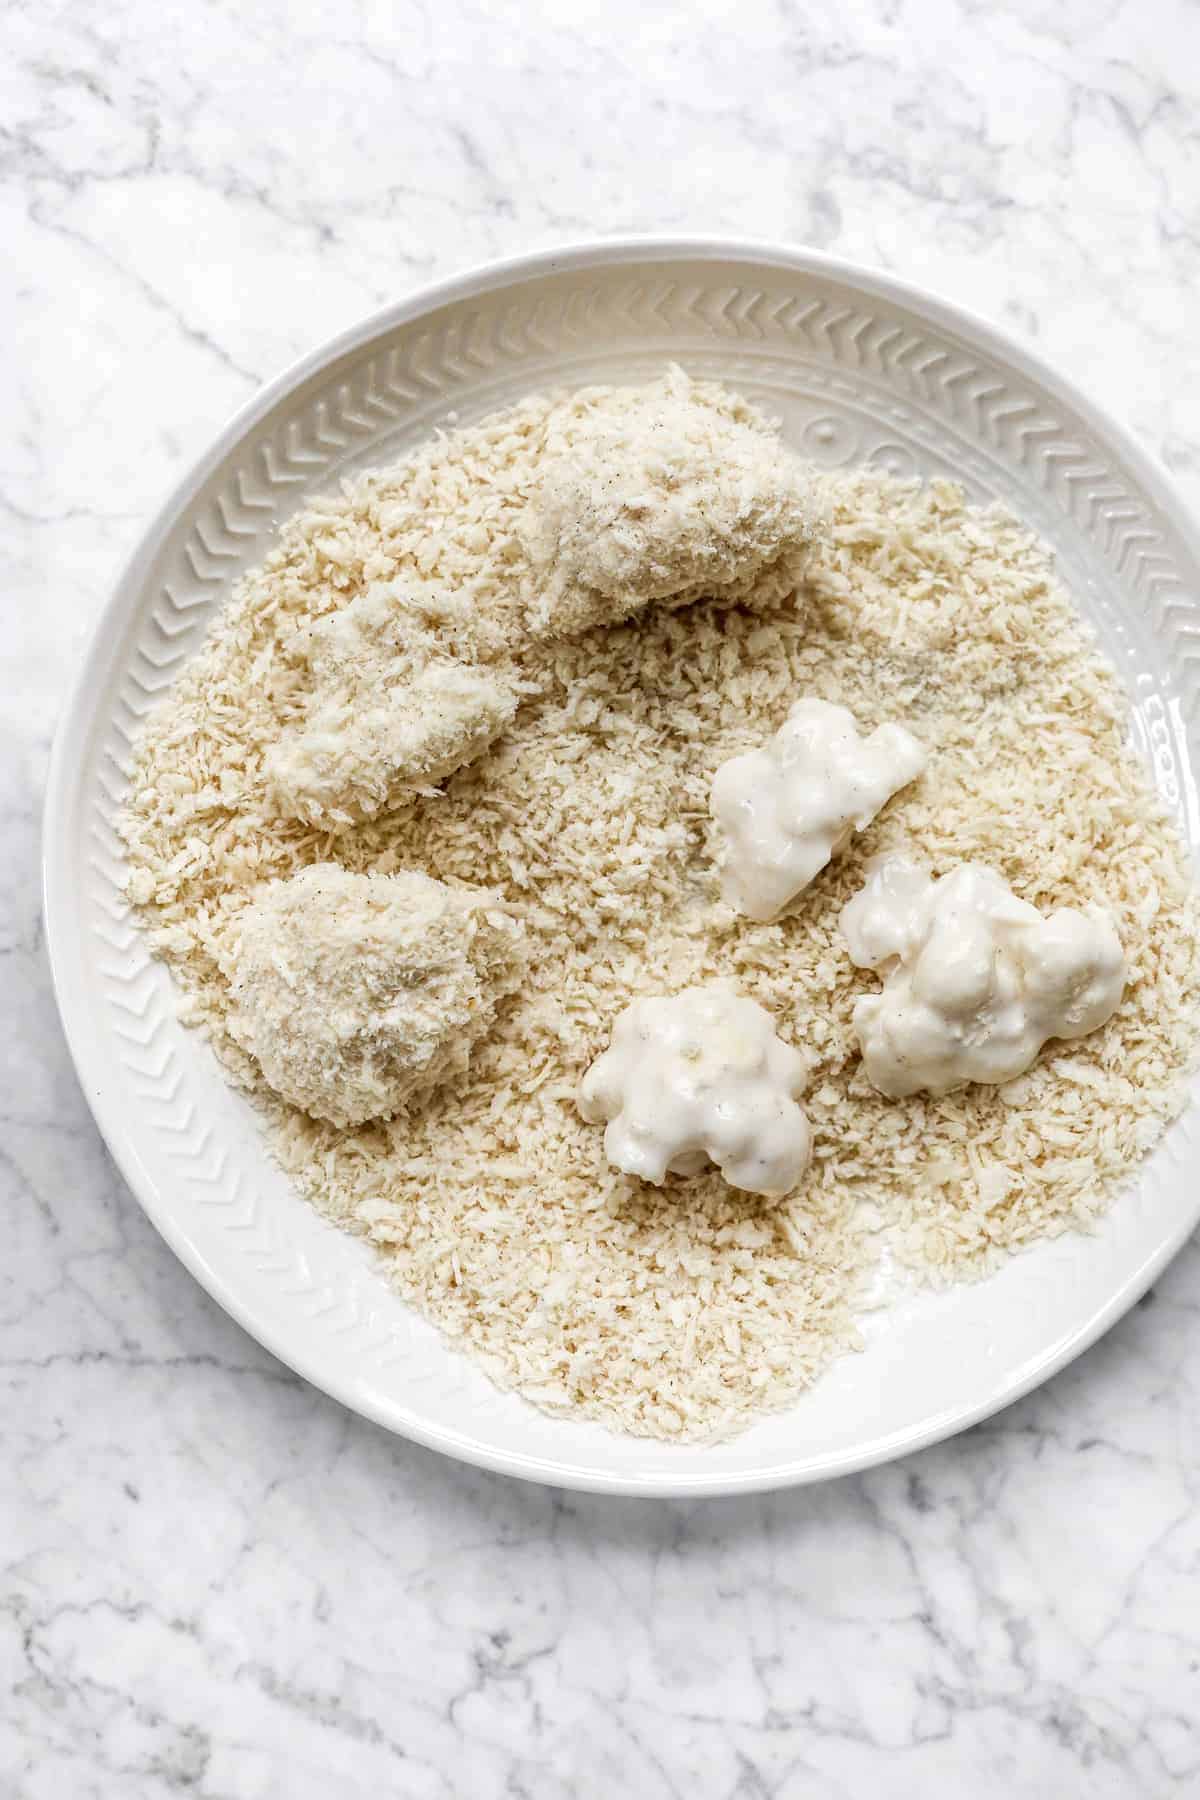
Transfer them to the breadcrumbs (you can do this in two or three batches) to coat completely.
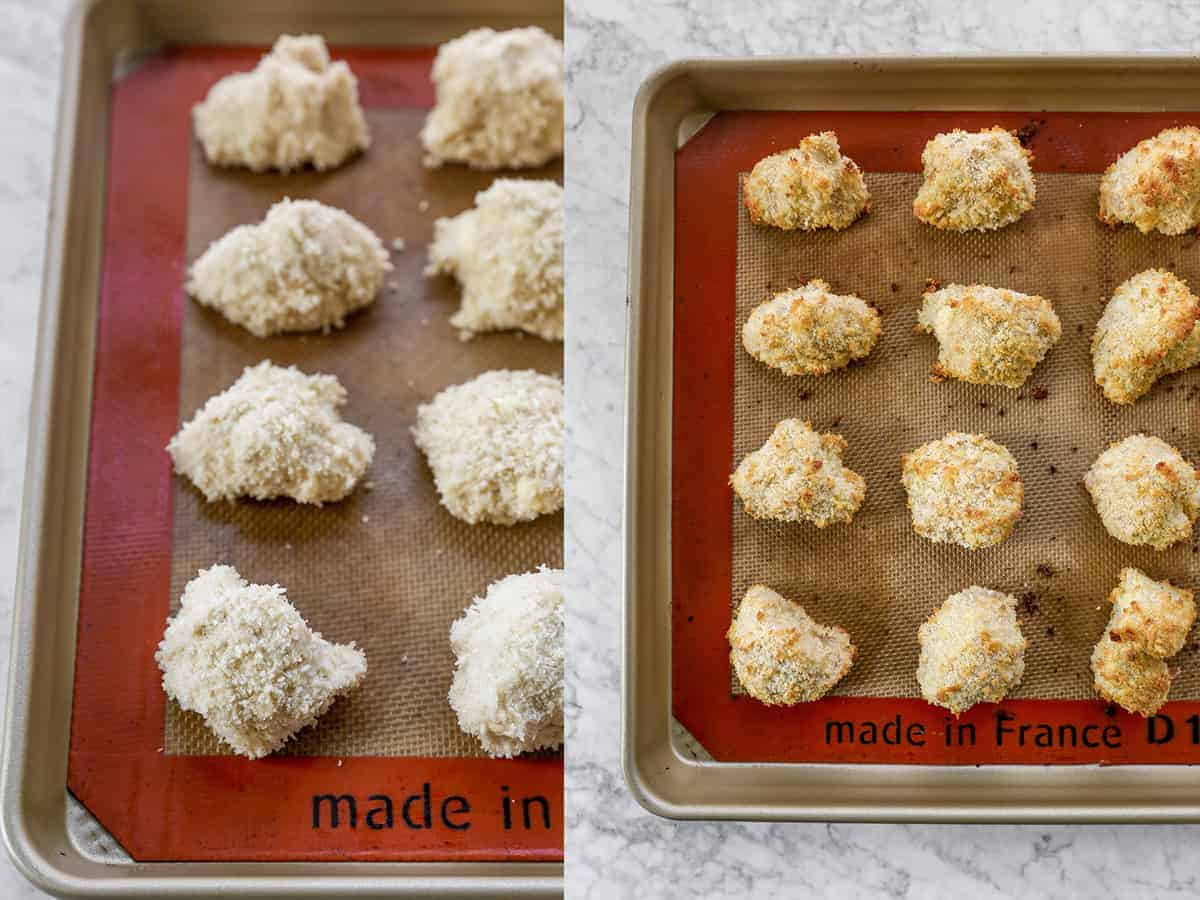
Then place onto the baking sheet, giving each wing enough space. Repeat until all of the wings are coated. Bake for 22 minutes.
While baking, prepare the ingredients for the sauce by heating & whisking together. Allow it to cool while the wings finish cooking.
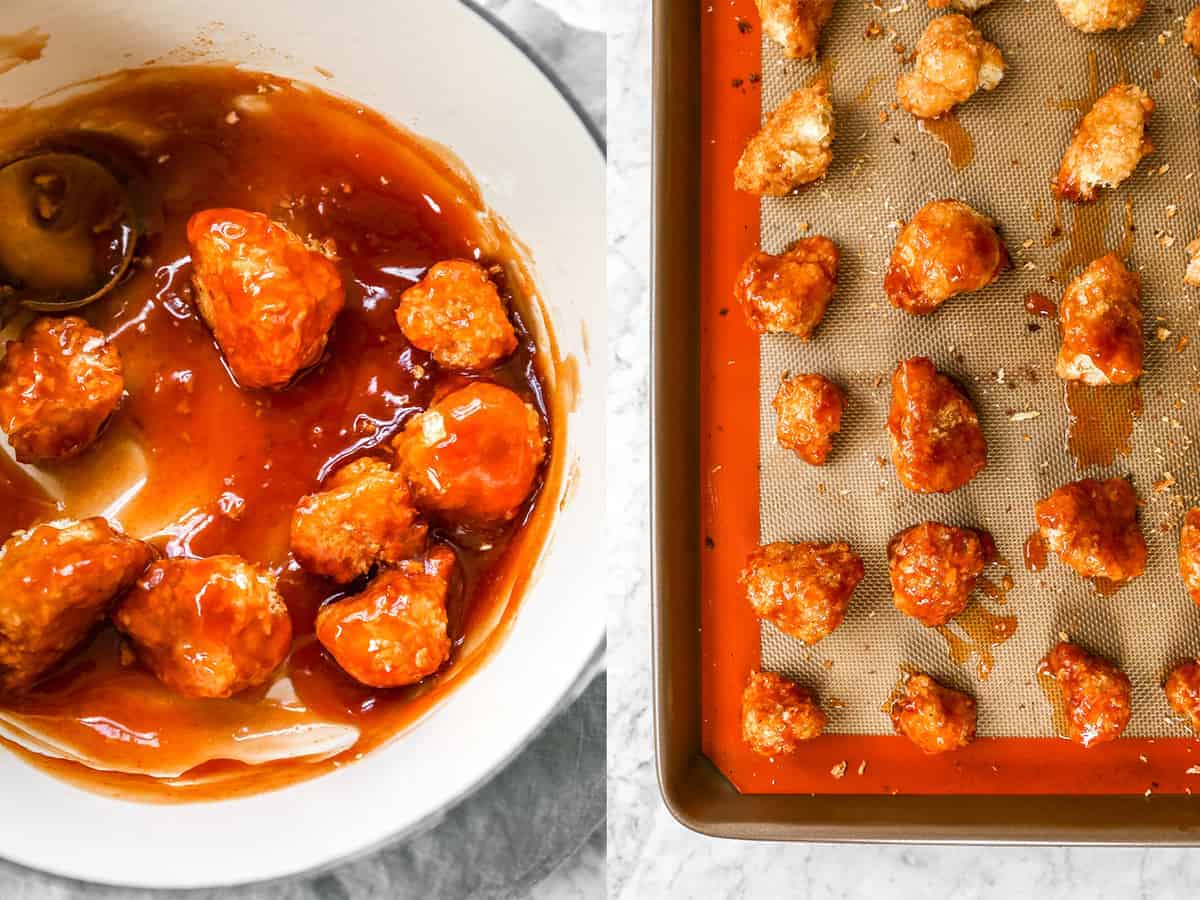
Remove from oven. Toss the wings in the sauce (I like to use a spatula to move them around to get properly coated) then using tongs or a spoon, remove and place back on the baking sheet. Bake for another 5 minutes for the sauce to soak into the wings.
Remove from oven, and garnish with sesame seeds and chopped scallions. Eat immediately – enjoy!
When you’re cutting the cauliflower off of the stem, don’t make them too small. Think: hand held wing-like pieces!
BTW, and it’s a big “by the way”, I completely hacked my own recipe! You don’t have to dip each cauliflower wing in individually (like I used to in the past). Like in the video, you can just toss them all at once! It saves SO much time and energy (and you get to eat them faster!)!
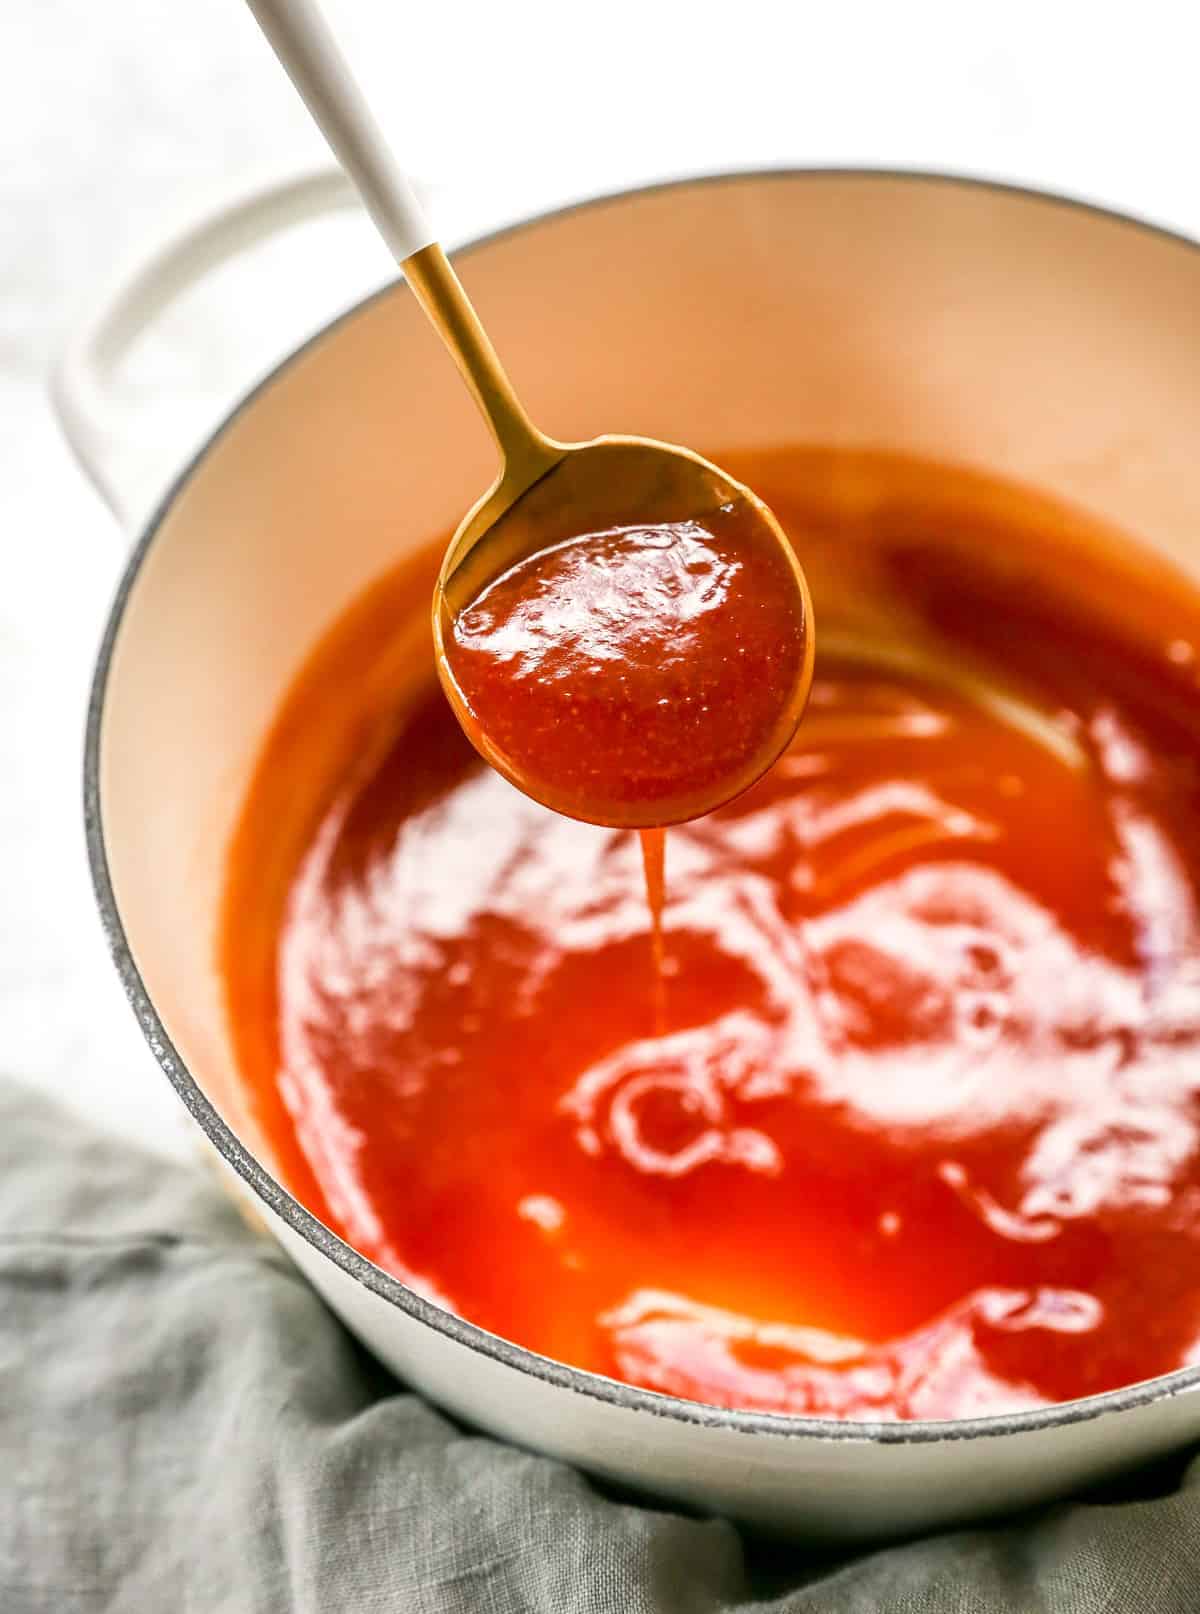
When making your sauce, ensure that you actually simmer it for the full 5 minutes so that the sauce reaches the perfect viscosity. A thick sauce is preferred over a thin one.
The sauce only takes a short time to prepare. Starting it early in the baking process allows the sauce to cool and ensures the wings stay crispy (so you’re not pouring piping hot sauce over crispy wings and losing the crispiness).
Serving Suggestions for Sweet and Sour Cauliflower Wings
Keeping it simple is key with the combination of flavours in this dish. So one of the best pairings for it is white rice.
If simple isn’t your thing using you can try these 15 Minute Sesame Noodles . It also pairs really well.
More Vegan Game Day Snacks
As game day approaches, these cauliflower wings are must on the table. It works as a stand-alone or a treat to pass around to the family. The best part is that these cauliflower wings work perfectly with the other “wings” I have on the blog.
You can make a platter with your family by adding the following:
- BBQ Cauliflower Wings
- Lemon Pepper Cauliflower Wings
- Crispy Cauliflower Tacos with Chipotle Crema
- Sticky Spicy Sesame Cauliflower Wings
- Bang Bang Cauliflower Wings
To find even more me approved cauliflower wings to mix and match, you can look through all my cauliflower recipes!
Ingredients
- 1 medium head cauliflower , if using a large head, you may need to double the batter and sauce quantities
- ¾ cup flour , all-purpose gluten-free flour or regular all purpose flour works
- 3 tablespoons cornstarch
- ¾ cup unsweetened vegan milk , any kind works
- ¼ teaspoon sea salt
- ½ teaspoon ground black pepper
- ½ teaspoon garlic powder
- 1 cup panko breadcrumbs , seasoned with salt & pepper (use gluten free if needed)
Sweet and Sour Sauce
- ½ cup sugar , I use cane sugar, you can use brown or any granulated kind (meaning not a liquid sugar)
- ¼ cup ketchup
- ¼ cup vinegar , preferably rice or white
- ¼ cup water
- 1 tablespoon soy sauce , gluten free if needed, or liquid aminos or tamari
- 1 teaspoon garlic powder
- 2 teaspoons cornstarch + 2 teaspoons water stirred together
- ½ tablespoon sesame seeds , for garnish
- Chopped Scallion , for garnish
Instructions
Cauliflower Wings
- Preheat oven to 450°F/230°C.
- Prepare a baking sheet by lining it with a silicone baking sheet or greased foil. Using a knife, remove florets from the cauliflower (aka cut off the leaves and don’t use the stems). Chop the cauliflower into smaller pieces to resemble the size of the wings.
- In a separate bowl, whisk the gluten-free flour, cornstarch, almond milk, sea salt, ground black pepper and garlic powder in a bowl to make the batter. If the batter is too thick, feel free to thin it out with some more milk and vice versa. In a separate bowl, place the breadcrumbs. Line it up beside the batter bowl.
- Toss the cauliflower in the batter mixture (you can add them all at once), using a spatula or spoon to coat them all. Transfer them to the breadcrumbs (you can do this in two or three batches) to coat completely, then place onto the baking sheet, giving each wing enough space. Repeat until all of the wings are coated.
- Bake for 22 minutes. Please ensure your oven is completely preheated and hot.
- While baking, prepare the ingredients for the sauce by heating & whisking together.
- Remove from oven. Toss the wings in the sauce (I like to use a spatula to move them around to get properly coated) then using tongs or a spoon, remove and place back on the baking sheet. Bake for another 5 minutes for the sauce to soak into the wings.
- Remove from oven, and garnish with sesame seeds and chopped scallions. Eat immediately – enjoy!
Sweet and Sour Sauce
- In a pan over medium high heat, whisk together the sugar, ketchup, vinegar, water, soy sauce, garlic powder and the cornstarch slurry for the sweet and sour sauce and stir together until fully combined and cornstarch slurry is dissolved.
- Bring to a slight boil, then reduce to a simmer for about 5 minutes until the sauce has thickened up. Taste test and add more sugar or soy sauce if you desire. Whisk frequently so the cornstarch doesn’t thicken up in spots but instead mixes evenly throughout the sauce. If you’d like the sauce thicker, add more cornstarch, one teaspoon (+ a teaspoon of water) at a time. Remove from heat until needed.
Notes
This Sweet and Sour Cauliflower Wings recipe is a twist on a popular takeout order! They’re crispy, crunchy and coated in a sweet and sour sauce with just a few ingredients. Learn how to make these in HALF the time!!
I first made this sauce 10 years ago during Jessiker Bakes days & have been trying to find every way that I can use it since then (hello sweet and sour tofu !). 10 years later (and after a little tweaking) I’m so happy to add this to one of my favourite veggies, cauliflower!
This sweet and sour cauliflower wings recipe hits all the notes. Tangy, sweet and savoury. If the 100+ 5-star reviews on my sweet and sour tofu is any indication, you’ll love this version, especially if you can’t eat tofu. It’s definitely another great addition to your game-day options, or for a great vegan dinner recipe.
Notes on Ingredients
This recipe calls for standard dredging and will be absolutely easy for all cooking levels.
Cauliflower: If you’re using a large cauliflower head instead of medium, definitely double it! It’s hard for me to guess the size of yours, so size up your ingredients accordingly!
Sweet and Sour Sauce: Using ingredients that you enjoy are important. I prefer the subtle taste of rice wine vinegar but white vinegar works well too.
Flour, breadcrumbs: these work perfectly any version of these ingredients! Regular or gluten free flour or breadcrumbs – the choice is up to you.
Vegan milk: For the vegan milk, any kind will work. If you want the best battering result, might I suggest a thicker one like soy milk or cashew milk?
Seasonings: There is a lot of flavour in the sauce so basic seasonings like garlic powder, black pepper and sea salt go a long way.
How to make Sweet and Sour Cauliflower Wings (Step by Step)
Here are some step by step instructions on how to make this sweet and sour cauliflower wings recipe.
Using a knife, remove florets from the cauliflower (aka cut off the leaves and don’t use the stems). Chop the cauliflower into smaller pieces to resemble the size of the wings.
In a bowl, whisk the flour, vegan milk and sea salt, ground black pepper and garlic powder in a bowl to make the batter. If the batter is too thick, feel free to thin it out with some more milk and vice versa.
In a separate bowl, place the breadcrumbs. Line it up beside the batter bowl and the cauliflower (for a dredging station). Toss the cauliflower in the batter mixture (you can add them all at once), using a spatula or spoon to coat them all.
Transfer them to the breadcrumbs (you can do this in two or three batches) to coat completely.
Then place onto the baking sheet, giving each wing enough space. Repeat until all of the wings are coated. Bake for 22 minutes.
While baking, prepare the ingredients for the sauce by heating & whisking together. Allow it to cool while the wings finish cooking.
Remove from oven. Toss the wings in the sauce (I like to use a spatula to move them around to get properly coated) then using tongs or a spoon, remove and place back on the baking sheet. Bake for another 5 minutes for the sauce to soak into the wings.
Remove from oven, and garnish with sesame seeds and chopped scallions. Eat immediately – enjoy!
When you’re cutting the cauliflower off of the stem, don’t make them too small. Think: hand held wing-like pieces!
BTW, and it’s a big “by the way”, I completely hacked my own recipe! You don’t have to dip each cauliflower wing in individually (like I used to in the past). Like in the video, you can just toss them all at once! It saves SO much time and energy (and you get to eat them faster!)!
When making your sauce, ensure that you actually simmer it for the full 5 minutes so that the sauce reaches the perfect viscosity. A thick sauce is preferred over a thin one.
The sauce only takes a short time to prepare. Starting it early in the baking process allows the sauce to cool and ensures the wings stay crispy (so you’re not pouring piping hot sauce over crispy wings and losing the crispiness).
Serving Suggestions for Sweet and Sour Cauliflower Wings
Keeping it simple is key with the combination of flavours in this dish. So one of the best pairings for it is white rice.
If simple isn’t your thing using you can try these 15 Minute Sesame Noodles . It also pairs really well.
More Vegan Game Day Snacks
As game day approaches, these cauliflower wings are must on the table. It works as a stand-alone or a treat to pass around to the family. The best part is that these cauliflower wings work perfectly with the other “wings” I have on the blog.
You can make a platter with your family by adding the following:
- BBQ Cauliflower Wings
- Lemon Pepper Cauliflower Wings
- Crispy Cauliflower Tacos with Chipotle Crema
- Sticky Spicy Sesame Cauliflower Wings
- Bang Bang Cauliflower Wings
To find even more me approved cauliflower wings to mix and match, you can look through all my cauliflower recipes!
Ingredients
- 1 medium head cauliflower , if using a large head, you may need to double the batter and sauce quantities
- ¾ cup flour , all-purpose gluten-free flour or regular all purpose flour works
- 3 tablespoons cornstarch
- ¾ cup unsweetened vegan milk , any kind works
- ¼ teaspoon sea salt
- ½ teaspoon ground black pepper
- ½ teaspoon garlic powder
- 1 cup panko breadcrumbs , seasoned with salt & pepper (use gluten free if needed)
Sweet and Sour Sauce
- ½ cup sugar , I use cane sugar, you can use brown or any granulated kind (meaning not a liquid sugar)
- ¼ cup ketchup
- ¼ cup vinegar , preferably rice or white
- ¼ cup water
- 1 tablespoon soy sauce , gluten free if needed, or liquid aminos or tamari
- 1 teaspoon garlic powder
- 2 teaspoons cornstarch + 2 teaspoons water stirred together
- ½ tablespoon sesame seeds , for garnish
- Chopped Scallion , for garnish
Instructions
Cauliflower Wings
- Preheat oven to 450°F/230°C.
- Prepare a baking sheet by lining it with a silicone baking sheet or greased foil. Using a knife, remove florets from the cauliflower (aka cut off the leaves and don’t use the stems). Chop the cauliflower into smaller pieces to resemble the size of the wings.
- In a separate bowl, whisk the gluten-free flour, cornstarch, almond milk, sea salt, ground black pepper and garlic powder in a bowl to make the batter. If the batter is too thick, feel free to thin it out with some more milk and vice versa. In a separate bowl, place the breadcrumbs. Line it up beside the batter bowl.
- Toss the cauliflower in the batter mixture (you can add them all at once), using a spatula or spoon to coat them all. Transfer them to the breadcrumbs (you can do this in two or three batches) to coat completely, then place onto the baking sheet, giving each wing enough space. Repeat until all of the wings are coated.
- Bake for 22 minutes. Please ensure your oven is completely preheated and hot.
- While baking, prepare the ingredients for the sauce by heating & whisking together.
- Remove from oven. Toss the wings in the sauce (I like to use a spatula to move them around to get properly coated) then using tongs or a spoon, remove and place back on the baking sheet. Bake for another 5 minutes for the sauce to soak into the wings.
- Remove from oven, and garnish with sesame seeds and chopped scallions. Eat immediately – enjoy!
Sweet and Sour Sauce
- In a pan over medium high heat, whisk together the sugar, ketchup, vinegar, water, soy sauce, garlic powder and the cornstarch slurry for the sweet and sour sauce and stir together until fully combined and cornstarch slurry is dissolved.
- Bring to a slight boil, then reduce to a simmer for about 5 minutes until the sauce has thickened up. Taste test and add more sugar or soy sauce if you desire. Whisk frequently so the cornstarch doesn’t thicken up in spots but instead mixes evenly throughout the sauce. If you’d like the sauce thicker, add more cornstarch, one teaspoon (+ a teaspoon of water) at a time. Remove from heat until needed.
Notes

Sweet and Sour Cauliflower Wings
Ingredients
- 1 medium head cauliflower if using a large head, you may need to double the batter and sauce quantities
- ¾ cup flour all-purpose gluten-free flour or regular all purpose flour works
- 3 tablespoons cornstarch
- ¾ cup unsweetened vegan milk any kind works
- ¼ teaspoon sea salt
- ½ teaspoon ground black pepper
- ½ teaspoon garlic powder
- 1 cup panko breadcrumbs seasoned with salt & pepper (use gluten free if needed)
Sweet and Sour Sauce
- ½ cup sugar I use cane sugar, you can use brown or any granulated kind (meaning not a liquid sugar)
- ¼ cup ketchup
- ¼ cup vinegar preferably rice or white
- ¼ cup water
- 1 tablespoon soy sauce gluten free if needed, or liquid aminos or tamari
- 1 teaspoon garlic powder
- 2 teaspoons cornstarch + 2 teaspoons water stirred together
- ½ tablespoon sesame seeds for garnish
- Chopped Scallion for garnish
Instructions
Cauliflower Wings
- Preheat oven to 450°F/230°C.
- Prepare a baking sheet by lining it with a silicone baking sheet or greased foil. Using a knife, remove florets from the cauliflower (aka cut off the leaves and don’t use the stems). Chop the cauliflower into smaller pieces to resemble the size of the wings.
- In a separate bowl, whisk the gluten-free flour, cornstarch, almond milk, sea salt, ground black pepper and garlic powder in a bowl to make the batter. If the batter is too thick, feel free to thin it out with some more milk and vice versa. In a separate bowl, place the breadcrumbs. Line it up beside the batter bowl.
- Toss the cauliflower in the batter mixture (you can add them all at once), using a spatula or spoon to coat them all. Transfer them to the breadcrumbs (you can do this in two or three batches) to coat completely, then place onto the baking sheet, giving each wing enough space. Repeat until all of the wings are coated.
- Bake for 22 minutes. Please ensure your oven is completely preheated and hot.
- While baking, prepare the ingredients for the sauce by heating & whisking together.
- Remove from oven. Toss the wings in the sauce (I like to use a spatula to move them around to get properly coated) then using tongs or a spoon, remove and place back on the baking sheet. Bake for another 5 minutes for the sauce to soak into the wings.
- Remove from oven, and garnish with sesame seeds and chopped scallions. Eat immediately - enjoy!
Sweet and Sour Sauce
- In a pan over medium high heat, whisk together the sugar, ketchup, vinegar, water, soy sauce, garlic powder and the cornstarch slurry for the sweet and sour sauce and stir together until fully combined and cornstarch slurry is dissolved.
- Bring to a slight boil, then reduce to a simmer for about 5 minutes until the sauce has thickened up. Taste test and add more sugar or soy sauce if you desire. Whisk frequently so the cornstarch doesn’t thicken up in spots but instead mixes evenly throughout the sauce. If you’d like the sauce thicker, add more cornstarch, one teaspoon (+ a teaspoon of water) at a time. Remove from heat until needed.
Video
Notes
Nutrition
Sweet and Sour Cauliflower Wings https://jessicainthekitchen.com/sweet-and-sour-cauliflower-wings/ January 21, 2021
Luscious, chocolatey, and filled with all-natural peanut butter, my 3-Ingredient Vegan Peanut Butter Cups are an incredibly easy homemade, (& gluten-free!) version of your favourite store-bought peanut butter cups. They are every bit as divine, and of course, vegan!

A Simple Vegan Candy Recipe
Best news EVER – your favorite peanut butter cups are now super easy to make in an extremely delicious homemade version! Yes, believe it – these Vegan Peanut Butter Cups are about to be your new go-to fridge/freezer snack. They are perfect for your dietary needs, too: vegan, gluten free, and made without any refined sugar.
I know the idea of making vegan candy at home might sound super intimidating and complicated. But trust me, it’s EASY. Like you might never go back to buying the pre-made stuff.
Notes on Ingredients
If you didn’t know before, I’m a complete peanut butter addict. Proof of this is the 3 jars currently sitting in my pantry. It’s truly a life necessity for me. So this simple recipe, using just peanut butter and chocolate chips, is definitely a favorite!
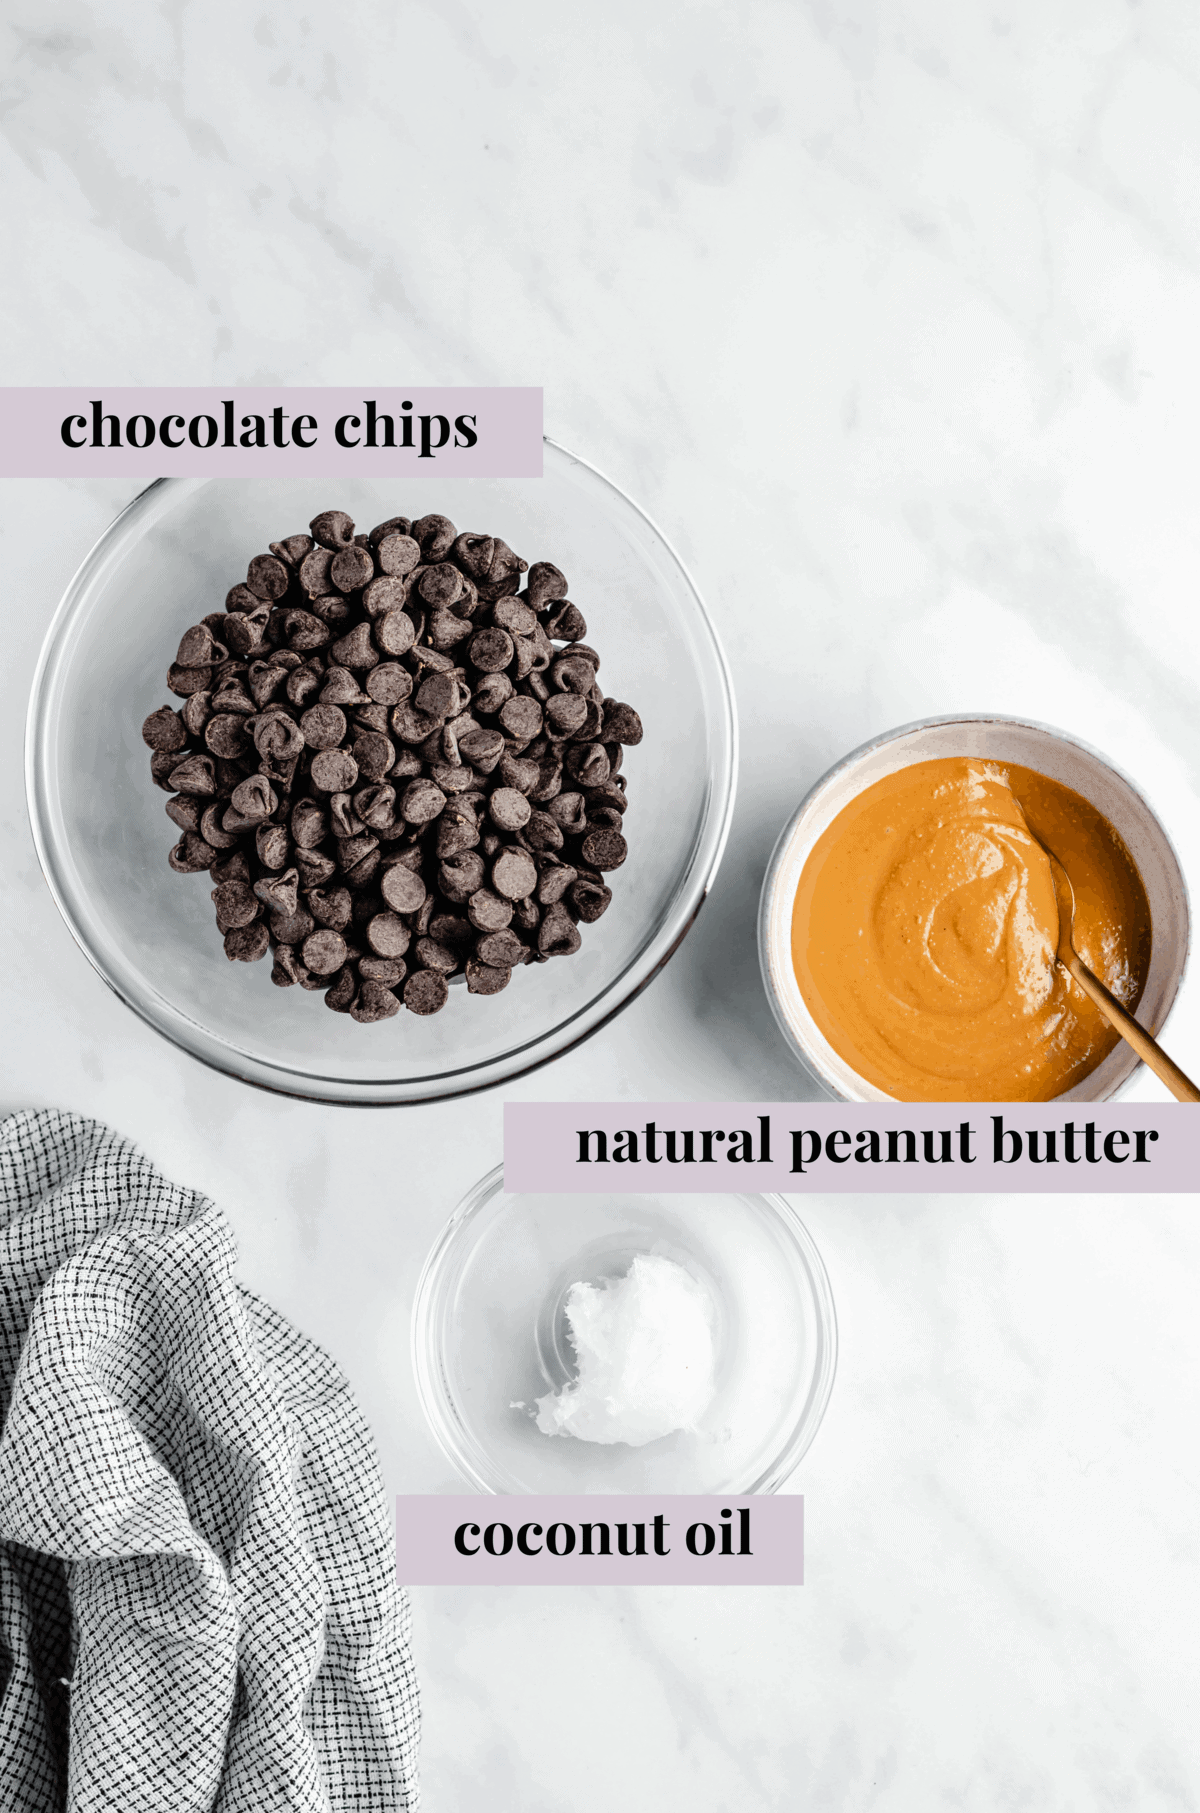
- Peanut Butter: I prefer to use all-natural peanut butter. There are quite a few brands and options out there: stir, no-stir, homemade, all-natural, and lots more. If you’d like, you can add a little sweetener to your peanut butter. I add a touch of maple syrup or agave, stirring it in before dolloping it into the cups. This isn’t necessary though, since the chocolate is already sweet.
- Chocolate Chips: In addition to the peanut butter, all you need is melted chocolate! Specifically, I use chocolate chips. And again, there are so many options out there. You can find great vegan chocolate chips that are free from refined sugar, free of sugar completely, organic, fair trade…. use whatever kind works for your needs!
- Coconut Oil : Coconut oil is actually essential here to help the chocolate cups solidify. It also helps to thin out the chocolate when it’s melting. I don’t recommend swapping it for another oil, but you can buy a refined version to eliminate the coconut taste.

How to Make Vegan Peanut Butter Cups
These are so easy to make (SO easy), and are no-bake. That’s definitely one of my favorite things about this recipe. It’s as simple as melt, mix and refrigerate.
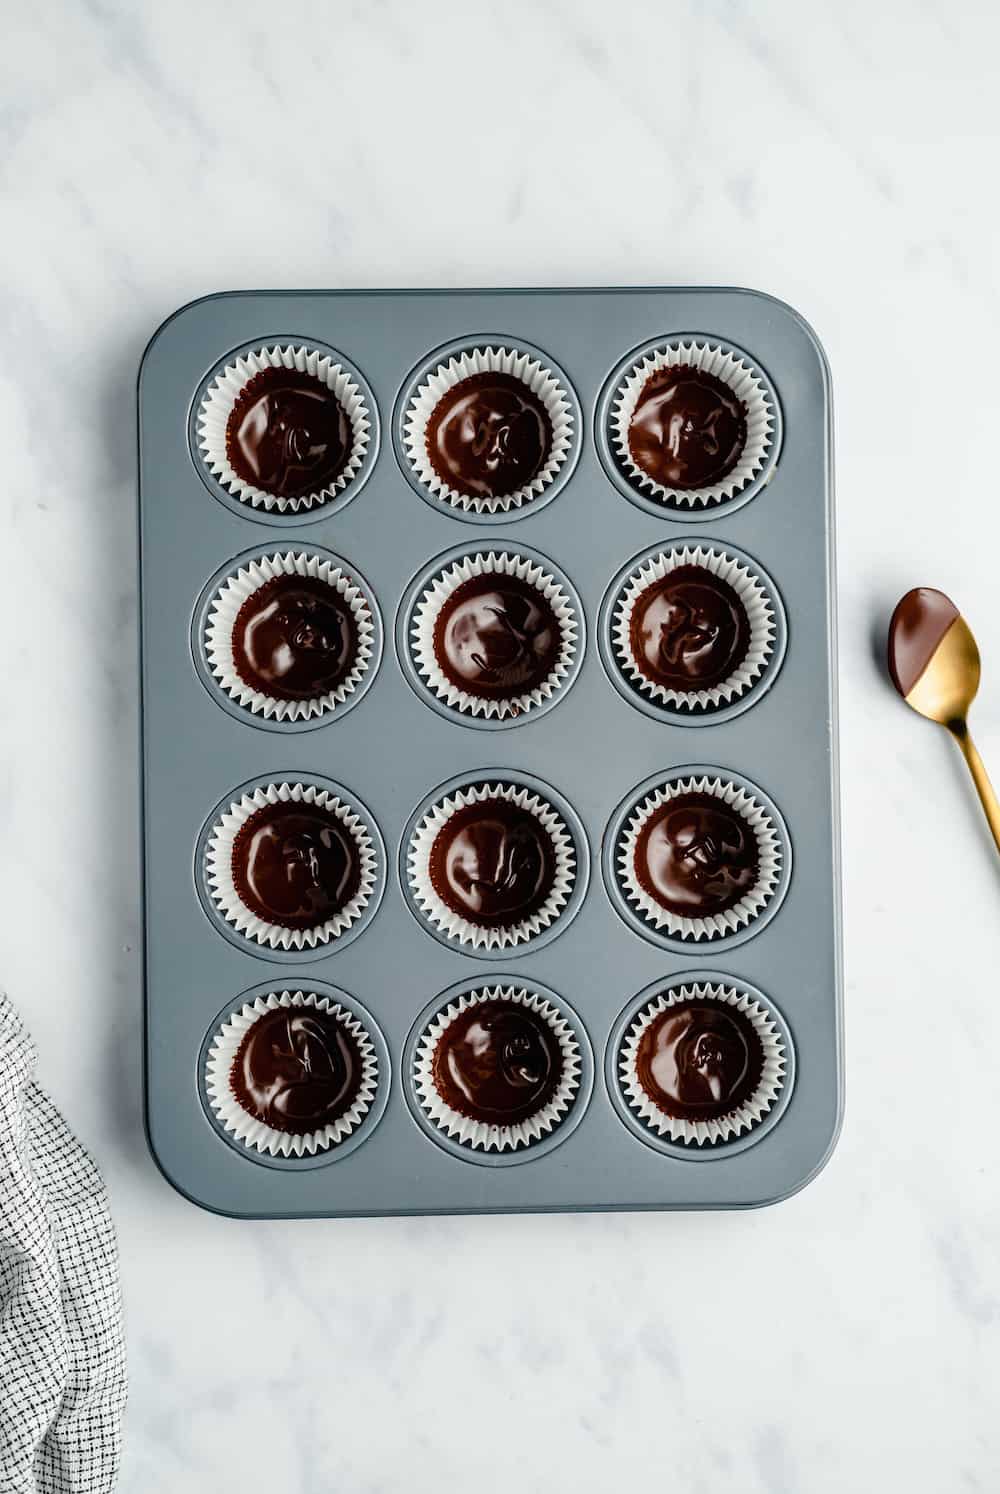
Prepare the Base of the Chocolate Cups: Line a mini muffin tin with 12 mini muffin/cupcake liners. Spoon a little bit of melted chocolate into each of the liners, spreading a thin layer up the sides. This will ensure that the peanut butter is encased in the chocolate. Place in the fridge for about 5 minutes, to set.
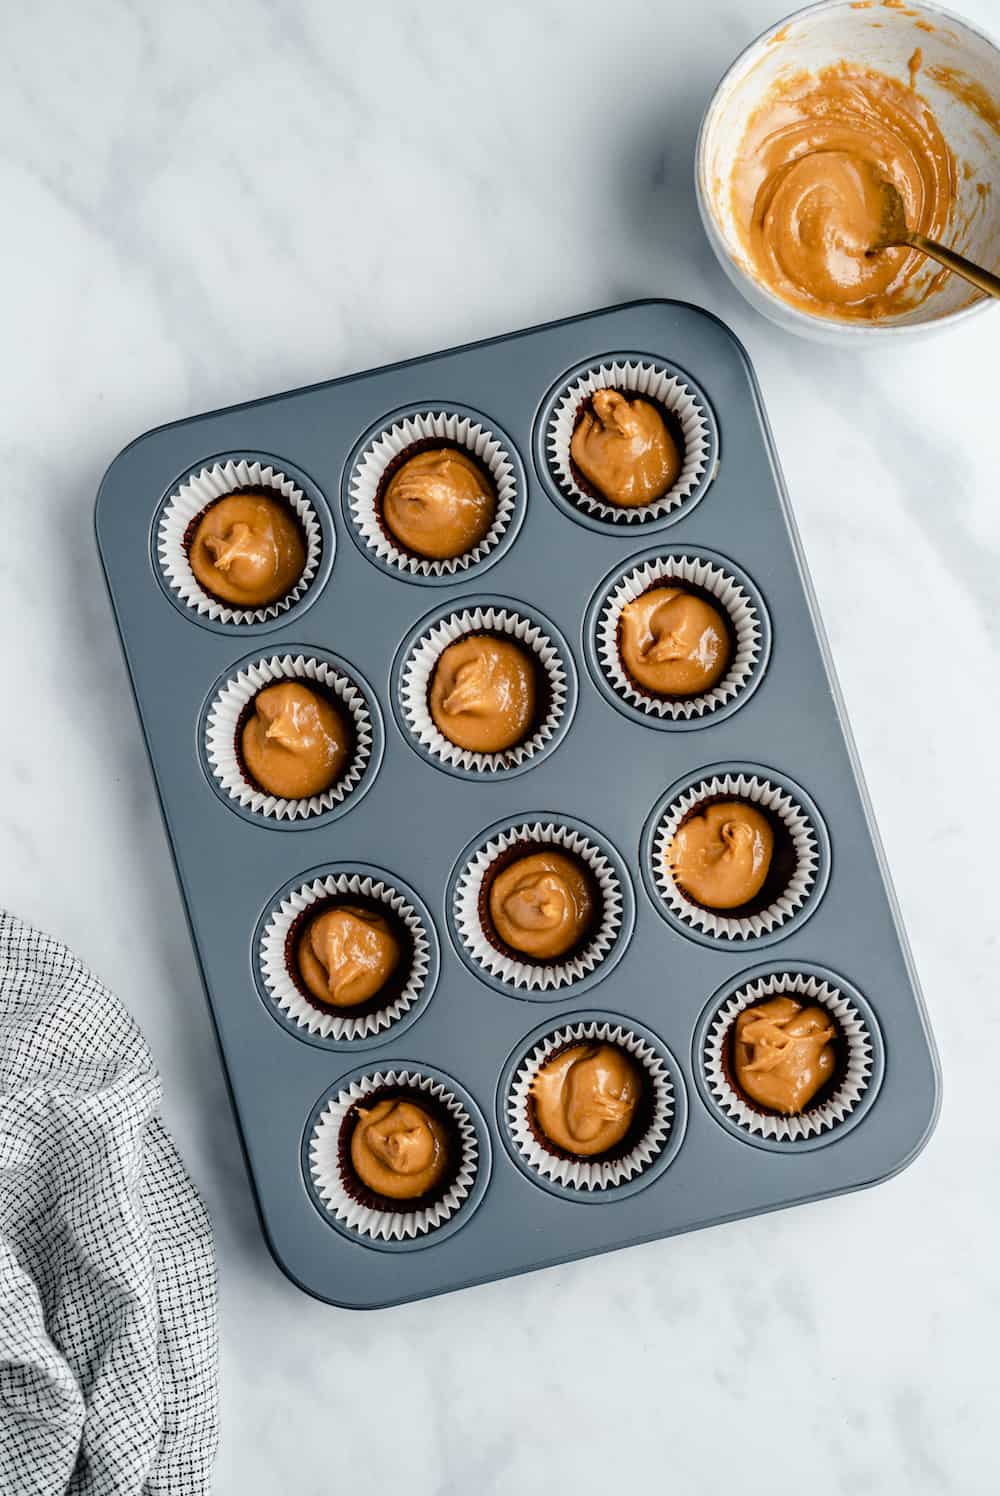
Add the Peanut Butter Filling: Remove the muffin tin from the refrigerator and spoon a small amount of peanut butter filling into the center of each chocolate cup, dividing the filling equally among the 12 cups.

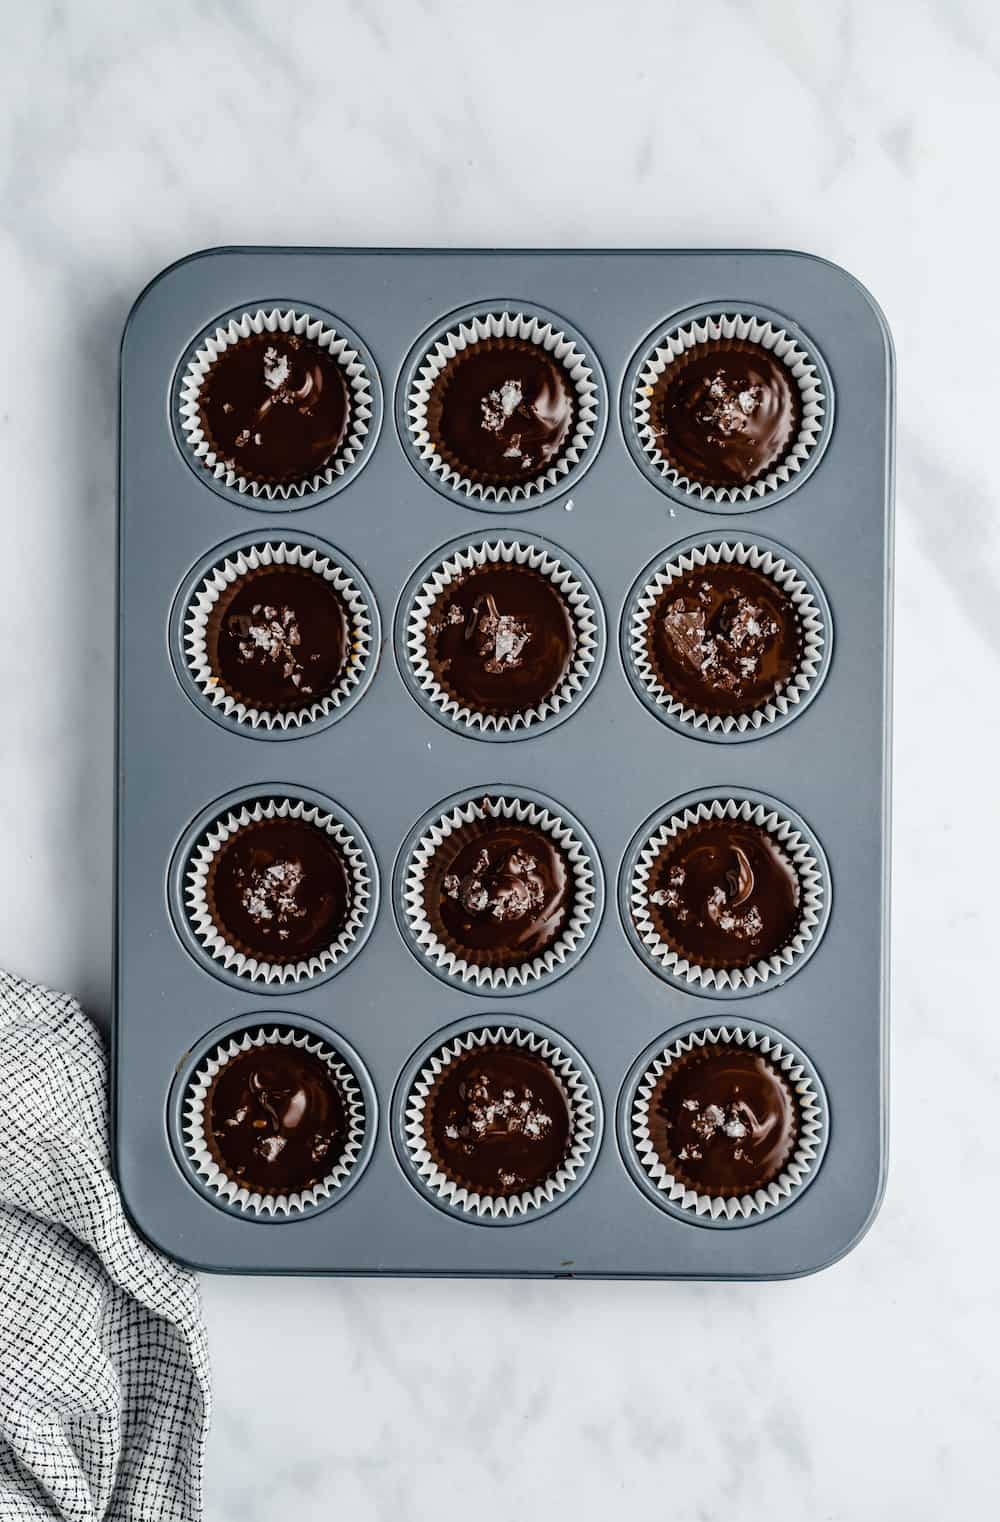
Top with More Chocolate: Top each peanut butter cup with a layer of chocolate, to cover and seal in the filling. Sprinkle with sea salt, if you’d like!
Refrigerate to Set: Place the muffin tin back in the fridge for another 30 minutes to fully set the chocolate.
Serve and Enjoy!
Do me a favor and ensure you enjoy these completely. They are such a great holiday or every day treat! I would make a whole lot, because I guarantee you won’t be able to keep your hands off them.

Tips for the Best Peanut Butter Cups
- Leave the Liners: While it’s fine to remove the muffin liner from each peanut butter cup, you can also leave them on. Trim them down like store-bought peanut butter cup wrappers, or fold the upper edges down over the top of the candies. This definitely makes them easier to handle and store!
- Peanut Alternatives: Yes, it’s definitely possible to make these using almond butter or sunflower seed butter. You may want to add a pinch of salt if the almond butter is on the mild side. I’ve also seen pecan butter and even cookie butter used!

How to Store Homemade Vegan Candy
These peanut butter cups tend to melt easily, so they should really be stored in the refrigerator until you’re ready to eat them. Keep them in an airtight container, and enjoy within 2 weeks for the best results.

Can I Freeze Peanut Butter Cups?
Yes, you can! I like to pop mine in the freezer once they are finished, to force myself not to eat them all at once, and because they last even longer in there – up to four months!
More Vegan Dessert Recipes
- Vegan Chocolate Chip Cookies
- Vegan Almond Flour Brownies (One Bowl, Gluten Free, and Fudgy)
- Rolled Pumpkin Spice Cookies (Vegan)
P.S. Here are some of the items I used to make this recipe, if you’d like to use them too:
| WHAT YOU’LL NEED // SHOP MY FAVORITE INGREDIENTS & PREP PRODUCTS |
I f you try this Vegan Peanut Butter Cups please let me know in the comment section below, or tag me on instagram with the hashtag #jessicainthekitchen ! For more exclusive recipes follow me on Instagram AND on Snapchat: jessinkitchen.
Ingredients
Vegan Peanut Butter Cups
- 1 cup chocolate chips , I love dark chocolate here
- 1 tablespoon coconut oil , to slightly thin out the chocolate
- ¼ cup natural peanut butter , (add a little maple syrup to sweeten if necessary) or nut butter of choice
Equipment
- Microwave
Instructions
- Line a mini muffin tin with 12 mini cupcake/muffin liners.
- In your microwave or over a pot of boiling water, melt your chocolate chips. Add the coconut oil to help to thin it out (it’ll also help to solidify the chocolate in a bite-able texture).
- Spoon a little bit of melted chocolate into each of the muffin liners, spreading a thin layer up the edges of the liners. This will ensure the peanut butter is encased in the chocolate.
- Put in the fridge for about 5 minutes to set slightly.
- Remove from fridge and divide the peanut butter equally throughout the 12 liners. Dollop a little bit over the chocolate into the middle of it.
- Top each liner with the remaining chocolate to cover. Top with a little sea salt if you desire.
- Set in the fridge for 30 more minutes to set.
- Remove and enjoy!
Notes
- Leave the Liners: While it’s fine to remove the muffin liner from each peanut butter cup, you can also leave them on. Trim them down like store-bought peanut butter cup wrappers, or fold the upper edges down over the top of the candies. This definitely makes them easier to handle and store!
- Peanut Alternatives: Yes, it’s definitely possible to make these using almond butter or sunflower seed butter. You may want to add a pinch of salt if the almond butter is on the mild side. I’ve also seen pecan butter and even cookie butter used!
