This vegan split pea soup has the creamy texture you love, a divine smoky flavour, and lots of tender potatoes and carrots in the mix. It’s a hearty soup perfect for making a meal!

Split pea soup is truly one of the heartiest, most satisfying soups you can make! It’s thick, rich, and creamy, all thanks to those dried split peas, which break down as they cook. (Red lentils are similar—see this One-Pot Red Lentil Curry recipe.) Split pea soup is often made with ham, but a little bit of smoked paprika helps replace that flavour with delicious results! This is a soup you’re going to want to double and freeze for later.
Why You’ll Love This Split Pea Soup Recipe
- Hearty and satisfying . With plenty of vegetables and protein-rich split peas, this soup is a filling meal that will keep you satisfied and cozy.
- Creamy texture . Despite being dairy-free, this soup has a velvety smoothness thanks to the combination of blended split peas and tender potatoes.
- Budget-friendly . Split peas are an affordable protein, and the other ingredients in this soup are inexpensive, too. This is a great recipe to make when you’re minding your grocery expenses!
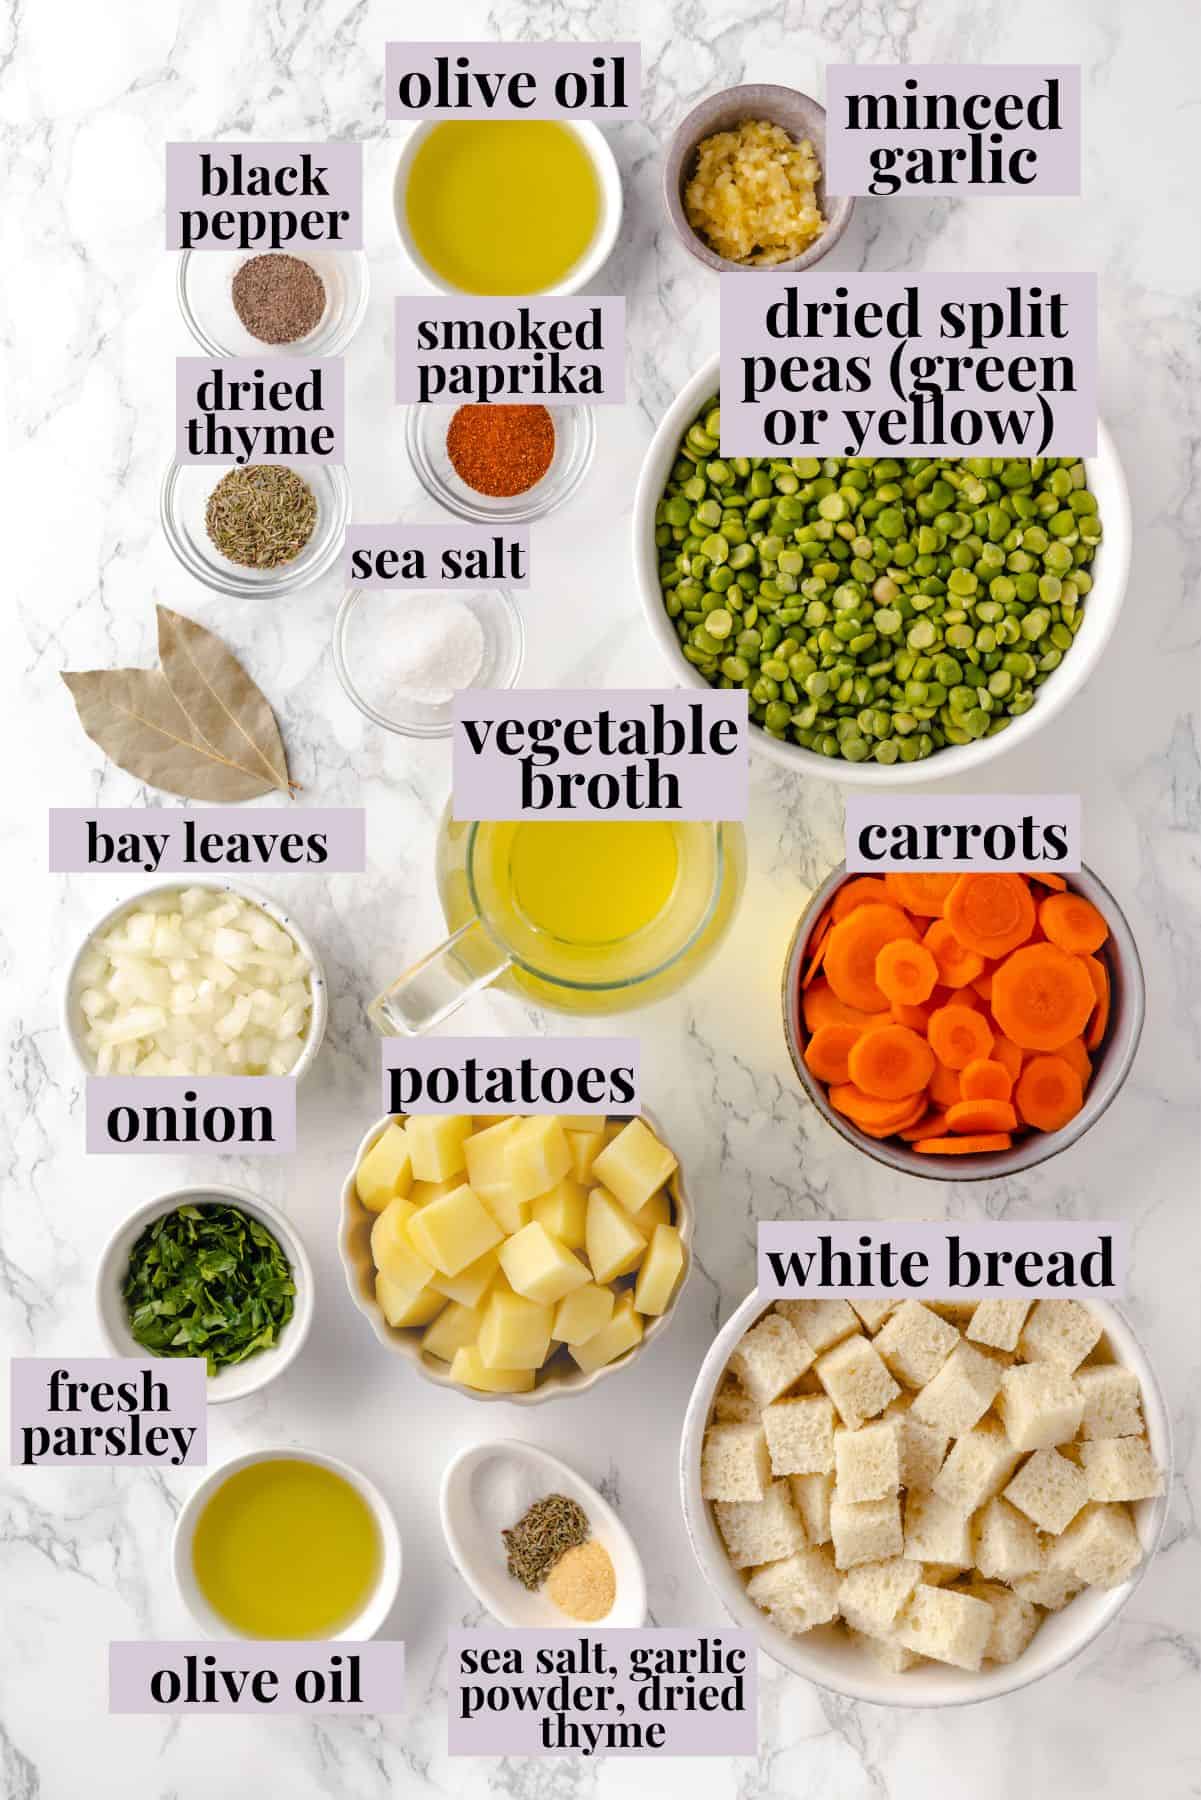
Notes on Ingredients
Scroll down to the recipe card to find the ingredient quantities and recipe instructions.
- Olive oil
- Onion and garlic – Yellow or white onion both work.
- Dried split peas – You can use yellow or green. Yellow split peas take longer to cook, I prefer soaking them overnight; green split peas can be soaked for 2 hours.
- Vegetable broth – I like to use my homemade vegetable broth in this vegan split pea soup recipe.
- Bay leaves
- Dried thyme
- Smoked paprika – A fabulous way to add smoky flavour to vegan recipes! Smoked paprika is not the same as sweet paprika or hot paprika, which don’t have that added smokiness.
- Sea salt and black pepper
- Carrots
- Potatoes – Any type you like. You can leave the skins on or peel them.
- Fresh parsley
- Homemade croutons – Vegan white bread, olive oil, sea salt, garlic powder, and dried thyme.
How to Make Split Pea Soup
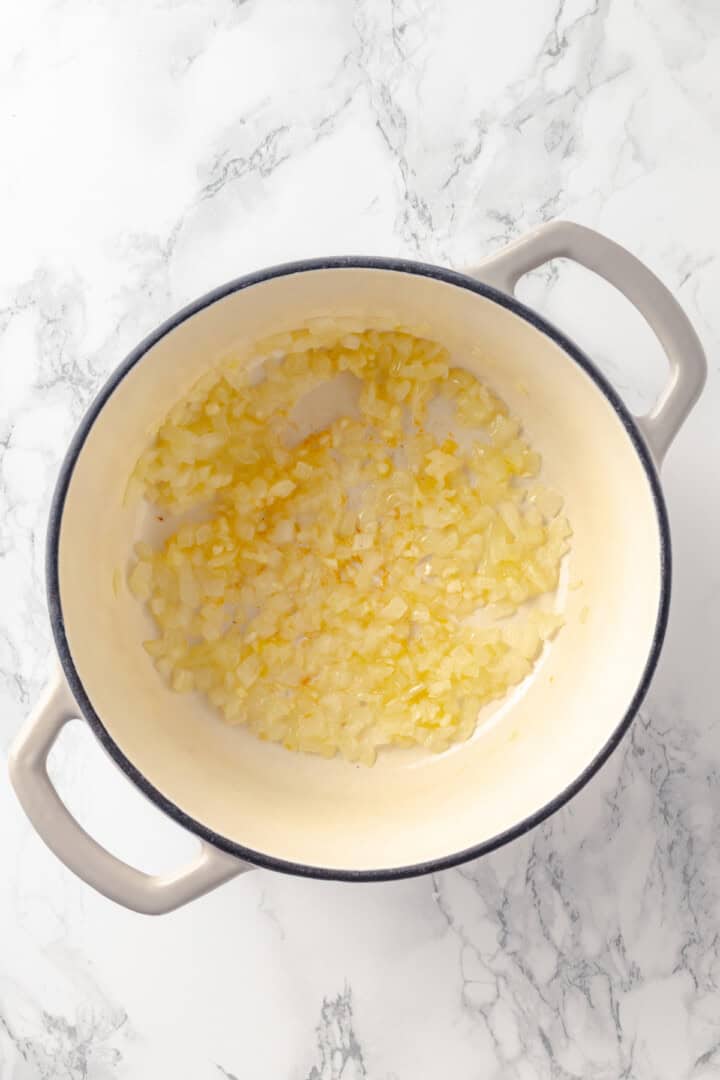
Sauté onion and garlic.
- Sauté the onion and garlic . Heat the oil in a large pot set over medium heat. Cook the onion until it’s softened, then add the garlic and cook until it’s fragrant.
- Simmer . Stir in the peas, broth, bay leaves, thyme, smoked paprika, salt, and black pepper. Bring to a boil, then reduce the heat to low and simmer covered for 40 to 60 minutes, or until the split peas are tender.
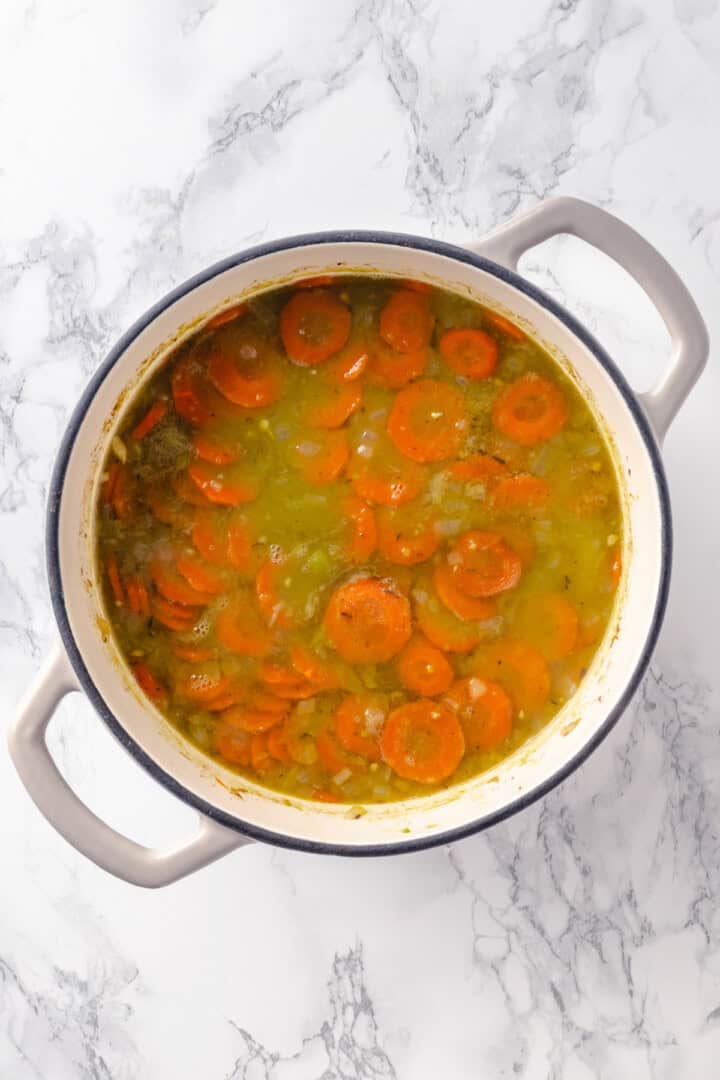
Add carrots and potatoes.
- Add the carrots and potatoes . Stir the carrots and potatoes into the soup and cook for 20 to 25 minutes more, until they’re tender.
- Blend . Use an immersion blender to partially blend the soup, or blend a portion in a countertop blender then stir it back in.
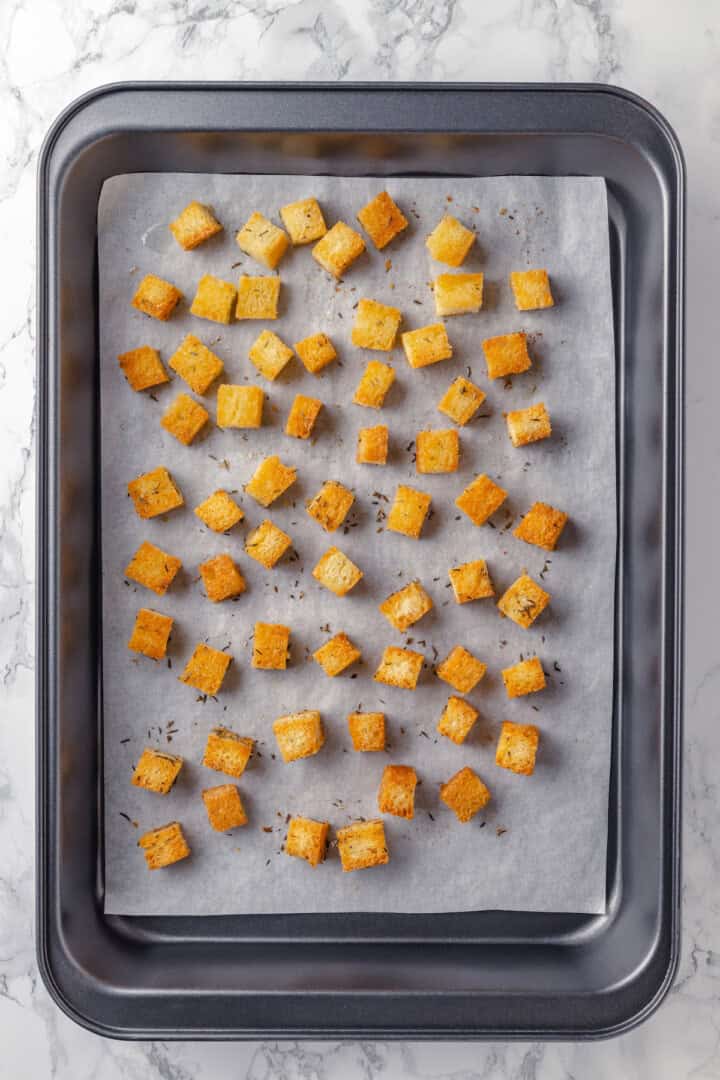
Make croutons.
- Make the croutons . Toss the bread cubes with the oil and seasonings. Spread on a baking sheet and bake for 10 minutes at 375ºF, turning halfway through.
- Serve . Remove the bay leaves, season to taste, and divide the split pea soup into bowls. Garnish with parsley and croutons.
Tips and Variations
- Thin as needed . If the soup becomes too thick, add more vegetable broth or water. You can also adjust the consistency by blending more or less of the soup.
- Add more smoky flavor . If you want your split pea soup extra smoky, add a few drops of liquid smoke to the soup while it simmers.
- Garnish with vegan bacon . Sprinkle tempeh bacon or coconut bacon over the top just before serving.
- Make it extra creamy . Serve with a dollop of vegan sour cream to add more richness and creaminess.

What to Serve With Split Pea Soup
Split pea soup is perfect for pairing with a salad like this easy vegan Caesar salad . If you don’t make the croutons, try serving the soup with crusty bread or skillet cornbread .
How to Store and Reheat Leftovers
- Refrigerator : Store leftover soup in an airtight container in the refrigerator for up to 5 days.
- Freezer : If you have leftovers that you won’t be able to finish within a few days, freeze them for later. Transfer the split pea soup into freezer-safe containers or storage bags and freeze for up to 3 months.
- Reheating : Warm the soup on the stovetop over medium heat or in the microwave.

More Vegan Soup Recipes
- French Onion Soup
- Vegan Chicken Noodle Soup
- Gnocchi Soup
- Vegetable Minestrone Soup
- Vegan Broccoli Cheddar Soup
Ingredients
For the Soup:
- 2 tablespoons olive oil
- 1 medium onion , diced
- 3 garlic cloves , minced
- 2 cups dried split peas , green or yellow, preferably soaked*, 400 g
- 8 cups vegetable broth , 2 litres
- 2 bay leaves
- 1 teaspoon dried thyme
- 1 teaspoon smoked paprika
- 1 teaspoon sea salt , or to taste
- ½ teaspoon black pepper , or to taste
- 2 large carrots , sliced
- 2 medium potatoes , diced
- 2 tablespoons fresh parsley , chopped, for garnish
For the Croutons:
- 2 cups vegan white bread , cubed, like ciabatta or sourdough
- 2 tablespoons olive oil
- ¼ teaspoon sea salt
- ½ teaspoon garlic powder
- ¼ teaspoon dried thyme
Instructions
*Soak the split peas:
- For the best taste and texture, soak your peas before beginning the soup recipe. First, rinse and sort the peas, removing any pieces of dirt, rocks, or skins. Place the peas in a pot and cover with cold water so that the water is at least an inch above the peas.
- Soak at room temperature. Green peas are softer and should be soaked for 2 hours. Yellow peas are harder and should be soaked overnight.
Make the soup:
- In a large pot or Dutch oven, heat the olive oil over medium heat.
- Add the diced onion and sauté for about 5 minutes until softened.
- Add the minced garlic and cook for another minute until fragrant, stirring frequently.
- Add the rinsed split peas, vegetable broth, bay leaves, thyme, smoked paprika, salt, and black pepper.
- Bring the mixture to a boil, then reduce the heat to low, cover, and simmer for 45 minutes for green peas/60 minutes for yellow peas, or until the split peas are tender.
- After the peas are tender, add the sliced carrots and diced potatoes.
- Continue to simmer for an additional 20-25 minutes, or until the carrots and potatoes are tender.
- For a smoother consistency, use an immersion blender to partially blend the soup or transfer 2 cups of soup to a blender and blend until smooth.
- While the soup finishes cooking, preheat your oven to 375°F (190°C).
- Toss the began bread cubes with olive oil, salt, garlic powder, and thyme until evenly coated.
- Spread the cubes in a single layer on a baking sheet and bake for 10 minutes, or until golden and crispy, turning halfway through.
- Remove bay leaves, adjust seasonings as needed, and ladle the soup into bowls.
- Top with croutons and garnish with fresh parsley, if desired.
Notes
- Refrigerator : Store leftover soup in an airtight container in the refrigerator for up to 5 days.
- Freezer : If you have leftovers that you won’t be able to finish within a few days, freeze them for later. Transfer the soup into freezer-safe containers or storage bags and freeze for up to 3 months.
- Reheating : Warm the soup on the stovetop over medium heat or in the microwave. If the soup becomes too thick, add a bit more vegetable broth or water as needed.

Split Pea Soup
Ingredients
For the Soup:
- 2 tablespoons olive oil
- 1 medium onion diced
- 3 garlic cloves minced
- 2 cups dried split peas green or yellow, preferably soaked*, 400 g
- 8 cups vegetable broth 2 litres
- 2 bay leaves
- 1 teaspoon dried thyme
- 1 teaspoon smoked paprika
- 1 teaspoon sea salt or to taste
- ½ teaspoon black pepper or to taste
- 2 large carrots sliced
- 2 medium potatoes diced
- 2 tablespoons fresh parsley chopped, for garnish
For the Croutons:
- 2 cups vegan white bread cubed, like ciabatta or sourdough
- 2 tablespoons olive oil
- ¼ teaspoon sea salt
- ½ teaspoon garlic powder
- ¼ teaspoon dried thyme
Instructions
*Soak the split peas:
- For the best taste and texture, soak your peas before beginning the soup recipe. First, rinse and sort the peas, removing any pieces of dirt, rocks, or skins. Place the peas in a pot and cover with cold water so that the water is at least an inch above the peas.
- Soak at room temperature. Green peas are softer and should be soaked for 2 hours. Yellow peas are harder and should be soaked overnight.
Make the soup:
- In a large pot or Dutch oven, heat the olive oil over medium heat.
- Add the diced onion and sauté for about 5 minutes until softened.
- Add the minced garlic and cook for another minute until fragrant, stirring frequently.
- Add the rinsed split peas, vegetable broth, bay leaves, thyme, smoked paprika, salt, and black pepper.
- Bring the mixture to a boil, then reduce the heat to low, cover, and simmer for 45 minutes for green peas/60 minutes for yellow peas, or until the split peas are tender.
- After the peas are tender, add the sliced carrots and diced potatoes.
- Continue to simmer for an additional 20-25 minutes, or until the carrots and potatoes are tender.
- For a smoother consistency, use an immersion blender to partially blend the soup or transfer 2 cups of soup to a blender and blend until smooth.
- While the soup finishes cooking, preheat your oven to 375°F (190°C).
- Toss the began bread cubes with olive oil, salt, garlic powder, and thyme until evenly coated.
- Spread the cubes in a single layer on a baking sheet and bake for 10 minutes, or until golden and crispy, turning halfway through.
- Remove bay leaves, adjust seasonings as needed, and ladle the soup into bowls.
- Top with croutons and garnish with fresh parsley, if desired.
Notes
- Refrigerator : Store leftover soup in an airtight container in the refrigerator for up to 5 days.
- Freezer : If you have leftovers that you won’t be able to finish within a few days, freeze them for later. Transfer the soup into freezer-safe containers or storage bags and freeze for up to 3 months.
- Reheating : Warm the soup on the stovetop over medium heat or in the microwave. If the soup becomes too thick, add a bit more vegetable broth or water as needed.
Nutrition
Split Pea Soup https://jessicainthekitchen.com/split-pea-soup/ December 23, 2024
Crispy fried tofu is a vegan staple, perfect for adding to salads, meal bowls, stir-fries, and more. This is a recipe you’ll make again and again!

Fried tofu is like the vegan version of baked chicken breast. The kind of recipe you make at least once a week because it’s an easy, reliable source of protein that goes with just about anything. With the right preparation, seasonings, and cooking method, you can make a simple block of tofu taste absolutely divine!
Why You’ll Love This Fried Tofu Recipe
- No special equipment needed . Now, I love my crispy air fryer tofu , but I know not everyone has an air fryer ! This fried tofu is cooked on the stovetop, so as long as you have a pan, you’re good to go!
- Crispy on the outside, soft on the inside . AKA little nuggets of heaven! I love the way the exterior of this tofu gets crispy, while the insides remain tender.
- So versatile . You can use this fried tofu in so many different ways, you’ll never get bored of it! I share some of my favourite ideas below, or come up with your own.
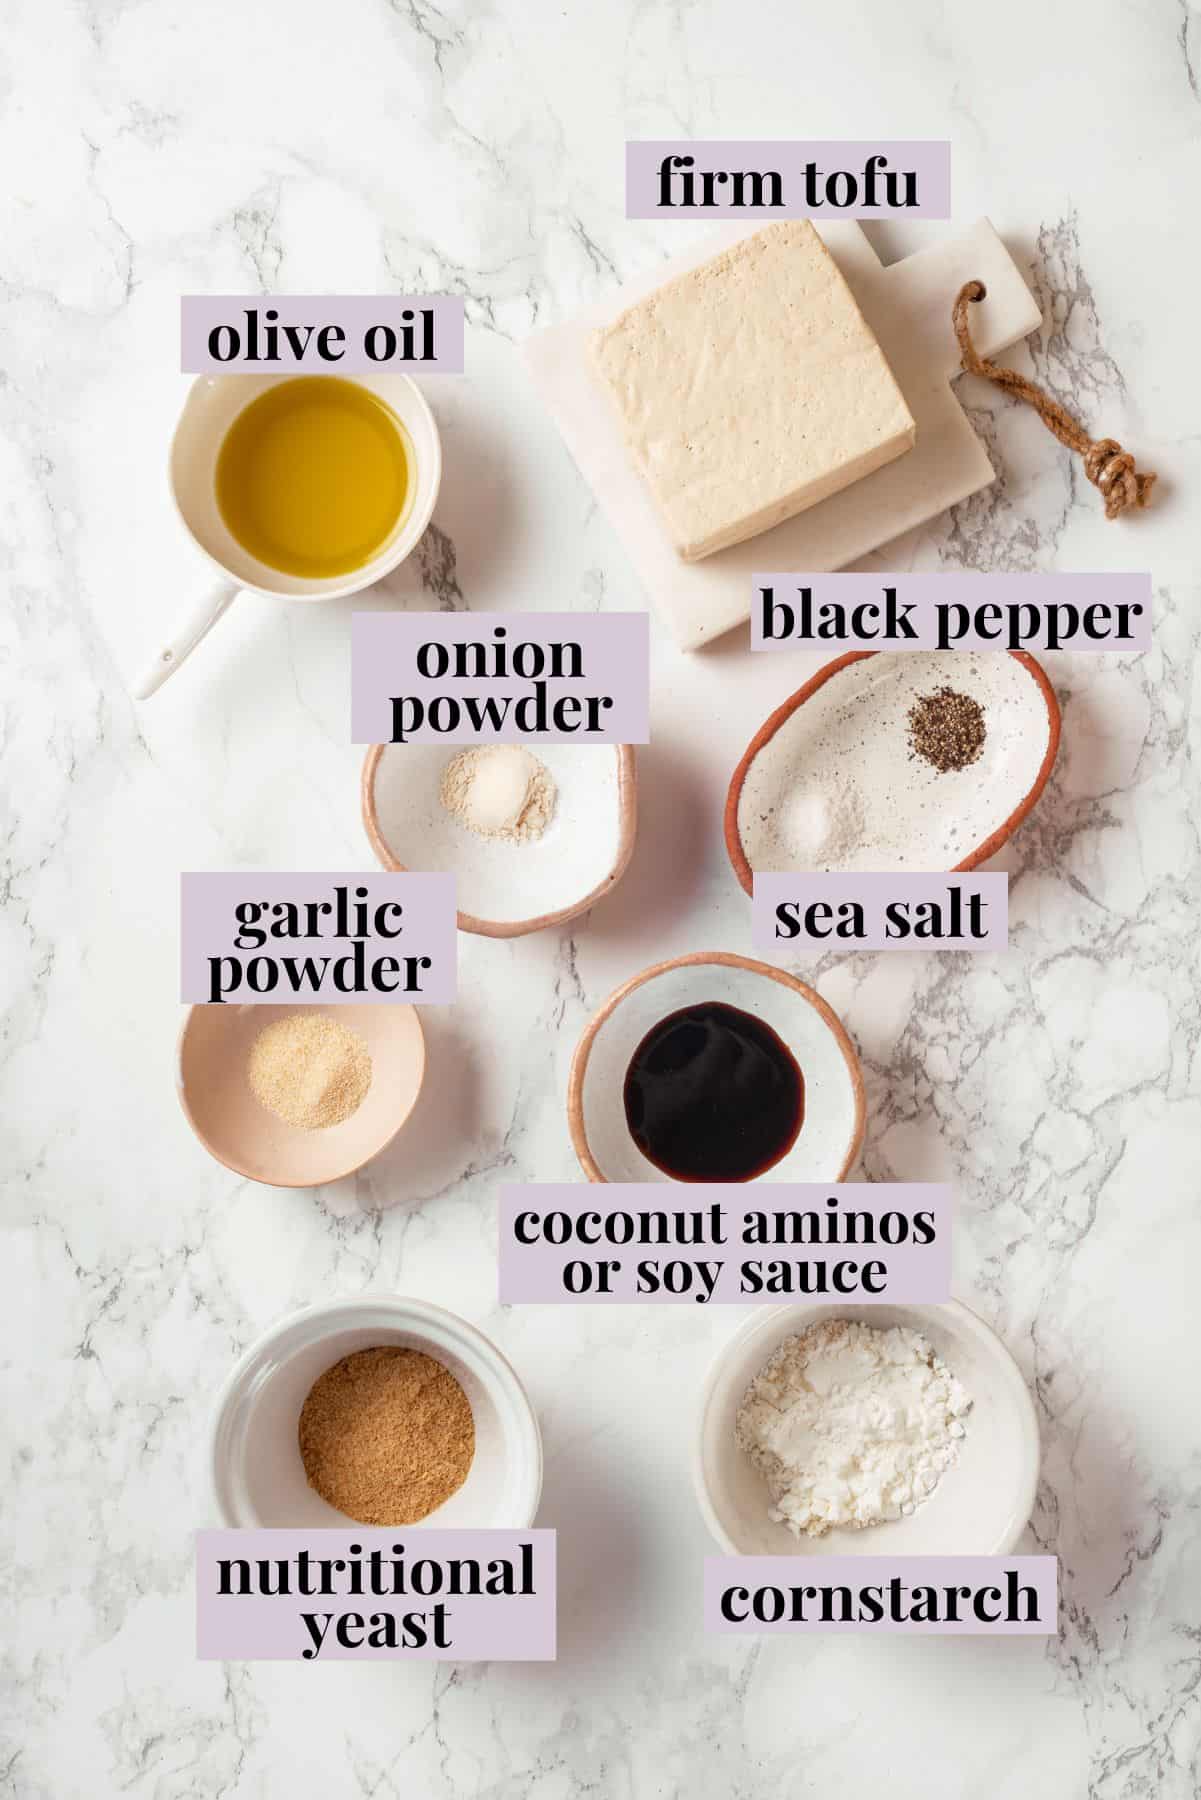
Notes on Ingredients
Scroll down to the recipe card to find the ingredient quantities and recipe instructions.
- Firm tofu – Be sure to buy the refrigerated kind, not shelf-stable silken tofu. Silken tofu has a completely different texture and is better used for creamy sauces and miso soup.
- Coconut aminos or soy sauce – To add savoury flavor use coconut aminos , soy sauce , or tamari sauce .
- Cornstarch – Key to that crispy exterior!
- Seasonings – Nutritional yeast , garlic powder, onion powder, sea salt, and black pepper.
- Olive oil – I love the flavor of olive oil , but you can use another oil you like to cook with. Don’t skimp here—you need 3 tablespoons for the tofu to be crispy and to keep it from sticking to the pan.
How to Make Fried Tofu
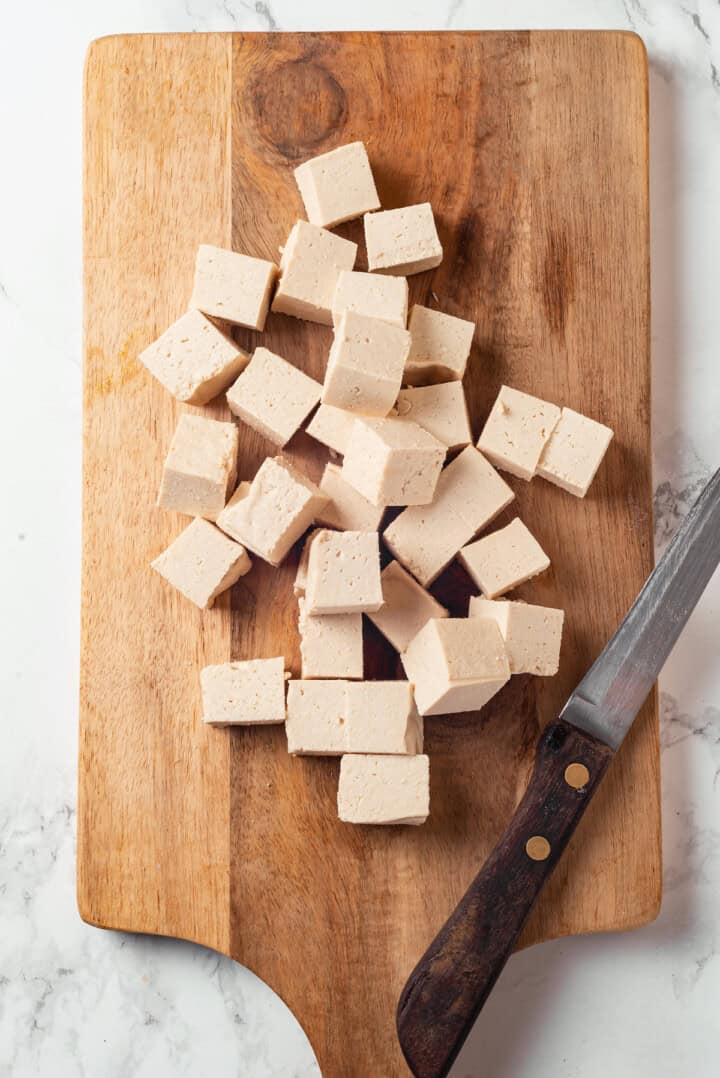
Press and chop tofu.
- Prep the tofu . Set it on a clean kitchen towel or a few layers of paper towels, then place another towel (or paper towels) on top. Set a heavy pan on top and press the tofu for 30 minutes. You can also use a tofu press for this step.
- Season . Cut the tofu into cubes and toss them with the soy sauce. Whisk together the cornstarch and seasonings, then gently toss the tofu with this mixture. Rest for 5 minutes, then toss again.
- Fry the tofu . Heat the oil in a large skillet or wok, then add the tofu. Cook for about 2 minutes on each side, or until golden brown and crispy.
- Finish . Transfer the tofu to a plate lined with paper towels to absorb the excess oil, then serve.

Tips and Variations
- Don’t skip pressing the tofu . Pressing the tofu is important because it removes excess water, allowing the tofu to absorb more flavour and achieve the perfect texture when cooked. Learn more: How To Cook Tofu 101 + Best Tips on Making the Most Delicious Tofu .
- Add some heat . If you like spicy food, feel free to add some cayenne pepper to the seasoning mix, or add red pepper flakes to the oil to infuse it with heat before adding the tofu.
- Try different textures and sizes . You can crumble the tofu before adding it to the soy sauce for a different texture, cut it into slabs for making sandwiches, etc.
My Favourite Ways to Use Fried Tofu
- Stir-Fries . Add fried tofu to your favorite stir-fry recipes for an extra protein boost.
- Salads . Toss crispy tofu cubes onto a salad instead of croutons or other proteins. They’d be great in this quinoa salad with sesame ginger dressing .
- Noodles . Make carb-y noodles (like these chow fun noodles !) more satisfying by adding tofu.
- Tacos . Add fried tofu to tortillas with easy mango basil salsa for an easy, tasty vegan taco recipe.
- Buddha bowls . Try this tofu recipe in my nourishing vegan Buddha bowl .
- With dipping sauce . Dip your crispy fried tofu into Thai peanut sauce . Yum!

How to Store and Reheat Leftovers
- Refrigerator : Fried tofu can be stored in an airtight container in the refrigerator for 3 to 4 days.
- Freezer : Store leftover tofu in an airtight container or freezer bag for up to 3 months.
- Reheating : You can eat this fried tofu cold, at room temperature, or heat it up. To reheat, place the tofu on a baking sheet and bake at 375°F until warmed through. Alternatively, you can heat it in a skillet over medium heat with a little oil or nonstick spray. The microwave also works, but I prefer the other two methods to restore some of the crispiness on the outside.
More Tasty Tofu Recipes
- Tofu Egg Salad
- Lemon Pepper Tofu
- Jamaican Jerk Tofu
- General Tso Tofu
- Crispy Teriyaki Tofu Recipe

Ingredients
- 1 block firm tofu , about 14 oz / 396 g (refrigerated not silken)
- 2 tablespoons coconut aminos , or soy sauce
- 2 tablespoons cornstarch
- 2 tablespoons nutritional yeast
- ½ teaspoon garlic powder
- ½ teaspoon onion powder
- ¼ teaspoon sea salt
- ¼ teaspoon black pepper
- 3 tablespoons olive oil , or other oil, for frying
Instructions
- Place tofu between a clean kitchen towel or paper towels. Put a heavy pan or weighted object on top and let it press for 30 minutes to remove excess moisture. You can also use a tofu press for this step.
- Cut the pressed tofu into 1/2-inch (1 cm) cubes and place in a large bowl. Pour the soy sauce over the tofu cubes, tossing gently to coat.
- In a small bowl, combine the cornstarch, nutritional yeasts, garlic powder, onion powder, salt, and black pepper. Sprinkle the coating over tofu pieces and toss gently. Ensure each piece is evenly coated. Let it rest for 5 minutes and toss again. This way you’ll get a nice thick coating.
- Heat vegetable oil in a skillet or wok over medium heat. Once the oil is hot (about 350°F / 175°C), carefully add tofu cubes, spacing them so they do not touch. Fry for about 2 minutes per side or until golden brown and crispy.
- Transfer fried tofu to a paper towel-lined plate to drain excess oil. Serve immediately.
Notes
- Refrigerator : Fried tofu can be stored in an airtight container in the refrigerator for 3 to 4 days.
- Freezer : Store leftover tofu in an airtight container or freezer bag for up to 3 months.
- Reheating : You can eat this fried tofu cold, at room temperature, or heat it up. To reheat, place the tofu on a baking sheet and bake at 375°F until warmed through. Alternatively, you can heat it in a skillet over medium heat with a little oil or nonstick spray. The microwave also works, but I prefer the other two methods to restore some of the crispiness on the outside.
