Garlic bread is always a good idea, but the buttery, caramelised roasted garlic in my vegan garlic bread recipe takes it to the next level! This easy garlic bread recipe is going to be your new go-to side dish for pasta dishes, holiday dinners, and every other occasion.
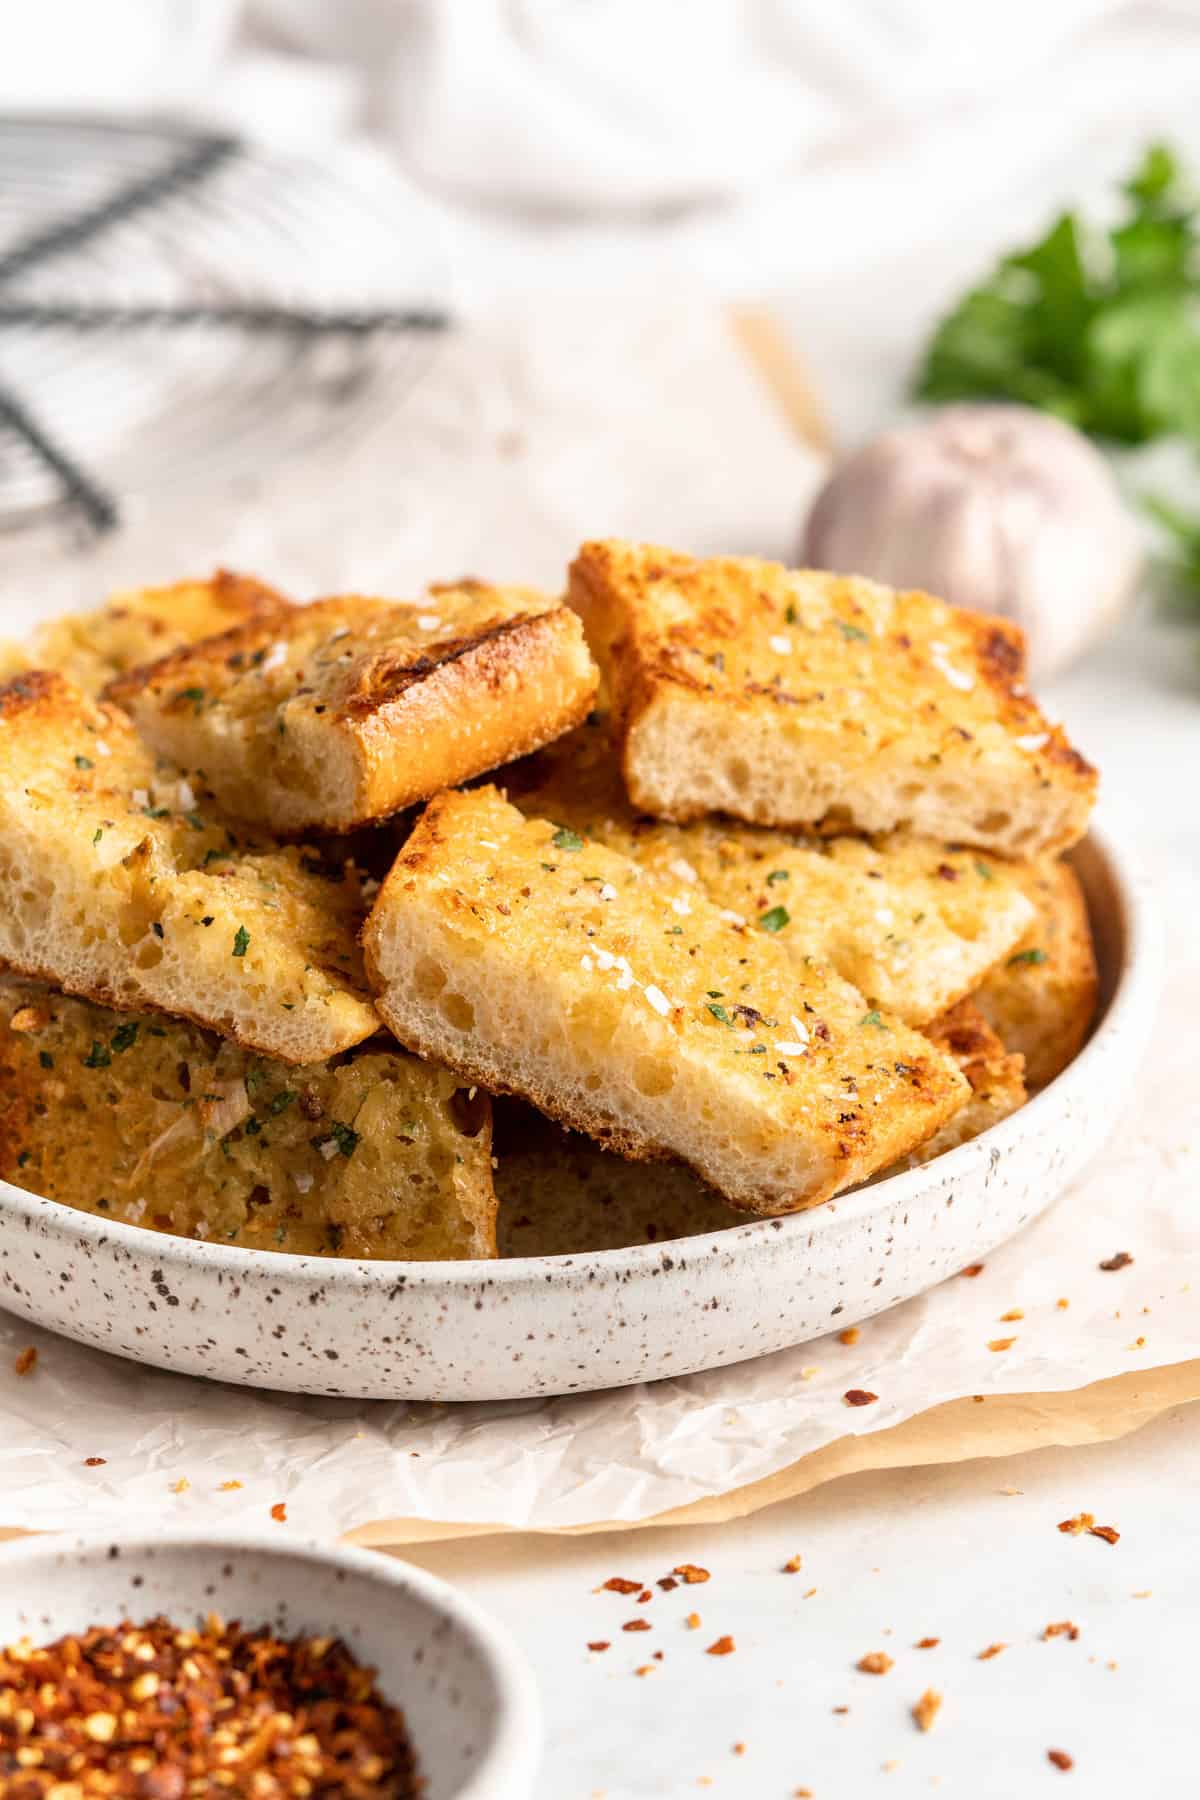
It’s no secret that I’m a big believer in the magic of roasted garlic . Roasting mellows the flavours while caramelising the garlic, making it rich and almost sweet-tasting. I could eat this ingredient in just about anything, and this roasted garlic bread might just be my favourite way to use it. This vegan garlic bread recipe is toasty, buttery, and perfect for soaking up soup, stew , and sauces.
Why This Vegan Garlic Bread Is the Best
- Dairy-free, with gluten-free bread options. When it comes to traditional garlic bread, it’s not vegan because it’s made with butter. My recipe is made with vegan butter, so it’s dairy-free!
- The roasting difference. Soft, caramelised roasted garlic cloves take traditional garlic bread to the next level. It’s an easy extra step with the best flavour pay-off, if you ask me.
- Make-ahead options. You can make your garlic butter in advance and keep it in the fridge until it’s time to prepare your garlic bread. Even better, make double the garlic butter so you’ll have extra to add to mashed potatoes and pasta recipes .
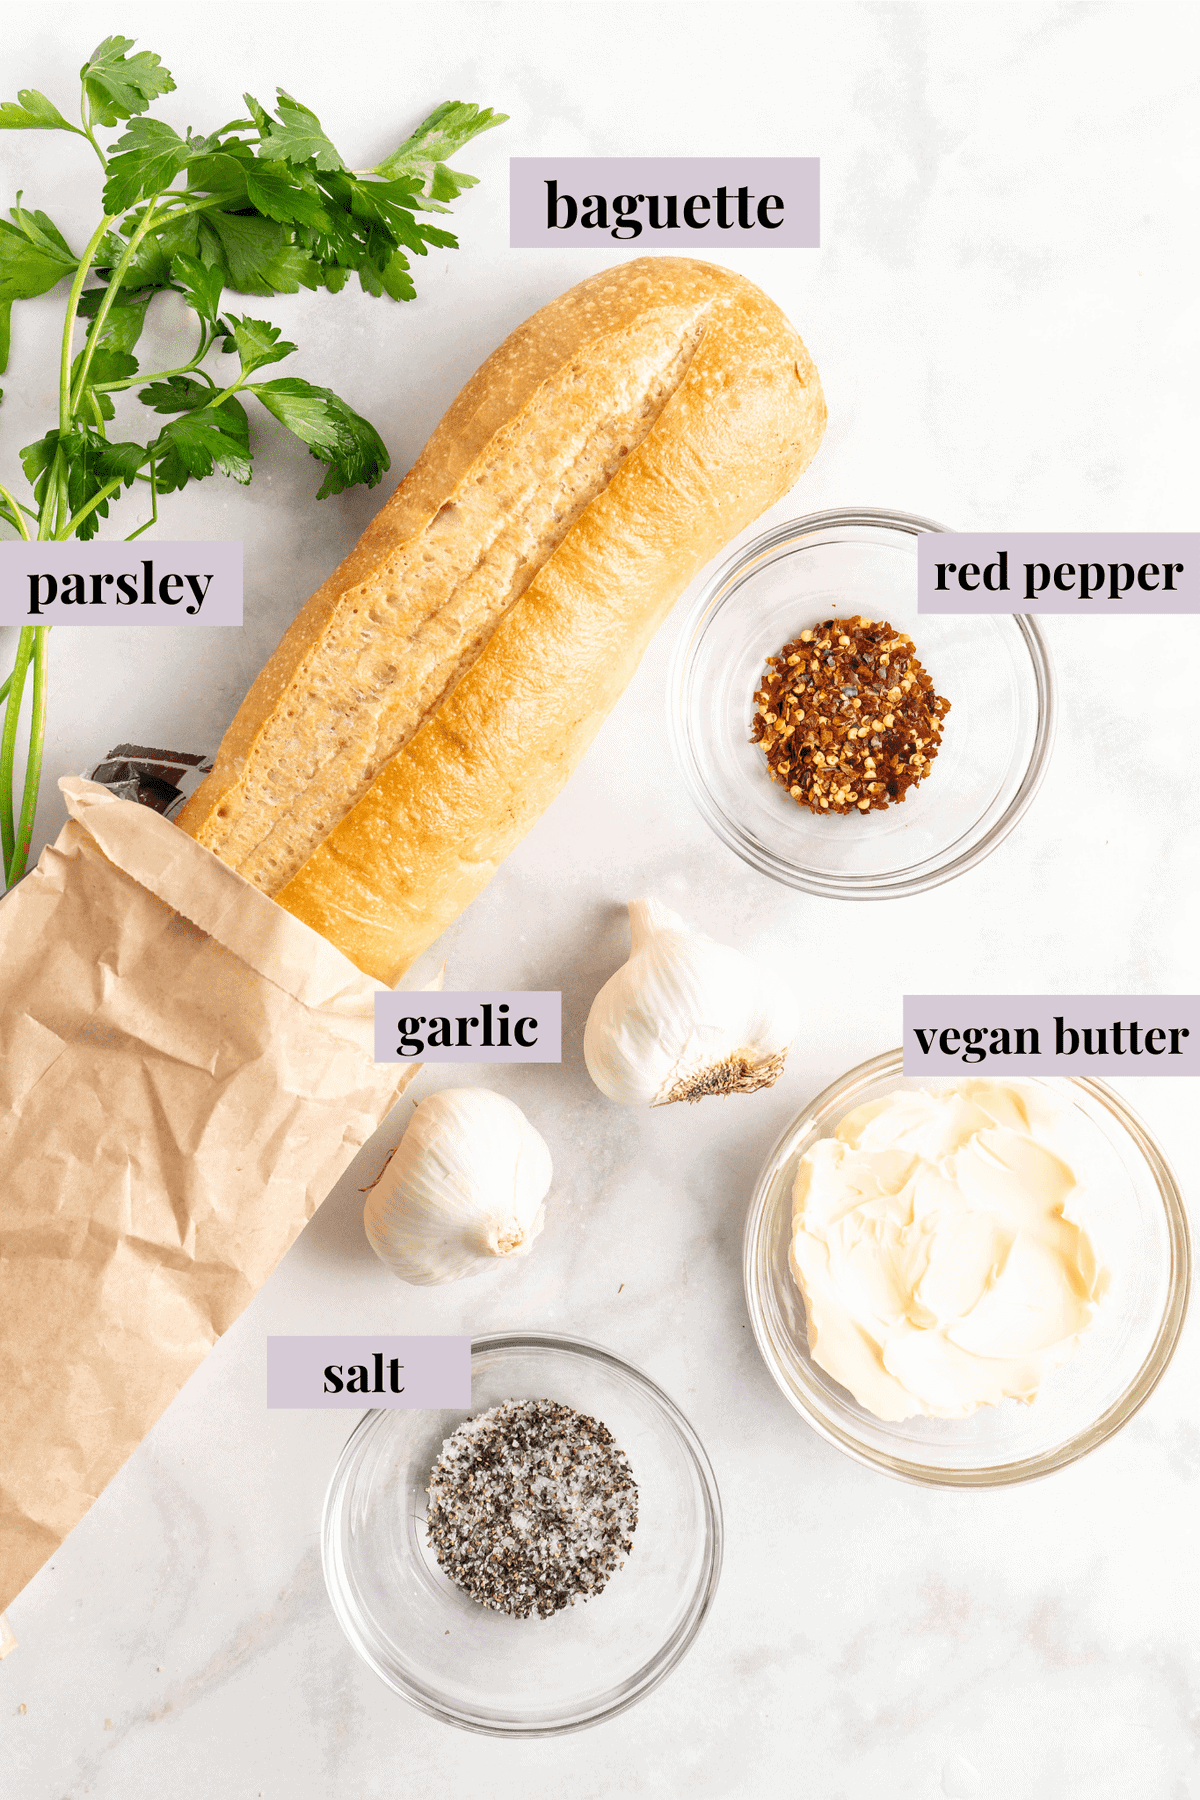
Notes on Ingredients
Please note that this is important information on the ingredients and instructions, and the FULL recipe with amounts and details can be found DOWN BELOW (scroll to it) in the recipe card.
- Demi baguette – Or use one half of a traditional baguette (or bake your own French bread ). You could also make garlic bread with an Italian loaf, like ciabatta, or use sourdough bread or homemade Dutch oven bread . If you’d like to make this recipe gluten-free, choose a gluten-free bread.
- Garlic – Choose fresh garlic cloves, without any green sprouting from the tops.
- Simple seasonings – Olive oil and sea salt when roasting the garlic, plus fresh or dried parsley and red pepper flakes to add to the garlic butter. Omit the chili flakes if you want a milder flavour, or use cracked black pepper instead.
- Vegan butter – You can use your preferred store-bought brand, or follow my recipe to make your own vegan butter .
How to Make Roasted Garlic Bread
You can roast the garlic up to a few days in advance; if you do this, you can have your garlic bread ready to eat in a matter of minutes!
First, Roast the Garlic
Prepare the garlic.
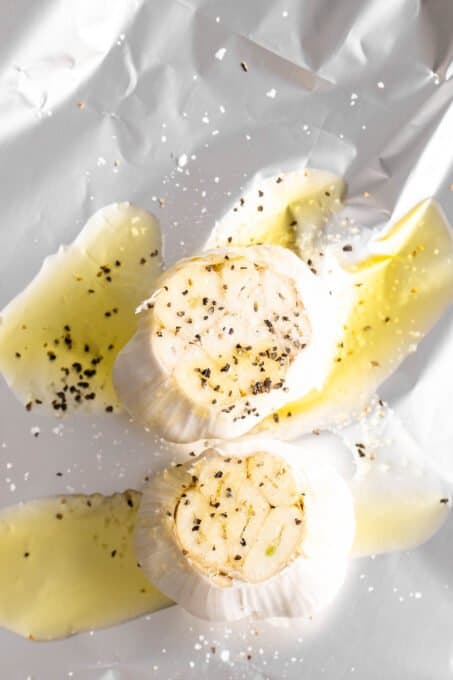
- Prepare for roasting. While the oven preheats to 400°F, slice the tops from the garlic bulbs to expose the cloves. Place each head of garlic on a piece of foil and season it with olive oil and salt.
- Roast the garlic. Seal the garlic inside the foil. Place the foil packet into the oven to roast for 60 minutes. Afterward, let the garlic cool enough to handle. Keep the oven on, as you’ll still toast the bread.
Assemble and Bake the Garlic Bread
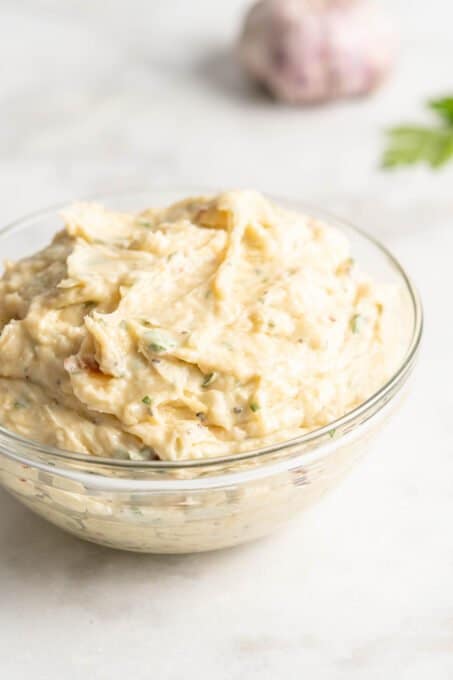
Combine the butter ingredients.
- Make the garlic butter spread. Now, combine the butter, parsley, sea salt, and red pepper flakes. Squeeze the roasted garlic cloves from their skins into the bowl. Then, use a spoon or fork to mash everything together until smooth.
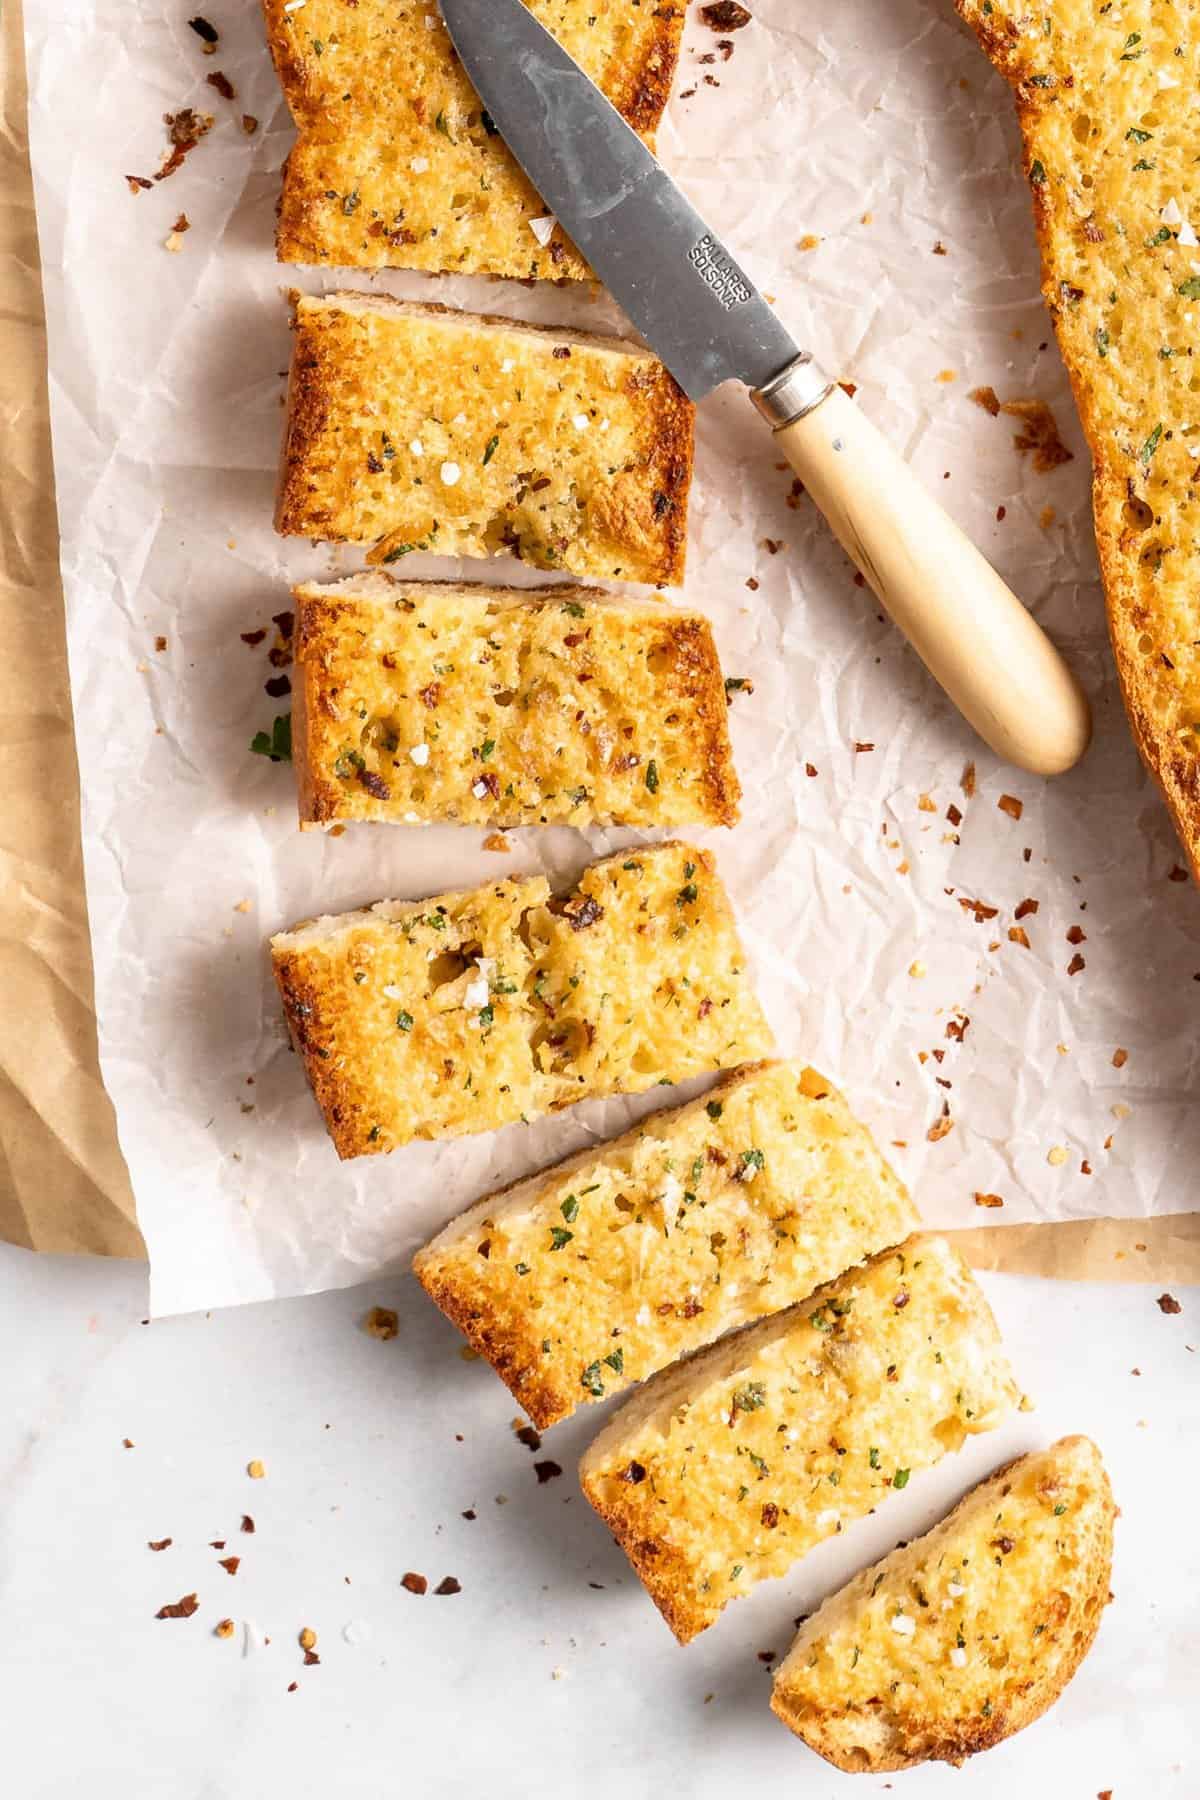
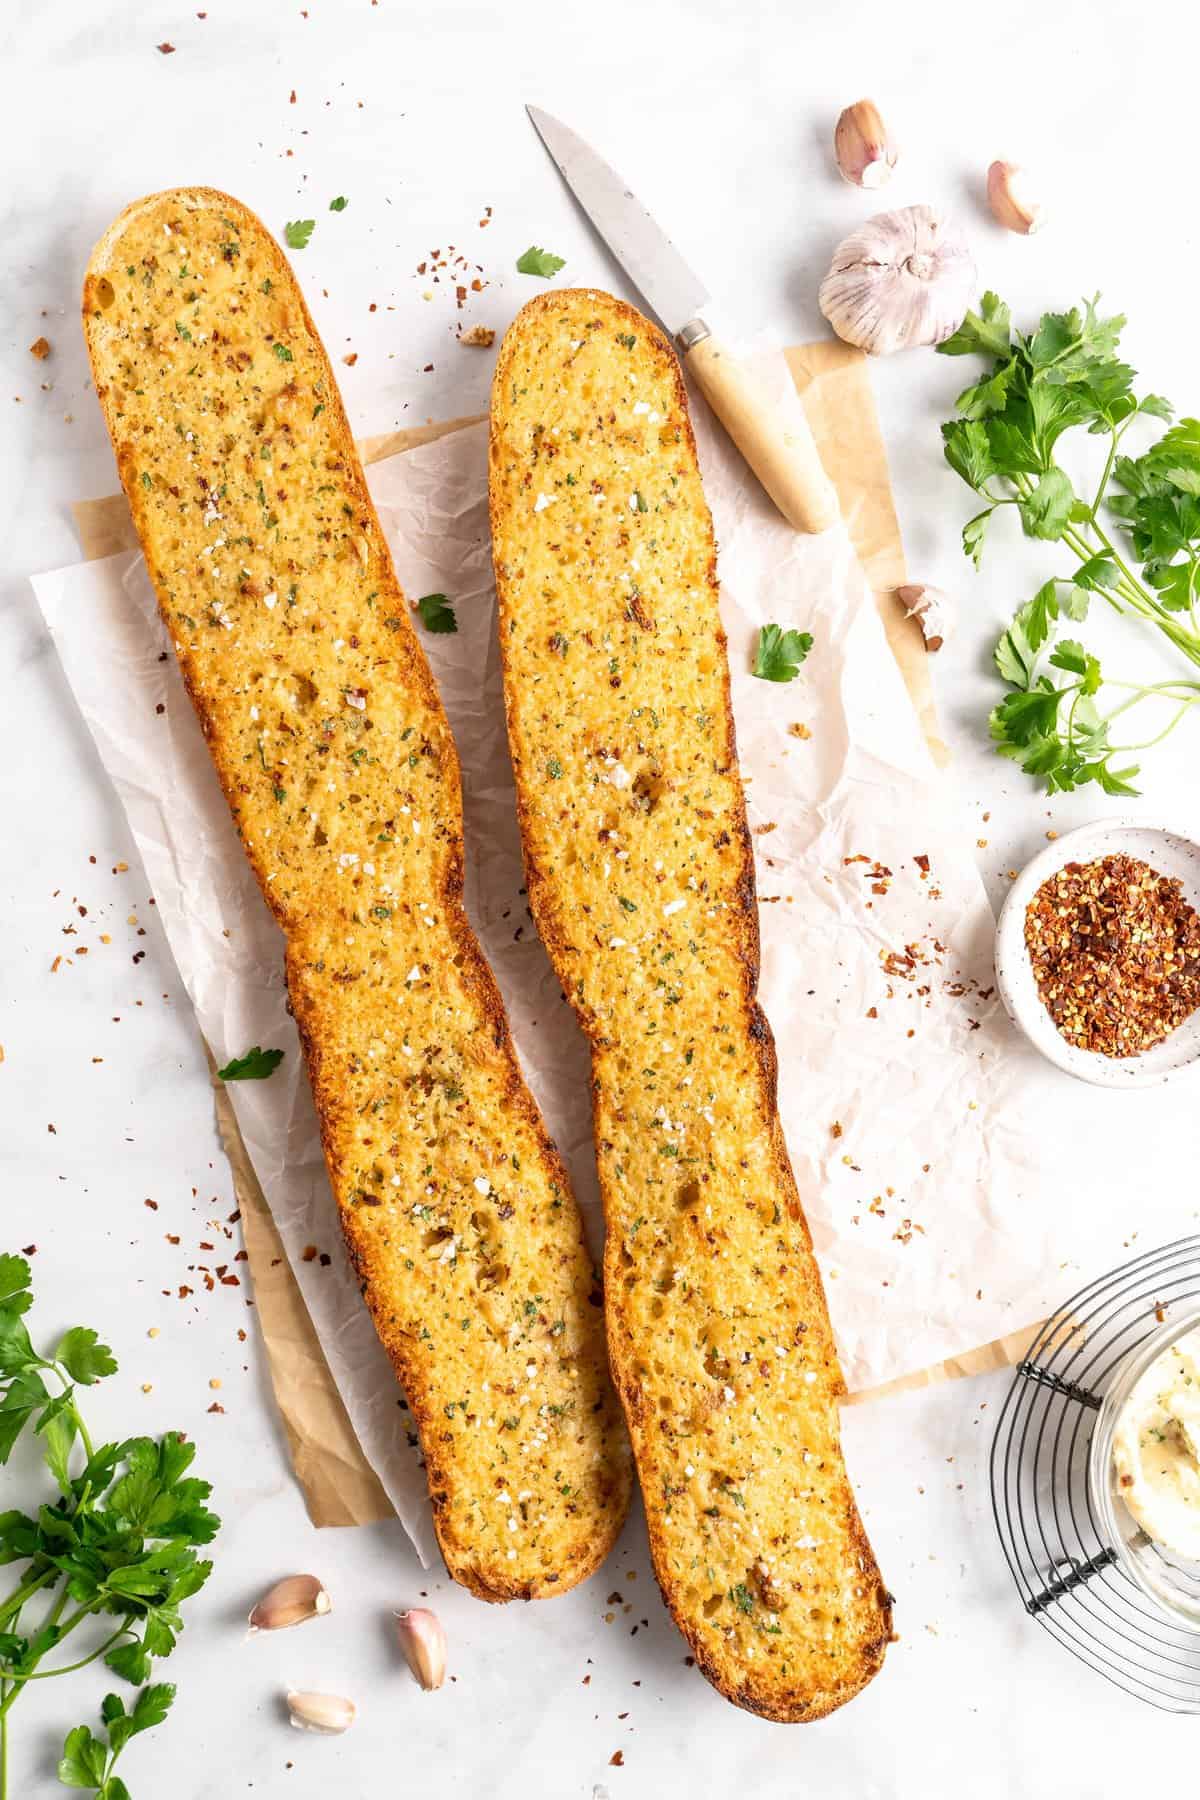
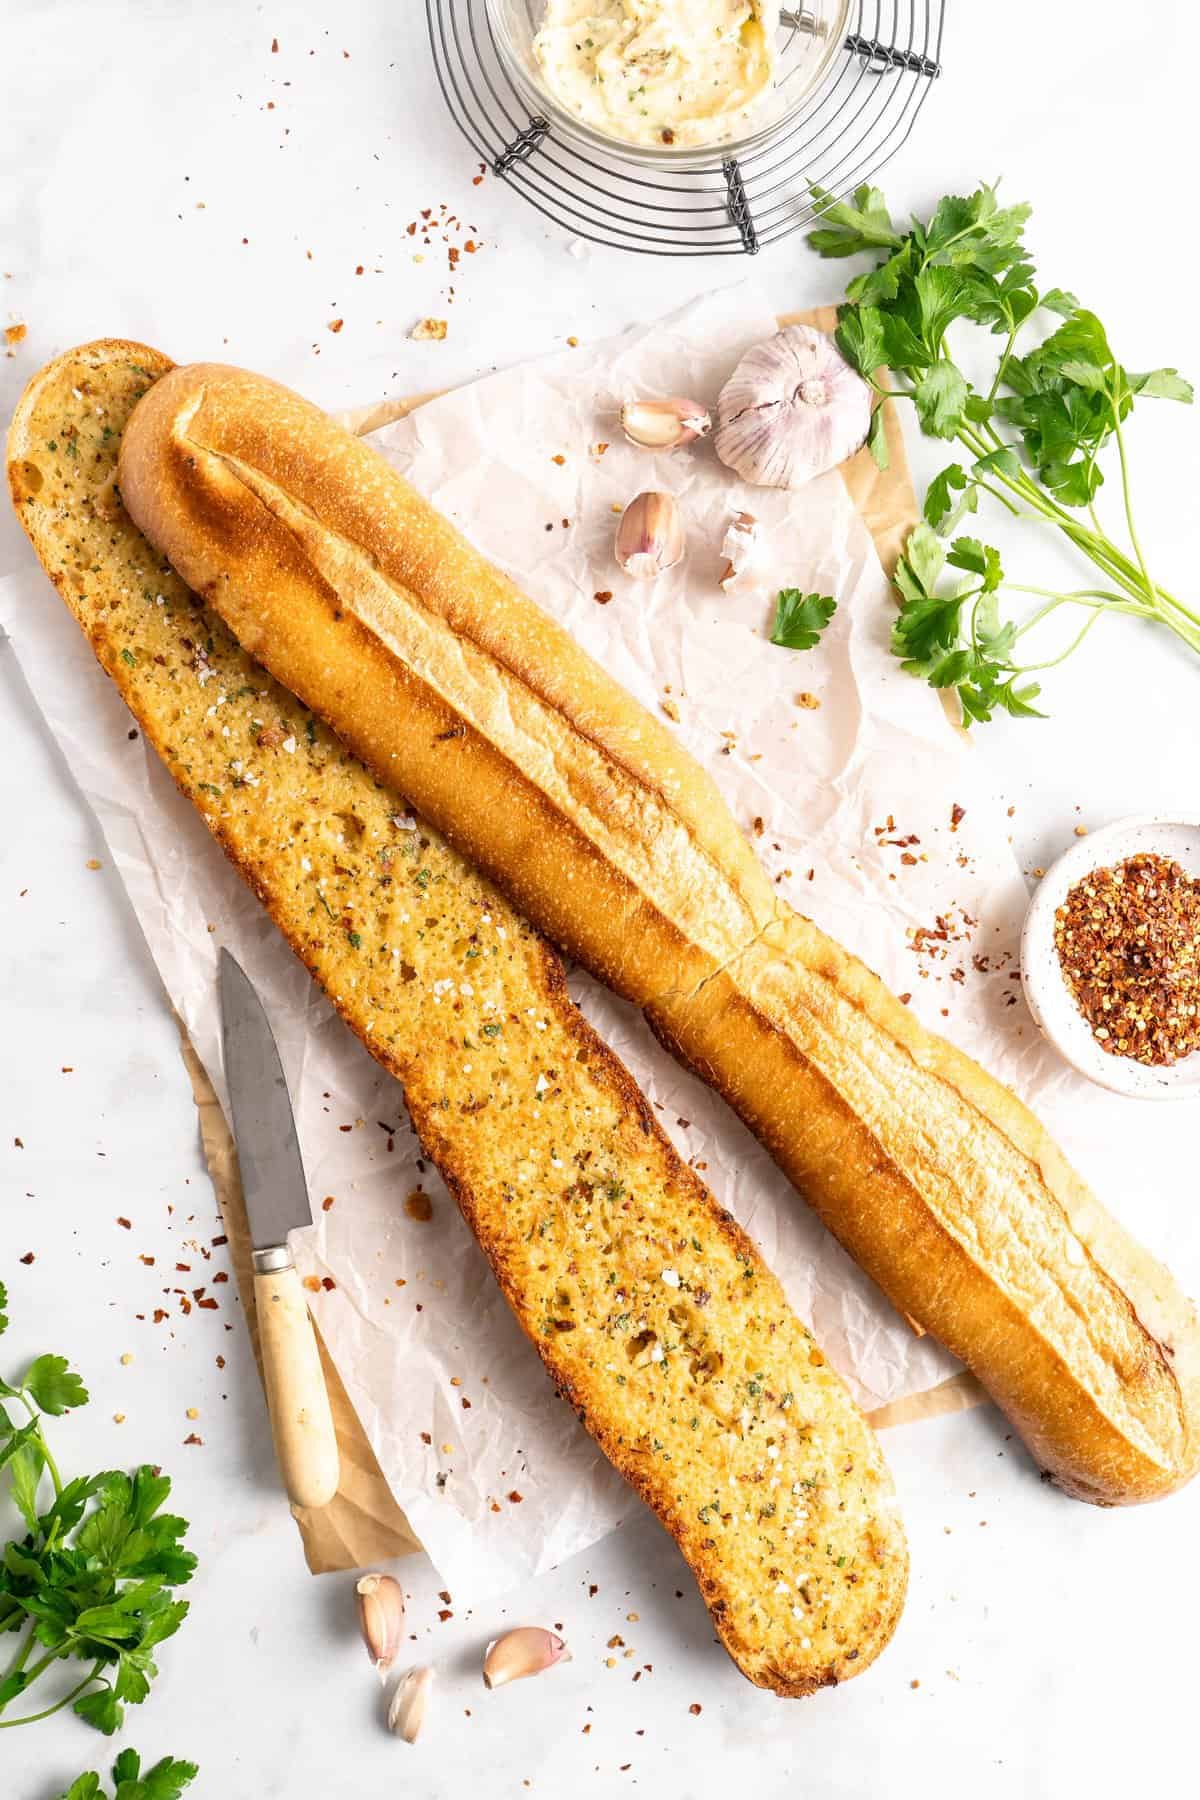
- Assemble. Next, cut the baguette in half lengthwise. Spread the garlic butter generously over the cut sides of the bread.
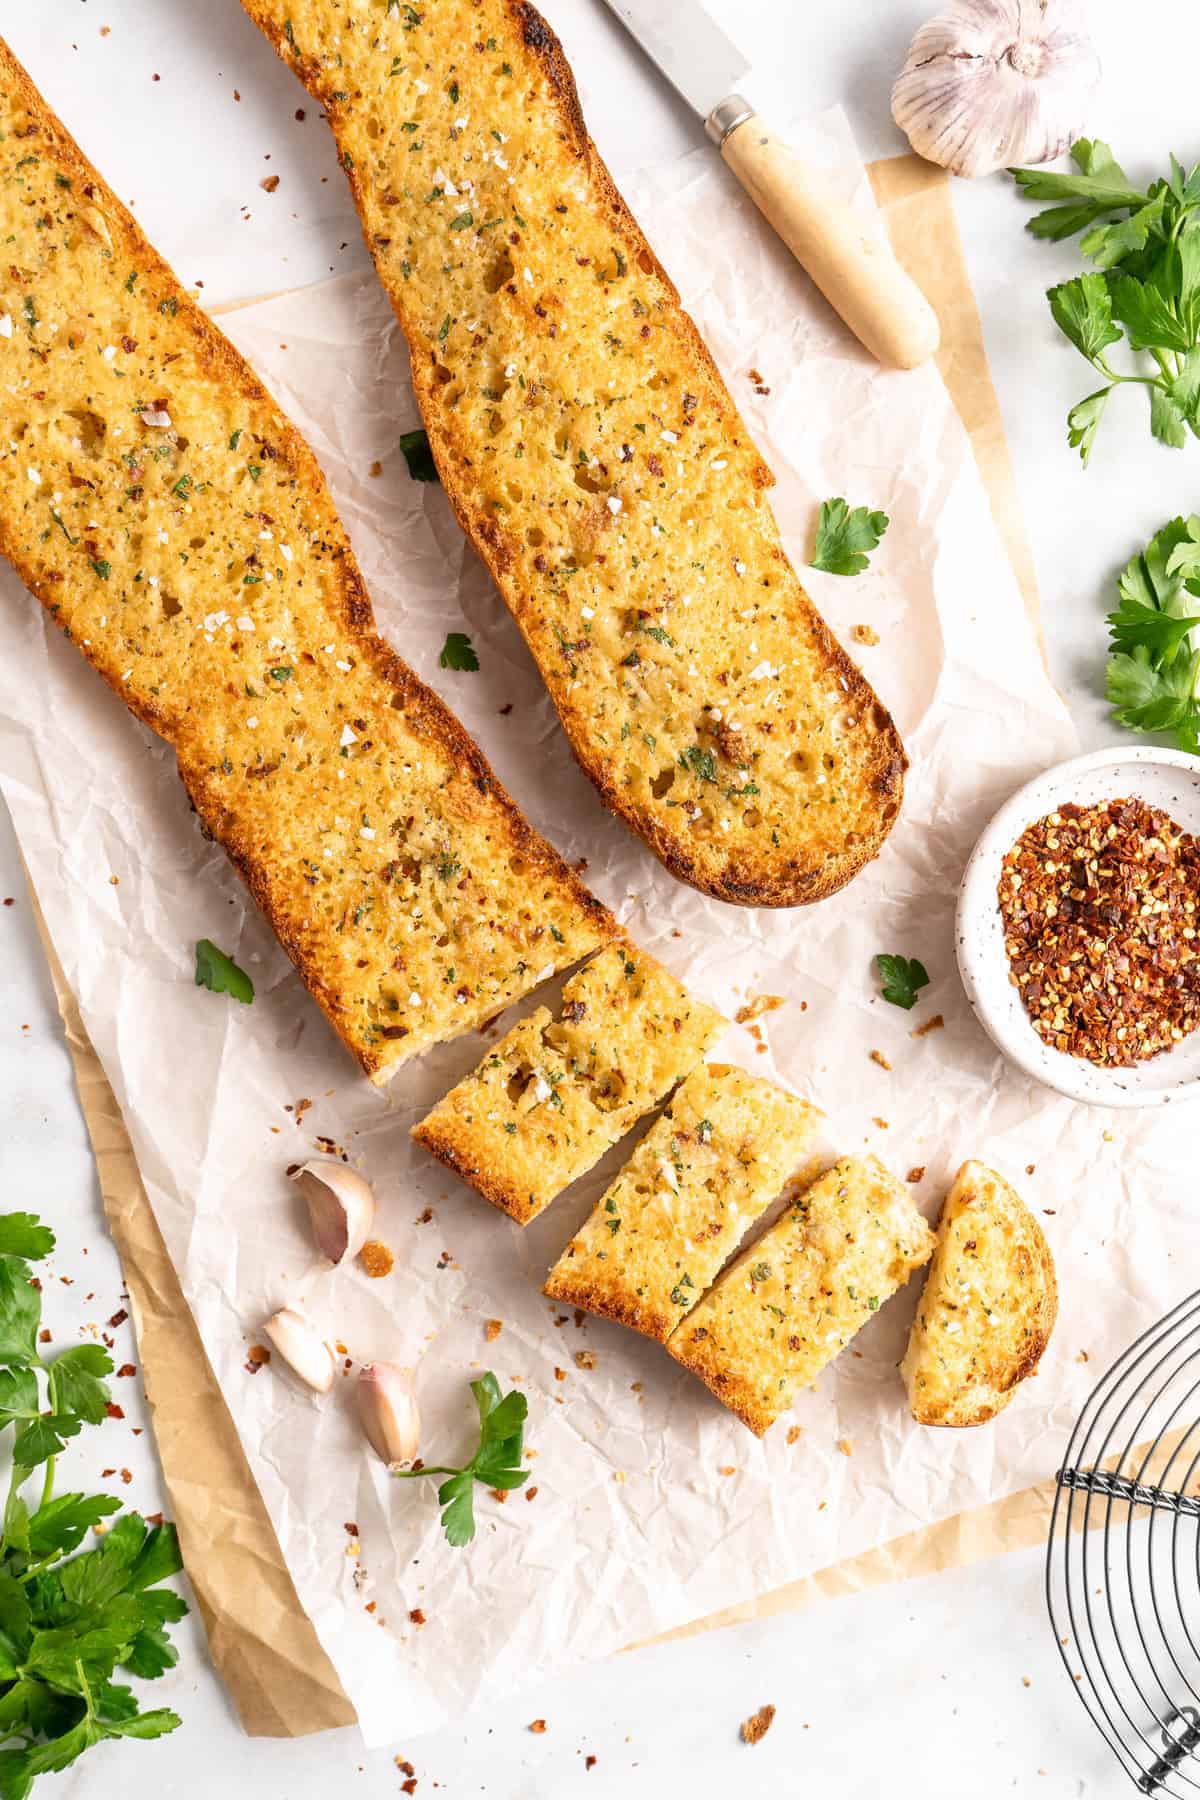
- Bake . Place the two bread halves on a parchment- or foil-lined baking sheet and bake for 10 to 12 minutes, or until the bread is golden, toasty, and crispy. Transfer to a cutting board and slice.
Tips to Keep In Mind
- No vegan butter? No problem! If you can’t find vegan butter at your grocery store, you can mash the garlic in olive oil instead. While it won’t be quite as buttery, the roasted garlic itself has a buttery flavour to it.
- Using different types of bread . French and Italian bread make great garlic bread, too, or you can use homemade dinner rolls for personal-sized garlic bread.
- Cheesy garlic bread. Add nutritional yeast or vegan Parmesan to the garlic butter mixture for a cheesy flavour.
What to Serve With Vegan Garlic Bread
Some of my favourite recipes to serve with this vegan roasted garlic bread recipe include my quick 20-minute vegan pesto pasta and creamy tomato pasta on weeknights. Of course, crispy, toasted hunks of homemade garlic bread are always welcome with a bowl of mushroom soup or roasted cauliflower soup . Garlic bread is also the perfect side to a bowl of vegan chili or cozy wintertime stew.
How to Store and Reheat Leftovers
- Refrigerate. Store leftover roasted garlic bread tightly wrapped in the refrigerator for up to 4 days.
- Reheat. Reheat it in a 350ºF oven for about 10 minutes, or until it’s warmed through and crisp on the edges.
- Freeze. Wrap the garlic bread well and freeze it for up to 3 months. It can be reheated from frozen in a 350ºF oven for about 15 minutes, or you can thaw it in the refrigerator first, and then it should be warmed up in about 10 minutes.
More Vegan Side Dish Recipes
- Vegan Garlic Parmesan Dinner Rolls
- Vegan Cornbread
- Gluten-Free Naan
- Gluten-Free Dinner Rolls
Ingredients
- 1 Demi baguette , like a baguette half the length of the traditional really long one
- 2 heads of garlic
- drizzle of olive oil and crack of sea salt
- ½ stick vegan butter , room temp
- 2 tablespoons finely diced parsley
- crack sea salt
- ¼ teaspoon red pepper flakes
Instructions
- Preheat your oven to 400°F/200°C. Cut off the tops of two heads of garlic. Place them on a piece of foil and drizzle with olive oil and sprinkle with a crack of sea salt. Cover the garlic completely with the foil by crumbling it over. Place in your oven and roast for 60 minutes.
- Remove and allow the garlic to cool a little (don’t turn your oven off).
- In a bowl, add the vegan butter, parsley, sea salt and red pepper flakes. Squeeze the roasted garlic into the bowl. Using a spoon, fork, or whisk, stir all the ingredients together until fully combined.
- Cut your baguette in half. Spread the garlic butter spread all over the insides of the loaves.
- Place the slathered garlic bread onto a parchment, foil or silicone lined baking sheet. Bake for 10-12 minutes at the same temperature (can do up to 15 but watch carefully) and then remove. Place on a cutting board, slice and enjoy!
Notes
- How to store: Store leftover roasted garlic bread wrapped in the refrigerator for up to 4 days. Reheat it in a 350ºF oven for about 10 minutes, or until it’s warmed through and crisp on the edges.
- How to freeze: W rap the garlic bread well and freeze it for up to 3 months. It can be reheated from frozen in a 350ºF oven for about 15 minutes.
Vegan Roasted Garlic Bread
Ingredients
- 1 Demi baguette like a baguette half the length of the traditional really long one
- 2 heads of garlic
- drizzle of olive oil and crack of sea salt
- ½ stick vegan butter room temp
- 2 tablespoons finely diced parsley
- crack sea salt
- ¼ teaspoon red pepper flakes
Instructions
- Preheat your oven to 400°F/200°C. Cut off the tops of two heads of garlic. Place them on a piece of foil and drizzle with olive oil and sprinkle with a crack of sea salt. Cover the garlic completely with the foil by crumbling it over. Place in your oven and roast for 60 minutes.
- Remove and allow the garlic to cool a little (don’t turn your oven off).
- In a bowl, add the vegan butter, parsley, sea salt and red pepper flakes. Squeeze the roasted garlic into the bowl. Using a spoon, fork, or whisk, stir all the ingredients together until fully combined.
- Cut your baguette in half. Spread the garlic butter spread all over the insides of the loaves.
- Place the slathered garlic bread onto a parchment, foil or silicone lined baking sheet. Bake for 10-12 minutes at the same temperature (can do up to 15 but watch carefully) and then remove. Place on a cutting board, slice and enjoy!
Video
Notes
- How to store: Store leftover roasted garlic bread wrapped in the refrigerator for up to 4 days. Reheat it in a 350ºF oven for about 10 minutes, or until it’s warmed through and crisp on the edges.
- How to freeze: W rap the garlic bread well and freeze it for up to 3 months. It can be reheated from frozen in a 350ºF oven for about 15 minutes.
Nutrition
Vegan Roasted Garlic Bread https://jessicainthekitchen.com/roasted-garlic-bread/ March 16, 2022
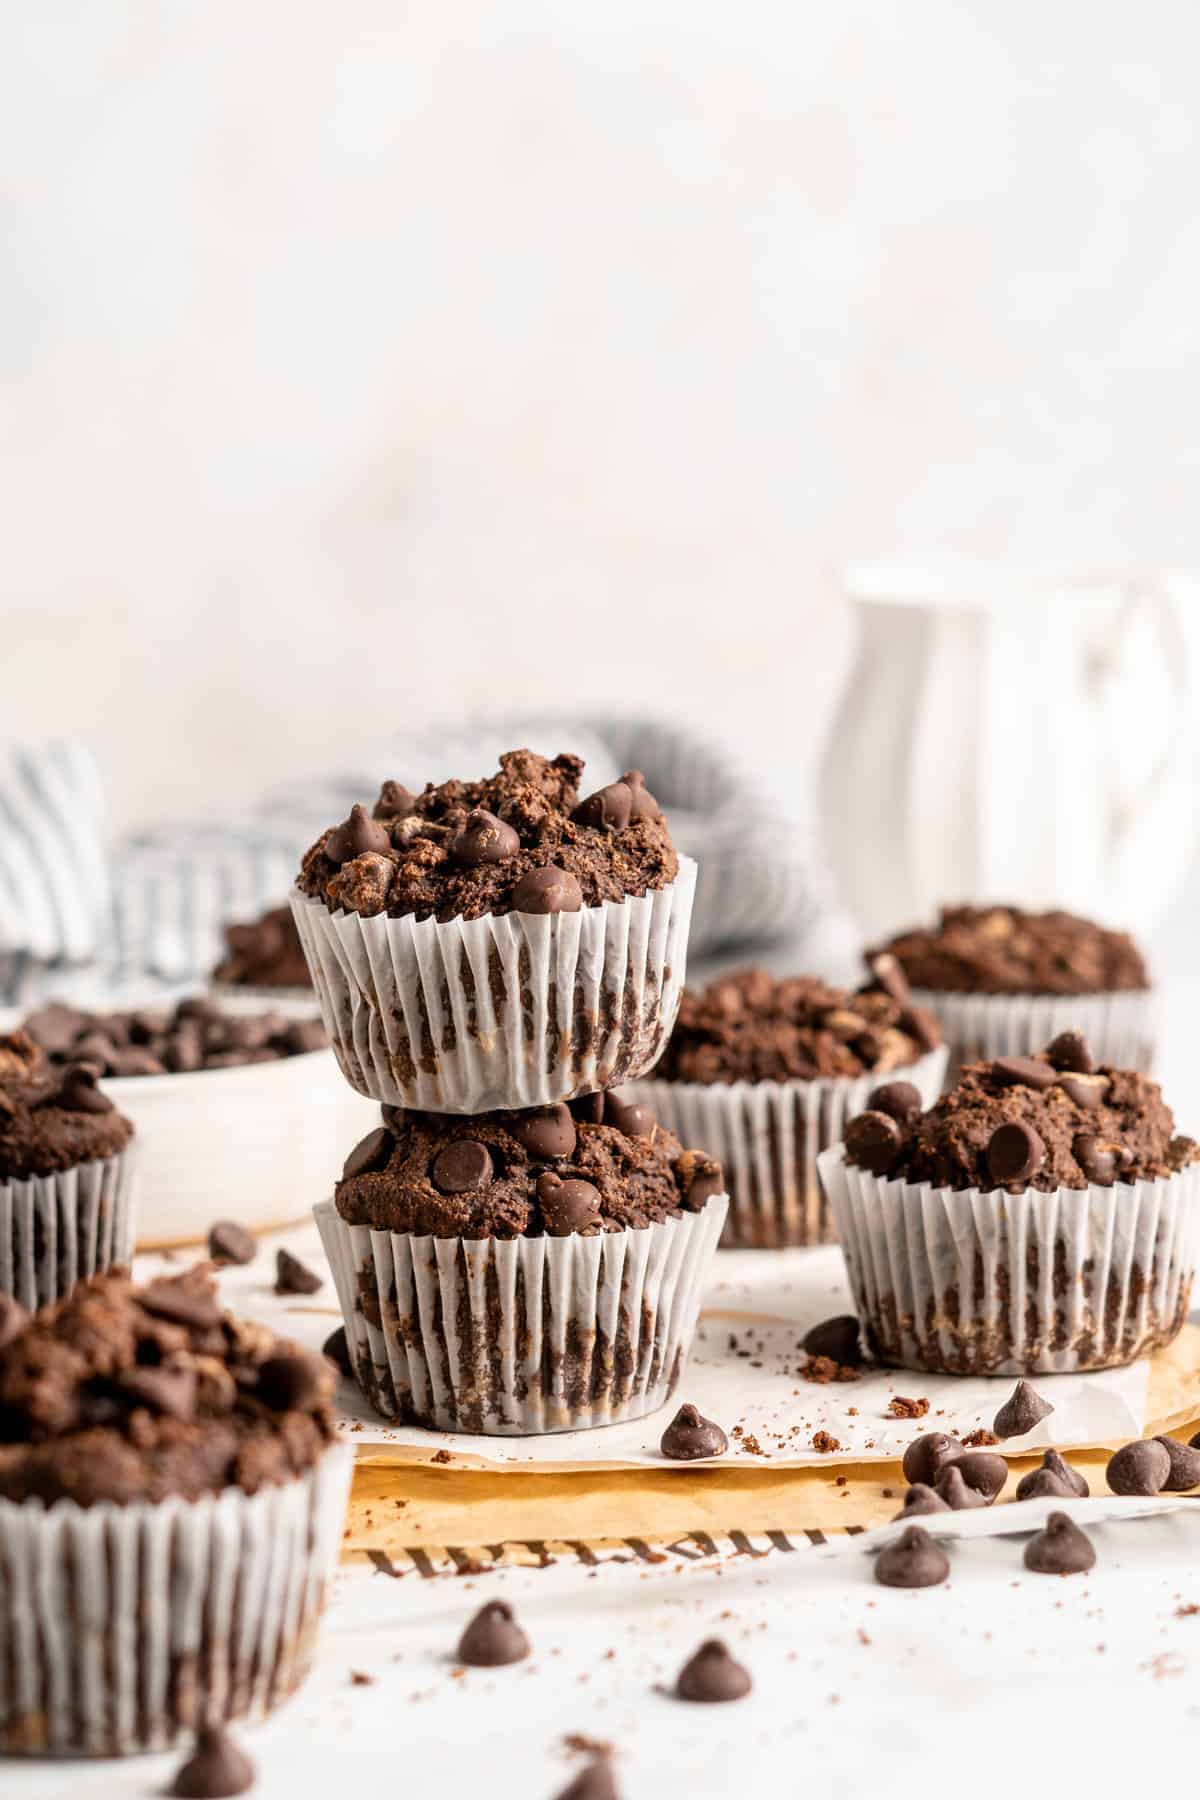
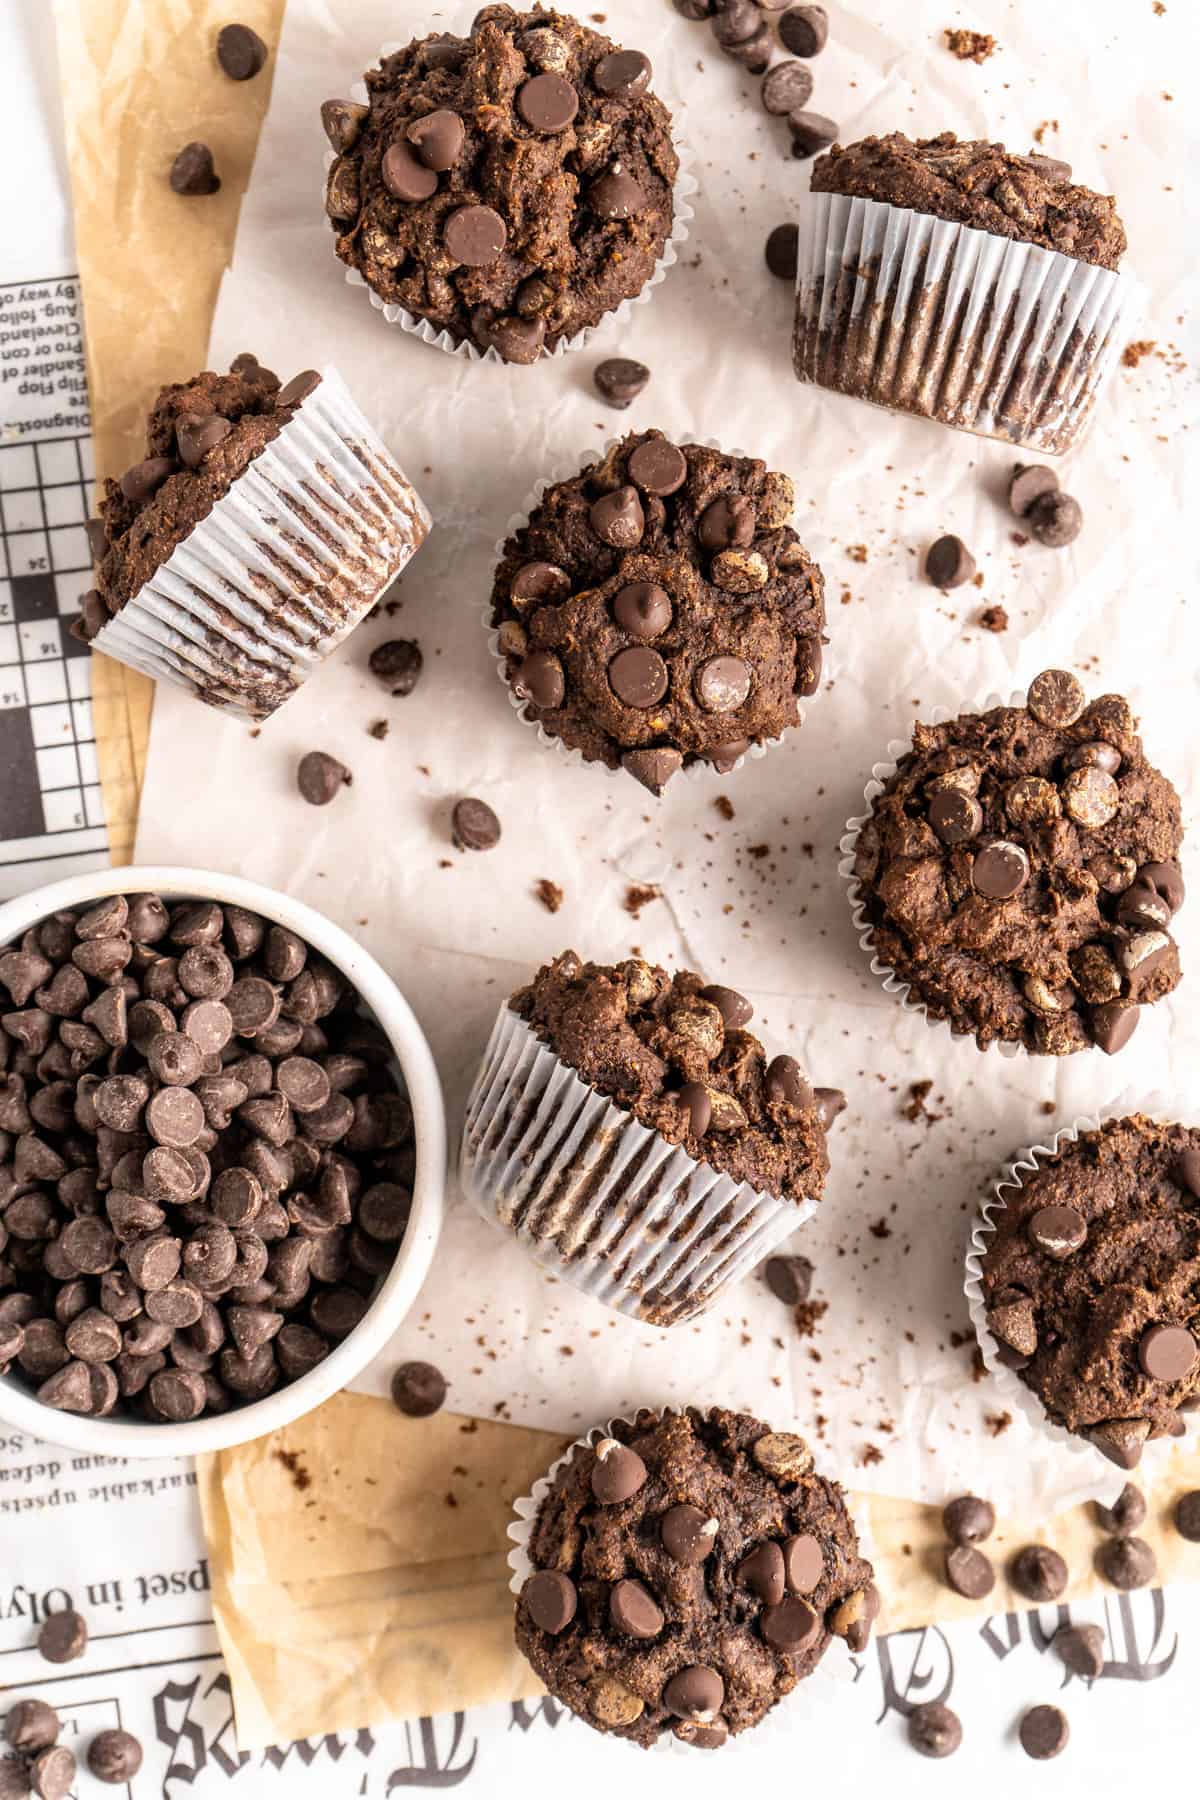
These vegan double chocolate banana muffins are moist, soft, and bursting with rich cocoa flavor and chocolate chips. I make these muffins gluten-free with oat flour and sweeten them only with banana and maple syrup.

Whenever I make my chocolate banana muffins to share, I’m always hit with, “Wait, these are vegan?!” and “These are gluten-free?!” The answers are yes and YES. These vegan chocolate banana muffins are dairy-free and sweetened with maple syrup and ripe bananas, and made gluten-free with oat flour. They remind me of my chocolate banana bread , and they’re just as soft, moist, and easy to make for an on-the-go breakfast or snack.
Why I Know You’ll Love These Chocolate Banana Muffins
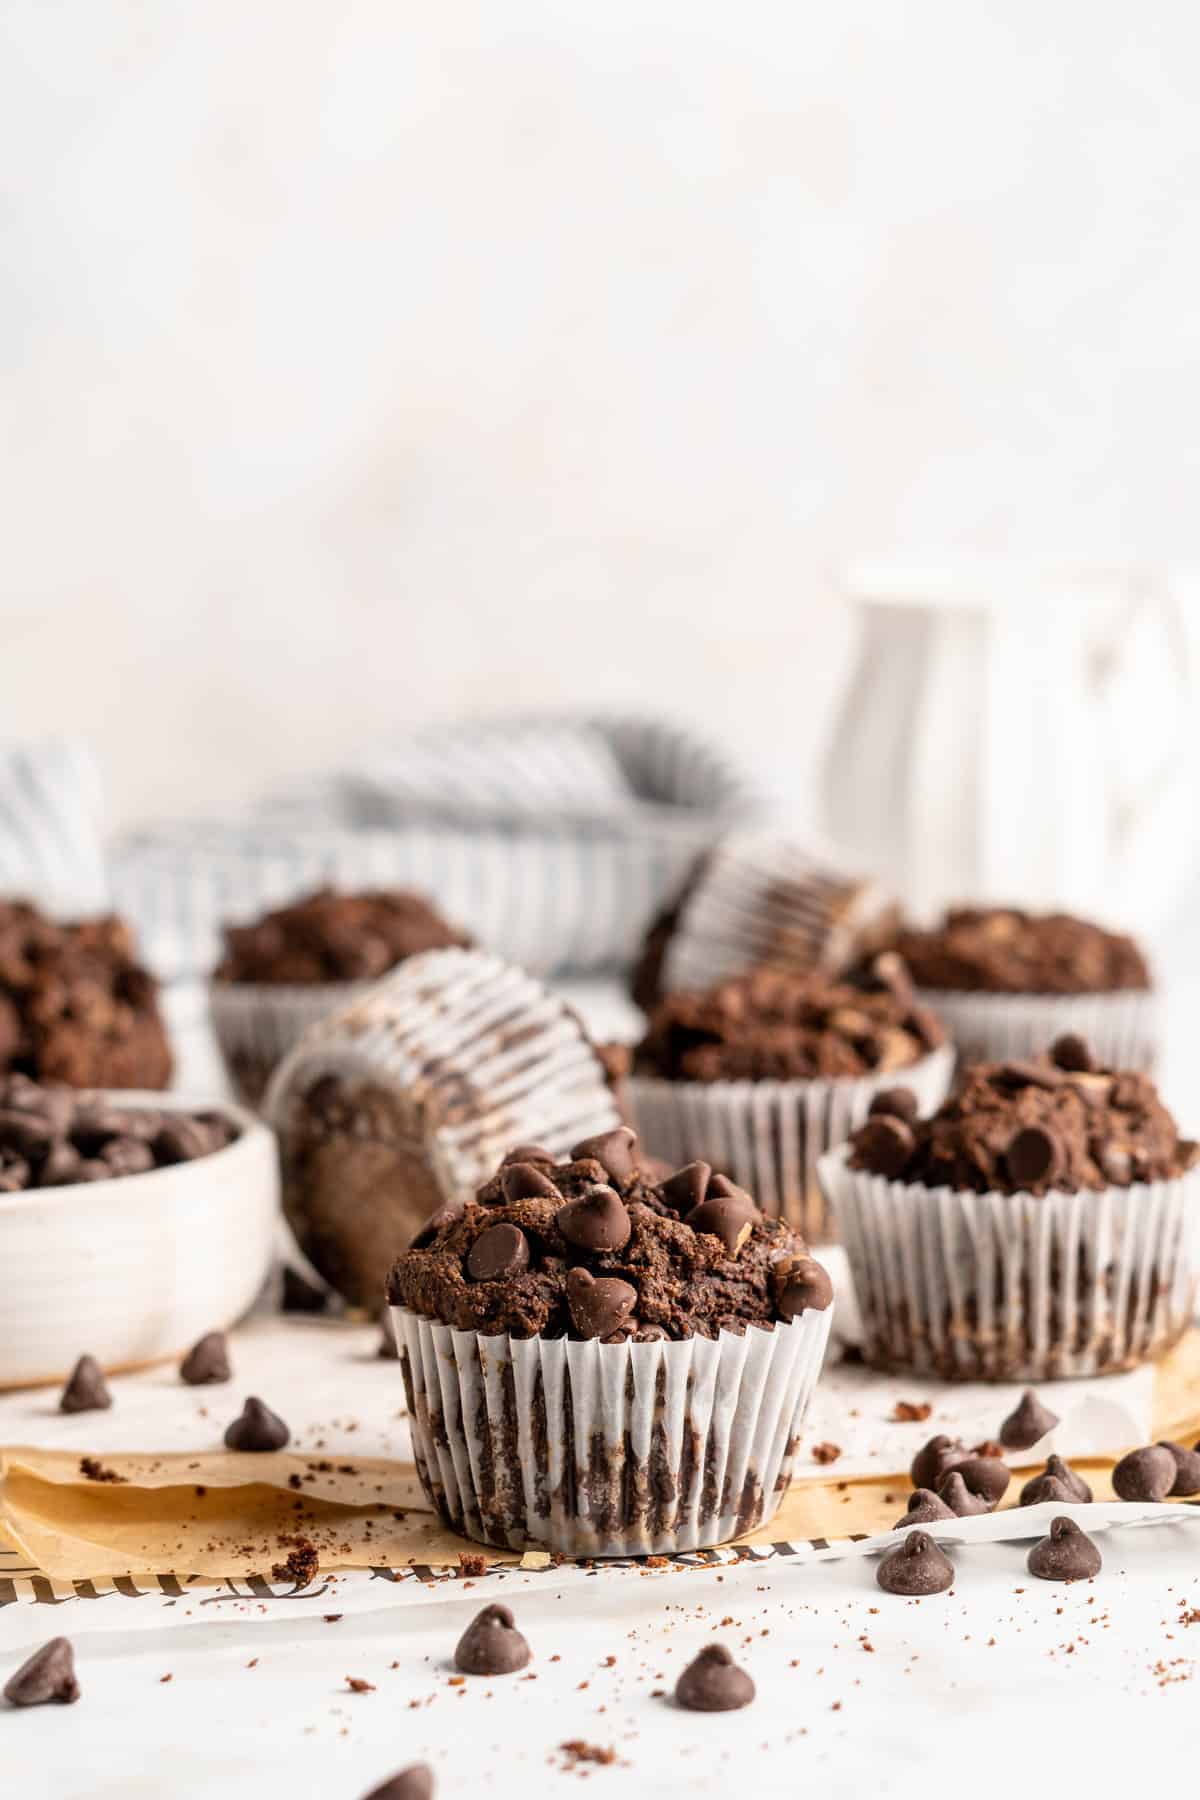
- Irresistible texture. The muffins are moist, fluffy, and soft, with a rich chocolate flavor thanks to cocoa powder and chocolate chips.
- Vegan & gluten-free. If I use stevia-sweetened chocolate chips, these muffins are refined sugar-free, too!
- Easy to make. Whisk the dry and wet ingredients separately, combine them, and then bake your muffins! These chocolate banana muffins are quick to whip up any day of the week.
- Customizable. Add chopped walnuts instead of the chocolate chips, or go half-and-half for a little added crunch.
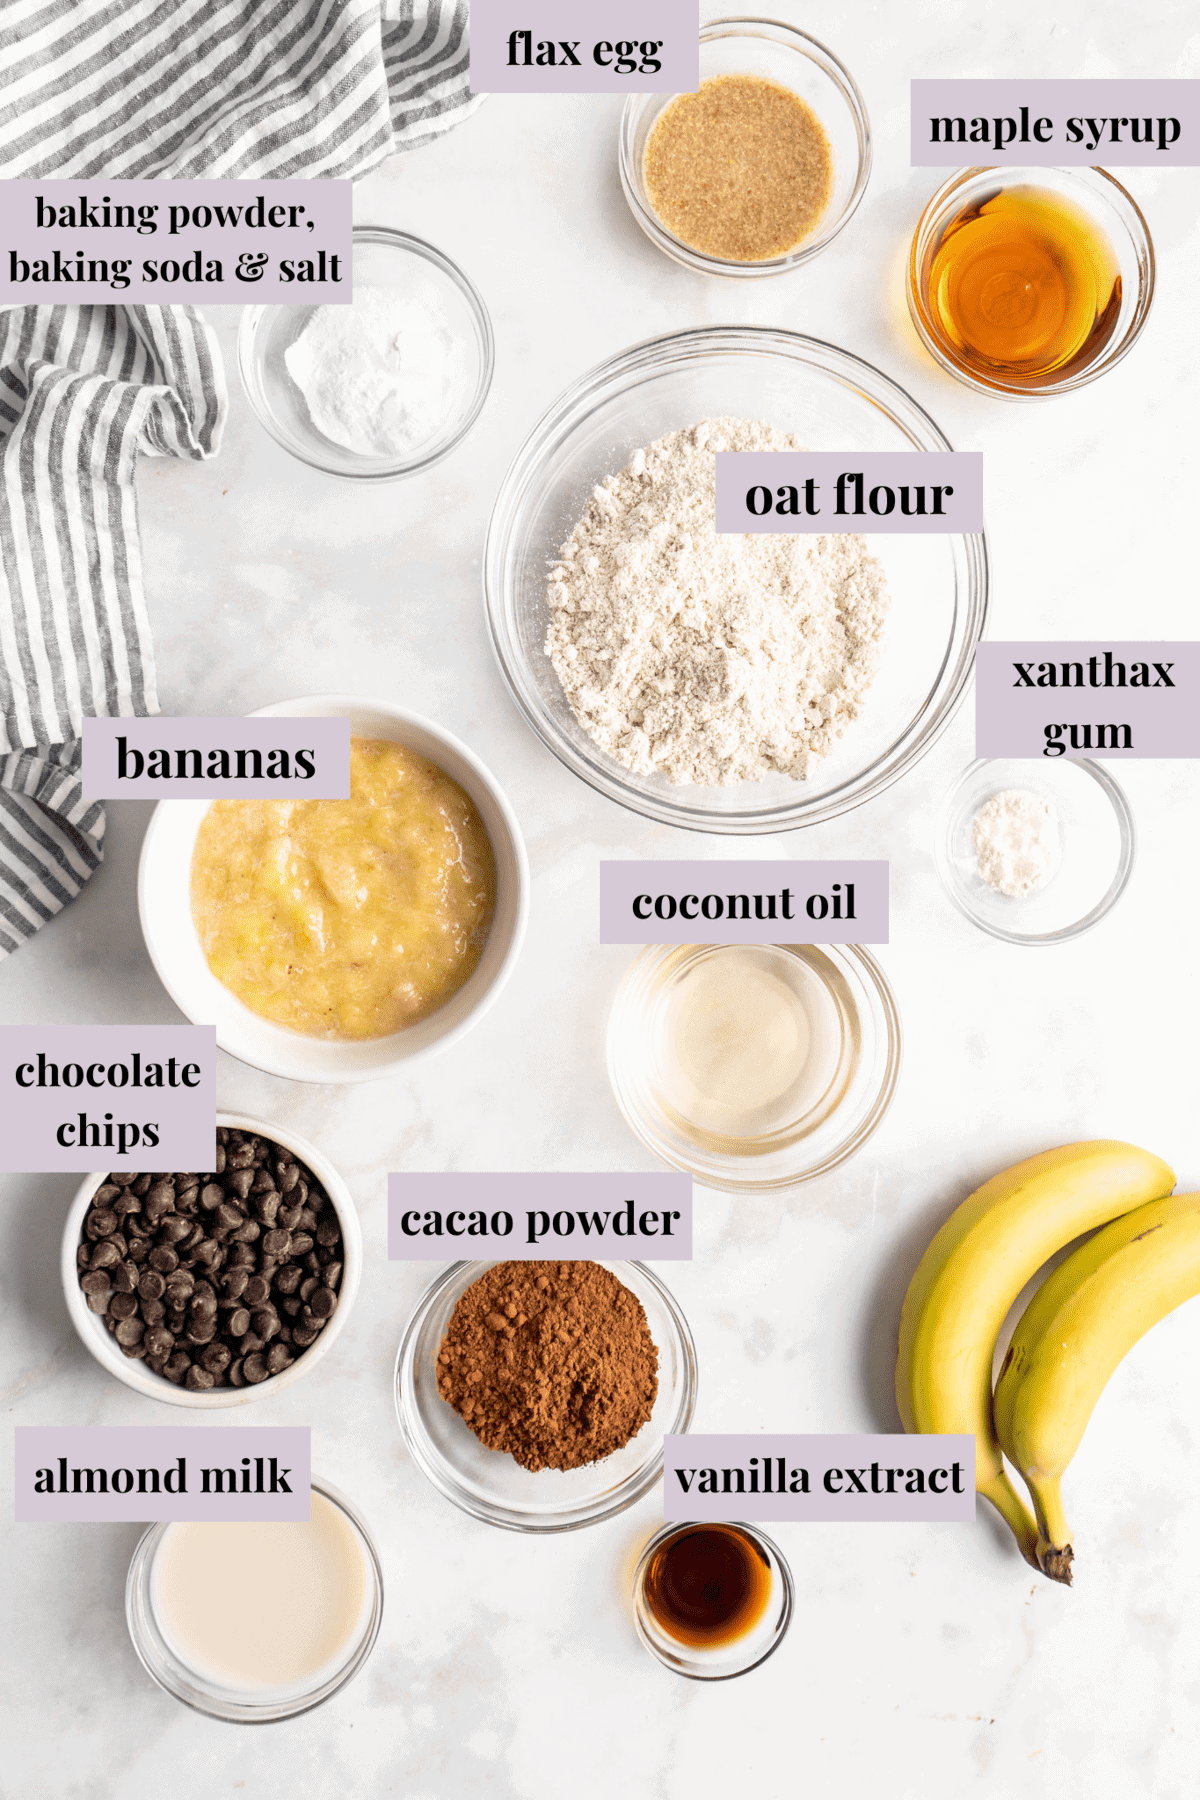
Notes on Ingredients
Please note that this is important information on the ingredients and instructions, and the FULL recipe with amounts and details can be found DOWN BELOW (scroll to it) in the recipe card.
- Gluten-free oat flour – For this recipe, I chose oat flour because of its light texture and subtle oat flavor.
- Xanthan gum – Xanthan gum imitates gluten in gluten-free baking recipes by binding and adding volume to the batter. You’ll find it in the baking aisle at most grocery stores, or it can be ordered online. Don’t skip it—it’s essential to the success of these chocolate muffins!
- Baking powder, baking soda, and salt – Check the expiration date on your leavening. If it’s expired, I recommend buying fresh so that the muffins rise properly.
- Cocoa powder – Either Dutch process or natural cocoa powder can be used for this recipe.
- Flax egg – This is a vegan egg substitute made from flax seeds and water. See my quick tutorial on how to make a flax egg for details.
- Maple syrup – You could also use brown sugar if you’re not making your muffins free from refined sugar.
- Coconut oil – My favorite oil for baking. You could use another neutral-flavored vegetable oil if you prefer.
- Vanilla extract – Or an equal amount of vanilla paste. You could also use pure vanilla bean if you’d like.
- Ripe bananas – These muffins are a great way to use up old, overripe bananas. The banana in this recipe is subtle in flavor and more of a binder for the other ingredients. It also adds moisture. If you’re looking for a more distinct, banana-bread-like flavor, you might like this vegan banana bread instead.
- Unsweetened almond milk – Or another dairy-free milk of your choosing.
- Chocolate chips – Make sure they’re refined sugar-free and vegan as needed.
The Secret to Moist Muffins
Every muffin recipe is different, but for these double chocolate banana muffins, it’s the coconut oil and banana that make them super moist. Coconut oil is always my favorite for vegan baking because it yields such a tender, moist crumb.
Apart from using the right ingredients, the best way to ensure your muffins come out soft and moist is to not overmix the batter and not overbake them.
How to Make Double Chocolate Banana Muffins
Here are the steps showing how to make these easy gluten-free and vegan chocolate banana muffins from scratch.
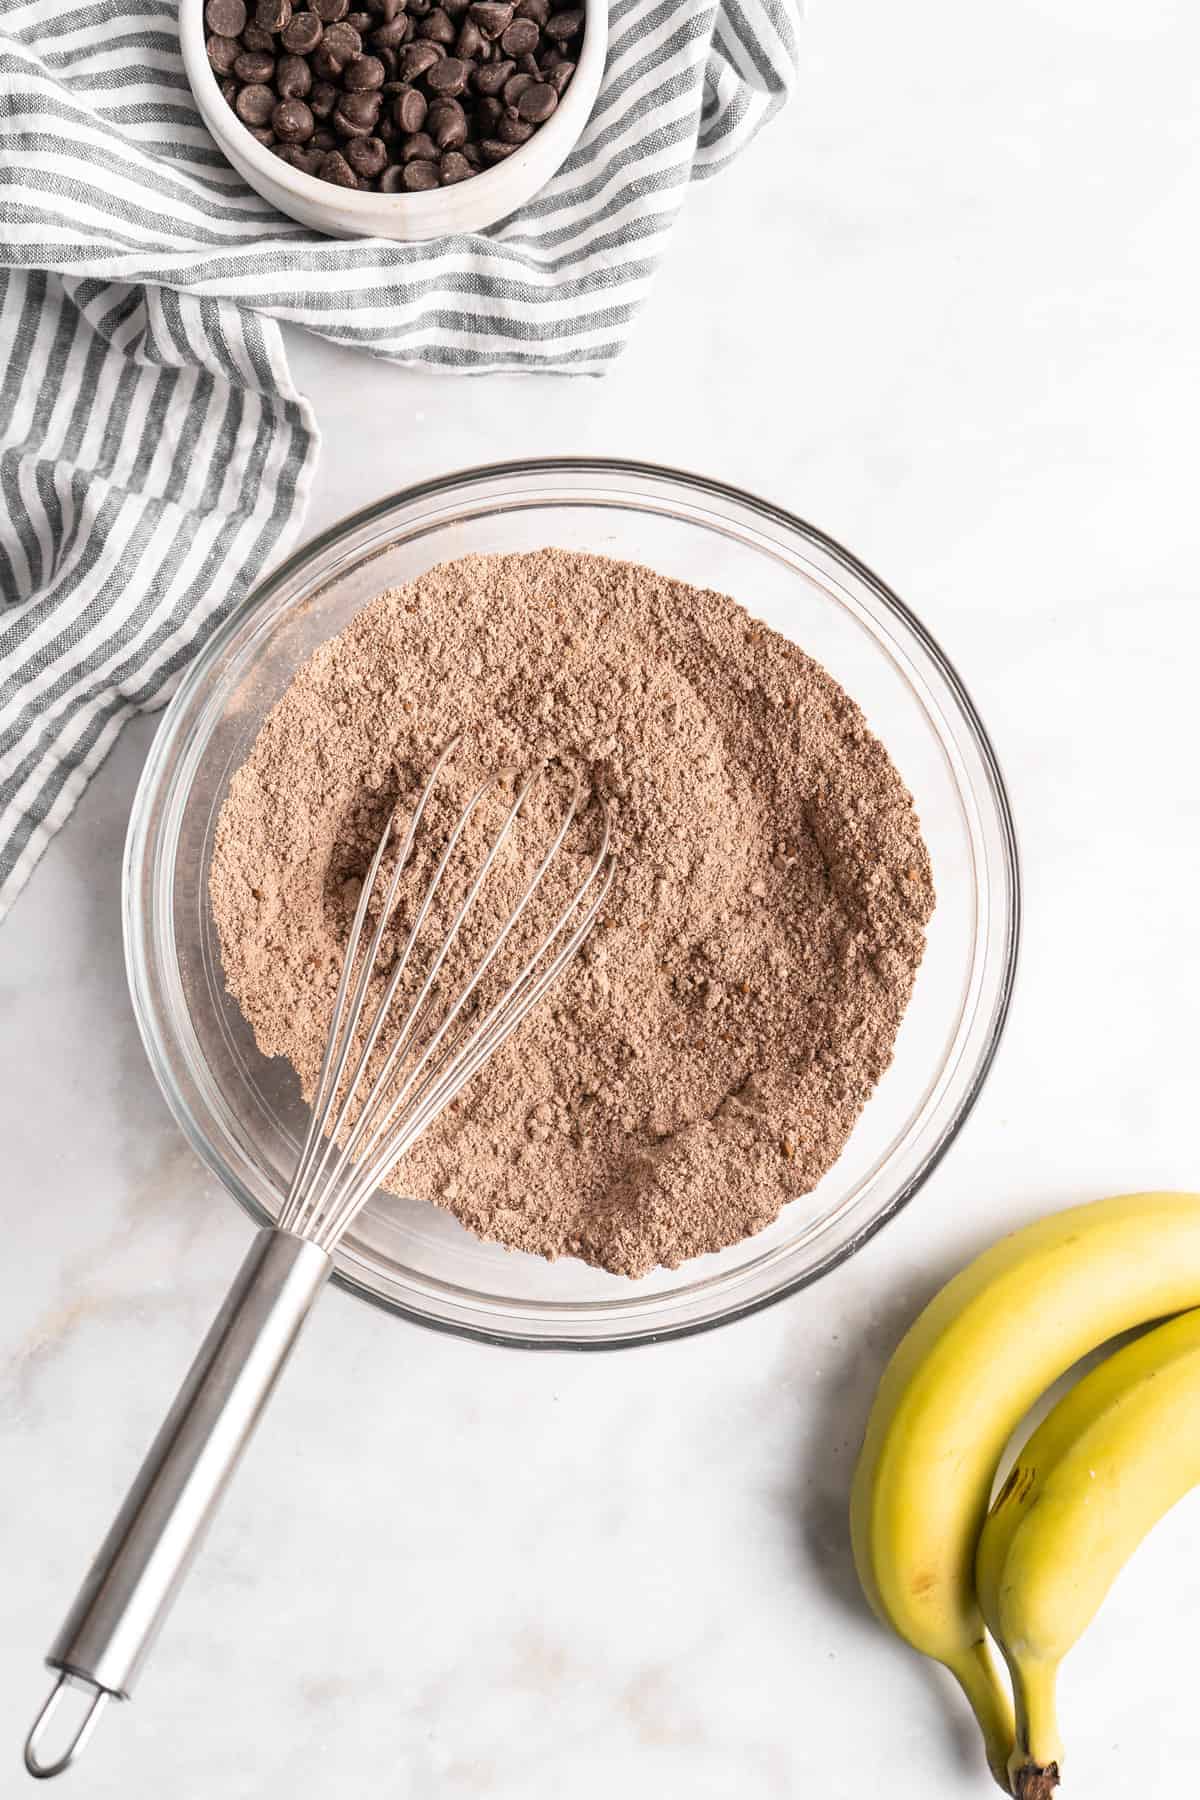
Whisk the dry ingredients.
- Prepare. Preheat the oven to 350ºF and prepare a muffin tin with muffin liners or by coating it lightly with coconut oil, then dusting with sifted cocoa powder, shaking off the excess.
- Mix dry ingredients. In a small bowl, whisk the flour, baking powder, baking soda, xanthan gum, sea salt, and cocoa powder.
- Mix wet ingredients. Whisk the flax eggs, maple syrup, and coconut oil in a medium bowl for about a minute, or until incorporated. Add the vanilla extract, mashed bananas, and almond milk and stir for another minute.
Combine and mix the batter.
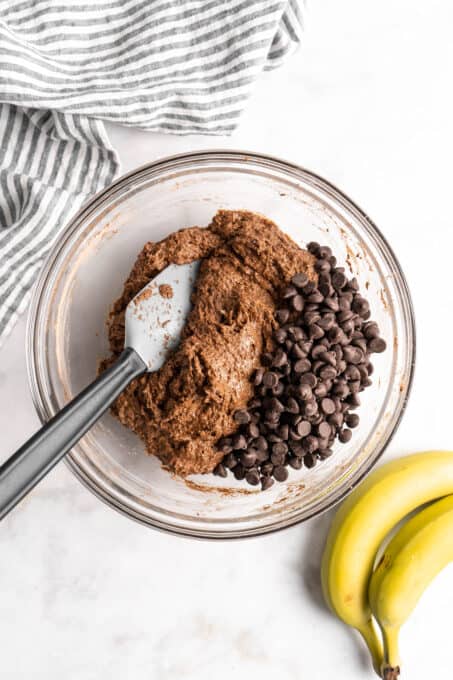
- Combine wet and dry ingredients. Stir the dry ingredients into the wet ingredients, scraping down the sides as needed. Do not over-mix. Fold in the chocolate chips.
- Fill the muffin tin. Divide the muffin batter into the muffin tin holders; I usually make 10 larger muffins, but you can also do 12 smaller muffins. Add a few more chocolate chips on the tops if you’d like.
- Bake. Place the muffin tin in the oven and bake for 20 to 23 minutes. Cool for 5 minutes, then slide a butter knife around the edges of the muffins and carefully remove them. Let them finish cooling on a wire rack.
Tips for Bakery-Style Muffins
- Not a fan of bananas? As mentioned above, these don’t have a very pronounced banana flavour, but if you’re baking these for someone who’s just not a fan of banana at all, you can use less-ripe bananas. They’ll still act as a binder and add moisture to the recipe, but they won’t have as strong a flavour as ripe bananas.
- Choosing chocolate chips. Dark chocolate is my prefered choice, but you can also use stevia-sweetened chocolate like Lily’s Dark Chocolate Baking Chips to make these refined-sugar-free.
- Testing for doneness. The muffins should spring back when you gently press them in the center if they’re done.
How to Store
- At room temperature. Store these muffins in an airtight container on the countertop for up to 4 days.
- Freeze. You can freeze these double chocolate banana muffins for up to 3 months in an airtight container or freezer bag. Let them thaw at room temperature before serving, or warm them up in the microwave.

More Vegan Muffin Recipes
- Vegan Pumpkin Muffins
- Banana Oatmeal Muffins
- Carrot Cake Muffins
- Pumpkin Banana Muffins
- Pumpkin Chocolate Chip Muffins
Ingredients
- 4.5 ounces gluten free oat flour , (127g)/1 ¼ cups raw oats – I grind up oats in a blender
- ½ teaspoon xanthan gum
- 1 ½ teaspoon baking powder
- ½ teaspoon baking soda
- ¼ teaspoon sea salt
- ¼ cup cocoa powder , sifted 20g
- 1 flax egg
- ⅓ cup maple syrup , 84g
- ¼ cup coconut oil , melted, 56g
- 1 teaspoon vanilla extract , liquid or gel or ½ of a vanilla bean, scraped
- ¾ cup mashed bananas , very ripe bananas
- ⅓ cup dairy free milk , any kind works
- ¾ cup vegan chocolate chips , plus a few extra for on top*
Instructions
- Preheat the oven to 350°F/180°C. Prepare a muffin tin or line with cupcake liners. If preparing the actual tin, using parchment paper, rub the insides of a muffin tin holders lightly with coconut oil, then sift cocoa powder over to coat insides and shake off the excess in and on top of the tin. So essentially, flouring and buttering like you would a cake pan. Set aside.
- In a small bowl, whisk the flour mix, baking powder, baking soda, xanthan gum, sea salt and cocoa powder to combine.
- In a medium bowl, add the flax eggs, maple syrup and the coconut oil. Whisk together for about 1 minute until incorporated. Add the vanilla extract/bean, the mashed bananas and the almond milk. Mix together for about 1 minute until bananas are completely incorporated. Add the dry ingredients to the wet and mix again, scraping the sides and ensuring everything is combined. Do not over mix.
- Fold in the chocolate chips. The batter should be very thick.
- Spoon the batter into the muffin tin holders. I like to do 10 larger muffins, but you could also do 12 normal sized muffins. Add a few extra chocolate chips on top if you’d like, it makes them prettier!
- Bake the muffins for 20 to 23 minutes. I’ve done both times and prefer 23 minutes. Remove from oven and let cool for 5 minutes, then using a butter knife or a toothpick, slide around the edges of the muffins and remove. Place on a cooling rack to cool completely. Enjoy!
