This red lentil dal recipe is comfort food Indian style! Rich, fragrant, and satisfying, this is a recipe you’ll want to make all winter long.

What Is Dal?
Dal is a classic South Asian dish made with lentils, peas, or beans. Of all the dals out there, I think red lentil dal is my absolute favourite! The lentils are cooked until they’re soft and falling apart, which gives the dal a rich, creamy texture without adding any cream or coconut milk. Dal is richly spiced, warm, and hearty—basically the perfect meal for cold winter days!
Why You’ll Love This Red Lentil Dal Recipe
- Source of plant protein . Red lentils are a great source of protein, which makes this dal filling and satisfying. (Looking to incorporate more lentils into your meals? Read up on how to cook lentils .)
- Easy to make . Red lentil dal comes together easily, with very little hands on time. Bonus: once you make it, it keeps well in the fridge or freezer for a quick heat-and-eat meal!
- Budget-friendly . Lentils are a budget-friendly ingredient, making this dal recipe an affordable option for anyone who’s looking to save some money on their weekly grocery trip.
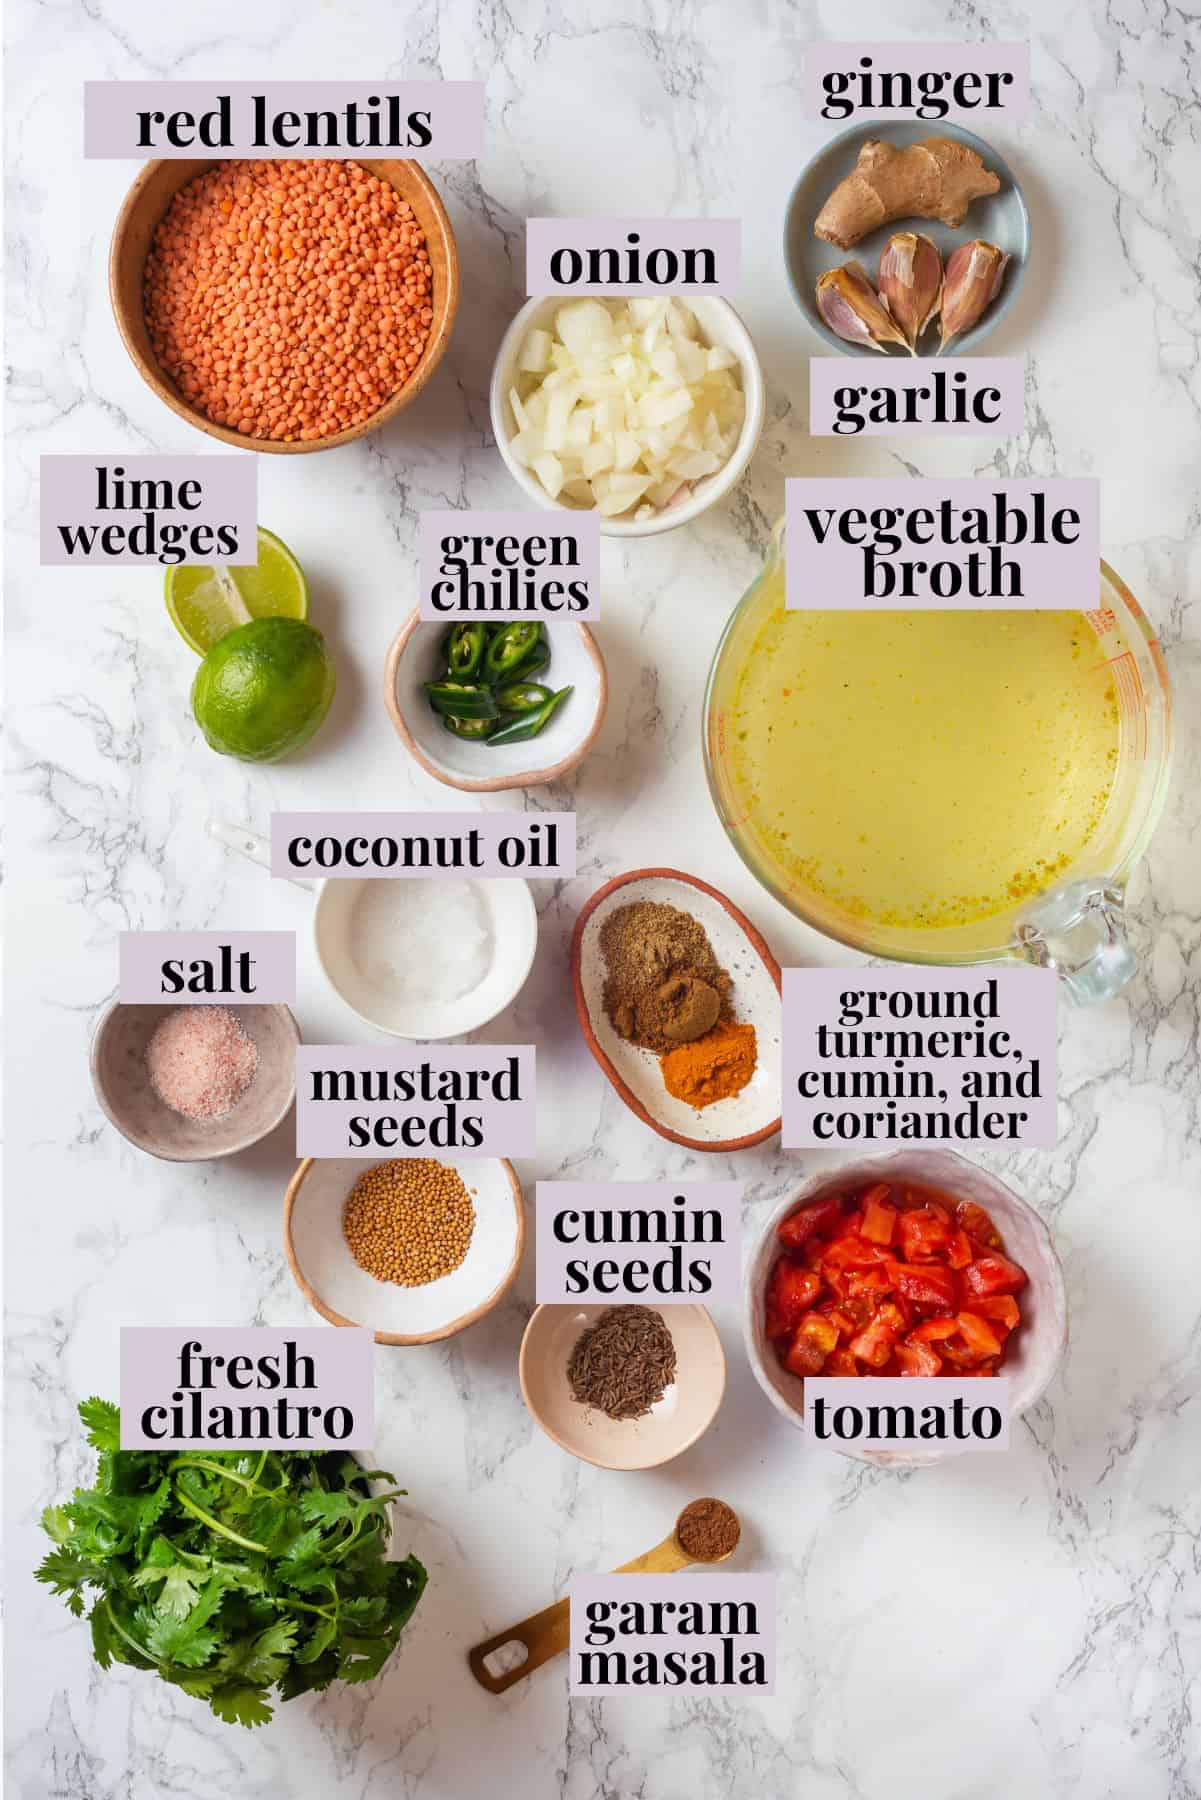
Notes on Ingredients
Scroll down to the recipe card to find the ingredient quantities and recipe instructions.
- Red lentils – Rinse your red lentils well, until the water runs clear.
- Vegetable broth or water – I like to use my homemade vegetable broth to make this red lentil dal extra flavourful.
- Coconut oil or vegetable oil
- Cumin and mustard seeds
- Onion, garlic cloves, and ginger – Three essential ingredients that form the foundation of flavour in this dal.
- Chilies – Feel free to adjust the amount to your heat preferences.
- Spices – Ground turmeric, cumin, coriander, and garam masala .
- Tomato – Canned tomatoes can be swapped in if you’d like.
- Salt to taste
- Garnishes – Fresh cilantro and lemon or lime wedges for serving.
How to Make Red Lentil Dal
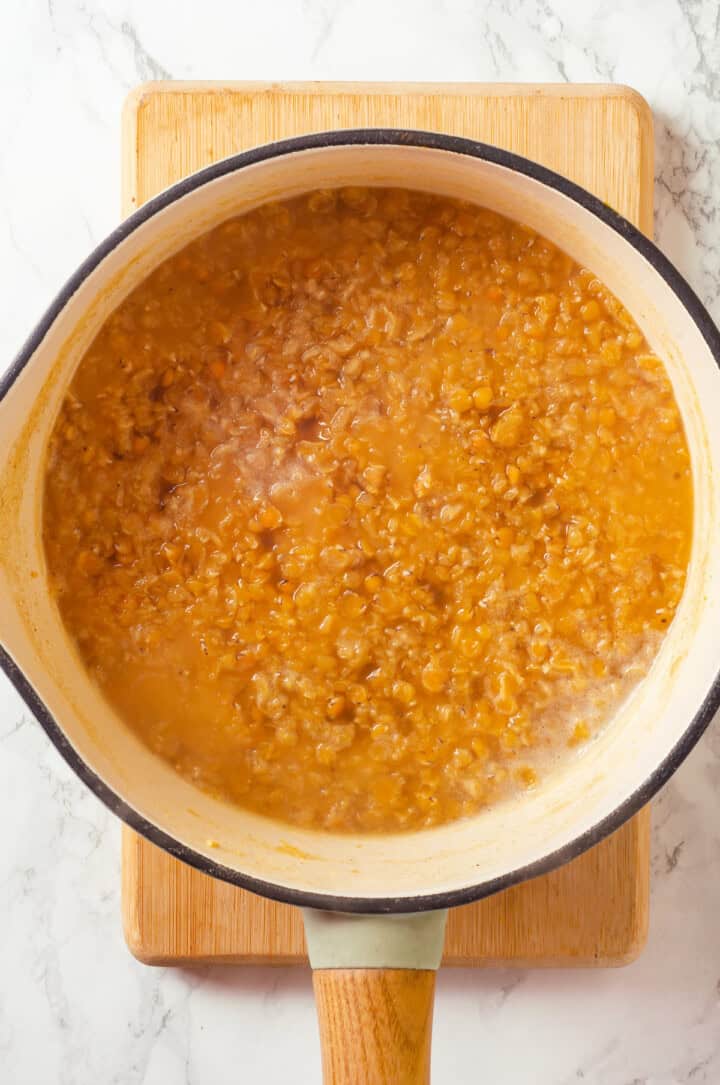
Cook lentils.
- Cook the lentils . Combine the lentils and water or broth in a pot. Bring to a boil, then simmer for 15 to 20 minutes, stirring occasionally.
- Prepare the tempering (tadka) . Heat the oil in a large pan over medium heat. Add the cumin and mustard seeds; when they start popping, stir in the onions. Once the onions are golden brown, add the garlic, ginger, and green chilies, and cook until fragrant. Stir in the spices and cook for 30 seconds.
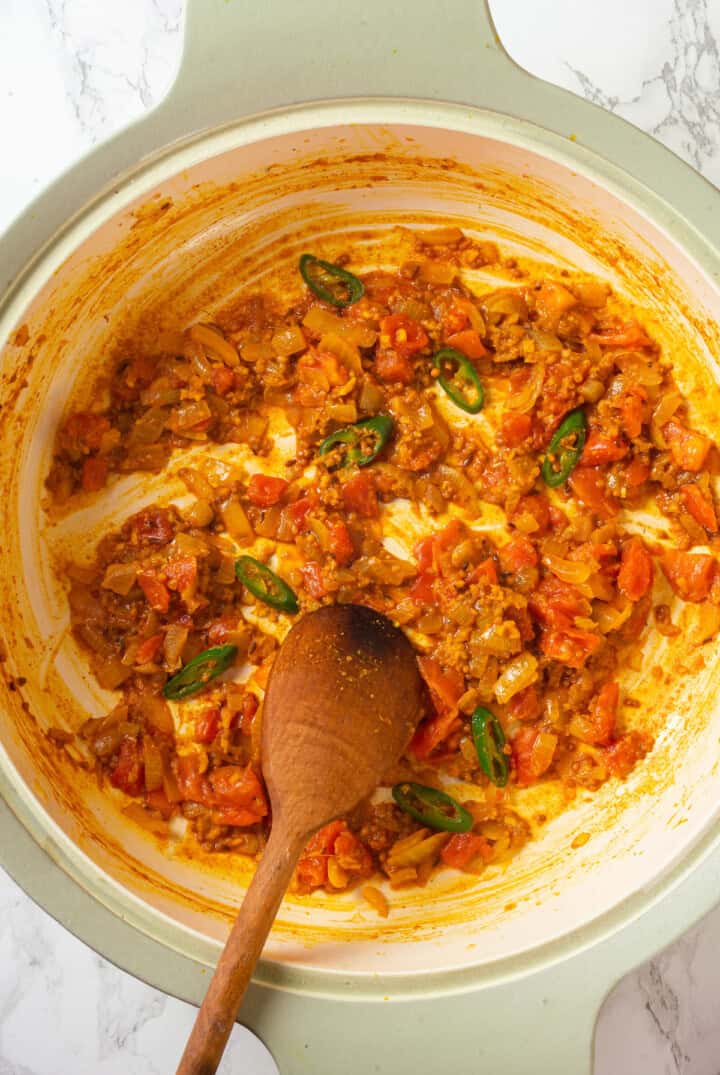
Add tomatoes.
- Add the tomatoes . Stir in the chopped tomatoes and cook for 4 to 5 minutes until they break down.
- Simmer . Stir the lentils into the tomato mixture. Simmer for 5 to 10 minutes, then season to taste.
- Garnish and serve . Garnish with fresh cilantro, a squeeze of lemon or lime, and enjoy!
Tips for Success
- Don’t swap in green/brown lentils . Red lentils have a different texture than other types of lentils. They cook more quickly, and they’re meant to break down when cooked, rather than hold their shape.
- Adjust the spice level to your preference . This dal isn’t overly spicy, but you can add more or less chili pepper, or even a pinch of cayenne, to change the spice level.
- Add more liquid if needed . When you stir the cooked lentils into the tomatoes, you can add more water or broth if the mixture is too thick.

Serving Suggestions
Serve red lentil dal over rice or cooked quinoa for a satisfying meal—sometimes I add a swirl of vegan yogurt or vegan cream over the top, too. I also love serving it with a side of my vegan naan or garlic naan .
How to Store and Reheat Leftovers
- Refrigerator : Store leftover dal in an airtight container in the refrigerator for up to 4 days.
- Freezer : Transfer the red lentil dal to a freezer-safe container or freezer bag. It will keep for up to 3 months; thaw in the refrigerator before reheating.
- To reheat : Reheat on the stovetop or in the microwave until warmed through, adding a splash of water or broth if the dal is too thick.

More Lentil Recipes
- One-Pot Red Lentil Curry
- Walnut Lentil Bolognese
- Easy Lentil Soup (Vegan & Spiced)
- Vegan Coconut Curry Lentil Soup
- One Pot Red Lentil Chili (Vegan & Gluten Free)
Ingredients
- 1 cup red lentils , 190 g, rinsed well
- 3 cups vegetable broth , or water (plus more if needed) 700 ml
- 1 tablespoon coconut oil , or vegetable oil
- 1 teaspoon cumin seeds
- 1 teaspoon mustard seeds
- 1 medium onion , finely chopped
- 2-3 garlic cloves , minced
- 1- inch piece of ginger , minced, 2.5 cm
- 1-2 green chilies , chopped
- 1 teaspoon ground turmeric
- 1 teaspoon ground cumin
- 1 teaspoon ground coriander
- 1 teaspoon garam masala , optional
- 1 large tomato , chopped (or ½ cup canned tomatoes)
- salt to taste
- fresh cilantro , chopped (for garnish)
- lemon or lime wedges , for serving
Instructions
- Rinse the red lentils thoroughly under cold water until the water runs clear.
- In a medium pot, combine lentils and 3 cups of vegetable broth or water. Bring to a boil, then reduce heat to a simmer. Cook uncovered for about 15-20 minutes, stirring occasionally, until the lentils are soft and starting to break down.
- While the lentils are cooking, heat the oil in a large pan over medium heat.
- Add the cumin seeds and mustard seeds. Once they start popping, add the chopped onions. Sauté until the onions are golden brown (about 5-7 minutes).
- Add the garlic, ginger, and green chilies, and cook for another 1-2 minutes until fragrant.
- Stir in the turmeric, ground cumin, ground coriander, and garam masala. Cook for 30-60 seconds to toast the spices.
- Add the chopped tomatoes to the spice mixture and cook for 4-5 minutes until they break down and release their juices.
- Pour the cooked lentils into the pan with the tomato and spice mixture. Stir well to combine. If the dal is too thick, add a bit more vegetable broth or water to reach your desired consistency.
- Simmer everything together for 5-10 minutes, allowing the flavors to meld. Season with salt to taste.
- Remove the dal from heat. Garnish with fresh cilantro, a squeeze of lemon or lime and some vegan cream or vegan yogurt if desired.
- Serve hot with rice, naan, or other flatbread.
Notes
- Refrigerator : Store leftover dal in an airtight container in the refrigerator for up to 4 days.
- Freezer : Transfer the red lentil dal to a freezer-safe container or freezer bag. It will keep well for up to 3 months; thaw in the refrigerator before reheating.
- To reheat : Reheat on the stovetop or in the microwave until warmed through, adding a splash of water or broth if the dal is too thick.

Red Lentil Dal
Ingredients
- 1 cup red lentils 190 g, rinsed well
- 3 cups vegetable broth or water (plus more if needed) 700 ml
- 1 tablespoon coconut oil or vegetable oil
- 1 teaspoon cumin seeds
- 1 teaspoon mustard seeds
- 1 medium onion finely chopped
- 2-3 garlic cloves minced
- 1- inch piece of ginger minced, 2.5 cm
- 1-2 green chilies chopped
- 1 teaspoon ground turmeric
- 1 teaspoon ground cumin
- 1 teaspoon ground coriander
- 1 teaspoon garam masala optional
- 1 large tomato chopped (or ½ cup canned tomatoes)
- salt to taste
- fresh cilantro chopped (for garnish)
- lemon or lime wedges for serving
Instructions
- Rinse the red lentils thoroughly under cold water until the water runs clear.
- In a medium pot, combine lentils and 3 cups of vegetable broth or water. Bring to a boil, then reduce heat to a simmer. Cook uncovered for about 15-20 minutes, stirring occasionally, until the lentils are soft and starting to break down.
- While the lentils are cooking, heat the oil in a large pan over medium heat.
- Add the cumin seeds and mustard seeds. Once they start popping, add the chopped onions. Sauté until the onions are golden brown (about 5-7 minutes).
- Add the garlic, ginger, and green chilies, and cook for another 1-2 minutes until fragrant.
- Stir in the turmeric, ground cumin, ground coriander, and garam masala. Cook for 30-60 seconds to toast the spices.
- Add the chopped tomatoes to the spice mixture and cook for 4-5 minutes until they break down and release their juices.
- Pour the cooked lentils into the pan with the tomato and spice mixture. Stir well to combine. If the dal is too thick, add a bit more vegetable broth or water to reach your desired consistency.
- Simmer everything together for 5-10 minutes, allowing the flavors to meld. Season with salt to taste.
- Remove the dal from heat. Garnish with fresh cilantro, a squeeze of lemon or lime and some vegan cream or vegan yogurt if desired.
- Serve hot with rice, naan, or other flatbread.
Video
Notes
- Refrigerator : Store leftover dal in an airtight container in the refrigerator for up to 4 days.
- Freezer : Transfer the red lentil dal to a freezer-safe container or freezer bag. It will keep well for up to 3 months; thaw in the refrigerator before reheating.
- To reheat : Reheat on the stovetop or in the microwave until warmed through, adding a splash of water or broth if the dal is too thick.
Nutrition
Red Lentil Dal https://jessicainthekitchen.com/red-lentil-dal/ December 11, 2024
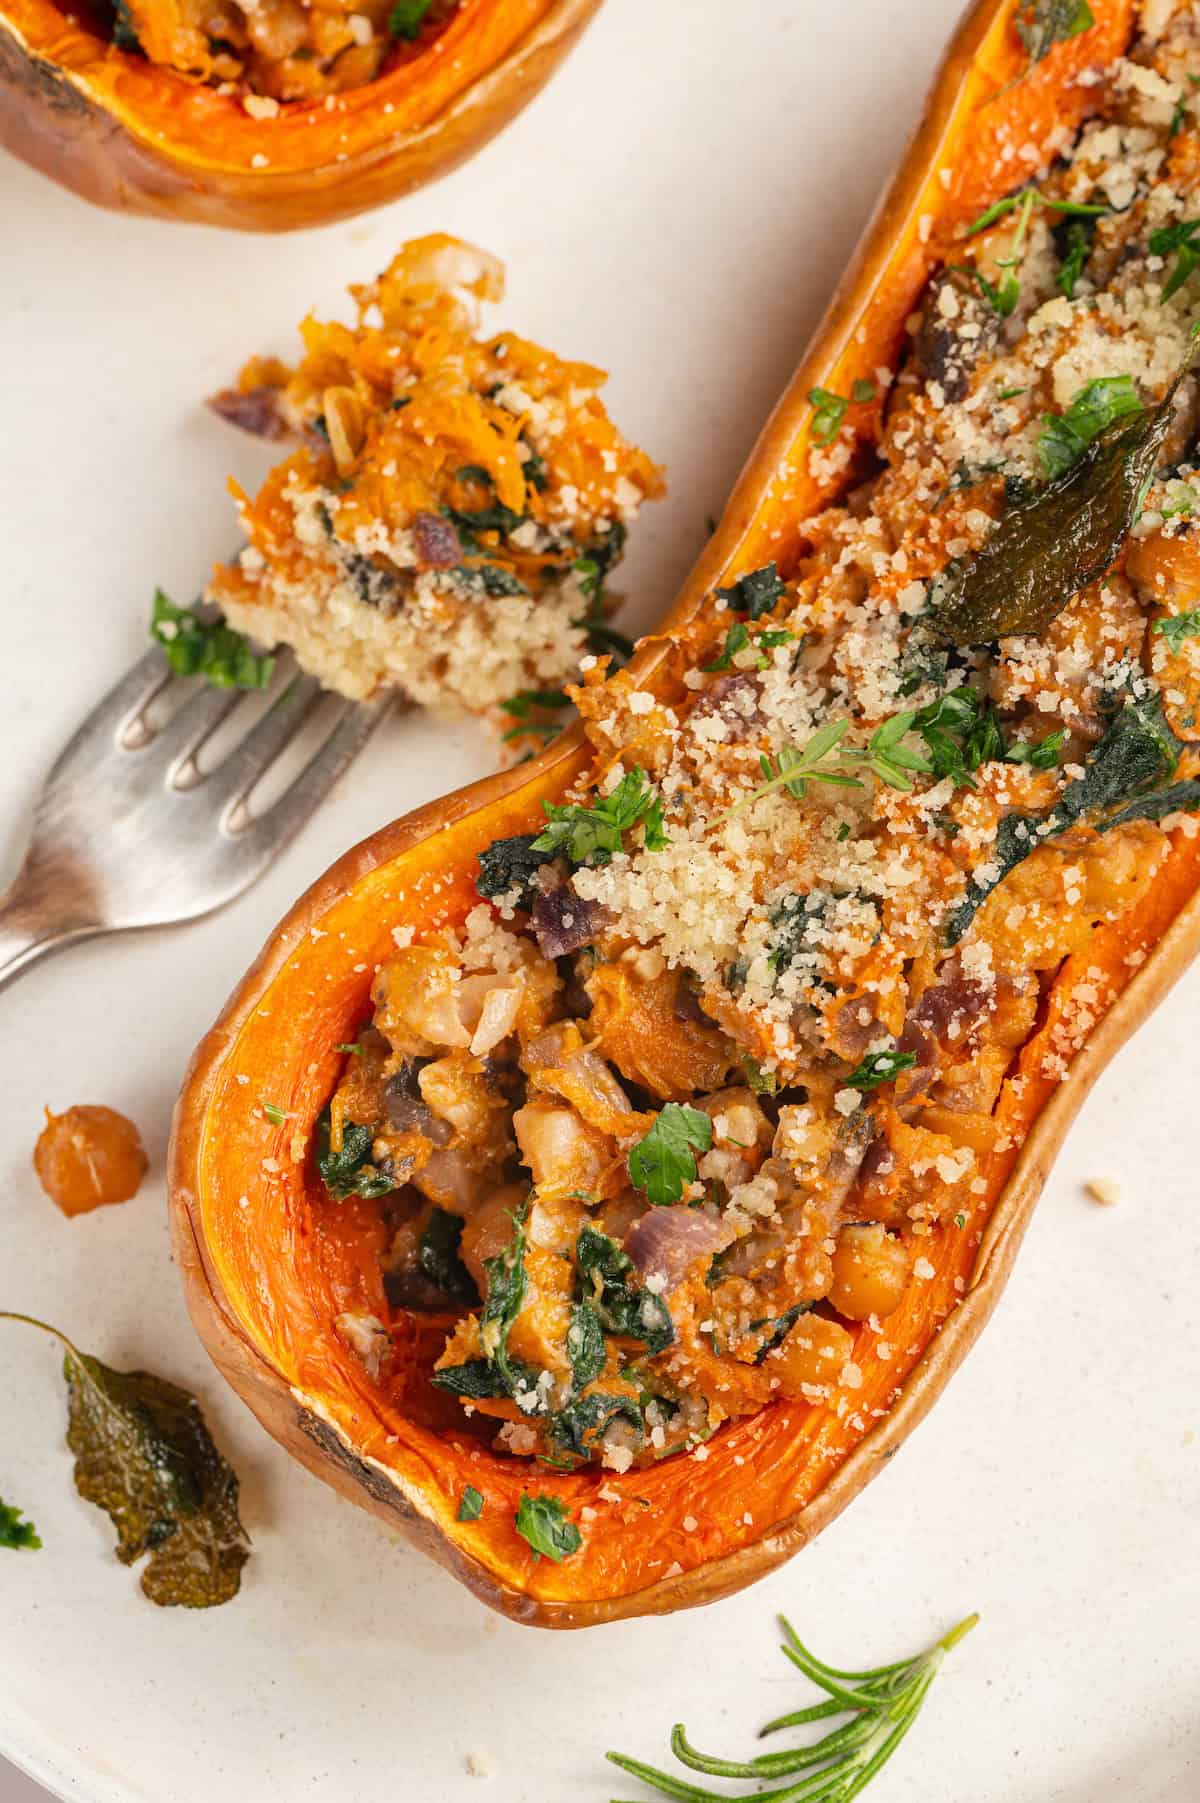
Stuffed butternut squash is a show-stopping vegan main dish for special occasions! With a savoury herbed mushroom and chickpea stuffing, it’s so delicious and beautiful on the table.

As a vegan, I’m always happy to partake in tasty plant-based side dishes for the holidays (hello, vegan mashed potatoes !), but I know sometimes we still want that centrepiece entree to replace the turkey or ham everyone else is eating. Friends, this stuffed butternut squash is IT. It has a savoury filling that reminds me a little bit of vegan stuffing , but without the bread. The roasted squash is sweet and earthy, while tender mushrooms and crunchy walnuts give the dish nice contrasting textures. I can’t rave about it enough—you’re just going to have to try it, and see what I mean!
Why You’ll Love This Stuffed Butternut Squash Recipe
- An entree worthy of a special occasion . Stuffed butternut squash isn’t exactly a weeknight meal (although if you make it in stages and prep the filling in advance, it definitely could be!), but it’s the kind of recipe you make with love to share with the people you care about.
- No fake meat . I love my homemade vegan turkey recipe , but not everyone wants vegan dishes that replicate meat. I get it! This butternut squash is a celebration of vegan food that’s delicious in its own right, not in comparison to meat-based recipes.
- Easy to customise . While this recipe calls for specific ingredients, you can easily adapt it to fit your taste preferences or dietary restrictions.
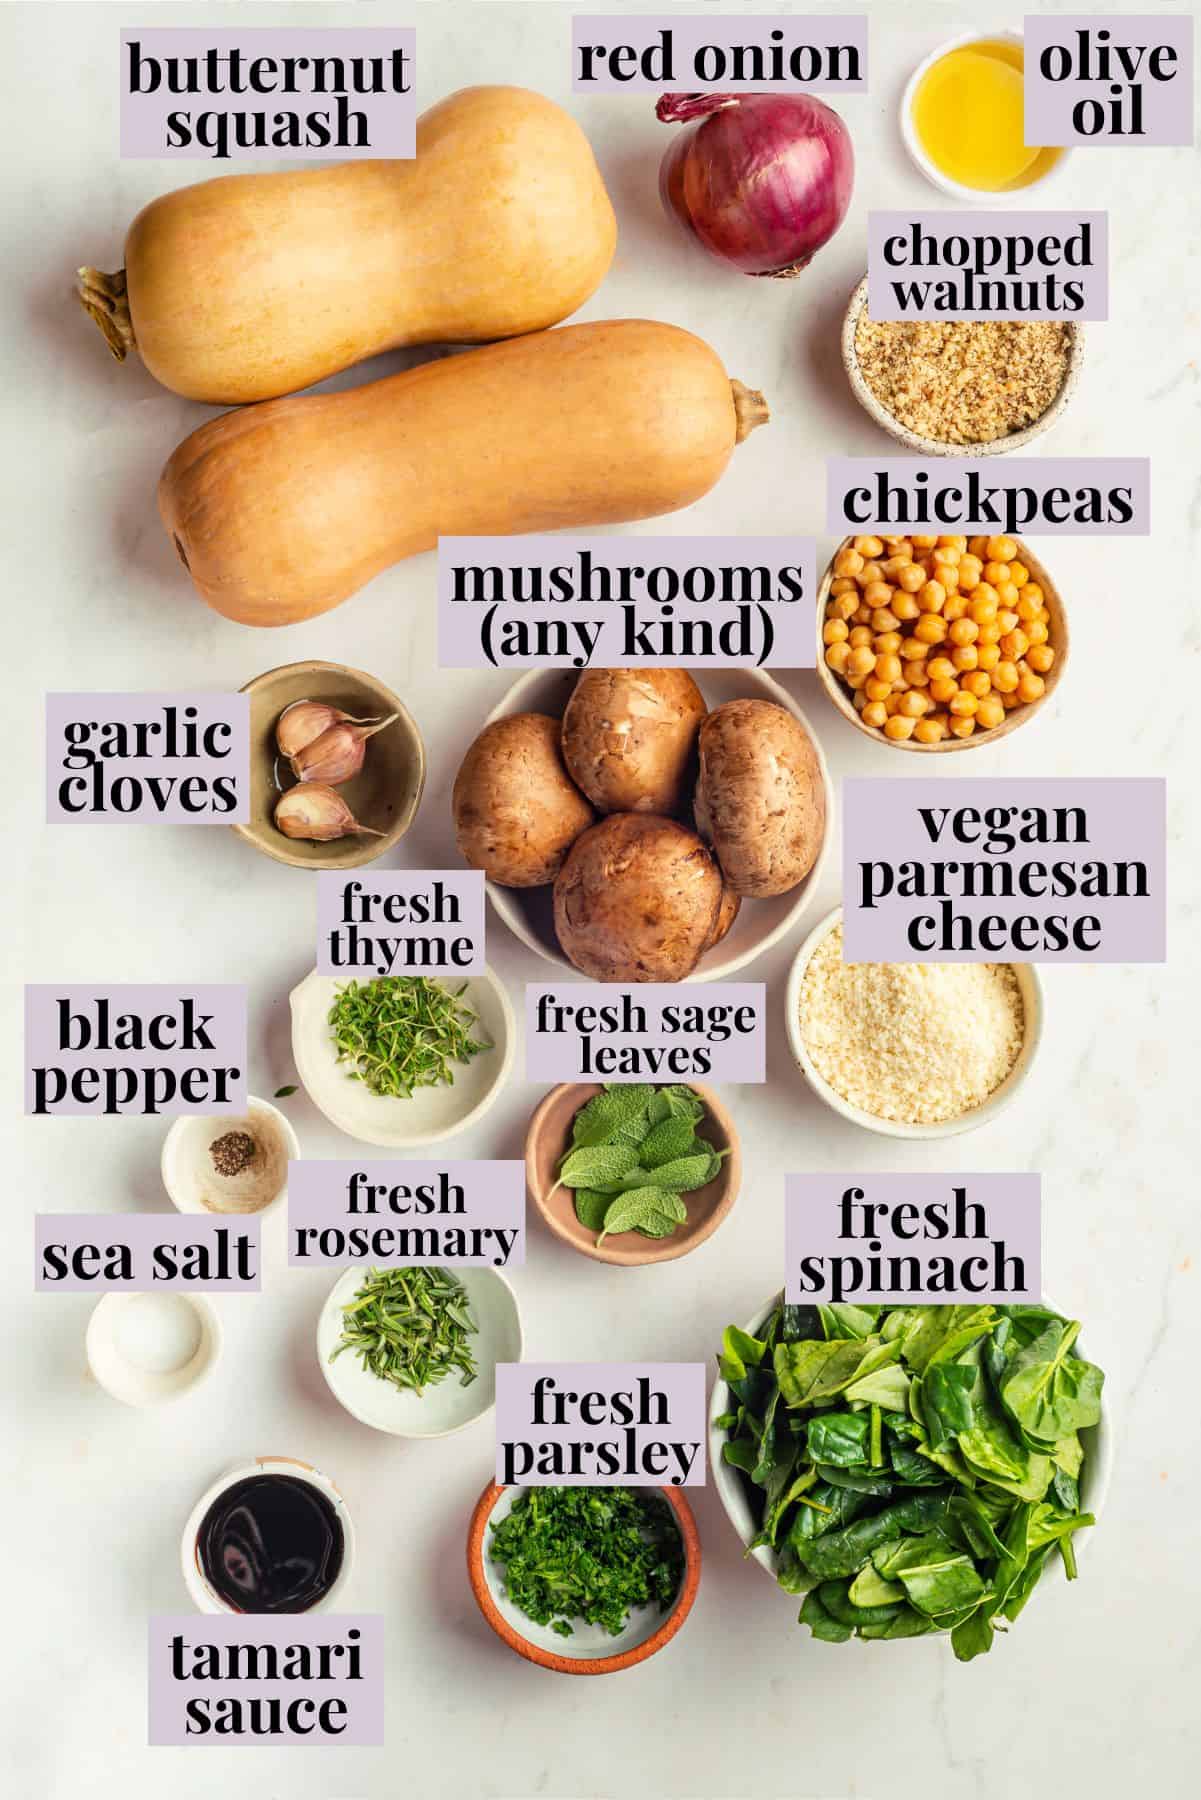
Notes on Ingredients
Scroll down to the recipe card to find the ingredient quantities and recipe instructions.
- Butternut squash – As written, this recipe makes 4 squash halves, but if you’d like, you can use 3 extra-small butternut squash or honeynut squash to make 6 halves.
- Olive oil
- Herbs – Fresh sage leaves, rosemary, and thyme, plus parsley for garnish.
- Red onion and garlic – These infuse flavour into the filling. Shallot or yellow onion can be substituted for the red onion.
- Mushrooms – Use any variety you like.
- Spinach
- Chickpeas – Drain, rinse, and lightly smash canned chickpeas with a fork.
- Walnuts
- Tamari sauce – I like the flavor of tamari sauce but you can also use soy sauce or coconut aminos .
- Sea salt and black pepper
- Vegan Parmesan cheese – Use my homemade vegan Parmesan cheese or store-bought.
How to Make Stuffed Butternut Squash

Roast the squash.
- Roast the squash . Cut the squash in half lengthwise and scoop out the seeds and pulp. Drizzle the cut sides with olive oil, season with salt, and bake at 400ºF for 25 to 35 minutes, or until tender. Scoop out some of the flesh, leaving a 1/2-inch shell.
- Fry the sage . Heat the oil in a skillet over medium heat. Add the sage leaves and cook until they’re crispy. Remove them from the pan and reserve for later.
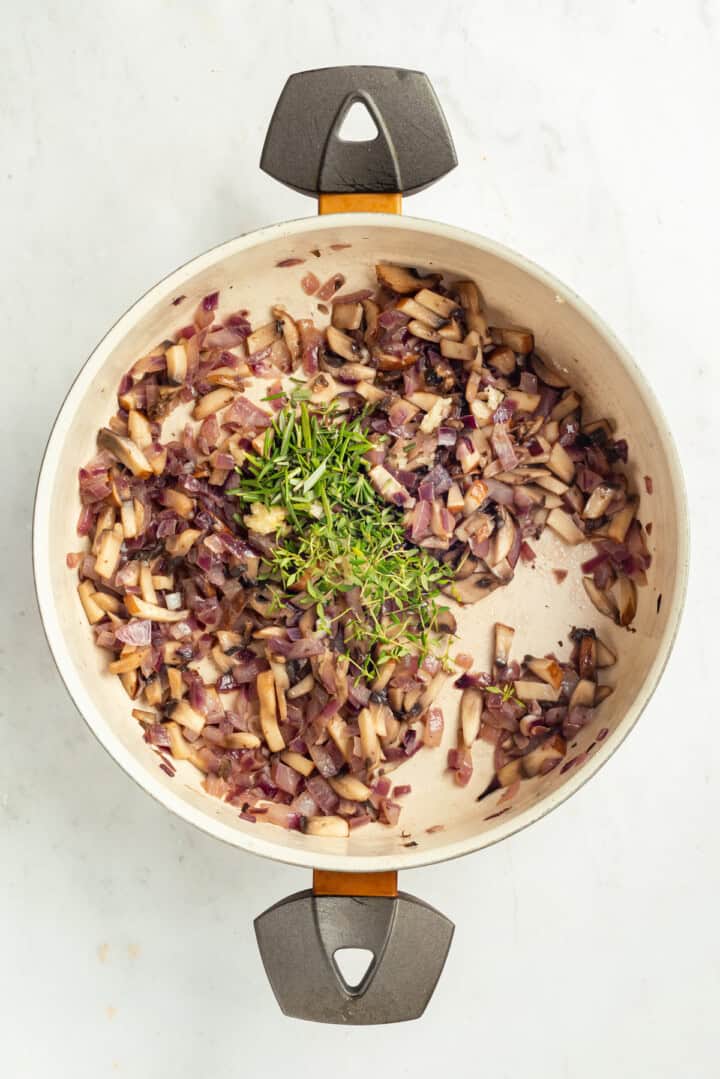
Cook vegetables and seasonings.
- Cook the vegetables . Add the red onion to the pan and cook until softened, then stir in the garlic and mushrooms. Add the herbs, salt, and pepper and cook until the mushrooms are browned and release their juices.
- Finish the filling . Stir in the spinach; once it wilts, add the chickpeas, walnuts, tamari, and butternut squash flesh. Season to taste.

Add filling to shells.
- Bake . Divide the filling into the squash shells and top with vegan Parmesan. Bake for 10 minutes, or until the tops are golden.
- Serve . Garnish with parsley and the crispy sage leaves, then serve.

Tips and Variations
- Pack the stuffing tightly . Pile the stuffing into the squash, then use the back of a spoon to push it down and pile in some more.
- Consider other add-ins for the stuffing . Swap the walnuts for pecans, or add dried cranberries or cherries for a touch of sweetness. You can use lentils or white beans instead of chickpeas, or add your favourite vegan sausage.
- Try a different squash variety . While this recipe calls for butternut squash, you can also use acorn squash, kabocha, delicata, etc.
What to Serve With Stuffed Butternut Squash
Serve this stuffed butternut squash with a salad like this kale apple and chickpea salad with vegan feta . It would be tasty with cranberry orange sauce spooned over the top, or use my vegan butter recipe and make brown butter with it to serve alongside the squash. A side of maple Brussels sprouts would be delicious as well!

How to Store and Reheat Leftovers
- Refrigerator : Store leftover stuffed squash in an airtight container in the refrigerator for up to 4 days.
- Freezer : Store leftovers in a freezer-safe container or bag. It will keep well in the freezer for up to 2 months. Thaw it in the refrigerator before reheating.
- Reheat : To reheat, place the stuffed squash on a baking sheet and bake at 350°F until heated through. The microwave also works, but it’s more prone to heating unevenly; you may want to cut it into a few pieces for more even reheating.
More Butternut Squash Recipes
- Butternut Squash Ravioli
- Hasselback Butternut Squash
- Butternut Squash Soup
- Butternut Squash Mac and Cheese (Vegan)
- Vegan Butternut Squash and Apple Soup
Ingredients
- 2 medium butternut squash , about 3 lbs ( 1 kilo each)
- 2 tablespoons olive oil , 30 ml
- 15 fresh sage leaves , or ½ teaspoon dried
- 1 medium red onion , diced
- 3 cloves garlic , minced
- 1 cup mushrooms , diced (any variety), 150 g
- 1 tablespoon fresh rosemary , chopped (or 1 teaspoon dried)
- 1 tablespoon fresh thyme , chopped (or 1 teaspoon dried)
- 1 cup fresh spinach , chopped, 80 g
- 1 (14-ounce) can chickpeas , smashed lightly with a fork, 425 g
- ⅓ cup walnuts , finely chopped
- 1 tablespoon tamari sauce
- 1 teaspoon sea salt
- ½ teaspoon black pepper
- ½ cup butternut squash flesh , scooped from the roasted squash, 120 g
- ½ cup vegan Parmesan cheese
- 2 tablespoons fresh parsley , chopped (for garnish)
Instructions
- Preheat your oven to 400°F (200°C).
- Cut the butternut squash in half lengthwise and scoop out the seeds. Place the halves cut side up on a baking sheet.
- Drizzle with a bit of olive oil and sprinkle with sea salt. Roast in the preheated oven for about 25-35 minutes, or until tender. If you have larger butternut squashes than listed, you will need to roast it longer (please refer to the video).
- Once the squash is done roasting, remove it from the oven and let it cool slightly. To make room for the filling, scoop out some of the squash flesh, leaving about a ½-inch layer all the way around the interior. Reserve the scooped out flesh for later use.
- In a large skillet, heat the olive oil over medium heat. Add fresh sage leaves and toast until crispy, about 1-2 minutes. Remove from the pan and save for serving. If using dried sage, add it together with the rest of the herbs later.
- To the same pan add the diced red onion and sauté for about 3-4 minutes until translucent.
- Add the minced garlic and diced mushrooms to the skillet. Add rosemary, thyme, sea salt, and black pepper. Sauté for another 5-7 minutes until the mushrooms are browned and have released their moisture.
- Add chopped spinach and cook until it wilts, about 3 minutes.
- Stir in the smashed chickpeas, chopped walnuts, tamari sauce and the scooped-out butternut squash flesh. Taste and add more salt and pepper if needed.
- Carefully spoon the filling into each half of the butternut squash, packing it slightly.
- Sprinkle with vegan Parmesan.
- Return the stuffed squash to the oven and bake for an additional 10 minutes until heated through and golden on the top.
- Garnish with fresh parsley and crispy sage before serving.
Notes
- Refrigerator : Store leftover stuffed squash in an airtight container in the refrigerator for up to 4 days.
- Freezer : Store leftovers in a freezer-safe container or bag. It will keep well in the freezer for up to 2 months. Thaw it in the refrigerator before reheating.
- Reheat : To reheat, place the stuffed squash on a baking sheet and bake at 350°F until heated through. The microwave also works, but it’s more prone to heating unevenly; you may want to cut it into a few pieces for more even reheating.
