In just 10 minutes, you can make a batch of quick pickled red onions to add to burgers, tacos, and more. They’re sweet, tangy, and a welcome pop of flavour for so many meals!
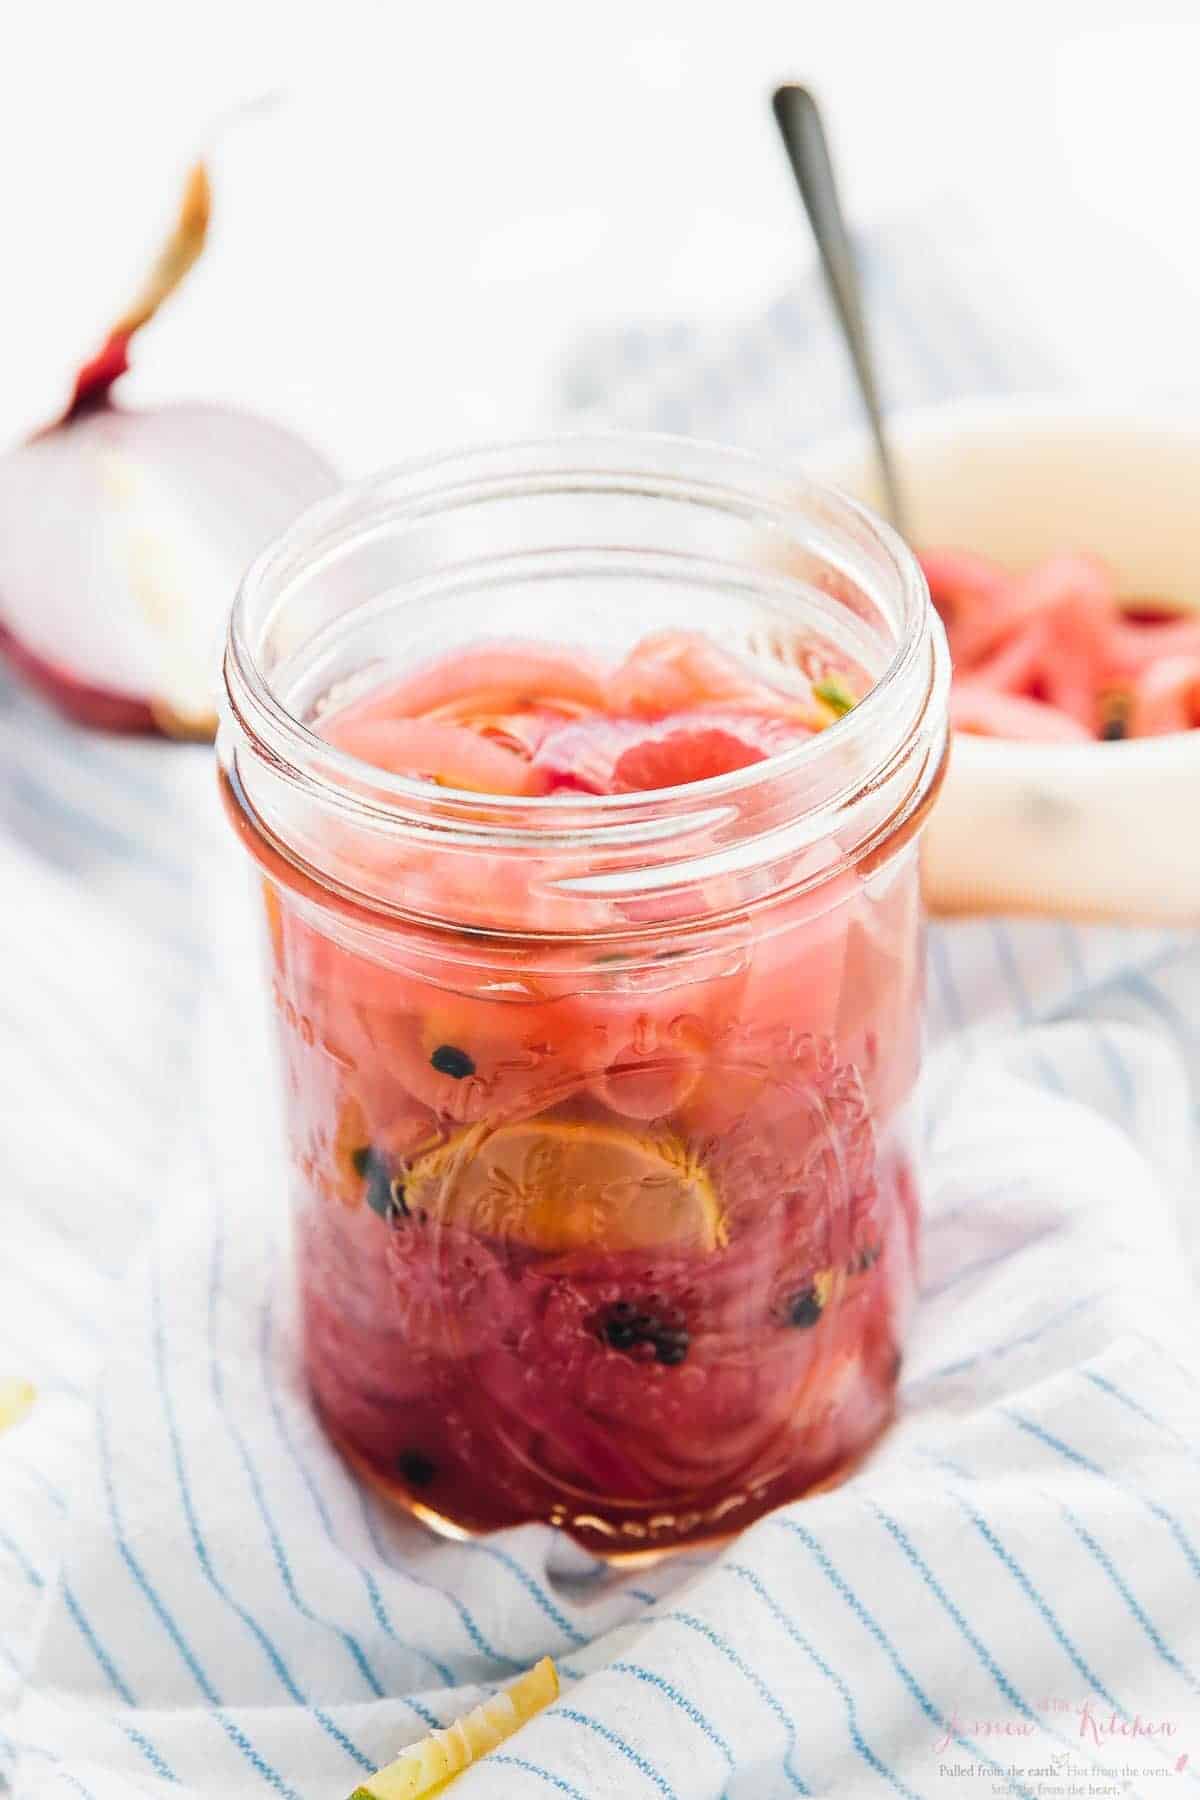
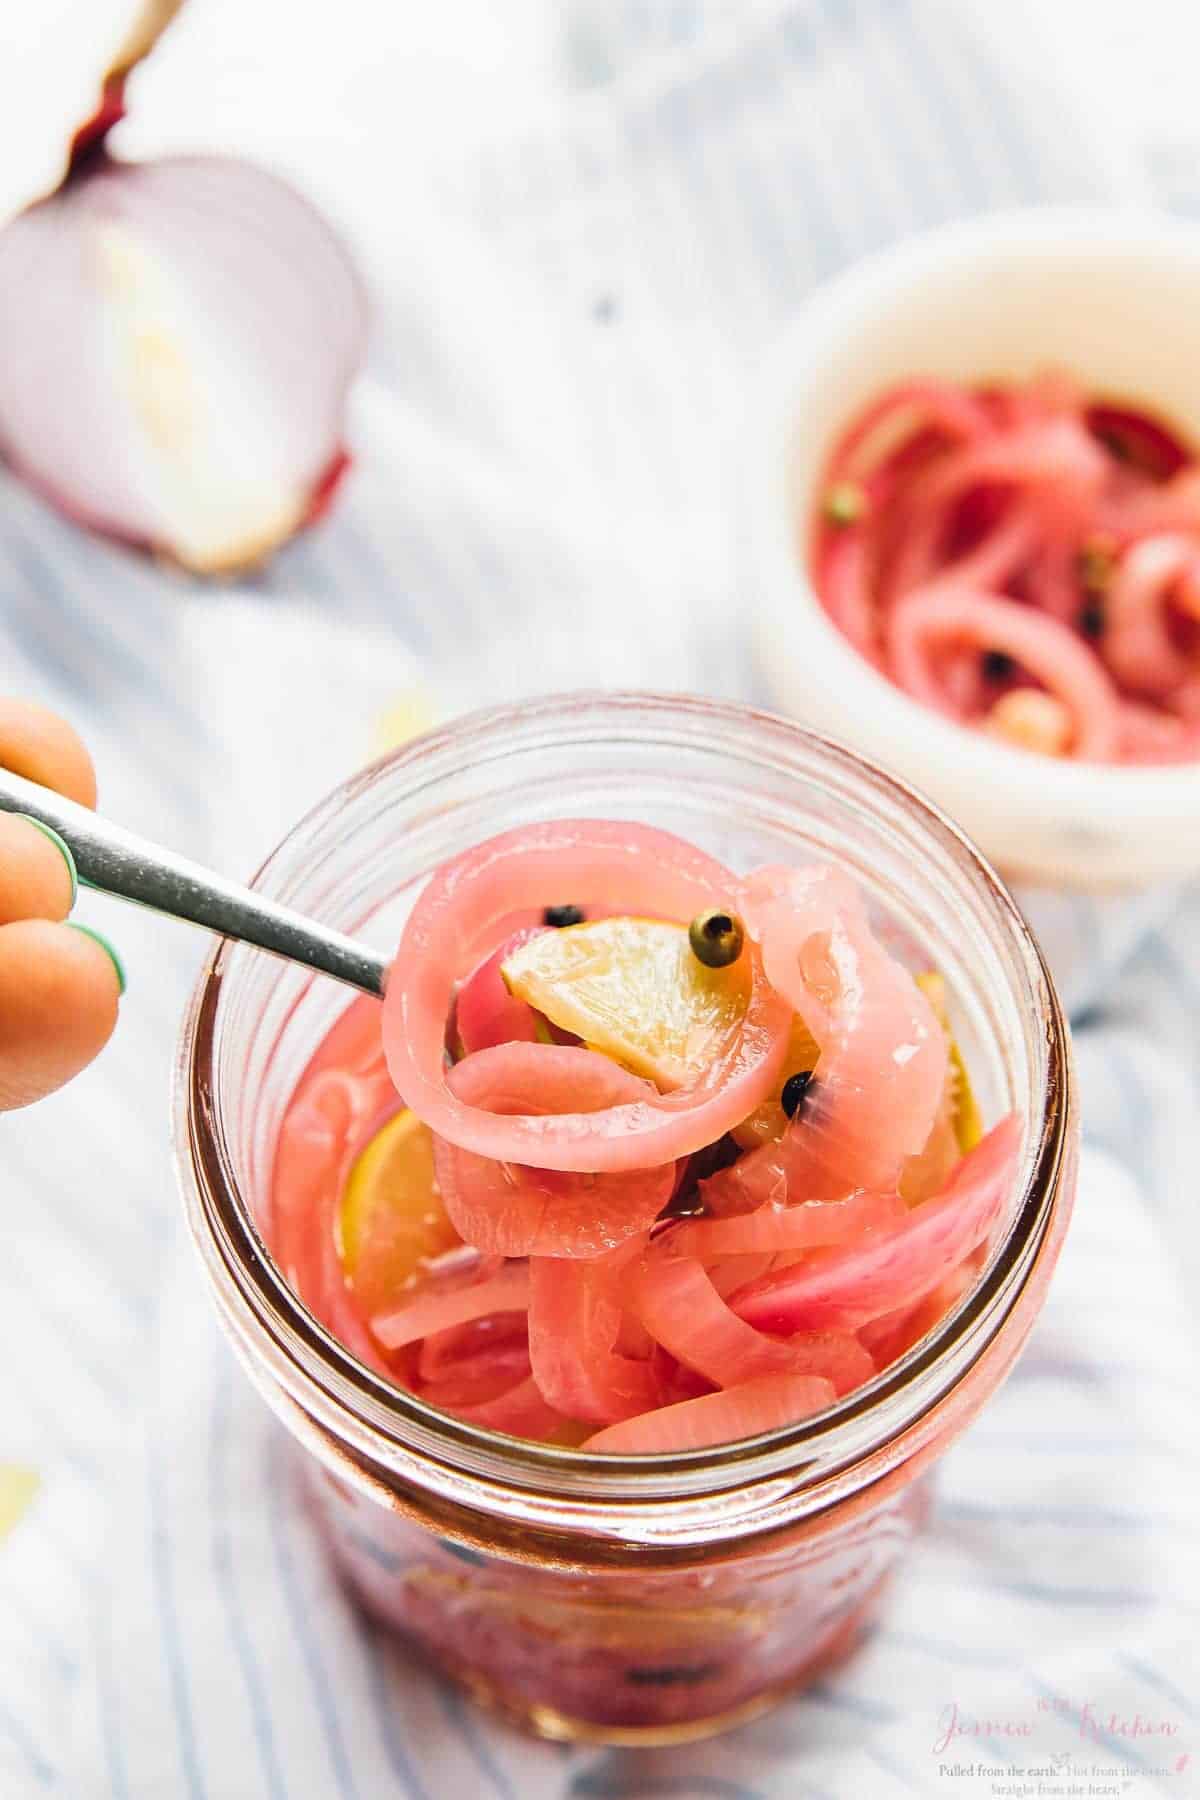
Yes, quick pickled red onions are delicious, but before we get into that, can we talk about that pink? It’s stunning and it makes me want to put these on everything. But if the colour doesn’t convince you, the taste absolutely will.
Quick pickled red onions have a sweet tang, the onions are softened a bit, but they still have a tender crunch, and they are absolutely amazing on everything. I guarantee you’ll fall in love with them and find endless ways to use them.
Why You’ll Love This Quick Pickled Red Onions Recipe
- The best way to use extra onions . You know how sometimes you need one onion and you have to buy a whole bag? Then you have to figure out how to use a whole bag of onions? Quick pickled onions, friends. THIS is the solution.
- A bright pop of flavour . Like pickled radishes and pickled cabbage , these pickled red onions add some zing and texture to any dish. The vinegar mellows some of the pungency of the onion, but adds a fabulous tanginess.
- So easy to make . You don’t need to know how to can to make quick pickled onions! Nor do you need all that canning equipment. Just a jar and a saucepan will do.
Notes on Ingredients
Scroll down to the recipe card to find the ingredient quantities and recipe instructions.
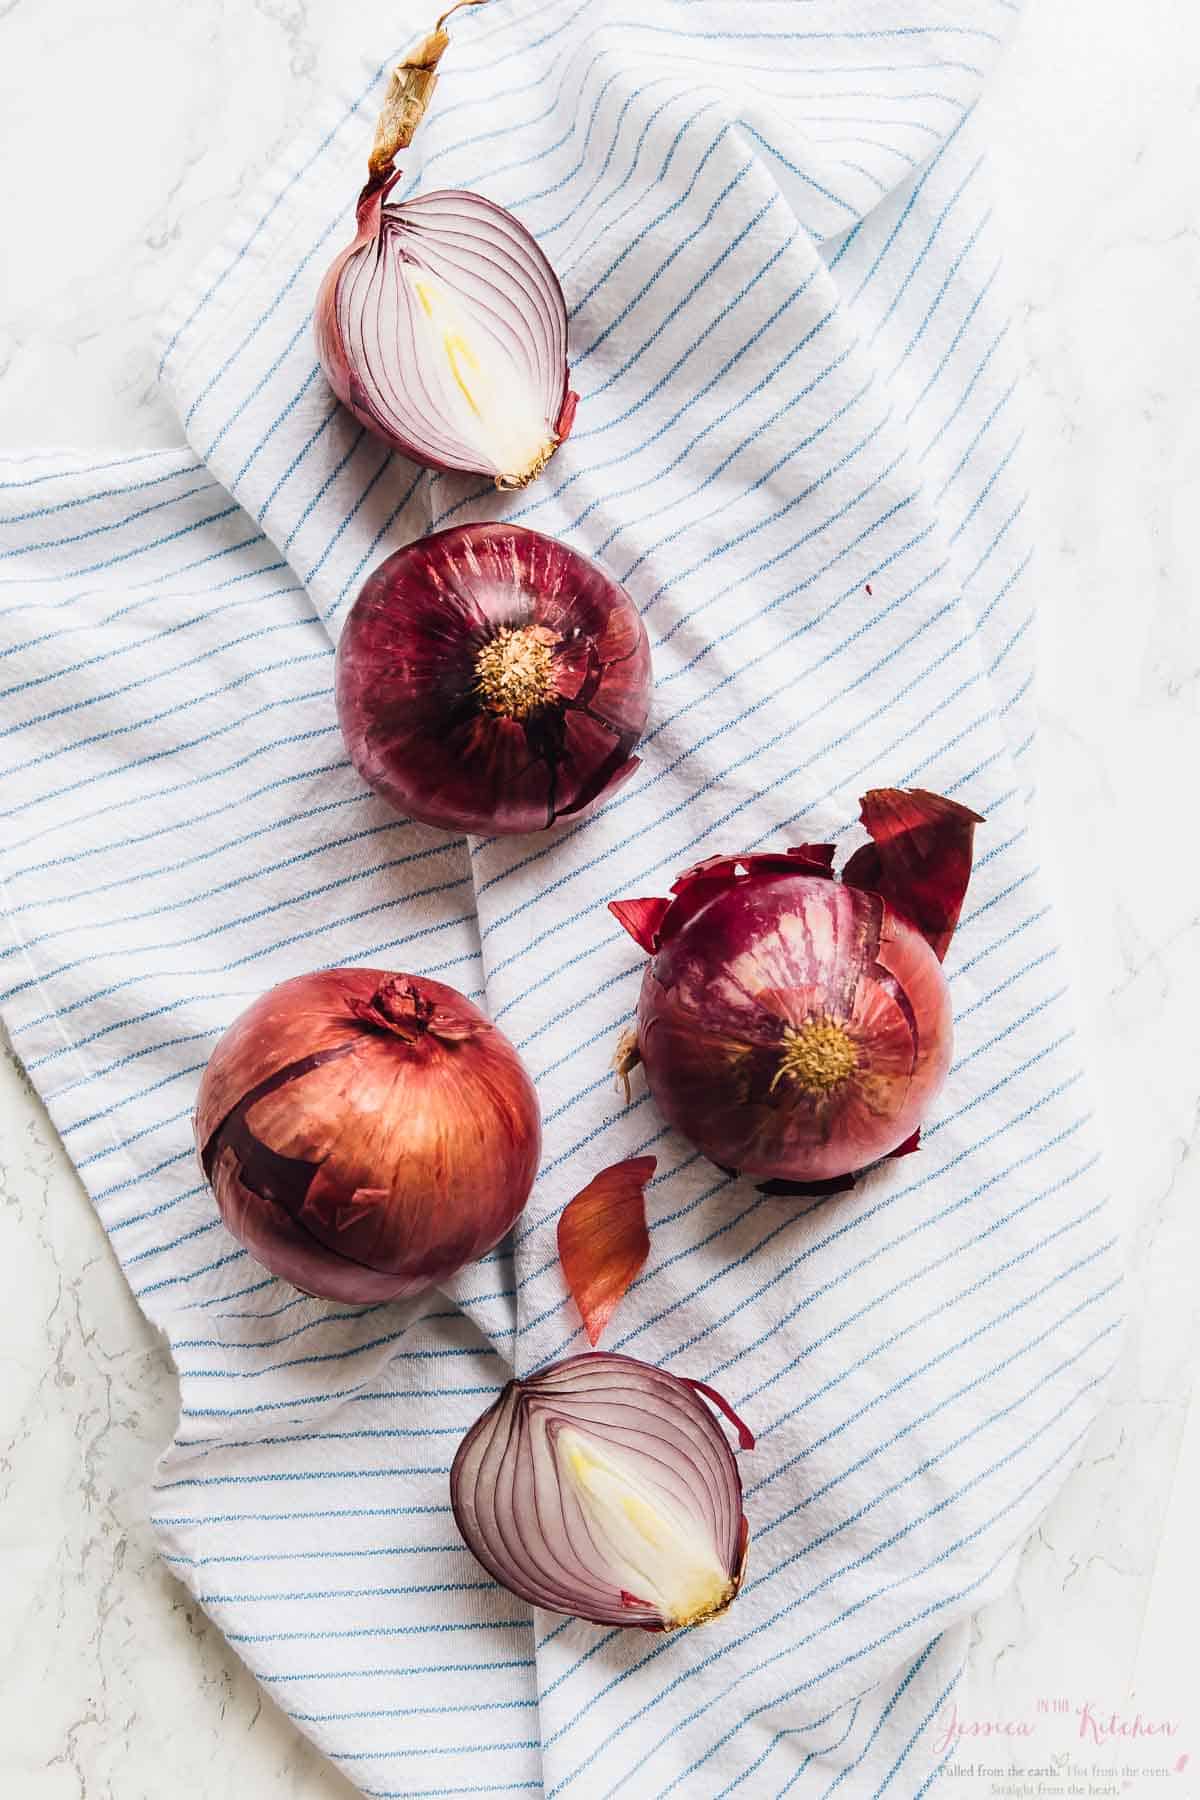
- Red onions – You can slice these thick or thin, or dice them, depending on how you plan on using your quick pickled red onions.
- Apple cider vinegar – White vinegar also works, but I prefer the flavour of apple cider vinegar.
- Filtered water
- Sea salt
- Sugar – You can use coconut, cane, or brown sugar for this recipe.
- Lime slices – Adding lime slices infuses the onions with a little more zippy flavour and they also get pickled in the brine, so you’ll have pickled lime slices. And yes, you can eat them!
How to Make Quick Pickled Red Onions
- Make the brine . Boil the vinegar, water, sea salt, and sugar for 2 minutes.
- Add the onions . Boil the onions in the brine for a minute.
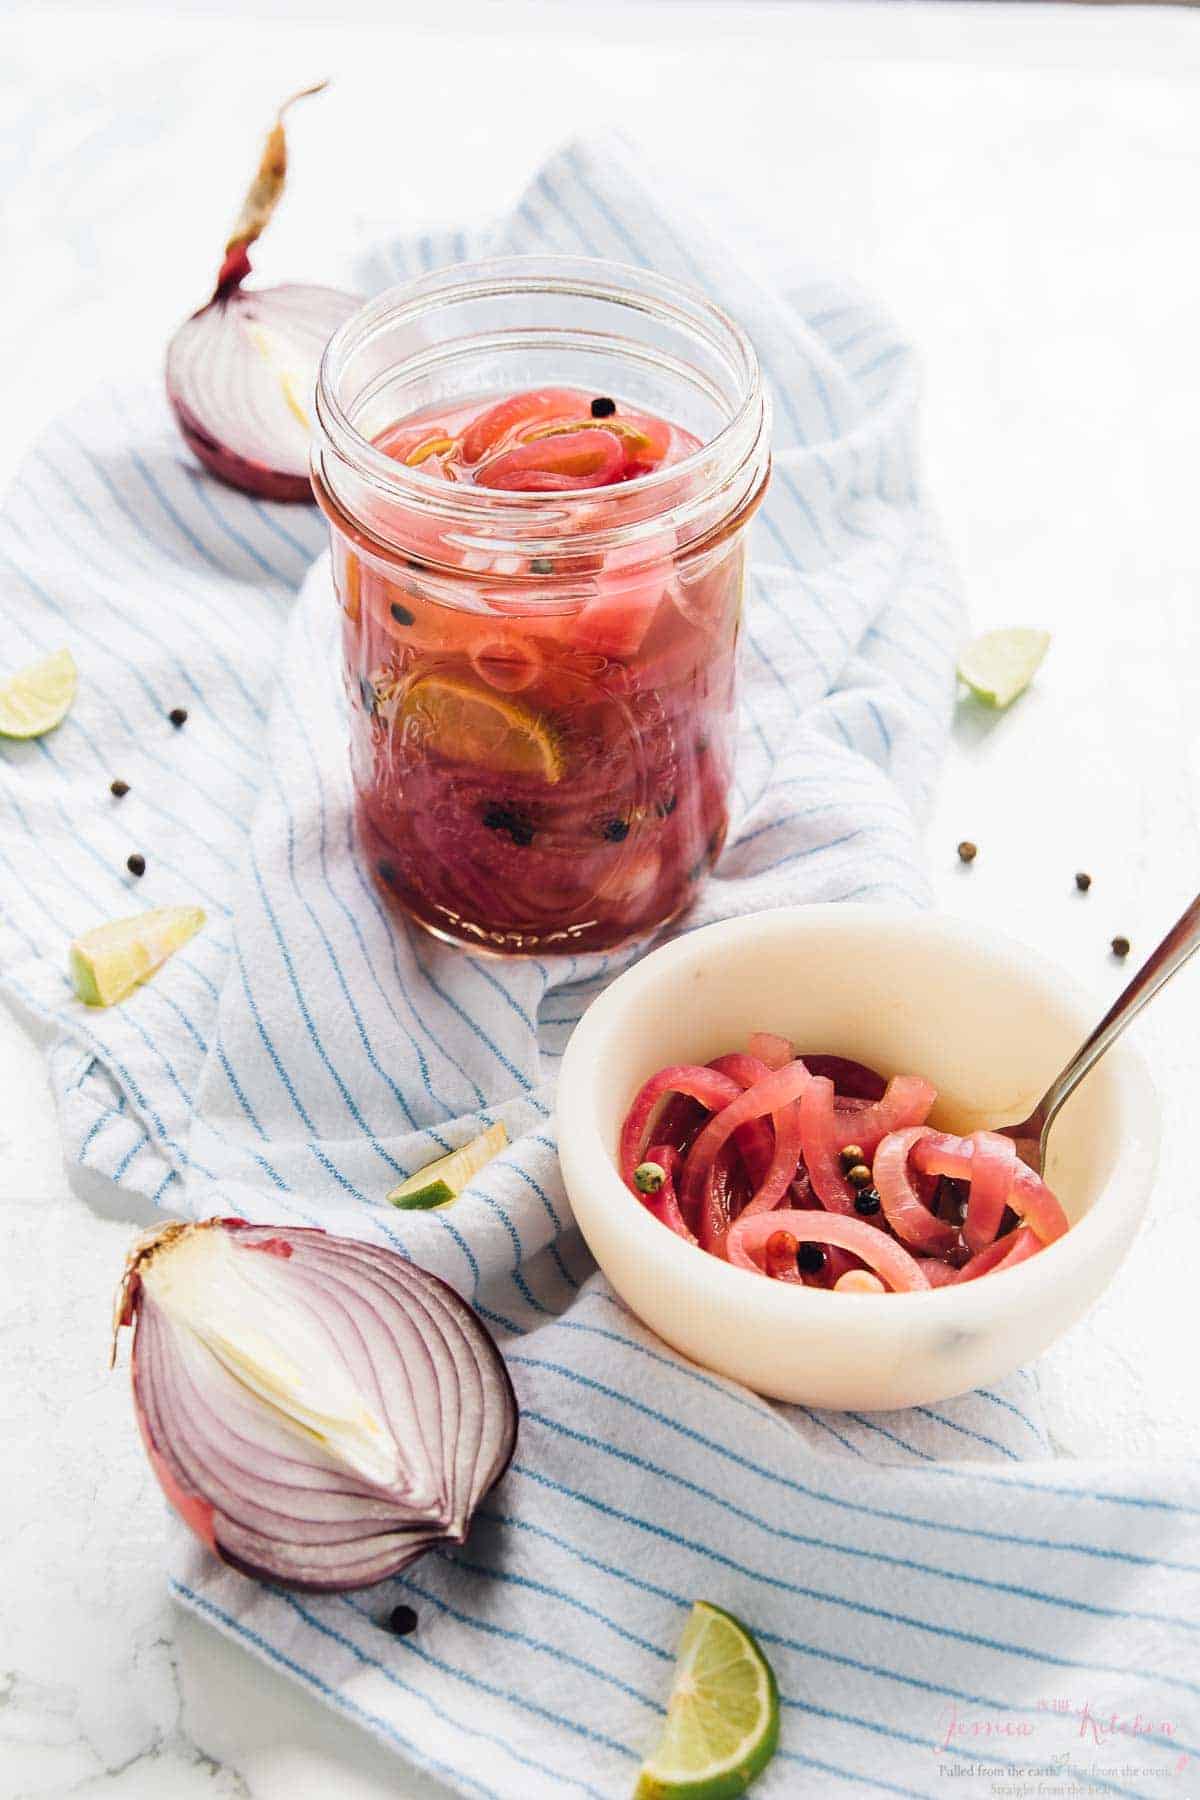
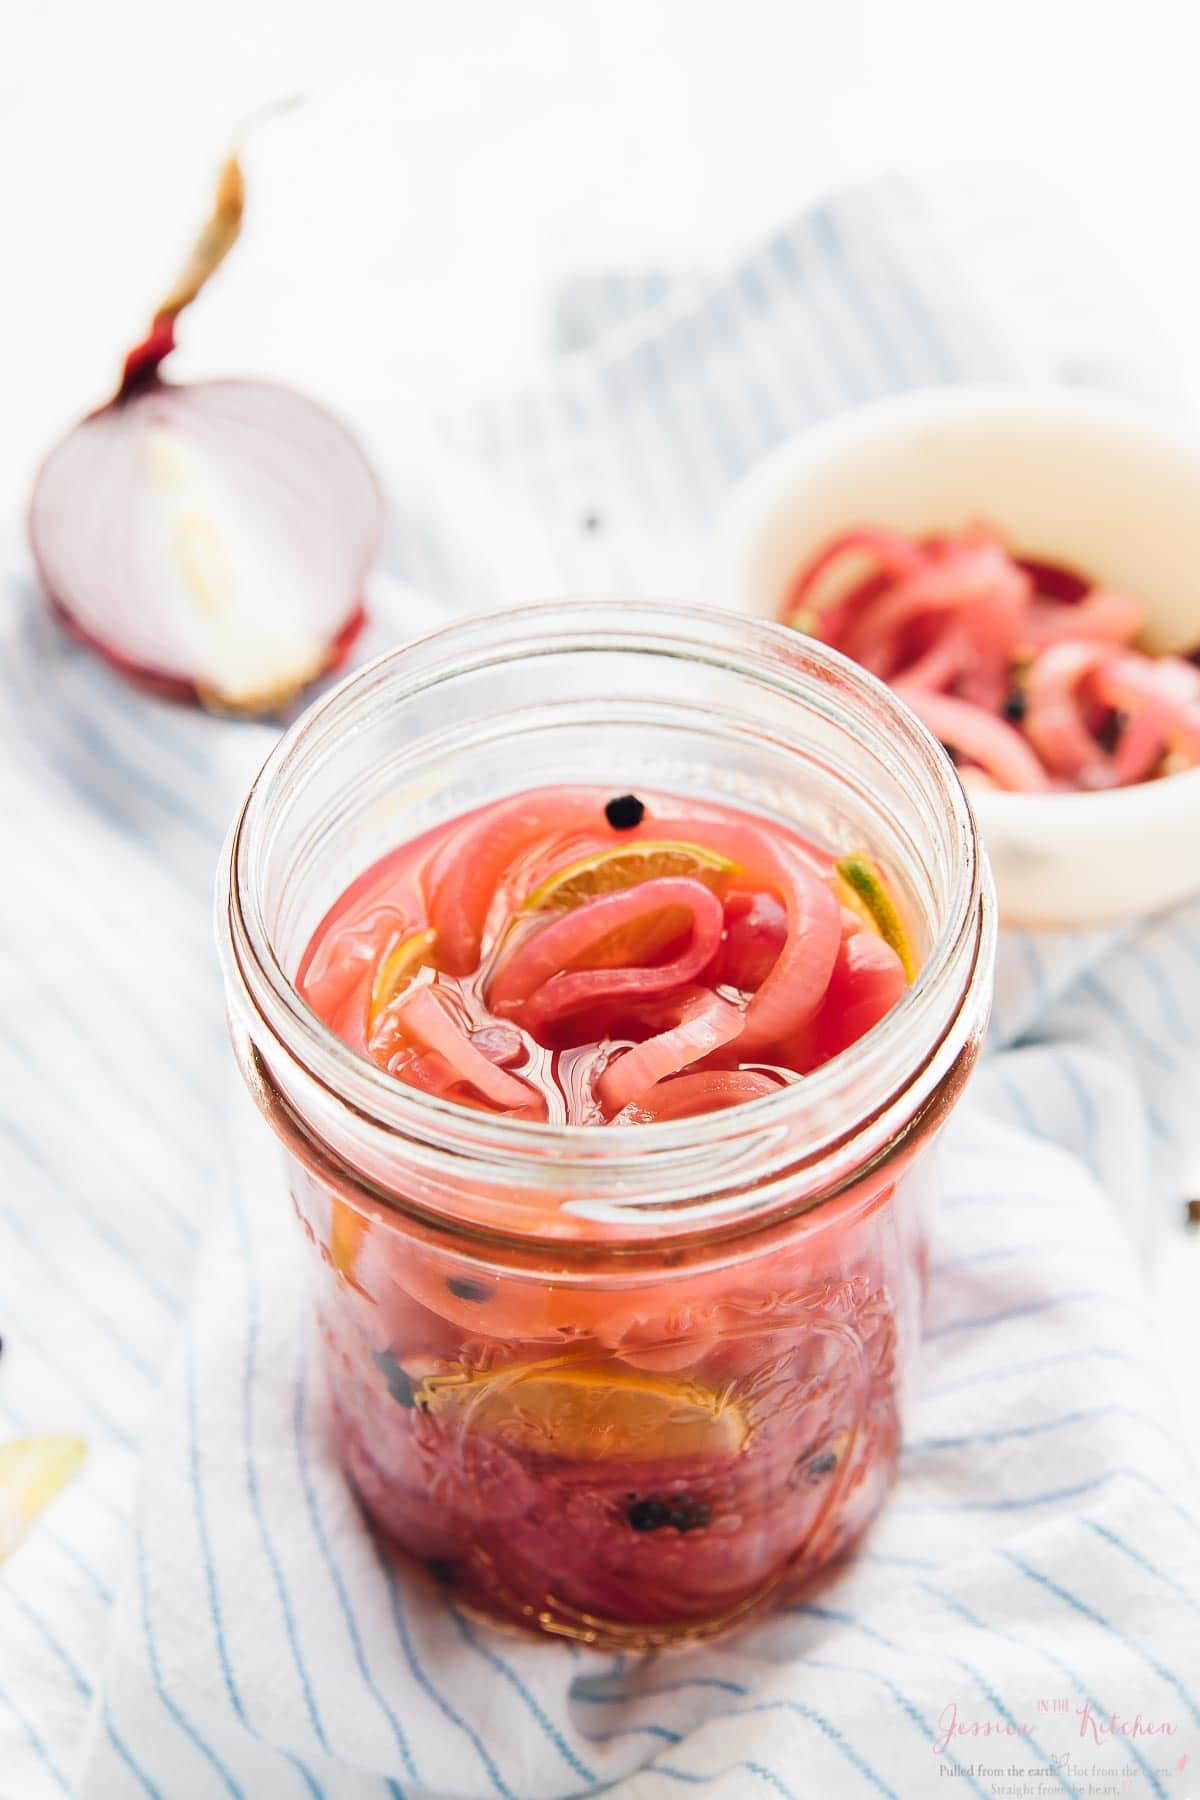
- Transfer to a jar . Remove from heat and let the onions and brine cool for 1 minute. Pour the mixture into a jar and add the lime.
- Cool . Allow the pickled red onions to cool to room temperature, then refrigerate.
Tips and Variations
- Let them sit for a day or two before eating . I know it’s hard to wait, but trust me, it’s worth it! After a little time in the fridge, the flavours really meld.
- Use a mandoline . If you have one, use a mandoline slicer to slice your onions evenly and quickly.
- Add some spices or adjust the seasonings . You can use a wide variety of seasonings in this recipe. Try adding mustard seeds, fennel seeds, peppercorns, more sugar, red pepper flakes, or a pickling spice blend.
- Make them spicy . For spicy quick pickled red onions, add a sliced jalapeño (with the seeds) or another hot pepper. Pickled jalapeños are fantastic on tacos!
- Try another veggie . You can use this brine to pickle any vegetable, or you can replace half the onions with a different veggie. Green beans, cauliflower, and carrots are all great options for pickling.
- Add fresh herbs . Tuck sprigs of fresh cilantro, parsley, or dill in with the onions to infuse them with flavour.
My Favourite Ways to Use Quick Pickled Red Onions
- Burgers . Try them on quinoa burgers or grillable veggie burgers .
- Sandwiches . Like this chopped cheese sandwich !
- Tacos . I love pickled red onions on BBQ chickpea tacos .
- Tex-Mex dishes . They’ll add some tangy flavour to these vegan burrito bowls and vegan enchiladas .
- Salads . Diced pickled onions perk up this loaded potato salad .
How to Store
Store quick pickled red onions in an airtight jar in the refrigerator. They will last for up to 2 weeks, and the flavour will continue to develop over time.
More Recipes For Onion Lovers
- How to Caramelize Onions
- Pear Brie & Caramelised Onions Quesadillas
- Maple Roasted Brussels Sprouts, Onions and Apples
- Goat Cheese Pizza with Caramelised Onions and Apples
Ingredients
- 2 regular sized red onions
- 1 cup apple cider vinegar
- 1 cup filtered water
- 2 teaspoons sea salt
- 1 tablespoon coconut/cane/brown sugar
- lime slices
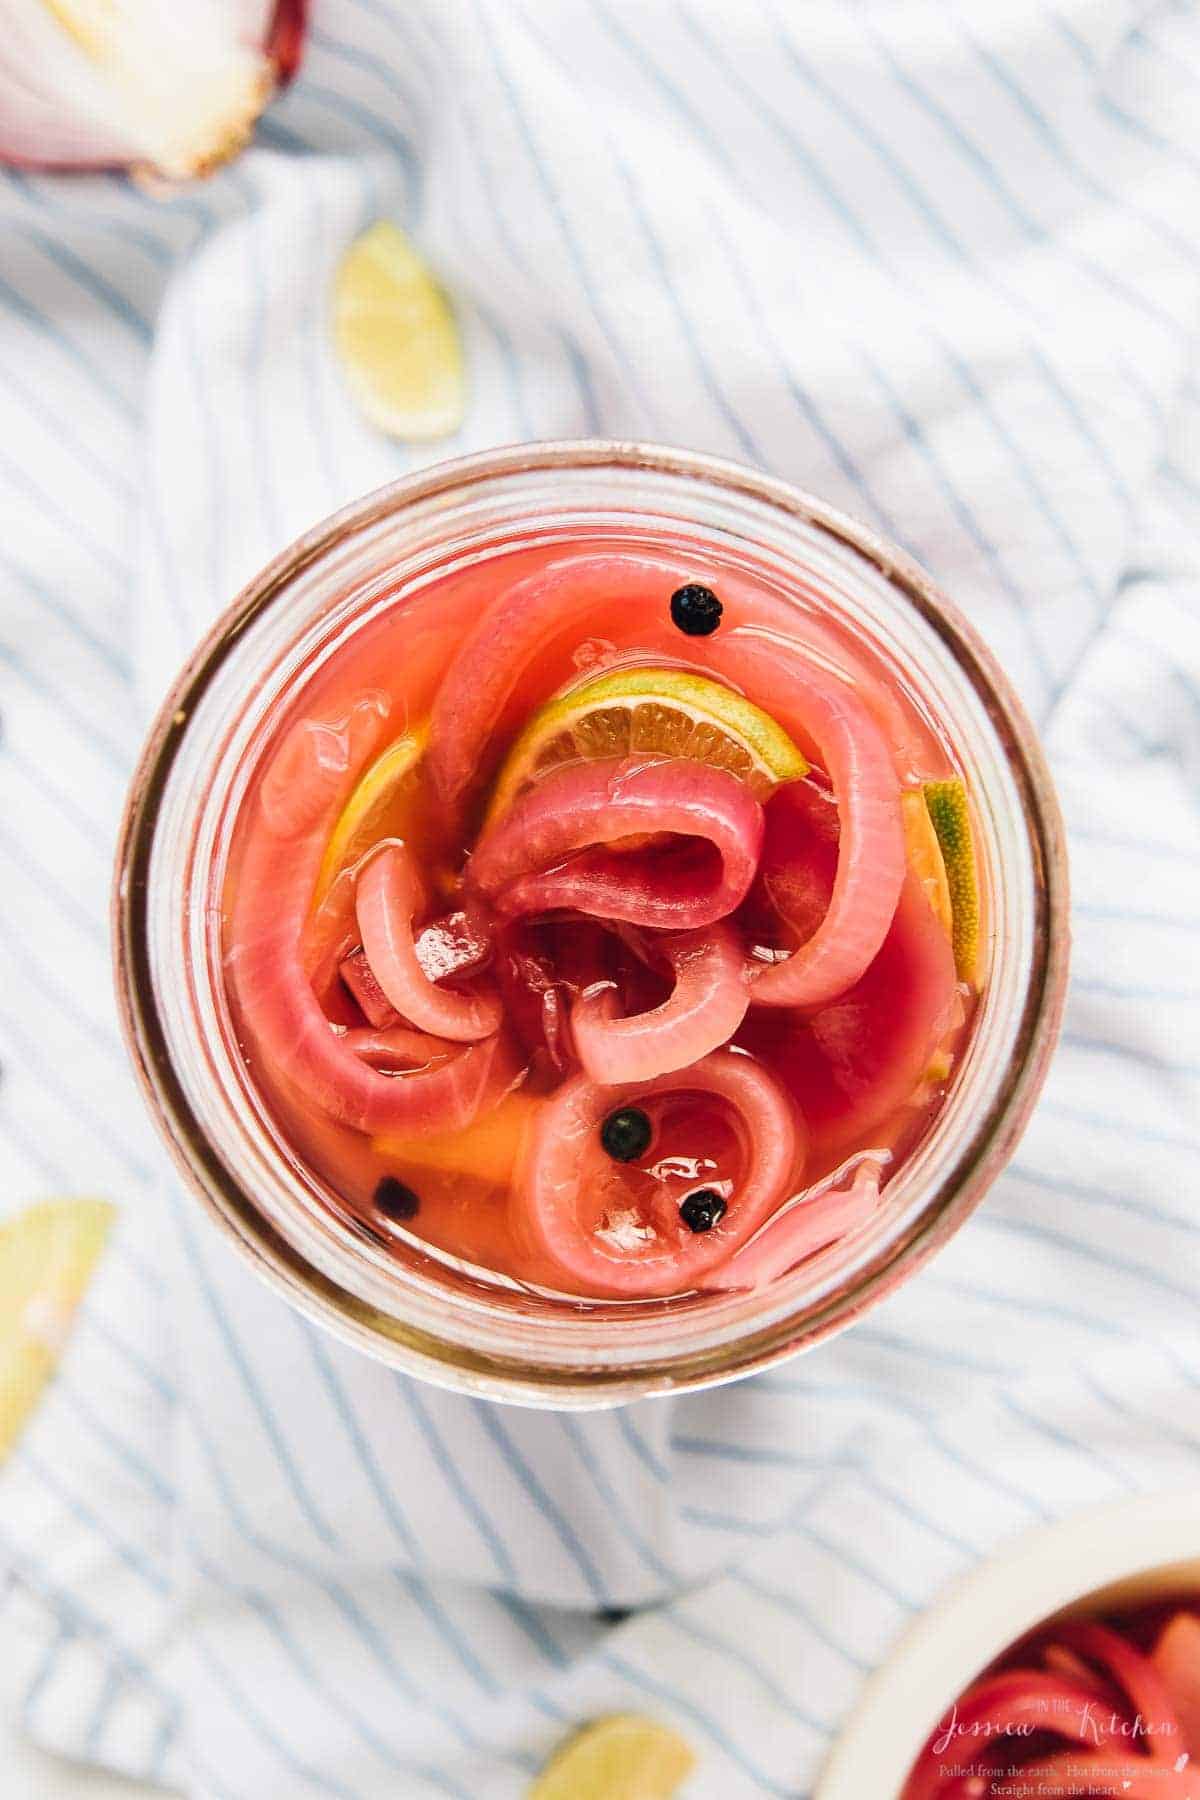
- 1 teaspoon peppercorns , crack slightly if you want to release more flavour
Instructions
- In a pot, add the vinegar, water, sea salt, sugar and peppercorns. If using any other additional seasonings, add them now too. Stir together. Bring to a boil for 2 minutes.
- Add in the onions, and allow to boil for 1 minute with the onions.
- Remove from heat, let cool for 1 minute, then pour into a mason jar large enough to hold everything but that allowed the onions to be completely covered in the vinegar mixture. Add in the lime slices and swirl together to mix everything together.
- Allow the mixture to cool completely to room temperature. You can serve immediately once cooled, but if you let it sit and continue to pickle, the flavours meld incredibly. I tried mine three days later and they were perfect. A week is even better. They will last several weeks in your fridge in a mason jar that has the cover tightly screwed on.
- Enjoy!
Notes
- You can use a wide variety of seasonings in this recipe. You could add mustard seeds, fennel seeds, more sugar, jalapeños, anything. It’s really up to you.
- You can use the basic recipe and replace it with your vegetable of choice to pickle any vegetable you want. If pickling peppers, PLEASE use gloves and try not to inhale the fumes of the boiling peppers.
- To store : Store quick pickled red onions in an airtight jar in the refrigerator. They will last for up to 2 weeks, and the flavour will continue to develop over time.
In just 10 minutes, you can make a batch of quick pickled red onions to add to burgers, tacos, and more. They’re sweet, tangy, and a welcome pop of flavour for so many meals!
Yes, quick pickled red onions are delicious, but before we get into that, can we talk about that pink? It’s stunning and it makes me want to put these on everything. But if the colour doesn’t convince you, the taste absolutely will.
Quick pickled red onions have a sweet tang, the onions are softened a bit, but they still have a tender crunch, and they are absolutely amazing on everything. I guarantee you’ll fall in love with them and find endless ways to use them.
Why You’ll Love This Quick Pickled Red Onions Recipe
- The best way to use extra onions . You know how sometimes you need one onion and you have to buy a whole bag? Then you have to figure out how to use a whole bag of onions? Quick pickled onions, friends. THIS is the solution.
- A bright pop of flavour . Like pickled radishes and pickled cabbage , these pickled red onions add some zing and texture to any dish. The vinegar mellows some of the pungency of the onion, but adds a fabulous tanginess.
- So easy to make . You don’t need to know how to can to make quick pickled onions! Nor do you need all that canning equipment. Just a jar and a saucepan will do.
Notes on Ingredients
Scroll down to the recipe card to find the ingredient quantities and recipe instructions.
- Red onions – You can slice these thick or thin, or dice them, depending on how you plan on using your quick pickled red onions.
- Apple cider vinegar – White vinegar also works, but I prefer the flavour of apple cider vinegar.
- Filtered water
- Sea salt
- Sugar – You can use coconut, cane, or brown sugar for this recipe.
- Lime slices – Adding lime slices infuses the onions with a little more zippy flavour and they also get pickled in the brine, so you’ll have pickled lime slices. And yes, you can eat them!
How to Make Quick Pickled Red Onions
- Make the brine . Boil the vinegar, water, sea salt, and sugar for 2 minutes.
- Add the onions . Boil the onions in the brine for a minute.
- Transfer to a jar . Remove from heat and let the onions and brine cool for 1 minute. Pour the mixture into a jar and add the lime.
- Cool . Allow the pickled red onions to cool to room temperature, then refrigerate.
Tips and Variations
- Let them sit for a day or two before eating . I know it’s hard to wait, but trust me, it’s worth it! After a little time in the fridge, the flavours really meld.
- Use a mandoline . If you have one, use a mandoline slicer to slice your onions evenly and quickly.
- Add some spices or adjust the seasonings . You can use a wide variety of seasonings in this recipe. Try adding mustard seeds, fennel seeds, peppercorns, more sugar, red pepper flakes, or a pickling spice blend.
- Make them spicy . For spicy quick pickled red onions, add a sliced jalapeño (with the seeds) or another hot pepper. Pickled jalapeños are fantastic on tacos!
- Try another veggie . You can use this brine to pickle any vegetable, or you can replace half the onions with a different veggie. Green beans, cauliflower, and carrots are all great options for pickling.
- Add fresh herbs . Tuck sprigs of fresh cilantro, parsley, or dill in with the onions to infuse them with flavour.
My Favourite Ways to Use Quick Pickled Red Onions
- Burgers . Try them on quinoa burgers or grillable veggie burgers .
- Sandwiches . Like this chopped cheese sandwich !
- Tacos . I love pickled red onions on BBQ chickpea tacos .
- Tex-Mex dishes . They’ll add some tangy flavour to these vegan burrito bowls and vegan enchiladas .
- Salads . Diced pickled onions perk up this loaded potato salad .
How to Store
Store quick pickled red onions in an airtight jar in the refrigerator. They will last for up to 2 weeks, and the flavour will continue to develop over time.
More Recipes For Onion Lovers
- How to Caramelize Onions
- Pear Brie & Caramelised Onions Quesadillas
- Maple Roasted Brussels Sprouts, Onions and Apples
- Goat Cheese Pizza with Caramelised Onions and Apples
Ingredients
- 2 regular sized red onions
- 1 cup apple cider vinegar
- 1 cup filtered water
- 2 teaspoons sea salt
- 1 tablespoon coconut/cane/brown sugar
- lime slices
- 1 teaspoon peppercorns , crack slightly if you want to release more flavour
Instructions
- In a pot, add the vinegar, water, sea salt, sugar and peppercorns. If using any other additional seasonings, add them now too. Stir together. Bring to a boil for 2 minutes.
- Add in the onions, and allow to boil for 1 minute with the onions.
- Remove from heat, let cool for 1 minute, then pour into a mason jar large enough to hold everything but that allowed the onions to be completely covered in the vinegar mixture. Add in the lime slices and swirl together to mix everything together.
- Allow the mixture to cool completely to room temperature. You can serve immediately once cooled, but if you let it sit and continue to pickle, the flavours meld incredibly. I tried mine three days later and they were perfect. A week is even better. They will last several weeks in your fridge in a mason jar that has the cover tightly screwed on.
- Enjoy!
Notes
- You can use a wide variety of seasonings in this recipe. You could add mustard seeds, fennel seeds, more sugar, jalapeños, anything. It’s really up to you.
- You can use the basic recipe and replace it with your vegetable of choice to pickle any vegetable you want. If pickling peppers, PLEASE use gloves and try not to inhale the fumes of the boiling peppers.
- To store : Store quick pickled red onions in an airtight jar in the refrigerator. They will last for up to 2 weeks, and the flavour will continue to develop over time.
Quick Pickled Red Onions
Ingredients
- 2 regular sized red onions
- 1 cup apple cider vinegar
- 1 cup filtered water
- 2 teaspoons sea salt
- 1 tablespoon coconut/cane/brown sugar
- lime slices
- 1 teaspoon peppercorns crack slightly if you want to release more flavour
Instructions
- In a pot, add the vinegar, water, sea salt, sugar and peppercorns. If using any other additional seasonings, add them now too. Stir together. Bring to a boil for 2 minutes.
- Add in the onions, and allow to boil for 1 minute with the onions.
- Remove from heat, let cool for 1 minute, then pour into a mason jar large enough to hold everything but that allowed the onions to be completely covered in the vinegar mixture. Add in the lime slices and swirl together to mix everything together.
- Allow the mixture to cool completely to room temperature. You can serve immediately once cooled, but if you let it sit and continue to pickle, the flavours meld incredibly. I tried mine three days later and they were perfect. A week is even better. They will last several weeks in your fridge in a mason jar that has the cover tightly screwed on.
- Enjoy!
Video
Notes
- You can use a wide variety of seasonings in this recipe. You could add mustard seeds, fennel seeds, more sugar, jalapeños, anything. It’s really up to you.
- You can use the basic recipe and replace it with your vegetable of choice to pickle any vegetable you want. If pickling peppers, PLEASE use gloves and try not to inhale the fumes of the boiling peppers.
- To store : Store quick pickled red onions in an airtight jar in the refrigerator. They will last for up to 2 weeks, and the flavour will continue to develop over time.
Nutrition
Quick Pickled Red Onions https://jessicainthekitchen.com/quick-pickled-onions-how-to-pickle-any-vegetable/ June 14, 2024
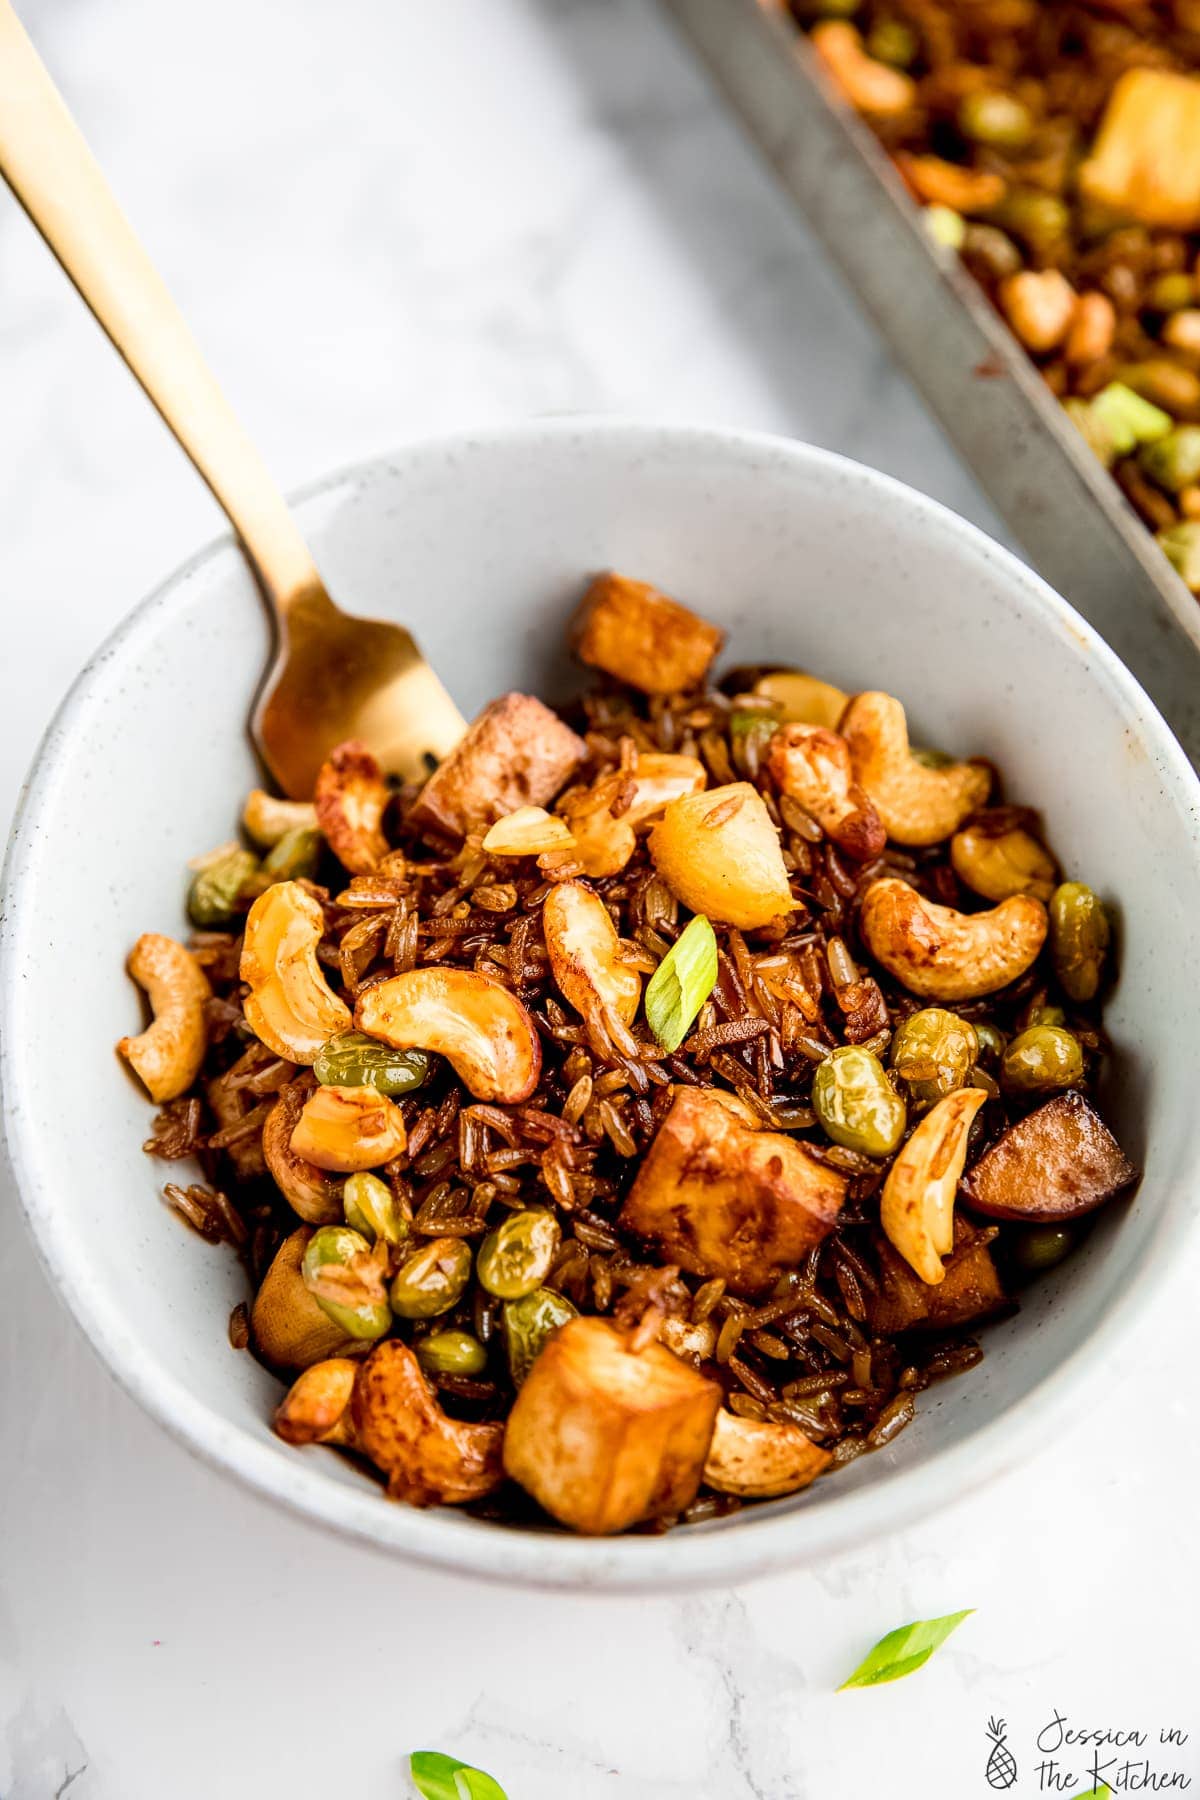
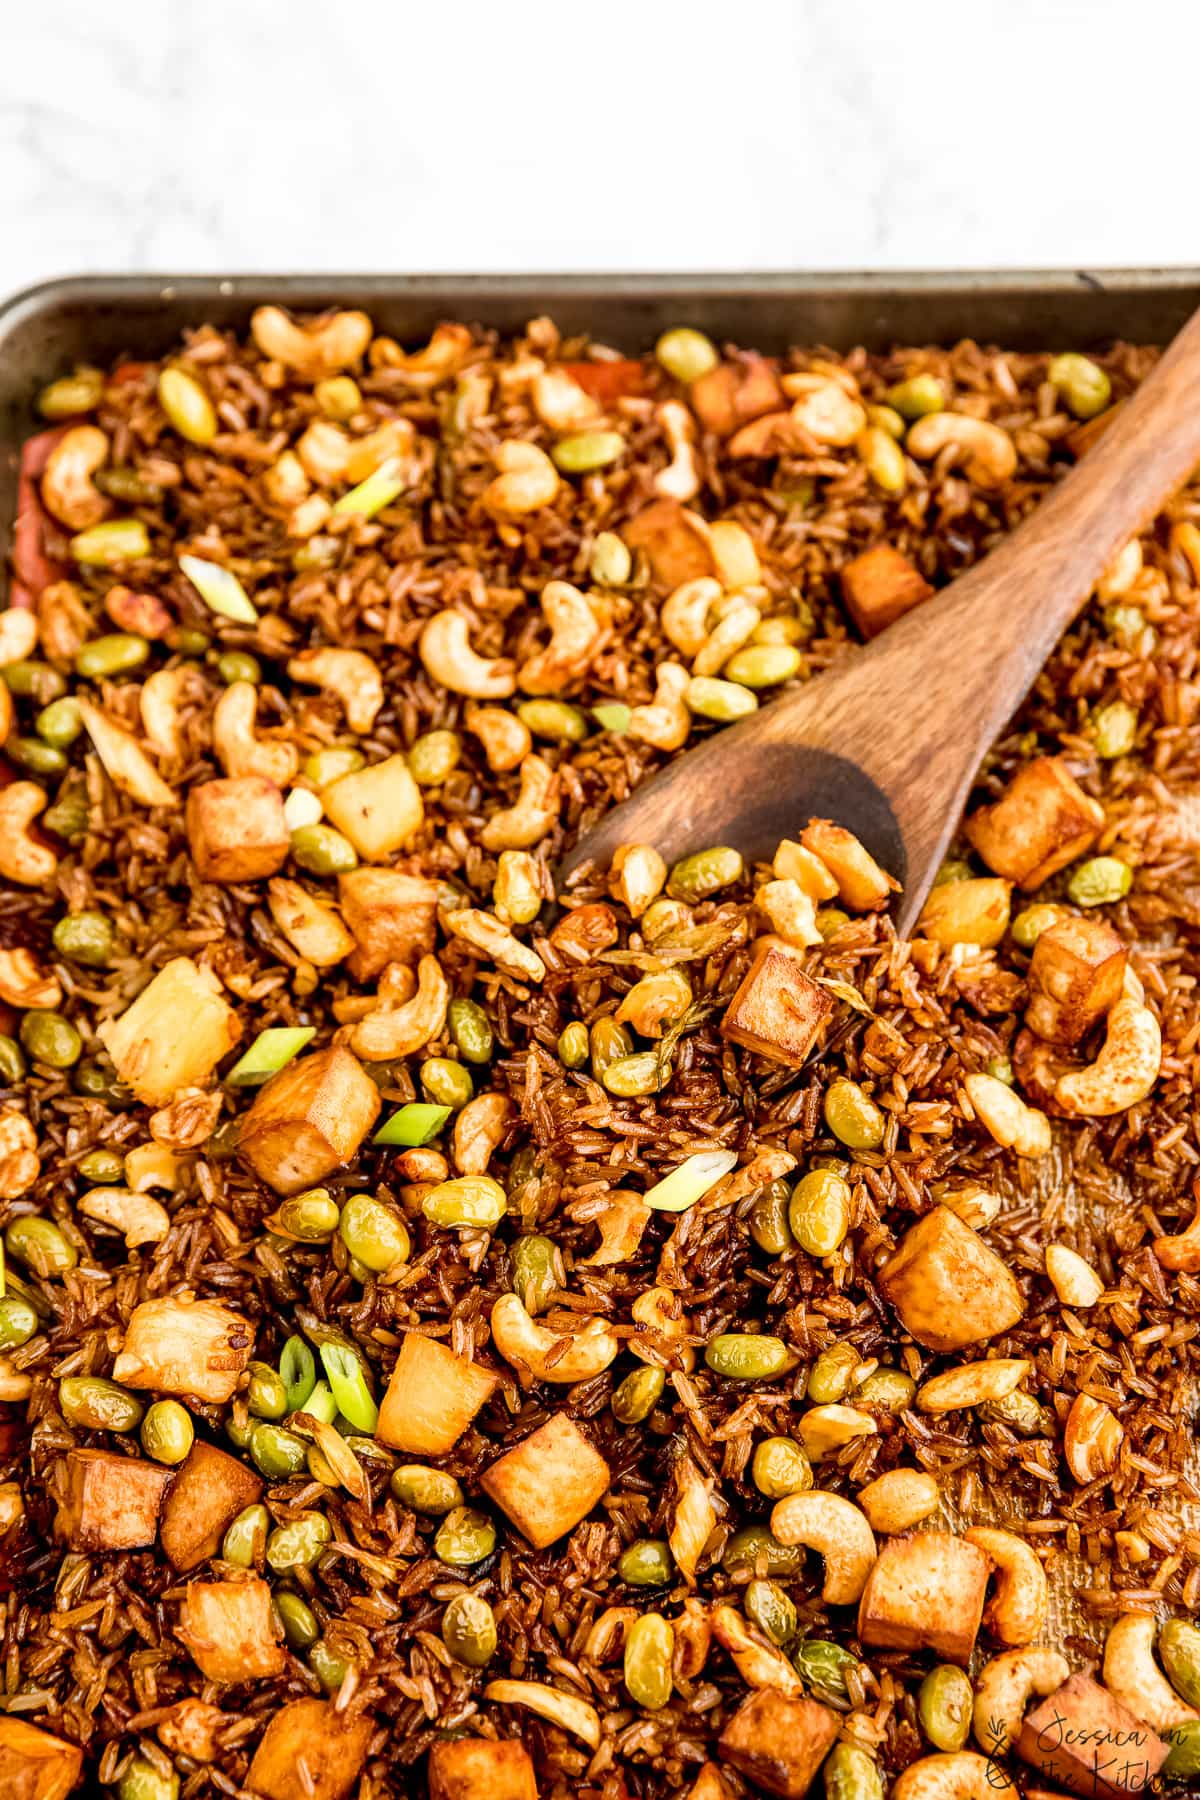
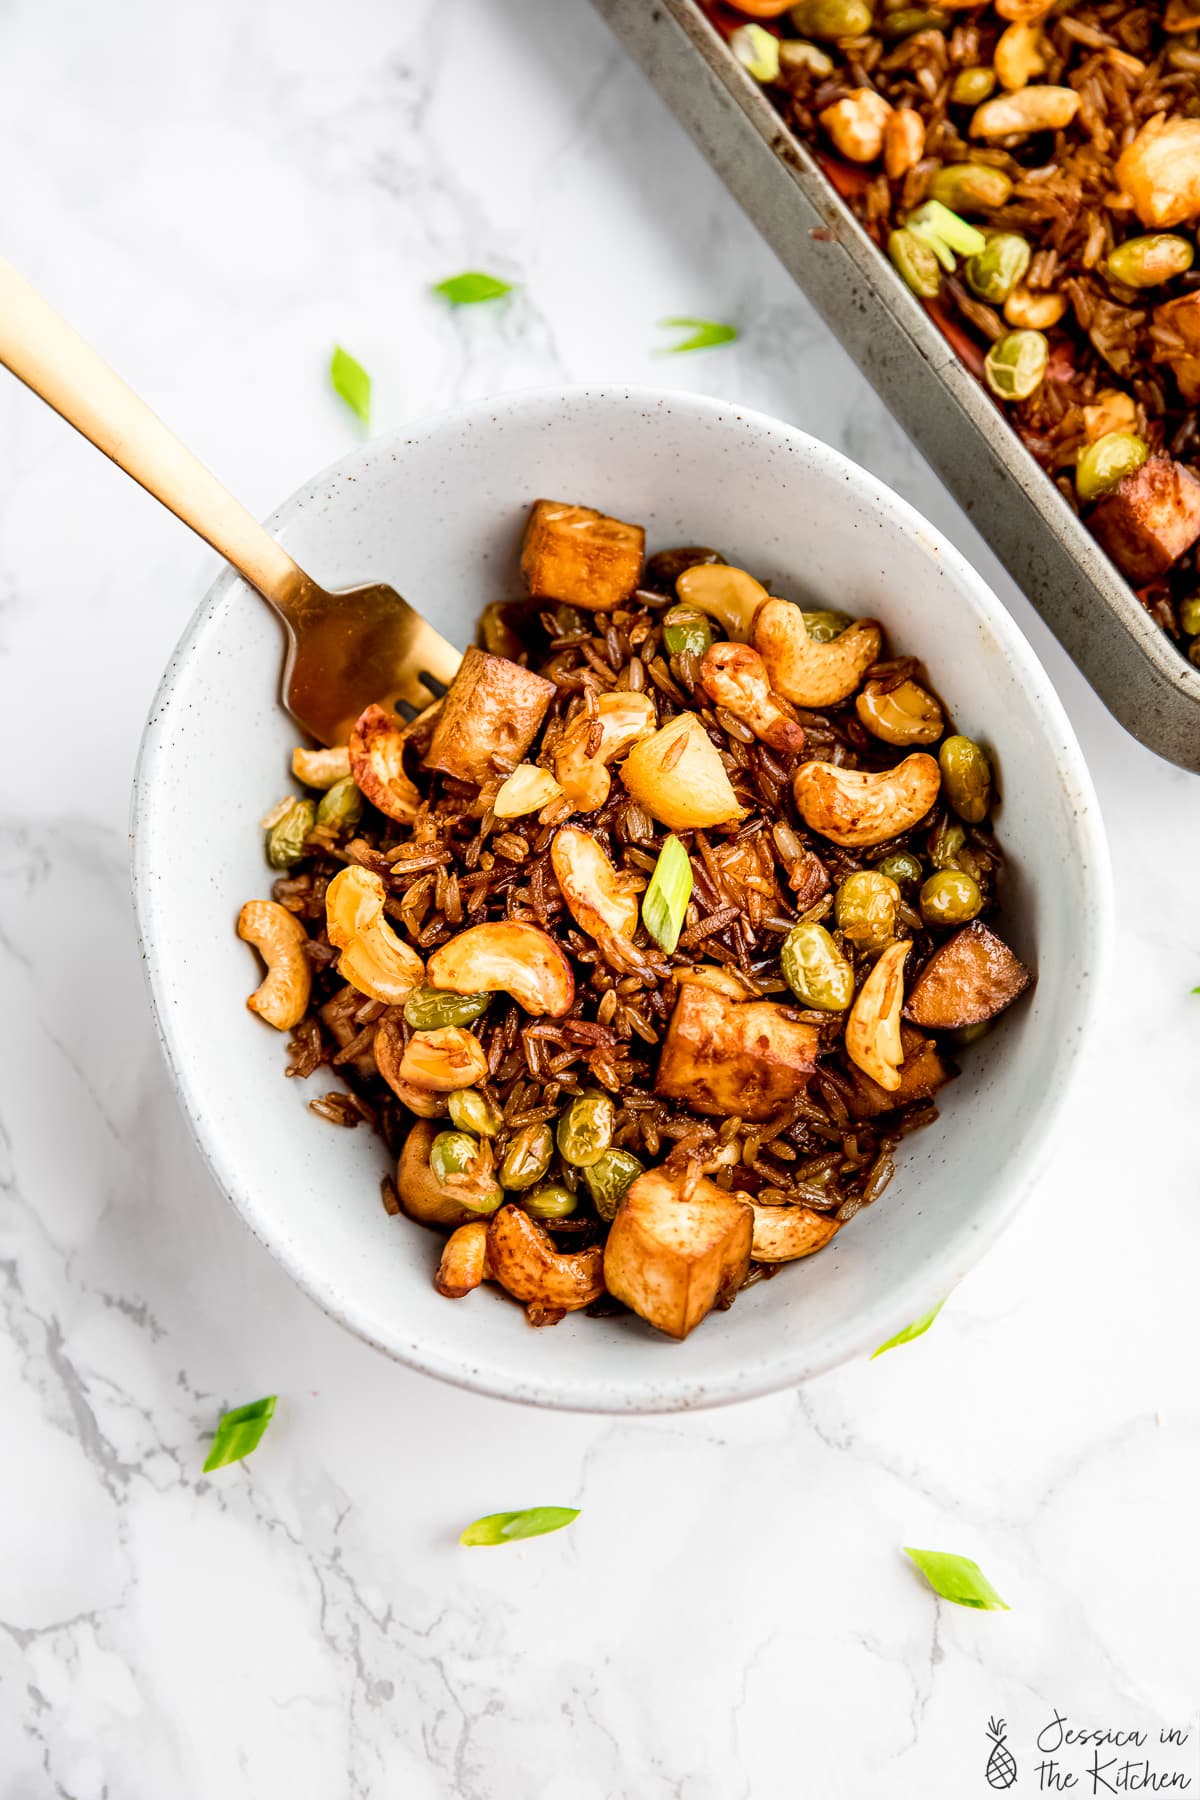
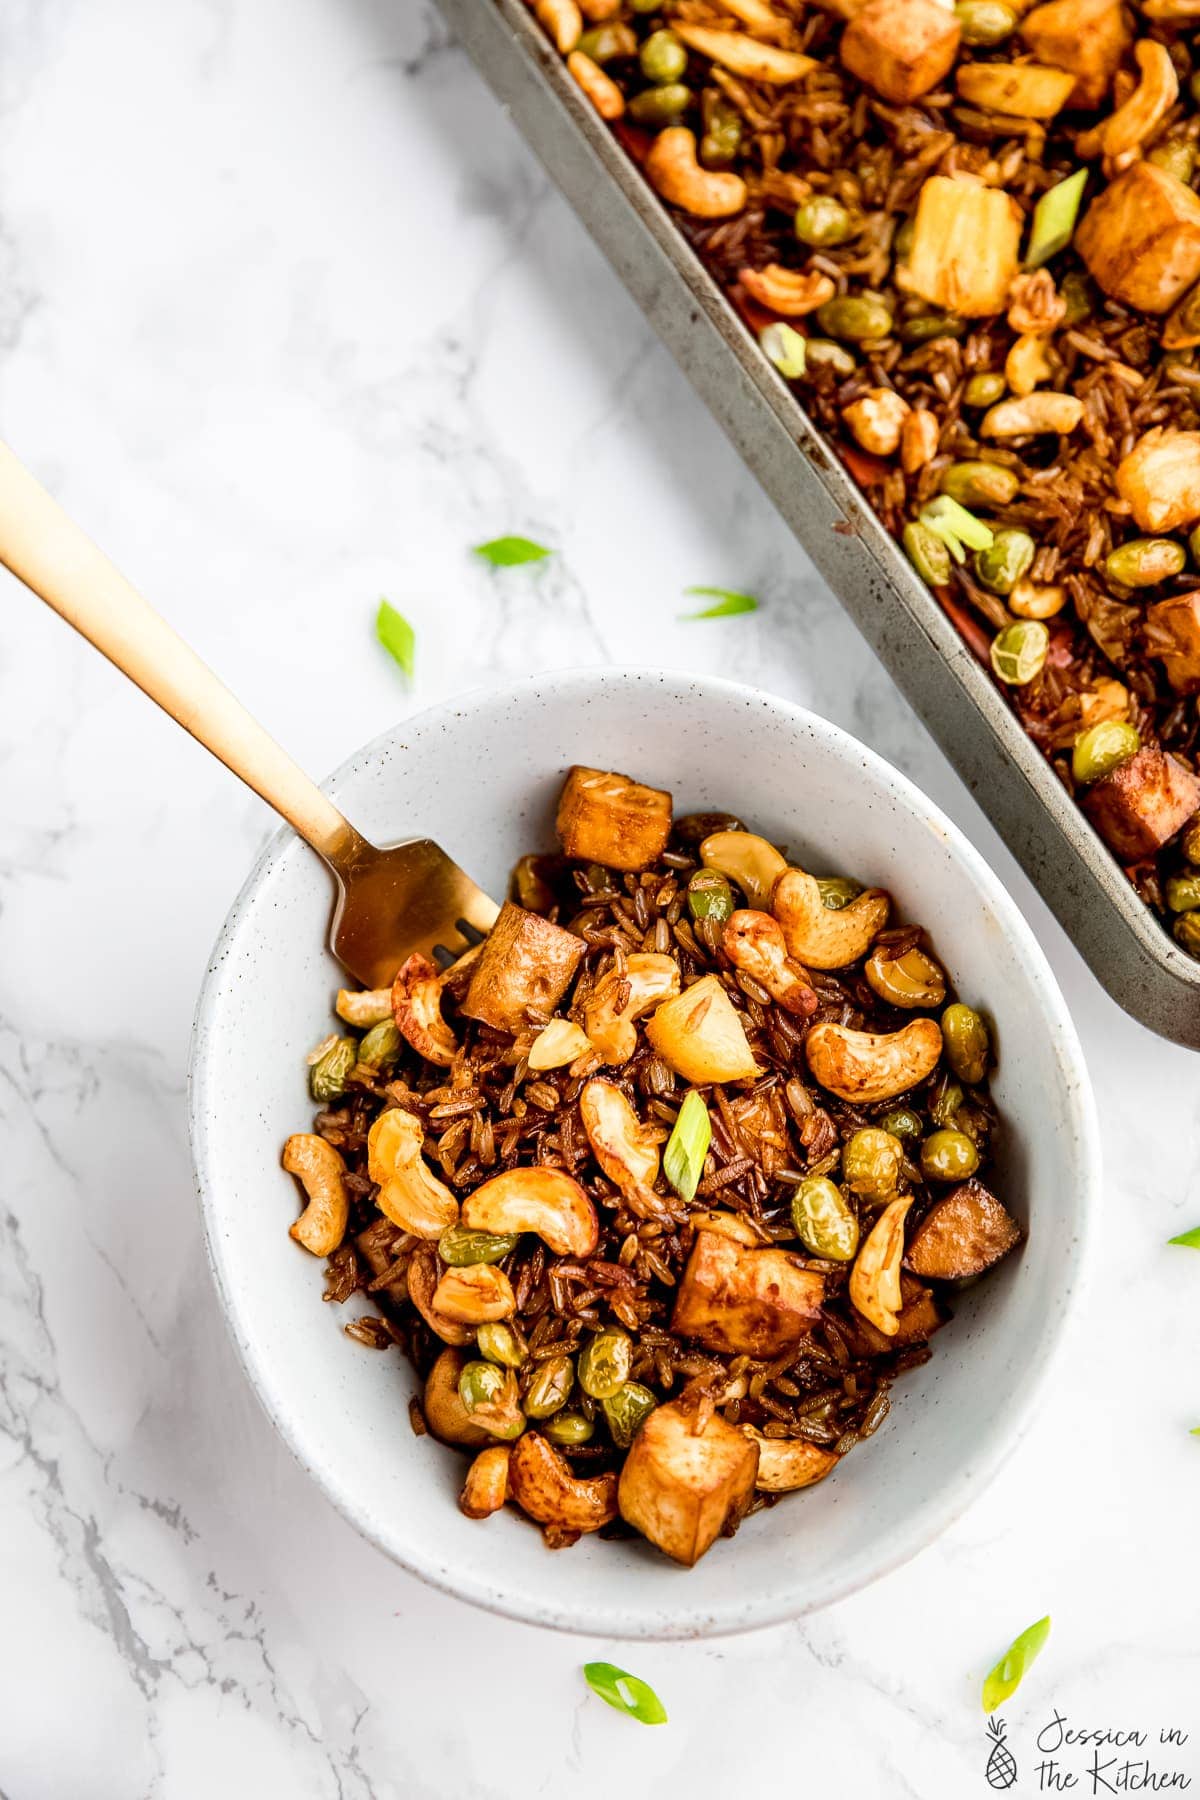
This is the best vegan fried rice recipe you’ll ever make, and it’s hiding a secret—it’s not fried at all! Baking it on a sheet pan gives it a fabulously chewy, crispy texture.
This recipe came to me from a now-retired food blogger friend and it’s become one of my favourite easy weeknight dinners. Sheet pan fried rice really is the answer to your prayers. It’s all mixed on the sheet pan, the cleanup is a breeze, and the ingredients are flexible.
(For another non-traditional take on vegan fried rice, try my cauliflower fried rice !)
Why You’ll Love This Sheet Pan Vegan Fried Rice Recipe
- No-fail, PERFECT texture . You know how sometimes you make fried rice at home and it ends up oily and soggy? That doesn’t happen when you bake fried rice in the oven! It turns out absolutely divine, with crispy edges, nice browning, and a chewy texture.
- Quick and easy . Although this rice does take some time to bake—you have to cook it at a low-ish temperature to achieve that perfect texture—it only requires 10 minutes of prep time, which is just a matter of tossing everything together.
- Family-friendly . Kids and adults will both love this one—and so will family members who usually turn up their nose at vegan food! This vegan fried rice is better than takeout!
Notes on Ingredients
Scroll down to the recipe card to find the ingredient quantities and recipe instructions.
- Leftover brown rice – Using leftover rice is important; it’s drier so it soaks up more of the sauce without getting soggy. I recommend making a dish served over brown rice the day before (like this coconut chickpea curry ) and setting aside what you need for this vegan fried rice recipe.
- Green onions – These also get a little crispy in the oven.
- Pineapple chunks – Because pineapple fried rice is the best fried rice! You can use fresh, canned, or frozen here.
- Fresh or frozen edamame – Or use peas, if you prefer them.
- Braised or marinated tofu – This adds protein to make the fried rice a meal. I buy store-bought marinated tofu when I’m in a time-crunch, or I use this marinated tofu recipe .
- Raw cashew pieces – These add a nice crunch and nutty flavour.
- Avocado oil – Or any other cooking oil you have on hand.
- Tamari or soy sauce – Liquid aminos are another option.
- Sriracha – You can leave this out for picky eaters, or add more for spicy sheet pan fried rice.

How to Make Vegan Fried Rice on a Sheet Pan
- Combine the ingredients . Toss together the rice, green onions, pineapple, edamame, tofu, and cashews on a sheet pan.
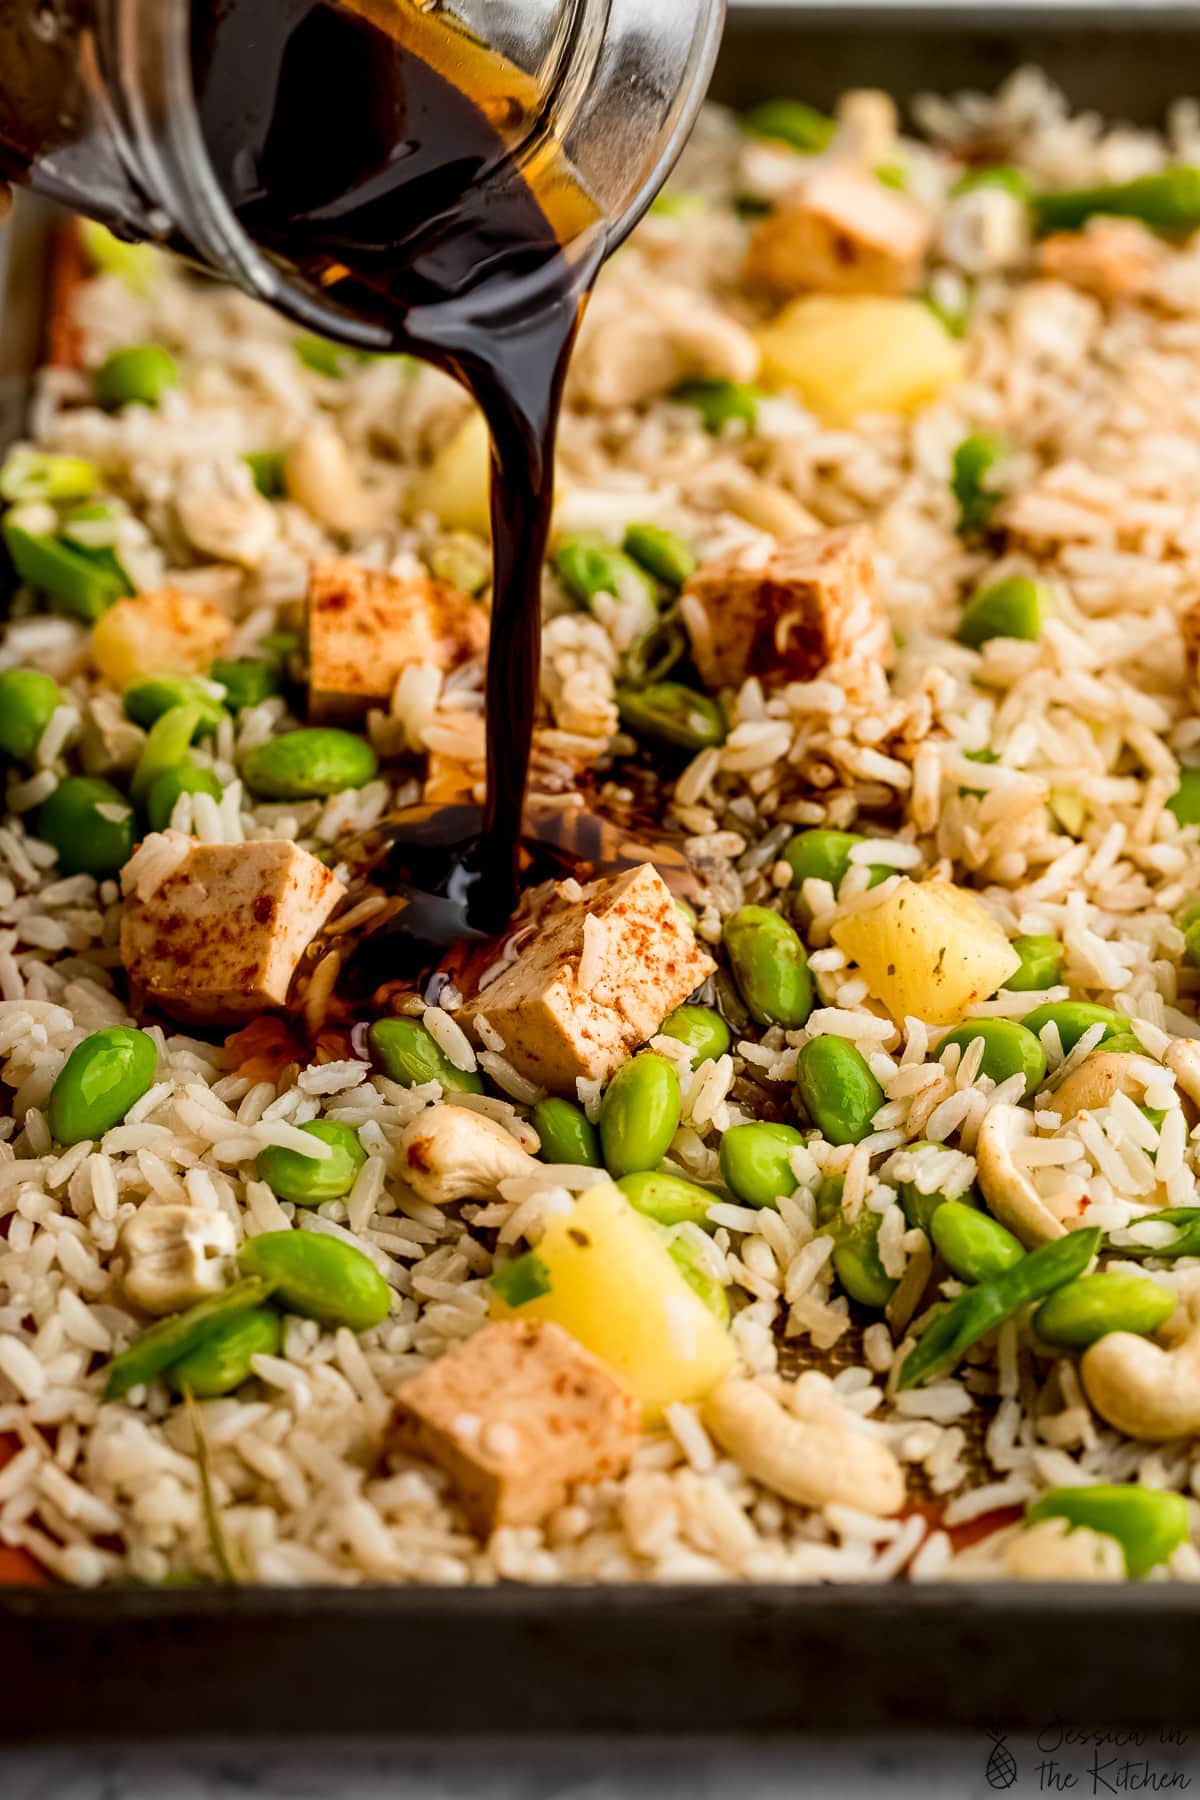
- Make the sauce . Whisk together the oil, soy sauce, and sriracha in a small bowl; pour this over the vegan fried rice ingredients and toss to coat.
- Bake . Place the pan in a 325ºF oven and bake for 45-60 minutes, until the rice is mostly dry and beginning to get crispy near the edges of the pan.
Tips for Success
- Use day-old rice (really) . I know it sounds fussy, but whether you’re making vegan fried rice on the stovetop or in the oven, you really, truly need leftover rice to nail that perfect texture.
- Make sure everything is evenly coated . Because the oil is in the sauce, you want to make sure all the rice is well-coated because the sauce is what will help the rice get a little bit crisp in the oven.
- Stir every 20 minutes . This helps everything cook evenly and keeps the edges from getting overly crispy.
Variations
- Use coconut oil . I’ve made this with melted unrefined (virgin) coconut oil instead of avocado oil and I like the little hint of coconut flavour it adds to the vegan fried rice. Give it a try!
- Swap out the protein . Marinated tempeh can be used instead of the tofu, or double the edamame. Although I haven’t tried it, I think vegan chicken would be fantastic—cut it into cubes and add them at the halfway point to keep them from getting too dry.
- Try other vegetables . The world is your oyster! You can use a frozen peas-and-carrots mix to make things easy, add broccoli, diced red peppers—this recipe is super versatile.
- Use a different rice . You don’t need to stick with brown rice. Basmati, jasmine, or even long-grain white rice will also work.
What to Serve With Vegan Fried Rice
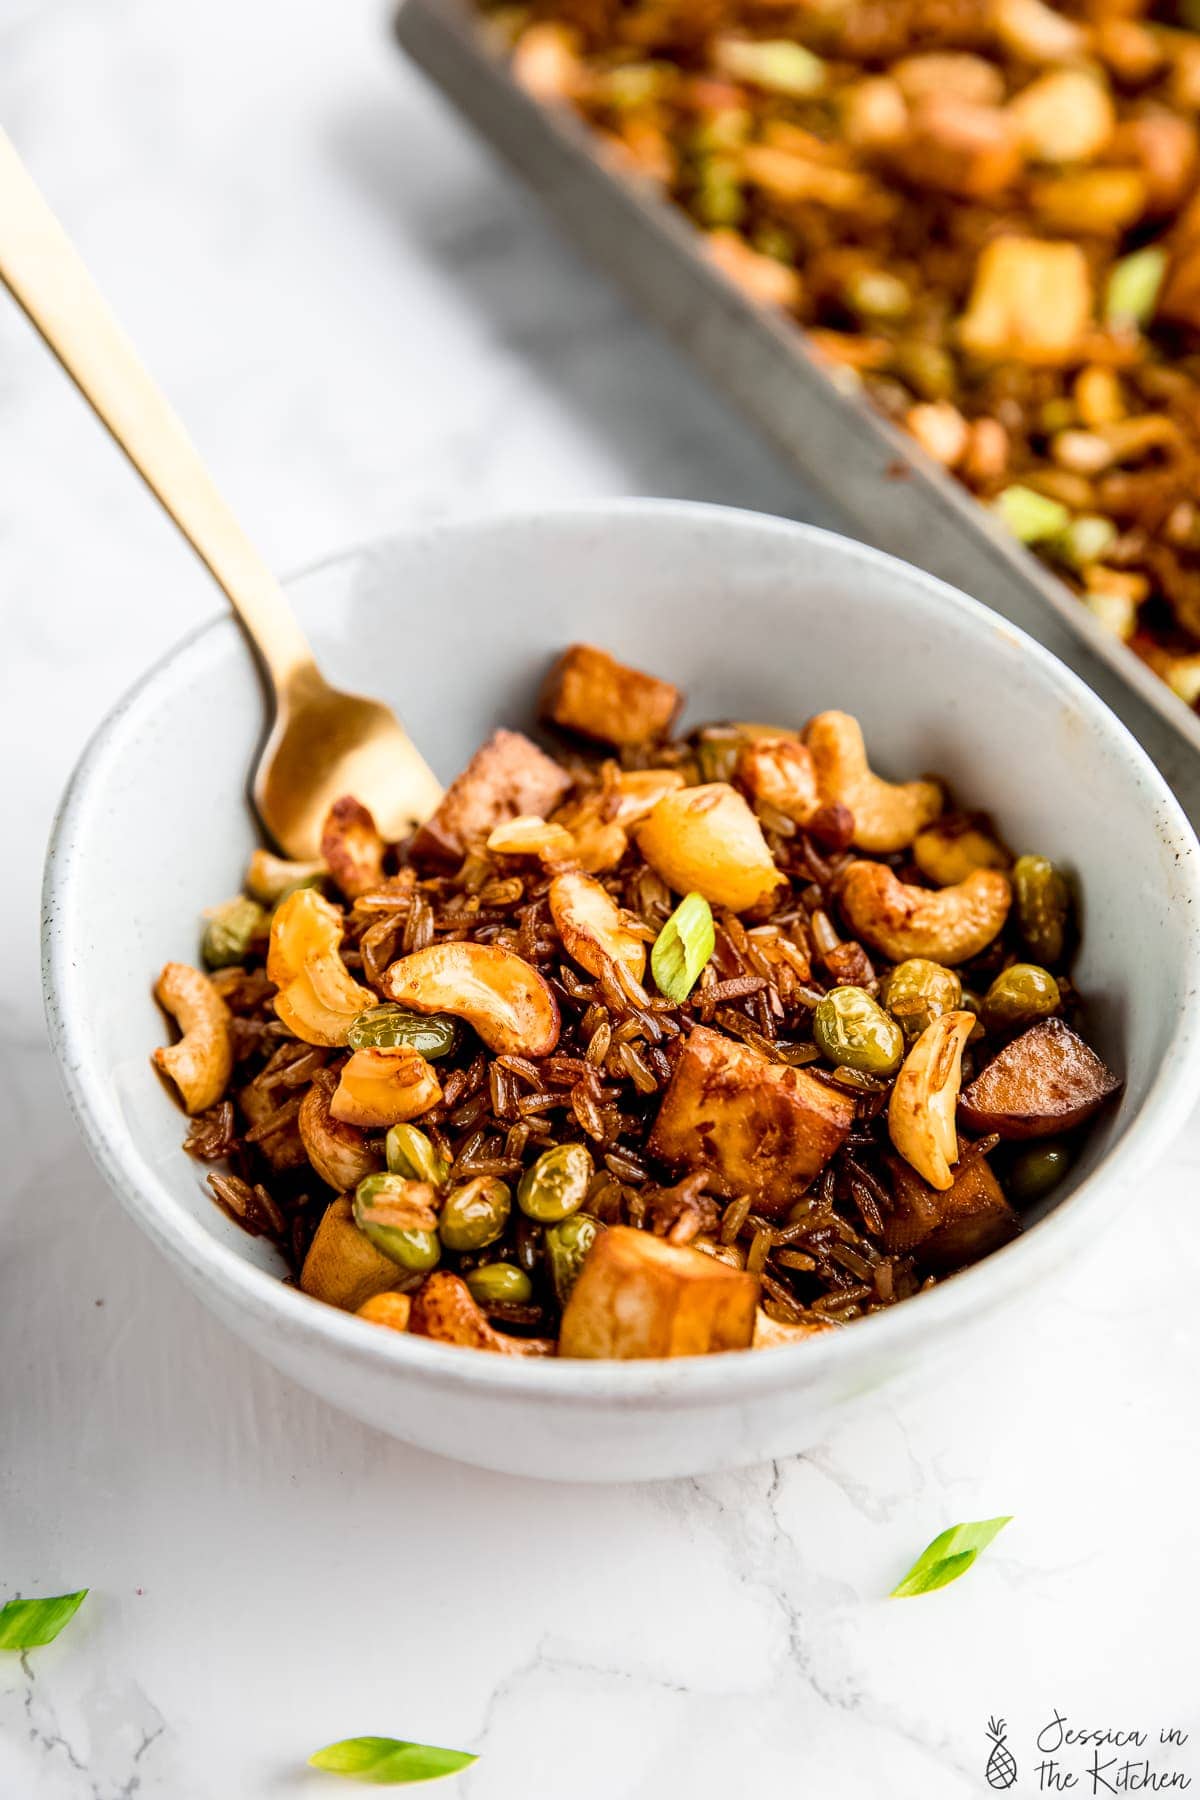
Because this recipe has grains, vegetables, and a protein, it really is a meal on its own. But if you want to stretch it out further, try pairing it with another Asian-inspired dish like sticky sesame shiitake mushrooms . An appetizer, like vegan potstickers or fresh spring rolls with peanut ginger sauce , would also be fantastic.
How to Store Leftovers
Store leftover vegan fried rice in the refrigerator for 3 to 4 days, in an airtight container. Reheat it in a skillet over medium heat or in the microwave.
Can I Freeze This Recipe?
Yes, you can freeze vegan fried rice for up to 3 months. Store it flat in a freezer bag with the air pressed out, or in an airtight container. Thaw it in the refrigerator before reheating it according to the instructions above.
More Vegan Rice Recipes
- Dirty Rice Recipe
- Pineapple Fried Rice
- Broccoli Cheese Rice Casserole
- Vegan Arancini Fried Rice Balls (With Air Fryer Option)
- Vegan Puerto Rican Rice and Beans (Arroz con Gandules)
Ingredients
- 4 cups leftover brown rice
- 1 bunch green onions , sliced into 1-inch pieces
- 1 cup pineapple chunks , canned, fresh, or frozen
- 1 cup fresh or frozen edamame , thawed
- 8 ounces braised or marinated tofu , cubed
- 1/2 cup raw cashew pieces
- 3 tablespoons avocado oil , or any other cooking oil you have on hand
- 3 tablespoons tamari sauce , or soy sauce
- 1 tablespoon sriracha , optional–you can use more if you like too
Instructions
- Preheat oven to 325ºF.
- Combine the rice, green onions, pineapple, edamame, tofu, and cashews on a sheet pan. In a small bowl, whisk together the oil, soy sauce, and sriracha. Pour the oil mixture over the rice mixture and toss to coat.
- Bake the rice for 45-60 minutes, stirring about every 20 minutes, or until the rice is mostly dry and beginning to get crispy near the edges of the pan. Serve with additional soy sauce and sriracha, if desired.
