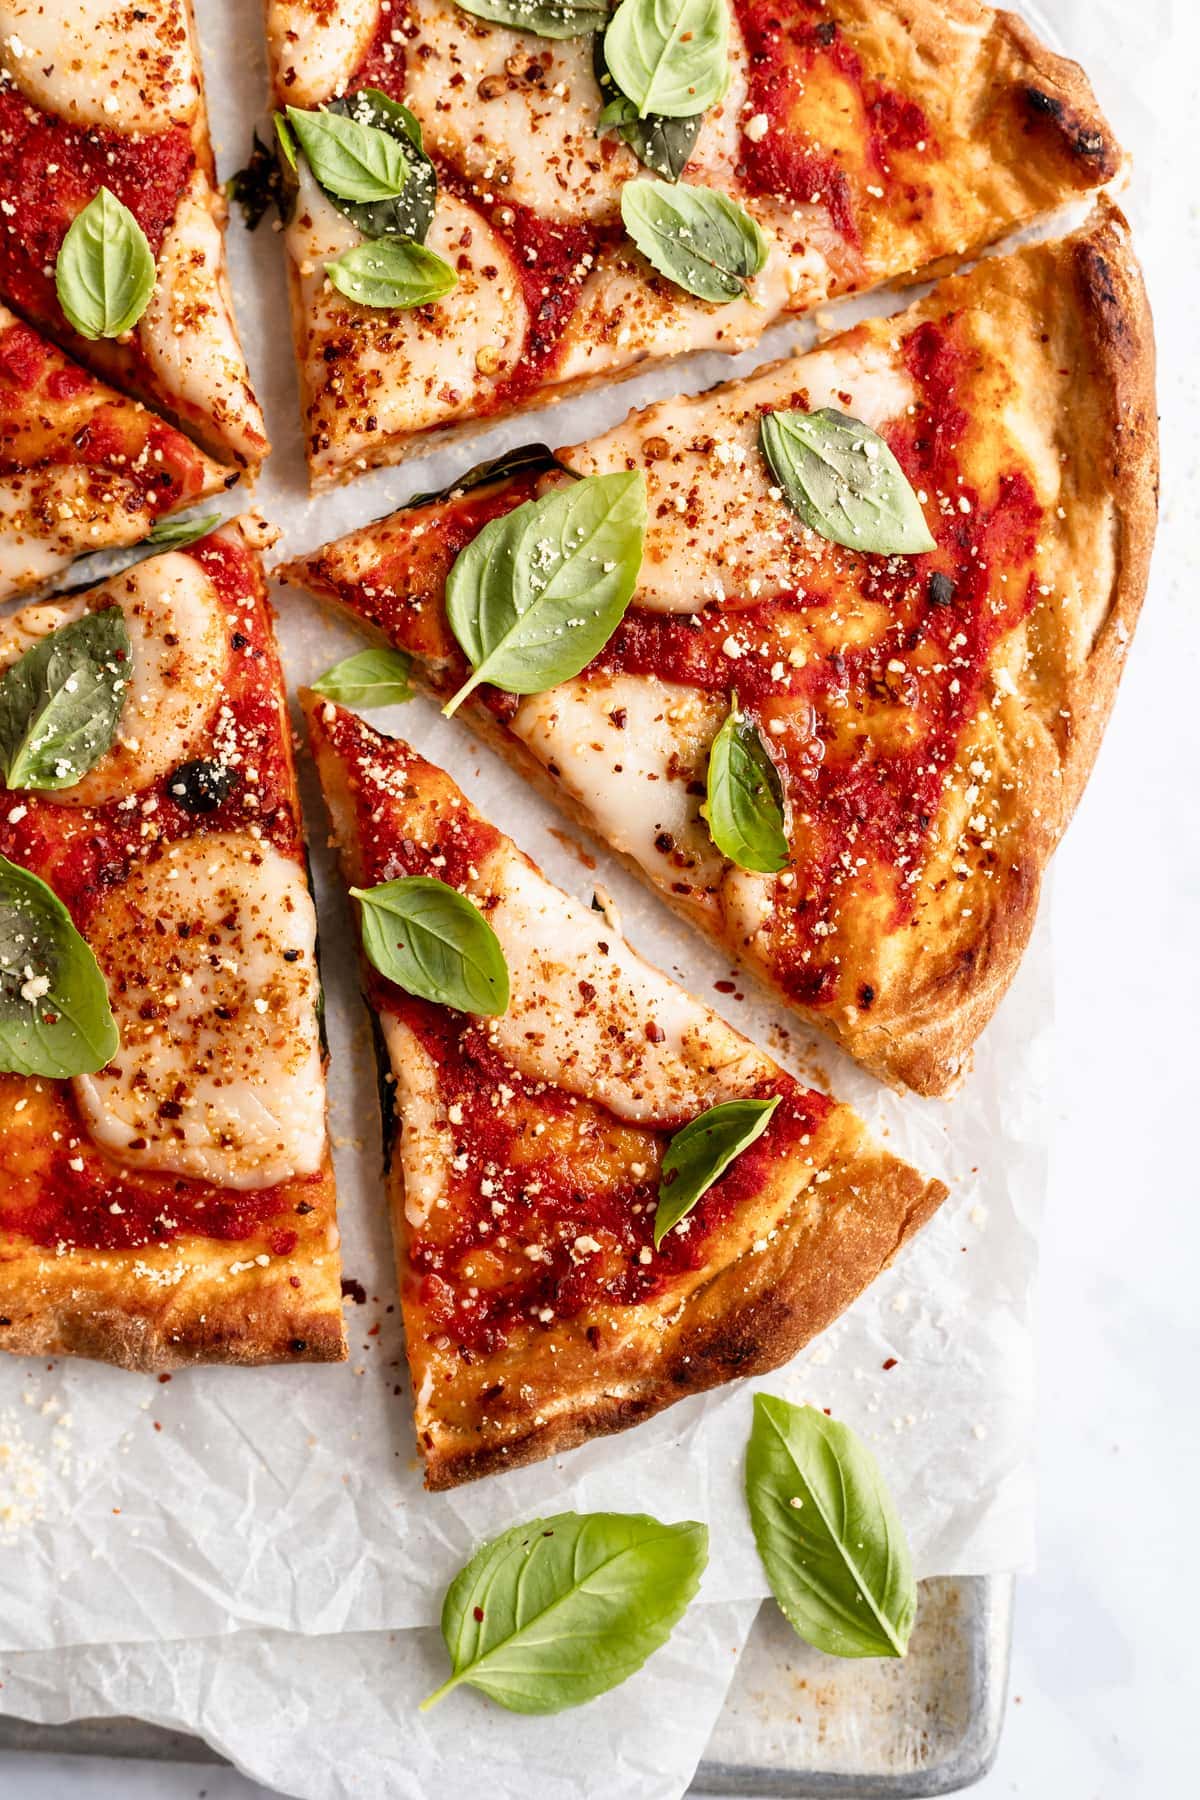
This pizza dough recipe is my absolute favourite for making homemade pizza! It’s vegan, it yields a thick, chewy crust, and it makes enough for two pizzas.
I’ve been making homemade vegan pizza for almost 10 years now with this crust. I know what you’re thinking: That’s a long time, Jessica! What makes it so great?! Well, to start, it’s thick and chewy, but also crispy in all the right places. It’s made with pantry staples and the method I use for it—well, it’s definitely the secret to homemade pizza success.
Why This Pizza Dough Recipe Is My Favourite
- The steam method . The steam method isn’t necessary, but it will make your pizza even better. Adding hot water to the oven while it preheats gives you the most beautiful bubbly, crispy crust. (I use this method for no-knead bread too.)
- A homemade dough for time-crunched cooks . This pizza dough recipe takes only takes 1 hour to rise, and I’ve even been known to let it rise for just 15 minutes when I’m in a hurry. It can also be made in advance and frozen for later.
- Easy to make . If the thought of working with yeast makes you nervous, fear not! Pizza crust is truly one of the easiest things you can make with yeast. Master this and soon you’ll be on your way to recipes like vegan cinnamon rolls .
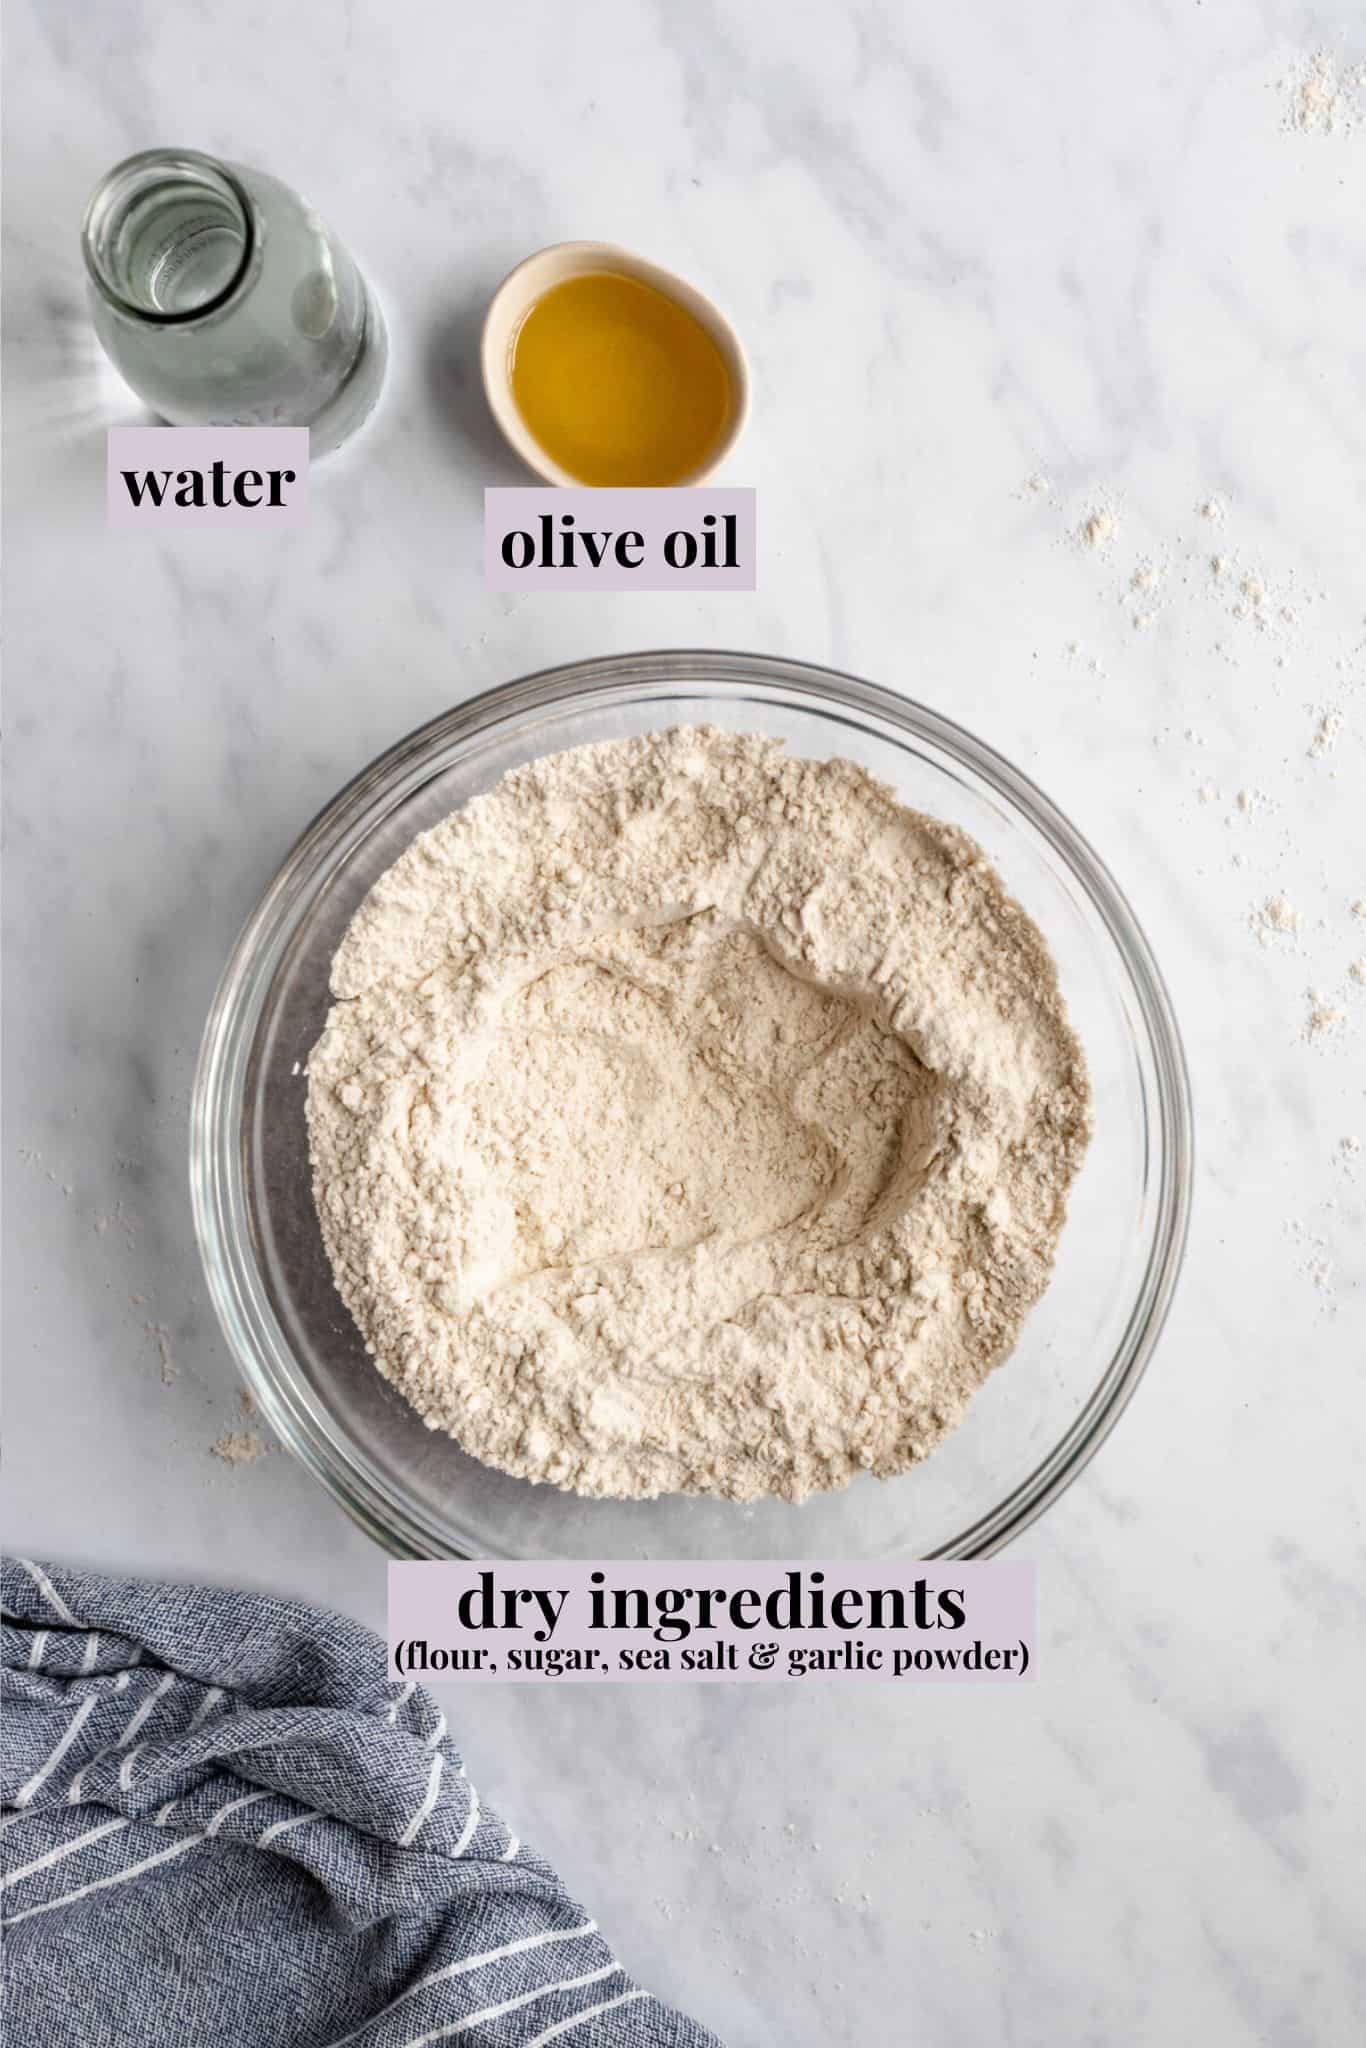
Notes on Ingredients
Here’s a quick look at what you’ll need along with some notes. Scroll down to the recipe card for a printable ingredients list.
- Instant yeast – I like to use SAF Instant Yeast.
- Warm water – Not hot; just warm to the touch. If it’s too hot, you’ll kill the yeast.
- All-purpose flour
- Sweetener – Granulated sugar, maple syrup or agave.
- Sea salt
- Garlic powder – You can buy “pizza flavorings” for homemade dough, but really, garlic powder is all you need!
- Olive oil
How to Make Homemade Pizza Dough
Alright are you ready to make pizza dough? Let’s do this!
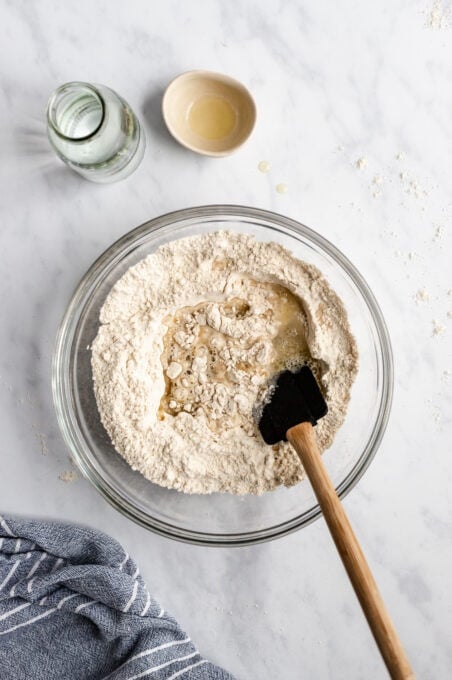
Add the wet ingredients to the dry ingredients.
- Combine the dry ingredients . Whisk them all in a large mixing bowl.
- Add the wet ingredients . Create a well in the dry ingredients and pour in the warm water and olive oil. Mix to incorporate.

Knead into a ball.
- Knead . Turn out the dough onto a clean floured surface and use floured hands to knead the dough for 8 to 10 minutes. If it remains sticky after 5 minutes or so, add more flour. (In humid climates, it’s common to have to add more flour.)
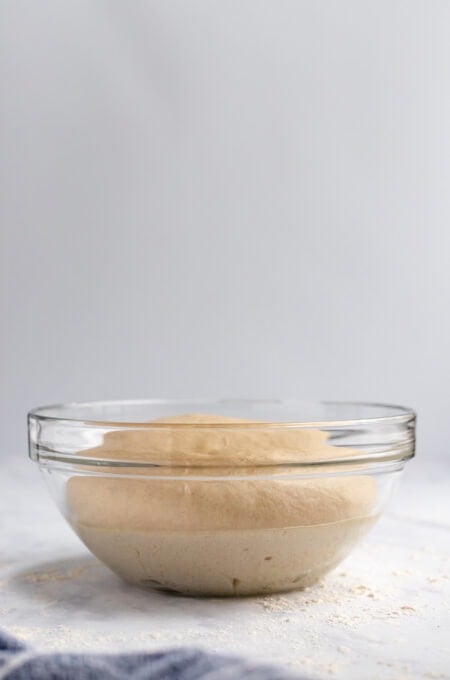
- Let the dough rise . Grease the ball of dough, return it to the bowl, and cover. Rest for at least 1 hour in a warm area free of drafts, until the dough doubles in size.
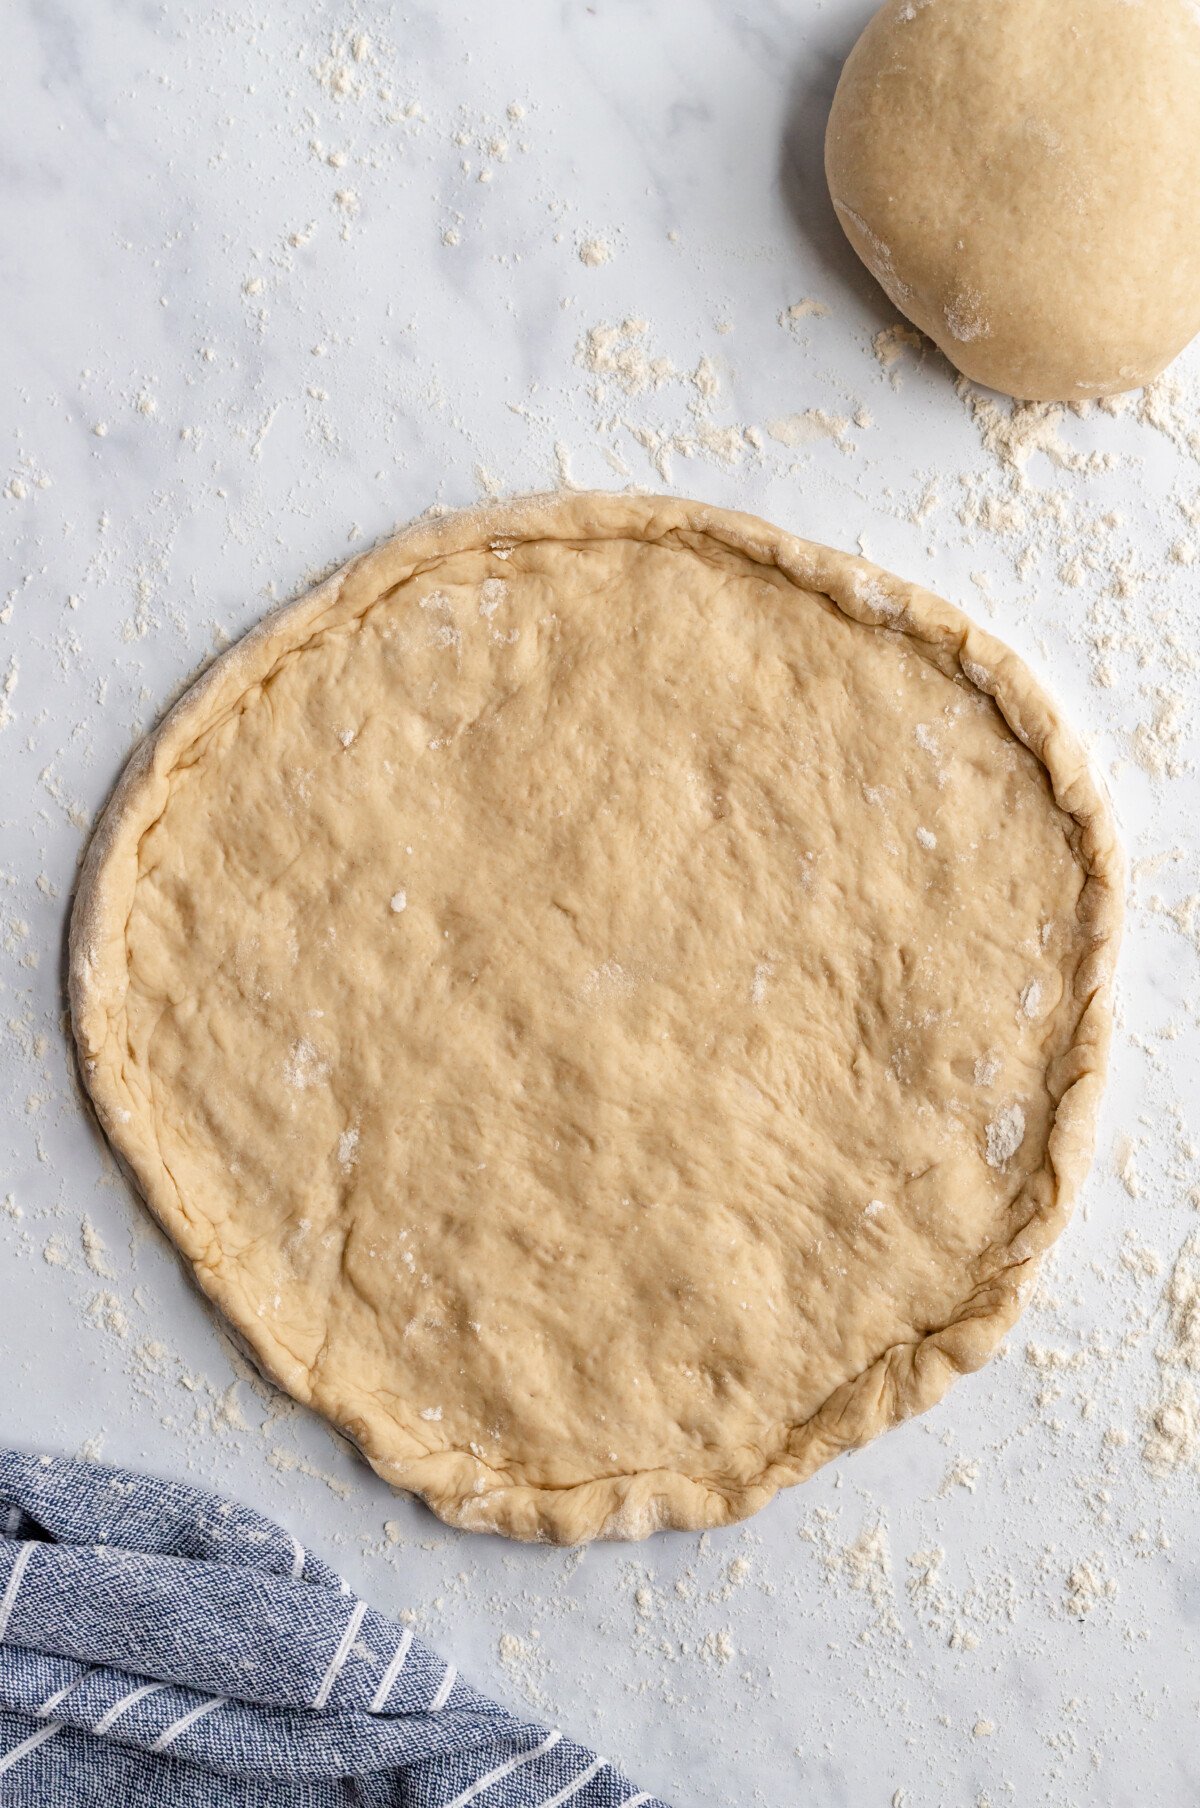
Punch down then roll out.
- Form the crust . Lightly punch down the dough to release the air and divide it into two balls. Roll them out into 10-inch circles.
- Use . Follow the instructions for your favourite pizza recipe for baking or use the steam method described in the recipe card below.
Tips for Making Homemade Pizza Crust
- Use fresh yeast . Ensure your yeast is fresh ! I always run a quick test before starting, so I don’t end up wasting time and ingredients.
- Set a timer to knead your dough . Consider it your arm workout of the day because it will improve the texture of your crust. You want it to look smooth and pretty like in the photos. At the same time, you don’t want to over-knead it because this can make your crust tough.
- Don’t be afraid to add more flour . The amount I list should work perfectly, but I live in a humid climate; if yours is more humid than mine or less humid, you may need a little bit more of less flour. Go by feel. You want your dough to feel supple and easy to use. It shouldn’t feel wet or bone dry.

My Favourite Ways to Use This Dough
I use this crust to make recipes like:
- Birria Pizza
- Vegan Spicy BBQ Chickpea Pizza
- Vegan Breakfast Pizza
- Grilled Peach, Basil and Vegan “Goat” Cheese Pizza
- Kale Pesto Pizza (Garlicky & Ridiculously Delicious)
Or top your pizza with marinara sauce , vegan cheese, and come up with your own topping ideas!
How to Store
Since this recipe makes two balls of dough, you can use both or store one for later.
- Refrigerator : Wrap the dough in plastic or place it in a freezer bag. Refrigerate it for up to 3 days.
- Freezer : Freeze this pizza dough recipe for up to 3 months in a freezer bag. Thaw it in the refrigerator before using, then set it out at room temperature before rolling it out.
More Homemade Basics
- How to Make Sprinkles
- Homemade Powdered Sugar
- Gluten-Free Sandwich Bread
- Homemade Oat Milk Creamer
- Vegan Feta Cheese (Tofu Feta Cheese)
Ingredients
- 2 1/4 teaspoons instant yeast , (about 1 packet)
- 1 cup warm water (between 100°F to 120°F) (not hot – warm to touch) , (240mL)
- 2 1/2 cups all purpose flour + extra ⅓ cup while kneading , (300g)
- 2 teaspoons granulated sugar, maple syrup or agave , (8.4g)
- 1 teaspoon sea salt , (5.5g)
- 1 teaspoon garlic powder , (omit if for sweet pizza) (3g)
- 2 tablespoons olive oil , (30mL)
Instructions
- In a bowl, the flour, sugar, yeast, garlic powder and salt. Whisk the ingredients together.
- Create a well in the centre of the flour. Slowly add the warm water and olive oil to the dry ingredients, and then mix together with a spatula until just incorporated. The dough should look shaggy.
- Flour a clean surface, and then pour/add the dough onto the surface. Flour your hands and fold the dough together. Knead the dough for about 8-10 minutes with your hands and knuckles. The dough will be sticky at first, but you add up to 1/3 cup flour while flouring and kneading to make it easier to manage. I usually add that entire extra ⅓ cup amount. You want the end dough ball to be smooth, with slight dimples.
- Lightly grease the ball of dough with some oil and place back into the bowl in a ball. Cover the bowl with a plastic wrap or a kitchen towel and let it sit for at least 1 hour on the counter in a warm area. If your kitchen is too cold, you can place it in your OFF oven with the pilot light on which will provide enough residual heat for it to rise. The dough should rise and double in size. You can allow your dough to rise up to three hours or up to overnight in the fridge.
- Punch down the dough and fold over. Divide the dough into two balls, they make two 10inch pizzas. You can make both or wrap one and place it in the fridge for up to 5 days or freeze it.
- On your floured surface, shape your pizza dough into a circular shape. I use a well floured rolling pin and roll it out in all directions to form a circle. It should measure about 10 inches diameter. Create a crust by lifting the edges to create a sort of heightened rim.
- Use it in your favourite pizza recipe, and enjoy!
Notes
Freezing and Thawing
Pizza Stone vs Baking Sheet
The Steam Method
What yeast to use?
This pizza dough recipe is my absolute favourite for making homemade pizza! It’s vegan, it yields a thick, chewy crust, and it makes enough for two pizzas.
I’ve been making homemade vegan pizza for almost 10 years now with this crust. I know what you’re thinking: That’s a long time, Jessica! What makes it so great?! Well, to start, it’s thick and chewy, but also crispy in all the right places. It’s made with pantry staples and the method I use for it—well, it’s definitely the secret to homemade pizza success.
Why This Pizza Dough Recipe Is My Favourite
- The steam method . The steam method isn’t necessary, but it will make your pizza even better. Adding hot water to the oven while it preheats gives you the most beautiful bubbly, crispy crust. (I use this method for no-knead bread too.)
- A homemade dough for time-crunched cooks . This pizza dough recipe takes only takes 1 hour to rise, and I’ve even been known to let it rise for just 15 minutes when I’m in a hurry. It can also be made in advance and frozen for later.
- Easy to make . If the thought of working with yeast makes you nervous, fear not! Pizza crust is truly one of the easiest things you can make with yeast. Master this and soon you’ll be on your way to recipes like vegan cinnamon rolls .
Notes on Ingredients
Here’s a quick look at what you’ll need along with some notes. Scroll down to the recipe card for a printable ingredients list.
- Instant yeast – I like to use SAF Instant Yeast.
- Warm water – Not hot; just warm to the touch. If it’s too hot, you’ll kill the yeast.
- All-purpose flour
- Sweetener – Granulated sugar, maple syrup or agave.
- Sea salt
- Garlic powder – You can buy “pizza flavorings” for homemade dough, but really, garlic powder is all you need!
- Olive oil
How to Make Homemade Pizza Dough
Alright are you ready to make pizza dough? Let’s do this!
Add the wet ingredients to the dry ingredients.
- Combine the dry ingredients . Whisk them all in a large mixing bowl.
- Add the wet ingredients . Create a well in the dry ingredients and pour in the warm water and olive oil. Mix to incorporate.
Knead into a ball.
- Knead . Turn out the dough onto a clean floured surface and use floured hands to knead the dough for 8 to 10 minutes. If it remains sticky after 5 minutes or so, add more flour. (In humid climates, it’s common to have to add more flour.)
- Let the dough rise . Grease the ball of dough, return it to the bowl, and cover. Rest for at least 1 hour in a warm area free of drafts, until the dough doubles in size.
Punch down then roll out.
- Form the crust . Lightly punch down the dough to release the air and divide it into two balls. Roll them out into 10-inch circles.
- Use . Follow the instructions for your favourite pizza recipe for baking or use the steam method described in the recipe card below.
Tips for Making Homemade Pizza Crust
- Use fresh yeast . Ensure your yeast is fresh ! I always run a quick test before starting, so I don’t end up wasting time and ingredients.
- Set a timer to knead your dough . Consider it your arm workout of the day because it will improve the texture of your crust. You want it to look smooth and pretty like in the photos. At the same time, you don’t want to over-knead it because this can make your crust tough.
- Don’t be afraid to add more flour . The amount I list should work perfectly, but I live in a humid climate; if yours is more humid than mine or less humid, you may need a little bit more of less flour. Go by feel. You want your dough to feel supple and easy to use. It shouldn’t feel wet or bone dry.
My Favourite Ways to Use This Dough
I use this crust to make recipes like:
- Birria Pizza
- Vegan Spicy BBQ Chickpea Pizza
- Vegan Breakfast Pizza
- Grilled Peach, Basil and Vegan “Goat” Cheese Pizza
- Kale Pesto Pizza (Garlicky & Ridiculously Delicious)
Or top your pizza with marinara sauce , vegan cheese, and come up with your own topping ideas!
How to Store
Since this recipe makes two balls of dough, you can use both or store one for later.
- Refrigerator : Wrap the dough in plastic or place it in a freezer bag. Refrigerate it for up to 3 days.
- Freezer : Freeze this pizza dough recipe for up to 3 months in a freezer bag. Thaw it in the refrigerator before using, then set it out at room temperature before rolling it out.
More Homemade Basics
- How to Make Sprinkles
- Homemade Powdered Sugar
- Gluten-Free Sandwich Bread
- Homemade Oat Milk Creamer
- Vegan Feta Cheese (Tofu Feta Cheese)
Ingredients
- 2 1/4 teaspoons instant yeast , (about 1 packet)
- 1 cup warm water (between 100°F to 120°F) (not hot – warm to touch) , (240mL)
- 2 1/2 cups all purpose flour + extra ⅓ cup while kneading , (300g)
- 2 teaspoons granulated sugar, maple syrup or agave , (8.4g)
- 1 teaspoon sea salt , (5.5g)
- 1 teaspoon garlic powder , (omit if for sweet pizza) (3g)
- 2 tablespoons olive oil , (30mL)
Instructions
- In a bowl, the flour, sugar, yeast, garlic powder and salt. Whisk the ingredients together.
- Create a well in the centre of the flour. Slowly add the warm water and olive oil to the dry ingredients, and then mix together with a spatula until just incorporated. The dough should look shaggy.
- Flour a clean surface, and then pour/add the dough onto the surface. Flour your hands and fold the dough together. Knead the dough for about 8-10 minutes with your hands and knuckles. The dough will be sticky at first, but you add up to 1/3 cup flour while flouring and kneading to make it easier to manage. I usually add that entire extra ⅓ cup amount. You want the end dough ball to be smooth, with slight dimples.
- Lightly grease the ball of dough with some oil and place back into the bowl in a ball. Cover the bowl with a plastic wrap or a kitchen towel and let it sit for at least 1 hour on the counter in a warm area. If your kitchen is too cold, you can place it in your OFF oven with the pilot light on which will provide enough residual heat for it to rise. The dough should rise and double in size. You can allow your dough to rise up to three hours or up to overnight in the fridge.
- Punch down the dough and fold over. Divide the dough into two balls, they make two 10inch pizzas. You can make both or wrap one and place it in the fridge for up to 5 days or freeze it.
- On your floured surface, shape your pizza dough into a circular shape. I use a well floured rolling pin and roll it out in all directions to form a circle. It should measure about 10 inches diameter. Create a crust by lifting the edges to create a sort of heightened rim.
- Use it in your favourite pizza recipe, and enjoy!
Notes
Freezing and Thawing
Pizza Stone vs Baking Sheet
The Steam Method
What yeast to use?

Pizza Dough Recipe
Ingredients
- 2 1/4 teaspoons instant yeast (about 1 packet)
- 1 cup warm water (between 100°F to 120°F) (not hot - warm to touch) (240mL)
- 2 1/2 cups all purpose flour + extra ⅓ cup while kneading (300g)
- 2 teaspoons granulated sugar, maple syrup or agave (8.4g)
- 1 teaspoon sea salt (5.5g)
- 1 teaspoon garlic powder (omit if for sweet pizza) (3g)
- 2 tablespoons olive oil (30mL)
Instructions
- In a bowl, the flour, sugar, yeast, garlic powder and salt. Whisk the ingredients together.
- Create a well in the centre of the flour. Slowly add the warm water and olive oil to the dry ingredients, and then mix together with a spatula until just incorporated. The dough should look shaggy.
- Flour a clean surface, and then pour/add the dough onto the surface. Flour your hands and fold the dough together. Knead the dough for about 8-10 minutes with your hands and knuckles. The dough will be sticky at first, but you add up to 1/3 cup flour while flouring and kneading to make it easier to manage. I usually add that entire extra ⅓ cup amount. You want the end dough ball to be smooth, with slight dimples.
- Lightly grease the ball of dough with some oil and place back into the bowl in a ball. Cover the bowl with a plastic wrap or a kitchen towel and let it sit for at least 1 hour on the counter in a warm area. If your kitchen is too cold, you can place it in your OFF oven with the pilot light on which will provide enough residual heat for it to rise. The dough should rise and double in size. You can allow your dough to rise up to three hours or up to overnight in the fridge.
- Punch down the dough and fold over. Divide the dough into two balls, they make two 10inch pizzas. You can make both or wrap one and place it in the fridge for up to 5 days or freeze it.
- On your floured surface, shape your pizza dough into a circular shape. I use a well floured rolling pin and roll it out in all directions to form a circle. It should measure about 10 inches diameter. Create a crust by lifting the edges to create a sort of heightened rim.
- Use it in your favourite pizza recipe, and enjoy!
Video
Notes
Freezing and Thawing
Pizza Stone vs Baking Sheet
The Steam Method
What yeast to use?
Nutrition
Pizza Dough Recipe https://jessicainthekitchen.com/pizza-dough-recipe-vegan/ January 20, 2025
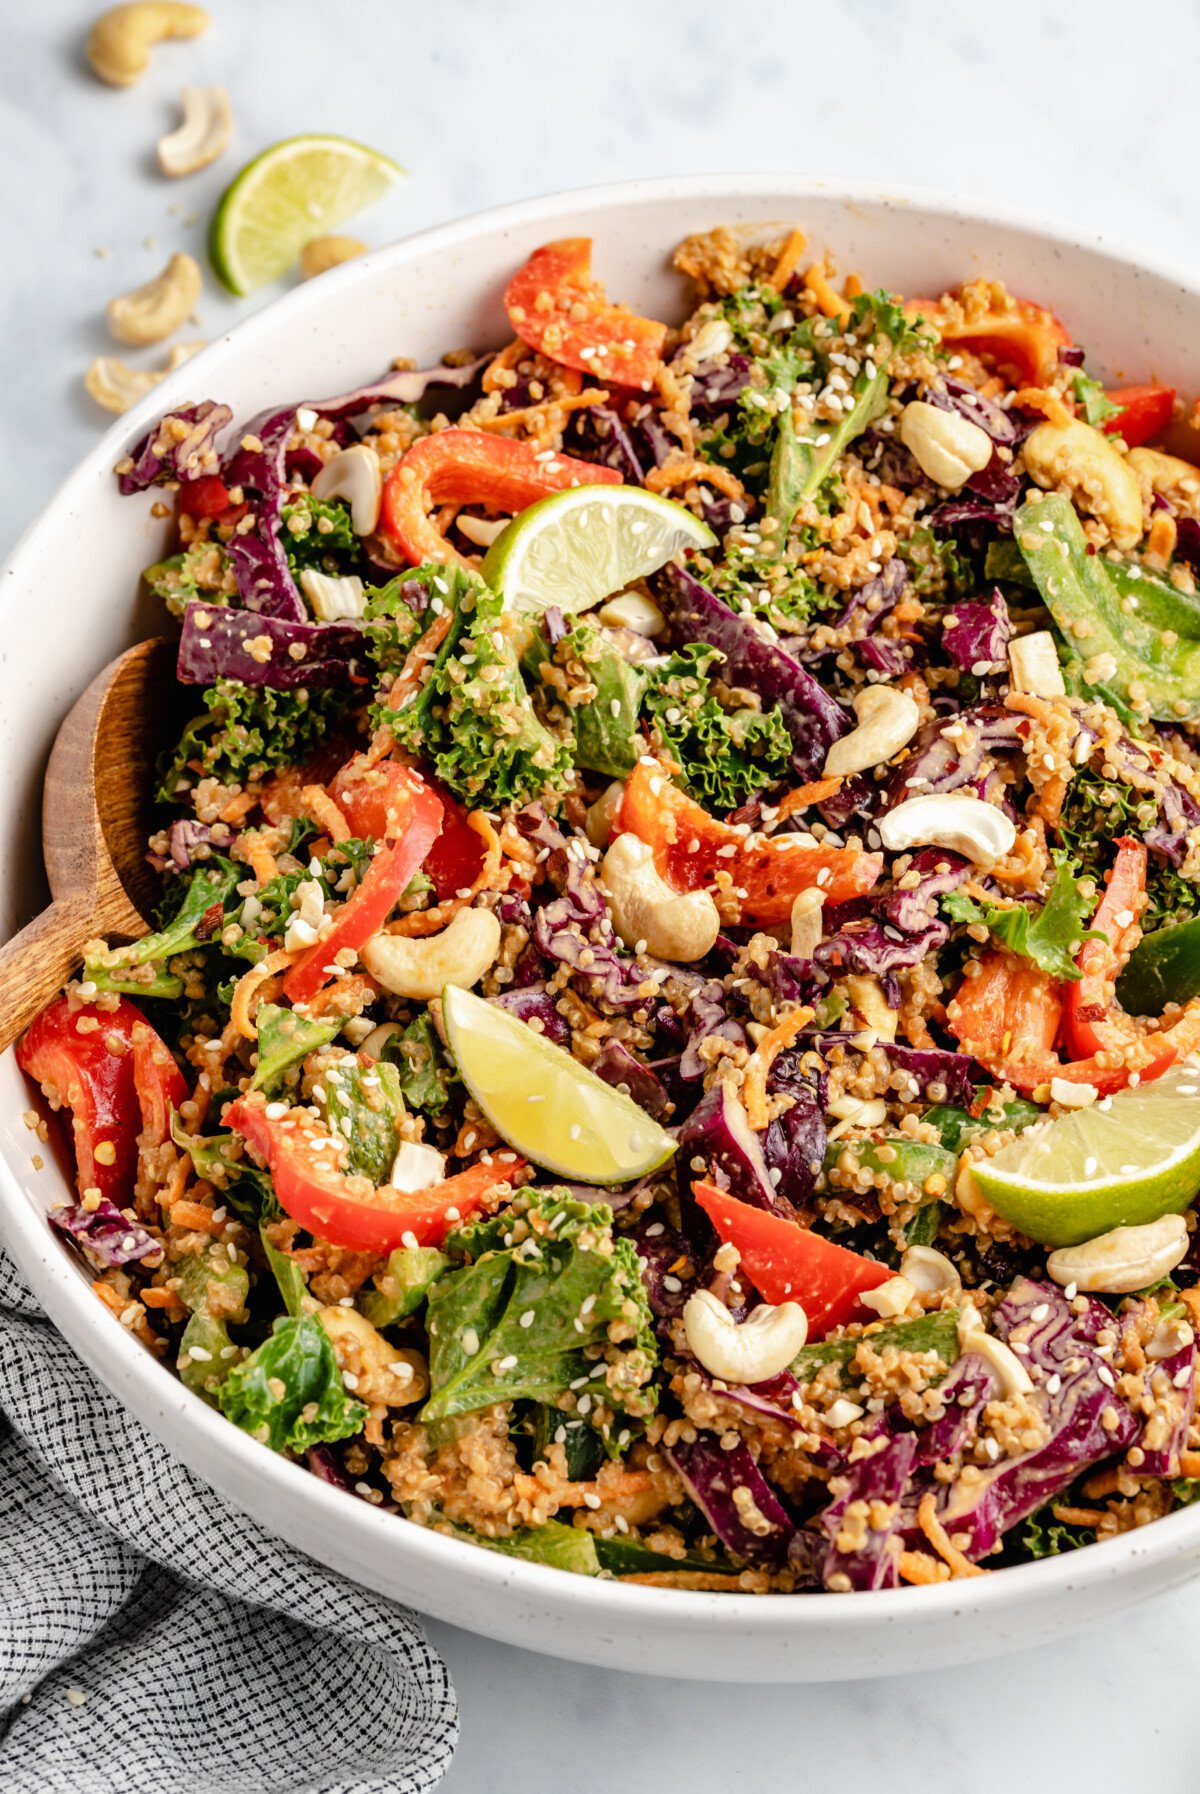
This Thai quinoa salad is a colourful and flavourful vegan meal that takes only 15 minutes to make! I love serving it as a light lunch or dinner — with Thai-inspired ingredients and a divine peanut ginger sauce, it’s always a hit.
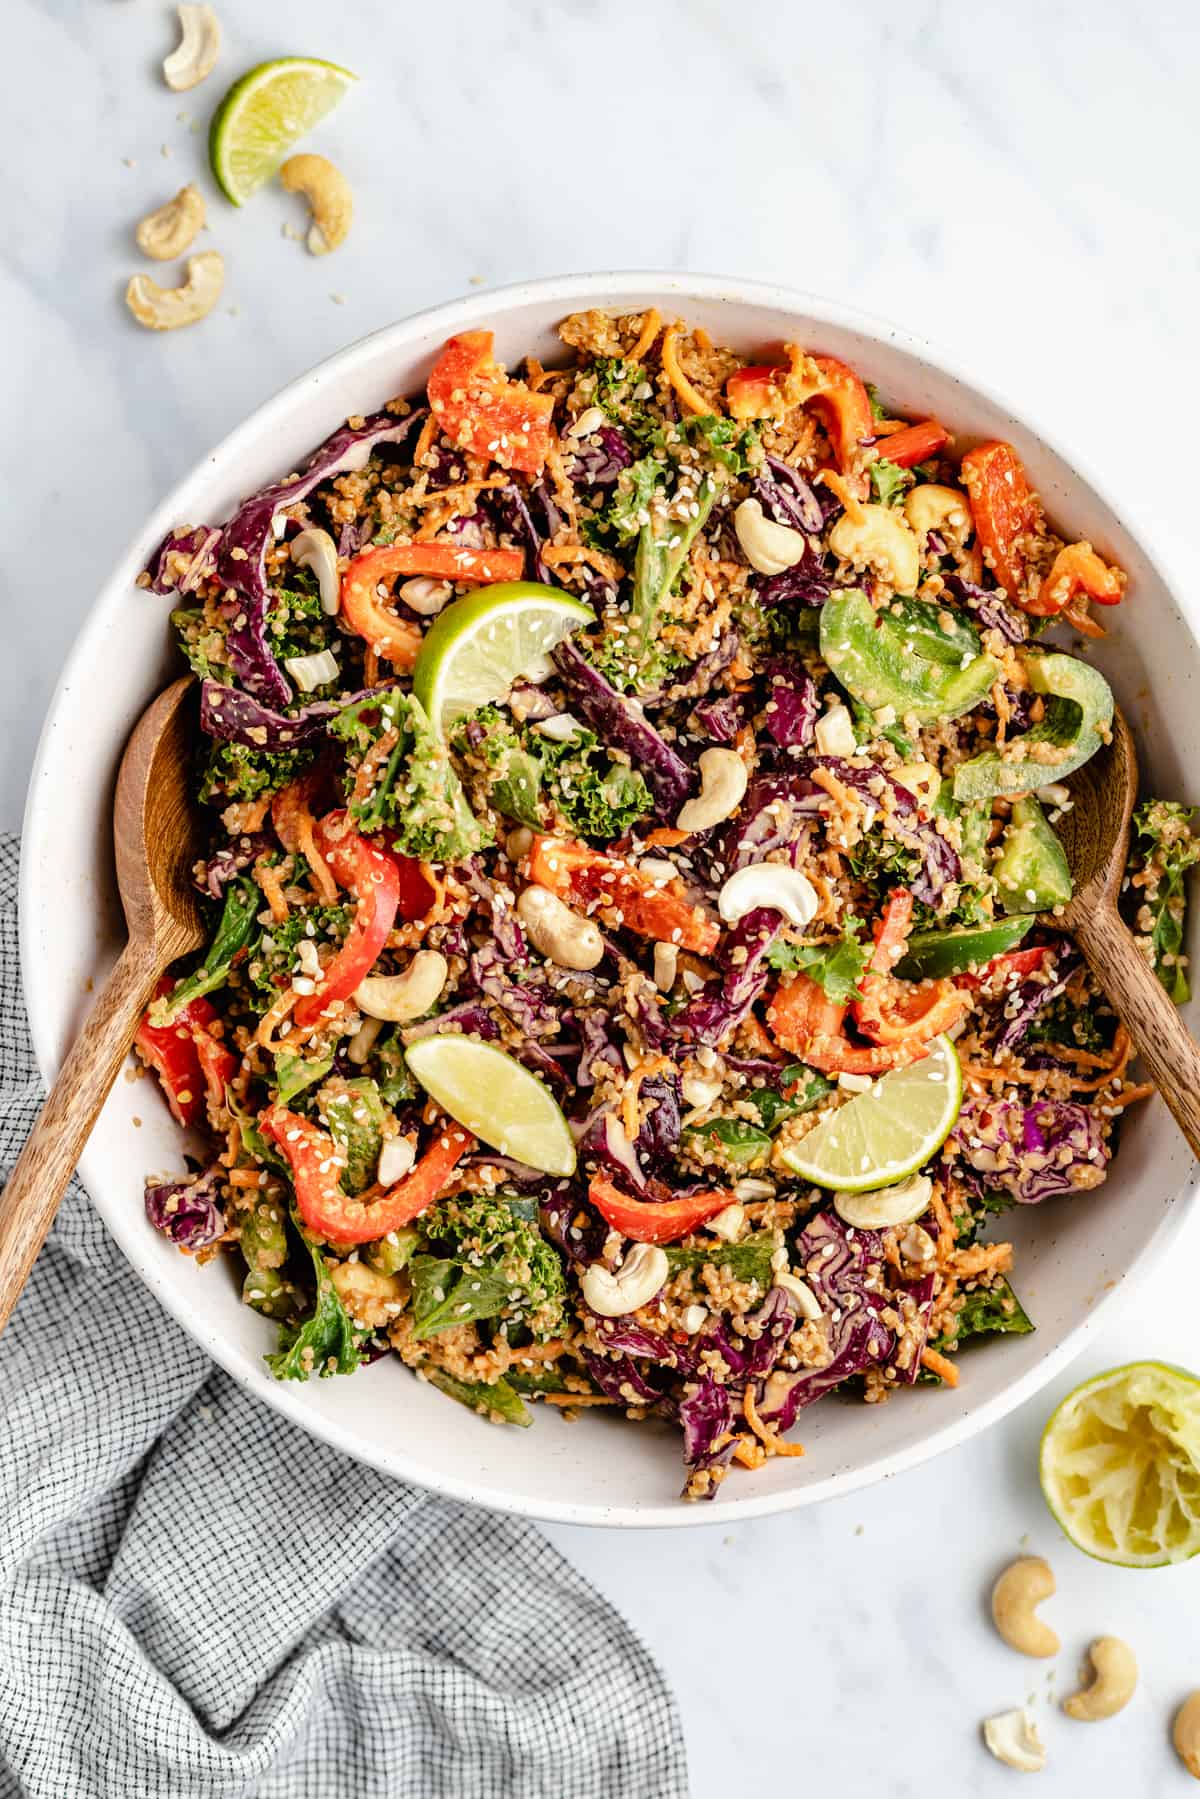
This crunchy, incredibly flavourful Thai quinoa salad is perfection in a bowl! Based on my Fresh Spring Rolls , I eliminated the wraps and noodles to make this a quick, no-fuss meal. I switched up the lettuce for kale, added crunchy cashews, and plenty of quinoa for protein. This recipe will leave you full and completely satisfied!
Why I Can’t Get Enough of This Thai Quinoa Salad
- The peanut ginger dressing . It’s honestly THE best dressing, one I would totally order over and over at any restaurant, and one I want to put on every single salad, forever. (It also stores perfectly, so maybe make a double batch!)
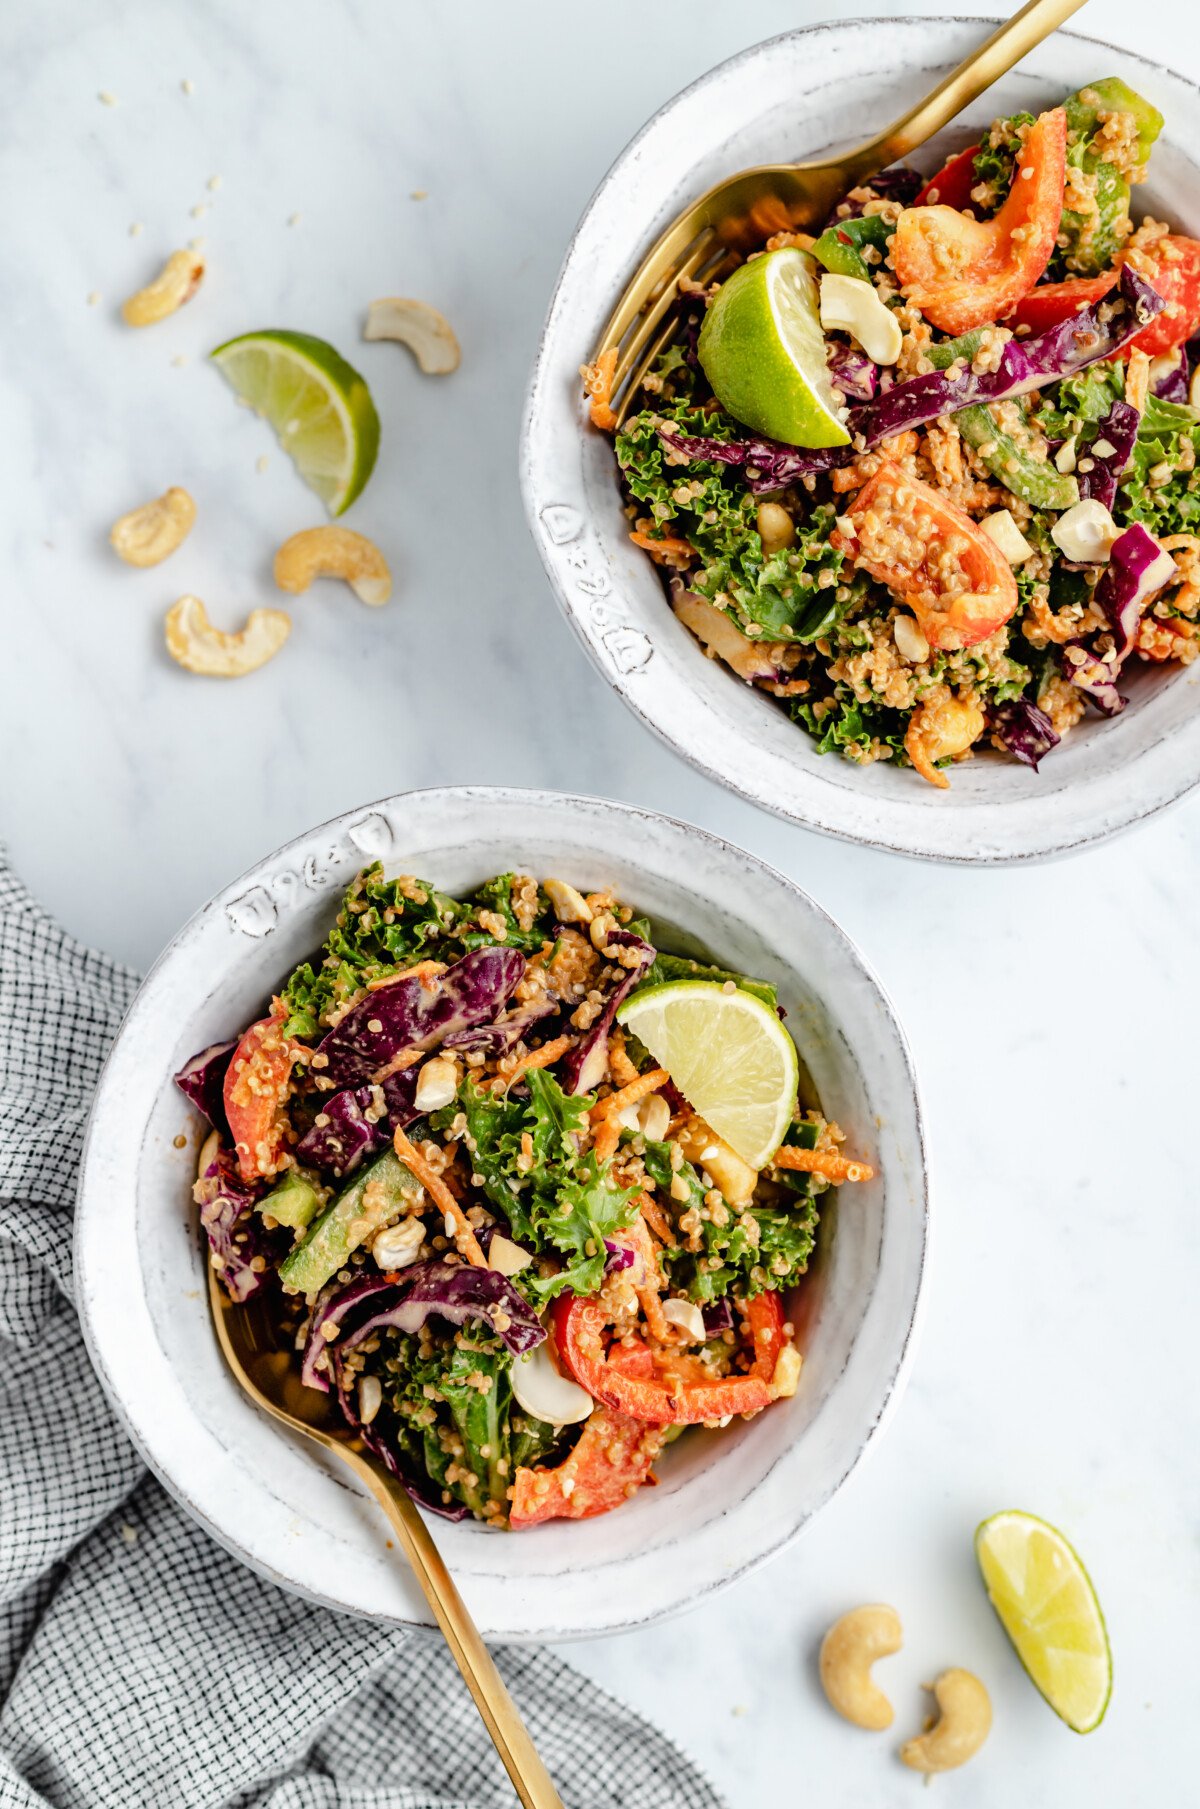
- A rainbow of colours . If we eat first with our eyes, this Thai quinoa salad is an absolute FEAST, my friends. It’s so vibrant and colourful, it makes you want to just dig in.
- Hearty and satisfying . The quinoa, veggies, and dressing all combine to make for a salad that leaves you feeling pleasantly full.
Notes on Ingredients
Let’s take a quick look at what you’ll need to make this salad. Scroll down to the recipe card to find the ingredient quantities and recipe instructions.
- Carrot – I like some sliced raw carrots in my salad for a bit of extra crunch and sweetness.
- Quinoa – You can use pre-cooked quinoa or even frozen if you don’t want to make fresh. I like to pop my cooked quinoa in the fridge after cooking so it’s cool when I make my salad. Check out my quinoa tutorial for lots of helpful info on properly cooking it.
- Red cabbage – A bit earthier than green cabbage, red cabbage also gives a pop of colour to the salad.
- Red and green bell peppers – A green bell pepper is at its least ripe and has more of a bite to it. Red bell peppers are ripe and more sweet. The combination of both gives this quinoa salad more complex flavour.
- Kale – I used kale for this salad, but you could also use lettuce or baby spinach.
- Cashews – The rich, nutty flavour of cashews pairs perfectly with the vegetables and the peanut ginger dressing. You can also use peanuts or almonds.
- Lime – I like to finish off my salad with a squeeze of fresh lime for a bit of citrusy brightness.
For the Dressing:
- Ground ginger – The combination of warm, aromatic ginger with sweet, nutty peanut butter is absolutely to die for.
- Maple syrup – Maple syrup sweetens the dressing naturally. Date syrup would also work.
- Soy sauce, tamari, or liquid aminos –Tamari is similar to soy sauce, but it’s gluten-free. It gives the same umami flavour, but it’s a bit less salty. You can also use liquid aminos or low sodium soy sauce.
- Distilled white vinegar – For a bit of tang and balancing the flavours. Rice vinegar will also work.
- Sesame seeds – I like sesame seeds for a little crunchy texture in my dressing.
- Natural peanut butter – Natural peanut butter is typically made only with peanuts and salt.
- Red pepper flakes – Just a tiny bit of heat tops off the dressing. Feel free to adjust the amount to your liking.
How to Make Thai Quinoa Salad
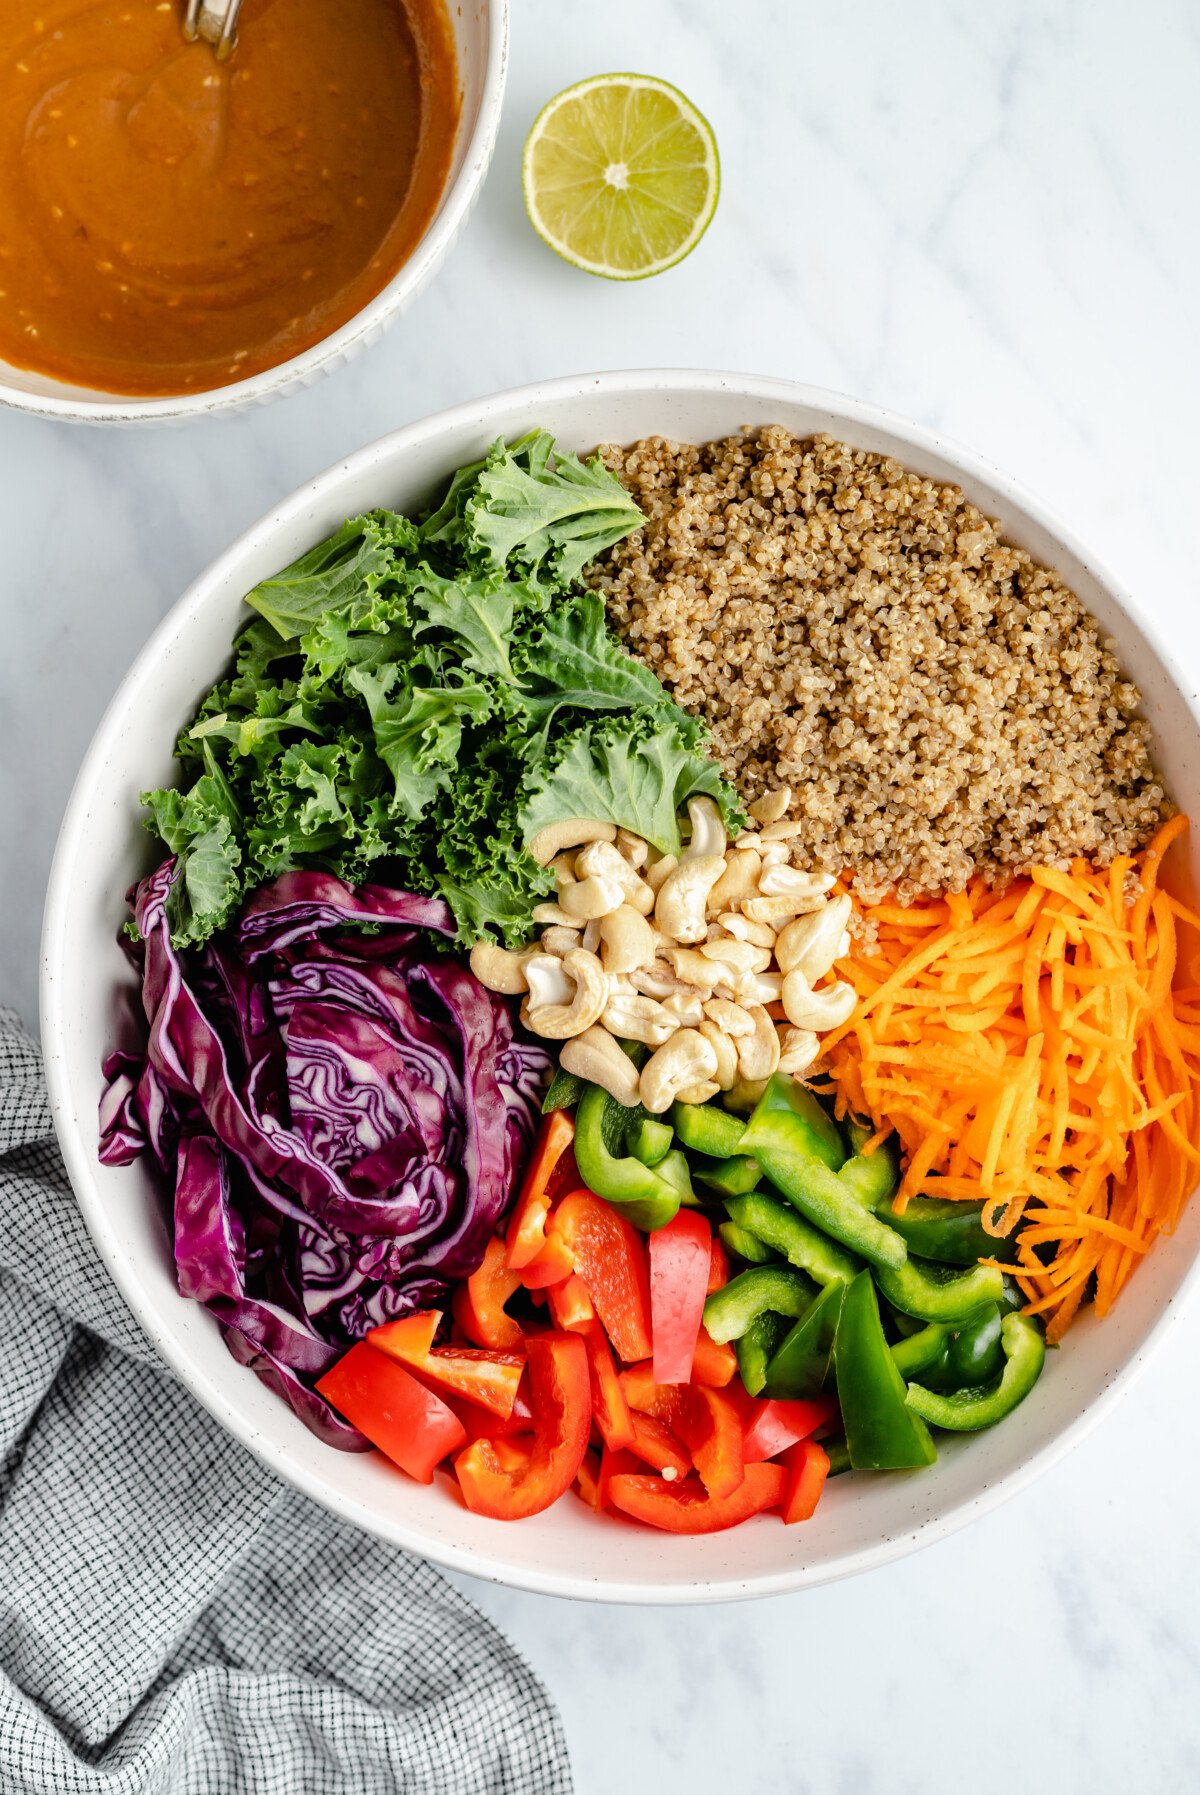
One of the things I love most about this recipe is how simple it is to make. Just mix up the dressing and toss with all the salad ingredients. Here’s a quick overview:
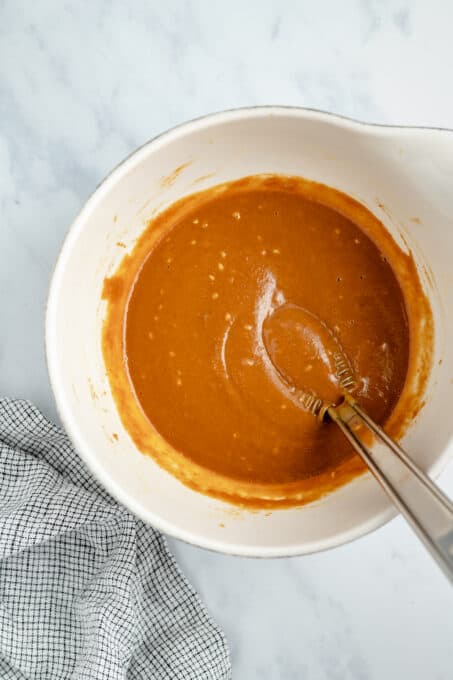
Whisk together the dressing.
- Make the dressing . Whisk all of the ingredients together until the dressing is smooth.
- Toss the salad . In a separate bowl, toss all the salad ingredients with a squeeze of lime juice.
- Dress the salad . Add the sauce to the salad and toss until everything is well-coated.
Tips and Variations
- Make sure the quinoa is dry . Follow my directions on how to cook quinoa to make sure it’s perfect! Soggy quinoa will water down the dressing, making this salad less flavourful.
- Add more protein . Shelled edamame or fried tofu will give this already protein-packed salad an even bigger boost.
- Switch up the nut butter . If you can’t eat peanuts, almond butter or sunflower seed butter will also work for the dressing.
- Make it into wraps . Scoop your Thai quinoa salad into lettuce leaves and sprinkle chopped cashews over the top.
Serving Suggestions
Serve this recipe with crispy teriyaki tofu or cooked tempeh if you want to add a simple protein to fill out your dinner. This Thai coconut curry soup would also be a delicious pairing!
How to Store Leftovers
Refrigerate this Thai quinoa salad in a Tupperware container in the fridge for up to 5 days. Extra dressing can be stored in the fridge separately in a mason jar or covered container. Stir before using or bring it to room temperature for 20 minutes, since it may thicken a bit in the fridge.
More Satisfying Salad Recipes
- Tofu Egg Salad
- Fattoush Salad
- Vegan Nicoise Salad
- Loaded Potato Salad
- Chickpea Panzanella Salad
Ingredients
- 1 large carrot , julienned
- 2 cups cooked quinoa
- 3 cups sliced red cabbage , (200g)
- 1 cup chopped red bell pepper , (104g)
- 1 cup chopped green bell pepper , (104g)
- 2 cups kale , removed from stems, washed, dried and chopped
- 1/4 cup cashews , chopped
- 1/2 small lime
Peanut Ginger Sauce:
- 1/2 teaspoon ground ginger
- 1 tablespoon maple syrup
- 2 tablespoons tamari sauce , or liquid aminos or low sodium soy sauce
- 1 teaspoon distilled white vinegar
- 1/2 teaspoon sesame seeds
- 1/3 cup natural peanut butter
- 1/4 cup warm water
- 1/4 teaspoon crushed red pepper flakes
Instructions
Peanut Ginger Sauce
- Whisk all the ingredients together in a deep bowl until combined. Set aside until ready to use.
Thai Quinoa Salad
- Add all the ingredients together in a bowl. Squeeze half a lime over it if desired to add a touch of brightness.
- Drizzle the sauce over the salad and mix everything in to combine.
- Serve and enjoy!
