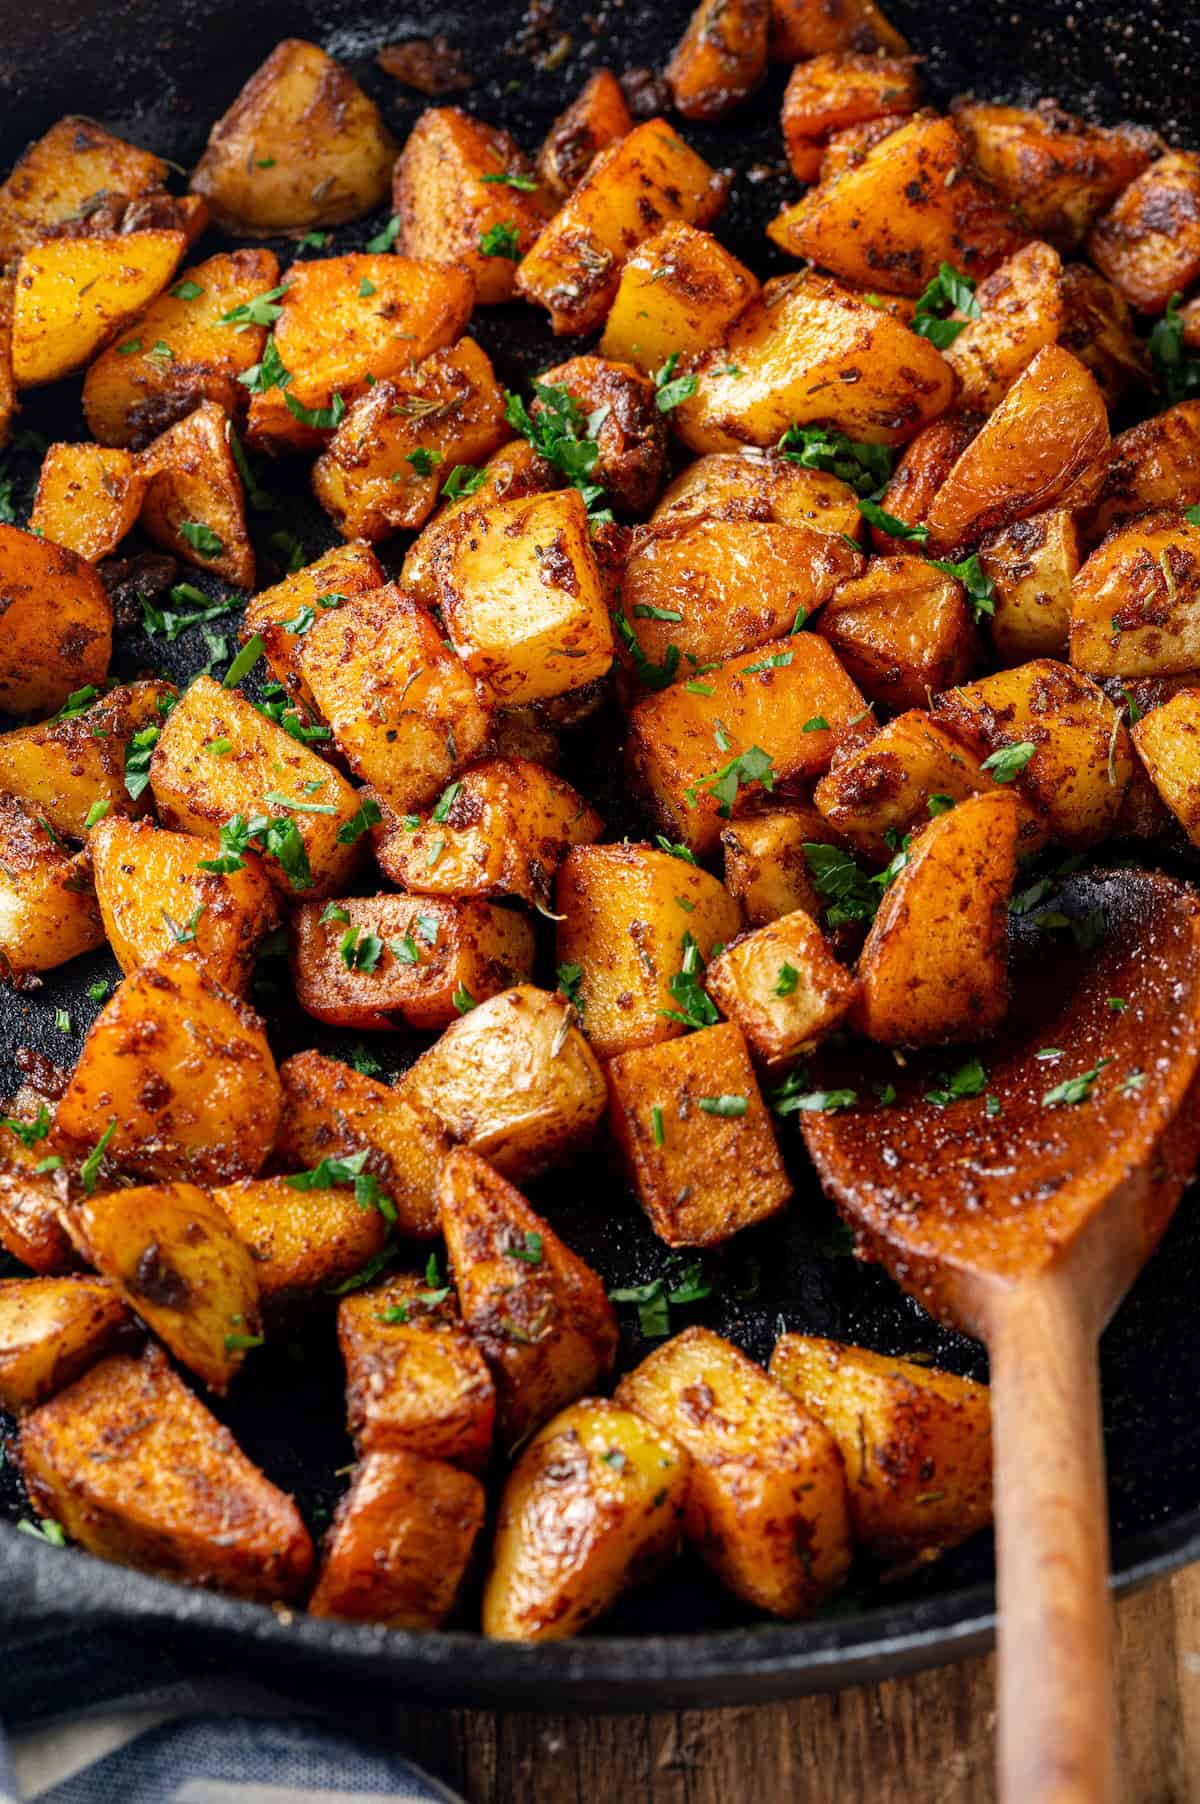
A smoky, savoury seasoning blend makes these Breakfast Potatoes delectable! I’ll show you how to get them perfectly crispy on the stovetop.
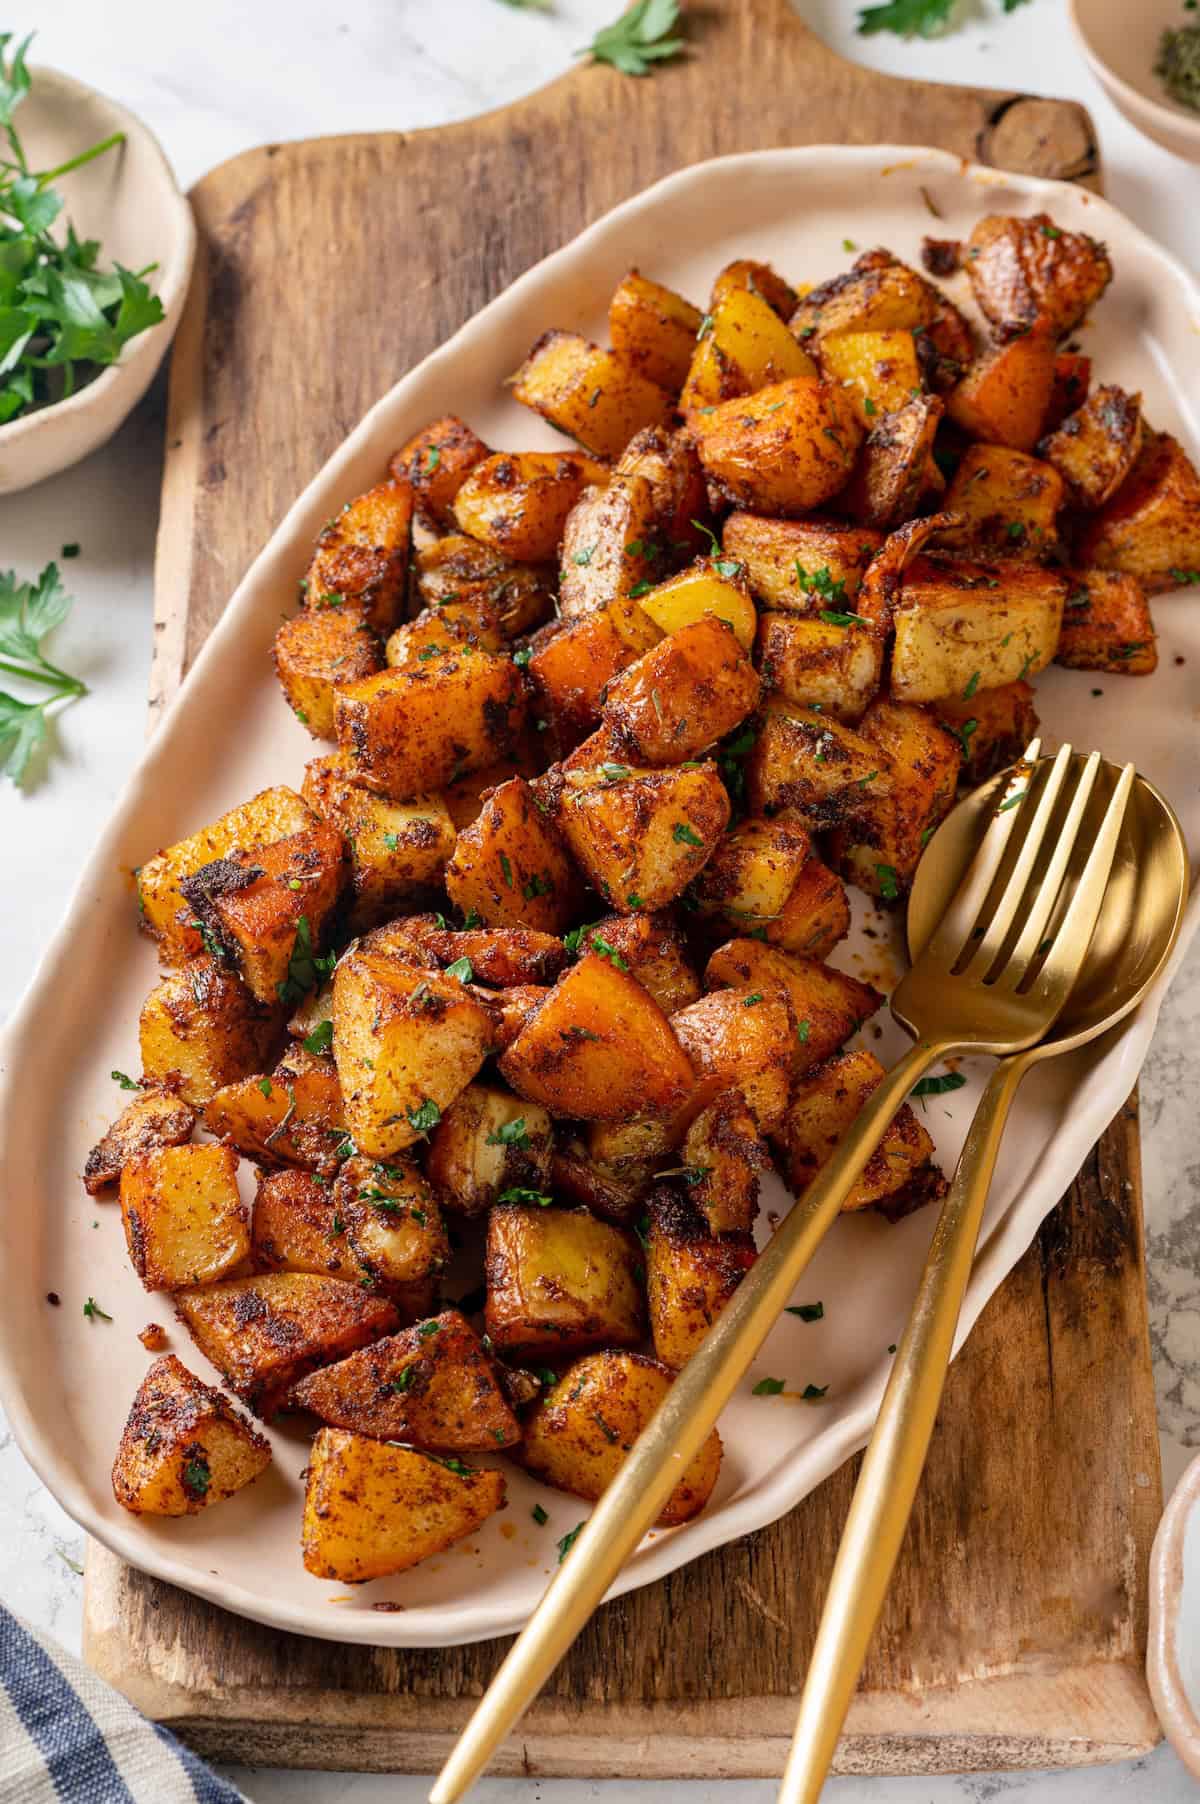
Potatoes are total comfort food, but sometimes you need your fix in the morning, when Mashed Potatoes just won’t work. Enter: breakfast potatoes! This is the perfect recipe to pair with a Fluffy Tofu Scramble . The potatoes are ultra-crispy (psst—follow my tips and I promise they won’t be soggy!), seasoned with the most divine blend of herbs and spices, and so good, you’ll want to eat them all day long.
Why Your Mornings Will Be Even Better With These Crispy Potatoes on Your Plate
Sometimes you wake up and you’re raring to go. And other times, you just need the promise of crispy breakfast potatoes to get you out of bed, you know what I mean? Here’s what makes these potatoes the best!
- The perfect seasoning blend . Potatoes are starchy and mild in flavour, so to bring out their best, you’ve got to jazz them up. So I add a blend of seasonings that’s smoky, deeply savoury, and a little bit herbaceous. It makes these breakfast potatoes DELICIOUS!
- Crispy, not soggy . You ever make breakfast potatoes or Hash Browns and they end up soggy and mushy? Yeah, me too. But since then, I’ve learned the secret to making sure skillet potatoes turn out crispy and brown!
- Cooked ALL the way through . The other problem I’ve found with cooking potatoes in a skillet is that it can be hard to get them tender on the inside. I’ve got a trick to prevent this from happening too, so your potatoes are fluffy and tender in the middle, crispy on the outside. Perfection!
Notes on Ingredients
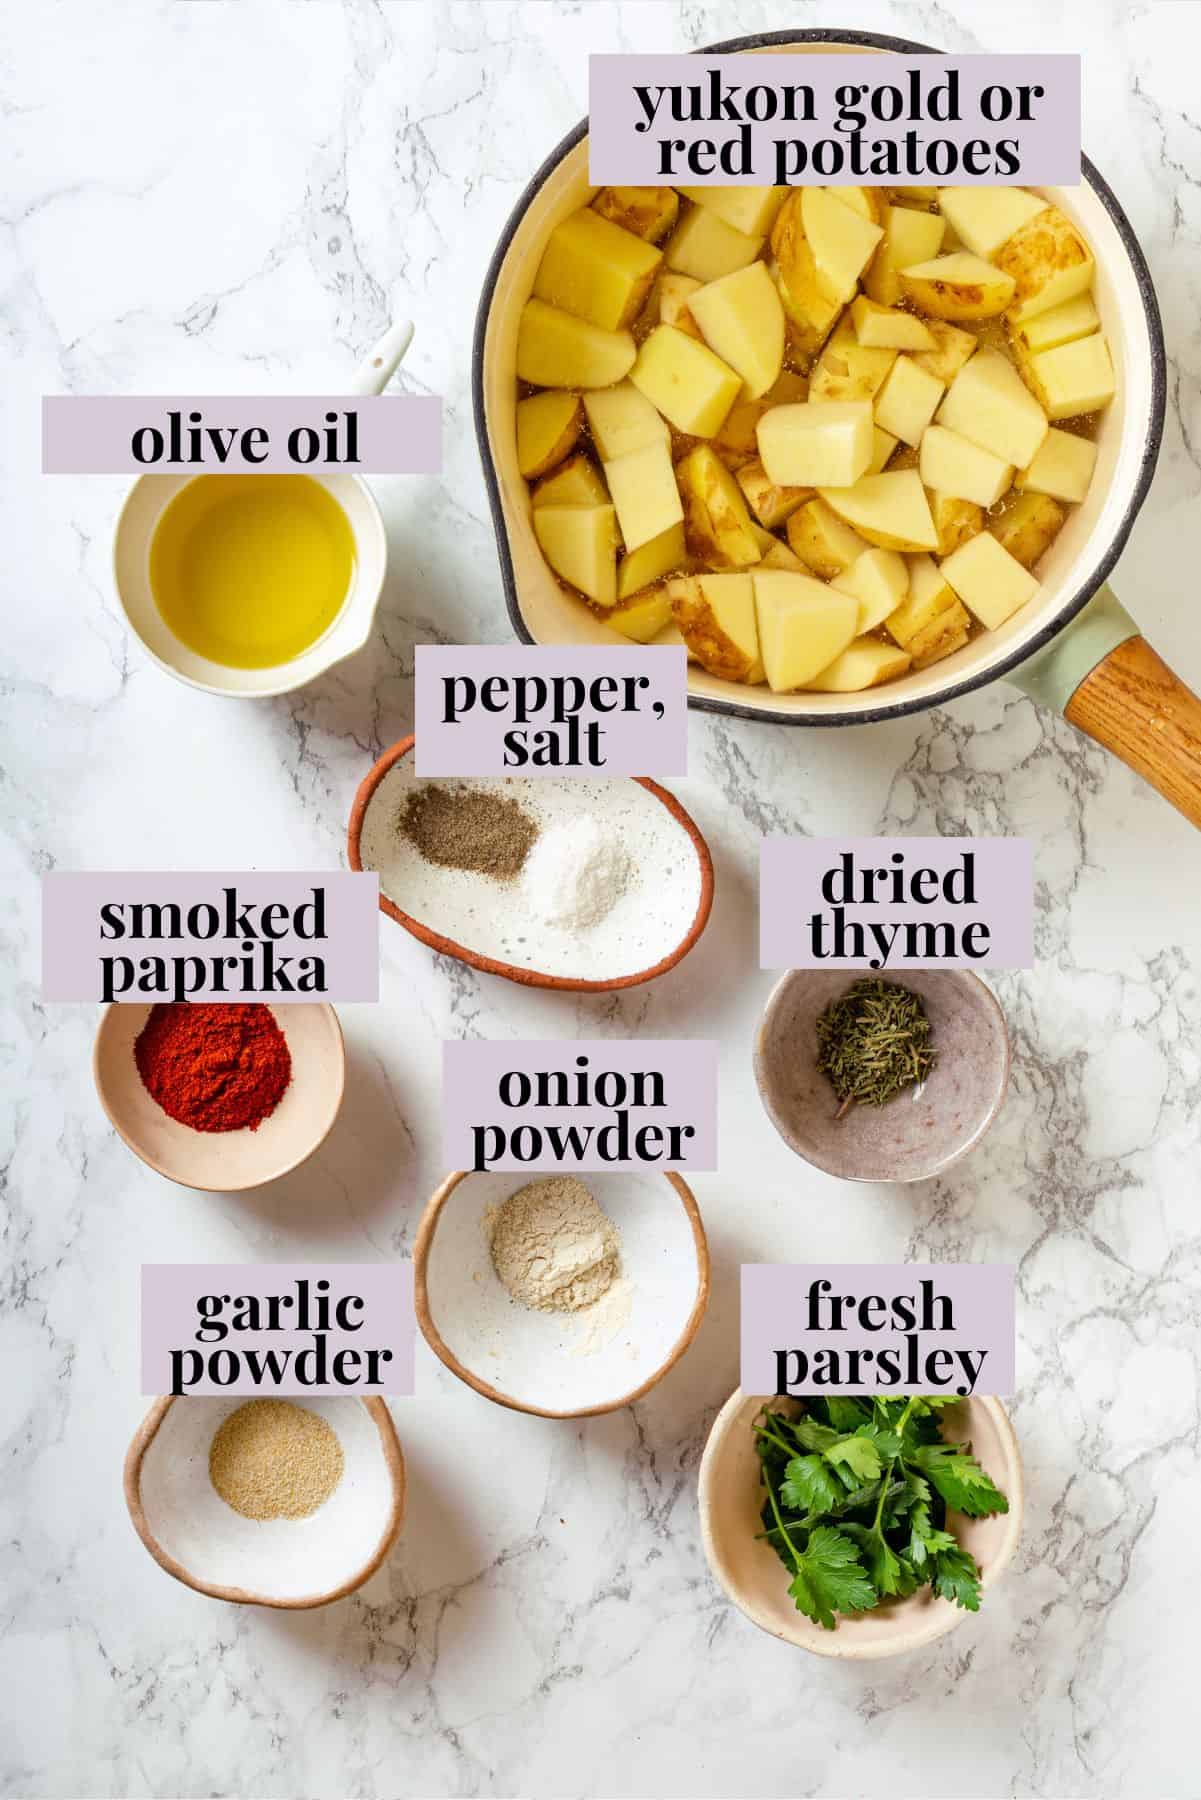
Most of what you need for this recipe is in your spice cabinet! Scroll down to the recipe card to find the ingredient quantities and recipe instructions.
- Olive oil – Or another oil you like to use for cooking.
- Potatoes – I use Yukon gold or red potatoes, which have lower starch content than russet potatoes.
- Seasonings – Smoked paprika, garlic powder, onion powder, dried thyme, salt, and pepper.
- Parsley – Optional, for garnish. I like using Italian parsley, which has more flavor than curly parsley.
How to Make Skillet Breakfast Potatoes
Get ready for the best breakfast potatoes you’ve ever had! Here’s what you’ll need to do.
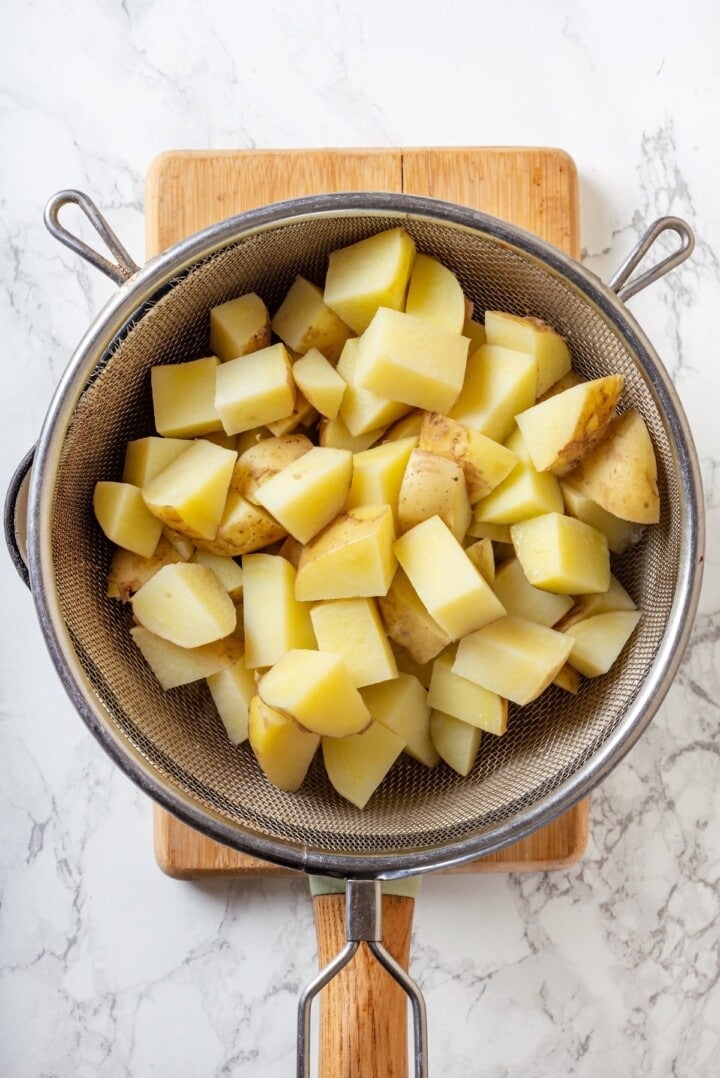
Parboil the potatoes and drain.
- Parboil the potatoes . Place the potatoes in a pot with cold water and salt. Bring to a boil and cook for 5 to 6 minutes, then drain. Put the drained potatoes back in the pot; the hot pot will dry the potatoes a bit.
- Heat the skillet . Set a large nonstick or well-seasoned cast iron skillet over medium heat. Once it’s hot, add the olive oil.
- Add the potatoes. Place the potatoes in the skillet in an even layer. Do NOT disturb them; just let them cook for 5 to 7 minutes without stirring or flipping.
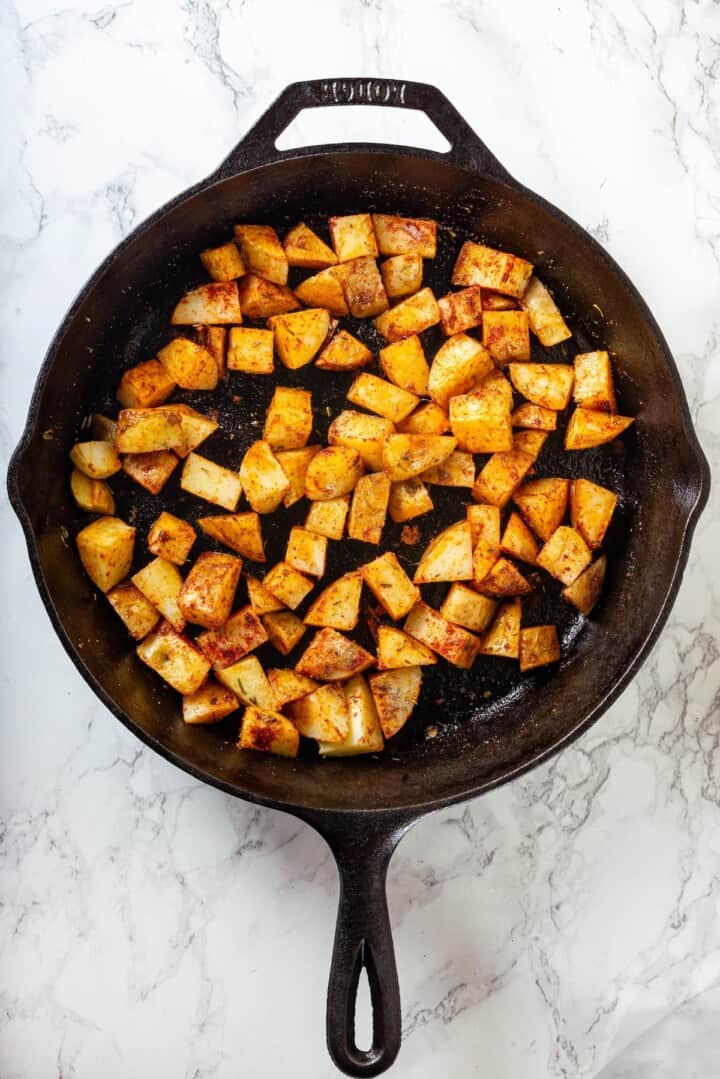
Flip the potatoes.
- Flip . Once the potatoes are browned on the bottom, sprinkle the seasonings over the top. Toss to coat and cook for 10 to 15 minutes more, or until they’re uniformly crispy and brown.
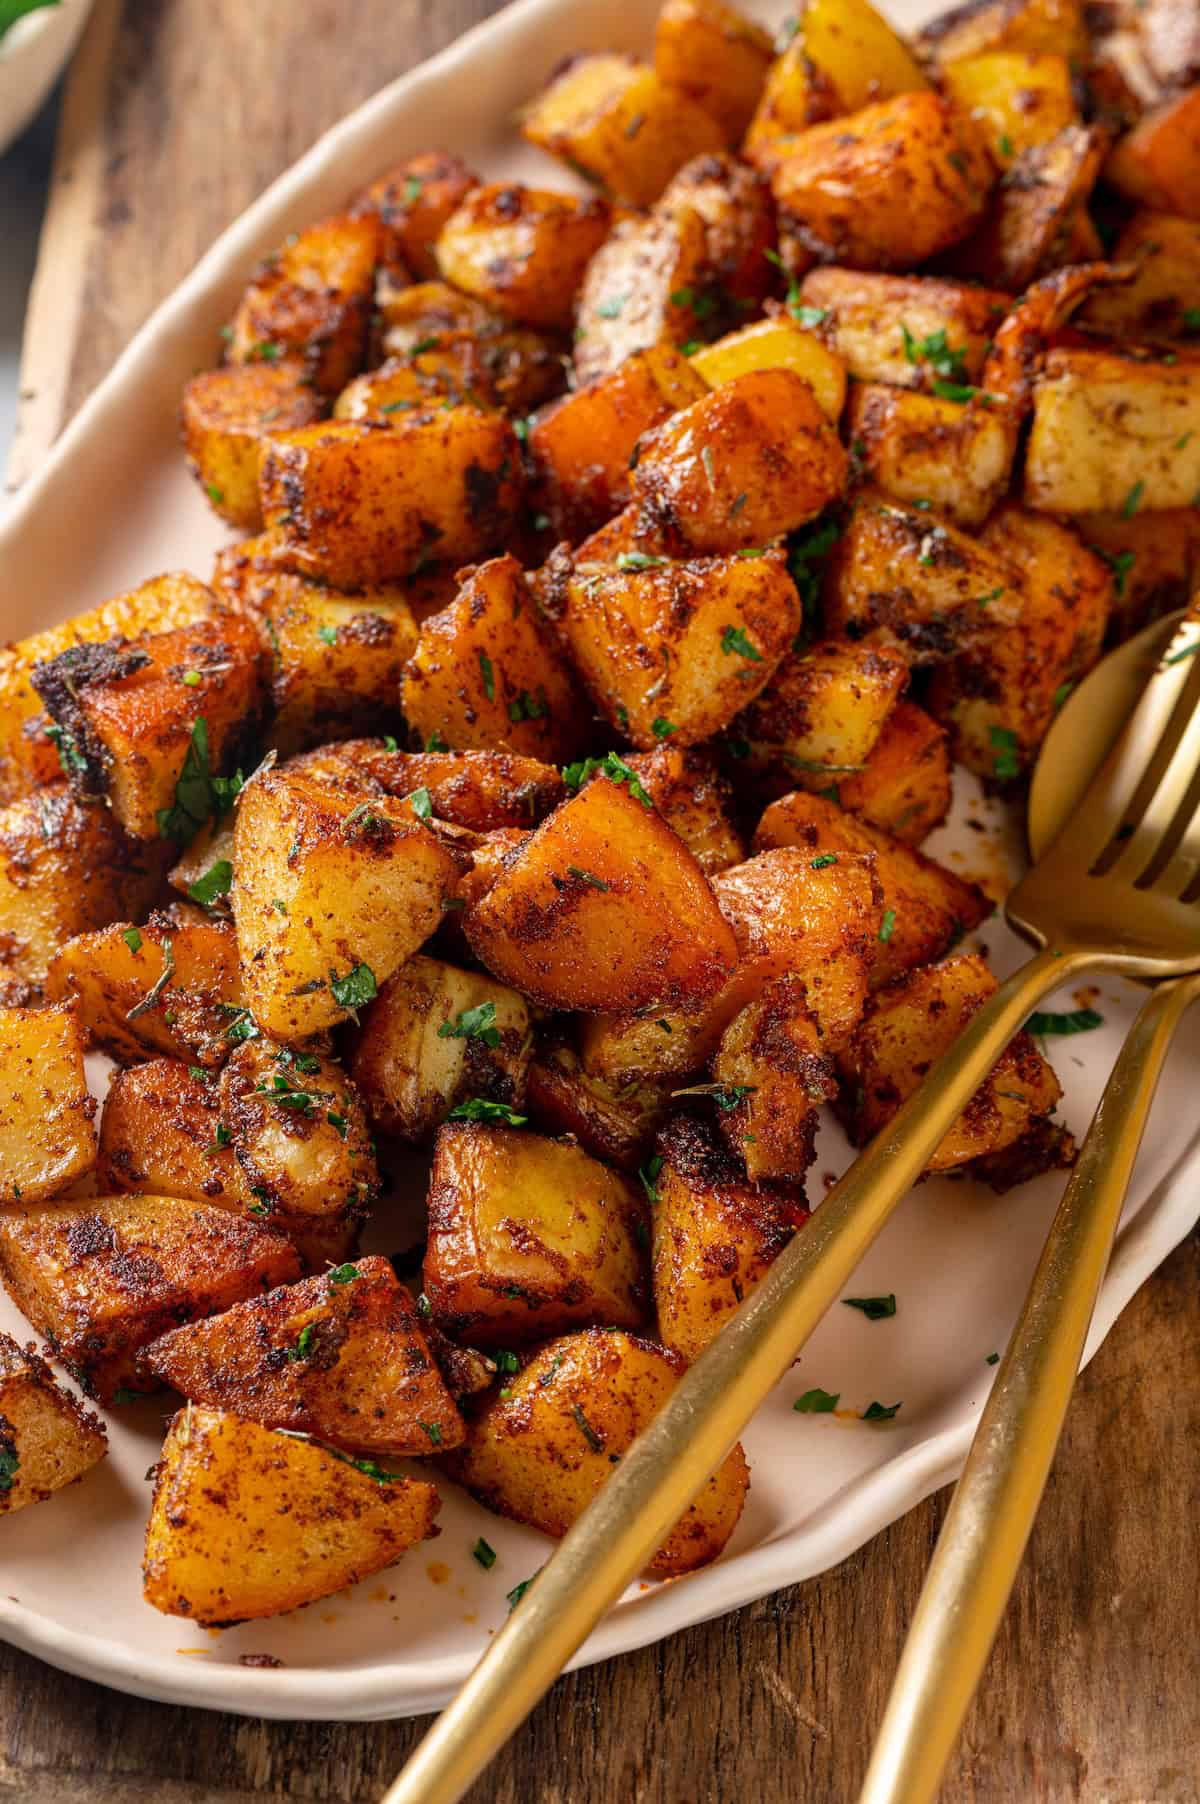
- Serve . Season to taste. Garnish with parsley and serve.
Tips for Making Your Potatoes Ultra-Crispy (But Tender Inside!)
As promised, here are my secrets for making the best breakfast potatoes.
- Don’t skip the parboiling . It’s an optional step, but if you love your potatoes fluffy and soft inside, it’s totally worth it. Just make sure you add the potatoes back to the pot so the excess water can cook off; if the potatoes are dry when you add them to the oil, they’ll crisp up better.
- Make sure the skillet is hot . The number one culprit when skillet potatoes end up soggy is a pan that’s not sufficiently heated. When the pan isn’t hot enough, the potatoes absorb the oil, which makes them mushy. With a blazing hot pan, the potatoes are instantly seared when you add them, which creates a barrier that keeps them from absorbing more oil.
- Do not disturb . Although it’s tempting to stir or lift the potatoes to check the bottoms, leaving them undisturbed helps them get crispy and also keeps them from sticking to the pan.
- Use the right pan . A well-seasoned cast iron skillet is ideal, but if you don’t have one, use a nonstick skillet.
Variations
Here are a few ways you can switch up this recipe.
- Change the seasonings . You can use any you like! Cajun seasoning, Old Bay, and even seasoning salt works well.
- Use sweet potatoes . They don’t get quite as crisp as regular potatoes, but oh, they are delicious! You can also use half sweet potatoes and half Yukon gold or red.
- Make it a breakfast potato hash . Crumble your favourite vegan breakfast sausage into the pan near the end of the cooking time.
Serving Suggestions
I like to serve breakfast potatoes with a savoury pairing like my Southwestern Tofu Scramble , Tofu Bacon , or Vegan Quiche . Of course, they’re also great to balance sweet breakfast foods like Vegan Waffles and Banana Pancakes .
How to Store and Reheat
- Refrigerator : Transfer leftovers to an airtight container and refrigerate for up to 4 days.
- Freezer : Freeze breakfast potatoes in an airtight container or freezer bag for up to 3 months. Note that sometimes potatoes can become mealy when frozen, but if you parboil your breakfast potatoes as described above, they should freeze well. Thaw in the refrigerator before reheating.
- To reheat : Warm leftovers in a skillet with oil set over medium-high heat. The microwave also works, but they won’t be as crispy.
More Vegan Ways to Make Potatoes
- Mashed Potato Casserole
- Loaded Potato Skins
- Duchess Potatoes
- Parmesan Crusted Potatoes
Ingredients
- 2 tablespoons olive oil , 30 mL
- 4 medium Yukon gold or red potatoes , diced into ½-inch cubes – about 1 ½ lbs. / 680 g
- 1 teaspoon smoked paprika , 2 g
- ½ teaspoon garlic powder , 1 g
- ½ teaspoon onion powder , 1 g
- ½ teaspoon dried thyme , 1 g
- Salt and black pepper , to taste
- 1 tablespoon chopped fresh parsley , optional for garnish – 4 g
Instructions
- Parboil the potatoes (recommended for best texture): Place diced potatoes in a saucepan and cover with cold salted water. Bring to a boil and cook for 5–6 minutes, just until barely tender. Drain and allow to steam dry for 2–3 minutes.
- Heat the olive oil in a large nonstick or cast iron skillet over medium heat.
- Add the potatoes to the skillet in an even layer. Press down gently and let them cook undisturbed for 5–7 minutes, until golden brown on the bottom.
- Sprinkle the potatoes with smoked paprika, garlic powder, onion powder, thyme, salt, and pepper. Toss to coat and continue cooking for another 10–15 minutes, flipping occasionally, until crisp and browned on all sides.
- Taste and adjust seasoning. Sprinkle with fresh parsley if using, and serve hot.
Notes
- Refrigerator : Transfer leftovers to an airtight container and refrigerate for up to 4 days.
- Freezer : Freeze these potatoes in an airtight container or freezer bag for up to 3 months. Note that sometimes potatoes can become mealy when frozen, but if you parboil your breakfast potatoes as described above, they should freeze well. Thaw in the refrigerator before reheating.
- To reheat : Warm leftovers in a skillet with oil set over medium-high heat. The microwave also works, but they won’t be as crispy.

Breakfast Potatoes
Ingredients
- 2 tablespoons olive oil 30 mL
- 4 medium Yukon gold or red potatoes diced into ½-inch cubes – about 1 ½ lbs. / 680 g
- 1 teaspoon smoked paprika 2 g
- ½ teaspoon garlic powder 1 g
- ½ teaspoon onion powder 1 g
- ½ teaspoon dried thyme 1 g
- Salt and black pepper to taste
- 1 tablespoon chopped fresh parsley optional for garnish – 4 g
Instructions
- Parboil the potatoes (recommended for best texture): Place diced potatoes in a saucepan and cover with cold salted water. Bring to a boil and cook for 5–6 minutes, just until barely tender. Drain and allow to steam dry for 2–3 minutes.
- Heat the olive oil in a large nonstick or cast iron skillet over medium heat.
- Add the potatoes to the skillet in an even layer. Press down gently and let them cook undisturbed for 5–7 minutes, until golden brown on the bottom.
- Sprinkle the potatoes with smoked paprika, garlic powder, onion powder, thyme, salt, and pepper. Toss to coat and continue cooking for another 10–15 minutes, flipping occasionally, until crisp and browned on all sides.
- Taste and adjust seasoning. Sprinkle with fresh parsley if using, and serve hot.
Notes
- Refrigerator : Transfer leftovers to an airtight container and refrigerate for up to 4 days.
- Freezer : Freeze these potatoes in an airtight container or freezer bag for up to 3 months. Note that sometimes potatoes can become mealy when frozen, but if you parboil your breakfast potatoes as described above, they should freeze well. Thaw in the refrigerator before reheating.
- To reheat : Warm leftovers in a skillet with oil set over medium-high heat. The microwave also works, but they won’t be as crispy.
Nutrition
Breakfast Potatoes https://jessicainthekitchen.com/breakfast-potatoes/ August 8, 2025
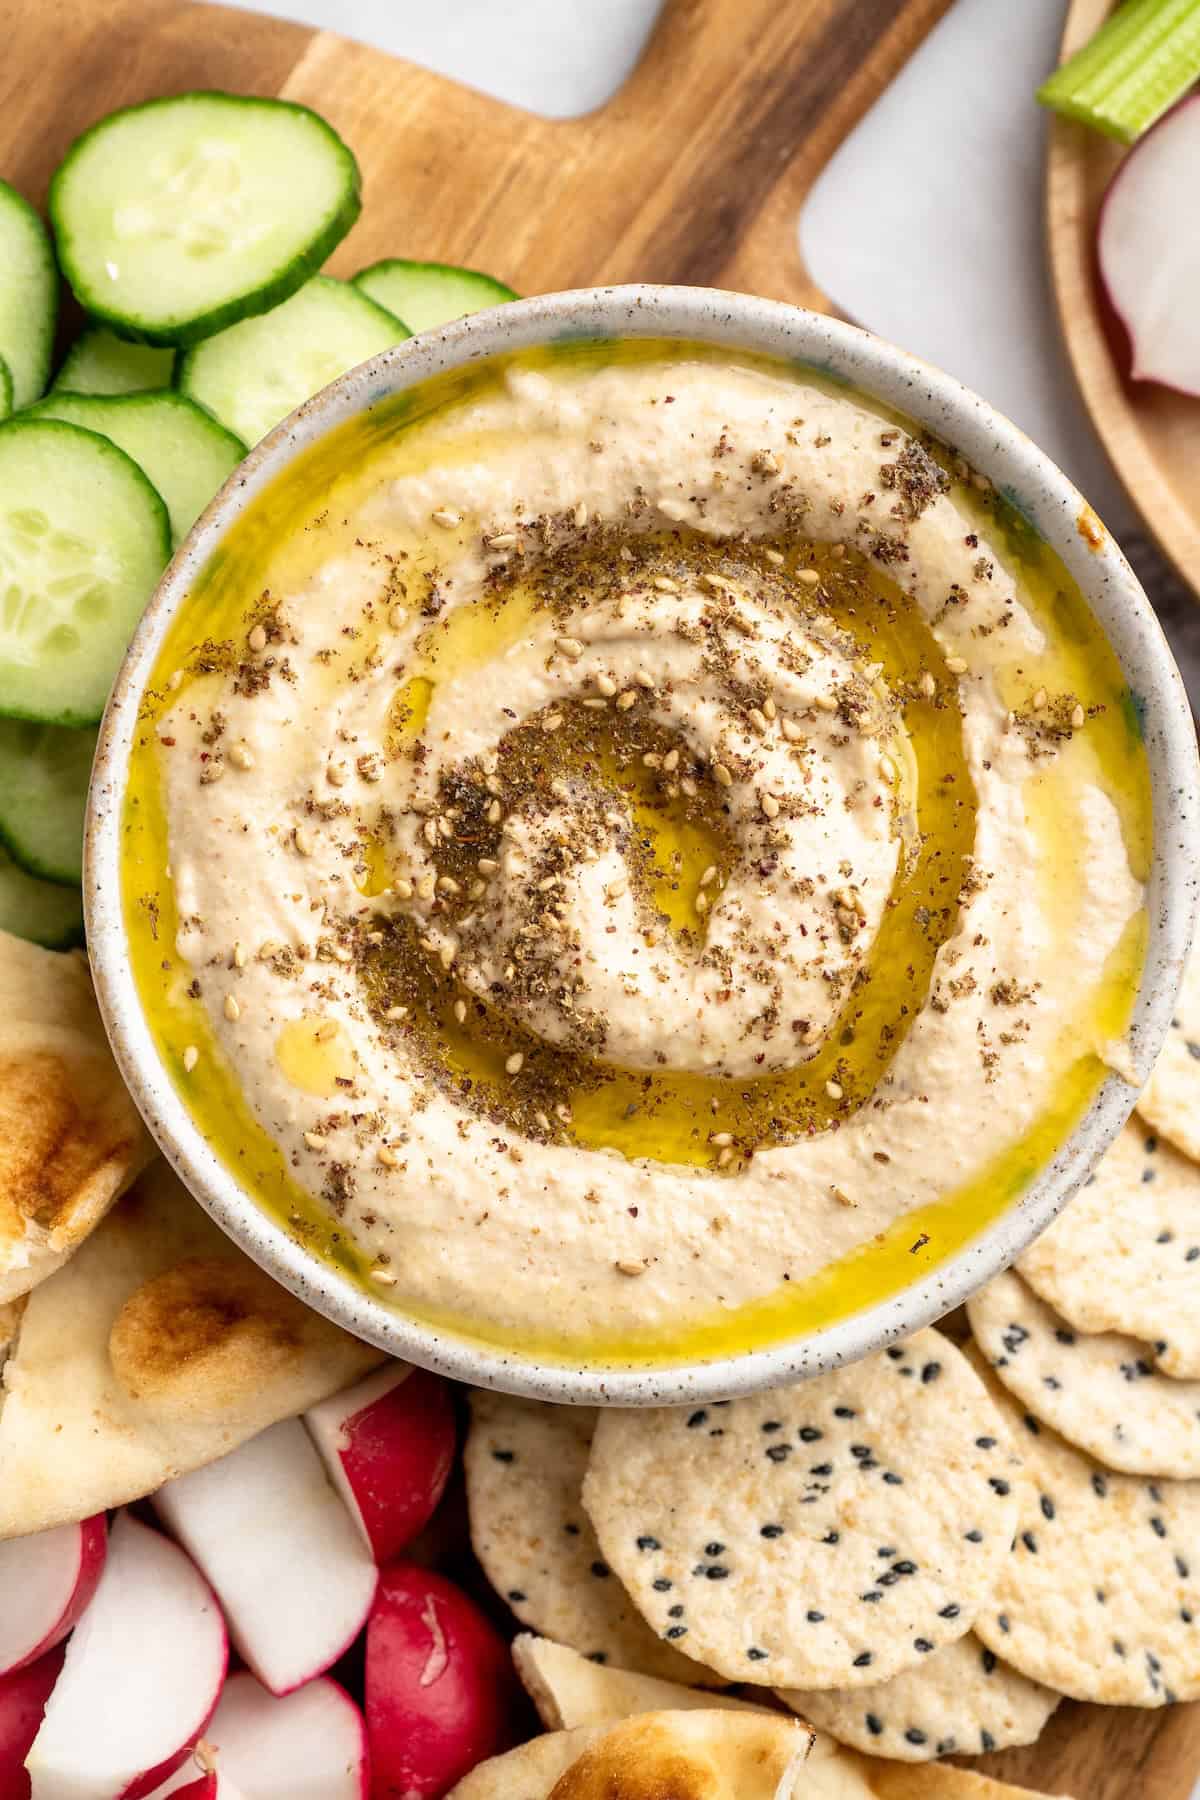
Roasted Cauliflower Hummus gives the classic dip a low-carb makeover! It’s absolutely smooth and creamy and I add roasted garlic too, which makes it extra delicious.
Cauliflower is definitely the most versatile vegetable. You can make it into Cauliflower Gnocchi , bake up some epic BBQ Cauliflower Wings , and you can even turn it into cauliflower hummus! Because it’s made with tahini, this roasted cauliflower hummus recipe tastes surprisingly similar to traditional hummus made with chickpeas, but it’s got a slightly caramelised flavour and much less bite than hummus made with fresh garlic because I roast the cloves first. It’s fabulous!
Why You’ll Flip for This Cauliflower Hummus Recipe
I hope you give this dreamy roasted cauliflower hummus a try, friends! Here’s why it’s going to be a hit.
- Use it for ALL the things . I’m talking spread on everything, from your sandwich, to your wraps, to pizzas. And then dip veggies and Pita Chips and crackers in it. Don’t forget to add a scoop your salads either!
- Hummus without the carbs . This cauliflower hummus comes in at 3 net carbs per serving, which is a whole 1/4 cup, making this keto-friendly!
- Roasted cauliflower makes it delicious . The first thing you need to do is roast your cauliflower. Just like in my Roasted Cauliflower Soup , roasting not only brings out the best of its flavour, but also makes it easy to puree until it’s smooth and creamy.
Notes on Ingredients
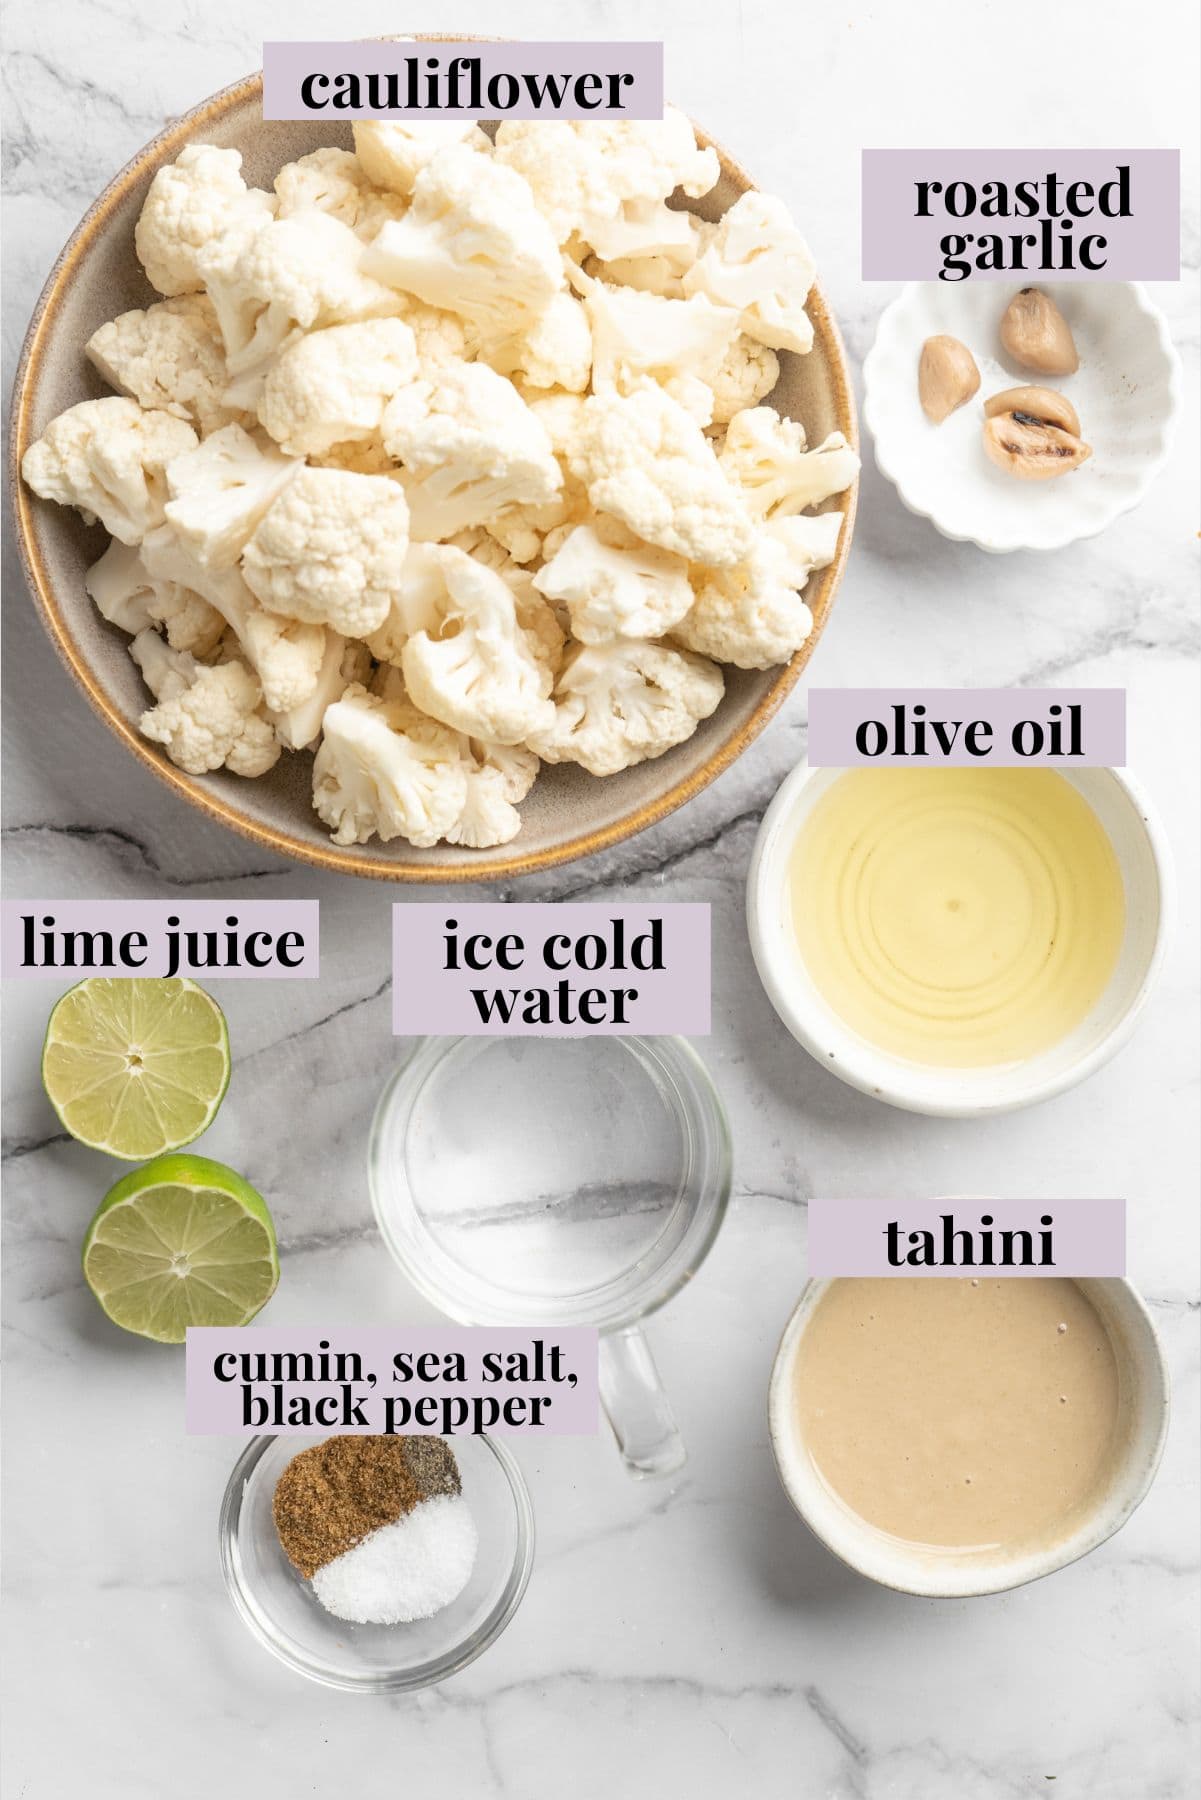
Here’s the short list of ingredients you’ll need to transform your cauliflower into creamy hummus. Scroll down to the recipe card to find the ingredient quantities and recipe instructions.
- Cauliflower – You can save on some prep time by buying a bag of pre-cut cauliflower, but don’t use frozen; it doesn’t roast very well.
- Olive oil – Use a good extra-virgin olive oil for the best flavour.
- Roasted garlic – You can use Oven Roasted Garlic or Air Fryer Roasted Garlic .
- Seasonings – Sea salt, ground black pepper, and cumin.
- Lime juice – Or lemon juice, for a more traditional flavour.
- Tahini – When I went to the Middle East, I fell in love with tahini . It’s what turns this from a cauliflower dip to cauliflower hummus!
- Ice cold water – I learned while in the Middle East that ice cold water really sticks to and activates the fat in the tahini, making hummus super fluffy. It’s what I do now every time I make hummus!
How to Make Cauliflower Hummus
Let’s get ready to snack! Here’s what you’ll need to do.
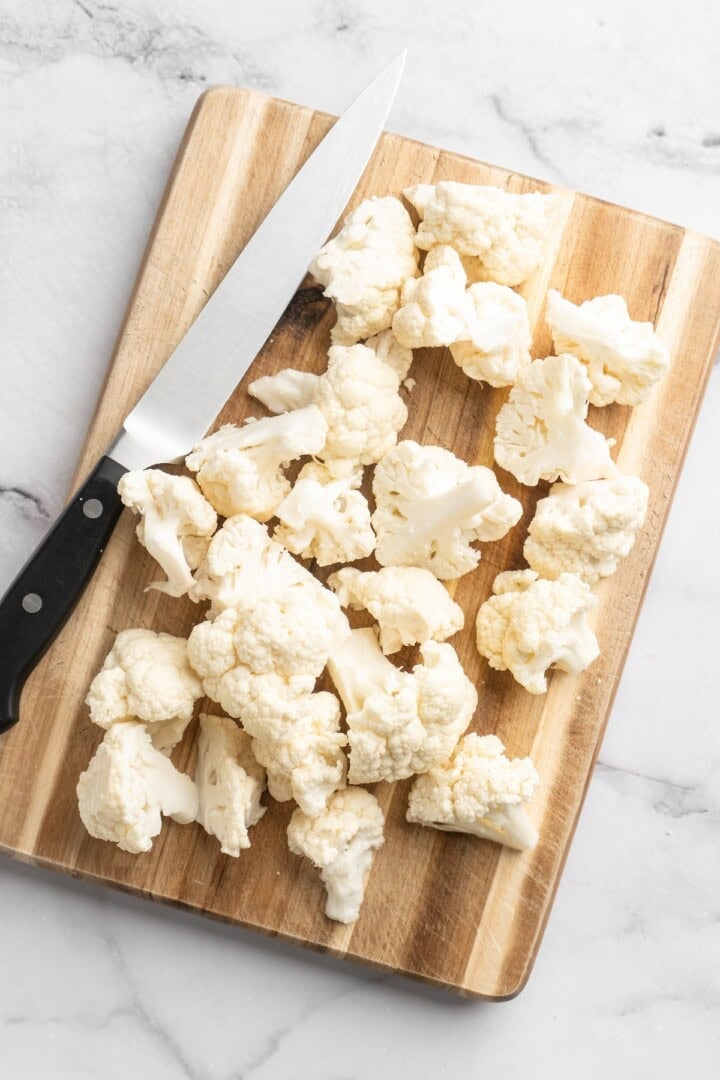
Cut the cauliflower into florets.
- Prepare . Preheat your oven to 450ºF and line a baking sheet.
- Roast the cauliflower . Break the cauliflower into florets and toss with 1/2 tablespoon of oil. Spread onto the baking sheet and roast for 15 minutes, then let it cool for 5 minutes.
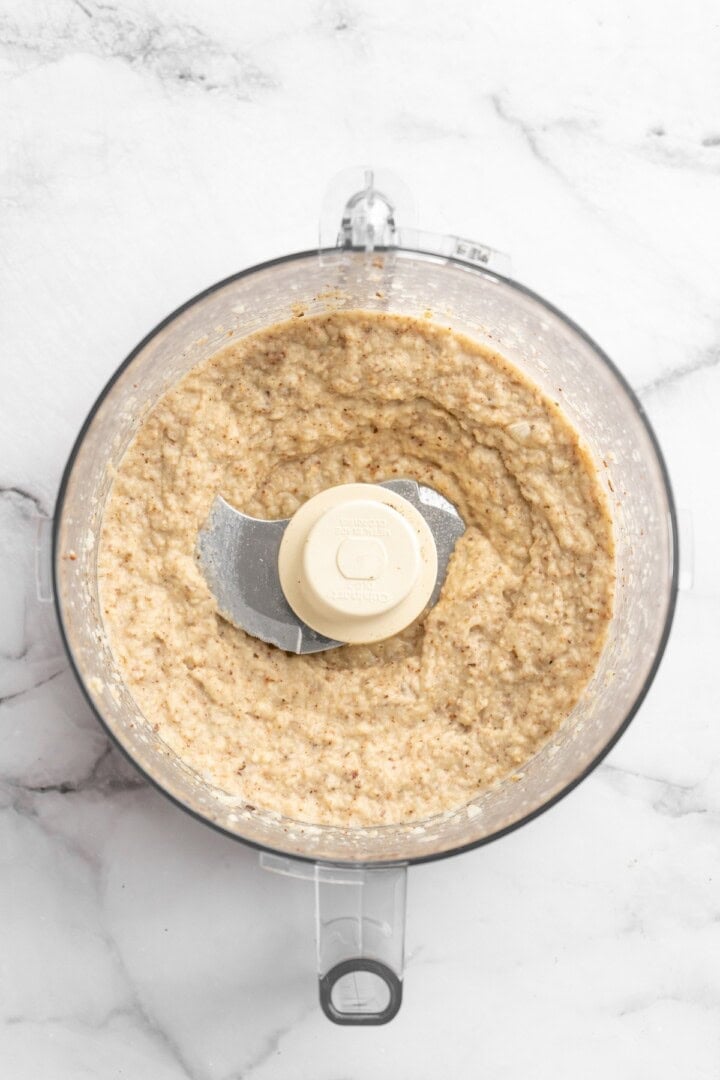
Puree.
- Process . Add the cauliflower to a food processor with the remaining oil, roasted garlic, seasonings, and lime juice. Turn on the food processor and slowly stream in the tahini; once it’s incorporated, stream in the ice water and process for about 5 minutes, or until smooth, creamy, and fluffy.
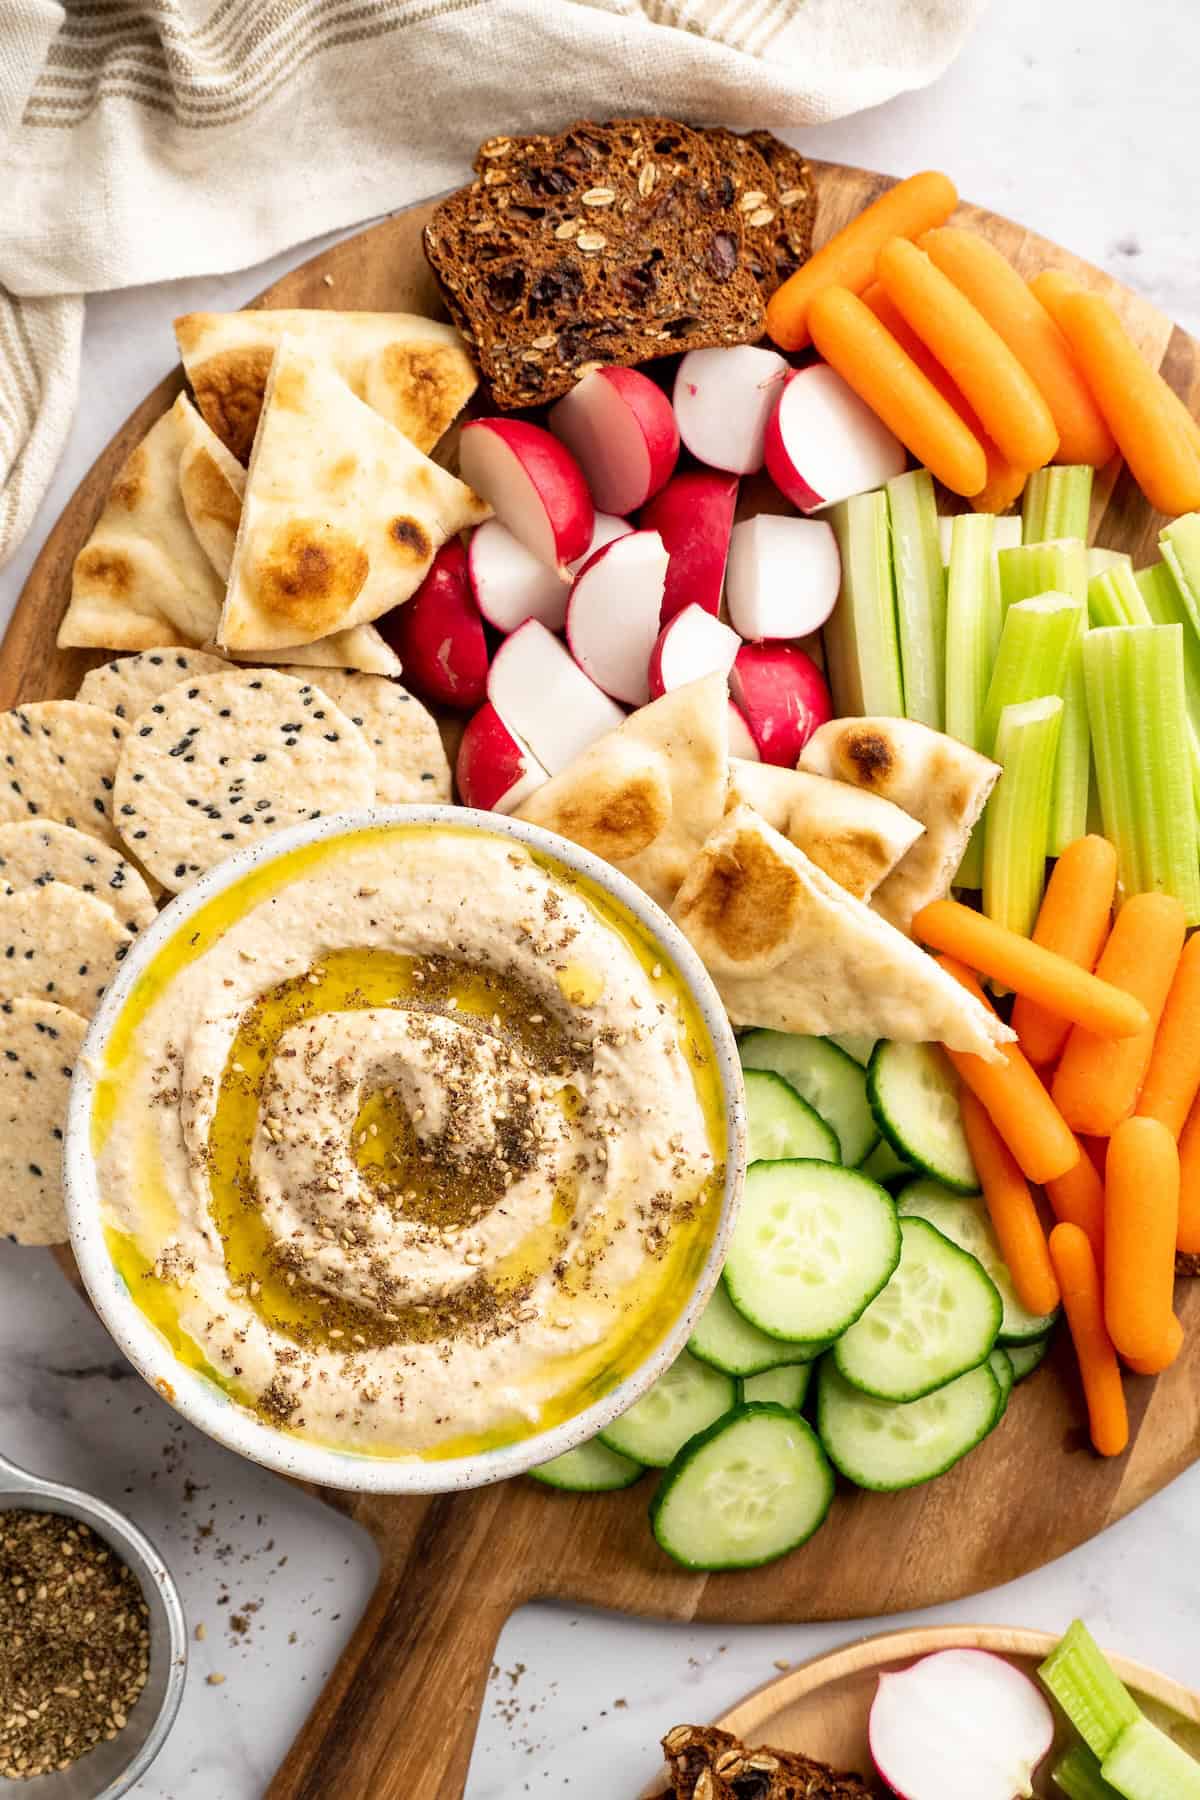
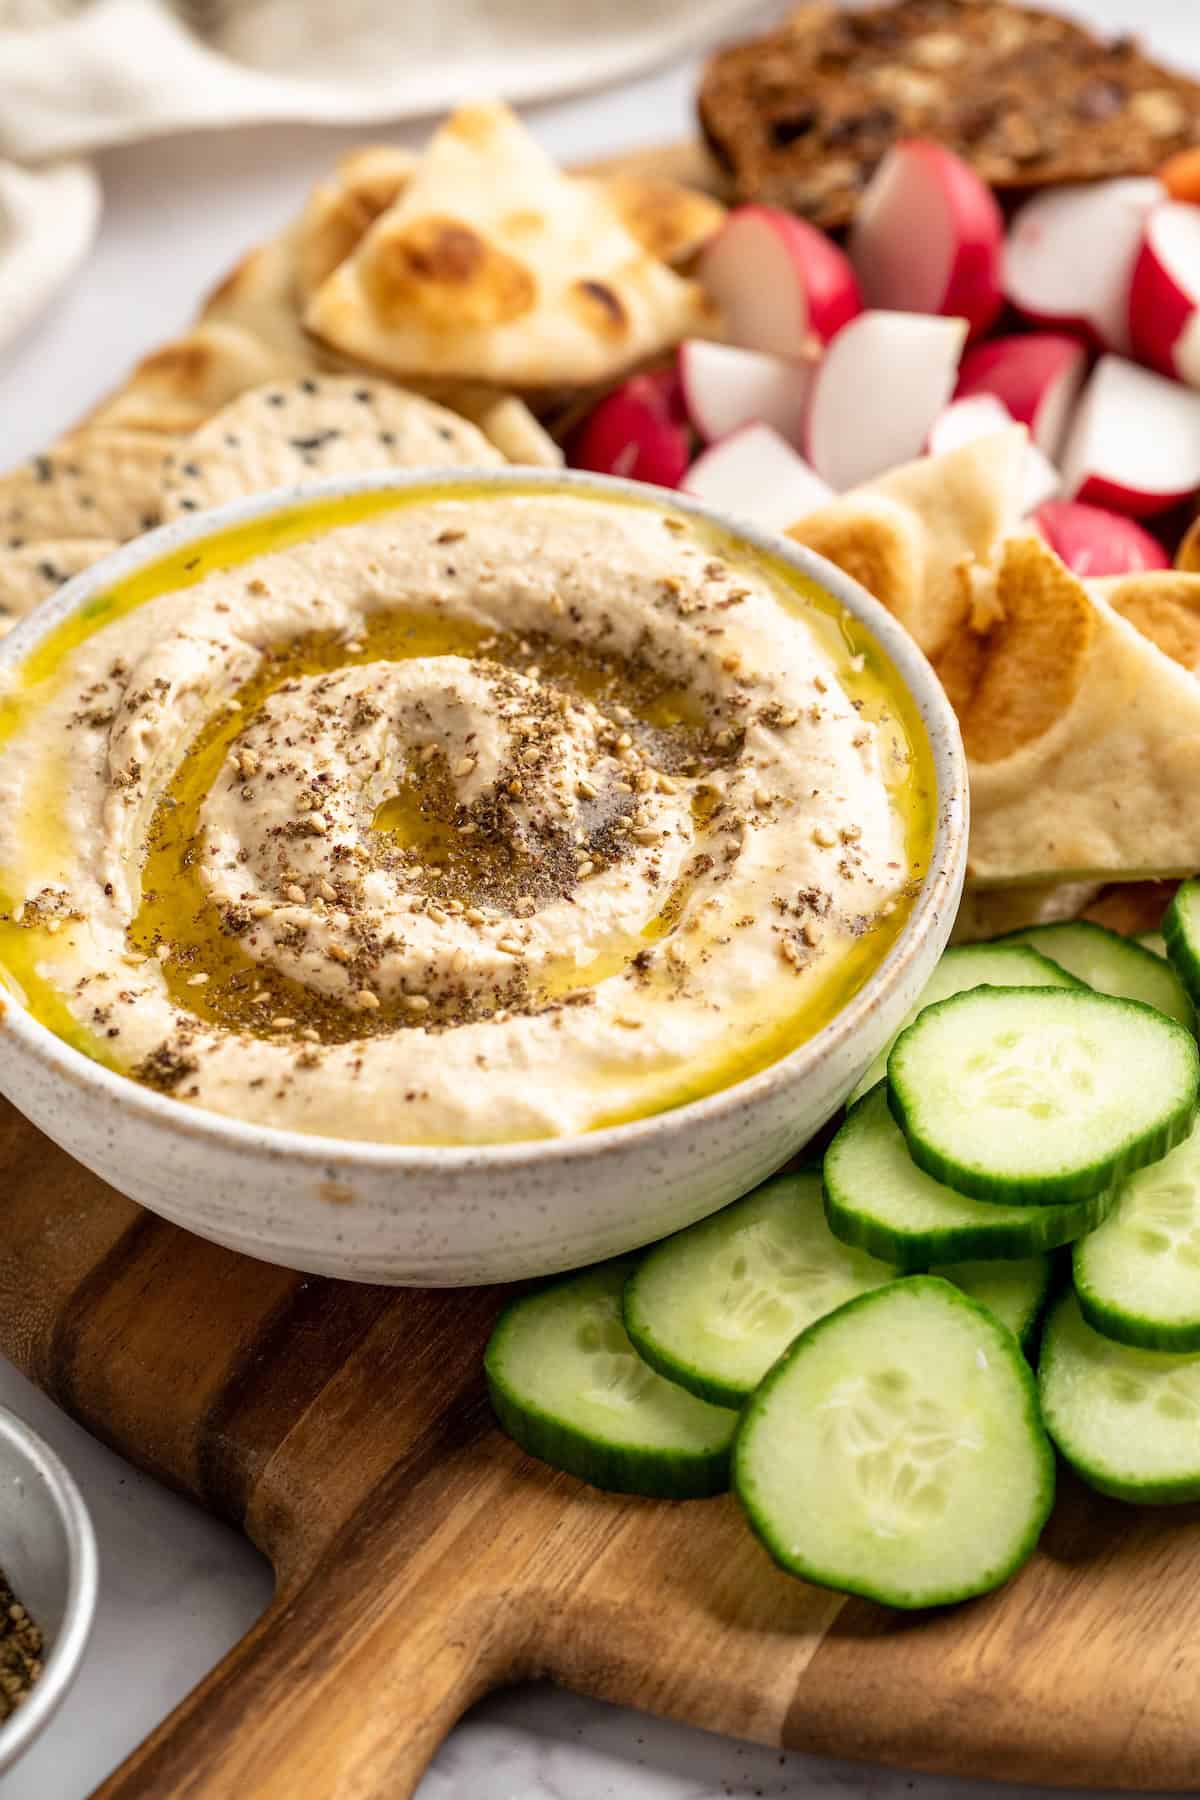
- Finish . Season to taste and process again. Serve as desired, whether it’s as a spread, with veggies, as a dip for pita bread or Vegan Naan , whatever!
Tips for Success
Here are a few more pointers to help you make perfect cauliflower hummus.
- Stop to scrape down the sides . I stop my food processor every minute and half, scrape down the sides, and blend again. By the time it’s done, it will be completely smooth and creamy.
- Use a blender if you don’t have a food processor . A high speed blender is best, but even a regular blender should work! Be sure to vent the lid, though, because the warm cauliflower will release steam.
- Roast the cauliflower longer if needed . If your florets are larger, you might need a little extra time in the oven. You want it fork tender so it purees smoothly.
Variations
There are so many ways to put your own spin on this recipe!
- Use raw garlic . You can add a clove of raw garlic instead of the roasted garlic if you want more pungent garlic flavour.
- Make it smoky . Add smoked paprika to the cauliflower hummus or sprinkle it on top of the hummus before serving.
- Top it . Add the hummus to a bowl and drizzle on a swirl of extra-virgin olive oil. To take it to the next level, you can add toasted pine nuts, za’atar, Crispy Roasted Chickpeas , sun-dried tomatoes, or Kalamata olives on top for garnish.
My Favourite Ways to Use This Hummus
It’s not just for dipping! I love slathering this cauliflower hummus onto tortillas and wrapping them up with romaine, diced tomatoes, cucumbers, and Crispy Homemade Falafel . You can also spread it onto buns with veggie burgers (like these Quinoa Burgers !) as a lighter vegan alternative to mayo.
How to Store Leftovers
- Refrigerator : Transfer leftover cauliflower hummus to an airtight container and refrigerate for up to 4 days.
- Freezer : Freeze this hummus in an airtight container or freezer bag for up to 3 months. Thaw in the refrigerator before serving.
More Vegan Cauliflower Recipes
- Cauliflower Steaks
- Orange Cauliflower
- Whole Roasted Cauliflower
- Cauliflower Pizza Bites
Ingredients
- 2 ½ cups cauliflower , 250 g
- 2 ½ tablespoons olive oil , 37.5 mL
- 4 cloves roasted garlic
- ½ teaspoon sea salt , 2.5 g
- ⅛ teaspoon ground black pepper , 0.25 g
- ½ teaspoon cumin , 1 g
- juice of 1 lime
- ¼ cup tahini , 60 g
- ½ cup ice cold water , 120 mL
Instructions
- Preheat your oven to 450 F/230 C. Prepare a baking sheet by lining it with a silicone baking sheet or greased foil.
- Remove florets from the cauliflower (aka don’t use the stem). Chop the cauliflower into smaller pieces like in the photo above. Drizzle the cauliflower with ½ tablespoon of olive oil and rub all over. Place on the lined baking sheet and roast for 15 minutes in the oven.
- Remove the cauliflower and let cool for about 5 minutes. Add to a food processor.
- Add in the leftover 2 tablespoons of olive oil, roasted garlic, sea salt and black pepper, cumin and the juice of one lime. Turn on the food processor to high to blend everything together. While blending, slowly stream in all of the tahini while the food processor is still running. Blend for about 2 minutes and then stop to scrape down all the sides.
- Turn the food processor back on and slowly stream in the ice cold water while the food processor is still running. The water should immediately begin to incorporate into the cauliflower hummus mixture. Let blend for 5 minutes straight or more depending on how powerful your food processor is, scraping down the sides every so often as needed.
- Your hummus should be smooth and creamy when you’re done. Taste test and add more salt, lime, tahini or water depending on your taste. Blend again until all incorporated. Serve with veggies and crackers and enjoy!
Notes
- Refrigerator : Transfer leftover cauliflower hummus to an airtight container and refrigerate for up to 4 days.
- Freezer : Freeze this hummus in an airtight container or freezer bag for up to 3 months. Thaw in the refrigerator before serving.
