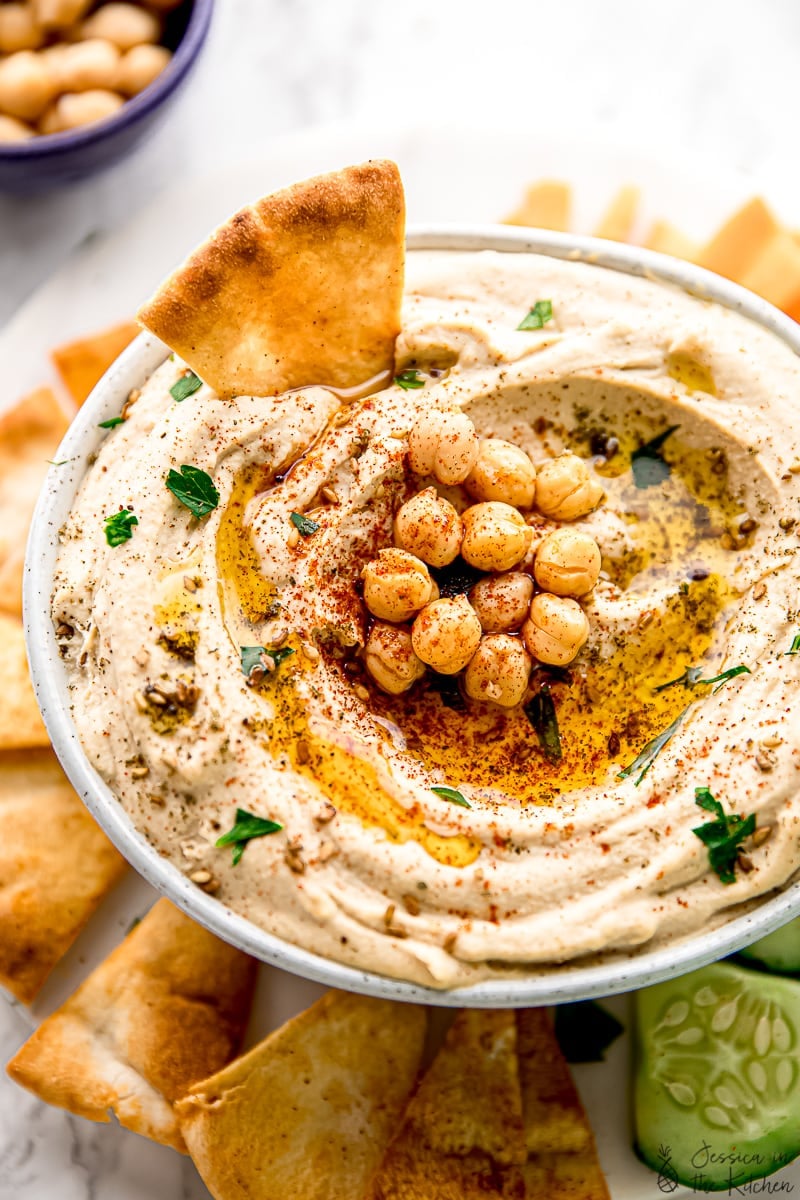
This is the best homemade hummus recipe I’ve ever tried! It’s a smooth and creamy blend of chickpeas and tahini, flavoured with fragrant roasted garlic. Hummus is naturally vegan and gluten-free, and there are so many ways to make this easy recipe your own.
Homemade hummus makes the perfect addition to a vegan charcuterie board served with pita chips or olive bread . It’s also delicious in hummus pasta !
I took a life-changing trip to the Middle East in 2018. I’d had hummus and baba ghanoush , and falafel before that, but never like what I had there! This homemade hummus is creamy and smooth, rich and even buttery, especially with the addition of roasted garlic (my secret to making just about everything taste better). If you’ve been disappointed by homemade hummus recipes in the past, this one won’t let you down.
What Makes This Homemade Hummus So Good
- Authentic flavors. Whenever I make this recipe, one thing that hits me is how aromatic the hummus is. It immediately brings me back to my time walking through the markets of Tel Aviv. And when I taste it? Well, that just seals the deal!
- Ready in 20 minutes. The best homemade hummus comes down to quality ingredients and a blender . Make it from scratch while hardly lifting a finger!
- Versatile. I recommend serving it with rounds of puffy pita and your favourite vegetables for dipping, but I have a few other ideas below, too.
Notes on Ingredients
Please note that this is important information on the ingredients and instructions. The full recipe, including amounts and details, can be found below (scroll to the recipe card) for your reference.
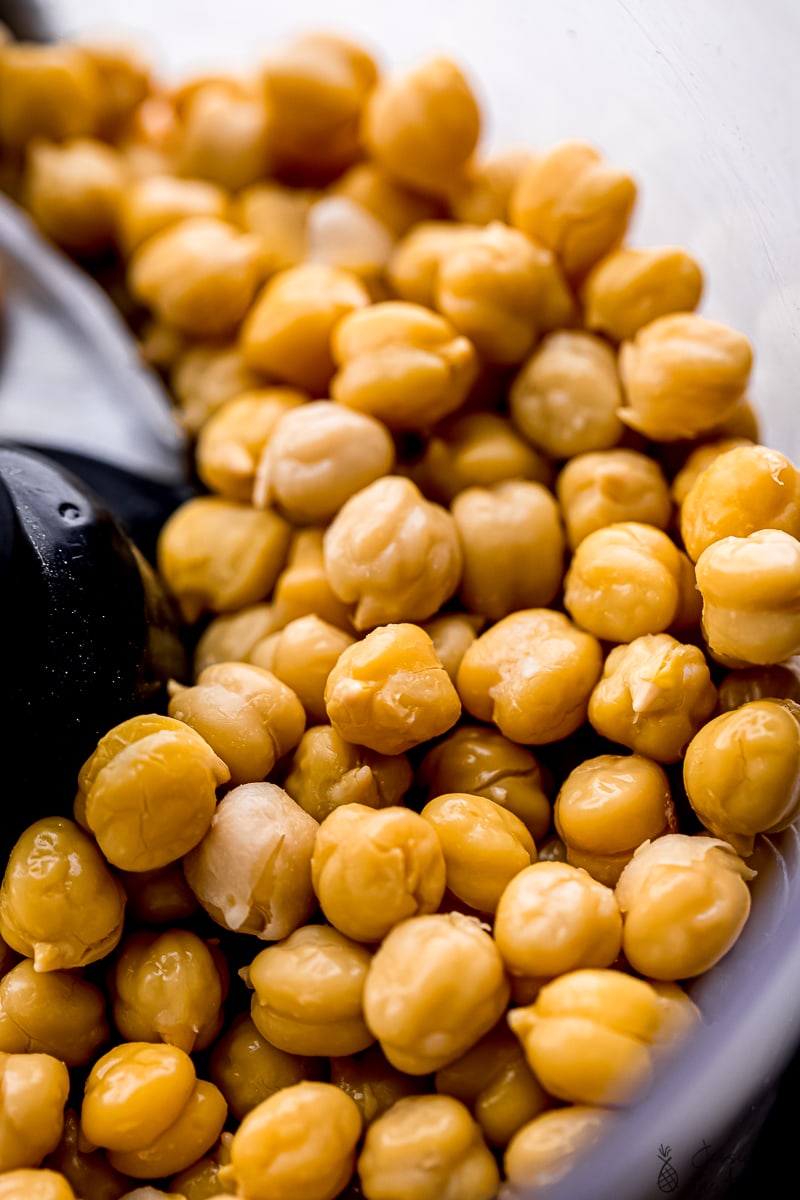
- Chickpeas – The great debate between freshly cooked or canned chickpeas ! Freshly cooked always tastes best, but ensure you’re getting quality dried chickpeas to start with. If you want to use canned, use a reliable brand . My favorite is the canned chickpeas (garbanzo beans) from Whole Foods .
- Roasted garlic – Here’s how to roast garlic in the oven, and you can also use your air fryer .
- Limes – Lime juice adds the perfect amount of acidity to complement the other flavours of the hummus.
- Sea salt and ground pepper – My favorite sea salt is Redmond Real Salt , and I recommend freshly ground black pepper. These are the grinders I use.
- Tahini – Be sure that your tahini is nutty, smooth, and palatable. It should never be bitter. I sometimes make homemade tahini , and I love the Baron’s Pure Ground Sesame Tahini , which is the closest I’ve found to what I enjoyed in the Middle East.
- Ice cold water – This will help incorporate the tahini and make the hummus lighter and fluffier.
- Olive oil – Always use the best quality olive oil you can afford. I don’t use a lot here, but what little I use makes a big difference.
Optional Hummus Toppings
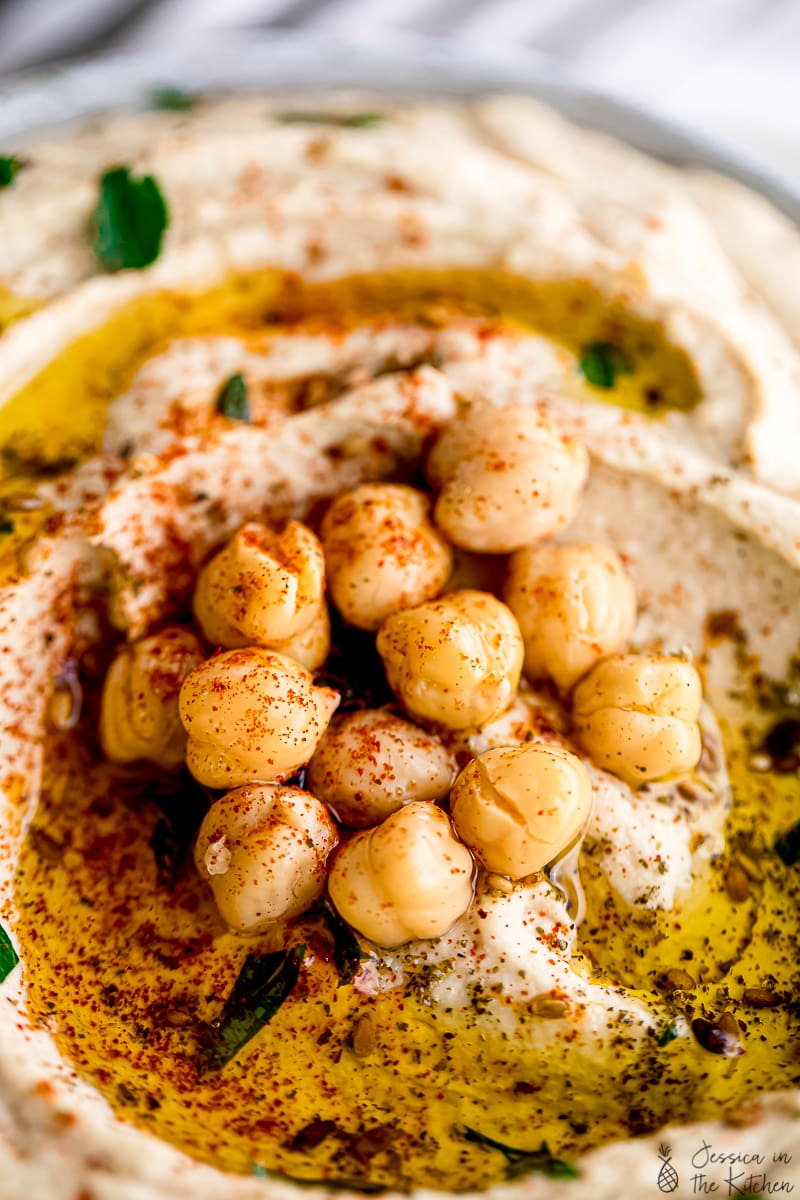
- Additional chickpeas – You can roast the chickpeas in the oven to make them crispy.
- Olive oil
- Za’atar – While za’atar isn’t a mandatory ingredient, every time I have hummus, I sprinkle some za’atar on top. You can make it if you have a recipe, or you can buy it .
- Smoked paprika
How to Make Homemade Hummus
Homemade hummus is simple, so the key to getting it right is high-quality ingredients and good technique. Here’s how to make this recipe in 3 easy steps:
- Pulse the chickpeas. Place the chickpeas, garlic, lime juice, sea salt, and ground black pepper in your food processor. Pulse on low for about 15 seconds, or until the chickpeas and other ingredients are chopped, but not blended smooth.
- Add the tahini and oil. Turn the food processor to low speed. Pour the tahini in through the chute, then slowly pour in the olive oil. Stop, scrape the sides, and turn the food processor back on at low speed.
- Add the water. Slowly pour the ice water into the chute as the food processor runs. The texture of the hummus should begin to change. Leave your food processor on for 3 to 5 minutes, stopping twice to scrape down the sides. The hummus should be light and fluffy. Taste and add more of any ingredient you’d like to balance the flavour.
Tips for the Best Homemade Hummus
- Peel the chickpeas. If you want to go the extra mile and get the smoothest, creamiest hummus, peel the chickpeas first. All it takes is a little pinch or rub to remove the skins. I actually love this process and find it kind of therapeutic.
- The ice water is essential. It only takes a few minutes to get ice-cold water, so don’t skip it. Just stick a glass of water with ice into your freezer for 15 minutes, then remove the ice and use the water. It helps the ingredients and tahini meld together and gives the hummus that incredibly fluffy and light texture.
- Add the tahini, oil, and water slowly. Always slowly pour these ingredients into your food processor . This allows them to properly incorporate into the hummus. It’s worth going a little slower to make the best hummus.
Feeling Creative? Try These Variations
Once you’ve made hummus from scratch, there are plenty of ways to adapt the flavors and ingredients. These are some easy homemade hummus recipes that I love, that use this traditional hummus as a base:
- Beet hummus . Blend in red beets for a pop of color and earthy flavor.
- Roasted red pepper hummus . Roasting the peppers first brings out their sweetness.
- Roasted cauliflower hummus . Classic hummus with a low-carb twist!
Ways to Serve Hummus
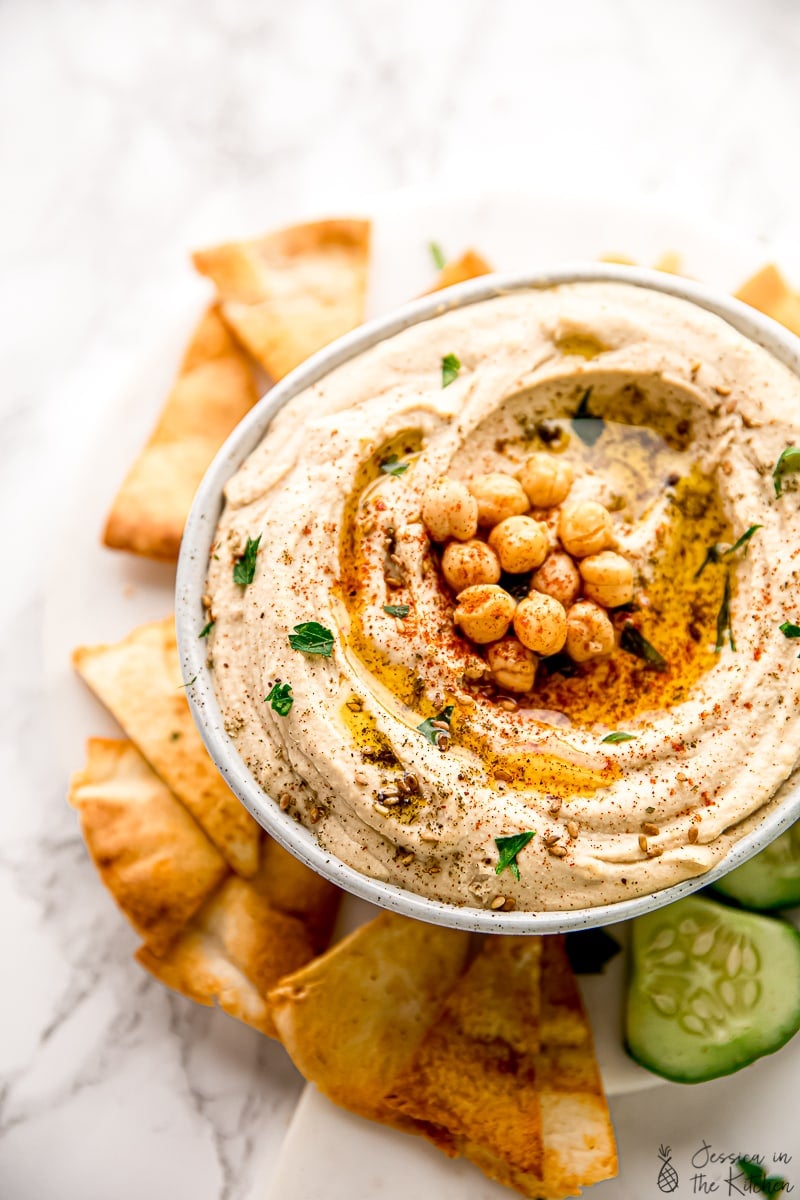
When it’s time to serve, scrape the hummus into a serving bowl and use the back of your spoon to swoop it into swirl shapes (see the photos). Drizzle more olive oil on top and add your favourite toppings.
The best thing about hummus is that it complements so many foods perfectly. Enjoy it with a crudité platter and fresh pita bread. These are more of my favorite serving suggestions:
- Add it to sandwiches and wraps, or spread it onto a falafel burger
- Use it in a Greek salad bowl or serve with tabbouleh
- As a dip for veggies, like carrots, celery, and sweet bell peppers
- Serve with bread, crackers, or veggie chips
- Thin it out and use it as a dressing or a sauce
How to Store
- Refrigerate. Transfer hummus to an airtight storage container and refrigerate for up to a week.
- Can I freeze hummus? Yes, you can freeze homemade hummus! Place it in an airtight storage container and freeze for up to 3 months. Let it thaw in the refrigerator, then serve.
More Homemade Dip Recipes
- Homemade Tzatziki
- Roasted Garlic White Bean Dip
- Creamy Vegan Whipped Feta Dip
- Vegan Spinach Artichoke Dip
- Easy Guacamole
Ingredients
Vegan Hummus Recipe
- 3 cups cooked chickpeas
- 4-5 cloves roasted garlic
- Juice of two limes
- ¾ teaspoon sea salt
- ½ teaspoon ground black pepper
- 1/2 cup tahini
- ½ – ¾ cup ice cold water , it will incorporate with the tahini and make the hummus lighter and fluffier
- 2 tablespoons olive oil
Topping
- Additional chickpeas
- Olive oil
- Za’atar
- smoked paprika
Instructions
- In your food processor, add the chickpeas, garlic and, lime juice, sea salt and ground black pepper. Pulse/blend on low for about 15 seconds until the chickpeas and other ingredients are chopped up together.
- Turn your food processor on to low blend. Through the chute in the top of your food processor, slowly drizzle in the tahini bit by bit until it’s all poured in. Next, slowly drizzle the olive oil in. Stop, scrape the sides, and turn back on.
- Now, slowly drizzle in the ice-cold water. The texture should begin to change. Leave your food processor on for 3 to 5 minutes, stop twice in between to scrape down the sides. Allow the hummus to blend completely until the hummus begins light and fluffy and fully incorporated. Once blended, taste test and add more of any ingredient that you’d like (be that more salt or tahini or lime juice).
- Scrape from food processor into a bowl if serving immediately and using the back of your spoon, swoop into swirl shapes. Drizzle more olive oil on top with your favourite toppings such as smoked paprika and za’atar. Enjoy with veggies and pita chips , or in sandwiches, wraps or on pasta!
Notes
This is the best homemade hummus recipe I’ve ever tried! It’s a smooth and creamy blend of chickpeas and tahini, flavoured with fragrant roasted garlic. Hummus is naturally vegan and gluten-free, and there are so many ways to make this easy recipe your own.
Homemade hummus makes the perfect addition to a vegan charcuterie board served with pita chips or olive bread . It’s also delicious in hummus pasta !
I took a life-changing trip to the Middle East in 2018. I’d had hummus and baba ghanoush , and falafel before that, but never like what I had there! This homemade hummus is creamy and smooth, rich and even buttery, especially with the addition of roasted garlic (my secret to making just about everything taste better). If you’ve been disappointed by homemade hummus recipes in the past, this one won’t let you down.
What Makes This Homemade Hummus So Good
- Authentic flavors. Whenever I make this recipe, one thing that hits me is how aromatic the hummus is. It immediately brings me back to my time walking through the markets of Tel Aviv. And when I taste it? Well, that just seals the deal!
- Ready in 20 minutes. The best homemade hummus comes down to quality ingredients and a blender . Make it from scratch while hardly lifting a finger!
- Versatile. I recommend serving it with rounds of puffy pita and your favourite vegetables for dipping, but I have a few other ideas below, too.
Notes on Ingredients
Please note that this is important information on the ingredients and instructions. The full recipe, including amounts and details, can be found below (scroll to the recipe card) for your reference.
- Chickpeas – The great debate between freshly cooked or canned chickpeas ! Freshly cooked always tastes best, but ensure you’re getting quality dried chickpeas to start with. If you want to use canned, use a reliable brand . My favorite is the canned chickpeas (garbanzo beans) from Whole Foods .
- Roasted garlic – Here’s how to roast garlic in the oven, and you can also use your air fryer .
- Limes – Lime juice adds the perfect amount of acidity to complement the other flavours of the hummus.
- Sea salt and ground pepper – My favorite sea salt is Redmond Real Salt , and I recommend freshly ground black pepper. These are the grinders I use.
- Tahini – Be sure that your tahini is nutty, smooth, and palatable. It should never be bitter. I sometimes make homemade tahini , and I love the Baron’s Pure Ground Sesame Tahini , which is the closest I’ve found to what I enjoyed in the Middle East.
- Ice cold water – This will help incorporate the tahini and make the hummus lighter and fluffier.
- Olive oil – Always use the best quality olive oil you can afford. I don’t use a lot here, but what little I use makes a big difference.
Optional Hummus Toppings
- Additional chickpeas – You can roast the chickpeas in the oven to make them crispy.
- Olive oil
- Za’atar – While za’atar isn’t a mandatory ingredient, every time I have hummus, I sprinkle some za’atar on top. You can make it if you have a recipe, or you can buy it .
- Smoked paprika
How to Make Homemade Hummus
Homemade hummus is simple, so the key to getting it right is high-quality ingredients and good technique. Here’s how to make this recipe in 3 easy steps:
- Pulse the chickpeas. Place the chickpeas, garlic, lime juice, sea salt, and ground black pepper in your food processor. Pulse on low for about 15 seconds, or until the chickpeas and other ingredients are chopped, but not blended smooth.
- Add the tahini and oil. Turn the food processor to low speed. Pour the tahini in through the chute, then slowly pour in the olive oil. Stop, scrape the sides, and turn the food processor back on at low speed.
- Add the water. Slowly pour the ice water into the chute as the food processor runs. The texture of the hummus should begin to change. Leave your food processor on for 3 to 5 minutes, stopping twice to scrape down the sides. The hummus should be light and fluffy. Taste and add more of any ingredient you’d like to balance the flavour.
Tips for the Best Homemade Hummus
- Peel the chickpeas. If you want to go the extra mile and get the smoothest, creamiest hummus, peel the chickpeas first. All it takes is a little pinch or rub to remove the skins. I actually love this process and find it kind of therapeutic.
- The ice water is essential. It only takes a few minutes to get ice-cold water, so don’t skip it. Just stick a glass of water with ice into your freezer for 15 minutes, then remove the ice and use the water. It helps the ingredients and tahini meld together and gives the hummus that incredibly fluffy and light texture.
- Add the tahini, oil, and water slowly. Always slowly pour these ingredients into your food processor . This allows them to properly incorporate into the hummus. It’s worth going a little slower to make the best hummus.
Feeling Creative? Try These Variations
Once you’ve made hummus from scratch, there are plenty of ways to adapt the flavors and ingredients. These are some easy homemade hummus recipes that I love, that use this traditional hummus as a base:
- Beet hummus . Blend in red beets for a pop of color and earthy flavor.
- Roasted red pepper hummus . Roasting the peppers first brings out their sweetness.
- Roasted cauliflower hummus . Classic hummus with a low-carb twist!
Ways to Serve Hummus
When it’s time to serve, scrape the hummus into a serving bowl and use the back of your spoon to swoop it into swirl shapes (see the photos). Drizzle more olive oil on top and add your favourite toppings.
The best thing about hummus is that it complements so many foods perfectly. Enjoy it with a crudité platter and fresh pita bread. These are more of my favorite serving suggestions:
- Add it to sandwiches and wraps, or spread it onto a falafel burger
- Use it in a Greek salad bowl or serve with tabbouleh
- As a dip for veggies, like carrots, celery, and sweet bell peppers
- Serve with bread, crackers, or veggie chips
- Thin it out and use it as a dressing or a sauce
How to Store
- Refrigerate. Transfer hummus to an airtight storage container and refrigerate for up to a week.
- Can I freeze hummus? Yes, you can freeze homemade hummus! Place it in an airtight storage container and freeze for up to 3 months. Let it thaw in the refrigerator, then serve.
More Homemade Dip Recipes
- Homemade Tzatziki
- Roasted Garlic White Bean Dip
- Creamy Vegan Whipped Feta Dip
- Vegan Spinach Artichoke Dip
- Easy Guacamole
Ingredients
Vegan Hummus Recipe
- 3 cups cooked chickpeas
- 4-5 cloves roasted garlic
- Juice of two limes
- ¾ teaspoon sea salt
- ½ teaspoon ground black pepper
- 1/2 cup tahini
- ½ – ¾ cup ice cold water , it will incorporate with the tahini and make the hummus lighter and fluffier
- 2 tablespoons olive oil
Topping
- Additional chickpeas
- Olive oil
- Za’atar
- smoked paprika
Instructions
- In your food processor, add the chickpeas, garlic and, lime juice, sea salt and ground black pepper. Pulse/blend on low for about 15 seconds until the chickpeas and other ingredients are chopped up together.
- Turn your food processor on to low blend. Through the chute in the top of your food processor, slowly drizzle in the tahini bit by bit until it’s all poured in. Next, slowly drizzle the olive oil in. Stop, scrape the sides, and turn back on.
- Now, slowly drizzle in the ice-cold water. The texture should begin to change. Leave your food processor on for 3 to 5 minutes, stop twice in between to scrape down the sides. Allow the hummus to blend completely until the hummus begins light and fluffy and fully incorporated. Once blended, taste test and add more of any ingredient that you’d like (be that more salt or tahini or lime juice).
- Scrape from food processor into a bowl if serving immediately and using the back of your spoon, swoop into swirl shapes. Drizzle more olive oil on top with your favourite toppings such as smoked paprika and za’atar. Enjoy with veggies and pita chips , or in sandwiches, wraps or on pasta!
Notes

Homemade Hummus
Ingredients
Vegan Hummus Recipe
- 3 cups cooked chickpeas
- 4-5 cloves roasted garlic
- Juice of two limes
- ¾ teaspoon sea salt
- ½ teaspoon ground black pepper
- 1/2 cup tahini
- ½ - ¾ cup ice cold water it will incorporate with the tahini and make the hummus lighter and fluffier
- 2 tablespoons olive oil
Topping
- Additional chickpeas
- Olive oil
- Za’atar
- smoked paprika
Instructions
- In your food processor, add the chickpeas, garlic and, lime juice, sea salt and ground black pepper. Pulse/blend on low for about 15 seconds until the chickpeas and other ingredients are chopped up together.
- Turn your food processor on to low blend. Through the chute in the top of your food processor, slowly drizzle in the tahini bit by bit until it’s all poured in. Next, slowly drizzle the olive oil in. Stop, scrape the sides, and turn back on.
- Now, slowly drizzle in the ice-cold water. The texture should begin to change. Leave your food processor on for 3 to 5 minutes, stop twice in between to scrape down the sides. Allow the hummus to blend completely until the hummus begins light and fluffy and fully incorporated. Once blended, taste test and add more of any ingredient that you’d like (be that more salt or tahini or lime juice).
- Scrape from food processor into a bowl if serving immediately and using the back of your spoon, swoop into swirl shapes. Drizzle more olive oil on top with your favourite toppings such as smoked paprika and za’atar. Enjoy with veggies and pita chips , or in sandwiches, wraps or on pasta!
Notes
Nutrition
Homemade Hummus https://jessicainthekitchen.com/the-best-homemade-authentic-hummus/ December 11, 2021
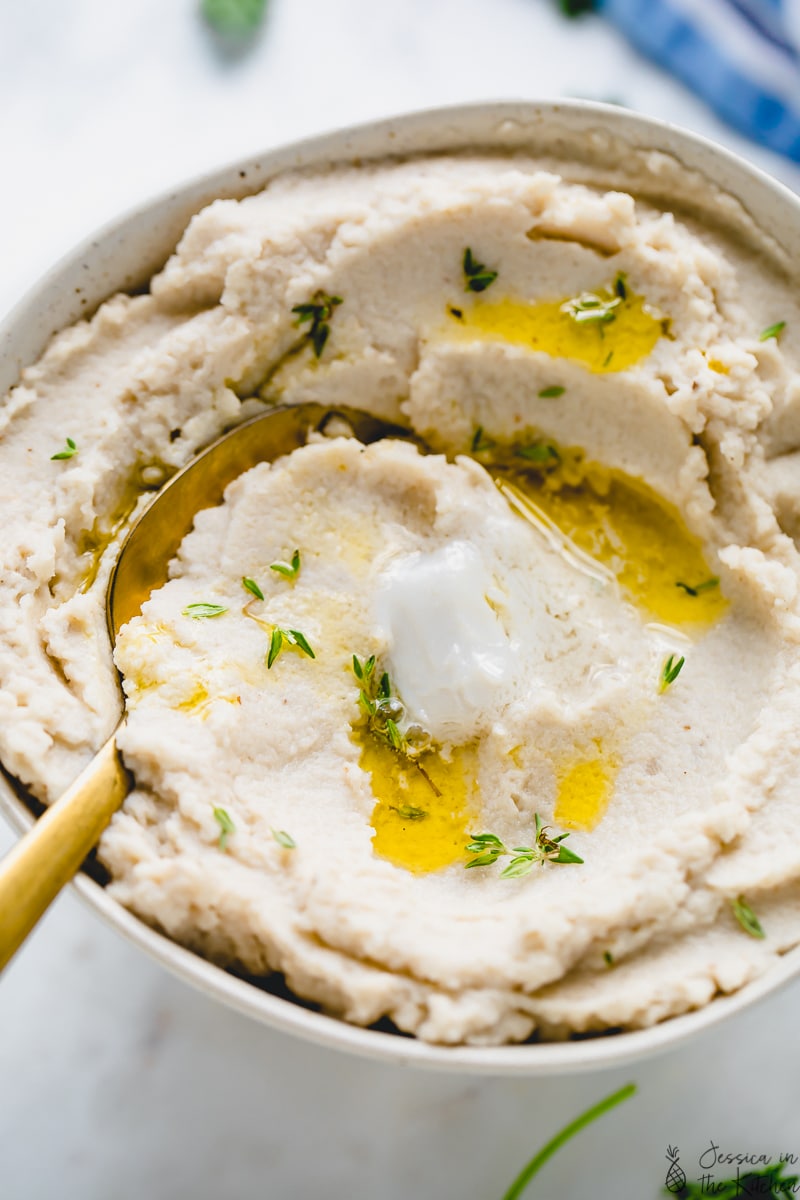
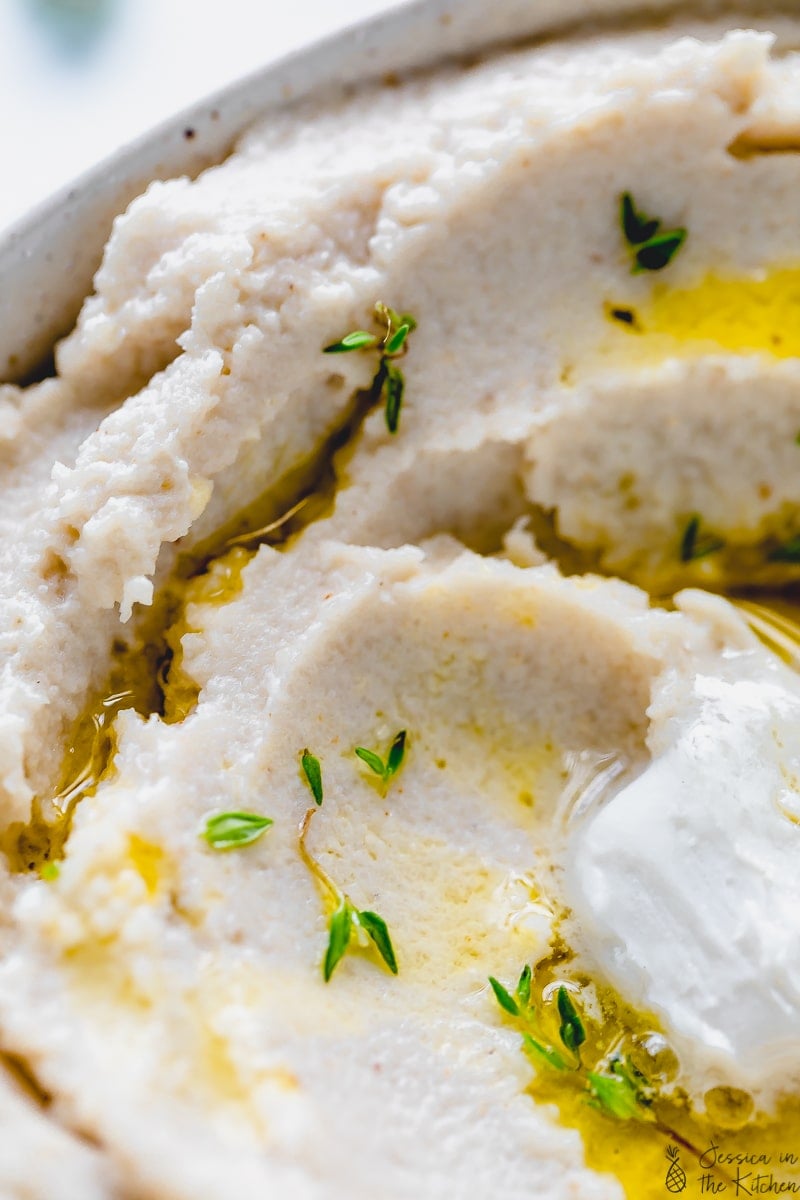
Vegan mashed cauliflower is buttery and creamy without dairy, and it’s a perfect low-carb side dish at the holiday table. Roasting fresh garlic with the cauliflower infuses this plant-based mash with rich, nutty, garlicky flavour. It also guarantees that it never turns out watery!
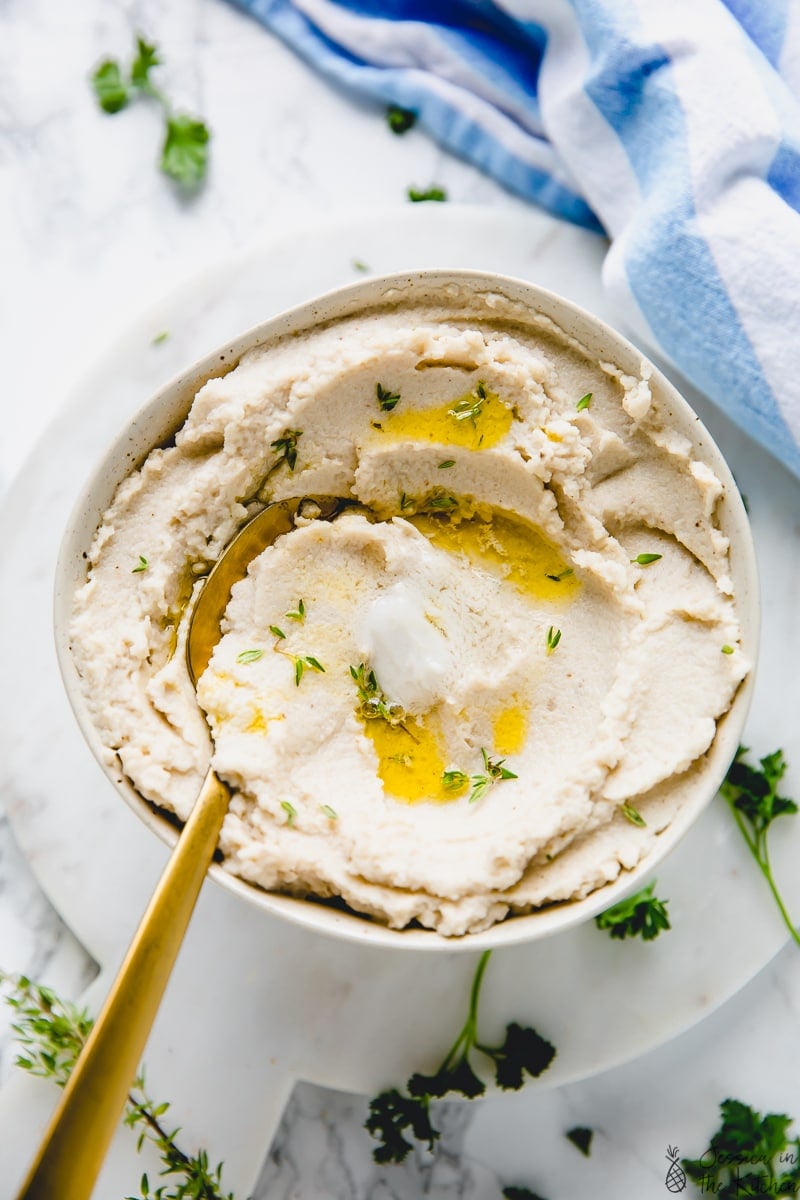
If you’re looking for a holiday side dish that’s dairy-free and lower in carbs, this vegan garlic mashed cauliflower is the best! It’s creamy, smooth, and light, with a subtle nuttiness from roasting. My favourite way to enjoy this recipe is with my vegan gravy . Serve it with a slice of vegan meatloaf for a homey, cozy plant-based meal or even Thanksgiving dinner!
What Makes This Creamy Garlic Mashed Cauliflower Recipe So Great
- Delicious and low-carb. Cauliflower is light and fluffy, and lower in carbs than mashed potatoes and similar Thanksgiving sides.
- Rich and garlicky. There’s plenty of flavour thanks to the addition of fragrant roasted garlic cloves.
- Creamy without dairy. Roasting the garlic and cauliflower not only deepens the flavours, but it also ensures that this cauliflower mash turns out fluffy and creamy, and never watery.
- Practically hands-free. The mash takes minutes to whip up in the food processor!
Notes on Ingredients
Please note that this is important information on the ingredients and instructions, and the FULL recipe with amounts and details can be found DOWN BELOW (scroll to it) in the recipe card.
- Cauliflower – You can buy a whole cauliflower and break it into florets, or save yourself time by buying a bag of pre-cut florets.
- Olive oil – Or a similar mild-flavored cooking oil, like avocado oil.
- Garlic – You’ll need fresh garlic cloves if you’re roasting them alongside the cauliflower. Otherwise, you can add jarred garlic to taste when you blend the mash afterward. You may need slightly less in this case, as jarred garlic is stronger in flavour.
- Vegan butter – Here’s how to make your own vegan butter . Otherwise, use your favourite brand of plant-based butter.
- Coconut milk – Use the canned variety, not refrigerated coconut milk. The richness in coconut milk makes this cauliflower mash ultra-smooth and creamy.
Optional Add-ins
The roasted garlic means this recipe is already full of flavour, but you can also try some of these additions to change things up:
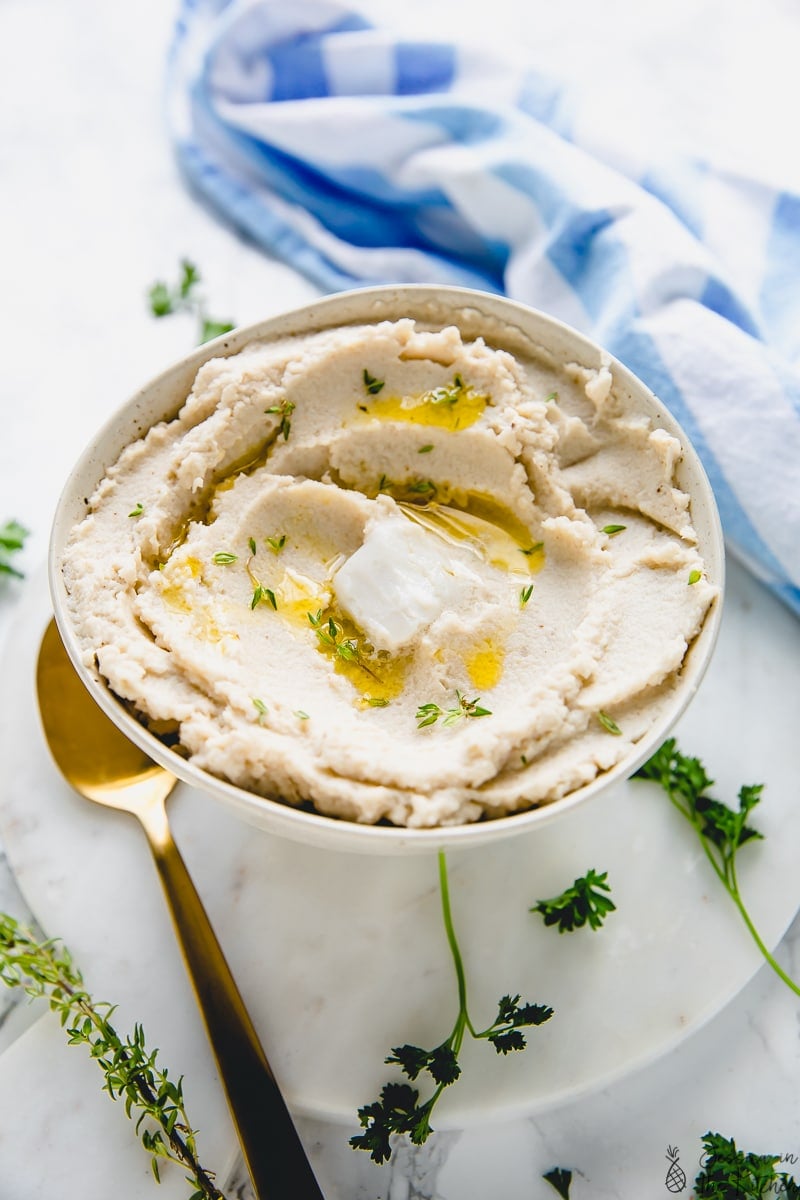
- Fresh or dried herbs, like parsley, chives, rosemary, sage, or thyme
- Cracked black pepper
- Vegan shredded cheese
How to Make the Best Mashed Cauliflower
You could get a jump on this recipe by roasting the garlic and cauliflower in advance if you need to. However, similar to preparing mashed potatoes, I highly recommend blending the freshly roasted cauliflower while it’s still warm and serving it right away. It’ll be smoother and fluffier this way. Let’s get started:
- Roast the cauliflower and garlic together. Toss the cauliflower florets with olive oil and spread them out on a baking sheet. Then, smash whole garlic cloves and add them to the pan. Roast the cauliflower at 450ºF for 20 minutes, until golden. Afterward, peel the garlic and transfer everything to the food processor along with a pinch of sea salt.
- Warm the coconut milk and butter. Next, combine the vegan butter and coconut milk in a saucepan and heat until the butter melts. You could also do this in a microwave-safe bowl in the microwave. Pour the mixture into the food processor with the cauliflower.
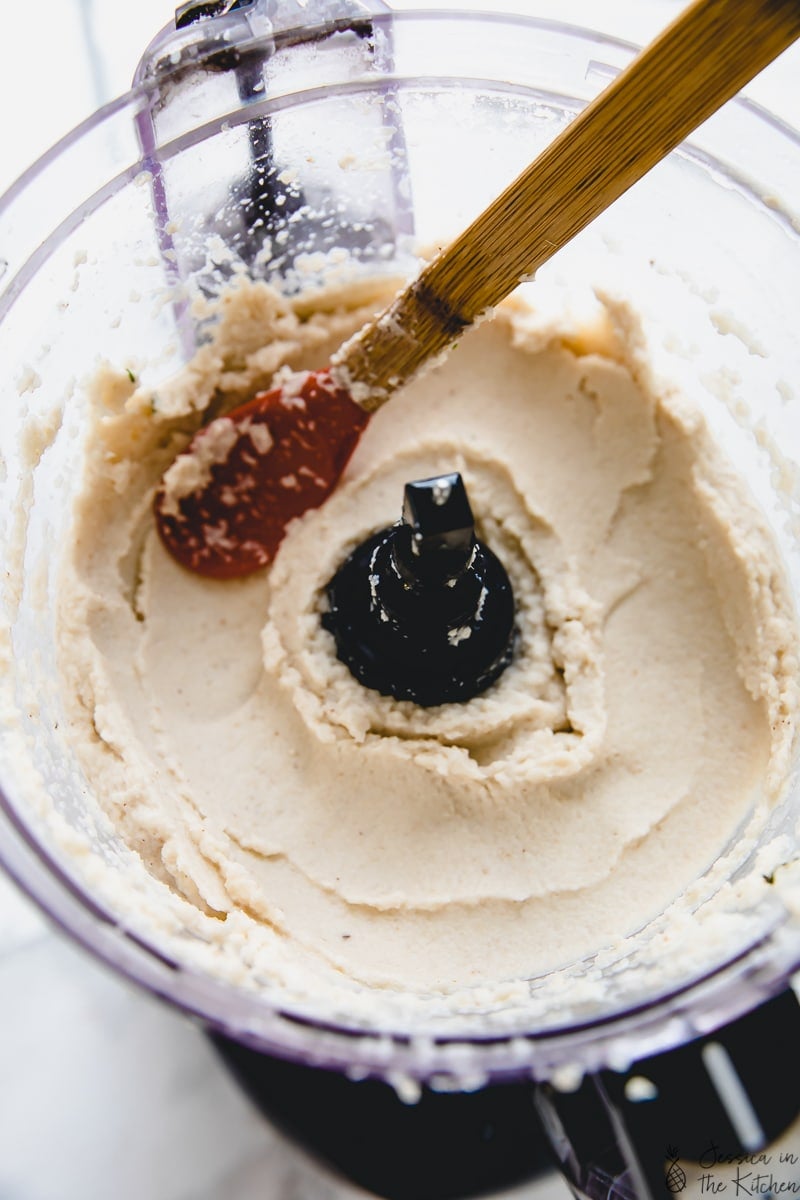
- Blend. Process the cauliflower on high for 3-4 minutes, until smooth. For a creamier texture, add an extra 1/4 cup of coconut milk. Afterward, season to taste, and serve warm.
Why Roasting the Cauliflower for Mash Matters
If you’ve tried mashed cauliflower and disliked it, I bet the recipe started with steamed cauliflower. That was my first introduction to mashed cauliflower, and let’s just say, it left me underwhelmed, too. If you want the BEST mashed cauliflower, you need to start with roasted cauliflower. It’s a game-changer!
Recipe Tips
- Don’t let it cool. Add the hot cauliflower, melted hot butter and hot coconut milk, and seasonings into your food processor and blend. Cauliflower can take on a bit of a funky flavour when refrigerated; if you like cauliflower, this might not be an issue for you, but I think this recipe tastes best when it doesn’t have a chance to cool before you serve it.
- Don’t skip the roasting. I really love this version of mashed cauliflower versus the kind that uses steamed or boiled cauliflower because it eliminates the potential for your cauliflower to be runny and bland.
- Don’t overmix. Process the cauliflower until it reaches the consistency you desire, and no longer.
Serving Suggestions
Serve this vegan mashed cauliflower at Thanksgiving or Christmas dinner with more holiday favourites like homemade cranberry sauce , candied yams , and air fryer green beans . It’s the perfect light side dish to a vegan turkey or vegan wellington .
Storing and Reheating Leftover Mash
- Refrigerate. Store leftover mashed cauliflower in an airtight container in the refrigerator for 2 to 3 days.
- Reheat. Reheat leftovers in the microwave or on the stovetop on low, adding a bit of coconut milk to thin it out.
- Can this be frozen? Yes. This vegan mashed cauliflower tastes best when it’s fresh, but you can freeze it in a pinch. Place the cauliflower mash in an airtight container and freeze for up to 3 months. You can warm mashed cauliflower in the microwave from frozen, or let it thaw in the refrigerator first.
More Easy Vegan Side Dishes
- Mashed Sweet Potato
- Whole Roasted Cauliflower
- Cabbage Steaks
- Hasselback Butternut Squash
- Maple Brussels Sprouts
Ingredients
- 3 to 4 cups of cauliflower florets , 1lb 11oz
- 2 teaspoons olive oil
- 4 cloves garlic , skins still on but slightly smashed
- 1 teaspoon sea salt
- 3 tablespoons vegan butter
- 3/4 cup to 1 cup coconut milk
- optional but delicious add ins: dried parsley , chives, black pepper
Instructions
- Preheat your oven to 450 F/230 C. Prepare a baking sheet by lining it with a silicone baking sheet or greased foil.
- Remove florets from the cauliflower (aka don’t use the stem). Drizzle the cauliflower with the olive oil and rub all over. Place on the lined baking sheet. Add the smashed garlic (skins still on) on the baking sheet. The skins help to prevent it burning; you’ll remove thee afterwards. Roast for 20 minutes in the oven.
- Remove the cauliflower and don’t let cool. Add the roasted cauliflower, the garlic (skins remove), and the sea salt into a food processor.
- In a microwave (or on stove top if you prefer), add the vegan butter to the coconut milk and microwave for about 45 seconds until both are hot and the butter is melted. Add it to the food processor.
- Turn on the food processor to high to blend everything together. Blend for about 3-4 minutes, stopping to scrape down all the sides. If you need it, add in the last 1/4 cup of the coconut milk to get the mashed cauliflower even creamier and smooth. Just watch it so it’s your desired texture.
- Your mashed cauliflower should be smooth and creamy when you’re done. Taste test and add more salt, depending on your taste. Blend again until all incorporated. Serve with veggies and crackers and enjoy!
Notes
- How to store: S tore leftover mashed cauliflower in an airtight container in the refrigerator for 2 to 3 days. Reheat it in the microwave or on the stovetop on low, adding a bit of coconut milk to thin it out.
- How to freeze: Place the mashed cauliflower in an airtight container and freeze for up to 3 months. You can warm it in the microwave from frozen, or let it thaw in the refrigerator and warm it on the stovetop or in the microwave.
