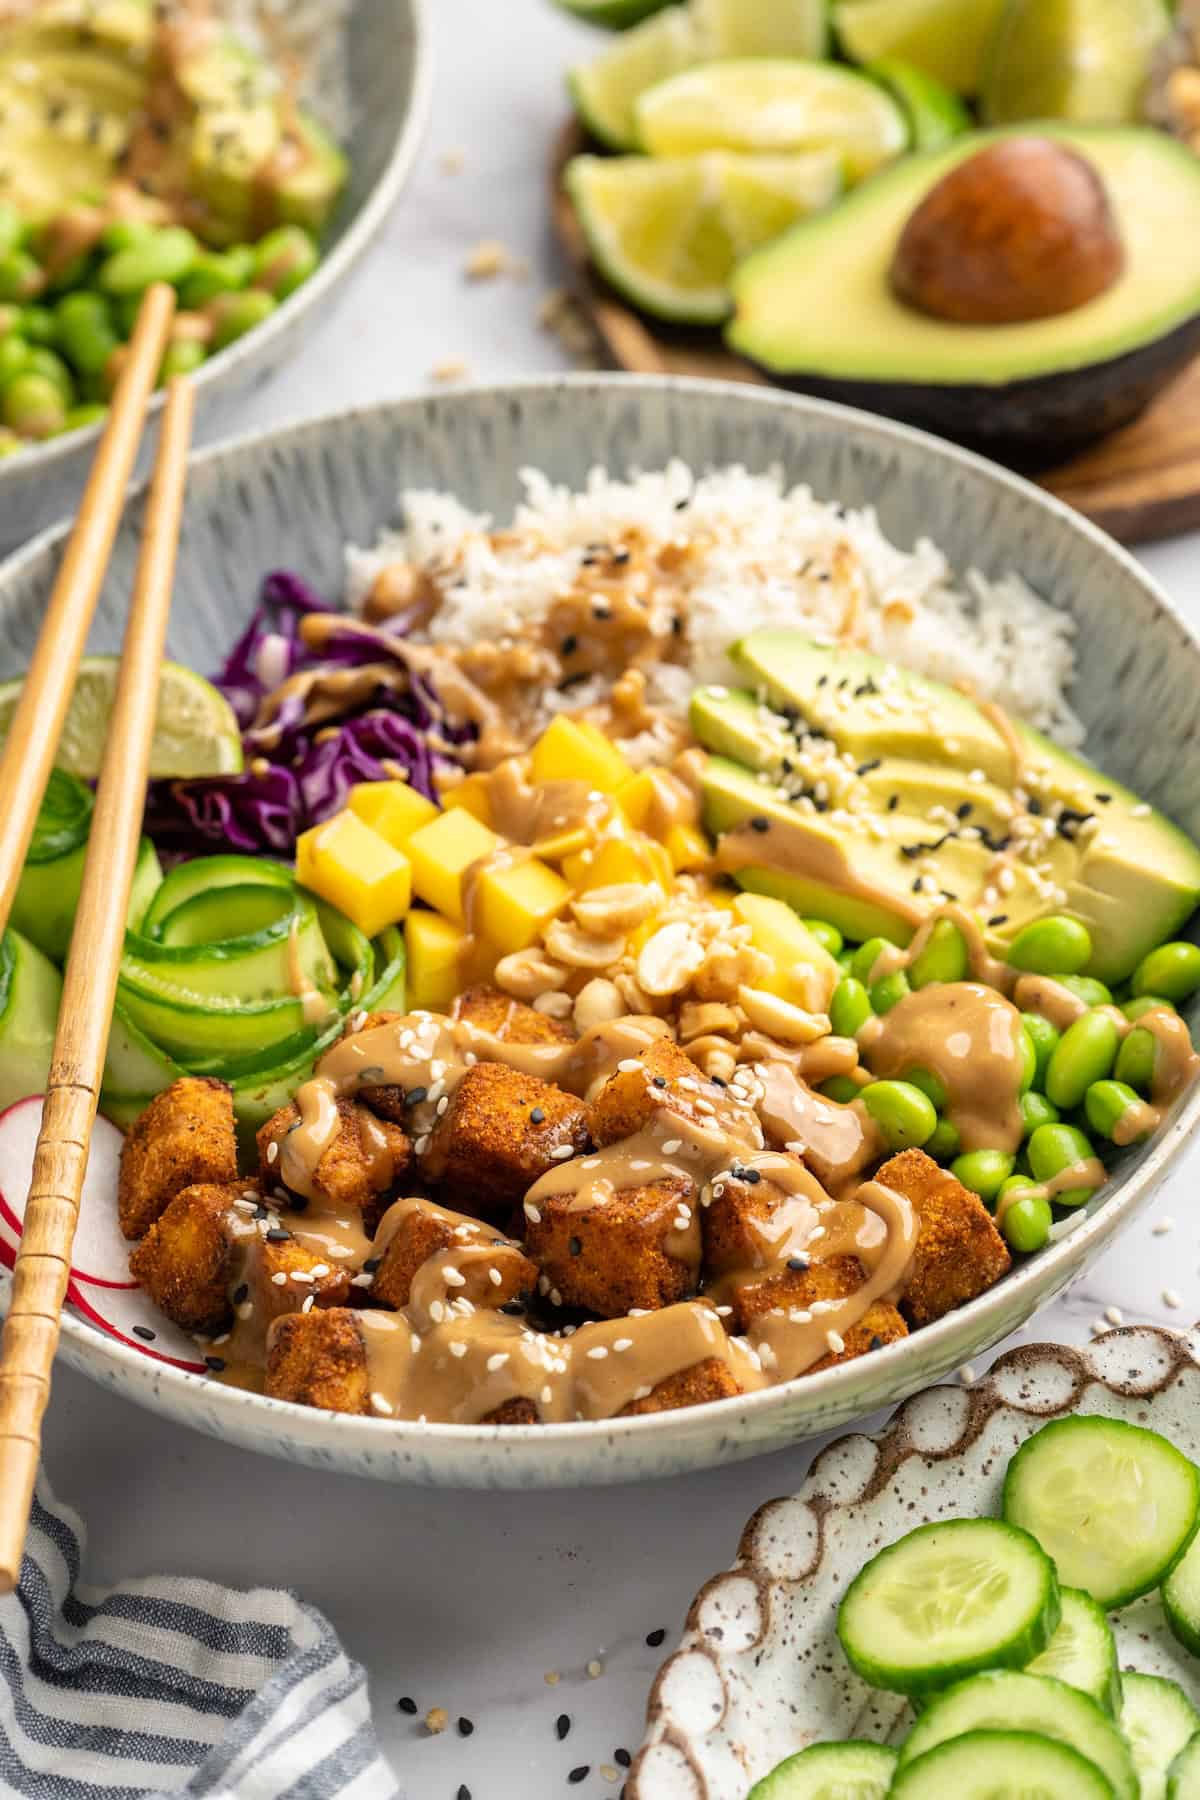
With crispy tofu, creamy peanut sauce, veggies, and rice, these Peanut Tofu Bowls have everything you need for a satisfying and delicious meal. They’re perfect for meal prep and the air fryer makes cooking the tofu a breeze!
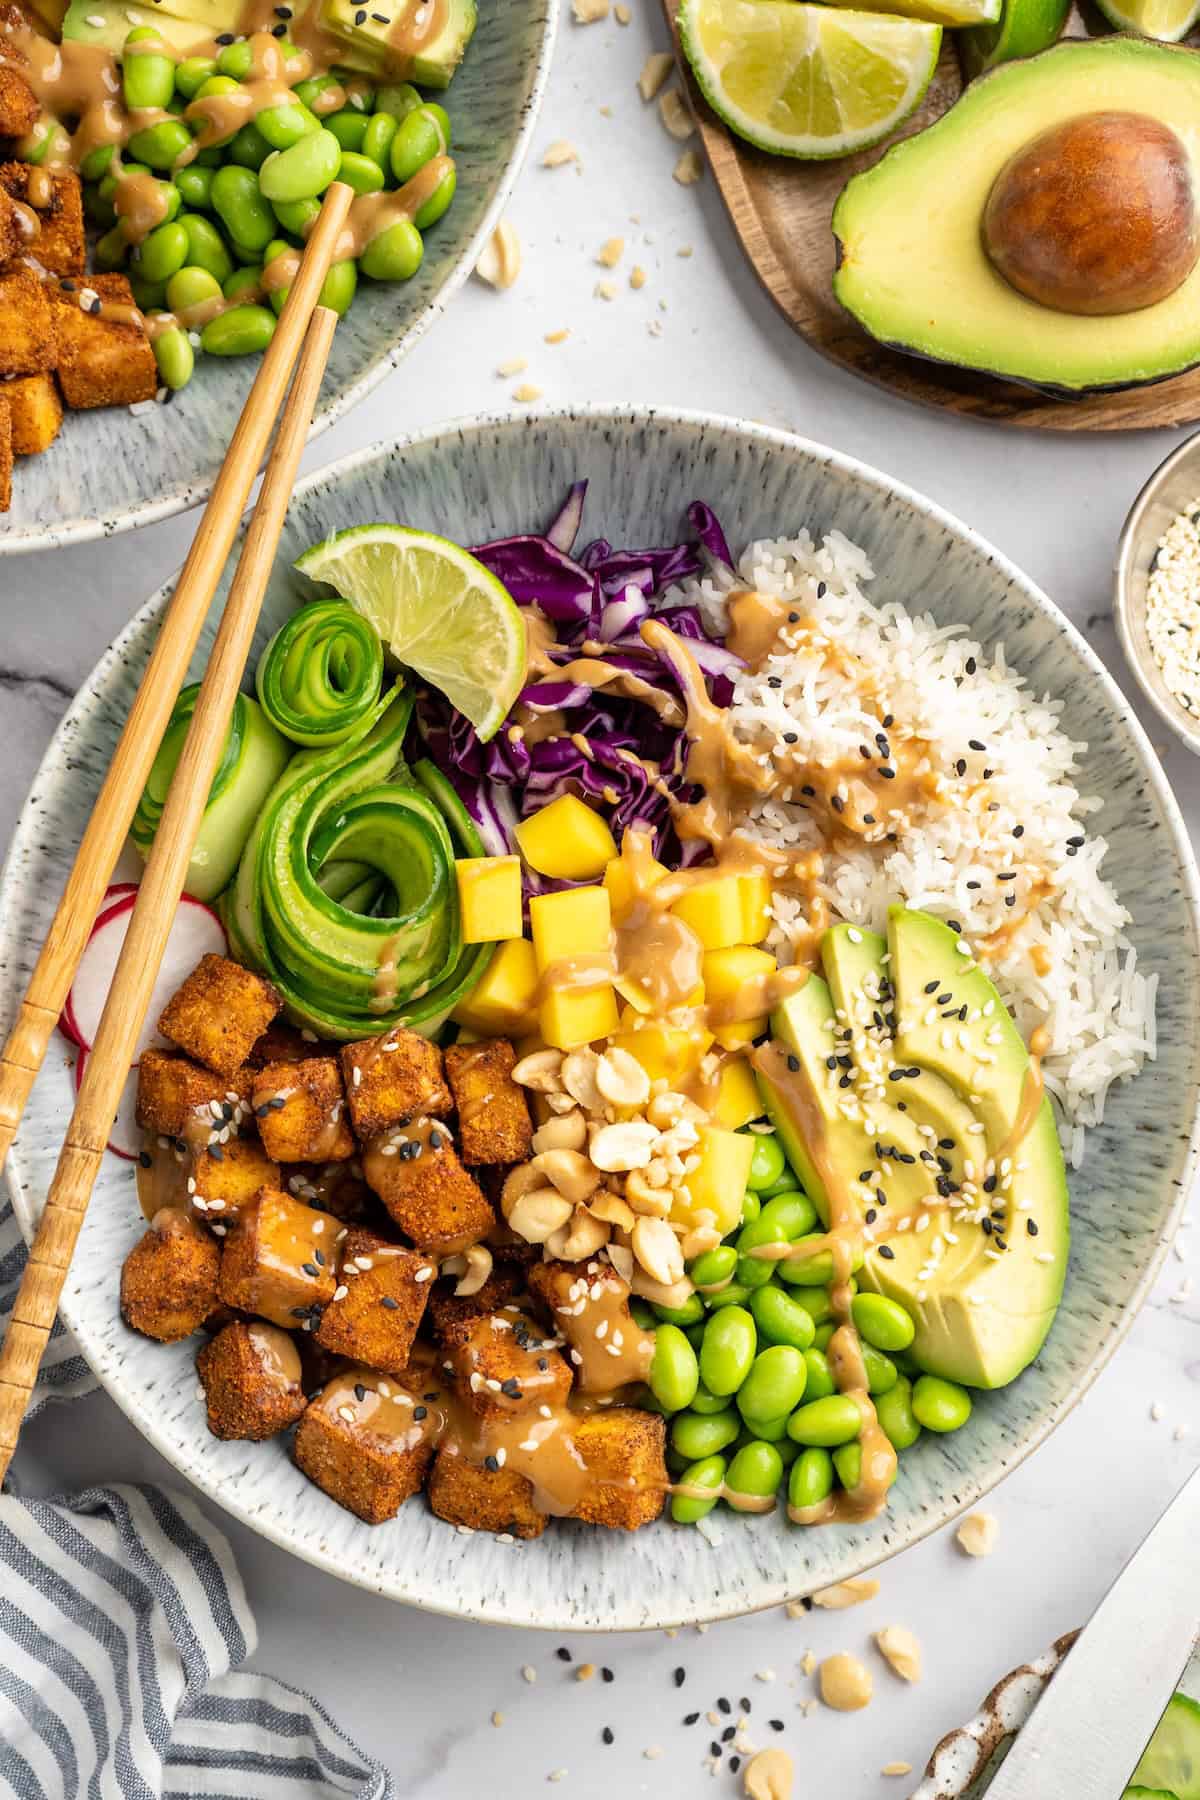
You know how mastering one recipe can unlock a whole bunch of meal possibilities? That’s how I feel about my Crispy Air Fryer Tofu . You can eat it as-is, you can layer it into a Tofu Banh Mi, and you can also add it to meal bowls—and these peanut tofu bowls are my current favourite. They’ve got it ALL, my friends: an amazing mix of textures, protein from the tofu, veggies galore, and rice to help soak up all the fabulous sauce. This is a meal bowl that’s an absolute feast for your eyes and, even more importantly, your taste buds!
Why These Peanut Tofu Bowls Are a Must-Make
This recipe is on frequent repeat in my home and I know you are going to love it too! Here’s what makes it so good.
- Quick and easy . The air fryer cooks the tofu in just 10 minutes and a few other tricks (which I’ll get to soon!) make this recipe a breeze!
- Peanut sauce! I don’t know about you, but I could put Peanut Sauce on EVERYthing. It’s the perfect balance of sweet, savoury, tangy, and umami.
- Great for meal prep . You can easily prepare these bowls in advance and have your work lunches lined up for the next few days.
Notes on Ingredients
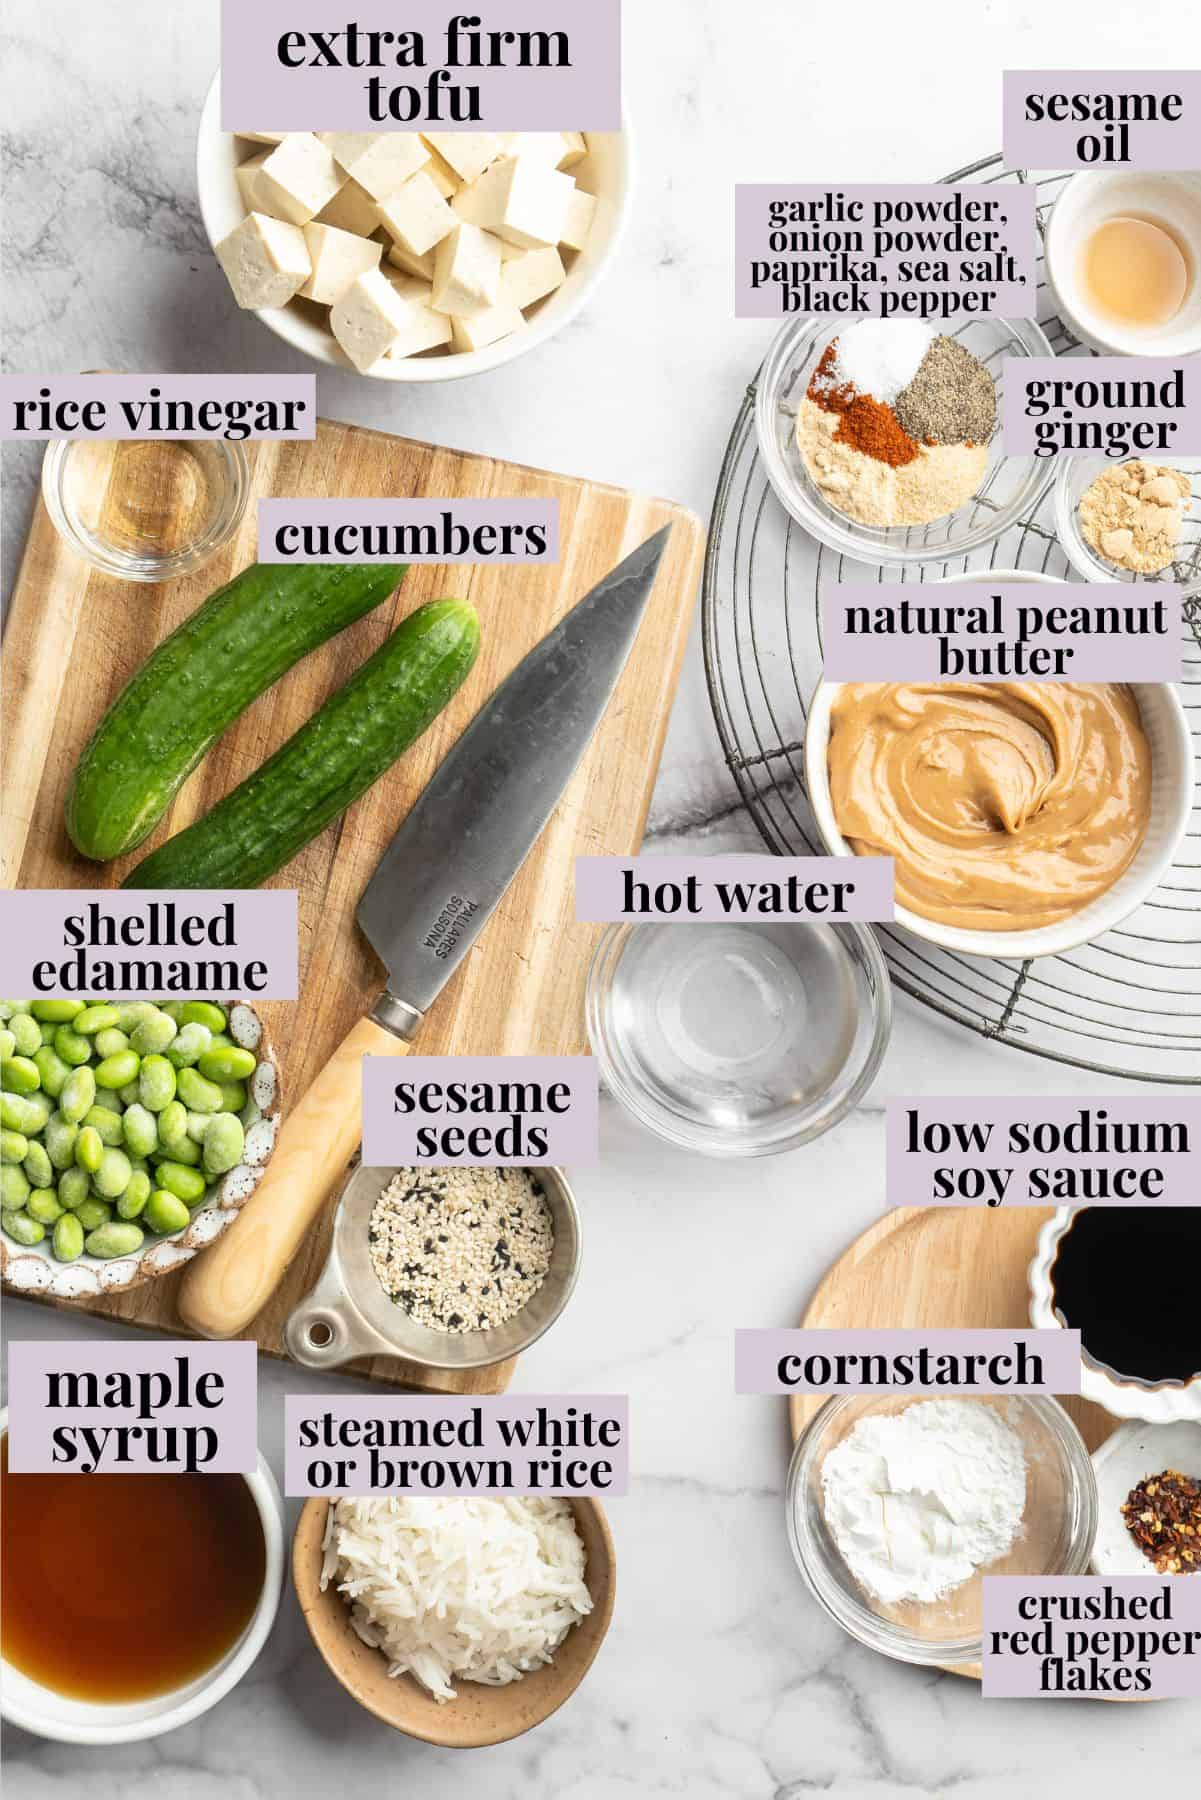
Here’s what you’ll need to make these peanut tofu bowls. Scroll down to the recipe card to find the ingredient quantities and recipe instructions.
For the Air Fryer Tofu:
- Extra-firm tofu – Press the tofu for 30 minutes before starting the recipe. Learn more: How To Cook Tofu + Best Tips on Making the Most Delicious Tofu
- Seasonings – Garlic powder, onion powder, paprika, sea salt, and black pepper.
- Cornstarch – This helps the tofu get super crispy.
- Light soy sauce – Or liquid aminos if you prefer.
- Sesame oil – Or any neutral oil.
For the Peanut Sauce:
- Natural peanut butter – I like using natural peanut butter that only has peanuts on the list of ingredients. It has a more robust flavour and it keeps the peanut sauce from being overly sweet.
- Ground ginger – Or freshly grated ginger, which will give the sauce a little more warmth and zing.
- Maple syrup
- Low-sodium soy sauce
- Rice vinegar – Fresh lime juice also works for a slightly different flavour.
- Sesame seeds
- Hot water
- Crushed red pepper flakes – Optional, for a kick!
Bowl Assembly (Suggestions):
- Steamed white or brown rice – If I’m in a hurry, I use pouches of microwaveable rice. They only take a minute or so to warm up!
- Shelled edamame – You can sometimes find this in the produce section of the grocery store, otherwise grab a bag of frozen edamame. You can thaw in the fridge or just run the edamame under hot water.
- Sliced cucumbers
- Sesame seeds
How to Make Peanut Tofu Bowls
I can’t wait for you to try this recipe! Here’s what you’ll need to do.
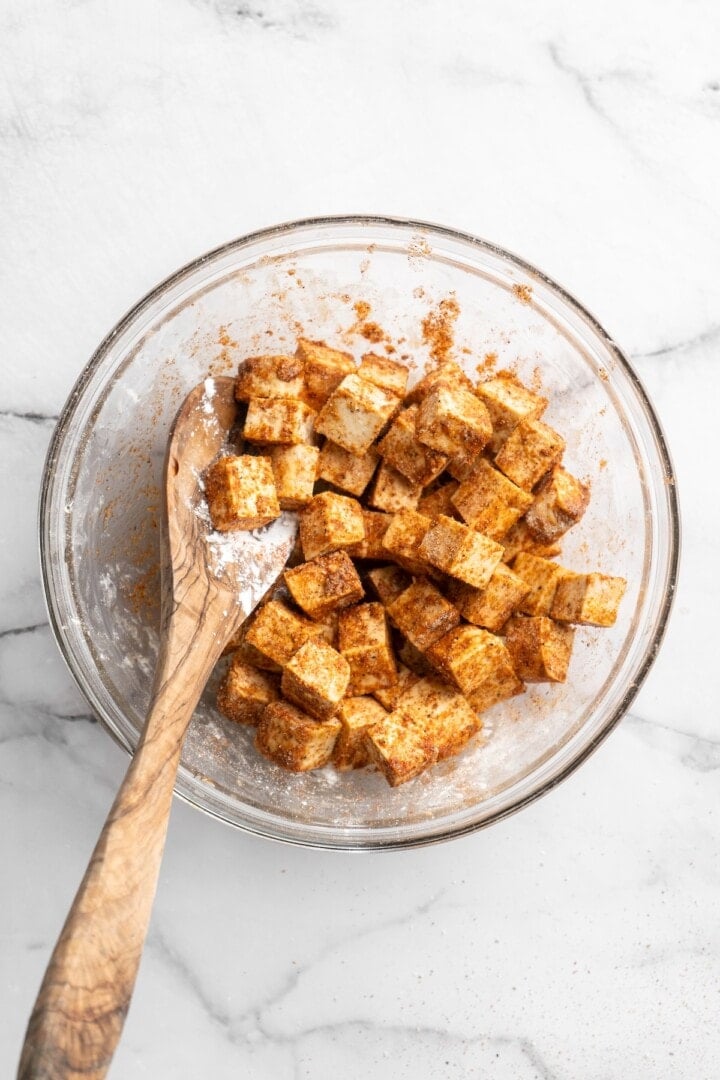
Season the tofu.
- Season the tofu . Toss the tofu with the soy sauce, seasonings, cornstarch, oil, and pepper.
- Air fry . Arrange the tofu in a single layer in the air fryer basket and cook at 400ºF for 10 minutes, shaking the basket after 5 minutes.
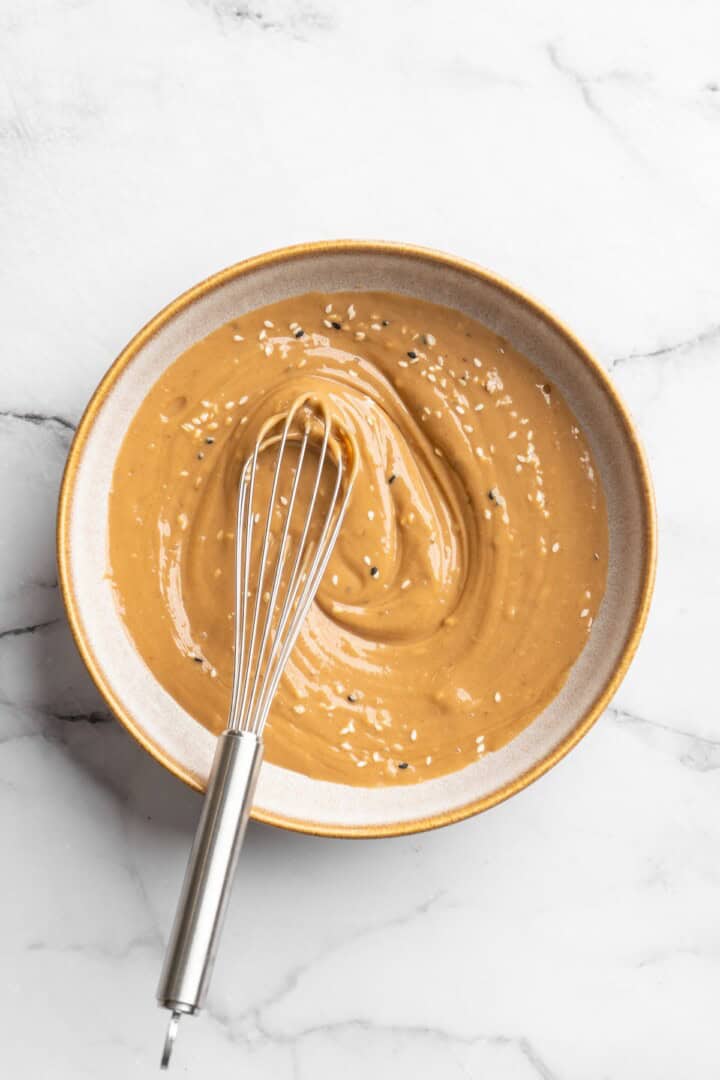
Make the peanut sauce.
- Make the peanut sauce . Mix together all the ingredients except the hot water. Then, whisk in 2 tablespoons of water. Add more if needed to reach a pourable consistency.
- Assemble . Add the rice, edamame, and cucumber to the bowls, then layer on the tofu, peanut sauce, and any garnishes you like.
Tips for Success
This recipe is easy, but I’ve got some additional tips to help you make sure your crispy air fryer tofu turns out perfect.
- Use refrigerated tofu . Not the silken kind sold in cartons! It doesn’t crisp up the same way and, in my experience, it doesn’t work well for air frying.
- Give the tofu space . If you need to cook it in batches, do that! It’s better to cook in batches than crowd the tofu in the air fryer, which will result in tofu that’s not as crispy.
- Adjust the crispiness to your preferences . You can tear the tofu with your hands instead of cubing it to get more crispiness. Or, if you prefer your tofu less crispy, you can omit the cornstarch.
Some More Bowl Ingredient Ideas
These peanut tofu bowls give you endless serving options, so they never get old! Here are some more garnish and ingredient ideas:
- Shredded cabbage
- Sliced radishes
- Cubed mango
- Sliced or cubed avocado
- Peanuts or cashews
- Cooked quinoa or cauliflower rice
- Pickled ginger
- Fresh greens
Storage + Meal Prep
- For meal prep : For best textures and flavours, I recommend keeping the warm and cold components separate and packing the sauce in a small container. A meal prep container with compartments is nice! Then when you’re ready to eat, reheat the tofu and rice, add the cold components, and drizzle on the sauce. This will last up to 4 days in the refrigerator.
- To store leftovers : Store assembled bowls in the refrigerator for 3 to 4 days. Reheat in the microwave; if you’d like, you can scoop out the cucumbers before heating to keep them crisp.
More Meal Bowls to Try
- Nourishing Vegan Buddha Bowl
- Loaded Taco Salad Bowl with Lime Crema
- Vegan Burrito Bowls
- Vegan Poke Bowls
Ingredients
For the Crispy Tofu:
- 1 pound extra-firm tofu , pressed for 30 minutes and cut into 1” cubes, 450 g
- 1 teaspoon garlic powder , 5 g
- ½ teaspoon onion powder , 2.5 g
- 1 teaspoon paprika , 2.3 g
- ½ teaspoon sea salt , 3 g
- 2 teaspoon cornstarch , 5 g
- ½ tablespoon light soy sauce or liquid aminos , 7.5 mL
- ½ teaspoon sesame oil , or any neutral oil, 2.5 mL
- ¼ teaspoon ground black pepper , 1 g
For the Peanut Sauce:
- ⅓ cup natural peanut butter , microwave for 15 seconds if thick, 80 g
- ¼ teaspoon ground ginger , 0.5 g, or ½ teaspoon freshly grated ginger
- 1 tablespoon maple syrup , 15 mL
- 2 tablespoons low sodium soy sauce , 30 mL
- 1 teaspoon rice vinegar , 5 mL
- ½ teaspoon sesame seeds , 2 g
- 2 tablespoons to ¼ cup hot water , 30 – 60 mL
- ¼ teaspoon crushed red pepper flakes , optional, 0.5 g
Bowl Assembly (Suggestions):
- Steamed white or brown rice
- Shelled edamame
- Sliced cucumbers
- Extra sesame seeds for garnish
Instructions
To Prepare the Tofu:
- In a medium bowl, add tofu cubes and soy sauce (or liquid aminos). Toss to coat.
- Add garlic powder, onion powder, paprika, sea salt, cornstarch, sesame oil, and black pepper. Toss gently to coat each piece evenly.
- Place tofu in a single layer in your air fryer basket, ensuring space between each piece.
- Air fry at 400°F for 10 minutes, shaking the basket halfway through (after 5 minutes), then continue cooking until golden and crispy.
- Remove from the air fryer and let cool slightly.
To Make the Peanut Sauce:
- In a bowl, jar, or small blender , combine peanut butter, ginger, maple syrup, soy sauce,
- rice vinegar, sesame seeds, and crushed red pepper flakes (if using).
- Add 2 tablespoons of hot water and whisk or blend until smooth.
- Gradually add more water until desired consistency is reached (thicker for dip, thinner for drizzle).
- Taste and adjust as needed — more ginger, more soy sauce, or more sweetness based on your preference.
To Assemble the Bowls:
- In each bowl, layer rice, edamame, and cucumber slices.
- Top with crispy tofu and generously drizzle with the peanut sauce.
- Garnish with extra sesame seeds if desired.
- Serve and enjoy!
Notes
- For meal prep : For best textures and flavours, I recommend keeping the warm and cold components separate and packing the sauce in a small container. A container with compartments is nice! Then when you’re ready to eat, reheat the tofu and rice, then add the cold components and drizzle on the sauce. This will last up to 4 days in the refrigerator.
- To store leftovers : Store assembled bowls in the refrigerator for 3 to 4 days. Reheat in the microwave; if you’d like, you can scoop out the cucumbers before heating to keep them crisp.

Peanut Tofu Bowls
Ingredients
For the Crispy Tofu:
- 1 pound extra-firm tofu pressed for 30 minutes and cut into 1” cubes, 450 g
- 1 teaspoon garlic powder 5 g
- ½ teaspoon onion powder 2.5 g
- 1 teaspoon paprika 2.3 g
- ½ teaspoon sea salt 3 g
- 2 teaspoon cornstarch 5 g
- ½ tablespoon light soy sauce or liquid aminos 7.5 mL
- ½ teaspoon sesame oil or any neutral oil, 2.5 mL
- ¼ teaspoon ground black pepper 1 g
For the Peanut Sauce:
- ⅓ cup natural peanut butter microwave for 15 seconds if thick, 80 g
- ¼ teaspoon ground ginger 0.5 g, or ½ teaspoon freshly grated ginger
- 1 tablespoon maple syrup 15 mL
- 2 tablespoons low sodium soy sauce 30 mL
- 1 teaspoon rice vinegar 5 mL
- ½ teaspoon sesame seeds 2 g
- 2 tablespoons to ¼ cup hot water 30 – 60 mL
- ¼ teaspoon crushed red pepper flakes optional, 0.5 g
Bowl Assembly (Suggestions):
- Steamed white or brown rice
- Shelled edamame
- Sliced cucumbers
- Extra sesame seeds for garnish
Instructions
To Prepare the Tofu:
- In a medium bowl, add tofu cubes and soy sauce (or liquid aminos). Toss to coat.
- Add garlic powder, onion powder, paprika, sea salt, cornstarch, sesame oil, and black pepper. Toss gently to coat each piece evenly.
- Place tofu in a single layer in your air fryer basket, ensuring space between each piece.
- Air fry at 400°F for 10 minutes, shaking the basket halfway through (after 5 minutes), then continue cooking until golden and crispy.
- Remove from the air fryer and let cool slightly.
To Make the Peanut Sauce:
- In a bowl, jar, or small blender, combine peanut butter, ginger, maple syrup, soy sauce,
- rice vinegar, sesame seeds, and crushed red pepper flakes (if using).
- Add 2 tablespoons of hot water and whisk or blend until smooth.
- Gradually add more water until desired consistency is reached (thicker for dip, thinner for drizzle).
- Taste and adjust as needed — more ginger, more soy sauce, or more sweetness based on your preference.
To Assemble the Bowls:
- In each bowl, layer rice, edamame, and cucumber slices.
- Top with crispy tofu and generously drizzle with the peanut sauce.
- Garnish with extra sesame seeds if desired.
- Serve and enjoy!
Video
Notes
- For meal prep : For best textures and flavours, I recommend keeping the warm and cold components separate and packing the sauce in a small container. A container with compartments is nice! Then when you’re ready to eat, reheat the tofu and rice, then add the cold components and drizzle on the sauce. This will last up to 4 days in the refrigerator.
- To store leftovers : Store assembled bowls in the refrigerator for 3 to 4 days. Reheat in the microwave; if you’d like, you can scoop out the cucumbers before heating to keep them crisp.
Nutrition
Peanut Tofu Bowls https://jessicainthekitchen.com/peanut-tofu-bowls/ August 27, 2025
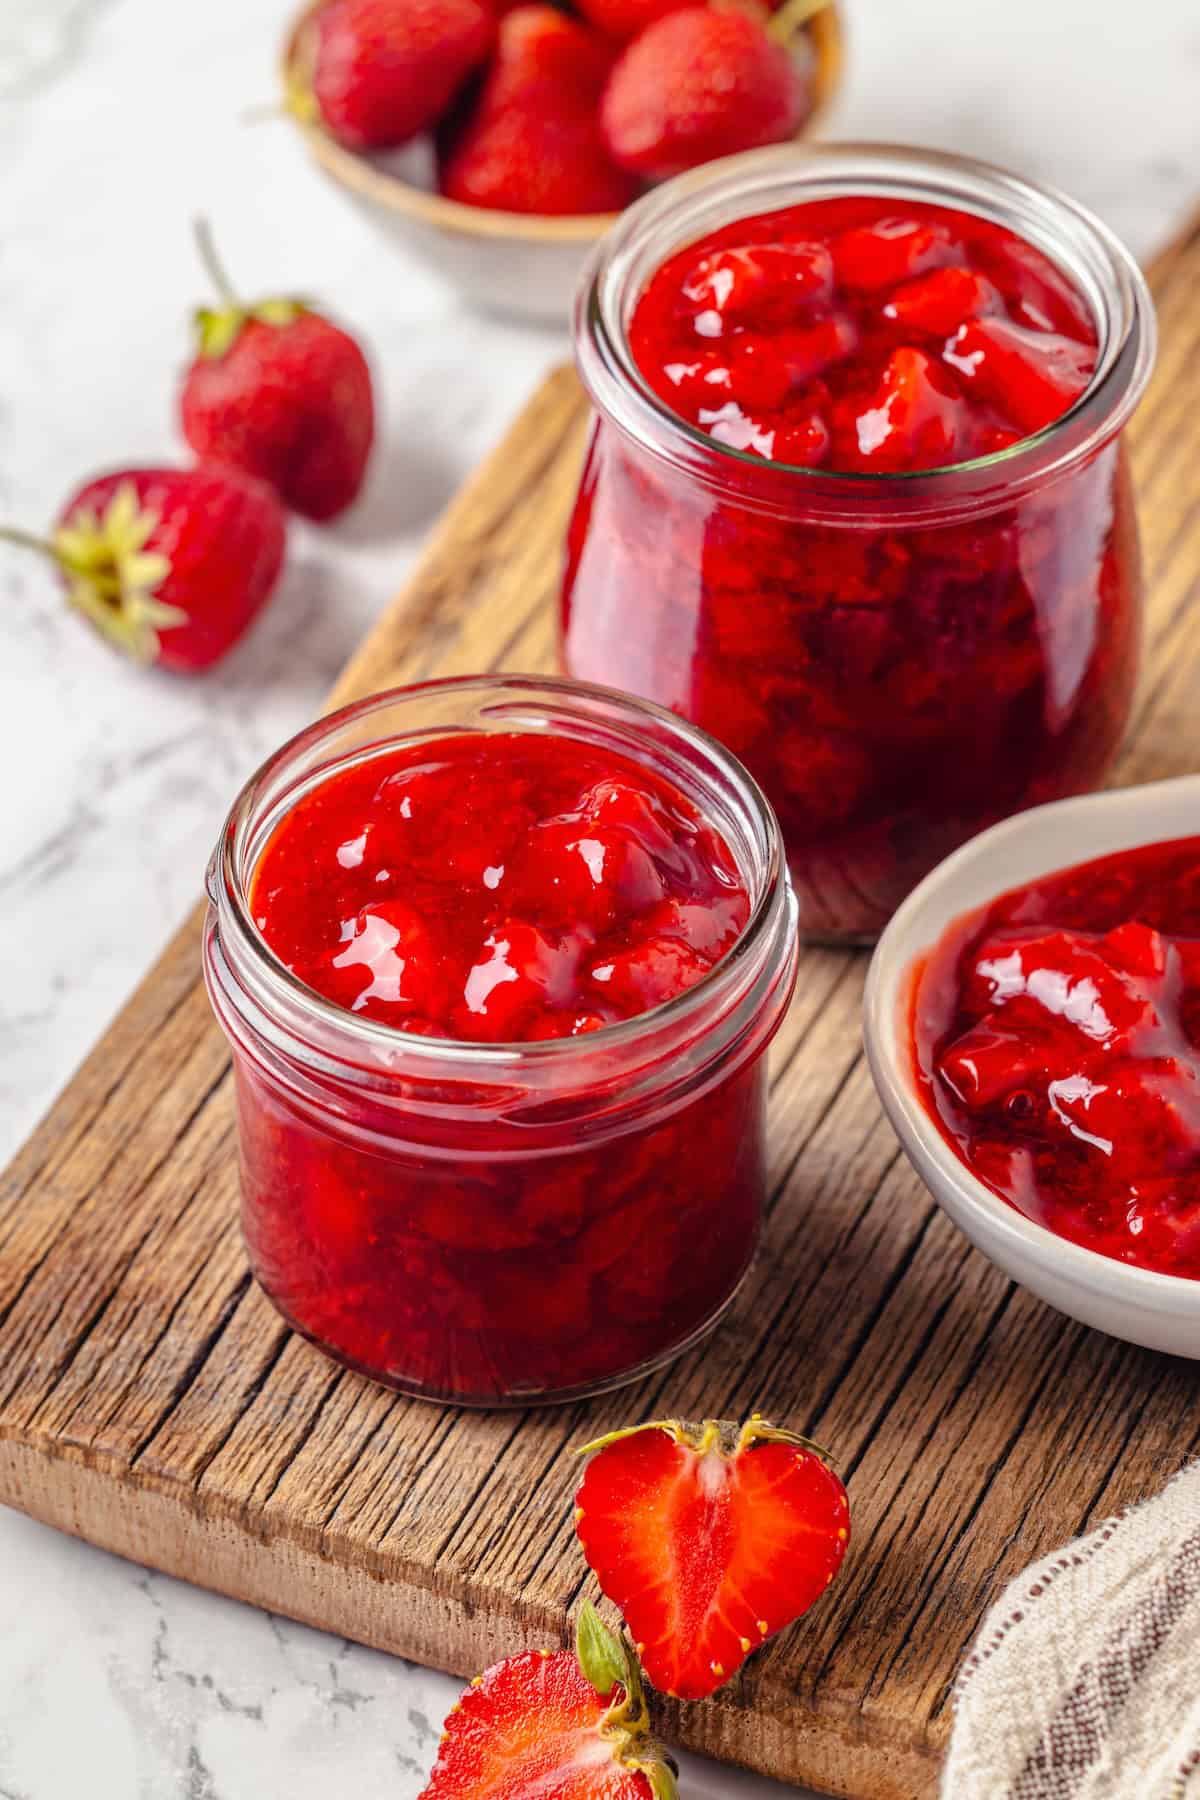
Made with REAL strawberries, this Strawberry Cake Filling is the perfect addition to any cake, whether it’s classic vanilla or decadent chocolate. It’s easy to make, with a thick, jammy texture that won’t make your layers soggy!
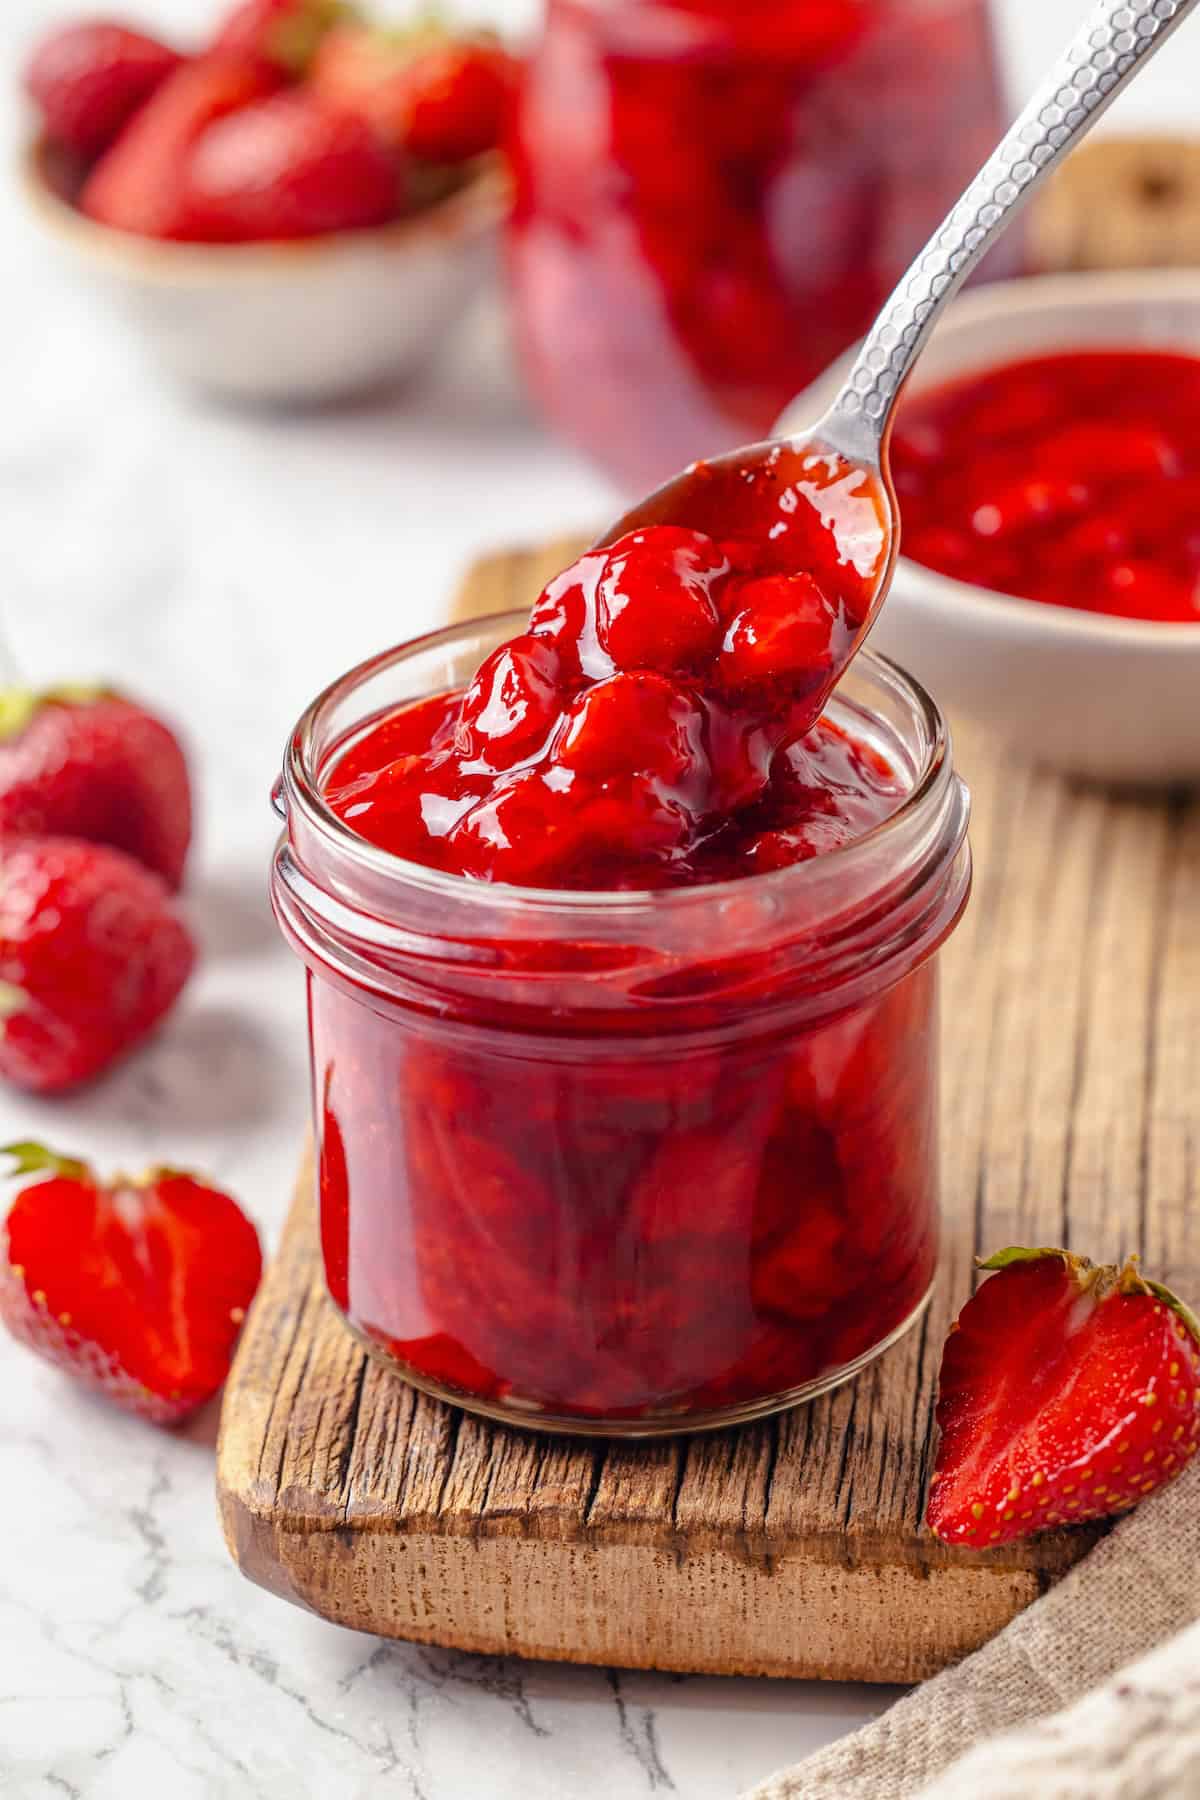
It’s easy to make a good, basic cake at home—my Vanilla Sheet Cake and Vegan Chocolate Sheet Cake are reader favourites. But if you want to give homemade cake a bakery-style upgrade, layering it with a filling is a great way to do it, and this strawberry filling for cake is divine! It works with chocolate cake, yellow cake, or white cake, and it adds a sweet and bright strawberry flavour that’s absolutely irresistible.
Why Your Next Cake Needs This Strawberry Filling
We’re talking instant upgrade here! These are the reasons I love this strawberry filling for cake:
- No fake colours or flavour . This cake filling is made with real strawberries, so the flavour and colour are true to actual berries, rather than being cloying and artificial.
- Thick and jammy . Cook the strawberry filling down until it’s THICK and it won’t make your cake layers soggy.
- Easy to make . There’s no reason to use canned strawberry pie filling for your cake or other pre-made options when it’s so easy to make your own cake filling at home! It takes just 10 minutes of prep and 10 minutes of cooking.
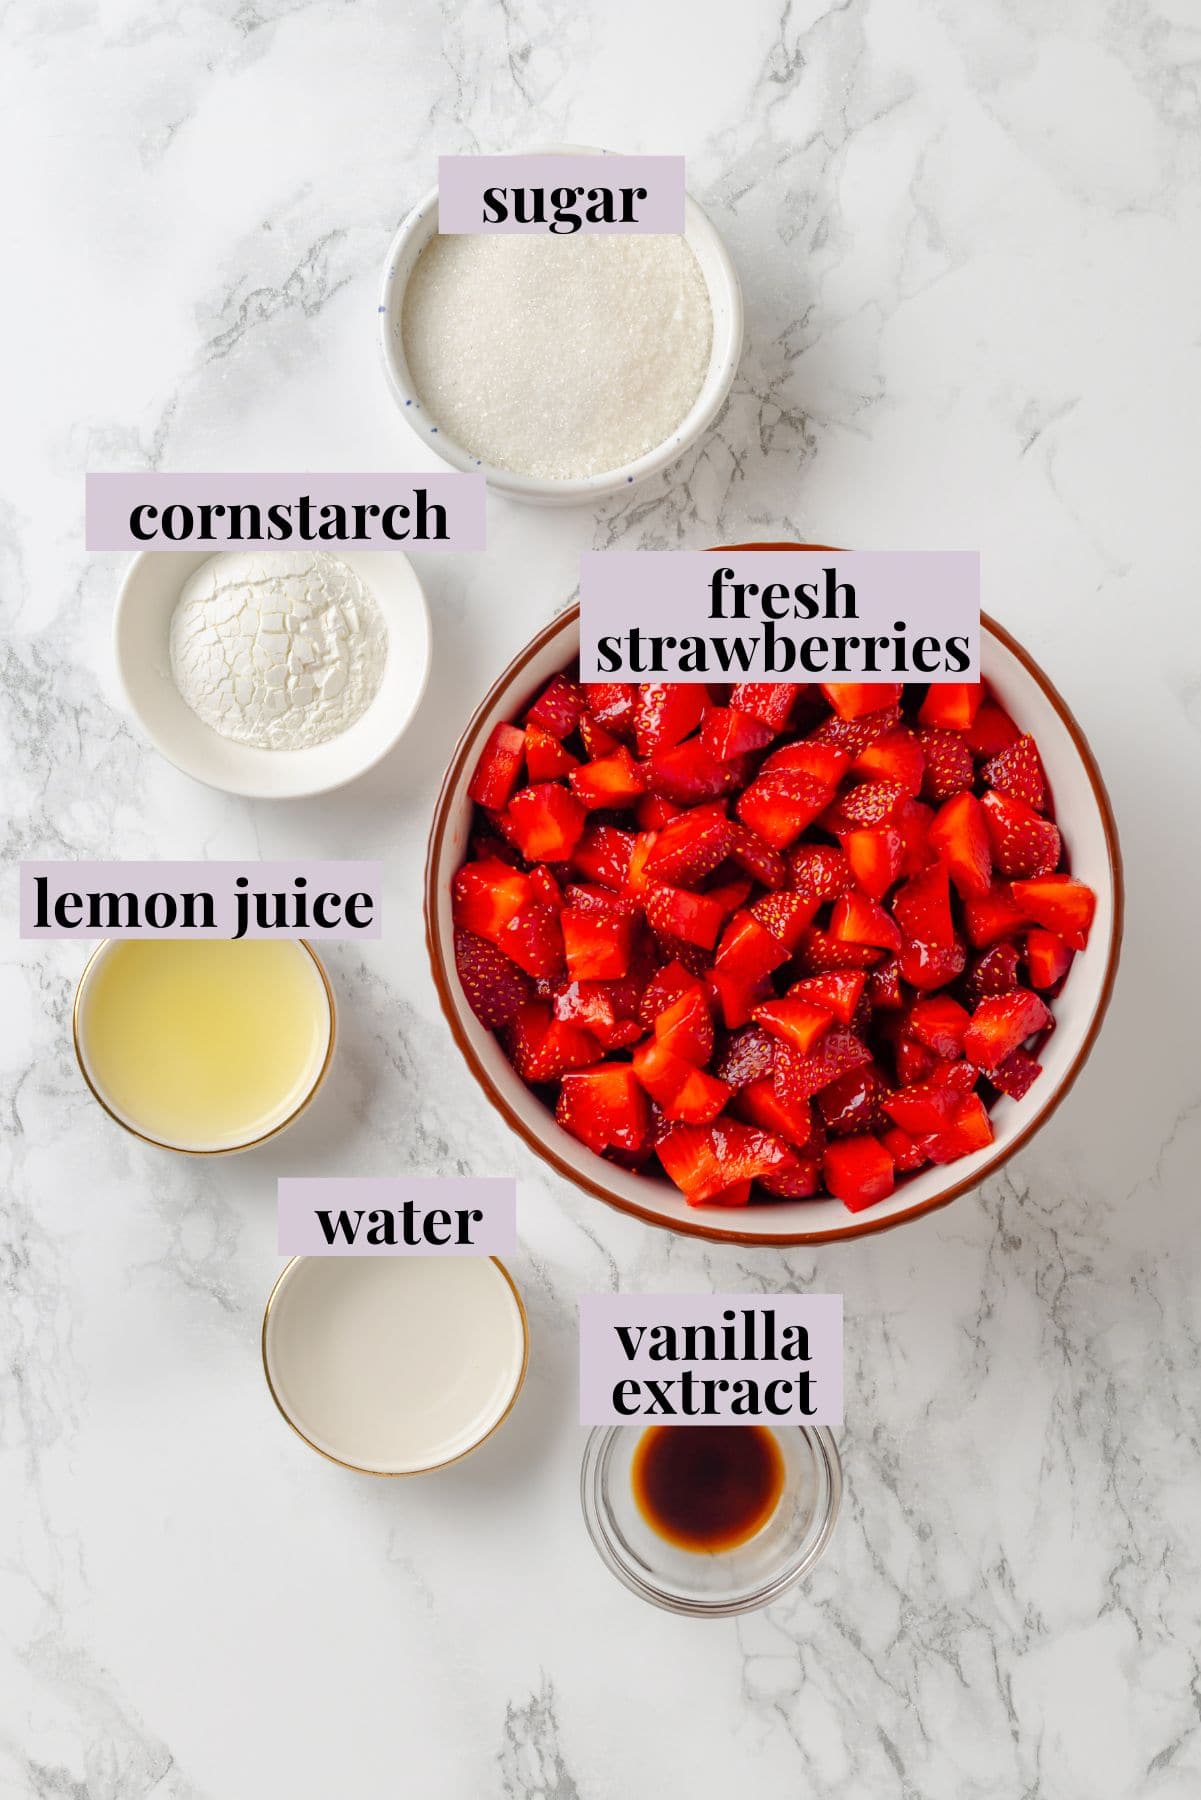
Notes on Ingredients
Here’s the short list of ingredients you’ll need for this strawberry cake filling. Scroll down to the recipe card to find the ingredient quantities and recipe instructions.
- Strawberries – Use a strawberry huller or paring knife to cut out the hull, then chop the berries.
- Sugar – This isn’t just for sweetness, but it also helps the strawberries thicken and get jammy.
- Lemon juice – For a bright note that perks up the flavour of the berries.
- Cornstarch – The other element that thickens the filling.
- Water
- Vanilla extract – If you’d like, but this is optional.
How to Make Strawberry Filling for Cake
The process is easy! Here’s what you’ll need to do.
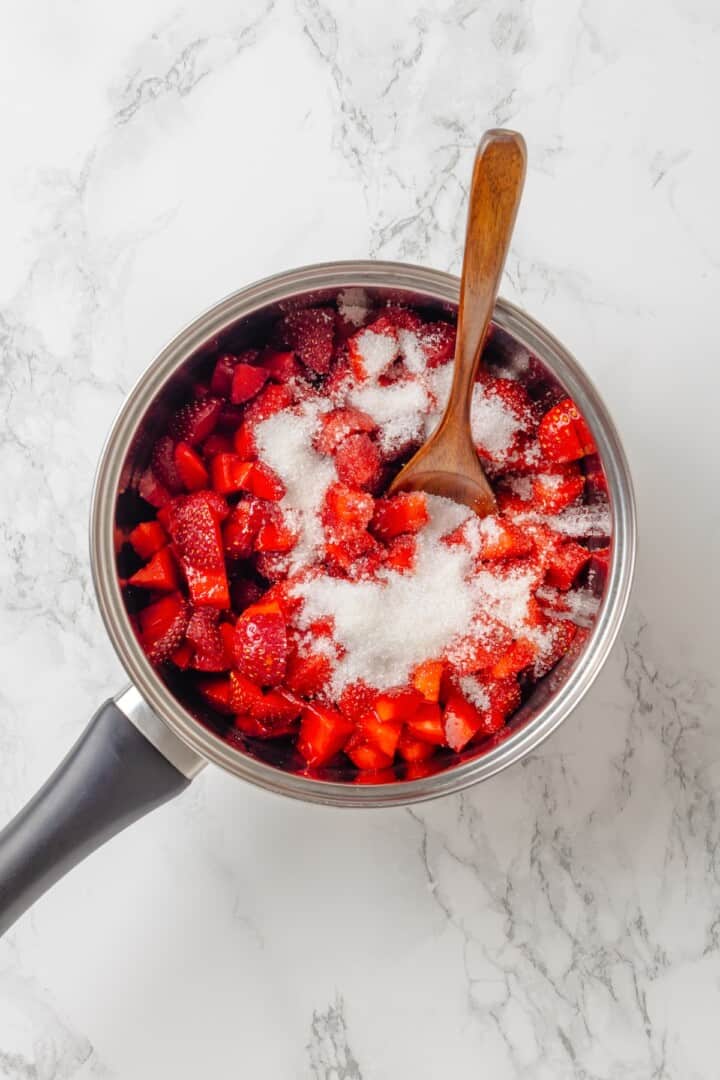
Heat strawberries and sugar.
- Cook the strawberries . Add the strawberries and sugar to a saucepan over medium heat. Cook for 4 to 5 minutes, or until the strawberries start releasing their juices.
- Add the lemon juice . Stir in the lemon juice and cook for 2 minutes more. Mash the berries a bit to break them down.
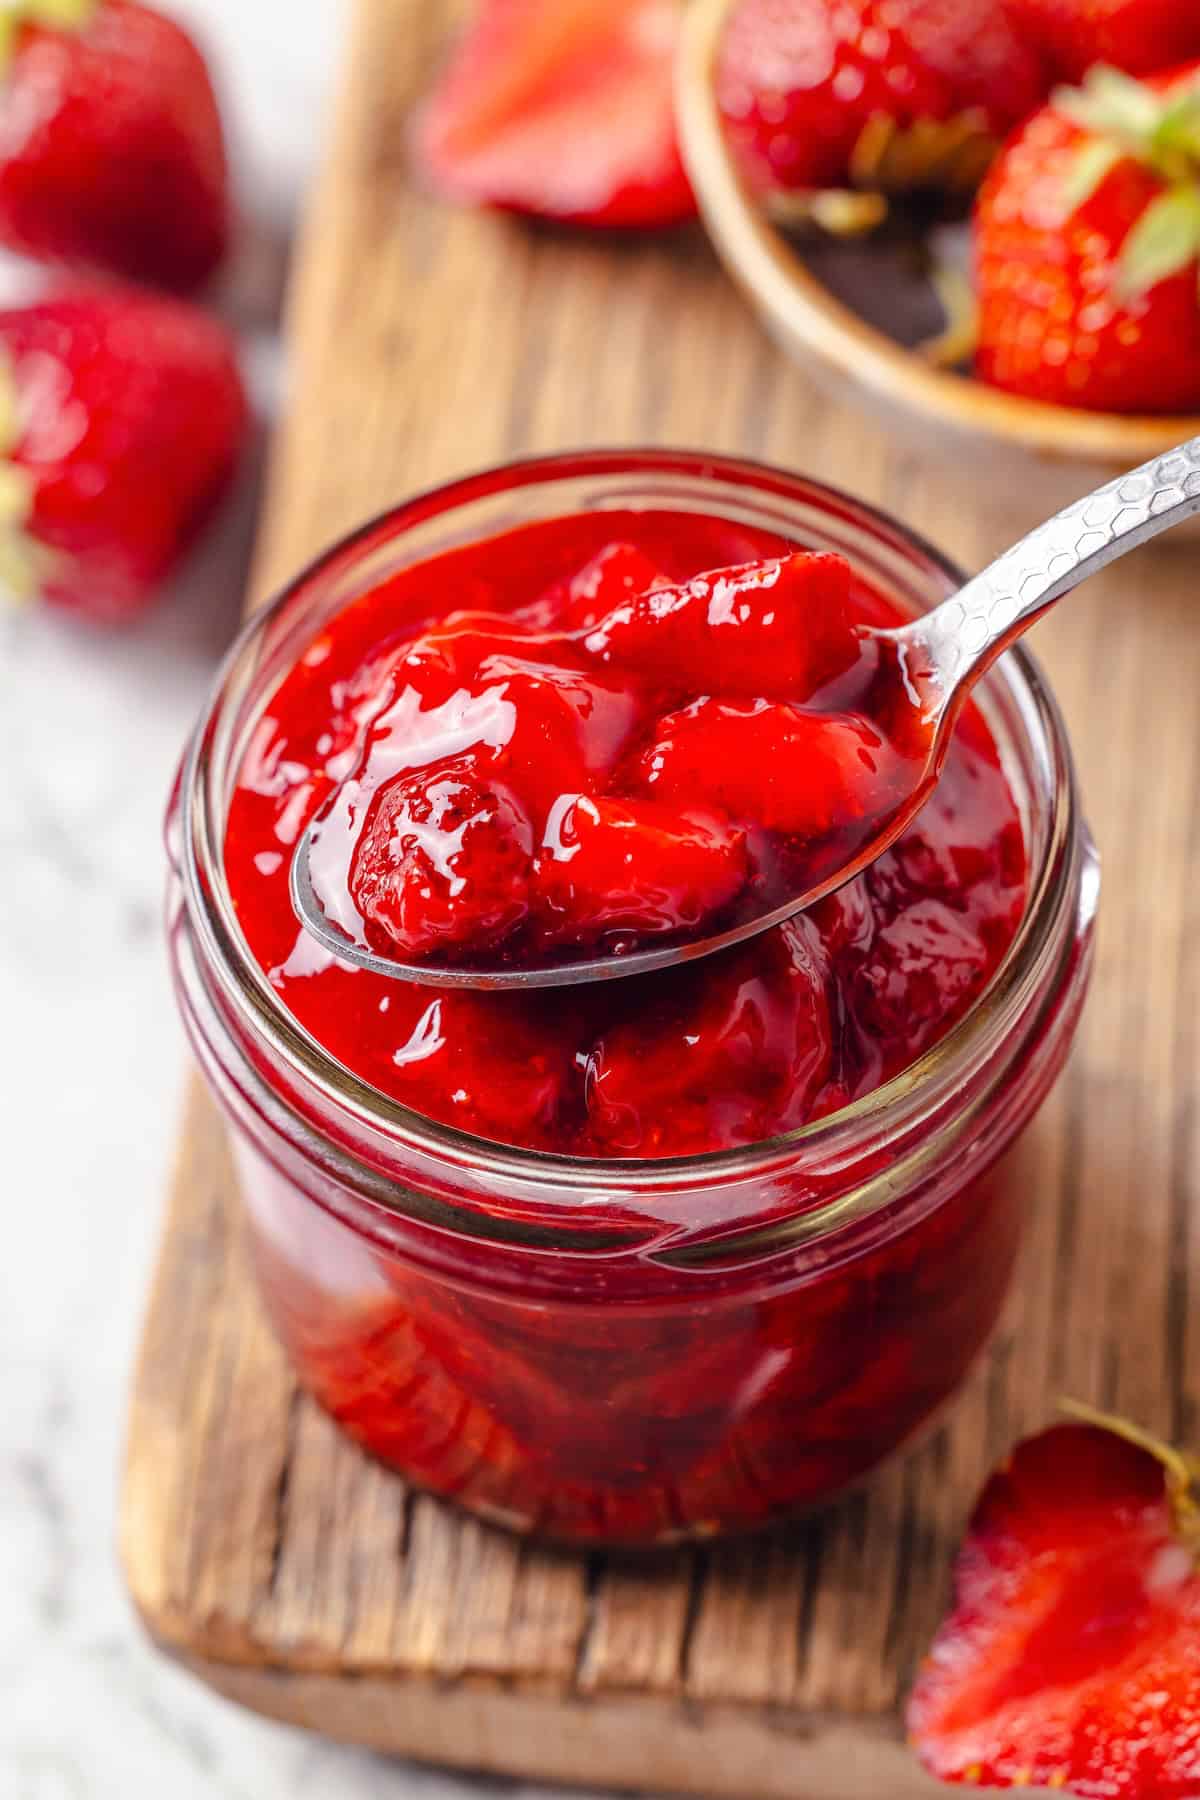
- Thicken the filling . Whisk the cornstarch with the water, then slowly stir this into the strawberry mixture. Simmer for 2 to 3 minutes, or until the filling thickens.
- Finish. Remove from heat and add the vanilla, if desired. Transfer to a bowl and cool to room temperature, then refrigerate for at least 30 minutes, until chilled and set. Use as desired!
Strawberry Cake Filling Variations
I love this recipe as-is, but I have a few ideas for switching things up if you want to experiment!
- Make it extra lemony . For a brighter lemon flavour, add lemon zest to the filling too. This would be fantastic layered between strawberry cake or lemon cake layers.
- Add other berries . Replace half the strawberries with raspberries or blueberries.
- Use arrowroot starch instead of cornstarch . If you don’t like to use cornstarch, you can swap in arrowroot starch instead.
My Favourite Ways to Use This Recipe
You may already have a cake in mind for your strawberry cake filling, but if not, here’s some inspiration!
- Add a layer to this No-Bake Strawberry Icebox Cake .
- Use it instead of frosting between the layers in my Vegan Chocolate Cake or Vegan Vanilla Cake with Buttercream Frosting .
- Make a Chocolate Strawberry Cake .
- Use it as a filling for Vegan Vanilla Cupcakes .
- Spoon it over Creamy Vegan Cheesecake .
How to Store
- Refrigerator : Store the strawberry cake filling in an airtight container in the refrigerator for up to 5 days.
- Freezer : You can also freeze strawberry filling for cake in a freezer bag for up to 6 months. Press out the excess air before freezing and thaw in the refrigerator before using.
More Recipes for Strawberry Lovers
- Strawberry Salsa
- Strawberry Banana Bread
- Korean Strawberry Milk
- Strawberry Cream Pie
Ingredients
- 3 cups fresh strawberries , hulled and chopped – 450 g
- ⅓ cup granulated sugar , 67 g
- 1 tablespoon lemon juice , 15 mL
- 1 tablespoon cornstarch , 8 g
- 1 tablespoon water , to dissolve cornstarch – 15 mL
- ½ teaspoon vanilla extract , optional – 2.5 mL
Instructions
- In a medium saucepan over medium heat, combine the chopped strawberries and sugar. Cook, stirring frequently, for about 4–5 minutes, until the strawberries begin releasing their juices.
- Stir in the lemon juice and continue to cook for another 2 minutes. Gently mash some of the strawberries with a spoon or potato masher to help break them down.
- In a small bowl, whisk together the cornstarch and water to form a slurry. Slowly pour the slurry into the strawberry mixture while stirring constantly. Let it simmer for 2–3 minutes until thickened to a jam-like consistency.
- Remove from heat and stir in the vanilla extract, if using.
- Transfer the mixture to a bowl and let it cool to room temperature. Then refrigerate for at least 30 minutes, or until fully chilled and set.
Notes
- Refrigerator : Store the strawberry cake filling in an airtight container in the refrigerator for up to 5 days.
- Freezer : You can also freeze strawberry filling for cake in a freezer bag for up to 6 months. Press out the excess air before freezing and thaw in the refrigerator before using.
- Makes enough for one 8- or 9-inch layer cake or for filling + topping.
