If you’re looking for a savoury vegan brunch option, this Overnight Breakfast Strata Recipe is it! Loaded with sautéed veggies, hearty bread, plant-based cheese, and veggie bacon, all baked in a silky tofu egg base, it’s a total crowd-pleaser.

Tofu is definitely my favourite egg substitute for breakfast recipes. I’ve tried the store-bought substitutes in the past, but tofu keeps it simple—and it’s a lot cheaper too! I use it in Easy Vegan Quiche and Vegan Frittata , and it’s also the binder in this overnight breakfast strata recipe. If you’ve never had a strata, think of it kind of like a savoury Overnight Baked French Toast Casserole or bread pudding. Instead of loading the bread-and-custard mixture with fruit and sweet ingredients, it’s full of veggies and cheese!
Why This Overnight Breakfast Strata Is Perfect for Holidays (and Weekdays Too!)
This breakfast strata recipe is such a multitasker, I think you’ll find yourself making it again and again! Here’s why I love it.
- Get the prep work done in advance . If you’re not a morning person, you will appreciate that all the hard work is done the night before! In the morning, all you have to do is bake.
- An all-day kind of recipe . Stratas are a classic breakfast or holiday brunch option, but there’s no reason you can’t enjoy this recipe for dinner too!
- Freezes beautifully . This breakfast strata recipe is also fantastic for meal prep. It stores well in the fridge and the freezer, so I love baking a pan, cutting it into pieces, and popping them in the freezer for heat-and-eat weekday breakfasts.
Notes on Ingredients
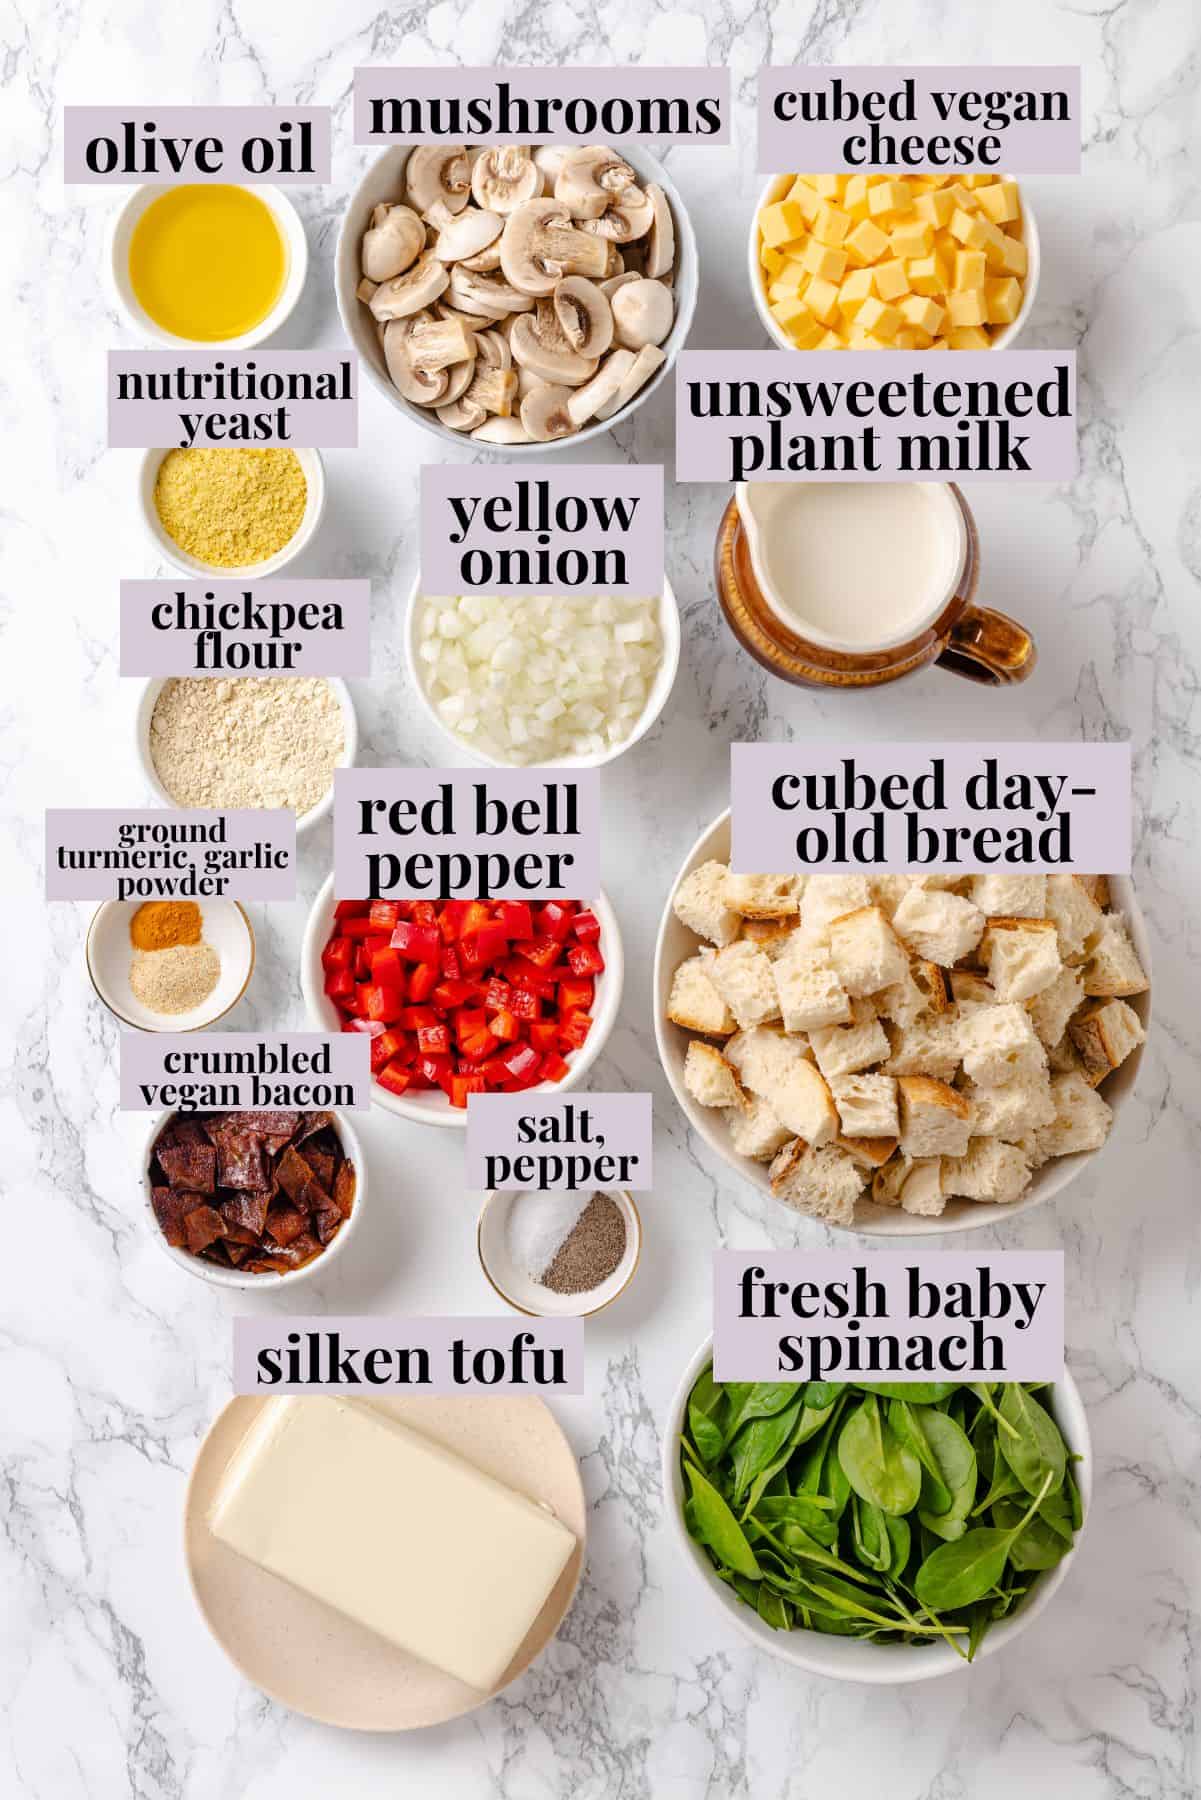
Grab these ingredients and you’re well on your way to making this vegan breakfast strata recipe! Scroll down to the recipe card to find the ingredient quantities and recipe instructions.
Vegetable Filling:
- Olive oil
- Yellow onion
- Red bell pepper – Orange or yellow bell pepper also work.
- Mushrooms – I recommend white mushrooms or cremini mushrooms.
- Baby spinach – This wilts into the filling and has a milder flavour than regular spinach.
- Salt and black pepper
Vegan Egg Base:
- Silken tofu – Silken tofu is a must! It has a smoother texture that works perfectly when you want to make it into a vegan custard for strata and quiche.
- Nutritional yeast
- Chickpea flour – This helps achieve the right baked egg texture.
- Seasonings – Ground turmeric, garlic powder, salt, and black pepper.
- Vegan milk – Any variety, as long as it’s unsweetened and unflavoured.
Assembly:
- Bread – Cubed day-old bread, preferably a hearty, crusty variety. (My No-Knead Bread is perfect!)
- Vegan cheese – Get a block of cheese and cut it into cubes rather than using shreds. This gives you pockets of melty cheesy goodness.
- Vegan bacon – You can use homemade Crispy Vegan Bacon or your favourite store-bought variety.
How to Make This Breakfast Strata Recipe
Here’s a step-by-step guide to making a vegan breakfast strata.
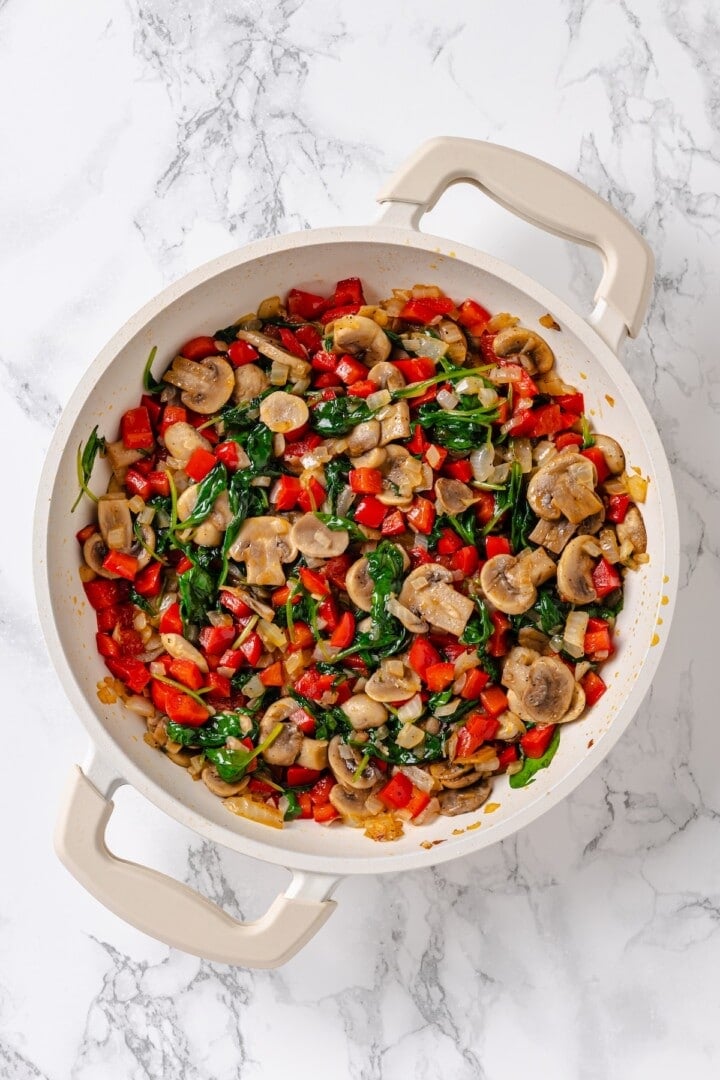
Sauté the vegetables.
- Sauté the vegetables . Heat the oil in a skillet set over medium heat, then add the onion and cook for 3 to 4 minutes to soften. Stir in the bell pepper and mushrooms, season with salt and pepper, and cook for 6 to 8 minutes, until the mushrooms are starting to brown. Stir in the spinach until it wilts.
- Make the vegan egg . Puree all of the ingredients in a blender or food processor.

Add the vegetables and bread to baking dish.
- Assemble . Add half the bread to a greased casserole dish, then add half the sautéed veggies. Repeat the layers and then pour the tofu egg mixture on top. Press the bread cubes into the egg and scatter the vegan cheese over the top.
- Chill . Cover and place the casserole dish in the refrigerator for at least 8 hours.
- Prepare . Take the strata out of the fridge and let it sit at room temperature for 15 to 20 minutes. Meanwhile, preheat the oven to 375ºF. Cover the baking dish with foil.

Bake.
- Bake . Place the strata in the oven and bake for 35 minutes, then remove the foil and bake for 15 to 20 minutes more. The center should be set and the top will be golden brown.
- Serve. Crumble the vegan bacon over the top and cool for 10 to 15 minutes. Slice and serve warm.
Tips and Variations
- Change it up with the seasons . You can use summer vegetables like fresh corn and zucchini in the summer, asparagus in the spring, etc. The vegetable portion of this recipe is versatile!
- Make it gluten-free . My Gluten-Free Sandwich Bread would be perfect, or use your favourite store-bought gluten-free bread.
- Try a bagel strata . For a fun twist on the classic, use chunks of bagel in this breakfast strata recipe. (My Gluten-Free Bagels also work for a gluten-free version!)
- Add vegan sausage . Cook and cut your favourite vegan breakfast sausage into chunks and add that to the strata for a savoury addition.
- Blend the tofu egg mixture thoroughly . You don’t want chunks of unblended tofu in there!

What to Serve With Breakfast Strata
I think this breakfast strata is perfect with a side of fresh fruit or my Rainbow Fruit Salad with Maple Lime Dressing . This Hash Brown Recipe is a great all-purpose breakfast side too, or for something a little sweeter, try Vegan Zucchini Muffins .
How to Store Leftovers
- Refrigerator : Cover leftovers in the baking dish or transfer smaller portions to an airtight container. This breakfast strata recipe will keep up to 4 days in the refrigerator.
- Freezer : Wrap individual portions in plastic wrap, then place them in an airtight container or freezer bag. Freeze for up to 3 months; thaw in the refrigerator before reheating.
- To reheat : Warm the strata in the microwave, or heat larger portions in a covered baking dish in the oven at 350ºF, until warmed through. (The amount of time it will take depends on the amount you’re reheating.)
More Savoury Vegan Breakfast Recipes
- Vegan Breakfast Pizza
- Perfectly Crispy Breakfast Potatoes
- Vegan Breakfast Burritos
- Biscuits and Gravy
Ingredients
Vegetable Filling:
- 1 tablespoon olive oil , 15 mL
- 1 small yellow onion , finely diced – 1 cup / 130 g
- 1 red bell pepper , finely diced – 1 cup / 120 g
- 2 cups mushrooms , sliced – 140 g
- 2 cups fresh baby spinach , 60 g
- Salt and black pepper , to taste
Vegan Egg Base:
- 1 block silken tofu , 12 oz / 340 g
- 2 tablespoons nutritional yeast , 10 g
- ½ cup chickpea flour , 60 g
- ¼ teaspoon ground turmeric , 0.5 g
- ½ teaspoon garlic powder , 1.5 g
- ¾ teaspoon salt , 4.5 g
- Black pepper , to taste
- 1 ¼ cups unsweetened vegan milk , 300 mL
Assembly:
- 7 cups cubed day-old bread , e.g., ciabatta or sourdough – about 400 g
- 2 cups vegan cheese , cubed – 220 g
- For the topping: 6 strips vegan bacon , cooked and crumbled – about 40 g
Instructions
- Heat olive oil in a large skillet over medium heat. Add the onion and sauté for 3–4 minutes until softened. Add bell pepper and mushrooms, season with a pinch of salt and pepper, and cook for another 6–8 minutes until the mushrooms release their moisture and begin to brown. Add spinach and cook for 1–2 minutes, stirring, until wilted. Remove from heat and let cool slightly.
- In a blender or food processor, combine silken tofu, nutritional yeast, chickpea flour, turmeric, garlic powder, salt, black pepper, and vegan milk. Blend until smooth and creamy.
- Lightly grease a 9×13 inch (23×33 cm) casserole dish. Spread half the bread cubes into the dish. Top with half the sautéed vegetables. Repeat with the remaining bread and vegetables. Pour the tofu mixture evenly over everything, pressing the bread gently into the liquid to ensure it’s well absorbed. Top with vegan cheese.
- Cover the casserole dish tightly and refrigerate overnight (at least 8 hours) to let the bread soak up all the custard and flavors.
- In the morning : Preheat the oven to 375°F (190°C). Let the strata sit at room temperature for 15–20 minutes. Cover with foil and bake for 35 minutes. Remove foil, and bake uncovered for another 15–20 minutes, until the center is set and the top is golden brown.
- Sprinkle crumbled vegan bacon over the top. Let cool for 10–15 minutes before slicing. Garnish with fresh herbs if desired and serve warm.
Notes
- Refrigerator : Cover leftovers in the baking dish or transfer smaller portions to an airtight container. This breakfast strata recipe will keep up to 4 days in the refrigerator.
- Freezer : Wrap individual portions in plastic wrap, then place them in an airtight container or freezer bag. Freeze for up to 3 months; thaw in the refrigerator before reheating.
- To reheat : Warm the strata in the microwave, or heat larger portions in a covered baking dish in the oven at 350ºF, until warmed through. (The amount of time it will take depends on the amount you’re reheating.)

Breakfast Strata Recipe
Ingredients
Vegetable Filling:
- 1 tablespoon olive oil 15 mL
- 1 small yellow onion finely diced – 1 cup / 130 g
- 1 red bell pepper finely diced – 1 cup / 120 g
- 2 cups mushrooms sliced – 140 g
- 2 cups fresh baby spinach 60 g
- Salt and black pepper to taste
Vegan Egg Base:
- 1 block silken tofu 12 oz / 340 g
- 2 tablespoons nutritional yeast 10 g
- ½ cup chickpea flour 60 g
- ¼ teaspoon ground turmeric 0.5 g
- ½ teaspoon garlic powder 1.5 g
- ¾ teaspoon salt 4.5 g
- Black pepper to taste
- 1 ¼ cups unsweetened vegan milk 300 mL
Assembly:
- 7 cups cubed day-old bread e.g., ciabatta or sourdough – about 400 g
- 2 cups vegan cheese cubed – 220 g
- For the topping: 6 strips vegan bacon cooked and crumbled – about 40 g
Instructions
- Heat olive oil in a large skillet over medium heat. Add the onion and sauté for 3–4 minutes until softened. Add bell pepper and mushrooms, season with a pinch of salt and pepper, and cook for another 6–8 minutes until the mushrooms release their moisture and begin to brown. Add spinach and cook for 1–2 minutes, stirring, until wilted. Remove from heat and let cool slightly.
- In a blender or food processor, combine silken tofu, nutritional yeast, chickpea flour, turmeric, garlic powder, salt, black pepper, and vegan milk. Blend until smooth and creamy.
- Lightly grease a 9×13 inch (23×33 cm) casserole dish. Spread half the bread cubes into the dish. Top with half the sautéed vegetables. Repeat with the remaining bread and vegetables. Pour the tofu mixture evenly over everything, pressing the bread gently into the liquid to ensure it’s well absorbed. Top with vegan cheese.
- Cover the casserole dish tightly and refrigerate overnight (at least 8 hours) to let the bread soak up all the custard and flavors.
- In the morning : Preheat the oven to 375°F (190°C). Let the strata sit at room temperature for 15–20 minutes. Cover with foil and bake for 35 minutes. Remove foil, and bake uncovered for another 15–20 minutes, until the center is set and the top is golden brown.
- Sprinkle crumbled vegan bacon over the top. Let cool for 10–15 minutes before slicing. Garnish with fresh herbs if desired and serve warm.
Notes
- Refrigerator : Cover leftovers in the baking dish or transfer smaller portions to an airtight container. This breakfast strata recipe will keep up to 4 days in the refrigerator.
- Freezer : Wrap individual portions in plastic wrap, then place them in an airtight container or freezer bag. Freeze for up to 3 months; thaw in the refrigerator before reheating.
- To reheat : Warm the strata in the microwave, or heat larger portions in a covered baking dish in the oven at 350ºF, until warmed through. (The amount of time it will take depends on the amount you’re reheating.)
Nutrition
Breakfast Strata Recipe https://jessicainthekitchen.com/breakfast-strata-recipe/ October 24, 2025
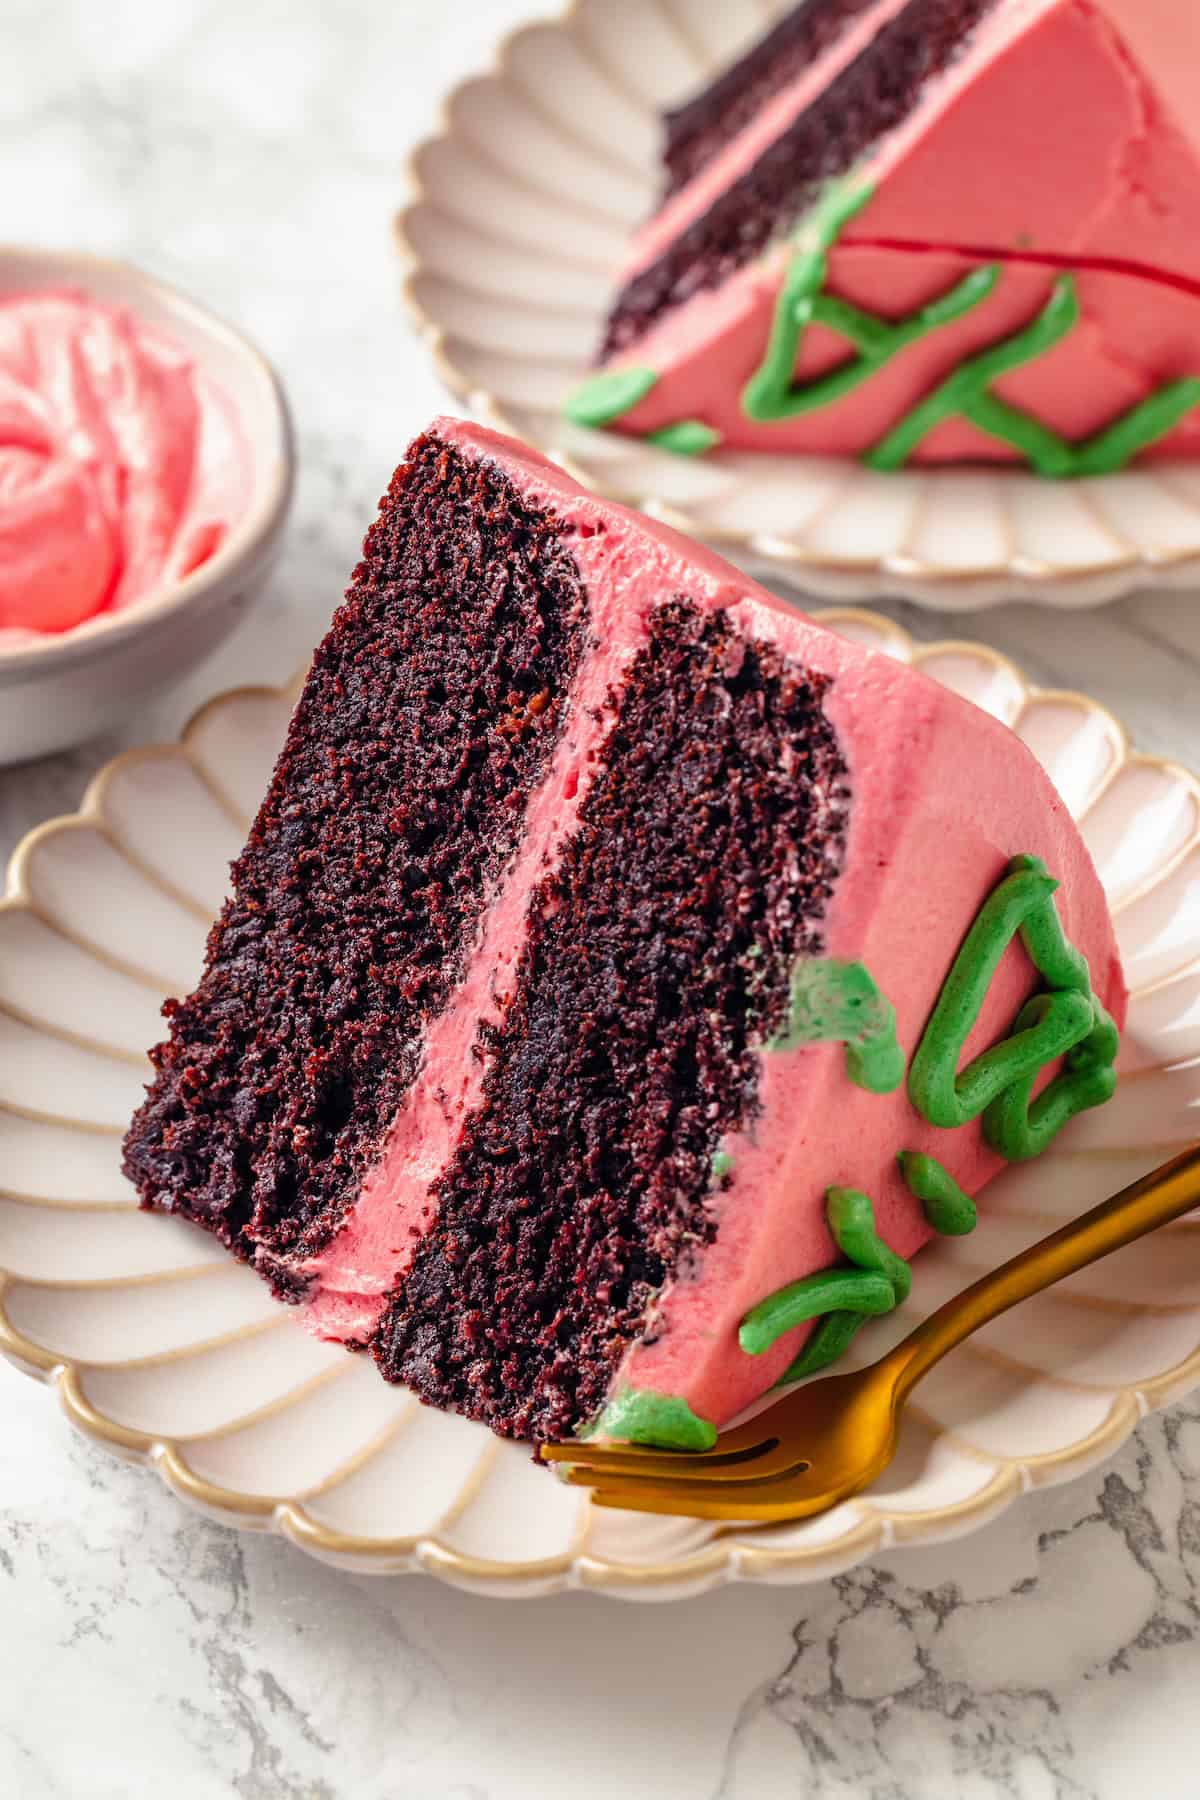
This Harry Potter Cake is a replica of Harry’s birthday cake from the movie! Underneath that iconic pink and green frosting is my famous moist vegan chocolate cake.

If you are a fan of the wizarding world of Harry Potter, then you are already familiar with this cake! This is the chocolate cake that Hagrid gave to Harry on his 11th birthday—a chocolate cake which, in the movie, had pink frosting and green icing that spelled out HAPPEE BIRTHDAE HARRY. Bake this cake for a Harry Potter themed party or to celebrate the birthday (or birthdae) of the Harry Potter fanatic in your life.
Why This Harry Potter Cake Is Sure to Be a Hit
Even people who have never read the books or watched the movie will love this cake!
- Adapted from my famous chocolate cake recipe . My Vegan Chocolate Cake is a reader favourite and this Harry Potter cake starts with all the same ingredients, with applesauce added for a fudgier texture to match the description of the cake in the book.
- Light, fluffy buttercream . My vanilla buttercream is another fave around here and it’s tinted pink and green to create the frosting for this Harry Potter cake.
- Fans will be delighted . Everyone who’s seen the movies remembers Harry’s 11th birthday cake!
Notes on Ingredients
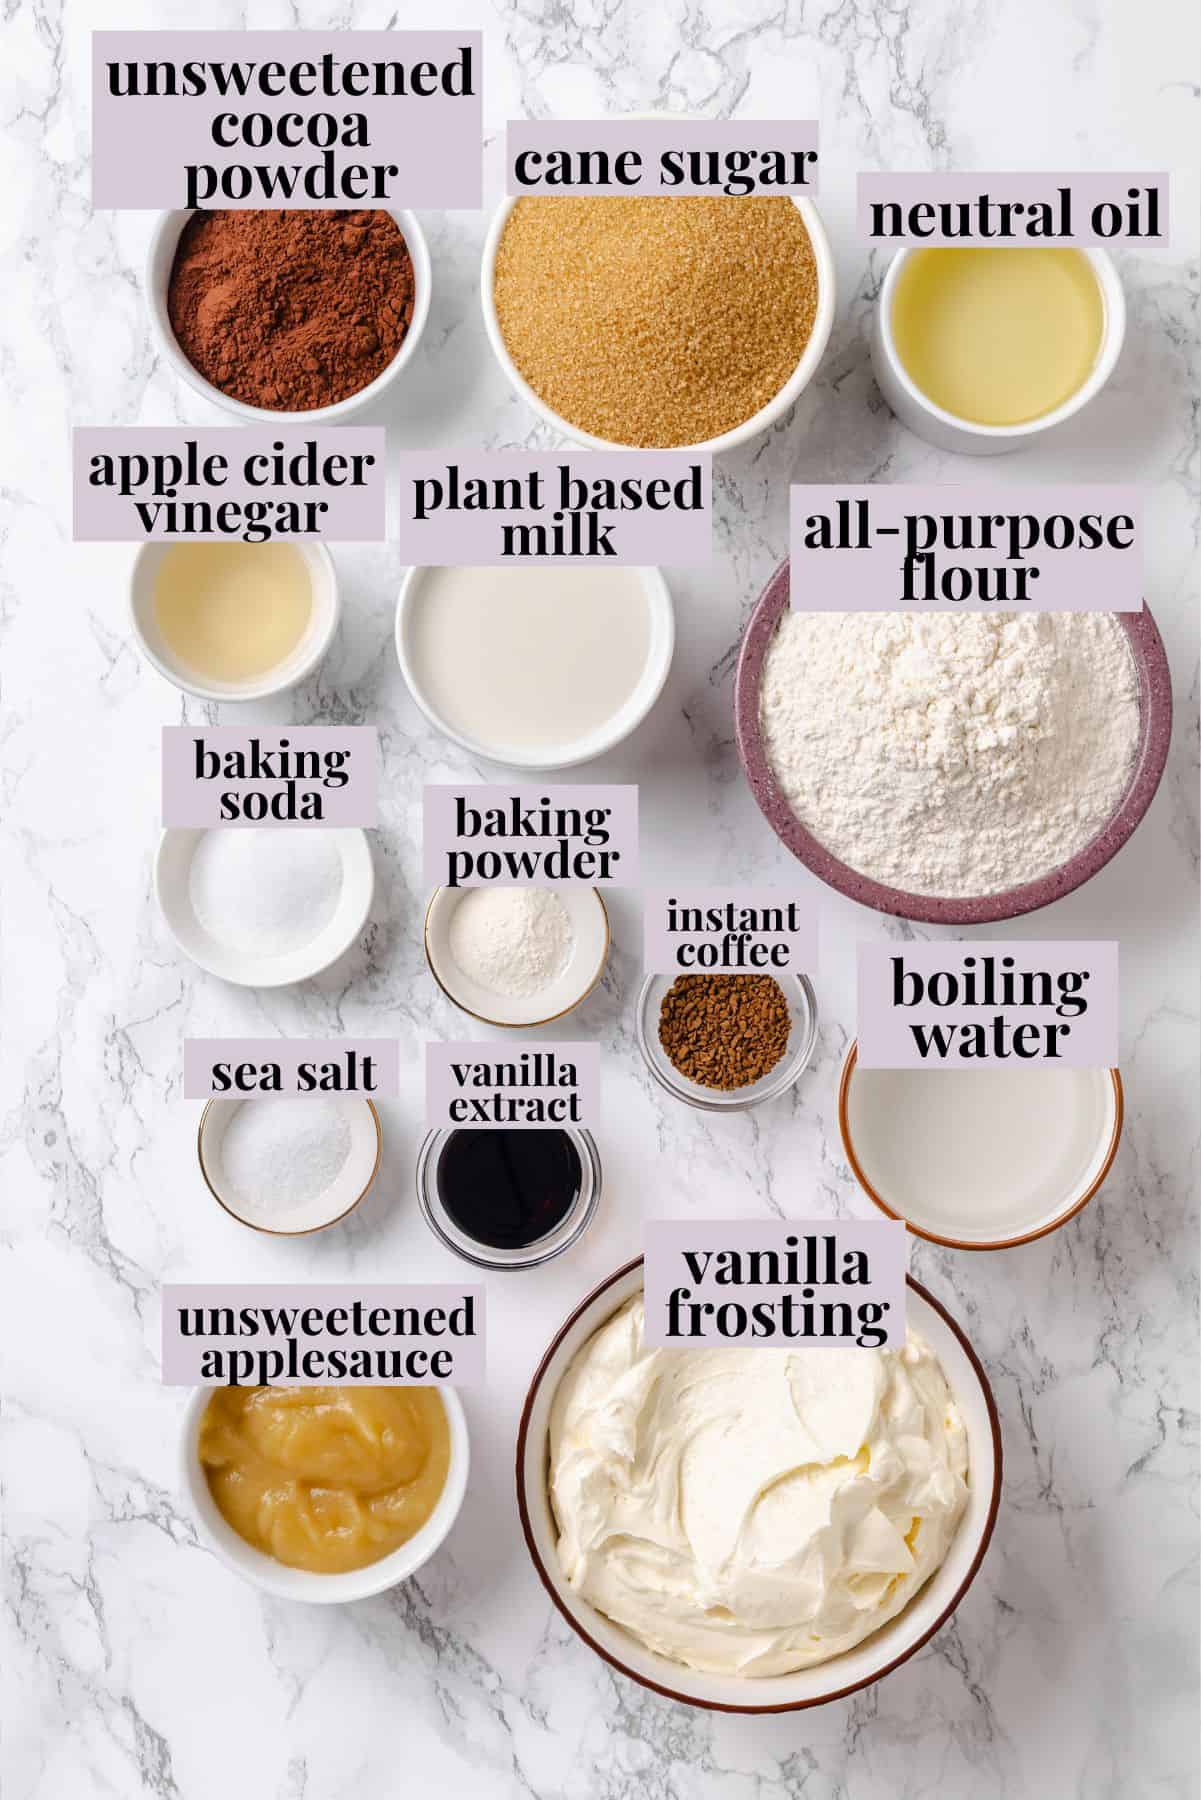
Here’s what you’ll need to grab to make this Harry Potter cake. Scroll down to the recipe card to find the ingredient quantities and recipe instructions.
- Apple cider vinegar – This is combined with the vegan milk to create Vegan Buttermilk .
- Soy milk – Or another unflavoured, unsweetened vegan milk.
- Cane sugar
- All-purpose flour – Want to make a gluten-free cake? Follow my Vegan Gluten Free Chocolate Cake Recipe .
- Unsweetened cocoa powder – You can use natural cocoa powder for a classic chocolate cake flavour or Dutch process, which has a more intense chocolate flavour.
- Baking powder and baking soda
- Sea salt
- Unsweetened applesauce – This makes the cake fudgy.
- Neutral oil – Like canola or sunflower seed oil.
- Vanilla extract
- Boiling water
- Instant coffee – This doesn’t make the cake taste like coffee; instead, it makes the chocolate flavour stand out more.
- Vanilla frosting – I use my Vegan Buttercream Frosting , but you could use store-bought or another recipe you like.
- Pink and green food colouring – I like to use gel food colouring because you can get deep, vibrant colour with it without watering down the frosting with a lot of liquid.
How to Make a Harry Potter Cake
Let’s get started! This step-by-step guide will show you the process of making a Harry Potter birthday cake.
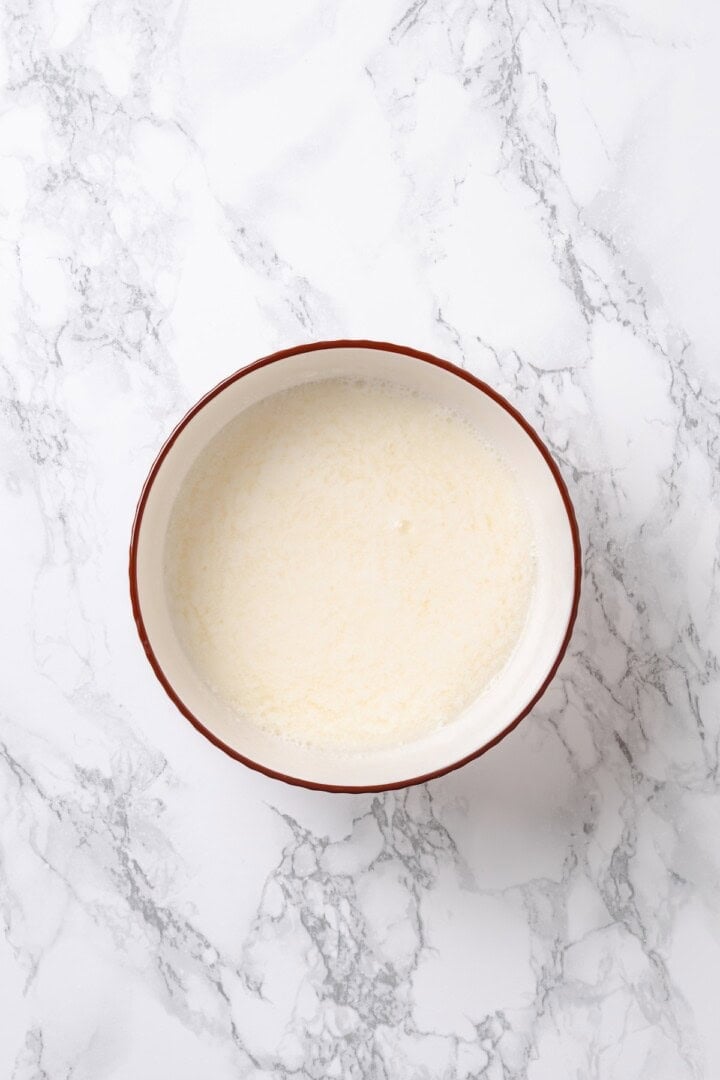
Mix vegan milk and vinegar.
- Prepare . Preheat your oven to 350ºF. Grease and flour two round cake pans, then line the bottoms with parchment paper circles.
- Make the vegan buttermilk . Whisk together the vegan milk and vinegar and set aside until thickened.
- Mix the batter . Whisk together the dry ingredients in a mixing bowl, then add the buttermilk, applesauce, oil, vanilla, and instant coffee dissolved in boiling water. Beat on medium speed to combine.
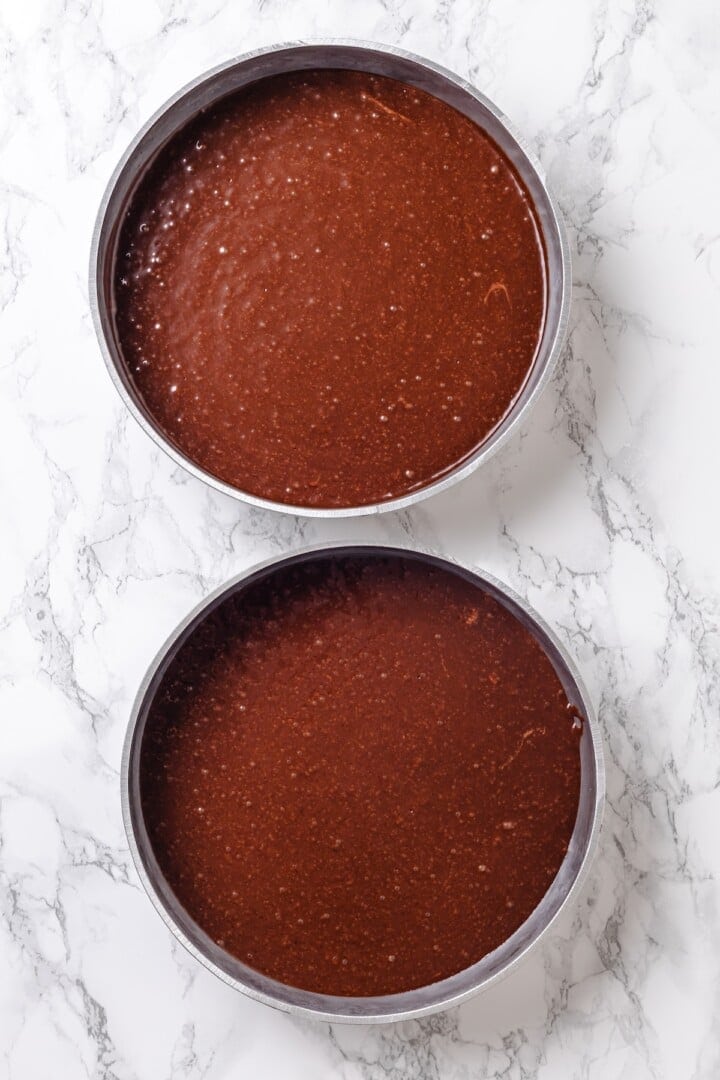
Divide the batter into pans.
- Bake the cakes . Divide the batter into the pans and bake for 27 minutes, or until a toothpick inserted into the centre comes out clean. Cool on a wire rack for 30 to 60 minutes, then turn out onto the wire rack to finish cooling.
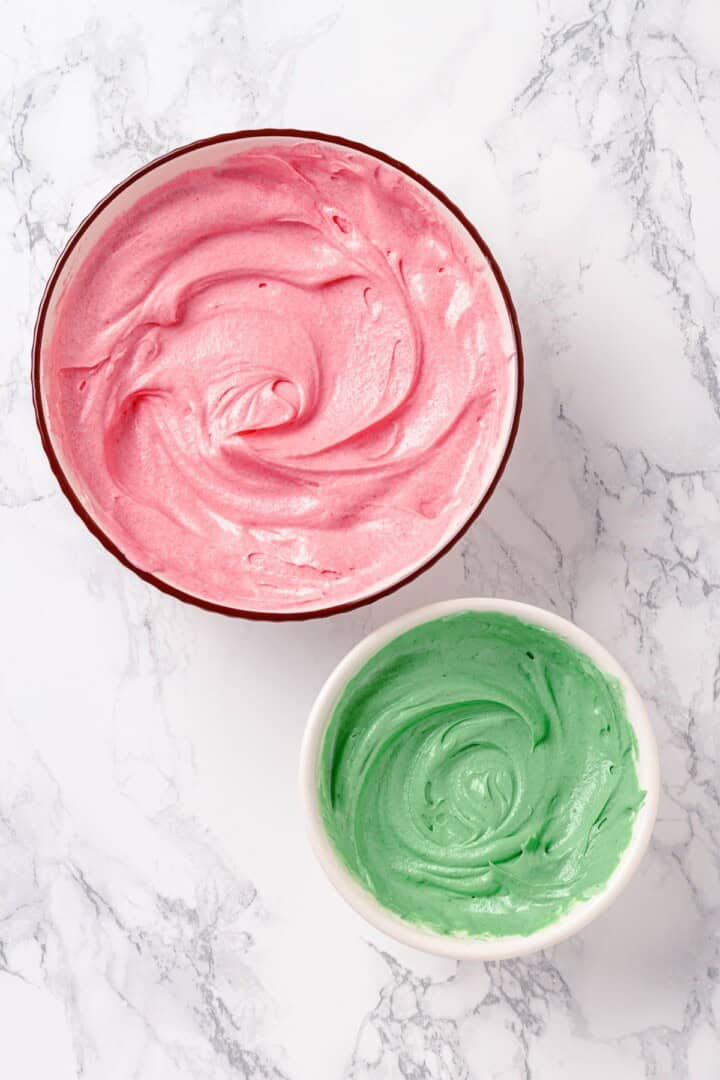
Prepare the frosting.
- Prepare the frosting . Follow the recipe directions for the frosting. Reserve a small portion and tint it green; colour the rest pink.
- Frost the cakes . Frost the first layer and then set the second layer on top. Spread the frosting over the top and sides, then use a piping bag to write your message in green frosting.

Tips and Variations
Here are a few more pointers for the perfect Harry Potter cake.
- Don’t overmix the batter . For maximum lift, mix the cake batter just until the wet ingredients are incorporated into the dry ingredients.
- Customise the message . Of course, you don’t have to write Harry on the cake if you’re celebrating someone else’s birthday! You can wish Happee Birthdae to anyone.
- Swap in cream cheese frosting . My Vegan Cream Cheese Frosting can be tinted to look just like the frosting used in the movie, but with a tangy cream cheese flavour!
- Add a filling . Although it’s not true to the book or movie, you could add a layer of Strawberry Cake Filling between the two layers of chocolate cake.
How to Store
- Room temperature : This Harry Potter cake will keep up to a day at room temperature, assuming your kitchen isn’t too warm.
- Refrigerator : You can refrigerate this cake for up to 4 days. Loosely wrap it in plastic wrap or transfer leftovers to an airtight container.
- Freezer : Freeze leftover Harry Potter cake in an airtight container for up to 2 months. Thaw in the refrigerator before serving.
More Vegan Cake Recipes
- Pistachio Cake
- Vanilla Sheet Cake
- Chocolate Lava Cake
- Vegan Red Velvet Cake
Ingredients
- 2 tablespoons apple cider vinegar , 30 mL
- 1 cup soy milk , or other vegan milk – 240 mL
- 1 ¾ cups cane sugar , 350 g
- 2 cups all-purpose flour , 240 g
- ¾ cup unsweetened cocoa powder , 60 g
- 1 teaspoon baking powder , 5 g
- 2 teaspoons baking soda , 10 g
- 1 teaspoon sea salt , 5 g
- ½ cup unsweetened applesauce , 120 mL
- ½ cup + 2 teaspoons neutral oil , e.g. canola, sunflower – 110 mL
- 2 teaspoons vanilla extract , 10 mL
- 1 cup boiling water , 240 mL
- 1 tablespoon instant coffee , 6 g
- 1 batch vanilla frosting
- Pink and green food coloring
Instructions
- Preheat oven to 350°F (180°C).
- Grease and flour two 9-inch (23 cm) round cake pans, and line the bottoms with parchment paper circles to prevent sticking.
Make the Cake Layers:
- In a small bowl, whisk together the soy milk and apple cider vinegar. Let sit for 5–10 minutes until curdled.
- In a large mixing bowl, whisk together the cane sugar, flour, cocoa powder, baking powder, baking soda and sea salt. Add the soy milk mixture, applesauce, oil, and vanilla extract.
- Mix boiling water and instant coffee in a small bowl until dissolved. Immediately pour into the batter.
- Using an electric mixer, beat the batter on medium speed for 2 minutes until fully combined. Scrape down the sides and stir once more by hand to ensure everything is incorporated.
- Divide the batter evenly between the two prepared pans.
- Bake for 27 minutes, or until a toothpick inserted in the center comes out clean.
- Let cakes cool in the pans on a wire rack for 30–60 minutes.
- Run a butter knife around the edges, then carefully turn out and let them cool completely on the wire rack.
Frost and Decorate:
- Tint most of the frosting light pink (use beet powder or plant-based pink food coloring).
- Reserve a small portion of frosting and color it green for piping the message.
- Place one cake layer on a serving plate or cake stand.
- Add a layer of pink frosting over the first cake.
- Top with the second cake layer and apply a layer of pink frosting over the top and sides. Don’t worry about it being smooth—it should look like the homemade cake Hagrid gave Harry.
- Use a piping bag with a small round tip (or a ziplock bag with a snipped corner) filled with green frosting to write: “Happee Birthdae Harry”
Notes
- Room temperature : This Harry Potter cake will keep up to a day at room temperature, assuming your kitchen isn’t too warm.
- Refrigerator : You can refrigerate this cake for up to 4 days. Loosely wrap it in plastic wrap or transfer leftovers to an airtight container.
- Freezer : Freeze leftover Harry Potter cake in an airtight container for up to 2 months. Thaw in the refrigerator before serving.
- Nutritional information is for cake without frosting, as the exact calculations will depend on the type of frosting you use.
