These sweet and sticky orange cauliflower bites have Chinese takeout vibes—but they swap the chicken with cauliflower and they’re baked, not fried!

Not to pat myself on the back too much, but my cauliflower recipes have kind of been a big deal! These Sticky Sesame Cauliflower Wings were named one of the recipes that “ won 2016 ” and declared “ better than the real thing . ” To say I’m proud is an understatement, and even all these years later, I still adore recipes like this orange cauliflower—not to mention Mango Habanero Cauliflower Wings and Cauliflower Steaks … the list goes on!
Why This Orange Cauliflower Recipe Will Be Your New Fave
You’re going to flip for this orange cauliflower! Here’s why I love it so much:
- Food court flavour . And I mean that in a good way! Who doesn’t love the flavour of orange chicken that most of us grew up sampling on toothpicks in mall food courts!? It’s sticky, sweet, kind of tangy, and citrusy. This orange cauliflower delivers that flavour in a healthier way.
- Crispy coating . As amazing as the sauce is, the batter also contributes to the popularity of my cauliflower wings and bites—it bakes up deliciously crisp and gives it that “chicken-like” breading texture.
- No frying needed . There’s a time and a place for frying (like when you’re making Crispy Homemade Falafel !), but for orange cauliflower, you don’t need it. You can achieve crispy cauliflower perfection in the oven!
Notes on Ingredients
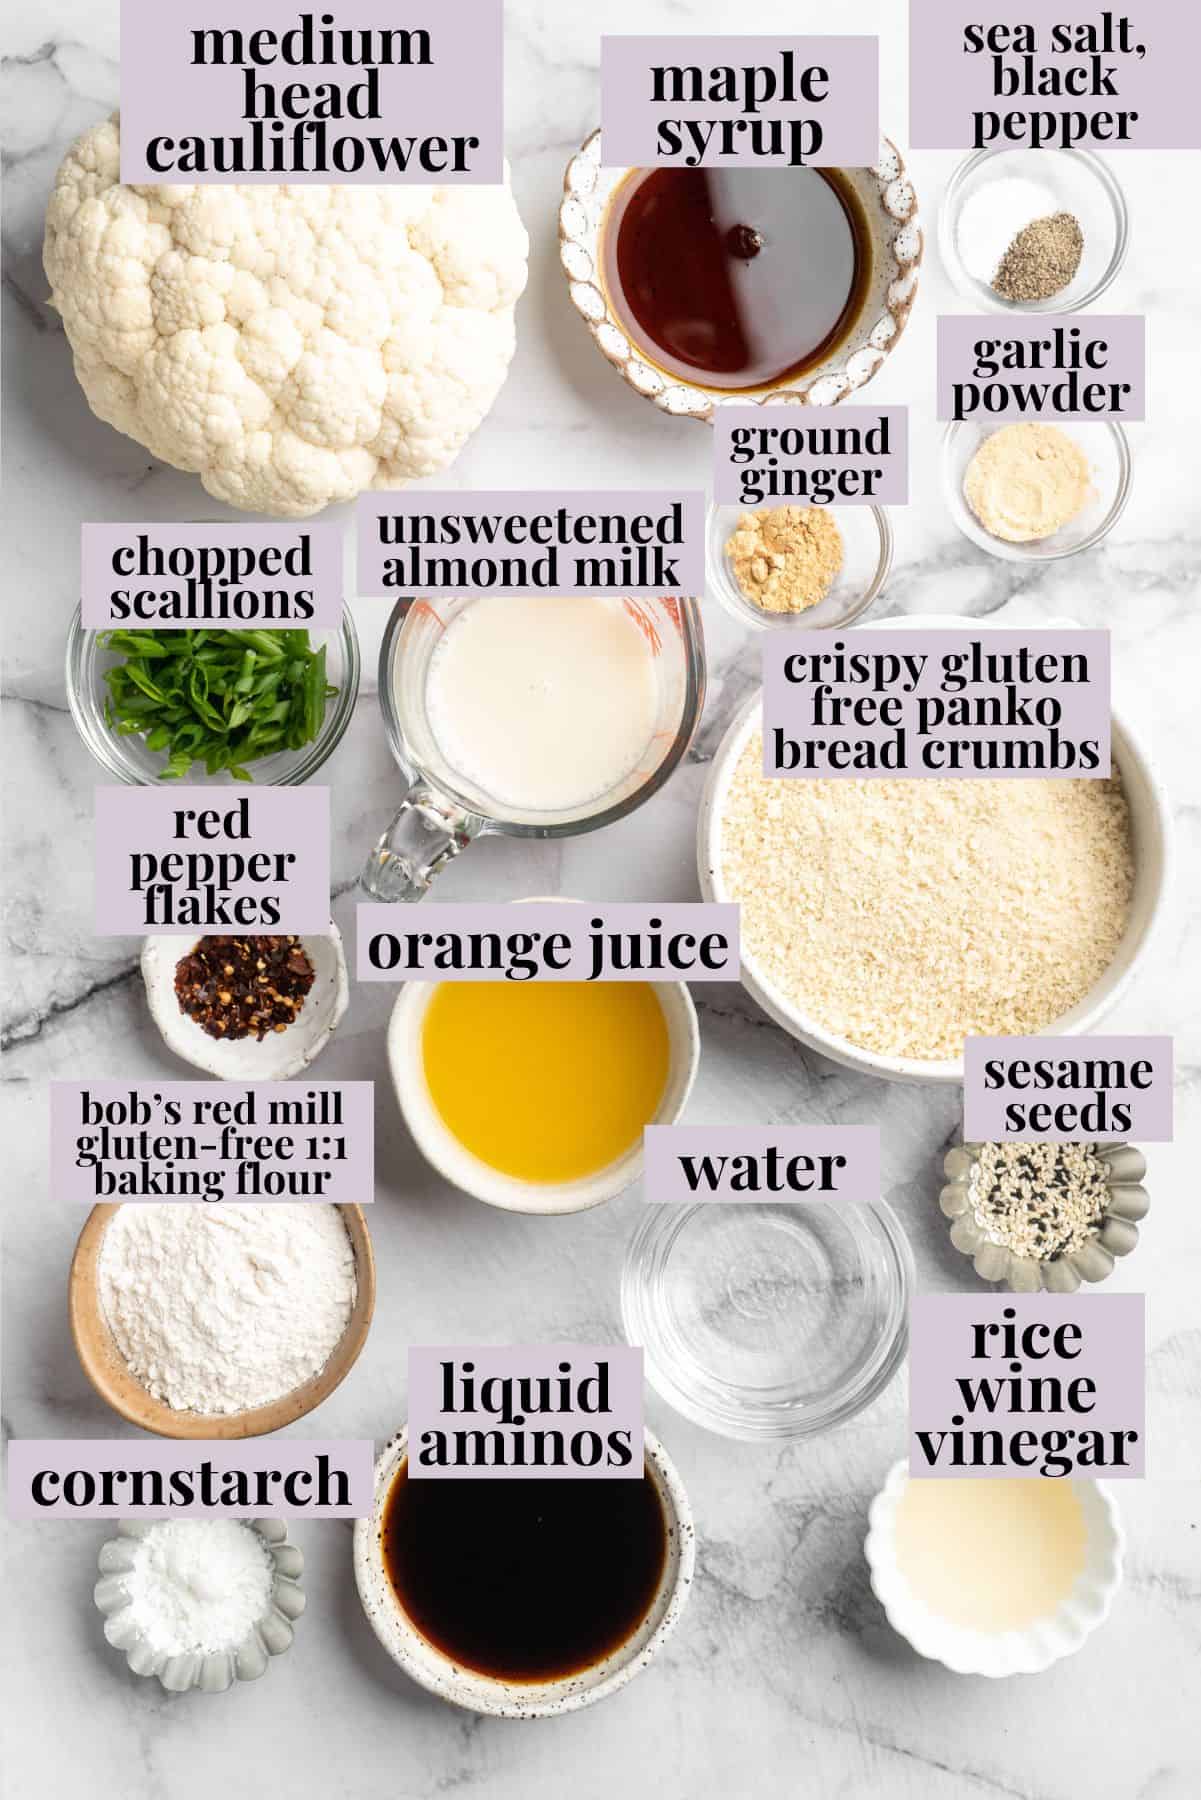
Here’s everything you’ll need to make this flavourful plant-based twist on the classic orange chicken recipe! Scroll down to the recipe card to find the ingredient quantities and recipe instructions.
Cauliflower Bites:
- Cauliflower – Use a medium head of cauliflower.
- Gluten-free 1-to-1 baking flour – Or regular all-purpose flour if you’re not on a gluten-free diet.
- Unsweetened almond milk – You can substitute with any plant-based milk as long as it’s unflavoured and unsweetened.
- Seasonings – Sea salt and ground black pepper, garlic powder for savoury depth, and crushed red pepper flakes.
- Gluten-free panko bread crumbs – Or regular panko if you prefer.
- Sesame seeds and chopped scallions – For garnish.
Orange Sauce:
- Water
- Orange juice – Although you can use bottled, I think freshly squeezed orange juice has a better flavour.
- Maple syrup – For natural sweetness. If you’d like, you can swap in vegan honey or date syrup .
- Ground ginger and garlic powder – For a combination of warmth and savoury flavour in the sauce.
- Liquid aminos – Or a low-sodium soy sauce.
- Rice wine vinegar – Balances the sweet flavour with acidity. Be sure to use unseasoned rice vinegar, which is unsweetened.
- Cornstarch – To thicken the sauce.
How to Make Orange Cauliflower
This simple step-by-step guide will show you how to make crispy, flavourful orange cauliflower at home!

Cut the cauliflower into florets.
- Prepare . Preheat your oven to 450°F and line a baking sheet with a silicone mat or greased foil. Cut cauliflower into bite-sized florets.
- Make the batter . Whisk the flour, almond milk, and seasonings in a bowl. Set the panko in another bowl.
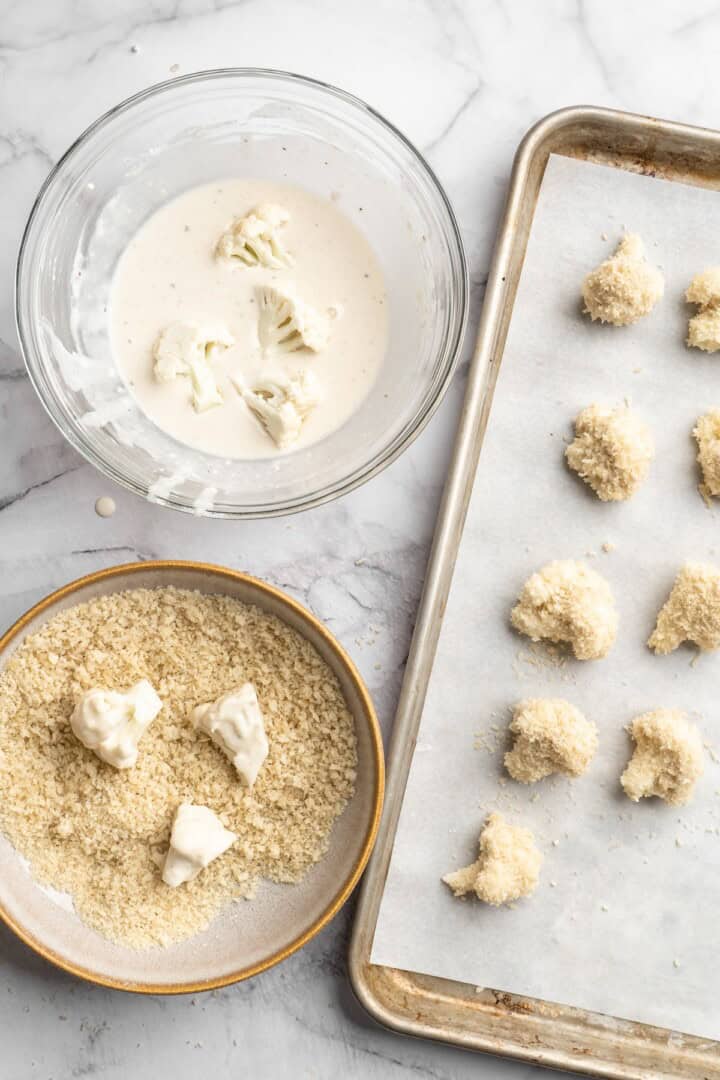
Dredge the cauliflower.
- Dredge the cauliflower . Dip the cauliflower in the batter, shake off any excess, then coat in the panko and place on the baking sheet.
- Bake . Cook the cauliflower in the oven for 22 minutes, or until crispy and golden.
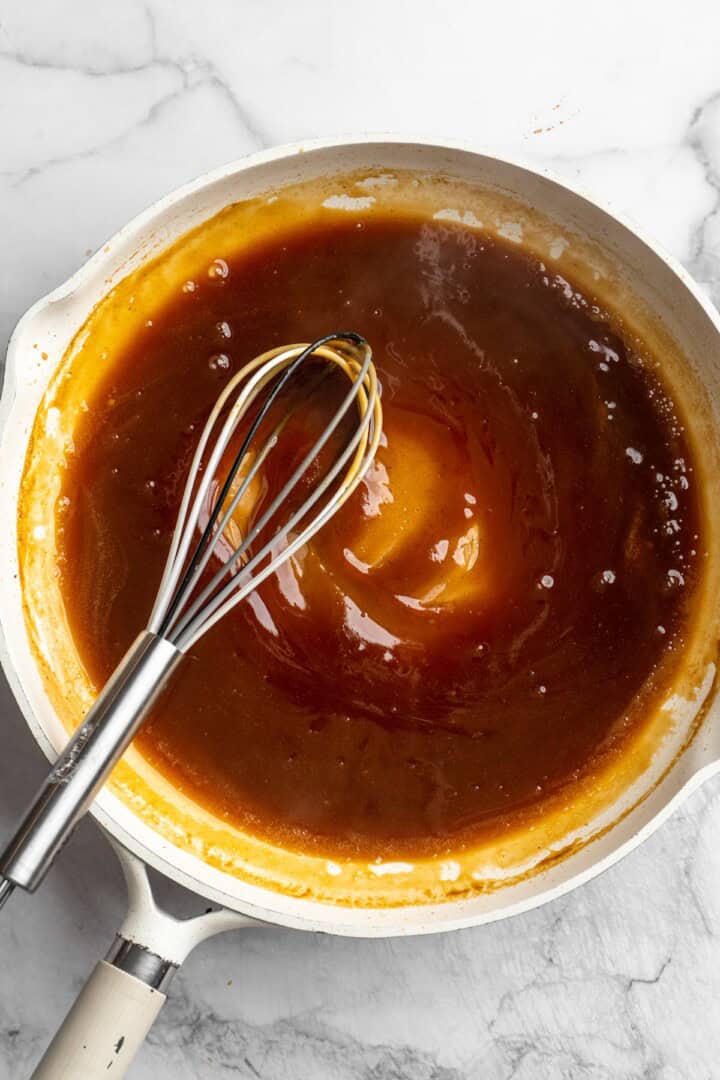
Make the orange sauce.
- Make the sauce . While the cauliflower bakes, heat all the sauce ingredients except the cornstarch slurry in a pan over high heat. Once it comes to a boil, let it cook for 1 minute, then reduce to medium-low and whisk in the slurry. Simmer until the sauce thickens.
- Toss the cauliflower in the sauce . Remove the cauliflower from the oven. Stir the florets into the sauce, return them to the pan, then bake for 5 minutes more.
- Serve . Garnish with sesame seeds and scallions and serve.

Tips for Success
- Use a high smoke point oil . Don’t use olive oil to grease the baking sheet; it will burn the bottoms of your bites. If you’re using a silicone mat, you don’t need to grease it at all, but otherwise, you will need a high smoke point oil like canola, peanut, or vegetable oil.
- Make sure the cauliflower is dry . The batter will only adhere to the cauliflower if the florets are completely dry, so pat the cauliflower dry after washing to make sure there are no water droplets clinging to the florets.
- Adjust the recipe to use frozen cauliflower . Fresh cauliflower is best, but if you have frozen on hand, you can use that too. Bake the cauliflower for 15 minutes in a 425ºF oven. Remove and drain off the excess liquid in a strainer. Toss the cauliflower with a few tablespoons of flour, coating lightly to soak up any liquid. Then, proceed with the recipe as written.

Serving Suggestions
You can serve orange cauliflower as a party appetizer with toothpicks, or pile them onto a bowl of fluffy Instant Pot Jasmine Rice. They’d also be divine paired with Vegan Fried Rice , which is another lighter version of a takeout favourite!
How to Store and Reheat Leftovers
- Refrigerator : Although they’re best right out of the oven, you can store orange cauliflower in an airtight container in your fridge for up to 4 days. I don’t recommend freezing this recipe.
- To reheat : Preheat oven to 375°F, place the cauliflower on a baking sheet and bake for about 10 minutes until heated through.

More Vegan Cauliflower Recipes
- Cauliflower Gnocchi
- Cauliflower Fried Rice
- Butter Cauliflower
- Cauliflower Pizza Bites
- Cauliflower Mac and Cheese
Ingredients
Cauliflower Bites
- 1 medium cauliflower
- ½ cup Bob’s Red Mill Gluten Free 1-to-1 Baking Flour , 60 g
- ½ cup unsweetened almond milk , 120 g
- ¼ teaspoon sea salt , 1.5 g
- ½ teaspoon ground black pepper , 1 g
- ½ teaspoon garlic powder , 1.5 g
- ¼ teaspoon crushed red pepper flakes , ½ if you want it very spicy, leave out if you don’t like spice, 0.5 g
- 1 cup crispy gluten free panko bread crumbs , seasoned with salt and pepper OR brown rice cereal puffs crushed and seasoned*, 50 g
- sesame seeds and chopped scallions , to garnish
Orange Sauce
- ½ cup water , 120g
- ½ cup orange juice , 120 g
- 2 tablespoons maple syrup , 40 g
- ¼ teaspoon ground ginger , 0.5 g
- ¼ teaspoon garlic powder , 0.75 g
- 2 tablespoons liquid aminos/low sodium soy sauce , 30 g
- 2 tablespoons rice wine vinegar , 30 g
- 1 tablespoons cornstarch + 1 tablespoon water , stirred together until cornstarch is dissolved, 8 g cornstarch + 15 g water
Instructions
- Preheat oven to 450°F/230°C. Prepare a baking sheet by lining it with a silicone baking sheet or greased foil.
- Remove florets from the cauliflower (aka don’t use the stem). Chop the cauliflower into smaller pieces to resemble the size of bites.
- In a separate bowl, whisk the gluten free flour, almond milk, salt, ground black pepper, garlic powder and crushed red pepper flakes in a bowl to make the batter.
- In another separate bowl, place the breadcrumbs. Line it up beside the batter bowl.
- Toss the cauliflower in the batter mixture one at a time, shaking off excess batter. Do not soak. Then, dip the cauliflower into the breadcrumbs to coat completely, then place onto the baking sheet. Repeat until all of the bites are coated.
- Bake for 22 minutes. Please ensure your oven is completely preheated and hot. While baking, prepare the ingredients for the sauce (see below).
- Remove from oven. Toss the bites in the sauce then using tongs or even just a large spoon, coating completely. Remove from pot and place back on the baking sheet. Bake for another 5 minutes for the sauce to soak into the bites.
- Remove from oven and serve immediately with sesame seeds and chopped scallions. Enjoy!
Orange Sauce
- While the bites are baking and have about 5 minutes left, in a pot over high heat, mix all the sauce ingredients, except the cornstarch slurry.
- Bring to a boil and boil for about 1 minute, then reduce heat to medium low. Add in the cornstarch slurry and whisk vigorously until dissolved into the sauce. Let it cook for about 3 to 4 minutes until the sauce begins to thicken. Remove from heat and allow to cool slightly. Taste a little bit to decide if you need more sweetener or more soy sauce.
Notes
These sweet and sticky orange cauliflower bites have Chinese takeout vibes—but they swap the chicken with cauliflower and they’re baked, not fried!
Not to pat myself on the back too much, but my cauliflower recipes have kind of been a big deal! These Sticky Sesame Cauliflower Wings were named one of the recipes that “ won 2016 ” and declared “ better than the real thing . ” To say I’m proud is an understatement, and even all these years later, I still adore recipes like this orange cauliflower—not to mention Mango Habanero Cauliflower Wings and Cauliflower Steaks … the list goes on!
Why This Orange Cauliflower Recipe Will Be Your New Fave
You’re going to flip for this orange cauliflower! Here’s why I love it so much:
- Food court flavour . And I mean that in a good way! Who doesn’t love the flavour of orange chicken that most of us grew up sampling on toothpicks in mall food courts!? It’s sticky, sweet, kind of tangy, and citrusy. This orange cauliflower delivers that flavour in a healthier way.
- Crispy coating . As amazing as the sauce is, the batter also contributes to the popularity of my cauliflower wings and bites—it bakes up deliciously crisp and gives it that “chicken-like” breading texture.
- No frying needed . There’s a time and a place for frying (like when you’re making Crispy Homemade Falafel !), but for orange cauliflower, you don’t need it. You can achieve crispy cauliflower perfection in the oven!
Notes on Ingredients
Here’s everything you’ll need to make this flavourful plant-based twist on the classic orange chicken recipe! Scroll down to the recipe card to find the ingredient quantities and recipe instructions.
Cauliflower Bites:
- Cauliflower – Use a medium head of cauliflower.
- Gluten-free 1-to-1 baking flour – Or regular all-purpose flour if you’re not on a gluten-free diet.
- Unsweetened almond milk – You can substitute with any plant-based milk as long as it’s unflavoured and unsweetened.
- Seasonings – Sea salt and ground black pepper, garlic powder for savoury depth, and crushed red pepper flakes.
- Gluten-free panko bread crumbs – Or regular panko if you prefer.
- Sesame seeds and chopped scallions – For garnish.
Orange Sauce:
- Water
- Orange juice – Although you can use bottled, I think freshly squeezed orange juice has a better flavour.
- Maple syrup – For natural sweetness. If you’d like, you can swap in vegan honey or date syrup .
- Ground ginger and garlic powder – For a combination of warmth and savoury flavour in the sauce.
- Liquid aminos – Or a low-sodium soy sauce.
- Rice wine vinegar – Balances the sweet flavour with acidity. Be sure to use unseasoned rice vinegar, which is unsweetened.
- Cornstarch – To thicken the sauce.
How to Make Orange Cauliflower
This simple step-by-step guide will show you how to make crispy, flavourful orange cauliflower at home!
Cut the cauliflower into florets.
- Prepare . Preheat your oven to 450°F and line a baking sheet with a silicone mat or greased foil. Cut cauliflower into bite-sized florets.
- Make the batter . Whisk the flour, almond milk, and seasonings in a bowl. Set the panko in another bowl.
Dredge the cauliflower.
- Dredge the cauliflower . Dip the cauliflower in the batter, shake off any excess, then coat in the panko and place on the baking sheet.
- Bake . Cook the cauliflower in the oven for 22 minutes, or until crispy and golden.
Make the orange sauce.
- Make the sauce . While the cauliflower bakes, heat all the sauce ingredients except the cornstarch slurry in a pan over high heat. Once it comes to a boil, let it cook for 1 minute, then reduce to medium-low and whisk in the slurry. Simmer until the sauce thickens.
- Toss the cauliflower in the sauce . Remove the cauliflower from the oven. Stir the florets into the sauce, return them to the pan, then bake for 5 minutes more.
- Serve . Garnish with sesame seeds and scallions and serve.
Tips for Success
- Use a high smoke point oil . Don’t use olive oil to grease the baking sheet; it will burn the bottoms of your bites. If you’re using a silicone mat, you don’t need to grease it at all, but otherwise, you will need a high smoke point oil like canola, peanut, or vegetable oil.
- Make sure the cauliflower is dry . The batter will only adhere to the cauliflower if the florets are completely dry, so pat the cauliflower dry after washing to make sure there are no water droplets clinging to the florets.
- Adjust the recipe to use frozen cauliflower . Fresh cauliflower is best, but if you have frozen on hand, you can use that too. Bake the cauliflower for 15 minutes in a 425ºF oven. Remove and drain off the excess liquid in a strainer. Toss the cauliflower with a few tablespoons of flour, coating lightly to soak up any liquid. Then, proceed with the recipe as written.
Serving Suggestions
You can serve orange cauliflower as a party appetizer with toothpicks, or pile them onto a bowl of fluffy Instant Pot Jasmine Rice. They’d also be divine paired with Vegan Fried Rice , which is another lighter version of a takeout favourite!
How to Store and Reheat Leftovers
- Refrigerator : Although they’re best right out of the oven, you can store orange cauliflower in an airtight container in your fridge for up to 4 days. I don’t recommend freezing this recipe.
- To reheat : Preheat oven to 375°F, place the cauliflower on a baking sheet and bake for about 10 minutes until heated through.
More Vegan Cauliflower Recipes
- Cauliflower Gnocchi
- Cauliflower Fried Rice
- Butter Cauliflower
- Cauliflower Pizza Bites
- Cauliflower Mac and Cheese
Ingredients
Cauliflower Bites
- 1 medium cauliflower
- ½ cup Bob’s Red Mill Gluten Free 1-to-1 Baking Flour , 60 g
- ½ cup unsweetened almond milk , 120 g
- ¼ teaspoon sea salt , 1.5 g
- ½ teaspoon ground black pepper , 1 g
- ½ teaspoon garlic powder , 1.5 g
- ¼ teaspoon crushed red pepper flakes , ½ if you want it very spicy, leave out if you don’t like spice, 0.5 g
- 1 cup crispy gluten free panko bread crumbs , seasoned with salt and pepper OR brown rice cereal puffs crushed and seasoned*, 50 g
- sesame seeds and chopped scallions , to garnish
Orange Sauce
- ½ cup water , 120g
- ½ cup orange juice , 120 g
- 2 tablespoons maple syrup , 40 g
- ¼ teaspoon ground ginger , 0.5 g
- ¼ teaspoon garlic powder , 0.75 g
- 2 tablespoons liquid aminos/low sodium soy sauce , 30 g
- 2 tablespoons rice wine vinegar , 30 g
- 1 tablespoons cornstarch + 1 tablespoon water , stirred together until cornstarch is dissolved, 8 g cornstarch + 15 g water
Instructions
- Preheat oven to 450°F/230°C. Prepare a baking sheet by lining it with a silicone baking sheet or greased foil.
- Remove florets from the cauliflower (aka don’t use the stem). Chop the cauliflower into smaller pieces to resemble the size of bites.
- In a separate bowl, whisk the gluten free flour, almond milk, salt, ground black pepper, garlic powder and crushed red pepper flakes in a bowl to make the batter.
- In another separate bowl, place the breadcrumbs. Line it up beside the batter bowl.
- Toss the cauliflower in the batter mixture one at a time, shaking off excess batter. Do not soak. Then, dip the cauliflower into the breadcrumbs to coat completely, then place onto the baking sheet. Repeat until all of the bites are coated.
- Bake for 22 minutes. Please ensure your oven is completely preheated and hot. While baking, prepare the ingredients for the sauce (see below).
- Remove from oven. Toss the bites in the sauce then using tongs or even just a large spoon, coating completely. Remove from pot and place back on the baking sheet. Bake for another 5 minutes for the sauce to soak into the bites.
- Remove from oven and serve immediately with sesame seeds and chopped scallions. Enjoy!
Orange Sauce
- While the bites are baking and have about 5 minutes left, in a pot over high heat, mix all the sauce ingredients, except the cornstarch slurry.
- Bring to a boil and boil for about 1 minute, then reduce heat to medium low. Add in the cornstarch slurry and whisk vigorously until dissolved into the sauce. Let it cook for about 3 to 4 minutes until the sauce begins to thicken. Remove from heat and allow to cool slightly. Taste a little bit to decide if you need more sweetener or more soy sauce.
Notes

Orange Cauliflower
Ingredients
Cauliflower Bites
- 1 medium cauliflower
- ½ cup Bob’s Red Mill Gluten Free 1-to-1 Baking Flour 60 g
- ½ cup unsweetened almond milk 120 g
- ¼ teaspoon sea salt 1.5 g
- ½ teaspoon ground black pepper 1 g
- ½ teaspoon garlic powder 1.5 g
- ¼ teaspoon crushed red pepper flakes ½ if you want it very spicy, leave out if you don’t like spice, 0.5 g
- 1 cup crispy gluten free panko bread crumbs seasoned with salt and pepper OR brown rice cereal puffs crushed and seasoned*, 50 g
- sesame seeds and chopped scallions to garnish
Orange Sauce
- ½ cup water 120g
- ½ cup orange juice 120 g
- 2 tablespoons maple syrup 40 g
- ¼ teaspoon ground ginger 0.5 g
- ¼ teaspoon garlic powder 0.75 g
- 2 tablespoons liquid aminos/low sodium soy sauce 30 g
- 2 tablespoons rice wine vinegar 30 g
- 1 tablespoons cornstarch + 1 tablespoon water stirred together until cornstarch is dissolved, 8 g cornstarch + 15 g water
Instructions
- Preheat oven to 450°F/230°C. Prepare a baking sheet by lining it with a silicone baking sheet or greased foil.
- Remove florets from the cauliflower (aka don’t use the stem). Chop the cauliflower into smaller pieces to resemble the size of bites.
- In a separate bowl, whisk the gluten free flour, almond milk, salt, ground black pepper, garlic powder and crushed red pepper flakes in a bowl to make the batter.
- In another separate bowl, place the breadcrumbs. Line it up beside the batter bowl.
- Toss the cauliflower in the batter mixture one at a time, shaking off excess batter. Do not soak. Then, dip the cauliflower into the breadcrumbs to coat completely, then place onto the baking sheet. Repeat until all of the bites are coated.
- Bake for 22 minutes. Please ensure your oven is completely preheated and hot. While baking, prepare the ingredients for the sauce (see below).
- Remove from oven. Toss the bites in the sauce then using tongs or even just a large spoon, coating completely. Remove from pot and place back on the baking sheet. Bake for another 5 minutes for the sauce to soak into the bites.
- Remove from oven and serve immediately with sesame seeds and chopped scallions. Enjoy!
Orange Sauce
- While the bites are baking and have about 5 minutes left, in a pot over high heat, mix all the sauce ingredients, except the cornstarch slurry.
- Bring to a boil and boil for about 1 minute, then reduce heat to medium low. Add in the cornstarch slurry and whisk vigorously until dissolved into the sauce. Let it cook for about 3 to 4 minutes until the sauce begins to thicken. Remove from heat and allow to cool slightly. Taste a little bit to decide if you need more sweetener or more soy sauce.
Notes
Nutrition
Orange Cauliflower https://jessicainthekitchen.com/sweet-and-sticky-orange-cauliflower-bites/ April 21, 2025
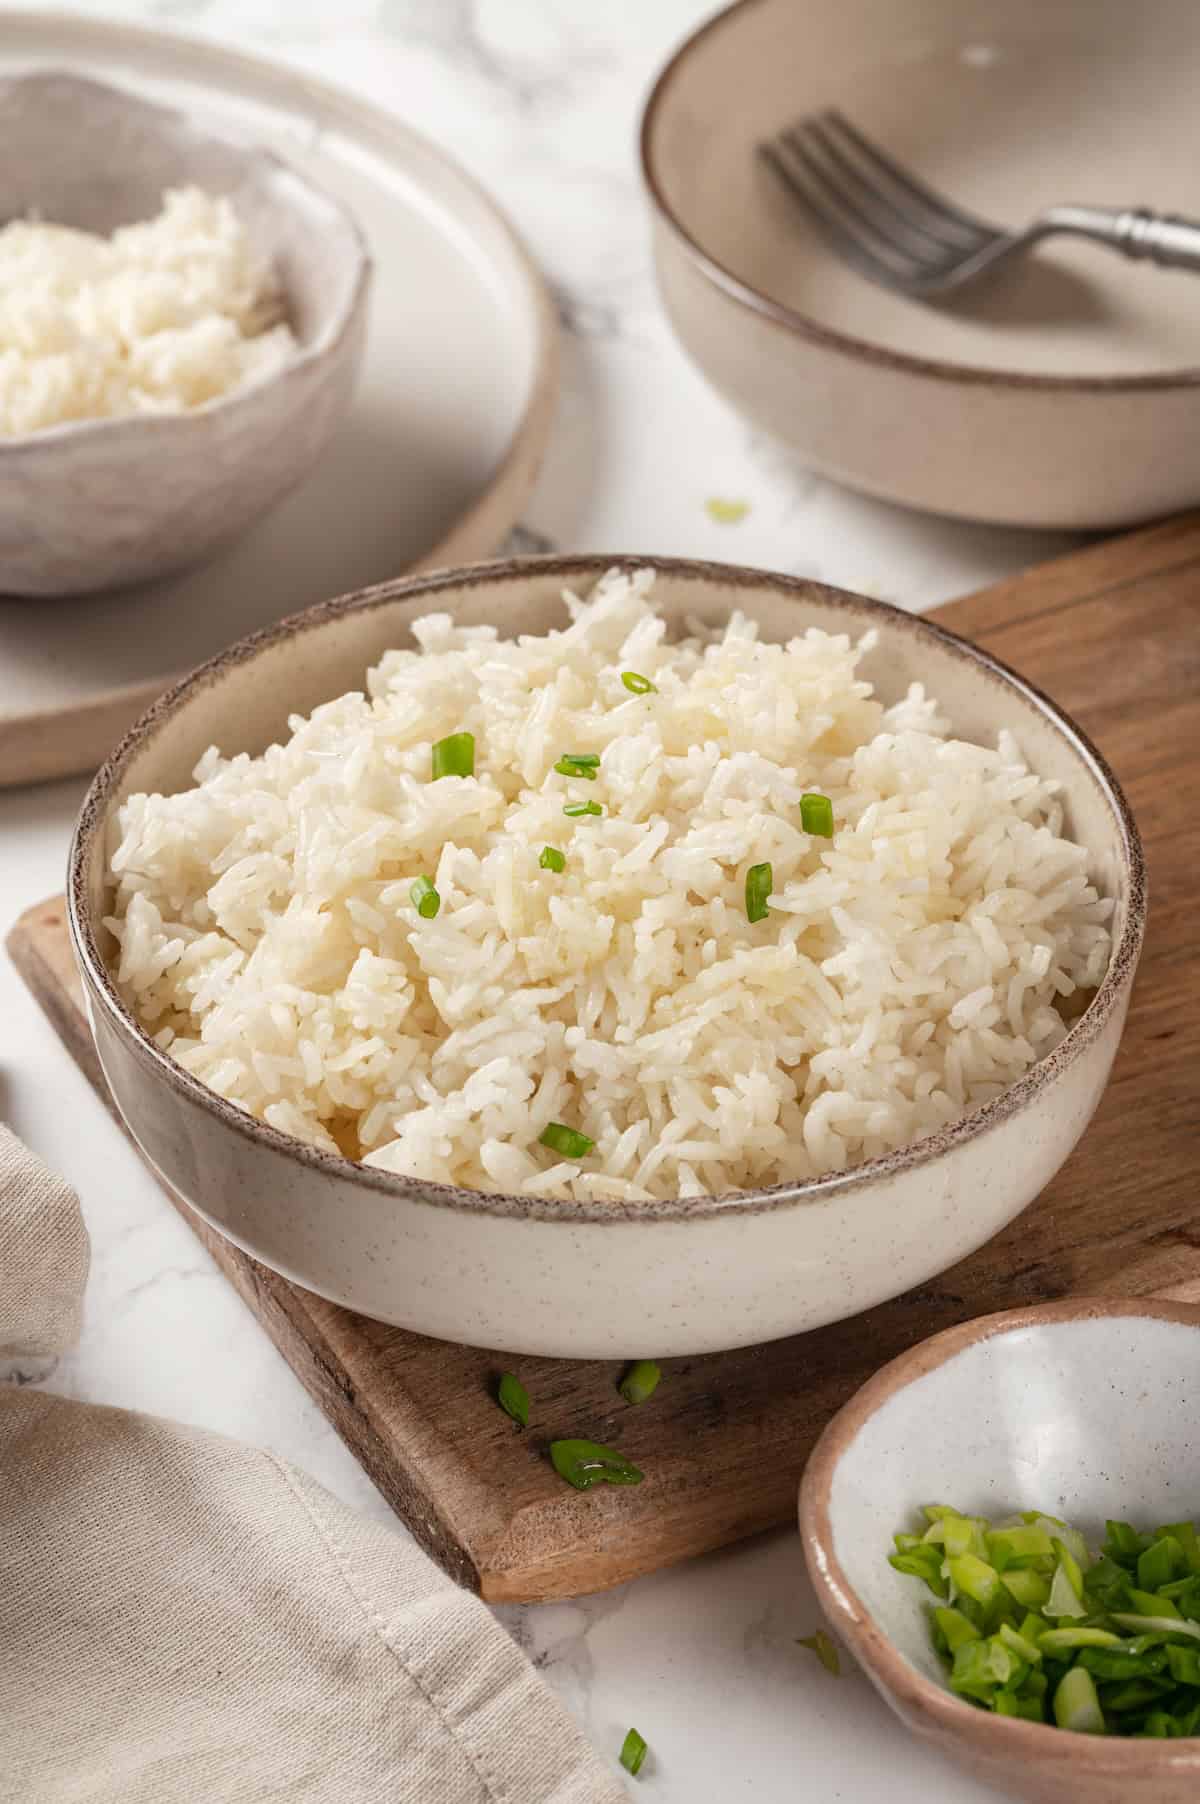
The Instant Pot is the easiest, most reliable way to make jasmine rice! This fragrant Instant Pot jasmine rice is perfect for pairing with stir fries, curries, and more.
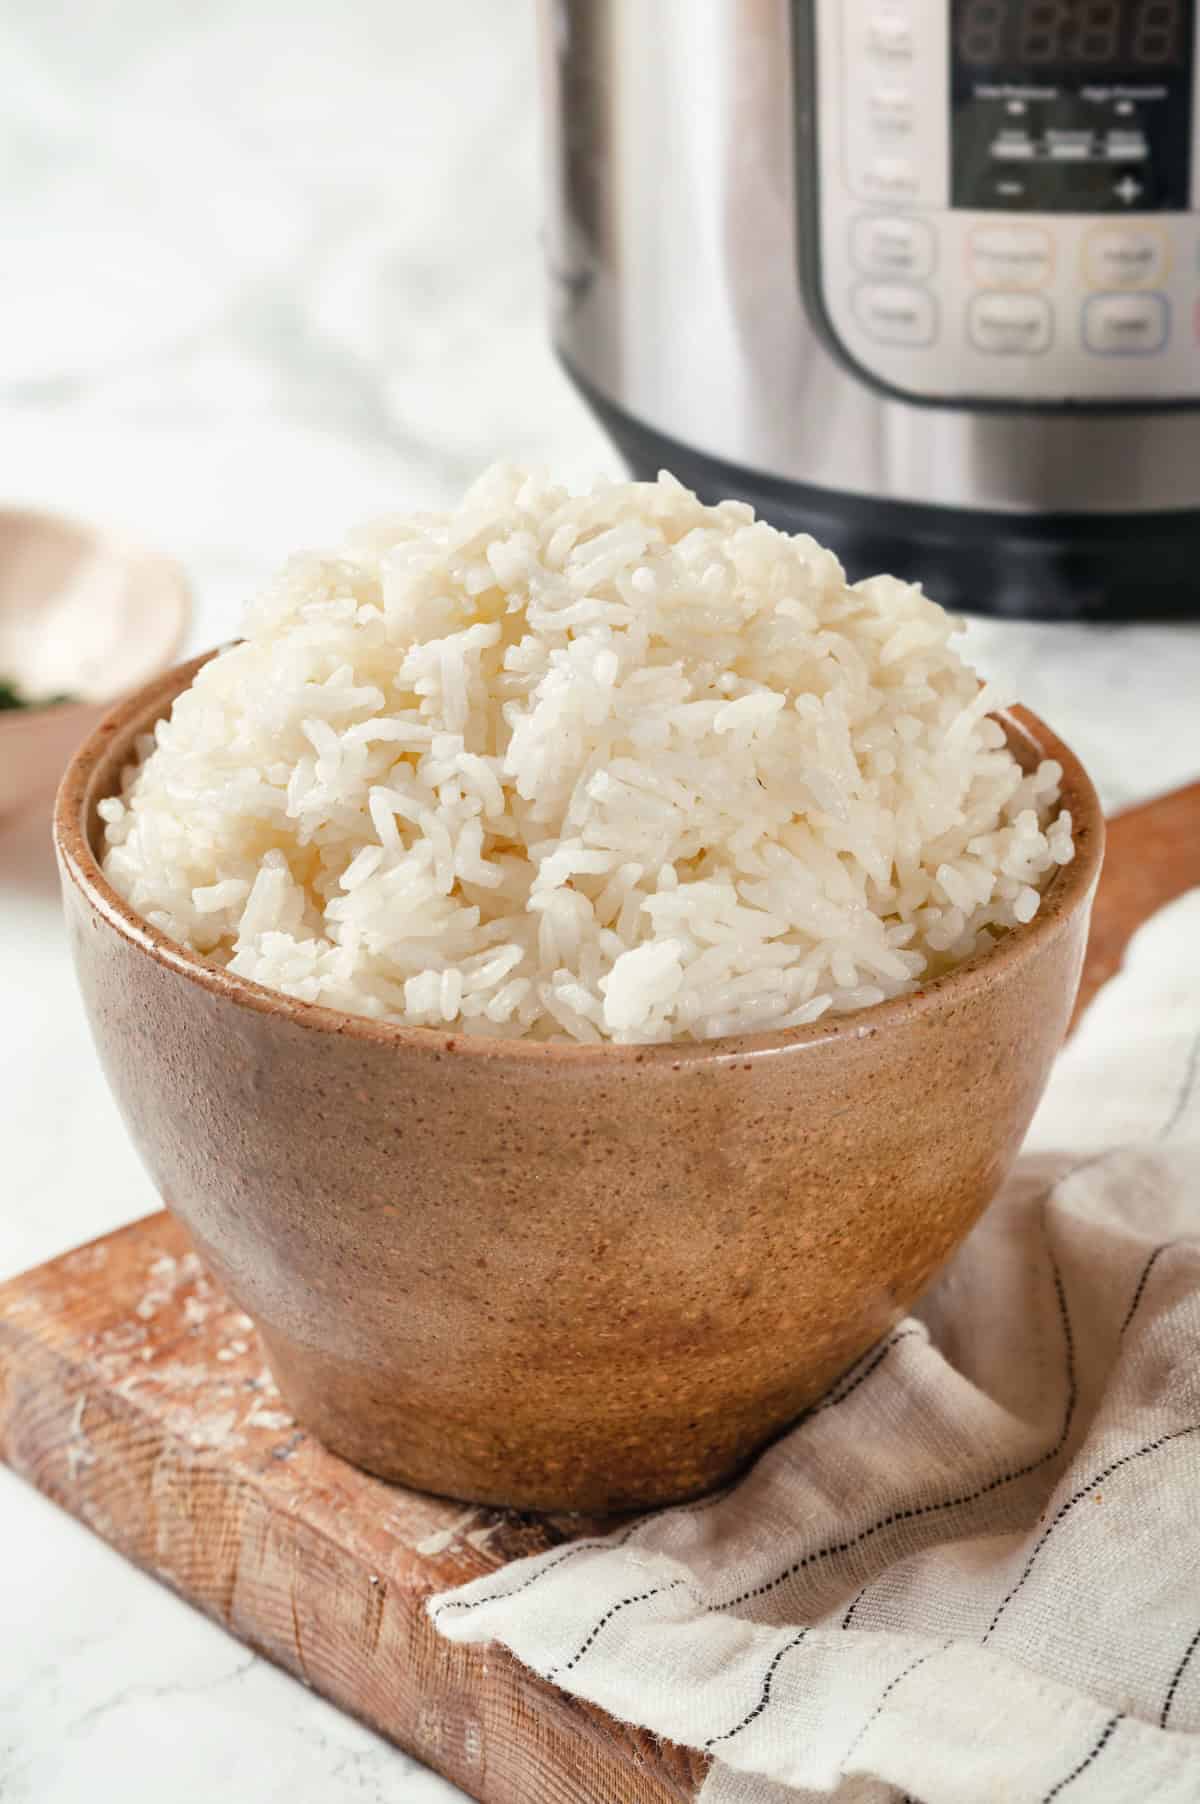
As a vegan, it took me a while to come around to buying an Instant Pot. Obviously, I’m not in the market for an appliance that makes cooking meat easier, and as for the rice and beans—well, I can make them on the stovetop, right? Well, I ended up being a convert and this Instant Pot jasmine rice is one of the recipes that made me a believer. The Instant Pot isn’t just faster, it also cooks grains and beans perfectly. (Need more proof? Try my Instant Pot Risotto and Instant Pot Steel-Cut Oats too!)
Why Instant Pot Jasmine Rice Has Become a Regular in Our House
Spoiler alert: It’s quick, foolproof, and consistently delivers fluffy and fragrant rice every time.
- Hands-off cooking . No need to watch the stove or worry about the water boiling over—the Instant Pot takes care of everything. This frees up time for you to cook the rest of your meal!
- Fragrant and delicious . Jasmine rice has a wonderful floral, slightly nutty flavour that sets it apart from regular white rice.
- The texture is always perfect . Like I said: fluffy! If you struggle with soggy rice or rice burnt onto the bottom of the pan when you make it on the stovetop, you’ll appreciate the Instant Pot.
Notes on Ingredients
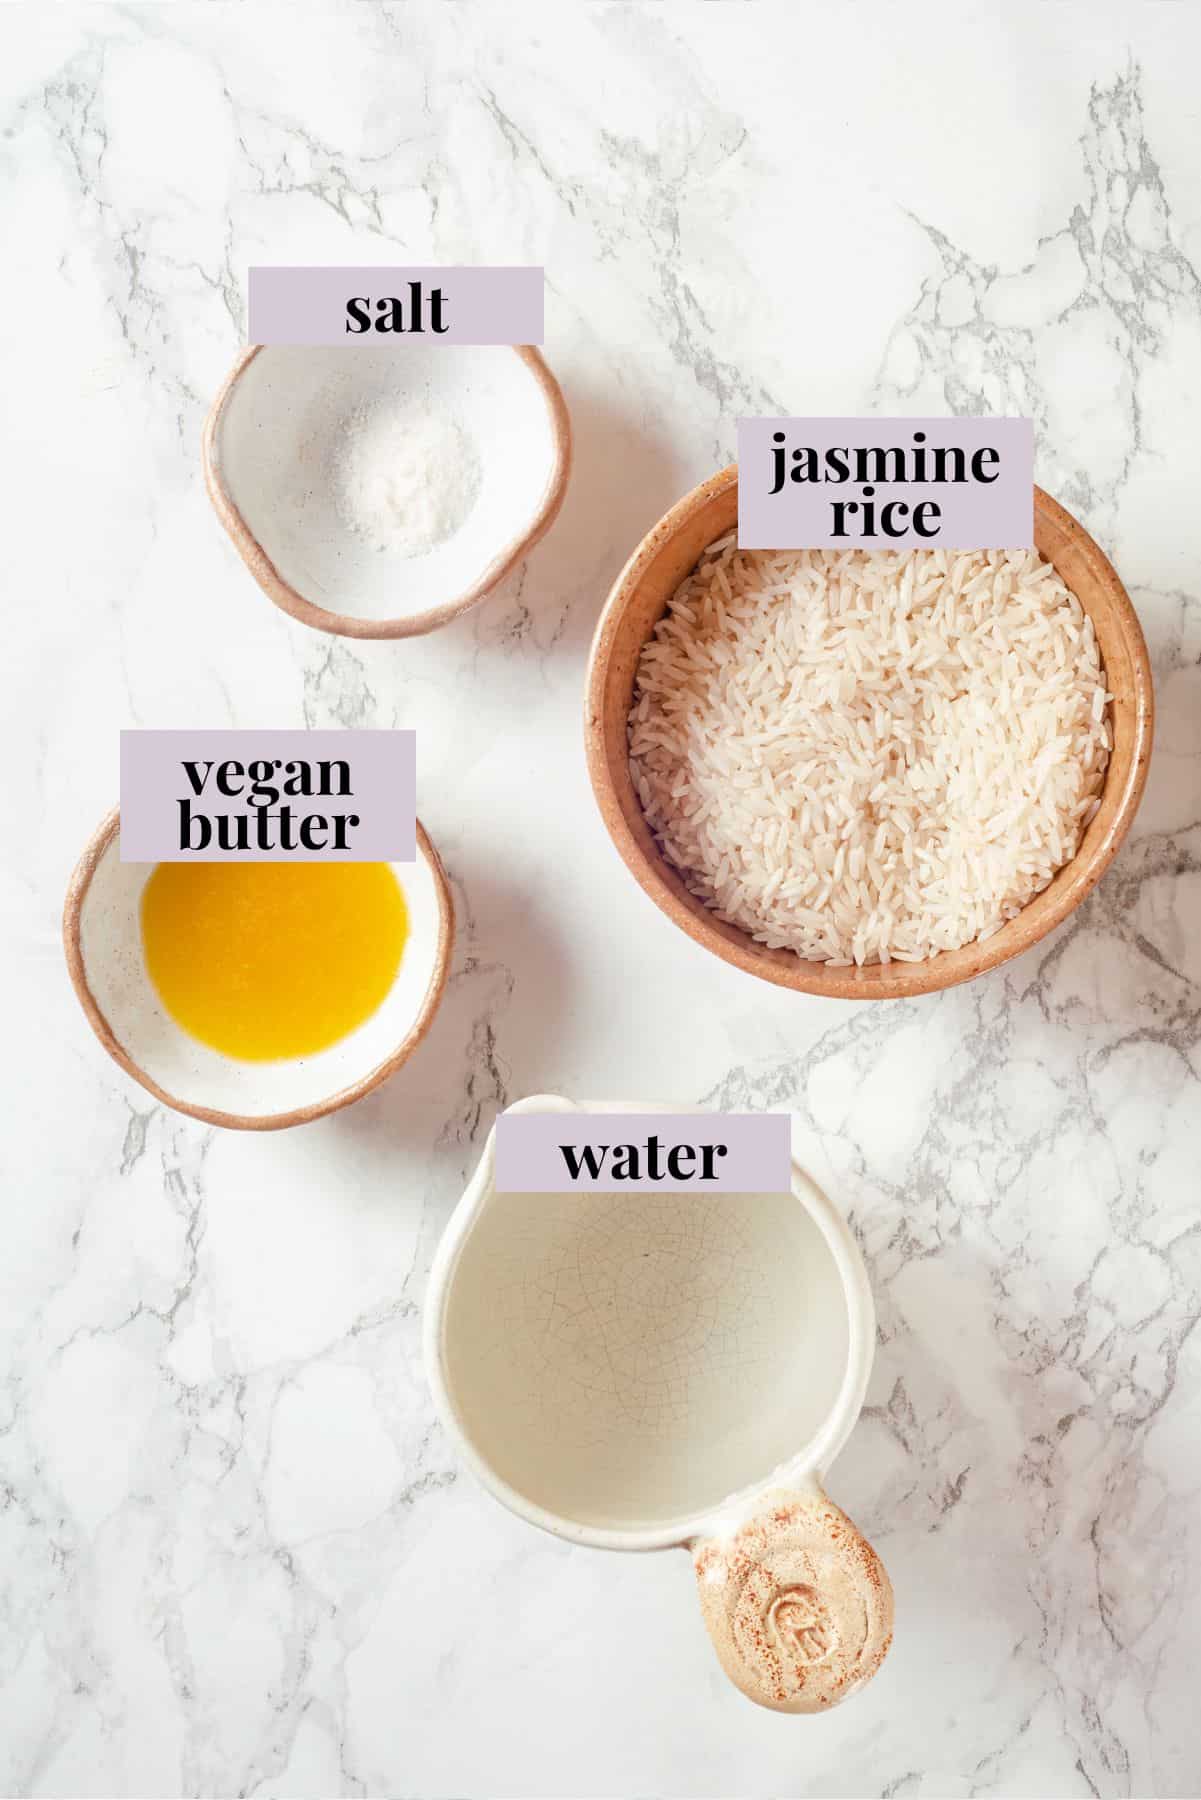
The ingredient list is super simple! Scroll down to the recipe card to find the ingredient quantities and recipe instructions.
- Jasmine rice – A fragrant rice variety popular in Asian cuisine.
- Water – Or use Vegetable Broth .
- Salt – Even if you don’t like to cook with a lot of added salt, it’s essential here to bring out the best in the rice.
- Vegan butter – For a little bit of richness and flavour. I use my Vegan Butter .
How to Cook Jasmine Rice in the Instant Pot
You are going to love how easy this is!
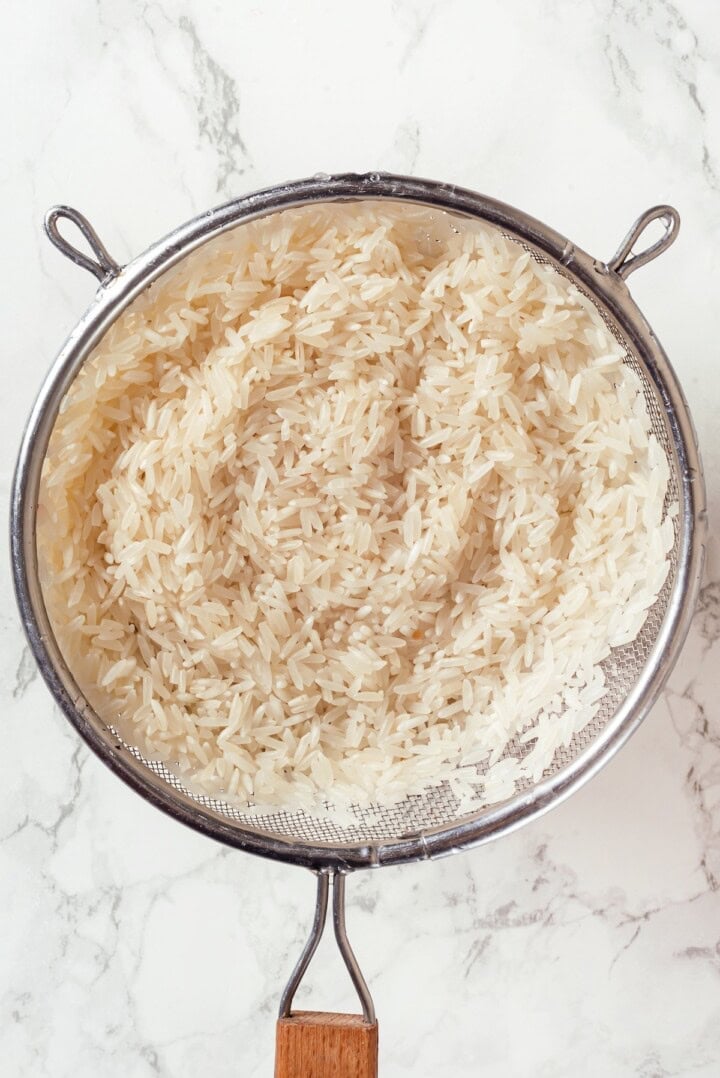
Rinse the rice.
- Rinse the rice. Rinse the jasmine rice in a fine-mesh strainer until the water runs clear.
- Add to Instant Pot. Transfer the rice to the Instant Pot with the water, salt, and butter, then stir gently.
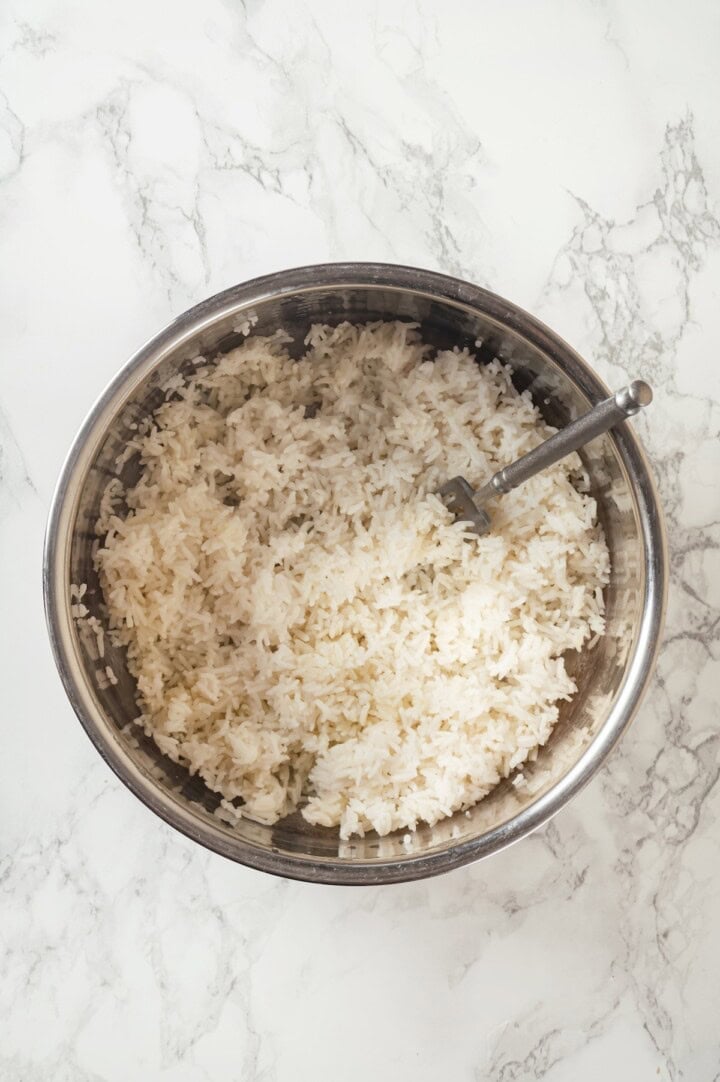
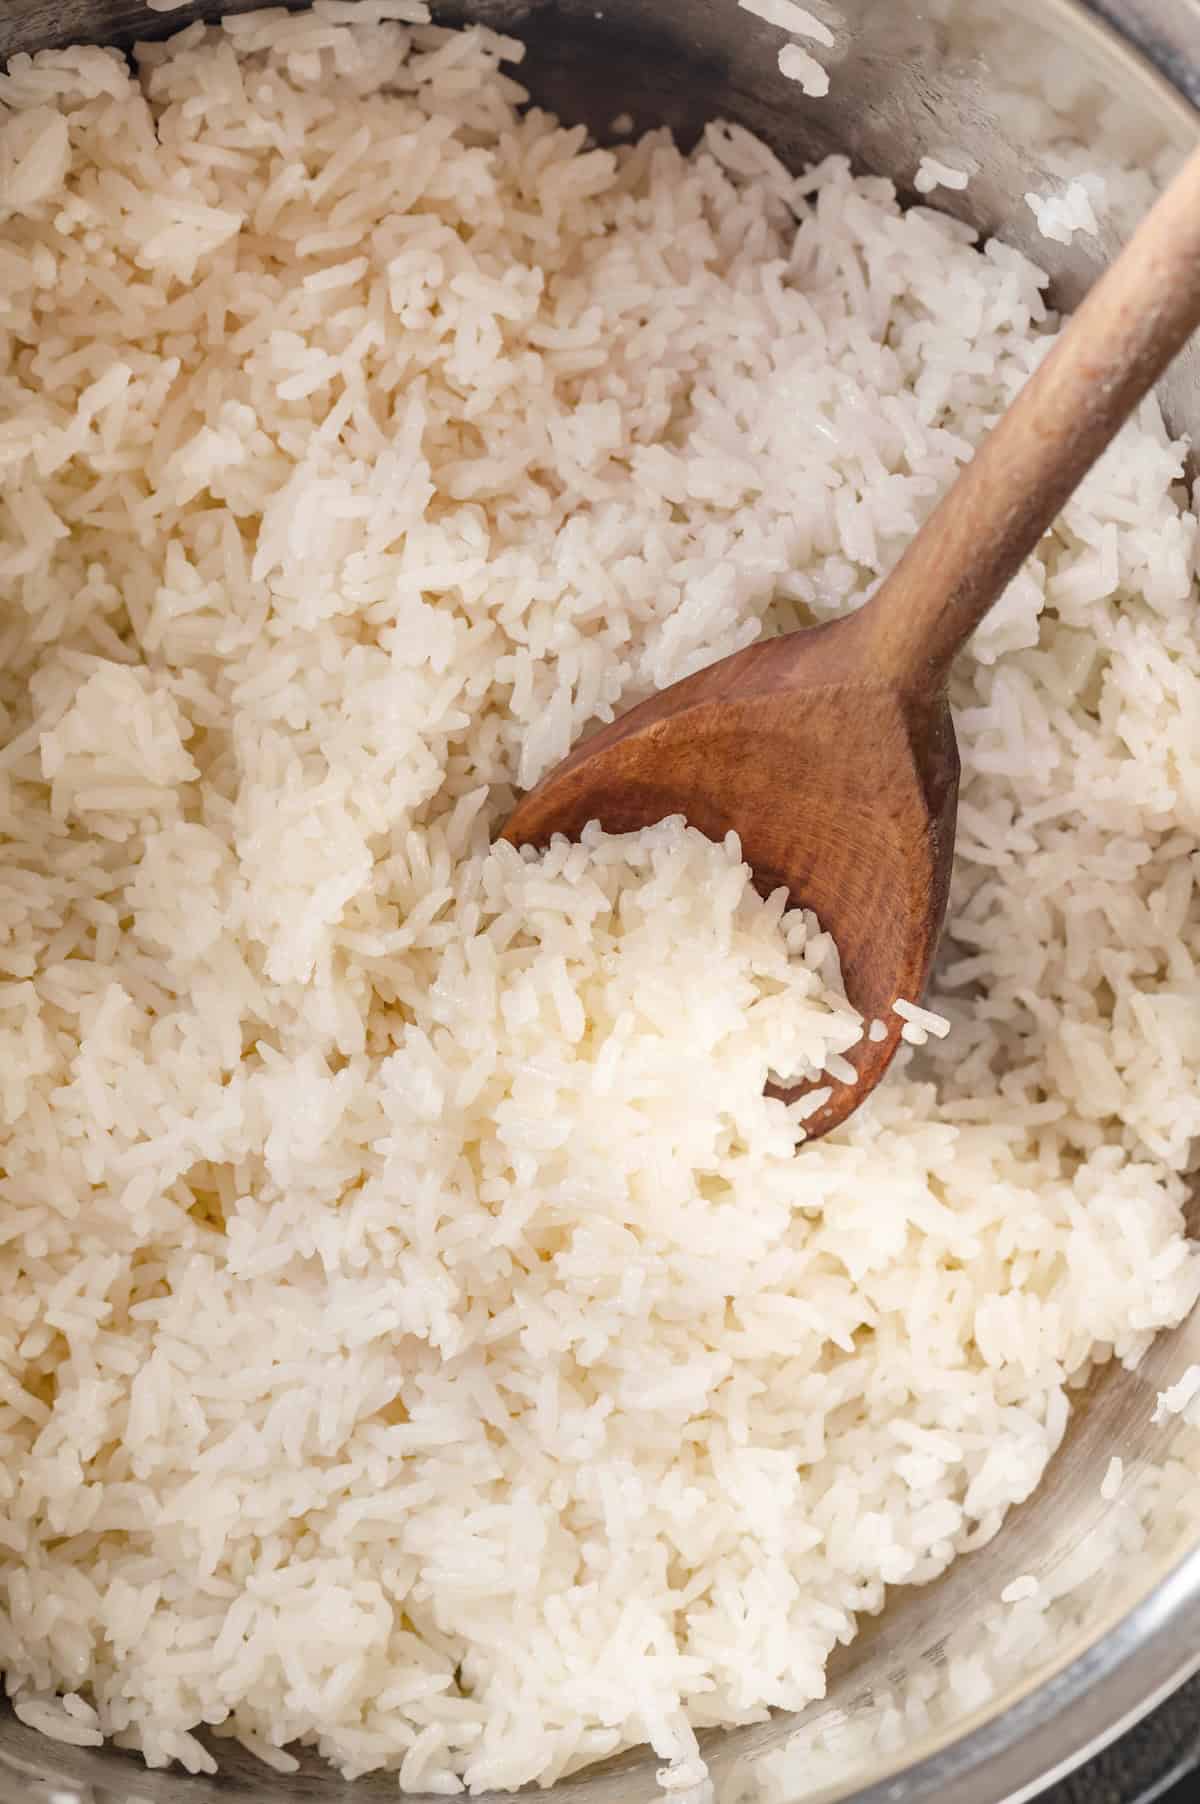
Cook and fluff.
- Pressure cook. Secure the lid, set the valve to Sealing, and cook on high for 5 minutes.
- Perform a natural release. Let the pressure release naturally for 10 minutes, then switch the valve to Venting to release the remaining steam.
- Fluff and serve. Fluff the rice with a fork before serving.
Tips for Success
- Rinse thoroughly. Don’t skip rinsing the rice! This step removes excess starch, which helps prevent the rice from becoming gummy or overly sticky.
- Use the right ratio. Stick to the recommended water-to-rice ratio to achieve that perfect fluffy texture. For jasmine rice, the 1:1 ratio works well in the Instant Pot if you’re scaling the recipe up.
- Avoid opening early. Make sure to allow the natural pressure release before opening the Instant Pot. This step ensures the rice finishes cooking evenly.
Serving Suggestions
I love pairing this Instant Pot jasmine rice with my Tempeh Stir Fry with Peanut Ginger Sauce , General Tso Tofu , and Thai Red Curry . Although Indian food is more traditionally served with basmati rice, I think it’s great with jasmine rice too—try it with my Vegetable Korma recipe and see what you think!
How to Store and Reheat
- Refrigerator : Store any leftover rice in an airtight container and refrigerate for up to 3 days.
- Freezer : Transfer the jasmine rice to a freezer-safe container or zip-top bag. It will keep for up to 3 months. Thaw in the fridge before reheating.
- Reheating : To keep the rice from drying out, sprinkle some water over the top and microwave until warm. Alternatively, you can add it to a pan with a splash of water, cover, and heat on the stovetop over low heat, stirring occasionally, until warmed through.
More Rice Recipes
- Vegan Fried Rice
- Dirty Rice Recipe
- Jamaican Rice and Peas
- Pineapple Fried Rice
- Broccoli Cheese Rice Casserole
Ingredients
- 1 cup jasmine rice , 190 g
- 1 cup water , 240 ml
- ¼ teaspoon salt , 1.5 g
- 1 tablespoon vegan butter , melted, 15 ml
Instructions
- Place the jasmine rice in a fine-mesh strainer and rinse under cold water until the water runs clear. Rinsing will remove excess starch and prevent the rice from becoming sticky.
- Transfer the rinsed rice to the Instant Pot.
- Add water, salt, and butter. Stir gently to distribute everything evenly.
- Secure the Instant Pot lid and set the valve to Sealing.
- Select the Pressure Cook (Manual) setting and set the cooking time to 5 minutes on high pressure.
- Once the cooking cycle is complete, allow the Instant Pot to naturally release pressure for 10 minutes.
- After 10 minutes, carefully switch the valve to Venting to release any remaining steam.
- Open the lid, fluff the rice gently with a fork, and serve immediately.
Notes
- If doubling or tripling the recipe, maintain the 1:1 ratio of rice to water. The cooking time remains the same.
- You can substitute water with broth for extra flavour.
- Refrigerator : Store any leftover rice in an airtight container and refrigerate for up to 3 days.
- Freezer : Transfer the jasmine rice to a freezer-safe container or zip-top bag. It will keep for up to 3 months. Thaw in the fridge before reheating.
- Reheating : To keep the rice from drying out, sprinkle some water over the top and microwave until warm. Alternatively, you can add it to a pan with a splash of water, cover, and heat on the stovetop over low heat, stirring occasionally, until warmed through.
