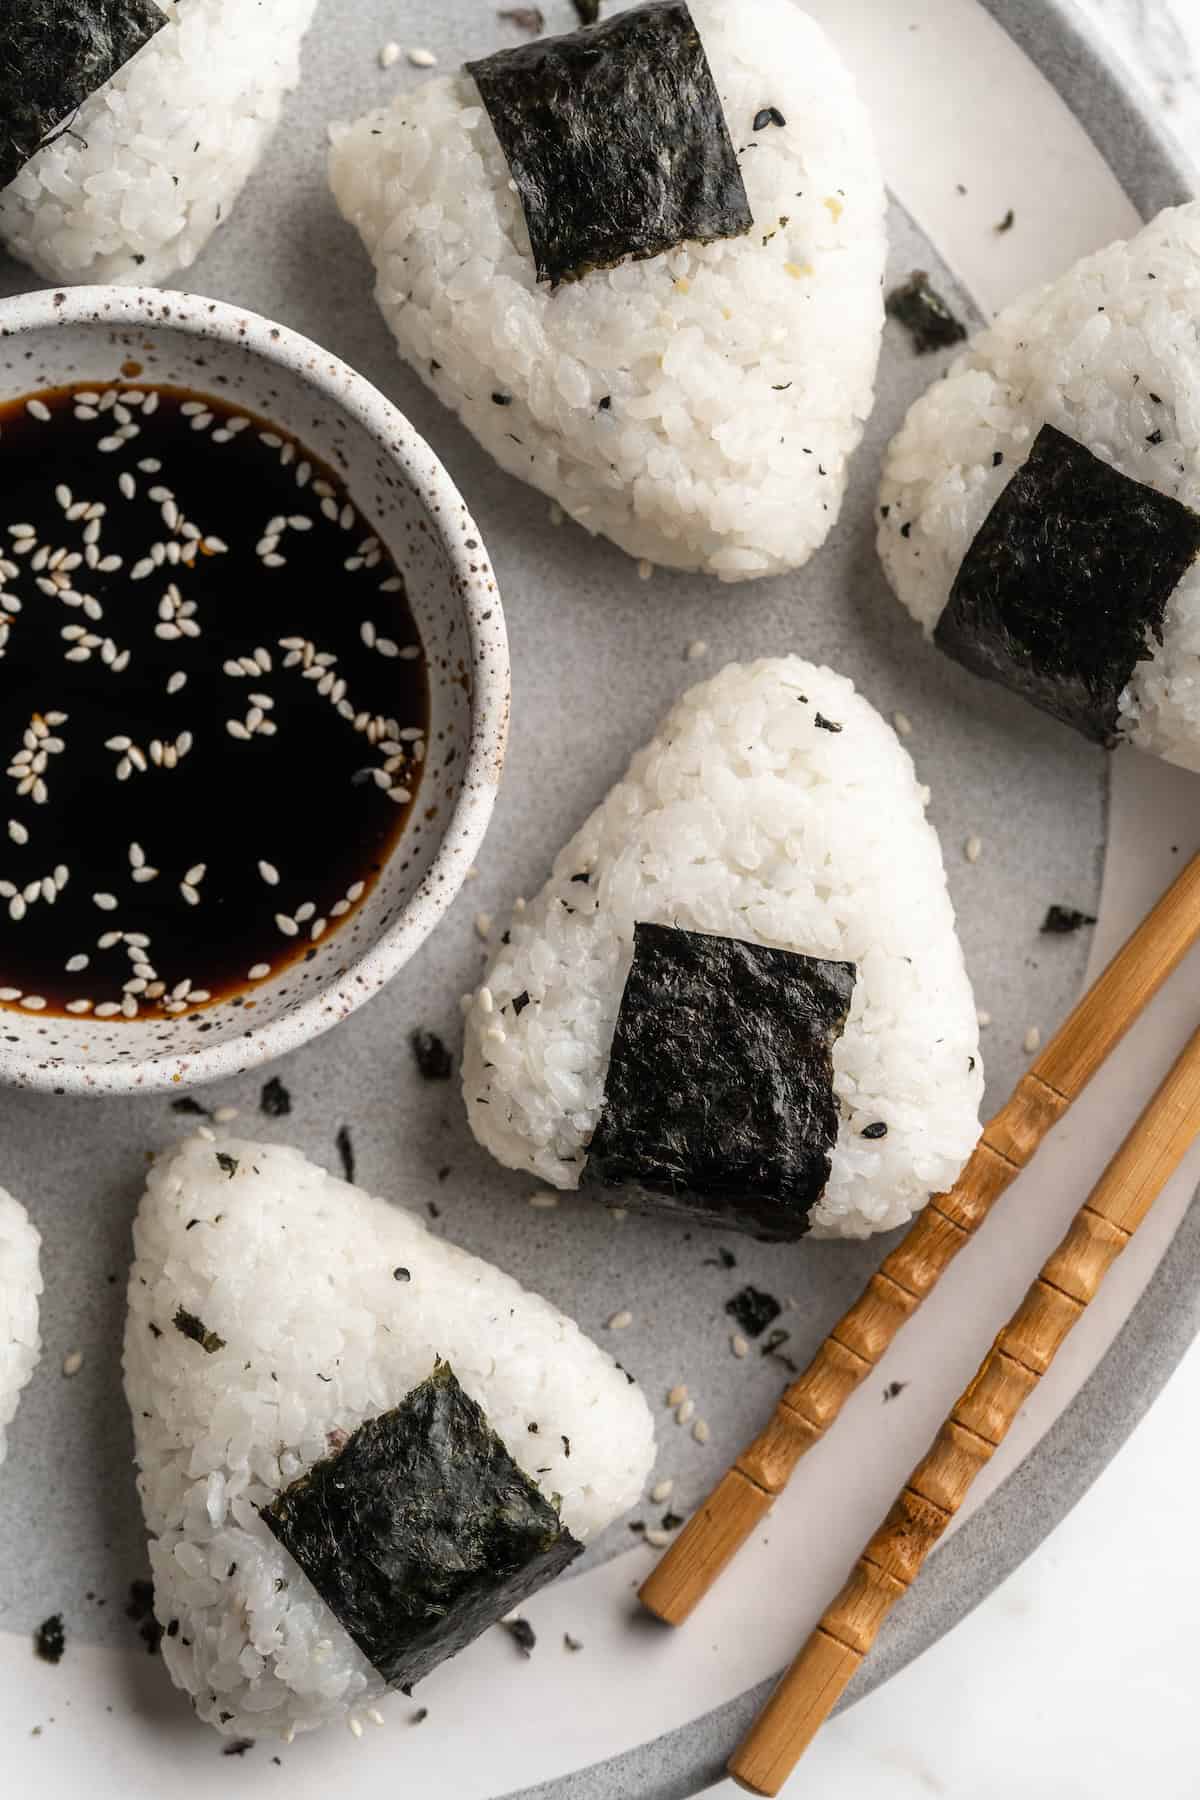
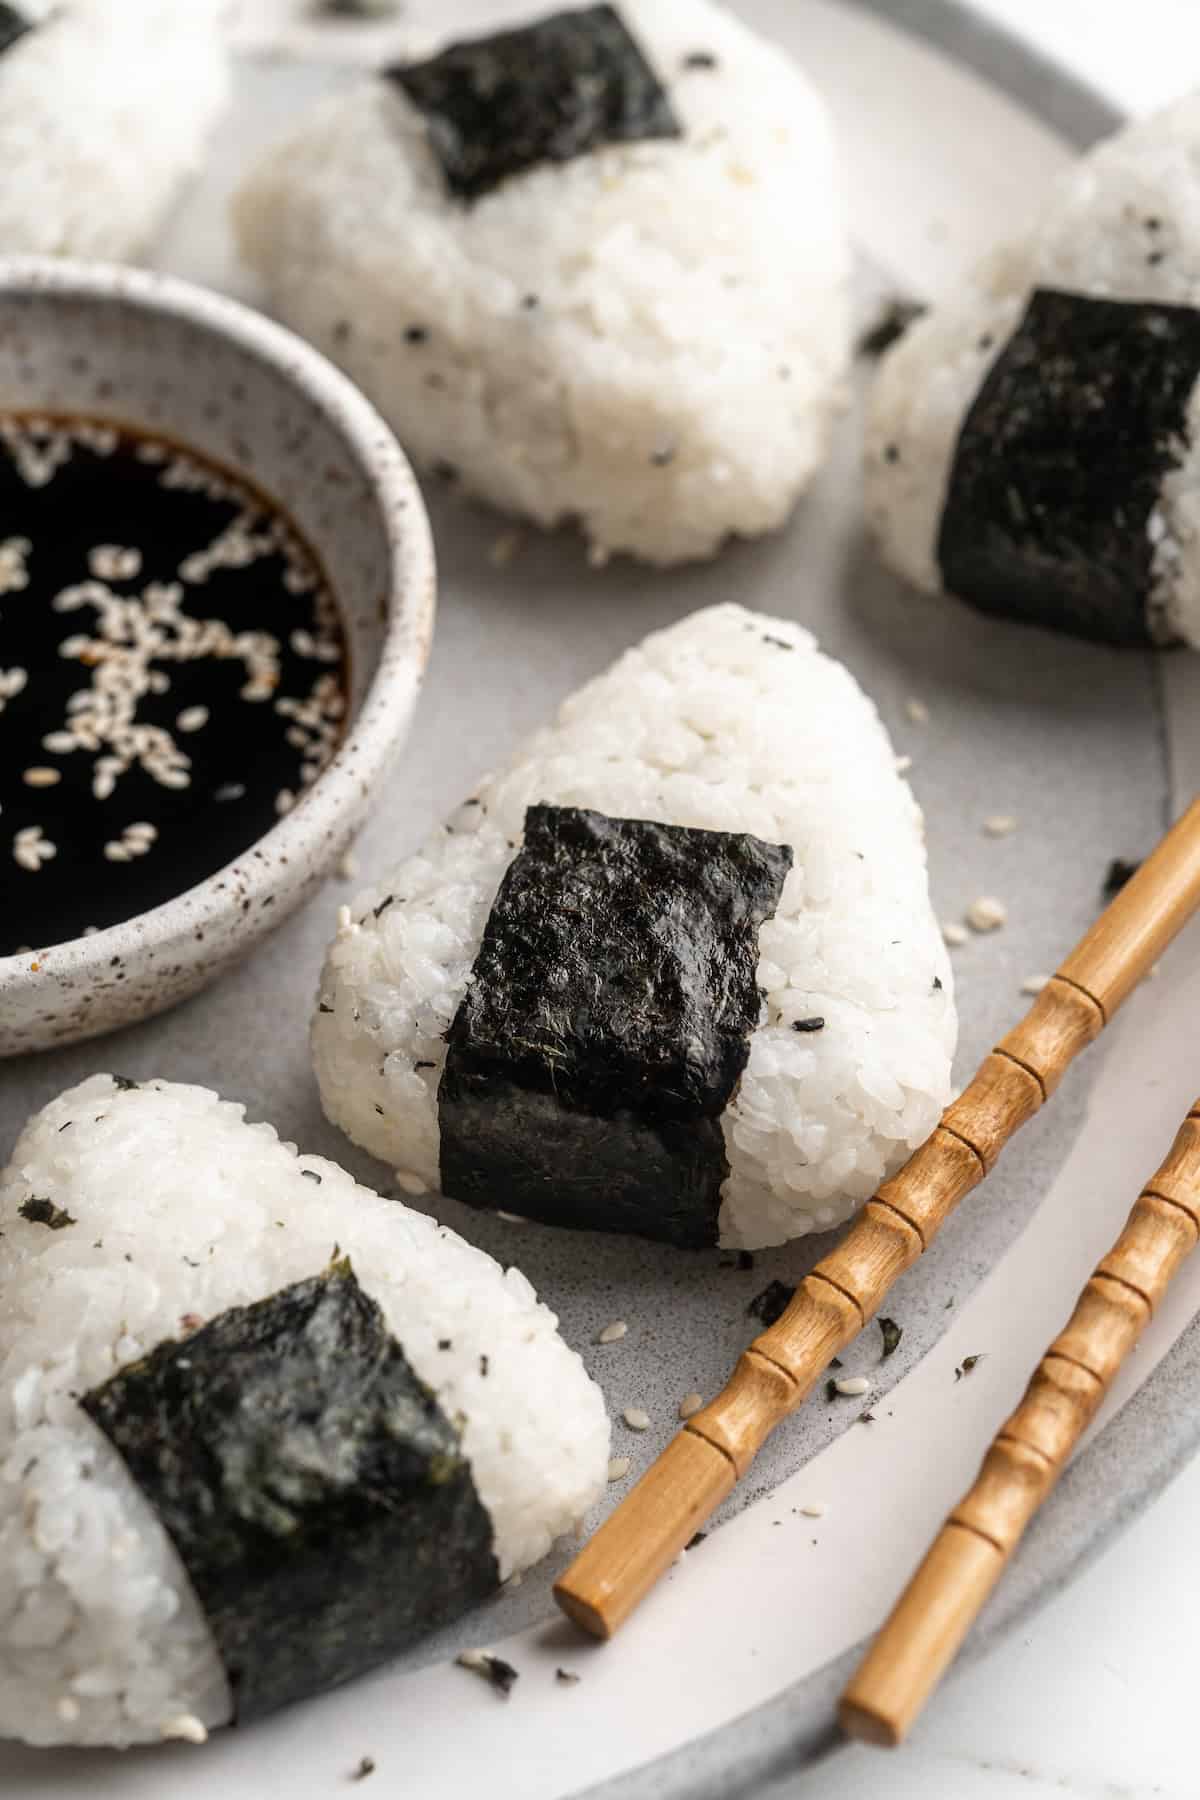
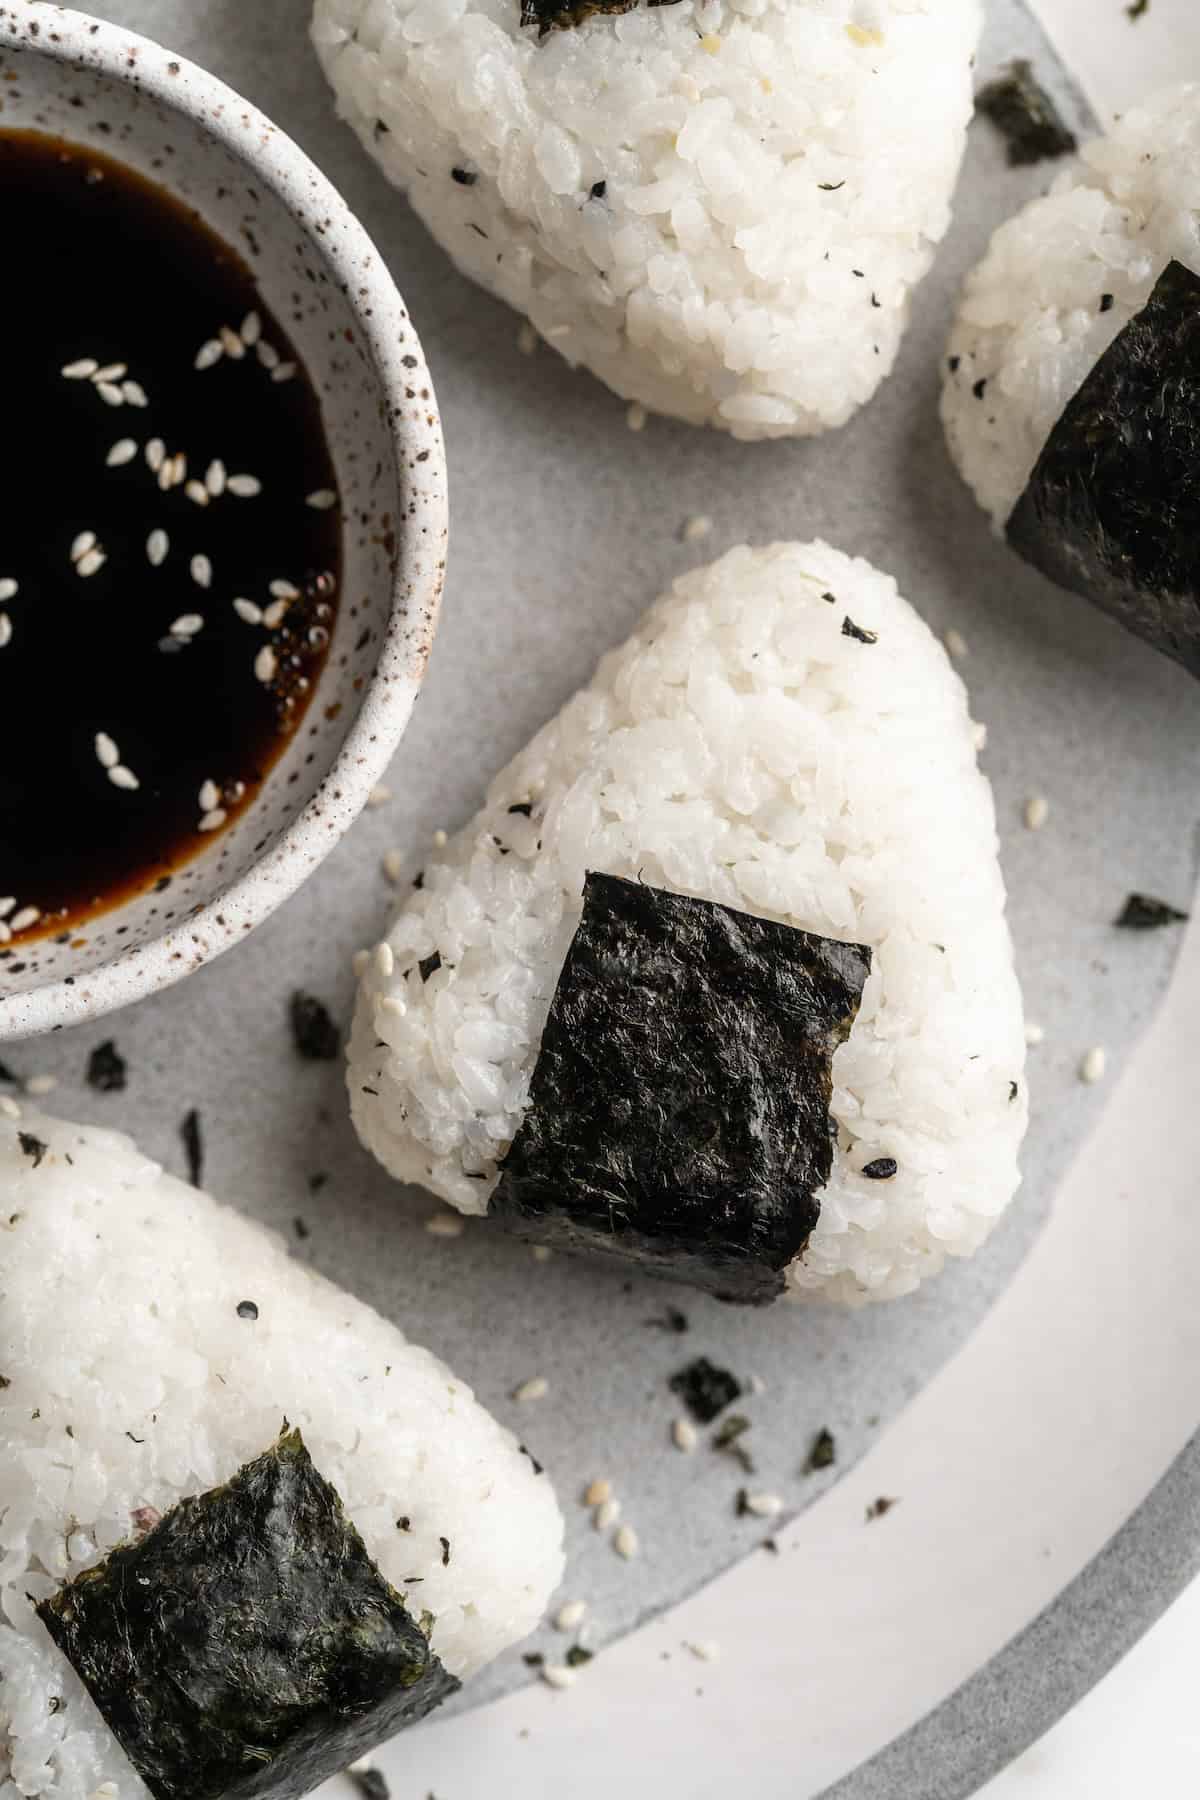
Onigiri are a handheld Japanese snack that tucks a filling into sushi rice and presses it into shape so it doesn’t fall apart. They’re fun to make and delicious to eat!
Onigiri are rice balls that are a traditional snack in Japan. If you’ve been reading my blog for a while, you know that I love making vegan versions of Japanese favourites at home— vegan Japanese milk bread , vegan katsu curry , and now vegan onigiri!
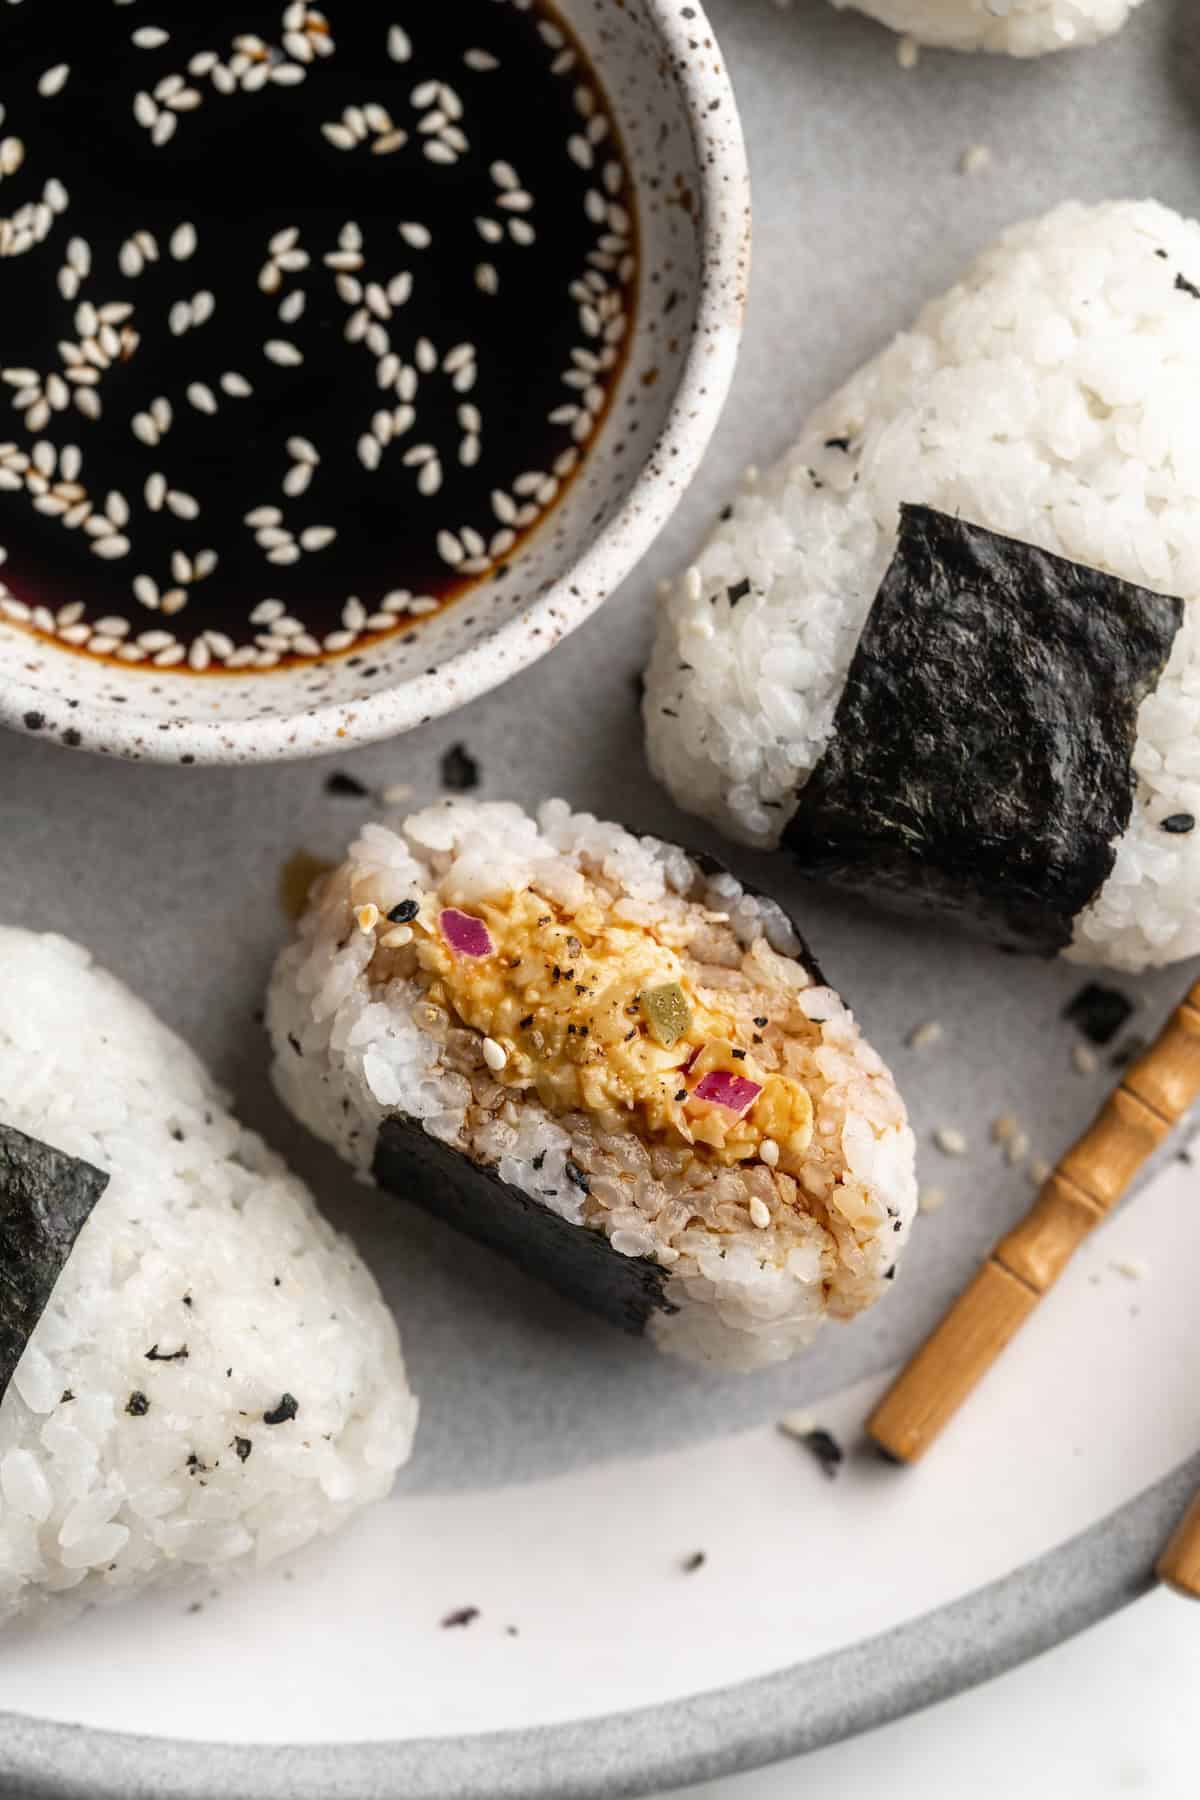
To make onigiri, sticky sushi rice is molded into shapes and wrapped in nori (seaweed). Usually there is a filling tucked into the center of each onigiri—traditional fillings include pickled ume (plum) and various seafoods, but this vegan version uses chickpea “tuna” instead.
Why You’ll Love This Onigiri Recipe
- Perfect for lunch . Onigiri is ideal for adding to lunchboxes—it’s easy to pack, mess-free, and it can be eaten on-the-go!
- Easy and fun to make . Once you get the hang of it, making onigiri is a cinch. I think it’s kind of fun, too. It’s the type of recipe your kids will love to help you make!
- Versatile filling options . While I like to use chickpea tuna, this is definitely a recipe that you can tweak to make your own. I share some additional filling ideas below!

Notes on Ingredients
Scroll down to the recipe card to find the ingredient quantities and recipe instructions.
- Sushi rice – This Japanese short grain rice is naturally sticky, so when you compact it, it holds its shape. Long grain rice doesn’t do this.
- Furikake seasoning – A seasoning blend that typically contains sesame seeds, seaweed, and salt, but some versions also have dried fish or egg so be sure to check the label.
- Vegan chickpea tuna – Here’s my chickpea tuna recipe. Use the leftovers for sandwiches!
- Water
- Sea salt
- Roasted nori – The seaweed wrapper for the onigiri. It can be found in most Asian grocery stores or online.
How to Make Onigiri
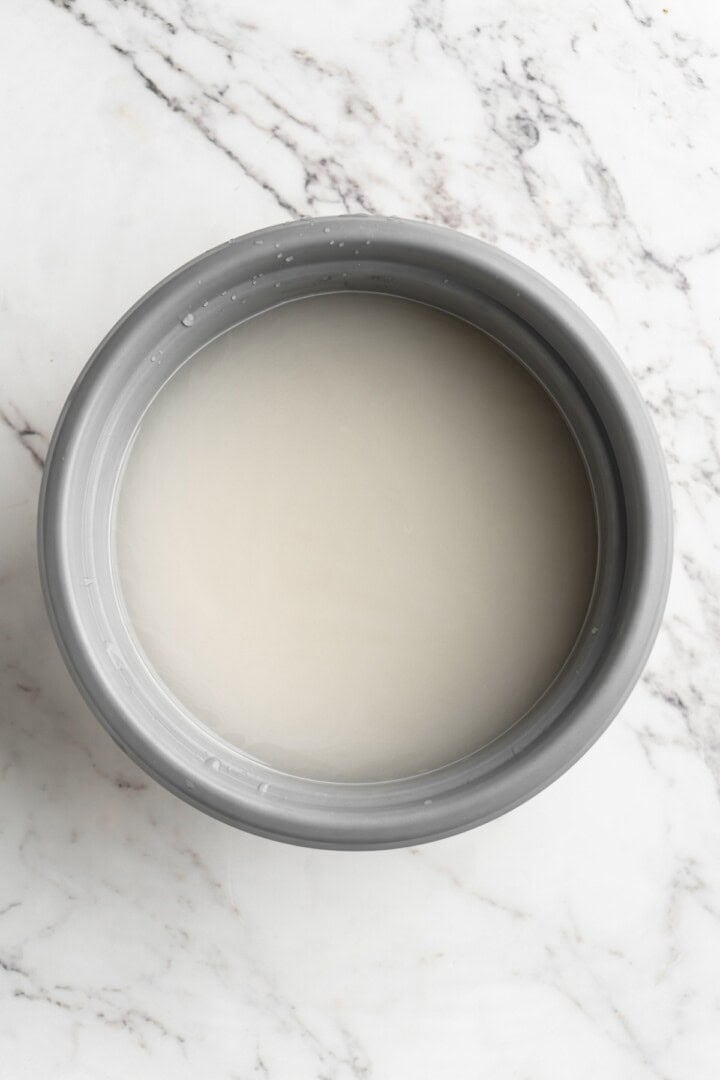
- Rinse the rice . Cover the sushi rice with cold water. Swish it around, then drain and add more water. Repeat the process until the water is clear.
- Cook the rice . I like to use a rice cooker; follow its instructions.
- Season the rice . Transfer it to a bowl and fold in the furikake.
- Make the chickpea tuna . I recommend making this ahead of time so it’s chilled when you’re ready to use it.
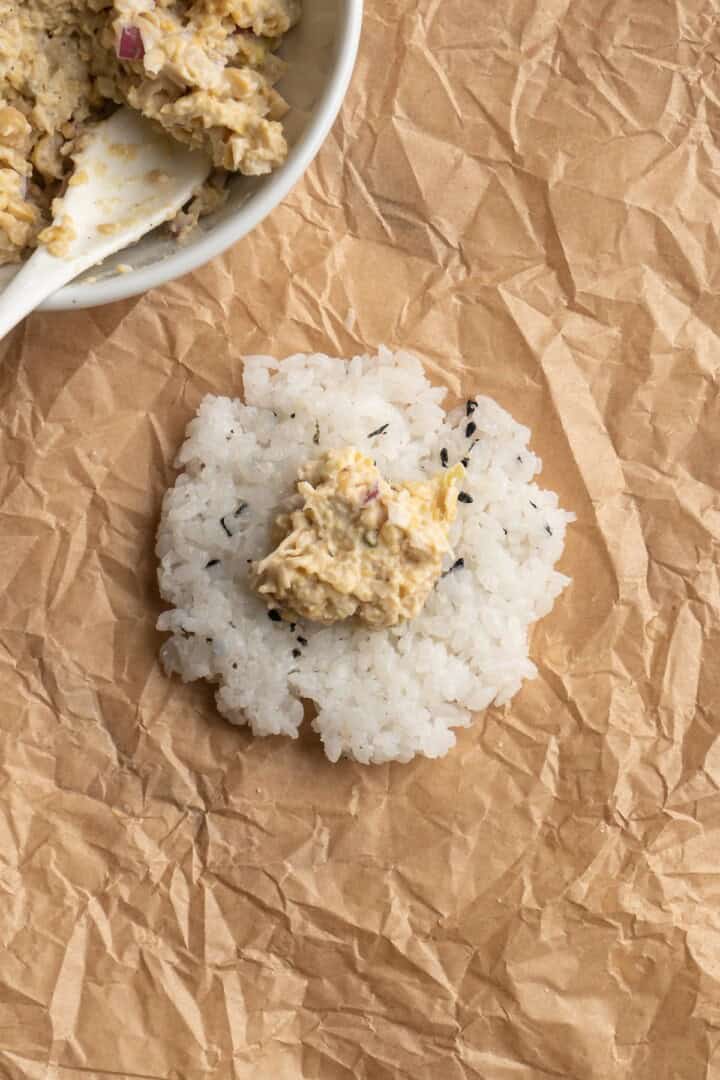
- Form the onigiri . Wet your hands and sprinkle salt on them. Shape a tablespoon or two of rice into a patty, then add the chickpea tuna in the middle. Cover with additional rice, then use your hands to shape into a triangle or ball.
- Wrap it . Cut the nori into strips and wrap a piece along the bottom of the onigiri.
- Repeat and serve . Repeat the process with the rest of the rice. Serve immediately or refrigerate for later.
Tips for Success
- Don’t overfill . While it might be tempting to add lots of filling, too much can cause the onigiri to fall apart.
- Keep your hands wet . Keep a bowl of water nearby and wet your hands frequently to prevent the rice from sticking.
- Be gentle yet firm . Press the rice gently but firmly to shape it. You’ll get a good idea of the right amount of pressure after making one or two onigiri!
More Vegan Filling Ideas for Onigiri
- Shiitake mushrooms. Use these sticky sesame shiitake mushrooms .
- Tofu. Cut marinated tofu into a very small dice.
- Pickled vegetables . A mix of pickled vegetables adds a crunchy, tangy contrast to the rice. You can go to a Japanese market and buy traditional pickled veggies, or try quick pickled radishes .
- Sesame spinach . Sauté spinach and season it with toasted sesame oil, soy sauce, and a sprinkle of sesame seeds.
- Cucumber . Dice a Persian or English cucumber and add it to the onigiri.
- Watermelon tuna . Use the watermelon “tuna” from these vegan poke bowls .
How to Store
Onigiri are best enjoyed immediately, but they’ll keep for up to a day in the fridge. Wrap them in plastic wrap before storing. I do not recommend freezing this recipe.
More Vegan Snack Ideas
- Homemade Granola Bars
- Chocolate Chia Pudding
- Pretzel Bites
- Peanut Butter Energy Balls
- Pumpkin Banana Muffins
Ingredients
- 400 g sushi rice/Japanese short grain rice
- 1 tablespoon furikake seasoning
- About ½ cup vegan chickpea tuna , see note
- Water
- Sea salt
- Several strips of roasted nori
Instructions
- Place the sushi rice in a large bowl and cover with cold water. Gently swirl the rice with your hand, then drain the water. Repeat this process 3-4 times until the water runs clear. This step is essential to remove excess starch and prevent the rice from becoming too sticky.
- Transfer the washed rice to a rice cooker. Add the appropriate amount of water (refer to your rice cooker’s instructions, typically it’s a 1:1.25 ratio of rice to water). Let the rice cook until done.
- Once the rice has cooled slightly but is still warm, transfer it to a large bowl. Gently fold in the furikake seasoning, ensuring it’s evenly distributed. Adjust the amount of furikake to taste.
- If you haven’t already made the vegan chickpea tuna, prepare it according to the recipe linked here . Ensure it’s chilled before using it as a filling.
- Wet your hands with a little water and sprinkle with a pinch of sea salt. This prevents the rice from sticking to your hands and adds a bit of flavor. Scoop about 1-2 tablespoons of seasoned rice into your palm, then slightly flatten it to form a small patty. Place about 1 teaspoon of the vegan chickpea tuna filling in the center of the rice.
- Cover the filling with an equal amount of rice, then gently press and shape the rice into a triangle or ball, ensuring the filling is completely enclosed. Press firmly but gently to compact the rice without crushing it.
- Cut the roasted nori into strips (around 1/3 of the perforated strip found in most nori packages). Wrap a strip of nori around the bottom of each onigiri, pressing it slightly to adhere. The nori strip helps hold the shape of the onigiri and adds a nice flavor and texture.
- Repeat the process with the remaining rice and filling, adjusting the amount of filling and rice according to your preference. Serve the onigiri immediately, or wrap them individually in plastic wrap and store them in the refrigerator for up to a day.
Notes
- Vegan Chickpea Tuna : This can be made in advance and stored in the refrigerator. It’s a flavorful and protein-rich filling that mimics the texture of traditional tuna.
- Furikake Seasoning : This Japanese seasoning blend typically contains sesame seeds, seaweed, salt, and sometimes dried fish or egg. Ensure you choose a vegan variety if required.
- Serving Suggestions : Onigiri can be enjoyed as a snack, part of a bento box, or as a light meal. They are great for picnics and lunchboxes.
- Storage : While onigiri are best enjoyed fresh, they can be stored in an airtight container in the refrigerator for up to 24 hours. The nori may lose its crispiness, but they will still be delicious.
- Nutrition : Nutritional information includes the rice only, not the filling.

Onigiri
Ingredients
- 400 g sushi rice/Japanese short grain rice
- 1 tablespoon furikake seasoning
- About ½ cup vegan chickpea tuna see note
- Water
- Sea salt
- Several strips of roasted nori
Instructions
- Place the sushi rice in a large bowl and cover with cold water. Gently swirl the rice with your hand, then drain the water. Repeat this process 3-4 times until the water runs clear. This step is essential to remove excess starch and prevent the rice from becoming too sticky.
- Transfer the washed rice to a rice cooker. Add the appropriate amount of water (refer to your rice cooker’s instructions, typically it’s a 1:1.25 ratio of rice to water). Let the rice cook until done.
- Once the rice has cooled slightly but is still warm, transfer it to a large bowl. Gently fold in the furikake seasoning, ensuring it’s evenly distributed. Adjust the amount of furikake to taste.
- If you haven’t already made the vegan chickpea tuna, prepare it according to the recipe linked here . Ensure it’s chilled before using it as a filling.
- Wet your hands with a little water and sprinkle with a pinch of sea salt. This prevents the rice from sticking to your hands and adds a bit of flavor. Scoop about 1-2 tablespoons of seasoned rice into your palm, then slightly flatten it to form a small patty. Place about 1 teaspoon of the vegan chickpea tuna filling in the center of the rice.
- Cover the filling with an equal amount of rice, then gently press and shape the rice into a triangle or ball, ensuring the filling is completely enclosed. Press firmly but gently to compact the rice without crushing it.
- Cut the roasted nori into strips (around 1/3 of the perforated strip found in most nori packages). Wrap a strip of nori around the bottom of each onigiri, pressing it slightly to adhere. The nori strip helps hold the shape of the onigiri and adds a nice flavor and texture.
- Repeat the process with the remaining rice and filling, adjusting the amount of filling and rice according to your preference. Serve the onigiri immediately, or wrap them individually in plastic wrap and store them in the refrigerator for up to a day.
Video
Notes
- Vegan Chickpea Tuna : This can be made in advance and stored in the refrigerator. It’s a flavorful and protein-rich filling that mimics the texture of traditional tuna.
- Furikake Seasoning : This Japanese seasoning blend typically contains sesame seeds, seaweed, salt, and sometimes dried fish or egg. Ensure you choose a vegan variety if required.
- Serving Suggestions : Onigiri can be enjoyed as a snack, part of a bento box, or as a light meal. They are great for picnics and lunchboxes.
- Storage : While onigiri are best enjoyed fresh, they can be stored in an airtight container in the refrigerator for up to 24 hours. The nori may lose its crispiness, but they will still be delicious.
- Nutrition : Nutritional information includes the rice only, not the filling.
Nutrition
Onigiri https://jessicainthekitchen.com/onigiri/ August 7, 2024
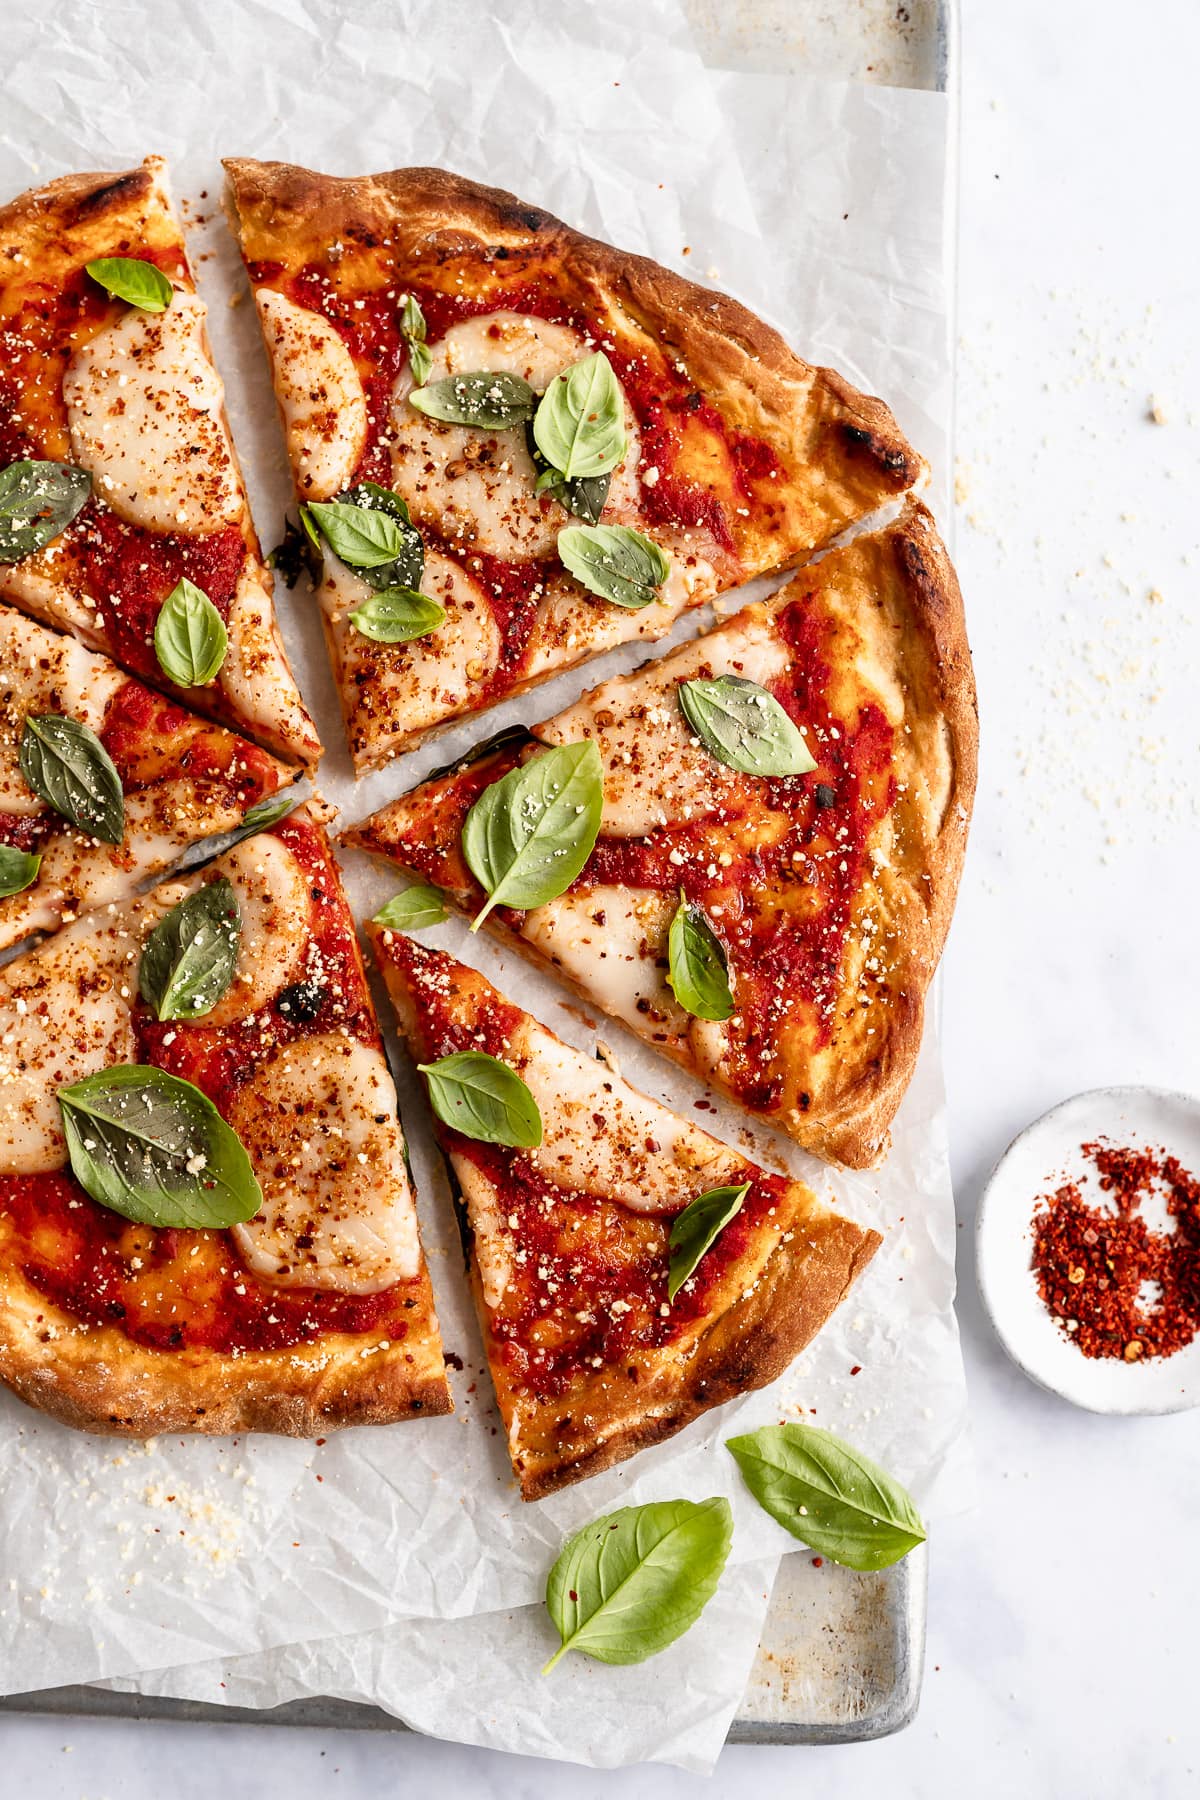
Here’s how to make the perfect vegan pizza ! Customise this recipe with your favourite toppings and enjoy a plant-based pizza night any day of the week!
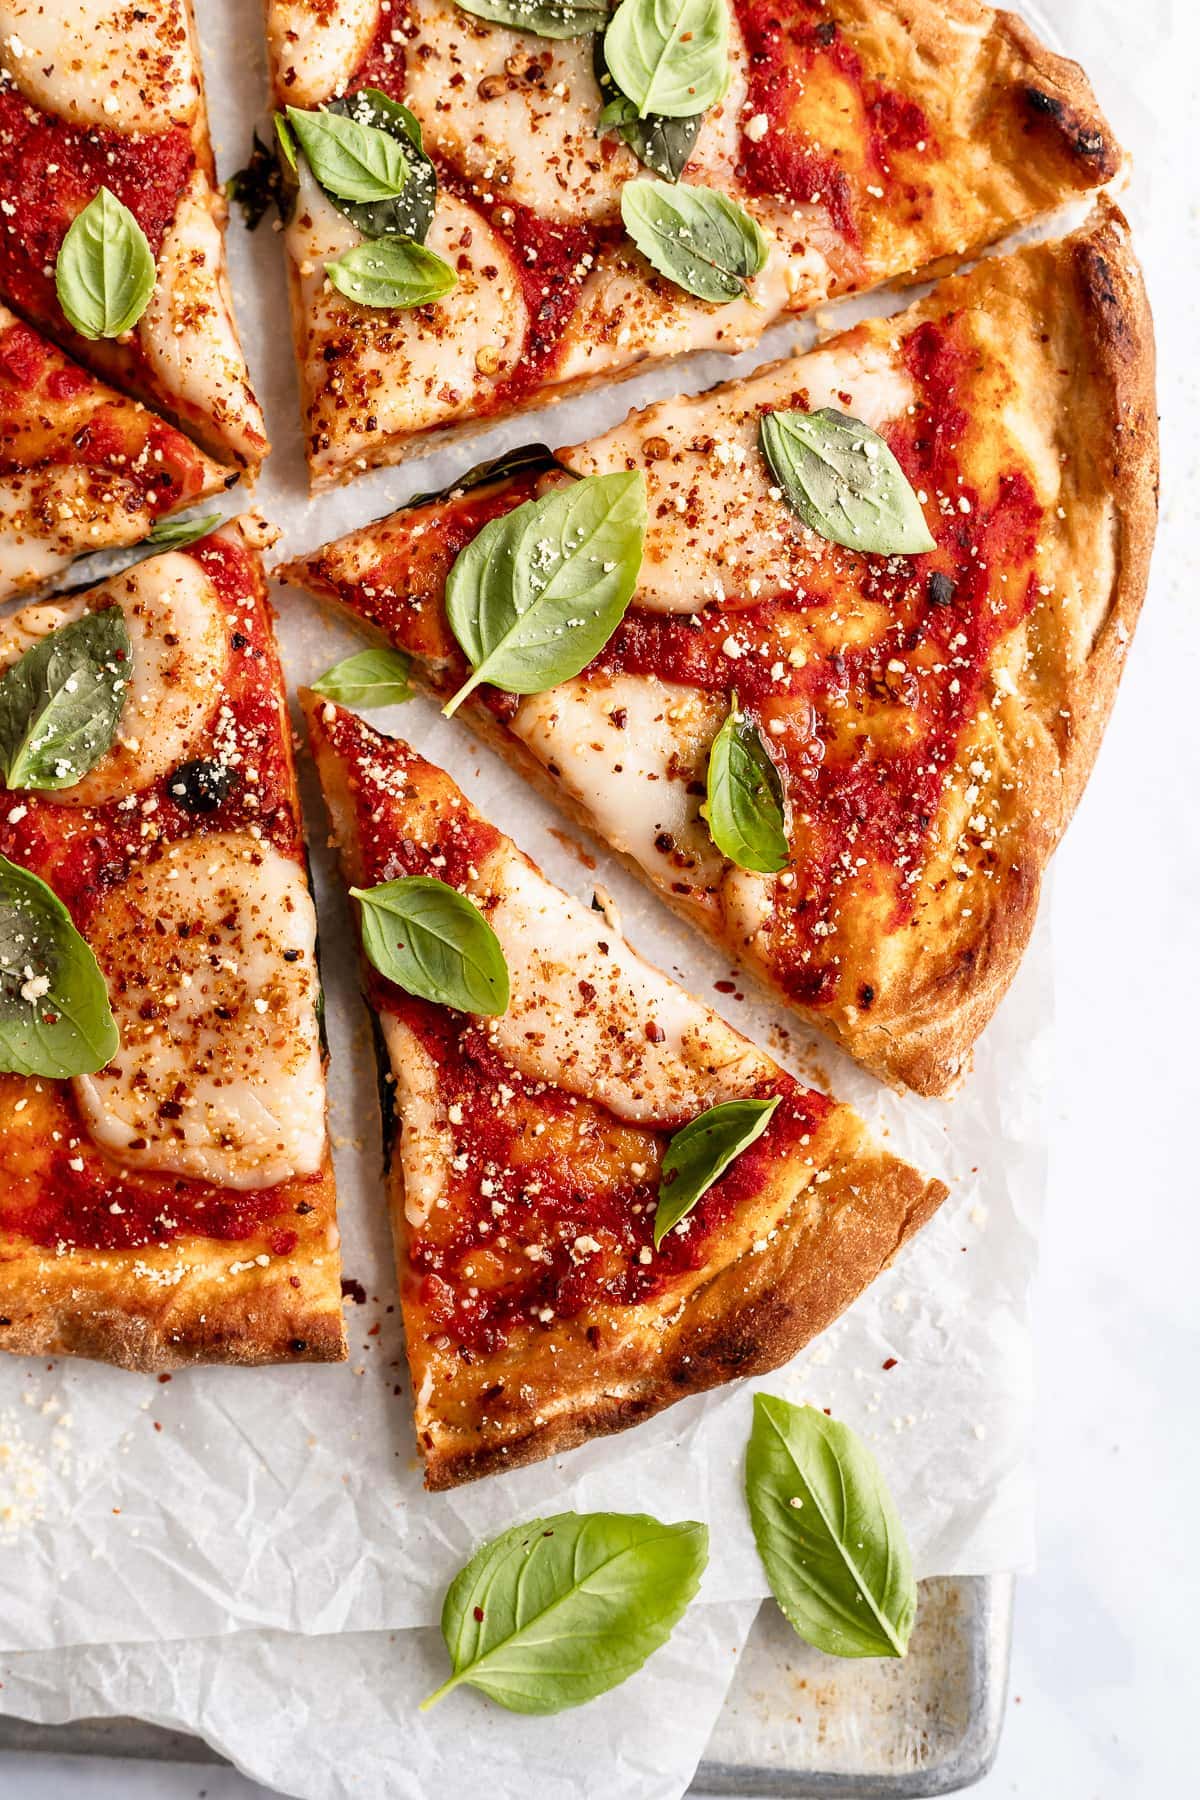
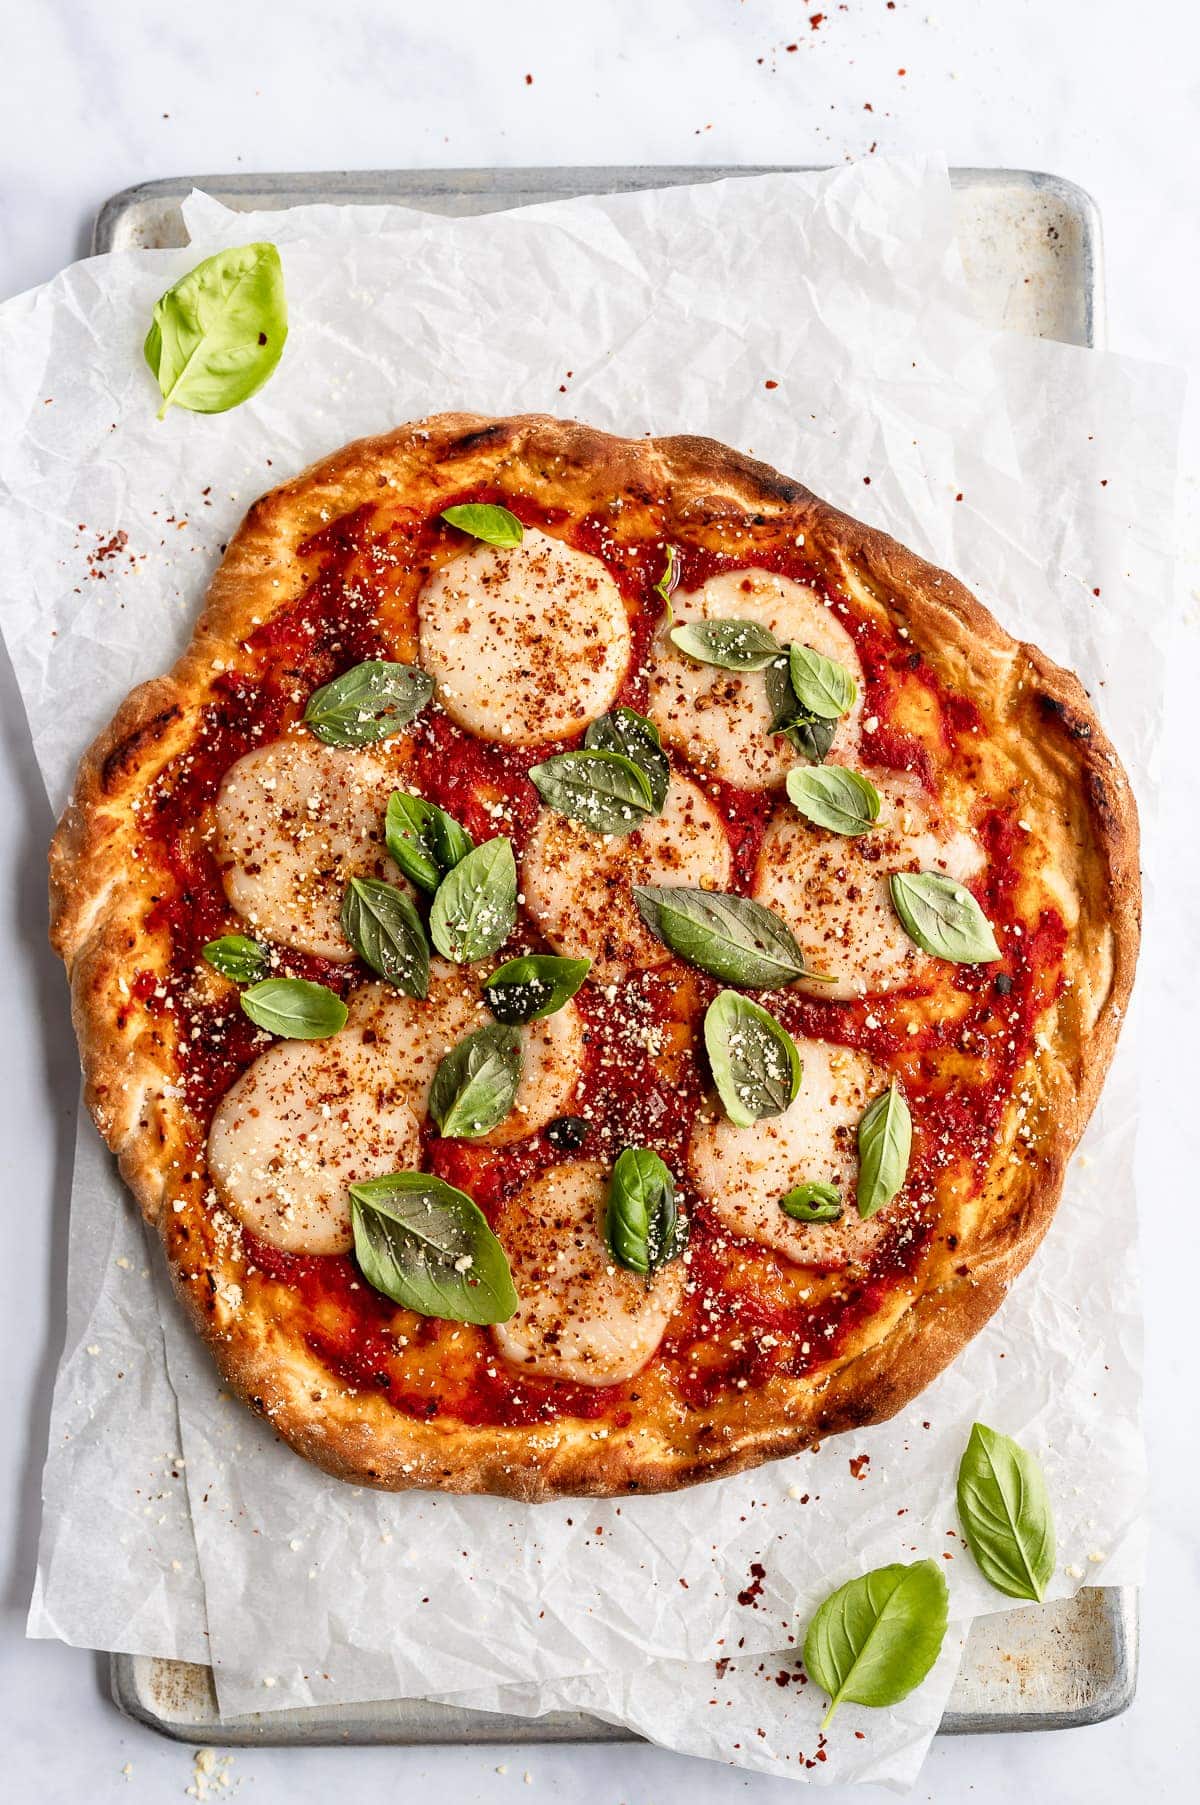
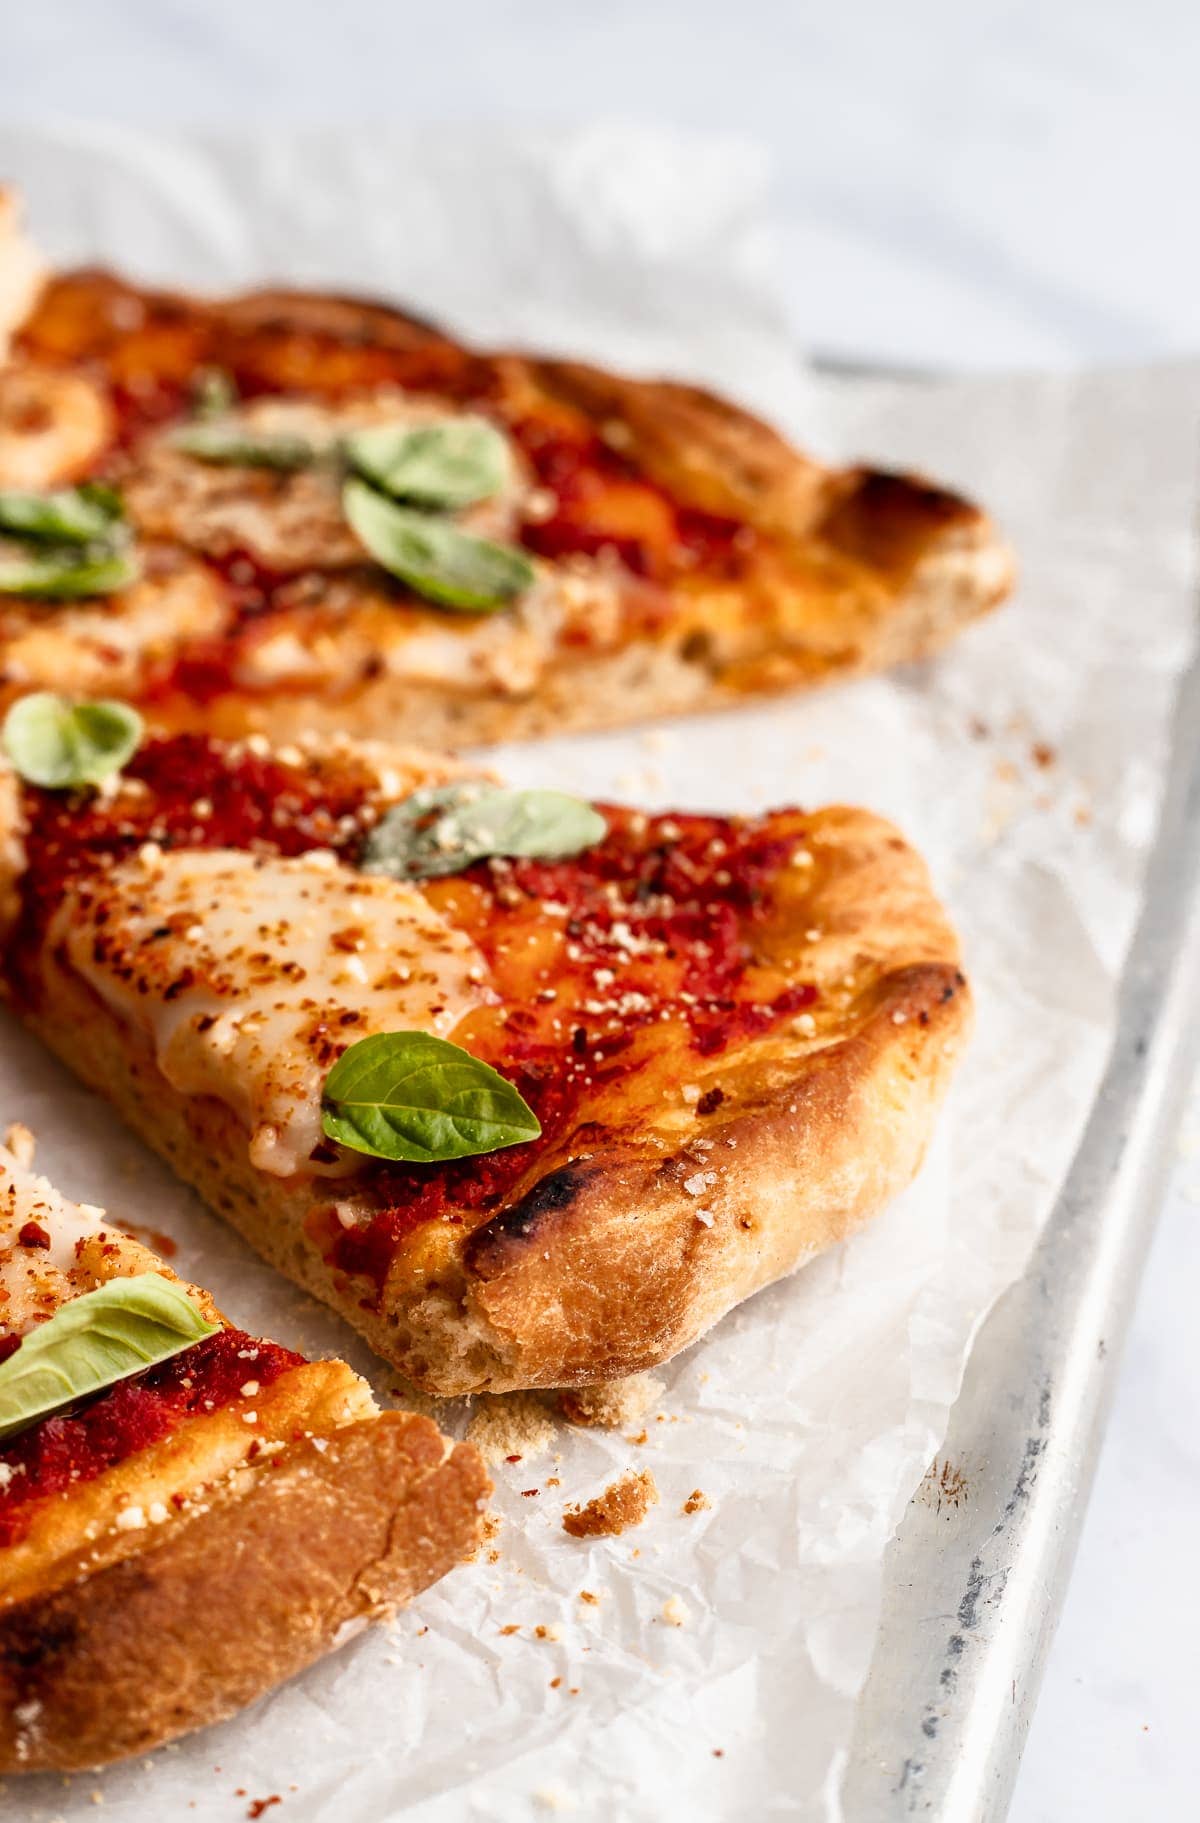
Pizza Fridays are a regular occurrence in our house, and while I’ll often make something like vegan spicy BBQ chickpea pizza or kale pesto pizza , I have to tell you that this homemade vegan pizza recipe is the one I keep going back to—a simple, classic pizza with an incredible crust, fantastic tomato sauce, and melty vegan cheese.
When you’re making such a simple recipe, it’s all about quality of ingredients and technique. The technique I use here is the steam method, which I learned during my two visits to Italy. It’s key to beautifully browned, bubbly crusts. Once you try it, you’ll never go back!
Why You’ll Love This Vegan Pizza Recipe
- Simply delicious . Don’t get me wrong, sometimes I do love to go wild with toppings. But If you start with a good crust—and this is a GREAT crust—you can make a really enjoyable pizza without all that.
- Authentic flavour . You probably don’t have a wood-fired pizza oven at home, but the steam method I describe below is the next best thing for vegan homemade pizza!
- Perfect for customising . Keep it simple with sauce and vegan cheese, or add some more toppings. It’s up to you!
Notes on Ingredients
Scroll down to the recipe card to find the ingredient quantities and recipe instructions.
- Pizza dough – Here’s my pizza dough recipe.
- Pizza sauce – And here’s my pizza sauce . Do not use store-bought jarred marinara or pasta sauce—it has a higher water content and will make your pizza soggy!
- Vegan mozzarella cheese – My favourites for homemade vegan pizza are Miyoko’s Vegan Mozzarella, Eat Harmless, Violife, Daiya, and So Delicious.
- Olive oil – For brushing the crust.
- Cornmeal – To dust the baking sheet or pizza stone.
How to Make the Best Vegan Pizza
- Prepare . Preheat your oven for 20 minutes at 500ºF or its highest temperature.
- Shape the crust . Roll out the dough on a floured surface until it reaches 10-inches in diameter. Place the dough on a pizza stone or baking sheet dusted with cornmeal.
- Top the pizza . Spread the sauce onto the crust, then add the cheese. Drizzle the olive oil on top and brush it on the edges.
- Bake . Place the pizza in the oven and bake for 12 to 17 minutes, or until the dough is baked through and golden brown on the edges. Broil for a few minutes at the end if desired.
- Serve . Cool slightly, then slice and serve.
Tips for Success
- Don’t overdo the toppings . The biggest culprit when it comes to soggy pizza crust is too many toppings. Keep it around 1 cup of topping ingredients.
- Use the best ingredients you can find . They say even bad pizza is still pizza, but we want incredible vegan pizza, right? With such a simple recipe, you really taste everything, so make sure it’s good stuff.
- Try the steam method . To do this, place a loaf pan with hot water on the bottom rack of your oven once it reaches 500ºF. Let it sit in the oven for 10 to 15 minutes, then add the pizza. The crust will get bubbly and crisp!
- Use a pizza stone . A pizza stone will give you the very best results, so if you make pizza often, it may be worth the investment. If not, the back of a heavy baking sheet will also work or use a cast iron skillet . (I describe all of these methods in detail in the recipe card below.)
Simple Vegan Pizza Topping Ideas
As I mentioned above, we don’t want to overdo the toppings! But here are some simple combinations I love for vegan pizza:
- Tomato pizza sauce + Italian olives + vegan Parmesan cheese
- Olive oil (instead of pizza sauce) + vegan mozzarella + caramelized onions + Kalamata olives
- Tomato pizza sauce + torn vegan mozzarella + Roma tomato slices + fresh basil leaves (after baking)
- Olive oil + vegan mozzarella + garlic mushrooms + a drizzle of truffle oil before serving
How to Store Leftovers
Store leftover vegan pizza wrapped in foil or in an airtight container in the refrigerator for up to 3 days. You can eat it cold, warm it up in a 450ºF oven, or use my favourite method, which is reheating it covered in a skillet on the stovetop.
Can I Freeze This Recipe?
You can freeze homemade vegan pizza before or after baking. To freeze it before, place the assembled pizza on a parchment-lined baking sheet and freeze it until it’s solid. Wrap it tightly in plastic wrap then foil and freeze for up to 2 months. Bake as directed in the original recipe; you’ll just need to add a few extra minutes to the oven time.
To freeze after baking, wrap the slices in plastic wrap then foil and freeze for up to 2 months. Reheat from frozen according to the instructions above, or let the pizza thaw in the fridge first for faster reheating.
More Vegan Pizza Recipes
- Vegan Breakfast Pizza
- Vegan Naan Pizza
- Easy Vegan Almond Flour Pizza Crust (Gluten Free & Low Carb)
- Grilled Peach, Basil and Vegan “Goat” Cheese Pizza
- Fruit Pizza Recipe
Ingredients
- 1 pizza dough recipe , this is my recipe
- ½ cup to ¾ cup pizza sauce
- 1 ½ cups to 2 cups vegan mozzarella cheese , shreds or torn pieces
- 1 teaspoon olive oil for brushing crust , plus more for optional drizzling over
- cornmeal, for dusting baking sheet or pizza stone
Instructions
- Preheat oven to 500°F/260°C degrees or as hot as it will get. Let it preheat for at least 20 minutes on this heat. I would recommend also doing the steam method (in notes below) for an even hotter oven and the best crust.
- On your floured surface, shape your pizza dough into a circular shape. I use a well floured rolling pin and roll it out in all directions to form a circle. It should measure about 10 inches diameter. Create a crust by lifting the edges to create a sort of heightened rim.
- Dust a pizza stone or upside-down baking sheet with cornmeal. Lift and place the pizza dough on it. For help, sometimes I stretch/roll the pizza dough on cornmeal-dusted parchment paper, then transfer the pizza on the parchment to the pizza stone. Either method works. You can also use a cast iron for an extra crispy crust (see notes).
- On the pizza dough, spread the tomato sauce over the pizza. You don’t want to go all the way to the edges. Top with the cheese, and your desired toppings. They can overlap the edges of the crust if you’d like, or you can leave it bare for a solid crust edge.
- Drizzle some additional olive oil over the top and brush onto the crust too so it’s nice and crusty.
- Place in the oven and bake for 12-17 minutes, until cheese is bubbling, and the dough is fully cooked through. Check to ensure it isn’t burning after the 12 minute mark. If you want you can broil the pizza on low for a few extra minutes afterwards – just keep an eye on it to watch that it doesn’t burn.
- Remove, let cool slightly, slice and enjoy!
Notes
The Steam Method
Pizza Stone vs Baking Sheet
Cast Iron Method
What yeast to use?
Recipe by: Jessica Hylton – Jessica in the Kitchen | Photography by: Eat Love Eats
