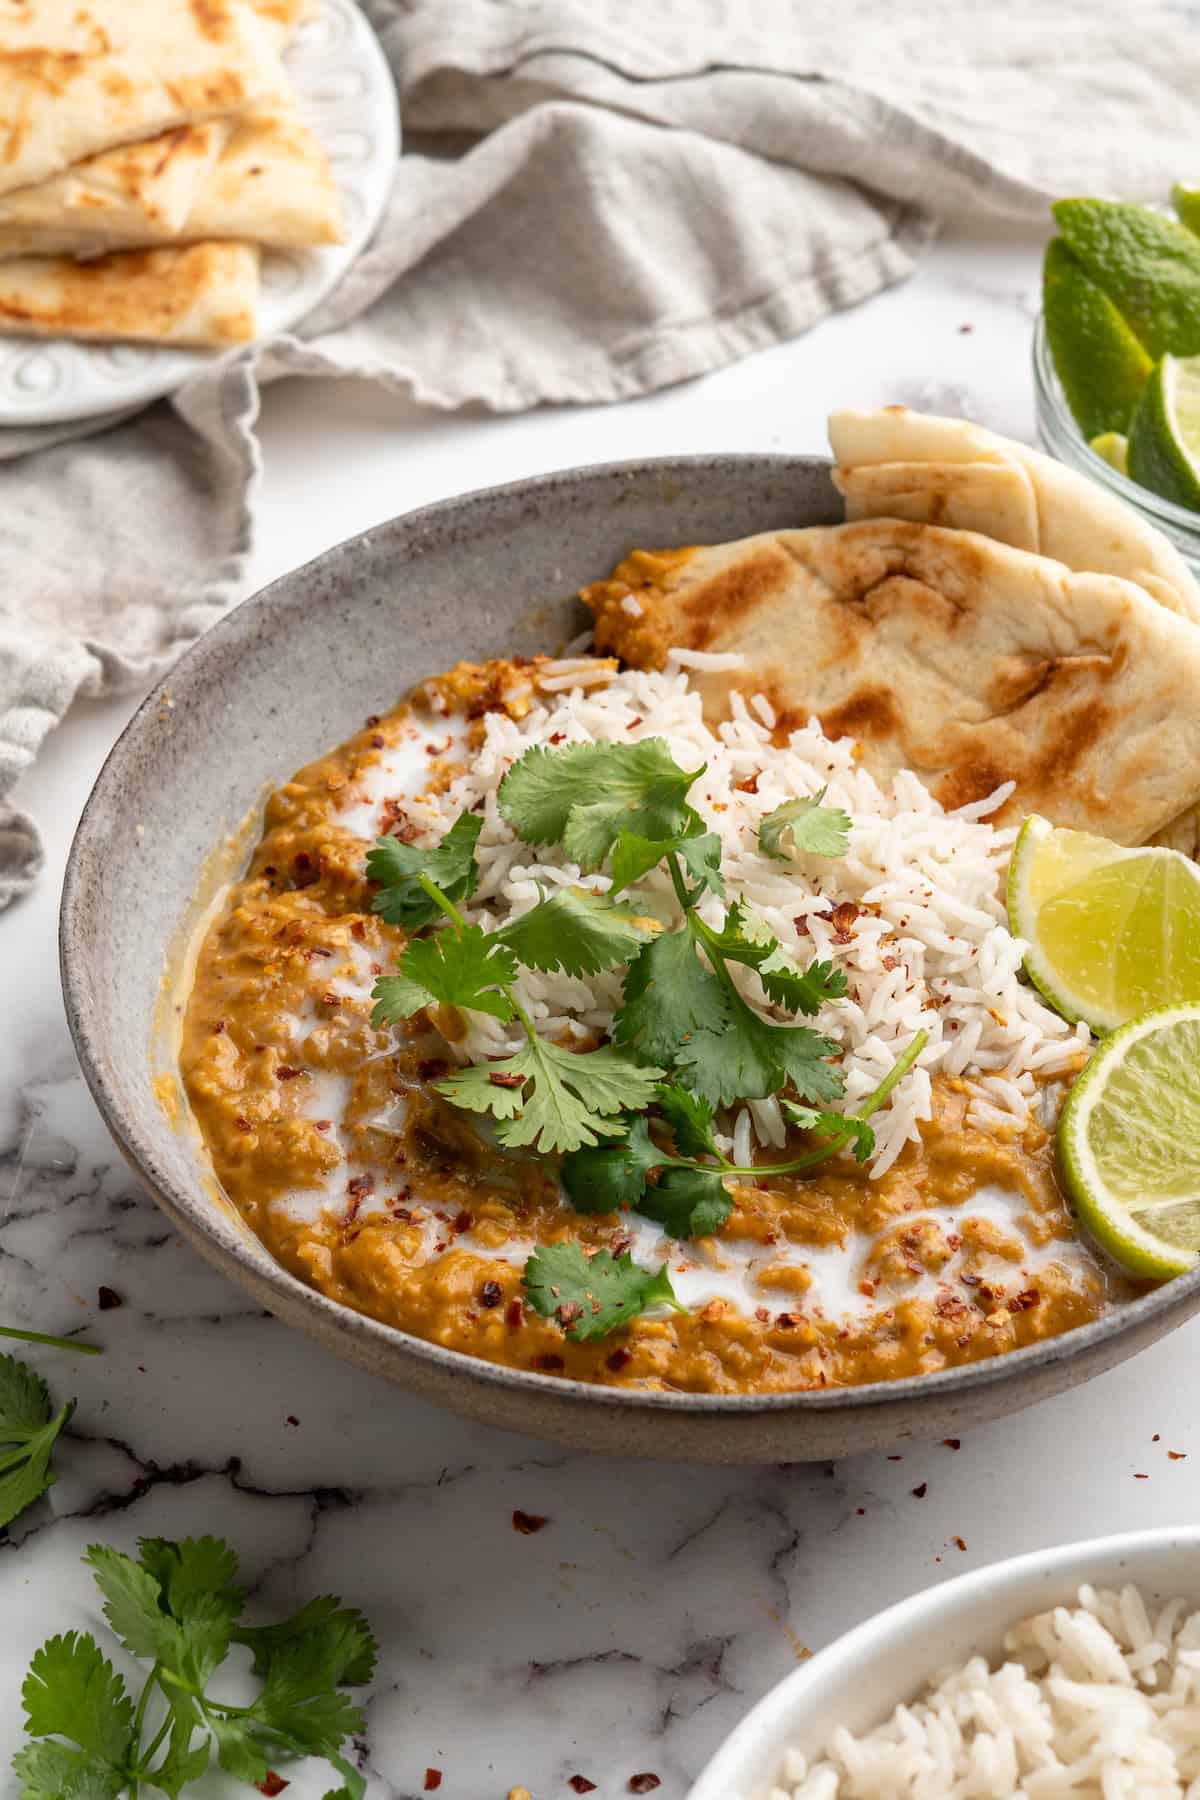
This red lentil curry is classic vegan comfort food! It’s a one-pot recipe that comes together in under an hour and it’s ideal for meal prep too.
If you love my coconut chickpea curry and Thai green curry , you’re going to flip for this red lentil curry. It’s every bit as flavourful, just as easy, and it comes together lickety-split. What’s not to love?!
When it comes to vegan proteins, lentils might not have the same excitement factor as those over-hyped supermarket faux meats, but this humble little legume brings a whole lot of goodness to this curry.
Of course, all the other ingredients here lend a helping hand—the spices, the tomatoes and onions, the coconut milk, the lime. Everything comes together to create a dish you’ll want to make (and eat) again and again.
And if you like to get creative in the kitchen, the world is your oyster with this dish. Feel free to try this red lentil curry with spinach, tofu, cauliflower, and even potatoes! It’s easily customisable, but also absolutely amazing just as it is.
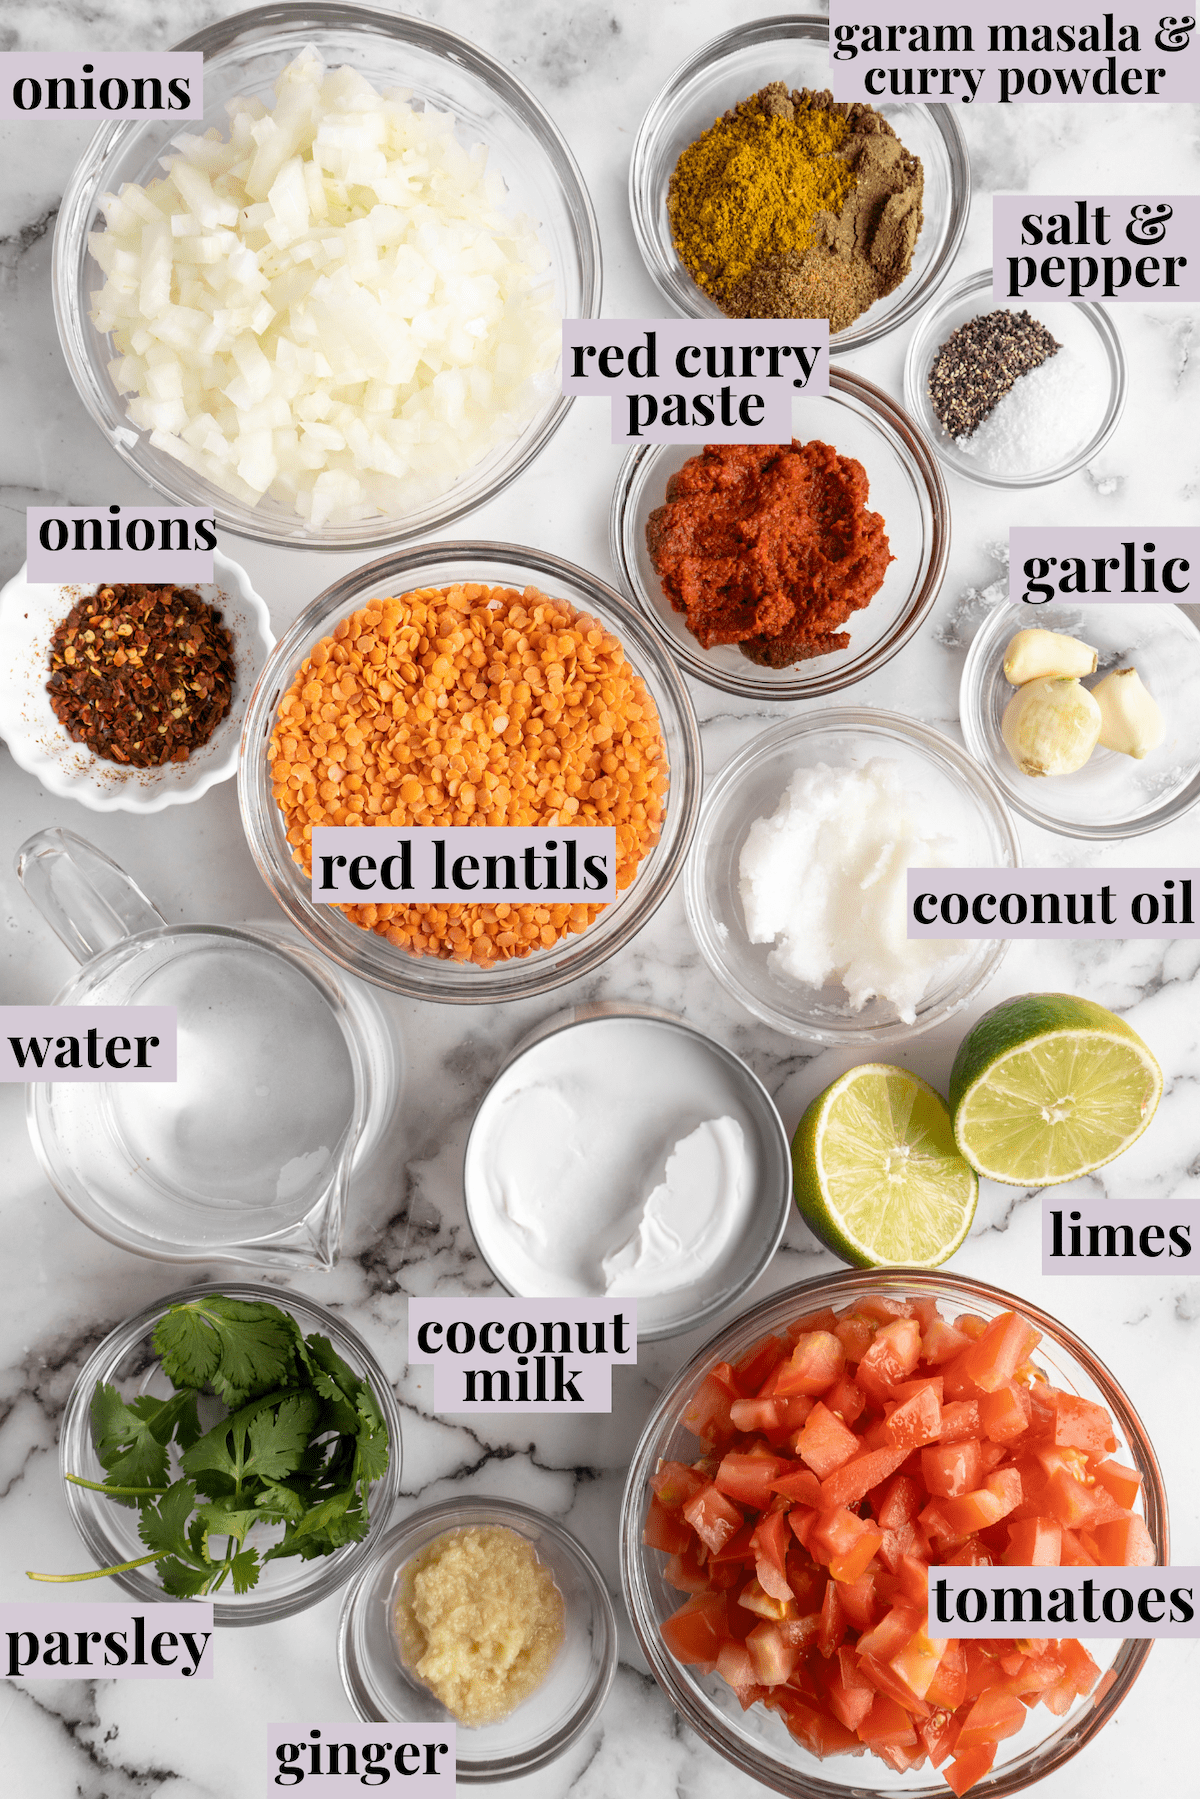
Notes on Ingredients
Scroll down to the recipe card to find the ingredient quantities and recipe instructions.
- Coconut oil – I love using coconut oil in curries, but another neutral-flavoured cooking oil can be used instead.
- Yellow or red onion
- Fresh tomatoes – Or substitute canned.
- Sea salt
- Ground black pepper
- Garlic cloves
- Ginger
- Garam masala
- Curry powder – Use a mild curry powder if you’re not a fan of spicy food; hot or Madras curry powder is perfect for palates that can handle a little more heat!
- Red curry paste – Some brands contain shrimp paste or fish sauce, so be sure to check the ingredients.
- Cumin
- Dry red lentils
- Filtered water
- Coconut milk – Full-fat coconut will give you the creamiest red lentil curry, but you can substitute lite if you want.
- Lime
- Red pepper flakes and chopped parsley – For garnish.
Can I Substitute Brown Lentils for Red?
Technically speaking, you can substitute brown lentils for red in a curry like this. That said, brown lentils will require more cooking time to reach the smooth, creamy consistency of red lentils; they’ll also have a less appetizing colour in the curry.
How to Make Red Lentil Curry
Once you’ve created a mise en place for your ingredients, the rest of this recipe is a cinch!
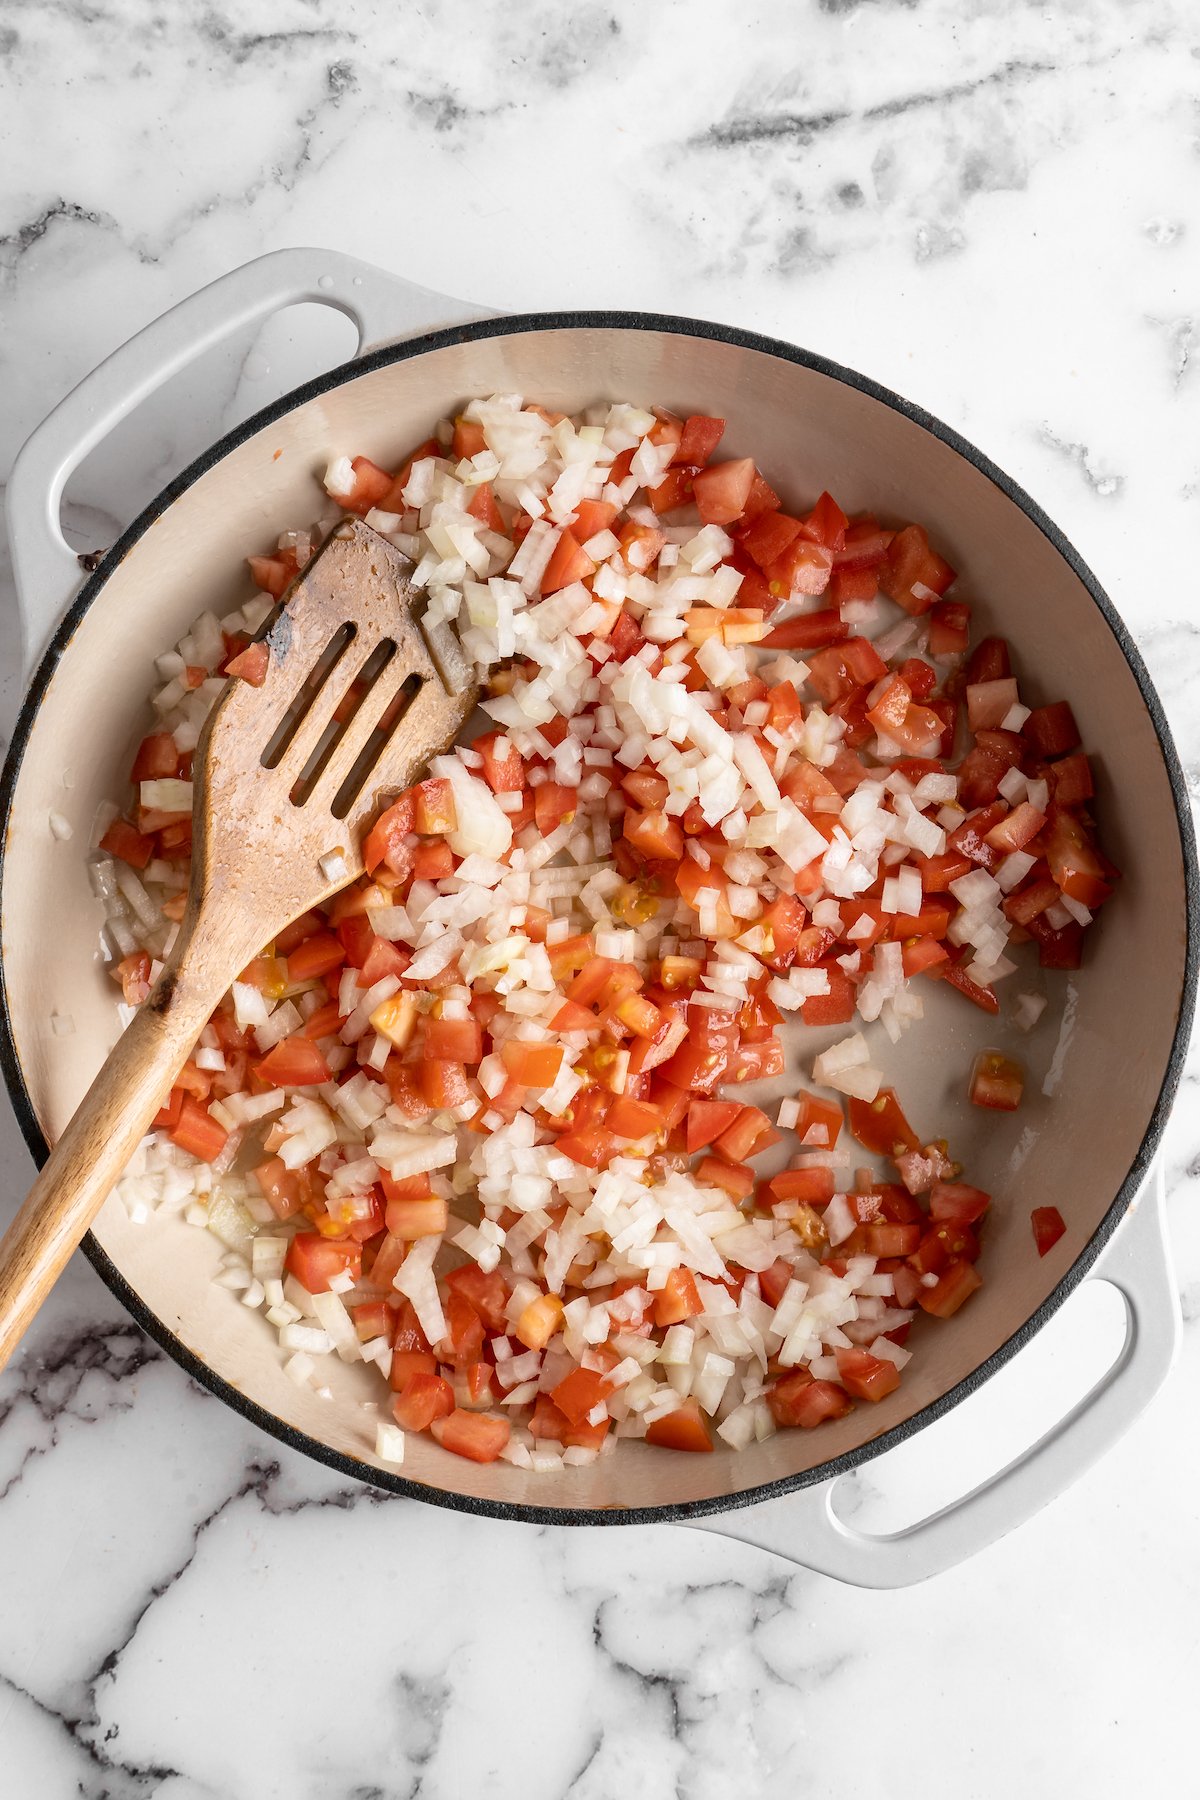
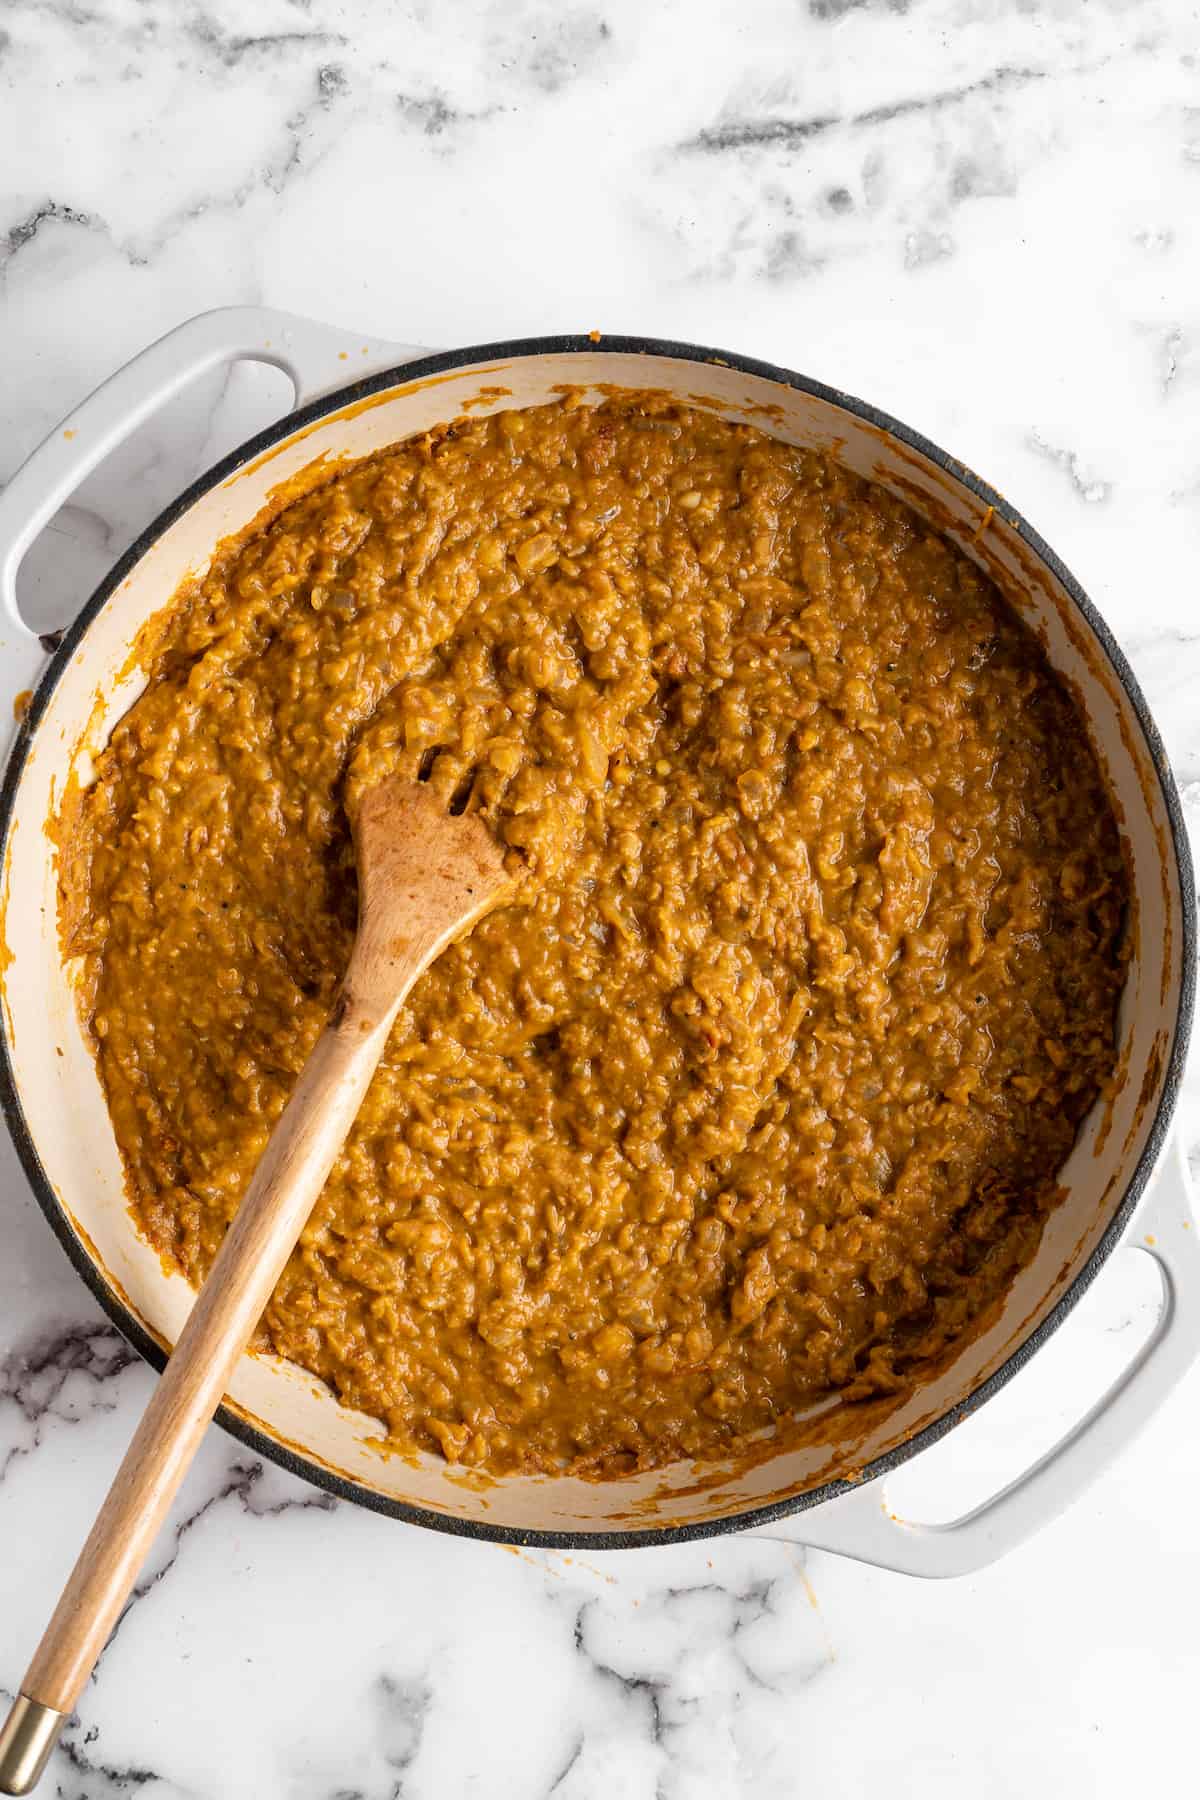
Cook the onions. Melt the coconut oil in a deep pot set over medium high heat. Add the onion, garlic, and ginger. Stir, then lower the heat to medium and cook for about 6 minutes, or until the onions are translucent and the ginger and garlic are fragrant.
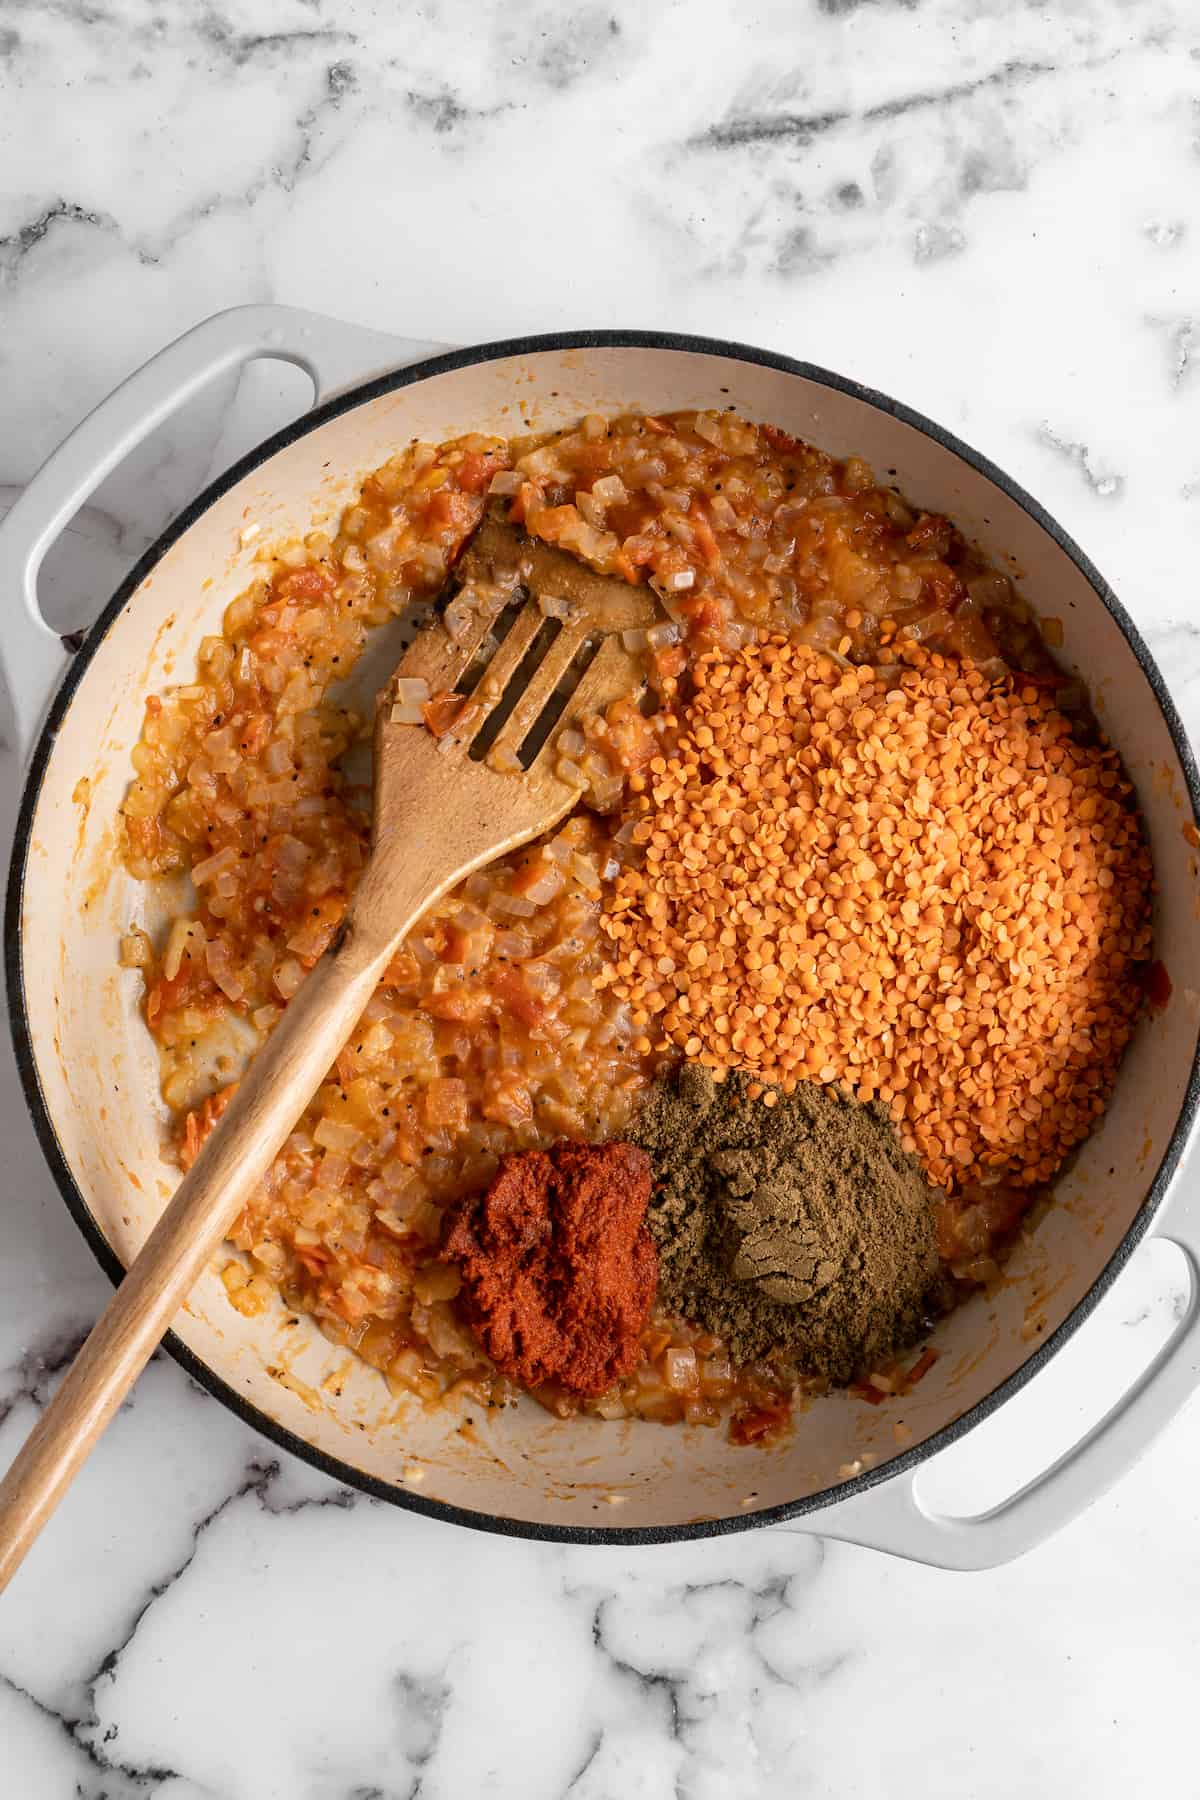
Add the spices and lentils. Add in all the remaining dry ingredients and stir to combine to keep the lentils from sticking to the bottom of the pot. Pour in the water and coconut milk and stir again.

Simmer. Bring the curry to a boil, then reduce the heat to medium-low. Partially cover the pot and simmer for about 35 minutes, stirring occasionally.
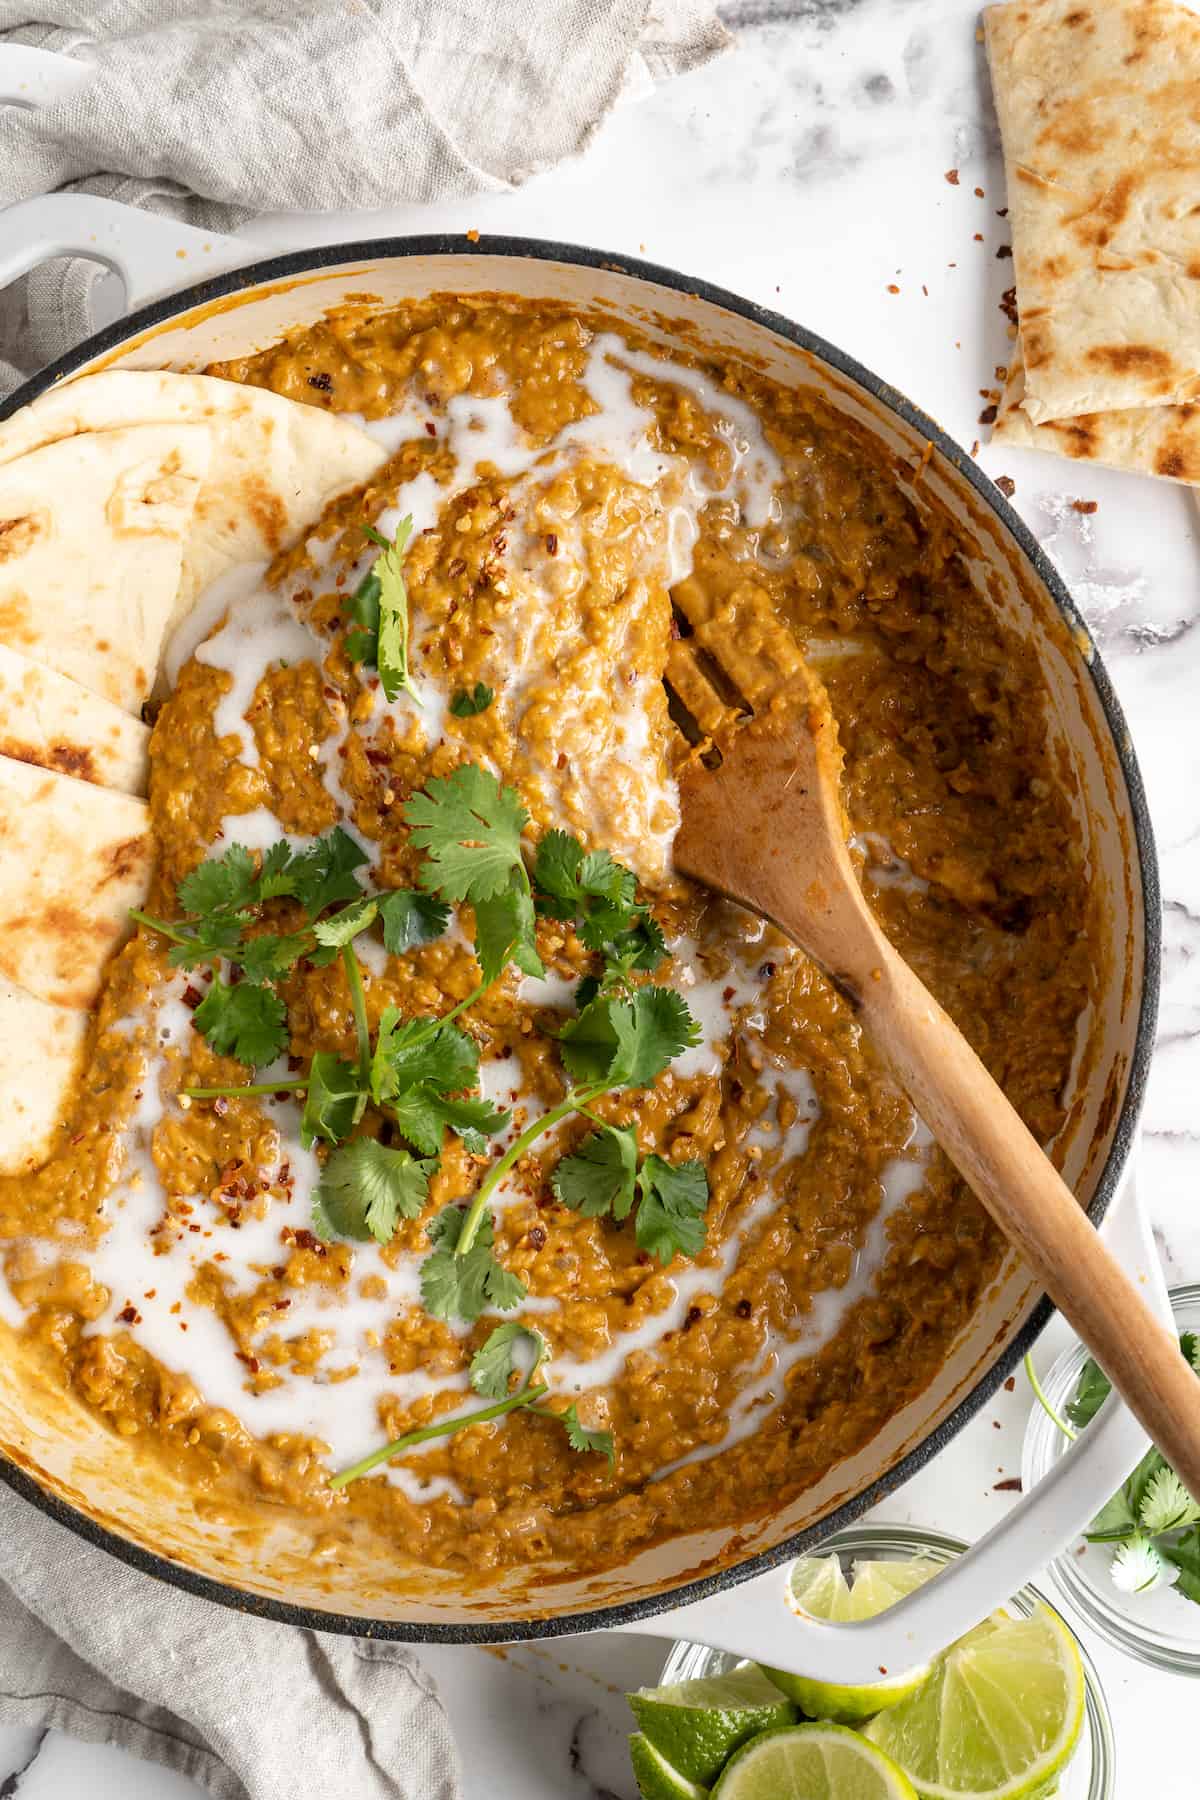
Finish. Season to taste and remove the curry from the heat. Stir in a squeeze of lime juice, cool slightly, then serve.
Tips for Success
Here are some tips and pointers for perfect red lentil curry:
- Check your lentils at the 20 minute mark. Like all pulses, the cooking time of lentils depends on how long they’ve been sitting on the store shelf! Some may be finished cooking in as little as 20 minutes, while older lentils may need longer.
- Add more water if needed. If the liquid has cooked off before the lentils soften—or if you prefer a more soup-like curry—you can add more water to the pot.
- Take some shortcuts. To save time, you can use pre-minced garlic and ginger from the store.
Serving Suggestions
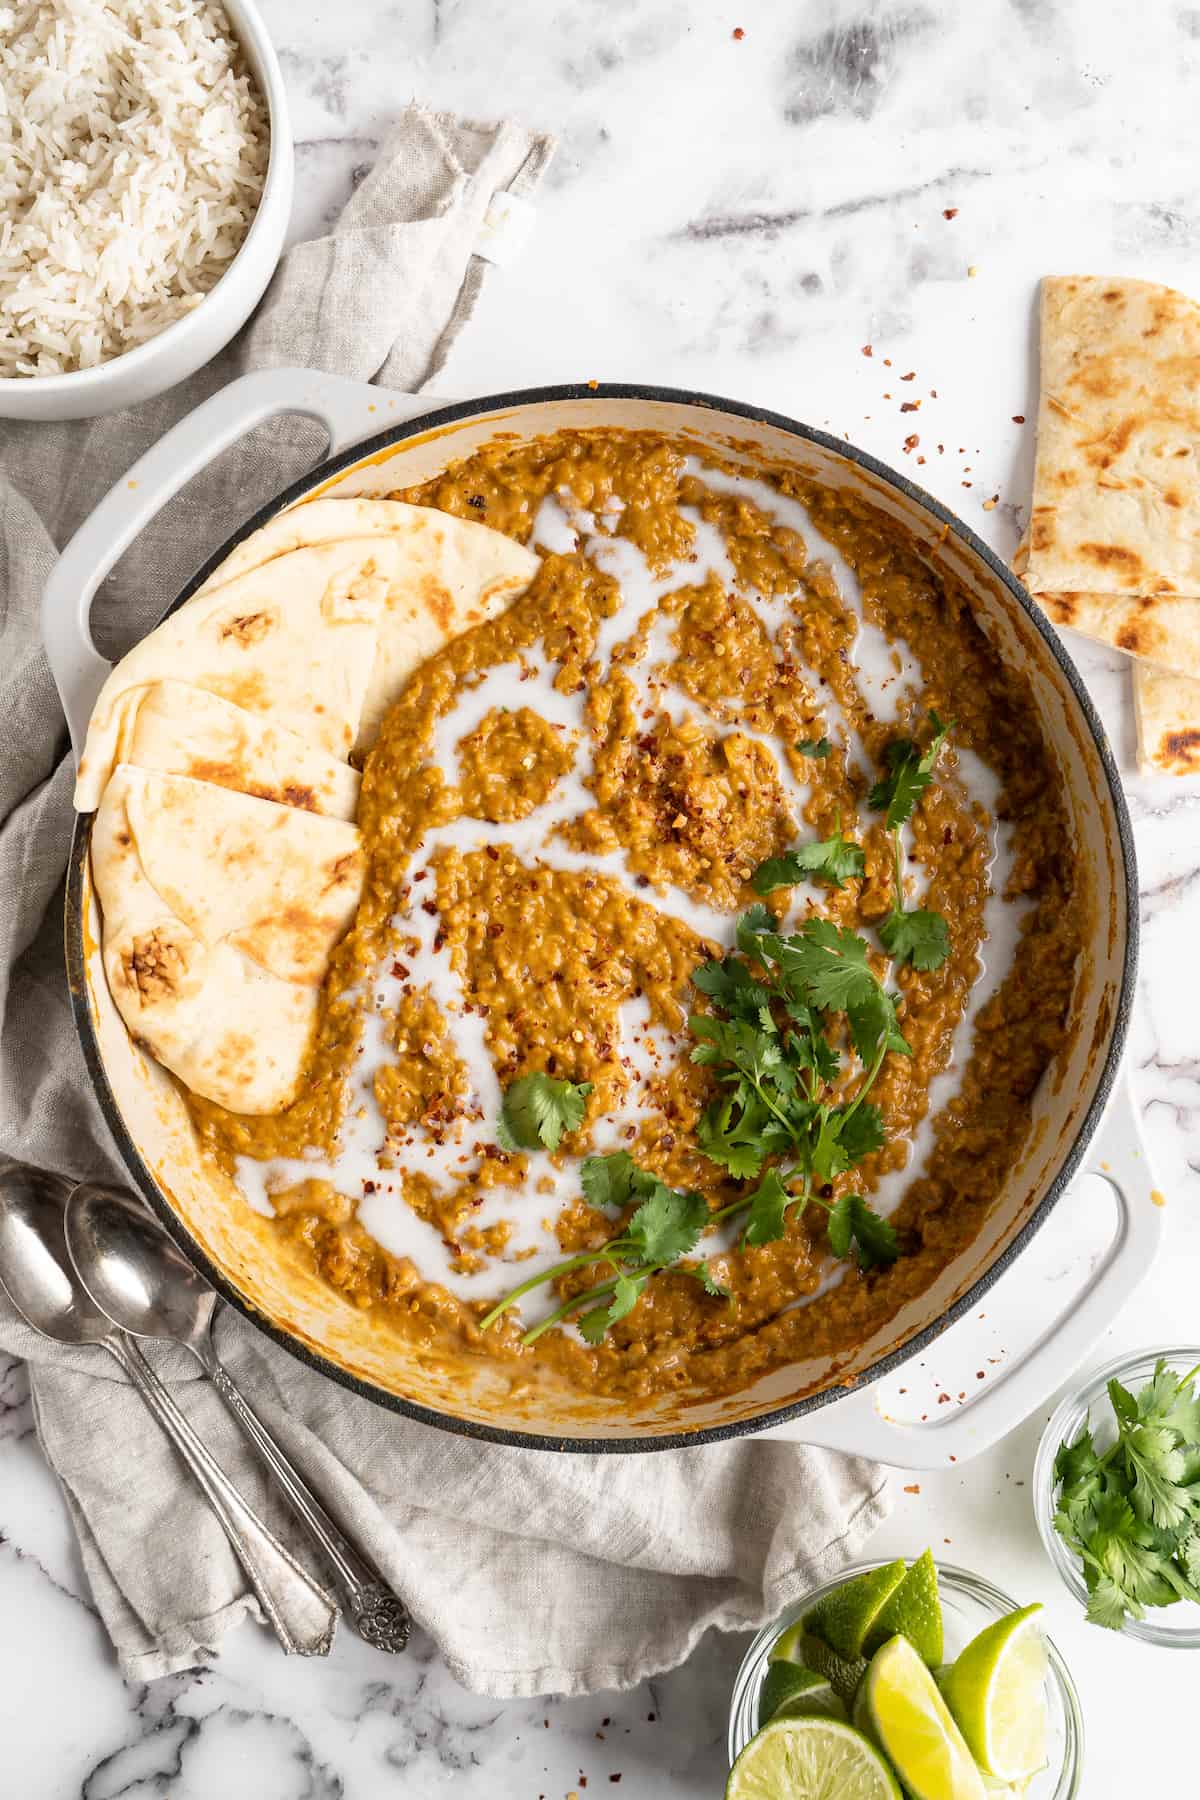
Serve your red lentil curry with basmati rice, cauliflower rice , quinoa , or homemade vegan naan . You can also stir a handful of baby spinach into the curry when you serve it for some extra veggies!
How to Store
Any leftovers can be stored in an airtight container in the refrigerator. Red lentil curry will keep fresh for up to a week. Reheat it on the stovetop or in the microwave until it’s warmed through.
Can I Freeze This Recipe?
Yes, you can easily freeze this red lentil curry for up to a month. Make sure it’s stored in an airtight container or freezer-safe bag and defrost overnight in the refrigerator before reheating according to the instructions above.

P.S. This is what I used for this recipe!
This red lentil curry is classic vegan comfort food! It’s a one-pot recipe that comes together in under an hour and it’s ideal for meal prep too.
If you love my coconut chickpea curry and Thai green curry , you’re going to flip for this red lentil curry. It’s every bit as flavourful, just as easy, and it comes together lickety-split. What’s not to love?!
When it comes to vegan proteins, lentils might not have the same excitement factor as those over-hyped supermarket faux meats, but this humble little legume brings a whole lot of goodness to this curry.
Of course, all the other ingredients here lend a helping hand—the spices, the tomatoes and onions, the coconut milk, the lime. Everything comes together to create a dish you’ll want to make (and eat) again and again.
And if you like to get creative in the kitchen, the world is your oyster with this dish. Feel free to try this red lentil curry with spinach, tofu, cauliflower, and even potatoes! It’s easily customisable, but also absolutely amazing just as it is.
Notes on Ingredients
Scroll down to the recipe card to find the ingredient quantities and recipe instructions.
- Coconut oil – I love using coconut oil in curries, but another neutral-flavoured cooking oil can be used instead.
- Yellow or red onion
- Fresh tomatoes – Or substitute canned.
- Sea salt
- Ground black pepper
- Garlic cloves
- Ginger
- Garam masala
- Curry powder – Use a mild curry powder if you’re not a fan of spicy food; hot or Madras curry powder is perfect for palates that can handle a little more heat!
- Red curry paste – Some brands contain shrimp paste or fish sauce, so be sure to check the ingredients.
- Cumin
- Dry red lentils
- Filtered water
- Coconut milk – Full-fat coconut will give you the creamiest red lentil curry, but you can substitute lite if you want.
- Lime
- Red pepper flakes and chopped parsley – For garnish.
Can I Substitute Brown Lentils for Red?
Technically speaking, you can substitute brown lentils for red in a curry like this. That said, brown lentils will require more cooking time to reach the smooth, creamy consistency of red lentils; they’ll also have a less appetizing colour in the curry.
How to Make Red Lentil Curry
Once you’ve created a mise en place for your ingredients, the rest of this recipe is a cinch!
Cook the onions. Melt the coconut oil in a deep pot set over medium high heat. Add the onion, garlic, and ginger. Stir, then lower the heat to medium and cook for about 6 minutes, or until the onions are translucent and the ginger and garlic are fragrant.
Add the spices and lentils. Add in all the remaining dry ingredients and stir to combine to keep the lentils from sticking to the bottom of the pot. Pour in the water and coconut milk and stir again.
Simmer. Bring the curry to a boil, then reduce the heat to medium-low. Partially cover the pot and simmer for about 35 minutes, stirring occasionally.
Finish. Season to taste and remove the curry from the heat. Stir in a squeeze of lime juice, cool slightly, then serve.
Tips for Success
Here are some tips and pointers for perfect red lentil curry:
- Check your lentils at the 20 minute mark. Like all pulses, the cooking time of lentils depends on how long they’ve been sitting on the store shelf! Some may be finished cooking in as little as 20 minutes, while older lentils may need longer.
- Add more water if needed. If the liquid has cooked off before the lentils soften—or if you prefer a more soup-like curry—you can add more water to the pot.
- Take some shortcuts. To save time, you can use pre-minced garlic and ginger from the store.
Serving Suggestions
Serve your red lentil curry with basmati rice, cauliflower rice , quinoa , or homemade vegan naan . You can also stir a handful of baby spinach into the curry when you serve it for some extra veggies!
How to Store
Any leftovers can be stored in an airtight container in the refrigerator. Red lentil curry will keep fresh for up to a week. Reheat it on the stovetop or in the microwave until it’s warmed through.
Can I Freeze This Recipe?
Yes, you can easily freeze this red lentil curry for up to a month. Make sure it’s stored in an airtight container or freezer-safe bag and defrost overnight in the refrigerator before reheating according to the instructions above.
P.S. This is what I used for this recipe!

Vegan Red Lentil Curry
Ingredients
- 2 tablespoons coconut oil
- 1 red onion diced, or yellow onion
- 3 garlic cloves minced
- 1/2 tablespoon minced ginger
- 1 teaspoon sea salt
- ¼ teaspoon ground black pepper
- ¼ teaspoon cumin
- 1 teaspoon curry powder
- 2 tablespoons garam masala
- 1 tablespoon red curry paste
- 1 cup dry red lentils rinsed
- 2 cups filtered water
- 14 ounces fresh tomatoes diced (if using canned, do not drain) - 400g - BLEND for a smoother curry
- 13.5 ounces can of coconut milk 383g
- 1 small lime
- garnish with red pepper flakes & chopped parsley
Instructions
- In a deep pot over medium high heat, add the coconut oil.
- Once the oil is heated, add in the onion, garlic, and ginger. Reduce to medium heat. Saute until the onions are translucent and the ginger and garlic are fragrant, about 6 minutes.
- Reduce heat to medium. Add in the sea salt, ground black pepper, ground cumin, curry powder and garam masala. Stir into the onion mix to combine. Add in the red curry paste and sauté it all together, heating up the spices to bring out more flavour, for about 3-4 minutes. Feel free to add a splash of water to keep it moving.
- Add in the lentils and stir to combine. Grind some sea salt and ground black pepper over the mixture and stir together. Now add the tomatoes (blended for a smoother curry), water and coconut milk and stir again to combine thoroughly.
- Bring the curry to a boil, and then reduce to medium-low so that the mixture continues to simmer for 35 minutes, cover slightly but allowing steam to escape. Stir occasionally to ensure the lentils don’t stick to the bottom. Depending on the kind of lentils you’re using, you can check around the 20 minute mark to see if your lentils have finished cooking.
- Taste the curry and season with salt and pepper if you desire. Remove the curry from the heat and squeeze a lime lightly over the top of the curry, stirring to combine. Don’t skip this step!! Allow to cool slightly and then serve. Enjoy!
Video
Notes
Nutrition
Vegan Red Lentil Curry https://jessicainthekitchen.com/red-lentil-curry-vegan/ January 23, 2023
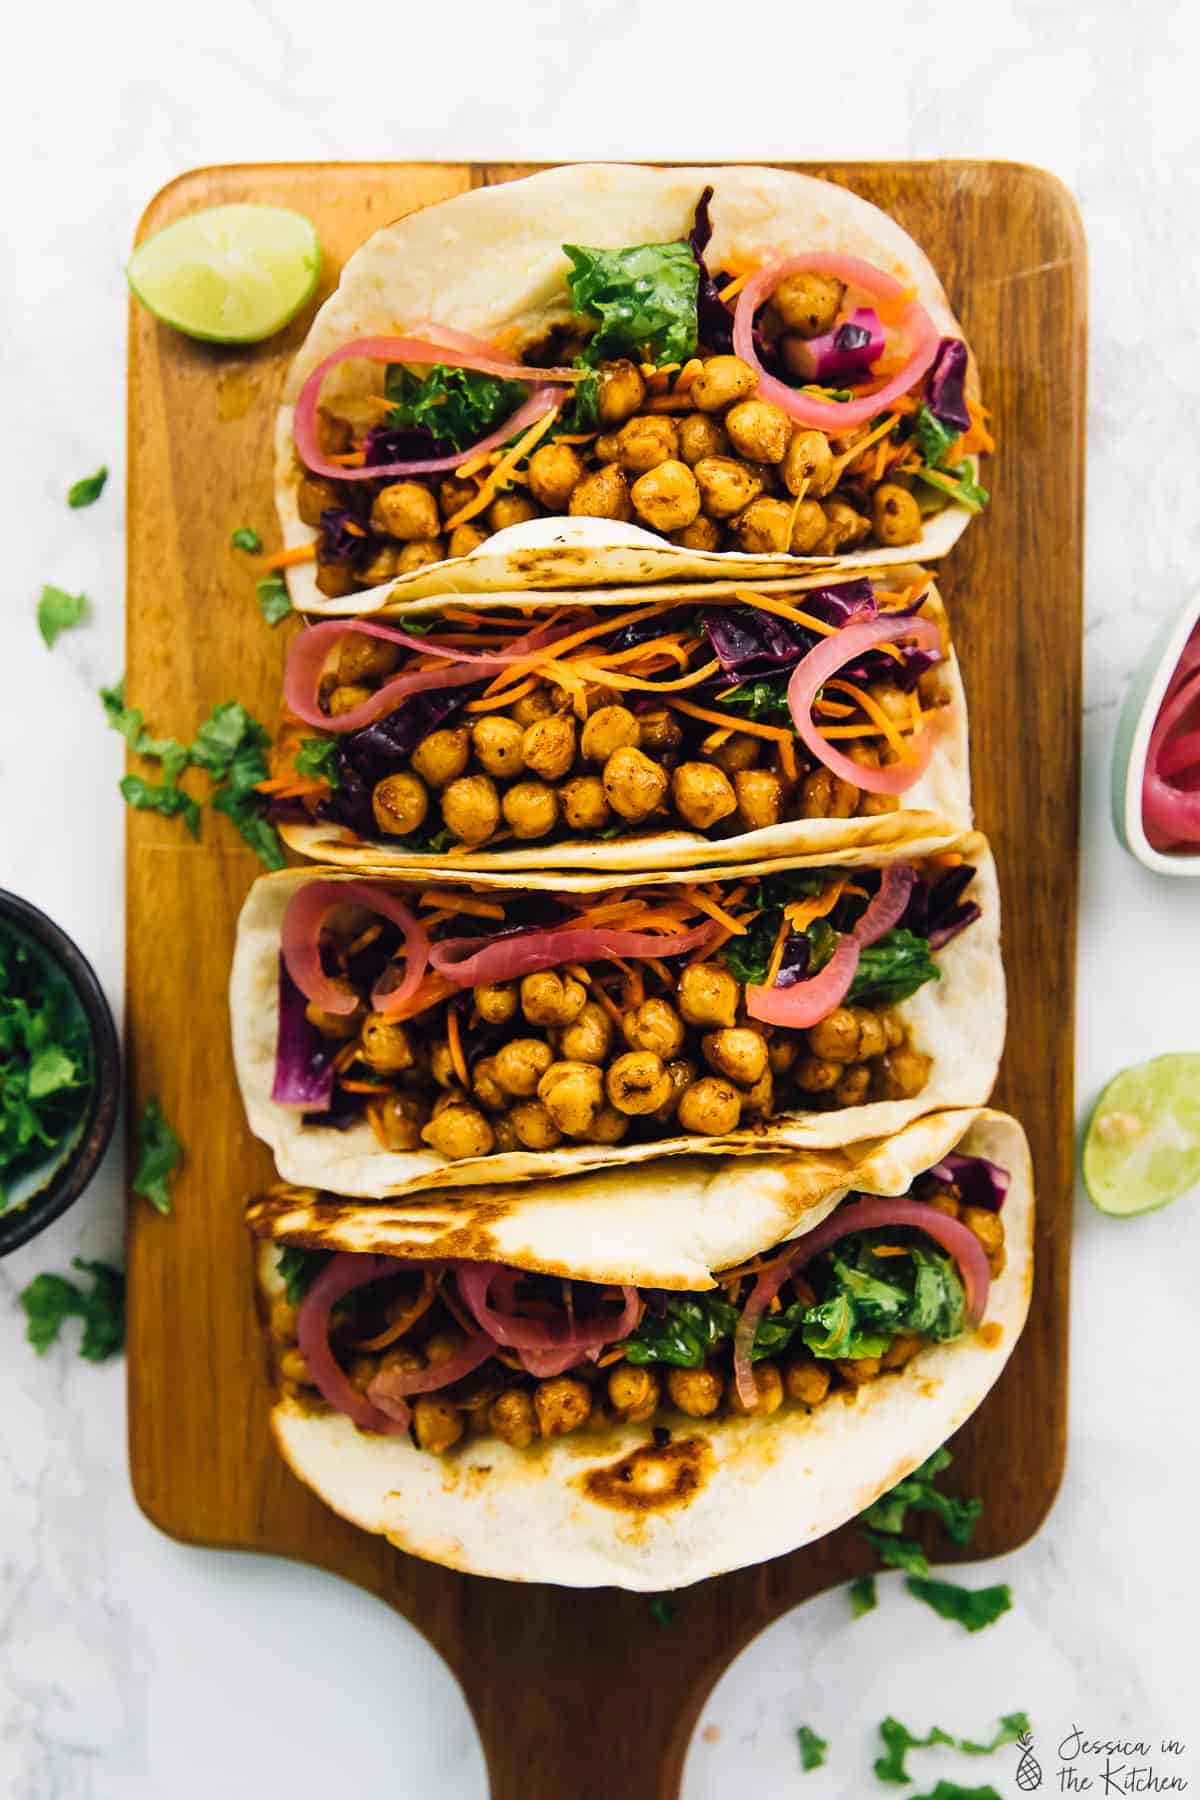
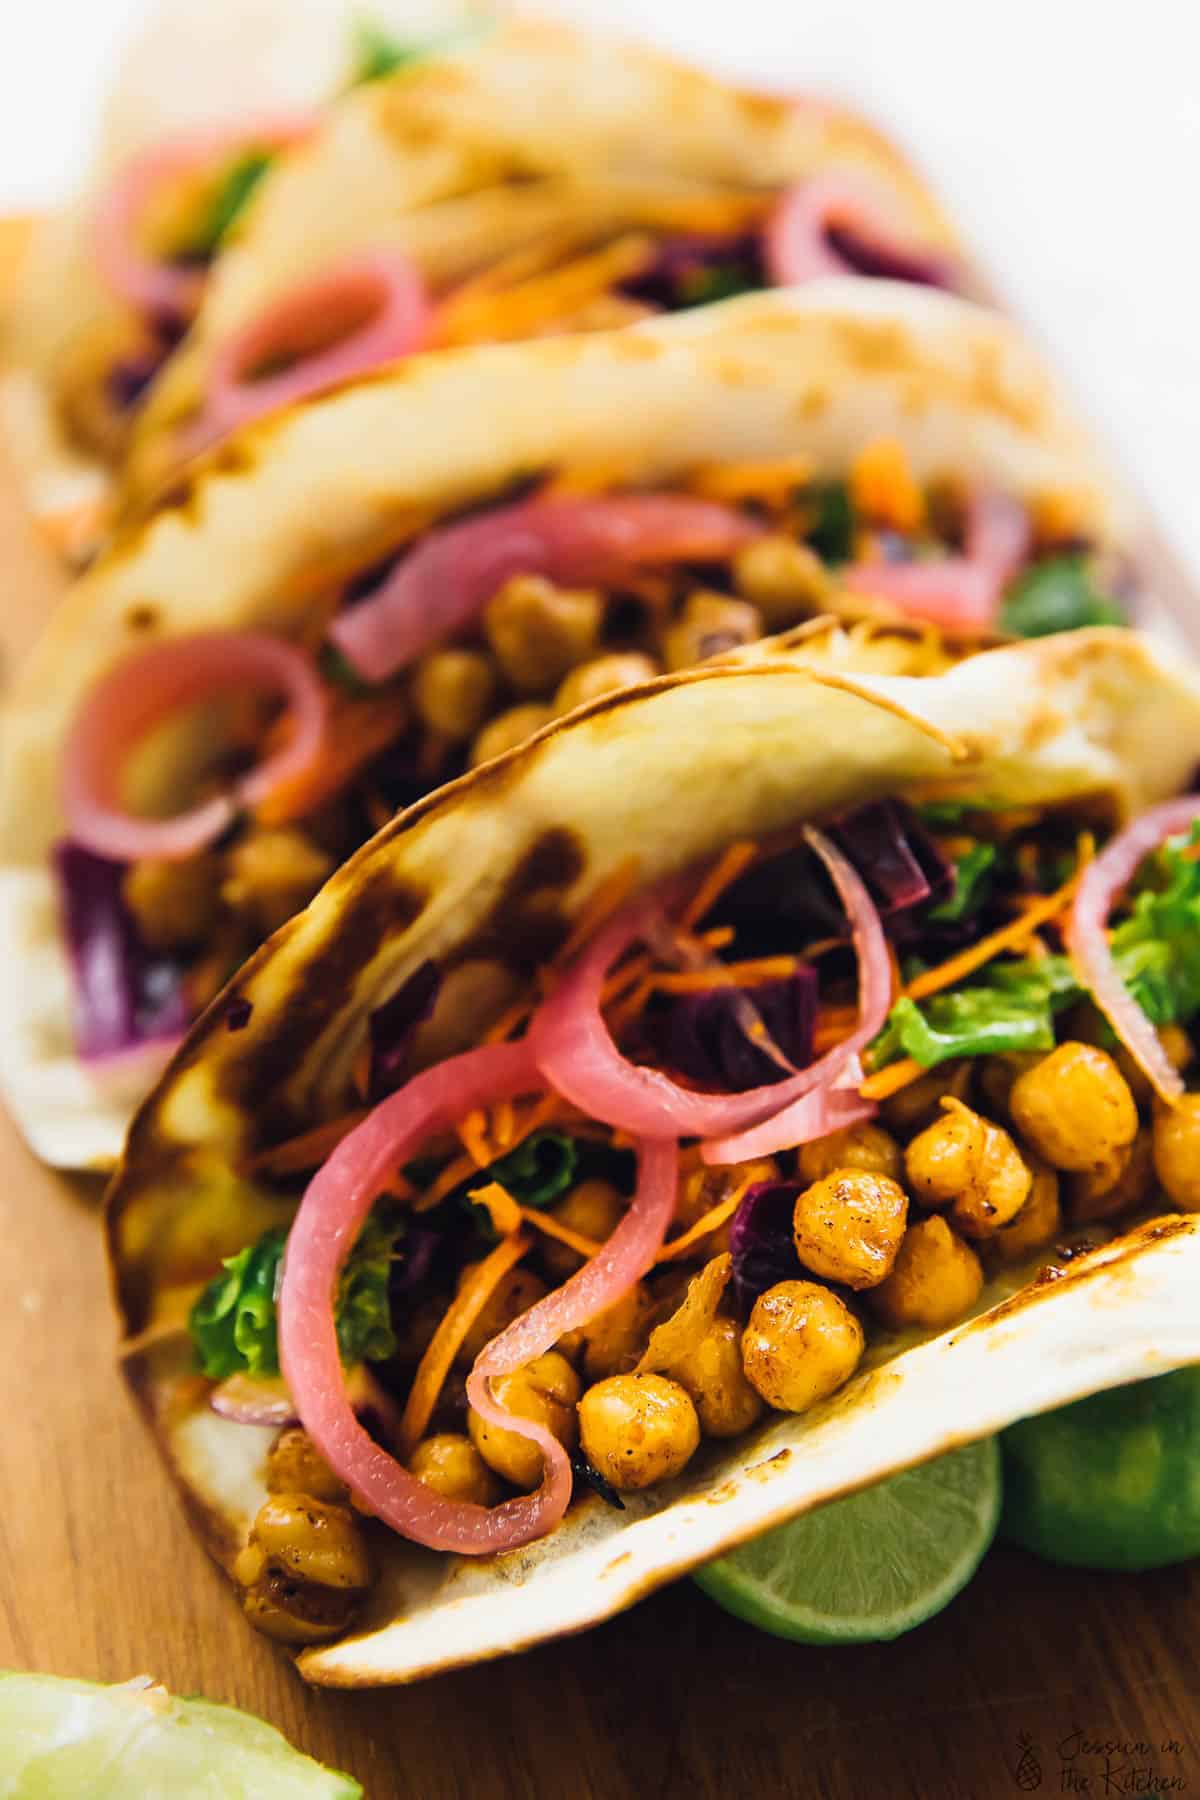
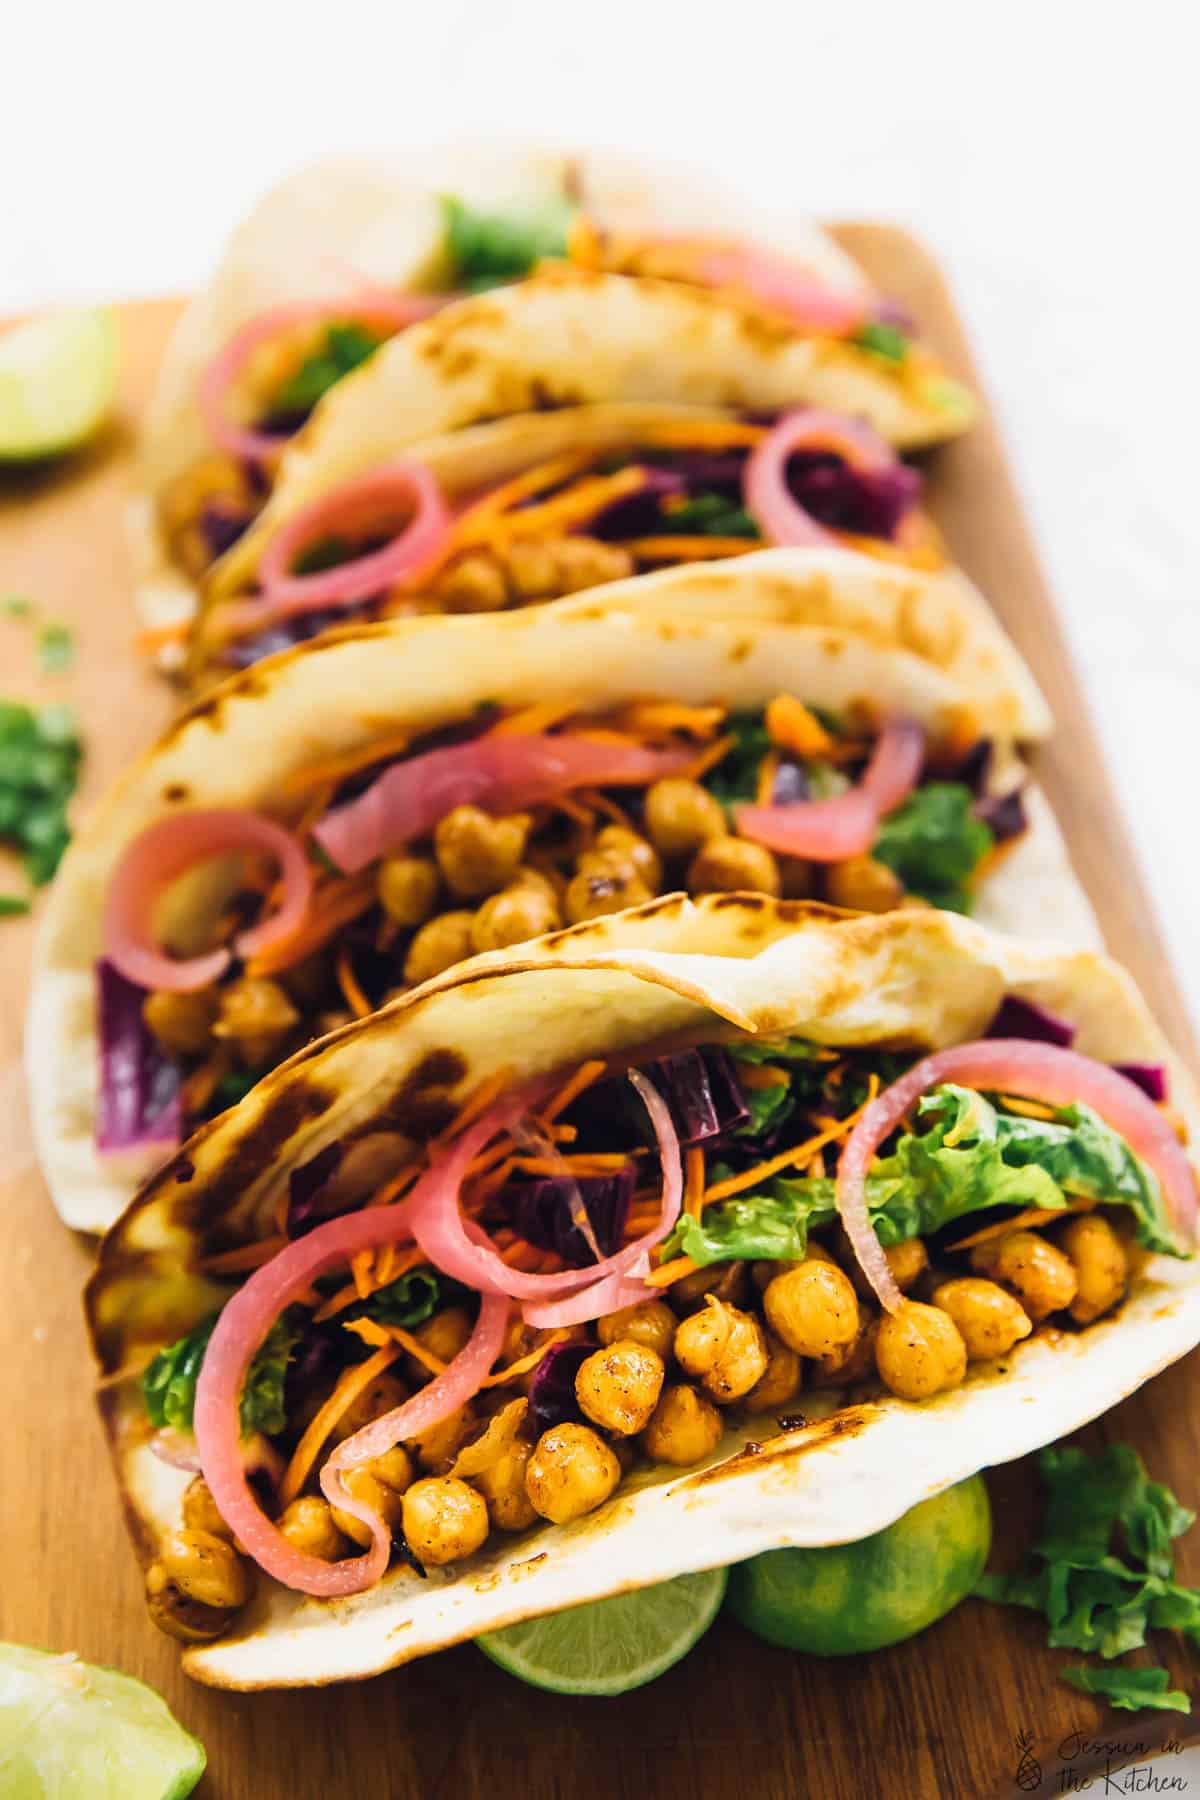
These BBQ chickpea tacos are an easy dinner recipe that comes together in minutes! Chickpeas are coated in a sticky BBQ sauce, topped with tangy pickled onions and crunchy kale slaw, then tucked into tortillas for a flavour-packed meal.
If you’ve been reading Jessica in the Kitchen for a while, then it’s no secret that I love tacos. Crispy cauliflower tacos , zucchini tacos , sweet potato and black bean tacos —I’ll take tacos any way I can get them. (As long as they’re vegan, of course!)
This BBQ chickpea taco recipe is truly made for busy weeknights. It comes together super fast, and if you make the pickled onions and slaw ahead of time, you’re literally 5 minutes away from a delicious dinner!
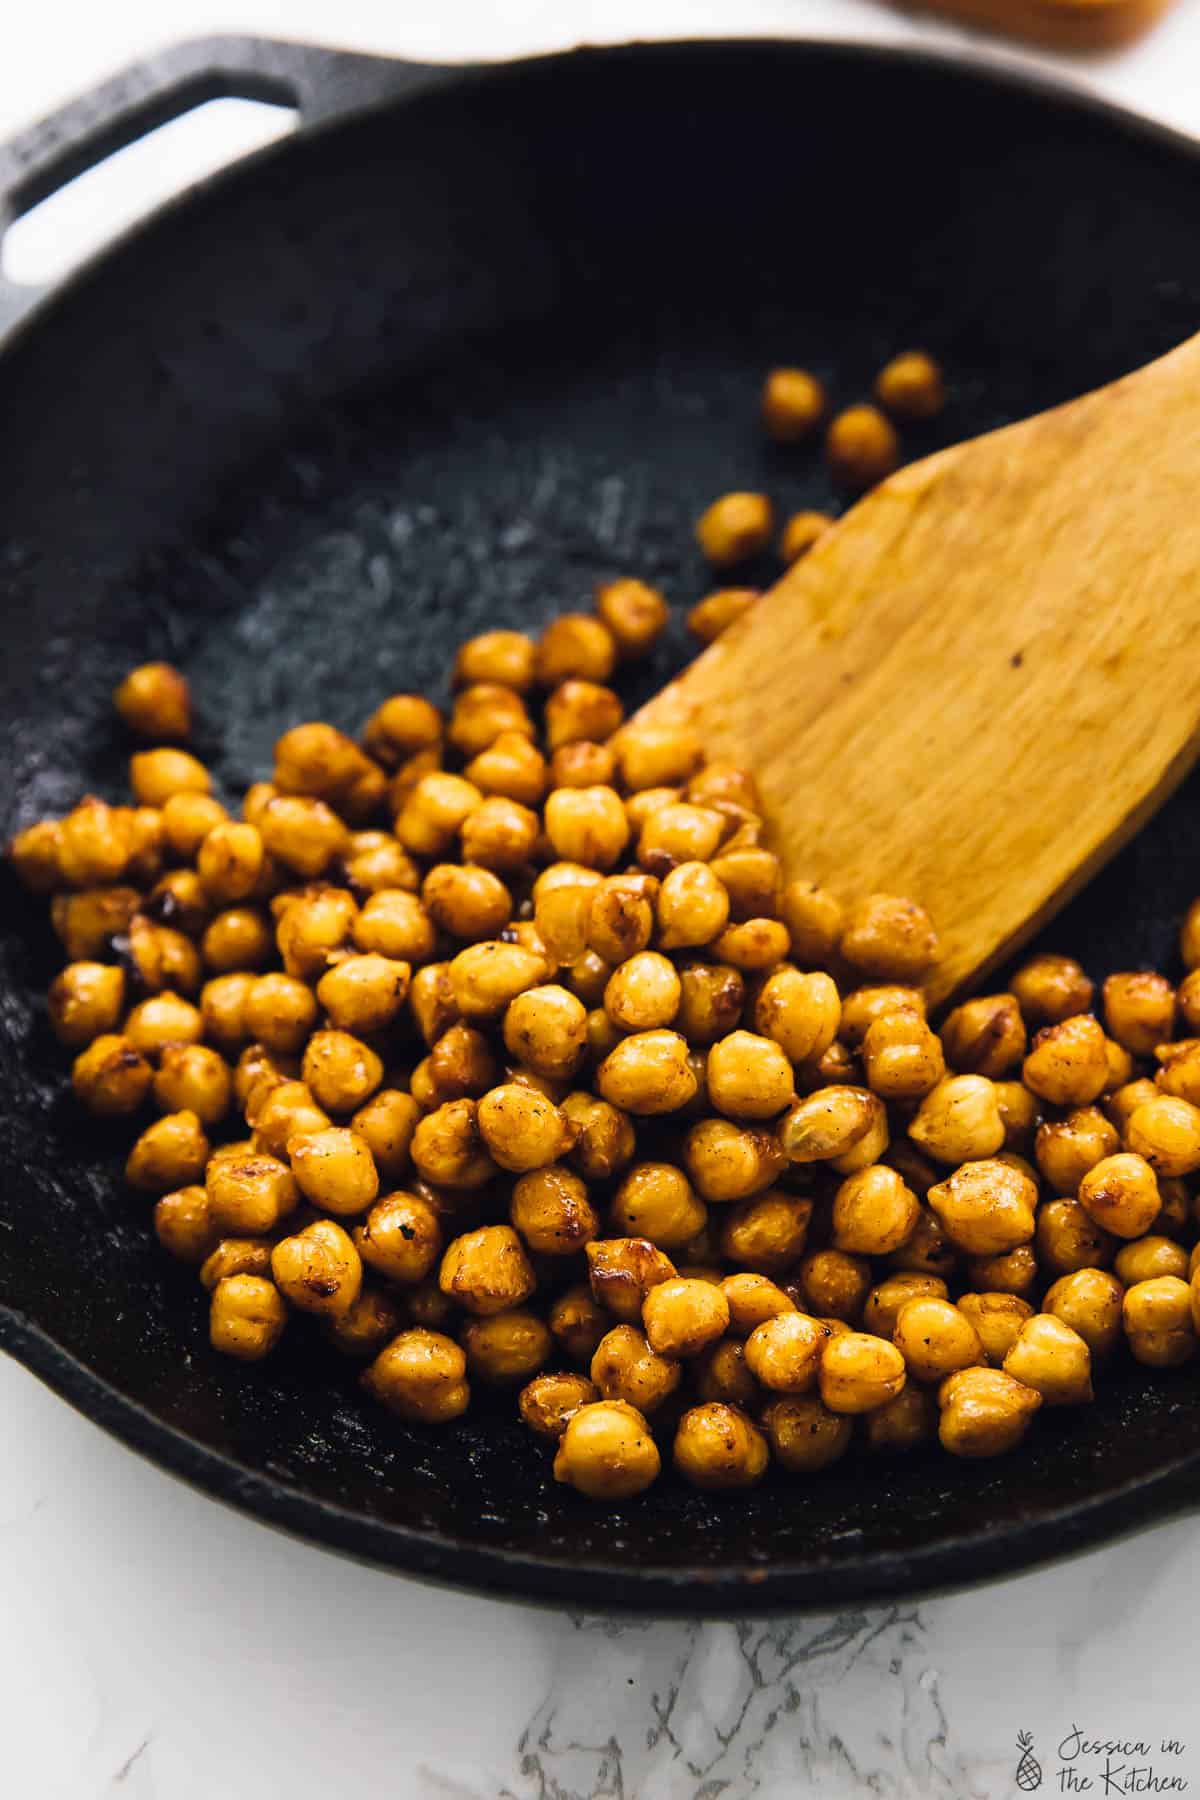
The chickpeas are pan-roasted in BBQ sauce until they’re warmed through and sticky. With the sweet BBQ sauce flavour, the chickpeas pair perfectly with the tangy onions and slaw. This recipe has all kinds of flavours and textures, but put them all together and they blend seamlessly. So good.
Notes on Ingredients
Scroll down to the recipe card to find the ingredient quantities and recipe instructions.
- Canned chickpeas – Rinse and drain these well, then dry them as much as possible.
- BBQ sauce – Use homemade BBQ sauce or store-bought. Just make sure it’s vegan—some brands contain honey!
- Kale Cabbage Slaw
- Quick Pickled Onions
- Soft taco shells – Flour or corn tortillas both work, so use whichever you prefer.
- Lime wedges
How Much Dried Chickpeas Equals One 15-Ounce Can?
If you’d like to use dried chickpeas instead of canned for this recipe, start with 3/4 cup of dried beans and cook them according to the package instructions.
How to Make BBQ Chickpea Tacos
Follow the recipes for the pickled onions and slaw, then cook the chickpeas and assemble according to the instructions below.
- Cook the chickpeas. Place the chickpeas in a small pot set over medium heat. Stir in the barbecue sauce and cook for about 5 minutes, or until the chickpeas are coated and the sauces thickens and gets sticky.
- Warm the tortillas. Heat a teaspoon of olive oil in a skillet set over medium heat. Warm the tortillas one at a time; once they’re puffy and browned in spots, flip and cook the opposite side.
- Assemble. Top the tortillas with the chickpeas, slaw, and onions. Serve with a squeeze of fresh lime juice.
Tips for Success
My BBQ chickpea tacos couldn’t be any easier to make, but these tips will help you make sure they turn out perfect!
- Dry the chickpeas after rinsing. This will keep the BBQ sauce from getting watered down and help it get thick and sticky.
- Add more sauce. Once the chickpeas are warmed through, you can stir more sauce into the pan, or allow everyone to customise their own tacos with the amount of sauce they want.
- Don’t skip the slaw and onions! They are essential to the flavour of this recipe, balancing the sweetness of the chickpeas.
Variations
There are so many ways to make this recipe your own. You can skip the tortillas and serve the BBQ chickpeas, slaw, and onions over rice or quinoa for taco bowls, or serve them over greens for a BBQ chickpea taco salad.
You can also try different toppings. Vegan ranch is delicious on these tacos, or add your favourite plant-based cheddar shreds .
Serving Suggestions
Serve your BBQ chickpea tacos with a simple side dish like Grilled Mexican Street Corn or Black Bean Avocado and Corn Salad .

How to Store Leftovers
For maximum freshness and flavour, store each component of these BBQ chickpea tacos separately; they can be refrigerated for up to 4 days. Then, reheat the tortillas and chickpeas in a skillet or the microwave and assemble.
Can This Recipe Be Frozen?
This recipe isn’t ideal for freezing, although the BBQ chickpeas will keep in the freezer for up to 3 months. (The other components should not be frozen.) Store them in an airtight container or freezer bag, then thaw in the refrigerator before reheating.
More Recipes With Chickpeas
- Vegan Chickpea Tuna Salad
- Mediterranean Chickpea Salad
- Easy Chickpea Tikka Masala
- Vegan Spicy BBQ Chickpea Pizza
Ingredients
- 1 15 ounce cooked chickpeas, rinsed and drained , 1 ½ cups
- ¼ cup bbq sauce
- Serve with Kale Cabbage Slaw
- Serve with Quick Pickled Onions
- 5 10 ” inch soft taco shells
- Serve with limes
Instructions
BBQ Chickpeas
- In a small pot over medium heat, place the chickpeas and 2 tablespoons barbecue sauce. Heat for about 5 minutes until warm and the sauce becomes sticky and coats the chickpeas.
- Remove from the heat and coat with the remaining barbecue sauce. If desired, you can add more barbecue sauce.
Assembling the Tacos
- Heat 1 teaspoon olive oil in a skillet over medium heat (if possible, brush with a pastry brush). Place a taco shell in the heat until golden brown spots appear and they are slightly puffy for a few seconds, then flip and cook the same. Set on a plate to assemble.
- Layer with kale cabbage slaw, chickpeas and pickled onions over the soft taco shells. Serve with limes. Enjoy!
Notes
- If you’re gluten free remember to check that your taco shells are gluten free!
- To store: Store each component of these BBQ chickpea tacos separately; they can be refrigerated for up to 4 days. Then, reheat the tortillas and chickpeas in a skillet or the microwave and assemble.
- To freeze: This recipe isn’t ideal for freezing, although the BBQ chickpeas will keep in the freezer for up to 3 months. (The other components should not be frozen.) Store them in an airtight container or freezer bag, then thaw in the refrigerator before reheating.
