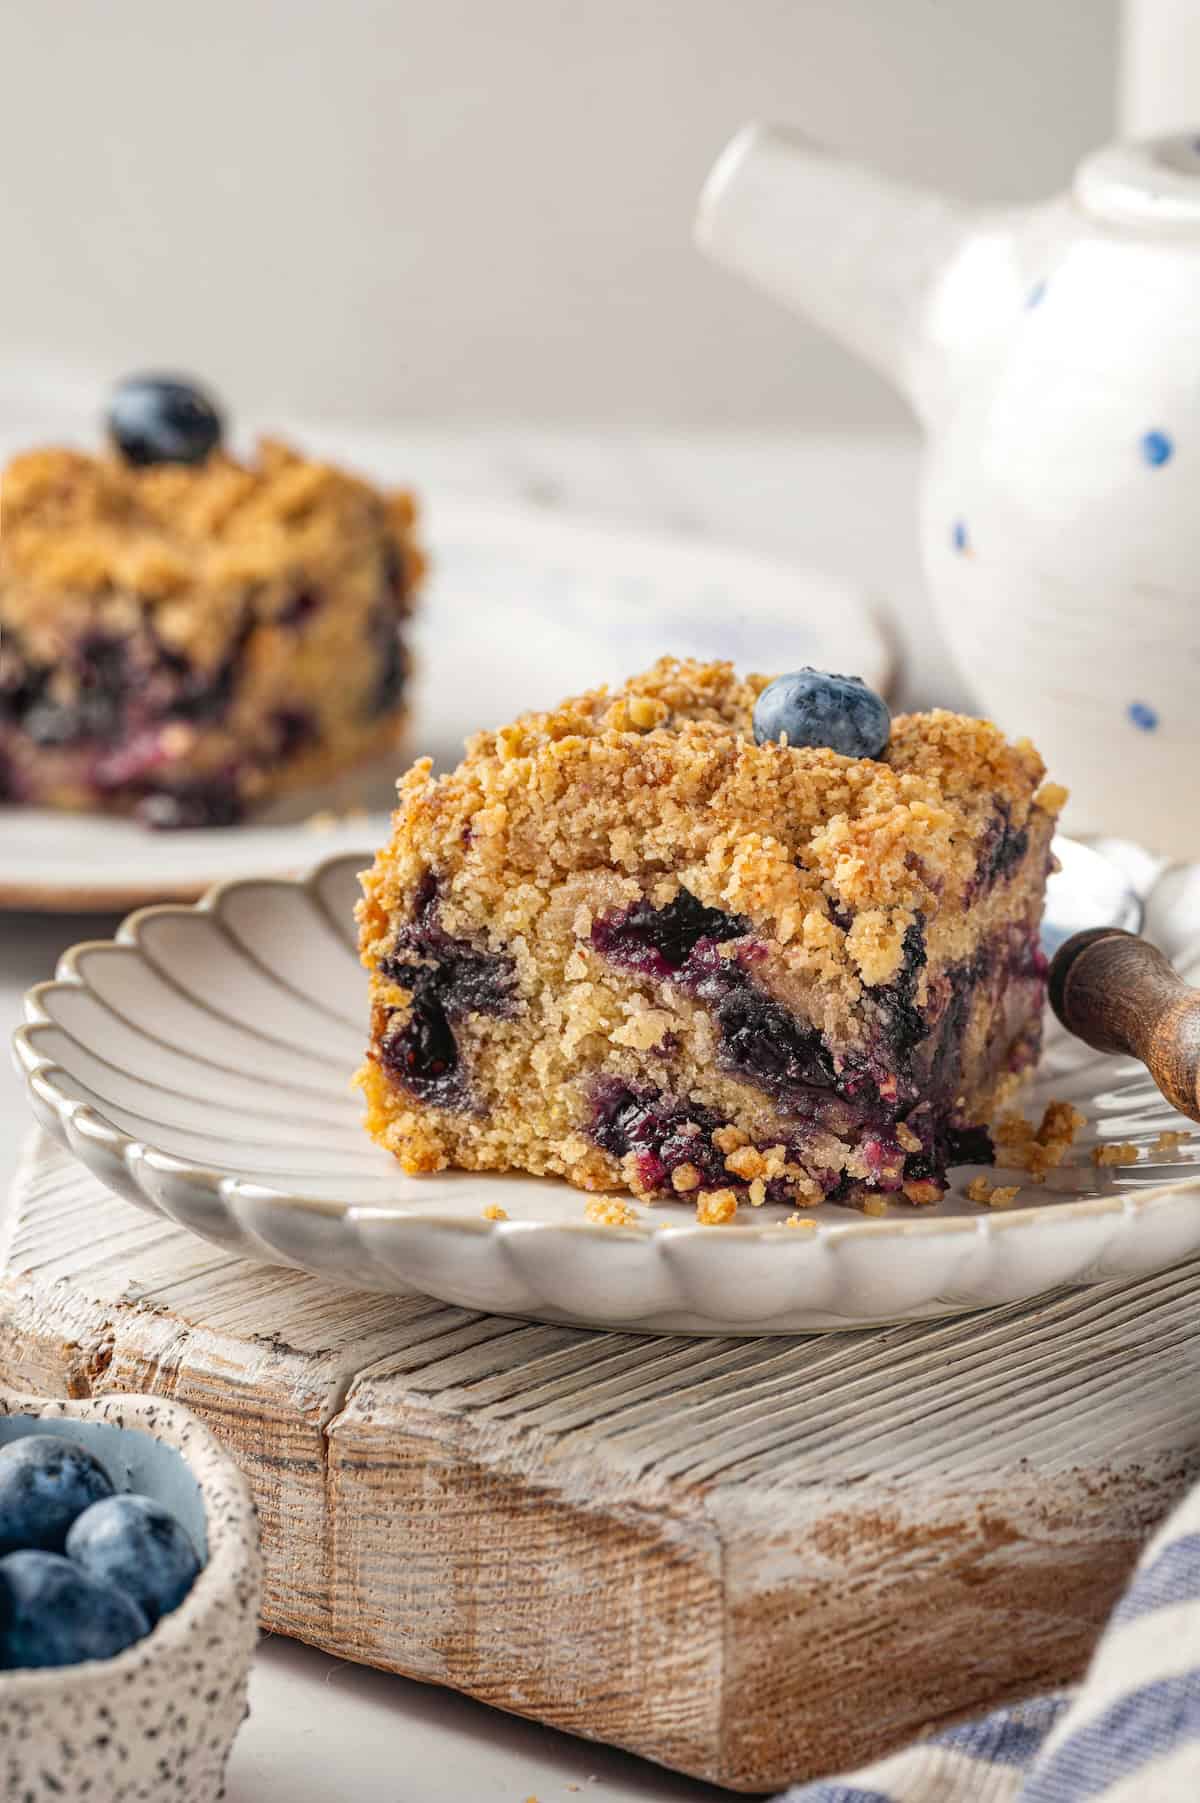
A little bit like coffee cake, this Blueberry Buckle is loaded with jammy berries, then topped with an irresistible brown sugar cinnamon streusel. Plan on having it for breakfast and for dessert because you’ll want to eat it all day long!
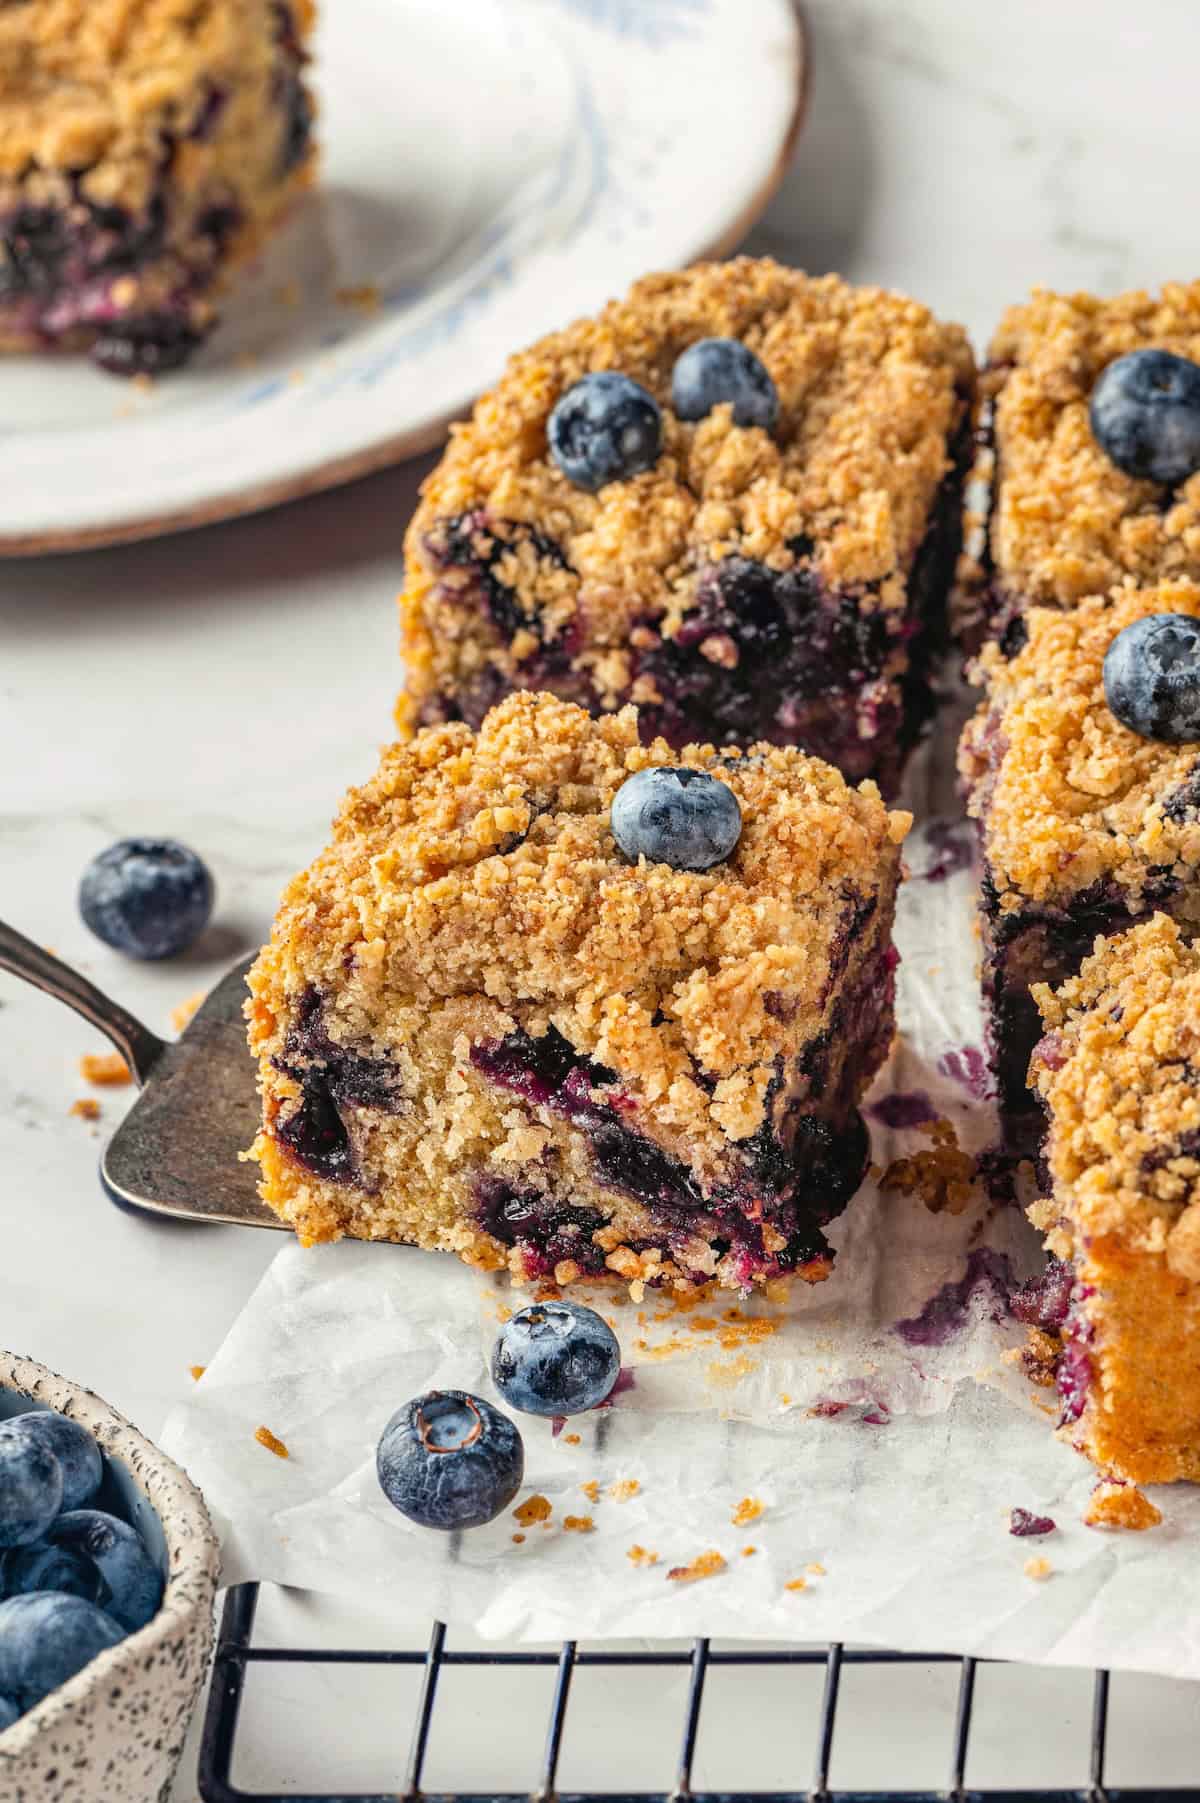
From pies to Vegan Blueberry Muffins , there are so many classic recipes that you can make with blueberries, and here I am, about to throw another one at you: a blueberry buckle! Buckles are basically a cake, and this one has a moist, tender crumb thanks to those beautiful blueberries. And then to make a good thing even better, we sprinkle buttery brown sugar cinnamon streusel over the top. With that streusel, you definitely get breakfast-y coffee cake vibes, but this blueberry buckle is delicious enough to make a proper dessert too!
Why This Vegan Buckle Recipe Belongs on Your Summer Baking List
Do you have a summer baking list too? Mine is ever-growing, but I’m glad I made room for this blueberry buckle and I know you will be too! Here’s why it’s a must-make.
- Easy to put together . The process of making this blueberry buckle really isn’t much different from making muffins or quick bread. So if you’ve made blueberry muffins, you can handle this recipe too!
- Super moist . There are a few different ingredients that help make this cake moist: the brown sugar, the butter, and the blueberries. Put them together and you’ve got the perfect tender crumb!
- The coziest flavour . Between the blueberries, the brown sugar, and all that glorious cinnamon, this is the kind of old-fashioned cake that feels welcoming and familiar in the best kind of way.
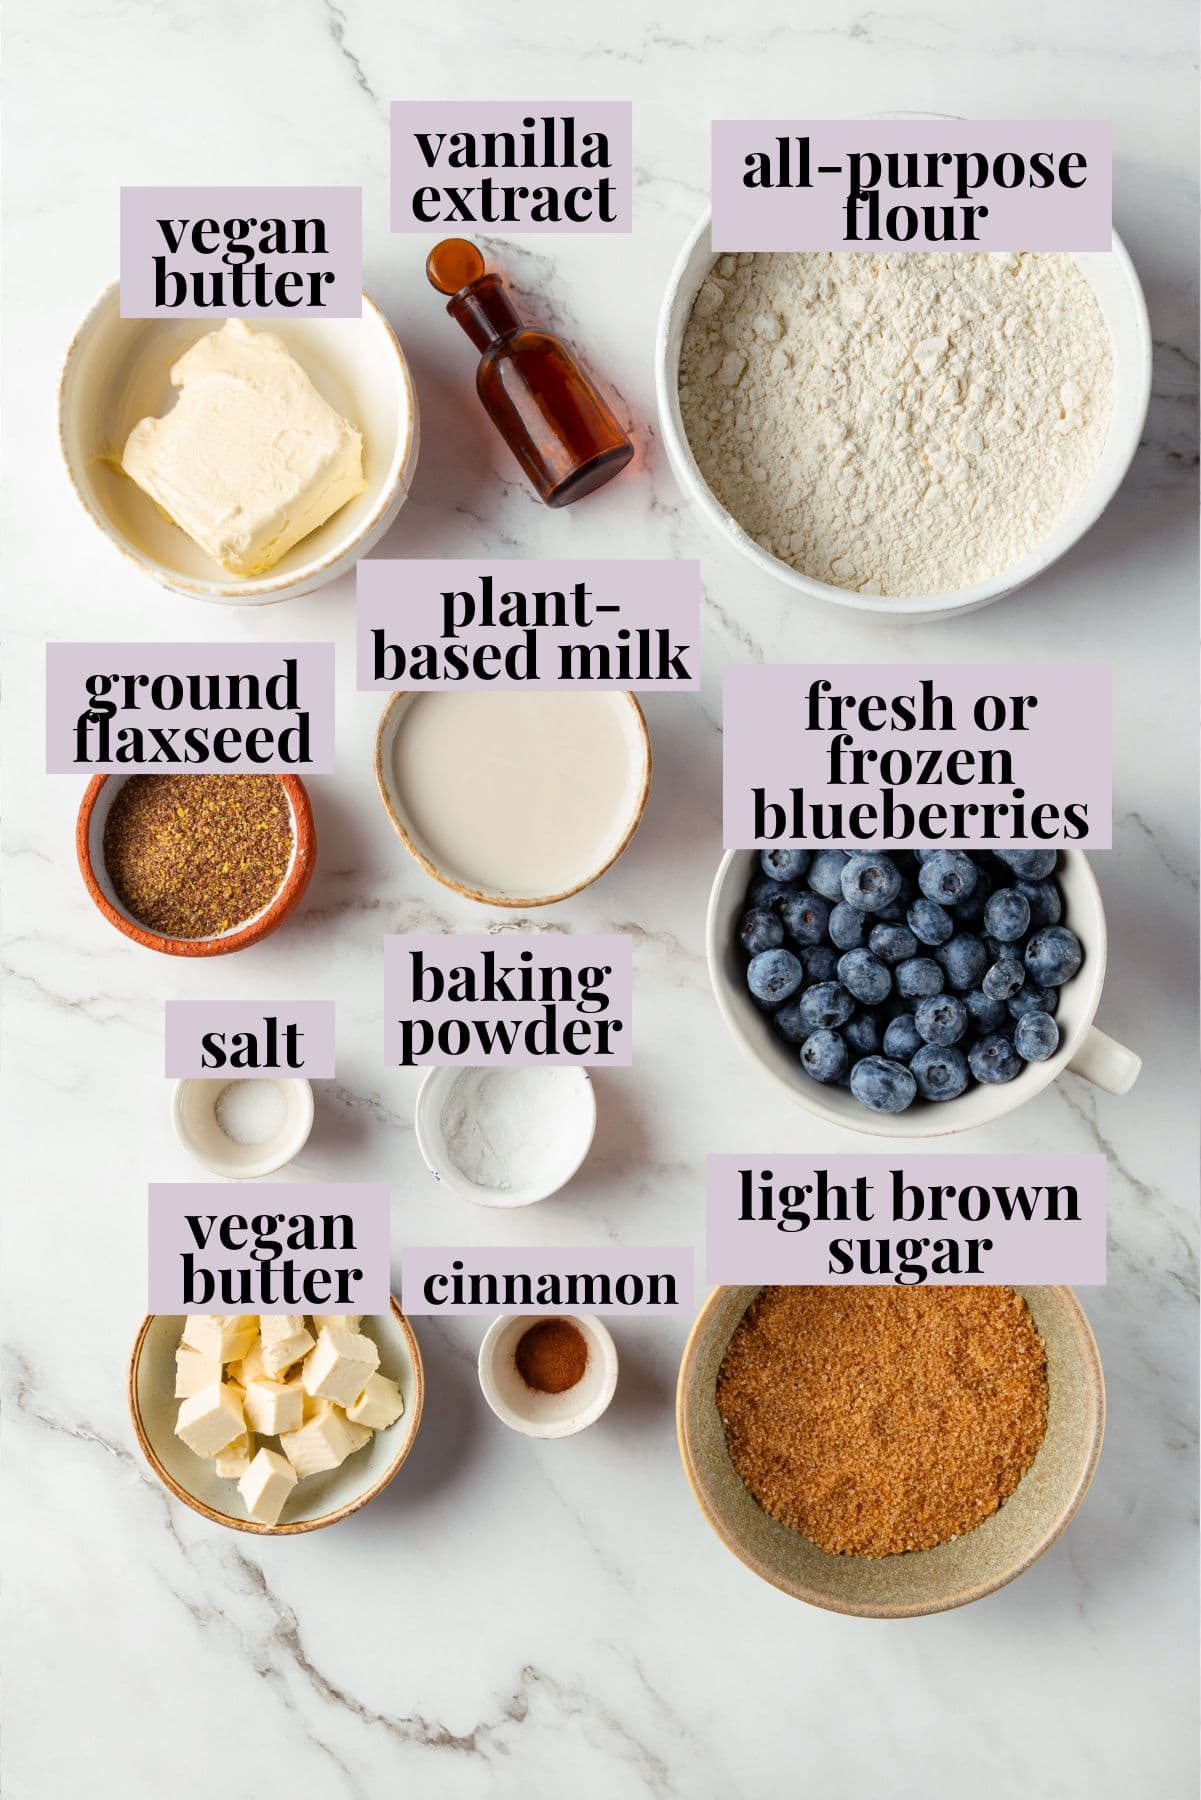
Notes on Ingredients
Many of the ingredients for the streusel and cake overlap, so you don’t need all that much for this recipe! Scroll down to the recipe card to find the ingredient quantities and recipe instructions.
Streusel Topping:
- All-purpose flour
- Light brown sugar
- Ground cinnamon – Be sure your cinnamon is fresh and fragrant when you open the jar. If it doesn’t have a strong aroma, it may be past its prime; as it gets older, its flavour and aroma fade.
- Salt
- Vegan butter – You can use store-bought or homemade Vegan Butter .
Cake:
- Ground flaxseed – For a Flax Egg .
- Vegan butter – Soften this before you start the recipe.
- Light brown sugar
- Vanilla extract – Almond extract would also work in this blueberry buckle.
- All-purpose flour
- Baking powder
- Salt
- Unsweetened plant milk – You can use any kind you like, as long as it’s unflavoured.
- Blueberries – Fresh or frozen blueberries both work.
How to Make a Blueberry Buckle
This blueberry buckle is a cinch to make! Here’s what you’ll need to do.
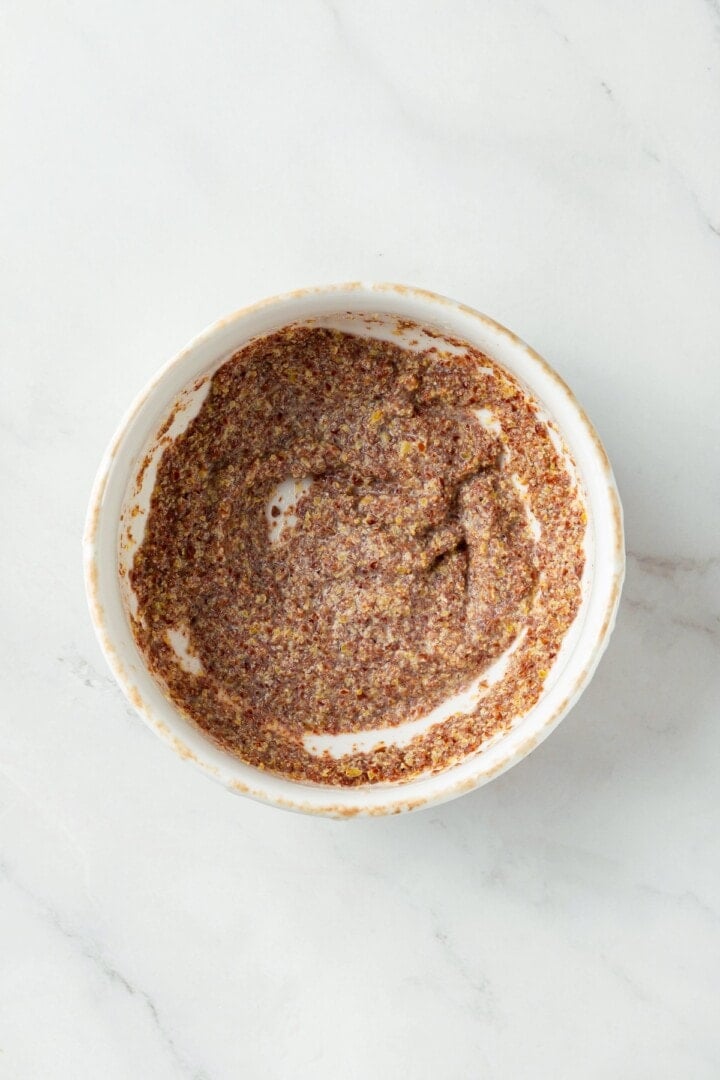
Make the flax egg.
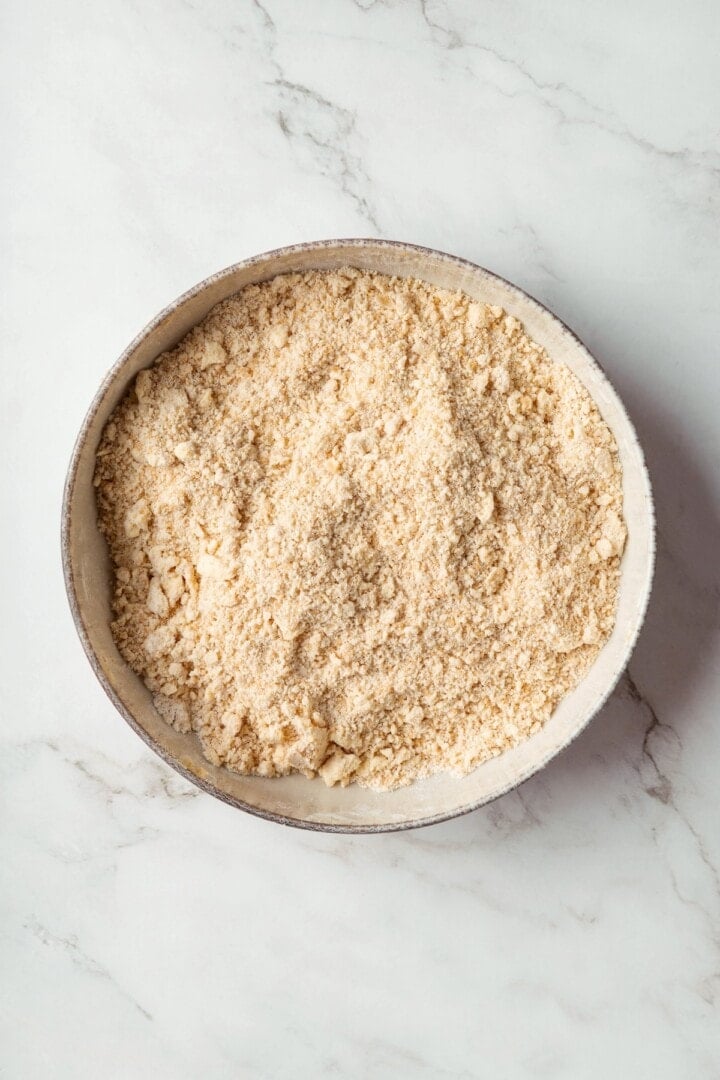
- Make the streusel . Whisk together the dry ingredients, then cut in the vegan butter until coarse crumbs form. Refrigerate to keep cold.
- Prepare . Preheat your oven to 350°F. Grease an 8×8 inch baking pan, then line it with parchment paper.
- Make the flax egg . Whisk the flax with 4 tablespoons of plant milk and set aside to thicken.
- Cream the butter and sugar . Beat the vegan butter with the brown sugar until it’s light and fluffy.
- Finish mixing the wet ingredients . Beat in the vanilla and flax egg.
Mix the dry ingredients.
- Mix the dry ingredients . In another bowl, whisk the flour, baking powder, and salt.
- Combine wet and dry . Add the flour mixture and plant milk to the wet ingredients in three additions, beginning and ending with the flour.
- Finish the batter . Fold the berries into the batter with a spatula.
Assemble in baking pan.
- Bake . Transfer the batter to the prepared pan. Add some blueberries on top if you’d like, then sprinkle on the streusel. Bake for 45 to 50 minutes, or until a toothpick inserted into the center comes out clean.
- Cool . Let the blueberry buckle cool in the pan for 15 minutes, then use the parchment to lift it onto a wire rack. Cool completely before serving.
Tips for Making the Perfect Buckle
These additional pointers will help you make sure your blueberry buckle turns out tasty and picture perfect!
- Don’t thaw frozen blueberries . Thawed frozen blueberries will make your buckle soggy and they’re also likely to tint it an unappetizing blue-green color.
- Avoid over-mixing . If you over-mix the batter, your buckle will end up dense, without as much rise. Just mix until the dry ingredients are incorporated, then gently fold in the berries.
- Let the buckle cool completely before serving . This will help it hold its shape when you slice into it!

Variation Ideas
Want to switch things up a bit? Here are some ideas!
- Make it gluten-free . Simply swap in a measure-for-measure gluten-free baking flour like King Arthur or Bob’s Red Mill.
- Try other berries . You can make a mixed berry buckle by swapping a portion of the blueberries for raspberries or diced strawberries.
- Add some lemon zest . Some blueberry buckle recipes call for lemon zest too. If you’d like to give it a try, mix the zest of 1 lemon into the batter.
How to Store
- Room temperature : Store blueberry buckle in an airtight container at room temperature for 3 to 4 days.
- Freezer : You can freeze leftovers by wrapping individual pieces in plastic wrap, then placing them in an airtight container or freezer bag. Freeze for up to 2 months; thaw at room temperature before serving.
More Blueberry Recipes
- Lemon Blueberry Bread
- Easy Vegan Blueberry Pancakes
- 2-Ingredient Vegan Blueberry Ice Cream
- Lemon Blueberry Bundt Cake
Ingredients
Streusel Topping:
- ½ cup all-purpose flour , 60 g
- ¼ cup light brown sugar , packed – 50 g
- ½ teaspoon ground cinnamon , 2.5 g
- Pinch of salt
- ⅓ cup vegan butter , cold and cubed – 56 g
Cake:
- 2 tablespoons ground flaxseed , 7 g
- ½ cup vegan butter , softened – 112 g
- ¾ cup light brown sugar , packed – 150 g
- 1 teaspoon vanilla extract , 5 mL
- 1 ½ cups all-purpose flour , 180 g
- 1 ½ teaspoons baking powder , 6 g
- ¼ teaspoon salt , 1.5 g
- ½ cup unsweetened plant milk , almond, oat, soy, etc. – 120 mL
- 2 cups fresh or frozen blueberries , if frozen, do not thaw; 300 g
Instructions
- Prepare the Streusel Topping: In a small bowl, whisk together the flour, brown sugar, cinnamon, and salt. Add the cold cubed vegan butter and use a pastry cutter or fork to blend until the mixture forms coarse, sandy crumbs with some pea-sized clumps. Refrigerate while preparing the cake batter.
- Preheat the oven to 350°F (175°C). Lightly grease an 8×8 inch (20×20 cm) baking pan and line with parchment paper for easy removal. 9×9 inch pan will work too.
- In a small bowl, mix ground flaxseed with 4 tablespoons of plant milk from the total amount. Set aside for 5–10 minutes to thicken.
- In a large mixing bowl, beat the softened vegan butter with the brown sugar for 2–3 minutes, until light and fluffy.
- Mix in the vanilla extract and thickened flaxseed mixture until well combined.
- In a separate bowl, whisk together the flour, baking powder, and salt.
- Alternately add the flour mixture and plant milk to the creamed mixture in three additions, beginning and ending with the flour. Mix just until combined—do not overmix.
- Gently fold in the blueberries using a spatula. If using frozen blueberries, fold them in straight from the freezer.
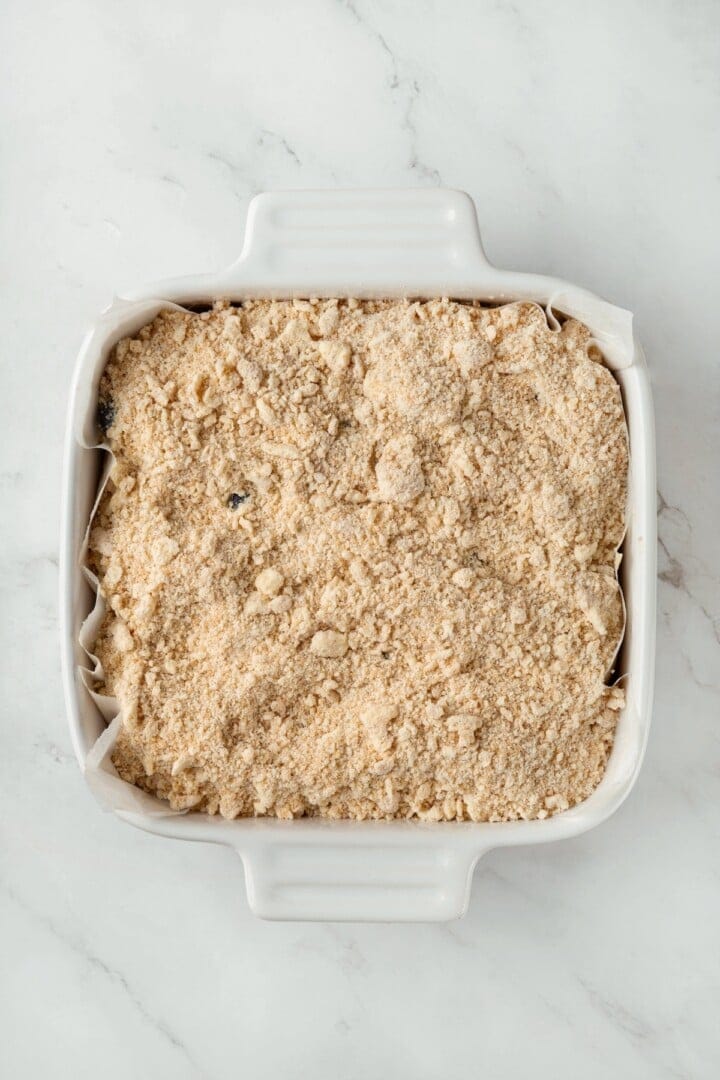
- Spread the batter evenly into the prepared baking pan. Optionally, scatter a few extra blueberries over the top. Sprinkle the chilled streusel evenly over the batter.
- Bake for 45–50 minutes, or until the top is golden brown and a toothpick inserted into the center comes out clean.
- Let cool in the pan for 15 minutes before transferring to a wire rack. Serve at room temperature.
Notes
- Room temperature : Store blueberry buckle in an airtight container at room temperature for 3 to 4 days.
- Freezer : You can freeze leftovers by wrapping individual pieces in plastic wrap, then placing them in an airtight container or freezer bag. Freeze for up to 2 months; thaw at room temperature before serving.

Blueberry Buckle
Ingredients
Streusel Topping:
- ½ cup all-purpose flour 60 g
- ¼ cup light brown sugar packed – 50 g
- ½ teaspoon ground cinnamon 2.5 g
- Pinch of salt
- ⅓ cup vegan butter cold and cubed – 56 g
Cake:
- 2 tablespoons ground flaxseed 7 g
- ½ cup vegan butter softened – 112 g
- ¾ cup light brown sugar packed – 150 g
- 1 teaspoon vanilla extract 5 mL
- 1 ½ cups all-purpose flour 180 g
- 1 ½ teaspoons baking powder 6 g
- ¼ teaspoon salt 1.5 g
- ½ cup unsweetened plant milk almond, oat, soy, etc. – 120 mL
- 2 cups fresh or frozen blueberries if frozen, do not thaw; 300 g
Instructions
- Prepare the Streusel Topping: In a small bowl, whisk together the flour, brown sugar, cinnamon, and salt. Add the cold cubed vegan butter and use a pastry cutter or fork to blend until the mixture forms coarse, sandy crumbs with some pea-sized clumps. Refrigerate while preparing the cake batter.
- Preheat the oven to 350°F (175°C). Lightly grease an 8x8 inch (20x20 cm) baking pan and line with parchment paper for easy removal. 9x9 inch pan will work too.
- In a small bowl, mix ground flaxseed with 4 tablespoons of plant milk from the total amount. Set aside for 5–10 minutes to thicken.
- In a large mixing bowl, beat the softened vegan butter with the brown sugar for 2–3 minutes, until light and fluffy.
- Mix in the vanilla extract and thickened flaxseed mixture until well combined.
- In a separate bowl, whisk together the flour, baking powder, and salt.
- Alternately add the flour mixture and plant milk to the creamed mixture in three additions, beginning and ending with the flour. Mix just until combined—do not overmix.
- Gently fold in the blueberries using a spatula. If using frozen blueberries, fold them in straight from the freezer.
- Spread the batter evenly into the prepared baking pan. Optionally, scatter a few extra blueberries over the top. Sprinkle the chilled streusel evenly over the batter.
- Bake for 45–50 minutes, or until the top is golden brown and a toothpick inserted into the center comes out clean.
- Let cool in the pan for 15 minutes before transferring to a wire rack. Serve at room temperature.
Notes
- Room temperature : Store blueberry buckle in an airtight container at room temperature for 3 to 4 days.
- Freezer : You can freeze leftovers by wrapping individual pieces in plastic wrap, then placing them in an airtight container or freezer bag. Freeze for up to 2 months; thaw at room temperature before serving.
Nutrition
Blueberry Buckle https://jessicainthekitchen.com/blueberry-buckle/ August 13, 2025
Toss out the seasoning packet and make this spicy Kimchi Ramen instead! It’s still ridiculously easy, but adding tofu, kimchi, and shiitakes makes it a satisfying, flavour-packed meal.

If you thought you left behind your ramen years when you graduated from college, it’s time to give it a second look. Ramen is EVERYWHERE lately because it allows you to start with an affordable ingredient and jazz it up into something that feels a little more adult than noodles + a seasoning packet. Like my Spicy Ramen and Peanut Butter Ramen , this kimchi ramen has you discard the seasoning and then add a TON of good stuff for more flavour and satisfaction. In addition to the kimchi, I add tofu and mushrooms too, which makes ramen into a more filling meal.
Why Kimchi Ramen Is My New Favourite Weekday Lunch
I’m always on the hunt for easy lunch options and this kimchi ramen has been on frequent rotation lately. Here’s why:
- Quick and easy . This kimchi ramen recipe is done in less than 30 minutes, with only a few more steps than if you made it following the package directions with the seasoning packet.
- Spicy and flavourful . Gochugaru adds heat, but it also has a subtle smokiness to it too, while the kimchi is tangy, spicy, umami, and a little bit sweet. It makes these noodles irresistible!
- A meal in a bowl . Between the noodles, kimchi, mushrooms, and tofu, this ramen recipe is a satisfying meal. You don’t need anything else to complete it!
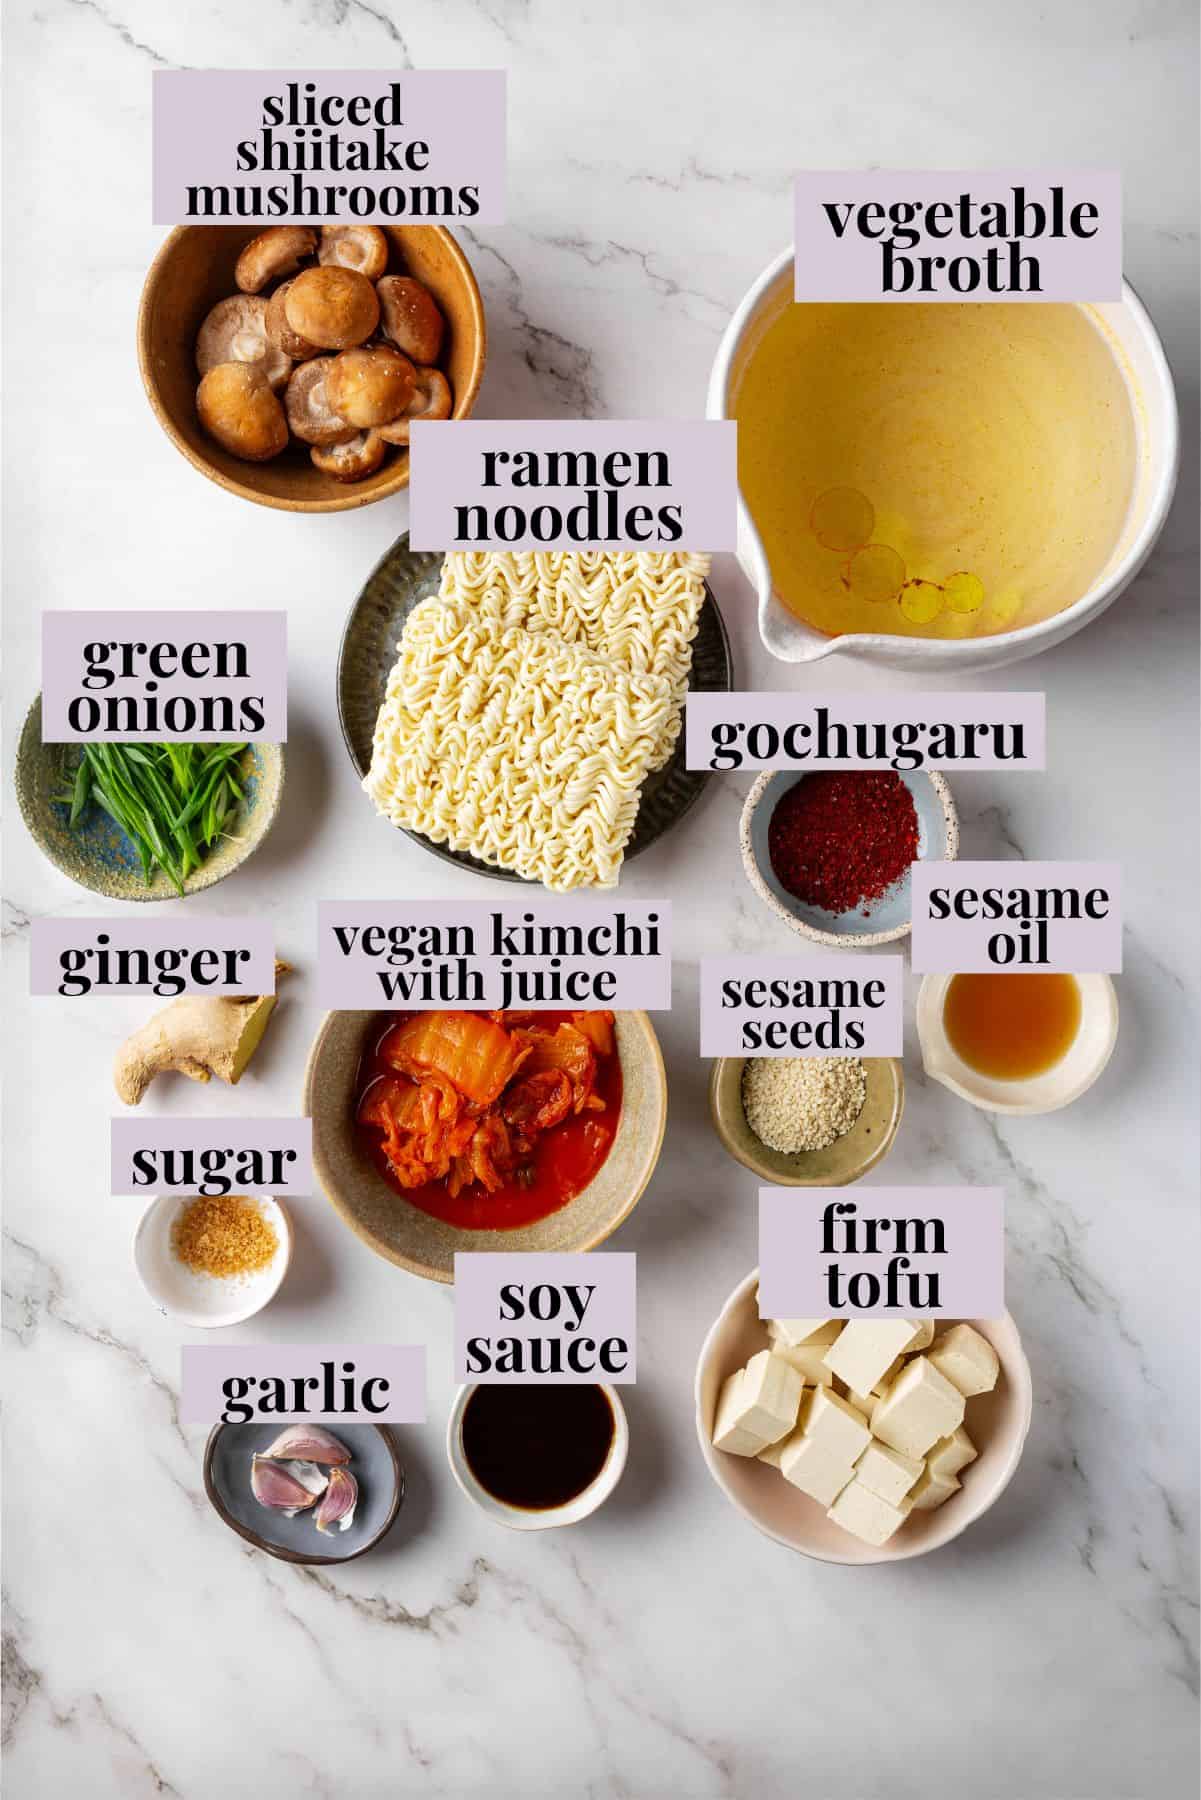
Notes on Ingredients
Here are some notes on the ingredients you’ll need to make kimchi ramen. Scroll down to the recipe card to find the ingredient quantities and recipe instructions.
- Sesame oil
- Garlic and ginger – Use fresh, not dried and ground, for the most dynamic flavour.
- Gochugaru – Feel free to adjust the amount to your tastes, but note that although it looks similar to cayenne, it’s not nearly as spicy!
- Soy sauce – Tamari or coconut aminos also work in this recipe.
- Vegan kimchi – Kimchi is commonly made with fish sauce and shrimp, so be sure to read the label.
- Sugar
- Shiitake mushrooms – Discard the stems, which are too tough to eat.
- Vegetable broth – I like to use my Homemade Vegetable Broth .
- Ramen noodles – You’ll only use the noodles, not the seasoning packets. (If you don’t like to waste, you can save the seasonings for popcorn.)
- Firm tofu – This will need to be cooked. Here are some options: Fried Tofu or Crispy Air Fryer Tofu .
- Green onions
- Sesame seeds – Optional, for serving.
What Is Gochugaru?
Gochugaru is a Korean red chili powder made from dried ground red chili peppers. It’s a key ingredient in kimchi and gochujang, giving both their red colour and spicy flavour. You’ll find that gochugaru has a little more depth than cayenne, with some subtle sweetness, smokiness, and fruitiness. The heat level can vary between different brands, so I recommend adding a smaller amount to your ramen, then taste and add more as needed!
How to Make Kimchi Ramen
You’re just a few steps away from this tasty kimchi ramen! Here’s what you’ll need to do.

Cook the aromatics.
- Sauté the aromatics . Warm the sesame oil in a pot over medium heat, then add the garlic and ginger and sauté until fragrant. Stir in the gochugaru and soy sauce; cook for 30 seconds more.
- Simmer . Stir in the chopped kimchi, sugar, shiitakes, and broth. Bring to a simmer and cook for 6 to 8 minutes, or until the mushrooms are tender.

Add the ramen.
- Add the noodles . Drop the noodles into the broth and cook until they’re tender, for the time indicated on the package.
- Add tofu and serve . Stir in the tofu, then divide everything into bowls and garnish with green onions and sesame seeds.
Variation Ideas
While this is the way I’ve been making kimchi ramen, it’s definitely not the only way! Here are a few more ideas for inspiration.
- Swap out the tofu . You can skip it altogether, or try something different like Vegan Chicken , tempeh, or even chickpeas.
- Try different mushrooms . Maitake mushrooms would be delicious, or add delicate enoki mushrooms just before serving.
- Veg it up . Stir in spinach, toss in some cabbage or bean sprouts, or use some of your zucchini harvest. You can totally get creative, friends!

Serving Suggestions
This is a meal on its own, but if you want to get some extra servings out of it (since it only serves 2), you can pair it with something else. My Vegan Potstickers , Vegan Dumplings With Dipping Sauce , or Fresh Summer Rolls would be great starters, or serve my Quinoa Salad with Sesame Ginger Dressing on the side.
How to Store and Reheat Leftovers
- Refrigerator : Transfer leftovers to an airtight container and refrigerate for up to 3 days.
- Freezer : You can also freeze leftover kimchi ramen in an airtight container or freezer bag for up to 3 months. Thaw in the refrigerator before reheating.
- To reheat : Warm up your ramen in a pan over medium heat or in the microwave.

More Asian-Inspired Soup Recipes
- Thai Coconut Curry Soup
- Easy Roasted Carrot Ginger Soup
- Vegan Coconut Curry Lentil Soup
Ingredients
- 1 tablespoon sesame oil , 15 mL
- 3 cloves garlic , minced – 9 g
- 1 teaspoon freshly grated ginger , 2 g
- 1 to 2 teaspoons gochugaru , adjust to taste – 2 to 4 g
- 2 tablespoons soy sauce , 30 mL
- ½ cup chopped vegan kimchi with juice , 120 g
- ¼ teaspoon sugar
- 1 cup sliced shiitake mushrooms , 90 g
- 3 cups vegetable broth , 720 mL
- 5 ounces ramen noodles , about 2 blocks, discard seasoning – 140 g
- ½ block firm tofu , cubed and pan-fried or air-fried until golden – 200 g
- 2 green onions , sliced – 20 g
- Sesame seeds , optional for serving
Instructions
- Heat sesame oil in a medium pot over medium heat. Add garlic and ginger. Sauté for 1 minute until fragrant.
- Stir in gochugaru and soy sauce. Let it bloom in the hot oil for about 30 seconds to release its flavor.
- Add chopped kimchi (with juice), sugar, sliced shiitake mushrooms, and vegetable broth. Bring to a simmer and cook for 6 to 8 minutes, until mushrooms are tender.
- Add ramen noodles to the broth and cook according to package instructions (usually 3 to 4 minutes), until tender.
- Stir in the tofu and let everything warm through. Divide into bowls, top with sliced green onions and sesame seeds, and serve hot.
Notes
- Refrigerator : Transfer leftovers to an airtight container and refrigerate for up to 3 days.
- Freezer : You can also freeze leftover kimchi ramen in an airtight container or freezer bag for up to 3 months. Thaw in the refrigerator before reheating.
- To reheat : Warm up your ramen in a pan over medium heat or in the microwave.
