What are chia seeds?
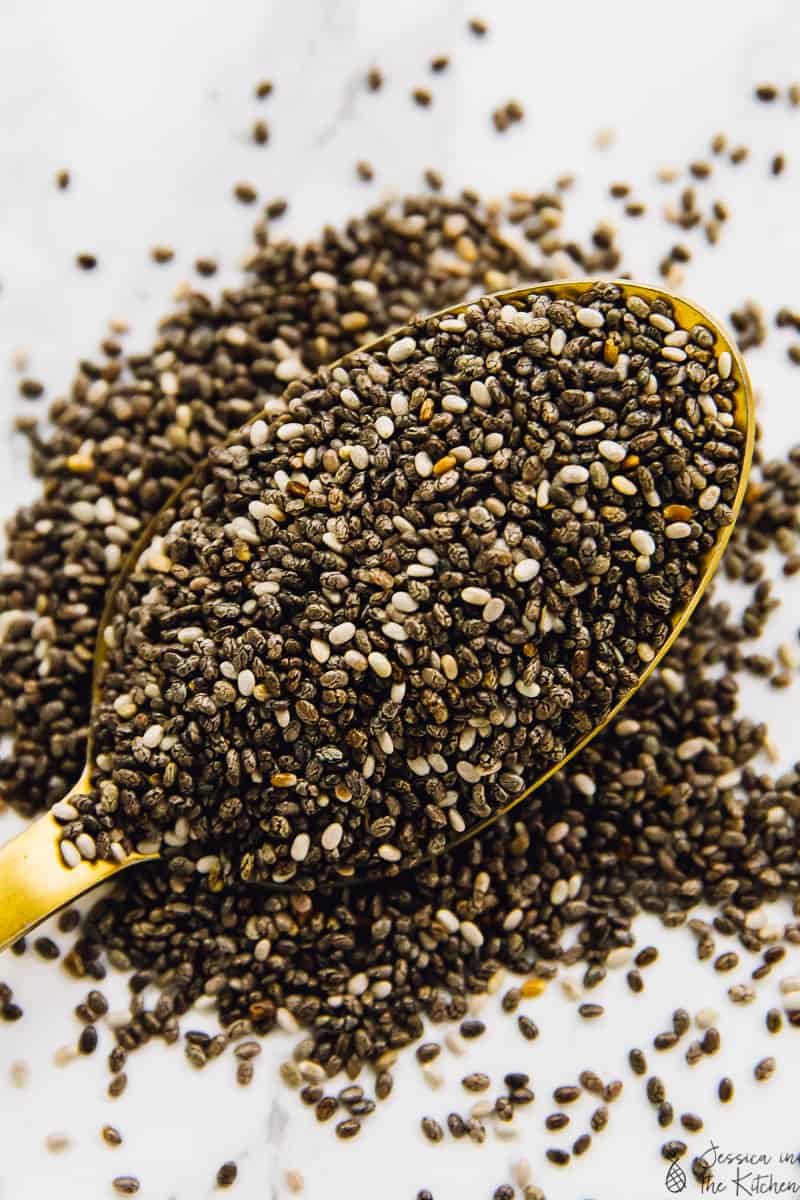
Chia seeds are a tiny seed that mean “strength” in Mayan, and I’m assuming it’s because the chia seed gives you lots of energy. They are tiny black seeds that get gelatinous when they absorb water, similar to flax seeds, and are loaded with fibre. You can use chia seeds in a multitude of ways – in your water to add fibre to your daily diet, as a great egg replacement too and really anywhere you want more protein and fibre. Due to their high fibre content, they help to keep you really full – which is why I like to sprinkle them over fruits or in overnight oats. They’re also high in omega 3’s so you can enjoy them daily! I’ve even added them to a jam to replace pectin (since they get so gel-like).
So, chia puddings are puddings made typically with chia seeds, a liquid, a sweetener and an optional topping or spice. They are thick, pudding like in texture, and very easy to make.
What is matcha green tea?
Benefits to this matcha chia pudding include:
- Leaves you nice and full thanks to the high fibre, high fat and calories of chia seeds.
- Gives you slow energy thanks to matcha
- Gives you all the benefits of matcha: high in antioxidants!
- Is AMAZING for meal prep! I tested and kept one in my fridge for four days and it tasted identical to the one I had made the night before. Stays fresh and delicious!
Meal prepping matcha chia pudding
Here’s how I meal prep chia puddings. I usually line up like 5 (or however amount I’m meal prepping) jars. I love using Weck Jars and mason jars for this, plus they look so neat lined up in your fridge. Then I will make the below recipe “5 times”, or make it 5x in a large bowl, then divide it up. It’s honestly up to you. I find the first way easier so I don’t have a bowl to clean up, and if you’re tracking macros or calories then you know you have an even amount in each. See all the nutritional information below in the recipe!
Ingredients
- 3 tablespoons chia seeds
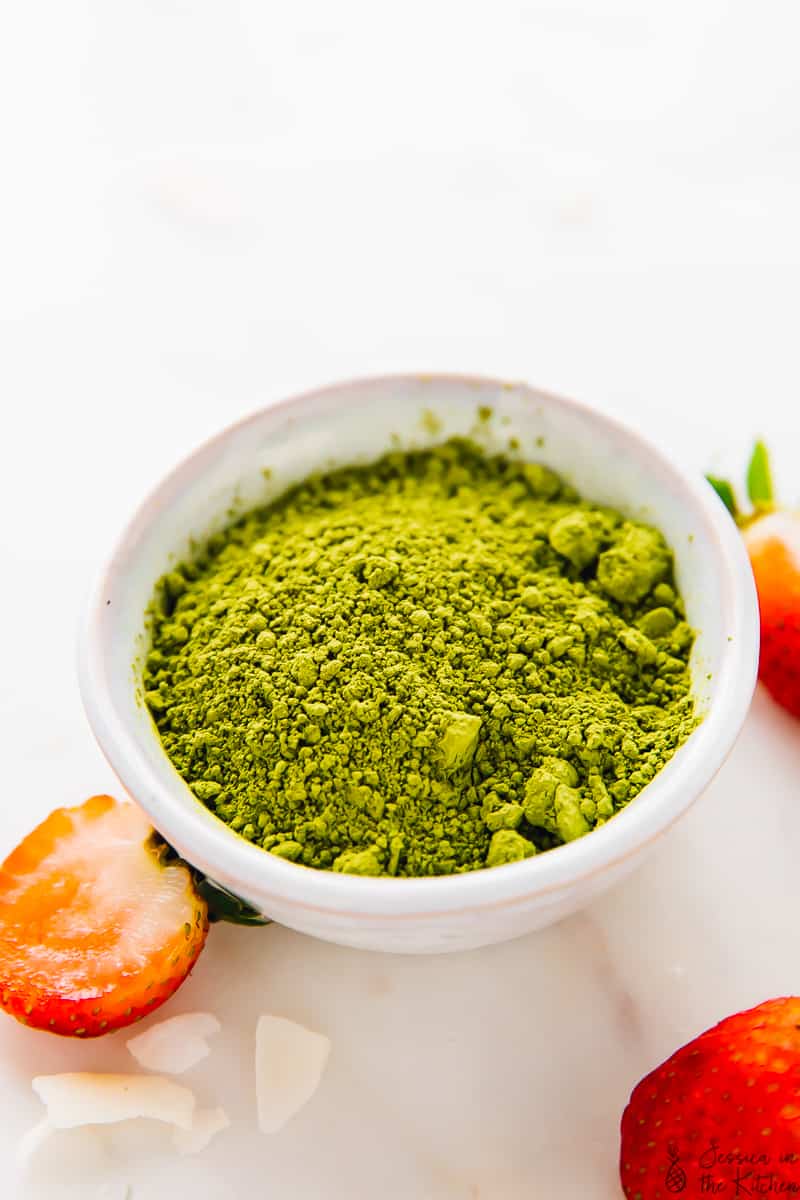
- 1 teaspoon matcha green tea powder
- 1 cup unsweetened almond milk
- 1/2 tablespoon to 1 tablespoon maple syrup*
- 1/4 teaspoon sea salt
Instructions
- In a bowl or in an individual jar, mix all of the ingredients together with a whisk. Stir until completely combined. Let it sit for 5 minutes, then stir again for about a minute. This ensures everything is thoroughly mixed and nothing clumps together in spots. Taste test and adjust based on whether you want more sweetener or spices.
- Set in the fridge covered for 4 hours or overnight.
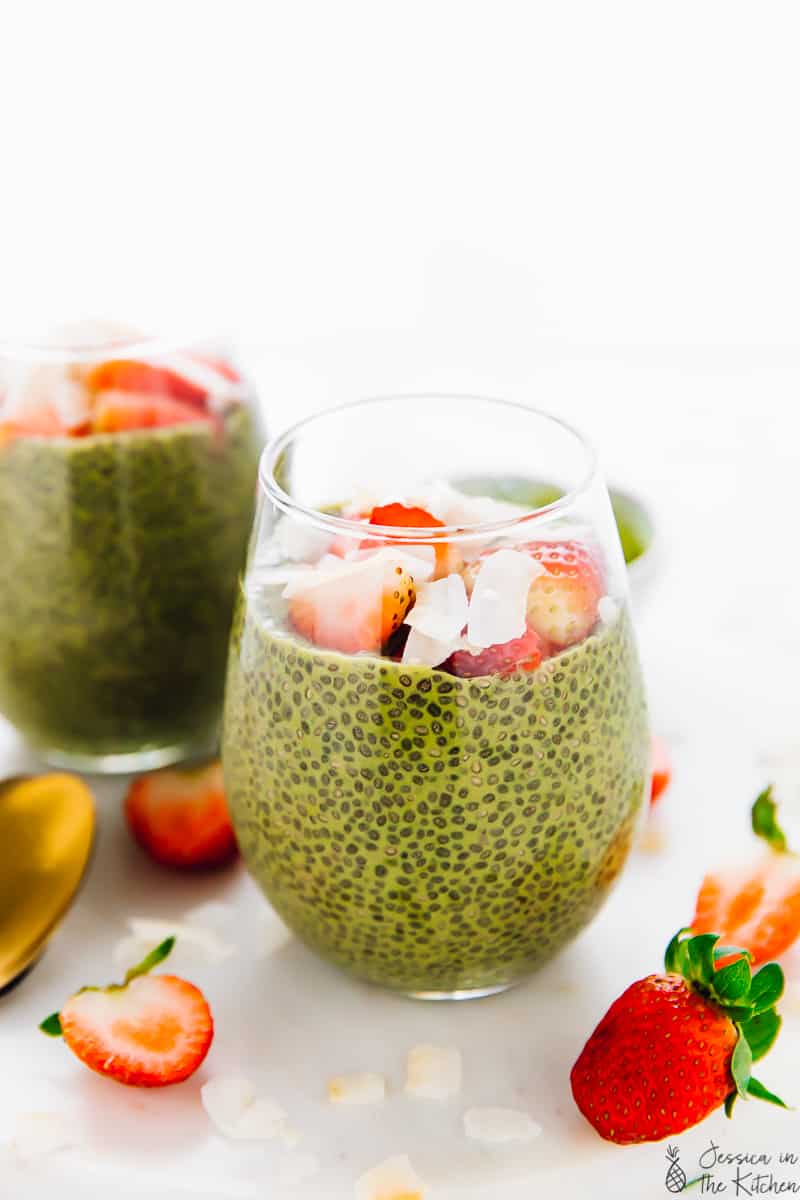
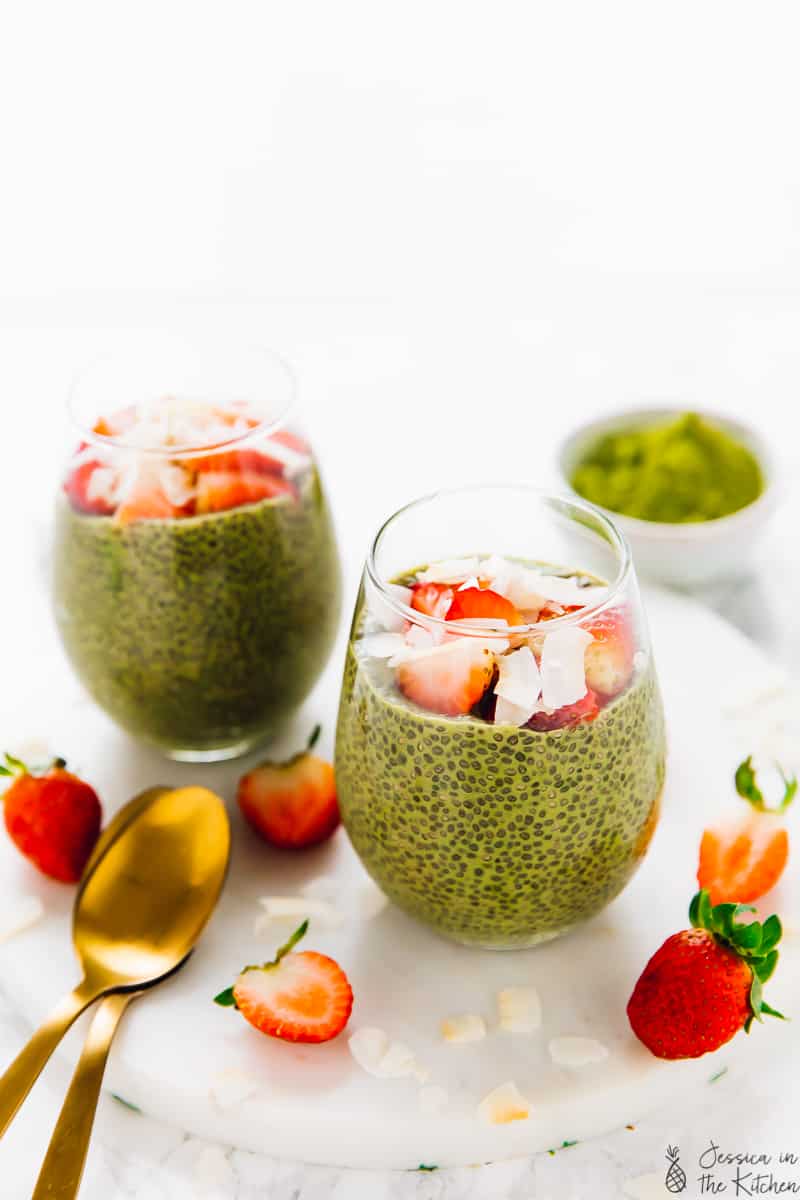
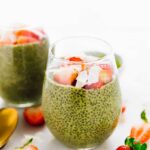
- Remove from fridge and top with your favourite toppings – here I like sliced strawberries and coconut flakes.
- Serve and enjoy!
Notes
Matcha Chia Pudding (Green Tea)
Ingredients
- 3 tablespoons chia seeds
- 1 teaspoon matcha green tea powder
- 1 cup unsweetened almond milk
- 1/2 tablespoon to 1 tablespoon maple syrup*
- 1/4 teaspoon sea salt
Instructions
- In a bowl or in an individual jar, mix all of the ingredients together with a whisk. Stir until completely combined. Let it sit for 5 minutes, then stir again for about a minute. This ensures everything is thoroughly mixed and nothing clumps together in spots. Taste test and adjust based on whether you want more sweetener or spices.
- Set in the fridge covered for 4 hours or overnight.
- Remove from fridge and top with your favourite toppings - here I like sliced strawberries and coconut flakes.
- Serve and enjoy!
Video
Notes
Nutrition
Matcha Chia Pudding (Green Tea) https://jessicainthekitchen.com/matcha-chia-pudding-green-tea/ June 10, 2019
Here’s How to Make Stovetop Popcorn (Cheesy Vegan Popcorn)! It’s incredibly easy to make and makes the best comfort food snack!
I’m not even sure when it happened, but at some point in the last two years I became the ultimate popcorn lover. I’m talking, popcorn became my go to snack, my go to comfort food, my go to “it’s late and I don’t want to eat too much so let’s make popcorn”. Sometimes I even have popcorn for dinner friends. So why, oh why, have I not shared how to make stovetop popcorn with you?
Somehow I categorised this under “ oh well everyone probably makes stovetop popcorn at home “. No Jess. After expressing this you guys said you most definitely would like a quick and easy tutorial since stovetop popcorn can seem kind of overwhelming and complicated. I’m happy to say that it’s the opposite. I can practically do it in my sleep at this point in time.
How to Make Stovetop Popcorn
Let’s get right into it. Whether you’re someone who only eats popcorn at the movies or hasn’t found a popcorn you love, this recipe is for you. Why? Because it’s 100% customisable.
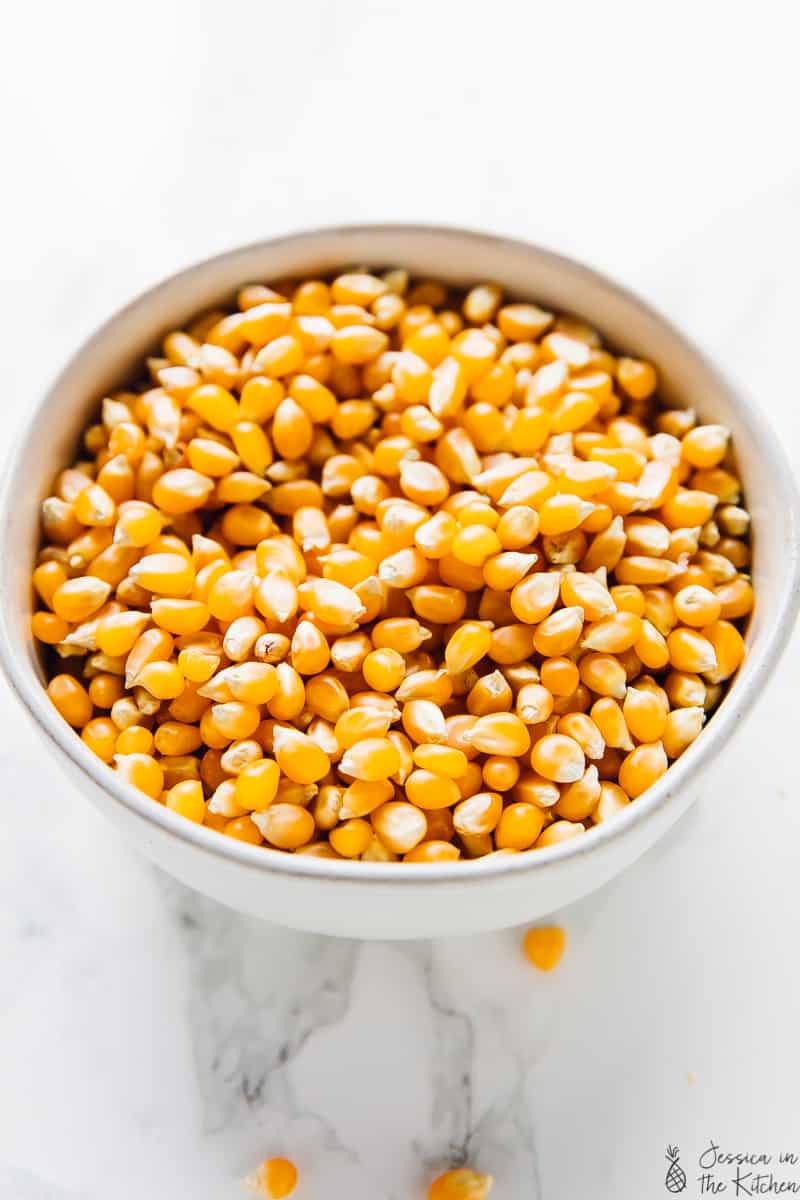
You start making stovetop popcorn by getting some fresh, high quality corn kernels. I love to get mine from a bulk bin or one of my favourite brands are Arrowhead Mills . I always get organic corn kernels. After that, I chose an oil.
Now, since I tried it once I always used Thrive Algae Oil for my popcorn. It’s smoke point is high and it never burns for me which I love. I have also use coconut oil and olive oil and I would definitely recommend coconut oil over olive oil since olive oil burns so easy with this. Just know that if you use unrefined coconut oil it does add a slight coconut flavour.
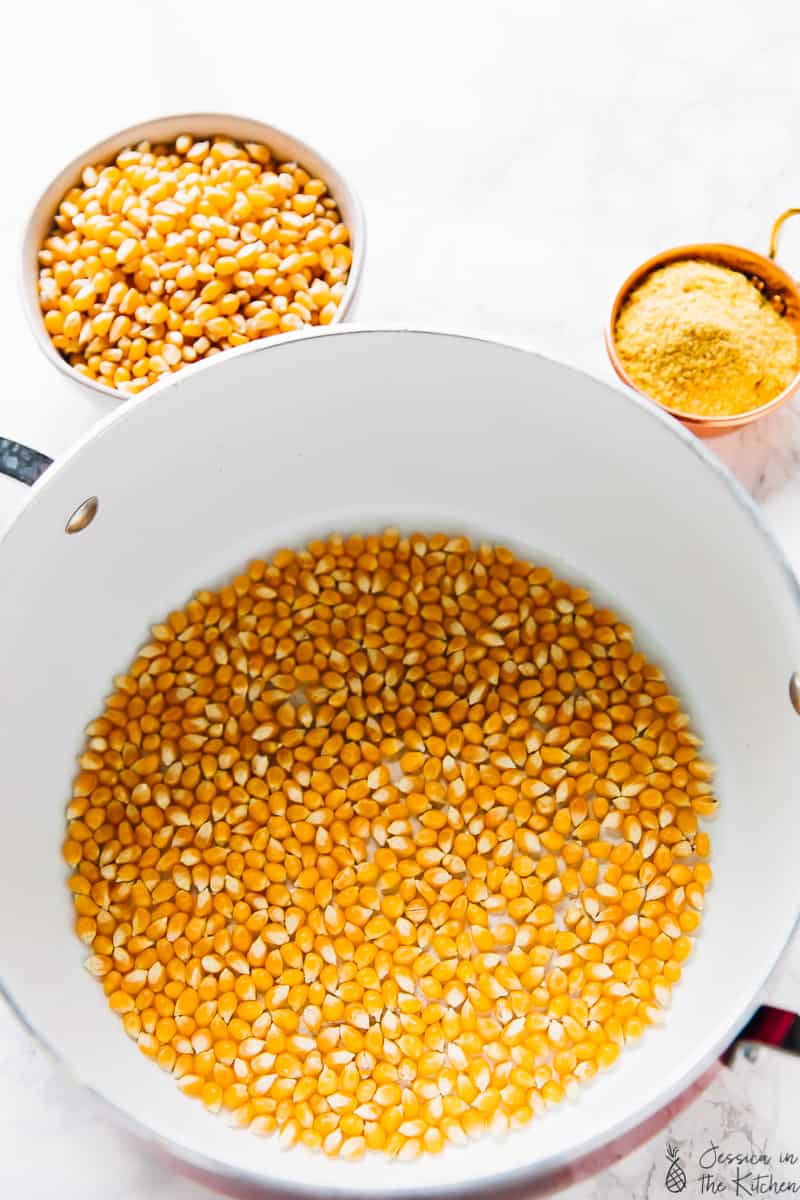
Now, we get to popping! Grab a large and high pot or a wide pot and put it on the stove. I’ll go through these details thoroughly below in the instructions but long story short, we pour our oil in and add three kernels and a lid. I can’t remember where I learned this three kernel rule (maybe even on the back of my popcorn bag) but this method means you get the oil nice and hot, until the first three kernels are fully cooked. This way, when you add the rest of your popcorn, the oil is hot, ready and everything will cook evenly.
When you hear those three glorious pops, open your lid and add in rest of your popcorn. Cover and lower the heat just a notch. I like to swirl to ensure all of the corn kernels are covered in the hot oil. Then I shake the pot for a good 30 second to minute straight. The kernels should begin popping and a lot all at once. I shake the pot about every 10 seconds until all of the kernels finish popping.
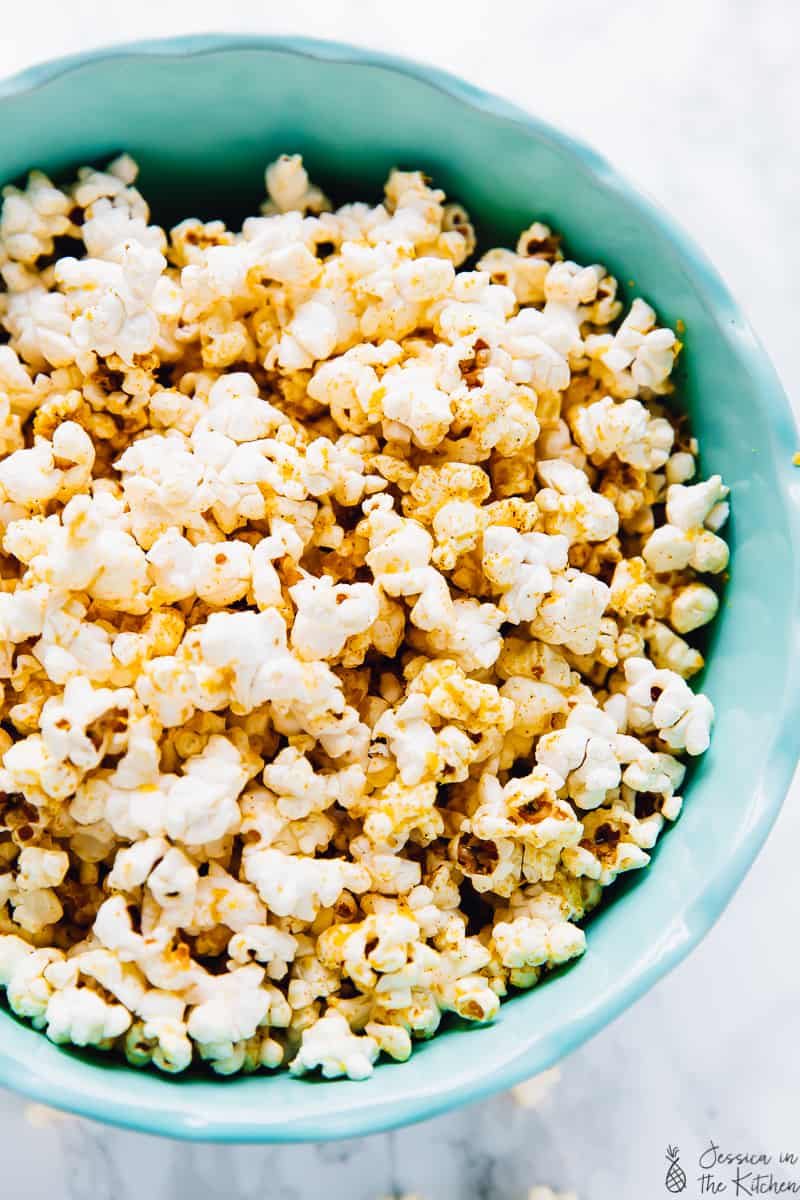
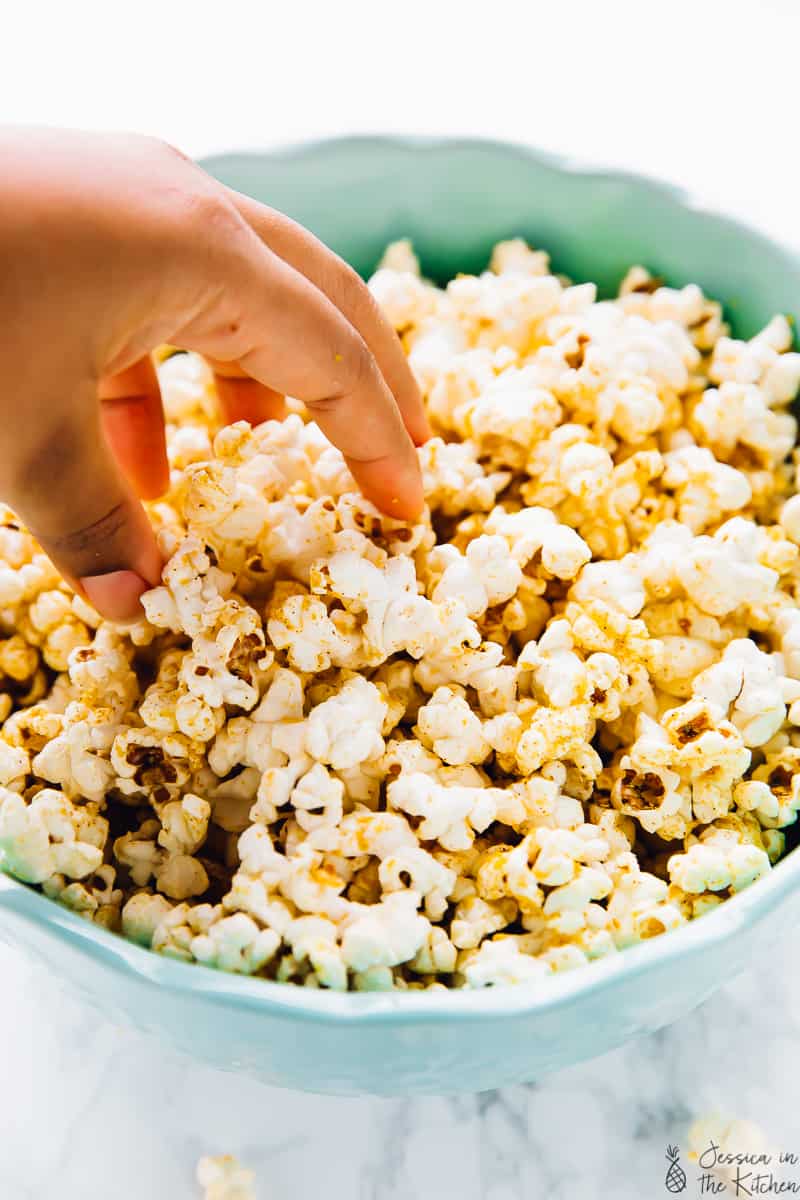
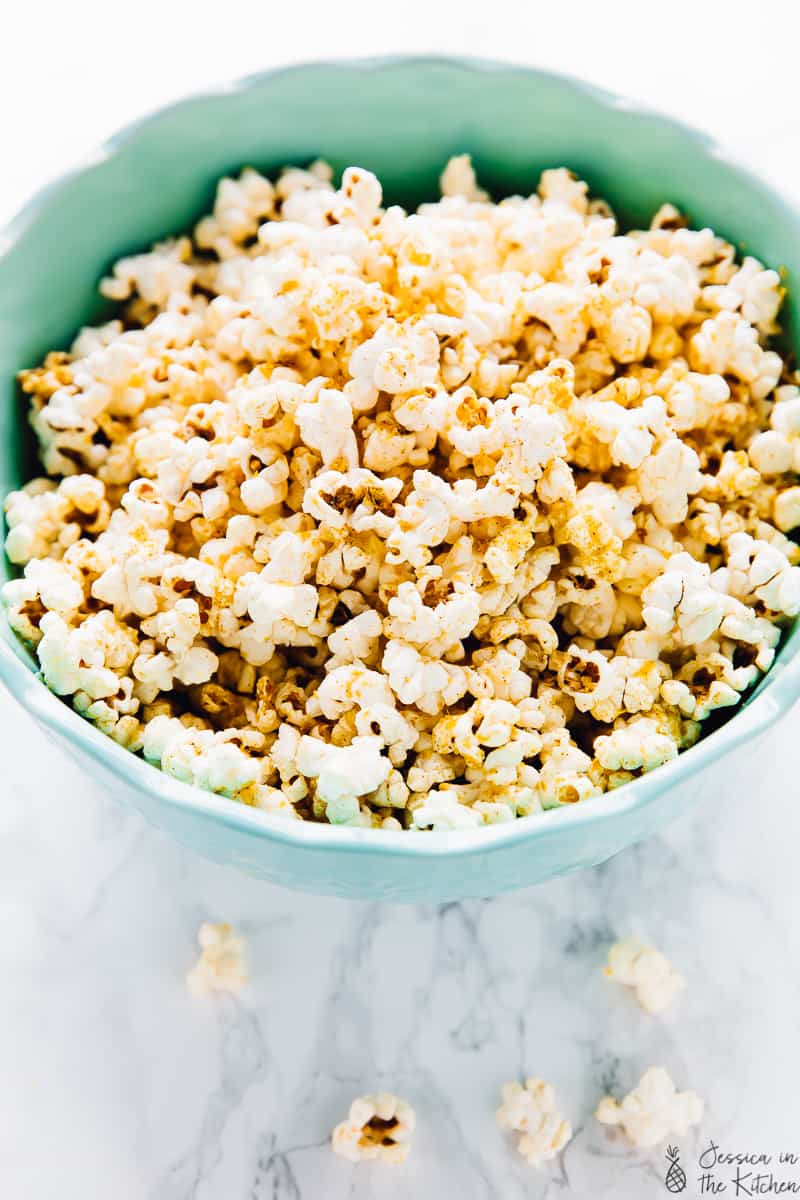
Now, I pour the butter over and I love that crackling sound (this helps the seasonings to stick), I toss it, then I add all the seasonings and toss again until fully combined! Then I serve and enjoy!
Now, the seasonings are what make this a cheesy popcorn. Nutritional yeast gives this popcorn the perfect cheesy taste. I use to make mine with only nutritional yeast (nooch) and salt but then I wanted more of a kick. I found that garlic, paprika and some heat REALLY took it over the top for me. This popcorn really feeds my soul.
Benefits of popcorn
Before we get it twisted, popcorn itself it not bad for you. A great whole grain, and is a great source of fibre. Of course movie theatre popcorn is usually slathered in all sorts of butter, coincidentally vegan or not. That’s not to say you can’t enjoy it when you go to the movies, but know that yes you can enjoy popcorn at home too! If you wanted to make this lower in calories, you could get a popcorn popper which would use air!
Stovetop popcorn vs homemade microwave popcorn
So I’ve tried both of these methods, and I prefer stovetop popcorn. It’s way easier to control, flavour and not burn!
How to keep stovetop popcorn fresh
How have I written over 700 words on popcorn? Anyway. Yes you can make a lot of this and store it in a reusable zipped bag to keep it fresh. I do it all the time. Except it usually doesn’t last cause I eat it, which is a difference issue, so you know.
I hope you enjoy this Cheesy Vegan Popcorn so much friends! Let me know how you love your popcorn!
Ingredients
- 1/2 cup popcorn
- 3 tablespoons oil*
- ¼ cup nutritional yeast
- ¼ teaspoon sea salt*
- 2 teaspoons paprika
- 1 teaspoon garlic powder
- ⅛ to ¼ teaspoon cayenne or scotch bonnet powder
- 2 tablespoons vegan butter
Instructions
- In a small bowl mix the nutritional yeast, paprika, garlic, sea salt and cayenne/scotch bonnet powder. Set aside. Melt the vegan butter in a separate bowl and set aside until you need it too.
- Heat the oil in a thick-bottomed pan over medium high heat. Make sure there’s enough space for the popcorn since it will increase in size dramatically and very quickly.
- Add in three corn kernels, swirl to coat and cover the pot with a lid. This method means you get the oil nice and hot, until the first three kernels are fully cooked. This way, when you add the rest of your popcorn, the oil is hot, ready and everything will cook evenly.
- When the kernels pop, add the rest of the popcorn in an even layer on the bottom of the pan (see photo above). Remove the pan from heat and shimmy/shake the pot for 60 seconds off the heat. Add the pot back to the heat afterwards.
- Give it about a minute. The popcorn should begin popping a lot and all at once. Every 15 seconds or so I just shake the pot back and forth a bit. Slide the cover slightly ajar so release some of the steam on the inside (to ensure crispier and drier popcorn).
- Once the popping begins to slow down, remove from heat and remove the lid. Pour the butter over while it is still hot and toss or use a spatula to coat over the popcorn entirely. Pour the seasonings over and coat again until the seasonings completely coat the popcorn. Serve and enjoy!
