This vegan version of Korean strawberry milk is made with just 4 ingredients and it’s full of fresh berry flavour. A cafe-style treat you can easily make at home!

Nope, this is not the strawberry milk made with artificially flavored powder or syrup! Korean strawberry milk is made with real strawberries and it’s an absolute treat . A staple in Korean cafes, strawberry milk has become a popular drink all around the world because it’s refreshing, delicious, and oh-so-easy to whip up.
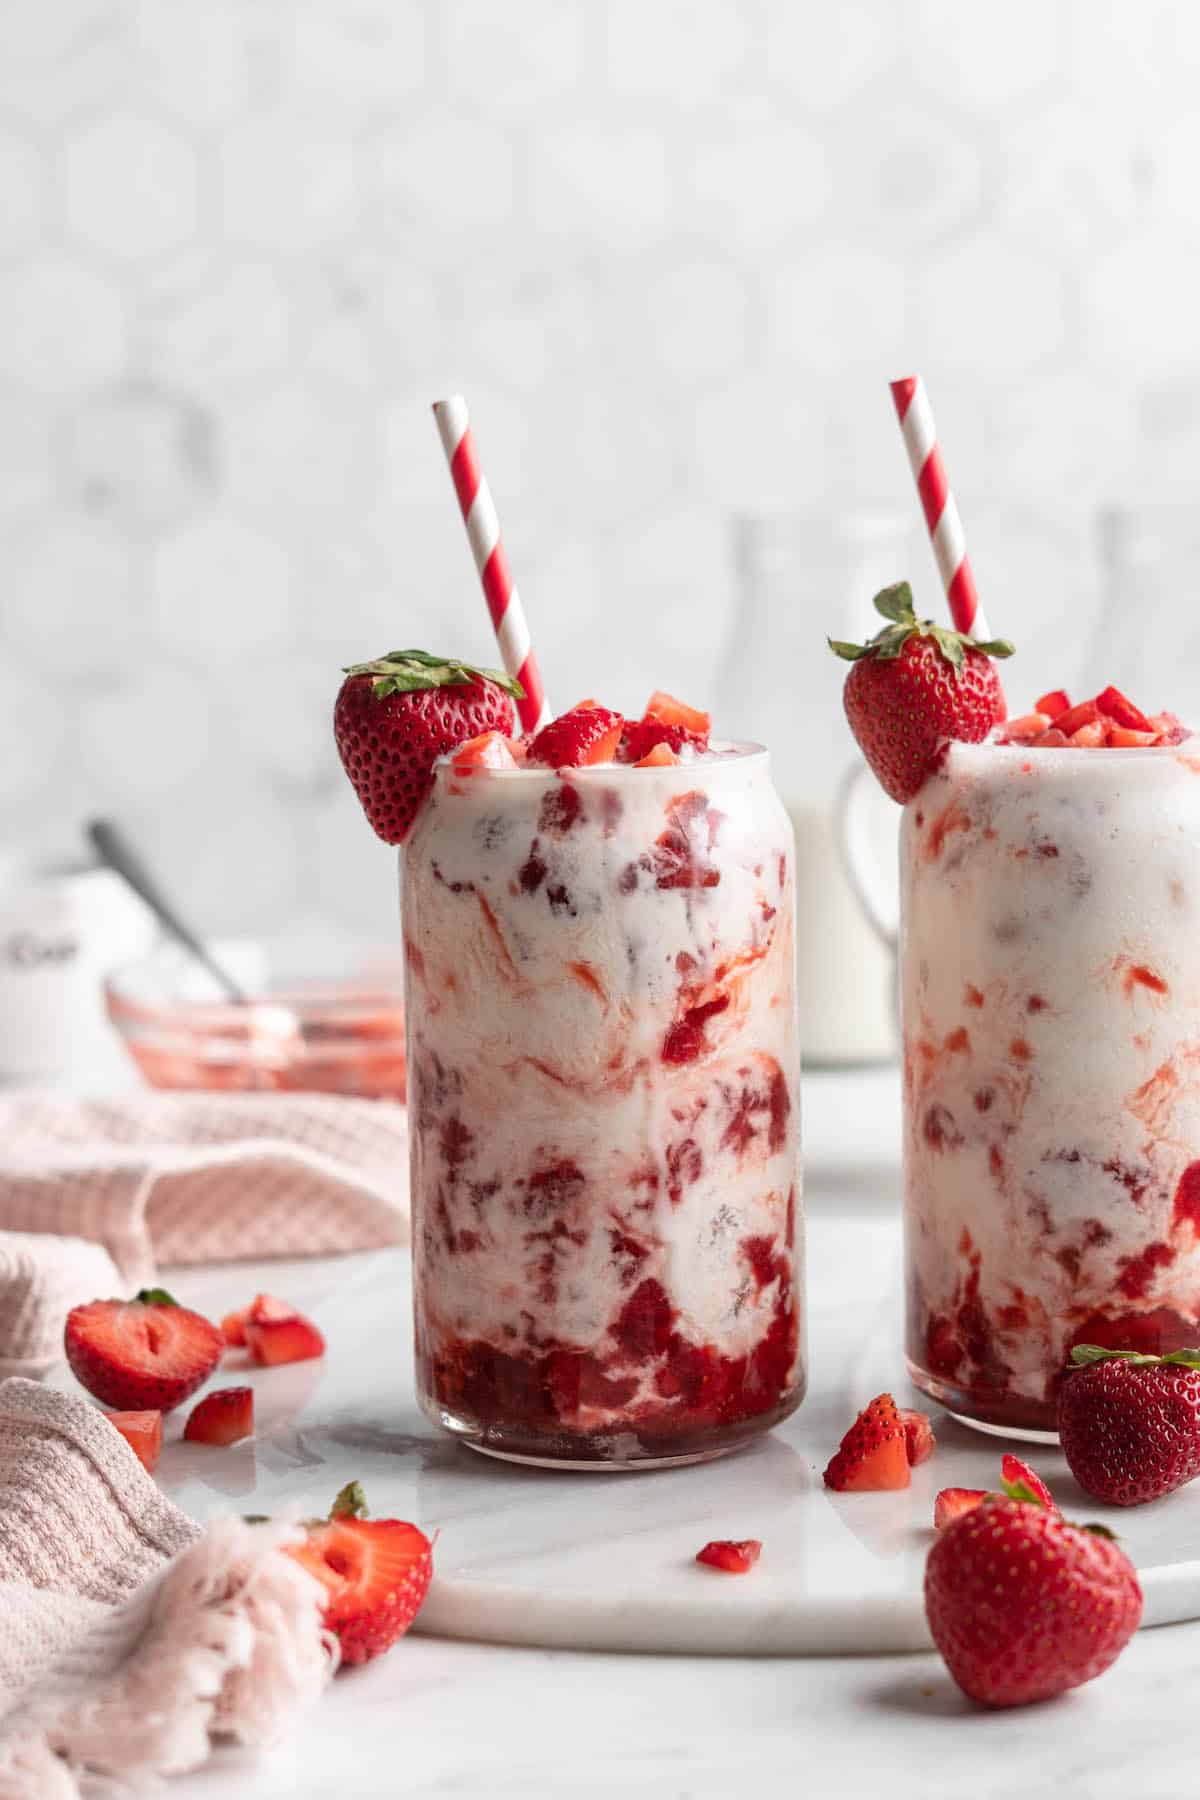
Plus, look how gorgeous it is! Those fresh, ruby red strawberries are just glorious. I love to make this milk as a sweet breakfast, a quick sugary snack during the day, or even as a light dessert! Basically, you can make it any time of day and it’s perfect. So let’s get to it!
If you’re all about drinks that are made with fresh strawberries, check out this Strawberry Banana Smoothie !
Why You’ll Love This Strawberry Milk
Not quite convinced yet? Here are some more reasons to love this strawberry milk recipe!
- Super sweet. It’s hard to beat ripe strawberries and brown sugar – they’re the perfect pairing!
- Quick and easy. This strawberry milk is made with 4 ingredients in 15 minutes! It comes together in a flash.
- Perfect for any occasion. You can make this vegan milk for a sweet treat, as a Valentine’s Day snack, or for a party! It’s up to you.
What Is Korean Strawberry Milk?
Aside from the fact that it’s made with fresh strawberries, Korean strawberry milk is different from the kind you probably grew up drinking because it has bits of macerated strawberry in the milk, rather than being completely smooth. You’ll need a big boba-style straw to get all that deliciousness out of the bottom of the glass—or simply use a spoon!
The basic recipe is sugar, strawberries, and milk, but I like to add a squeeze of lemon juice when I’m making my vegan Korean strawberry milk because a little bit of acid helps balance all the sweetness.
(If you love fresh strawberries, be sure to try my Strawberry Coconut Overnight Oats , Strawberry Banana Bread , and Gluten-Free Vegan Strawberry Pancakes too!)

Notes on Ingredients
Please note that this is important information on the ingredients and instructions and the FULL recipe with amounts and details can be found DOWN BELOW (scroll to it) in the recipe card.
- Strawberries – Use fresh strawberries when they’re in season, and frozen strawberries when they’re not. Both work!
- Sugar – You can use either cane sugar or brown sugar for this recipe. If you decide to use brown sugar, I recommend light brown rather than dark.
- Lemon juice – For a bit of tangy flavor that balances out all the sweetness.
- Unsweetened non-dairy milk – Any kind you like or have on hand. Homemade cashew milk is especially delicious for Korean strawberry milk, but almond milk, soy milk, and oat milk all work too.
How Do You Prepare and Cut Strawberries?
Instead of lopping off the tops of the strawberries and then dicing them, I suggest hulling them, which ensures that you don’t waste any tasty fruit! To do this, pull off the stem and leaves, then insert a pairing knife into the top of the strawberry at a 45º angle and rotate it to remove the hull.
How to Make Vegan Korean Strawberry Milk
Feel free to prepare the syrup and macerated strawberries a day ahead of time so that your ingredients are all ready to go! Here’s what you’ll need to do.
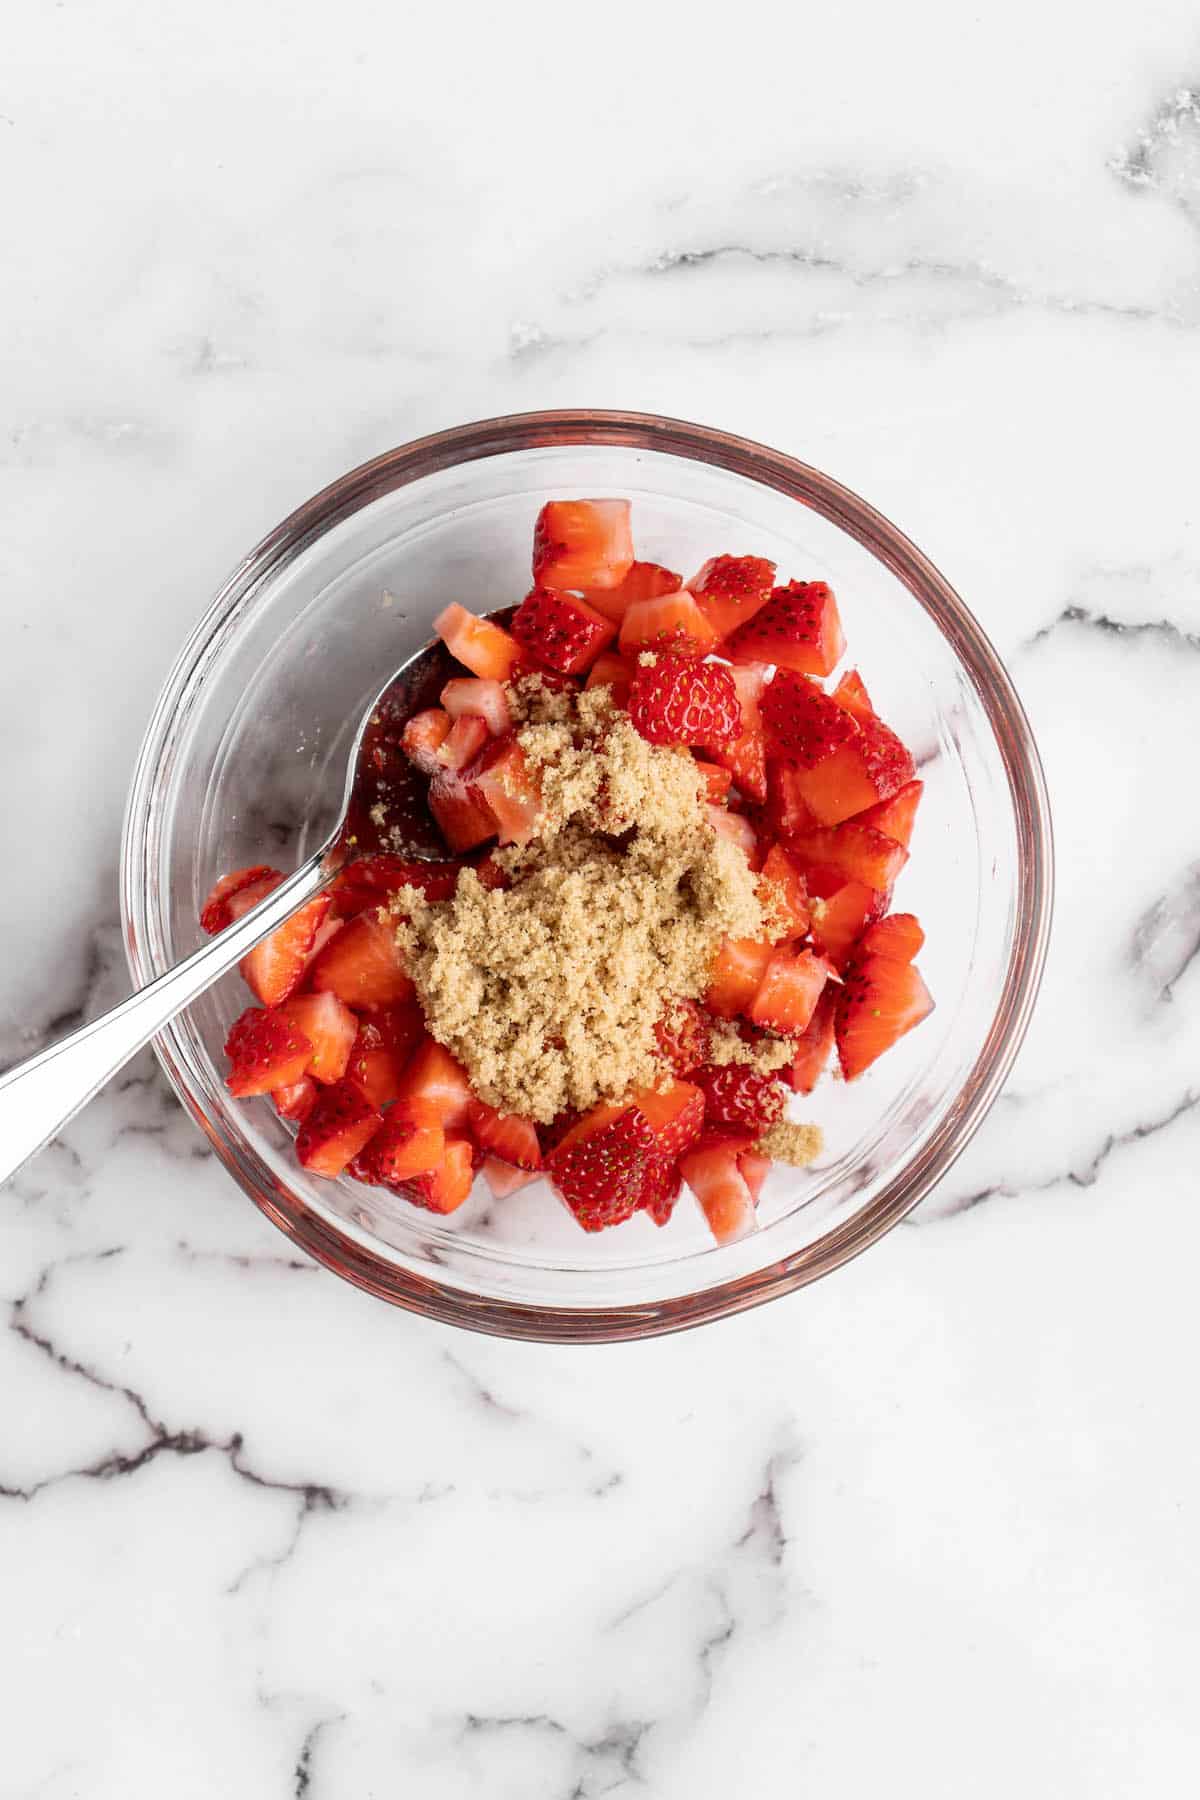
- Macerate the strawberries. Place the diced strawberries in a bowl. Add a tablespoon of sugar and stir. Set this aside to macerate.
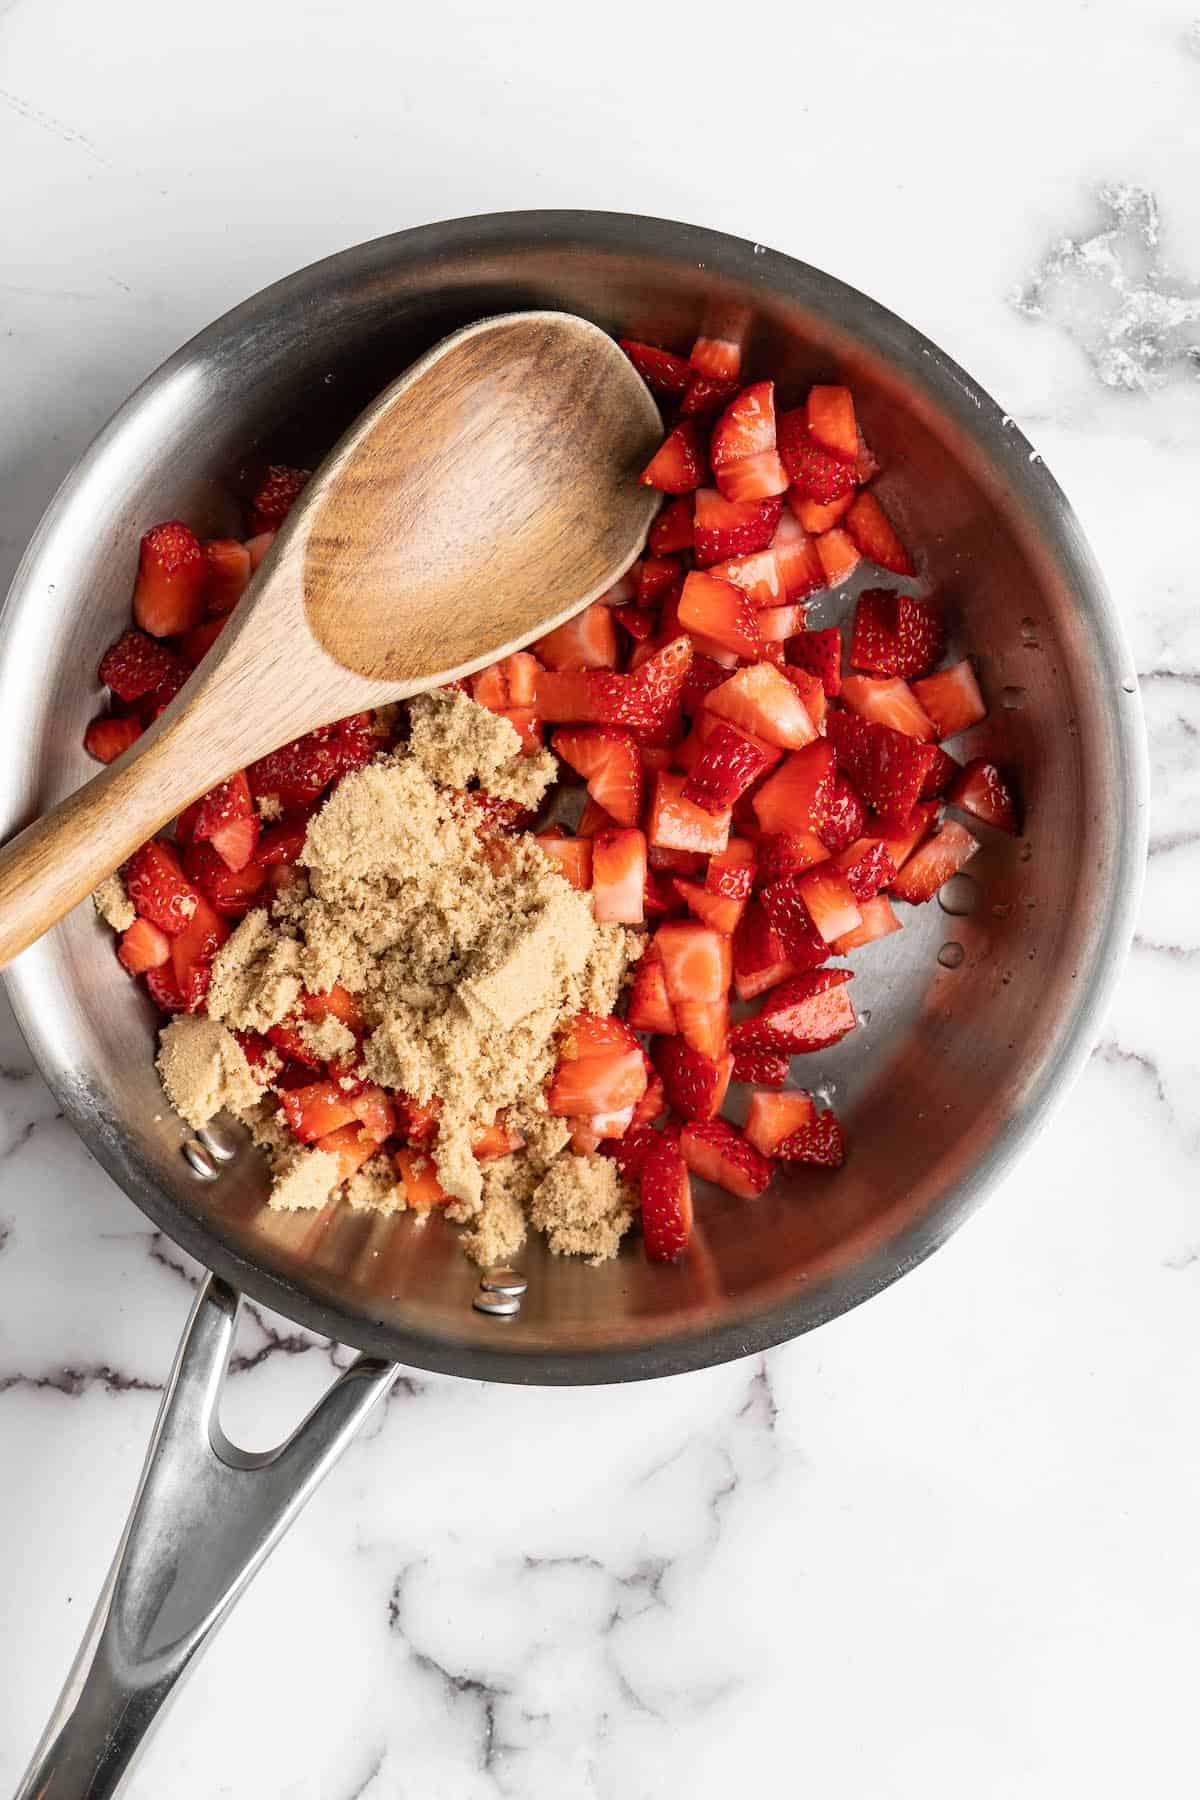
- Make the syrup. Add the remaining strawberries to a saucepan, along with the rest of the sugar and a squeeze of lemon juice. Bring the mixture to a boil, then reduce to just above a simmer and cook for about 10 minutes, stirring frequently, or until the berries are broken down and syrupy. Chill the syrup in the refrigerator.
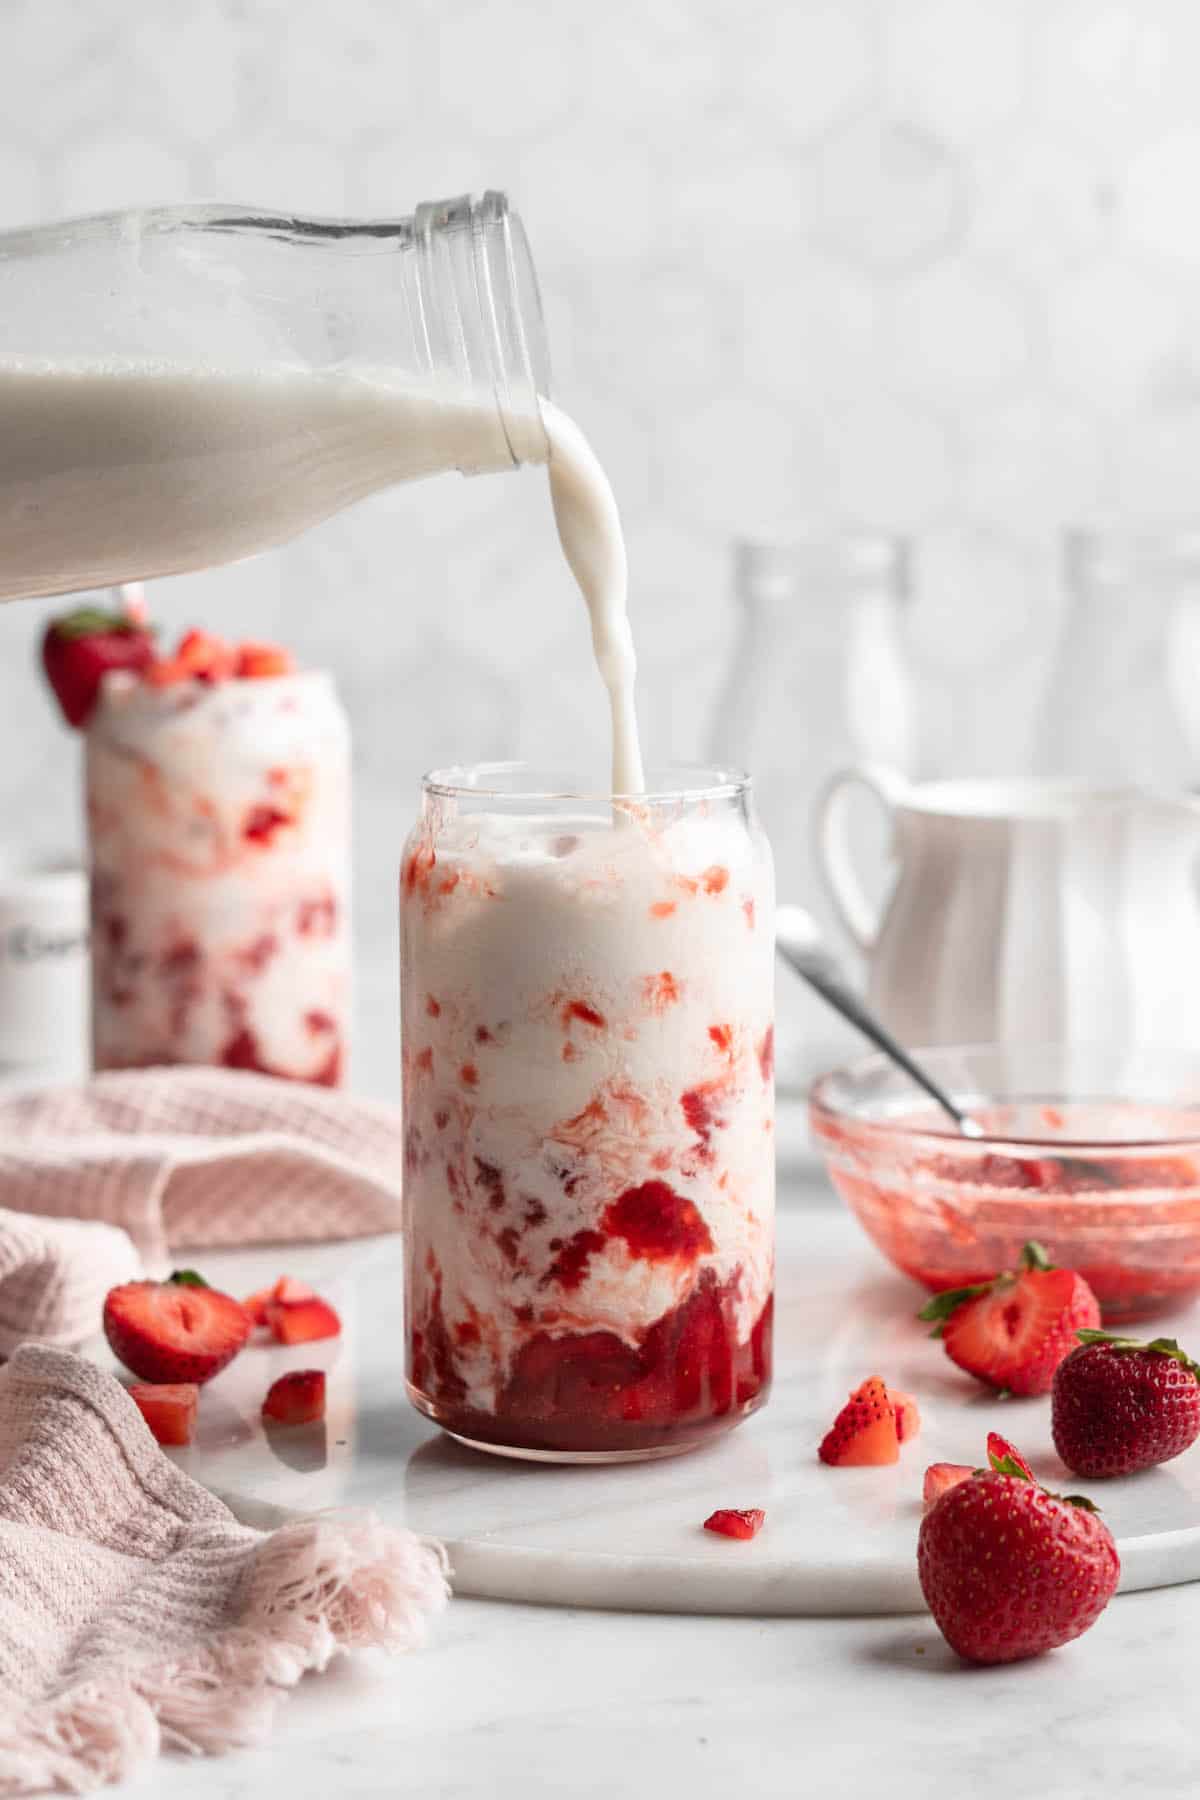
- Assemble. For each glass of strawberry milk, use 2 to 3 tablespoons of syrup, 3/4 cup of milk, a small handful of ice cubes, and a tablespoon of macerated strawberries. Stir to combine.
Tips for Success
Here are some hints and tips for perfect Korean strawberry milk.
- Using frozen strawberries. If you’re using frozen strawberries, you’ll need to thaw them first. If you’re in a rush, you can place them in a colander and run hot water over them to defrost them quickly.
- Chill the syrup before you use it. The refrigerator time isn’t just for making the syrup cold! The flavors will develop as the syrup cools.
- Adjust the ingredient amounts as needed. You can use more or less syrup or strawberries; the recipe above is really just a template, so feel free to switch things up with different proportions.
Substitutions & Recipe Variations
I love the simplicity of this Korean strawberry milk recipe, but here are some ways to fancy it up if you’d like.
- Add vanilla. Use vanilla plant-based milk instead of unsweetened, or add a splash of vanilla extract to the syrup.
- Top with whipped cream. Add a dollop of coconut whipped cream to the top for a more decadent treat.
- Make a strawberry matcha latte. Swap the milk for matcha latte for a boost of caffeine.
How to Store Leftovers
The strawberry milk itself will last in the fridge for 2 to 3 days once you’ve mixed it up. The strawberry syrup will last for about 4 days, while the macerated strawberries should be used within 2 to 3 days.
Can I Freeze This Recipe?
You can freeze both the syrup and the strawberries if you want to take advantage of fresh, local strawberry season and keep Korean strawberry milk ingredients on hand for future use. Store them in freezer bags for up to 3 months and thaw them in the refrigerator before using them.

More Easy Drink Recipes
Looking for more easy vegan drink ideas that you can make in your own kitchen? Try these ones!
- How to Make Banana Milk
- How to Make Almond Milk
- Best Green Smoothie
Ingredients
- 1 pound strawberries , finely diced (2 ¾ cups) – Divided into 2 cups and ¾ cup
- ¼ cup cane/brown sugar
- Squeeze of lemon juice
- 2-3 cups unsweetened non dairy milk
Instructions
- With the ¾ cup of diced strawberries – add 1 tbsp sugar to it and stir to macerate (draw out the juices basically). Let it sit aside.
- With the 2 cups of diced strawberries – add to a pan with 3 tbsp sugar large squeeze of lemon juice or lime. Bring to a boil then just above a simmer for 10 minutes (stir frequently) until broken down and syrup-y
- Set the syrup in the fridge to cool until cold.
- In a glass, add like 2-3 tbsp of syrup, ¾ cup of your milk (I used unsweetened soy), ice, then top with like 1 tbsp of the macerated strawberries. Stir to combine. Feel free to add more syrup or more strawberries. Enjoy! Store the rest of the syrup and macerated strawberries in the fridge.
Notes
- To store: The strawberry milk itself will last in the fridge for 2 to 3 days once you’ve mixed it up. The strawberry syrup will last for about 4 days, while the macerated strawberries should be used within 2 to 3 days.
- To freeze: You can freeze both the syrup and the strawberries if you want to take advantage of fresh, local strawberry season and keep Korean strawberry milk ingredients on hand for future use. Store them in freezer bags for up to 3 months and thaw them in the refrigerator before using them.

Korean Strawberry Milk
Ingredients
- 1 pound strawberries finely diced (2 ¾ cups) - Divided into 2 cups and ¾ cup
- ¼ cup cane/brown sugar
- Squeeze of lemon juice
- 2-3 cups unsweetened non dairy milk
Instructions
- With the ¾ cup of diced strawberries - add 1 tbsp sugar to it and stir to macerate (draw out the juices basically). Let it sit aside.
- With the 2 cups of diced strawberries - add to a pan with 3 tbsp sugar large squeeze of lemon juice or lime. Bring to a boil then just above a simmer for 10 minutes (stir frequently) until broken down and syrup-y
- Set the syrup in the fridge to cool until cold.
- In a glass, add like 2-3 tbsp of syrup, ¾ cup of your milk (I used unsweetened soy), ice, then top with like 1 tbsp of the macerated strawberries. Stir to combine. Feel free to add more syrup or more strawberries. Enjoy! Store the rest of the syrup and macerated strawberries in the fridge.
Notes
- To store: The strawberry milk itself will last in the fridge for 2 to 3 days once you’ve mixed it up. The strawberry syrup will last for about 4 days, while the macerated strawberries should be used within 2 to 3 days.
- To freeze: You can freeze both the syrup and the strawberries if you want to take advantage of fresh, local strawberry season and keep Korean strawberry milk ingredients on hand for future use. Store them in freezer bags for up to 3 months and thaw them in the refrigerator before using them.
Nutrition
Korean Strawberry Milk https://jessicainthekitchen.com/vegan-korean-strawberry-milk/ September 23, 2022
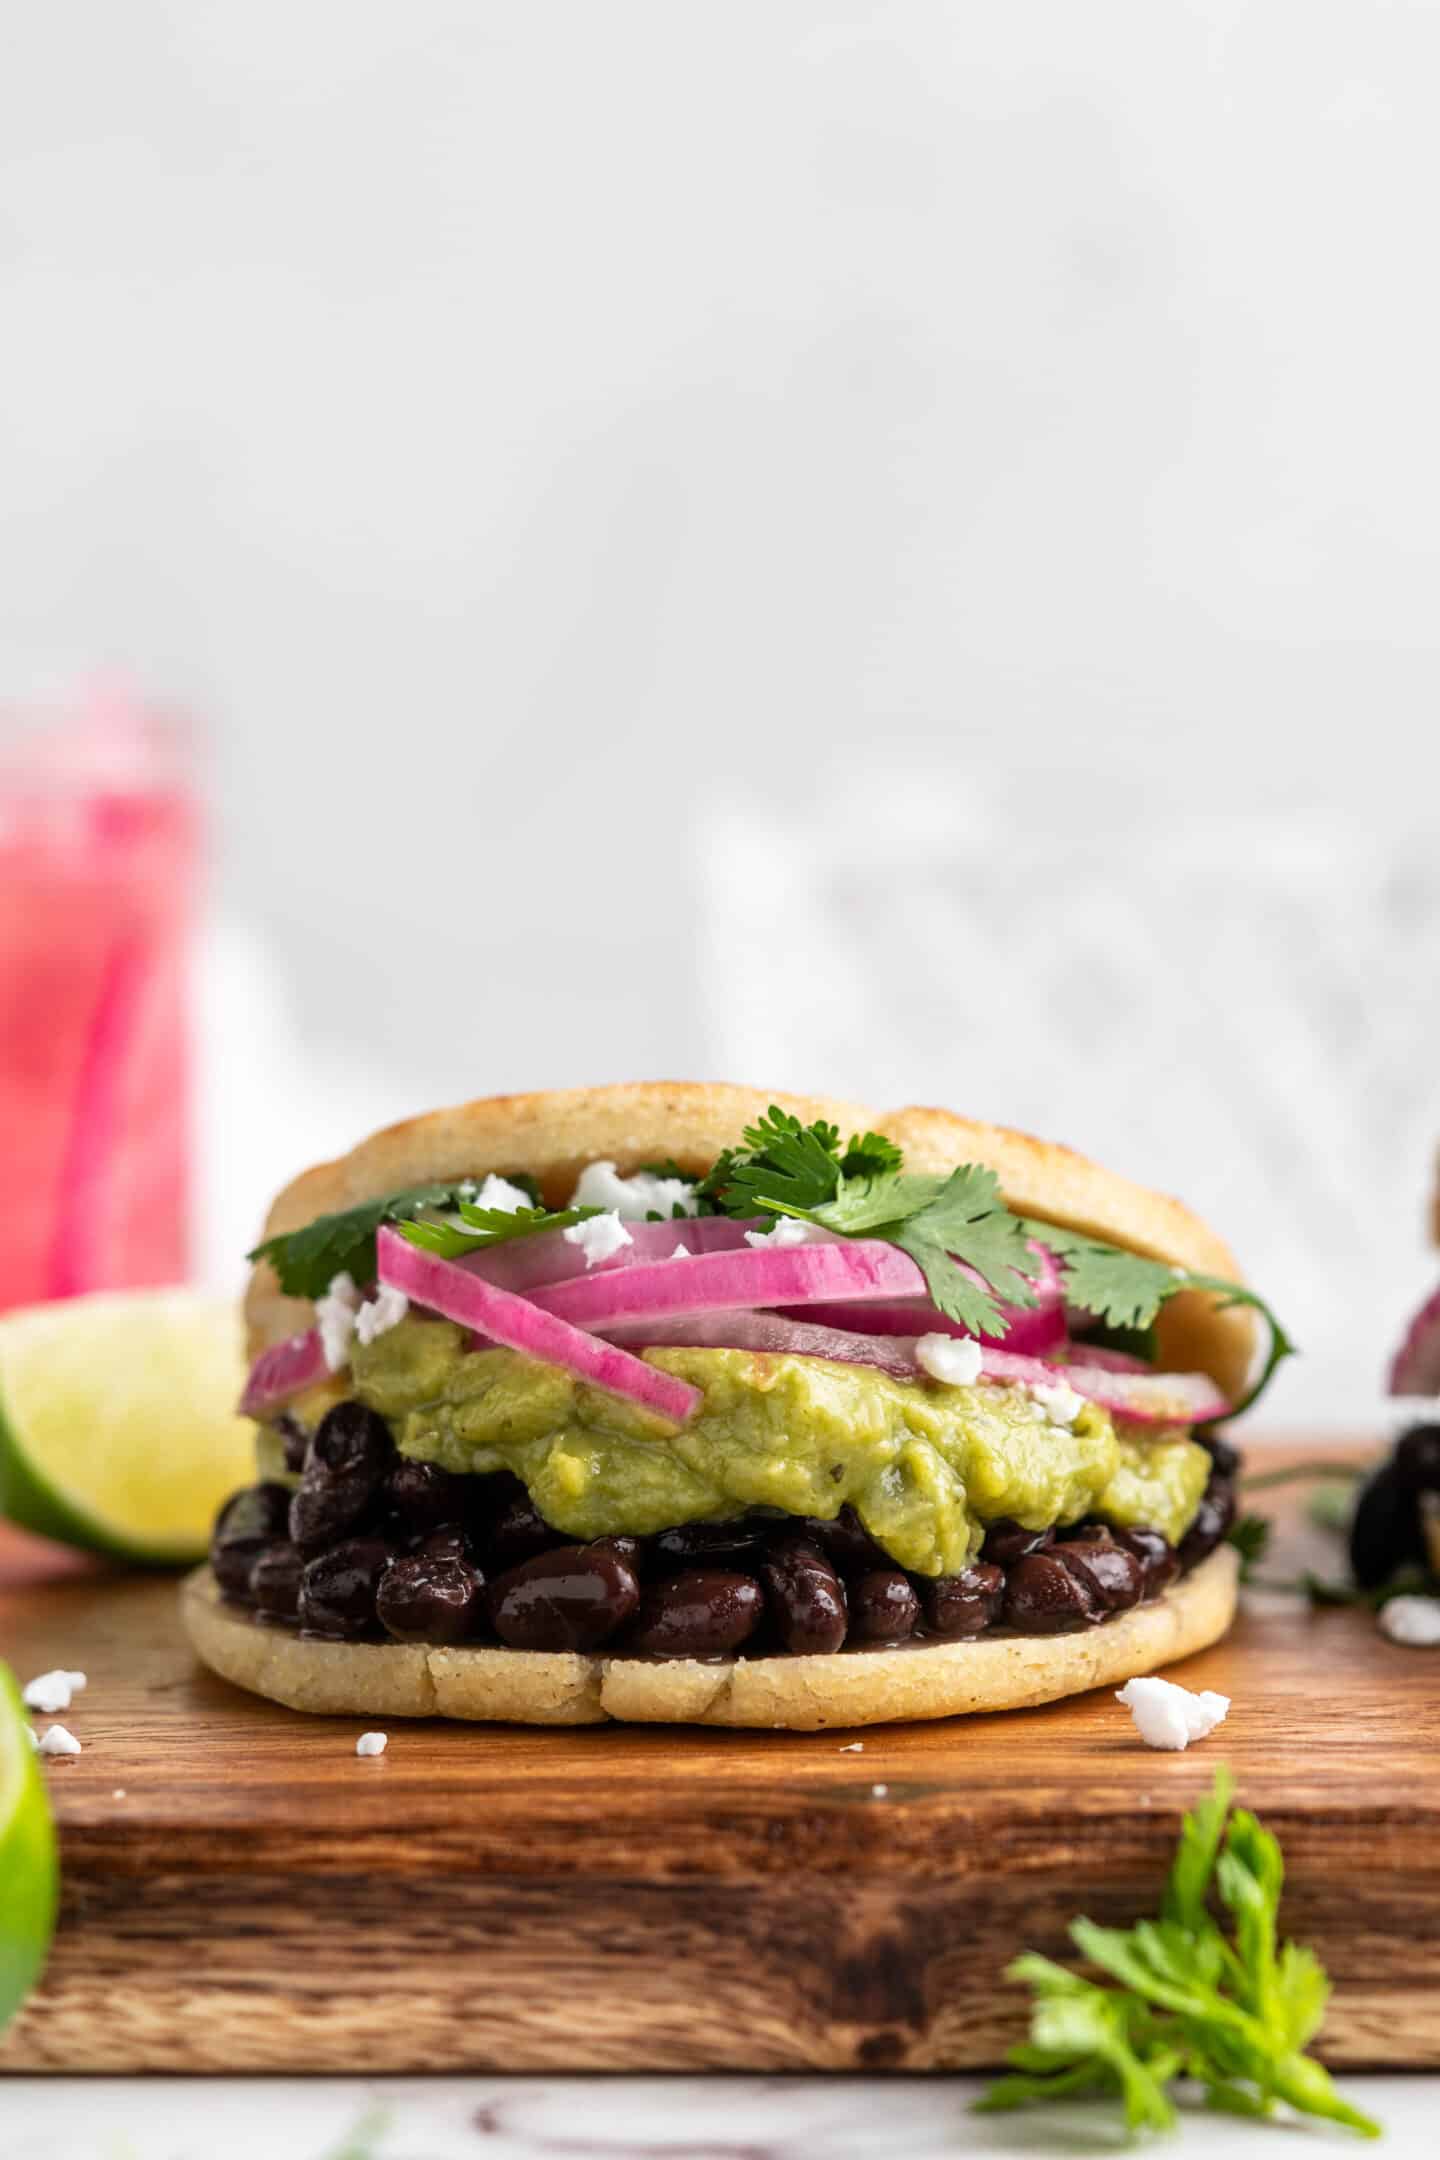
These vegan arepas are savory with just a hint of sweetness, crispy on the outside, and perfect for adding all kinds of tasty toppings. Here’s how to make them, step-by-step!

You know whenever you find a recipe with just a few ingredients, it’s all about technique, and that’s true of these vegan arepas.
You only need 4 ingredients to make them, so using the best quality ingredients and following the recipe to the letter is key. But then, you’ll be rewarded with restaurant-style arepas at home!
What Are Arepas?
Arepas are a type of cornmeal flatbread integral to both Colombian and Venezuelan people and have indigenous descent from the time when Colombia, Ecuador and Venezuela were all one country back in La Gran Colombia (thank you to reader Maria for this information!). They can be made with different types of fillings, either savory or sweet. Arepas can be grilled, baked, or fried, and are usually served as a side or snack.
Cheese is a common filling for arepas; these arepas are called arepas de queso or arepas con queso. Lucky for us, there are a lot of delicious, meltable plant-based cheeses available these days, so you can make arepas de queso without the dairy!
What Do Arepas Taste Like?
Arepas have a mildly sweet corn flavour. The dough is soft and slightly dense, and the outside becomes crispy when grilled, baked, or fried. They’re pretty much irresistible!
Notes on Ingredients
Please note that this is important information on the ingredients and instructions and the FULL recipe with amounts and details can be found DOWN BELOW (scroll to it) in the recipe card.
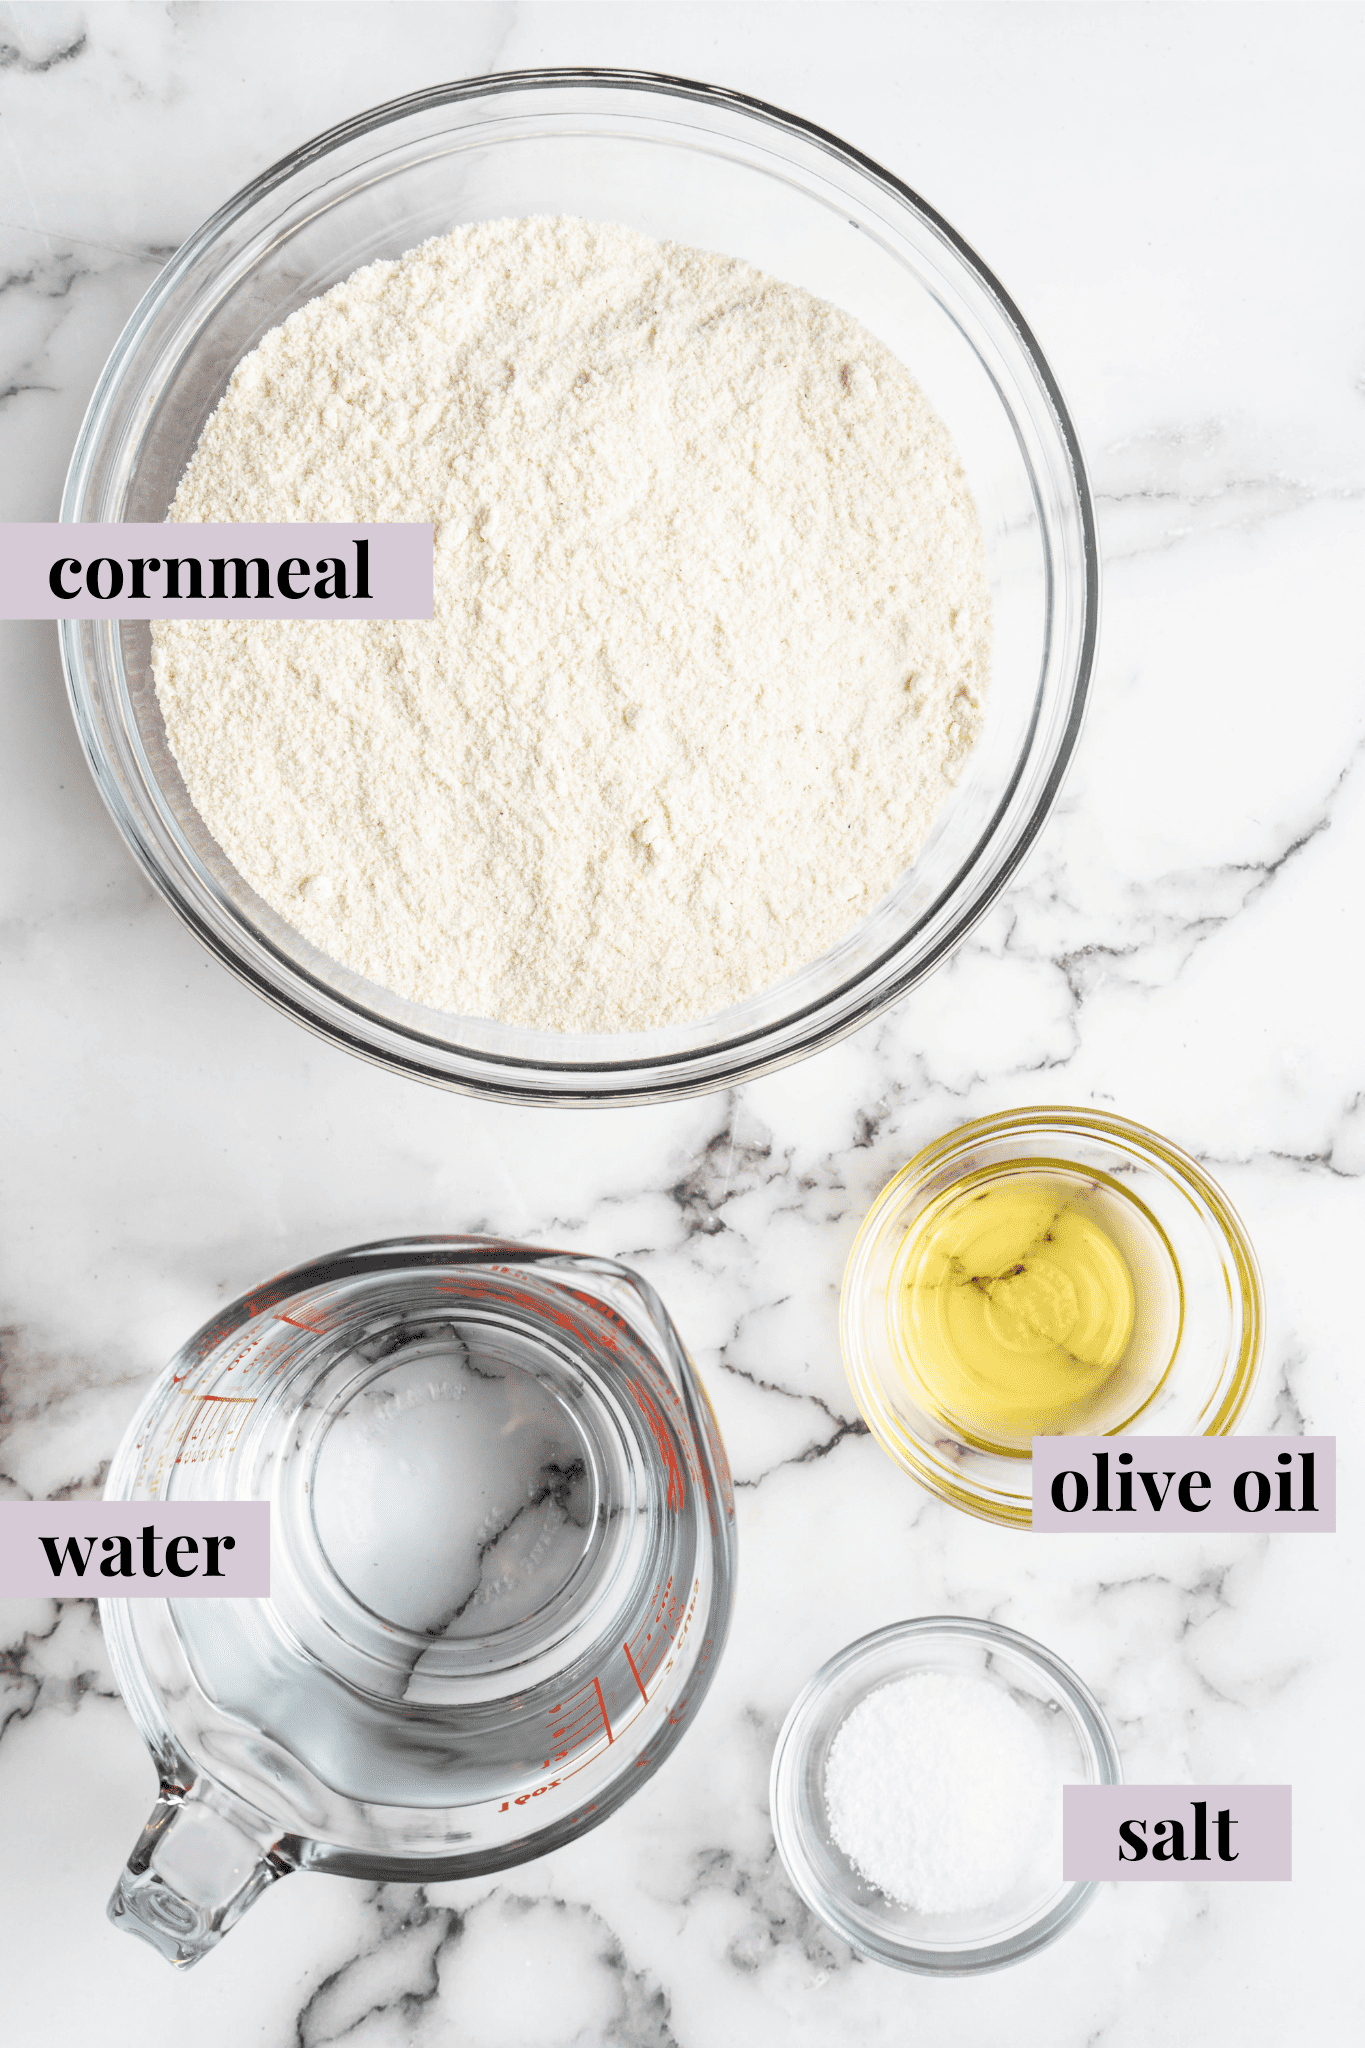
For the vegan arepas:
- Pre-cooked white or yellow cornmeal – Also known as masarepa. There is no substitute for this!
- Kosher salt
- Warm water
- Olive oil
For the arepa fillings:
- Vegan butter , shredded vegan cheese, black beans, curtido, slaw , pulled jackfruit
Is Cornmeal the Same as Masarepa?
They’re both milled corn, but the similarities end there. Masarepa is cooked then milled, while cornmeal is milled raw. This creates a completely different texture when used in recipes.
How to Make Vegan Arepas
Follow these step-by-step instructions for making arepas at home:
Prepare. Preheat your oven to 350°F.
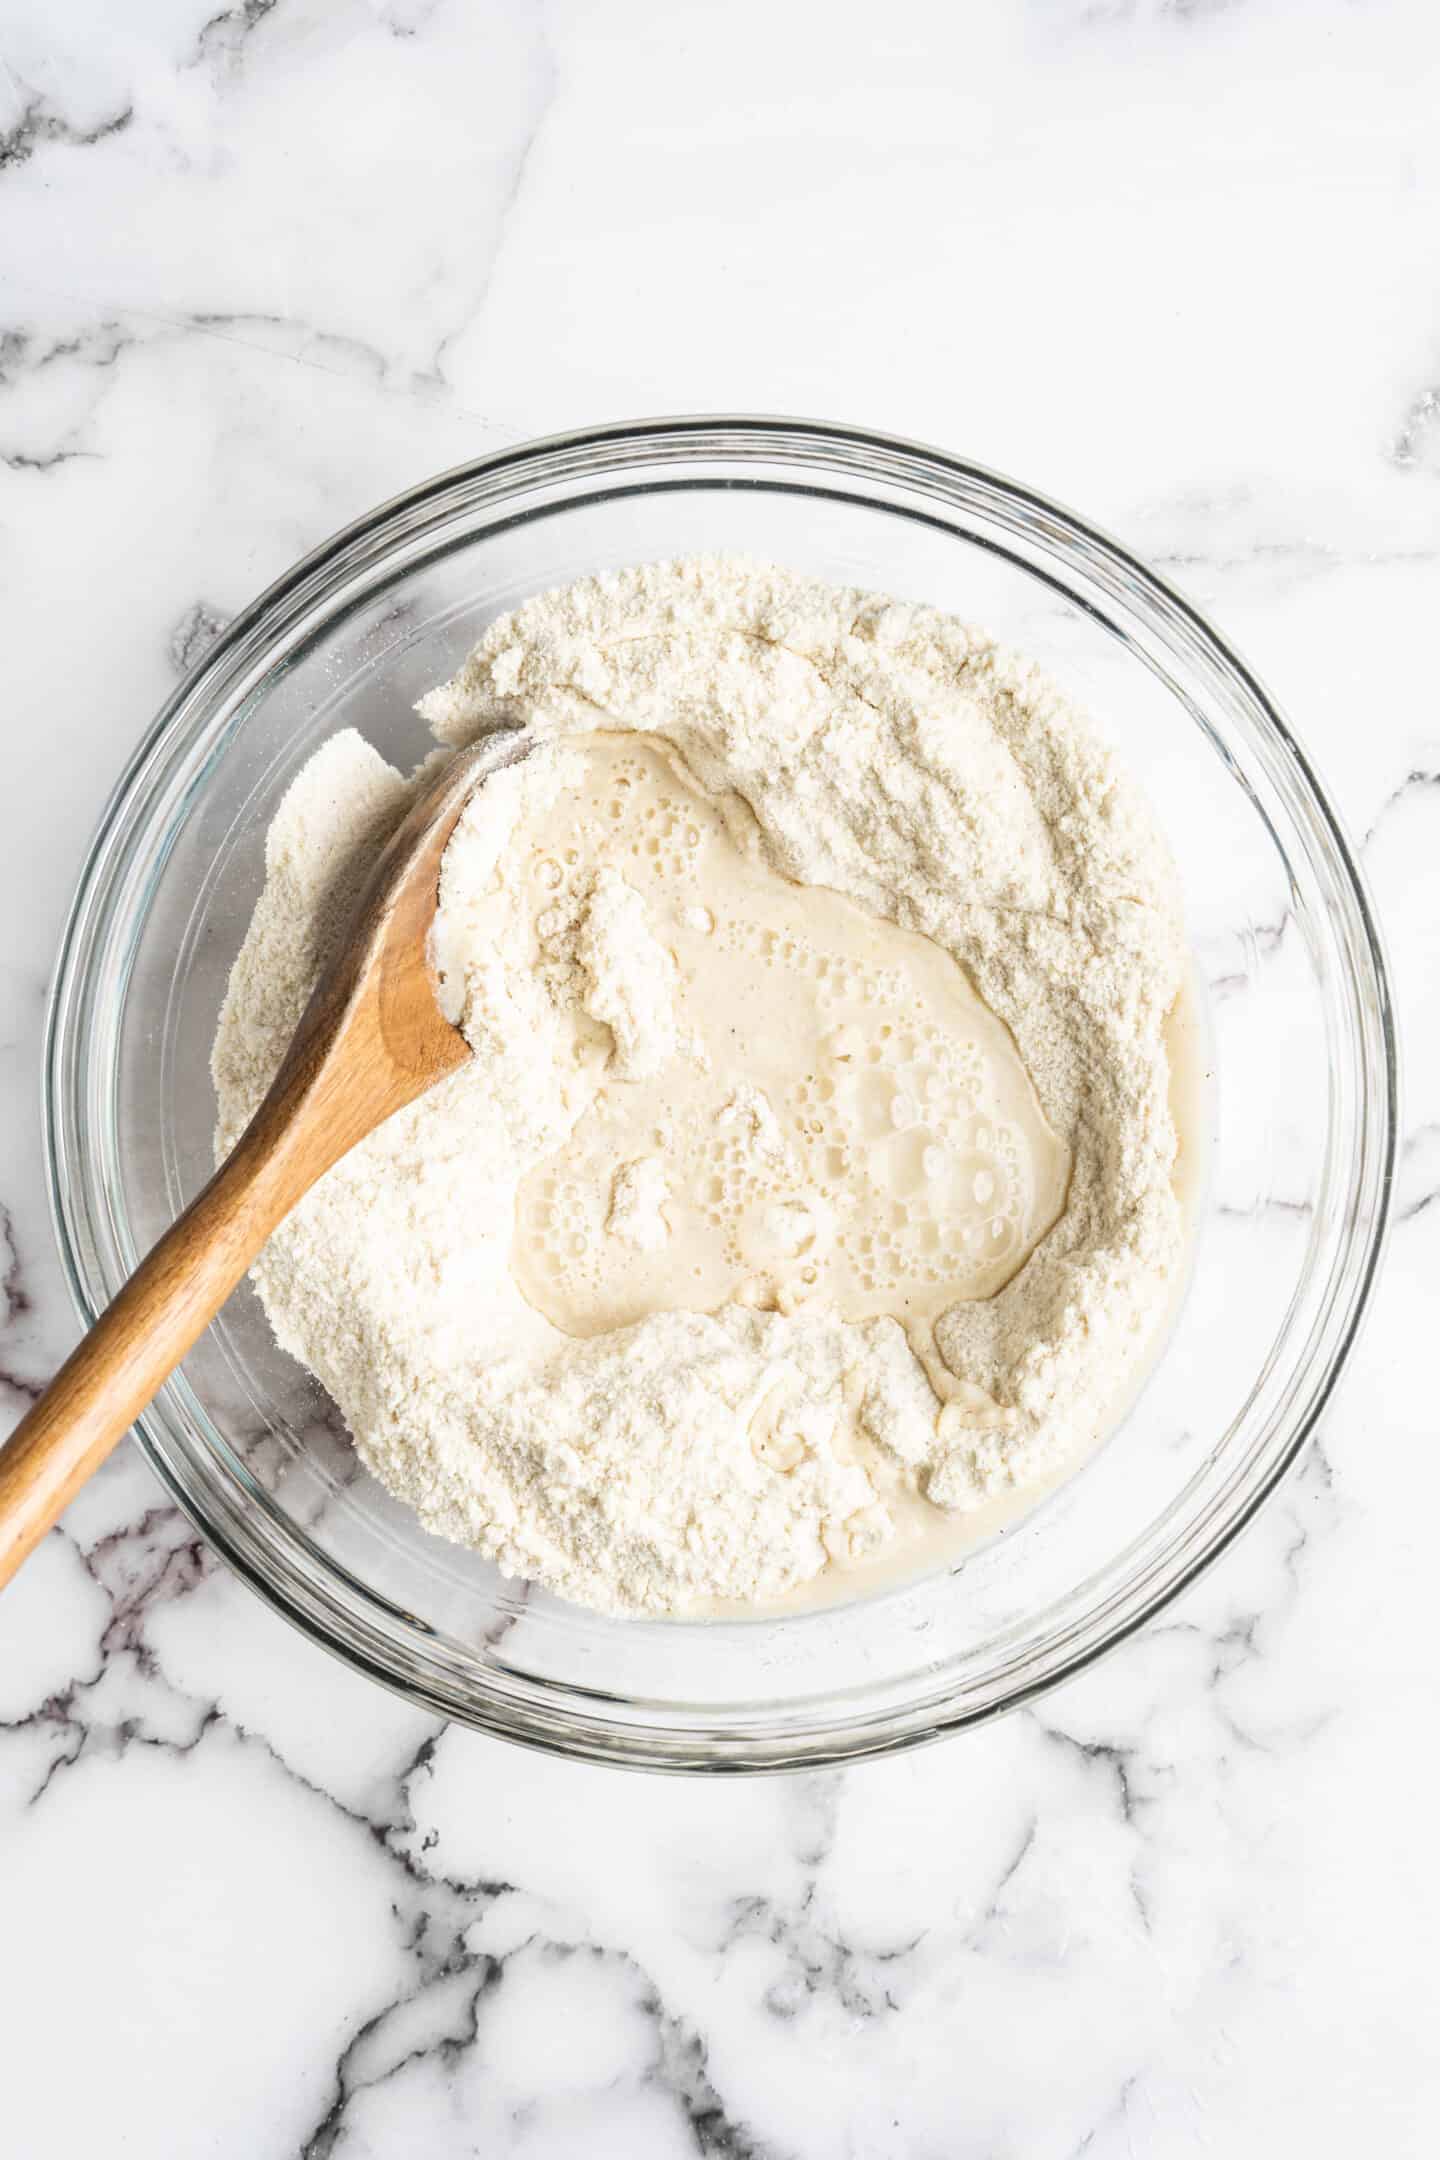
Make the dough. Whisk the cornmeal and salt in a large mixing bowl. Slowly pour in the water, whisking or mixing with your hands constantly. Just add enough water to make a soft, moist dough that’s not sticky.
Let the dough rest. Cover the bowl with plastic wrap and let the dough rest for 8 to 10 minutes, or until the liquid is absorbed.
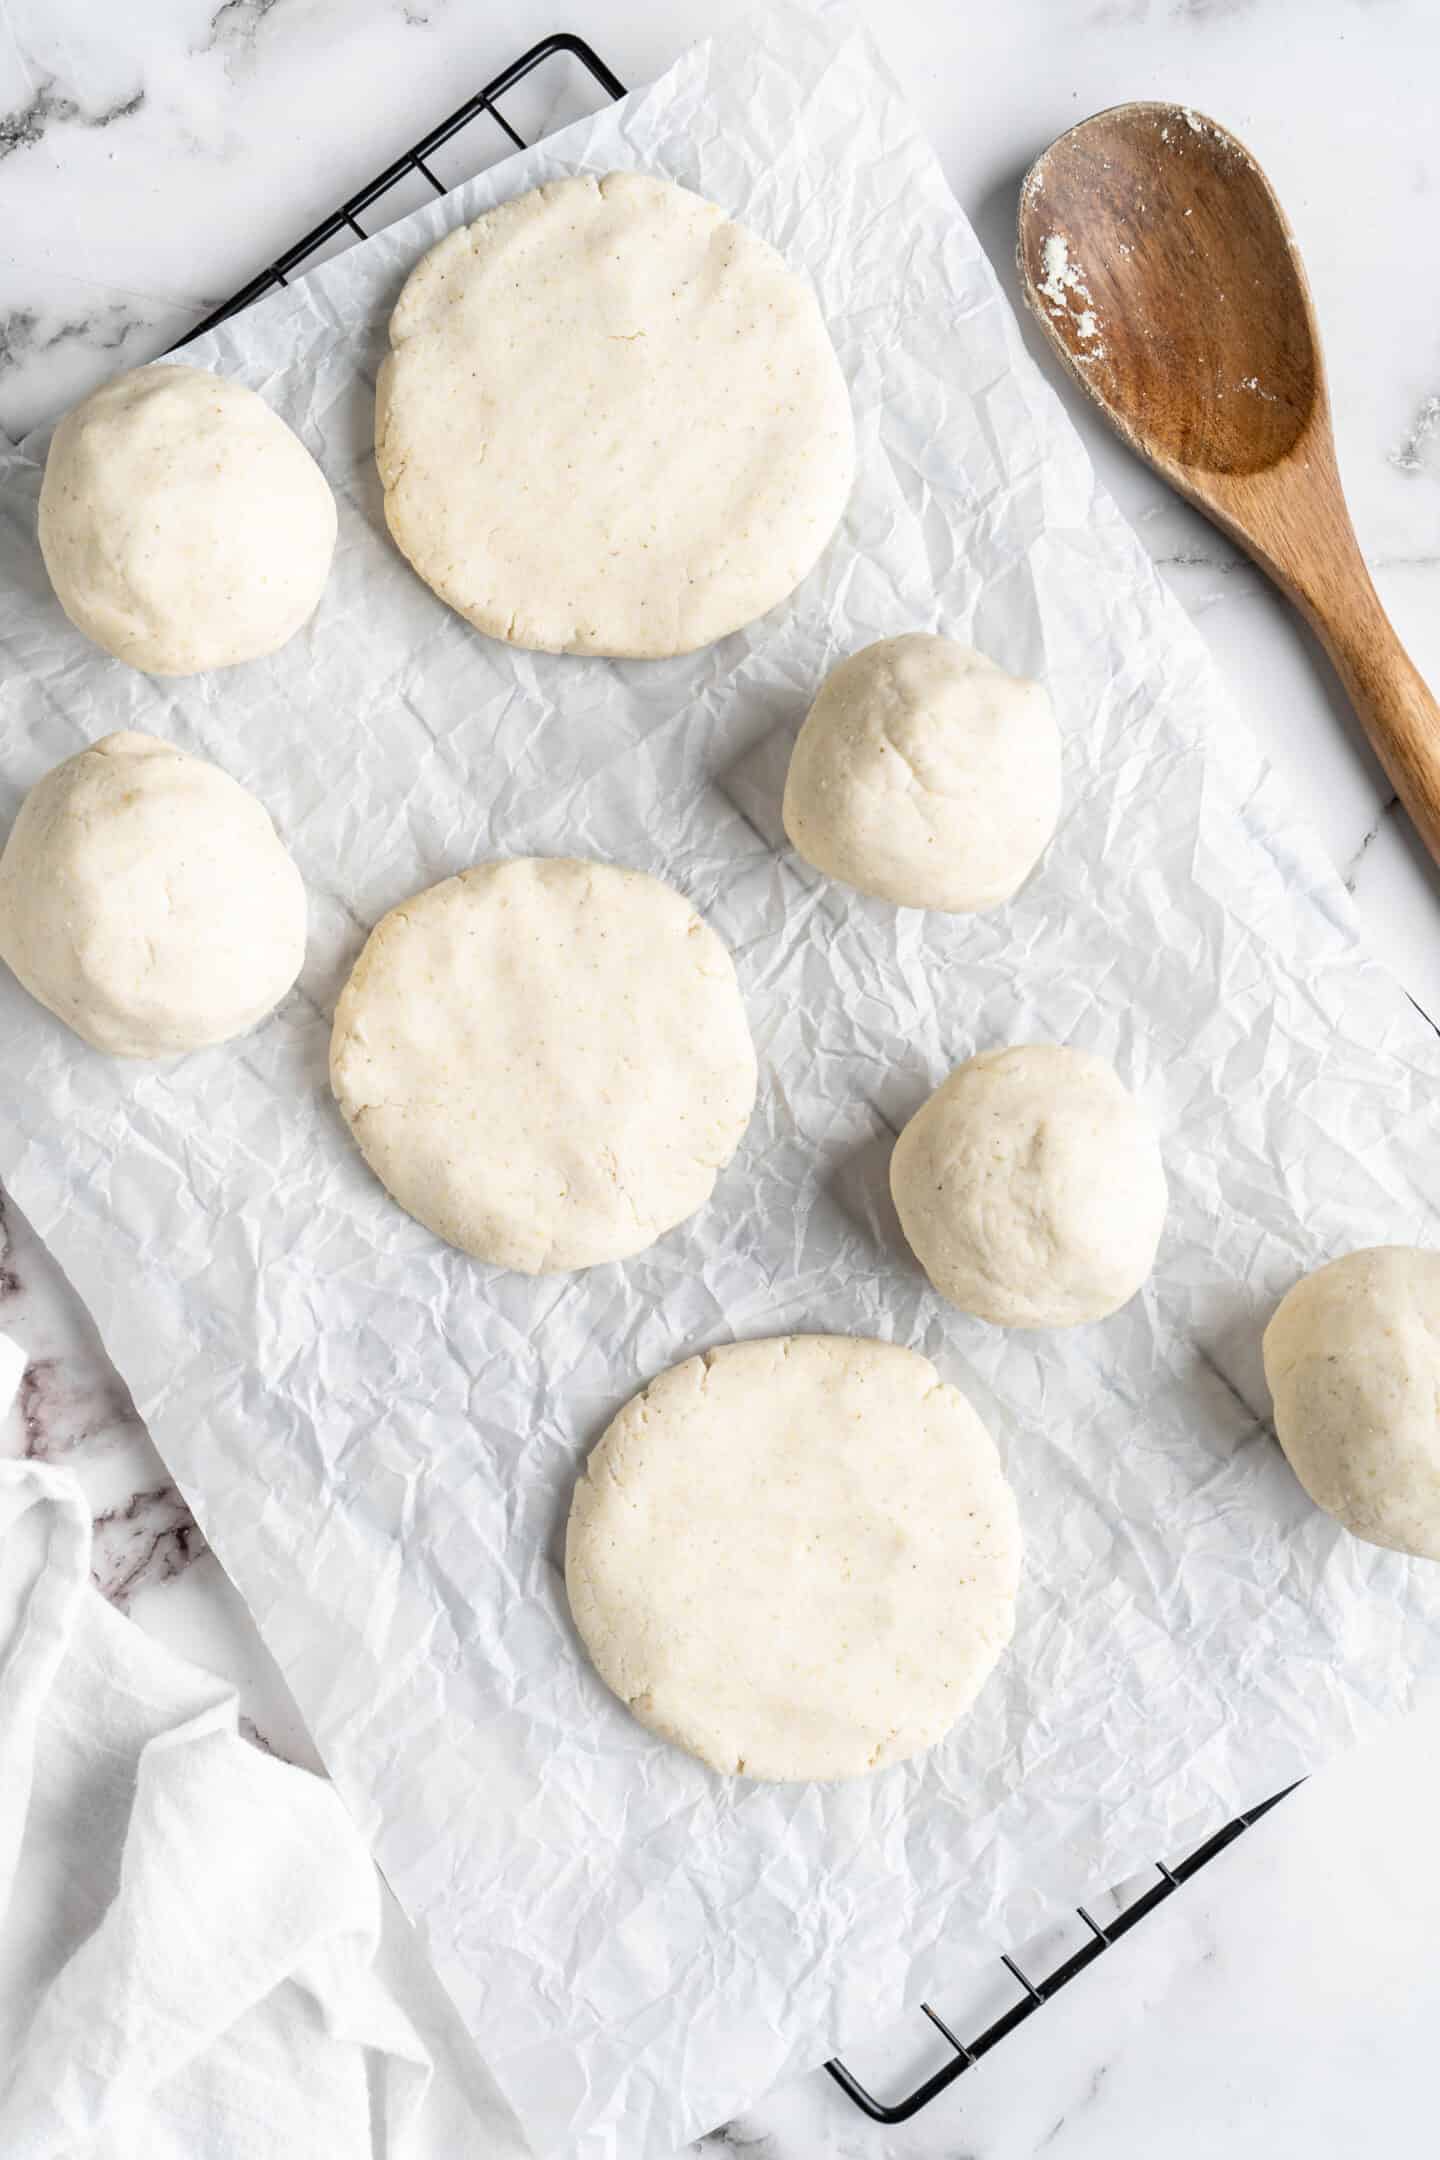
Form the arepas. Divide the arepas dough into 8 equal portions. Shape the dough into balls, then press them into smooth discs about 2 1/2 inches in diameter, adding more water if needed to keep the dough from cracking.
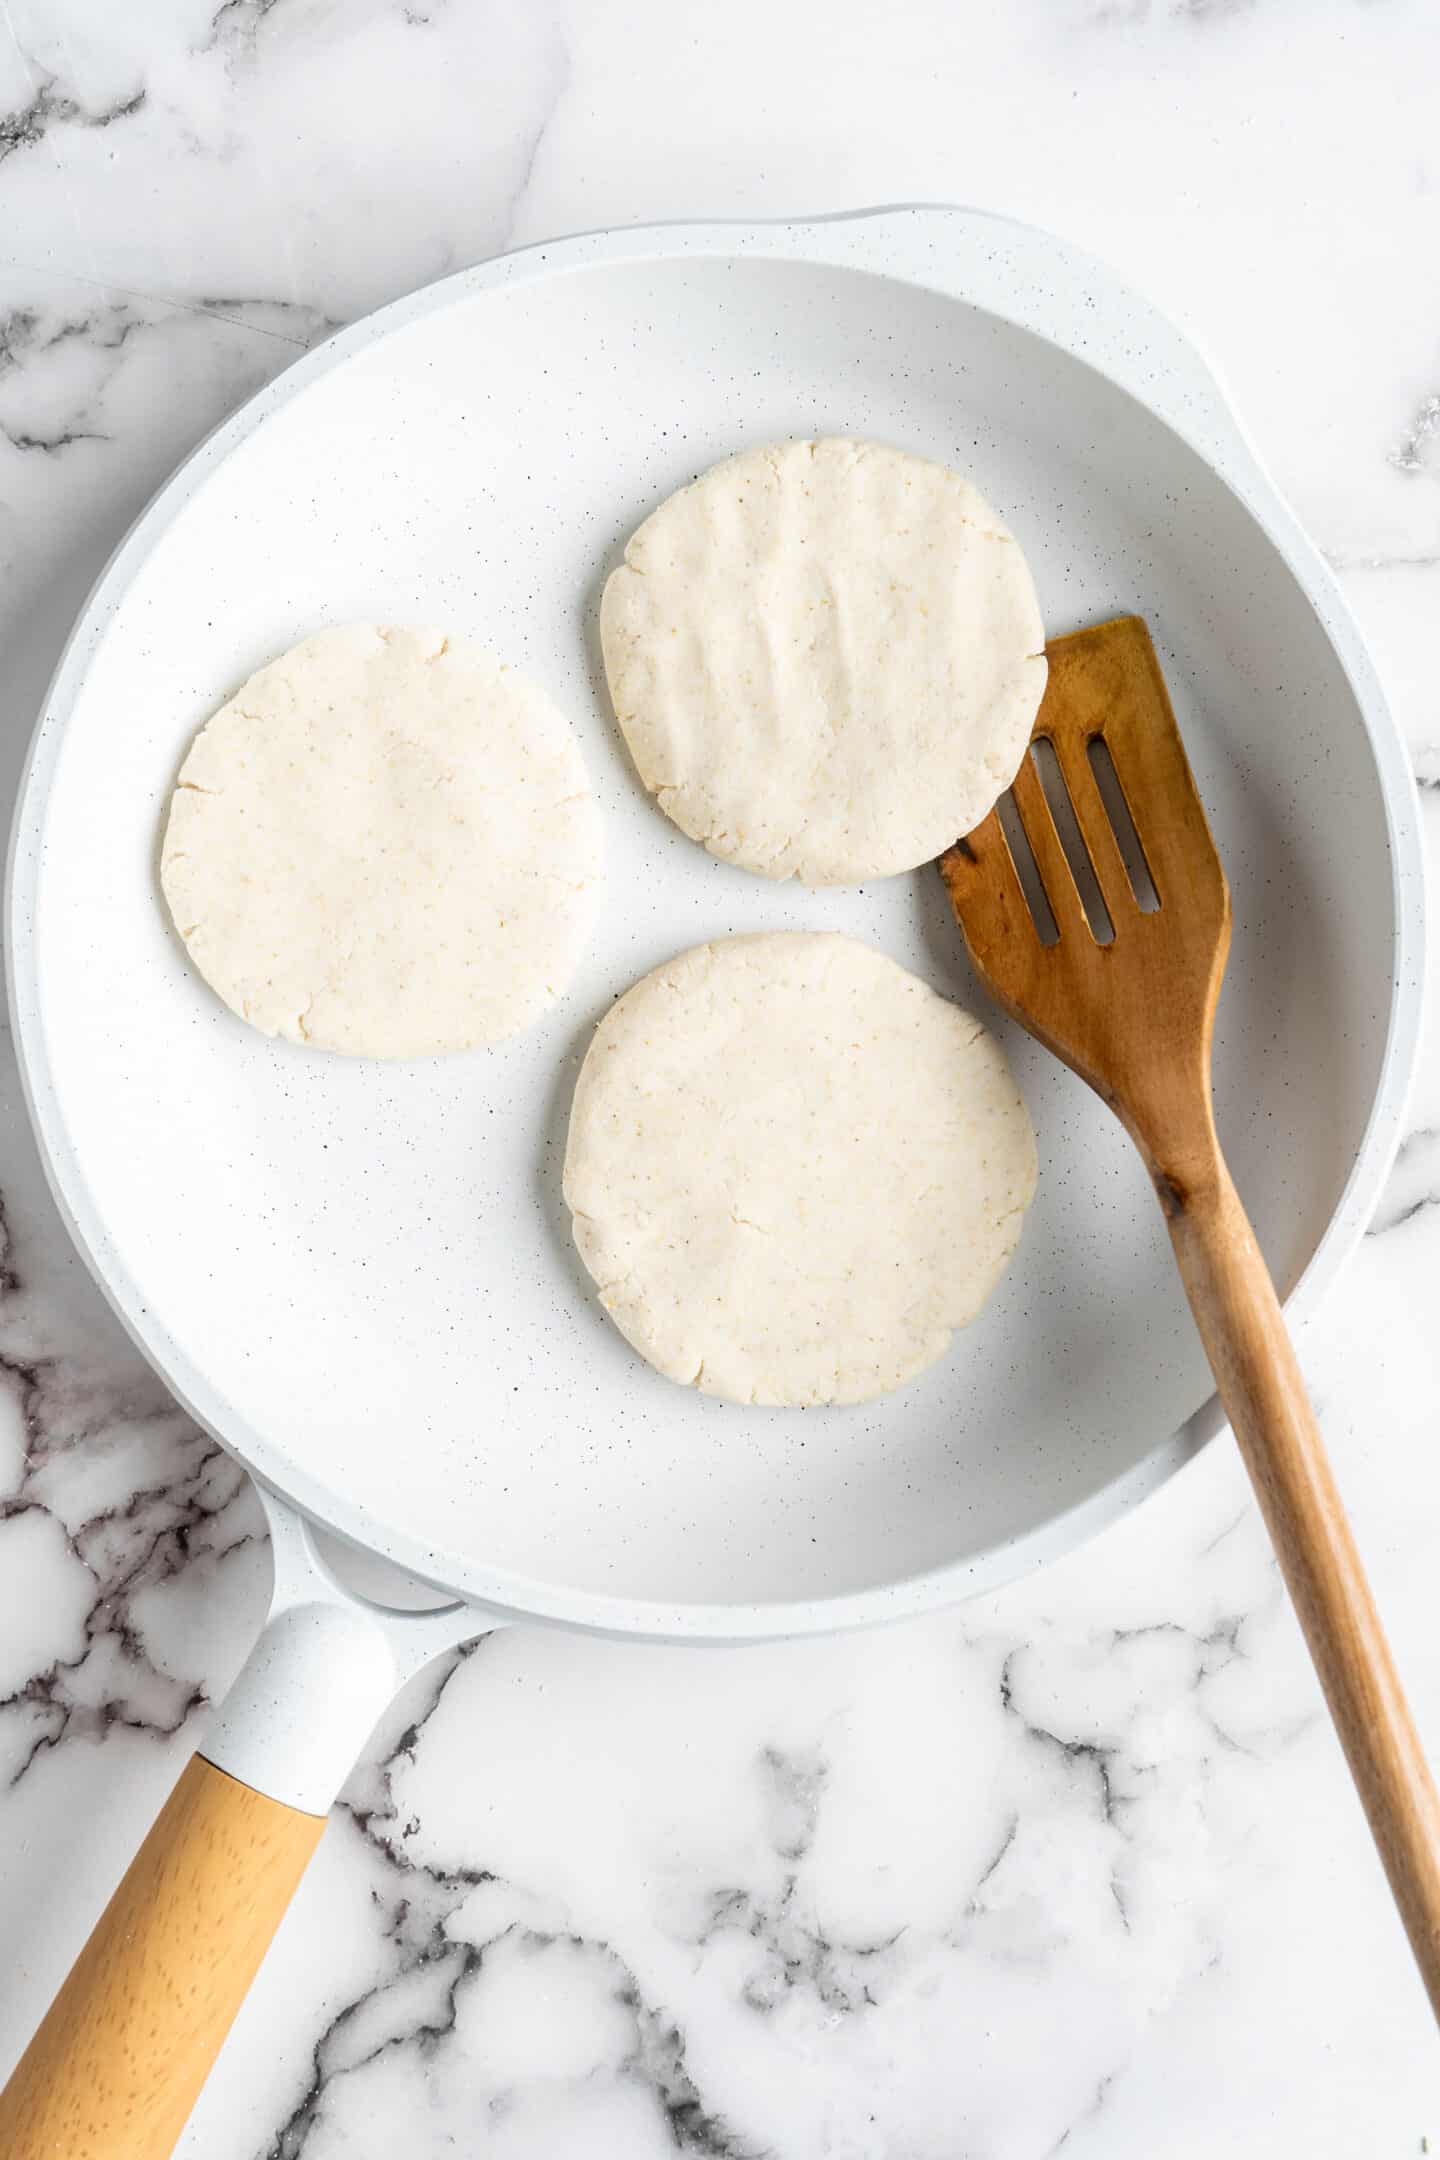
Pan-fry the arepas. Heat the oil in a large skillet over medium heat, then add as many arepas as will fit without crowding the pan. Cook for 2 to 3 minutes, or until golden brown.

Bake. Transfer the pan-fried arepas to a baking sheet and bake for 15 to 17 minutes, or until they’re crispy on the outside and firm in the middle.
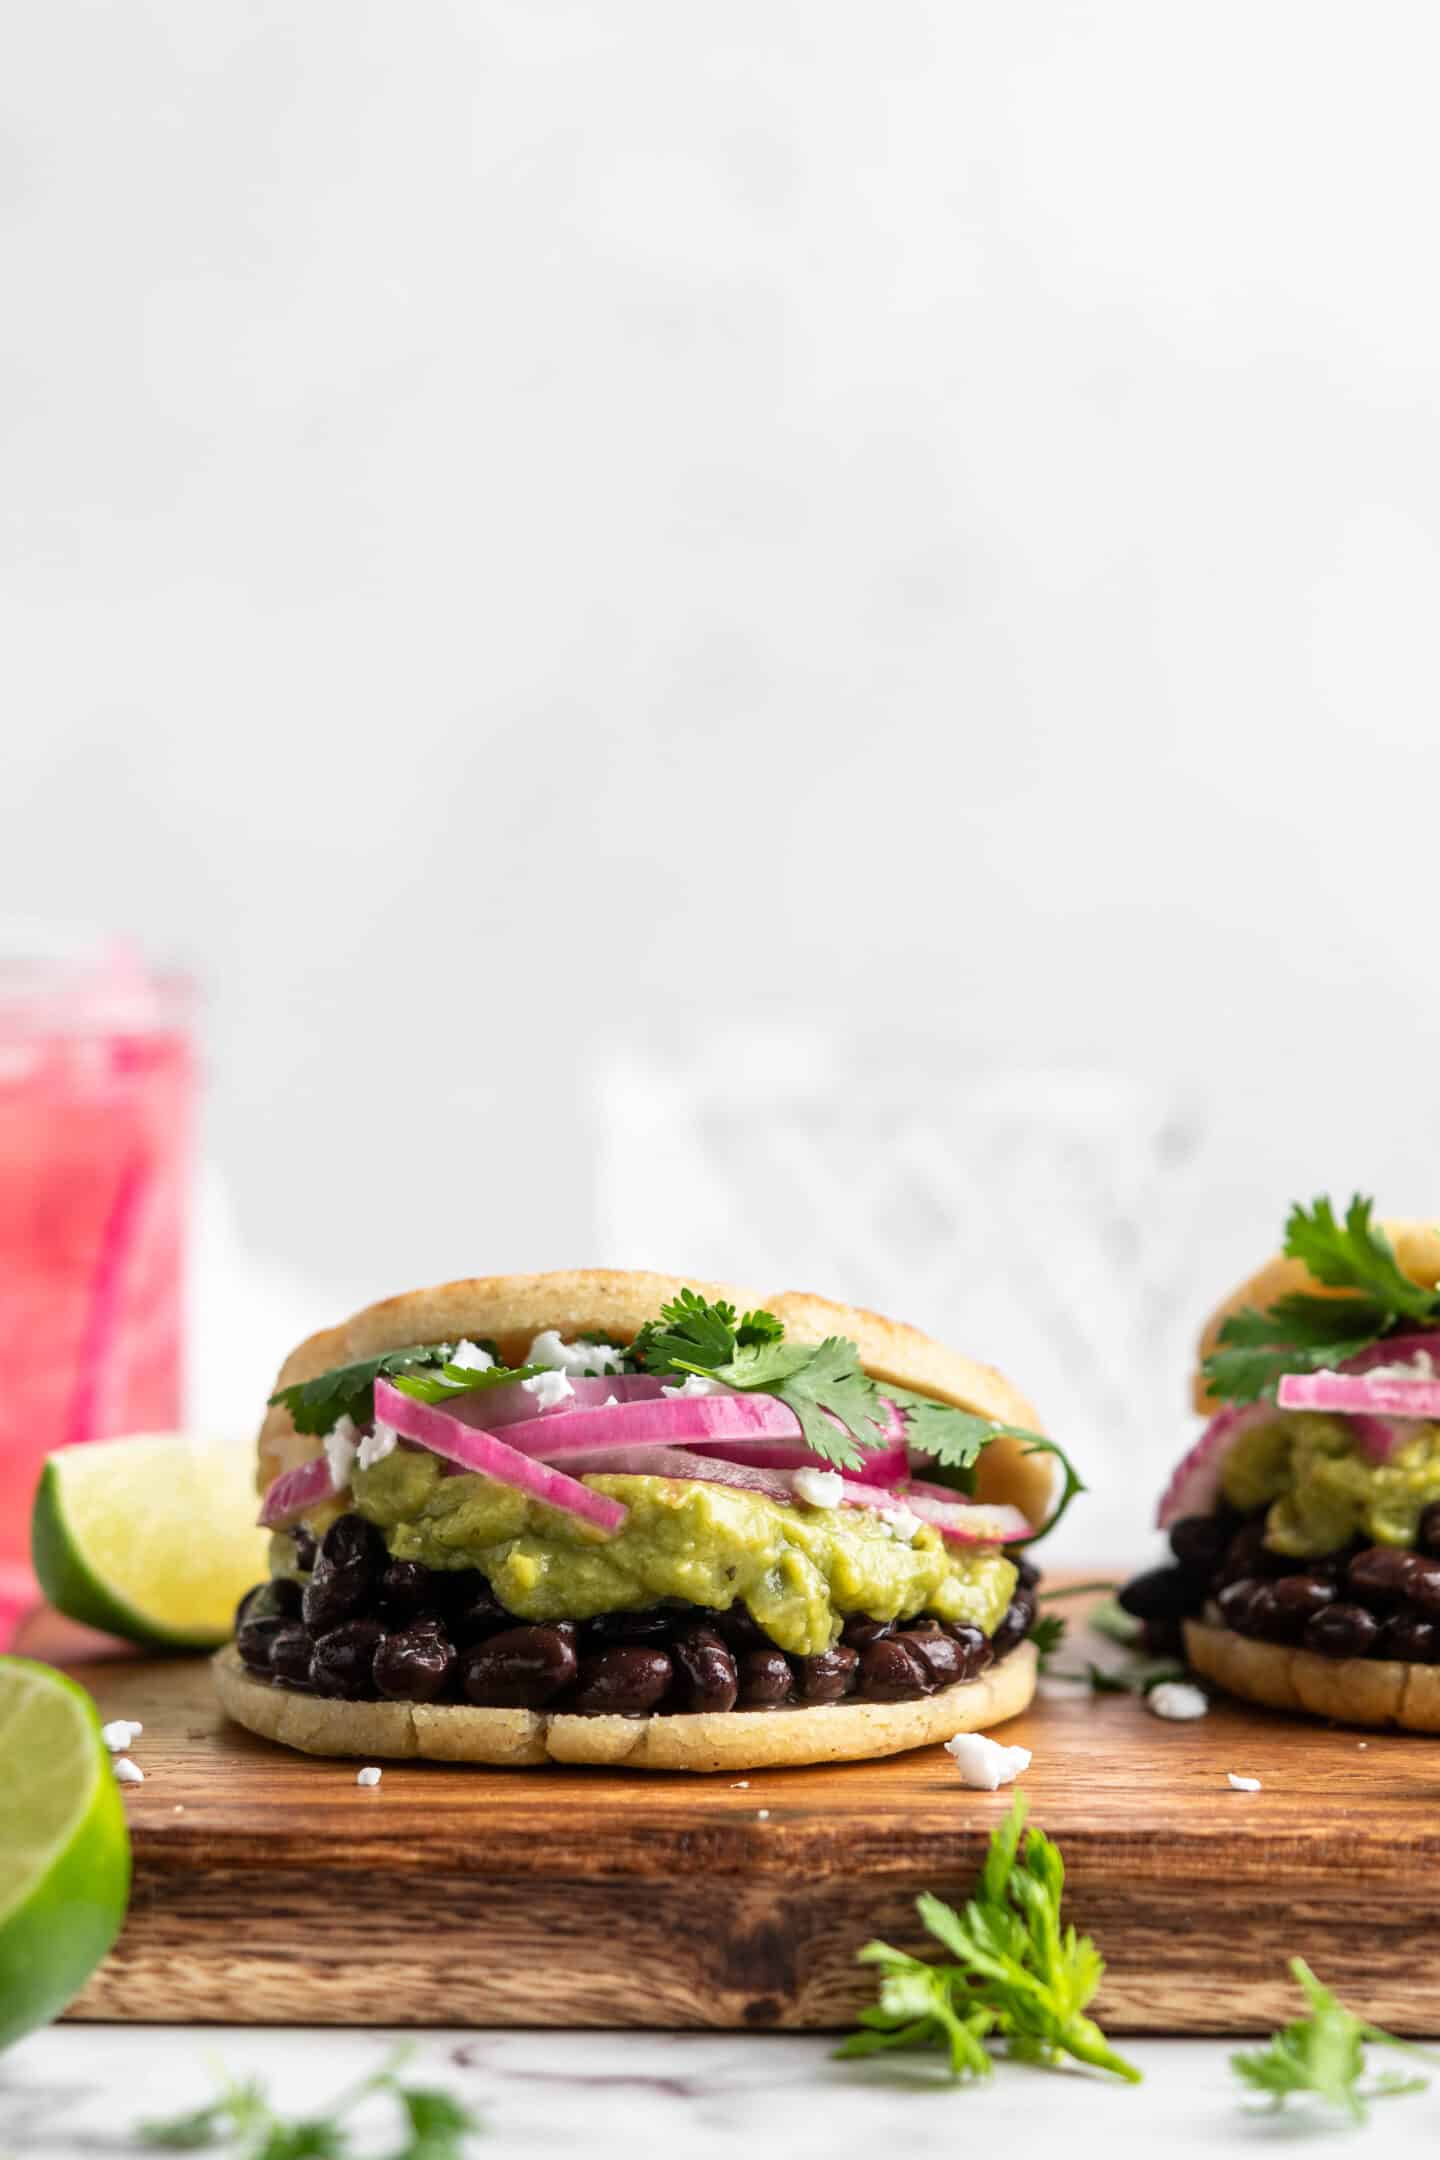
Serve. Serve the arepas hot with butter or your favourite vegan toppings. To fill, slice the arepas in half and add the fillings.
Tips for Success
These tips will help you make perfect vegan arepas every time!
- Use kosher salt. It has larger crystals than table salt; if you use table salt instead, your arepas will be too salty!
- Mix the dough until there are no lumps. The dough should be soft, pliable, and there should be no lumps of masarepa.
- Be patient. When pan-frying the arepas, don’t flip them until a crispy crust has formed on the bottom.

Serving Suggestions
Serve arepas with:
- Mexican Street Corn Burrito Bowls
- Sofritas (Chipotle Copycat)
- Quinoa and Black Bean Burrito Bowl
- Black Bean Avocado and Corn Salad
- 30-Minute Quinoa Enchilada Skillet
How to Store and Reheat Leftovers
Store leftover arepas in an airtight container in the refrigerator for 3 to 5 days. They can be reheated in a skillet over medium heat with a bit of oil, or you can warm them up in an air fryer .
Can This Recipe Be Frozen?
Yes, you can freeze arepas for up to 2 months. Place them in a freezer bag or airtight container with parchment paper between the layers. Let them thaw in the refrigerator, then heat in a skillet or air fryer, as directed above.

Ingredients
- 2 cups pre-cooked white or yellow cornmeal , masarepa
- 2 teaspoons kosher salt
- 2 cups warm water , you may not need all
- 1 tablespoon olive oil
- Fillings: vegan butter, shredded vegan cheese, black beans, curtido, slaw, pulled jackfruit, etc.
Instructions
- Preheat the oven to 350°F.
- In a large mixing bowl, combine the cornmeal and salt. Slowly add the water, whisking or
- mixing with your hands the entire time. Add just enough water until you have a soft, moist dough that’s not too sticky. Cover the bowl and rest for 8-10 minutes, until the liquid is absorbed.
- Divide the dough into 8 balls, then shape the balls into smooth discs about 21⁄2 inches in diameter. Add more water if necessary to avoid cracking.
- Heat the oil in a large skillet over medium heat. When hot, add as many arepas as will fit with about an inch of space between. Cook until golden brown, about 2-3 minutes per side. Transfer browned arepas to a baking sheet. Repeat with the remaining arepas.
- Bake for 15 to 17 minutes, until crisp on the outside and firm in the center.
- Serve hot with butter or fillings. Slice each arepa in half and add your favorite fillings.
