How do I test yeast and is it still good or fresh? Find out easily with this quick and simple 10 minute test!
Here’s a question I often ask myself: “Is my yeast still good?!”. Yeast is a living thing, and the bread and buter of your baking recipes so you always want to ensure it’s good before using it, else your recipe won’t work. I’ve been baking for over 10 years, and the truth is that unless you test your yeast, you won’t know. Fortunately, it is very easy to test yeast in just 10 minutes, and will make all your baking projects that much easier. I realised that if I’m asking this, maybe many of you are too. Here’s how to check if your yeast is still good.
What is Yeast?
Yeast is a leavening product that is alive and that you add to your dough to make it rise. In this post, I’ll be referring to instant yeast and active dry yeast. Yeast needs the correct environment to properly grow and multiply, thus helping your dough to expand and create beautiful baked products. This environment (known as a sympathetic environment) refers to the temperature of its surroundings such as your kitchen, the temperature of the liquid it’s in, and the food (sugar or starch) that you add to the dough to make it rise as it bakes.
Active dry yeast is a dormant form of yeast made up of live yeast cells surrounded by dead cells. Its granules are large, and as the name suggests you need to “activate” your dry yeast. When using active dry yeast, the yeast will need to be dissolved in some warm water with sugar (aka, exactly what are doing today) before using it in the recipe. This process is called proofing.
Instant yeast is made up of finer granules and does not need to be proofed before it. You can mix it right into the dry ingredients. It’s also made up of 100% living cells and as such tends to be seen as more powerful than active dry.
What yeast to use?
I recommend using the yeast that your recipe calls for. For instant, I use SAF Instant Yeast . For active dry yeast, I love Bob’s Red Mill . They are both very affordable, is affordable in large quantities and last very long.
How to Test Yeast to see if it is Good
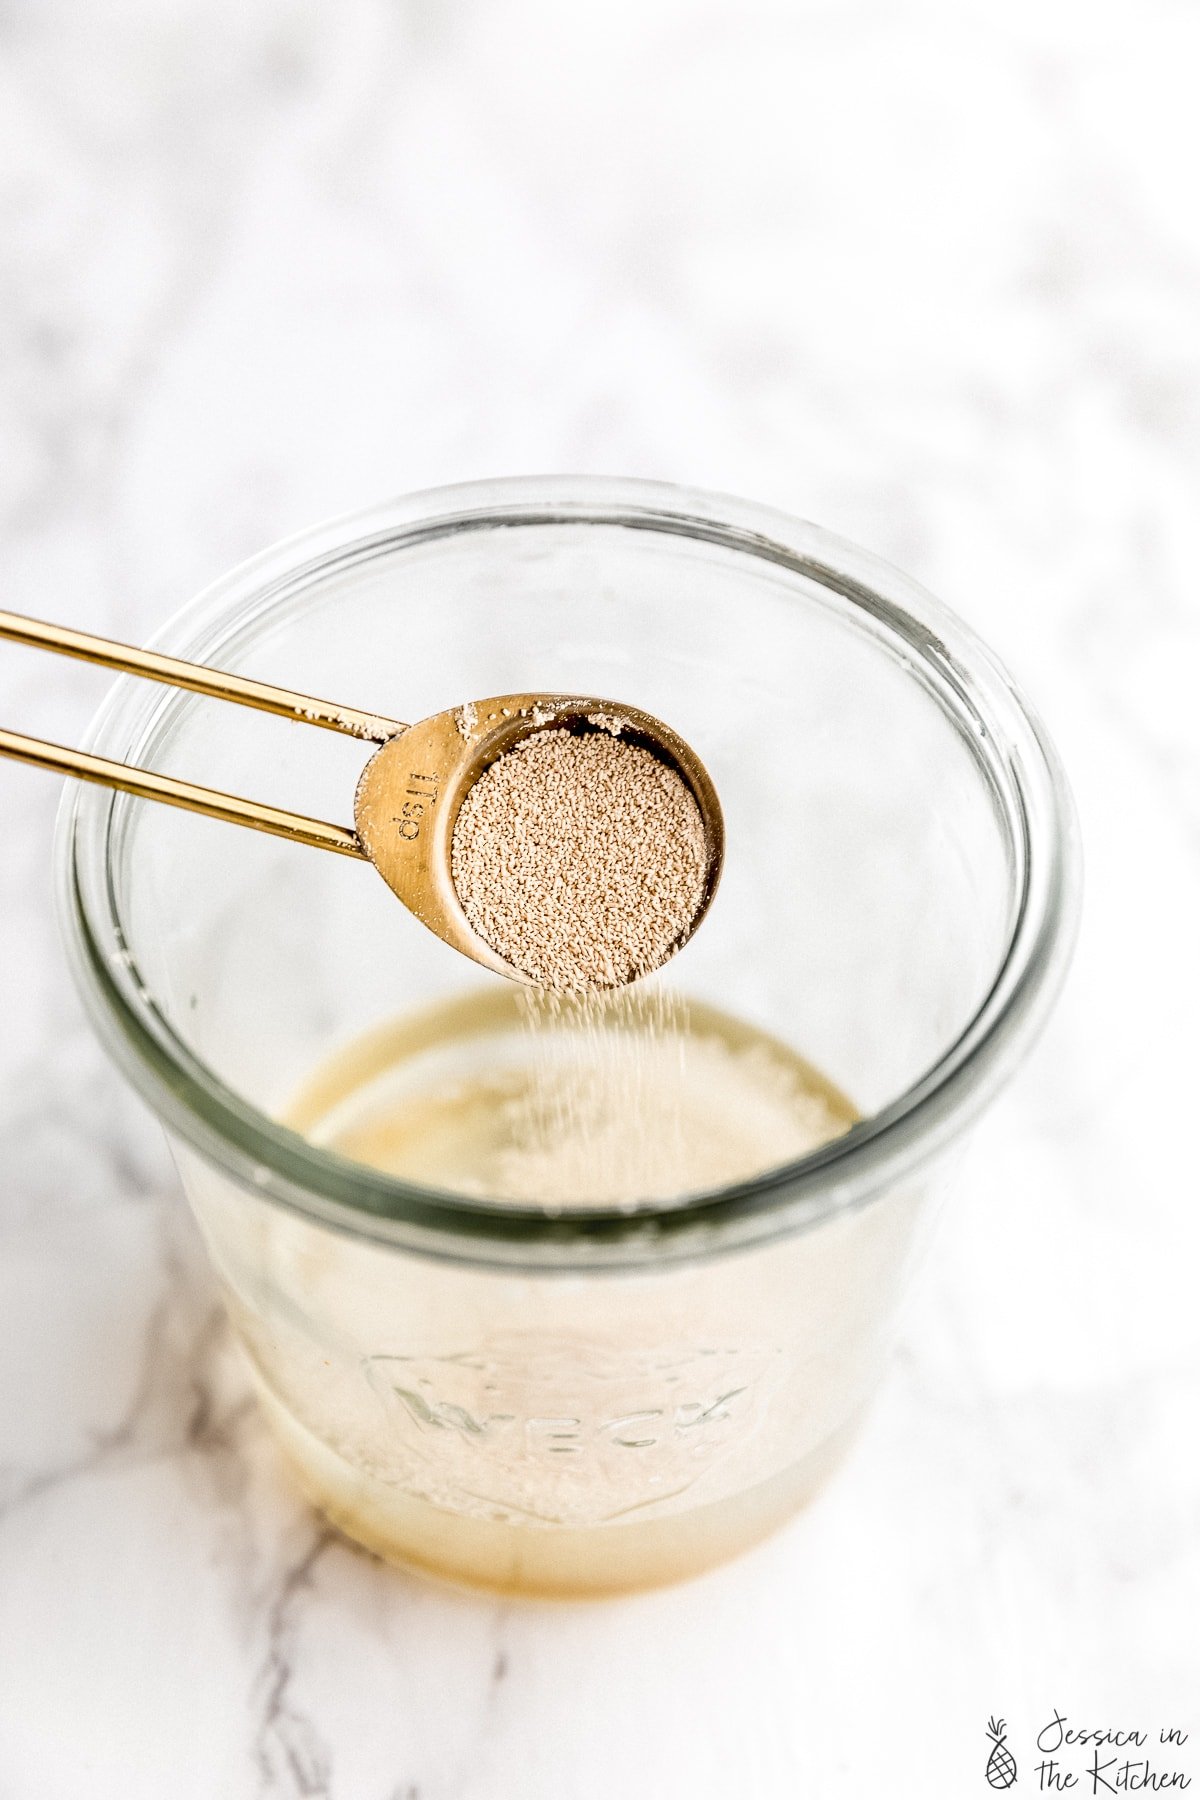
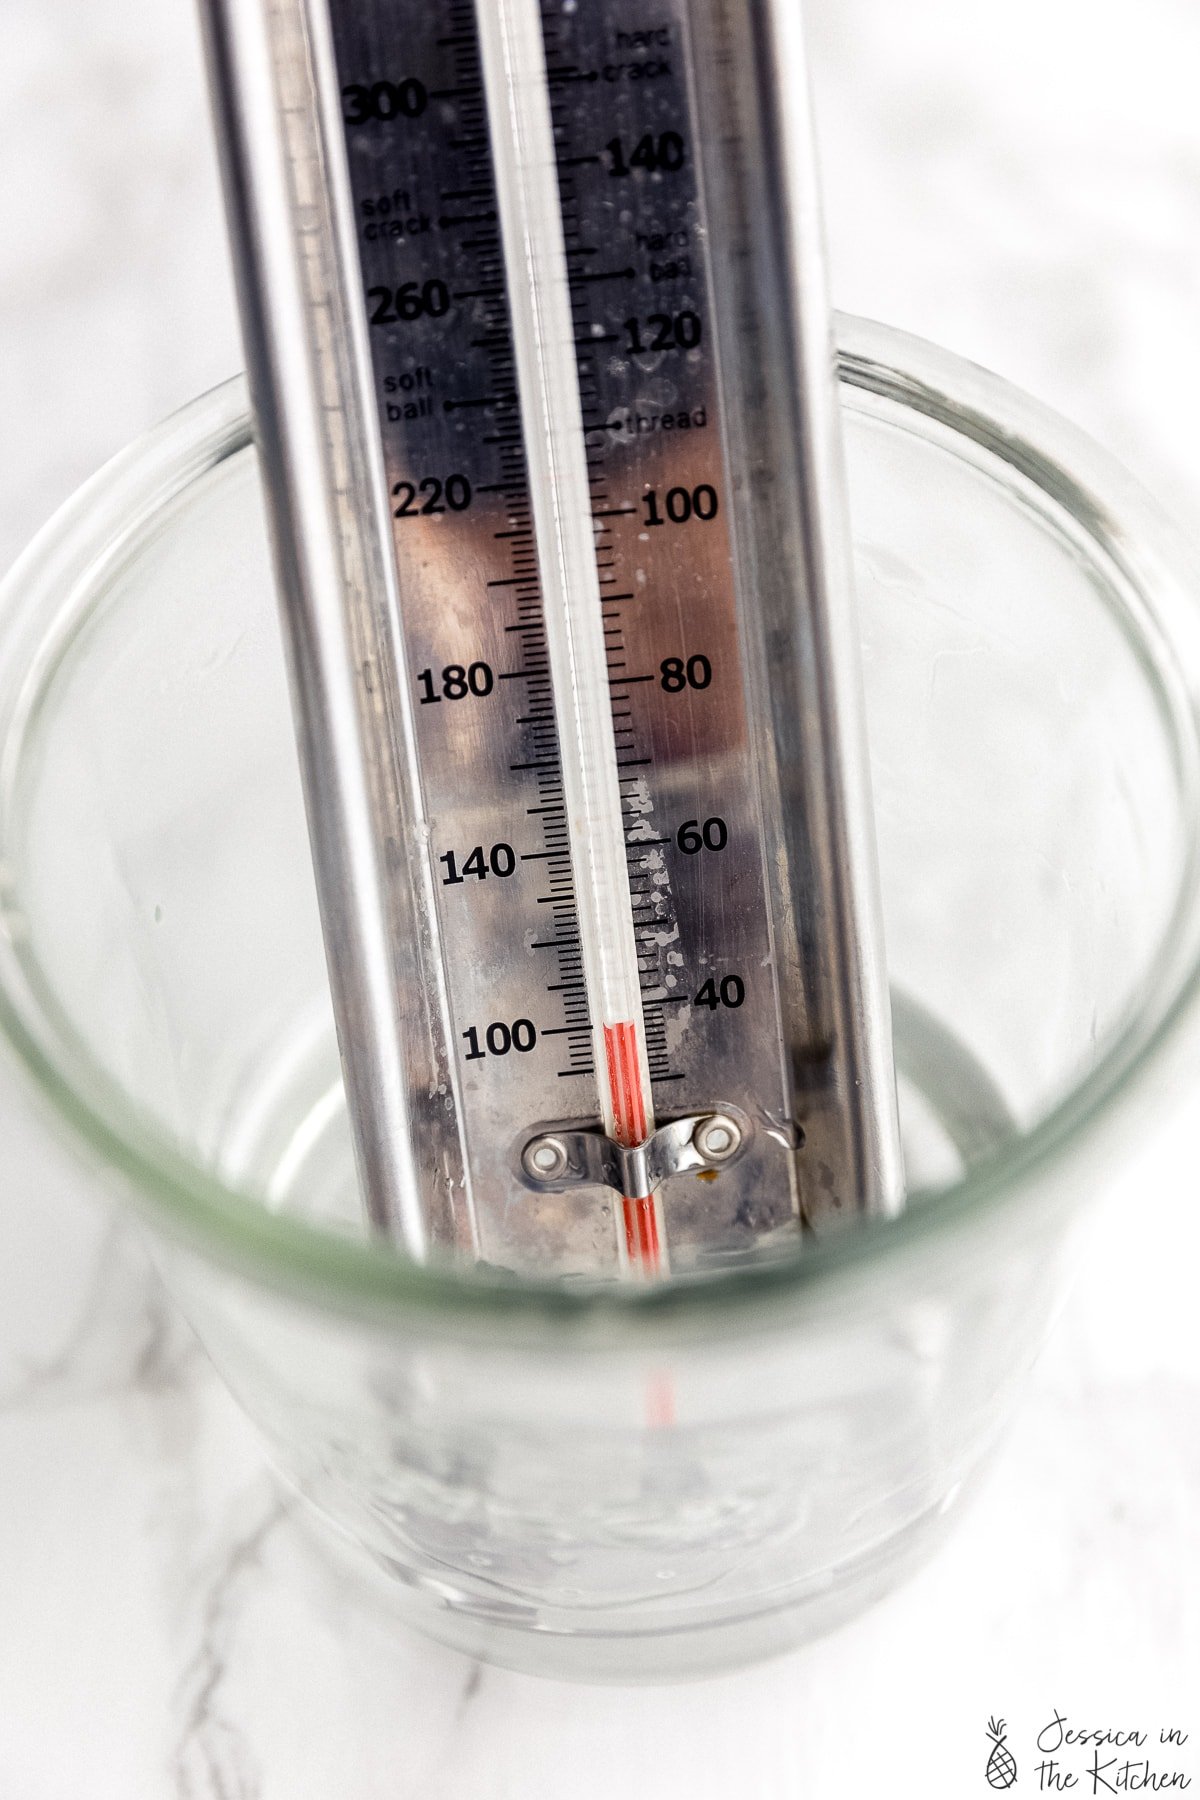
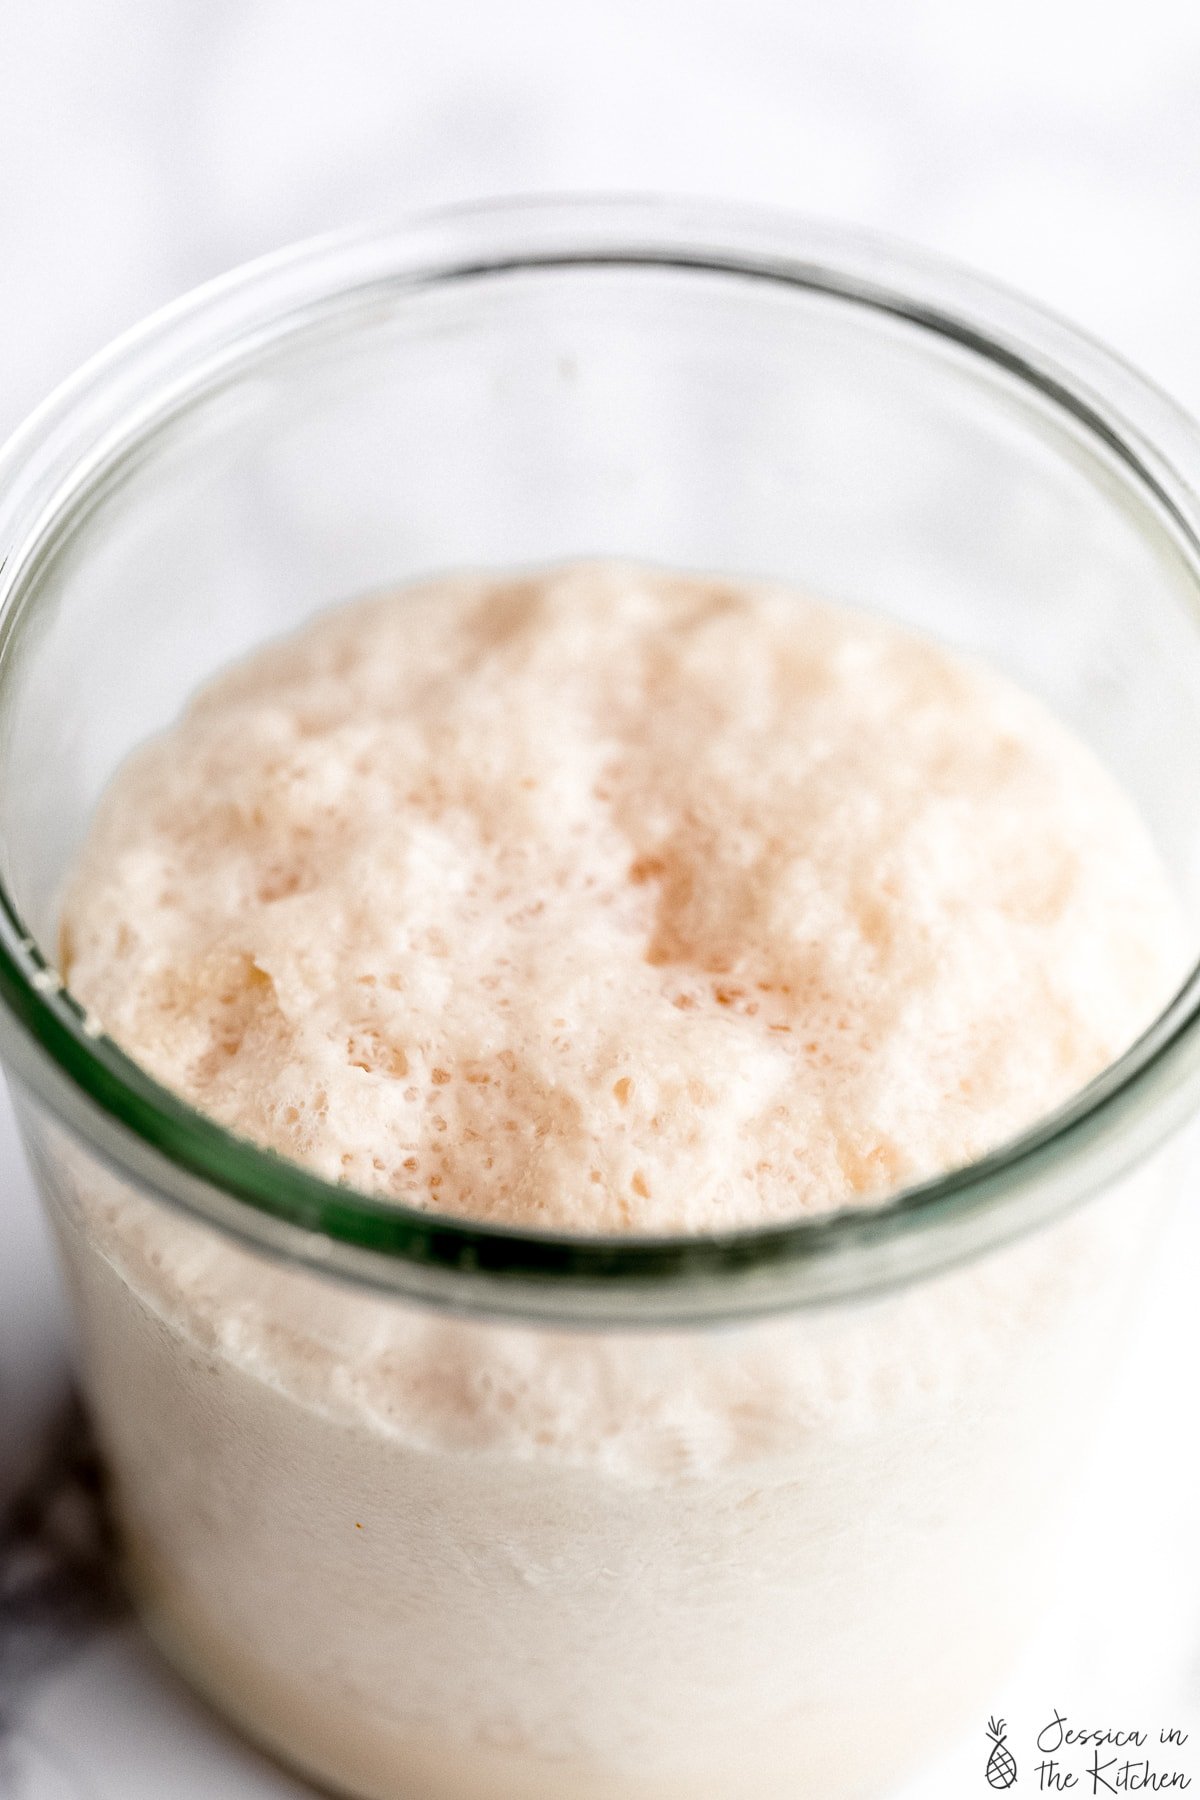
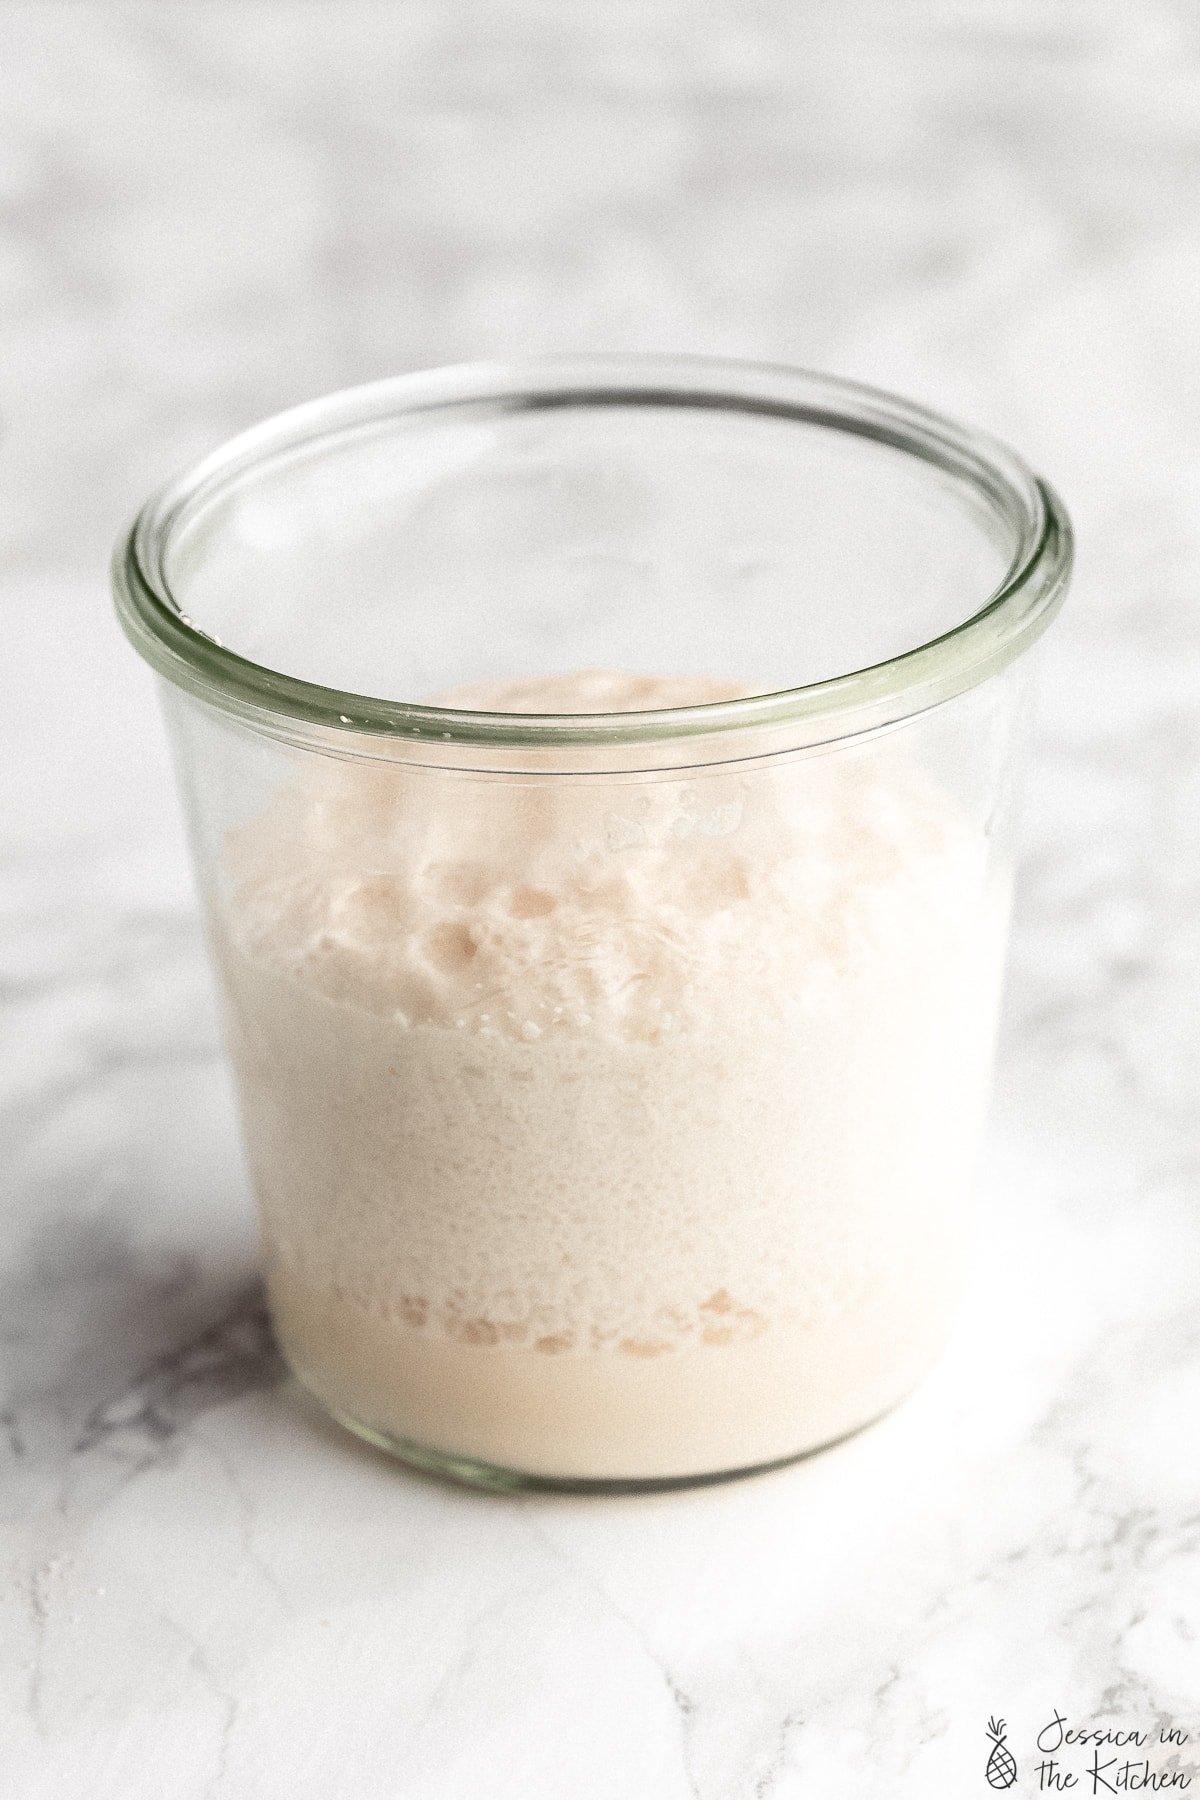
To test yeast, start with 1/2 cup of warm water that is about 100°F. You want your water at this temperature because it’ll be warm enough to activate your yeast, but not hot enough to kill it. To emphasize, you do not want boiling water nor too hot water. I recommend using a food thermometer or a candy thermometer. If you don’t have one, basically you don’t want water that’ll be too hot to touch.
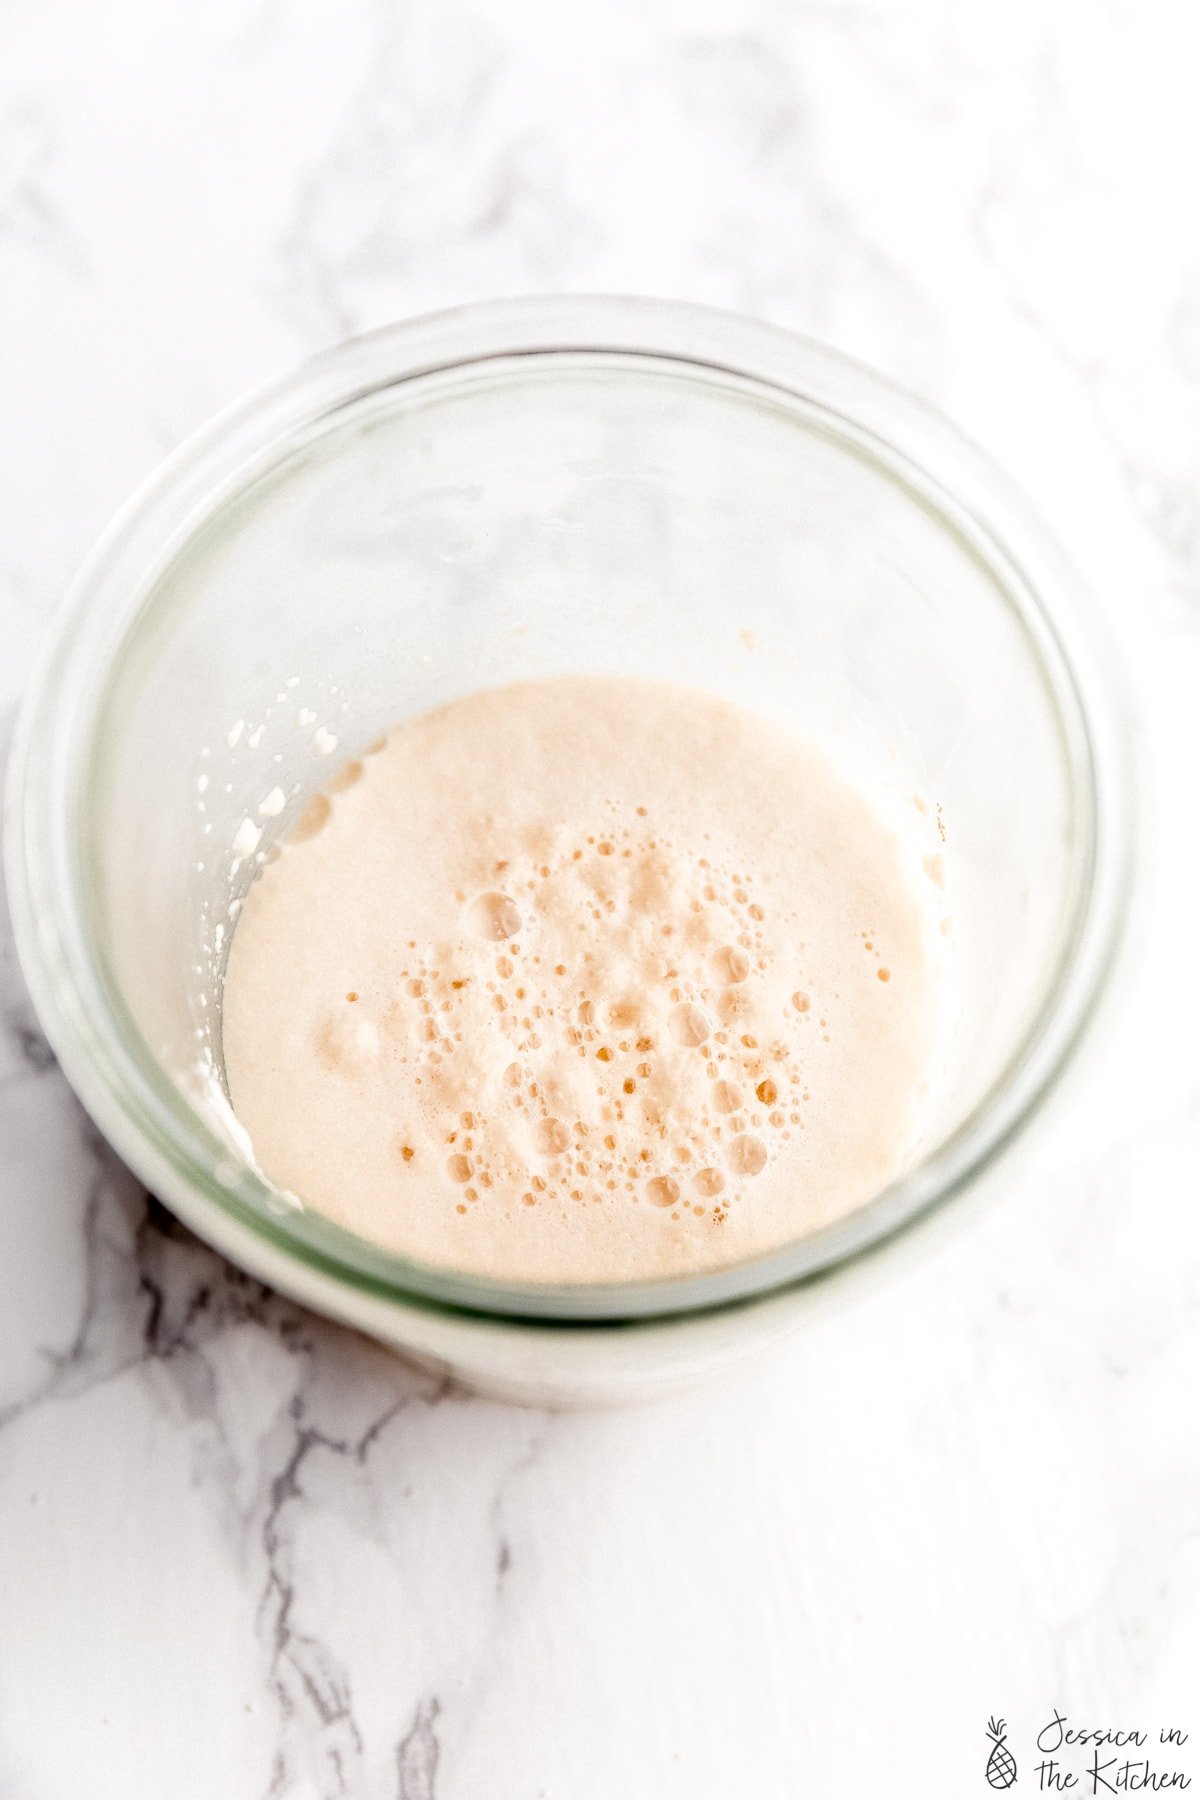
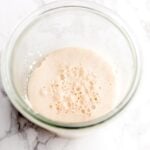
Then, add in 2 1/4 teaspoons room temperature instant yeast (or active dry yeast) and 1 teaspoon sugar. The sugar feeds the yeast and provides what my husband (the scientist) calls “activation station!”. Stir it all the combine for about 15 seconds until combined and then leave it alone for about 10 minutes. After even just a few minutes, you should start to see the top bubble and lightly bloom or foam.
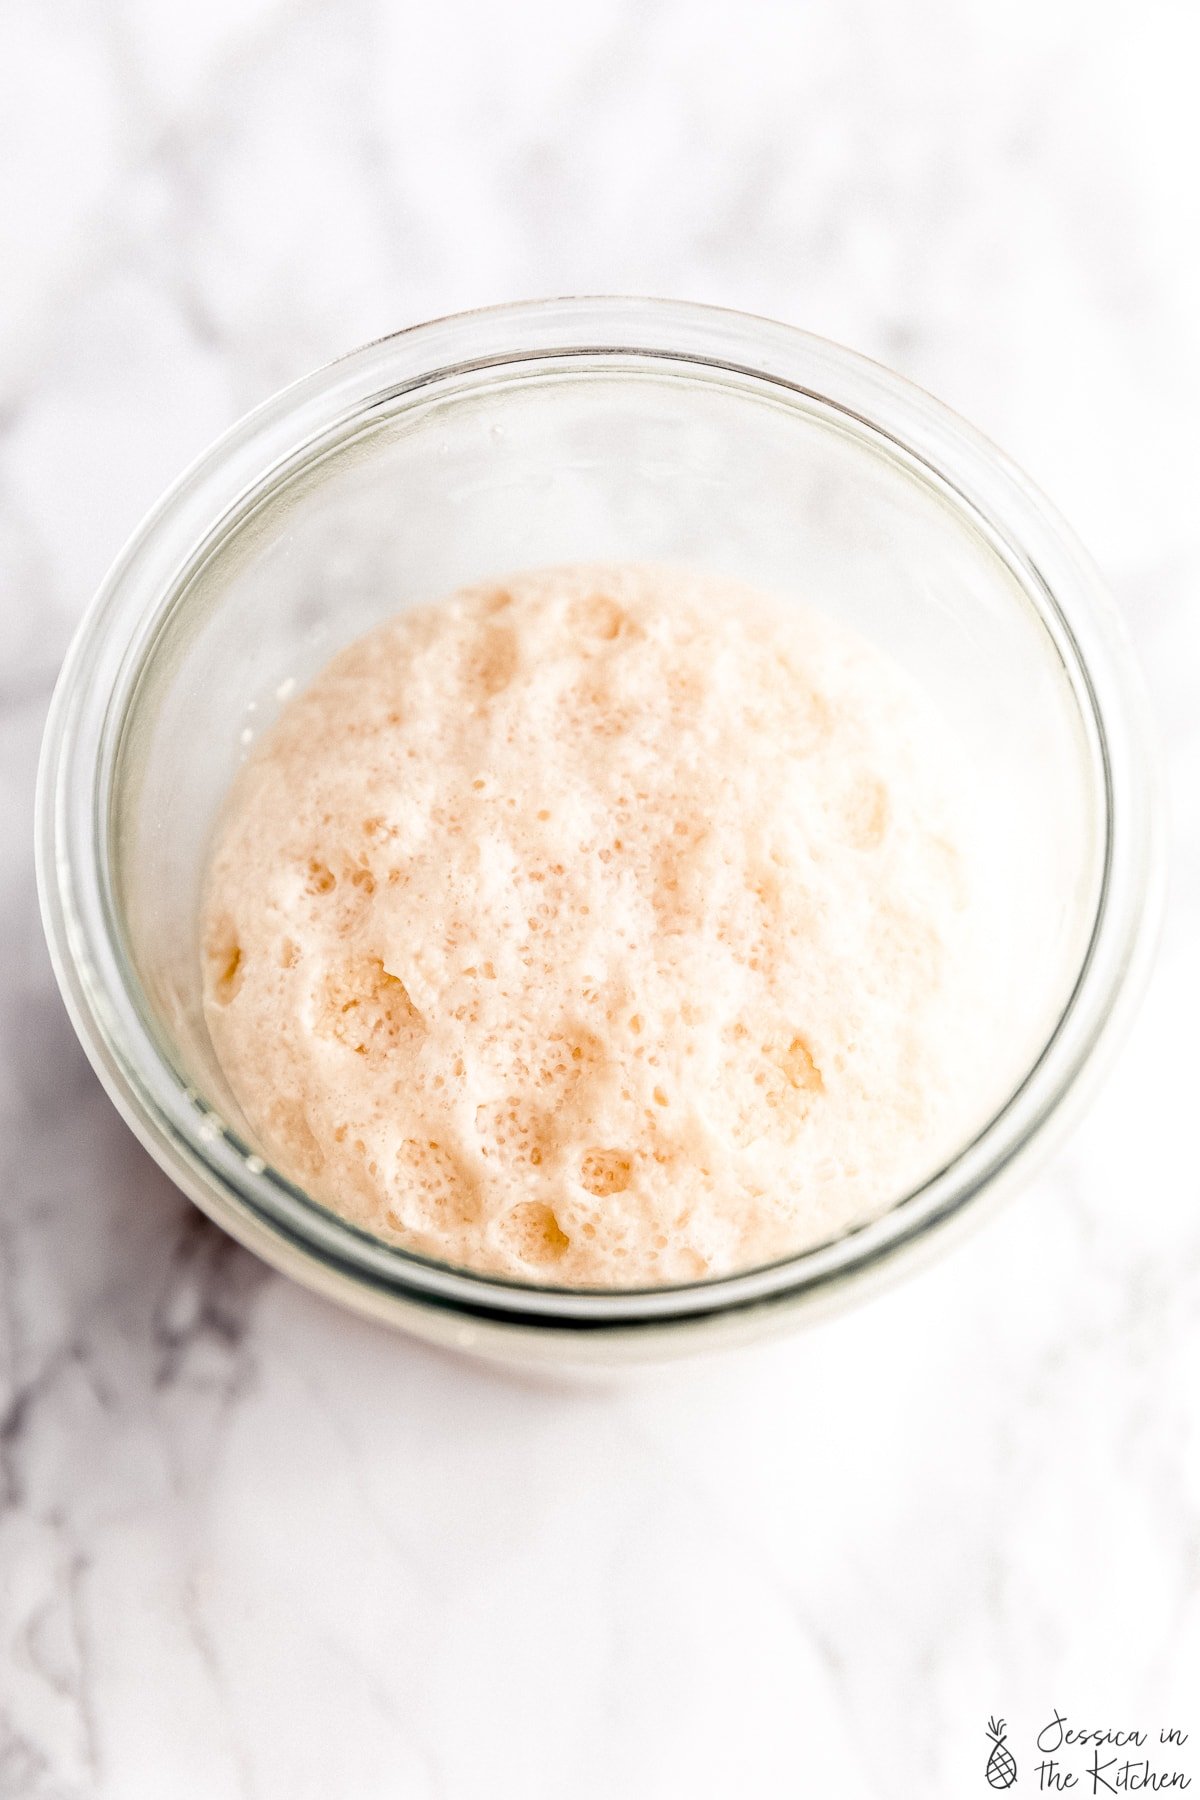
After 10 minutes, the yeast should’ve doubled or tripled in size and should be high up. The first container I tested this in, I completely forgot that I was testing and it bubbled over onto the counter! This is all good news – your yeast is fresh!
If your yeast does nothing and you added the right temperature of the water, your yeast is dead. Toss it, and get some fresh yeast.
Happy Baking! If you want a few yeast recipes to start off with here are some of my favourites:
- No Knead Bread (Dutch Oven Bread)
- Vegan Naan Bread Recipe
- Gluten Free Focaccia Bread with Garlic, Rosemary and Tomatoes
- Garlic and Rosemary Focaccia Bread
How to Store Your Yeast to Keep it Fresh
The best place to store your yeast is in the freezer or the fridge. I keep mine in the fridge, but the freezer puts a pause on the yeast’s expiry date, making it last much longer.
How long can you store yeast?
If using active dry yeast, I recommend going by the date on the bag. Instant yeast can last for years in your fridge or freezer.
I hope this post on how to test yeast helps friends and that you find it useful! Happy Baking!
Ingredients
- 1/2 cup warm water , (about 100°F/40°C)
- 2 1/4 teaspoons instant yeast , (or active dry yeast)
- 1 teaspoon granulated sugar
Equipment
- bowl
Instructions
- In your warm water, stir in all the yeast and granulated sugar for about 15 seconds until combined and then leave it alone for about 10 minutes. After even just a few minutes, you should start to see the top bubble and lightly bloom or foam.
- After 10 minutes, the yeast should’ve doubled or tripled in size and should be high up. It should also have a yeast aroma. Good news - your yeast is fresh!
- If your yeast does nothing and you added the right temperature of water, your yeast is dead. Toss it, and get some fresh yeast. Happy Baking!
How do I test yeast and is it still good or fresh? Find out easily with this quick and simple 10 minute test!
Here’s a question I often ask myself: “Is my yeast still good?!”. Yeast is a living thing, and the bread and buter of your baking recipes so you always want to ensure it’s good before using it, else your recipe won’t work. I’ve been baking for over 10 years, and the truth is that unless you test your yeast, you won’t know. Fortunately, it is very easy to test yeast in just 10 minutes, and will make all your baking projects that much easier. I realised that if I’m asking this, maybe many of you are too. Here’s how to check if your yeast is still good.
What is Yeast?
Yeast is a leavening product that is alive and that you add to your dough to make it rise. In this post, I’ll be referring to instant yeast and active dry yeast. Yeast needs the correct environment to properly grow and multiply, thus helping your dough to expand and create beautiful baked products. This environment (known as a sympathetic environment) refers to the temperature of its surroundings such as your kitchen, the temperature of the liquid it’s in, and the food (sugar or starch) that you add to the dough to make it rise as it bakes.
Active dry yeast is a dormant form of yeast made up of live yeast cells surrounded by dead cells. Its granules are large, and as the name suggests you need to “activate” your dry yeast. When using active dry yeast, the yeast will need to be dissolved in some warm water with sugar (aka, exactly what are doing today) before using it in the recipe. This process is called proofing.
Instant yeast is made up of finer granules and does not need to be proofed before it. You can mix it right into the dry ingredients. It’s also made up of 100% living cells and as such tends to be seen as more powerful than active dry.
What yeast to use?
I recommend using the yeast that your recipe calls for. For instant, I use SAF Instant Yeast . For active dry yeast, I love Bob’s Red Mill . They are both very affordable, is affordable in large quantities and last very long.
How to Test Yeast to see if it is Good
To test yeast, start with 1/2 cup of warm water that is about 100°F. You want your water at this temperature because it’ll be warm enough to activate your yeast, but not hot enough to kill it. To emphasize, you do not want boiling water nor too hot water. I recommend using a food thermometer or a candy thermometer. If you don’t have one, basically you don’t want water that’ll be too hot to touch.
Then, add in 2 1/4 teaspoons room temperature instant yeast (or active dry yeast) and 1 teaspoon sugar. The sugar feeds the yeast and provides what my husband (the scientist) calls “activation station!”. Stir it all the combine for about 15 seconds until combined and then leave it alone for about 10 minutes. After even just a few minutes, you should start to see the top bubble and lightly bloom or foam.
After 10 minutes, the yeast should’ve doubled or tripled in size and should be high up. The first container I tested this in, I completely forgot that I was testing and it bubbled over onto the counter! This is all good news – your yeast is fresh!
If your yeast does nothing and you added the right temperature of the water, your yeast is dead. Toss it, and get some fresh yeast.
Happy Baking! If you want a few yeast recipes to start off with here are some of my favourites:
- No Knead Bread (Dutch Oven Bread)
- Vegan Naan Bread Recipe
- Gluten Free Focaccia Bread with Garlic, Rosemary and Tomatoes
- Garlic and Rosemary Focaccia Bread
How to Store Your Yeast to Keep it Fresh
The best place to store your yeast is in the freezer or the fridge. I keep mine in the fridge, but the freezer puts a pause on the yeast’s expiry date, making it last much longer.
How long can you store yeast?
If using active dry yeast, I recommend going by the date on the bag. Instant yeast can last for years in your fridge or freezer.
I hope this post on how to test yeast helps friends and that you find it useful! Happy Baking!
Ingredients
- 1/2 cup warm water , (about 100°F/40°C)
- 2 1/4 teaspoons instant yeast , (or active dry yeast)
- 1 teaspoon granulated sugar
Equipment
- bowl
Instructions
- In your warm water, stir in all the yeast and granulated sugar for about 15 seconds until combined and then leave it alone for about 10 minutes. After even just a few minutes, you should start to see the top bubble and lightly bloom or foam.
- After 10 minutes, the yeast should’ve doubled or tripled in size and should be high up. It should also have a yeast aroma. Good news - your yeast is fresh!
- If your yeast does nothing and you added the right temperature of water, your yeast is dead. Toss it, and get some fresh yeast. Happy Baking!
How to Test Yeast to see if it’s still Good
Equipment
- bowl
Ingredients
- 1/2 cup warm water (about 100°F/40°C)
- 2 1/4 teaspoons instant yeast (or active dry yeast)
- 1 teaspoon granulated sugar
Instructions
- In your warm water, stir in all the yeast and granulated sugar for about 15 seconds until combined and then leave it alone for about 10 minutes. After even just a few minutes, you should start to see the top bubble and lightly bloom or foam.
- After 10 minutes, the yeast should’ve doubled or tripled in size and should be high up. It should also have a yeast aroma. Good news - your yeast is fresh!
- If your yeast does nothing and you added the right temperature of water, your yeast is dead. Toss it, and get some fresh yeast. Happy Baking!
Video
Nutrition
How to Test Yeast to see if it’s still Good https://jessicainthekitchen.com/how-to-test-yeast-to-see-if-its-still-good/ May 13, 2020
If you can’t live without mayonnaise, you don’t have to if you want to eat vegan. Here’s my fave Vegan Mayo recipe! It only takes 5 minutes, tastes incredible and uses easy ingredients!
I remember the first time I tried vegan mayo, or plant based mayo, about four years ago. It tasted just like regular mayonnaise and kind of blew my mind. It tastes exactly the same! Vegan mayo here costs me quite a lot, and I remember one day wondering if it was possible to make it at home and friends – here we are!
Not only is it possible to make vegan mayo at home, but it’s also easy and takes only a few minutes. It’ll save you a lot of money since it’s some basic affordable pantry ingredients (really), and tastes incredible!
What ingredients are in vegan mayo?
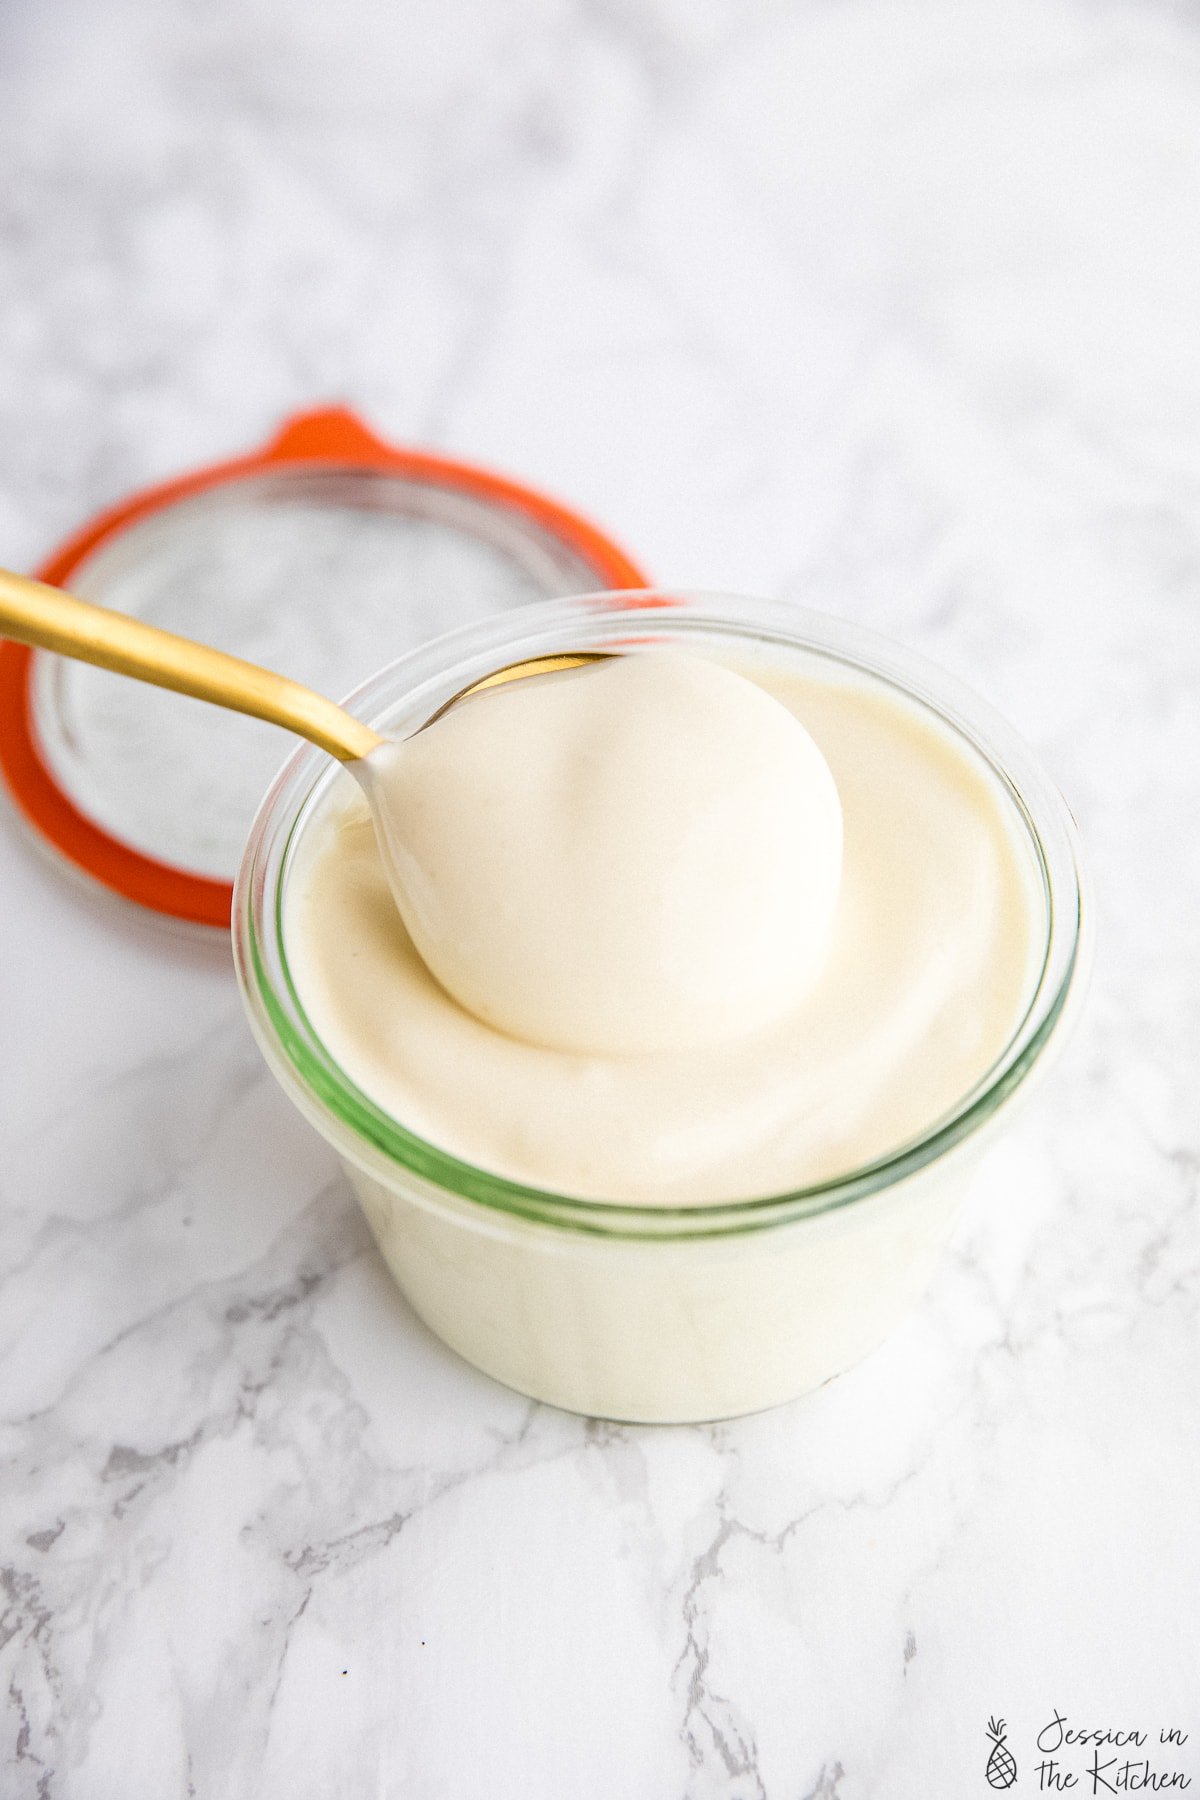
I’m so glad you asked! Vegan mayo is made up of three basic ingredients – soy milk, oil and salt. Let me break them down a bit for you.
- Soy milk – You’re going to need to use soy milk for this recipe. Truthfully, apart from almond milk, it’s the vegan milk I always have in stock. Why? Emulsification. Soy milk contains natural emulsifiers that make it perfect for so many purposes. I use it to make creamy and solid vegan butter, as the perfect buttermilk in pancakes and cakes and more, and here – in mayo! It works perfectly and binds to the oil to make it nice and fluffy and mayo like!
- Oil – oil adds the necessary fat and binds with the soy milk. You want to use a subtle/mellow and odourless oil for taste. I love olive oil and coconut oil but they can be a bit overpowering here, so I recommend a more neutral oil like sunflower seed, canola or grape seed oil.
- Salt – salt is such a superior ingredient to me. It acts as a flavour enhancer here and really boosts the flavour.
Now, for the other ingredients. I always add in some apple cider vinegar, mustard, black pepper and garlic powder which for me take it over the top and give it that quintessential mayonnaise flavour. If however you’re using this for a sweet dessert, leave those out.
- I go through this in detail in recipe, but the best tool to use is an immersion blender in an open cup (like the beaker that comes with it). Air is an essential ingredient and you need free-flowing air to allow the emulsification to properly take place.
- You can’t do this in a container that is completely sealed off (just like my whipped coffee recipe ). You can use a blender , but ensure it’s an open blender. I would do it that way by blending the soy milk first and then slowly streaming in the oil in the top. Cover it loosely with a cloth so it doesn’t splash. If you’re doing that, you might need to double the quantity so there’s enough for the blade.
- You should start with all your ingredients at the same temperature, preferably at room temperature.
Flavour Customisations/Add-ins
Feel free to customise this vegan mayo recipe with flavour add-ins. Here are some of my favourites:
- add in some dried Italian seasoning and an extra pinch of garlic powdered for herbed garlic mayo.
- Add in some sambal oelek or sriracha for a spicy mayo
Related Recipes
These are my favourite recipes where I use my homemade mayo:
- Bang Bang Broccoli
- Bang Bang Cauliflower
- Vegan BLT Sandwich
- Loaded Vegan Potato Salad
- Vegan Tuna Sandwich
- Vegan Tartar Sauce (with vegan fish tacos)
- spread on some No Knead Bread
Ingredients
- 1/2 cup original soy milk , (125mL) see notes for substitutions
- 2 teaspoons apple cider vinegar , or lime juice or white vinegar
- 1/2 teaspoon garlic powder
- 1/2 teaspoon sea salt
- 1 teaspoon dijion mustard
- 1 cup oil , I recommend any neutral oil (don’t use coconut or olive oil) (250mL)
Instructions
- Make sure all your ingredients are room temperature. If your milk is cold, you can microwave it for about 10 seconds.
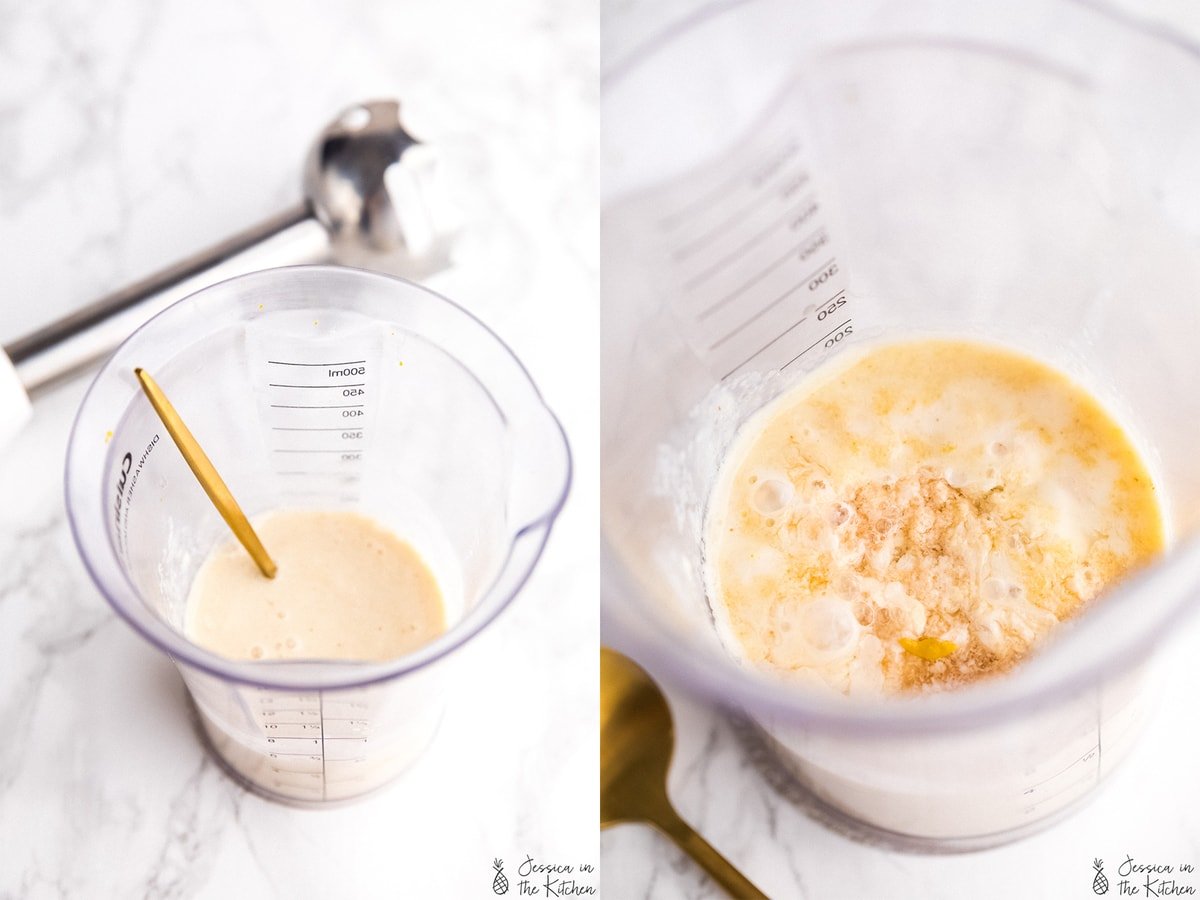
- Add the original soy milk, apple cider vinegar, garlic powder, sea salt and mustard in the immersion blender beaker/jar and stir together.
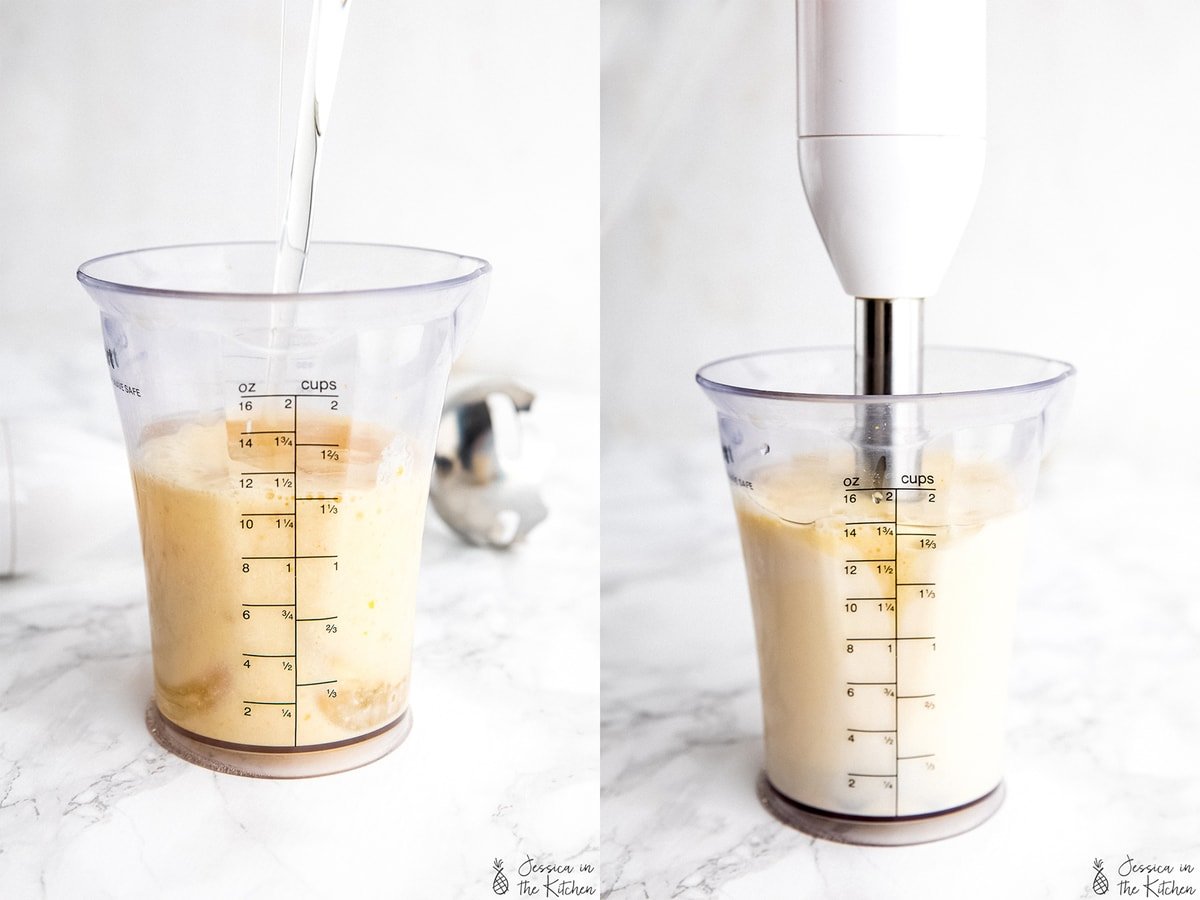
- Pour the oil over the soy milk mixture. Let it sit for about a minute.
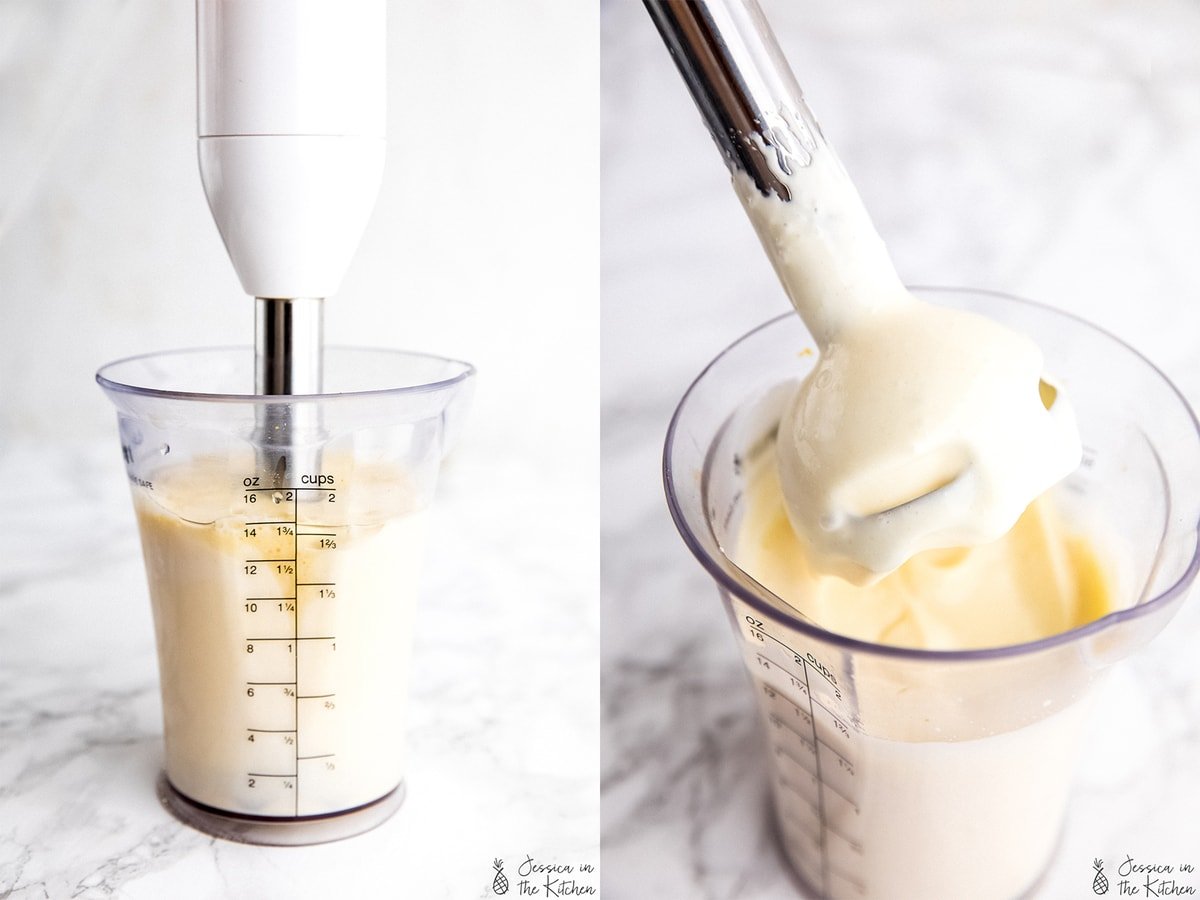
- Place your immersion blender into the bottom of the jar. Blend and keep it firmly pressed against the bottom for about 15 seconds while the mixture emulsifies. Slowly move the blender up and down to properly blend and incorporate all the ingredients until thick and fully combined.
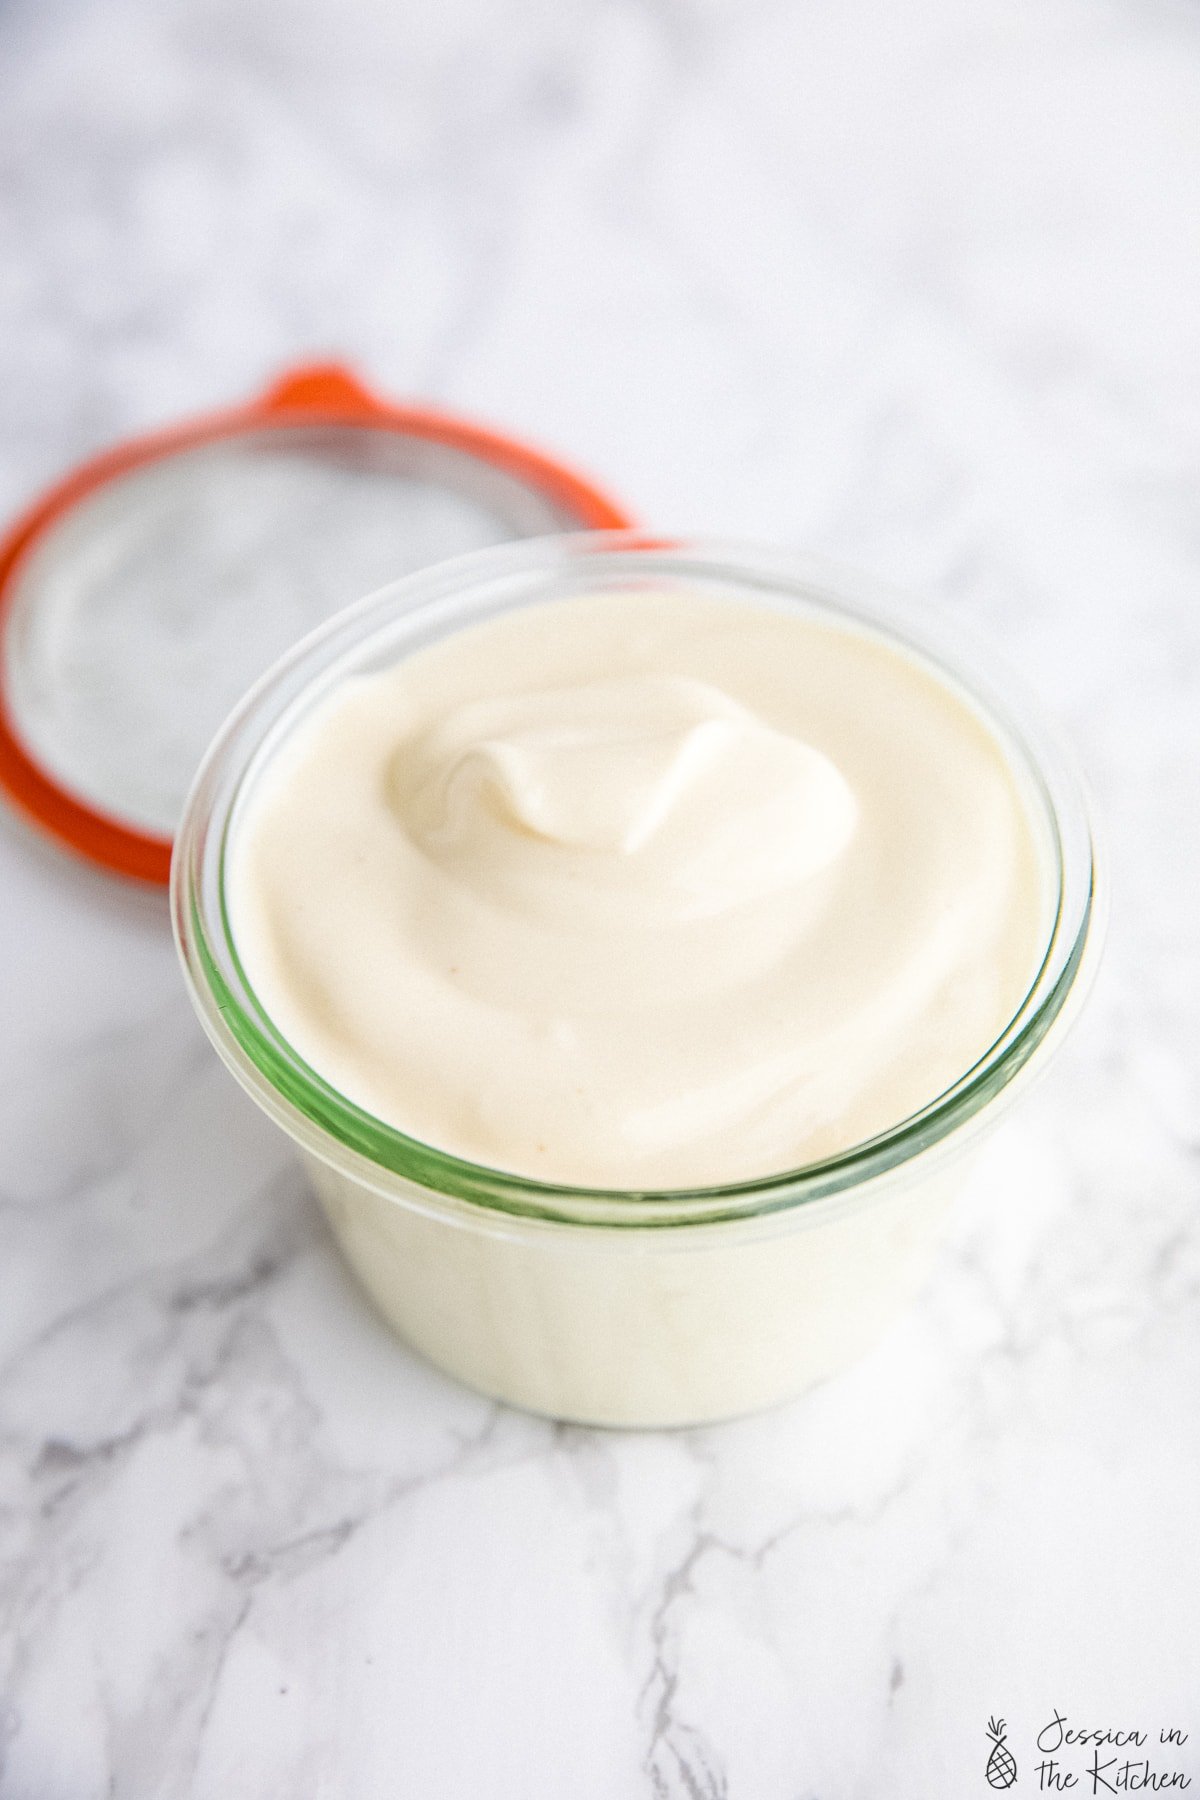
- Taste and add/adjust any ingredients if needed. Place in a sealed jar in the fridge. It thickens up in the fridge even more. Enjoy!
Notes
- I go through this in detail in recipe, but the best tool to use is an immersion blender in an open cup (like the beaker that comes with it). Air is an essential ingredient and you need free-flowing air to allow the emulsification to properly take place.
- You can’t do this in a container that is completely sealed off (just like my whipped coffee recipe ). You can use a blender , but ensure it’s an open blender . I would do it that way by blending the soy milk first and then slowly streaming in the oil in the top. Cover it loosely with a cloth so it doesn’t splash. If you’re doing that, you might need to double the quantity so there’s enough for the blade.
- You should start with all your ingredients at the same temperature, preferably at room temperature.
- If you don’t have the immersion blender cup, be sure to use a tall and narrow jar (like a Weck Jar ).
