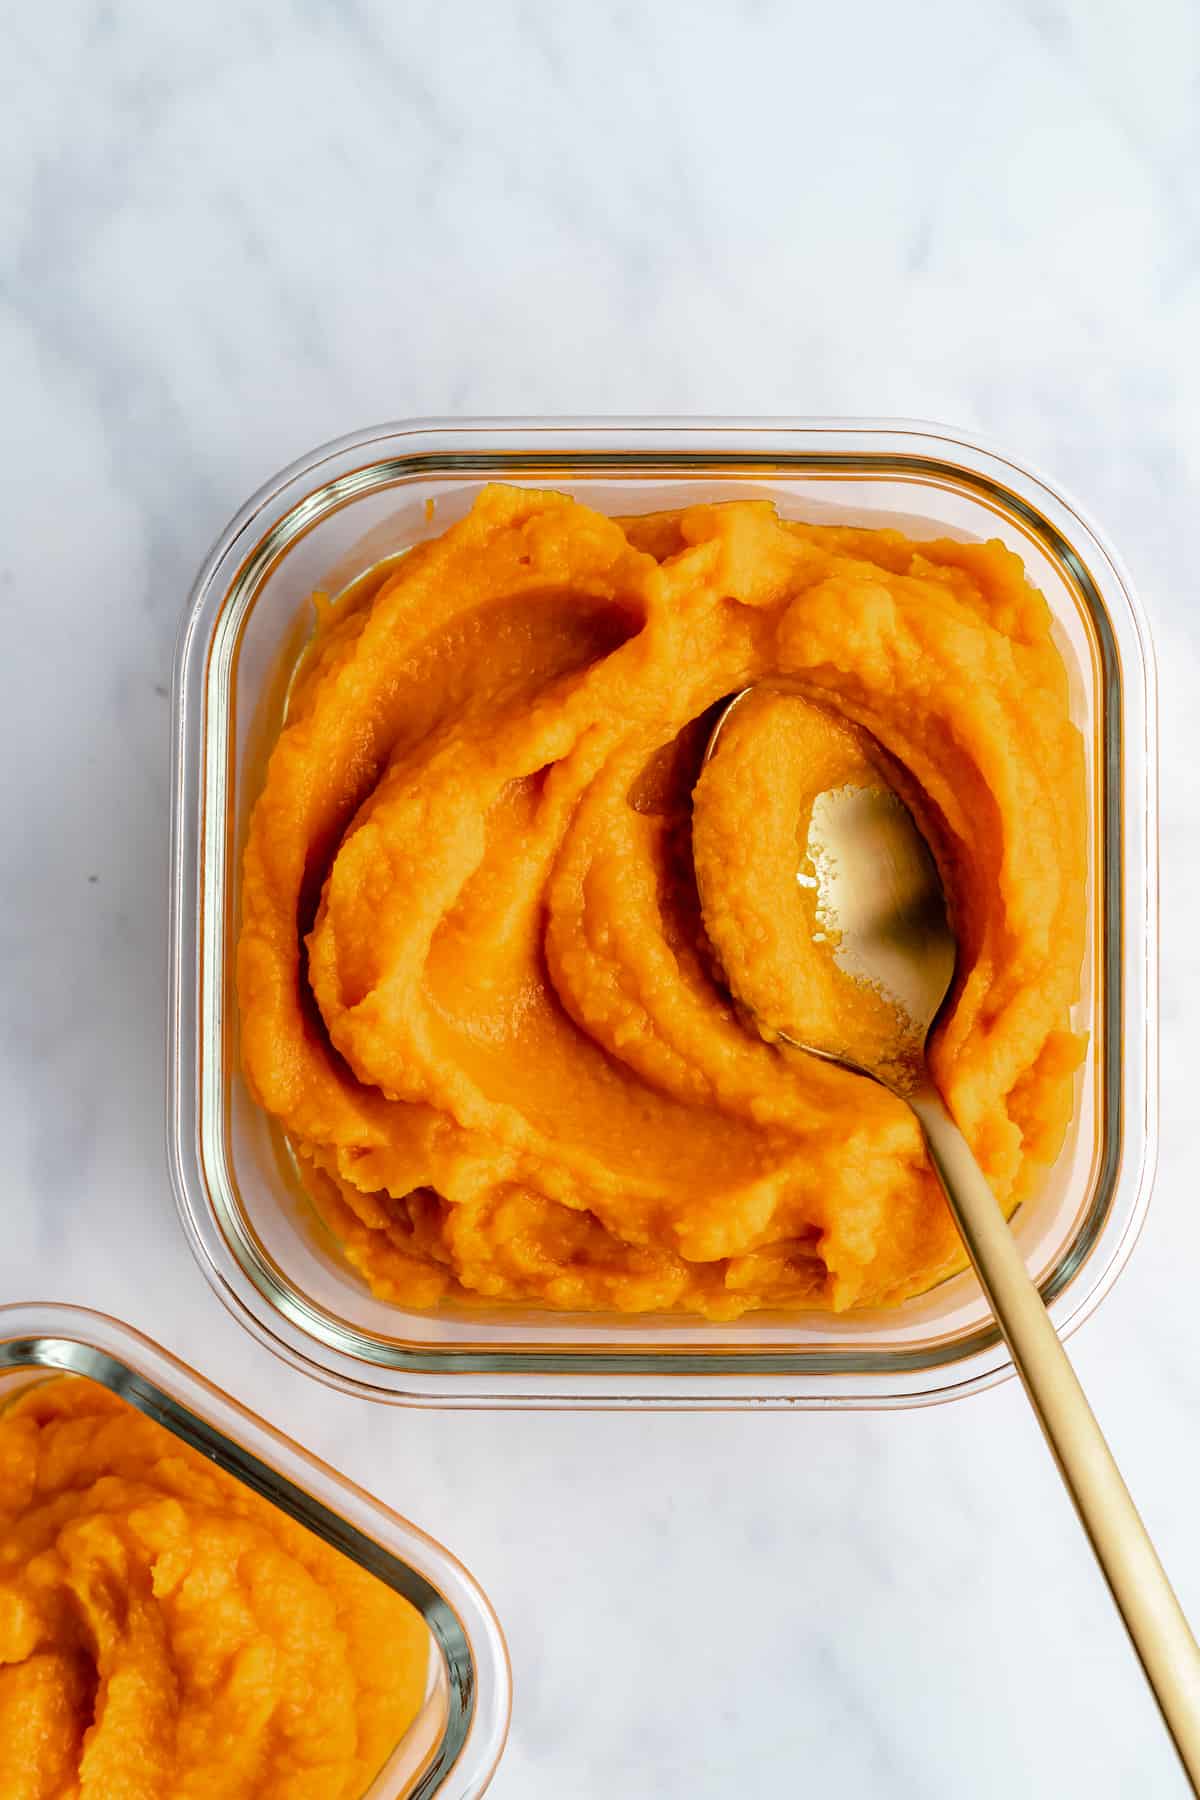
Learn how to make pumpkin puree using only 1 ingredient! This step-by-step tutorial is perfect if you can’t find a can of pumpkin puree at the store or just want to learn how to make it at home. It’s SO easy, freezer-friendly, and budget-friendly!
I keep hearing from you guys on my Instagram “ my supermarket has a limit on pumpkin puree ” or “ I can’t find any cans of this where I live! ” I’ve also had a lot of you ask me how to make pumpkin puree. Never fear friends, making pumpkin puree is far easier than it may seem and you can make a lot and freeze it for later!
What Is Pumpkin Puree?
Pumpkin puree is an end product from roasting your pumpkin, scooping out the flesh, and blending it to a smooth and creamy texture. You can use it in any of your favorite fall recipes, as a vegan egg replacement , or to add fiber to any dish!
Why You’ll Love This Pumpkin Puree Recipe
- It makes whole pumpkins usable . If you grow your own pumpkins (or buy some at the store), most recipes don’t have you use them whole— pumpkin recipes almost always call for puree. So puree your pumpkins and the world is your oyster!
- The best substitute for canned puree . When there’s a canned pumpkin shortage, this homemade pumpkin puree recipe will come to the rescue!
- Easy and cost effective . Once you know how to make pumpkin puree at home, you’ll never go back to the canned stuff! The process is simple and it will save you money too.

Notes on ingredients
There is only one ingredient in this recipe—pumpkin! But still, a few tips:
- Pumpkin – Hello star ingredient! You’re going to want to ensure that you’re buying edible pumpkins like sugar pumpkins or pie pumpkins, not carving pumpkins. The texture isn’t the same and won’t give you the same results.
How to Make Pumpkin Puree

- Preheat your oven. Set it to 350°F/180°C.
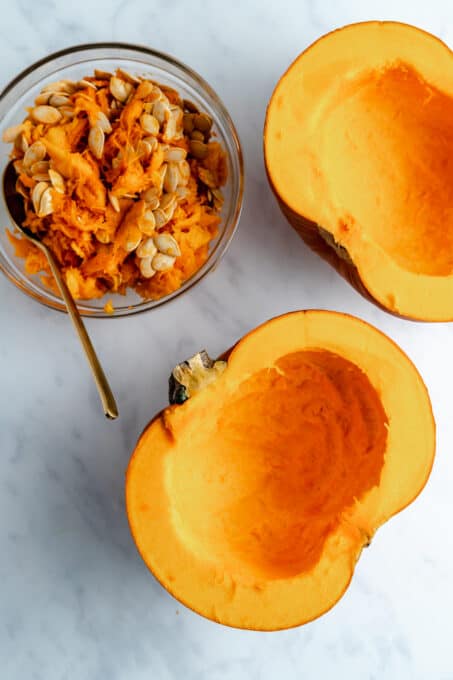
- Prep the pumpkin. Cut your pumpkin in half so it’s more manageable. Scoop out the seeds and stringy bits with a spoon, scraping along the inside of the flesh.
- Slice the pumpkin. Cut into wedges with a sharp knife and lay it on a baking tray.
- Bake the pumpkin. Bake for 1 hour in the oven until it is fork-tender.

- Remove the skin. When finished baking, peel off the skin.
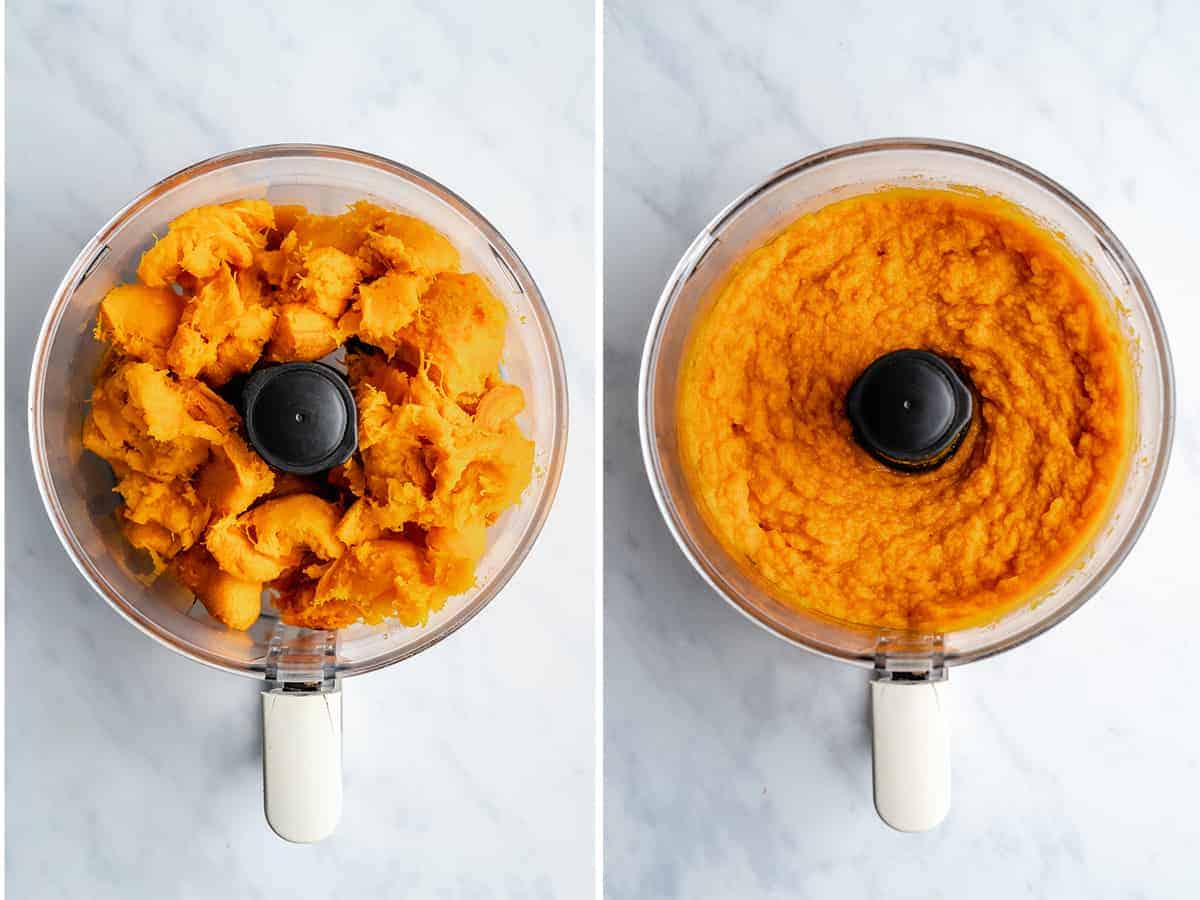
- Turn into pumpkin puree. Put the pumpkin into a food processor and blend until it’s smooth.
Tips for Success
- Line the baking sheet . I usually line my baking sheet with parchment paper or a silicone mat so I don’t have a big mess to clean afterwards.
- Use a rimmed baking sheet . Speaking of messes! You’ll also want to use a rimmed baking sheet (also known as a sheet pan). The edges keep the pumpkin juices from dripping into your oven.
- Strain watery pumpkin puree . If you’re getting a particularly watery puree, set it in a sieve/strainer over your sink for about 30 minutes to 1 hour. This will drain any excess liquid.
Ways to Use Pumpkin Puree
Now that you have this amazing homemade pumpkin puree, what can you do with it? Here are a few ideas:
- DIVINE Pumpkin Muffins
- For a surprisingly low cal but incredibly delicious Pumpkin Mug Cake
- For a creamy Pumpkin Soup
- To use in fabulous chili, like this Pumpkin Quinoa Chili
- In a savory pasta dish a la this Pumpkin Alfredo Pasta
- For cozy Pumpkin Pancakes
- To make a snack cake, like this Pumpkin Sheet Cake
Storing and Freezing Homemade Pumpkin Puree
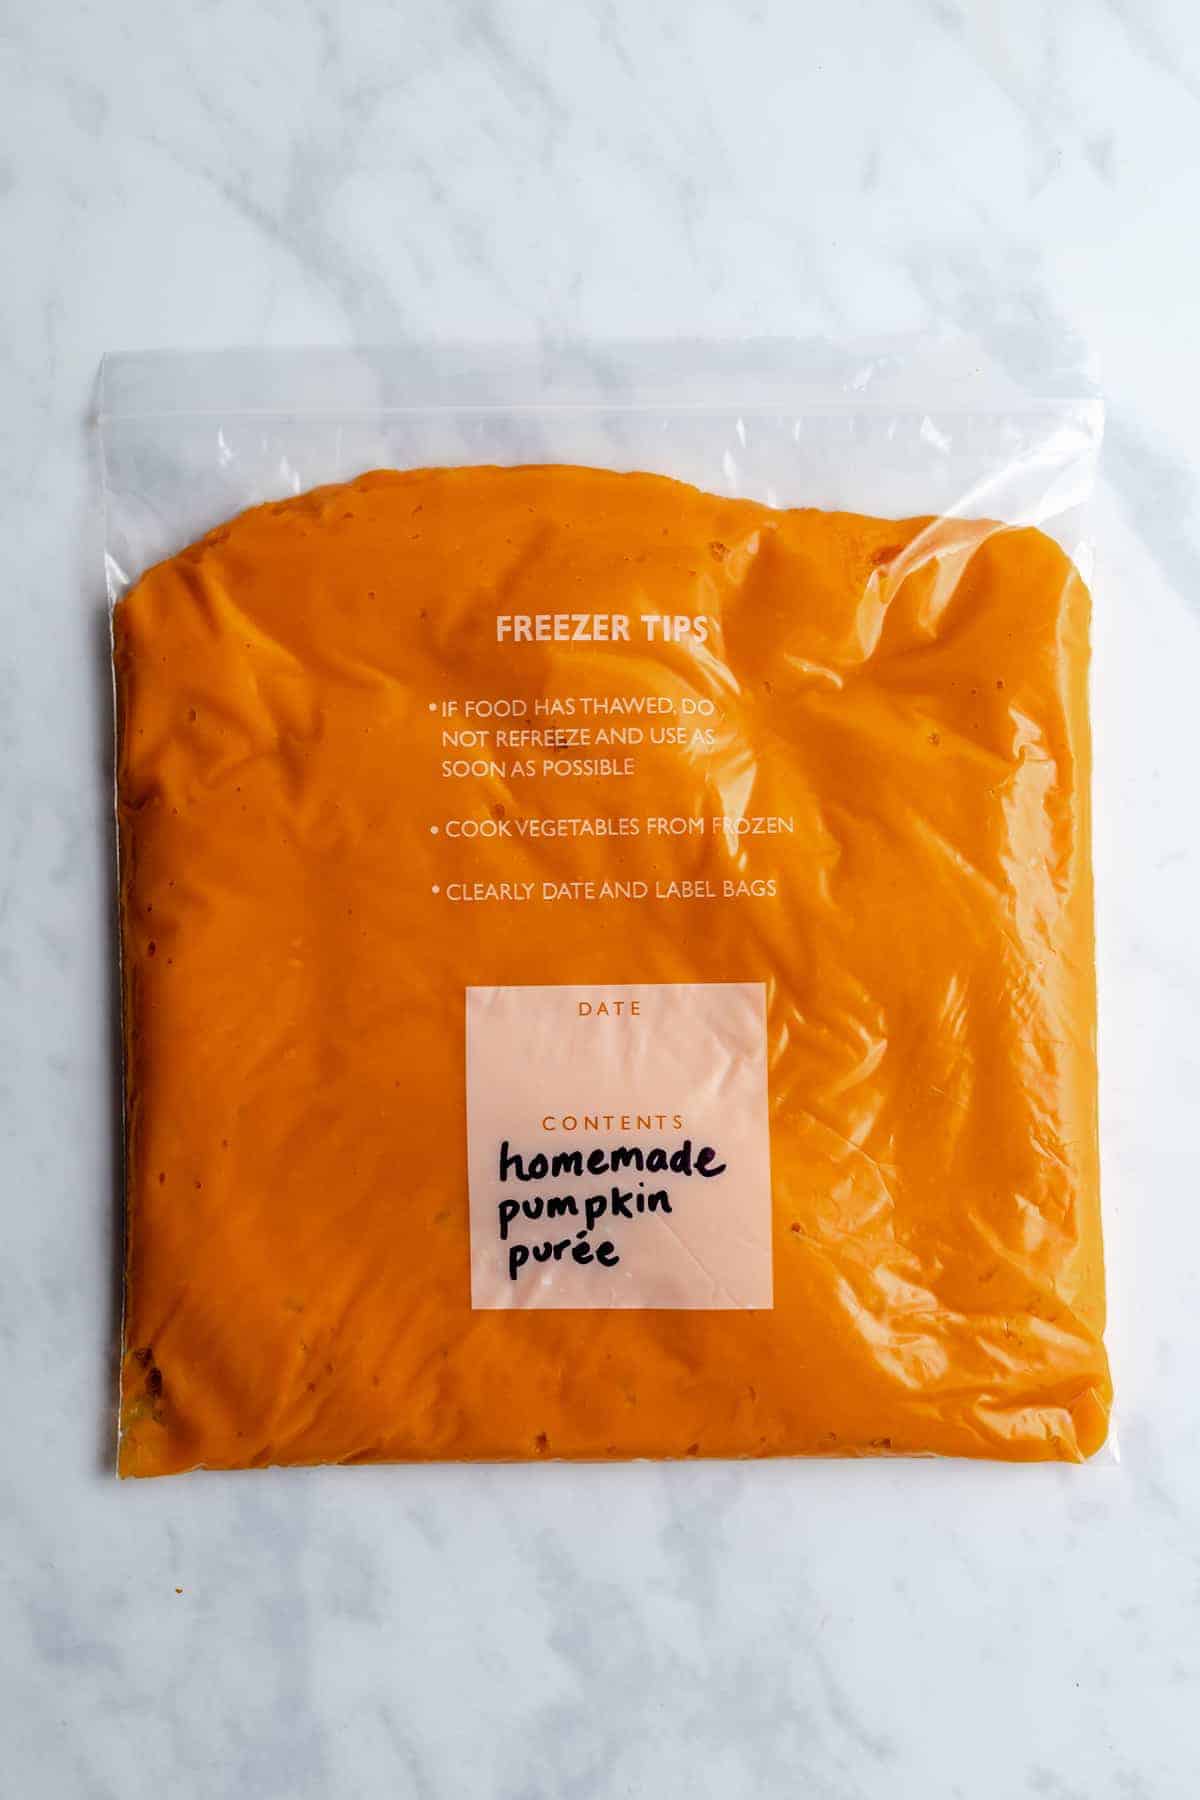
- Fridge: You can store this in a Tupperware container or jar in your fridge until needed, or you can store your pumpkin puree into zipped bags and place them in the freezer laid flat (like below).
- Freezer: You can also freeze this in tablespoon amounts in an ice cube tray, which is great for small amounts in smoothies or overnight oatmeal !
Ingredients
- 1 Pumpkin , or as many as you’d like
Instructions
- Preheat your oven to 350°F/180°C.
- Cut your pumpkin in half so it’s more manageable.
- Scoop out the insides of the pumpkin (the seeds and stringiness).
- Cut into manageable sizes with a sharp knife and lay it on a lined baking tray. I also love to line mine with parchment paper or (affiliate link) a silicone mat .
- Bake for 1 hour in the oven until it is fork tender (should slide right off of a fork stuck into it.)
- When finished baking, peel the skin (it should come right off).
- Put the pumpkin into a food processor and blend until it’s smooth. You may need to blend for up to 3 to 5 minutes until fully smooth.
- Sometimes homemade pumpkin puree is a bit watery, so strain off any excess liquid by adding the puree to a fine mesh strainer and letting the excess water drain off for about 5 minutes. This way you can easily use it anywhere canned pumpkin puree is used.
- You can store this in a tupperware or jar in your fridge until needed, or you can store your pumpkin puree into zipped bags and place them in the freezer laid flat. You can also freeze this in tablespoon amounts in an ice cube tray! Great for small amounts in smoothies or overnight oatmeal !
Notes
Recipe by: Jessica Hylton – Jessica in the Kitchen | Photography by: Eat Love Eats

How to Make Pumpkin Puree
Ingredients
- 1 Pumpkin or as many as you’d like
Instructions
- Preheat your oven to 350°F/180°C.
- Cut your pumpkin in half so it’s more manageable.
- Scoop out the insides of the pumpkin (the seeds and stringiness).
- Cut into manageable sizes with a sharp knife and lay it on a lined baking tray. I also love to line mine with parchment paper or (affiliate link) a silicone mat .
- Bake for 1 hour in the oven until it is fork tender (should slide right off of a fork stuck into it.)
- When finished baking, peel the skin (it should come right off).
- Put the pumpkin into a food processor and blend until it’s smooth. You may need to blend for up to 3 to 5 minutes until fully smooth.
- Sometimes homemade pumpkin puree is a bit watery, so strain off any excess liquid by adding the puree to a fine mesh strainer and letting the excess water drain off for about 5 minutes. This way you can easily use it anywhere canned pumpkin puree is used.
- You can store this in a tupperware or jar in your fridge until needed, or you can store your pumpkin puree into zipped bags and place them in the freezer laid flat. You can also freeze this in tablespoon amounts in an ice cube tray! Great for small amounts in smoothies or overnight oatmeal !
Video
Notes
Nutrition
How to Make Pumpkin Puree https://jessicainthekitchen.com/how-to-make-pumpkin-puree/ October 30, 2020
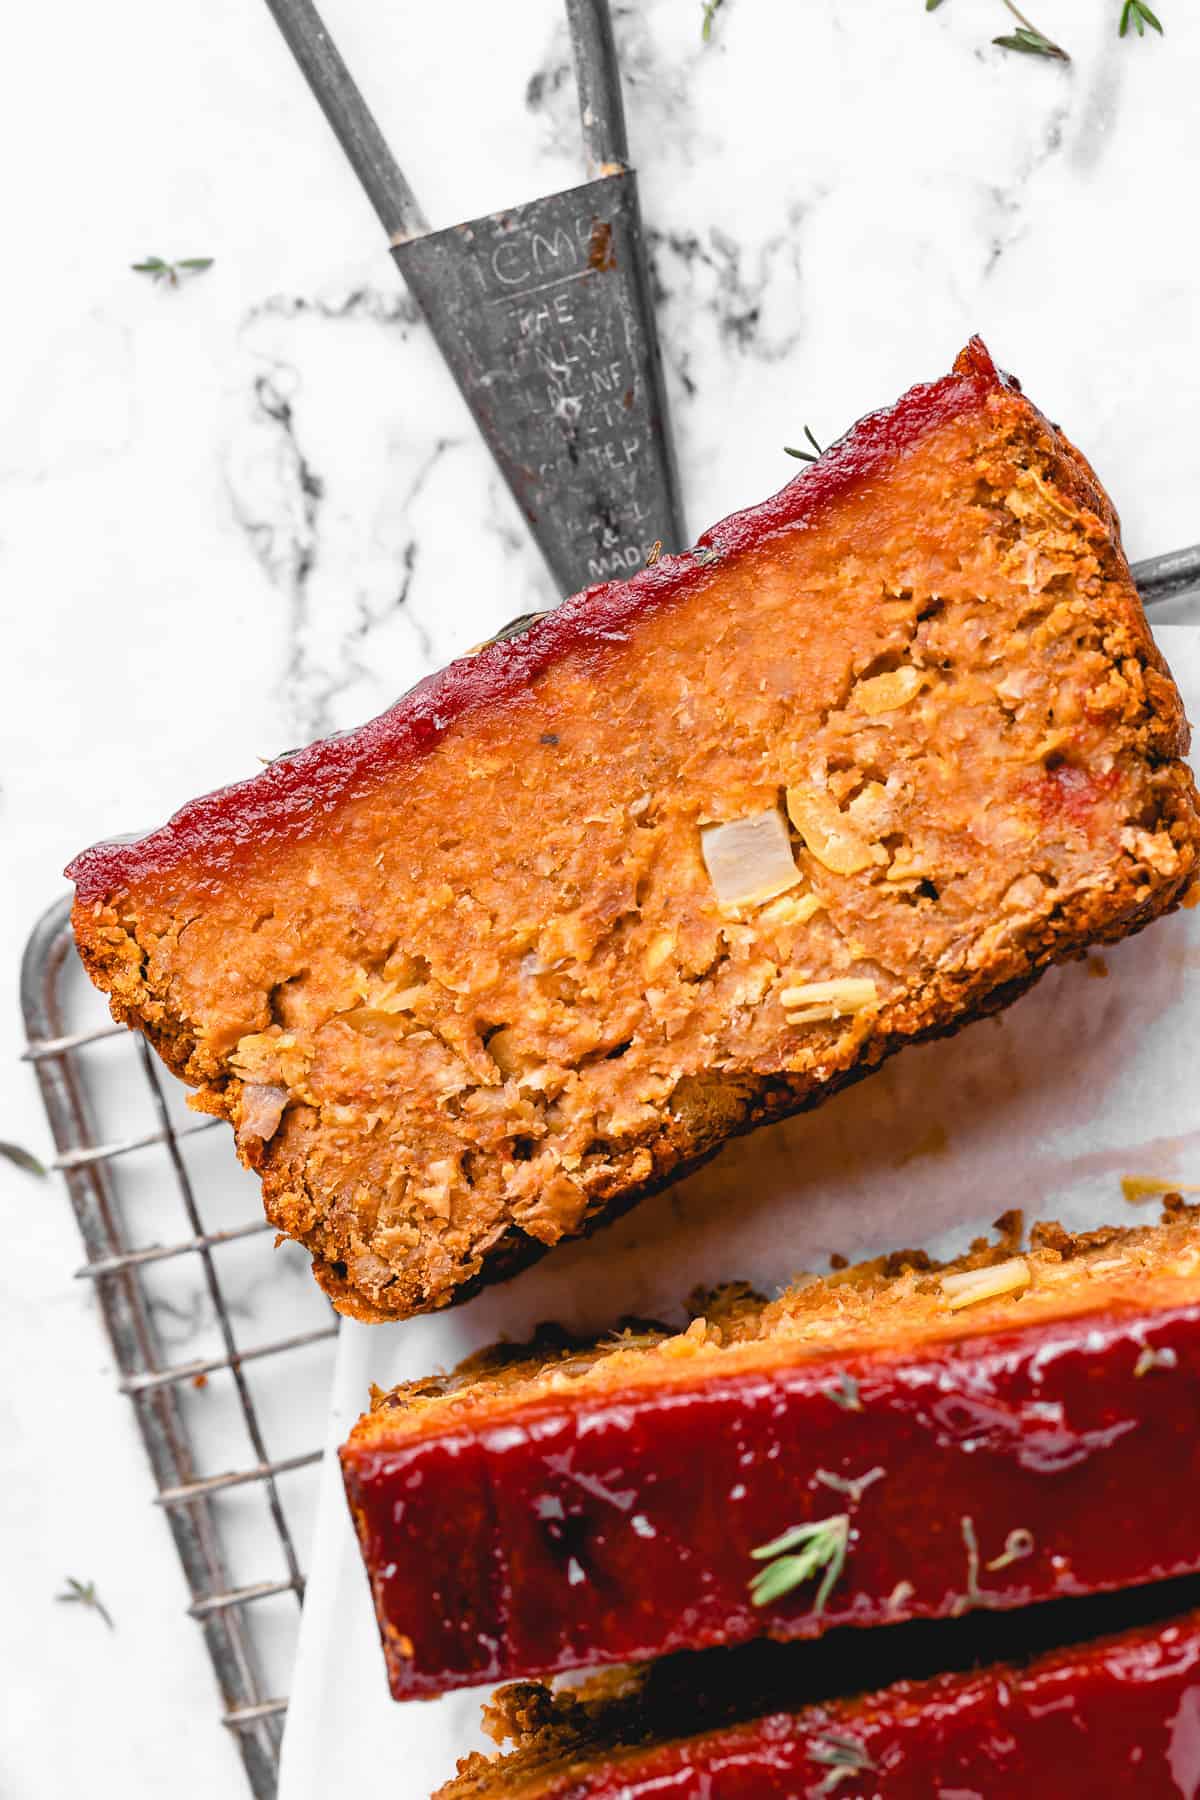
This vegan meatloaf makes a perfect holiday main dish or entree! With hearty chickpeas, lentils, and seasonings, it takes only 15 minutes of prep and has the most incredible texture, rated 5 stars by dozens. It’s bound to be a show-stopper at your next meal!
Serve this moist and flavourful vegan meatloaf at Thanksgiving with vegan mashed potatoes and green bean casserole . It’s a great alternative to vegan turkey !
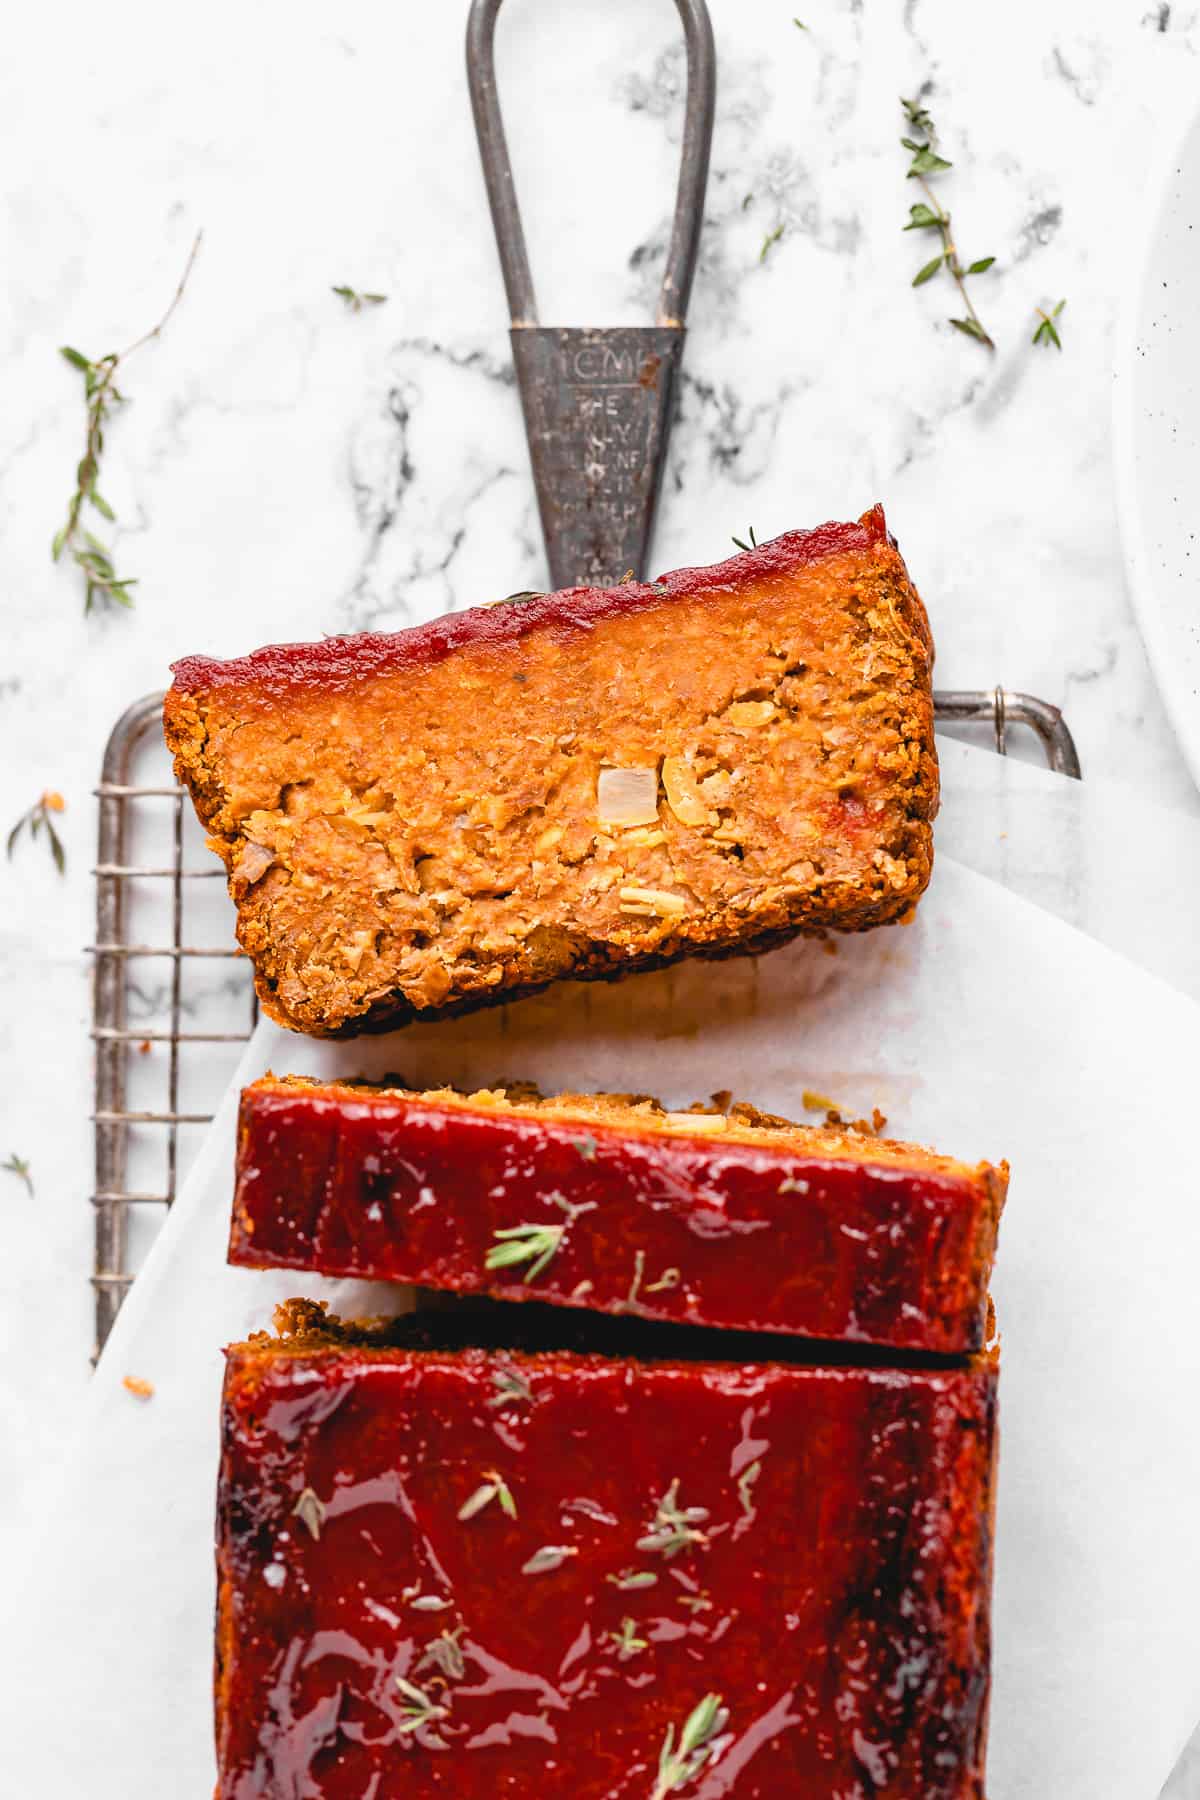
You NEED to try this vegan meatloaf! You will not be disappointed. I know I say that with almost everything, right? But this loaf is so delicious, with a meltingly tender 5-star texture that blows all other vegan meatloaf recipes away. I knew I wanted the perfect balance of moist versus firm, and after lots of testing, I’m thrilled to say that this meatloaf is IT. I can’t think of a better setting for this beauty than a vegan Thanksgiving table. Or, really, any table!
Why I Love This Vegan Meatloaf Recipe
- Quick. This vegan meatloaf recipe needs about 15 minutes of hands-on prep before it’s ready to bake. The filling is simple but packed with savory ingredients and cozy spice. I make a quick tomato sauce to brush over top before baking, which is also very quick.
- Holiday-worthy. Vegan meatloaf is the perfect vegan-friendly Thanksgiving or holiday main dish. It’s satisfying and hearty, and it pairs so well with all kinds of Thanksgiving sides, from mashed potatoes to stuffing !
- Versatile. I think I ate this meatloaf for breakfast, lunch, and dinner for days the last time I made it. Even beyond the holidays, it’s super versatile! Make it into a Thanksgiving leftovers sandwich , mince it to garnish a vegan pizza , or add it to a breakfast hash recipe.
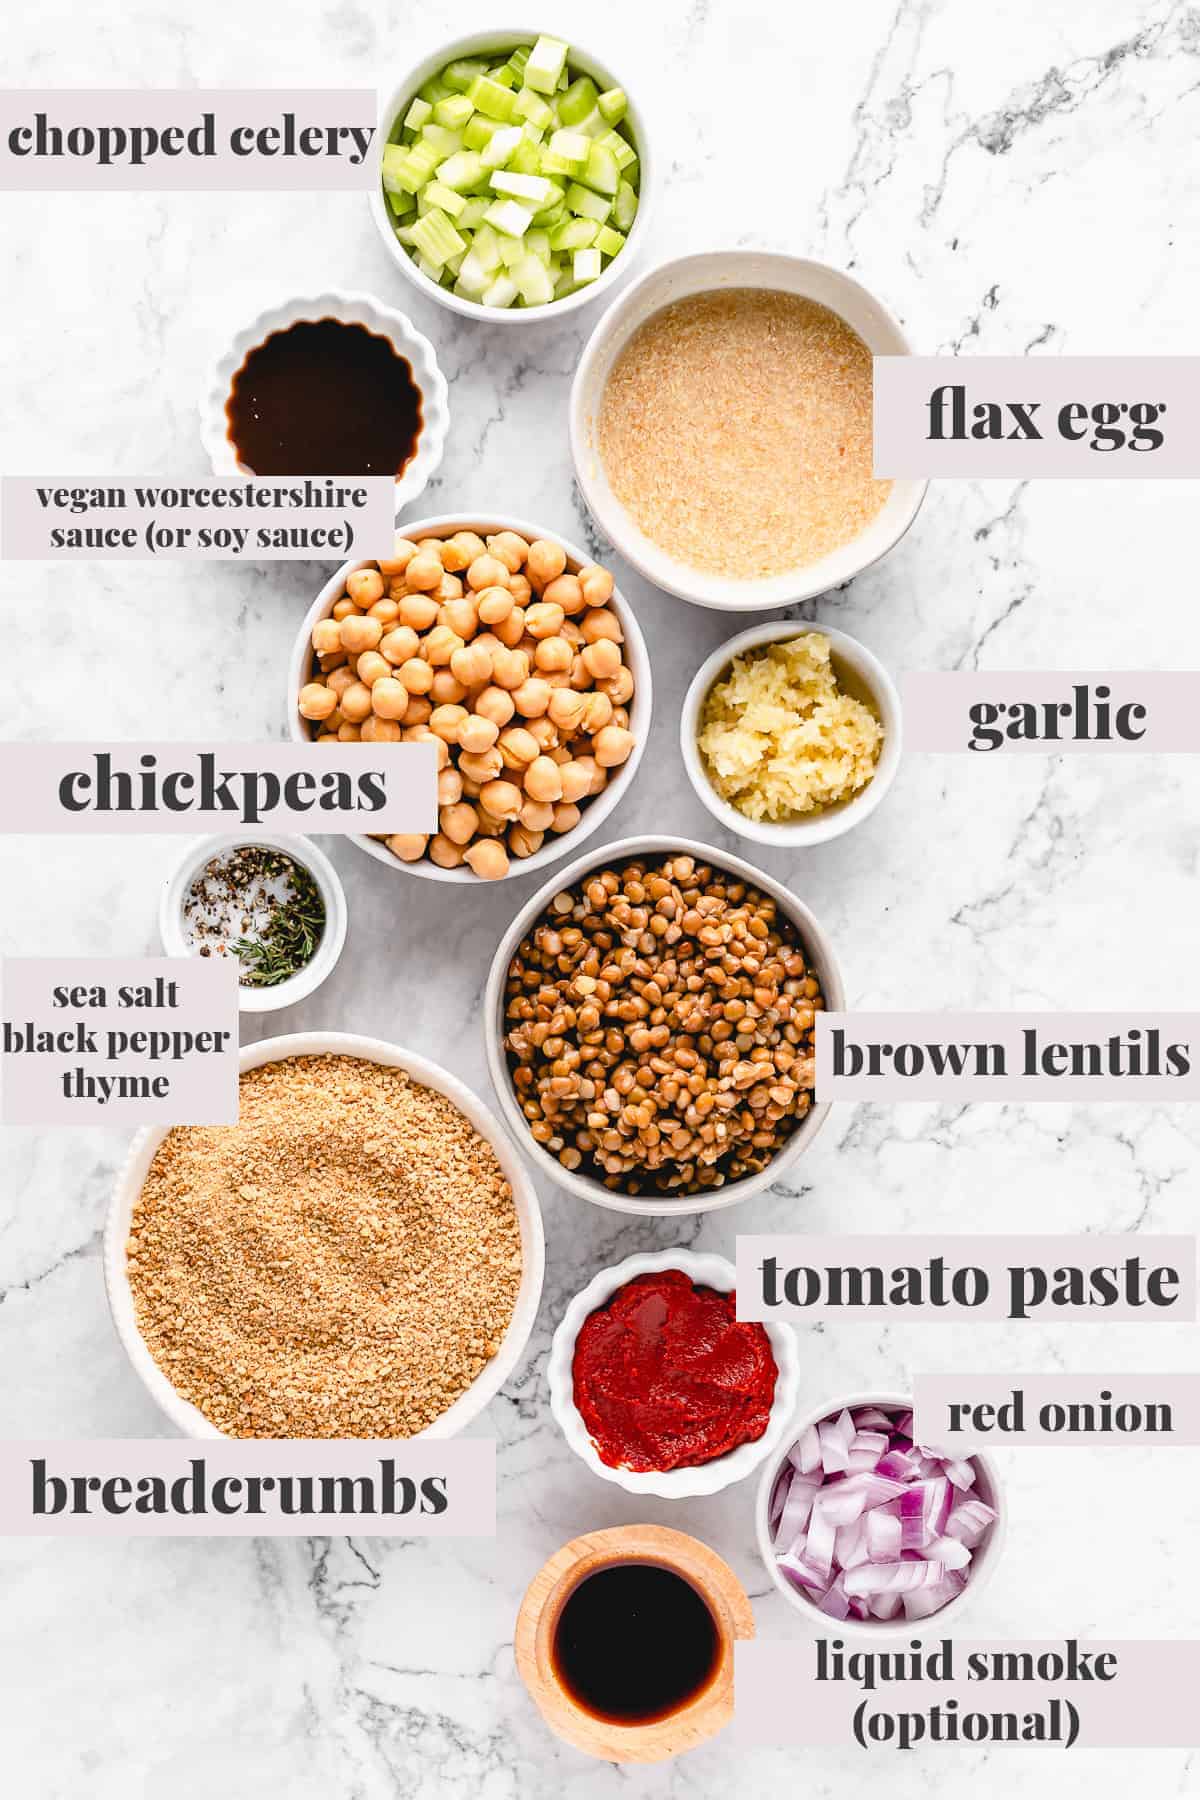
Notes on Ingredients
These are some quick notes on what this vegan meatloaf is made of. Spoiler: all good things, with no mystery ingredients or additives! One more perk of making this loaf from scratch. Scroll down to the recipe card for a printable list with the full recipe amounts.
- Vegan Worcestershire sauce – Make sure that you’re buying the vegan bottle, as most aren’t. And if you can’t find it, don’t sweat it. Soy sauce makes a great substitute.
- Flax egg – In all my testing, a flax egg is the best binder for vegan meatloaf. Ensure that your flax seeds are fresh (most of us seem to have a bag in our pantry or fridge from years ago). The seeds’ freshness affects how gelatinous your “egg” gets.
- Breadcrumbs – If you’re gluten-free, use gluten-free breadcrumbs!
- Brown lentils – I don’t recommend substituting any other type of lentils in this recipe. Red lentils are too mushy, and green lentils give the meatloaf a strange colour. Canned lentils are a great way to cut down on cooking time.
- Liquid smoke – I use a good amount of liquid smoke in this recipe. You can easily swap it for more soy sauce, but it makes a big difference in terms of flavour. If you’re sensitive to the taste or think 2 tablespoons might be overpowering, use only 2 teaspoons (and taste it before you add it to the meatloaf mixture).
How to Make Vegan Meatloaf
Here’s a short step-by-step showing how to make this best-ever vegan meatloaf. You’ll find printable directions in the recipe card after the post.
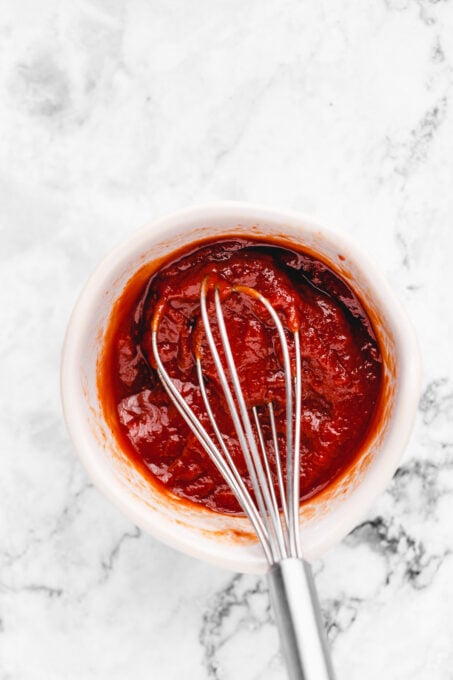
Make the tomato glaze.
- Make the tomato glaze. First, mix tomato paste with apple cider vinegar, maple syrup, and sea salt for the glaze. Set this aside for now.
- Sauté the veggies. Meanwhile, sauté garlic, onion, and celery over medium-high heat until softened.
Combine the ingredients.
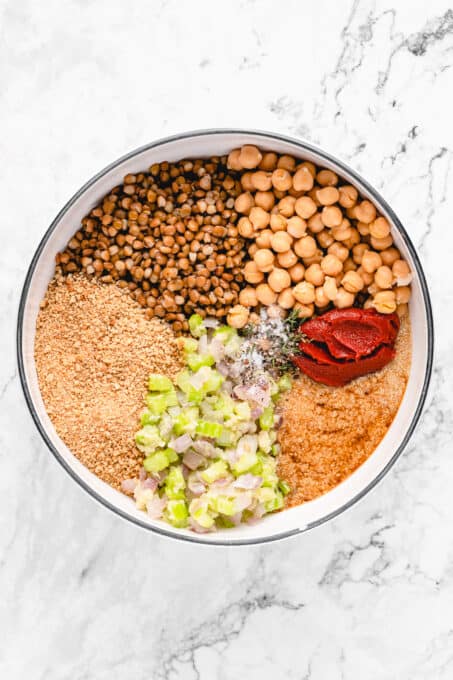
- Combine the ingredients. Add your sautéed veggies to a large bowl along with the chickpeas, lentils, liquid smoke, vegan Worcestershire (or soy sauce), breadcrumbs, sea salt, ground black pepper, flax eggs, tomato paste, and thyme. Gently mix with a wooden spoon.
- Blend. Next, add the mixture to a food processor. I have a 10-cup food processor, so if yours is smaller, consider blending in batches. Pulse a few times until everything begins to come together.

Blend.
- Fill the pan. Afterward, transfer the mixture into a parchment-lined loaf pan. Smooth the top with a spatula. Pour over the tomato glaze from earlier.
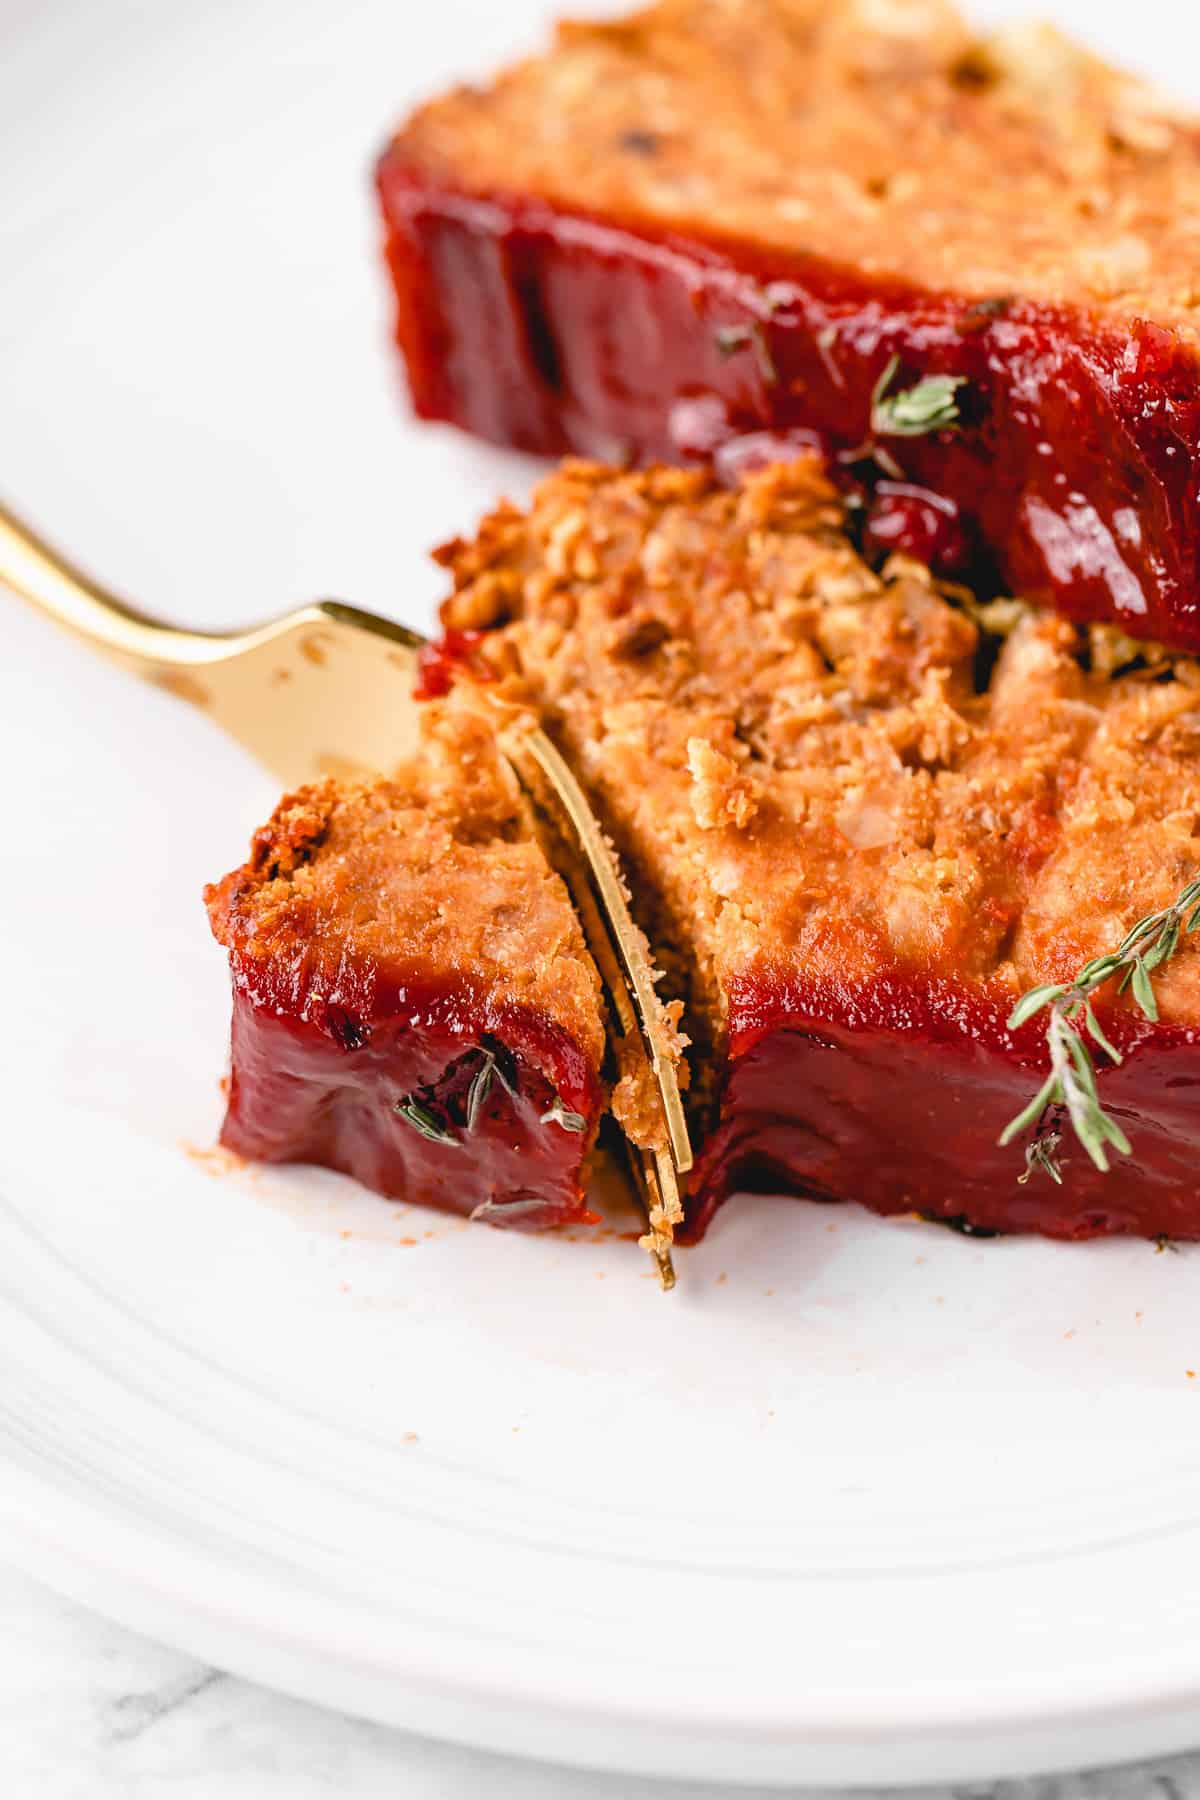
- Bake. Bake your vegan meatloaf at 375ºF for 45-60 minutes. My loaf is usually done at around 55 minutes. It’s ready if a toothpick comes out mostly clean. Allow the meatloaf to cool in the pan for 10 minutes, then remove it, slice, and serve. I cut my slices about 1-inch thick.
Why is my vegan meatloaffalling apart?
I tested this recipe specifically to avoid a crumbly meatloaf. However, it’s important to NOT over-pulse the vegan meatloaf ingredients in your blender or food processor. I did this the first time, and the mixture turns to mush and won’t firm up in the oven. You want to see chunks of celery, lentils, and other ingredients in the mix. I like to pulse about 10 times.
Secondly, make sure to press the mixture firmly into the loaf pan and bake the meatloaf until a toothpick stuck in the center comes out clean. If you’ve done all of this and it’s still falling apart, place the meatloaf in the fridge for an hour and it will firm up completely.

Recipe Tips
- Don’t overwork your meatloaf mixture. Too much blending in the food processor makes the meatloaf mushy (see above). Check out the step-by-step earlier and my video below for a better idea of what it should look like.
- Use the right pan. I strongly recommend using a loaf pan for this recipe. If you try to freeform this vegan meatloaf, it may fall apart or dry out (no one wants that!).
- Line the pan. Don’t skip this step! Lining the loaf pan with parchment paper holds the meatloaf together, not to mention, it’s much easier to remove from the pan.
- Go easy on the smoke. If you feel you’ll be sensitive to the liquid smoke (one or two readers have shared this) start with 2 teaspoons and adjust to taste. If you use less liquid smoke in the recipe, replace the rest with water so the meatloaf has the right amount of liquid (for example, add 1 teaspoon of liquid smoke + 1 tablespoon of water).
- Don’t skip the cooling period! Be sure to rest the meatloaf for at least 10 minutes after it’s out of the oven and before you slice it. You can even cool your meatloaf completely. As it cools, the texture firms up even more.
- Make a BBQ glaze. If you’d prefer a BBQ glaze, substitute the tomato paste for BBQ sauce.
Serving Suggestions
I love serving this “meatloaf” as a vegan Thanksgiving main. It goes with all of my favorite holiday sides, like this classic vegan green bean casserole , fluffy mashed potatoes , and roasted maple carrots . My easy sweet potato casserole also pairs great with the savoriness in this loaf. Of course, don’t skip a slice of vegan pumpkin pie or vegan pumpkin sheet cake for dessert.
Any other time of the year, serve vegan meatloaf with a side of air fryer fries and a vegan Cobb salad for a cozy, casual weeknight meal.
Storing and Reheating Leftovers
- Refrigerate. Store any leftover vegan meatloaf in an airtight container in the fridge for up to 3 days.
- Reheat. Warm your meatloaf in the oven or microwave until it’s hot throughout. Leftovers taste delicious in sandwiches, wraps, and over salads.
More Vegan Holiday Recipes
- Hasselback Butternut Squash
- Sweet Potato Soufflé
- Vegan Apple Pie
- Vegan Cranberry Meatballs
- Candied Yams
Ingredients
- 2 teaspoons coconut oil , or any oil
- ¼ cup chopped red onion
- 2 ribs celery , diced
- 5 cloves garlic , minced
- 1 (15 oz.) can chickpeas , drained and thoroughly rinsed
- 1 3/4 cup freshly cooked brown lentils , or 15 oz can, drained and throughly rinsed
- 2 teaspoons liquid smoke , up to 2 tablespoons* (see notes on liquid amount)
- 2 teaspoons vegan Worcestershire sauce , or more liquid smoke
- 1 1/4 cups breadcrumbs , gluten-free if needed
- 1/2 teaspoon sea salt
- 1/2 teaspoon ground black pepper
- 2 flax eggs
- 3 tablespoons tomato paste
- 1/2 teaspoon fresh thyme
Tomato Glaze
- 2 tablespoons tomato paste
- 2 teaspoons apple cider vinegar
- 1 tablespoon maple syrup , or agave or liquid sweetener
- 1/4 teaspoon sea salt
Instructions
Tomato Glaze
- Mix together the tomato paste, apple cider vinegar, maple syrup and the sea salt in a small bowl and set it aside until you need it.
Meatloaf
- Preheat your oven to 375°F/190°C degrees. Prepare a loaf with by lining with parchment paper so that it’s hanging over the sides. This helps to remove the loaf with ease.
- In a skillet over medium heat, heat the oil. Add the red onion and the celery. Sauté until onions are translucent and celery has softened, about 5 minutes. Add garlic, stirring for 1 minute until fragrant.
- In a large bowl, add all of the ingredients (the cooked garlic, red onion, celery above, as well as the chickpeas, lentils, liquid smoke, vegan Worcestershire (or soy sauce), breadcrumbs, sea salt, ground black pepper, flax eggs, tomato paste, and thyme).
- Mix together slightly with a wooden spoon. I find that this helps to distribute the liquid ingredients equally one the beans and breadcrumbs.
- In a food processor, add all of your ingredients from the bowl. I have a 10-cup food processor, so if yours is smaller, you may want to put it in in increments. Pulse a few times until everything begins to come together. Do NOT over pulse – it will turn to mush and not firm up in the oven. You want to see chunks of celery, lentils and other ingredients. I like to pulse about 10 times.
- Pour/scoop the mixture into your parchment paper-lined loaf pan. Smooth down the top with the spatula. Pour over your glaze from earlier, smoothing it down with a spoon or spatula. Make and add more glaze if desired.
- Bake for 45 minutes to 60 minutes. My loaf was done at around 55 minutes. It’s ready if a toothpick comes out mostly clean.
- Remove from oven and allow to cool for 10 minutes. Remove from loaf pan and slice up and serve. Enjoy!
Notes
- If you think you’ll be sensitive to the liquid smoke (one or two readers have shared this) start with 2 teaspoons. Give it a taste (everything is cooked so you can try it) then add more if desired! I usually add the full amount. IF you’re lowing the amount, replace the rest with water so the recipe has the right amount of liquid (so add 1 tablespoon of water + 1 teaspoon).
