Homemade peanut butter is easy to make, tastier than store-bought, and it has amazing texture. Here’s how to make it.
There are some homemade recipes that fall into the “why bother?” category. They’re a lot of work, and the results really aren’t that much better than store-bought. Then there are other recipes where homemade is cheaper, tastier, and easy to boot, like Homemade Hummus and Vegan Yogurt.
Friends, I’m happy to report that homemade peanut butter definitely falls into the latter category.
Why Make Your Own Own Peanut Butter
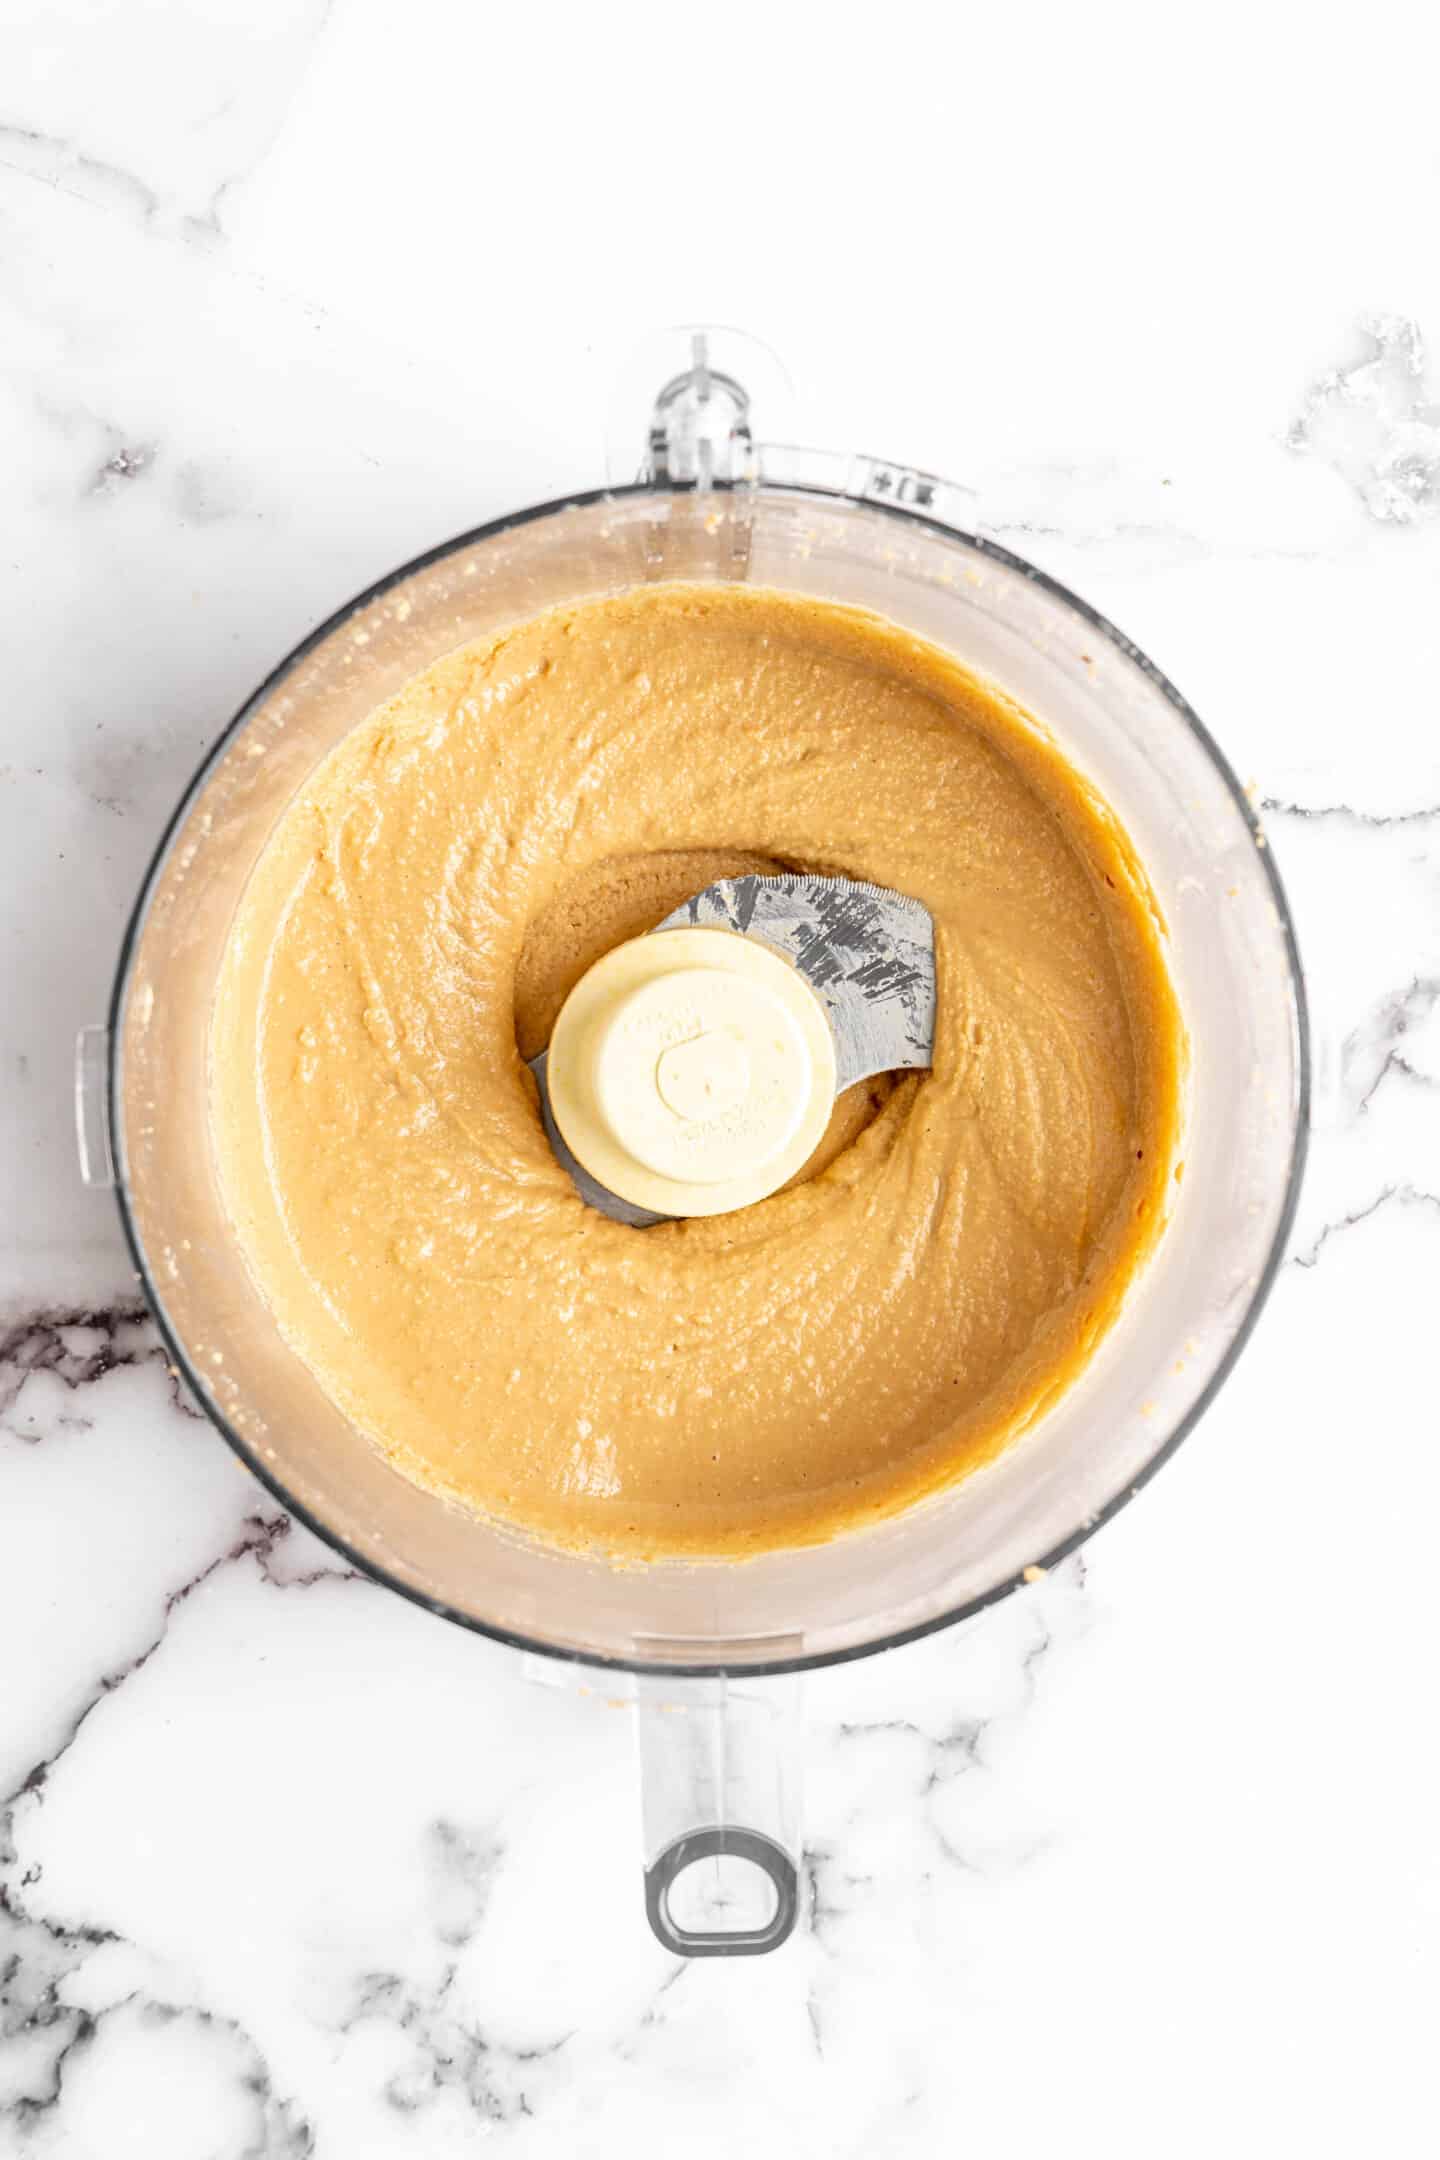
Well, first, it’s really easy. Seriously, all you need to do is throw some peanuts into a food processor and let it run. Process until the peanut butter is smooth and creamy, or leave some bits of nuts in there for a crunchy texture.
Second, it’s way cheaper than store-bought. Buy a big bag of inexpensive nuts in the bulk section of your grocery store and you’ll have enough homemade peanut butter to last you for weeks.
You also get to control the ingredients, which is huge. Unless you buy the fancy natural brands (which are expensive!), you’ll notice that store-bought peanut butter has a ton of added sugar and weird filler ingredients. When you make your own PB, you can skip those ingredients without having to pay a premium.
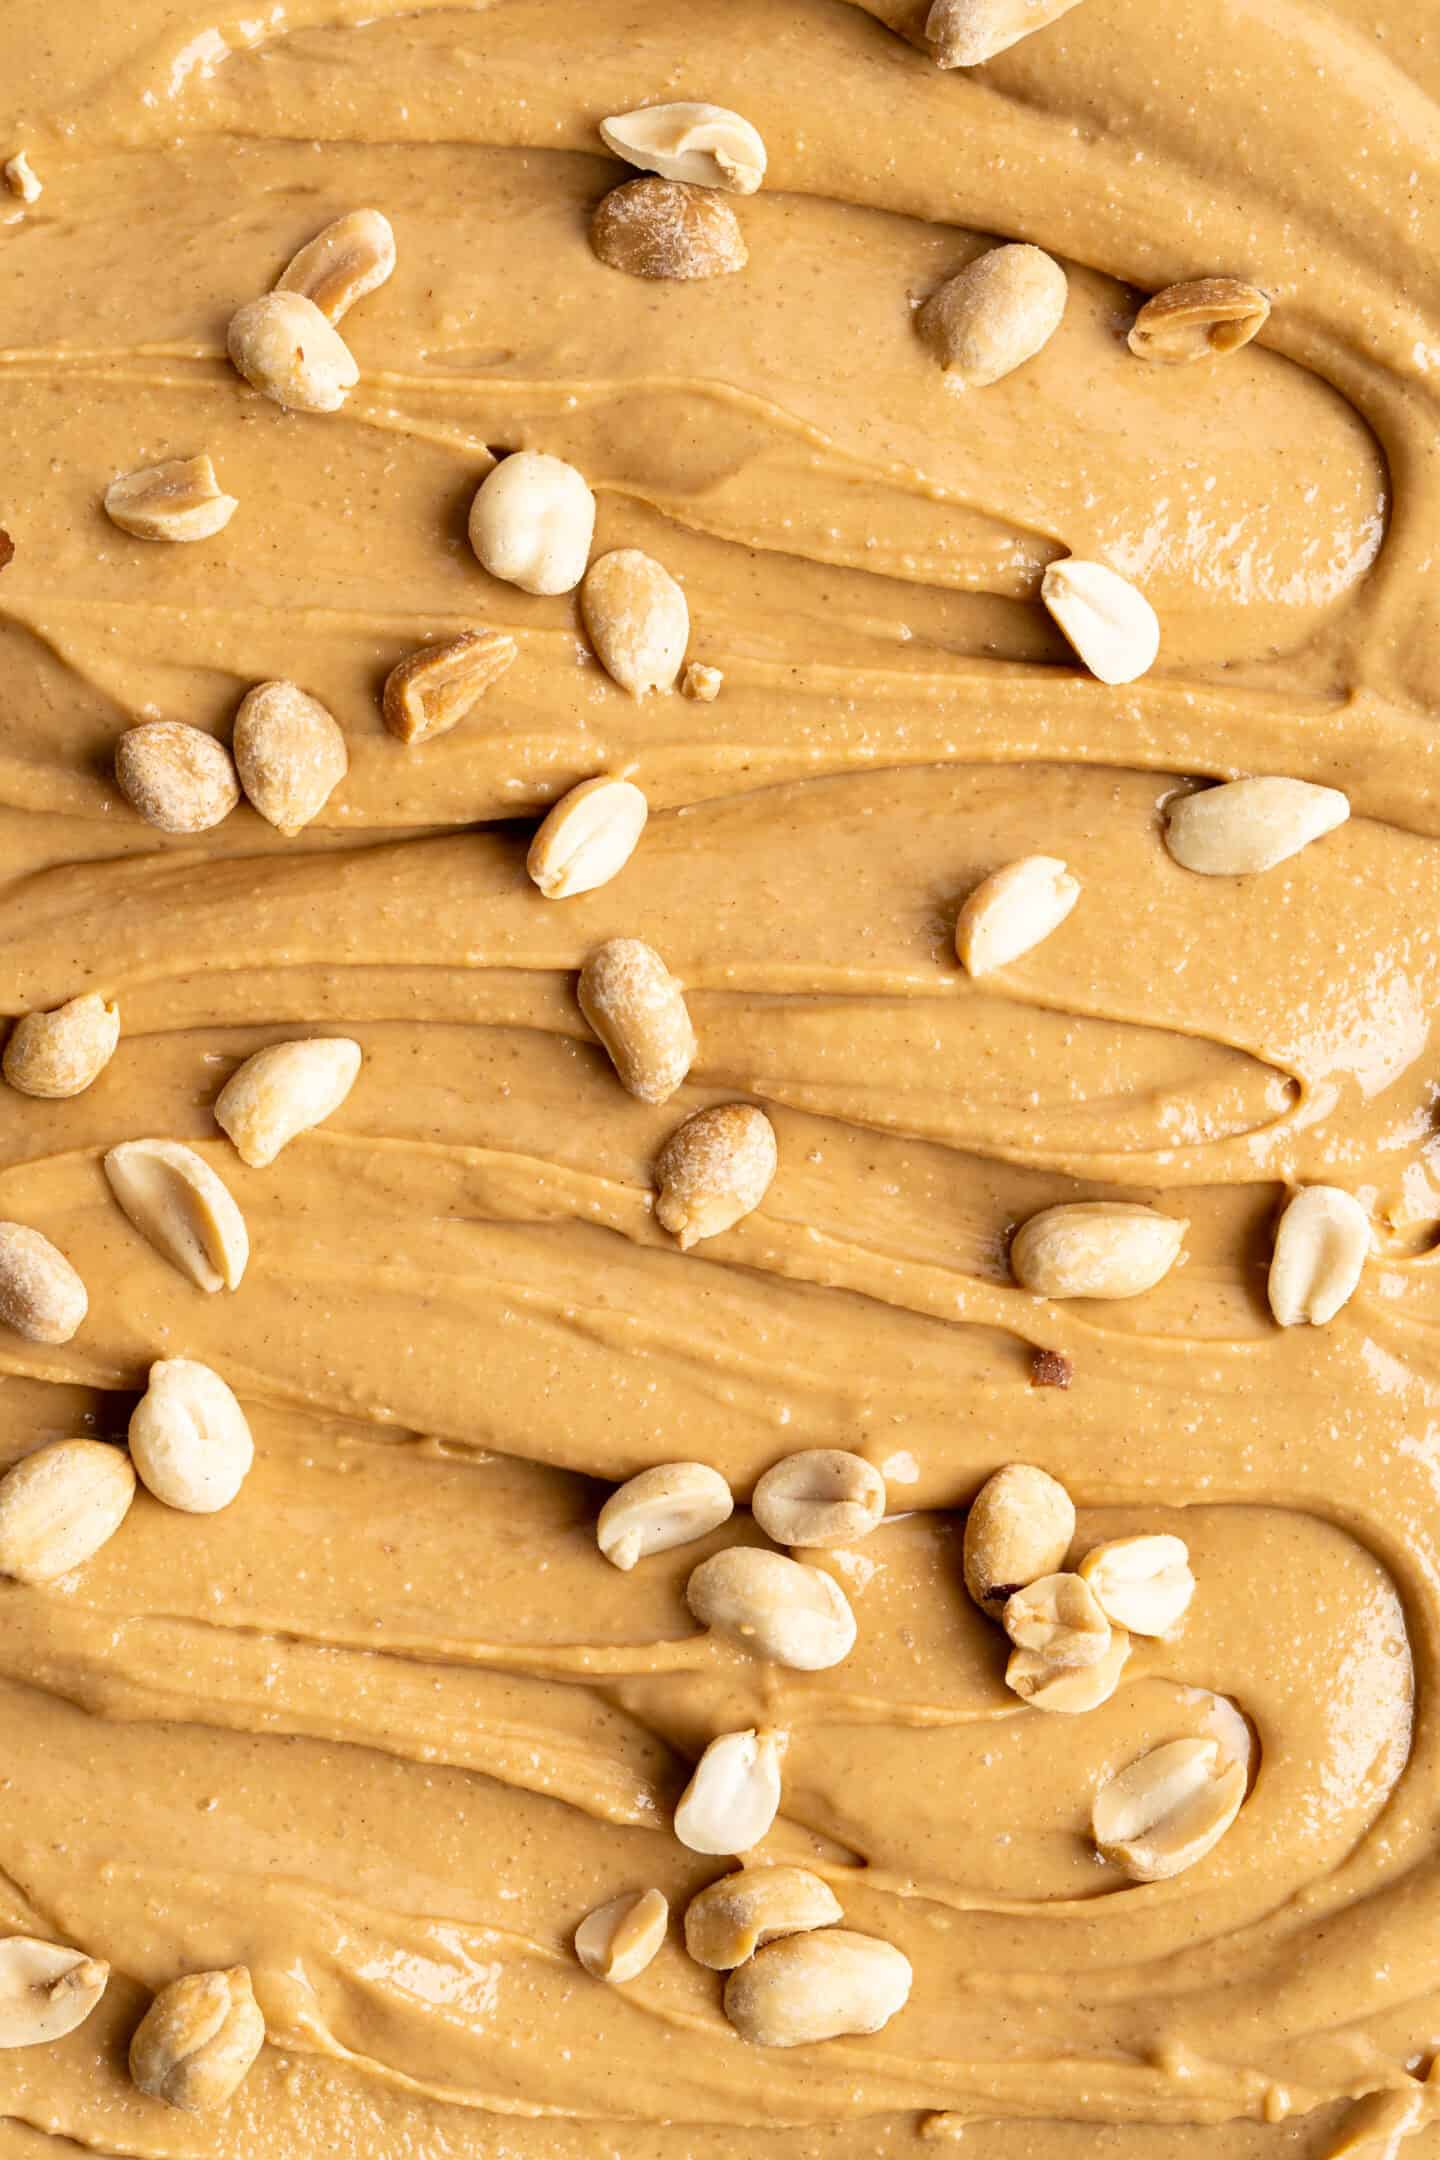
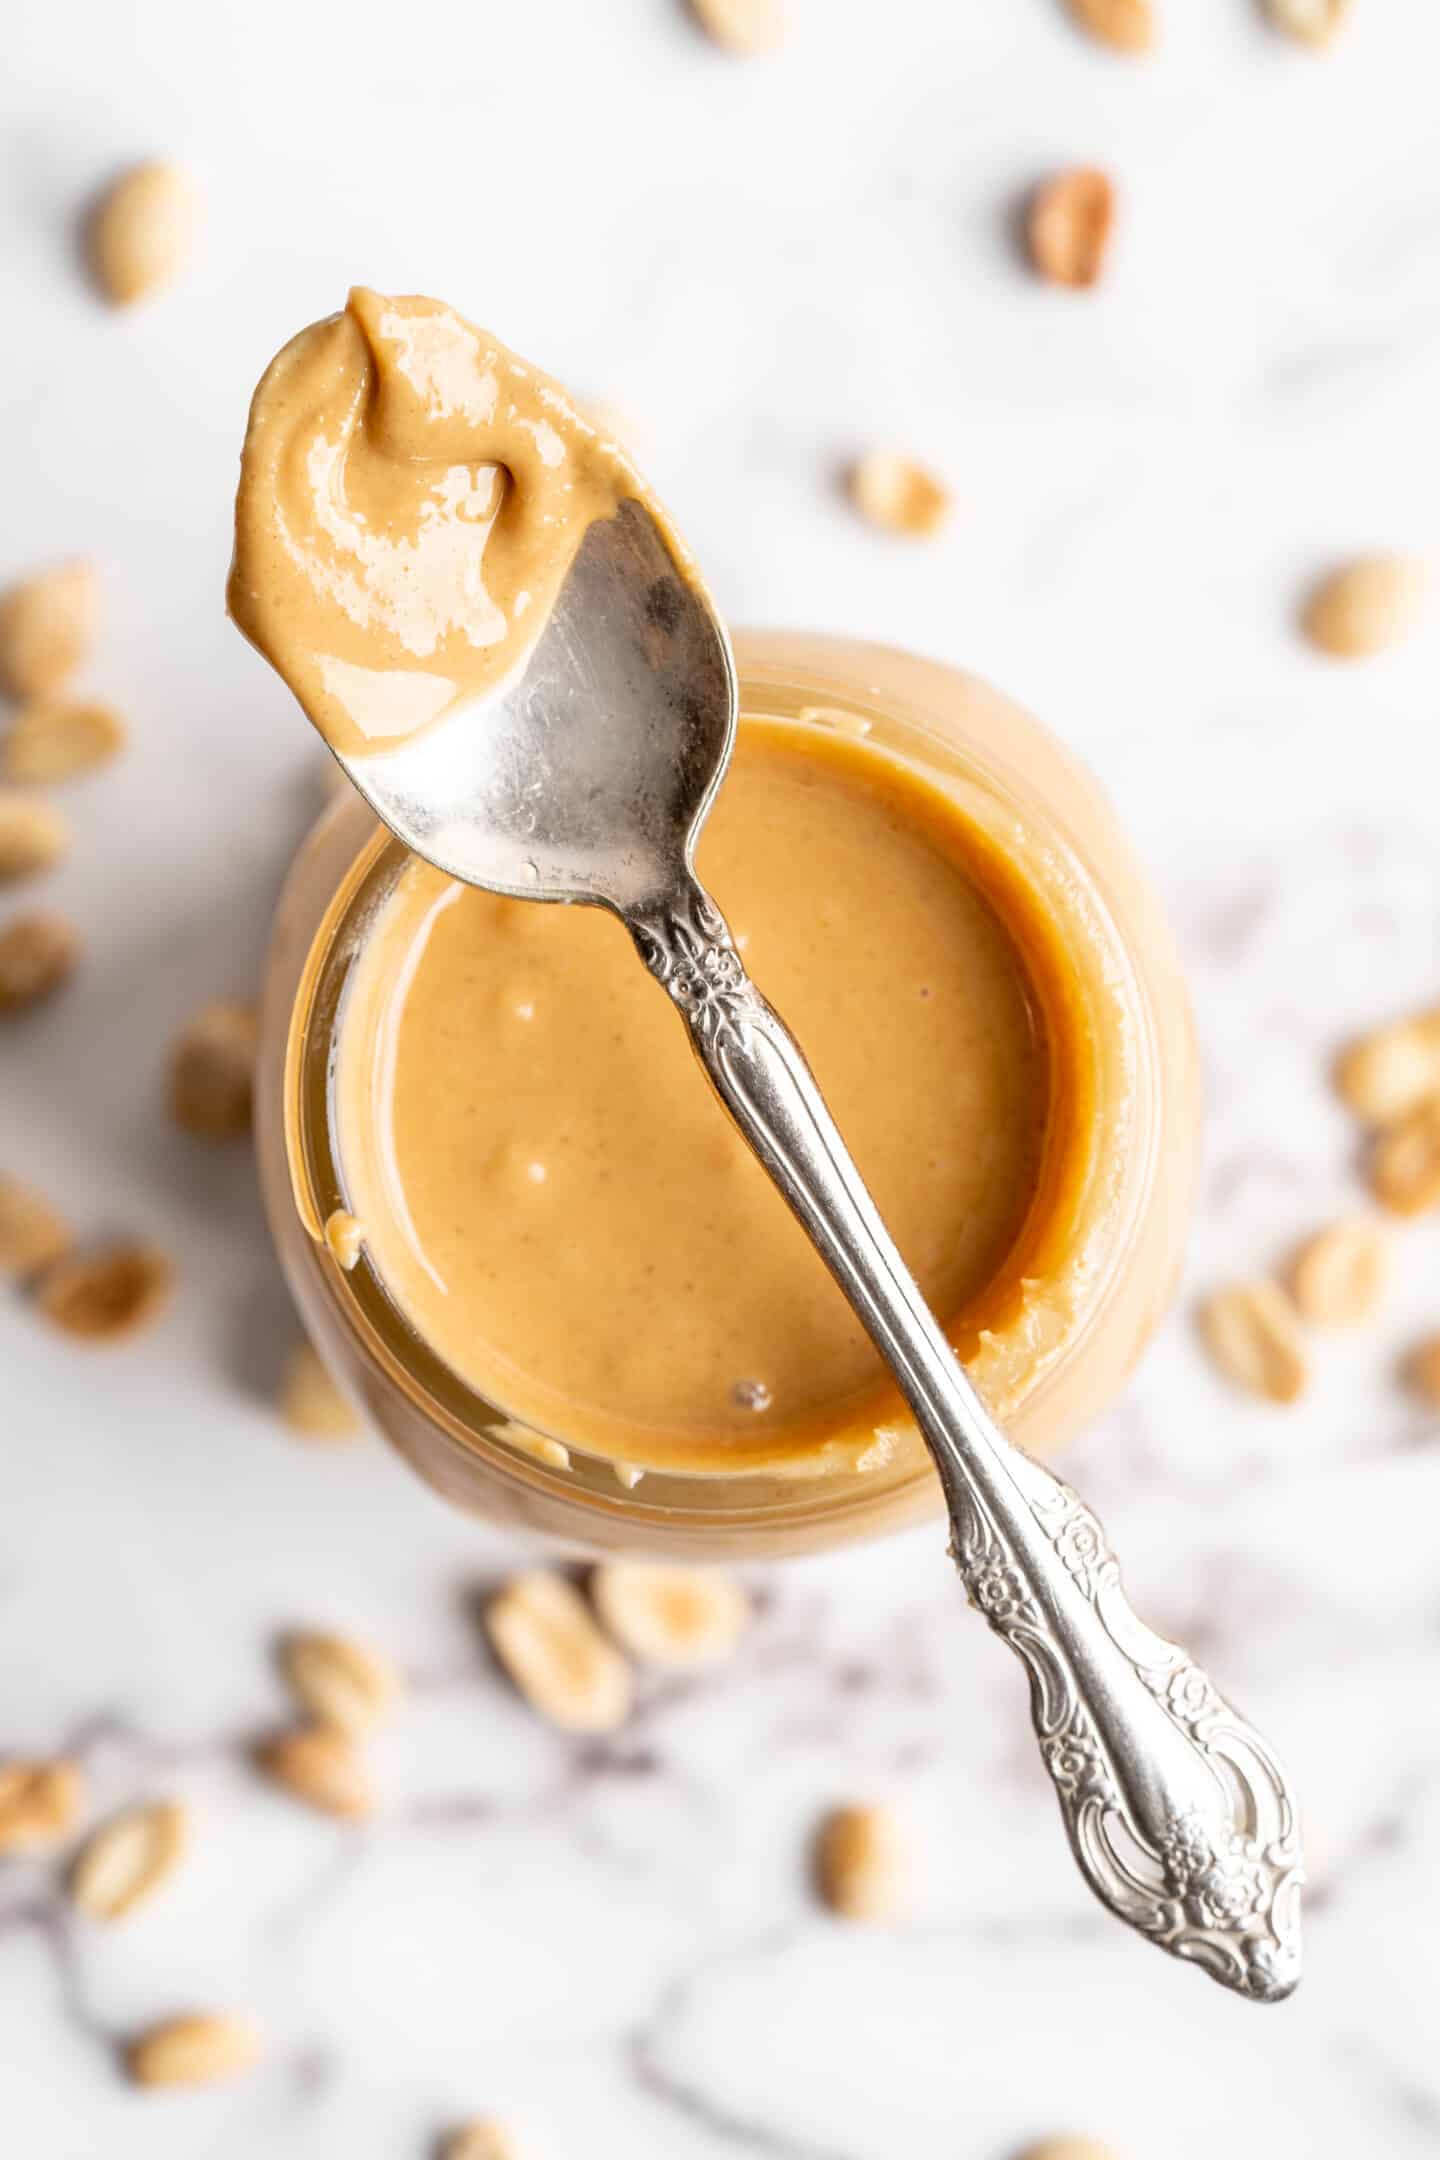
And, of course, it tastes amazing. Seriously, once you’ve had freshly made nut butters, store-bought just isn’t going to cut it anymore.
Notes on Ingredients
Please note that this is important information on the ingredients and instructions and the FULL recipe with amounts and details can be found DOWN BELOW (scroll to it) in the recipe card.
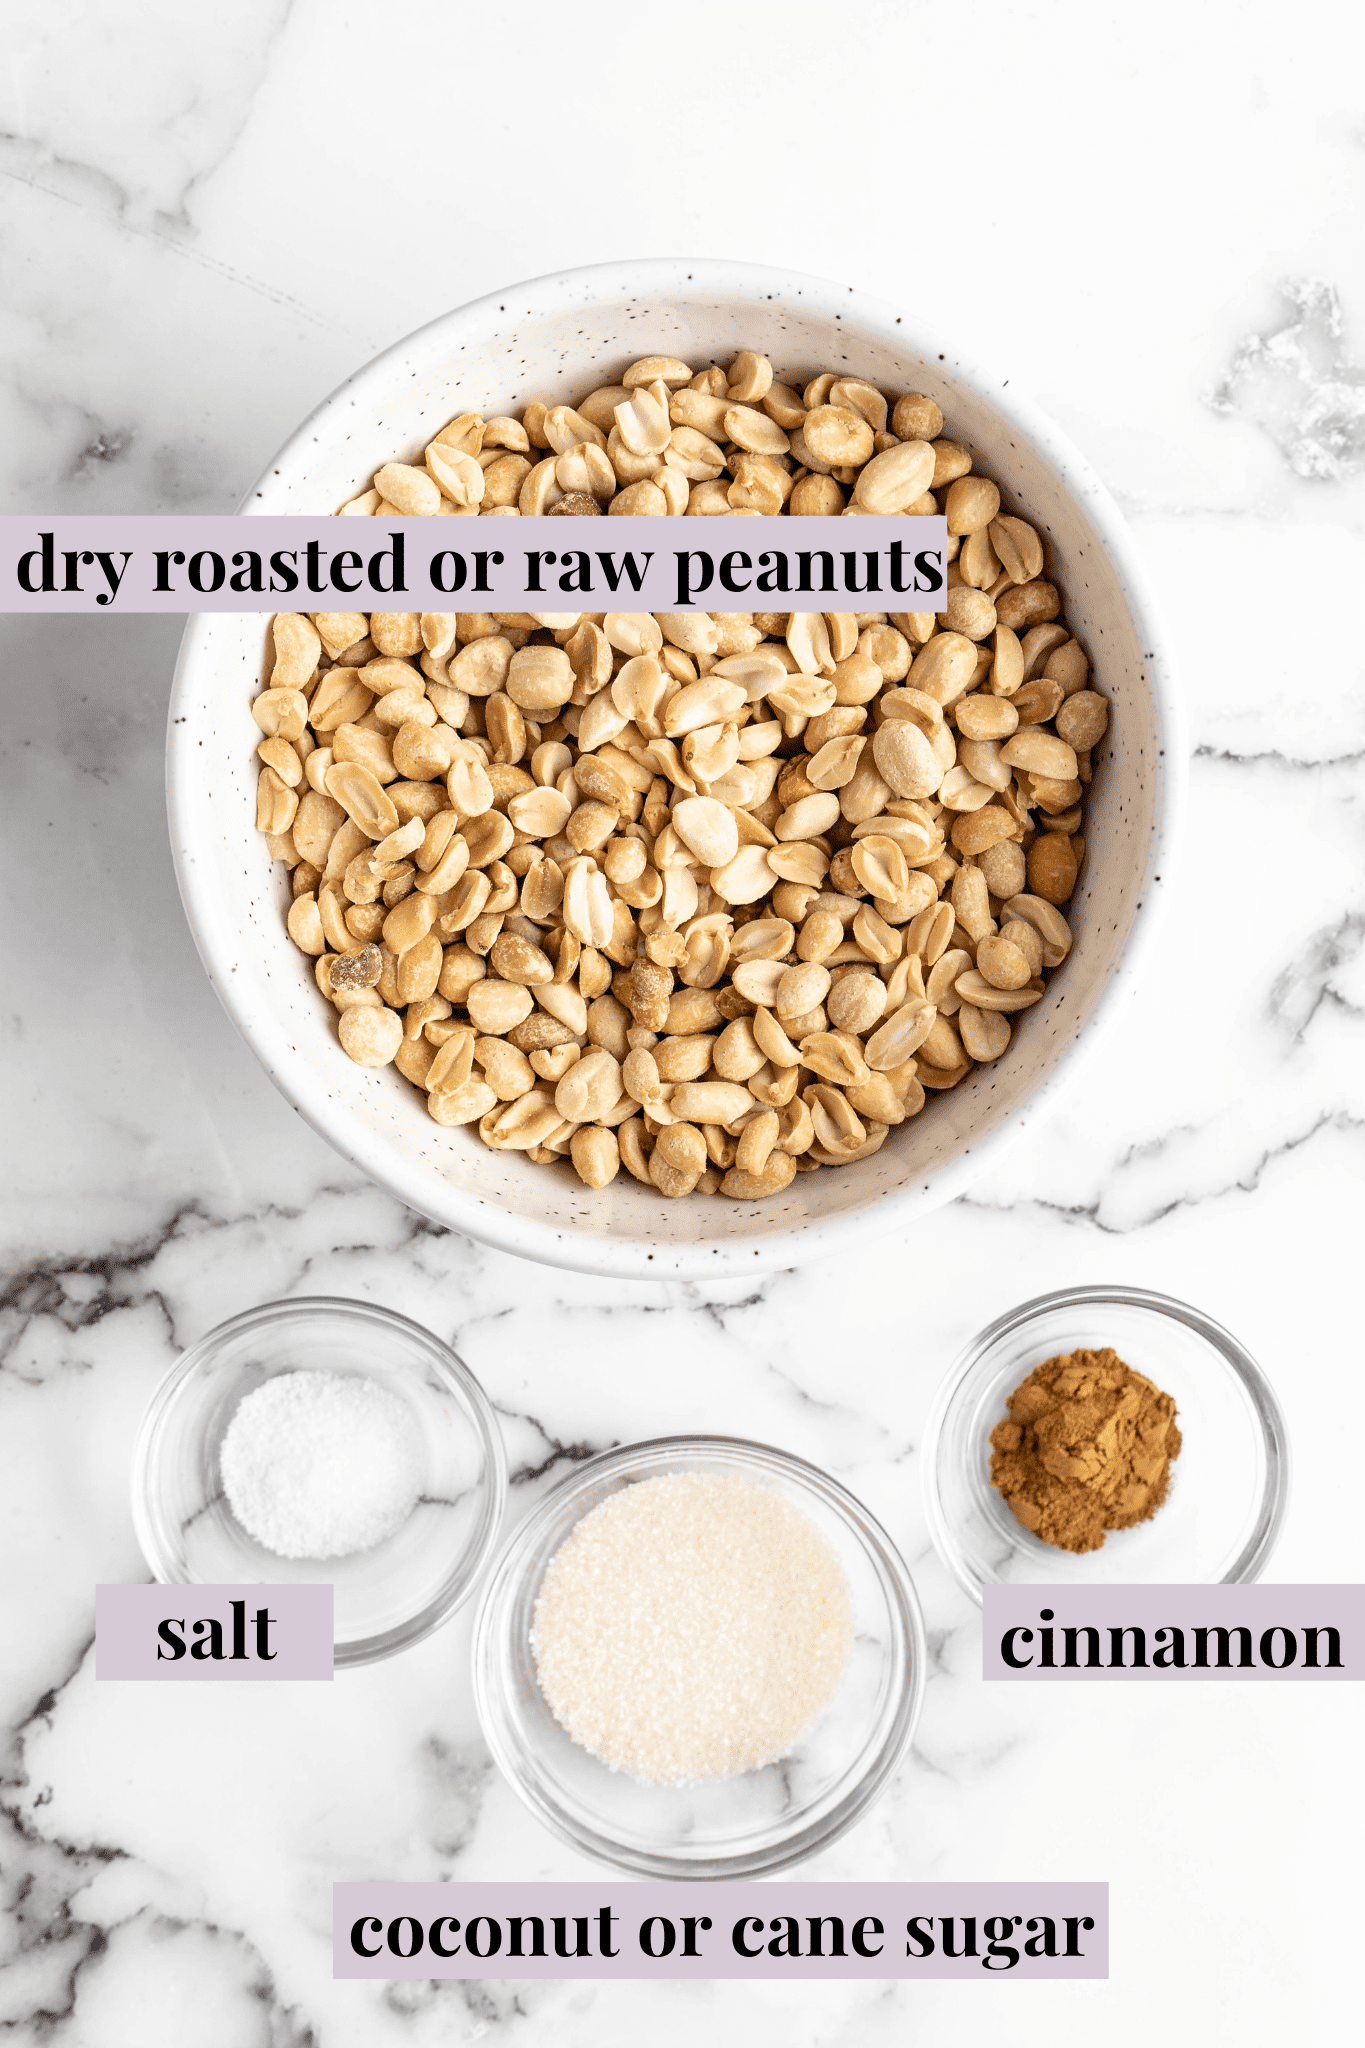
- Dry roasted unsalted peanuts – If you want to make raw peanut butter, you can certain use raw peanuts, but the flavour of dry roasted is superior.
- Sea salt – Add more or less to taste.
Optional for a sweet peanut butter:
- Coconut or cane sugar
- Cinnamon
How to Make Peanut Butter
Ready to get started? Here’s what you’ll need to do!
Prepare . Preheat your oven to 350°F/180°C and line a baking sheet with parchment paper or a silicone mat.
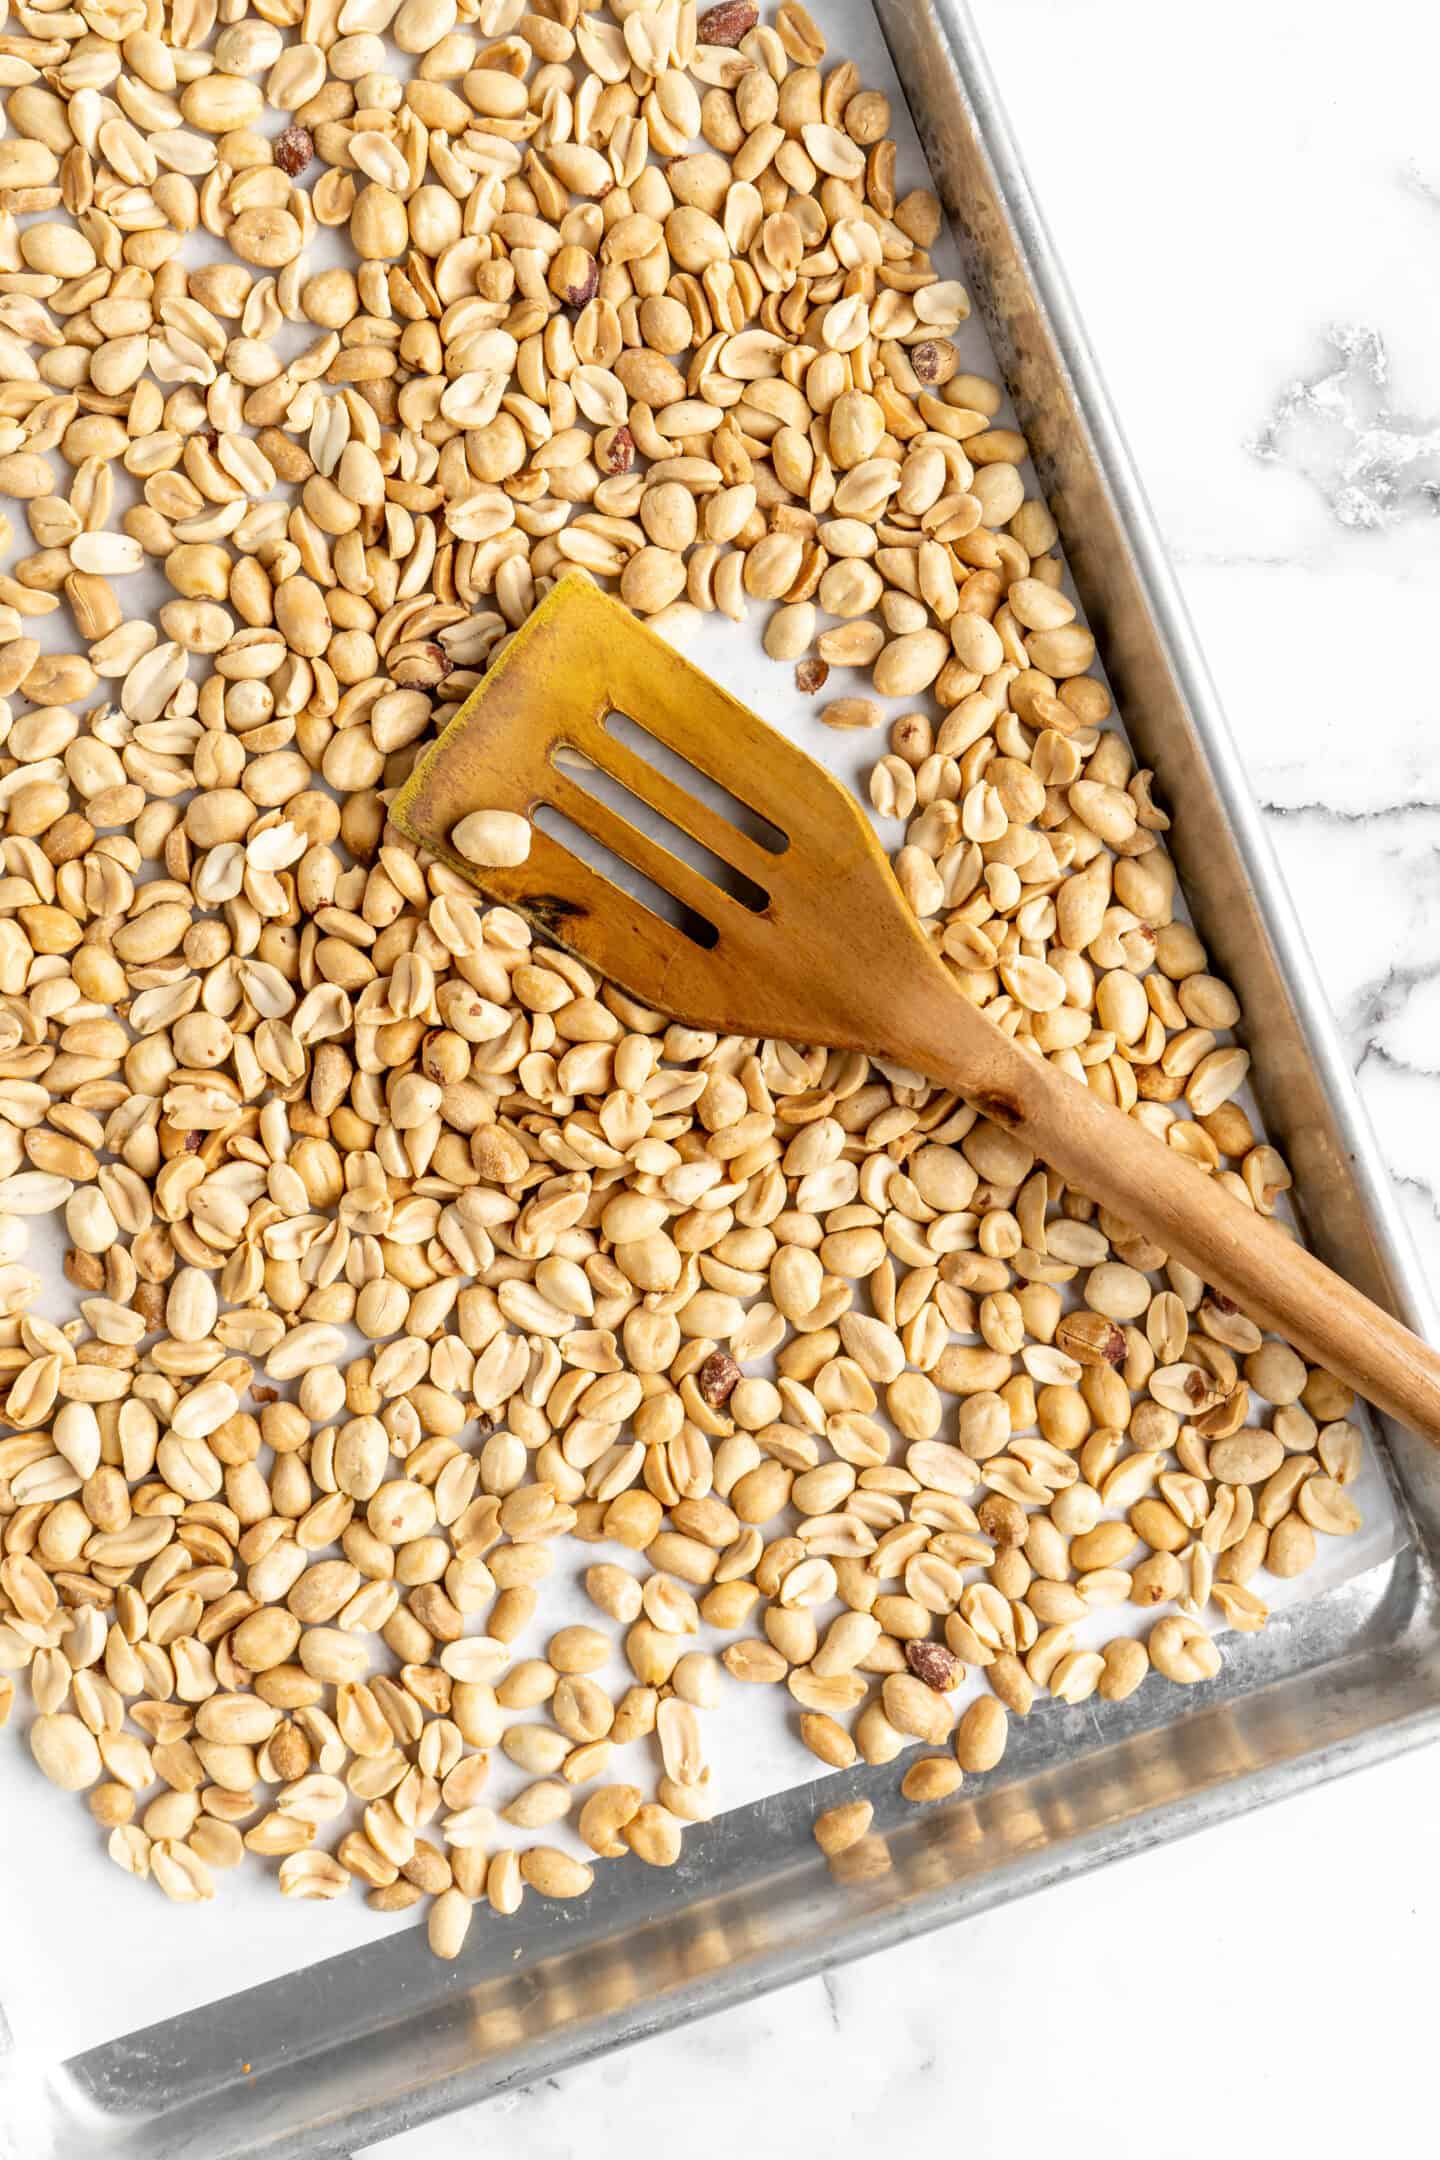
Roast the nuts . Place the nuts on the baking sheet and roast them for 5 minutes. This helps give the nuts a fragrant aroma and warms up the oils.
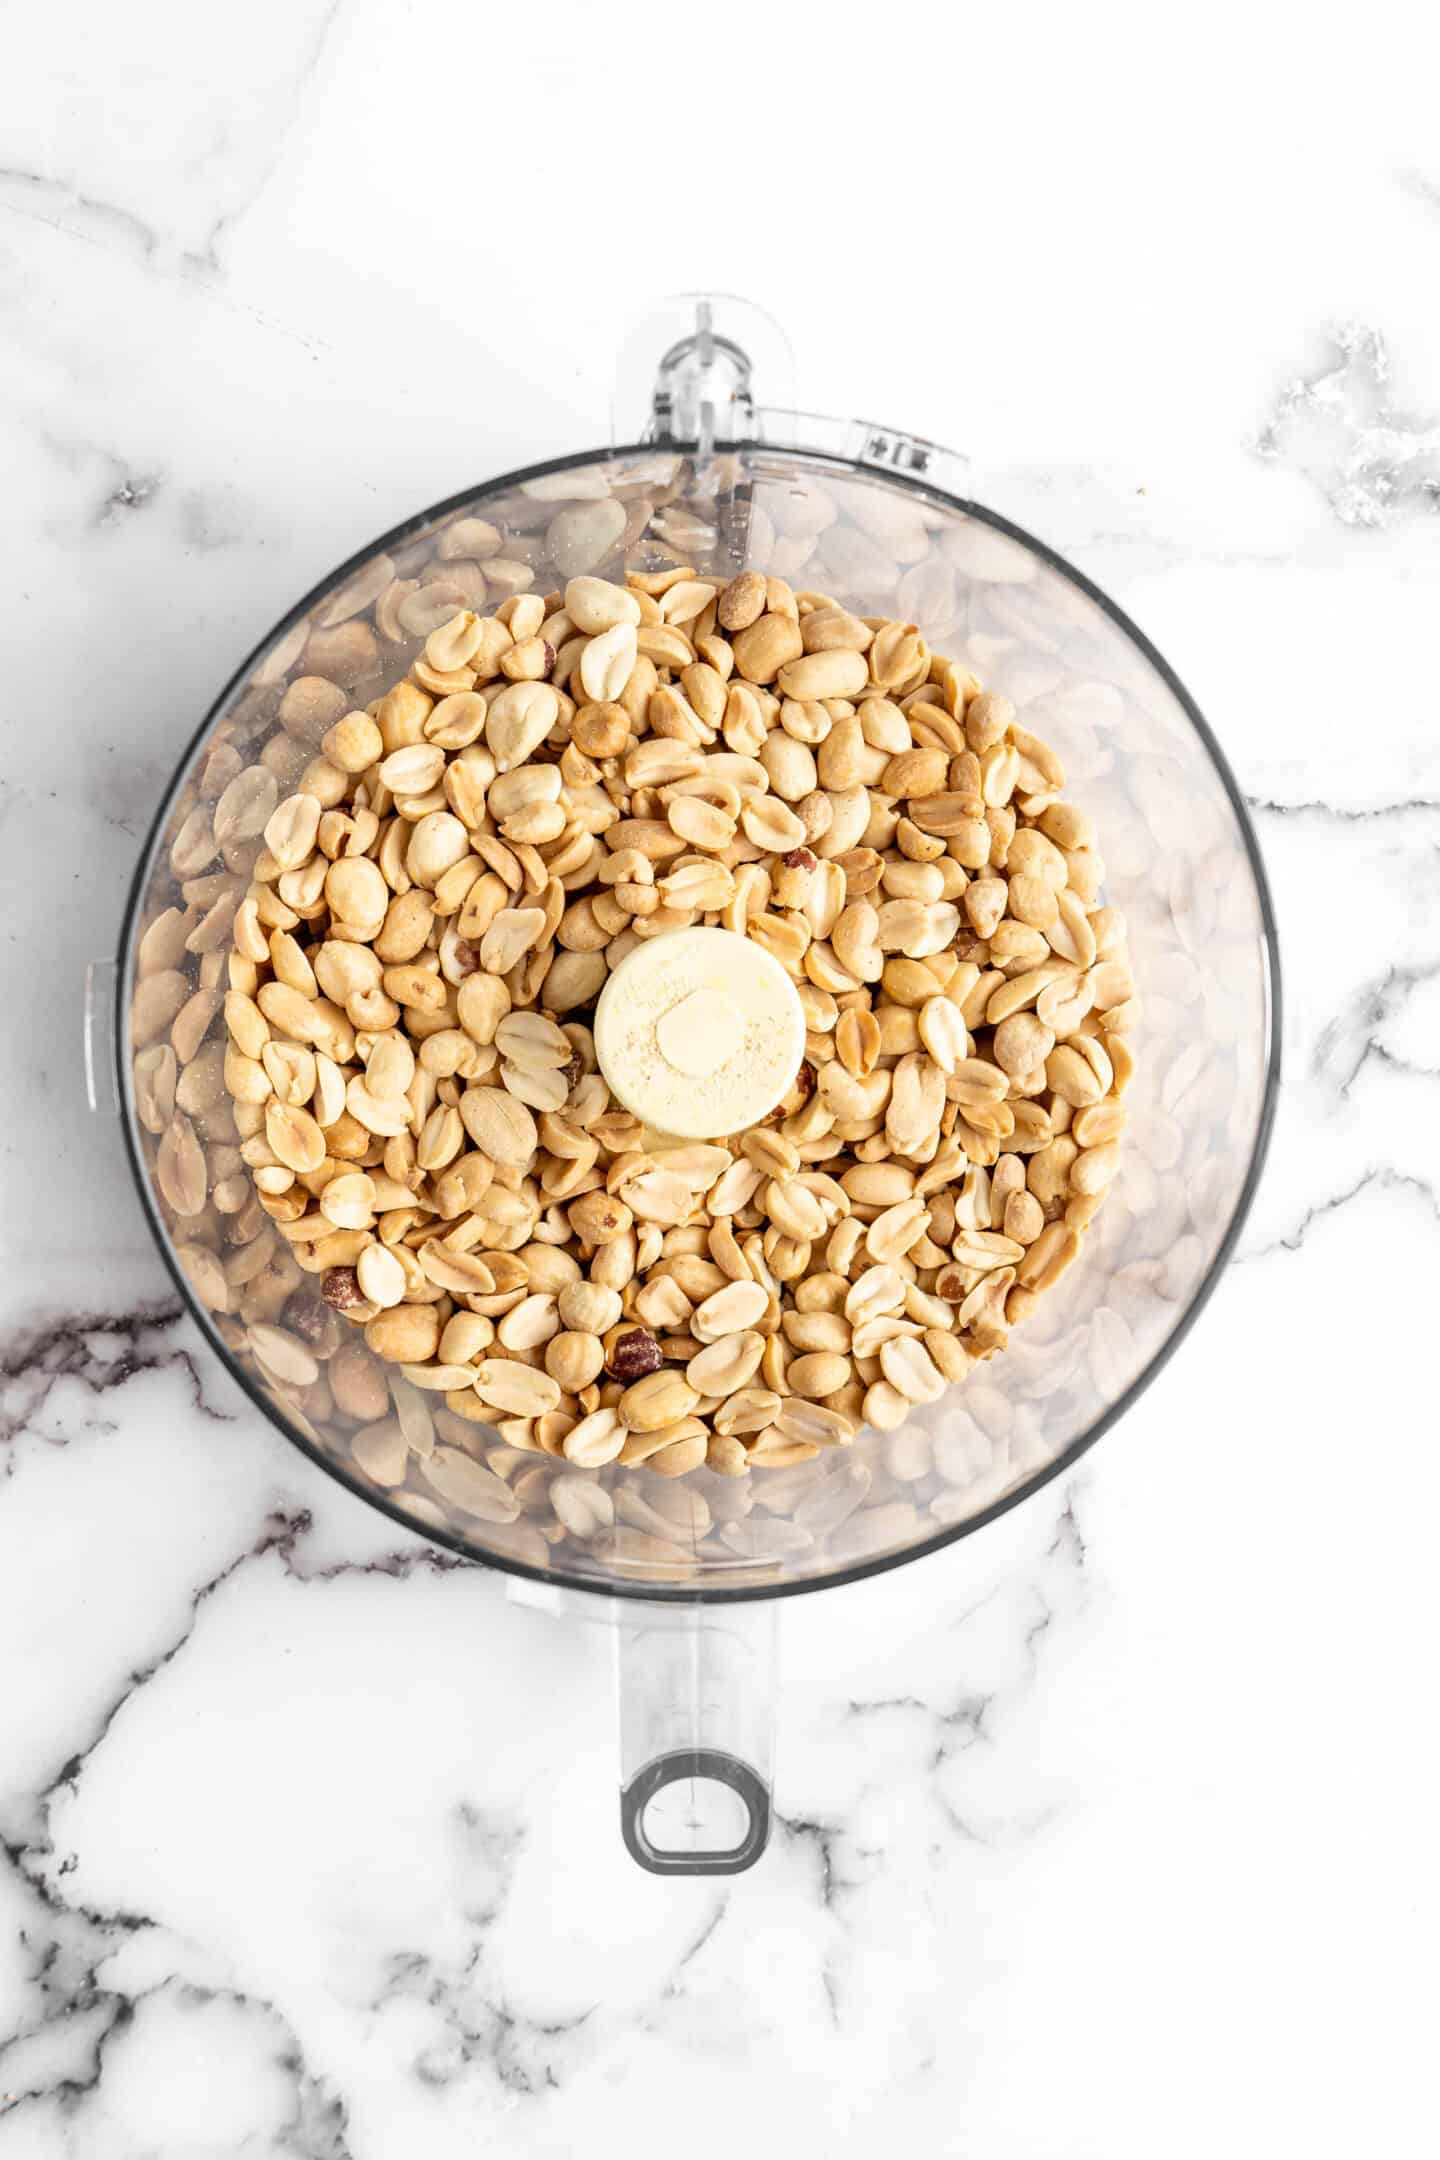
Process the peanuts . Let the nuts cool slightly, then add them to a food processor and process until the mixture is smooth, stirring occasionally. This will take a while; your food processor may get warm, so just turn it off for about a minute to prevent overheating if this happens.
Season . Once the peanut butter reaches your desired consistency, add a pinch of salt (and any other add-ins) and pulse for 30 seconds to incorporate.
Tips for Success
In an easy recipe like this one, the quality of ingredients you use and the technique are critical. Here are some pointers for perfect homemade peanut butter:
- Use unsalted roasted peanuts. Don’t use flavoured peanuts, and avoid salted because using unsalted will allow you to control the flavour of the finished peanut butter.
- Don’t overdo it on the salt . A little pinch of salt is all you need to enhance the flavour here. If you add too much, it will be too salty, overpowering the natural, subtle sweetness you want.
- Taste as you go . This is the best way to ensure that your peanut butter is exactly to your liking. Add more salt, sugar, or other flavours as desired.
Flavour Ideas
The other thing that’s fun about making your own peanut butter is that you can customize the flavour! Here are some ideas for upgrading homemade peanut butter:
- Add chocolate . A few tablespoons of melted chocolate will give you a rich, creamy chocolatey spread for homemade waffles or dipping your favourite fruits.
- Make it spicy . Add a pinch of cayenne pepper if you want to spice things up.
- Add a little bit of maple syrup . This will give the peanut butter a slightly sweeter, maple-y flavour.
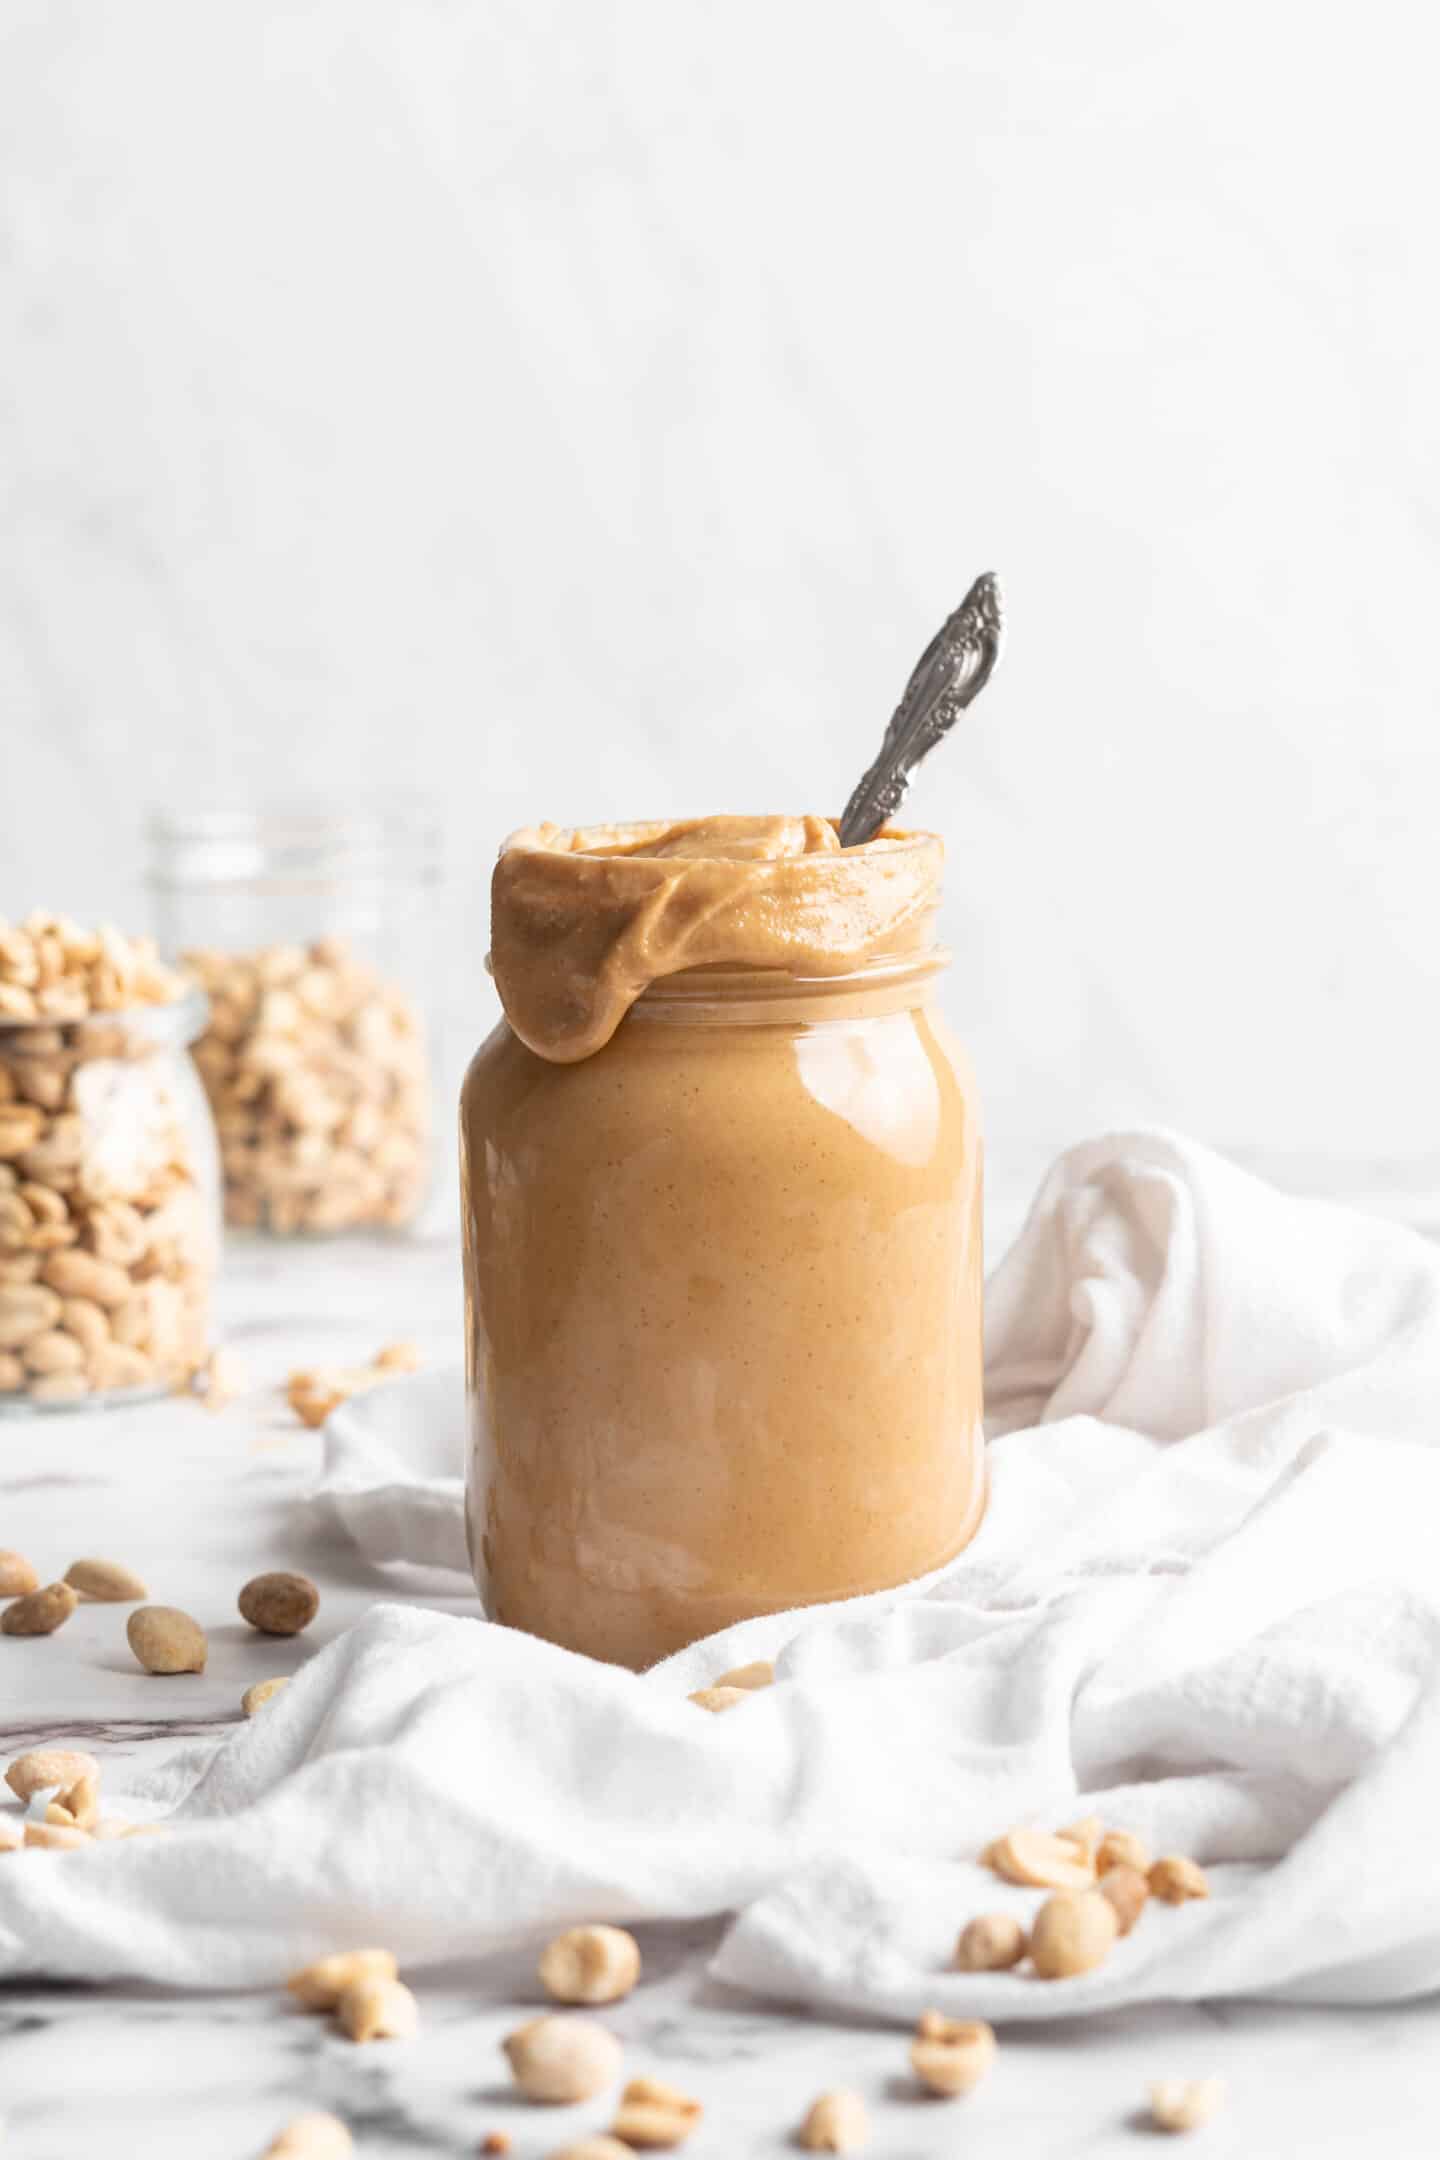
How to Store
Pour the peanut butter into a jar with a cover and place it in the fridge. You can use this nut butter anywhere you’d use store-bought, and it will last for about a month in the refrigerator. (You may need to give it a stir before serving.)
Can You Freeze Homemade Peanut Butter?
If you want your peanut butter to last even longer, you can freeze it for up to six months. Let it thaw in the fridge overnight before using.
Ingredients
- 3 cups of dry roasted peanuts , or desired raw nut for other nut butters
- ½ teaspoon sea salt to taste
- Optional for a sweet nut butter:
- 2 tablespoons coconut or cane sugar
- 1 teaspoon cinnamon
Instructions
- Preheat oven to 350°F/180°C. Line a baking sheet with parchment paper or a silicone mat.
- Add the nuts to the baking sheet and bake for 5 minutes. This helps to give the nuts a fragrant smell and to warm up the oils in the nuts.
- Remove the nuts and add to a food processor. Pulse on low or high until combined into a nut butter. Your food processor may get a bit warm depending on how long it takes, so just turn it off for about a minute to prevent overheating if this happens. You may also need to stir everything together every few minutes.
- When liquified into a nut butter, sprinkle over a pinch of sea salt and extra add ins if adding now too. Pulse for another 30 seconds to incorporate.
- Pour into a jar with a cover and place in the fridge. You can use this nut butter anywhere you’d use storebought!
Notes

Homemade Peanut Butter
Ingredients
- 3 cups of dry roasted peanuts or desired raw nut for other nut butters
- ½ teaspoon sea salt to taste
- Optional for a sweet nut butter:
- 2 tablespoons coconut or cane sugar
- 1 teaspoon cinnamon
Instructions
- Preheat oven to 350°F/180°C. Line a baking sheet with parchment paper or a silicone mat.
- Add the nuts to the baking sheet and bake for 5 minutes. This helps to give the nuts a fragrant smell and to warm up the oils in the nuts.
- Remove the nuts and add to a food processor. Pulse on low or high until combined into a nut butter. Your food processor may get a bit warm depending on how long it takes, so just turn it off for about a minute to prevent overheating if this happens. You may also need to stir everything together every few minutes.
- When liquified into a nut butter, sprinkle over a pinch of sea salt and extra add ins if adding now too. Pulse for another 30 seconds to incorporate.
- Pour into a jar with a cover and place in the fridge. You can use this nut butter anywhere you’d use storebought!
Video
Notes
Nutrition
Homemade Peanut Butter https://jessicainthekitchen.com/how-to-make-peanut-butter/ July 8, 2022
These vegan Cauliflower Pizza Bites will satisfy your pizza cravings, without all the carbs and dairy! Customize them with your favourite pizza toppings for an irresistible snack!

Oh friends, you’re in for a treat today. Ever since I made my Quinoa Pizza Bites , I’ve been thinking of other ways to put the flavours of pizza into convenient bite-sized snacks. These Cauliflower Pizza Bites fit the bill PERFECTLY. They’re low-carb, so delicious that even kids will devour them, and you can keep them in the freezer for whenever you need to satisfy a pizza craving.
You’ve got to try these.
Once you add the vegan cheese, sauce, and seasonings, the flavour of the cauliflower fades into the background, so even if you’re not usually a fan, you’ll still enjoy these Cauliflower Pizza Bites.
You can add any toppings you’d like to your bites. I like to just add cheese, but a plant-based pepperoni would be delicious (just chop it up so it mixes in well!), as would olives, diced onions and green peppers, or mushrooms. Even roasted garlic would be good in this recipe!
Notes on Ingredients
Please note that this is important information on the ingredients and instructions and the FULL recipe with amounts and details can be found DOWN BELOW (scroll to it) in the recipe card.
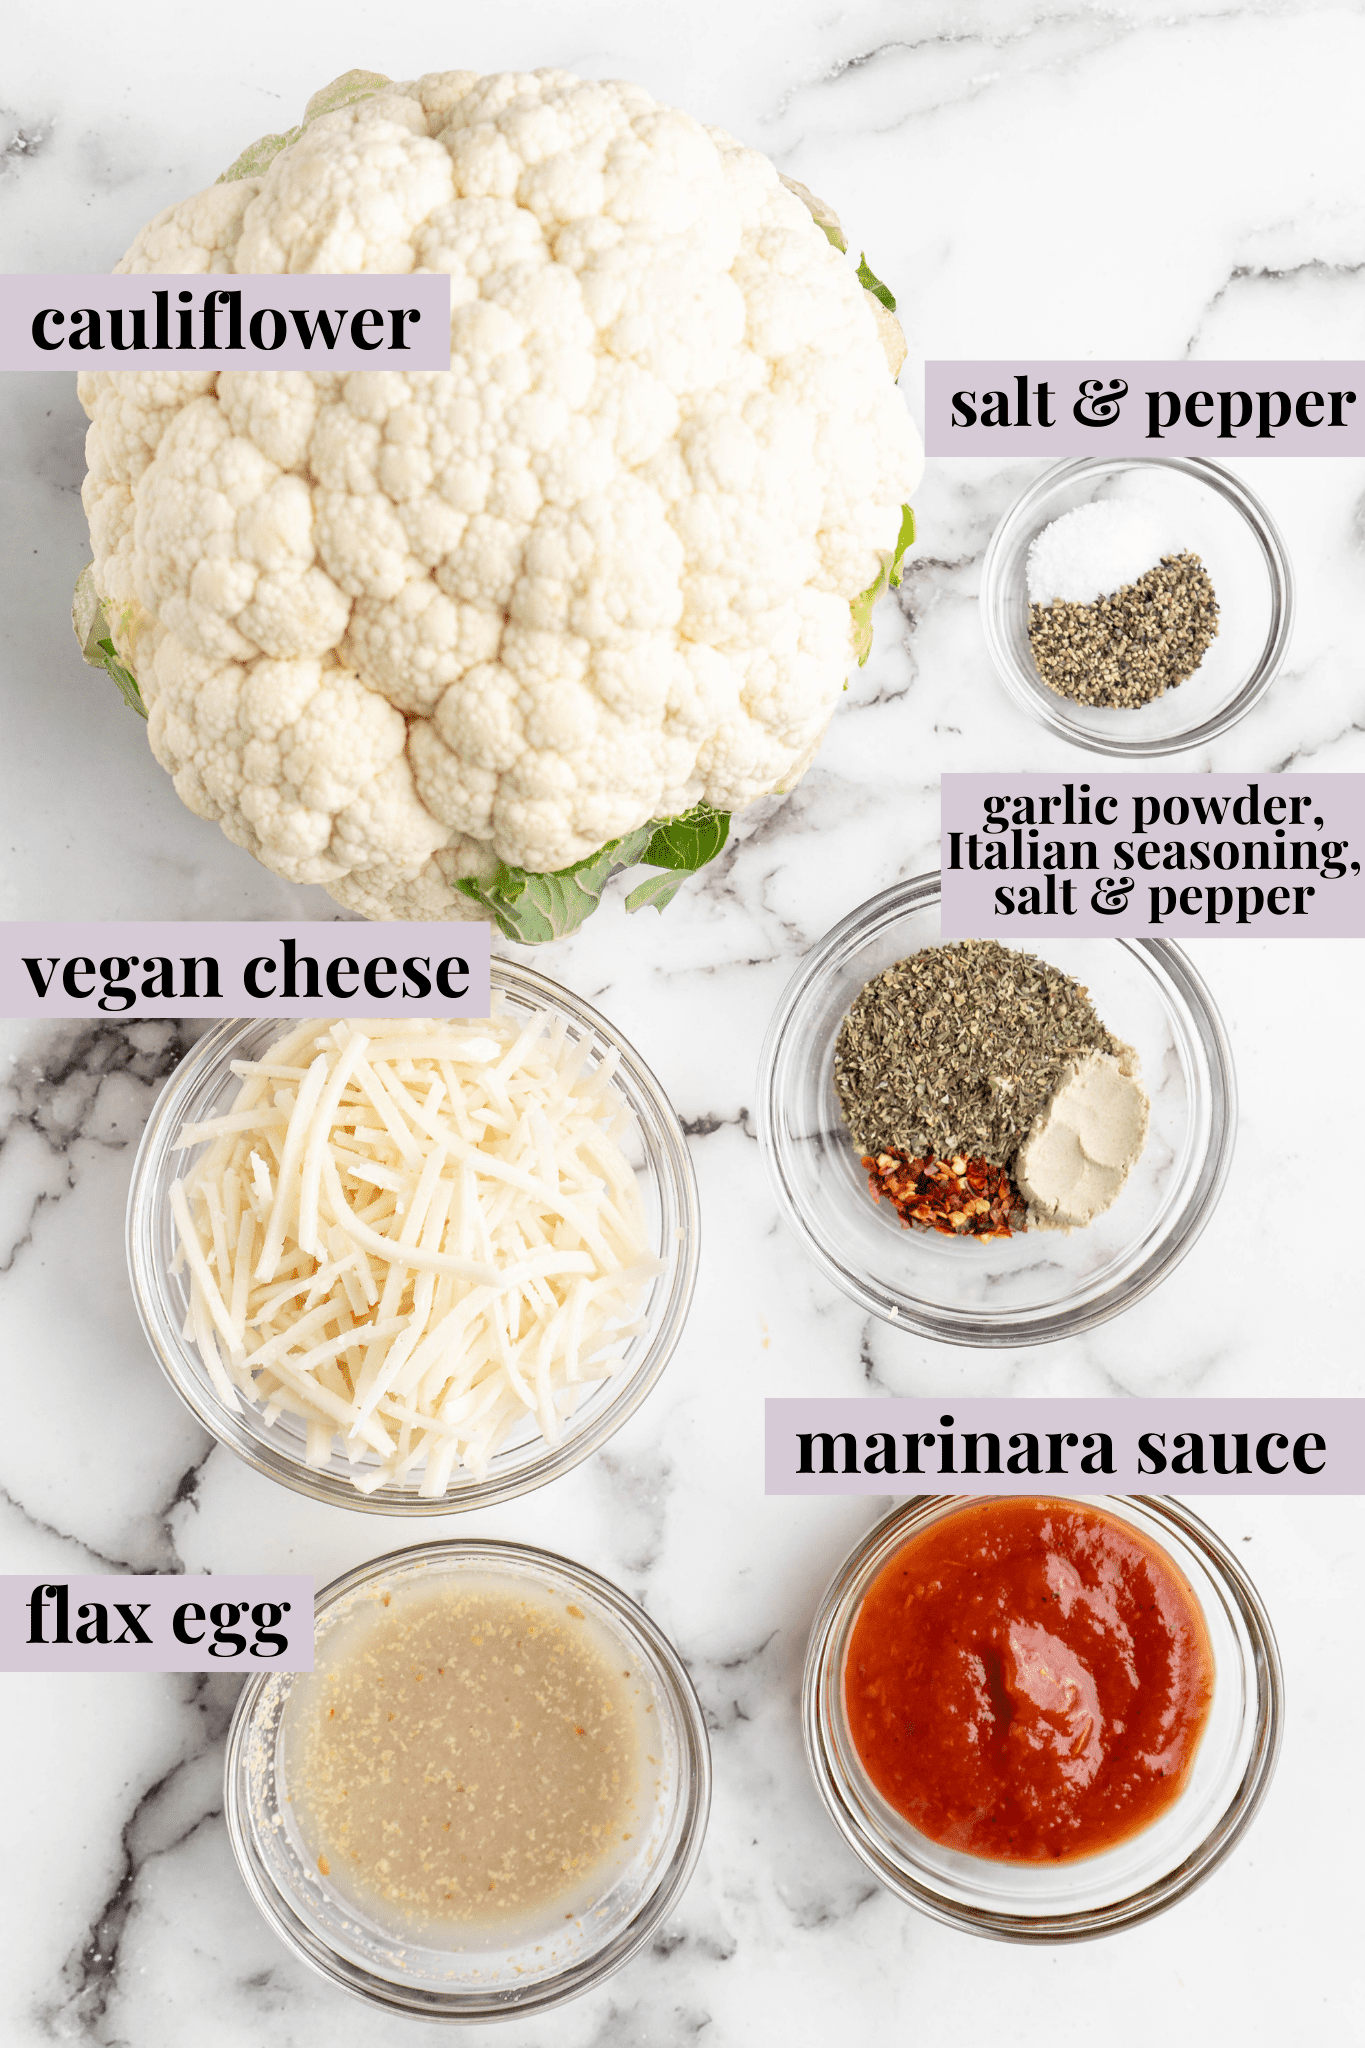
- Cauliflower – You’ll need a medium head of cauliflower for this recipe.
- Vegan shredded cheese
- Flax egg or egg replacement – This, along with the vegan cheese, will help hold the Cauliflower Pizza Bites together.
- Sea salt
- Ground pepper
- Marinara sauce – Use store-bought or homemade marinara .
- Garlic powder
- Italian seasoning
- Crushed red pepper flakes
Does Any Vegan Cheese Melt?
Daiya cheese is known for its melting abilities and it’s one of the most widely-available vegan cheese brands, but these days, there are a number of different varieties that melt well. Generally speaking, any vegan cheese that comes in shredded form will be formulated for melting, while blocks of cheese may or may not melt smoothly.
I used vegan mozzarella for these Cauliflower Pizza Bites, but you could also use a blend of plant-based mozzarella and Parmesan.
How to Make Vegan Cauliflower Pizza Bites
If you want to get a head start on this recipe without making the whole thing, you can prep the cauliflower rice a day or two ahead of time.
Prepare . Preheat your oven to 400°F and line a 12-cup mini muffin pan with parchment paper strips.

Make the cauliflower rice . Use a food processor or grater to rice the cauliflower, following the instructions in my tutorial on how to make cauliflower rice .
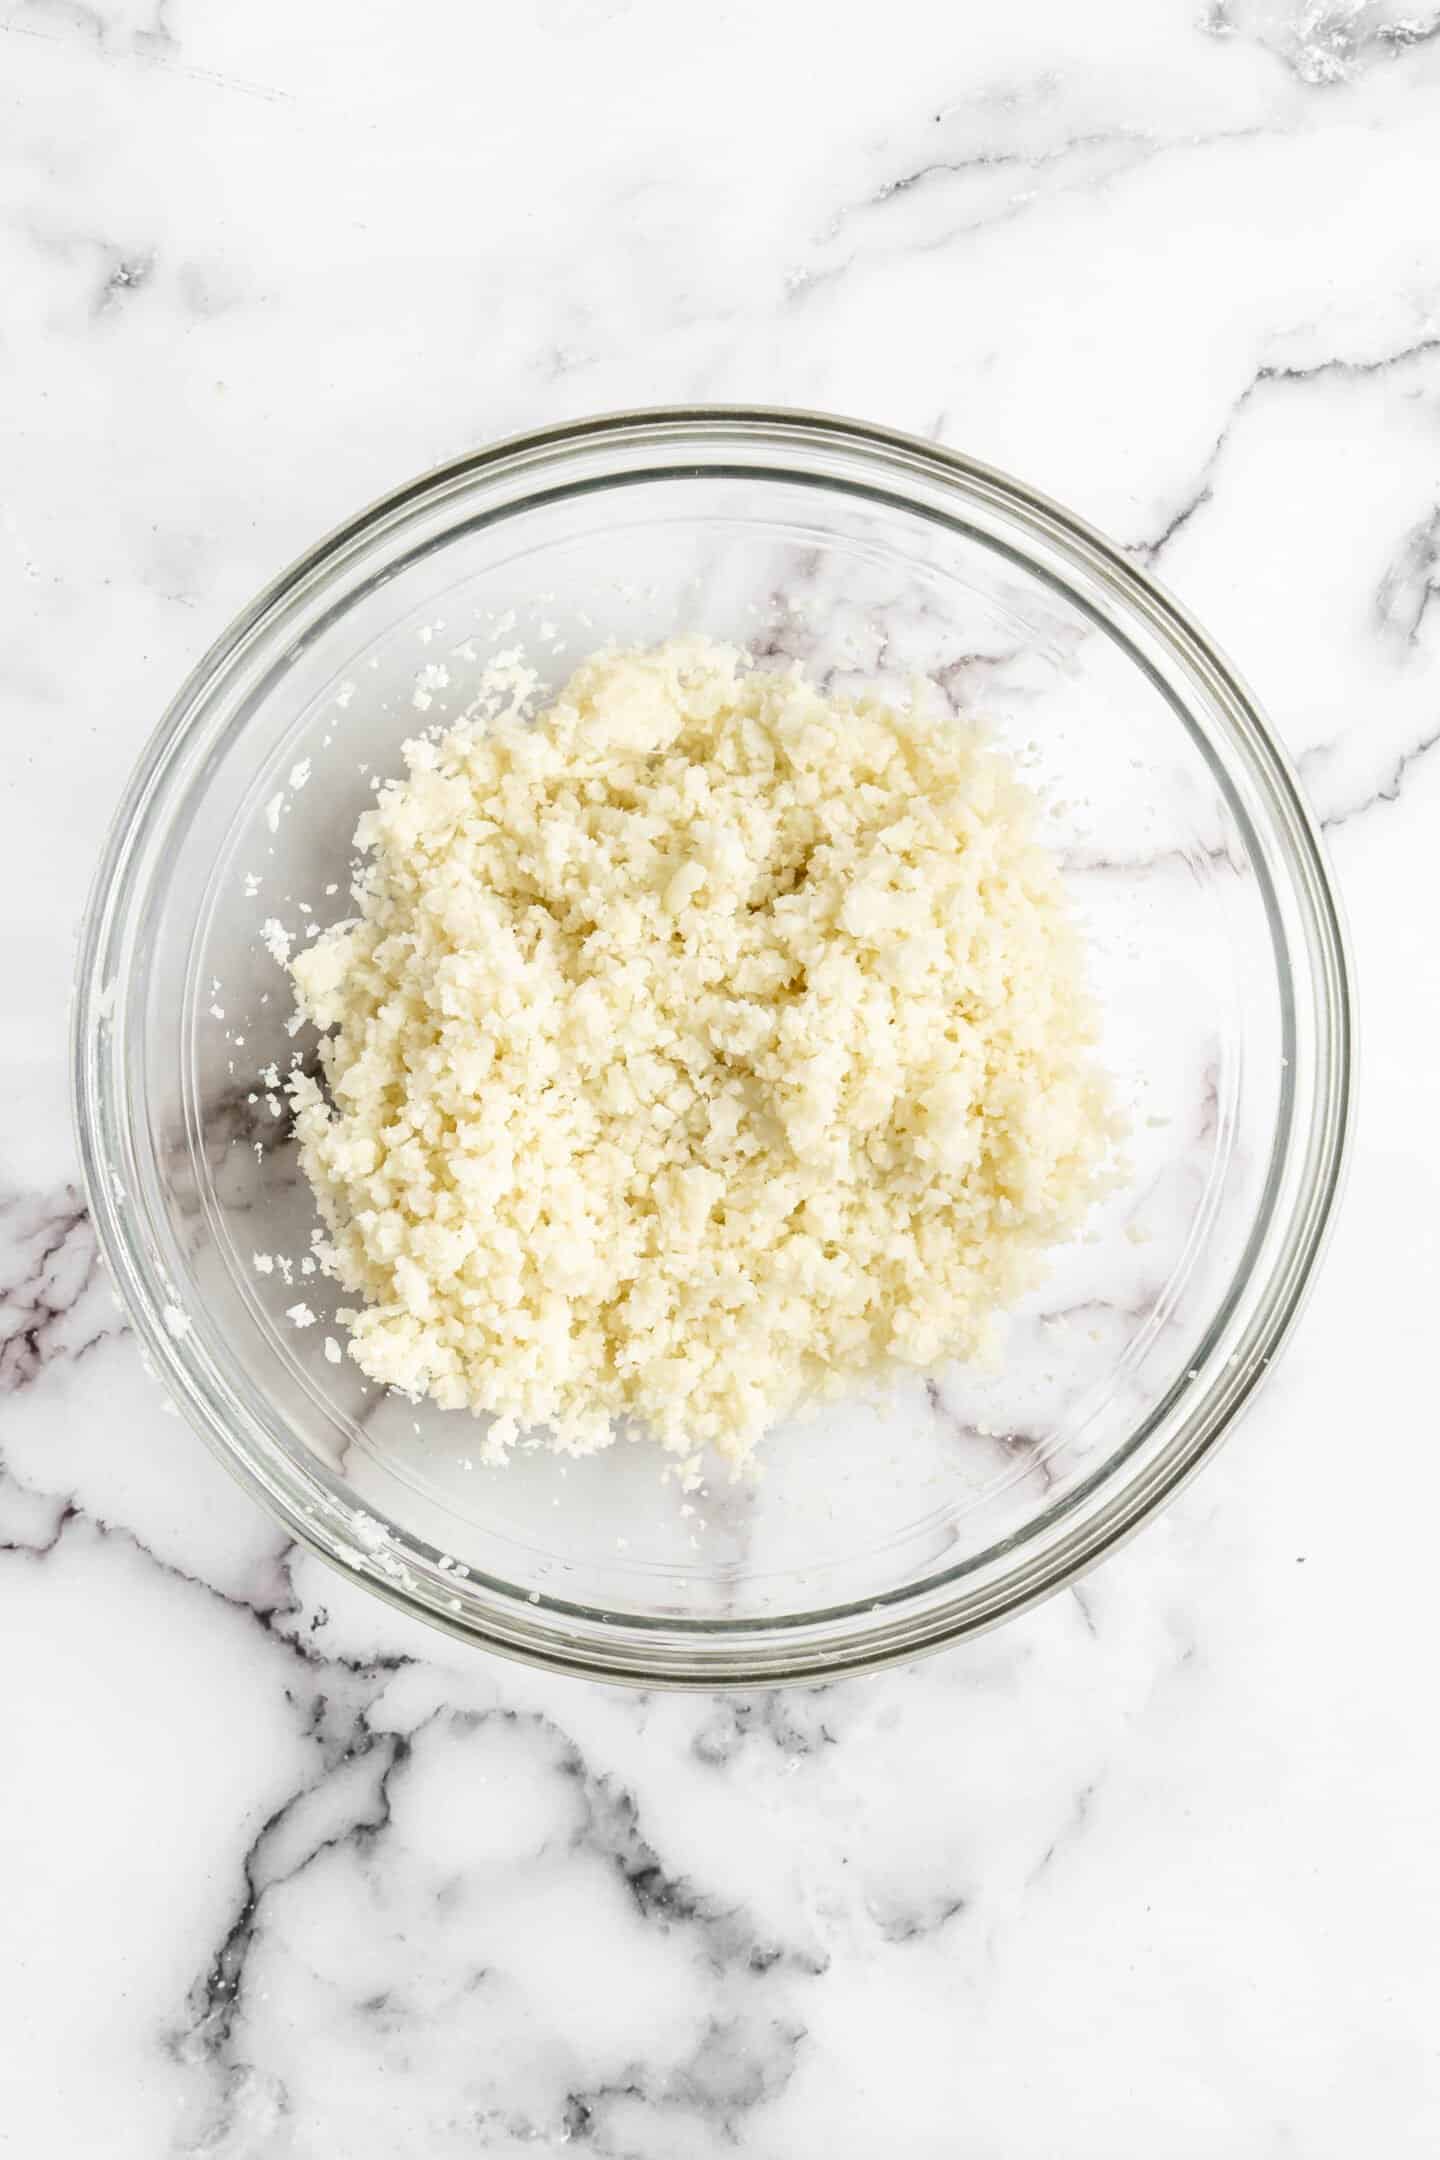
Cook the cauliflower rice . Place the cauliflower rice in a large bowl. Set a paper towel over it and microwave for 5 minutes. Let it cool enough to handle, then transfer the cauliflower rice to a clean, thin kitchen towel. Wrap it up and squeeze it over a sink to get the liquid out. The cauliflower should be light and fluffy.
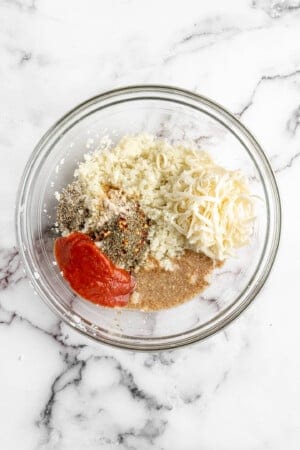
Make the pizza bite mixture . Place the riced cauliflower in a bowl, along with the cheese, flax egg, salt, pepper, marinara sauce, garlic powder, Italian seasoning, and crushed red pepper. Set aside the extra 2 tablespoons of cheese for topping.
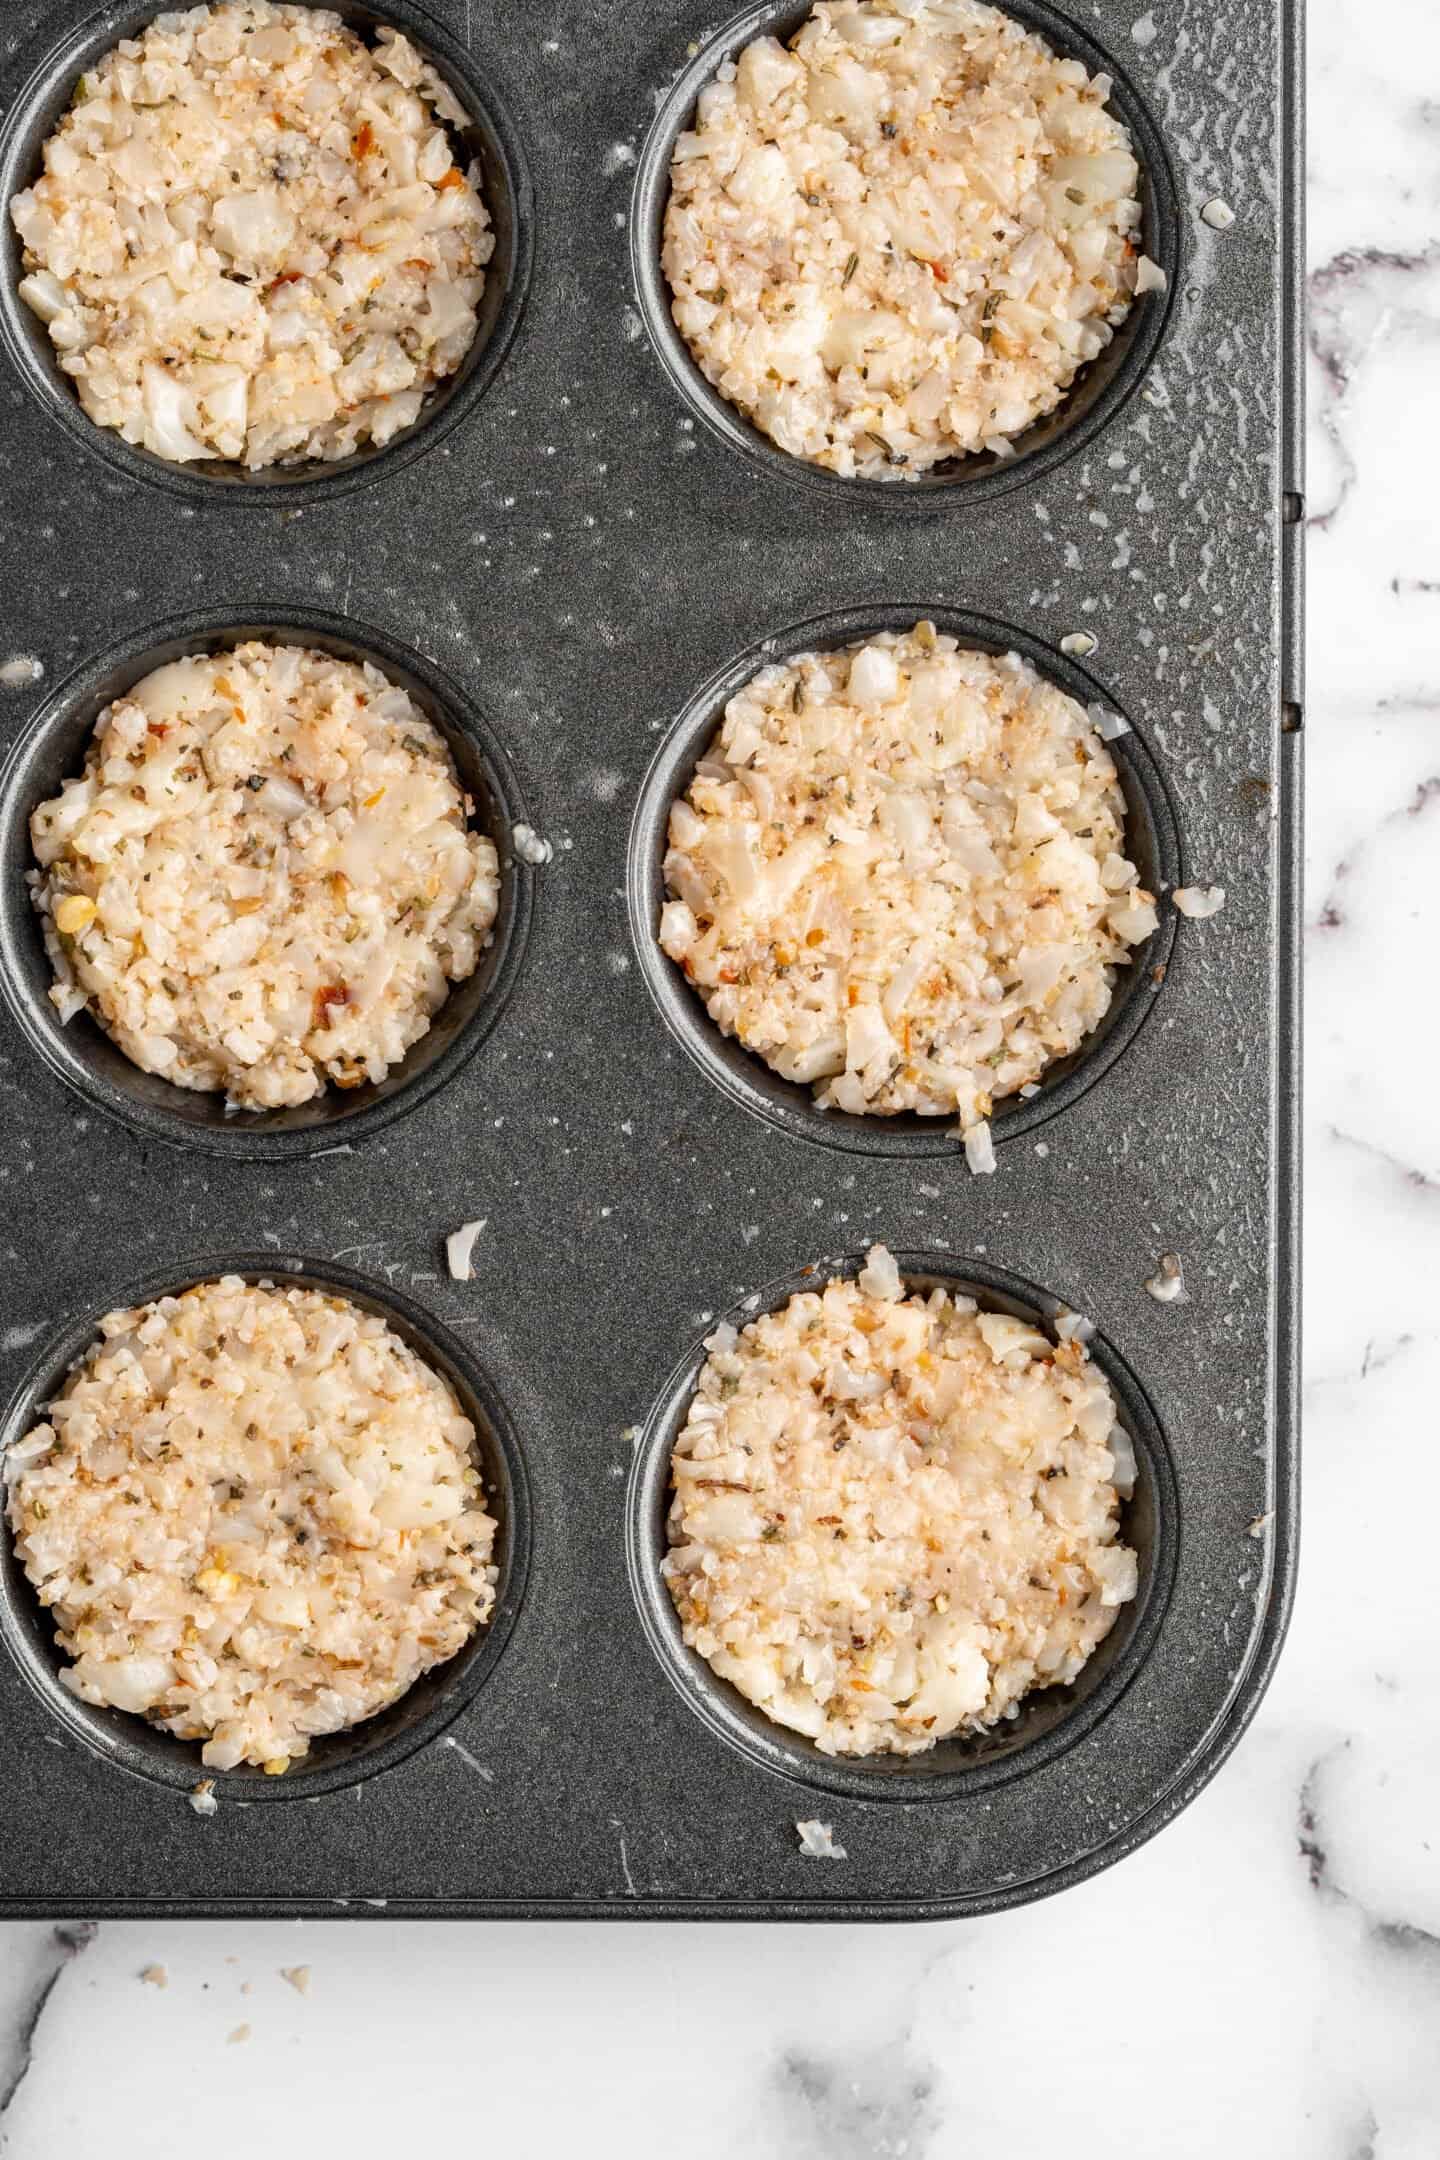
Form the pizza bites . Use a tablespoon to scoop the cauliflower mixture and divide it into the prepared cups. Press the mixture into the cups to compact it; this will help it stick together!
Bake . Bake your Cauliflower Pizza Bites for 12 to 15 minutes. Top them with the remaining cheese, then broil them for about a minute more.

Cool . Let the bites cool on a wire rack for about 15 minutes, then remove them from the pan by lifting the parchment paper.
How Do You Make Cauliflower Rice Not Soggy?
The answer is to cook it properly and to squeeze out as much liquid as possible before moving onto the next step of the recipe. The soggier your cauliflower rice, the harder it will be to get your Cauliflower Pizza Bites to stick together, and the more watered-down the flavour will be.
Tips for Success
Here are my best tips on how to make perfect vegan Cauliflower Pizza Bites:
- Don’t use frozen cauliflower rice . It has a tendency to be much “wetter” than fresh cauliflower rice, so it’s harder to get it to hold together.
- Cook any veggie add-ins first . If you decide to add other veggies to this recipe, sauté them to cook them through and remove any excess moisture.
- Season to taste . Feel free to add more spices or salt to the recipe. Since it’s made with vegan egg, you can taste it and adjust as needed!

Serving Suggestions
These Cauliflower Pizza Bites are perfect as a snack or appetizer. In addition to serving them with marinara , you could pair them with vegan ranch dressing (hey, some people love pizza and ranch together!), spicy arrabbiata sauce or sprinkle them with homemade vegan Parmesan .
How to Store and Reheat Leftovers
Cauliflower Pizza Bites will keep in an airtight container in the fridge for up to a week. To reheat, simply pop them in a 350ºF oven or the microwave until heated through.
Can This Recipe Be Frozen?
You can freeze these bites and reheat them from frozen. Simply place them in an airtight container or freezer bag and store them for up to 3 months. When you’re ready to eat them, simply reheat in the oven or microwave until warmed through.

Ingredients
- 1 medium head of cauliflower , 935 grams
- ½ cup vegan shredded cheese + 2 extra tablespoons of cheese
- 1 flax egg , or vegan egg substitute
- ¼ teaspoon sea salt , to taste
- ½ teaspoon ground pepper
- 3 tablespoons marinara sauce
- ½ teaspoon garlic powder
- 3 teaspoons italian seasoning
- ¼ teaspoon crushed red pepper flakes , optional
Instructions
- Preheat oven to 400 ° F/ 205° C. Layer a 12 mini muffin tin pan with parchment paper strips – it makes it so easy to remove.
- Remove the cauliflower leaves. Using a mandolin/grater, shred the cauliflower to make a “cauliflower” rice. Place the cauliflower rice in a large bowl with a paper towel over it and microwave it for 5 minutes.
- Remove and allow it to cool down. Put the cauliflower in a thin kitchen towel, and over a bowl or the sink, and bundle and squeeze tightly. A lot of liquid will be released! Keep squeezing until you can’t get any liquid out. The cauliflower will look thick and fluffy and almost mealy.
- In a bowl, mix the cauliflower, cheese, flax egg, salt, pepper, marinara sauce, garlic powder, italian seasoning, and crushed red pepper, except the extra 2 tablespoons of cheese. Using a tablespoon measuring, scoop the mix and put one tablespoon into each cup, then distribute the rest evenly among the cups. press them down tightly together.
- Bake for 12-15 minutes. When finished, remove from over, top the cups with the remaining 2 tablespoons cheese, then broil for about 1 minute (please watch them, they burn easily).
- After broiling, allow to cool on a wire rack for about 15 minutes and then remove from pan by lifting the parchment paper edges out.
- Serve with extra marinara sauce – enjoy!!
