Learn how to make coconut butter using just one ingredient! It’s a creamy, rich indulgence that’s super easy to make at home, and great in all kinds of dishes.

Coconut butter is here to change your life! If you’ve never made it before, it takes less than 20 minutes, it’s as simple as pushing a button, and it requires minimal cleanup afterwards. If you have coconut flakes in your pantry, you’ve already got everything you need to whip it up.
WATCH THE VIDEO TO SEE HOW IT’S MADE:
What Is Coconut Butter?
Also known as coconut manna or creamed coconut, coconut butter is made by grinding the pulp of a coconut until it forms a creamy white paste. Unsweetened coconut flakes produce the same result, and they’re a lot easier to work with than actual dried coconut meat.
The thin paste hardens into coconut butter once it cools completely. Coconut butter, though a little grainer than regular butter, is a great substitute in so many recipes, both in and out of the kitchen. It has a tropical flavour and aroma that makes it absolutely irresistible!
(Once you’ve made homemade coconut butter, you might be wondering what other kitchen staples you can whip up yourself. Try my homemade tahini , almond butter , or cashew milk next!)
Notes on Ingredients
Please note that this is important information on the ingredients and instructions and the FULL recipe with amounts and details can be found DOWN BELOW (scroll to it) in the recipe card.
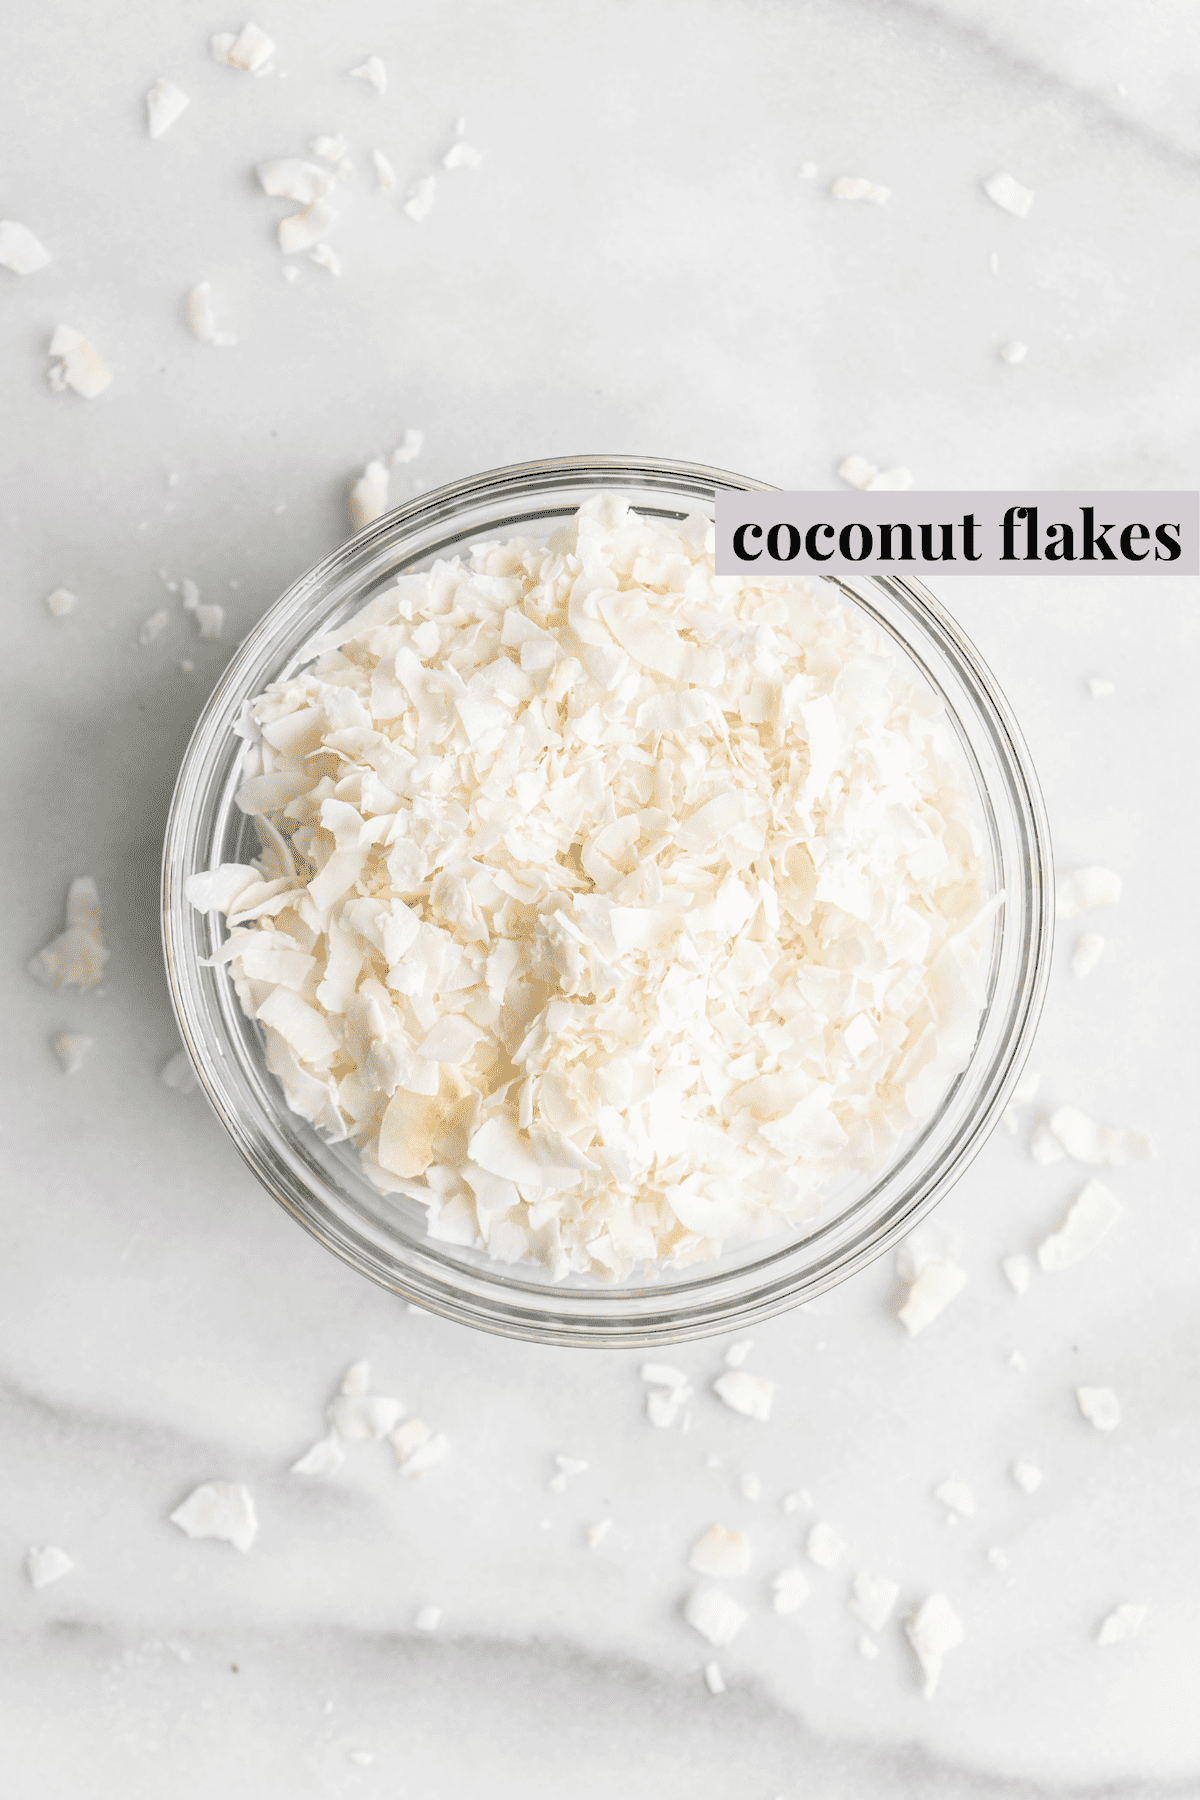
- Unsweetened coconut flakes – Because this is the only ingredient you need, you can easily adjust this recipe to make more coconut butter by adding more coconut flakes. The more flakes you use, the easier it is to blend, too.
Are Coconut Flakes the Same as Shredded Coconut?
Shredded coconut is grated, while coconut flakes are made from coconut meat that’s cut into larger pieces and then dried. You can use shredded coconut to make coconut butter as long as it’s not sweetened.
How to Make Coconut Butter
Ready to get started? Here’s what you’ll need to do.
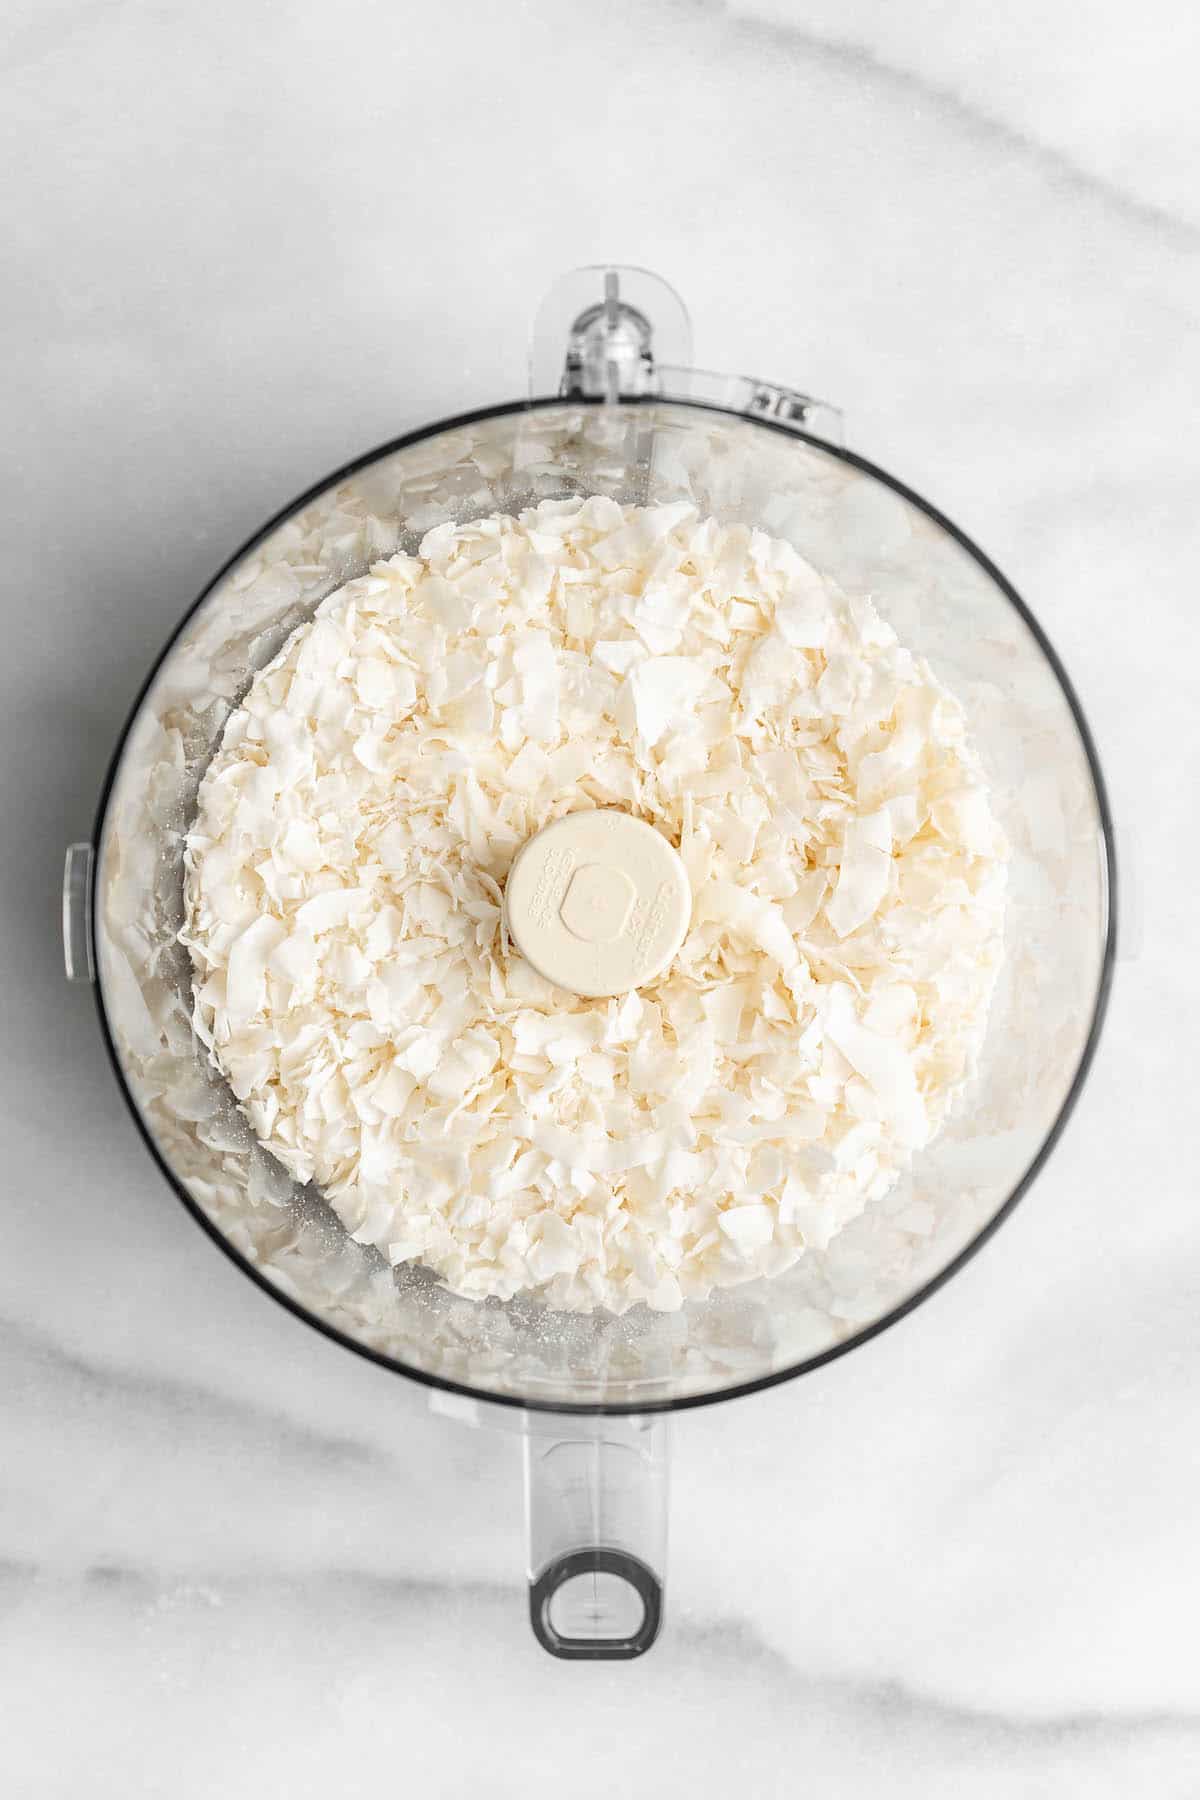
Add the coconut flakes to your blender . Place all of the coconut flakes into the jar of a high-speed blender or a food processor.
Process . Turn on your blender or food processor and process for 3 to 4 minutes, or until the flakes are beginning to clump together.
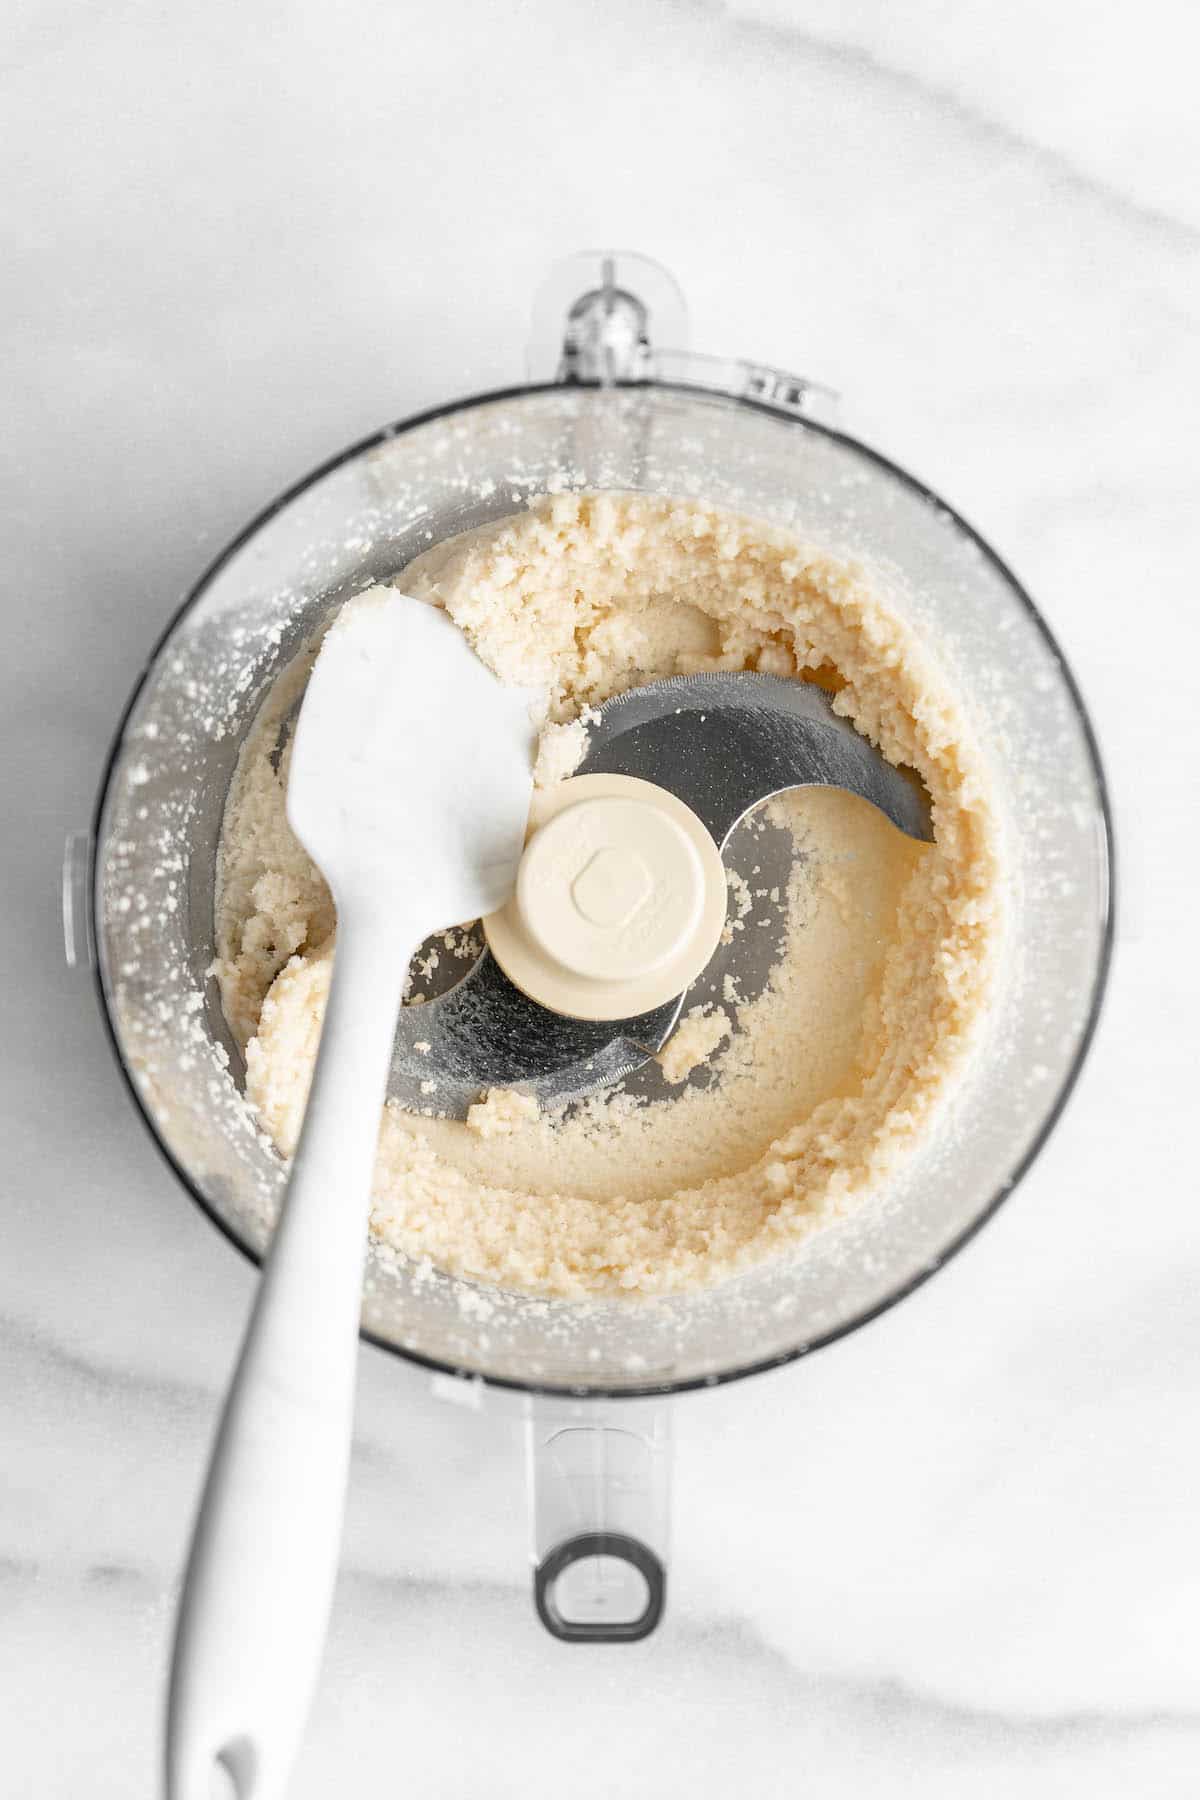
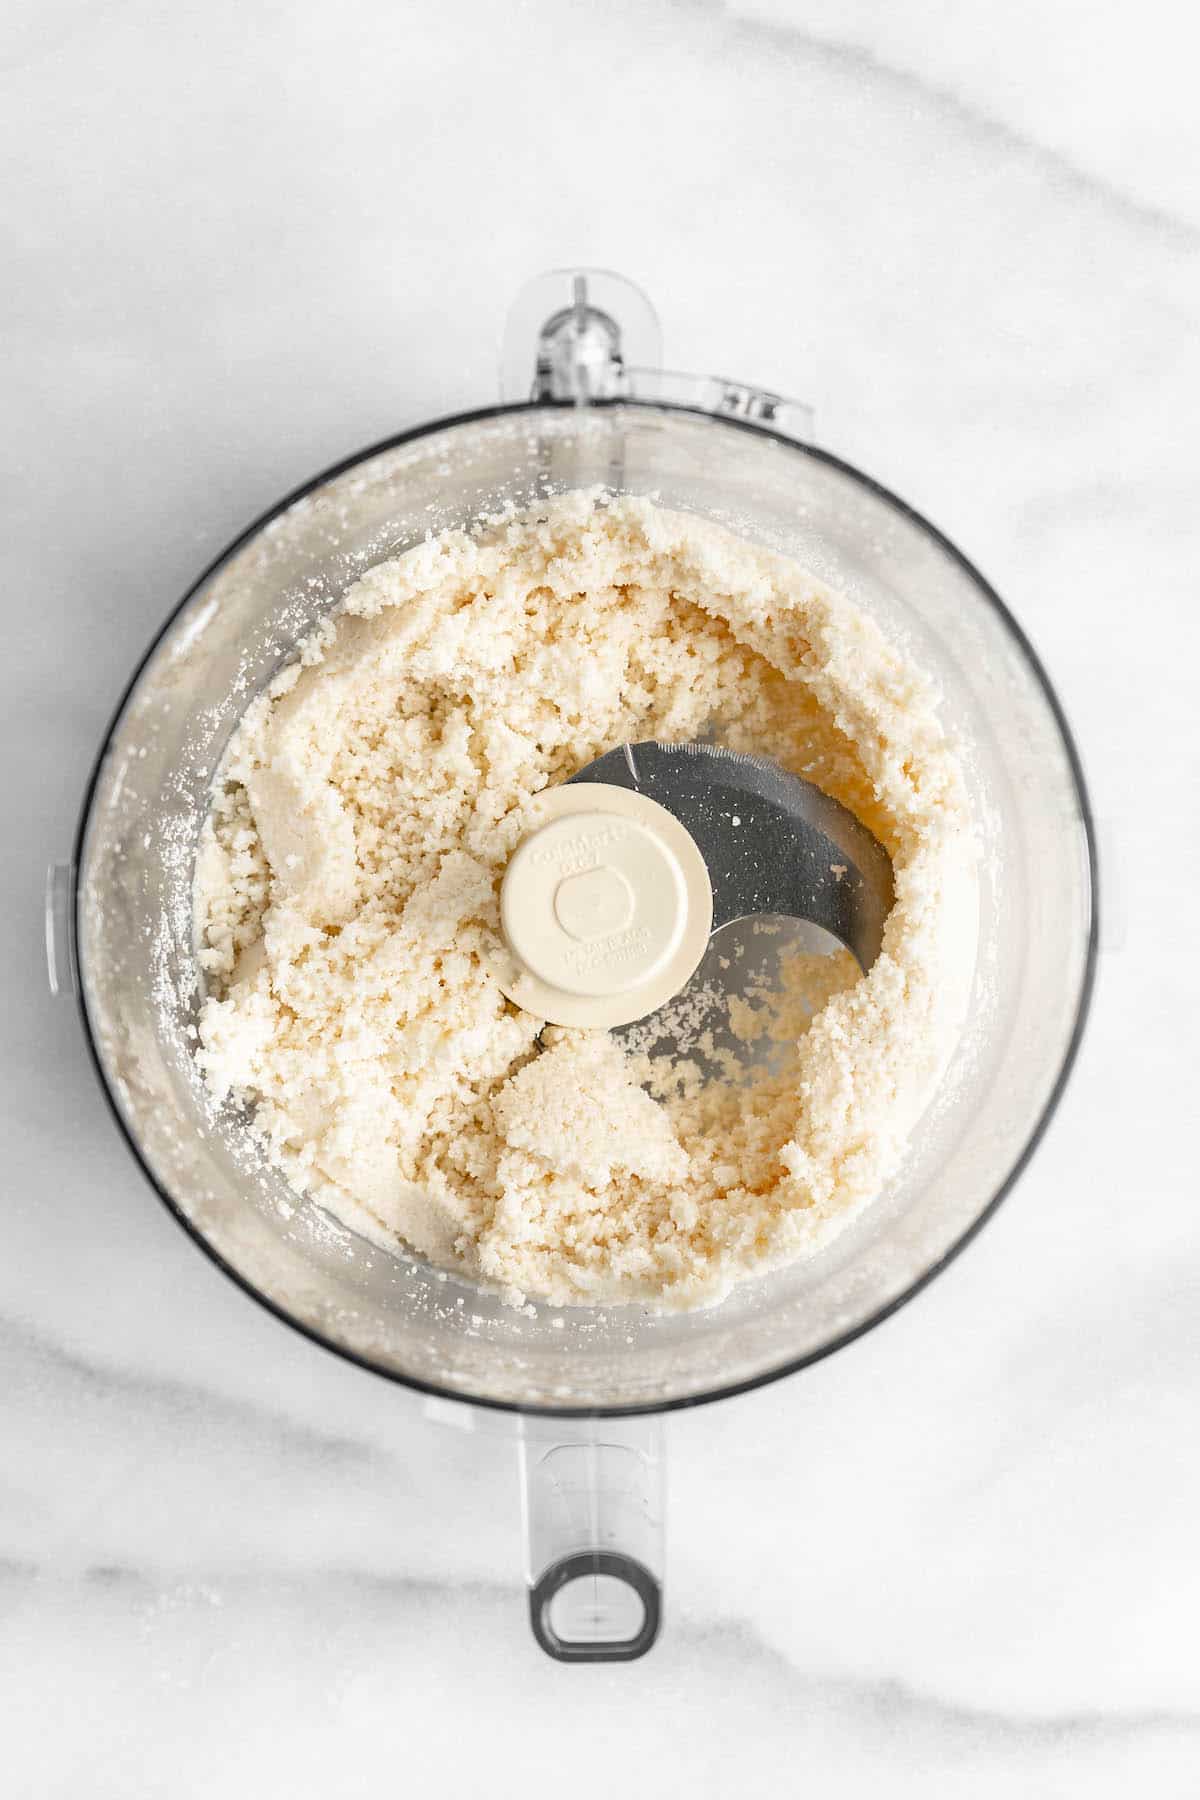
Scrape down sides. Open the blender or food processor and use a rubber spatula to scrape down the sides.

Process more. Place the top back onto the blender and and continue to blend, stopping to scrape every 3 to 5 minutes. I needed about 16 minutes, but your blender or food processor may vary; high-speed blenders will accomplish this faster than food processors. When its done, the flakes will be transformed into a paste.
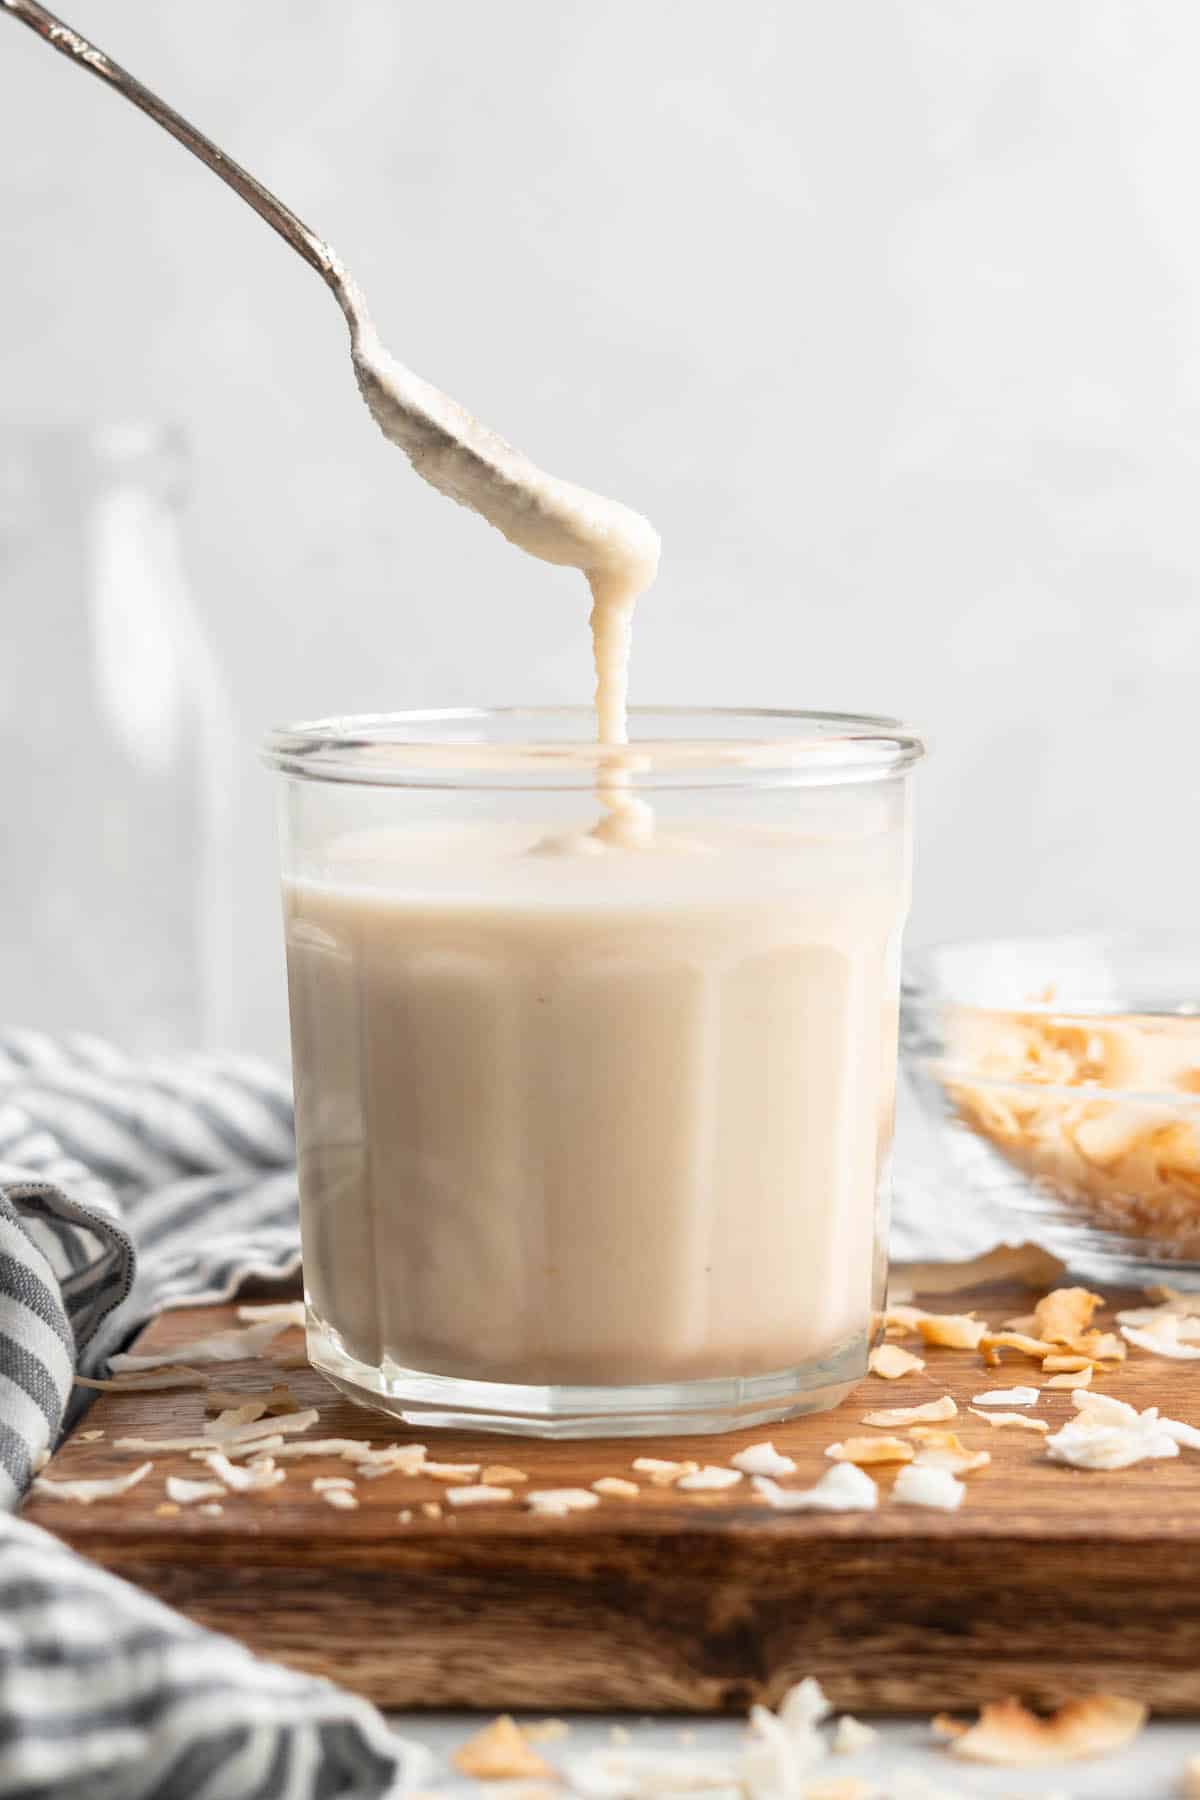
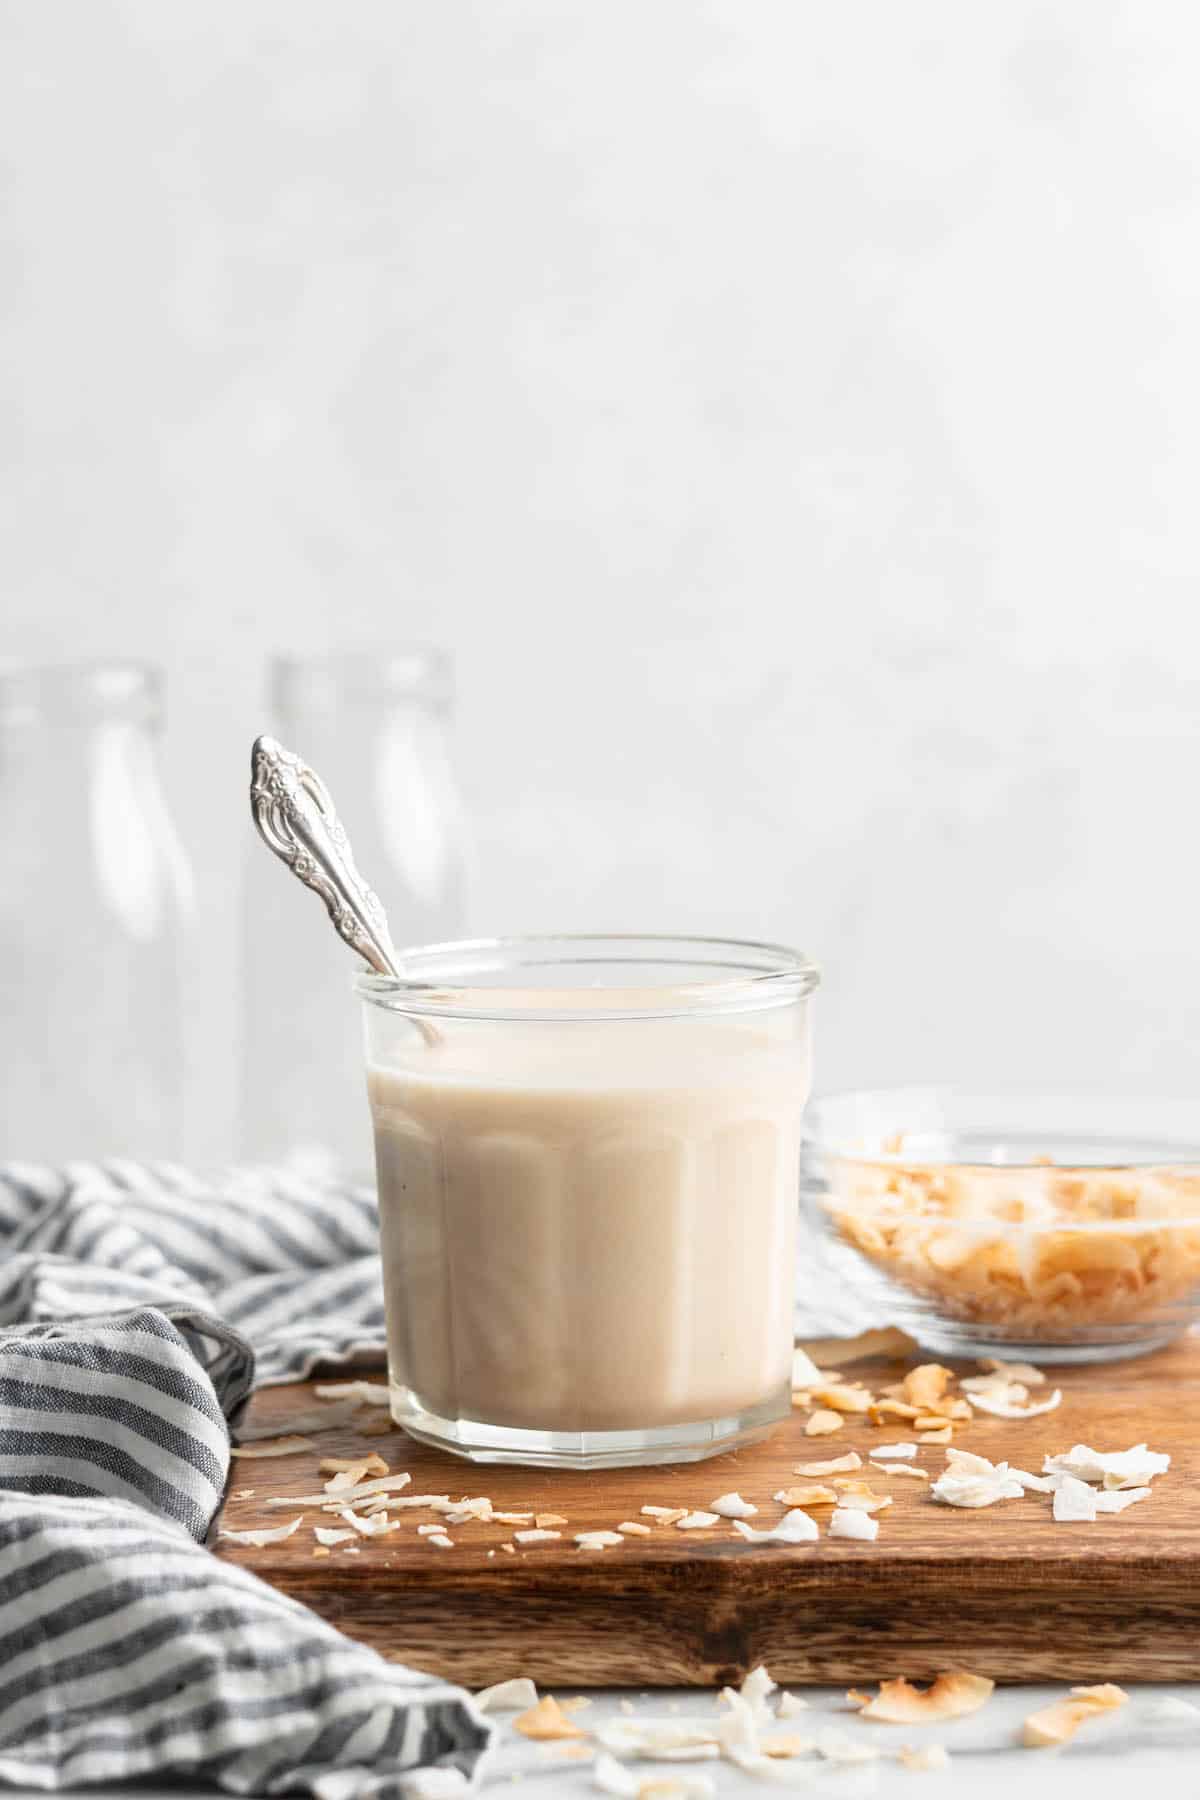
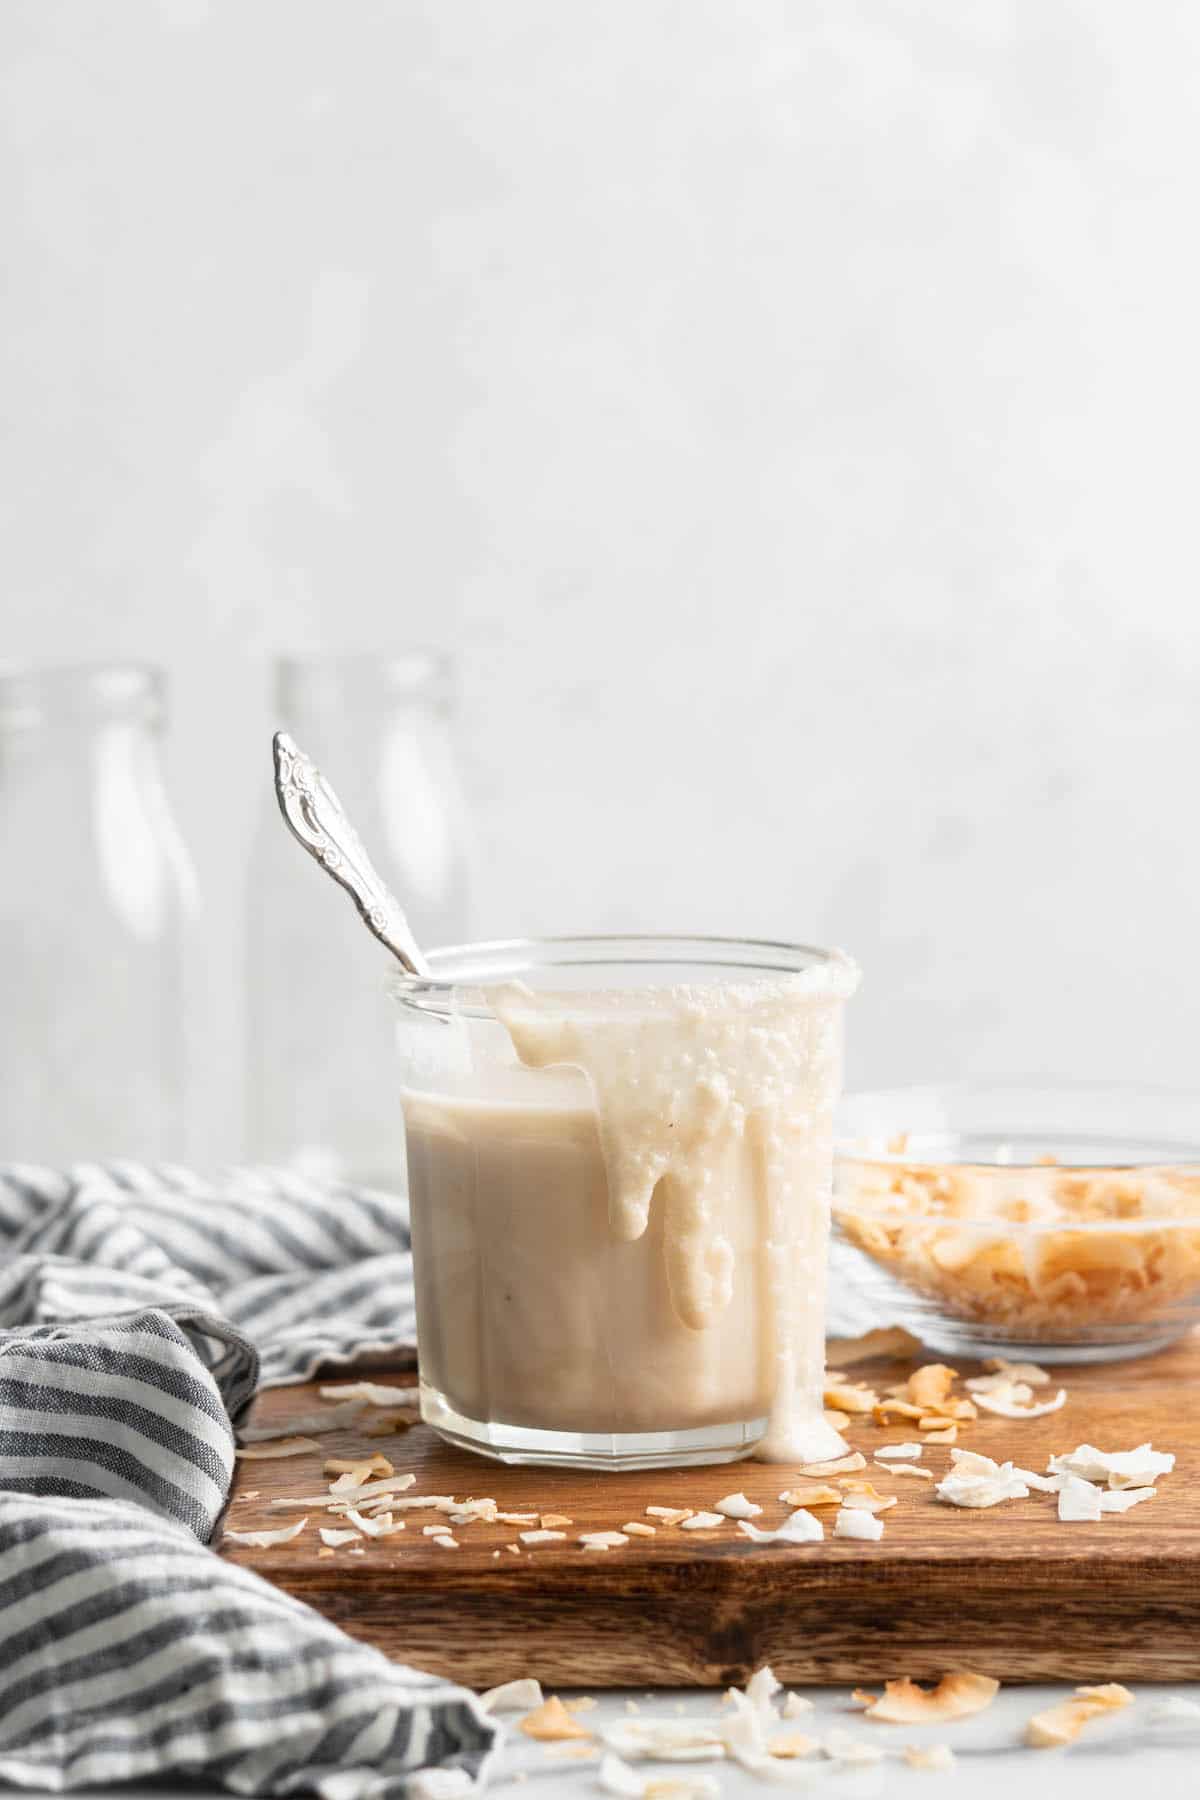
Finish. Transfer the coconut butter to a jar and store it in the refrigerator or a cool place in your pantry. It will harden into a thick, creamy butter. To use, microwave for about 10 seconds to soften, or place a hot kitchen towel around the jar to warm it up.
Tips for Success
This recipe is all about technique! Here’s how to make sure your coconut butter turns out perfect .
- The more coconut flakes, the better. I wouldn’t use any less than 3 cups of coconut flakes, but by all means, feel free to increase the amount. You’ll find that it blends up much easier that way.
- Troubleshooting your blender. If your blender gets stuck, use the tamper to push the coconut towards the blades and get rid of any air pockets. If you don’t have a tamper, turn off the blender and use a wooden spoon.
- Let it cool. Don’t try to use your coconut butter right away! It will be warm from the blending process. Let it cool and it will firm up into a nice, spreadable consistency.
How to Store
Store homemade coconut butter in an airtight jar or container and keep it in a cool dry place; it will last for a few weeks. If it’s summertime or you’re in a warm environment, you can store it in the refrigerator if you want it to maintain a firmer consistency.
My Favourite Ways to Use Coconut Butter
There’s no way I can list every single way to use homemade coconut butter, but here are my favourites:
- Use it to replace butter on your toast. Add a little salt to taste, then spread on. Drizzle some maple syrup or agave on top. Or jam. The world is your oyster.
- Make it into frosting for cookies or warm it up and drizzle it over muffins or quick breads.
- You can also warm it up and drizzle it over French toast , pancakes , and waffles .
- Add it to smoothies or your morning bowl of oatmeal.
- You can substitute it where you usually put peanut butter or almond butter. Prime example? These Vegan Peanut Butter Cups . YUM.
- I haven’t tried this, but I did hear from reader Rachel that it’s great in coffee!
- Spread a little onto a square of dark chocolate for a sweet treat.
Ingredients
How to Make Coconut Butter
- At least 3 cups unsweetened coconut flakes
Instructions
How to Make Coconut Butter
- In a food processor or high powdered blender, add the coconut flakes.
- Blend together for about 3 to 4 minutes until the flakes are beginning to clump together.
- Open and scrape down the food processor.
- Secure back on top and continue to blend. Keep blending until everything has been blended together for about 16 minutes. You’ll need to keep scraping in between, about every 3-5 minutes or when the blade is not blending anything. The flakes will begin to break down into a paste, and then a thick and creamy spreadable butter.
- Remove and pour into a jar. It’ll harden once cooled or in the fridge.
- To use, microwave slightly for about 10 seconds to soften, or place a hot kitchen towel around the jar to soften. Enjoy!
Notes

How to Make Coconut Butter
Ingredients
How to Make Coconut Butter
- At least 3 cups unsweetened coconut flakes
Instructions
How to Make Coconut Butter
- In a food processor or high powdered blender, add the coconut flakes.
- Blend together for about 3 to 4 minutes until the flakes are beginning to clump together.
- Open and scrape down the food processor.
- Secure back on top and continue to blend. Keep blending until everything has been blended together for about 16 minutes. You’ll need to keep scraping in between, about every 3-5 minutes or when the blade is not blending anything. The flakes will begin to break down into a paste, and then a thick and creamy spreadable butter.
- Remove and pour into a jar. It’ll harden once cooled or in the fridge.
- To use, microwave slightly for about 10 seconds to soften, or place a hot kitchen towel around the jar to soften. Enjoy!
Notes
Nutrition
How to Make Coconut Butter https://jessicainthekitchen.com/make-coconut-butter/ September 13, 2022
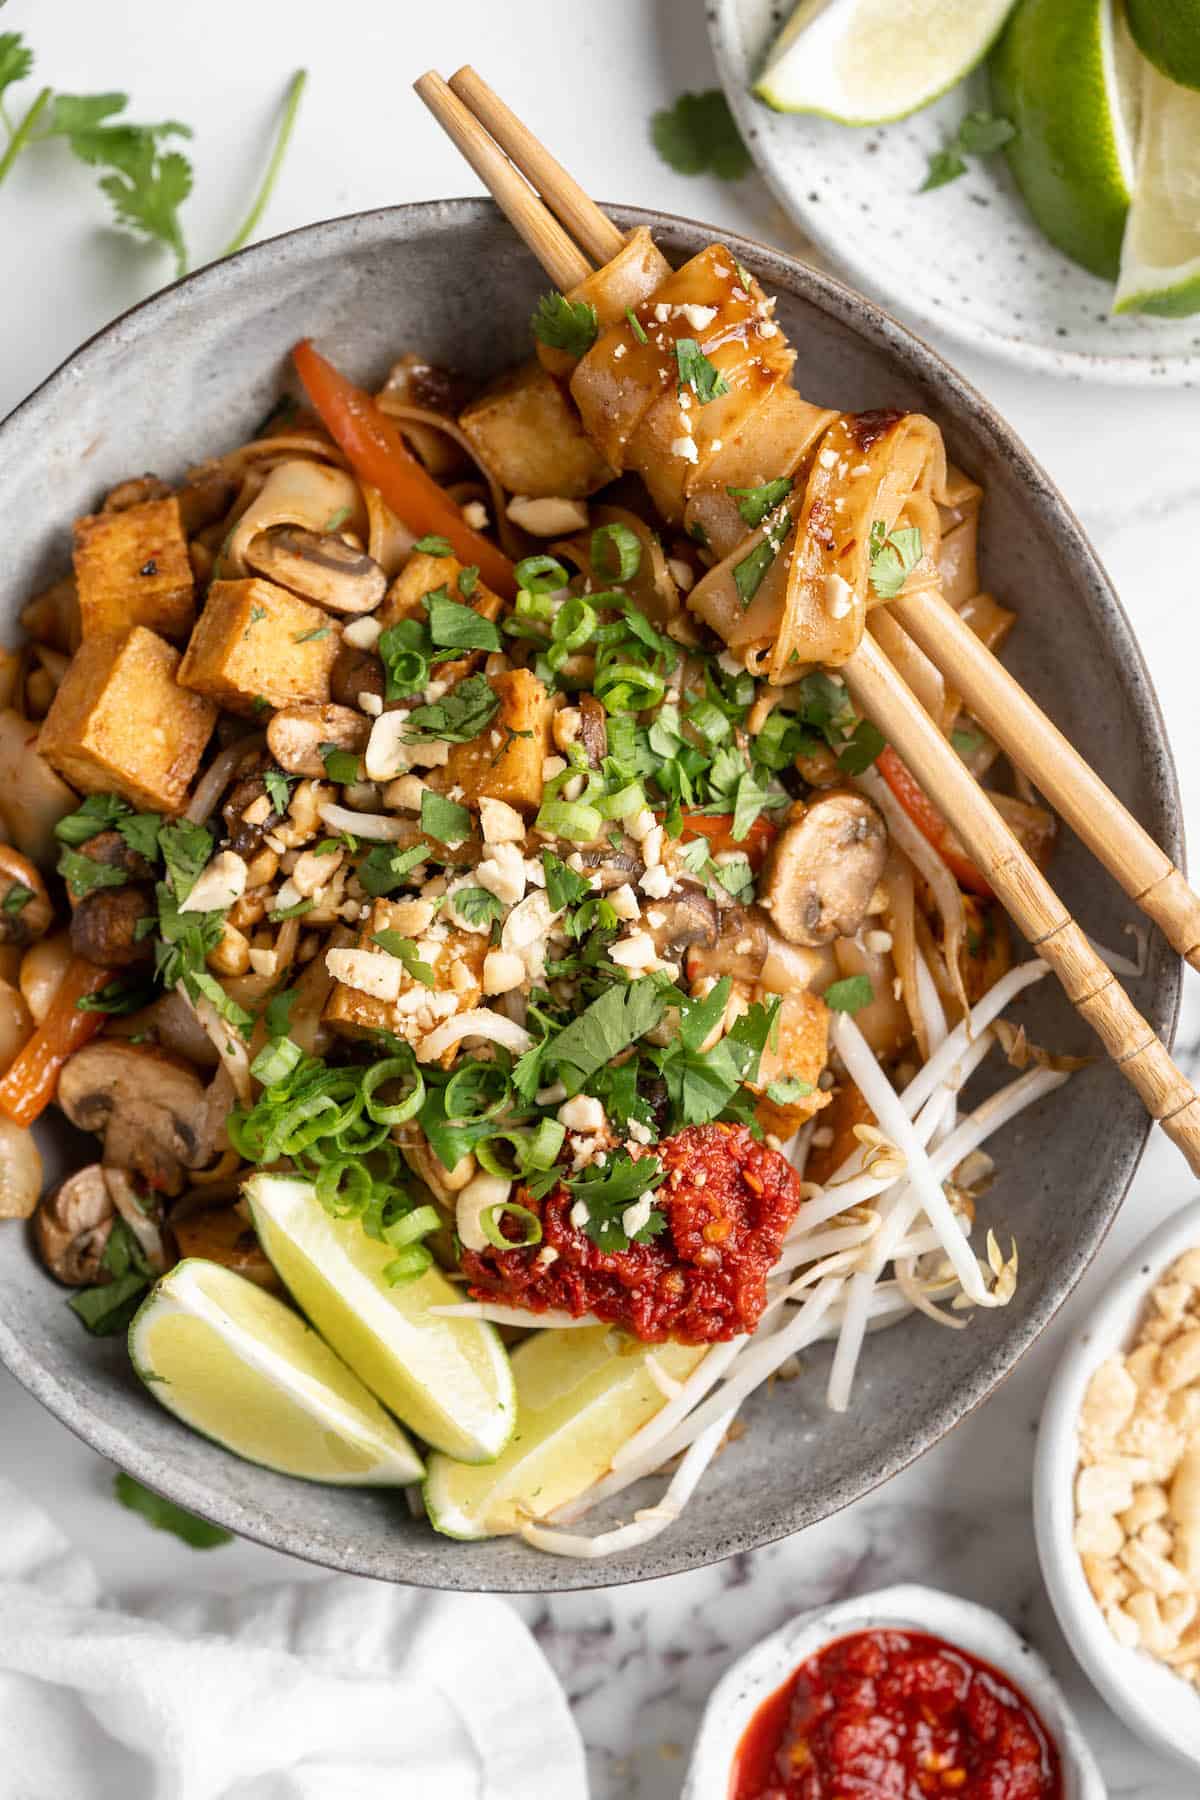
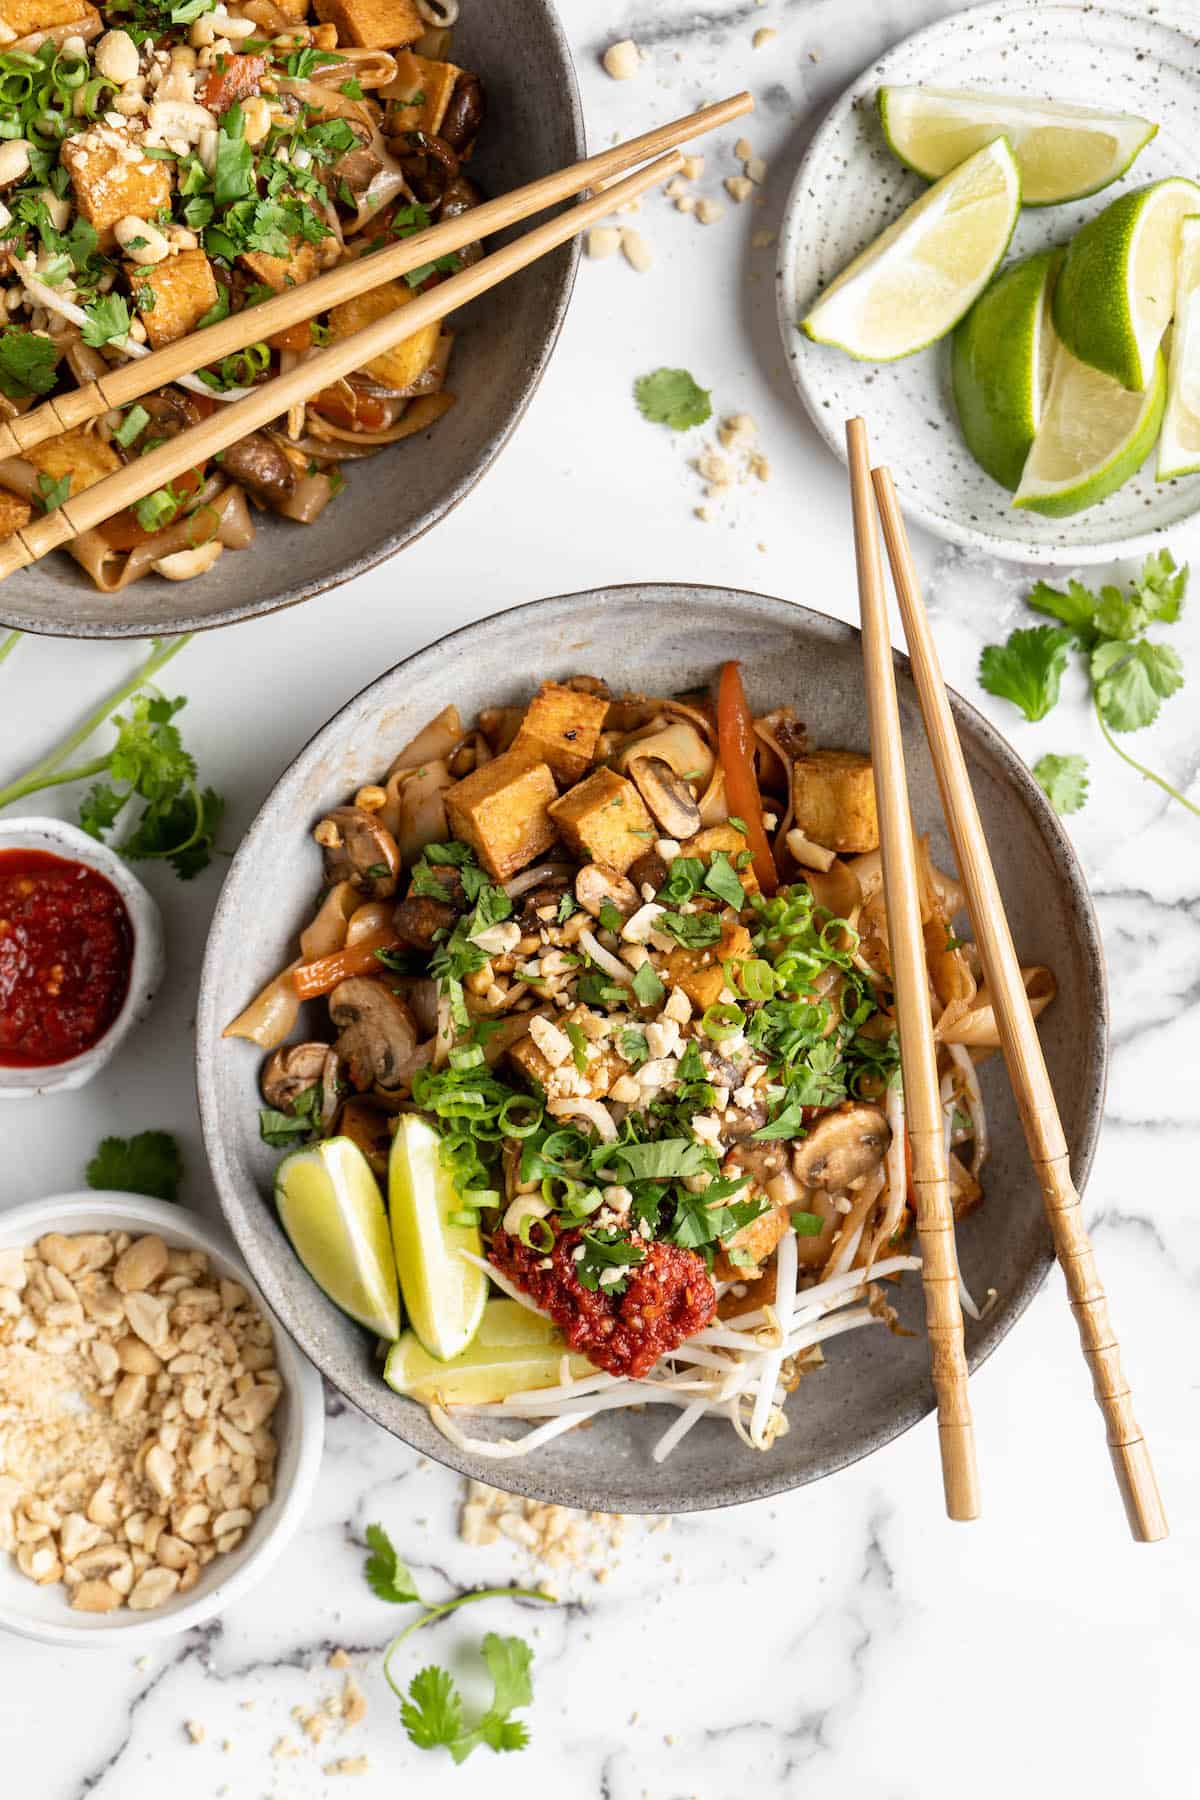
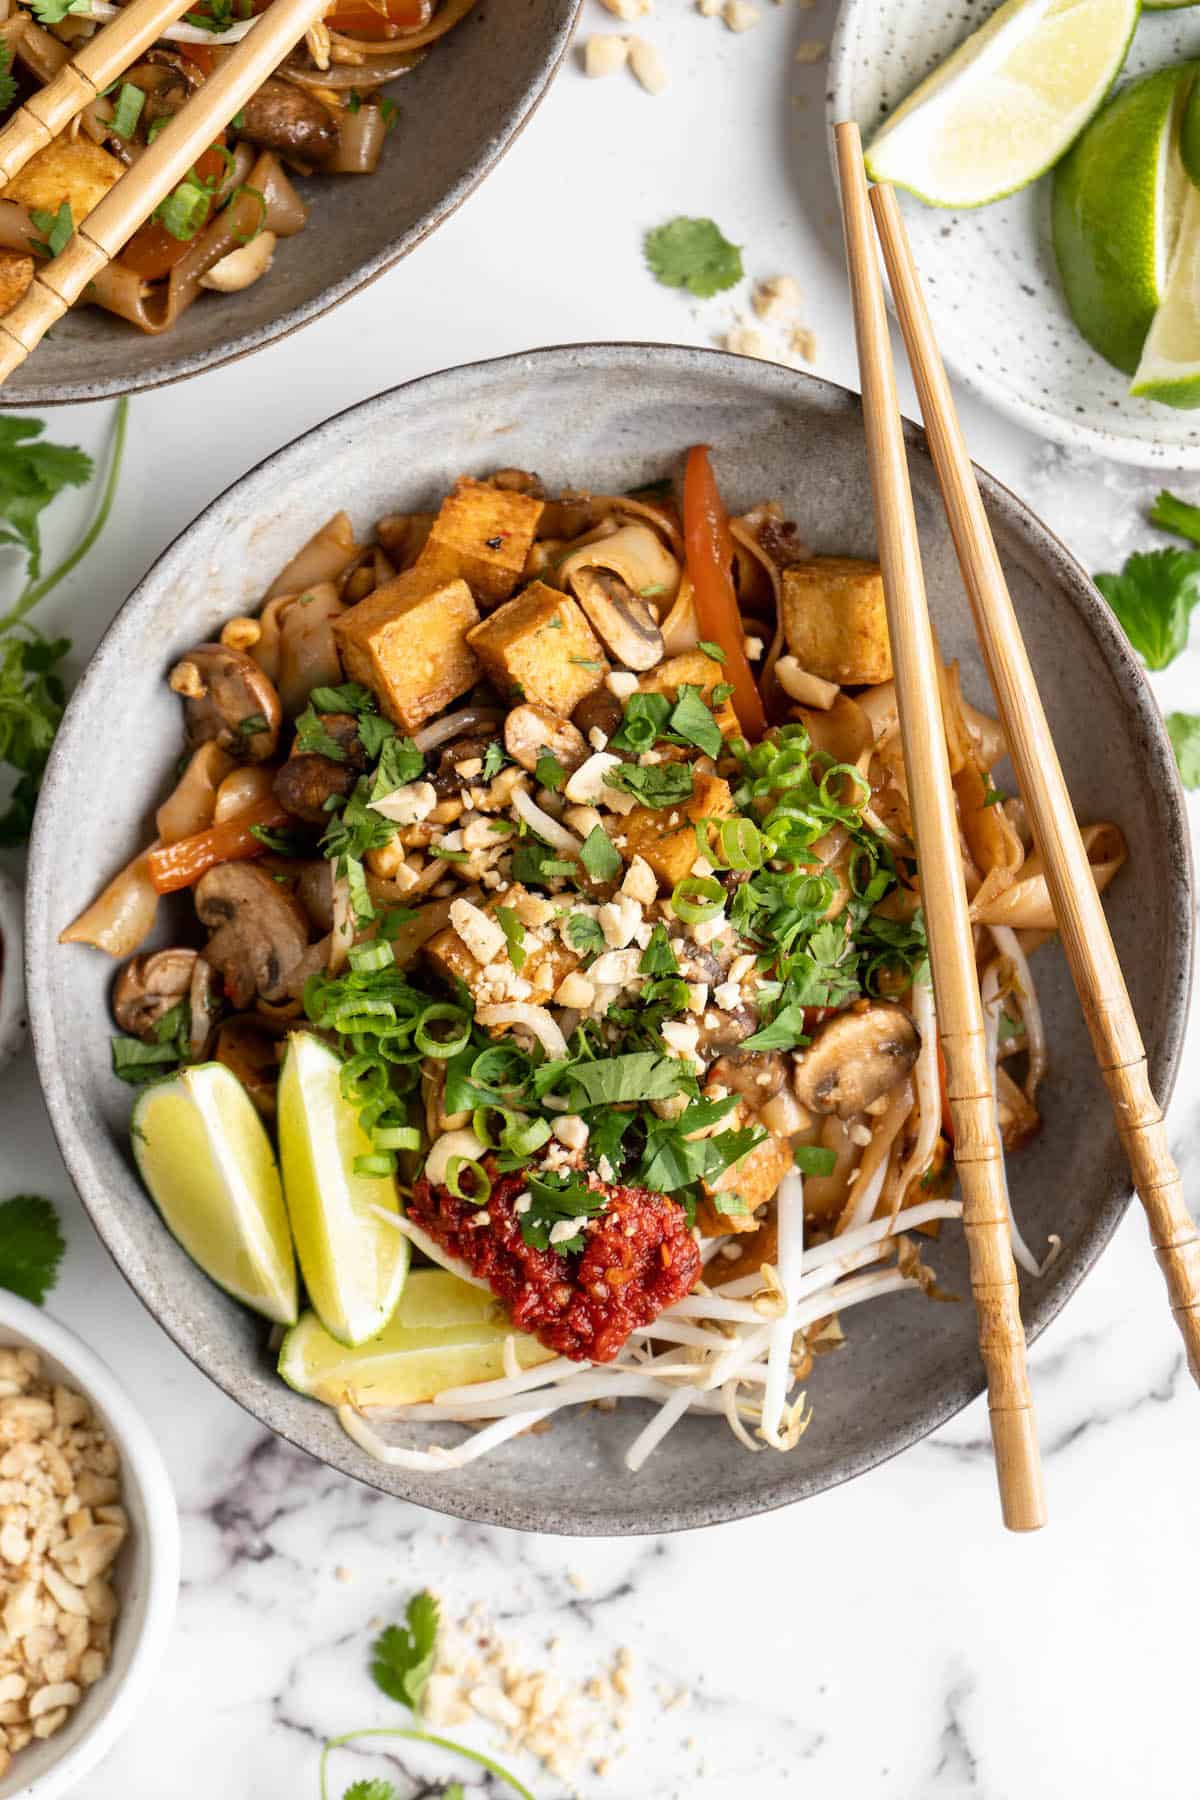
This vegan Pad Thai recipe tastes just like your favourite takeout version, but it’s made without fish sauce or scrambled eggs, making it perfect for plant-based diets! Bonus: you only need 20 minutes to make it from start to finish!
Pad Thai is one of those restaurant dishes that’s sometimes stealthily un -vegan. You might think ordering tofu Pad Thai will mean it’s plant-based, but then: oops, there are scrambled eggs in there! So next time, you ask for no eggs, but: oops again, there’s fish sauce in traditional Pad Thai too!
Well, when you make Pad Thai at home, there are no oopses. You know what you’re getting is vegan!
Now, there are a lot of vegan Pad Thai recipes floating around online, and many of them don’t measure up to the restaurant version. Often, the reason is because they don’t use tamarind paste.
While we all hate having to buy ingredients we might not use often, tamarind paste really is key to that Pad Thai flavour. Without it, you just have stir fried noodles, which are nice, but, well, they’re not Pad Thai. So don’t skip it!
(If you love Asian-inspired noodle recipes try my Vegan Sesame Noodles and Vegan Coconut Curry Soup with Noodles next!)
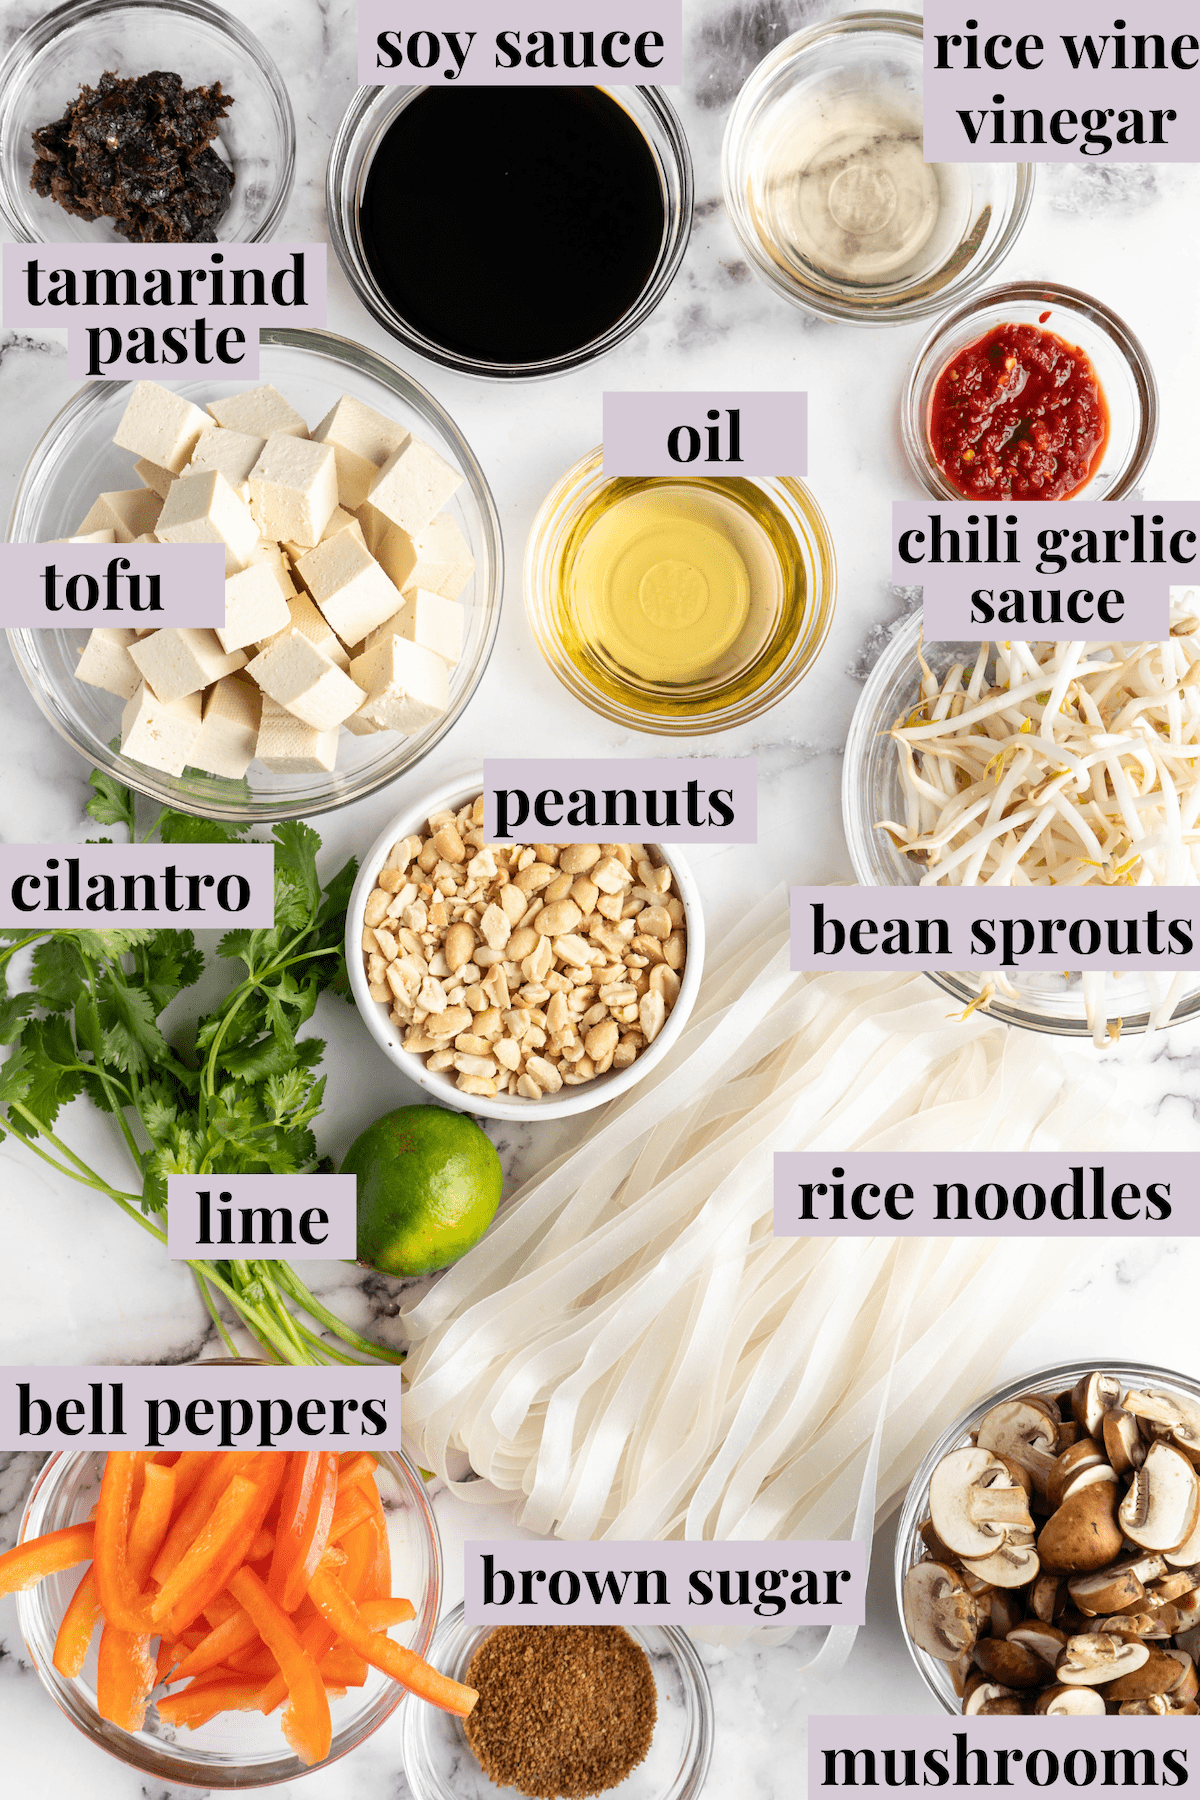
Notes on Ingredients
Please note that this is important information on the ingredients and instructions and the FULL recipe with amounts and details can be found DOWN BELOW (scroll to it) in the recipe card.
- Wide flat rice noodles
- Avocado oil – Or another neutral-flavoured oil suitable for cooking.
- Extra-firm tofu – You’ll need to press the tofu first; learn more here: How To Cook Tofu 101 + Best Tips on Making the Most Delicious Tofu .
- Tamarind paste
- Tamari or low-sodium soy sauce
- Brown or coconut sugar
- Rice wine vinegar
- Chili garlic sauce – Add more or less, according to your preferences.
- Bell pepper
- Baby bella mushrooms – White mushrooms or an Asian variety of mushroom works, too.
- Lime
- Bean sprouts
- Roasted peanuts – If you happen to have a peanut allergy, roasted cashews are also excellent in Pad Thai, even if they’re not quite as authentic!
- Cilantro
Where Do You Find Tamarind Paste in the Grocery Store?
How to Make Vegan Pad Thai
While this is the kind of recipe ideal for an easy weeknight dinner, vegan Pad Thai also keeps well in the fridge, so it works for meal prep too! Here’s what you’ll need to do.
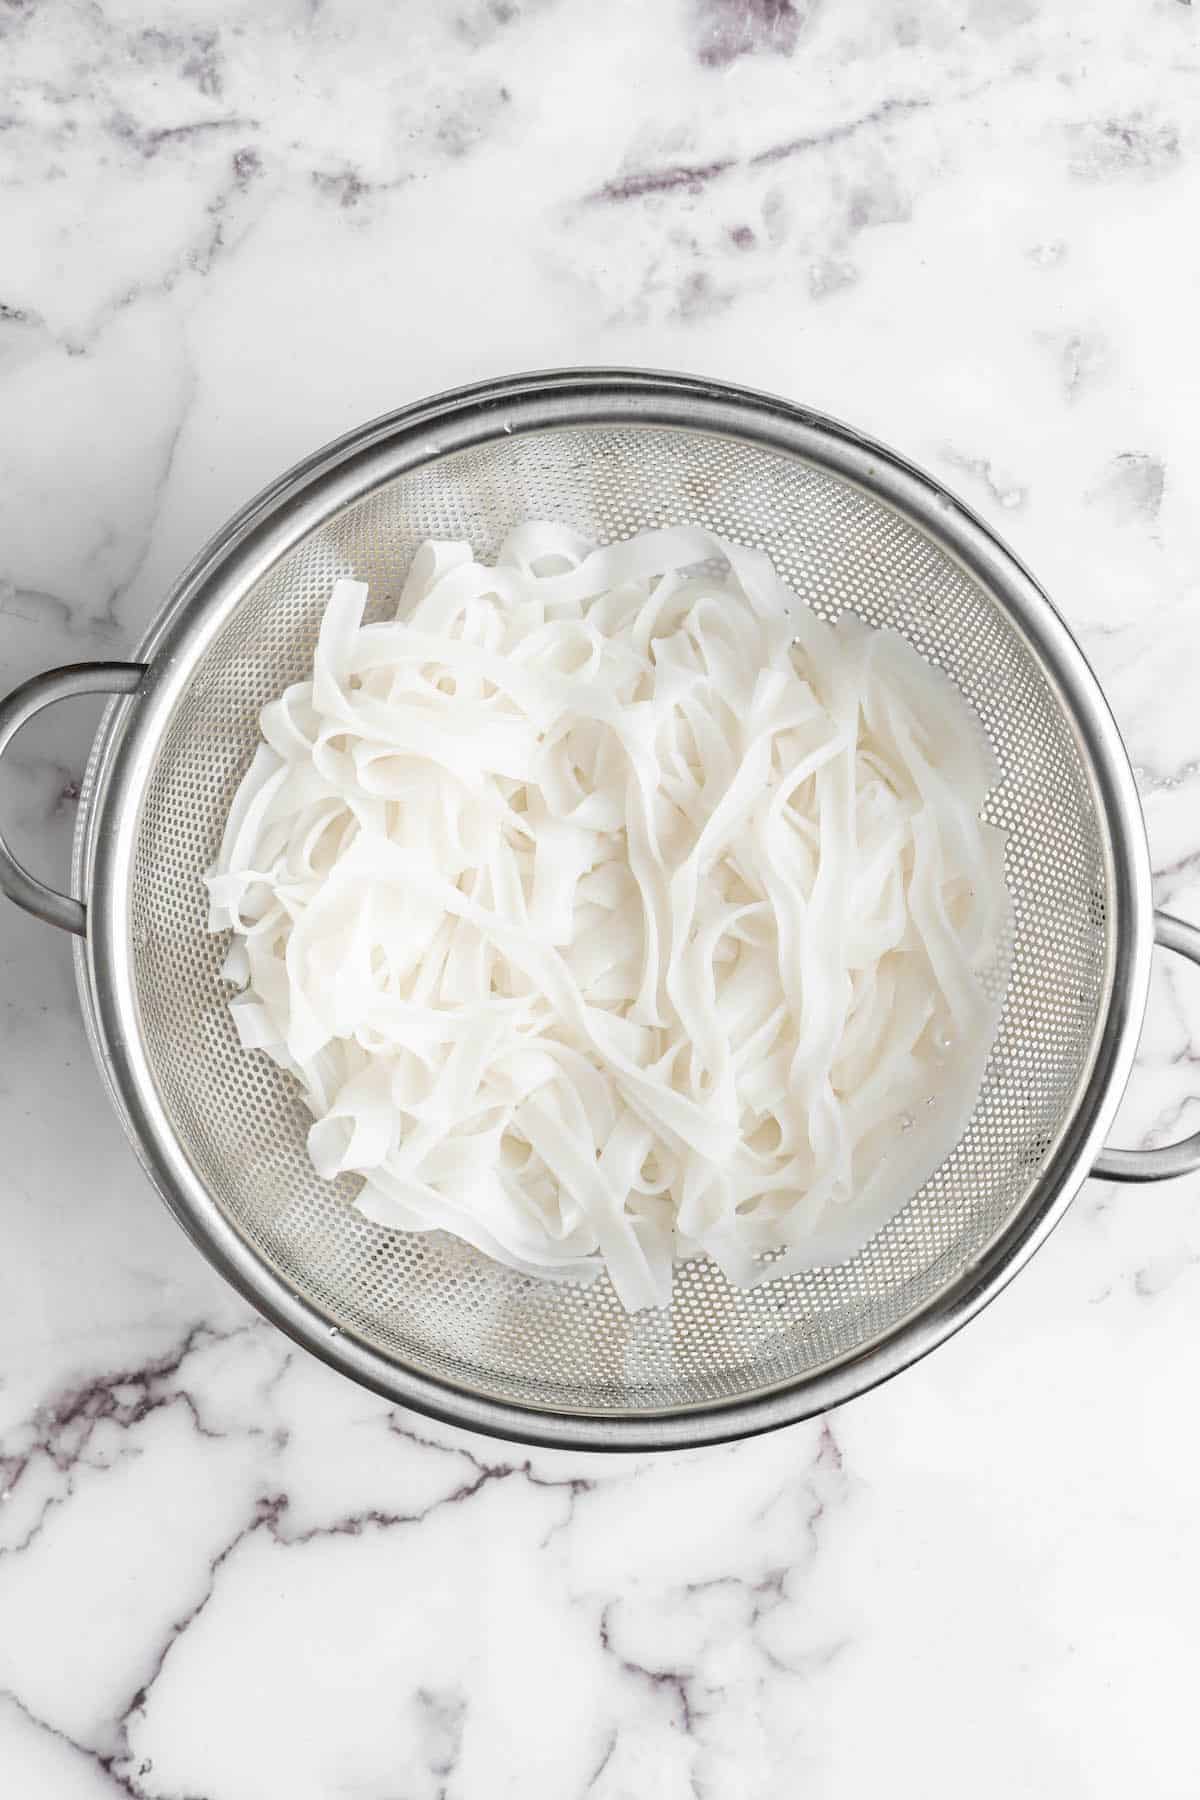
Prepare the noodles. Bring a large pot of salted water to a boil over high heat, then add the noodles and cook them according to the package instructions. Drain and return the noodles to the pot.
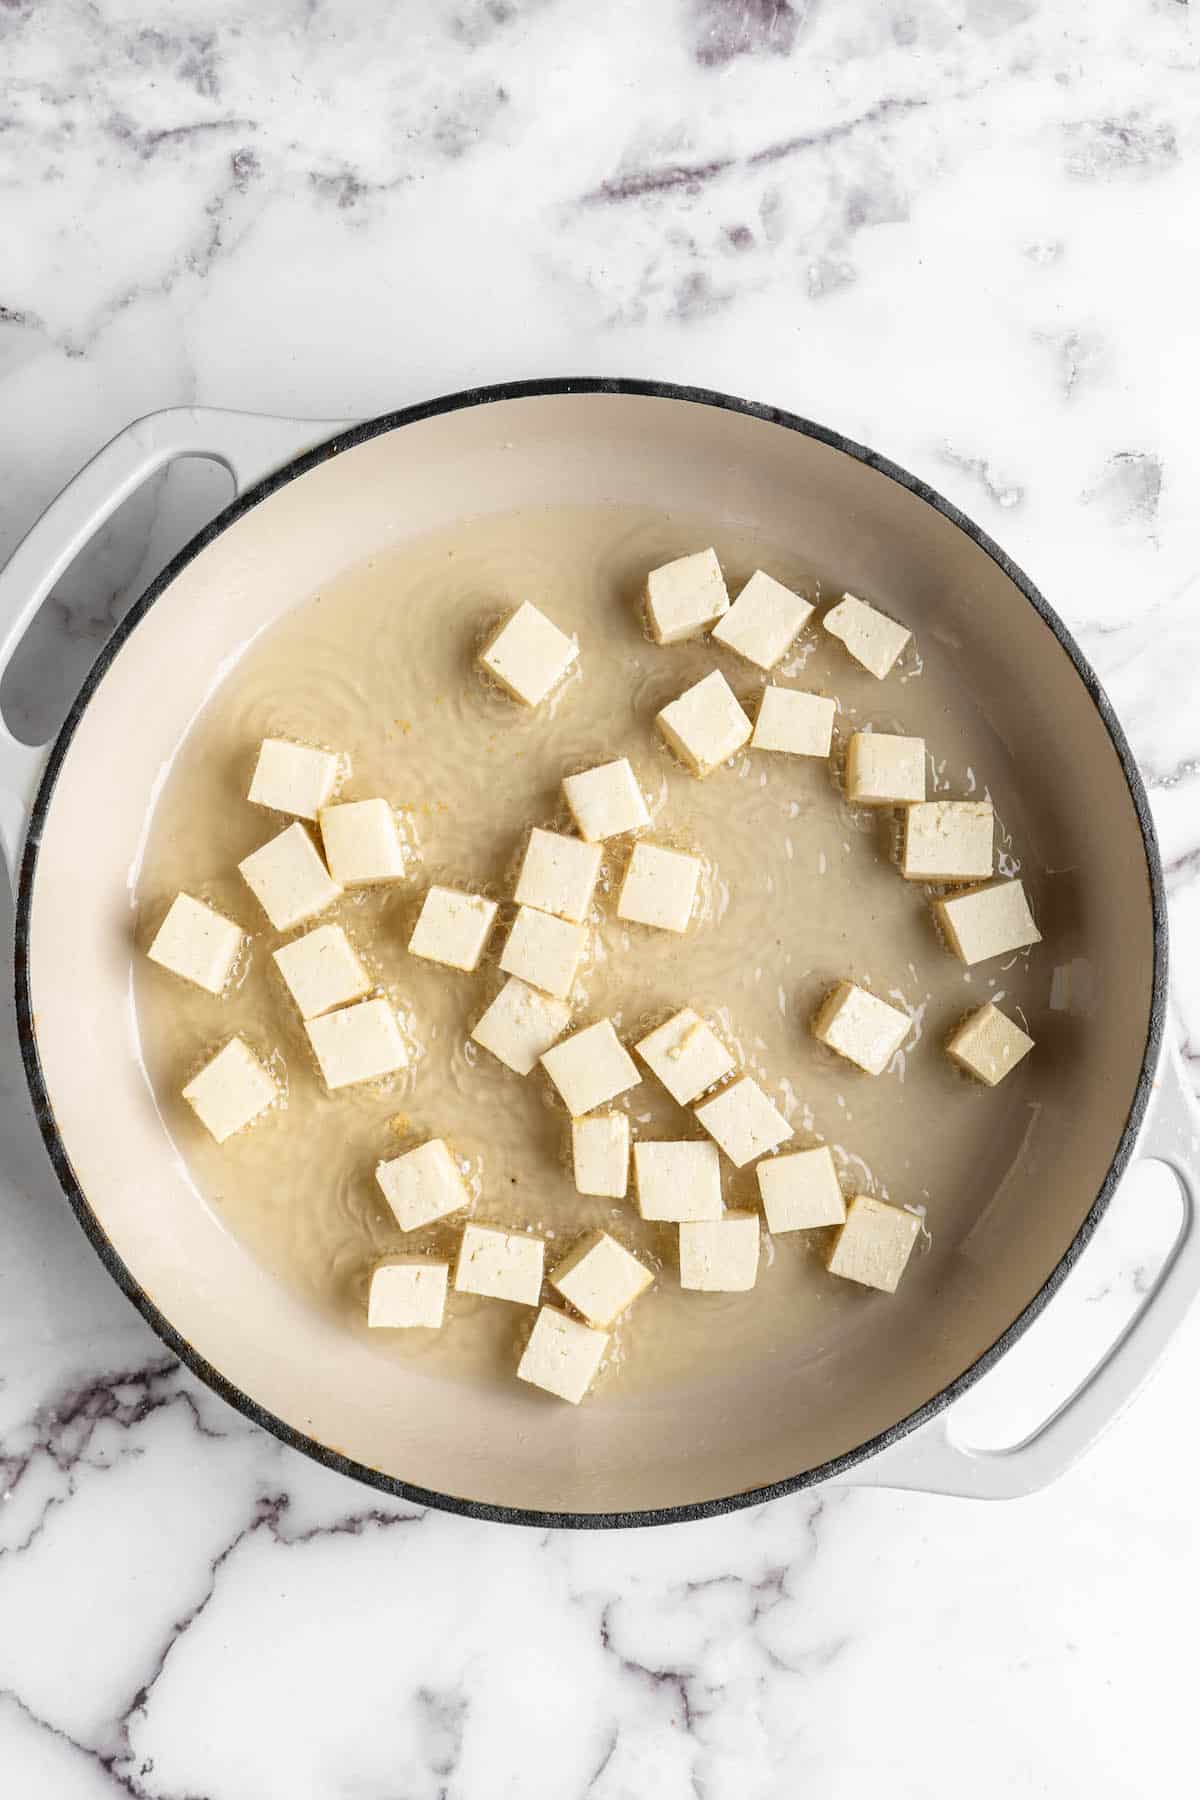
Cook the tofu. While the noodles boil, heat 2 tablespoons of oil in a large skillet set over medium heat. Add the tofu and cook until it’s browned on all sides. Transfer the tofu to a plate.
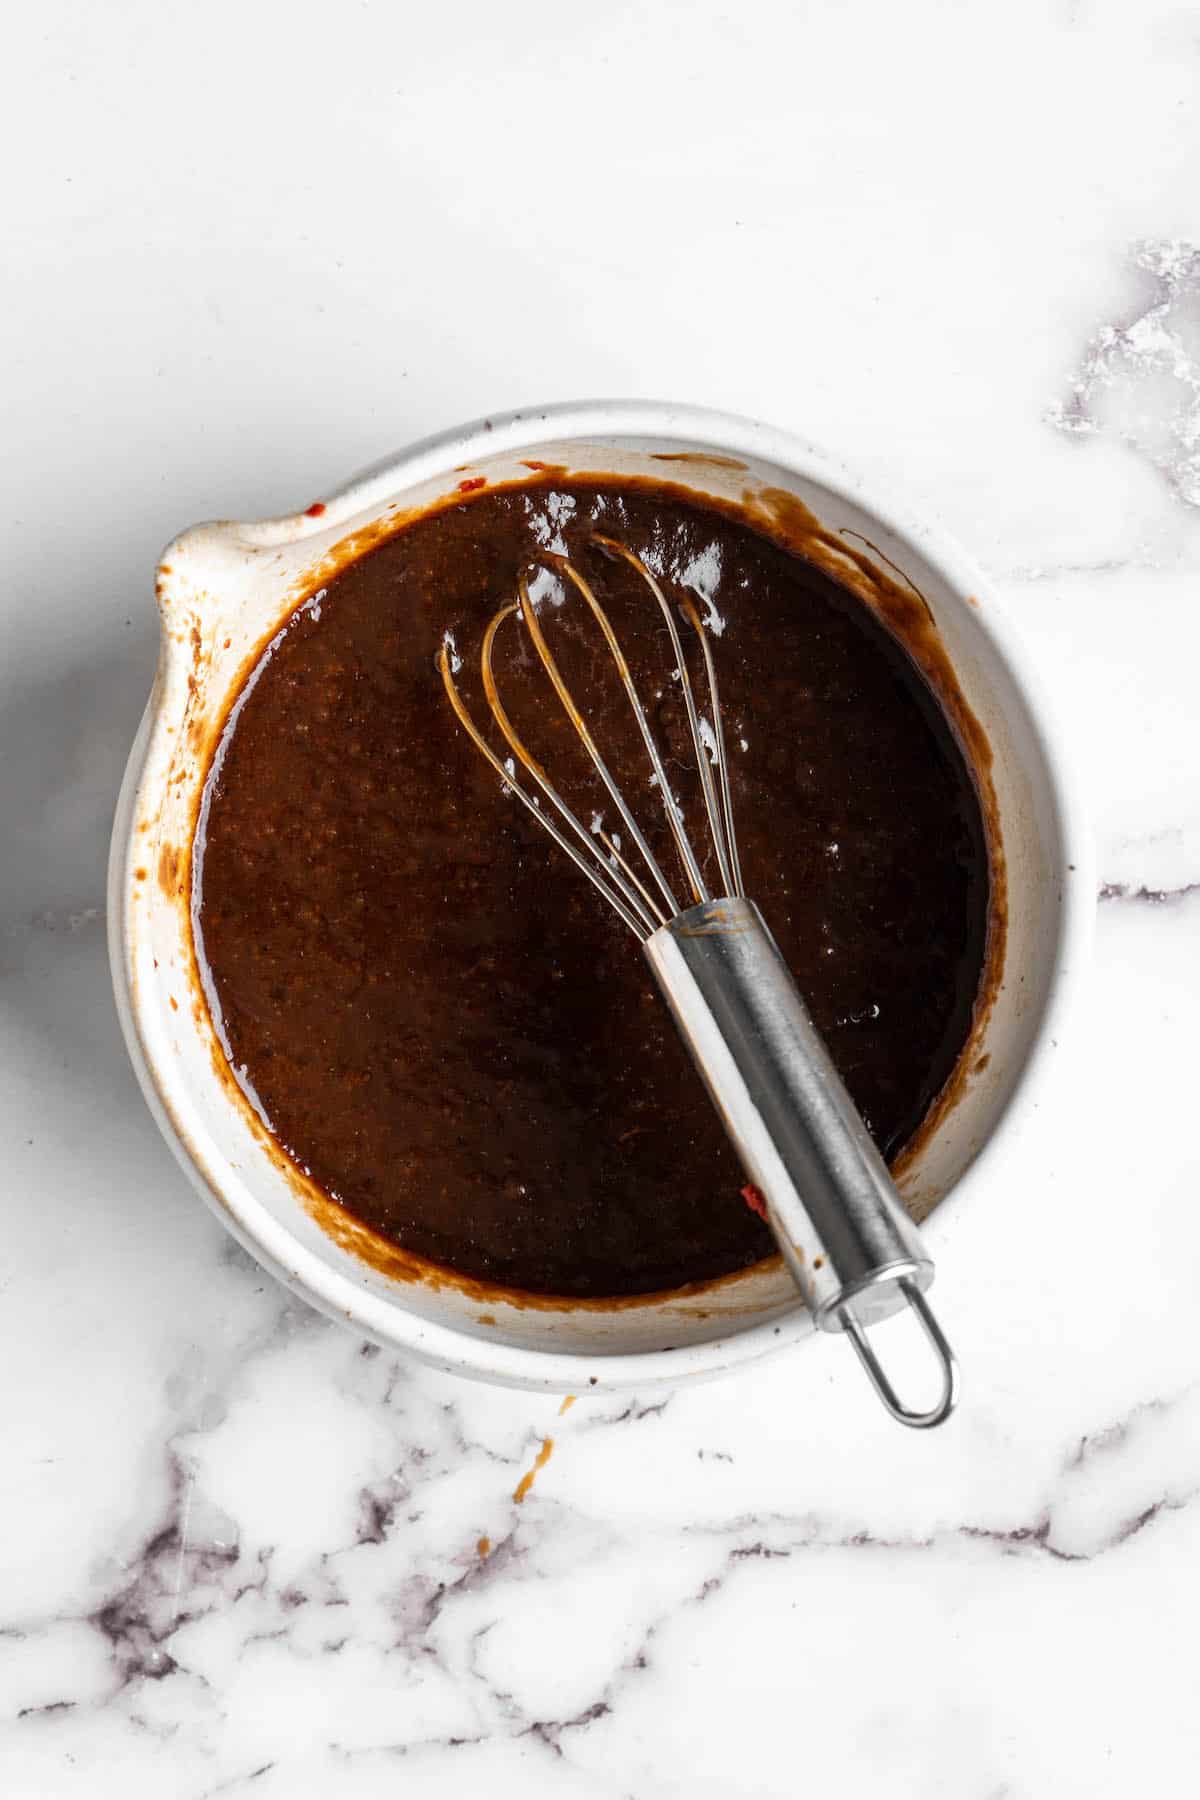
Make the sauce. Stir together the tamarind paste, tamari or soy sauce, sugar, rice vinegar, and chili garlic sauce in a small bowl or liquid measuring cup.
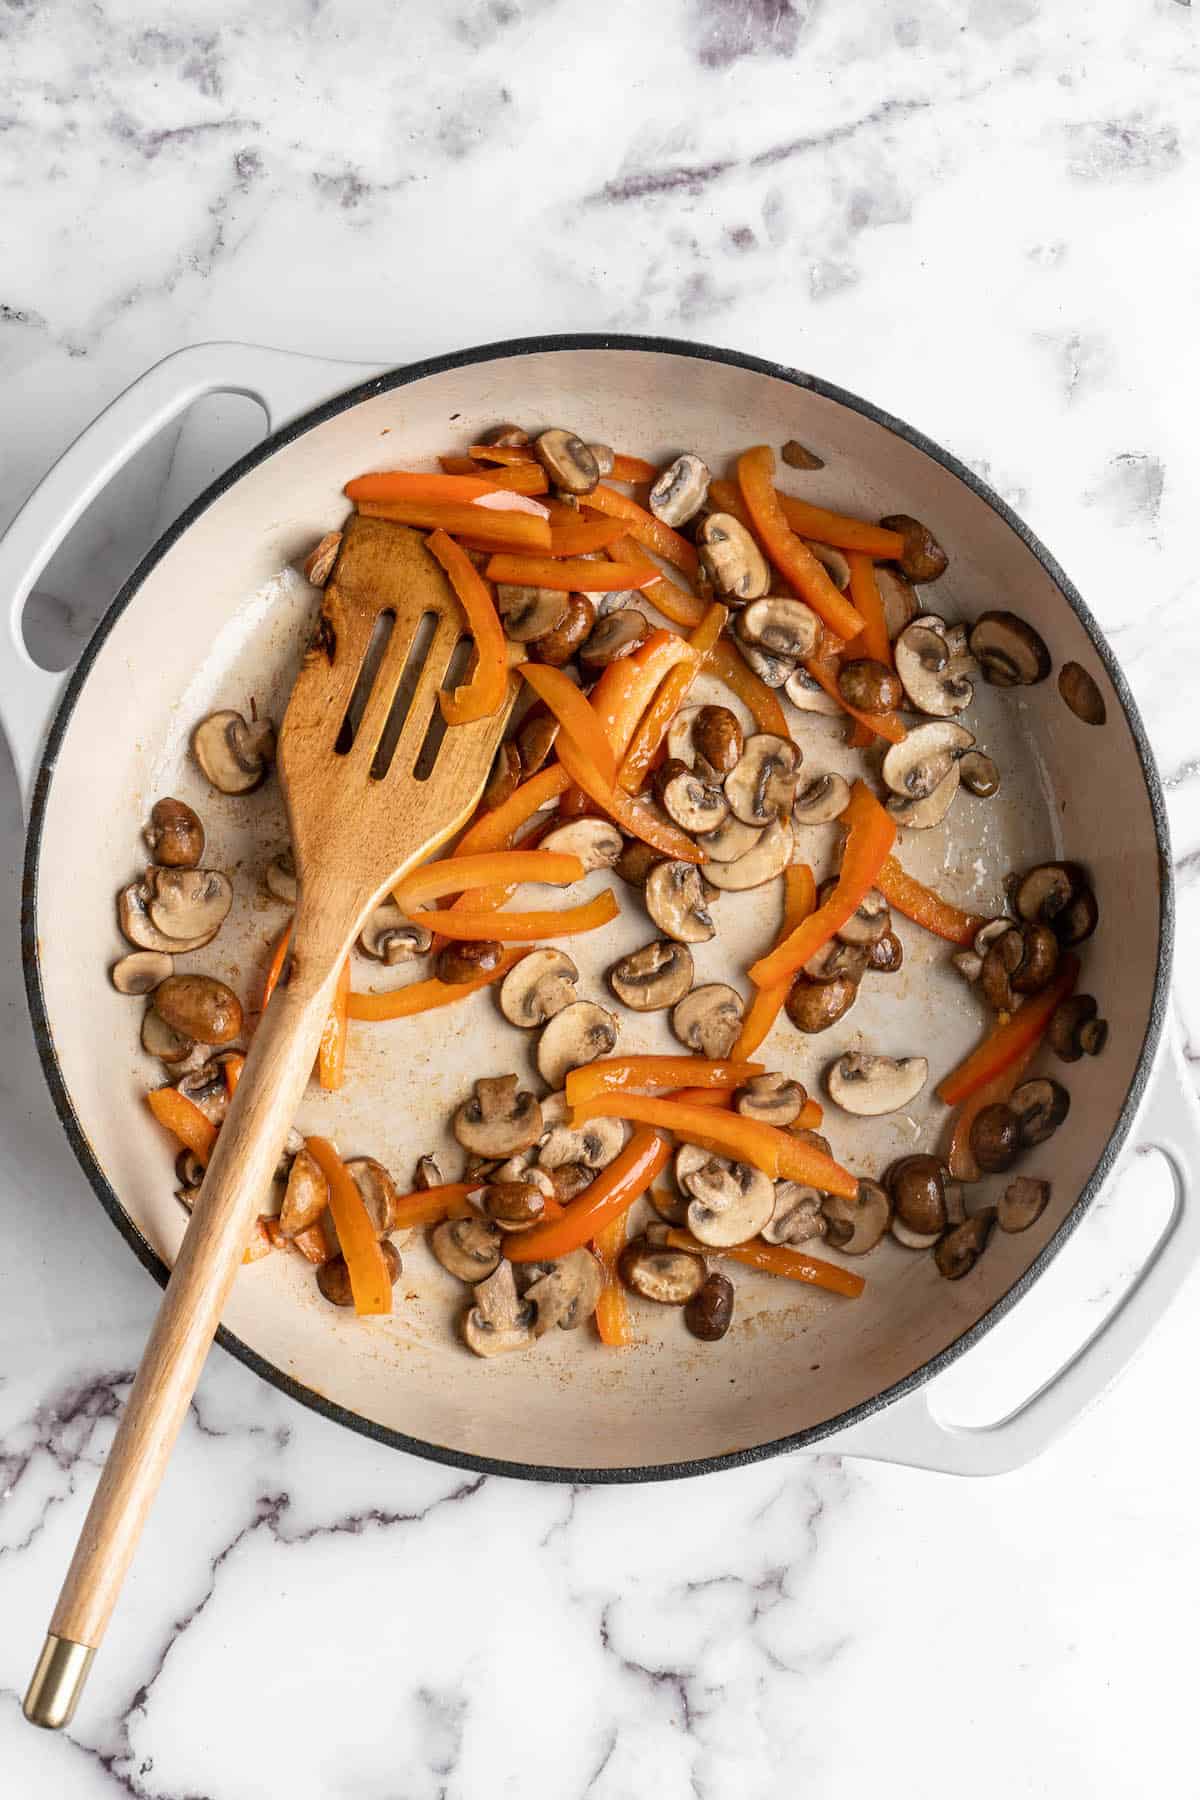
Cook the Pad Thai. Heat the remaining tablespoon oil in the skillet, this time over medium heat. Add the peppers and mushrooms and cook until softened, about 5 minutes, stirring often. Return the tofu to the skillet, then add the noodles and sauce. Stir to combine and cook for 1 to 2 minutes, or until everything heated through and evenly coated in the sauce.
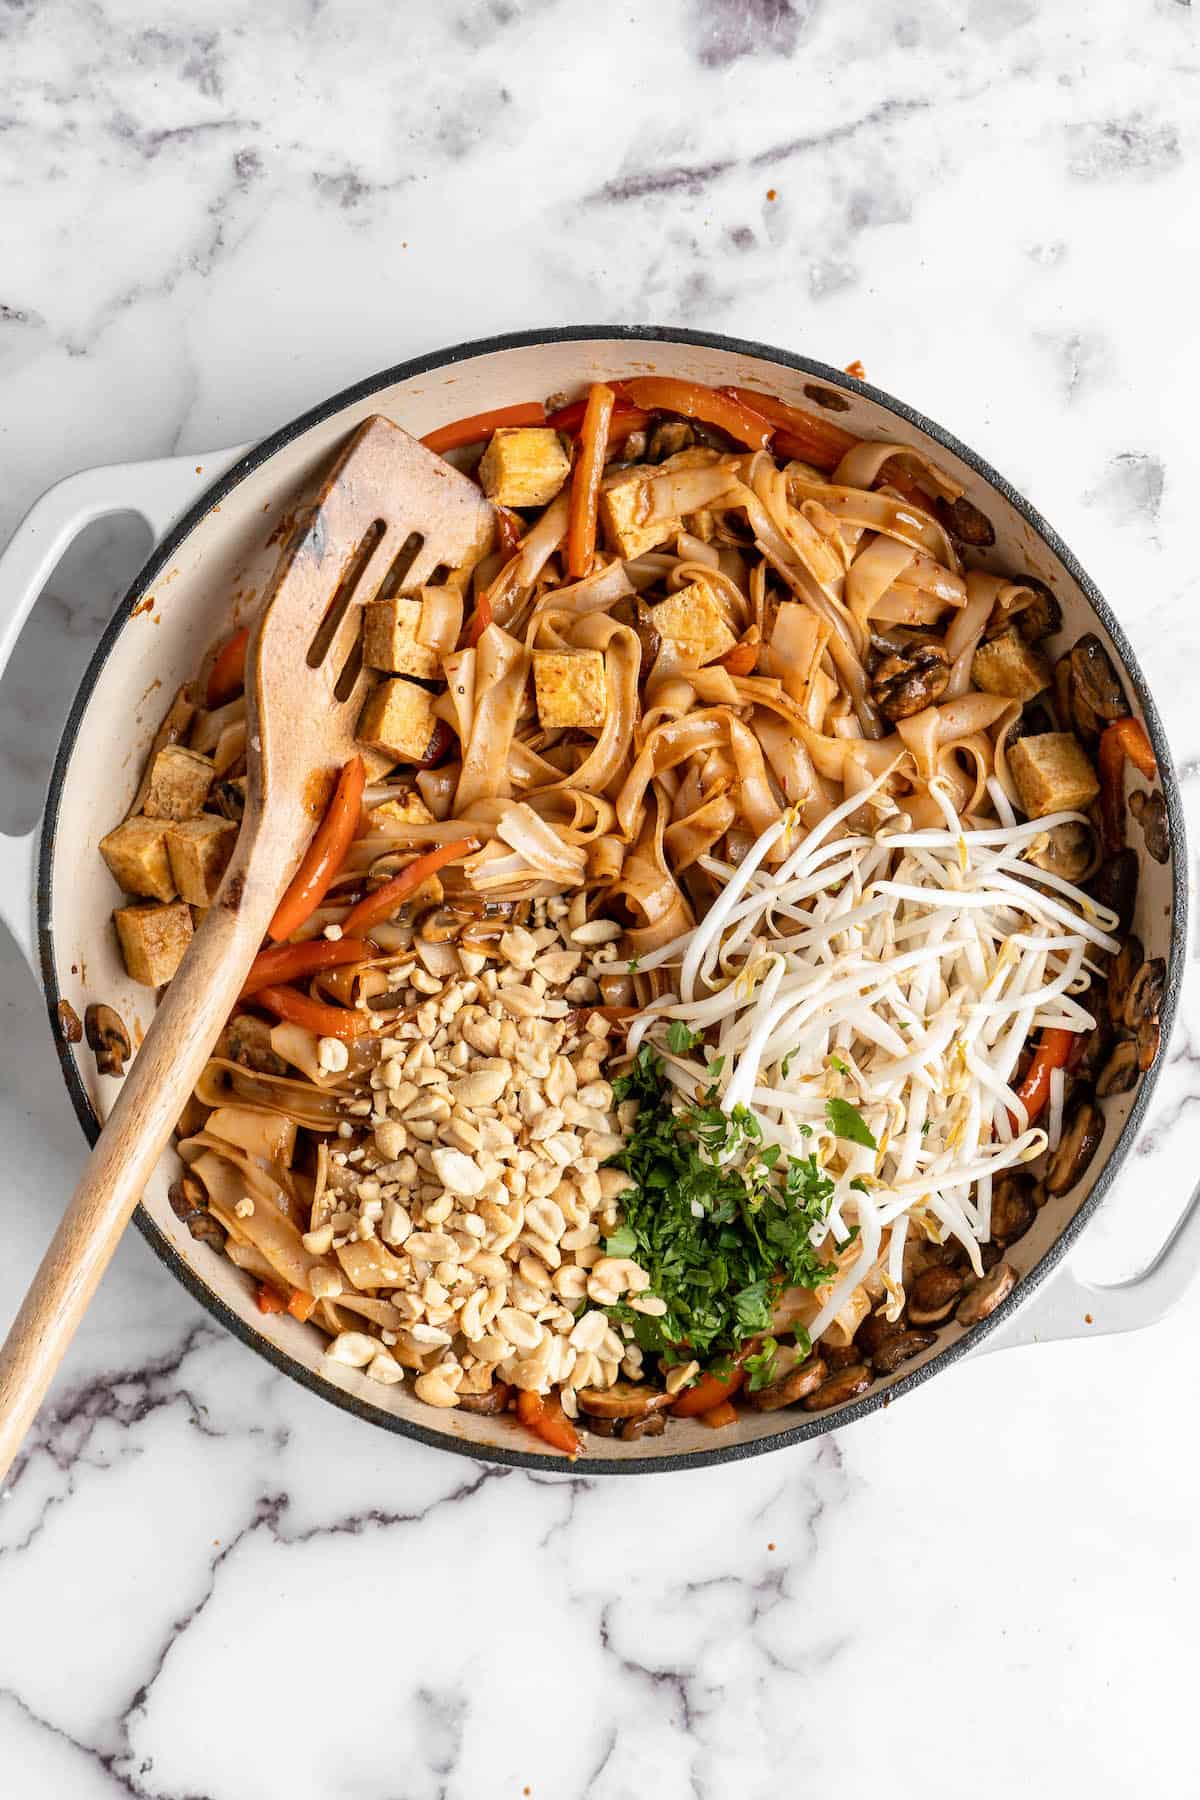
Finish. Stir in the bean sprouts and lime juice, then turn off the heat. Serve with peanuts and cilantro.
Tips for Success
There’s not much to this vegan Pad Thai recipe, but here are some simple tips to make sure it’s perfect.
- Cooking the tofu. Be sure to press the tofu to get all the water out, then when you’re cooking it, split it into batches if necessary to avoid crowding the pan. Don’t move the tofu until the bottom is brown and crispy; at this point, you can flip it and cook the other side.
- Making it your own. Pad Thai at restaurants doesn’t usually have veggies added to the mix, but that’s the beauty of making it at home! I added bell peppers and mushrooms, but feel free to add any veggies you like or happen to have on hand—or skip them if you prefer.
- Don’t over-cook it. Once the sauce is absorbed, the noodles will start sticking to the bottom of the pan.
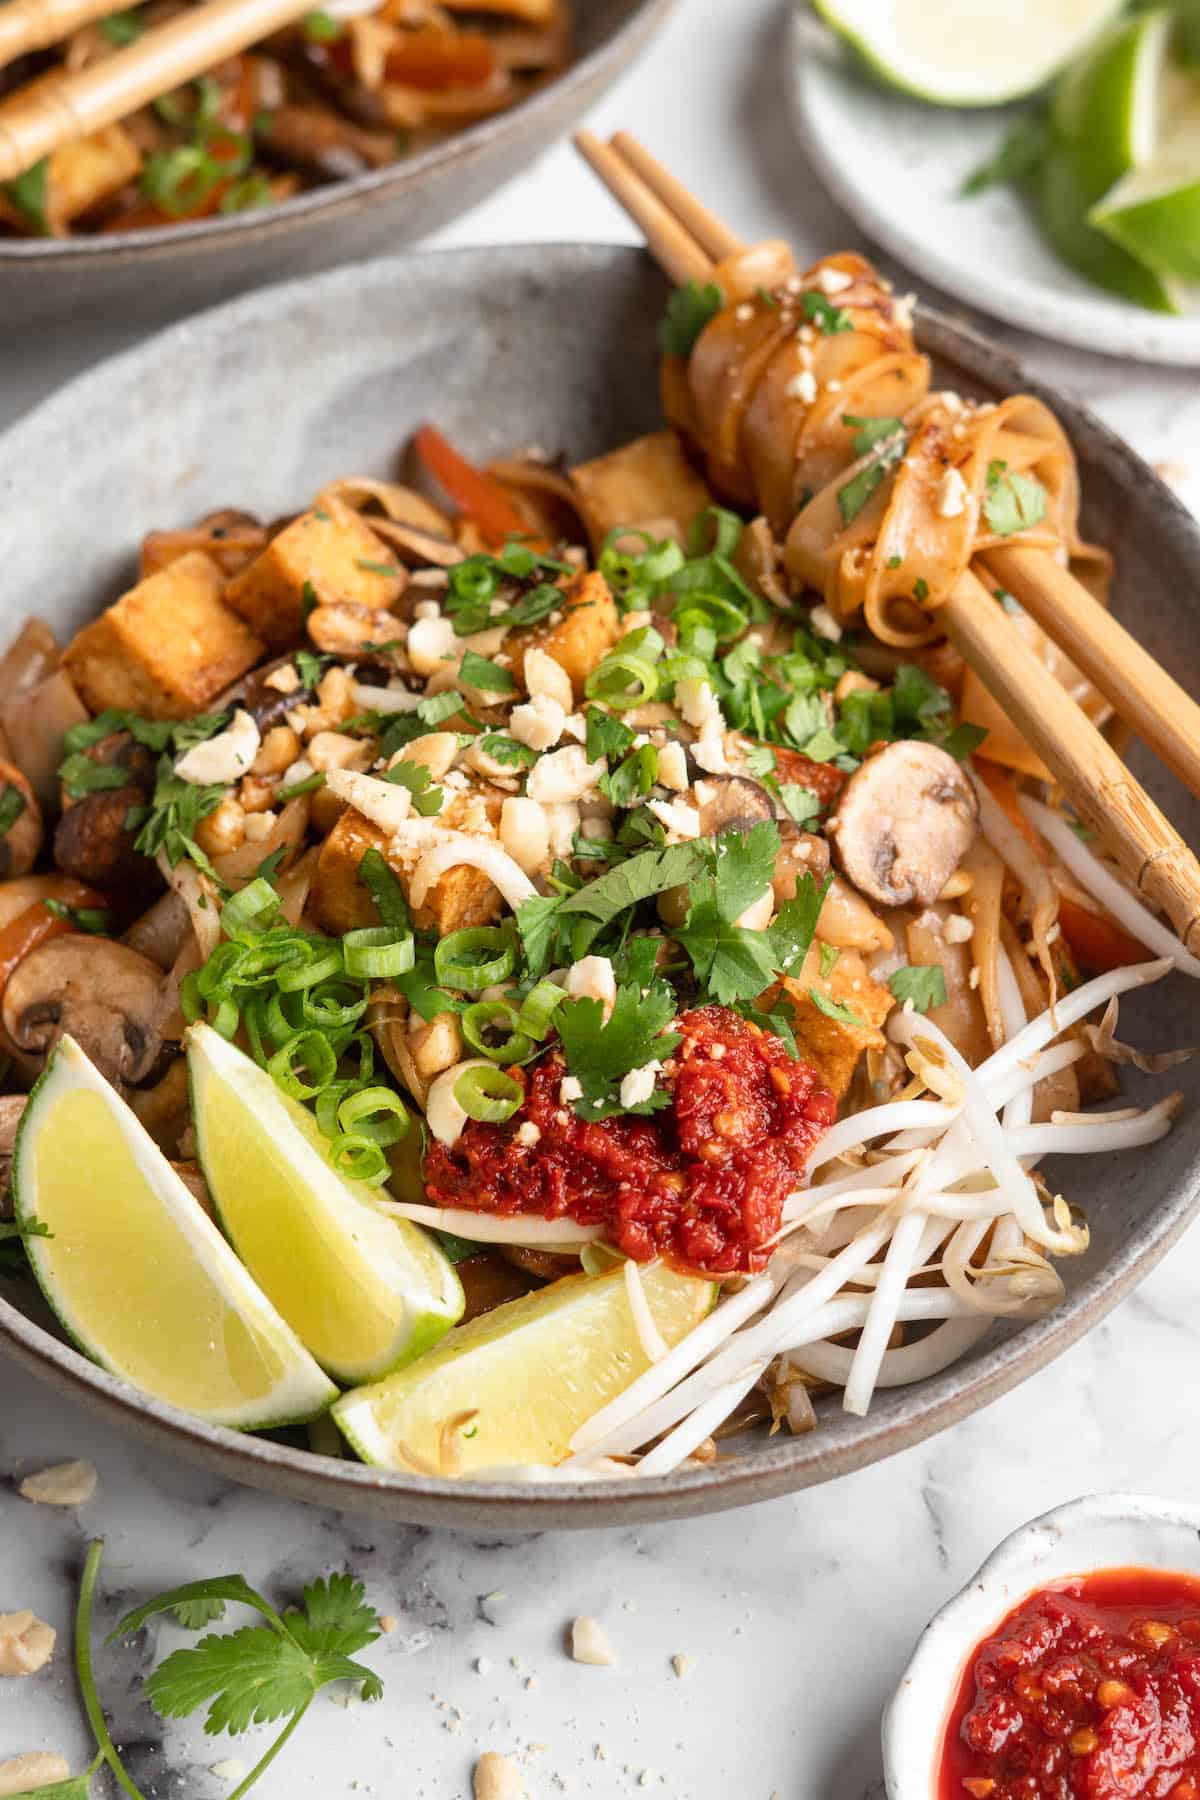
Serving Suggestions
Because this vegan Pad Thai recipe is so easy to make, you can easily pair it with other Thai-inspired recipes and have a takeout-at-home night. Here are some of my favourites:
- Quick and Easy Thai Green Curry
- Thai Peanut Sauce
- Vegan Thai Red Curry with Tofu
- Fresh Spring Rolls with Peanut Ginger Sauce
How to Store and Reheat Leftovers
Leftovers can be stored in an airtight container in the refrigerator for up to 4 days. Reheat in the microwave, or in a skillet on the stovetop with a splash of oil.
Can This Recipe Be Frozen?
You can freeze this vegan Pad Thai for up to 3 months. Store it in an airtight container or freezer bag. It can be microwaved from frozen, or you can let it thaw in the refrigerator first for more even heating.
Ingredients
- 8 ounces wide flat rice noodles
- 3 tablespoons avocado oil
- 7.5 ounces extra firm tofu , pressed and cut into 1⁄2-inch cubes
- 2 tablespoons tamarind paste
- ⅓ cup tamari sauce , or low-sodium soy sauce
- 2 tbsp brown sugar , or coconut sugar
- 2 tbsp rice wine vinegar
- 1-3 tsp chili garlic sauce , to taste
- 1 bell pepper , sliced thinly
- 8 ounces sliced baby bella mushrooms
- 1 lime , juiced
- 2 cups bean sprouts
- ½ cup roasted peanuts , chopped
- ¼ cup fresh cilantro
Instructions
- Bring a large pot of salted water to a boil over high heat. When boiling, add the noodles and cook according to package instructions, then drain and return to the pot.
- Meanwhile, heat 2 tablespoons oil in a large skillet over medium heat. When hot, add the tofu and cook until browned on all sides, working in batches if necessary to avoid crowding the pan. Transfer the tofu to a plate.
- Meanwhile, stir together the tamarind paste, tamari/soy sauce, sugar, rice vinegar, and chili garlic sauce in a bowl or liquid measuring cup.
- Heat the remaining tablespoon oil in the empty skillet over medium. Add the peppers and mushrooms and cook, stirring, until softened, about 5 minutes. Return the tofu and noodles to the skillet, along with the sauce. Stir to combine and cook for 1-2 minutes, until heated through and the sauce coats the noodles. Stir in the bean sprouts and lime juice and turn off the heat.
- Garnish with peanuts and cilantro to serve.
