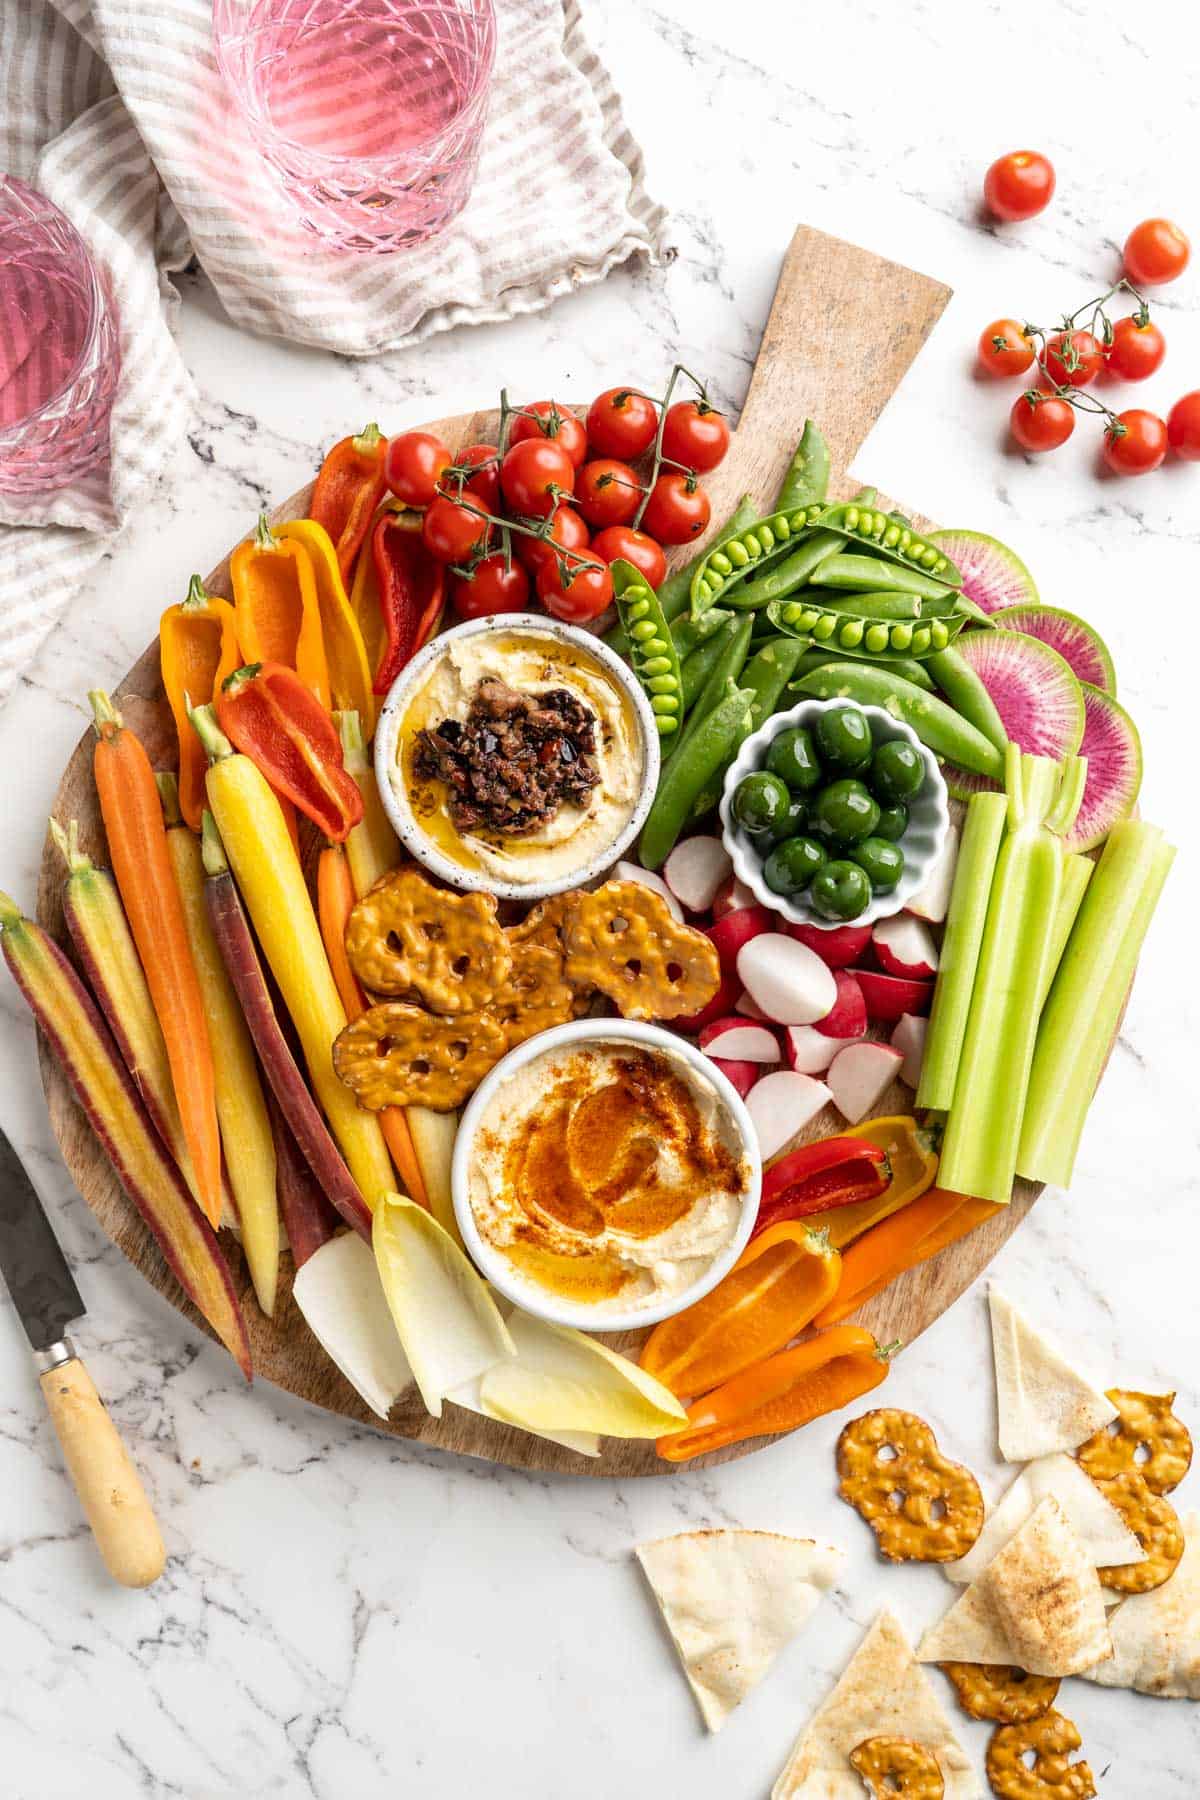
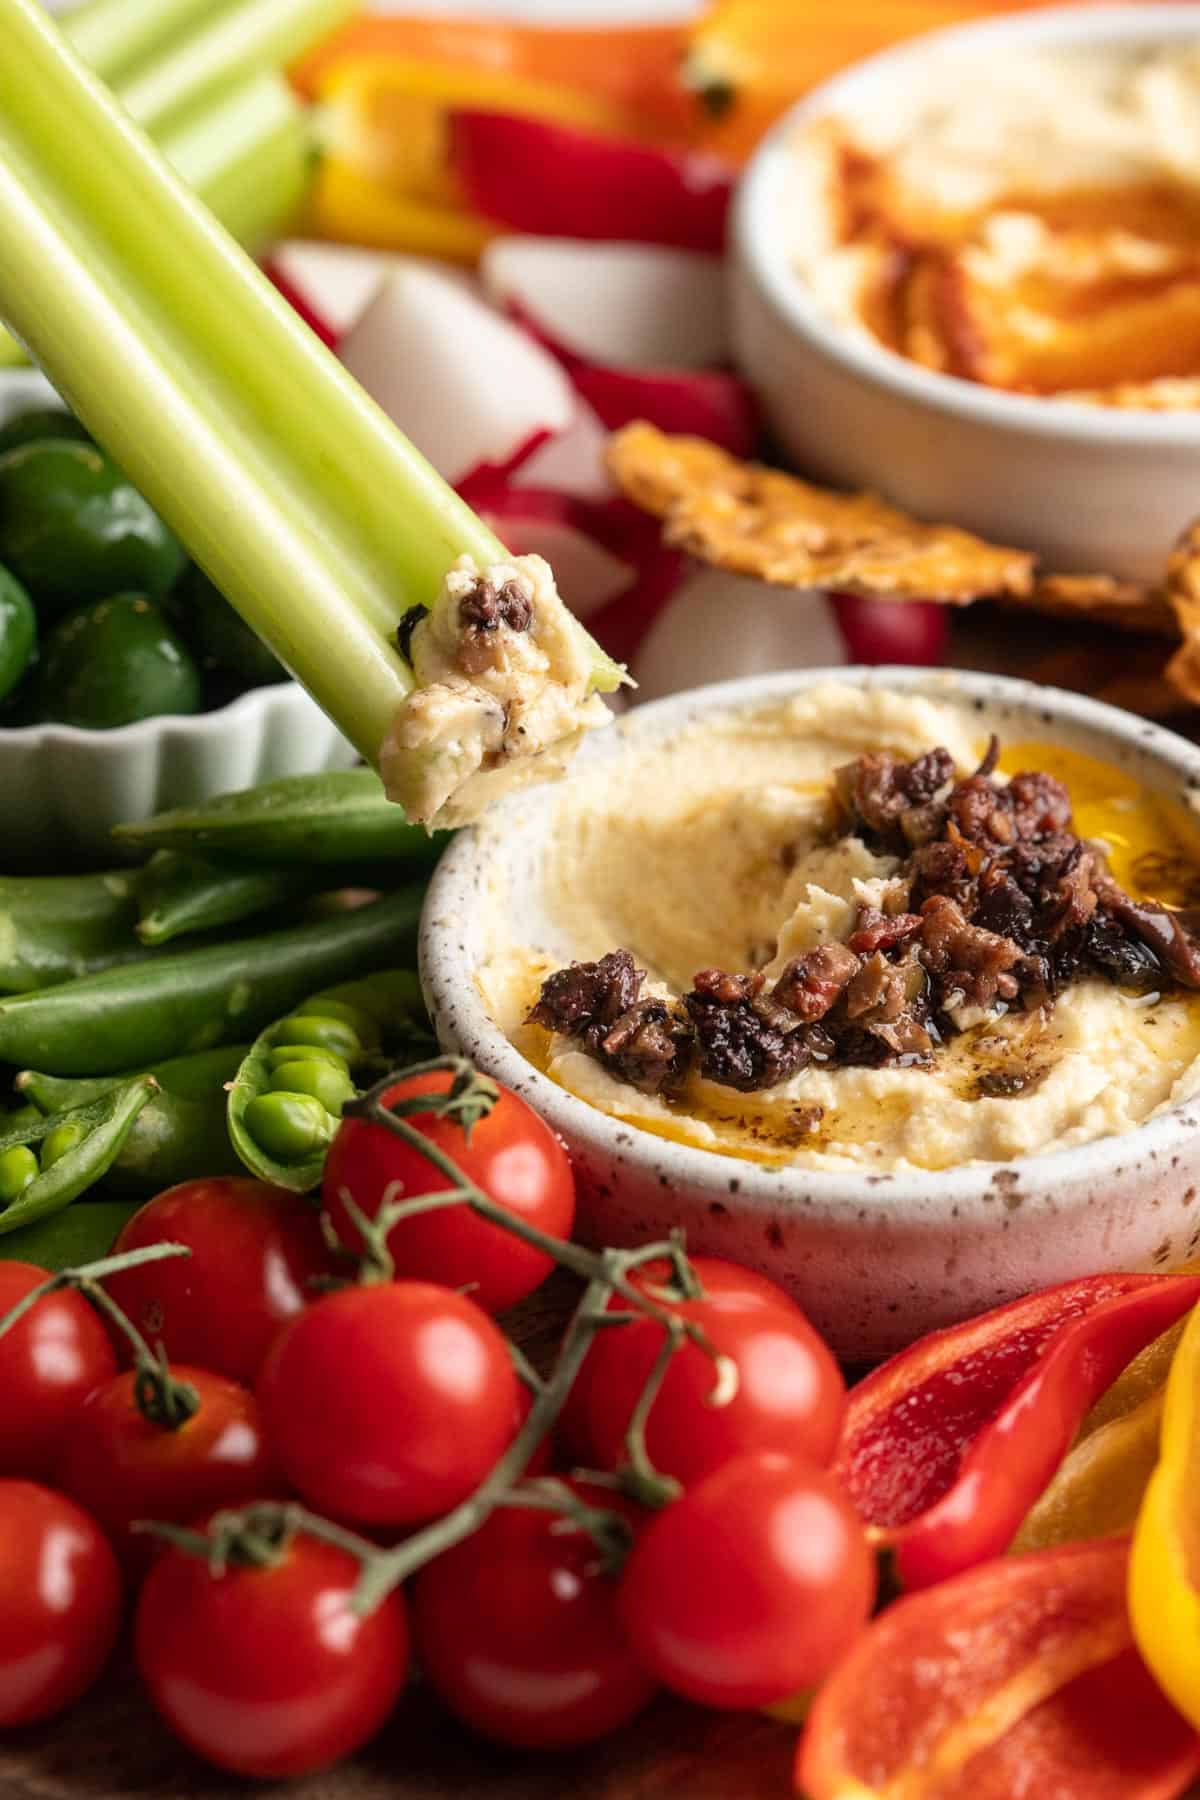
A perfect crudité platter is a feast for the eyes, with a rainbow of colours and an assortment of shapes and textures. This easy tutorial will show you how to make a crudité platter that’s sure to impress your guests!
There was a time when the crudité platter was the most ho-hum snack option at any party. Some sliced cucumbers, maybe a handful of limp celery and baby carrots, and a plastic tub of dip plopped in the centre— yawn .
Well, friends, times have changed and now crudité platters are worth getting excited about. The colours! The textures! All the dips and spreads!
Best of all, making a crudité platter is one of those things that takes very little effort, but it looks super impressive. Make one for a party and your guests will ooh and ahh, but only you will know that the whole tray took you just a few minutes to assemble.
Best Vegetables for a Crudité Platter
Making the perfect crudité platter requires thought and planning to ensure that the colours, textures, and flavours of the vegetables are balanced.
When choosing vegetables for a crudité platter, choose a mixture of different colours and shapes. A variety of crunchy, juicy, and mild-flavoured veggies, as well as some strongly flavoured veggies, should be included to ensure that there is something for everyone’s taste preferences. And it goes without saying that when you’re shopping for your veggies, you want them to look perfect . Now’s not the time for bruises, browning, or any vegetable that looks past its prime.
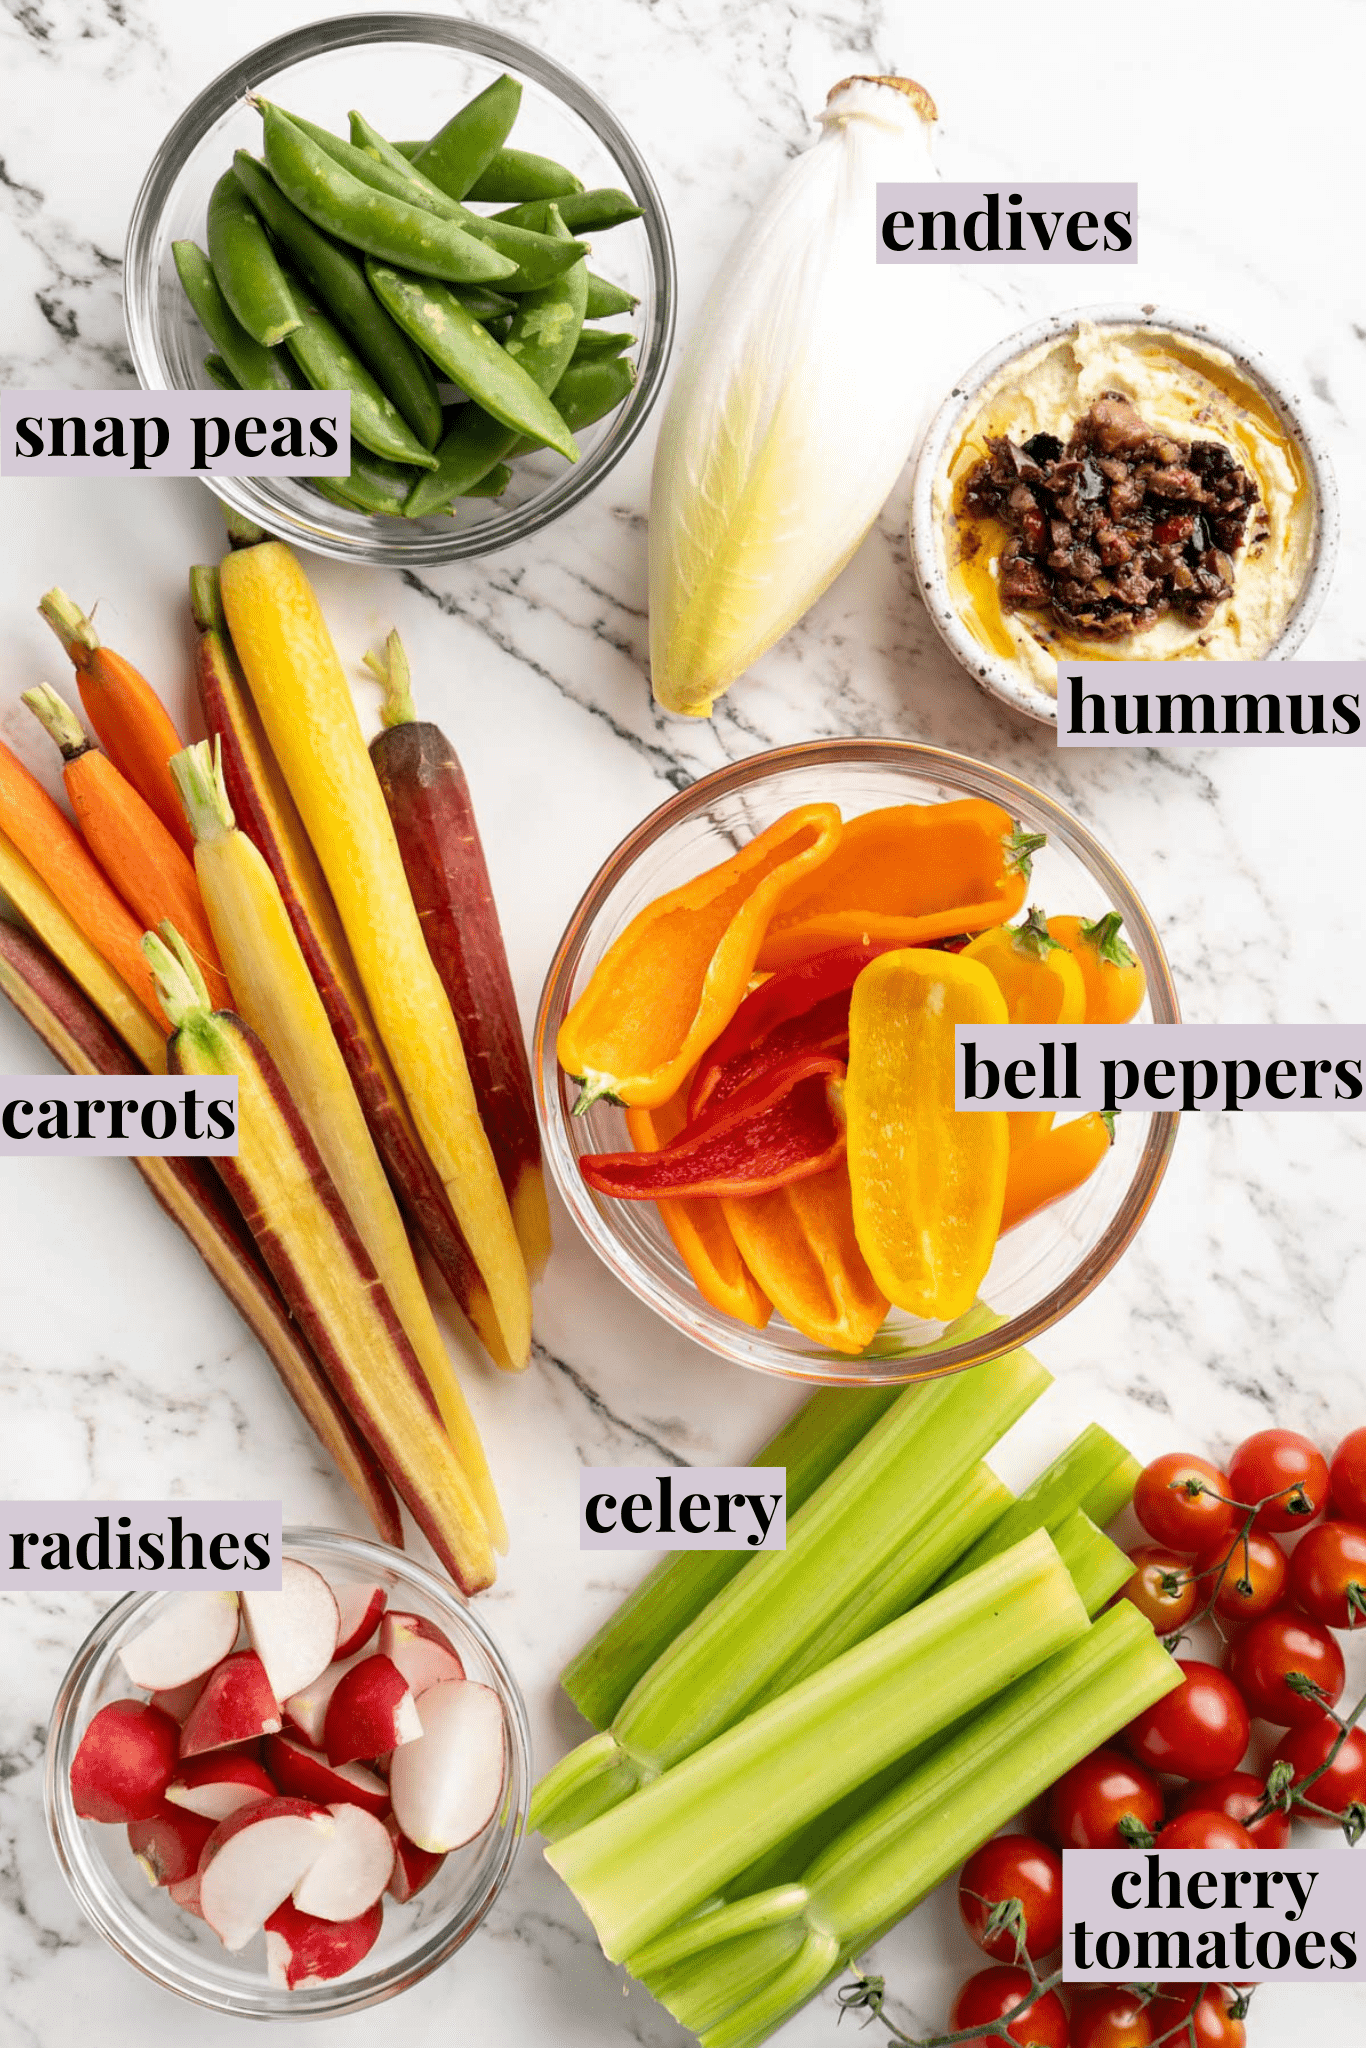
Some of the best vegetables to include on a crudité platter are:
- Carrots – I think larger carrots look better on a crudité platter than baby carrots.
- Celery
- Endives
- Bell peppers – I like using baby bell peppers in an array of colours.
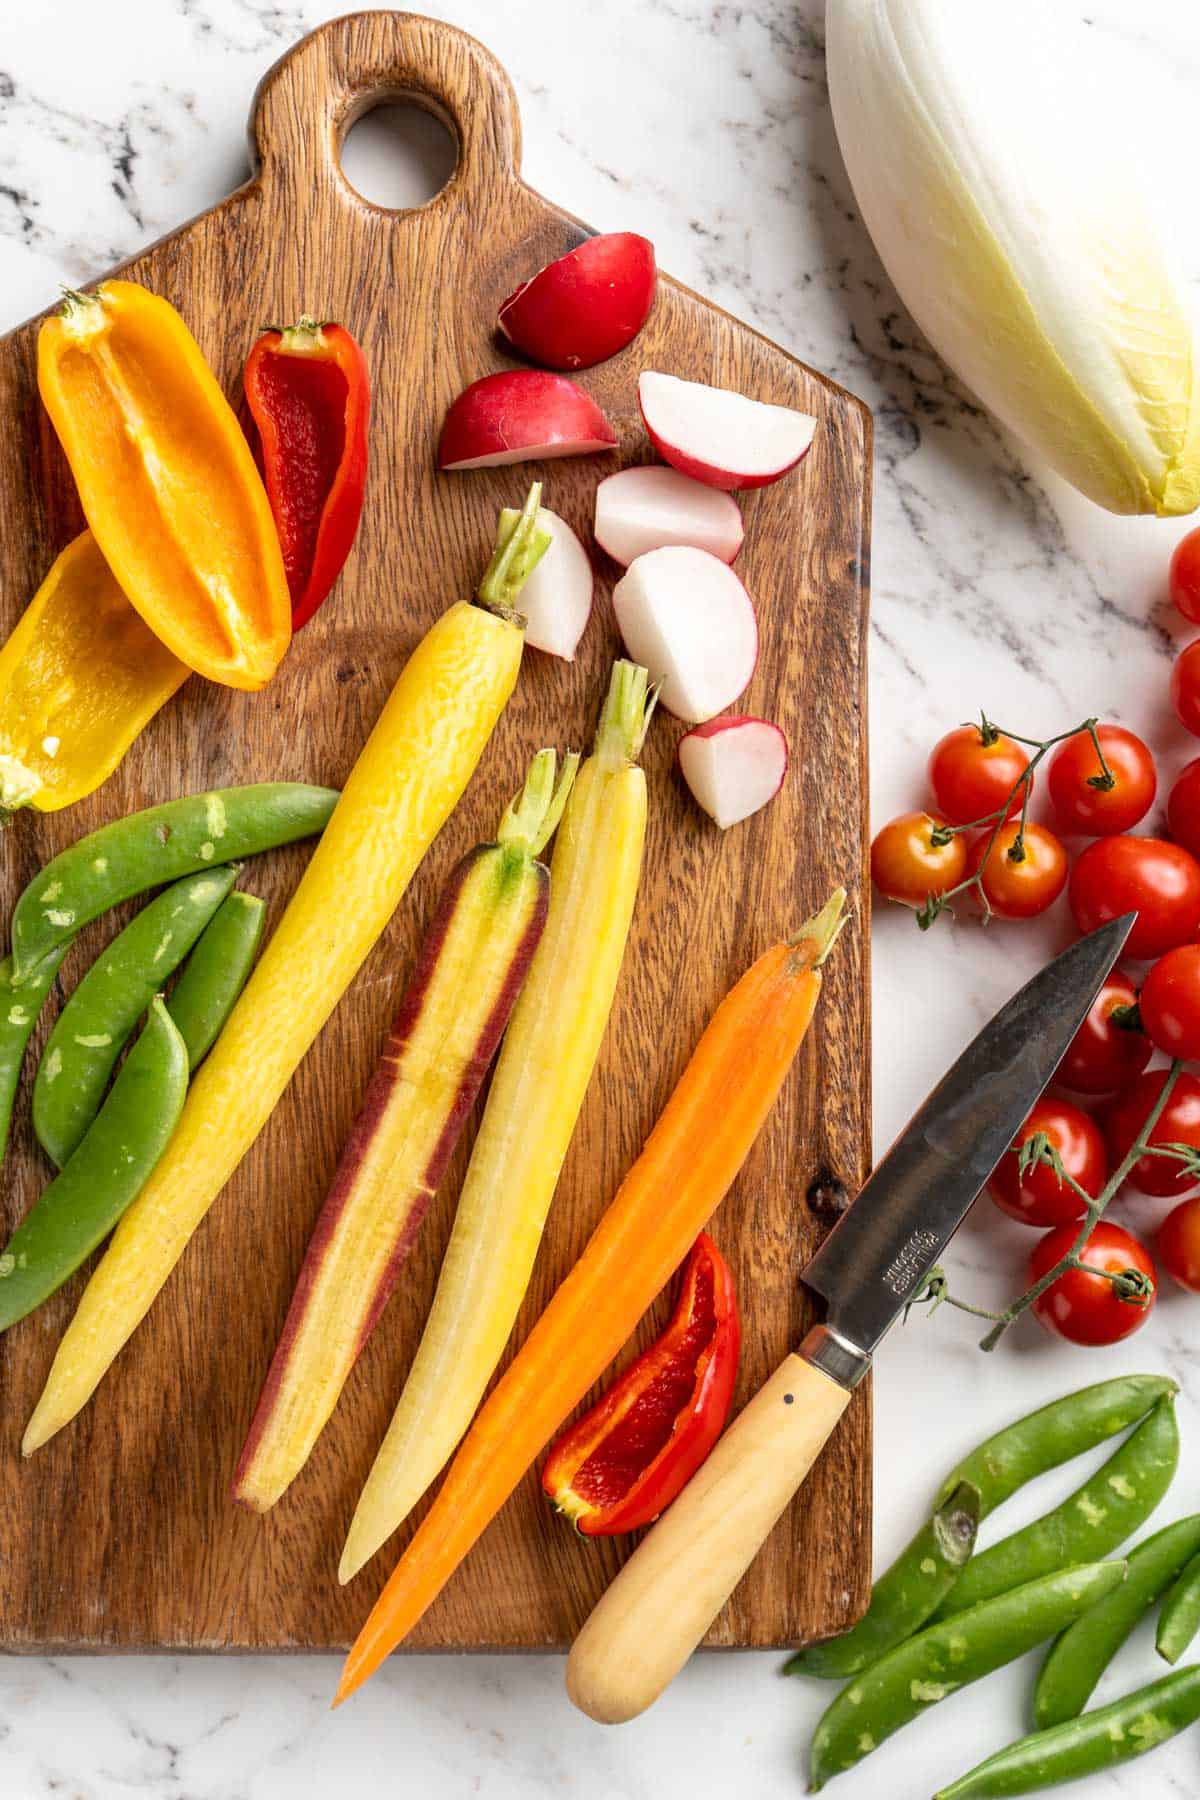
- Radishes – Large radishes can be thinly sliced for dipping like chips (as I did with the watermelon radishes pictured), small radishes can be left whole, and medium radishes can be halved or quartered.
- Broccoli and cauliflower florets – I prefer these blanched, but if you don’t mind raw, that works too!
- Snap peas – I opened some up and left others whole.
- Asparagus spears – Blanch these to soften them just a bit.
- Green beans – These can be served raw or blanched.
- Jicama slices
- Cherry tomatoes – Leave them on the vine for a pretty look.
- Artichoke hearts
Once you have chosen your vegetables, it’s time to prepare them for the platter. Most vegetables should be washed and cut into pieces that are easy to dip; some you’ll want to blanch (as noted above) to soften them a bit.
Dips and Spreads
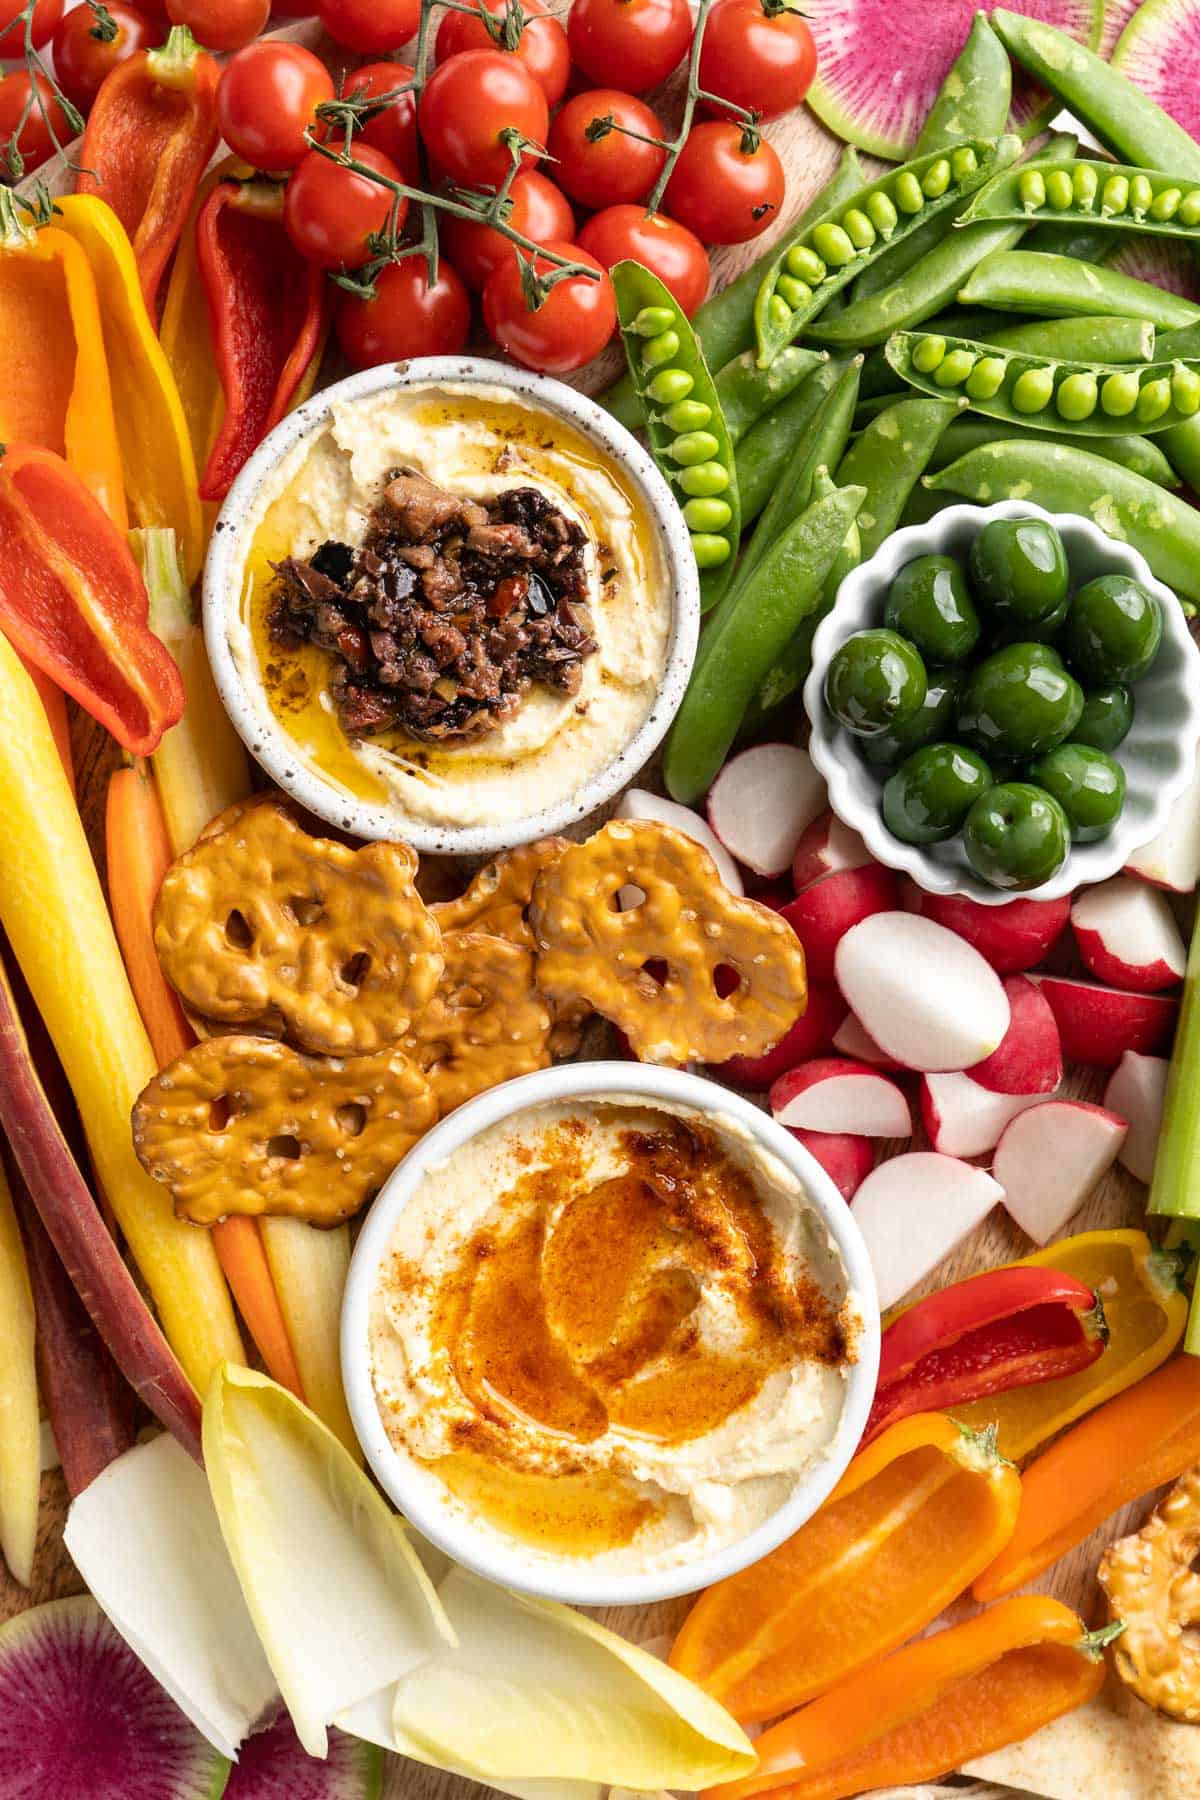
When it comes to creating a perfect crudité platter, the dip is just as important as the vegetables. I think the best crudité platters have options, so be sure to include at least two different dips so your guests have choices.
Creamy dips like ranch dressing or hummus are perfect alongside some of the crunchier veggies, or for a unique twist, you can also offer spreads such as pesto or guacamole . These options are perfect for adding variety to the platter without outshining the vegetables.
Here are some dips and spreads to consider:
- Store-bought hummus – You can dress it up with a drizzle of olive oil and sumac or olive tapenade on top. If you have time, you can make homemade hummus instead—try my Perfect Homemade Hummus , Roasted Cauliflower Hummus , or Spicy Roasted Red Pepper Hummus .
- Vegan Whipped Feta Dip
- Roasted Garlic White Bean Dip
- Vegan Ranch Dressing – You can add a little less liquid to make it thicker for dipping.
Other Snacks and Garnishes to Add
In addition to vegetables, crudité platters can be jazzed up with other snacks to add to their visual appeal. Crackers, pita chips , nuts, and olives are all great options for adding flavour and texture to the platter, but don’t go overboard—remember, crudité boards are all about the veggies! Use other snacks as an accent.
Another option is to add some sprigs of fresh herbs to your board. The leafy texture contrasts nicely with the vegetables, and they also add some extra flavour to your crudité platter too. You can’t go wrong with fresh basil and tomatoes or a sprinkle of dill in homemade ranch dip!
How to Arrange a Beautiful Crudité Platter
When it comes to creating a beautiful crudité platter, presentation is key. Use a wood, marble, or stone board or platter that’s big, but not too big—you want a look of abundance and using a huge board for a smaller amount of food will make your board look sparse and uninteresting.
Here are the three simple steps to making the perfect crudité platter for a party:
1. Add the Bowls
Start by placing bowls of dip and small foods (like olives or nuts) on the board; using three bowls and placing them in a triangle works well visually. Don’t leave store-bought dips in the container you bought them in—transferring them to a bowl will look much more appetizing!
2. Arrange the Large Veggies
To arrange the vegetables, begin with the largest veggies and work with the shape of your board. With the round board pictured here, I’ve placed the large, long vegetables like carrots and celery along the perimeter; for a rectangular board, try placing the large vegetables at different angles for visual interest.
If you have a very large board, you can place groupings of the same vegetable in two or three different places; for a smaller board, keep all of the same veggies together for a cohesive look.
3. Fill in the Gaps
Next, fill in the gaps with smaller vegetables like radishes and tomatoes. Add some crackers and chips in between the vegetables to give the platter a bit of texture.
Keep in mind that if you finish and you don’t like the way your platter looks, you can start over again and re-arrange things!
Serving and Storing Your Crudité Platter
Once your crudité platter is assembled, it should be kept cold until you’re ready to serve it. You can assemble your board and wrap it tightly in plastic wrap before refrigerating it, or prep the vegetables and dip, then assemble everything right before serving. (If you have time, assembling just before serving is your best bet because everything will look a little bit fresher.)
Any leftovers can be stored in an airtight container and refrigerated for up to 3 days.
Ingredients
- Radishes
- Snap peas
- Bell peppers
- Celery
- Cherry Tomatoes
- Endives
- Carrots
- Roasted Garlic Hummus , 10 oz.
- Beet Hummus , 10 oz.
- OPTIONAL: Breads , pita chips, crackers, pretzels
Instructions
- Wash, dry and cut all the vegetables to your desired sizes (I don’t cut the tomatoes since they’re so small and juicy).
- Serve in an attractive manner (like in the photos) around the the Roasted Garlic Hummus and Beet Hummus. Serve with optional breads, pita chips, crackers and pretzels if you like.
- Serve and enjoy!
Notes
- I recommend cutting the vegetables on the same day that you’ll be serving them so that they are still bright and fresh.
- If you plan to be using broccoli for this platter, I would recommend blanching it first.
- Feel free to substitute your own favourite dips and vegetables.

How to Create an Easy Crudité Platter
Ingredients
- Radishes
- Snap peas
- Bell peppers
- Celery
- Cherry Tomatoes
- Endives
- Carrots
- Roasted Garlic Hummus 10 oz.
- Beet Hummus 10 oz.
- OPTIONAL: Breads pita chips, crackers, pretzels
Instructions
- Wash, dry and cut all the vegetables to your desired sizes (I don’t cut the tomatoes since they’re so small and juicy).
- Serve in an attractive manner (like in the photos) around the the Roasted Garlic Hummus and Beet Hummus. Serve with optional breads, pita chips, crackers and pretzels if you like.
- Serve and enjoy!
Notes
- I recommend cutting the vegetables on the same day that you’ll be serving them so that they are still bright and fresh.
- If you plan to be using broccoli for this platter, I would recommend blanching it first.
- Feel free to substitute your own favourite dips and vegetables.
Nutrition
How to Create an Easy Crudité Platter https://jessicainthekitchen.com/how-to-create-an-easy-crudite-platter/ April 28, 2023
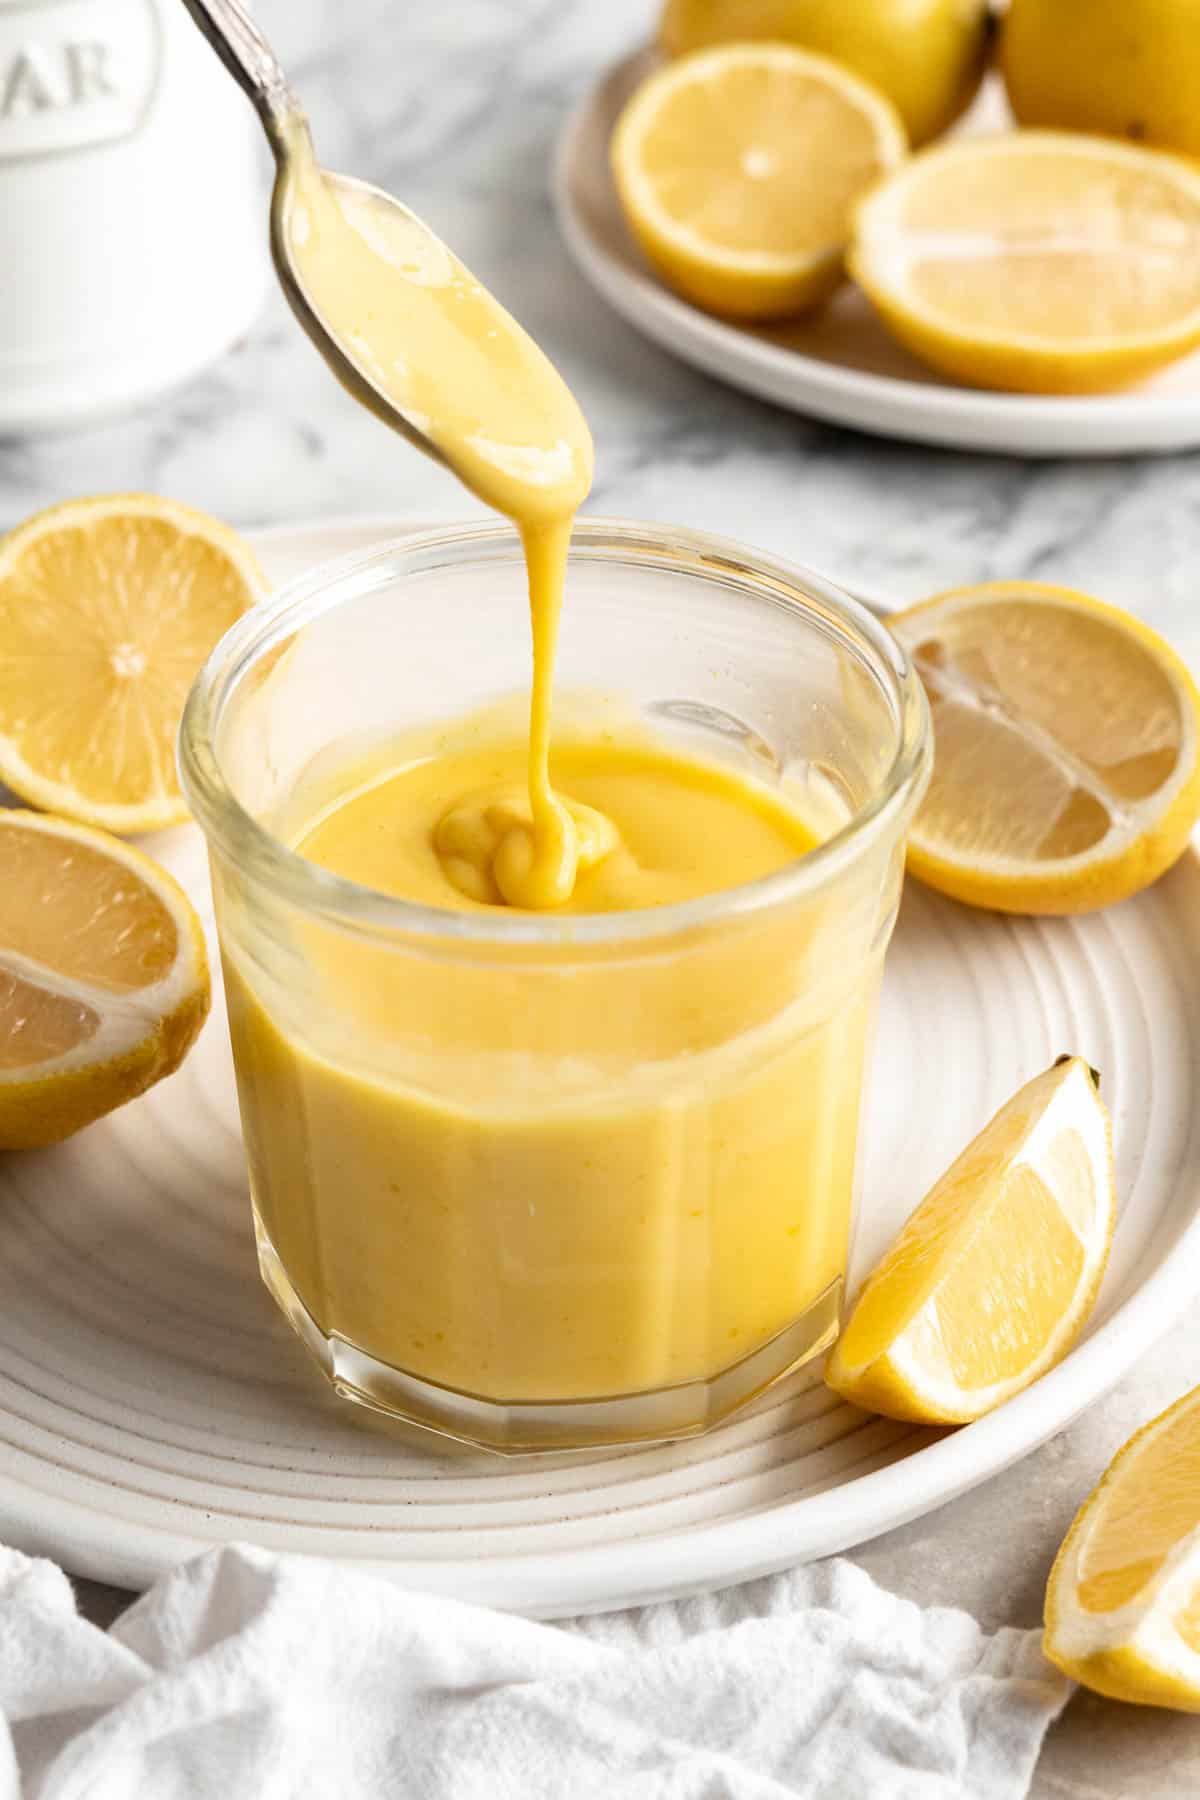
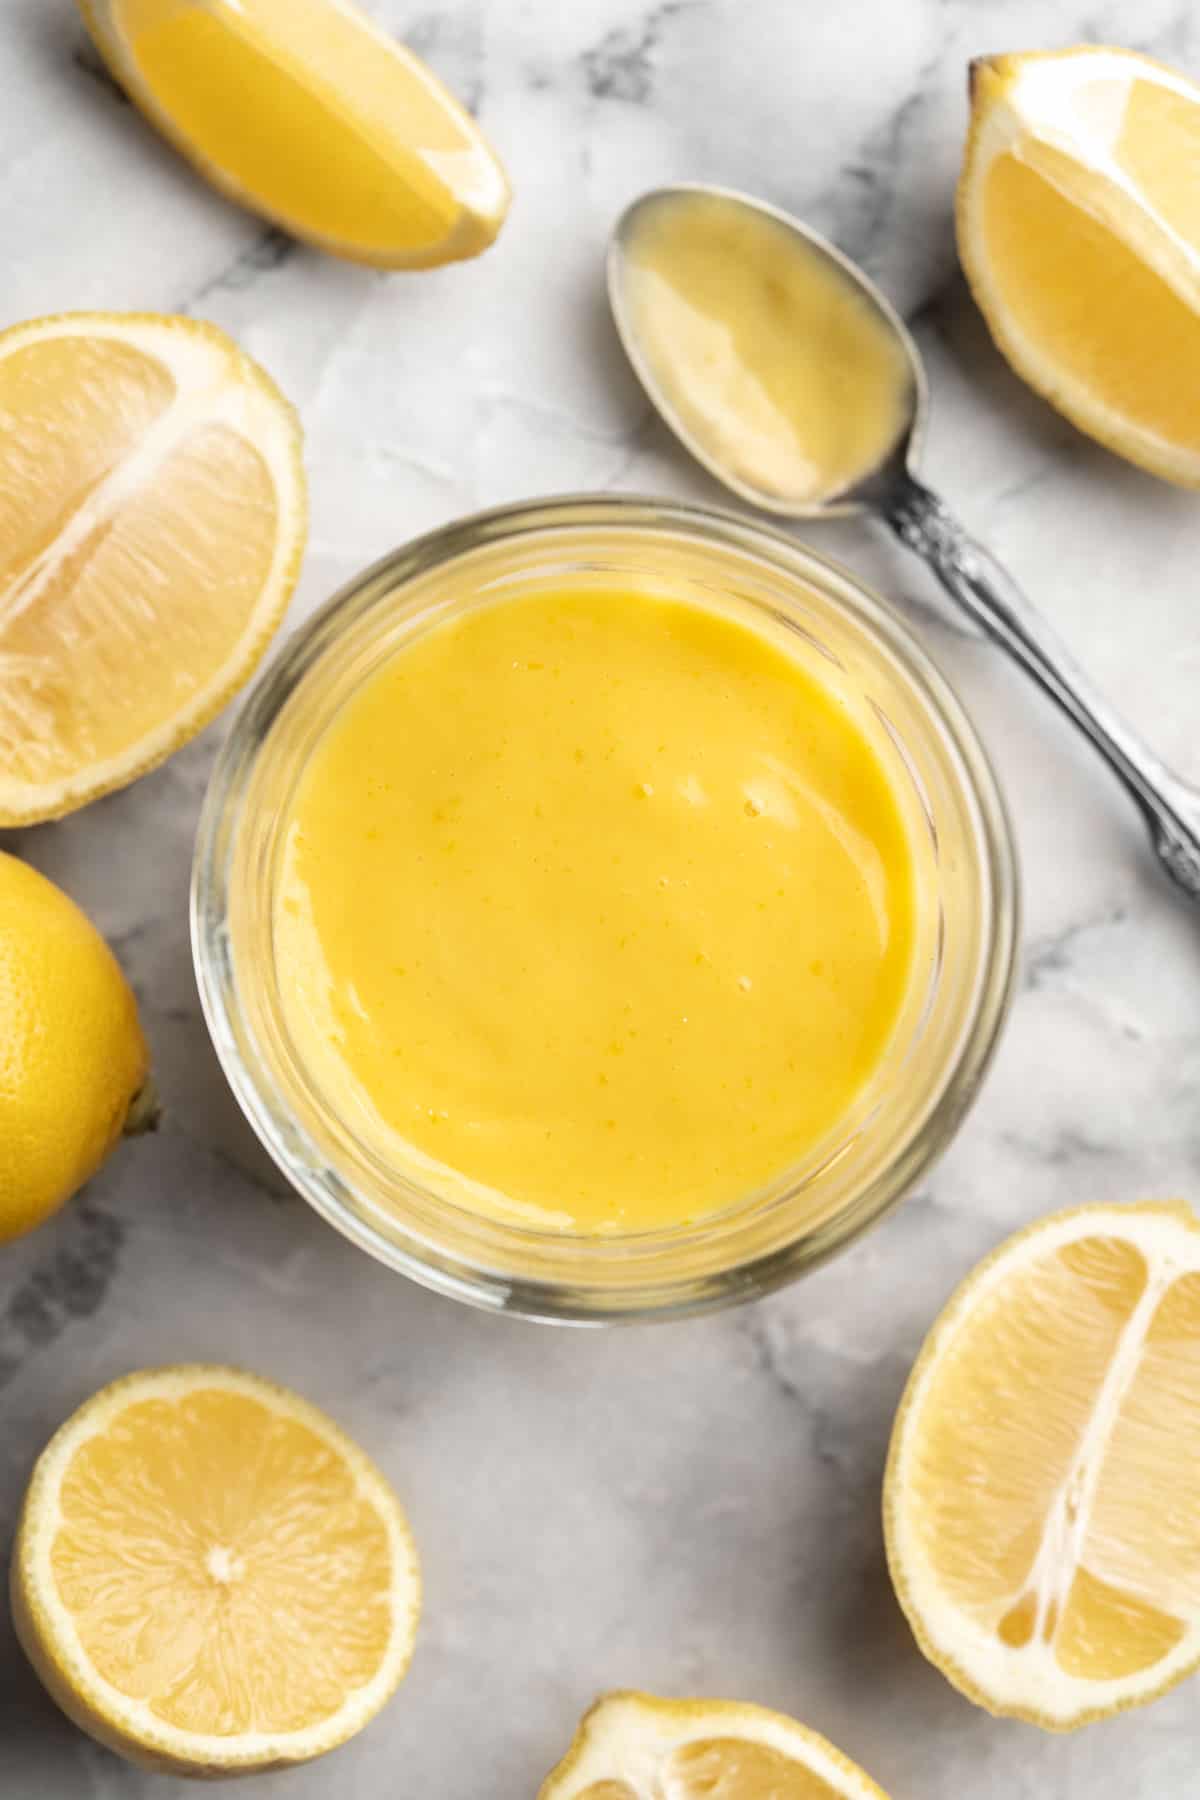
This easy vegan lemon curd has the same luxurious, creamy texture and sweet-tart flavour as the original, minus the butter and eggs! You’ll love it on pancakes, desserts, or just eating with a spoon.
I love all things lemon! There I said it; I admitted it and I’m not ashamed. Now that I got that off my chest, I can speak about this vegan lemon curd recipe with extreme bias.
I used to love lemon curd before going vegan, and I loved to make it from scratch too. I wasn’t sure if a vegan lemon curd could measure up to the original version, but I was so wrong. This vegan lemon curd is rich and smooth; tart and sweet; perfect for spreading on toast and scones for breakfast or shortbread and cakes for dessert.
That said, one of my favourite things about this lemon curd is how easy it is to make. Although I used to enjoy making regular lemon curd, I was always aware of how temperamental it was. I knew I could make this vegan lemon curd recipe at 2 am in the morning (this is my life) and still be able to pull it off easily.
If you’re not sold yet, you really should just give this recipe a try. I bet you’ll end up making it again and again!
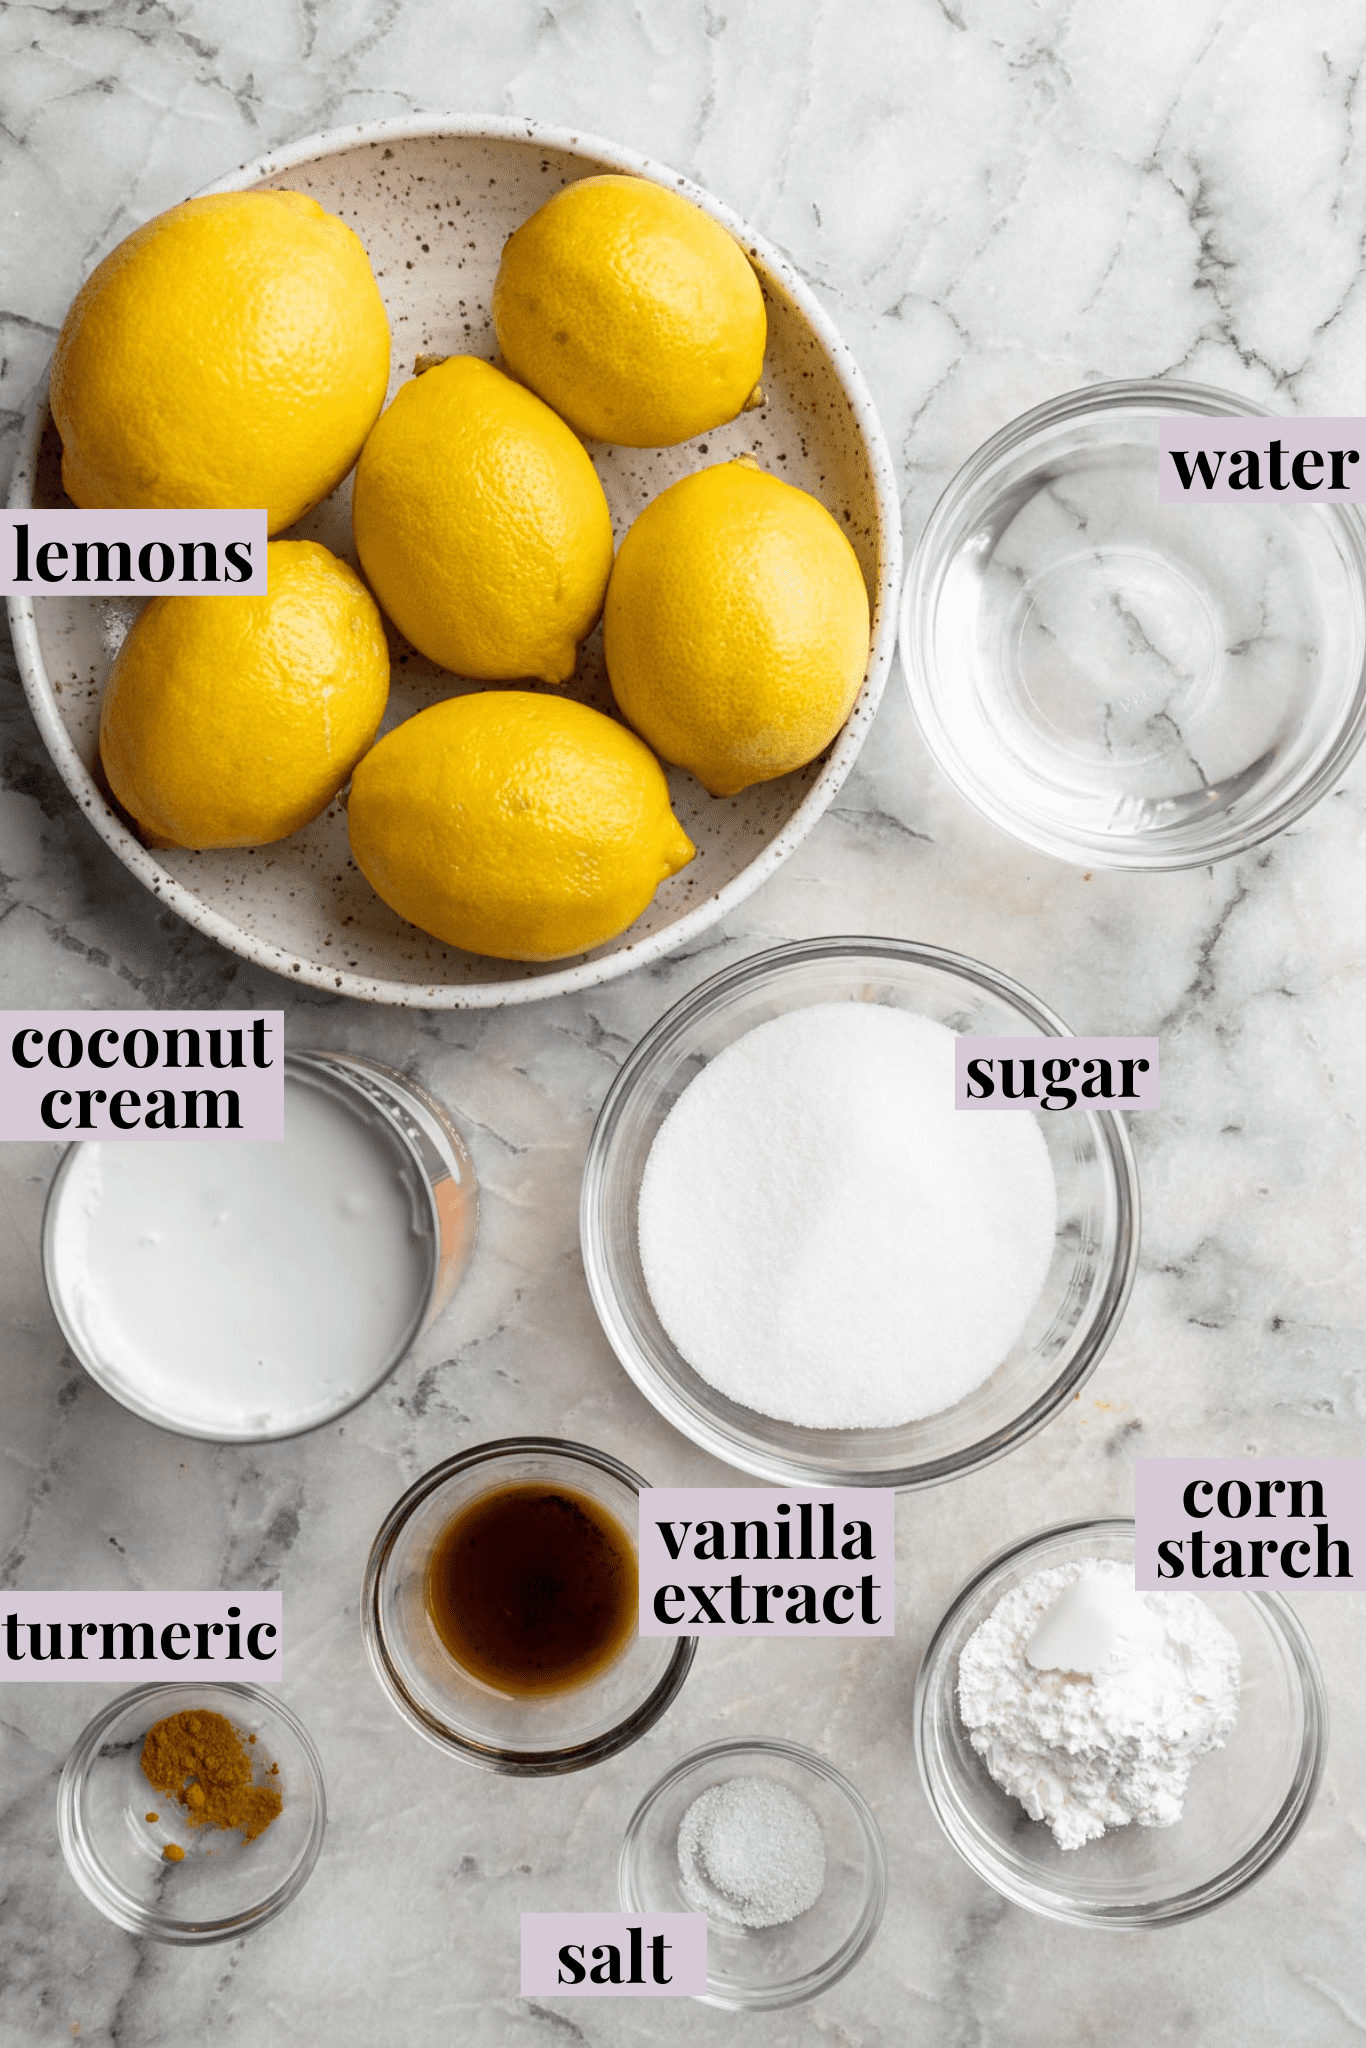
Notes on Ingredients
Scroll down to the recipe card to find the ingredient quantities and recipe instructions.
- Fresh lemon juice – This isn’t the time to use bottled lemon juice! Fresh is best.
- Cornstarch – The cornstarch replaces the egg in this recipe, thickening the vegan lemon curd so it’s creamy and spreadable.
- Water
- Sugar
- Turmeric – This gives your lemon curd a nice colour even without the egg yolks.
- Coconut cream – Scoop this from the top of a can of coconut milk.
- Sea salt
- Vanilla extract
- Lemon zest – Zest the lemons before juicing them.
How Do You Juice Lemons Without a Juicer?
- Use a citrus reamer or a handheld lemon squeezer.
- Use a fork or a knife to poke holes into the halved lemons and break apart the membranes so it’s easier to squeeze out the juice.
Another quick trick is to let the lemons come to room temperature, then roll them on the countertop under the palm of your hand before squeezing. This will help more juice come out.
How to Make Vegan Lemon Curd
If you’ve made traditional lemon curd before, you’ll appreciate that this vegan version is much less fussy! Here’s what you’ll need to do.
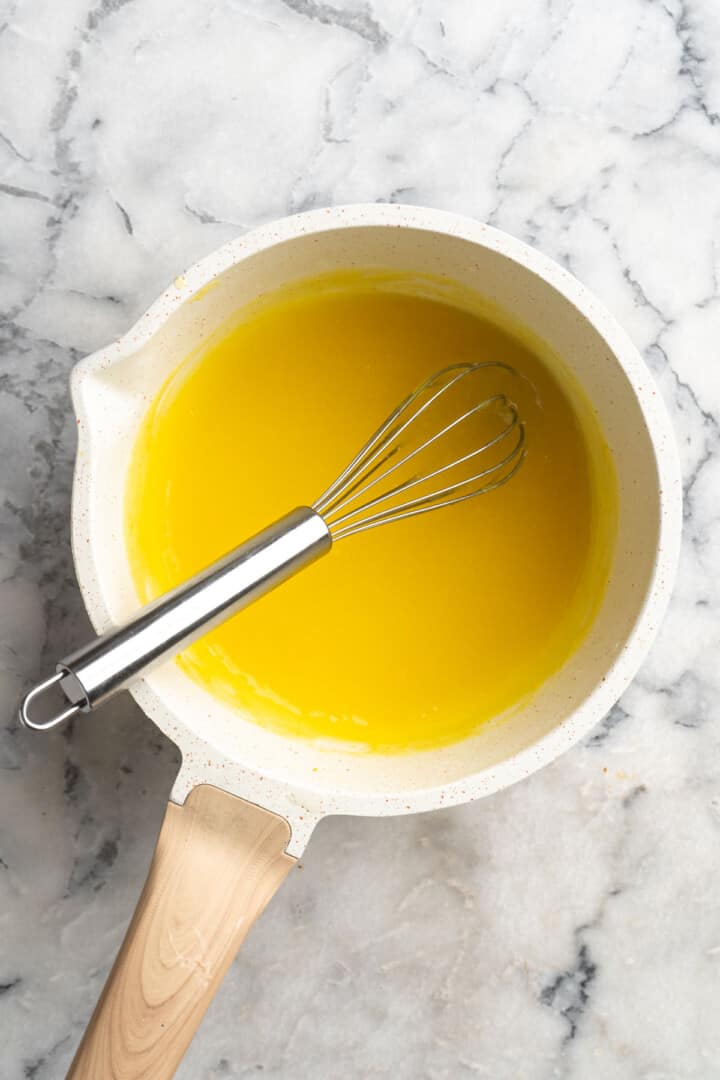
Combine the ingredients. Whisk the cornstarch, lemon zest, turmeric, water, and lemon juice in a saucepan until the ingredients are fully incorporated.
Thicken. With the saucepan over medium-high heat, whisk the curd mixture for about 6 minutes as it warms up.
Add the next 3 ingredients. Once the lemon curd mixture has thickened, reduce the heat to medium. Slowly pour in the sugar while whisking, then whisk in the sea salt and vanilla. Cook, stirring, for 2 minutes more.
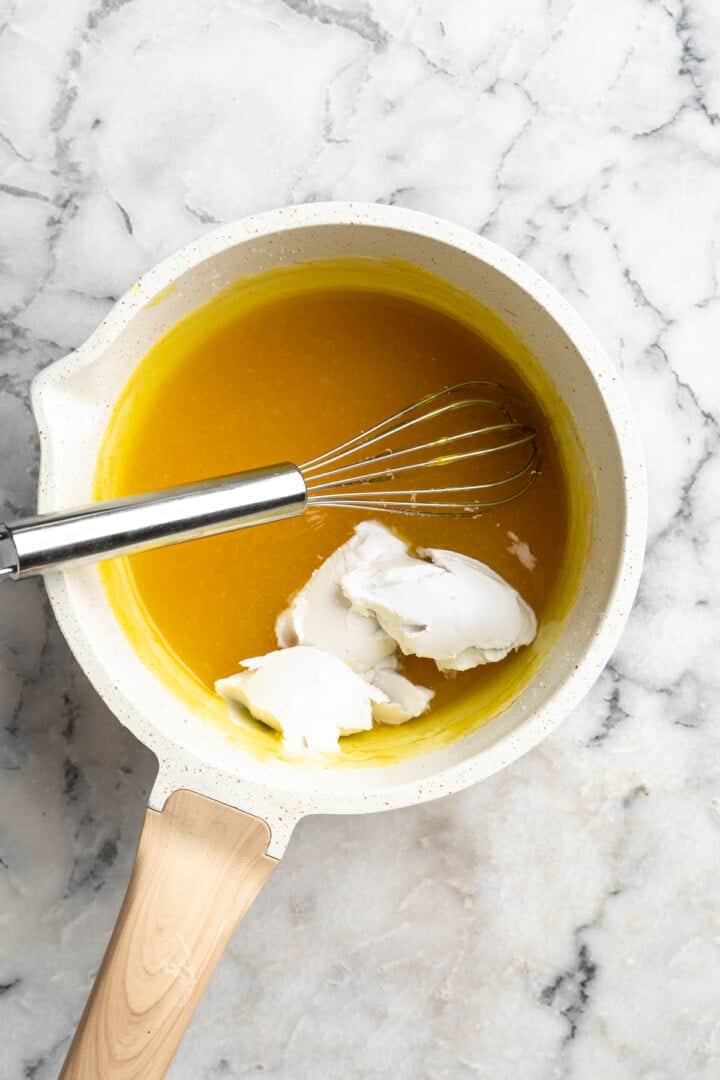
Add the coconut cream. Remove the pan from the heat and vigorously whisk in the coconut cream.
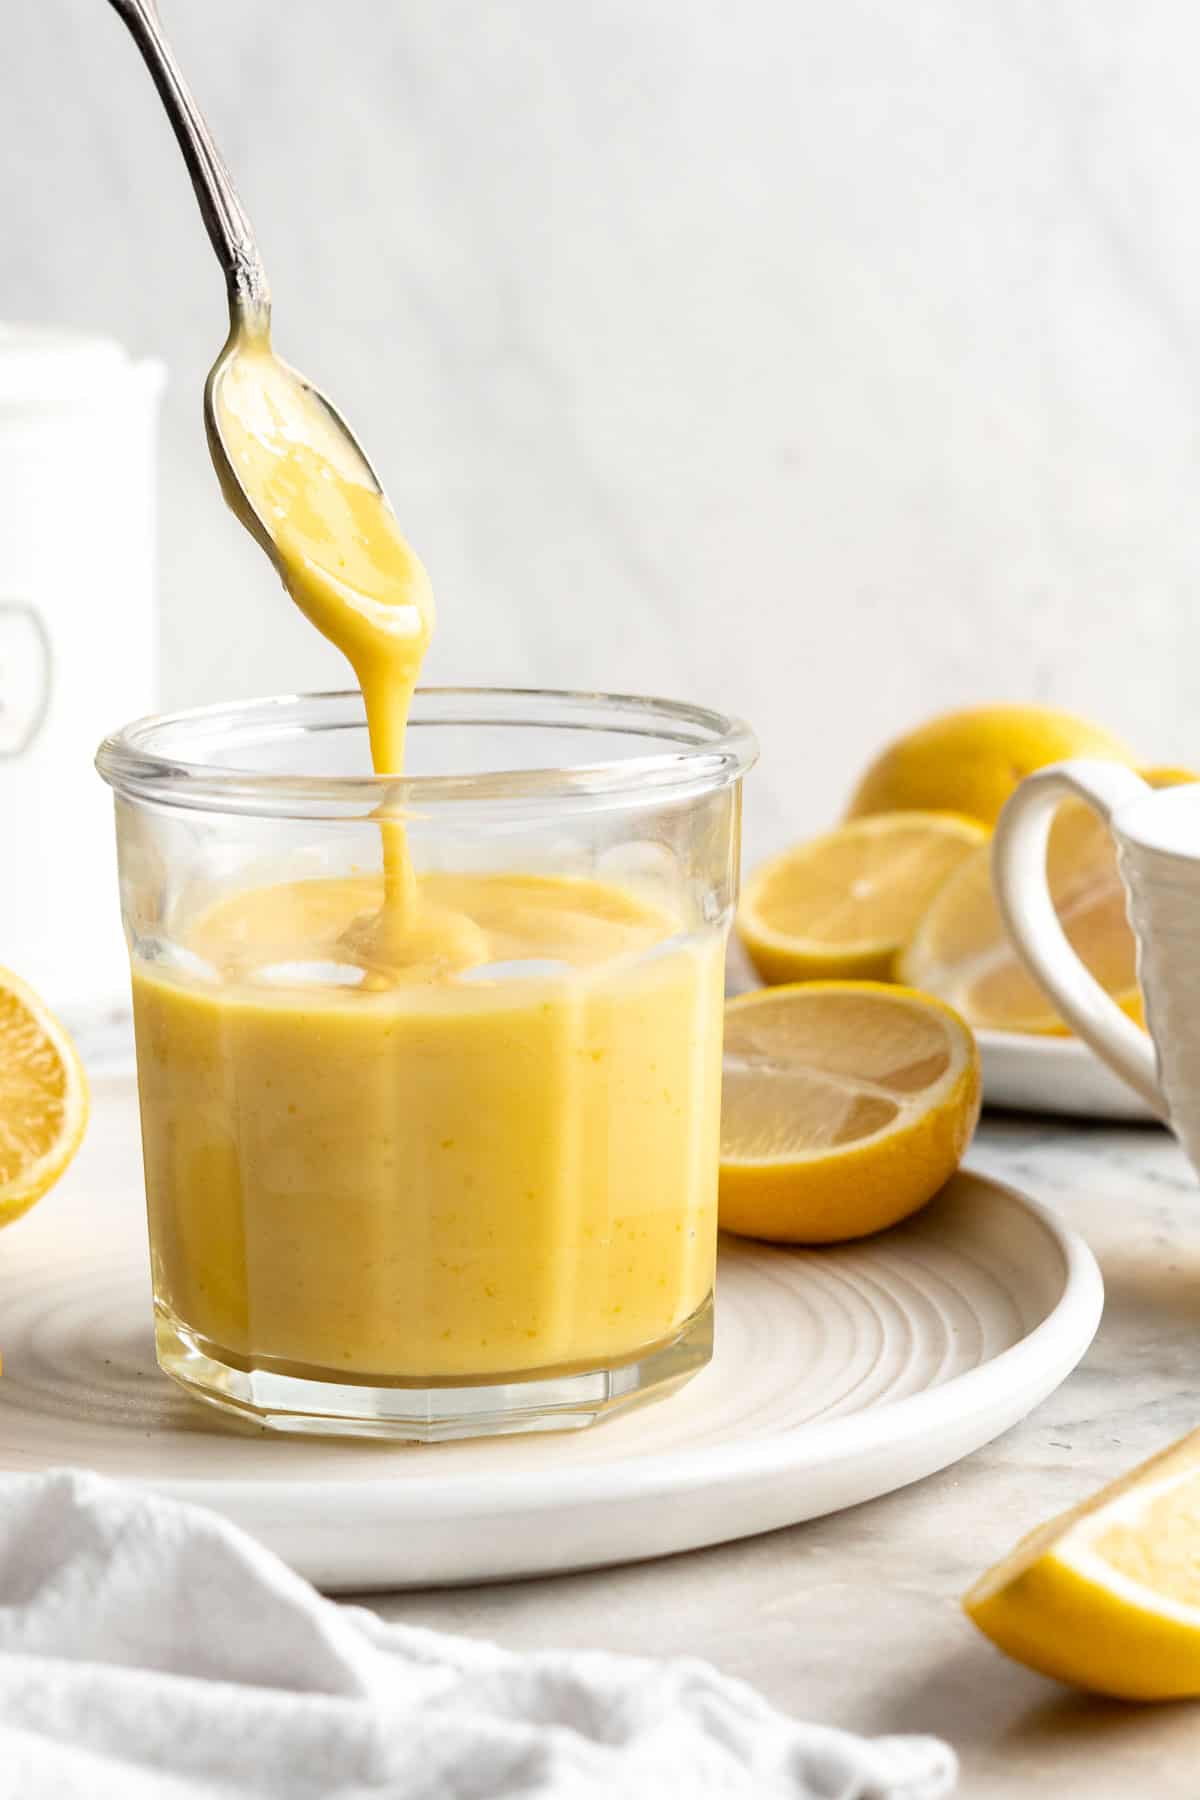
Finish. Return the saucepan to medium heat and cook for about 5 more minutes, or until the vegan lemon curd thickens. Add more sugar to taste.
Chill. Refrigerate the lemon curd until you’re ready to serve.
Tips for Success
Here are some simple tips to help make sure your vegan lemon curd turns out perfect .
- Use coconut cream. Coconut cream is the solid white mass at the top of a can of coconut milk. If it’s warm in your kitchen, I recommend popping your can of coconut milk in the fridge a day ahead of time, as chilling will help the cream separate from the coconut water. (You can use the leftover coconut water to make smoothies—I love it in my Pineapple Peach Smoothie !)
- Whisk well. Both the cornstarch and the coconut cream can create small lumps in the lemon curd, so be sure to whisk constantly and vigorously to break them up.
- Be patient. This vegan lemon curd really benefits from the chilling time, which mellows any remaining coconut flavour and thickens the curd mixture so it’s super creamy and spreadable.
What Do You Eat Lemon Curd With?
Other than eating it with a spoon, I love this vegan lemon curd for breakfast with pancakes and waffles . It’s delicious spread on my vegan Japanese milk bread , biscuits , or just a slice of toast. Use it to make lemony desserts by layering it on vegan vanilla cupcakes , or keep it simple and serve a dollop over vegan yogurt or ice cream .
How to Store
Store this vegan lemon curd in a tightly sealed jar or container in the refrigerator for up to a week.
Can This Recipe Be Frozen?
Yes, this vegan lemon curd freezes very well. Pour it into an airtight container and store for up to 3 months. Defrost in the fridge before using.
More Reader-Favourite Lemon Recipes
- Vegan Lemon Poppyseed Muffins
- Lemon Pepper Tofu
- Vegan Lemon Loaf
- Easy Vegan Lemon Bars

Ingredients
Easy Vegan Lemon Curd
- ½ cup fresh lemon juice
- 2 tablespoons cornstarch
- 6 tablespoons water
- ½ cup sugar
- tiny pinch of turmeric for colour
- 1/4 cup thick coconut cream (from the top of a can of coconut milk
- pinch of sea salt
- ¼ teaspoon vanilla extract
- 1 teaspoon lemon zest
Instructions
Easy Vegan Lemon Curd
- In an off pan whisk the cornstarch, lemon zest, turmeric, water and lemon juice until fully incorporated. Turn the pan to medium-high heat and begin to whisk for about 6 minutes as the mixture heats up. You want to whisk the entire time so the cornstarch doesn’t clump up. The mixture will begin to thicken around the 3-minute mark then continue to get thicker by 6 minutes.
- Reduce heat to medium. Slowly add in the sugar and whisk thoroughly into the curd. Add in the sea salt, vanilla and stir to combine. Stir for another two minutes. If you begin to see any lumps whisk vigorously to remove.
- Remove from heat and Stir in the coconut cream and whisk vigorously to combine again. Bring back to heat and allow the mixture to heat over medium heat for about 5 minutes more minutes until it begins to thicken up even more, stirring occasionally. Taste and add more sugar if needed for your tastebuds – it’s supposed to be sweet and tart.
- Remove from heat and allow to cool in the fridge. There’s barely any coconut flavour but any traces will be removed once it cools fully. Enjoy!
