Caramelized onions add something special to so many different meals! I’ll show you how to caramelize onions the right way, for onions that are sweet, dark, and jammy.
Caramelized onions are one of my favourite things to add to everything from pizza and burgers to a frittata . They take the meal to the next level! Unfortunately, a lot of recipes have you rushing the process—and let’s be honest here, you’re not going to caramelize onions by cooking them over medium-high heat for 10 minutes. Sautéed onions are just fine, but caramelized onions? Well, they’re pretty much magical. Once you know how to caramelize onions, the world is your oyster.
What’s the Secret to Caramelized Onions?
- Low and slow cooking. Caramelized onions take patience and time. Luckily, you’ll be rewarded in the end with sweet, jammy onions to add to ALL THE THINGS.
- Perfectly browned. As you slowly cook the onions, they soften and sweeten. The colour darkens and the flavour becomes more complex, similar to roasting garlic .
- Make a big batch. Now, not everyone has 45 minutes to make caramelized onions for a weeknight dinner. I get it! The good news is that you can make a big batch of caramelized onions and keep them in the fridge to use throughout the week. You can also freeze caramelized onions, and they’re just as delicious when thawed and reheated.
Notes on Ingredients
Please note that this is important information on the ingredients and instructions, and the FULL recipe with amounts and details can be found DOWN BELOW (scroll to it) in the recipe card.
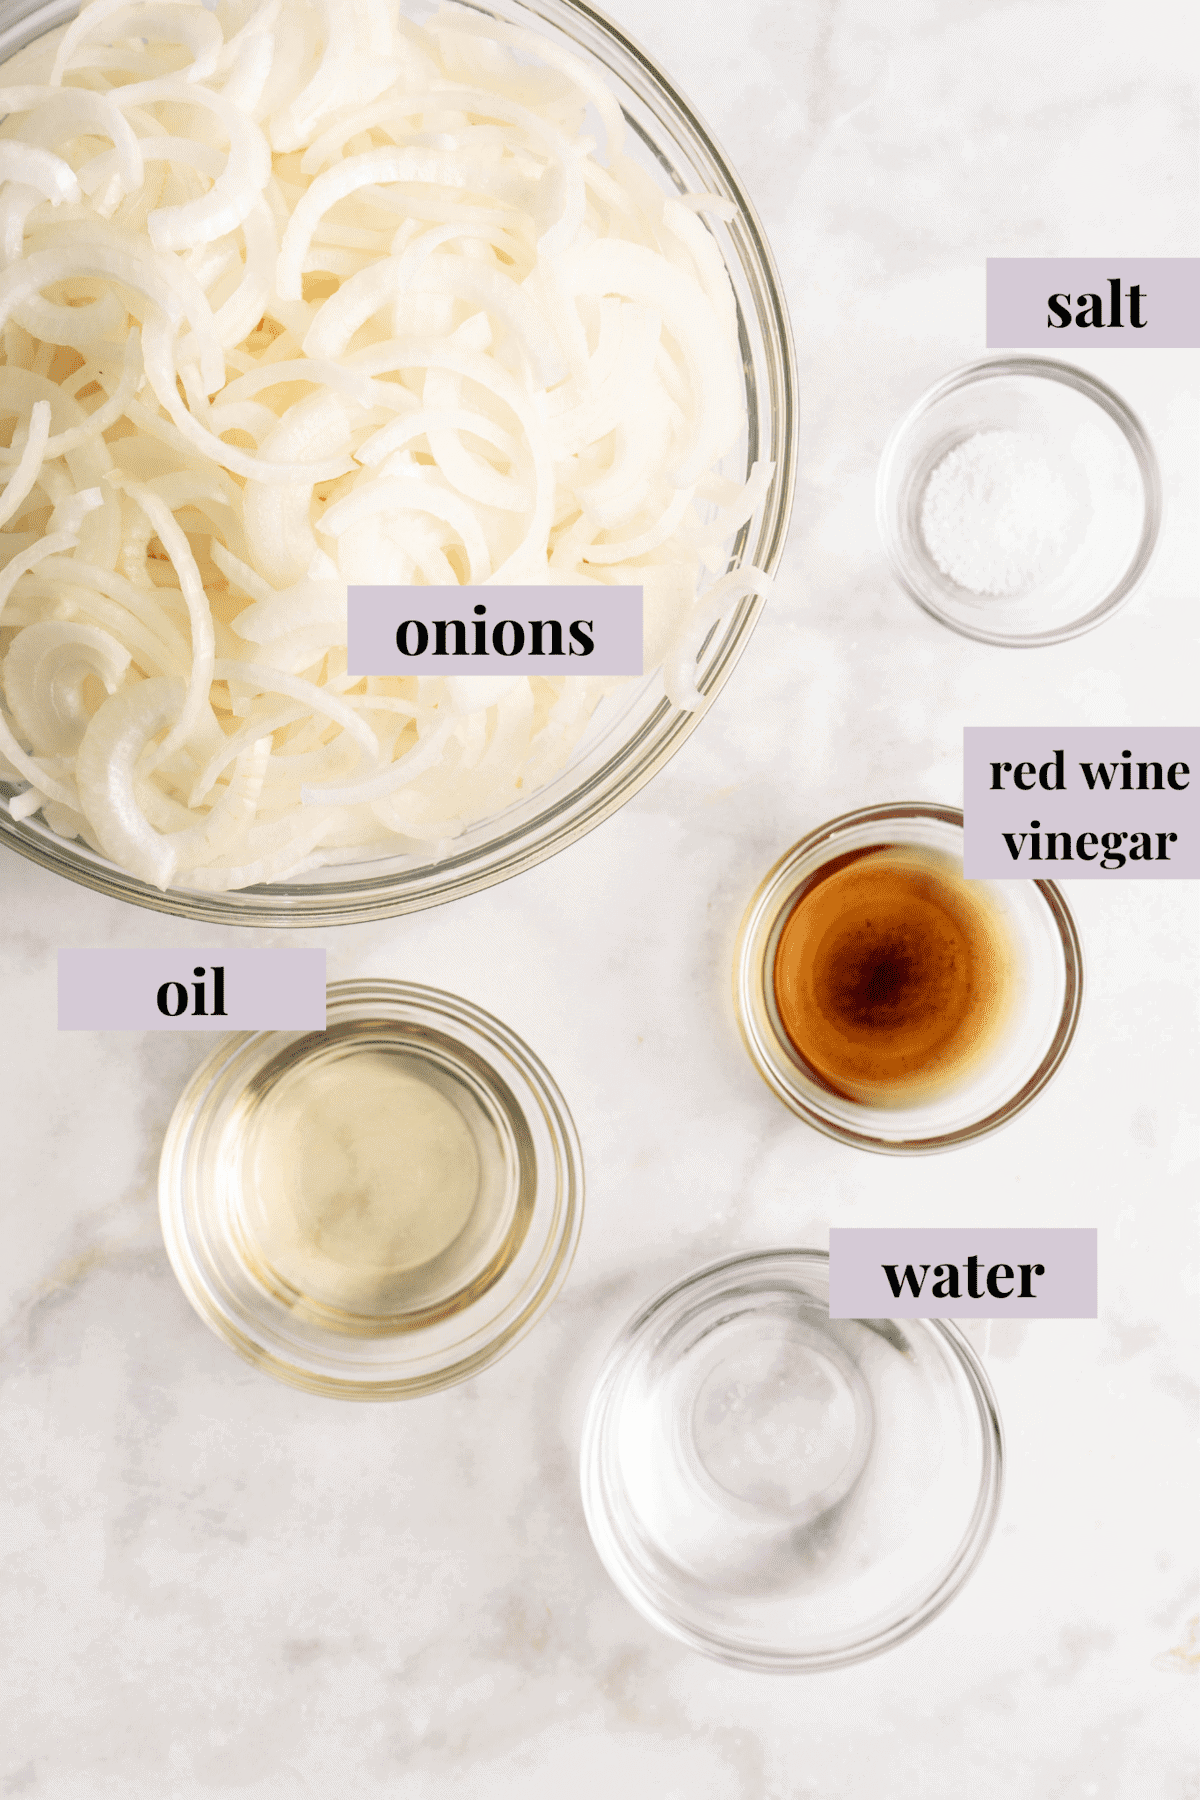
- Oil – I usually use olive oil, but another neutral-flavored cooking oil will work.
- Onions – You can do it without them! When caramelizing onions, the type of onion matters. See below. You’ll want to slice the onions thinly, making sure they’re uniform in size.
- Red wine vinegar or red wine – Vinegar is optional, but I like to add it to season the onions and brighten the flavor in addition to sea salt.
What Onions Are Better for Caramelizing?
Yellow onions are the best and most common choice for caramelized onions. They’re what I used in this recipe. Yellow onions are naturally a bit sweet and readily available, and they also won’t turn to mush when cooked for longer periods of time.
You can also caramelize white, red, and sweet onions and shallots, too. Softer onions may need less time to cook.
How to Caramelize Onions
Once you have the time and the ingredients listed above, you’re ready to make caramelized onions! Here’s the only tutorial you’ll need on how to caramelize onions, step-by-step.
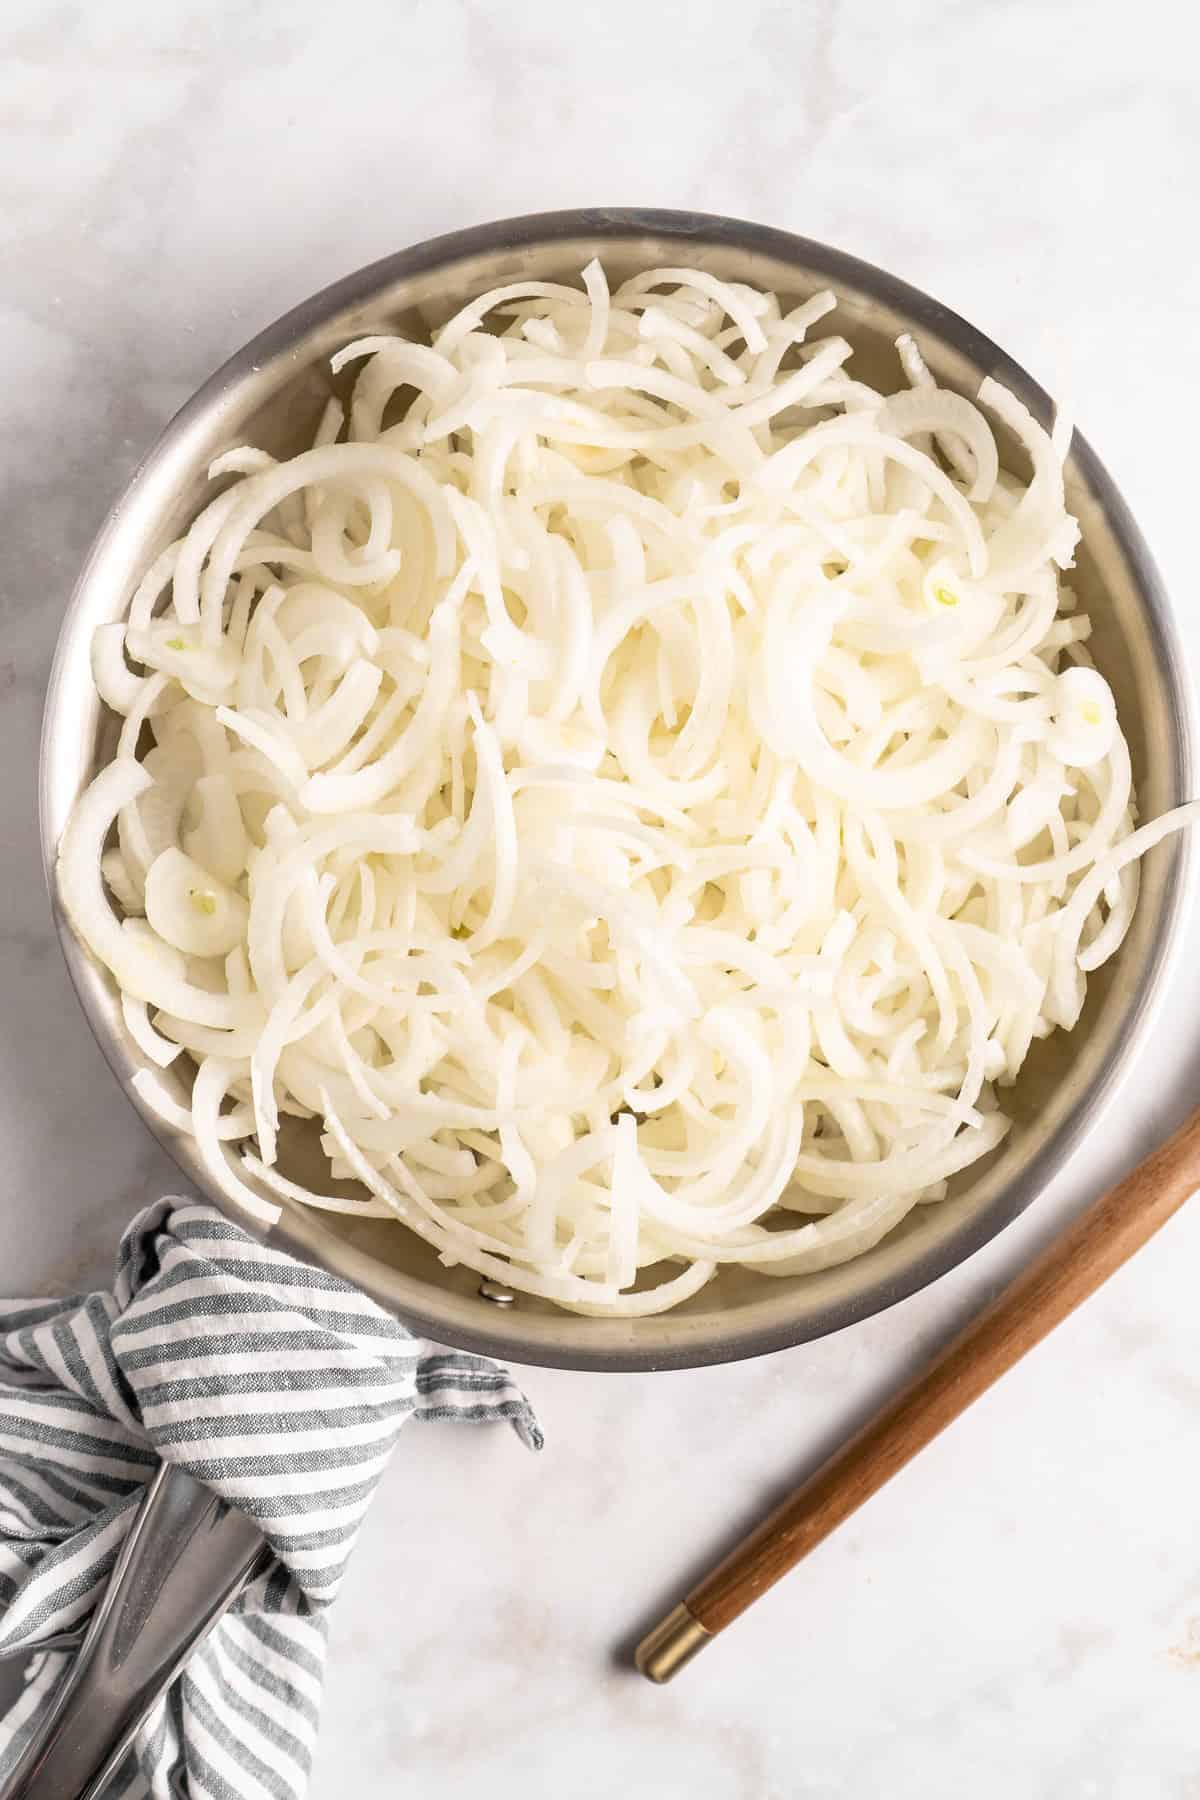
Slice the onions.
- Heat the oil. Set a large, heavy skillet over medium heat and add the oil.
- Add the onions. Place the onions in the skillet and stir them to ensure they’re all coated with the oil. Stir in a pinch of salt.
- Sauté. Cook the onions over medium heat for 5 to 8 minutes, or until they’re translucent. Reduce the heat to medium-low.
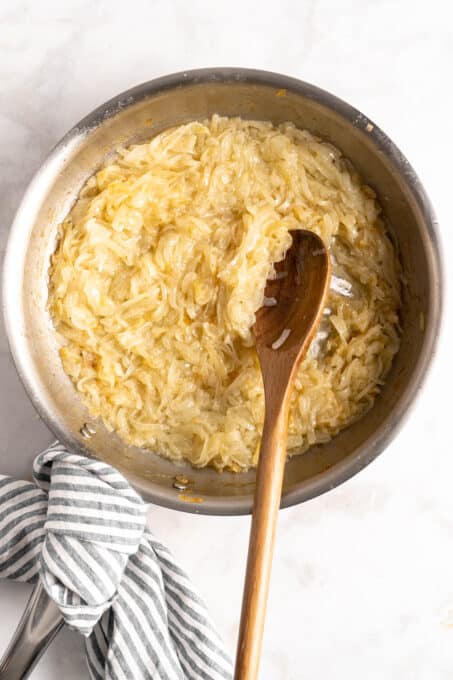
Keep cooking.
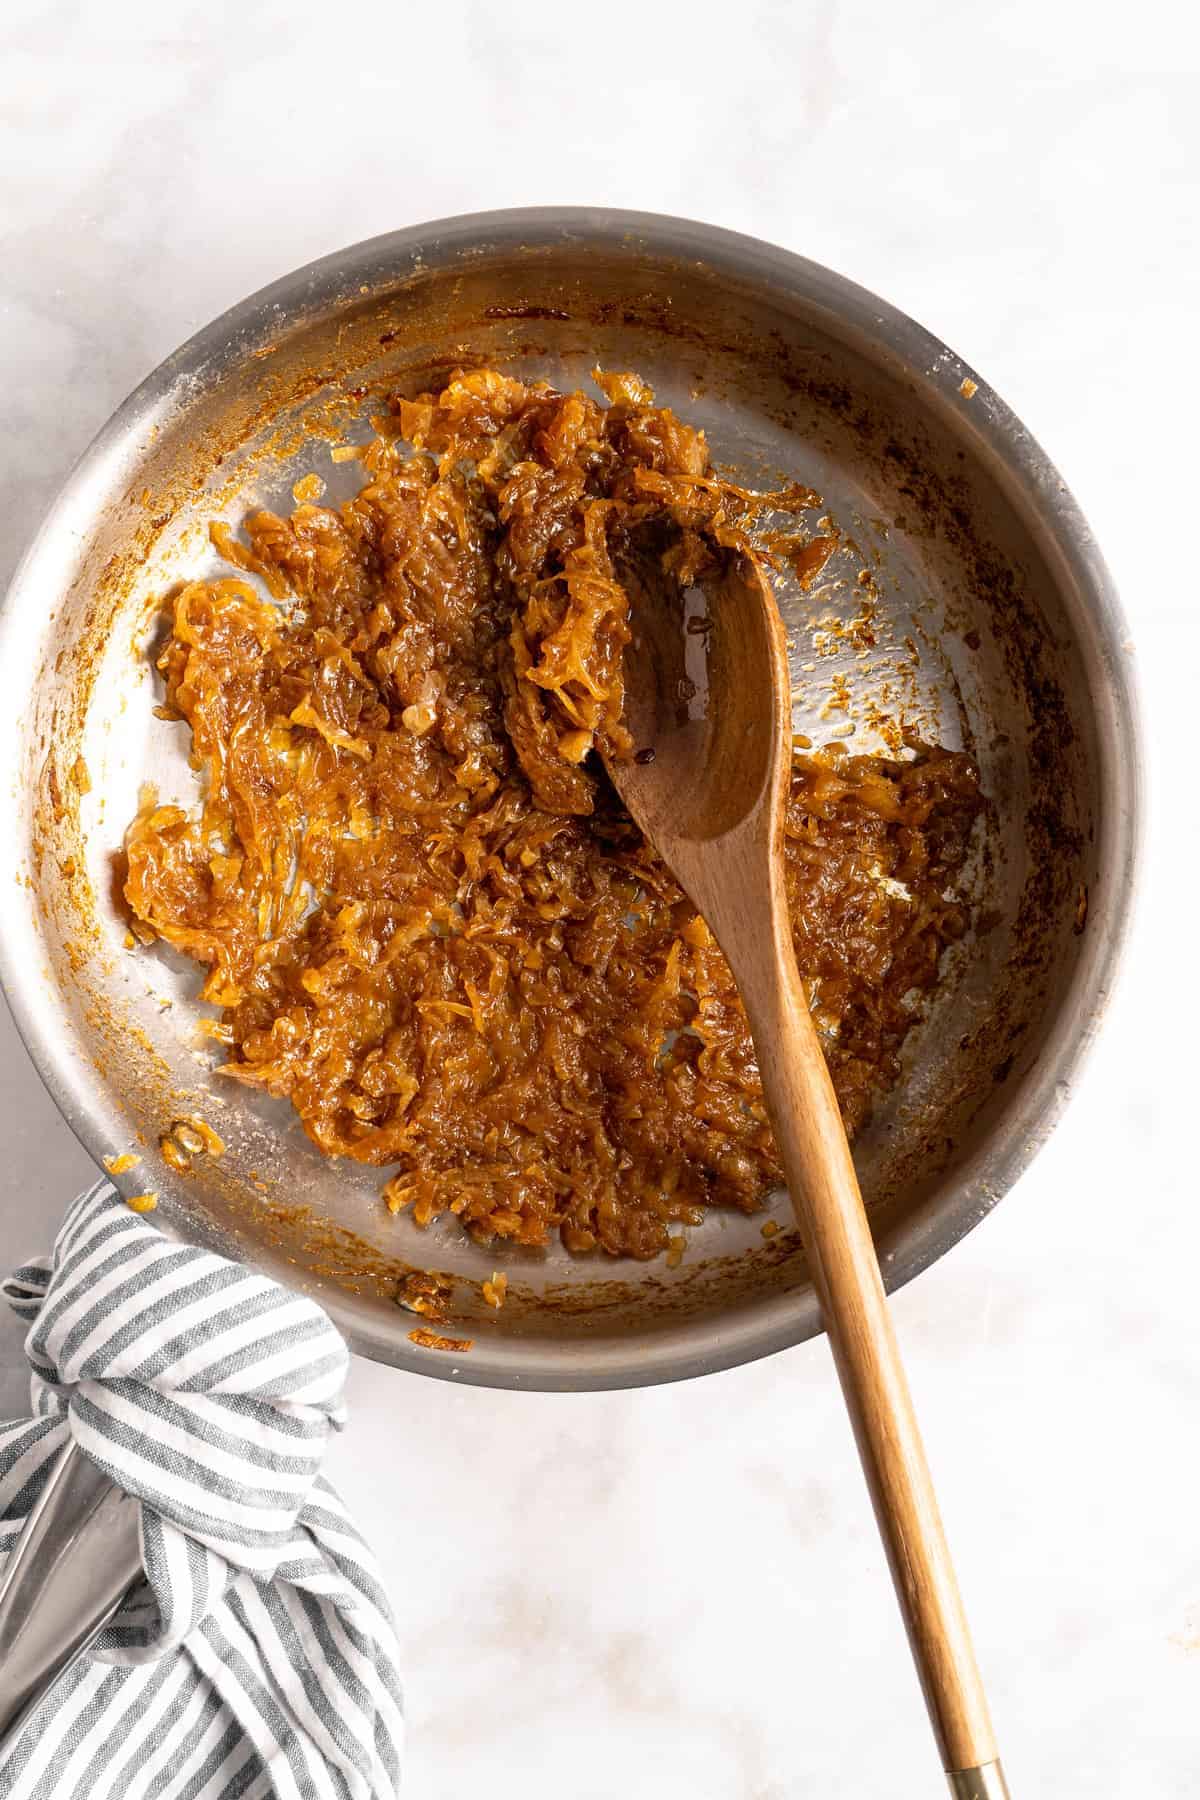
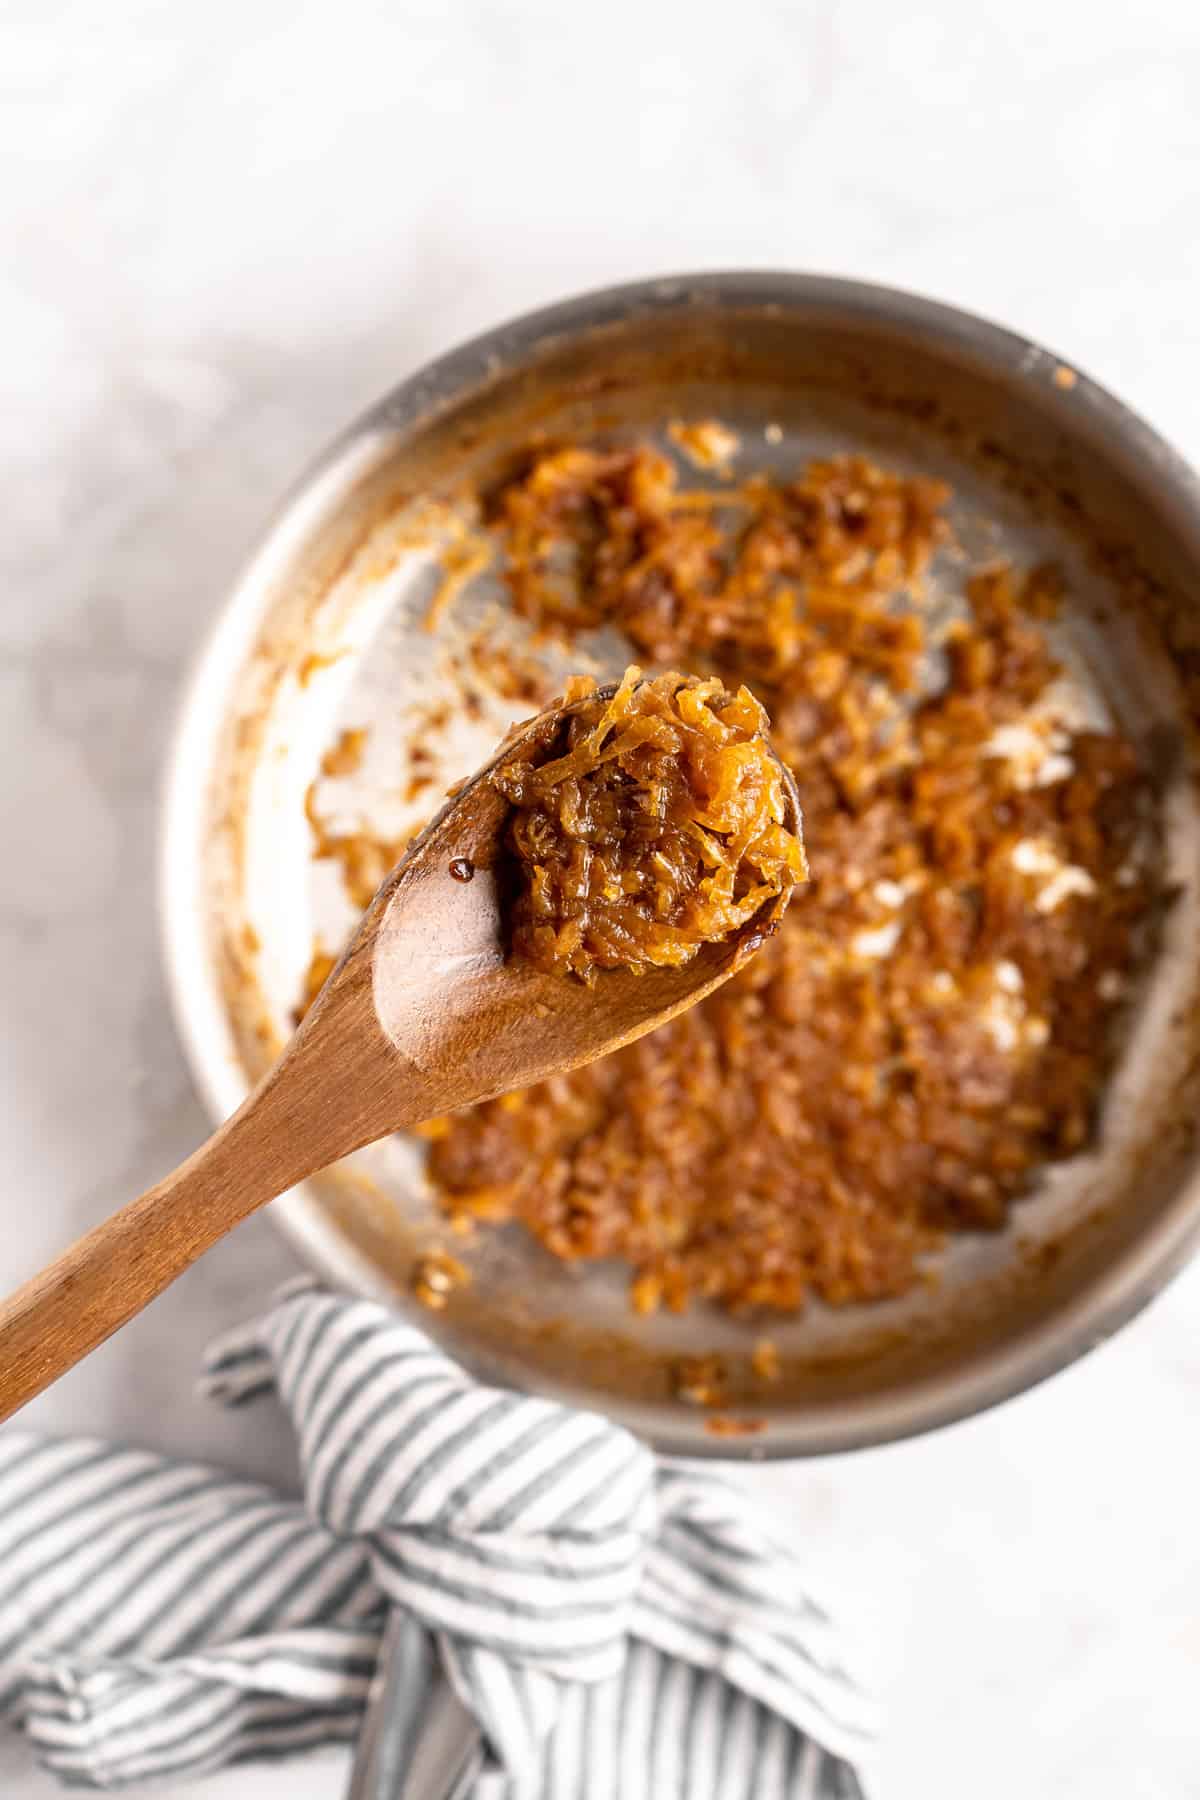
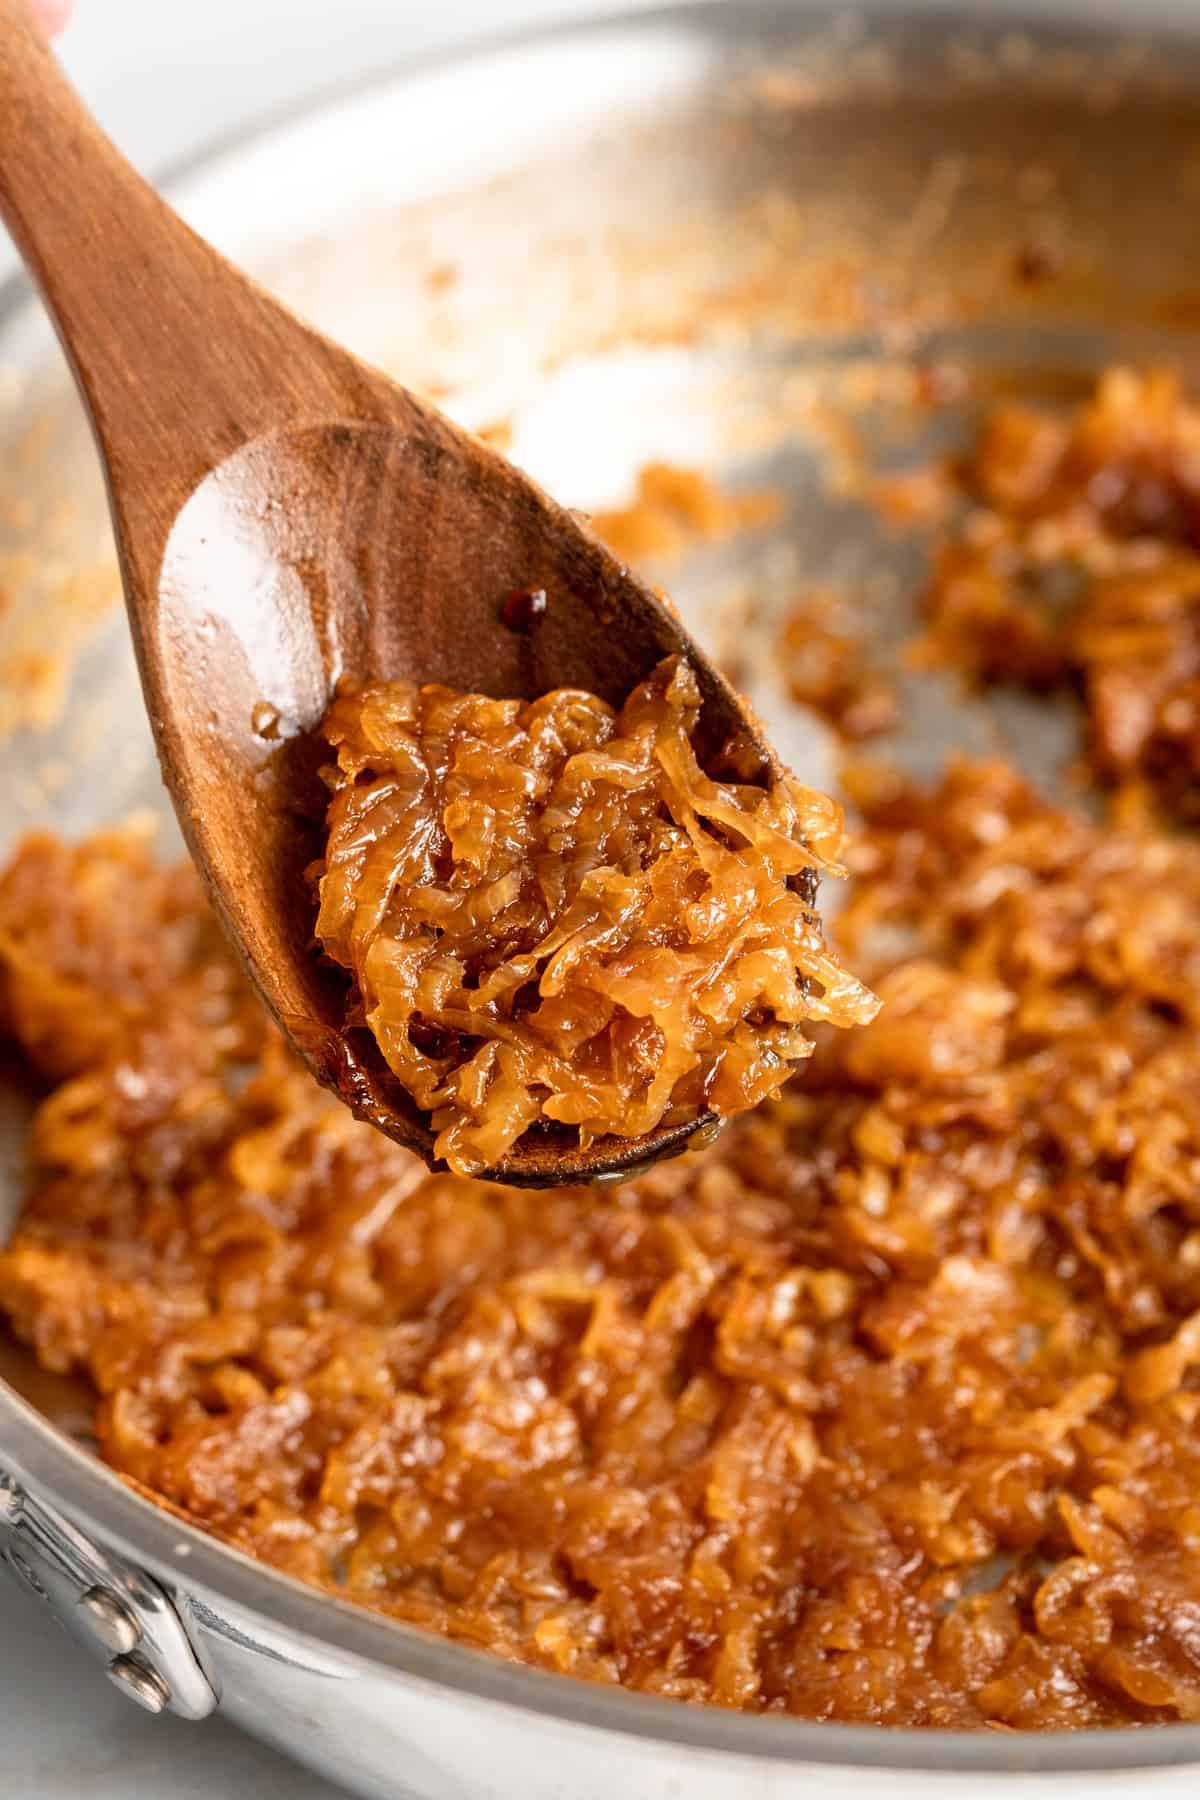
- Now, we wait. Or, wait and stir . Let the onions cook until they reach your desired depth of colour—this should take about 30 minutes, but it can vary depending on your stove and the colour or texture you’re after. Stir occasionally, and if the onions begin to get dry, add a splash of water to keep them moist and deglaze the pan.
- Finish. Just before the onions are done, add a splash of red wine vinegar to deglaze the pan and add flavour. Remove the pan from the stovetop and use the onions immediately or let them cool before storing.
Recipe Tips
- Cut the onions evenly. If your onion slices vary in thickness, they won’t cook evenly or be done at the same time.
- Scrape and deglaze the pan. When the onions begin to brown, they’ll start to leave a fond (the technical term for the little browned bits) on the bottom of the pan. Scrape this fond when it forms (a splash of water will help release it) and swirl it back into the onions. This helps give your onions that deep, dark colour and adds so much flavour!
- Use a large, wide pan. This allows the onions to spread out and cook evenly.
It’s not necessary. Covering the onions while they cook traps the steam, which can help them soften more quickly. However, I prefer to leave them uncovered, firstly, so I can keep an eye on them, and secondly, so the onions don’t turn out watery.
If you’d like, you can sprinkle a small amount (about 1 teaspoon) of sugar over the onions while they cook to help them caramelize.
Ways to Use Caramelized Onions
I mentioned it earlier, but a great way to prepare these onions is to cook a big batch at once so you can store them to add to meals and recipes. Here are my favourite ways to put caramelized onions to use:
- Use them as a topping for burgers.
- Make them into caramelized onion dip.
- Use them to add flavour to pasta sauce .
- Add a spoonful to hummus before serving.
- Layer them with vegan cheese and bread for an epic grilled cheese sandwich.
- Top BBQ chickpea tacos with a spoonful of caramelized onions.
- Spread them onto pieces of toasted baguette.
- Have onions already caramelized to make a quick French onion soup .
How to Store Caramelized Onions
- Refrigerate. You can store caramelized onions in an airtight container in the refrigerator for up to a week.
- Freeze. You can freeze caramelized onions for up to 3 months. Freeze them flat in a freezer bag or place them in an airtight container. Let them thaw in the refrigerator before using.
More Cooking Basics
- How to Make Balsamic Glaze
- Crispy Roasted Chickpeas
- Homemade Marinara Sauce
- How to Make Vegetable Broth
Ingredients
- 2-3 tablespoons oil
- 1 lb onions , about 5 large yellow onions, sliced
- ½ teaspoon sea salt
- water , see instructions
- 2 tablespoons red wine vinegar or red wine , optional
Instructions
- In a large pan over medium heat, heat the oil.
- Add the onion slices and stir together to ensure the onions are fully coated. Add a pinch of salt and stir again.
- Saute the onions for about 5-8 minutes until the onions begin to slowly become translucent. Reduce the heat to medium low.
- Continue to stir onions every now and then. If/when the onions begin to get dry, add a splash of water (about 2 tablespoons of water a time) to deglaze the pan and ensure onions don’t stick.
- While stirring, ensure you’re always scraping the fond off the bottom and swirling it back into the onions! This gives it beautiful flavour. Continue to scrape for about 30 more minutes until the onions are the colour and texture you desire.
- In the last few minutes, add a splash of red wine vinegar for a flavour burst, swirling it into the onions. Remove from the stove and allow to cool.
- Serve immediately or store in a tupperwater container in your fridge for up to a week. Enjoy!
Notes

How to Caramelize Onions
Ingredients
- 2-3 tablespoons oil
- 1 lb onions about 5 large yellow onions, sliced
- ½ teaspoon sea salt
- water see instructions
- 2 tablespoons red wine vinegar or red wine optional
Instructions
- In a large pan over medium heat, heat the oil.
- Add the onion slices and stir together to ensure the onions are fully coated. Add a pinch of salt and stir again.
- Saute the onions for about 5-8 minutes until the onions begin to slowly become translucent. Reduce the heat to medium low.
- Continue to stir onions every now and then. If/when the onions begin to get dry, add a splash of water (about 2 tablespoons of water a time) to deglaze the pan and ensure onions don’t stick.
- While stirring, ensure you’re always scraping the fond off the bottom and swirling it back into the onions! This gives it beautiful flavour. Continue to scrape for about 30 more minutes until the onions are the colour and texture you desire.
- In the last few minutes, add a splash of red wine vinegar for a flavour burst, swirling it into the onions. Remove from the stove and allow to cool.
- Serve immediately or store in a tupperwater container in your fridge for up to a week. Enjoy!
Notes
Nutrition
How to Caramelize Onions https://jessicainthekitchen.com/how-to-caramelize-onions-easy-and-life-changing/ March 25, 2022
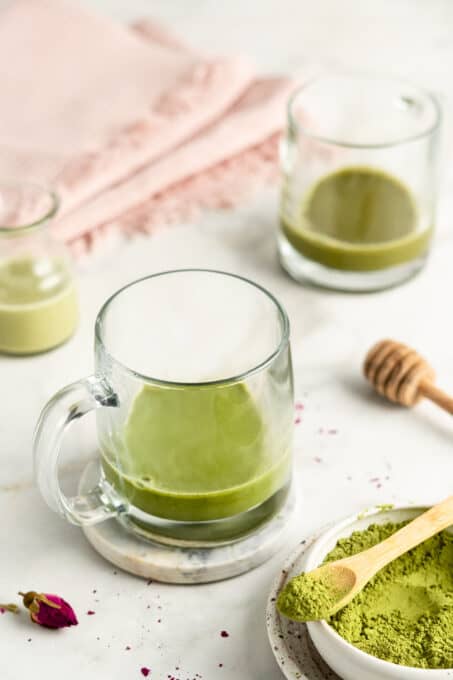
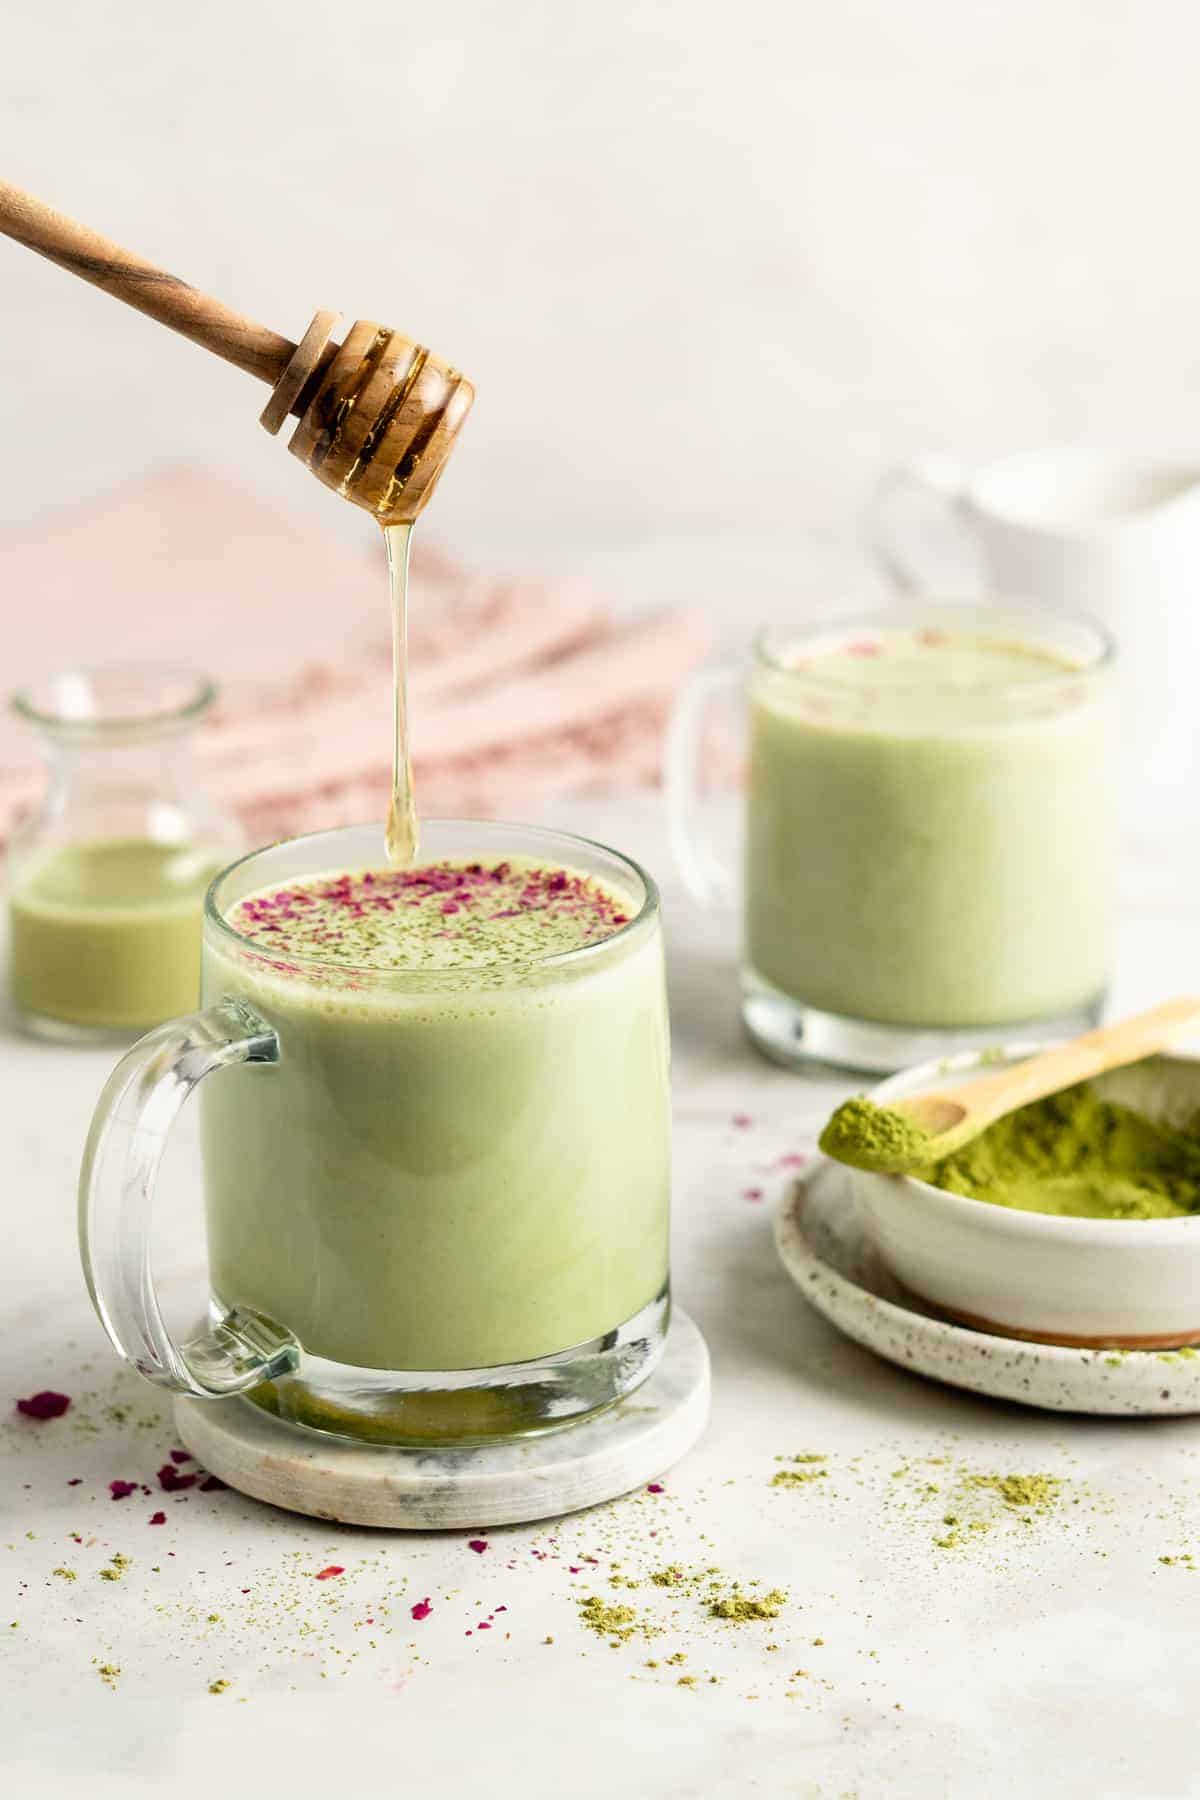
This hot matcha latte will give you the boost you need to conquer the day, and it’s just as creamy and delicious as the kind you buy at the coffeehouse!
This matcha latte is a cozy, creamy, soothing drink made from finely ground tea leaves and steamed dairy-free milk. While other types of tea leaves are steeped in hot water and then removed, matcha powder is whisked into the water, so you’re not just drinking flavoured water but the actual, antioxidant-rich tea leaves! If you love an iced matcha latte in the warmer months, this hot version is perfect for cooler weather.
What’s So Great About This Hot Matcha Latte Recipe
- Energy boosting. Matcha contains a gentle boost of caffeine, and it’s the perfect way to start a chilly morning.
- Budget-friendly. Make a perfect matcha latte that tastes just like the coffeehouse version, for a fraction of the price!
- Warm and soothing. Wrap your hands around a mug of steamy, frothy matcha and feel the stress melt away. It’s a delicious drink any time of the day.
- Easy to make. I’m sharing my tried-and-tested tips for making the best matcha latte at home, from choosing the right matcha to a step-by-step tutorial.
Notes on Ingredients
Please note that this is important information on the ingredients and instructions, and the FULL recipe with amounts and details can be found DOWN BELOW (scroll to it) in the recipe card.
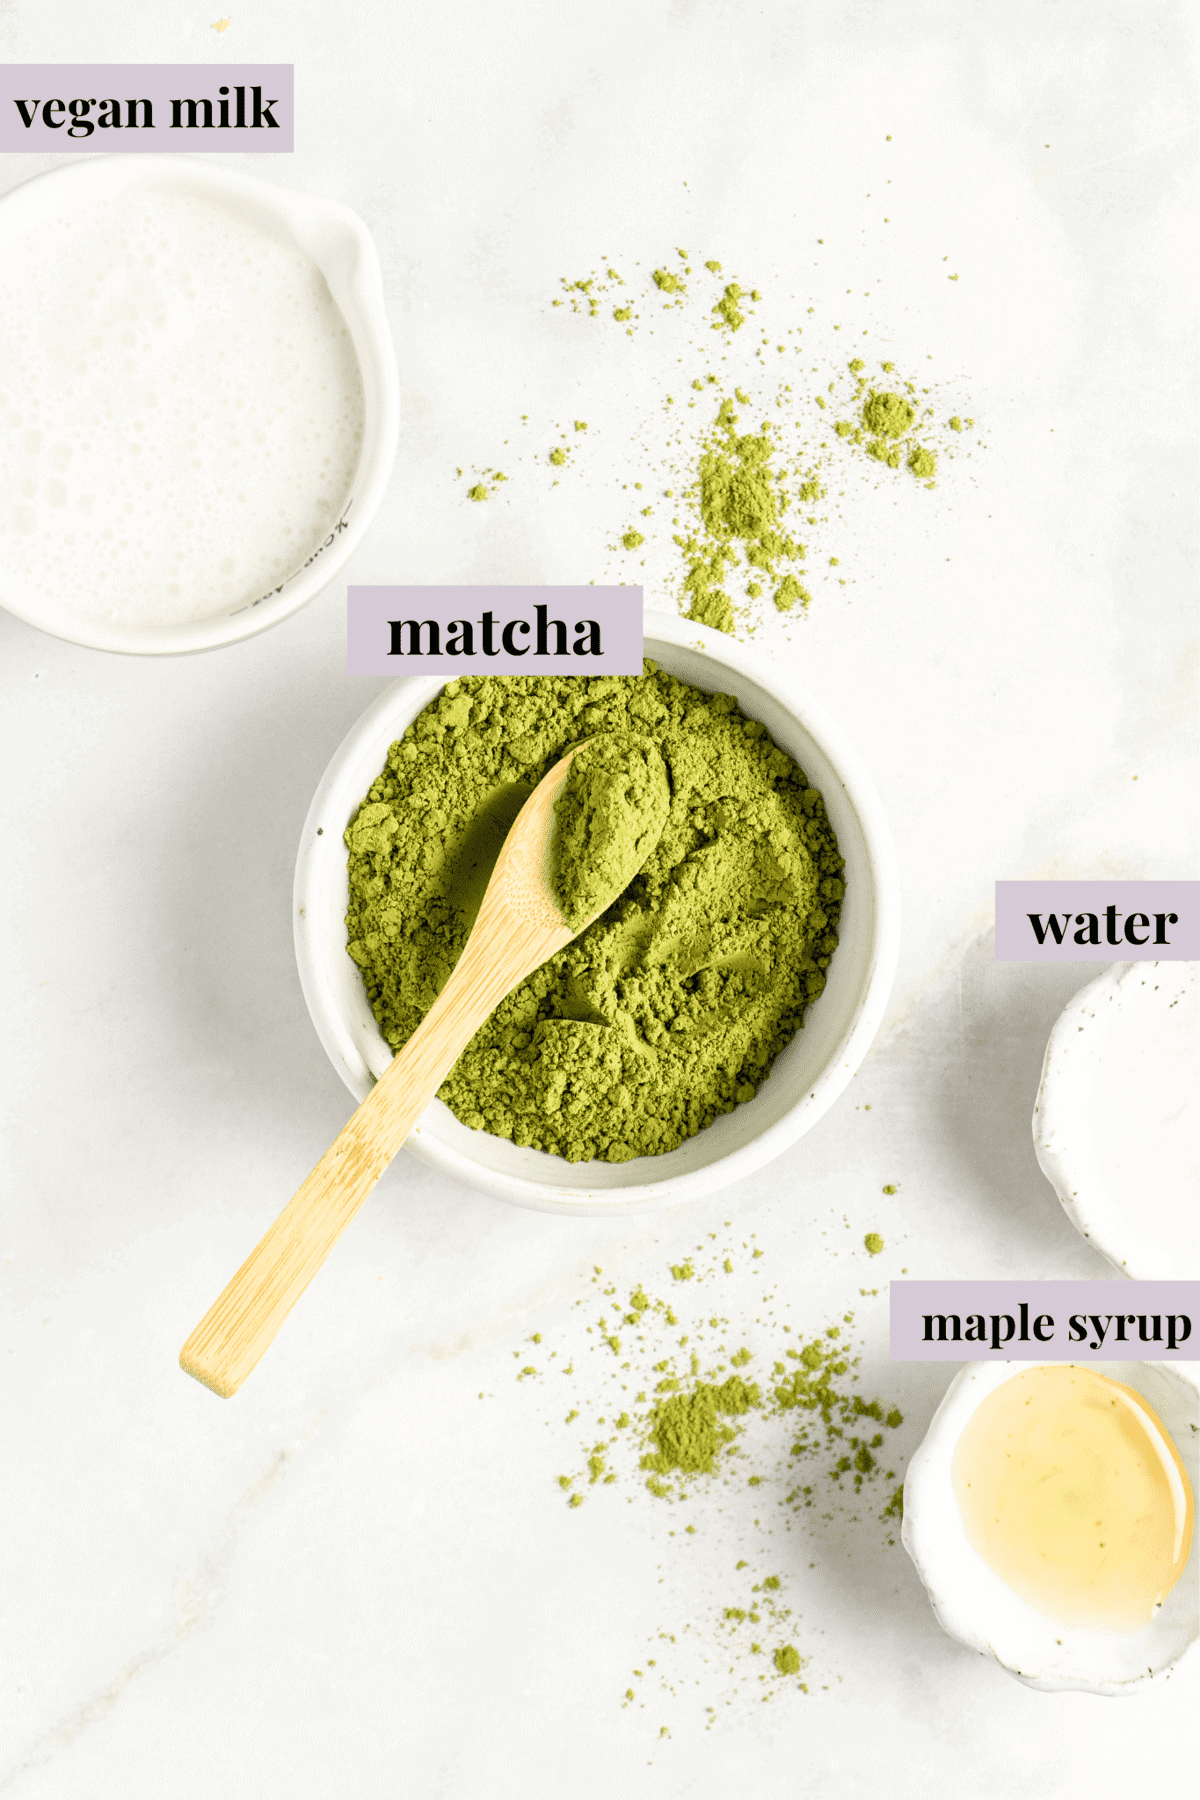
- Ceremonial-grade matcha – This type of matcha is specifically for brewing. See below for more details. I also recommend buying matcha from Japan, as it’s more consistent in quality and flavour. This is the matcha brand I use to make lattes.
- Hot water – If you have a kitchen thermometer, use it here! You’ll want the water to be around 175ºF for a perfect matcha brew.
- Maple syrup or agave – Or whichever sweetener you prefer.
- Vegan milk – Use any variety you like; plain plant milk lets the earthy matcha flavour take centre stage, while a vanilla milk adds a subtle hint of vanilla flavour that’s quite nice too!

Ceremonial-Grade Matcha vs. Other Kinds
You want to use ceremonial-grade matcha to make this hot matcha latte. Ceremonial-grade matcha is the highest quality and best variety for drinking. It’s made from the youngest, first-picked tea leaves and buds. Culinary-grade matcha is meant for cooking and baking since it has a stronger flavour— I use it in my matcha chia pudding recipe.
How to Make a Matcha Latte At Home
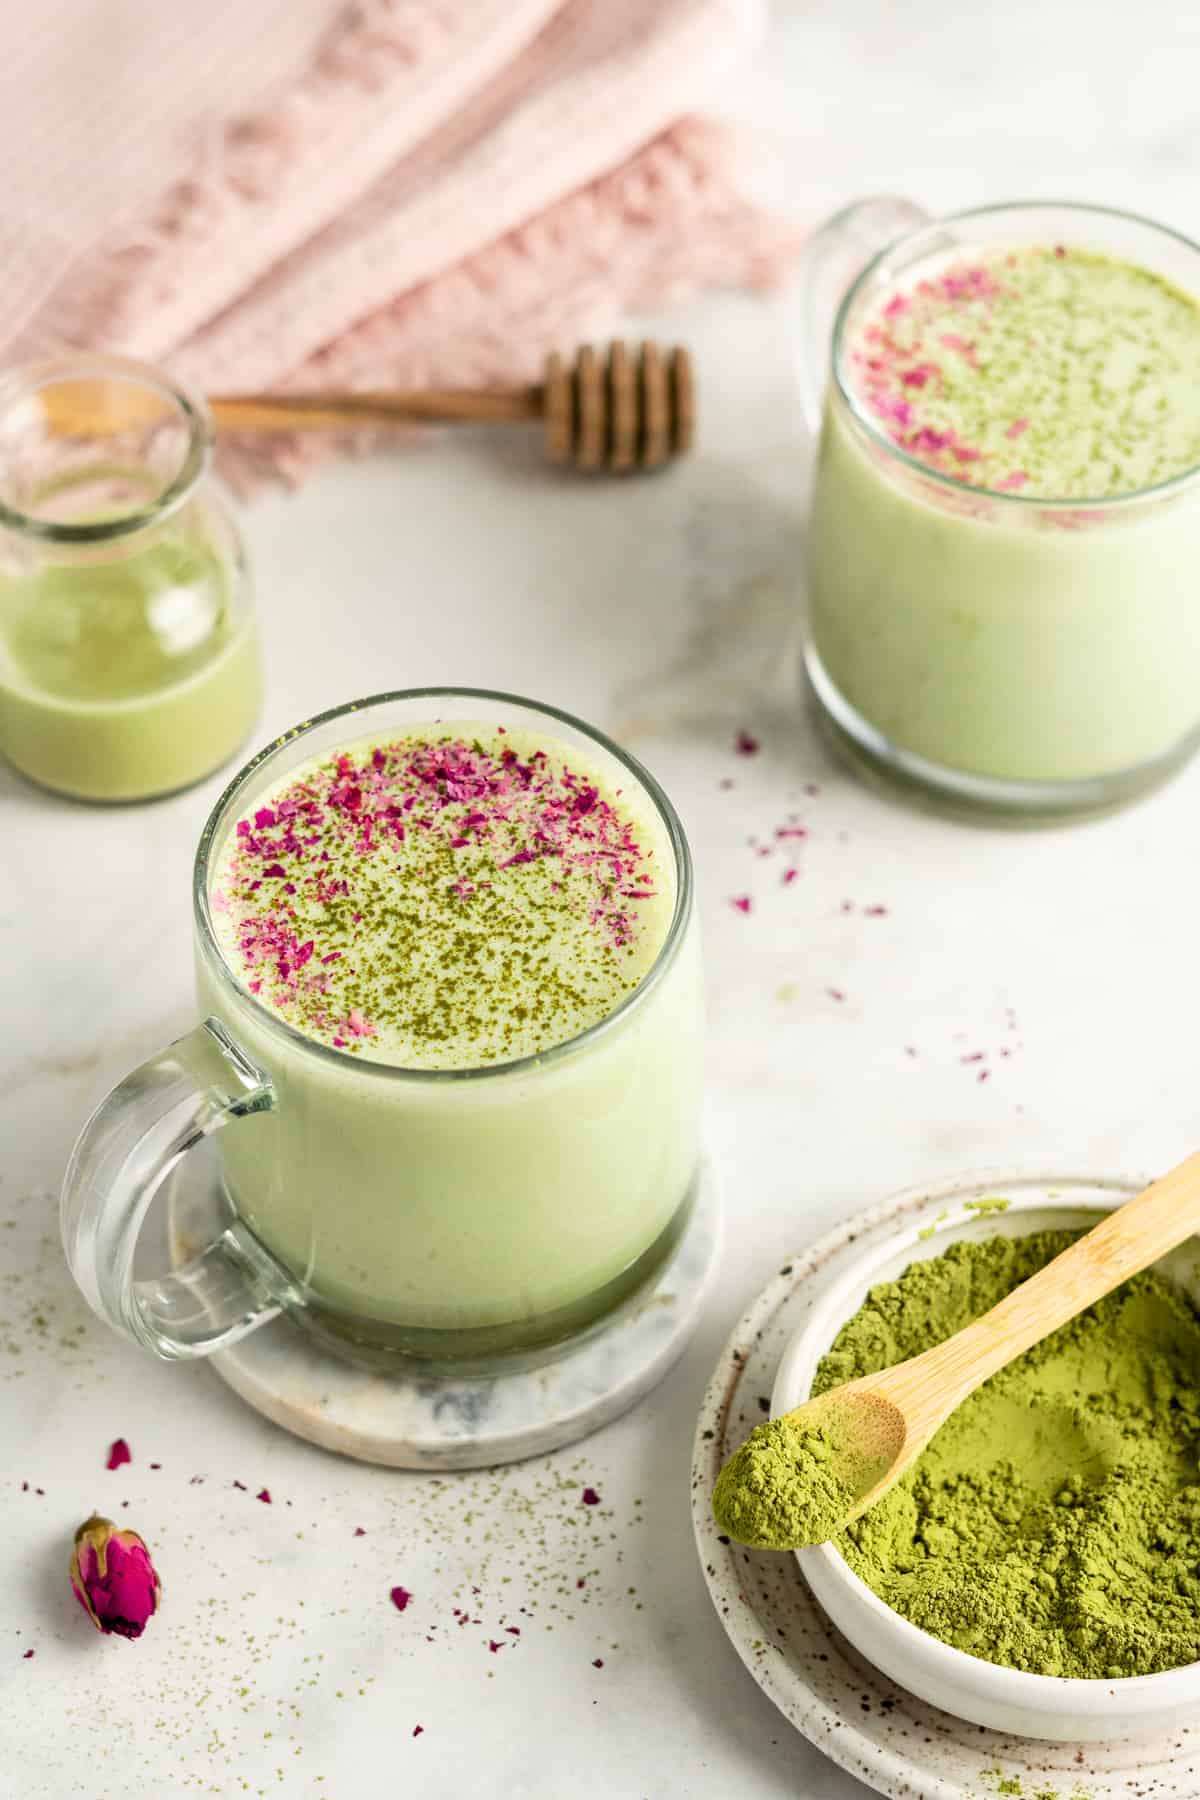
A small bowl or wide mug will work for making matcha lattes, but if you enjoy this recipe and find yourself making it often, you might want to buy a matcha bowl. Once you have your ingredients and equipment, making a hot matcha latte is easy:
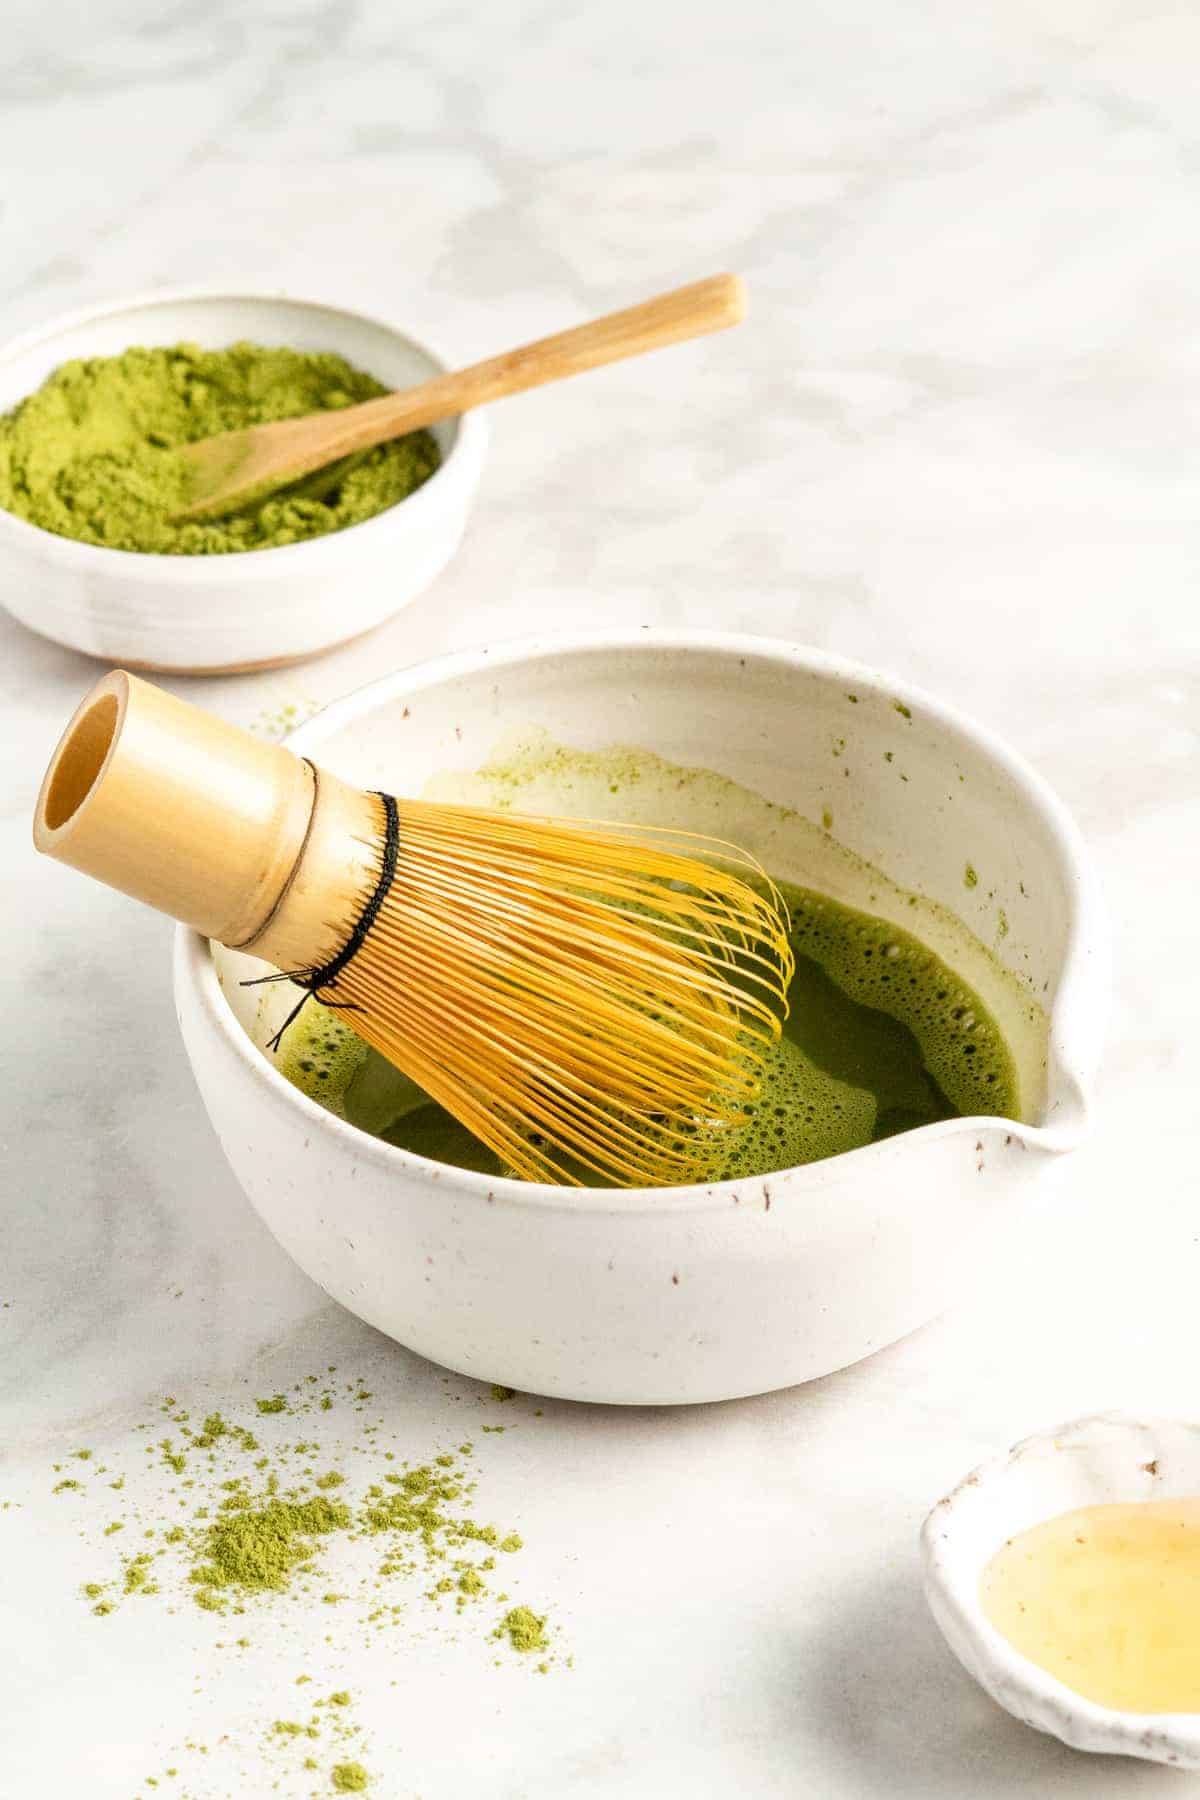
Combine the matcha with hot water.
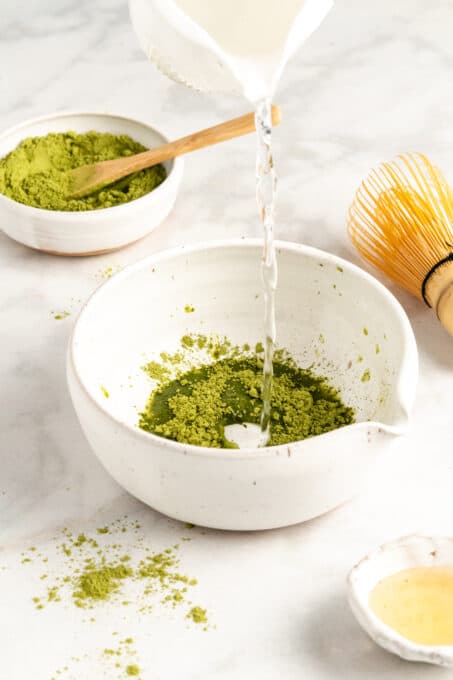
- Prepare the matcha base. In a large mug or matcha bowl, combine the matcha powder and hot water. Whisk the water and matcha together by moving back and forth in an M motion for at least 15 seconds, or until there are no lumps and the mixture is frothy.
- Add sweetener. At this point, whisk in the maple syrup, agave, or your choice of sweetener.
Add the matcha to your mug.
- Warm the milk. Heat your milk in a frother, in a bowl in the microwave, or on the stovetop. Once warmed, froth the milk with a handheld frother or in a mason jar by shaking it vigorously.
- Combine and enjoy. Pour the milk into your matcha mug, stirring to combine.
Do I Really Need the Matcha Whisk?
While you can use a small kitchen whisk to make matcha, I highly recommend investing in a traditional Japanese matcha whisk, called a chasen, if you plan to make it often. Look for a whisk that is handmade with pesticide-free bamboo.
- What’s the difference? Unlike a standard metal whisk, matcha whisks are designed specifically for making matcha powder foam when whisked into hot water.
- Which one should I buy? This is the bamboo whisk, chashaku, and sifter set that I use; a chashaku is a small scoop that holds the perfect amount of matcha powder for a single serving.
Tips for a Perfect Matcha Latte
- Don’t overheat the water or milk. This is important! Very hot water will make the matcha bitter.
- Use properly-stored matcha. Many matcha experts recommend storing an opened container of matcha in the refrigerator to keep it from oxidizing. Whether or not you do that, it’s important to keep matcha away from heat, moisture, light, and air.
- Drink immediately. Matcha powder doesn’t dissolve in water; instead, it’s suspended in water, which means that as you let your matcha latte sit, the matcha powder will begin to settle at the bottom.
Try These Variations
Along with my iced matcha latte linked earlier in the post, these are some other matcha variations that you can try:
- Pumpkin spice. Make a pumpkin spice matcha latte and add one teaspoon of pumpkin pie spice to this recipe, or one tablespoon of pumpkin spice syrup as the sweetener.
- Whipped. Try this Dalgona-style whipped matcha latte . It’s also vegan!
How to Store
- Refrigerate (if you have to). As mentioned above, matcha lattes are meant for enjoying right away, not refrigerating for later. If you can’t finish your latte in one sitting, you can pop it in the fridge for a day.
- Enjoy chilled, or reheat. The leftover latte is best to drink it chilled, but if you want to reheat it, do so in a saucepan set over low heat to prevent it from getting too hot, which causes matcha to become bitter. Whisk or froth the latte again before drinking.
More Cozy Drink Recipes
- Golden Milk
- Pumpkin Spice Latte
- Dirty Chai Latte
- Vegan Hot Chocolate
Ingredients
- ½ teaspoon to 2 teaspoons ceremonial grade matcha
- 1 tablespoon hot water , heated to 175°F
- 1 teaspoon maple syrup or agave up to a tablespoon , up to your sweetness preference
- 1 cup vegan milk , hot or warmed
Instructions
- In your matcha mug, mix the matcha and the hot water together with a bamboo whisk to remove any clumps, moving back and forth in an M motion for at least 15 seconds until combined and frothy. Stir in the maple syrup or agave and combine once again.
- Heat your milk (in a frother, in a bowl in the microwave or any other method) and froth your milk with a handheld frother or in a mason jar by shaking it vigorously.
- Pour your milk into your matcha mug, swirling or stirring slightly to combine everything. You could also choose to froth the milk as you’re pouring it in. Enjoy!
- Alternatively, blend everything together in a blender
