Happy Monday Everyone!
I’m so excited to start my how-to series! Today we are going to be doing the perfect whipped cream frosting – definitely one of my favourites thanks to it’s melt in your mouth texture.
I made a video for you (yaaay) done by Mr. Jessiker Bakes showing you how I make it! Seriously though, if you mute the video for the first twenty seconds I look HILARIOUS gesticulating and shaking my head! Now, some things I didn’t say in the video:
PREPARATION
Your whipped cream should be cold; not freezer cold but fridge cold, refrigerated for at least 6 hours before use (it’s supposed to be kept in the fridge anyway so you should be fine).
If your bowl and whipping attachment are cold too that’s a HUGE plus. To do this you can fast-freeze them in the freezer for about 10-15 minutes immediately before use.
Make sure your bowl is CLEAN and DRY. Like, any amount of leftover soap, anything can mess up the texture of the cream so make sure it’s clean and dry.
Make sure the measuring cups you’re going to use are also clean and dry.
DURING
- Seriously, it’s super easy for this to turn to butter. It’s happened to me already, and there’s no coming back most times. HOWEVER, if you happened to be day dreaming while it’s on it’s last whipping increment, and you have an over thick curdling mixture in front of you, you can fix it. Add some more liquid whipping cream frosting and using your spatula, fold it in slowly. This will lighten up the thick mixture. If you used 2 cups originally, you will need like 1/4 cup for example, so a 2:0.25 ratio. Mix slowly and you will be able to fix this problem.
AFTER
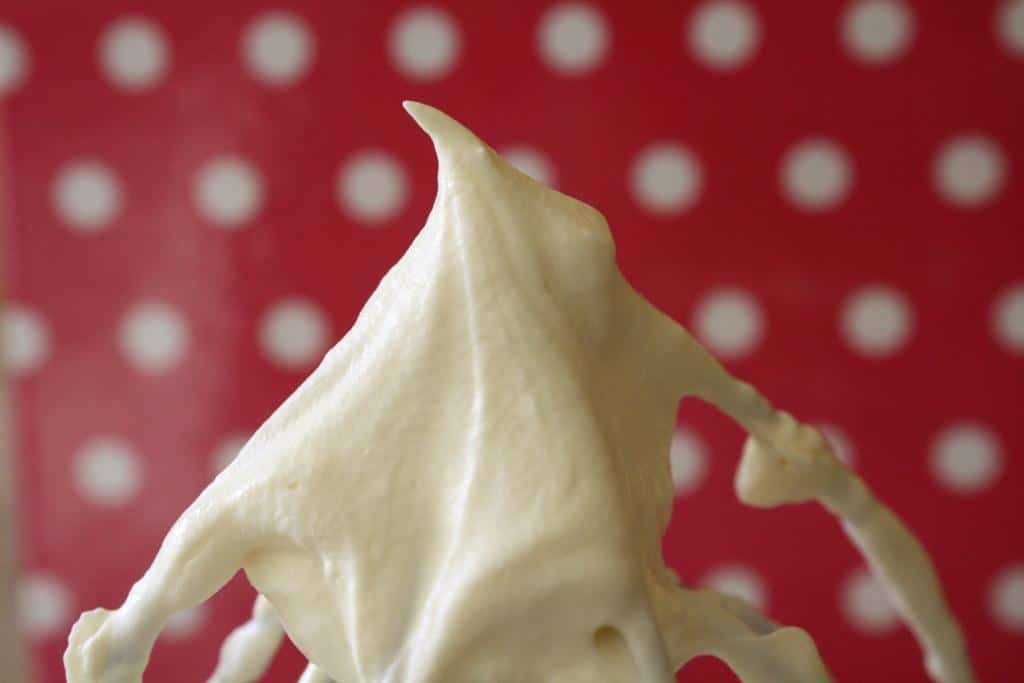
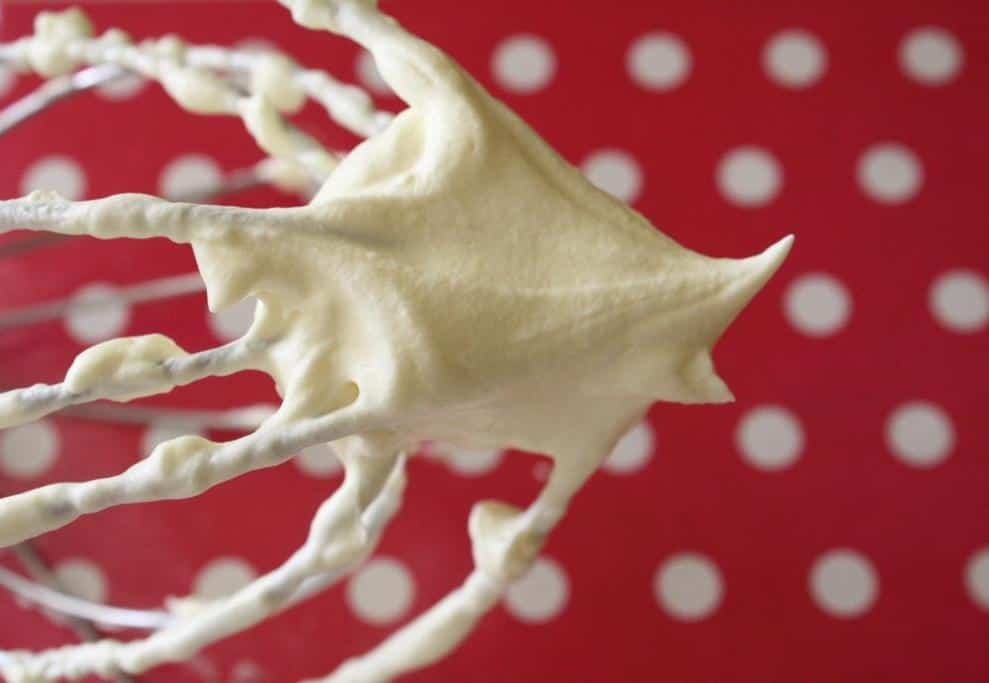
- The thickness of the frosting you will need depends on what you’re using it for. In the video, I’m at like level 1 of thickness. So
Level 1 of Thickness (consistency of what you think a cloud would be! Or marshmallow creme – Cheesecake or other dessert toppings, or fillings
Level 2 of Thickness (About 10 more seconds of mixing) (consistency of a thicker marshmallow creme) – Middle of cakes or other layers, or to frost cupcakes
Level 3 of Thickness (THICKEST and don’t push past this! About 5-10 more seconds) (consistency of a thick body butter lotion) – To frost for example the top of an icebox cake
After tasting the three teaspoons, I added another one and then it was perfect. Again, this is to taste so that’s why I added it one at a time.
Always keep the frosting in the fridge or cold.
Ingredients
- 2 cups whipping cream
- 3 teaspoons sugar
Instructions
- Place heavy cream mixture and 1 teaspoon of sugar in the bowl of an electric mixer fitted with the whisk attachment; beat until soft peaks form then add the other two teaspoons, then beat until thick and spreadable.
- Use immediately or keep in fridge until ready.
How-To: Perfect Whipped Cream Frosting
Ingredients
- 2 cups whipping cream
- 3 teaspoons sugar
Instructions
- Place heavy cream mixture and 1 teaspoon of sugar in the bowl of an electric mixer fitted with the whisk attachment; beat until soft peaks form then add the other two teaspoons, then beat until thick and spreadable.
- Use immediately or keep in fridge until ready.
Nutrition
How-To: Perfect Whipped Cream Frosting https://jessicainthekitchen.com/how-to-perfect-whipped-cream-frosting/ March 11, 2013
I have some great news to share with you!
After a Jessiker Bakes’ (the business not the blog) meeting, you’re going to be seeing some great changes!
A great sale is coming up for Jessiker Bakes
The giveaway for the 50 GREAT spices is still on!
Forgive all the exclamation marks. I’m watching the Next Great Baker and a cake just collapsed. Not only did I scream outloud, but I’m still having a heart palpitation.
Yikes,
NOW, frosting! The truth is, I basically covered frosting yesterday. I just wanted to re-cap and all a few extra details.
Ingredients
- 1 cup butter (room temperature) , 2 sticks
- 1 teaspoon pure vanilla extract
- 3 cups powdered sugar
- 2-3 tablespoons milk , half and half or cream
Instructions
- Using a mixer, cream softened butter and vanilla until smooth. Jessica’s note: To soften butter, leave on the counter whole for about an hour before use, or 30 minutes if cubed. Always cut your butter in small cubes before putting into mixer, so that the butter will not only blend better, but won’t fly everywhere from the mixer trying to cut it!
- Add sugar gradually, allowing butter and sugar to cream together before adding more. Jessica’s note: Add the three cups in by 1/2 cup increments for a small bowl and 1 cup increments for a bigger one. If you have a splash guard, use it now! Sugar will be flying everywhere. You want to mix your frosting until it is WHITE.Yes, it will look yellow for a while, but after being beat for about 5 minutes it will turn white.This will work perfectly for adding colours so it won’t have a yellow tinge.
- If you want your frosting a little creamier, add a teaspoon of milk at a time and beat on high until you get the right texture. Jessica’s note: a little milk goes a long way. You don’t want to end up watering down your frosting so remember, add a little at a time.
