This Homemade Vegan Yogurt (Cultured and Creamy) will absolutely change your life! It tastes identical to store-bought dairy yogurt, tastes absolutely delicious, and can be used in so many ways from breakfasts to dips to dinners! The process to make it is pretty foolproof, and doesn’t require any special tools or ingredients!
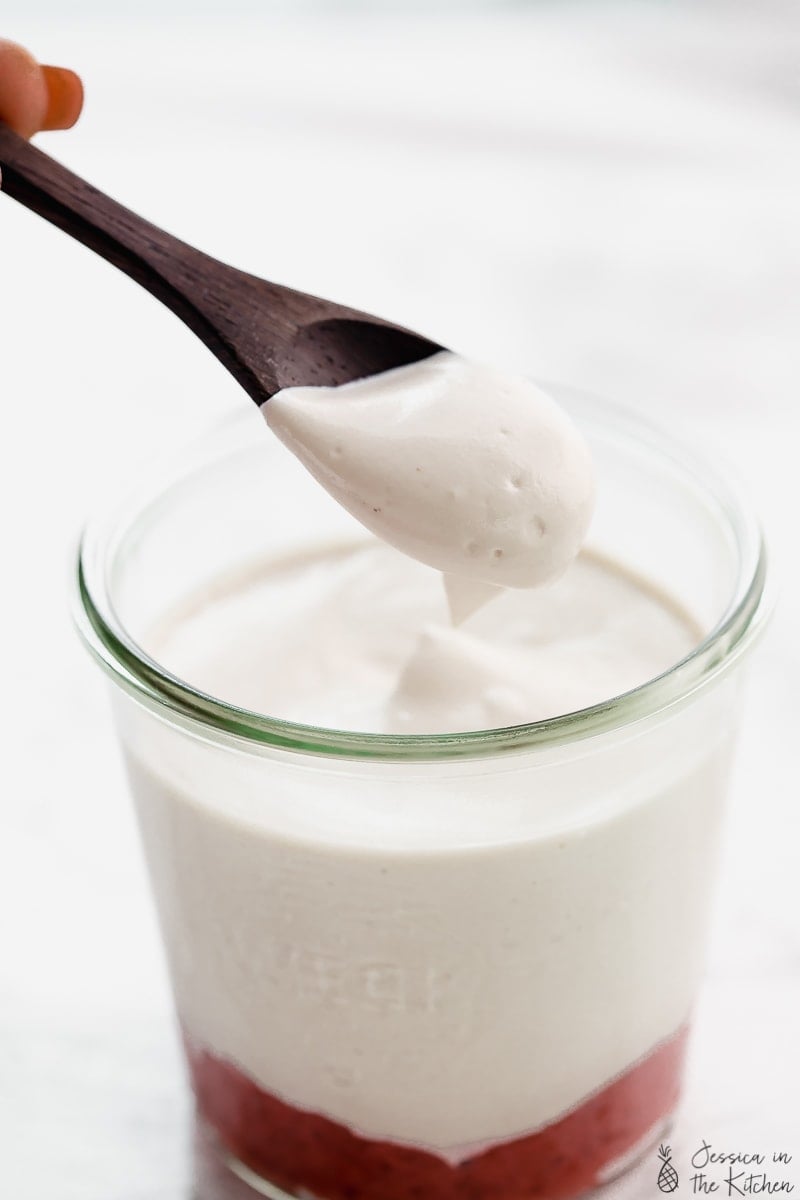
Wow. What a time to be alive where I can make homemade yogurt in my home with no special tools and ingredients, despite what I’ve always heard. Making yogurt from scratch has been a dream of mine. Not, a day dream. I wasn’t writing poems or doodling “Mrs. Yogurt” in my notebooks. It’s just something I’ve always wanted to try. When I took a taste of it though? I might as well have been. Let’s just say this – there’s nothing like that first spoonful of your fresh, creamy, homemade vegan yogurt.
Previously, every time I looked it up, I read that I would need this tool, and that tool, and don’t forget a yogurt maker! A yogurt maker? Who wants to buy a whole yogurt maker? I already have like eight other kitchen gadgets I haven’t used in a year. Then, when I turned vegan, the only way to get vegan yogurt at first was through a starter kit and I wasn’t into it. Years later and life simplified, here we are. Making the most mind blowing and creamy vegan yogurt with water, cashews, probiotics, apple cider vinegar and a blender .
So much to say yet so little time before I bore you. Long story short – make this homemade vegan yogurt. It doesn’t just taste like yogurt – it IS yogurt. It’s a near foolproof, cultured, fermented, good gut bacteria loaded yogurt that’ll satisfy both your tastebuds and your stomach. In fact, I had a mild case of food poisoning from a bad batch of beans that nothing would fix. A few tablespoons of this? I felt so much better.
How to Make Homemade Vegan Yogurt
The process is so straight forward, you might think you’re doing something wrong at first. You’re not. Unless, of course you are, which if you follow my directions, you aren’t :). Blend all the ingredients together, then pour it into a glass bowl or tall jar. Emphasis on glass, I’ll get more into that under “tips”. Now add in your probiotics (open the capsules), then using a wooden spoon or a silicone spatula, stir it in for a good 2 minutes (go pull up a Youtube video, that’ll help).
Cover the bowl or jar with a cheesecloth, or in my case since I ran out, paper towel, and a rubber band. Now, it’s fermenting time! Let it ferment in a nice warm place. I live in the tropics, so it’s always warm! So my countertop did just fine. If you don’t, leave it in your oven with the stove OFF and the oven light on.
Allow the bacteria to culture and everything to ferment for 24-48 hours. I found my sweet spot was around 40 hours, so I just let it sit for the full 48 hours. Feel free by the way to check on it during this process. Everything should look fine, and after about 24 hours, you should start to slightly smell a light yogurt-y sour (not spoiled) smell. Then it’s like a full blown smell by the time 48 hours comes around. Stir, taste, and use like you want
Tips (including making greek yogurt)
Okay, so there are a few ways you can do this wrong. I’ll try and point them all out here, and will also include them in the instructions down below, too.
- Make sure you really blend all your ingredients together. You don’t want any chunks of cashew, in fact, you don’t even want it to look like there was cashew here before, friends. It certainly doesn’t taste like it, so if you blend right, you’ll be on your way to just general amazing vegan yogurt. I blended mine for a good 3 minutes in a high powered blender, so just ensure yours is so blended it already resembles a creamy, no grains, no strains, product.
- Make sure you’re using fresh ingredients and that you soak your cashews. Don’t use anything that’s going bad because it’ll come out in the fermenting process.
- Use a great probiotic. I use JustThrive and have been for over two years now and let me tell you – #goals. I can’t do without this probiotic. While this isn’t sponsored, my good friends over at JustThrive let me know that you can get 15% off if you use the code JESSICA15 which um, YES that’s an incredible deal so definitely go use it! I’m pretty sure mine turned out so great because I was using a top notch probiotic that truly works.
- Do not, I repeat, do not, use metal. Metal can react negatively to the good bacteria and can just kill your entire process. I’ll admit I’ve never tried it with metal and safe to say, just avoid it. That’s why I prefer to add the probiotic powder into the mixture after it leaves the blender, and to use wood and silicone to stir it in a glass bowl. I would also suggest not using a wooden bowl since it’ll seep in and make the bowl smell like yogurt for, well, ever.
- Don’t disrupt your yogurt in the making too often. I would try not to touch it for at least the first 24 hours, and thereafter maybe check on it only like once or twice.
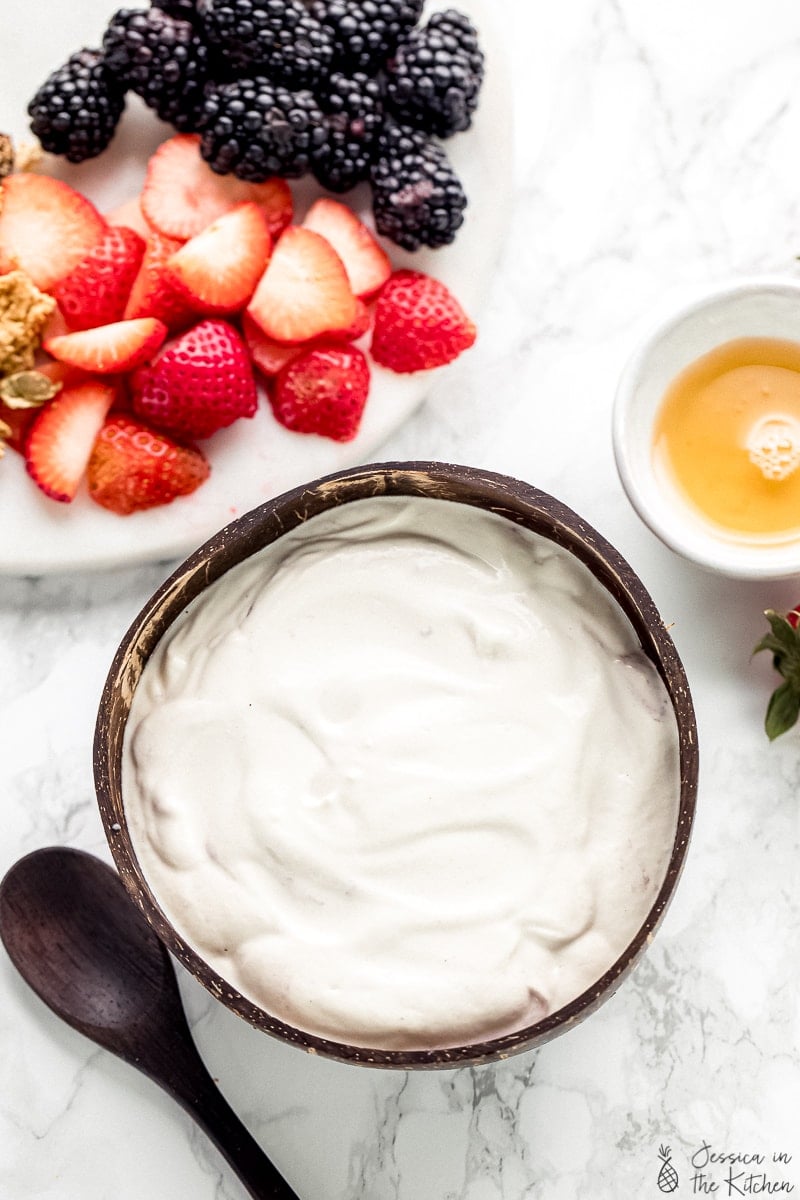
- The consistency of this yogurt is nice and thick, but not greek yogurt thick. I did make some greek yogurt from it (my goodness that was delicious) and it’s very easy to make. Just place some or all of the yogurt in a cheesecloth, tie it, and let it hang over a bowl for 2 hours in the fridge. That will get rid of all the excess liquid, making it thicker. Don’t go overnight though, or you’ll end up making cheese like I did. Which, is a whole other post because after I stirred in some nutritional yeast , sun dried tomatoes and some herbs, I was in vegan cream cheese heaven.
Ways to Use Homemade Yogurt
There are so many ways to use this Homemade Vegan Yogurt. Here are a few of my favourite ways:
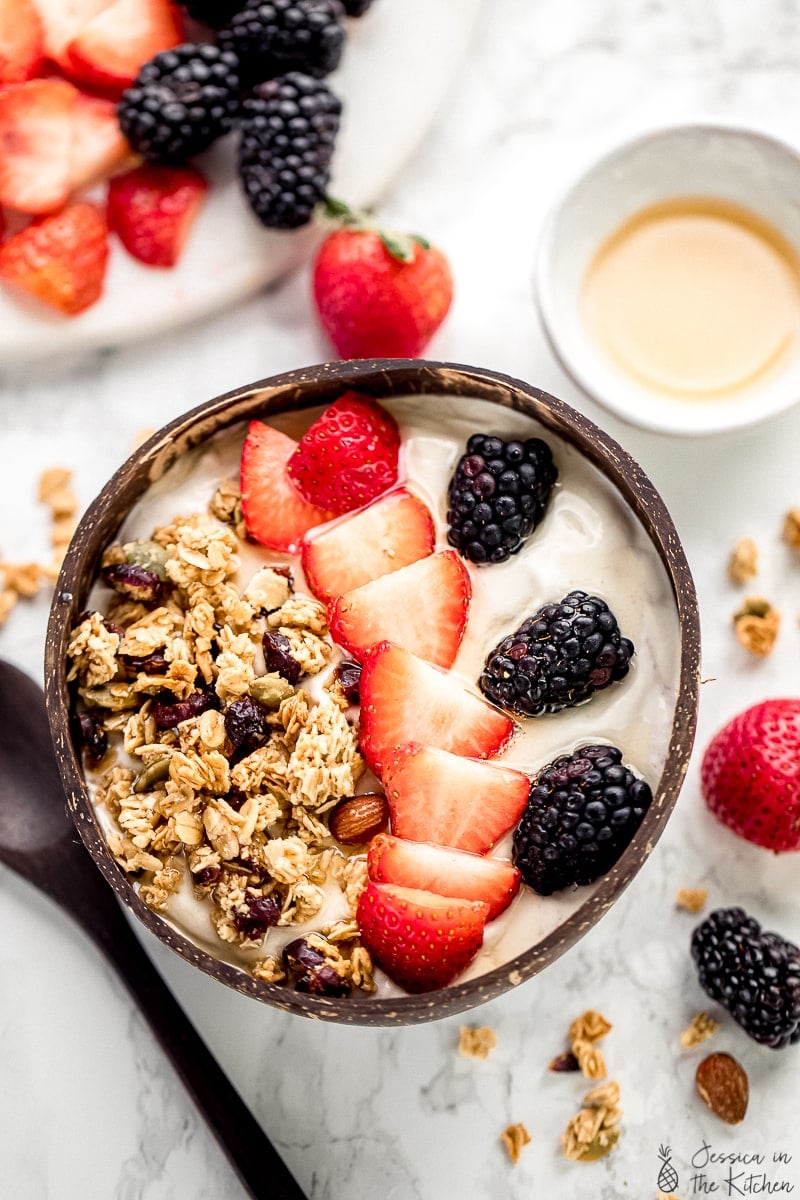
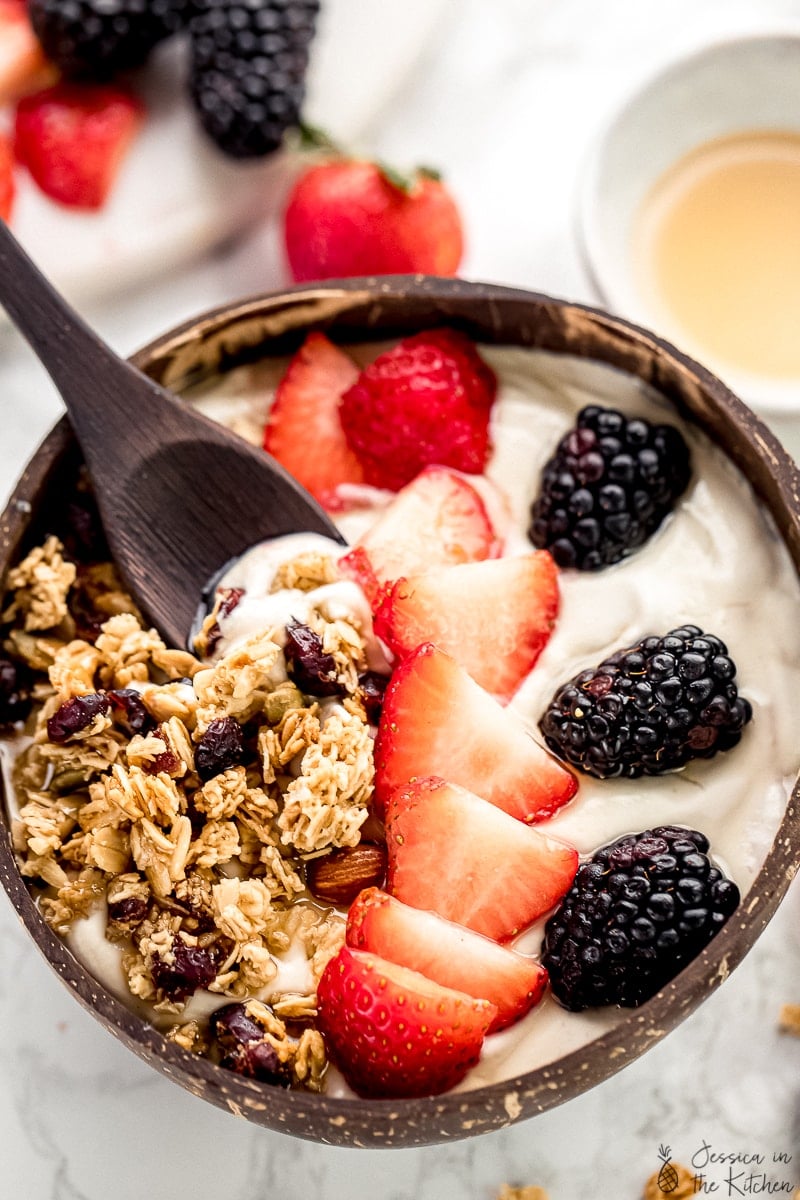
- In a bowl, with maple syrup stirred in, some vanilla extract, and fruits and granola. So good!
- As an oil substitute in our favourite vegan mug brownie :). I tested this one several times, just for you.
- In your favourite Indian sauce recipes, such as swirled into my Chickpea Tikka Masala , my Indian butter tofu and my Indian Butter Cauliflower .
- For a vegan Tzatziki
- To make labneh
- Into any assortment of sauces and dips
- To your favourite veggie burgers
- Use anywhere instead of sour cream
Okay, my ode to yogurt is over! Enjoy the recipe friends!
Ingredients
- 2 cups cashews , soaked overnight
- 2 teaspoons apple cider vinegar
- pinch sea salt
- 1 ½ cups clean filtered water
- 3 probiotic capsules , roughly 1.26 grams of probiotic powder, or ½ teaspoon (I used JustThrive capsules*)
Instructions
- First, rinse off your soaked cashews completely. In a high powered blender, add the cashews, apple cider vinegar, filtered water, and the sea salt. Blend until completely smooth and clean. I blended for about 3 minutes on high.
- Pour the contents into a very clean and dry glass bowl or tall jar. Open your probiotic capsules and pour the powered contents inside the cashew yogurt mixture. Using a wooden or silicone spoon, stir the probiotic powder into the mixture and stir/mix into it for about 2 minutes, until fully incorporated.
- Cover the bowl/jar with some cheesecloth or even a clean dry paper towel and secure with a rubber band. Place in a warm, dry place. If you live in a tropical country, you can leave it on your counter top. If you don’t, place it in your oven with the oven OFF and the oven light on (do not place right after cooking something, this will be too hot). Leave the yogurt undisturbed as much as possible for 24-48 hours. You should begin to smell a slight yogurt-y smell after about 24 hours. I recommend leaving it for the full 48 hours but see notes below if you’re using a different probiotic.
- The yogurt should be much thicker now. Stir to combine fully. If you hear a carbonated sound that is normal, it’s a part of the fermenting process.
- Cover the jar/bowl or transfer to a new clean jar/bowl and cover and place in your fridge. It should also thicken up in the fridge and you can start using it now! It’ll last in your week for at least two weeks.
- If you want your yogurt any thicker, strain/drain it in cheesecloth or paper towel or a fine mesh colander for about 30 minutes to strain off any extra liquid. If you want greek yogurt, see the notes below.
- Enjoy with any combination of you want including yogurt, maple syrup, vanilla extract and fruits!
Notes
Tips (including making greek yogurt)
- Make sure you really blend all your ingredients together. You don’t want any chunks of cashew, in fact, you don’t even want it to look like there was cashew here before, friends. It certainly doesn’t taste like it, so if you blend right, you’ll be on your way to just general amazing vegan yogurt. I blended mine for a good 3 minutes in a high powered blender , so just ensure yours is so blended it already resembles a creamy, no grains, no strains, product.
- Make sure you’re using fresh ingredients and that you soak your cashews. Don’t use anything that’s going bad because it’ll come out in the fermenting process.
- Use a great probiotic. I use JustThrive and have been for over two years now and let me tell you – #goals. I can’t do without this probiotic. While this isn’t sponsored, my good friends over at JustThrive let me know that you can get 15% off if you use the code JESSICA15 which um, YES that’s an incredible deal so definitely go use it! I’m pretty sure mine turned out so great because I was using a top notch probiotic that truly works.
- Do not, I repeat, do not, use metal. Metal can react negatively to the good bacteria and can just kill your entire process. I’ll admit I’ve never tried it with metal and safe to say, just avoid it. That’s why I prefer to add the probiotic powder into the mixture after it leaves the blender , and to use wood and silicone to stir it in a glass bowl. I would also suggest not using a wooden bowl since it’ll seep in and make the bowl smell like yogurt for, well, ever.
- Don’t disrupt your yogurt in the making too often. I would try not to touch it for at least the first 24 hours, and thereafter maybe check on it only like once or twice.
- The consistency of this yogurt is nice and thick, but not greek yogurt thick. I did make some greek yogurt from it (my goodness that was delicious) and it’s very easy to make. Just place some or all of the yogurt in a cheesecloth, tie it, and let it hang over a bowl for 2 hours in the fridge. That will get rid of all the excess liquid, making it thicker. Don’t go overnight though, or you’ll end up making cheese like I did. Which, is a whole other post because after I stirred in some nutritional yeast , sun dried tomatoes and some herbs, I was in vegan cream cheese heaven.
This Homemade Vegan Yogurt (Cultured and Creamy) will absolutely change your life! It tastes identical to store-bought dairy yogurt, tastes absolutely delicious, and can be used in so many ways from breakfasts to dips to dinners! The process to make it is pretty foolproof, and doesn’t require any special tools or ingredients!
Wow. What a time to be alive where I can make homemade yogurt in my home with no special tools and ingredients, despite what I’ve always heard. Making yogurt from scratch has been a dream of mine. Not, a day dream. I wasn’t writing poems or doodling “Mrs. Yogurt” in my notebooks. It’s just something I’ve always wanted to try. When I took a taste of it though? I might as well have been. Let’s just say this – there’s nothing like that first spoonful of your fresh, creamy, homemade vegan yogurt.
Previously, every time I looked it up, I read that I would need this tool, and that tool, and don’t forget a yogurt maker! A yogurt maker? Who wants to buy a whole yogurt maker? I already have like eight other kitchen gadgets I haven’t used in a year. Then, when I turned vegan, the only way to get vegan yogurt at first was through a starter kit and I wasn’t into it. Years later and life simplified, here we are. Making the most mind blowing and creamy vegan yogurt with water, cashews, probiotics, apple cider vinegar and a blender .
So much to say yet so little time before I bore you. Long story short – make this homemade vegan yogurt. It doesn’t just taste like yogurt – it IS yogurt. It’s a near foolproof, cultured, fermented, good gut bacteria loaded yogurt that’ll satisfy both your tastebuds and your stomach. In fact, I had a mild case of food poisoning from a bad batch of beans that nothing would fix. A few tablespoons of this? I felt so much better.
How to Make Homemade Vegan Yogurt
The process is so straight forward, you might think you’re doing something wrong at first. You’re not. Unless, of course you are, which if you follow my directions, you aren’t :). Blend all the ingredients together, then pour it into a glass bowl or tall jar. Emphasis on glass, I’ll get more into that under “tips”. Now add in your probiotics (open the capsules), then using a wooden spoon or a silicone spatula, stir it in for a good 2 minutes (go pull up a Youtube video, that’ll help).
Cover the bowl or jar with a cheesecloth, or in my case since I ran out, paper towel, and a rubber band. Now, it’s fermenting time! Let it ferment in a nice warm place. I live in the tropics, so it’s always warm! So my countertop did just fine. If you don’t, leave it in your oven with the stove OFF and the oven light on.
Allow the bacteria to culture and everything to ferment for 24-48 hours. I found my sweet spot was around 40 hours, so I just let it sit for the full 48 hours. Feel free by the way to check on it during this process. Everything should look fine, and after about 24 hours, you should start to slightly smell a light yogurt-y sour (not spoiled) smell. Then it’s like a full blown smell by the time 48 hours comes around. Stir, taste, and use like you want
Tips (including making greek yogurt)
Okay, so there are a few ways you can do this wrong. I’ll try and point them all out here, and will also include them in the instructions down below, too.
- Make sure you really blend all your ingredients together. You don’t want any chunks of cashew, in fact, you don’t even want it to look like there was cashew here before, friends. It certainly doesn’t taste like it, so if you blend right, you’ll be on your way to just general amazing vegan yogurt. I blended mine for a good 3 minutes in a high powered blender, so just ensure yours is so blended it already resembles a creamy, no grains, no strains, product.
- Make sure you’re using fresh ingredients and that you soak your cashews. Don’t use anything that’s going bad because it’ll come out in the fermenting process.
- Use a great probiotic. I use JustThrive and have been for over two years now and let me tell you – #goals. I can’t do without this probiotic. While this isn’t sponsored, my good friends over at JustThrive let me know that you can get 15% off if you use the code JESSICA15 which um, YES that’s an incredible deal so definitely go use it! I’m pretty sure mine turned out so great because I was using a top notch probiotic that truly works.
- Do not, I repeat, do not, use metal. Metal can react negatively to the good bacteria and can just kill your entire process. I’ll admit I’ve never tried it with metal and safe to say, just avoid it. That’s why I prefer to add the probiotic powder into the mixture after it leaves the blender, and to use wood and silicone to stir it in a glass bowl. I would also suggest not using a wooden bowl since it’ll seep in and make the bowl smell like yogurt for, well, ever.
- Don’t disrupt your yogurt in the making too often. I would try not to touch it for at least the first 24 hours, and thereafter maybe check on it only like once or twice.
- The consistency of this yogurt is nice and thick, but not greek yogurt thick. I did make some greek yogurt from it (my goodness that was delicious) and it’s very easy to make. Just place some or all of the yogurt in a cheesecloth, tie it, and let it hang over a bowl for 2 hours in the fridge. That will get rid of all the excess liquid, making it thicker. Don’t go overnight though, or you’ll end up making cheese like I did. Which, is a whole other post because after I stirred in some nutritional yeast , sun dried tomatoes and some herbs, I was in vegan cream cheese heaven.
Ways to Use Homemade Yogurt
There are so many ways to use this Homemade Vegan Yogurt. Here are a few of my favourite ways:
- In a bowl, with maple syrup stirred in, some vanilla extract, and fruits and granola. So good!
- As an oil substitute in our favourite vegan mug brownie :). I tested this one several times, just for you.
- In your favourite Indian sauce recipes, such as swirled into my Chickpea Tikka Masala , my Indian butter tofu and my Indian Butter Cauliflower .
- For a vegan Tzatziki
- To make labneh
- Into any assortment of sauces and dips
- To your favourite veggie burgers
- Use anywhere instead of sour cream
Okay, my ode to yogurt is over! Enjoy the recipe friends!
Ingredients
- 2 cups cashews , soaked overnight
- 2 teaspoons apple cider vinegar
- pinch sea salt
- 1 ½ cups clean filtered water
- 3 probiotic capsules , roughly 1.26 grams of probiotic powder, or ½ teaspoon (I used JustThrive capsules*)
Instructions
- First, rinse off your soaked cashews completely. In a high powered blender, add the cashews, apple cider vinegar, filtered water, and the sea salt. Blend until completely smooth and clean. I blended for about 3 minutes on high.
- Pour the contents into a very clean and dry glass bowl or tall jar. Open your probiotic capsules and pour the powered contents inside the cashew yogurt mixture. Using a wooden or silicone spoon, stir the probiotic powder into the mixture and stir/mix into it for about 2 minutes, until fully incorporated.
- Cover the bowl/jar with some cheesecloth or even a clean dry paper towel and secure with a rubber band. Place in a warm, dry place. If you live in a tropical country, you can leave it on your counter top. If you don’t, place it in your oven with the oven OFF and the oven light on (do not place right after cooking something, this will be too hot). Leave the yogurt undisturbed as much as possible for 24-48 hours. You should begin to smell a slight yogurt-y smell after about 24 hours. I recommend leaving it for the full 48 hours but see notes below if you’re using a different probiotic.
- The yogurt should be much thicker now. Stir to combine fully. If you hear a carbonated sound that is normal, it’s a part of the fermenting process.
- Cover the jar/bowl or transfer to a new clean jar/bowl and cover and place in your fridge. It should also thicken up in the fridge and you can start using it now! It’ll last in your week for at least two weeks.
- If you want your yogurt any thicker, strain/drain it in cheesecloth or paper towel or a fine mesh colander for about 30 minutes to strain off any extra liquid. If you want greek yogurt, see the notes below.
- Enjoy with any combination of you want including yogurt, maple syrup, vanilla extract and fruits!
Notes
Tips (including making greek yogurt)
- Make sure you really blend all your ingredients together. You don’t want any chunks of cashew, in fact, you don’t even want it to look like there was cashew here before, friends. It certainly doesn’t taste like it, so if you blend right, you’ll be on your way to just general amazing vegan yogurt. I blended mine for a good 3 minutes in a high powered blender , so just ensure yours is so blended it already resembles a creamy, no grains, no strains, product.
- Make sure you’re using fresh ingredients and that you soak your cashews. Don’t use anything that’s going bad because it’ll come out in the fermenting process.
- Use a great probiotic. I use JustThrive and have been for over two years now and let me tell you – #goals. I can’t do without this probiotic. While this isn’t sponsored, my good friends over at JustThrive let me know that you can get 15% off if you use the code JESSICA15 which um, YES that’s an incredible deal so definitely go use it! I’m pretty sure mine turned out so great because I was using a top notch probiotic that truly works.
- Do not, I repeat, do not, use metal. Metal can react negatively to the good bacteria and can just kill your entire process. I’ll admit I’ve never tried it with metal and safe to say, just avoid it. That’s why I prefer to add the probiotic powder into the mixture after it leaves the blender , and to use wood and silicone to stir it in a glass bowl. I would also suggest not using a wooden bowl since it’ll seep in and make the bowl smell like yogurt for, well, ever.
- Don’t disrupt your yogurt in the making too often. I would try not to touch it for at least the first 24 hours, and thereafter maybe check on it only like once or twice.
- The consistency of this yogurt is nice and thick, but not greek yogurt thick. I did make some greek yogurt from it (my goodness that was delicious) and it’s very easy to make. Just place some or all of the yogurt in a cheesecloth, tie it, and let it hang over a bowl for 2 hours in the fridge. That will get rid of all the excess liquid, making it thicker. Don’t go overnight though, or you’ll end up making cheese like I did. Which, is a whole other post because after I stirred in some nutritional yeast , sun dried tomatoes and some herbs, I was in vegan cream cheese heaven.

Homemade Vegan Yogurt (Cultured and Creamy)
Ingredients
- 2 cups cashews soaked overnight
- 2 teaspoons apple cider vinegar
- pinch sea salt
- 1 ½ cups clean filtered water
- 3 probiotic capsules roughly 1.26 grams of probiotic powder, or ½ teaspoon (I used JustThrive capsules*)
Instructions
- First, rinse off your soaked cashews completely. In a high powered blender, add the cashews, apple cider vinegar, filtered water, and the sea salt. Blend until completely smooth and clean. I blended for about 3 minutes on high.
- Pour the contents into a very clean and dry glass bowl or tall jar. Open your probiotic capsules and pour the powered contents inside the cashew yogurt mixture. Using a wooden or silicone spoon, stir the probiotic powder into the mixture and stir/mix into it for about 2 minutes, until fully incorporated.
- Cover the bowl/jar with some cheesecloth or even a clean dry paper towel and secure with a rubber band. Place in a warm, dry place. If you live in a tropical country, you can leave it on your counter top. If you don’t, place it in your oven with the oven OFF and the oven light on (do not place right after cooking something, this will be too hot). Leave the yogurt undisturbed as much as possible for 24-48 hours. You should begin to smell a slight yogurt-y smell after about 24 hours. I recommend leaving it for the full 48 hours but see notes below if you’re using a different probiotic.
- The yogurt should be much thicker now. Stir to combine fully. If you hear a carbonated sound that is normal, it’s a part of the fermenting process.
- Cover the jar/bowl or transfer to a new clean jar/bowl and cover and place in your fridge. It should also thicken up in the fridge and you can start using it now! It’ll last in your week for at least two weeks.
- If you want your yogurt any thicker, strain/drain it in cheesecloth or paper towel or a fine mesh colander for about 30 minutes to strain off any extra liquid. If you want greek yogurt, see the notes below.
- Enjoy with any combination of you want including yogurt, maple syrup, vanilla extract and fruits!
Notes
Tips (including making greek yogurt)
- Make sure you really blend all your ingredients together. You don’t want any chunks of cashew, in fact, you don’t even want it to look like there was cashew here before, friends. It certainly doesn’t taste like it, so if you blend right, you’ll be on your way to just general amazing vegan yogurt. I blended mine for a good 3 minutes in a high powered blender , so just ensure yours is so blended it already resembles a creamy, no grains, no strains, product.
- Make sure you’re using fresh ingredients and that you soak your cashews. Don’t use anything that’s going bad because it’ll come out in the fermenting process.
- Use a great probiotic. I use JustThrive and have been for over two years now and let me tell you – #goals. I can’t do without this probiotic. While this isn’t sponsored, my good friends over at JustThrive let me know that you can get 15% off if you use the code JESSICA15 which um, YES that’s an incredible deal so definitely go use it! I’m pretty sure mine turned out so great because I was using a top notch probiotic that truly works.
- Do not, I repeat, do not, use metal. Metal can react negatively to the good bacteria and can just kill your entire process. I’ll admit I’ve never tried it with metal and safe to say, just avoid it. That’s why I prefer to add the probiotic powder into the mixture after it leaves the blender , and to use wood and silicone to stir it in a glass bowl. I would also suggest not using a wooden bowl since it’ll seep in and make the bowl smell like yogurt for, well, ever.
- Don’t disrupt your yogurt in the making too often. I would try not to touch it for at least the first 24 hours, and thereafter maybe check on it only like once or twice.
- The consistency of this yogurt is nice and thick, but not greek yogurt thick. I did make some greek yogurt from it (my goodness that was delicious) and it’s very easy to make. Just place some or all of the yogurt in a cheesecloth, tie it, and let it hang over a bowl for 2 hours in the fridge. That will get rid of all the excess liquid, making it thicker. Don’t go overnight though, or you’ll end up making cheese like I did. Which, is a whole other post because after I stirred in some nutritional yeast , sun dried tomatoes and some herbs, I was in vegan cream cheese heaven.
Nutrition
Homemade Vegan Yogurt (Cultured and Creamy) https://jessicainthekitchen.com/homemade-vegan-yogurt-cultured-and-creamy/ December 18, 2019
Prepare to be blown away by these Crispy and Crunchy Vegan Chicken Nuggets aka Tofu Nuggets, that are my vegan version to popcorn chicken! They’re so flavourful on the inside with the best texture thanks to some key tips and marinating the tofu. They’re bound to be a part of your meal prep rotation – I made them three times in one week!

Stop what you’re doing and go marinate this tofu NOW. Friends, these Vegan Chicken Nuggets definitely make my top 10 favourite recipes I’ve made all year. The funny thing is, they were never originally on my recipe list for December. I had another recipe that I wasn’t feeling inspired anymore to make, so decided I would try a tofu recipe instead. One thing led to another and I thought – oh, Vegan Chicken Nuggets! Why haven’t I done that before?
Wow, look at fate. I am SO glad I made these, because I’m made them three times in one week already! Guarantee, if you know someone who dislikes tofu, give them this. If you already love tofu thanks to key tips from my Tofu 101 Blog post , you’re in for a treat!

Key Tips for Making Vegan Chicken Nuggets
I have a few key tips to make these the best vegan chicken nuggets you’ll ever try. #1, press your tofu! There are very rare instances when you shouldn’t press your tofu, and this isn’t one of them. Squeeze all that excess water out of your tofu. Not only will it give you a much better tofu, it’ll prep it for tip #2 which is to marinate your tofu.
I choose a very light marinade, but feel free to up the saltiness on your marinade. It really soaks up into the insides of the tofu, making the texture even better, and each bite perfectly textured and juicy. You can marinate yours for 30 minutes, or overnight.

Two more key tips friends, then we’re ready to dig in. Tear your tofu instead of slicing it into cubes. Yes, I’m all for slicing perfect pieces. But tearing your tofu means there are more rough edges for not only the marinade to soak into, but for the batter to coat the tofu. It truly also gives it more of a nugget look, soo. I just tear mine into 1 inch pieces. Totally okay if the pieces aren’t the exact same size, just to try make them similar enough.
Our last tip friends which is still a major key DJ Khaled voice – shake off the excess batter. Funny enough, I ignored this the first time I made them. They still tasted fantastic, but the second time I did. Gav noted how much better they tasted the second time around, even key I lightened up the marinade AND marinated them for less time. They really cooked better, coated the tofu better, and tasted better. So definitely just shake off the excess flour and buttermilk batter with each dip. It makes a difference.
Speaking of which – you can do one or two coats, it’s up to you. I did two because well, that’s delicious, but you can do one! Enjoy, friends!

Ingredients
- 1 lb block tofu , pressed and drained of liquid
Marinade
- ¼ cup light soy sauce + 1 tablespoon , or liquid aminos or tamari (any is fine)
- ½ cup filtered water
- 1 teaspoon garlic powder
- 1 teaspoon onion powder
- 1 teaspoon smoked paprika
- 1 tablespoon nutritional yeast , if you don’t have this, that’s okay
Batter
- ¾ cup any nut milk , or ANY vegan milk (I used unsweetened almond milk)
- 1 ½ teaspoons apple cider vinegar , or regular vinegar
- 1 cup all purpose gluten free flour mix , or regular flour (I used Bob’s Red Mill’s Gluten Free All Purpose Baking Flour)
Crumb Mixture
1 ¼ cup gluten free breadcrumbs , or regular breadcrumbs (I used Nature’s Path Organic Crispy Rice Cereal and pulsed them in my food processor until they resembled panko breadcrumbs)
3 teaspoons smoked paprika
3 teaspoons nutritional yeast
1 teaspoon garlic powder
1 teaspoon onion powder
1 teaspoon Italian seasoning
1 teaspoon sea salt
¼ cup of oil , if pan-frying, if not, instructions for baking are below
Instructions
- Take your pressed tofu and slice it in half length wise (so you end up with two large slices the same length and width as the original). Tear the tofu into 1 inch cubes. I like to use a ruler to help me measure the first tear, then use that as a guide, but it doesn’t seem to be exactly 1 inch.
- In a bowl or glass tupperware, add all the marinade ingredients and stir to combine. Taste it, you can add more liquid aminos if you want yours saltier, or more water. Add in tofu and stir to combine so all the tofu is coated. Marinade for at least 15 minutes, but up to overnight. While marinating, prepare your bowls with the flour, the buttermilk, and the crumbs.
Batter & Crumb Mixture
- In a bowl, add the nut milk and the apple cider vinegar. Stir to combine and let sit for about 2 minutes. This is your buttermilk mixture.
- Add the flour to its own bowl and line up side by side.
- In a bowl add all the crumb mixture ingredients. You can use gluten free panko breadcrumbs or make your own by food processing 1 ¼ cups of brown rice krispies. Line up in a bowl beside the buttermilk. Line a baking sheet beside that - this is where you’ll place your tofu pieces before pan-frying them, or layer them to bake them.
Putting it All Together
- Take one tofu piece from the marinade. Dip it into the flour, shaking off all the excess flour, then into the buttermilk. Shake off the excess buttermilk, then dip it back into the flour, then into the buttermilk again, shaking off all the excess again. Then dip it into the crumb mixture, roll around, and place on the baking sheet.
- Once you get the hang of it, you can add several pieces at a time (I do like 10 pieces maximum at a time). This battering process is very forgiving!
- When you’re done all the pieces, it’s time to cook them.
Cooking the Tofu
- Heat ¼ cup of oil in a baking over medium high heat. When oil is hot, add one piece of tofu. Cook for 1 ½ minutes on each side (check for browning) or until golden brown, then flip and cook for another 1 ½ minutes on the other side. Remove to a paper towel to absorb the excess oil.
- Continue to cook the rest, but you can now add several pieces of tofu now that you’ve tested that the oil is hot and you have your cooking time figured out. Don’t overcrowd the pan since it’ll reduce the temperature the oil, making them not as crispy. It’s best to leave enough space between each piece of tofu.
- Continue unti you’ve cooked all of the tofu. Allow to cool slightly, then serve immediately by itself, or with a dipping sauce. You can also add these to tacos, sandwiches and many other uses!
- To BAKE these: Preheat the oven to 400F/200C. Line the battered and breaded tofu pieces on the baking sheet and spray with some cooking oil on both sides. Bake for 25 minutes, flipping once way at the halfway mark. Serve and enjoy!
