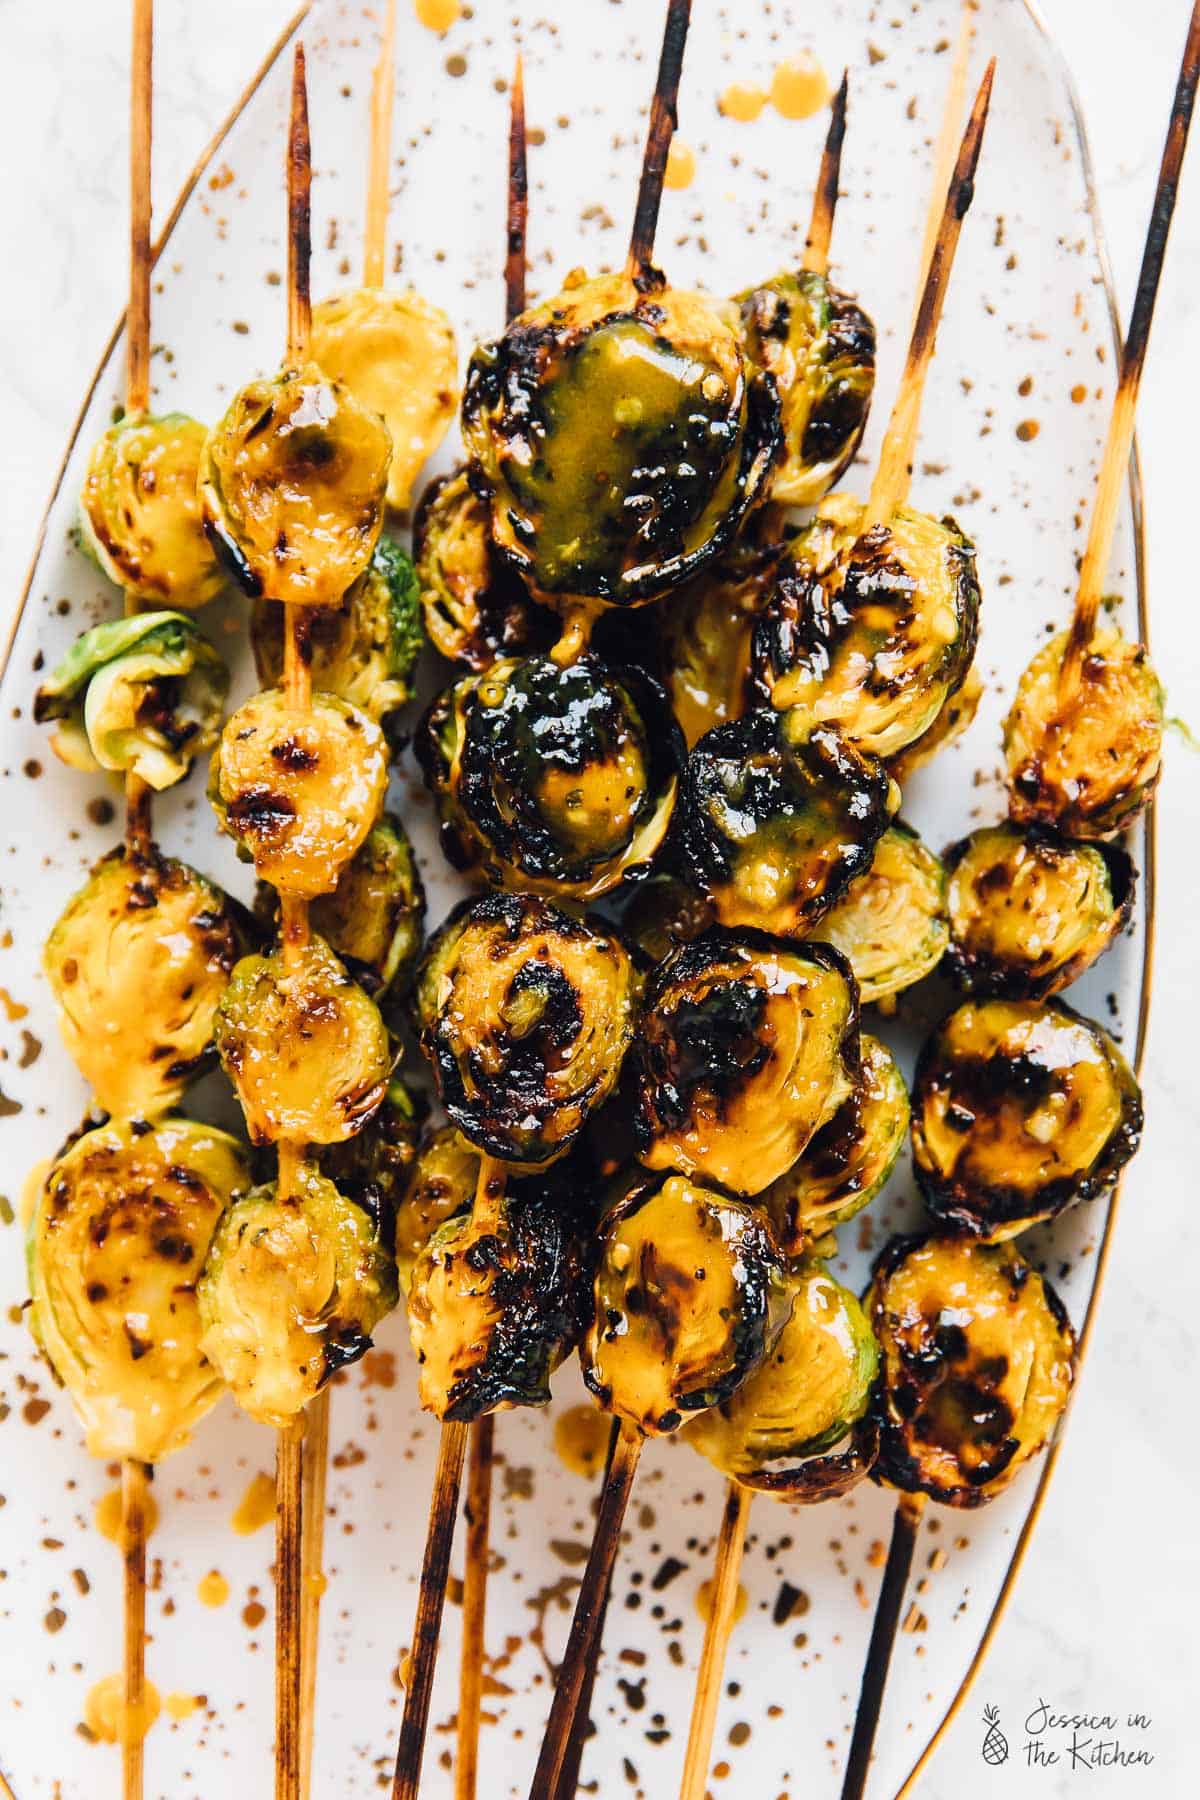
These mouthwatering Grilled Maple Mustard Brussels Sprouts will be your new favourite appetiser! Made quickly and easily on the grill, you’ll be making extras!
Here’s a genius idea that I can’t believe I never thought of: cut your holiday prep work down by grilling some of your fall veggies side dishes. It’s the right temperature to warm you up outside, you can grill several side dishes, and it’s less things in your oven. You can use this quick tip for Christmas (and thanksgiving next year) by whipping up these to die for Grilled Maple Mustard Brussels Sprouts. Whew, that’s a mouthful that I want to have a mouthful of. One bite of these and you’ll be wondering where have these grilled Brussels sprouts been your entire life.
I’ll be honest – Gav does most of the grilling. I’ve done it a few times without him for blog posts, and he has to re explain it to me every single time. Real life: this time I kind of forget three seconds after he left the house. So I went into Kingsford’s website and went straight to their basics sections. Honestly – after their super informative video (I’m a sucker for well done videos) there’s no way I can forget now.
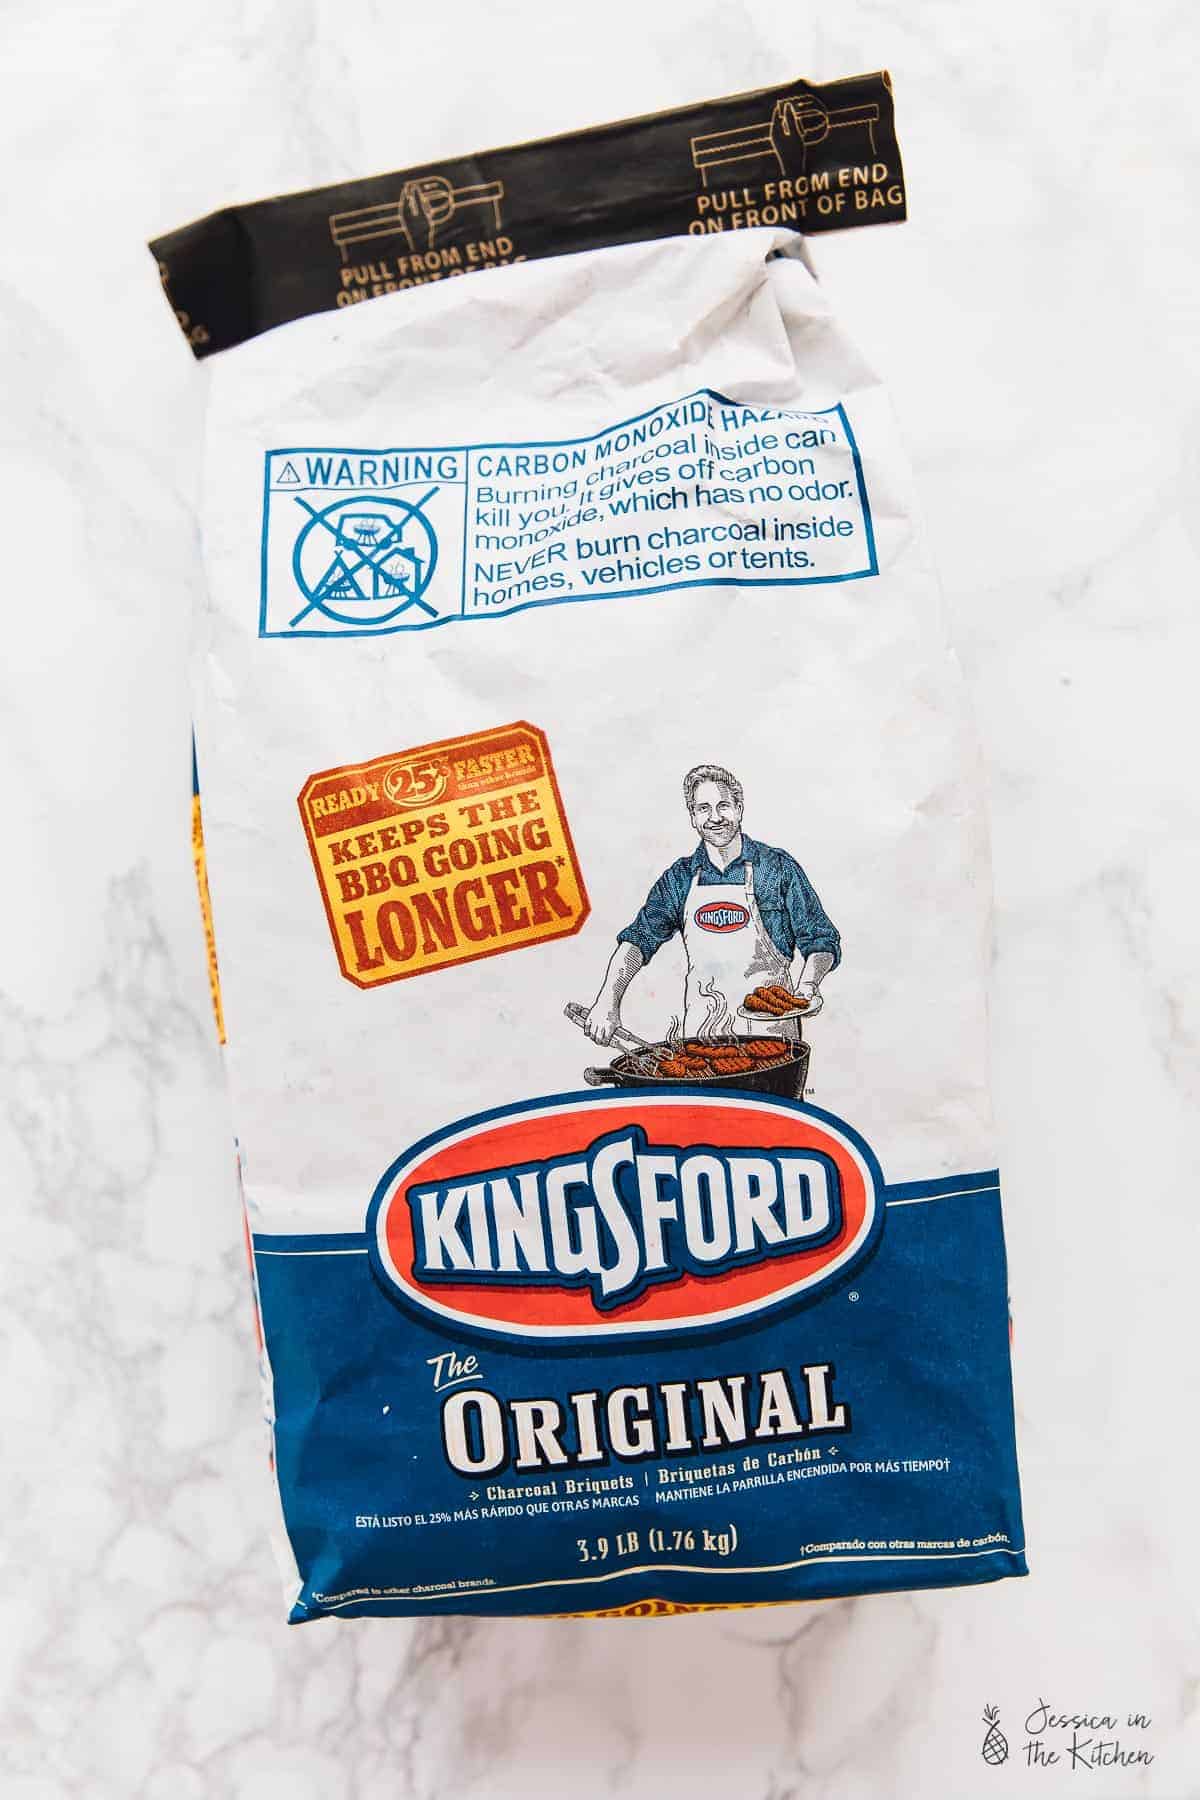
I made these Grilled Brussels Sprouts with Kingsford Original Charcoal. It’s the charcoal that Gav, me, my dad, and actually my entire family has been using for as long as I can remember. My dad is a grilling fanatic and always bought Kingsford products, so when I moved out, it was only natural. So I’m really excited to be partnering with them on this post because it feels so natural for me. We have so many memories and moments over the year that have been surrounded by a grill , charcoal and Kingsford that it’s actually pretty touching. As you guys know – Gav and I met at a super bowl party and in the background of the photos are Kingsford’s products. Kind of corny, but also pretty meant to be – us and the charcoal!
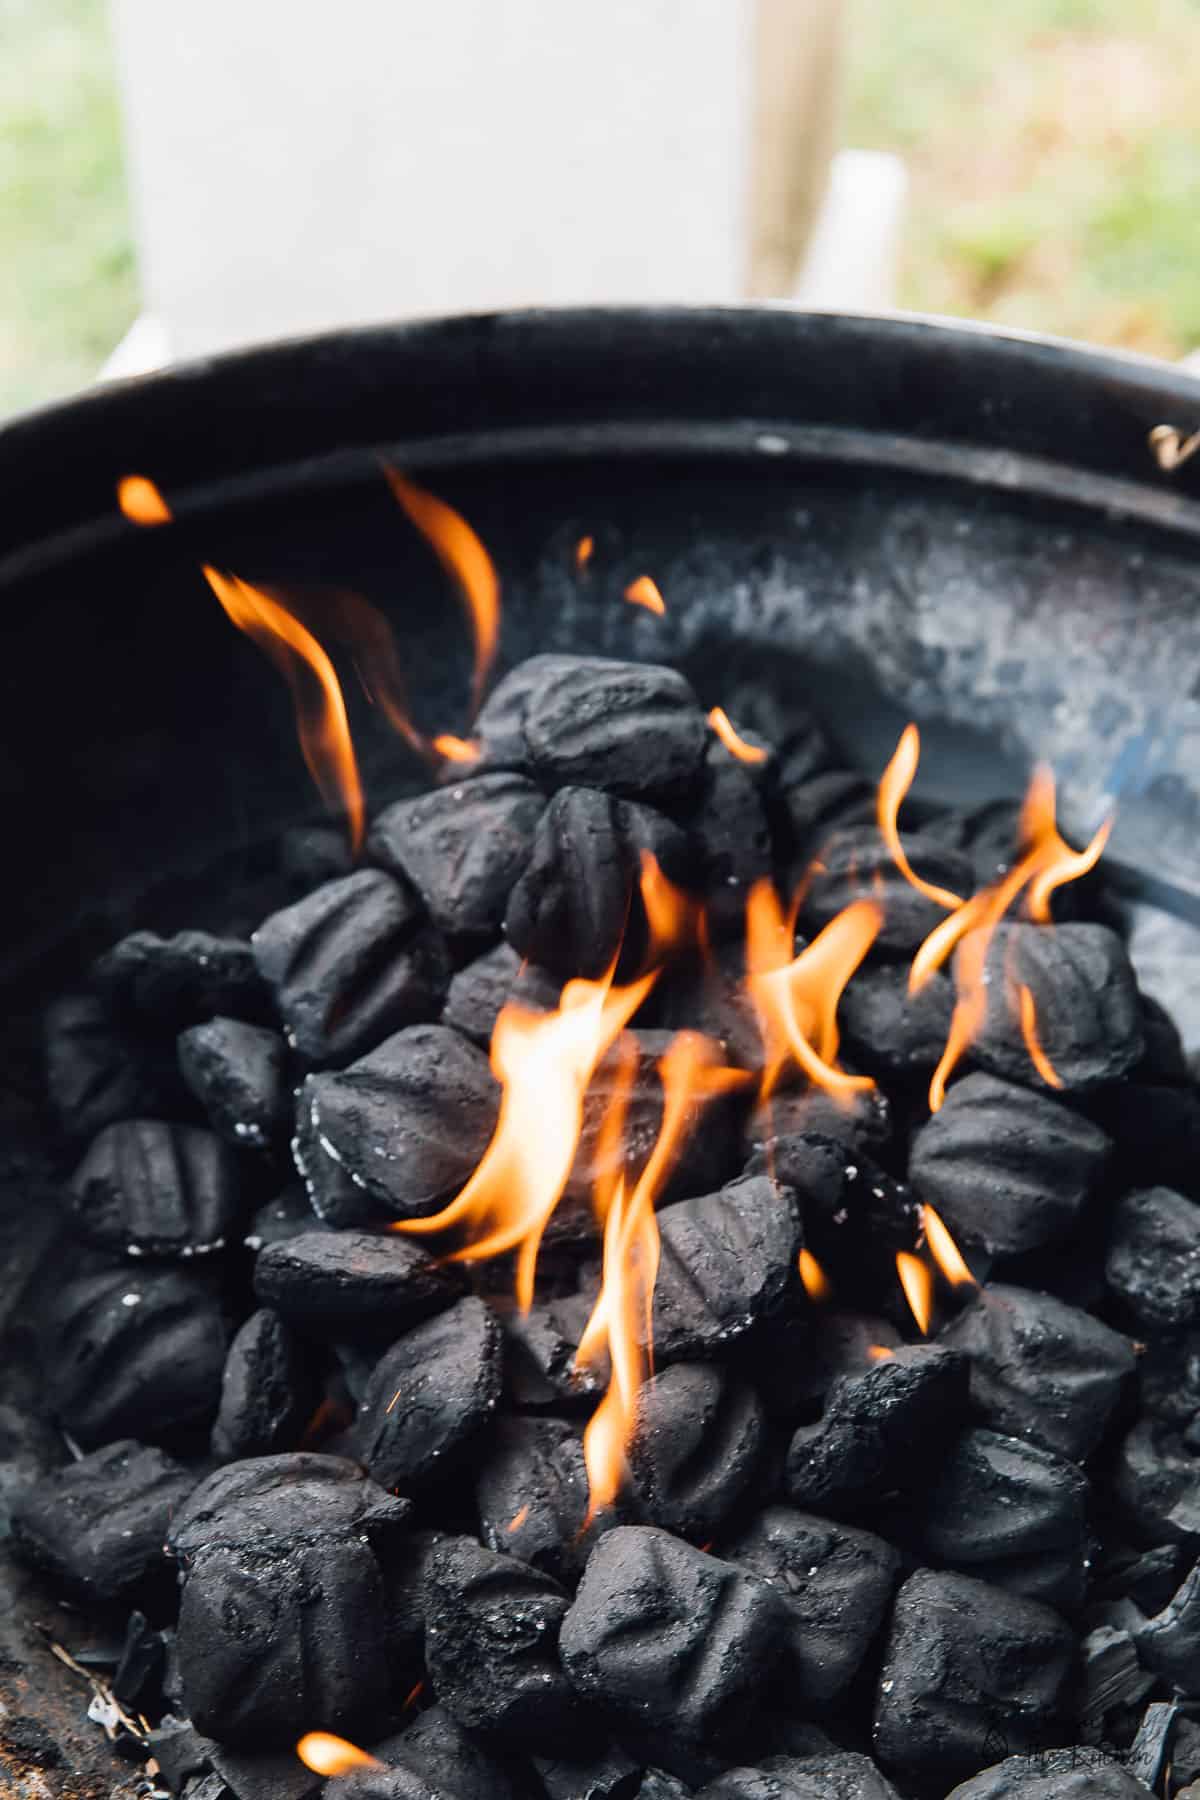
I used the lighter fluid method (using Kingsford’s lighter fluid) on their website to whip up the charcoal which took literally 15 minutes to be ready. I timed it, being a food blogger and all. The charcoal gave me a beautiful heat that lasted so long that I ate, then even went back and heated up more Brussels sprouts on it. I love the fact that Kingsford is pushing to show that veggies, and in this beautiful season fall veggies, can be also be grilled just as easily and deliciously as meat, because well, that’s what we’re here for! I’m definitely whipping up some more fall veggies on the grill this holiday season, especially now that’s it’s no longer intimidating to me anymore.
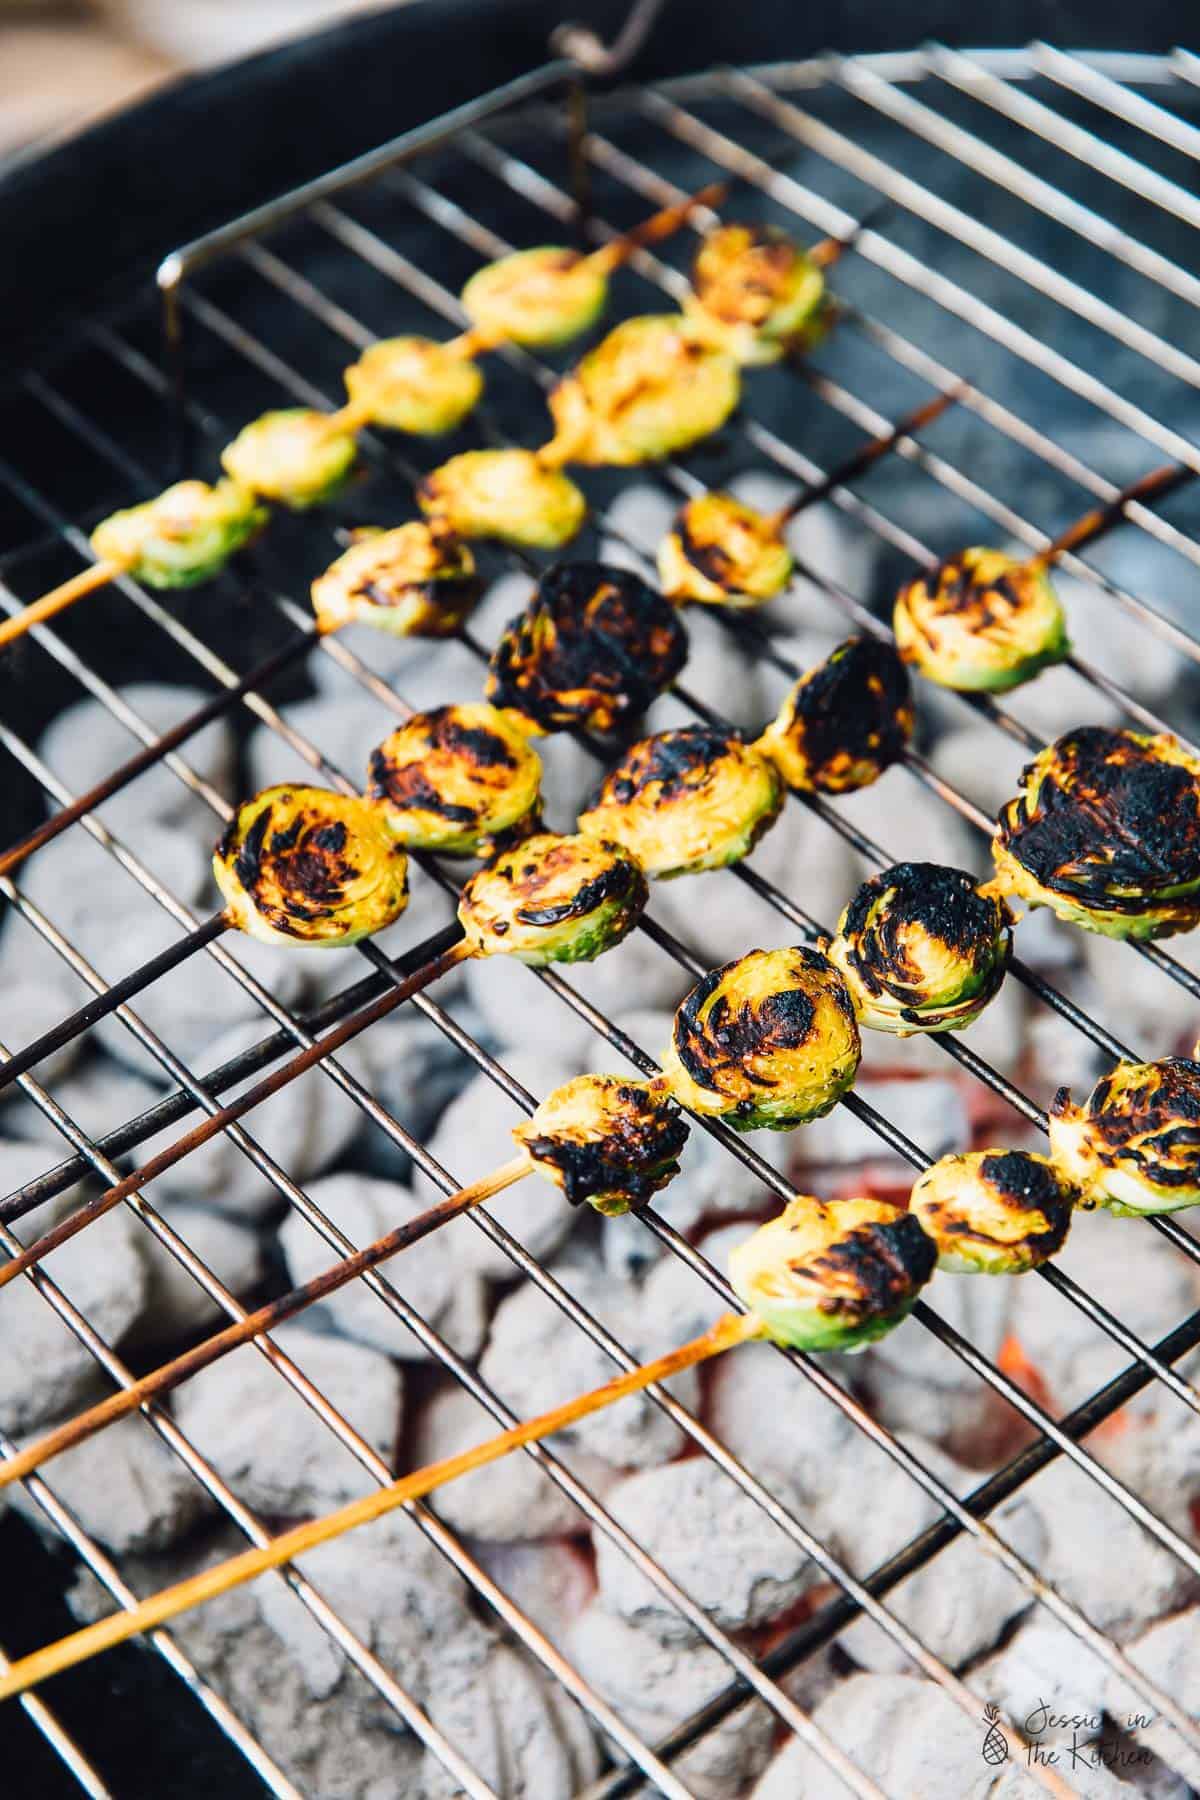
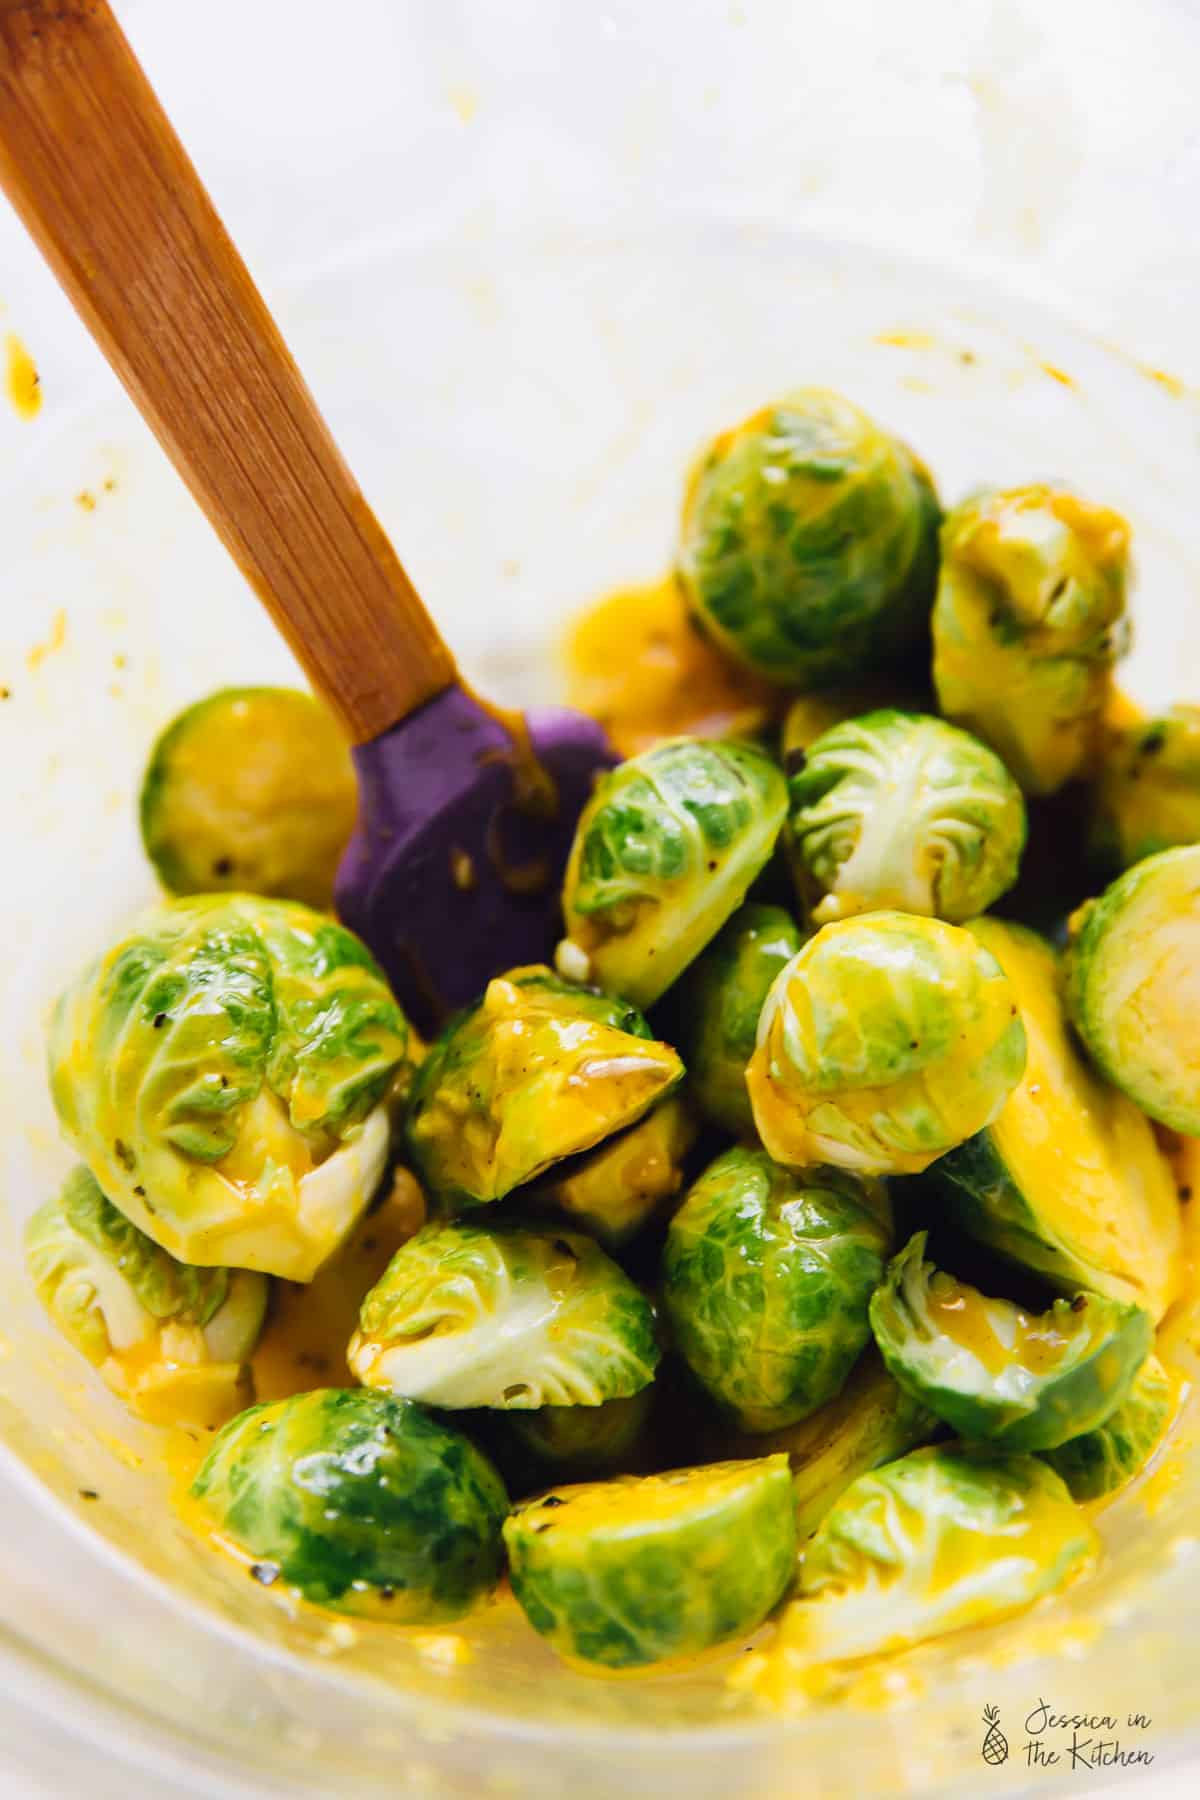
Let’s talk about these Grilled Maple Mustard Brussels sprouts before I give you the recipe. Man, these are divine. They are a delicious mix of sweet, mustard-y and spicy thanks to the amount of freshly cracked ground black pepper I used. I actually blanched the Brussels sprouts for boiled water minutes before grilling so the skewers could go through easily. The Brussels sprouts grill so easily and so quickly. The mix of the maple mustard flavours and the smokyness from the grill are honestly a set of flavours you’ve GOT to try to understand how divine they are.
I hope you guys enjoy this recipe so much!
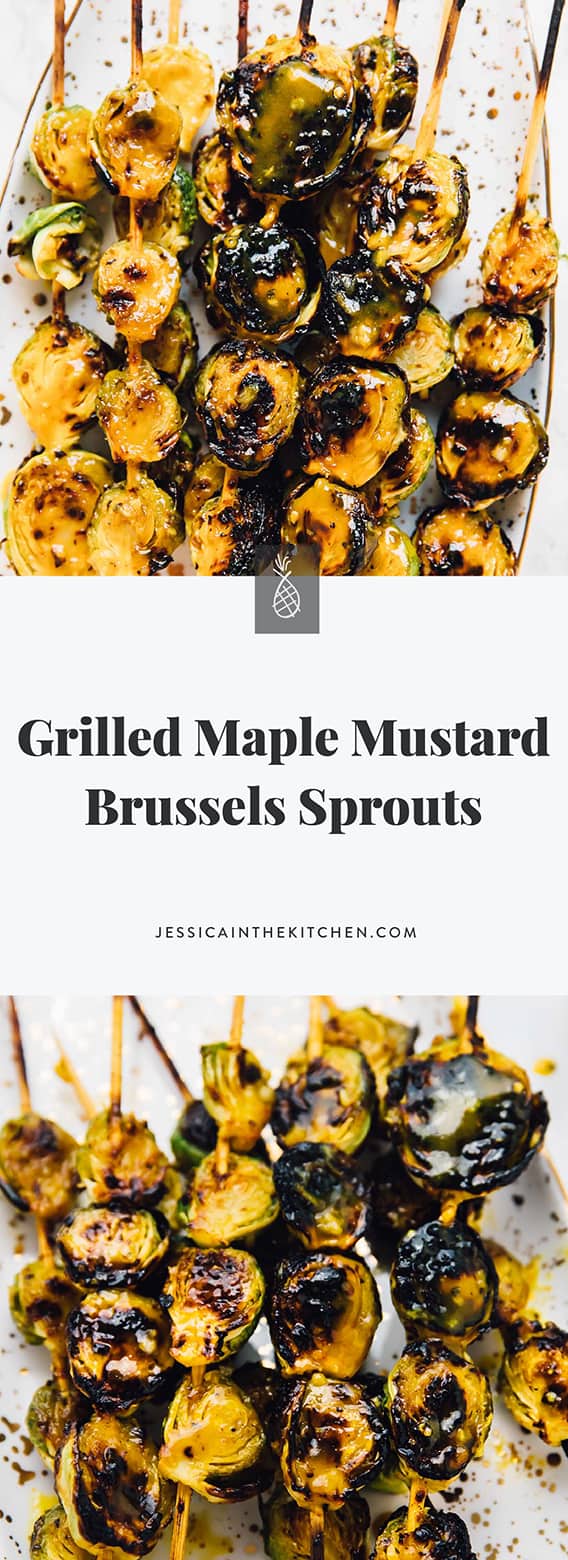
Grilled Maple Mustard Brussels Sprouts
Ingredients
- 1 pound Brussels sprouts small tip of ends trimmed, outer leaves removed and halved
- 1 ½ tablespoons dijon mustard
- 3 tablespoons maple syrup
- 2 tablespoons olive oil
- 1 teaspoon sea salt
- ¾ teaspoon ground black pepper
- 4 cloves minced garlic
Instructions
- Follow instructions on your Kingsford Original Charcoal’s bag to heat up your grill to high heat.
- While the grill is heating (15 minutes), blanch the Brussels sprouts in boiled water for about 2 minutes. This helps a lot with skewering them.
- In a large bowl, whisk together the mustard, maple syrup, olive oil, sea salt, black pepper and minced garlic. Toss in the halved Brussels sprouts and stir to coat properly.
- Skewer about 4 Brussels sprouts halves or more onto each skewer.
- Add skewers to the grill once it is heated and Kingsford Original Charcoal is grey and heated. Grill on each side for about 3 to 4 minutes until the Brussels sprouts have grill marks. Flip and repeat.
- Remove from the grill and enjoy! You can also brush the Brussels sprouts with a little extra sauce when they come off the grill, at which point they will really absorb the flavour.
Nutrition
Grilled Maple Mustard Brussels Sprouts https://jessicainthekitchen.com/grilled-maple-mustard-brussels-sprouts/ November 30, 2018
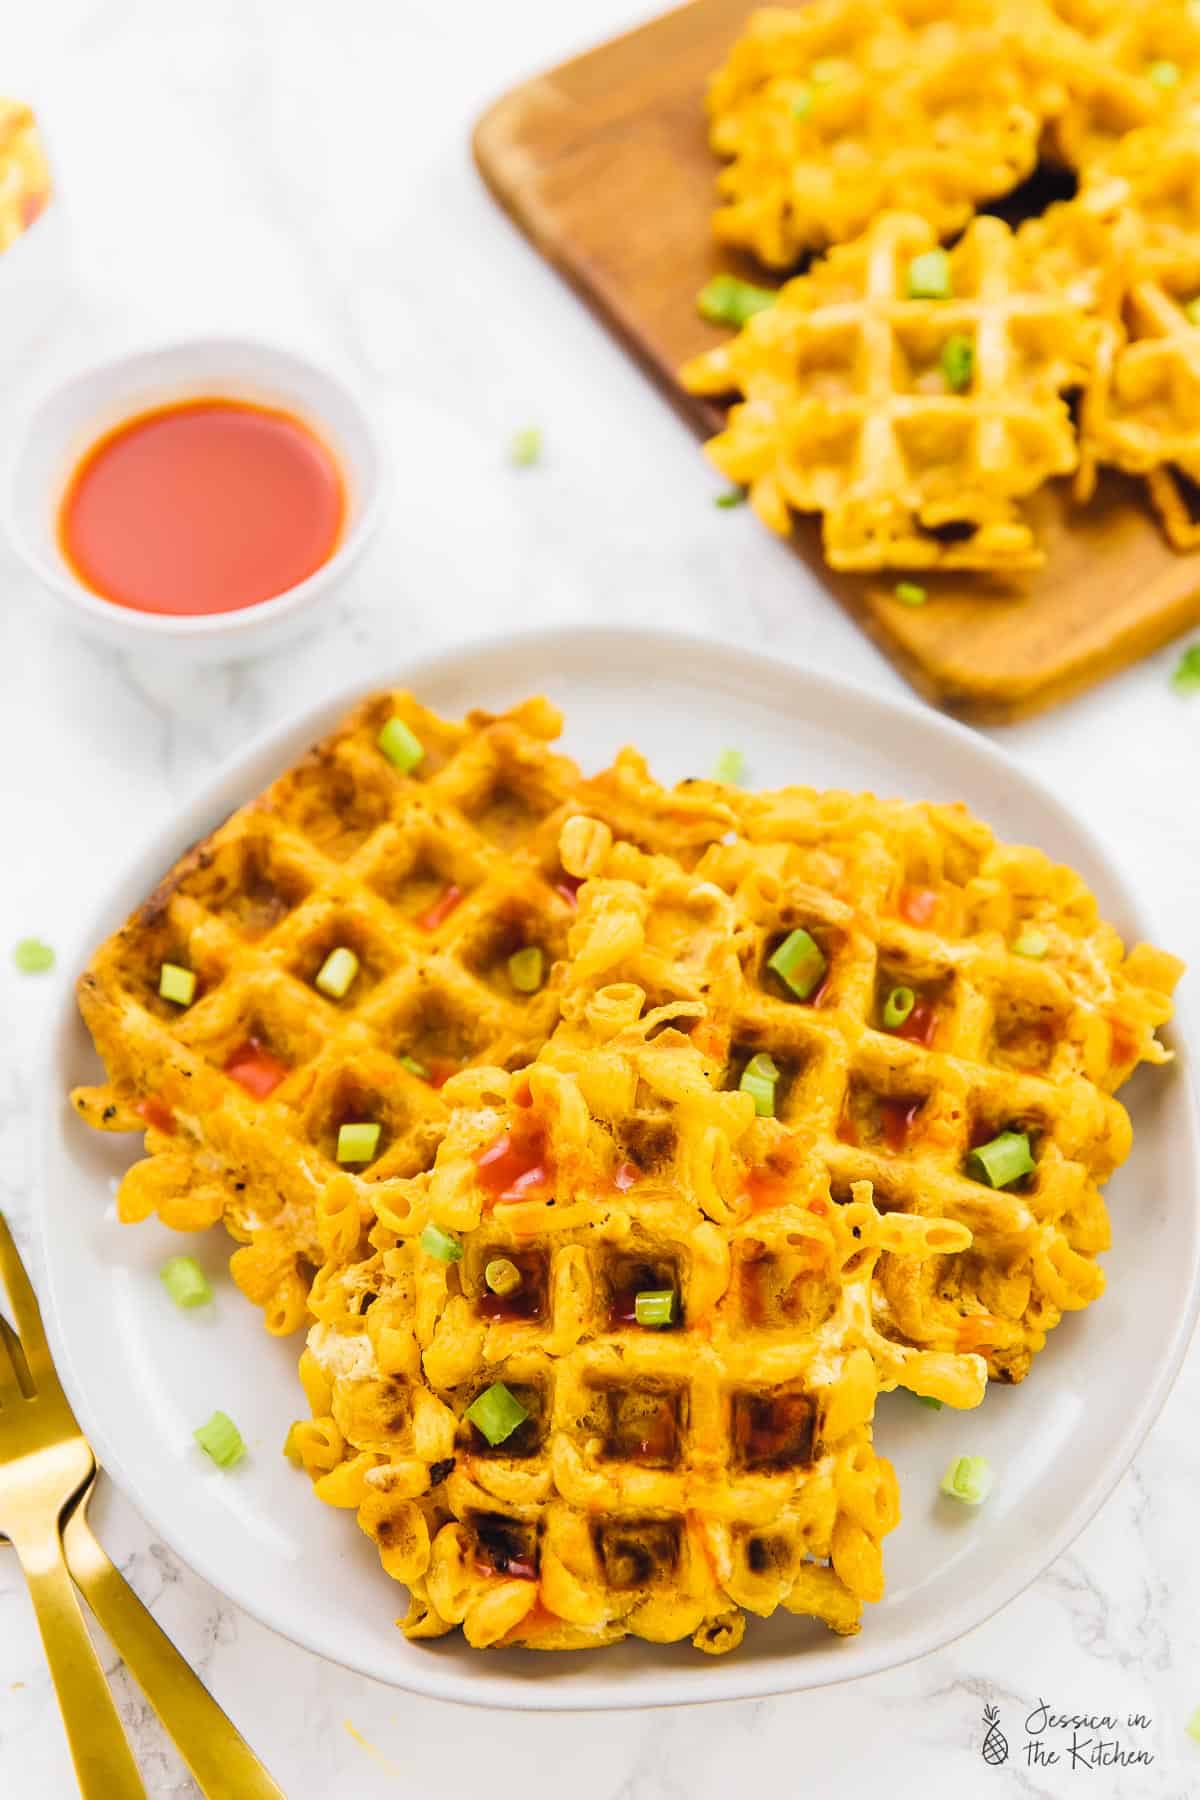
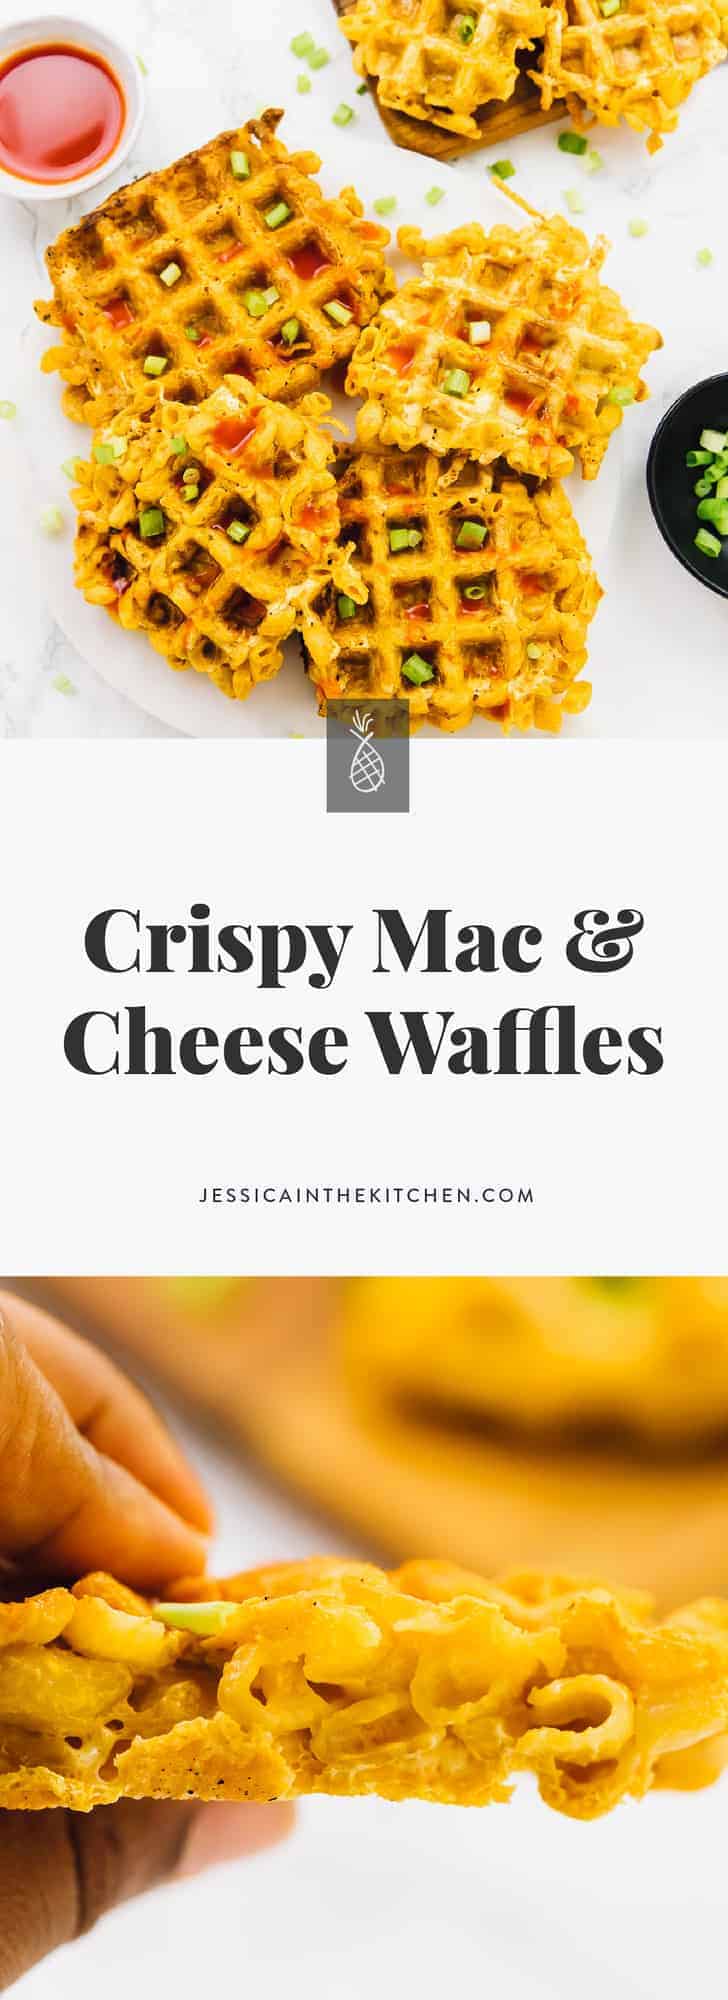
These Crispy Mac and Cheeze Waffles are the perfect indulgent side dish! Two ingredients, and you get crisp on the outside, and soft cheesy Mac and cheese on the inside of these divine waffles!
You know what you need today? A life balance. These Mac and Cheeze Waffles are the kind of balance that I’m talking about. Good for you ingredients that taste like Christmas came early. Cheesy, creamy, crispy, crunchy that have come true. We’re about to make that happen here with these two – yes TWO – ingredients waffles.
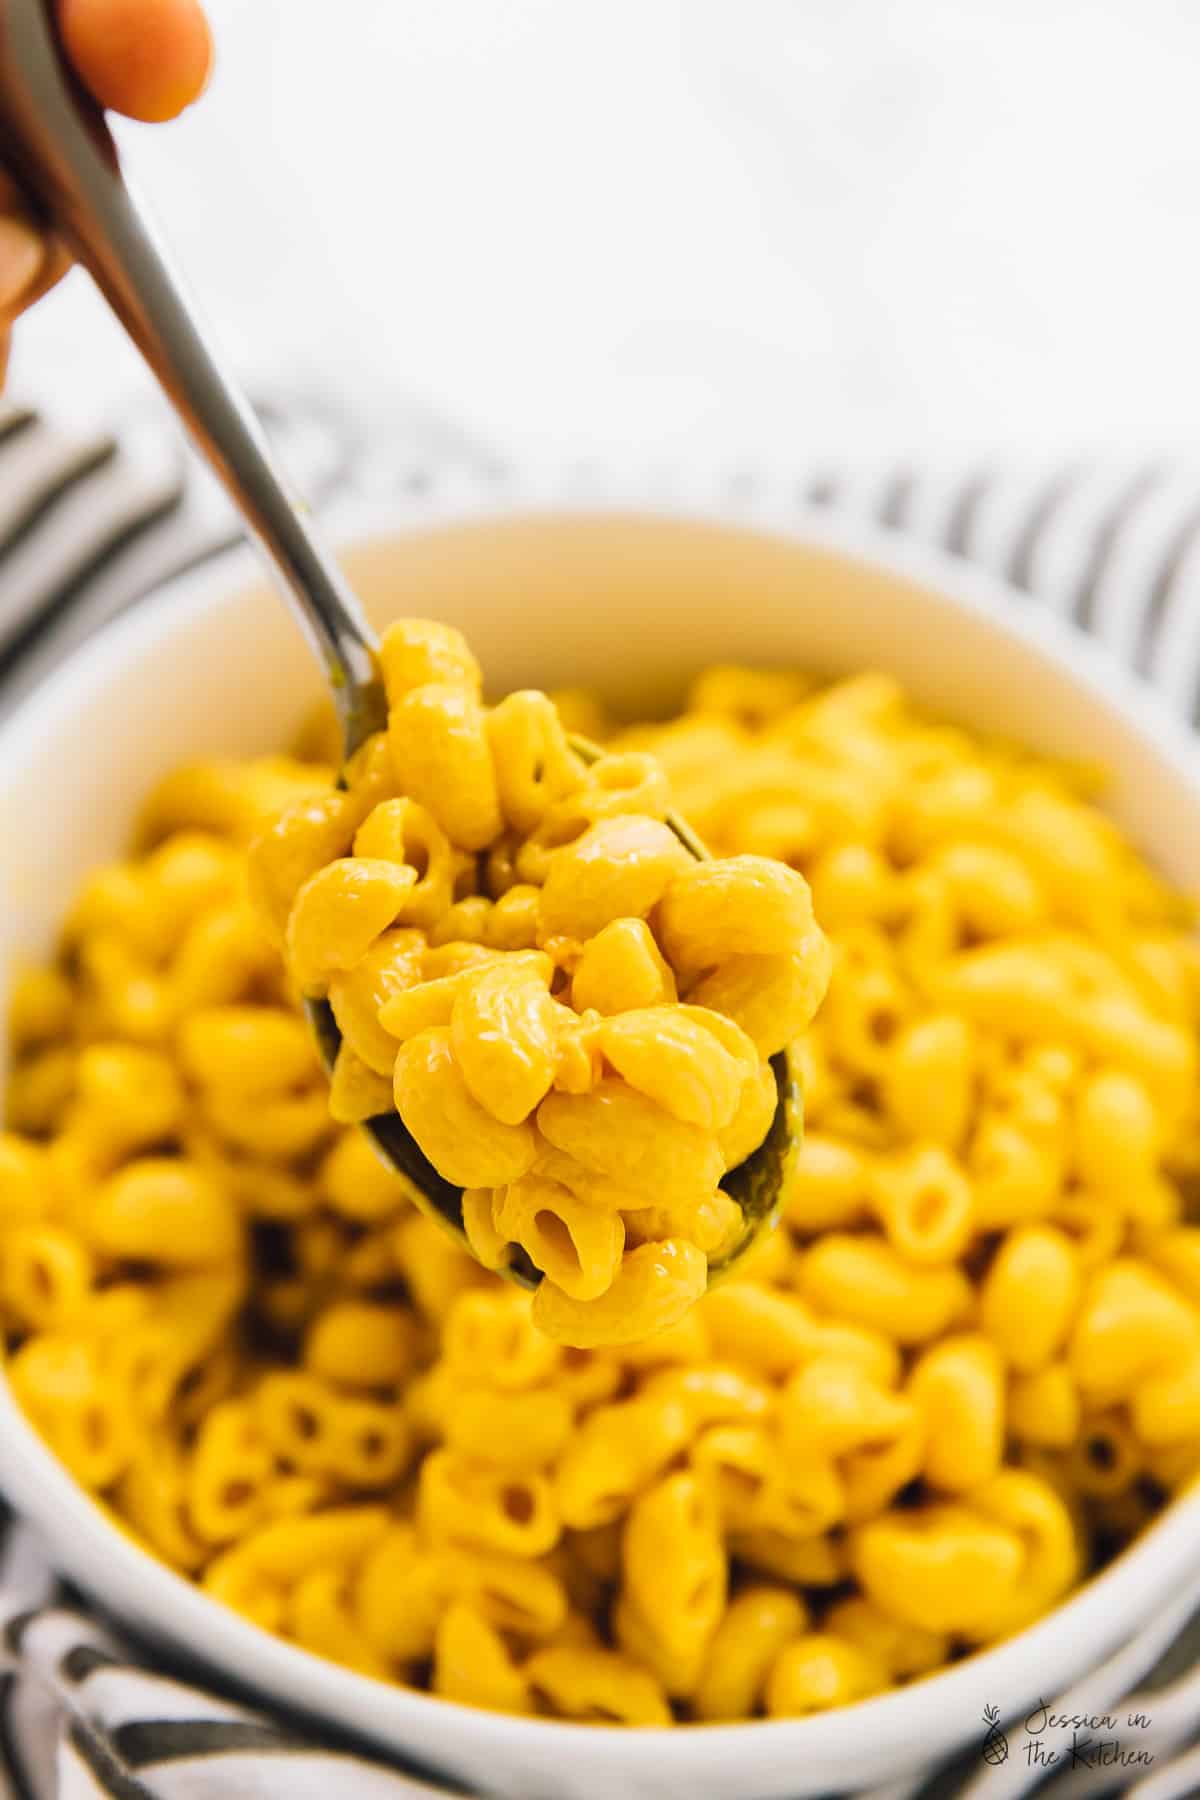
I have been using Daiya products for years now. I remember the first time I used a Daiya product – it was on a vegan pizza (like this one) that I made while still vegetarian. One bite and Gav said “you could sell this!” That pretty much convinced me. The first time we tried Daiya’s Deluxe Cheddar Style Cheezy Mac, we were in shock at how cheesy it was. I actually completely forgot that it was gluten free, too! That’s exactly why I’m so excited to be sharing these waffles with you. Let’s be real – leftover Mac and cheese is always delicious, but these takes it over the top and with only one more ingredient, plus a few delicious add-ons.
I’m making these waffles as a part of Daiya’s Comfort Food That Loves You Back campaign – which is pretty awesome. Firstly, one of my favourite things about being vegan is that when I do indulge in comfort food, I don’t get that uncomfortable feeling that I used to get with dairy. That’s pretty much the point with this campaign – with Mac and cheese that’s filled with protein, is gluten free, dairy free, and free of all the top 8 allergens, this is the best kind of comfort food. The kind that doesn’t weigh you down, tastes amazing and (of course) comforting, and that you could actually enjoy throughout the holiday season. I mean, I know you’re in agreement with me, am I right?! P.S. you got to watch the video below – it’s hilarious. Needless to say we pressed our box endlessly!
So these Crispy Mac and Cheeze Waffles. Gav and I started “waffling” things from our very first waffle iron, so my first thought was to immediately make these into Mac and cheese waffles. I mean – ONLY good could come from that right?!

I tested these quite a few because I wanted to ensure that they were still cheesy and soft yet crisp on the outside. After only a few tries, one method stood true. Add a small square of cold Mac and cheese unto the hot waffle iron, sprinkle some dairy-free Daiya cheese on top (I used their new Cutting Block Shreds), then cook for like 4-5 minutes. The cheese layer almost protects that Mac and cheese so it remains in perfect cheesy condition with an extra yummy layer. Let me tell you, this has been a happier household ever since. I didn’t even need to add any additional seasonings since the Cheezy Mac is already insanely delicious.
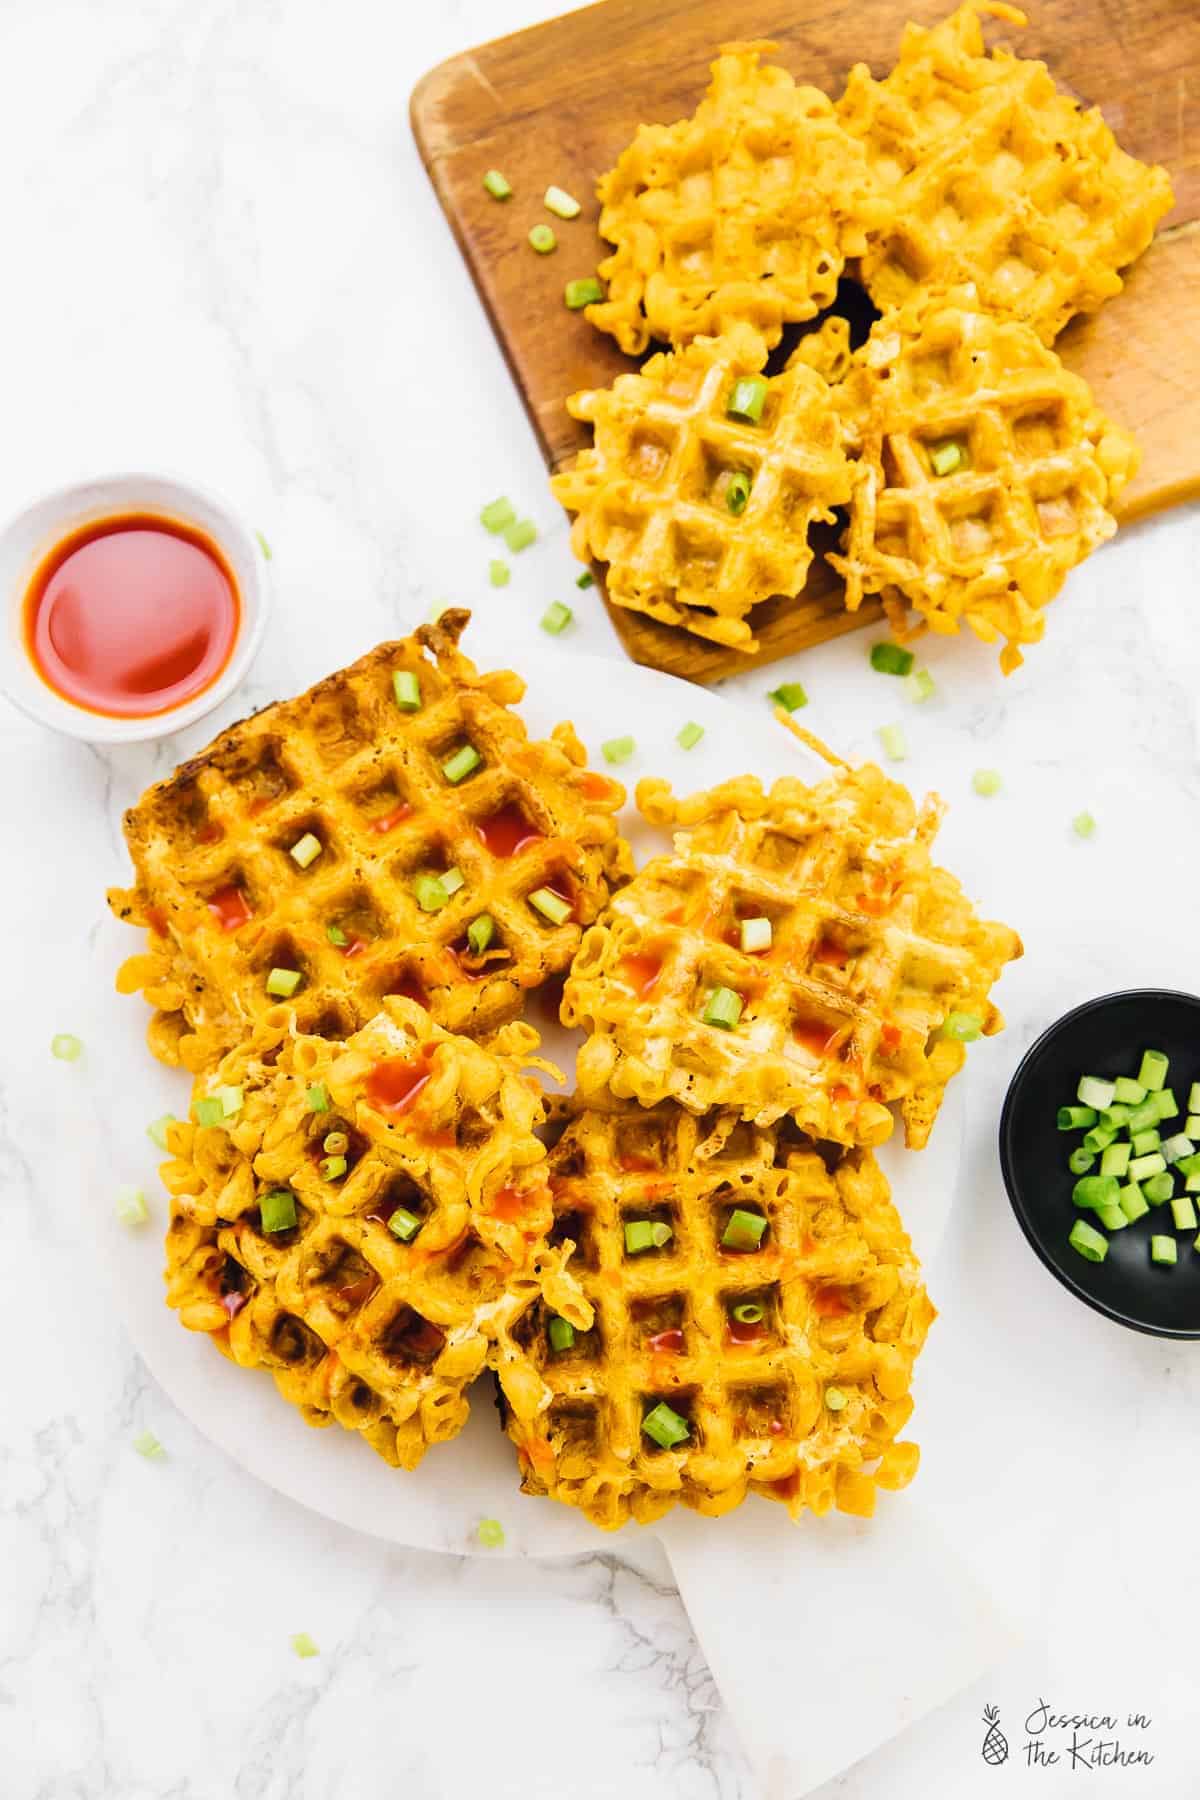
As if that wasn’t good enough, I topped mine with hot sauce and scallions and let me tell you we have a WINNER here. This “recipe” is super versatile because while I did 3×3 inch squares, you could do 2×2 for appetiser size, or go mega with a 4×4. It’s your Mac and cheese dream world, friends.

I hope you enjoy these and find some amazing ways to serve them in your house this holiday season. Eat up and enjoy!
Ingredients
- 1 box Daiya Deluxe Cheddar Style Cheezy Mac
- 1 package Daiya Cheddar Cutting Board Shreds*
Instructions
- Cook Daiya Mac and cheese according to the directions on the box.
- Spread the Mac and cheese in an even layer in an 8x8 or a 9x9 pan and set in the fridge for at least an hour, or overnight. These work great with leftovers too!
- Cut a 3x3 square (or really any size that you desire) and place on to your preheated waffle maker. Top with a tablespoon or two of Daiya cheddar shreds and then close the waffle. Cook for about 4-5 minutes until the cheese is nice and crusty. Remove from waffle maker and continue with as many waffles as you like! Feel free to change up the size of them to your preference.
- Top waffles with hot sauce and scallions. Enjoy!
