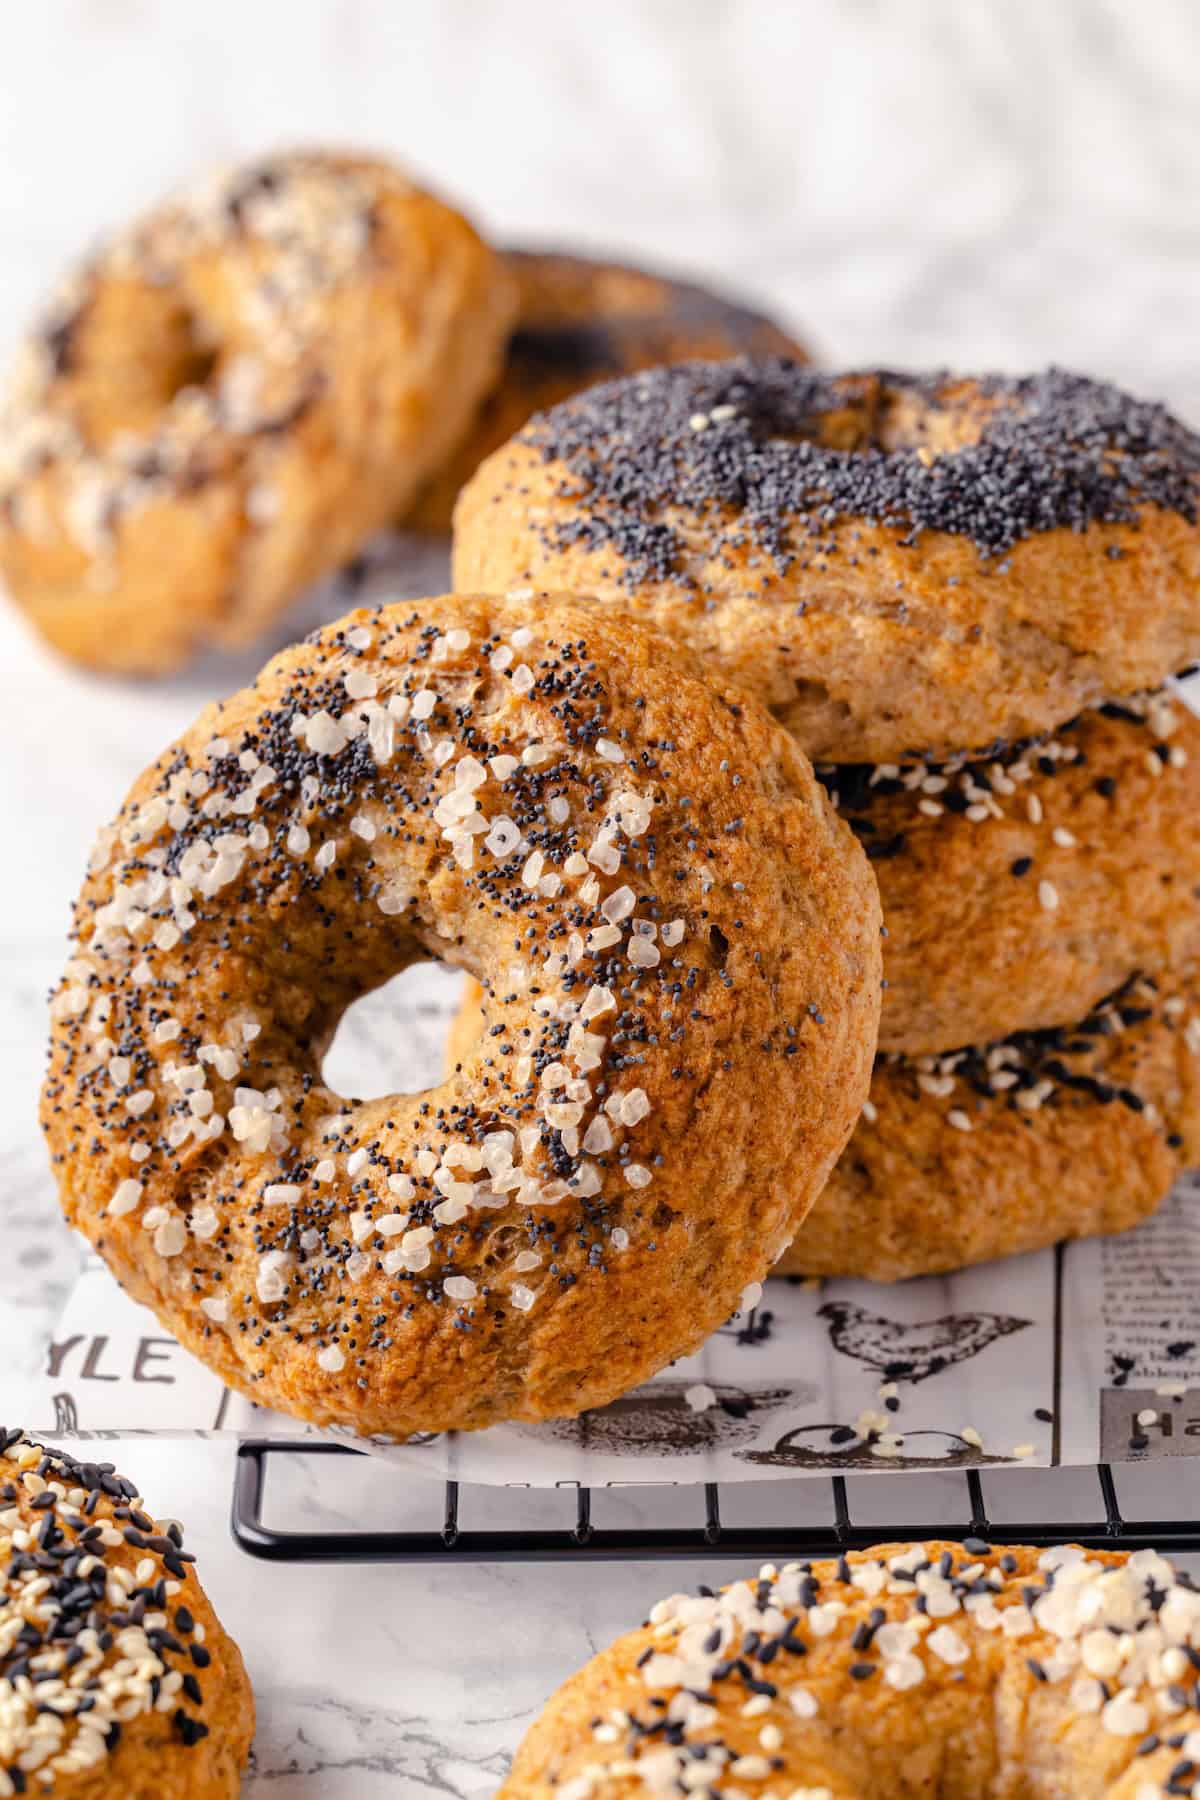
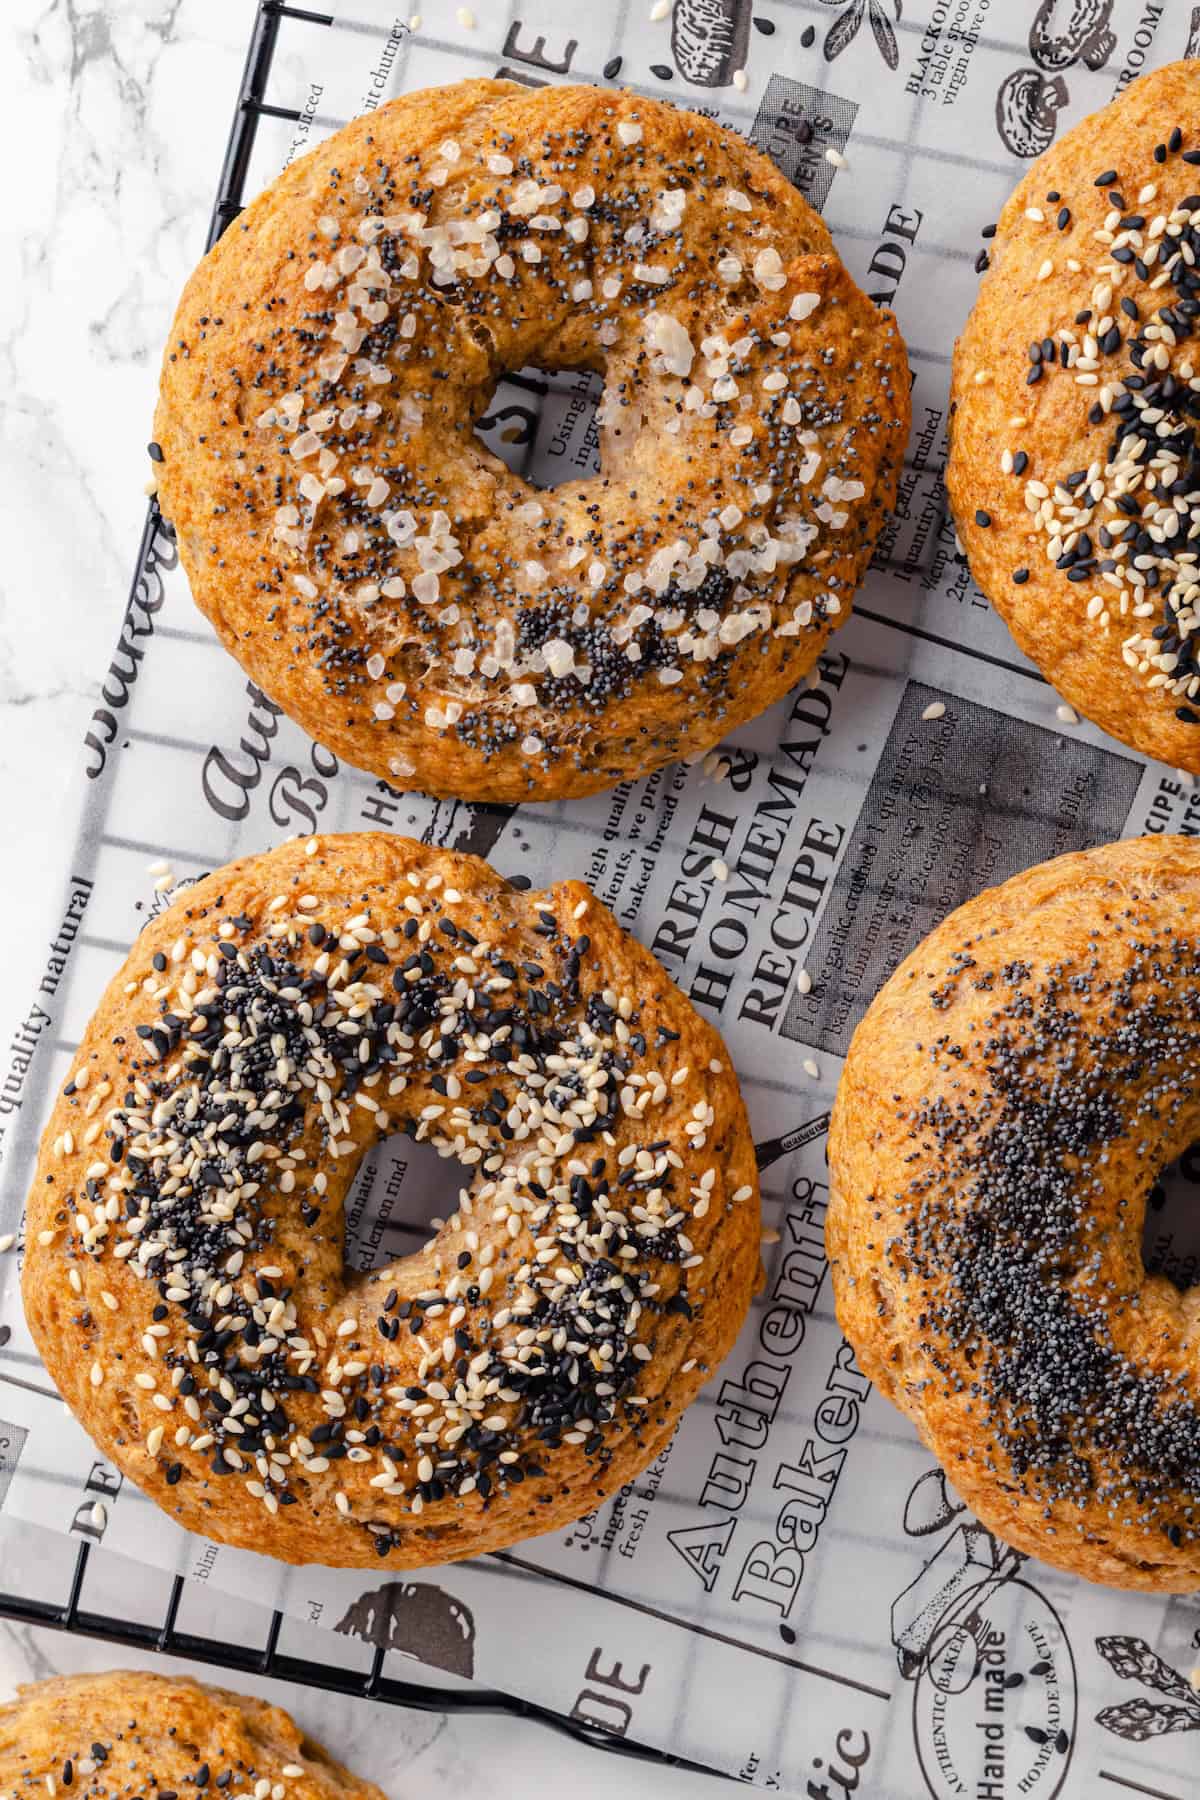
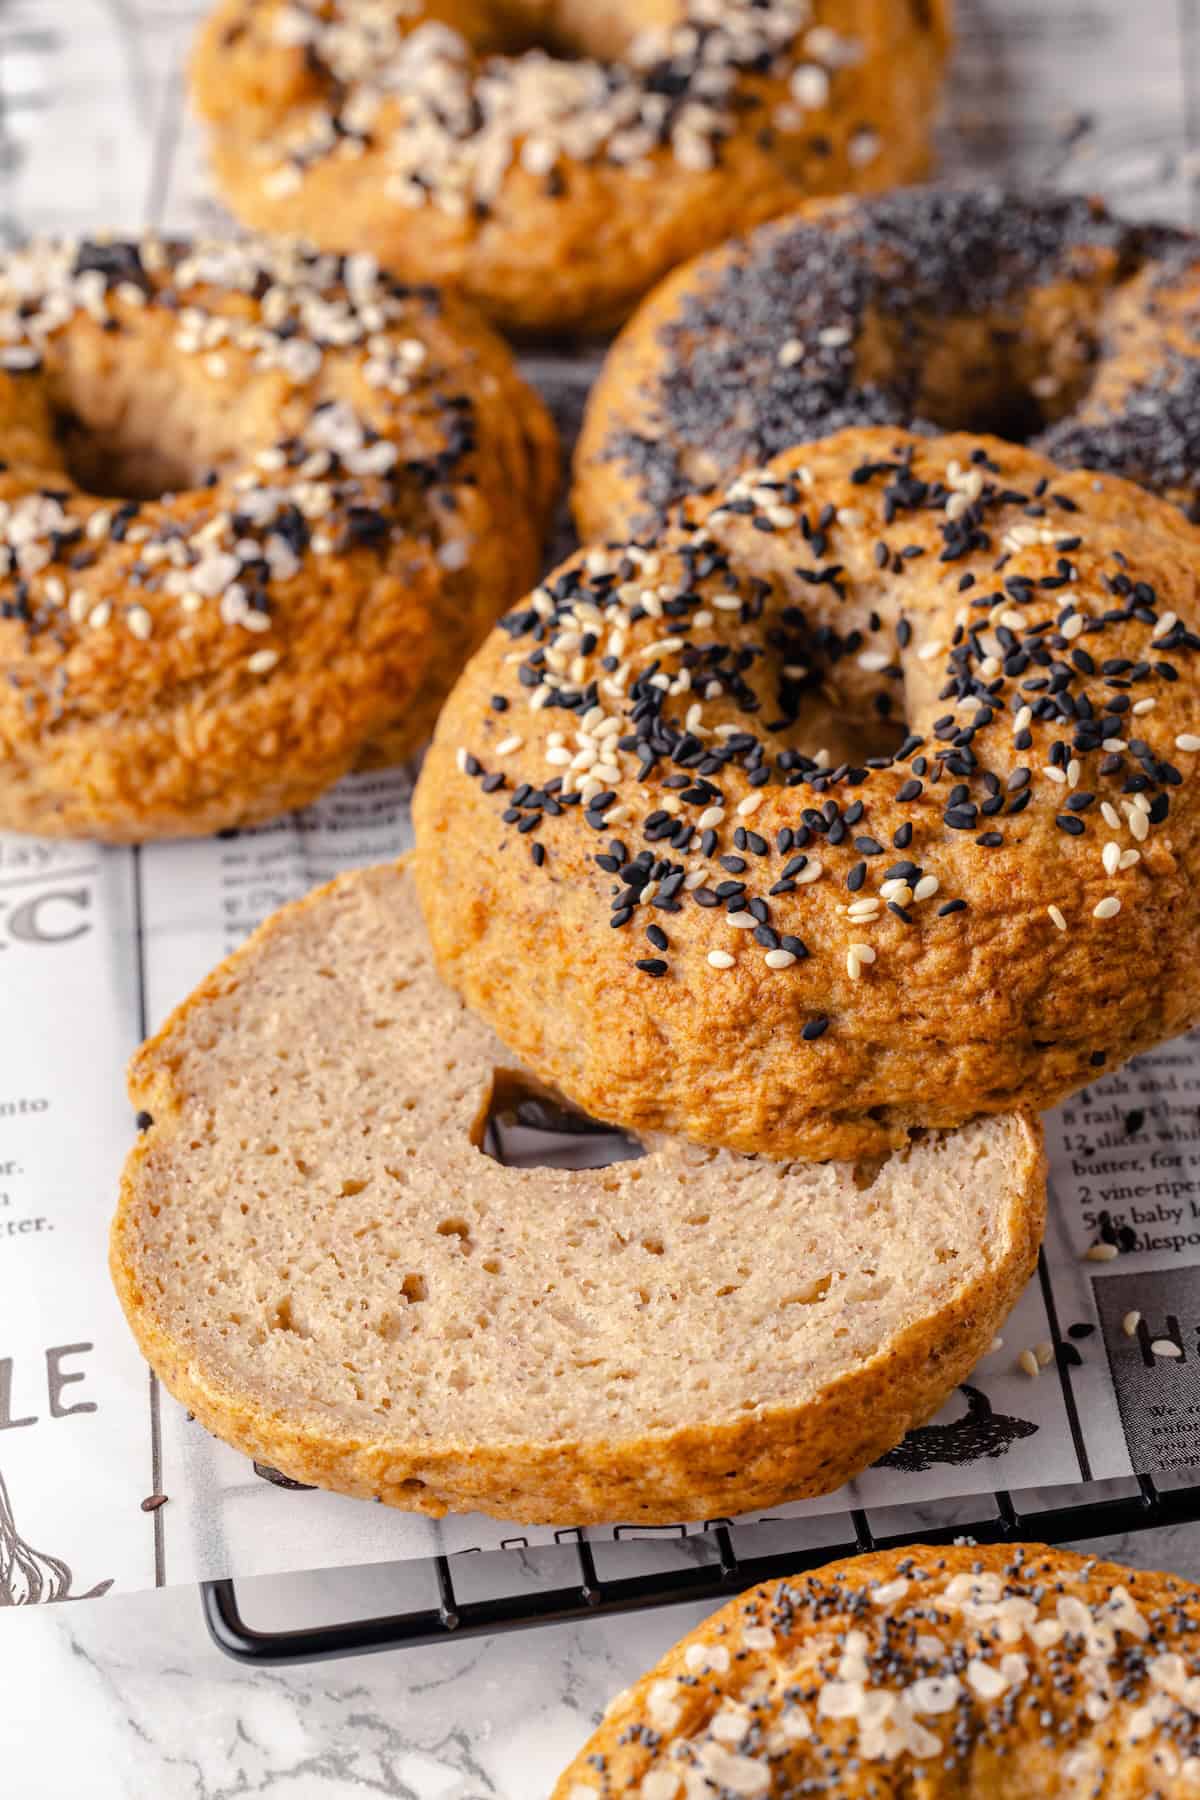
Vegan and gluten-free bagels for everyone! These homemade bagels are so tasty, even those who aren’t gluten-free will flip for them. Chewy, delicious, and perfect for smearing with your favourite plant-based cream cheese!
I love coming up with recipes for gluten-free breads. I’ve done Gluten-Free Naan and Gluten-Free Sandwich Bread , but gluten-free bagels? I wasn’t sure if I’d be able to get it right. Bagels are tough even with regular wheat flour! But after several attempts, I finally came up with a recipe that I’m proud to share. Your mornings will never be the same!
Why This Vegan Gluten-Free Bagel Recipe WORKS
This recipe combines the perfect ingredients to create chewy, flavourful bagels that are both vegan and gluten-free.
- A custom gluten-free flour blend . Using the right gluten-free flour blend is crucial for achieving the proper texture, and I realized that a store-bought blend wouldn’t cut it. I had to make my own! A mix of rice flour, tapioca starch, sorghum flour, and corn starch works best to mimic the elasticity (AKA gluten) of traditional flour.
- Psyllium husk . This is a game-changer for gluten-free baking. Psyllium husk provides structure and chewiness, acting as a substitute for the gluten typically found in regular bagels as well as helping bind everything together.
- Yeast . To give the bagels their classic rise and subtle tangy flavour, yeast is essential. (Learn more: Is Yeast Vegan? )
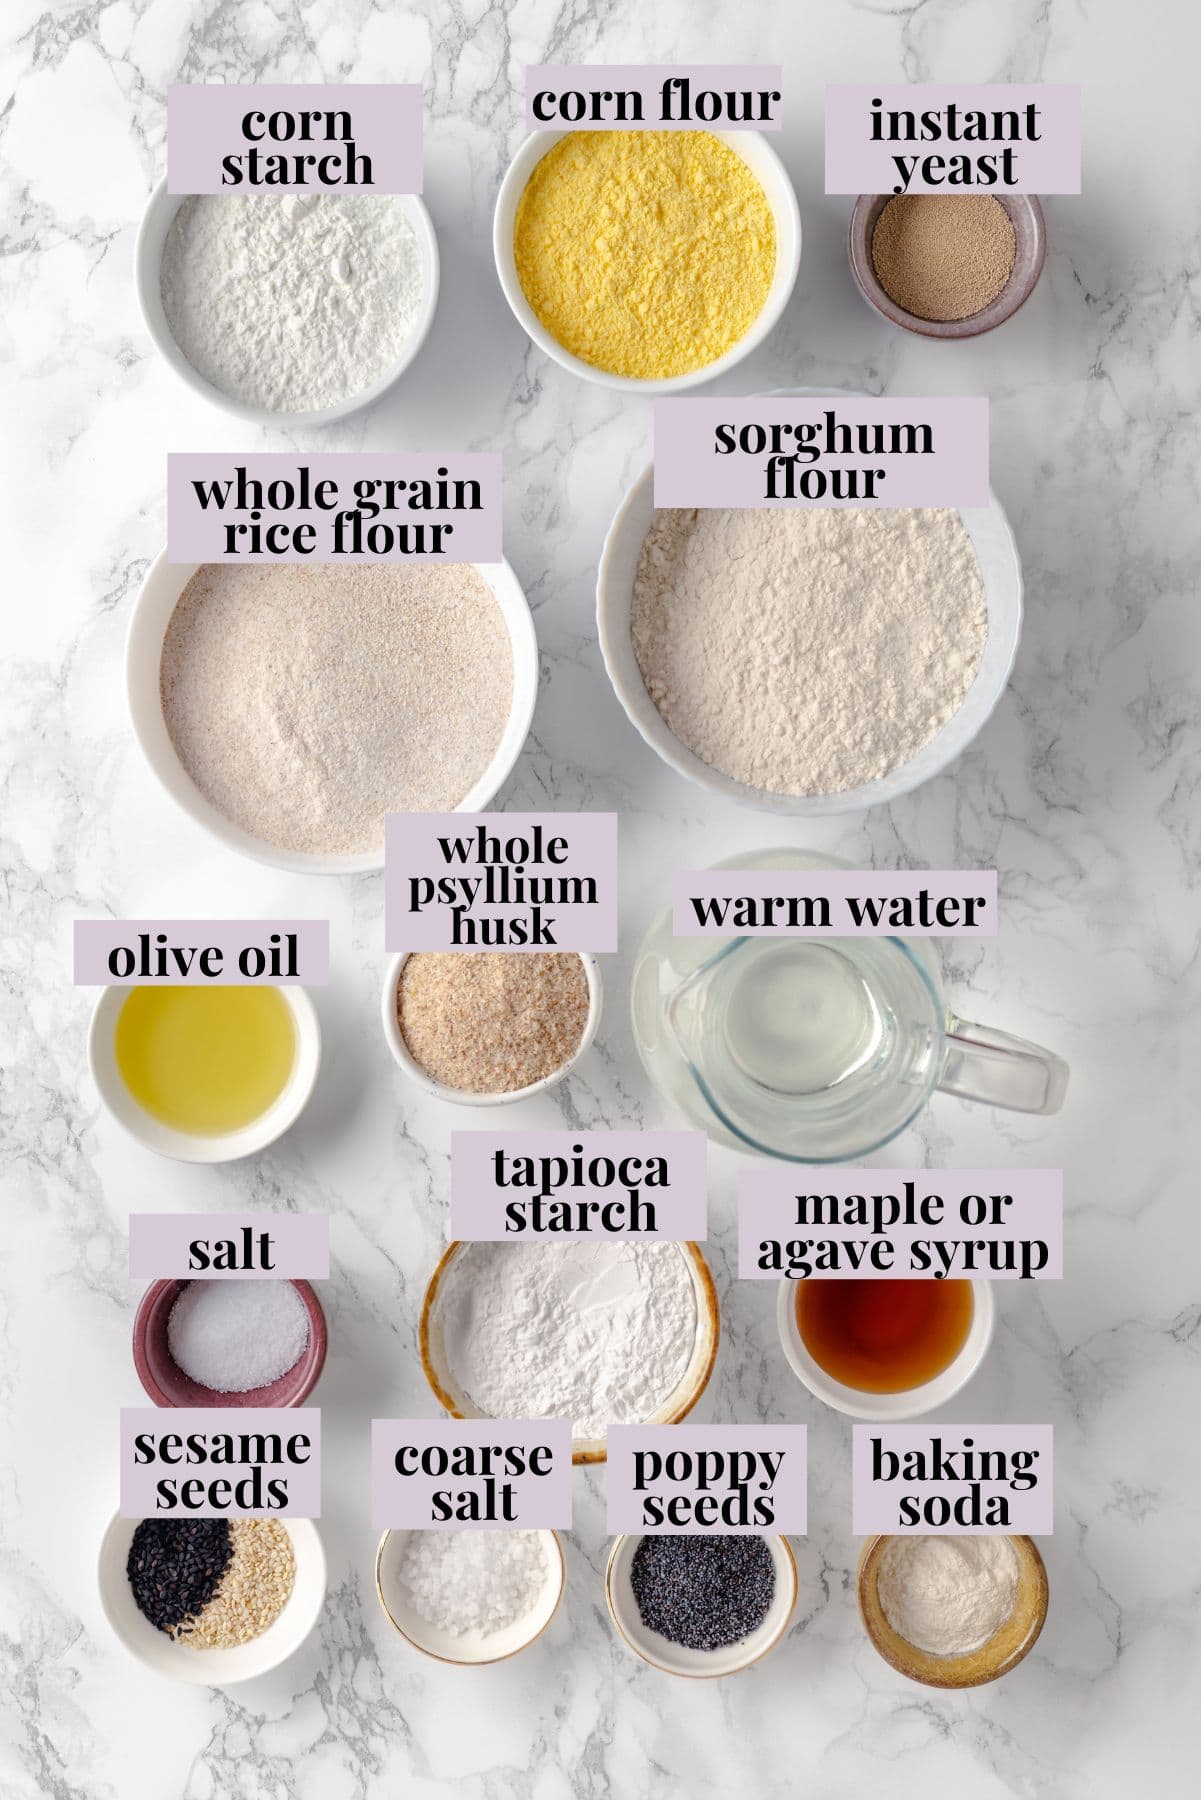
Notes on Ingredients
Here’s what you’ll need to make homemade gluten-free bagels. Scroll down to the recipe card to find the ingredient quantities and recipe instructions.
Dough:
- Water – Warm water helps activate the yeast. Just don’t use hot water, or you’ll kill the yeast instead!
- Whole psyllium husk – A binding agent that improves texture of gluten-free bagels and breads.
- Maple syrup or agave syrup – This adds a touch of sweetness and feeds the yeast.
- Olive oil
- Instant yeast
- Tapioca starch – Adds chewiness and elasticity.
- Cornstarch – Lightens the texture and helps bind the ingredients too.
- Whole grain rice flour – This is what helps give the bagels structure.
- Corn flour – Contributes a slight sweetness and nice texture.
- Sorghum flour or buckwheat flour – I love the earthy flavour of both of these flours. Feel free to use either!
- Salt
For boiling:
- Water
- Baking soda – This creates an alkaline environment and gives the bagels that chewy “skin” on the outside.
Toppings :
- Sesame seeds, poppy seeds, everything bagel seasoning, coarse salt
How to Make Gluten-Free Bagels
Making gluten-free bagels at home is easier than you might think—and if you love to bake like I do, you’ll even find it fun!

Mix the liquid ingredients.
- Mix the liquid ingredients. . Whisk the water, psyllium husk, maple syrup, and olive oil in a bowl and set aside for 10 minutes to thicken.
- Mix the dry ingredients . In another bowl, whisk the tapioca starch, cornstarch, rice flour, corn flour, sorghum flour, instant yeast, and salt.
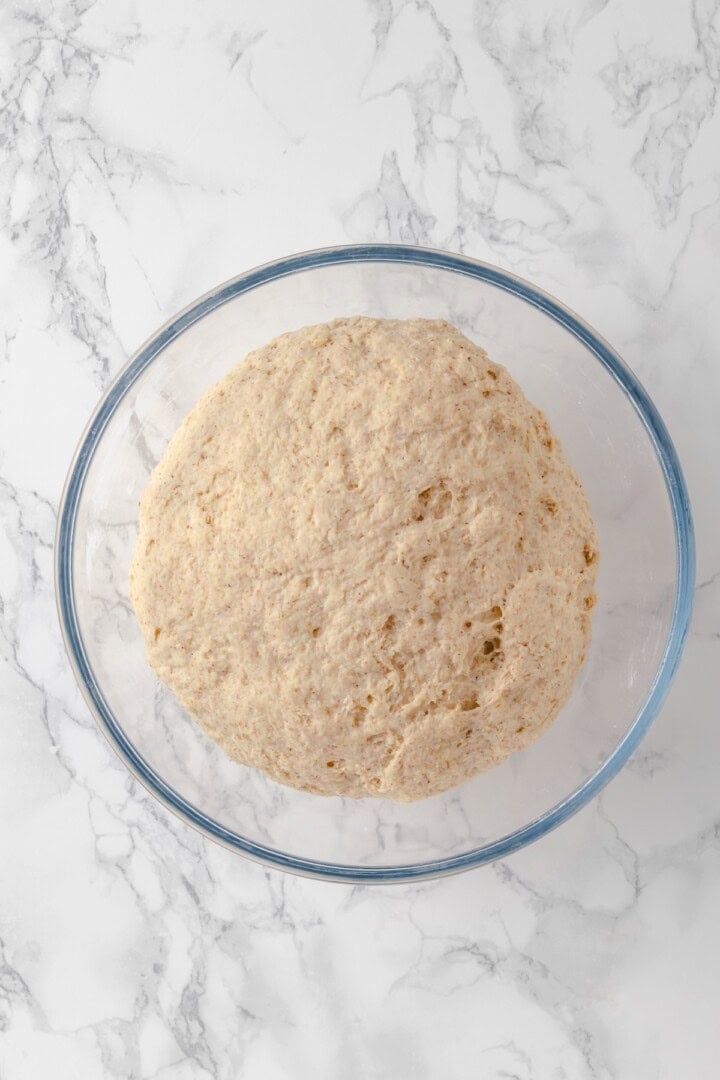
Combine wet and dry; let the dough rise.
- Finish the dough . Mix the dry ingredients into wet ingredients, then cover the bowl and set in a warm place to proof for about 45 minutes.
- Shape the bagels . Divide the dough into 8 portions; roll each into a ball, then poke a hole in the middle and stretch a bit to form bagels. Set the bagels on a parchment-lined baking sheet, cover, and let them rise for 20 to 30 minutes.
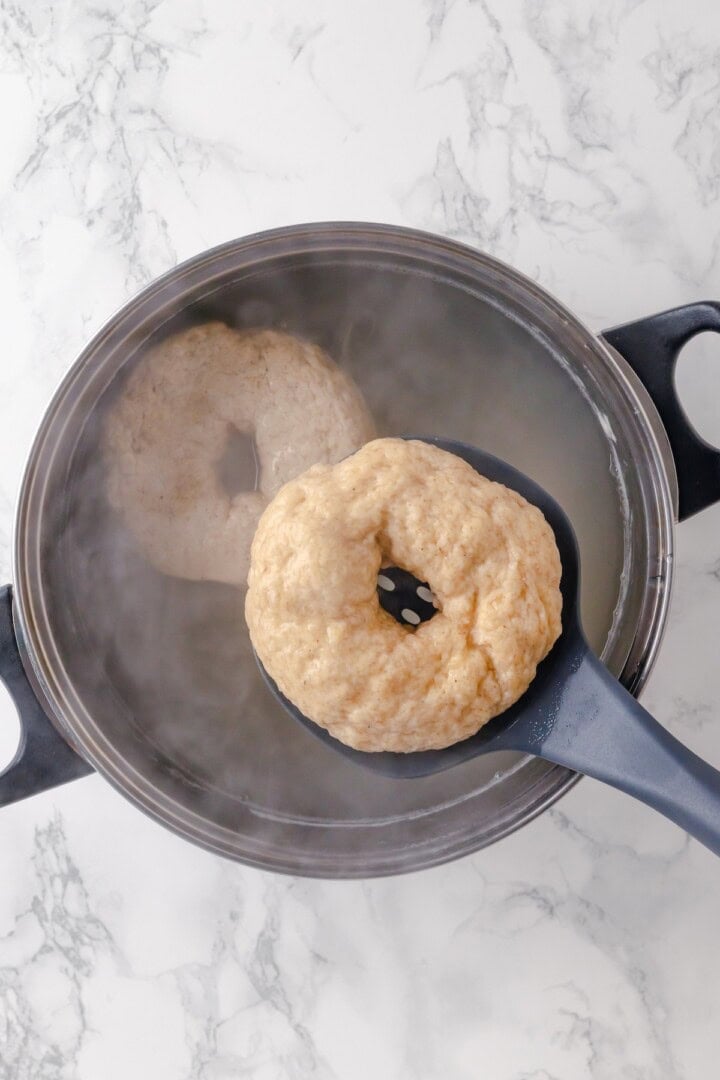
Boil the bagels.
- Boil the bagels . Bring a pot of water to a boil and add the baking soda. Boil 2 bagels at a time for 30 seconds per side. Transfer the bagels back to the baking sheet with a slotted spoon.
- Bake . Sprinkle the bagels with toppings and bake at 425ºF for about 30 minutes, or until golden brown.
- Cool . Line a wire rack with a clean kitchen towel and set the bagels on top to cool completely before serving or storing.
Tips and Variations
- Don’t make any substitutions . With gluten-free baking, it’s important to follow the recipe exactly as written. Any substitutions could significantly alter the texture and taste of your bagels. This recipe is tested and perfected as-is!
- Use a kitchen scale . For the best results, weigh the ingredients with a kitchen scale rather than going by volume. This ensures that the ingredient amounts are all accurate, as even small variations can change how the bagels will turn out.
- Experiment with different toppings . While sesame seeds, poppy seeds, and everything bagel seasoning are classic choices for topping your bagels, don’t be afraid to try something else! Some other options include dried herbs, dried minced garlic or onion, or even grated vegan cheese.
- Add in some mix-ins . You can also add in some mix-ins like dried fruits, nuts, or chocolate chips to the dough before shaping and boiling.

My Favourite Ways to Enjoy These Bagels
First, I always toast these gluten-free bagels by slicing them in half and popping them in the toaster. Then, I love piling on the WORKS: Vegan Cream Cheese , Carrot Lox , some fresh dill, and capers. Plain bagels are also delicious as a PB&J—add my Strawberry Jam and peanut butter (or try it with Homemade Pecan Butter !).
How to Store
- Room temperature : Gluten-free bagels can be stored at room temperature for 1-2 days in an airtight container or plastic bag.
- Refrigerator : If you want to keep your bagels fresh for longer, you can store them in the refrigerator for up to 5 days. Make sure to wrap them in plastic wrap or seal in an airtight container to prevent them from drying out.
- Freezer : These bagels freeze well and can last for up to 3 months when properly stored. Wrap each bagel individually in plastic wrap and then place them in a freezer-safe bag or container before storing in the freezer. To defrost, simply let them sit at room temperature for a few hours or microwave for a quick thaw.
More Vegan Baking Recipes
- Vegan Cinnamon Rolls
- Gluten-Free Focaccia
- Gluten-Free Dinner Rolls
- No Knead Bread (Dutch Oven Bread)
- Olive Bread
Ingredients
Dough:
- 2 cups water , warm – 480 ml
- ¼ cup whole psyllium husk , 25 g
- 2 tablespoons maple syrup or agave syrup , 30 ml
- 2 tablespoons olive oil , 30 ml
- 2 teaspoons instant yeast , 6 g
- ½ cup tapioca starch , 60 g
- ½ cup cornstarch , 60 g
- 1 cup whole grain rice flour , 150 g
- ½ cup corn flour , 60 g
- 1 cup + 2 tablespoons sorghum flour or buckwheat flour , 140 g
- 2 teaspoons salt , 10 g
For boiling:
- Large pot of water , about 5 quart, 4.7 liters
- 1 tablespoon baking soda , 4 g
Toppings:
- Sesame seeds, poppy seeds, everything bagel seasoning, coarse salt
Instructions
- In a large bowl, whisk warm water, psyllium husk, maple syrup, and olive oil. Let rest for 10 minutes to thicken.
- In another bowl, mix tapioca starch, corn starch, rice flour, corn flour, sorghum flour, instant yeast, and salt.
- Add dry ingredients to wet ingredients. Mix thoroughly to form a smooth dough. It will be slightly sticky.
- Cover the dough bowl with a clean towel. Let it rest in a warm place for about 45 minutes to rise slightly.
Shape the Bagels:
- Divide dough into 8 equal portions.
- With lightly oiled hands, roll each portion into a ball. Poke a hole in the center and shape into a bagel form.
- Place bagels on a baking sheet lined with parchment paper. Cover and let rest for another 20-30 minutes in a warm place.
Boil and Bake:
- Preheat the oven to 425°F (220°C).
- Bring a large pot of water to a gentle boil and add baking soda.
- Boil bagels, 2 at a time, for about 30 seconds on each side.
- Remove with a slotted spoon and place back on the baking sheet.
- Sprinkle bagels with desired toppings.
- Bake for 30 minutes until golden brown.
- Cool on a wire rack covered with kitchen towel, this will ensure your bagels have a soft crust.
Notes
- I recommend weighing the ingredients.
- Room temperature : Gluten-free bagels can be stored at room temperature for 1-2 days in an airtight container or plastic bag.
- Refrigerator : If you want to keep your bagels fresh for longer, you can store them in the refrigerator for up to 5 days. Make sure to wrap them in plastic wrap or seal in an airtight container to prevent them from drying out.
- Freezer : These bagels freeze well and can last for up to 3 months when properly stored. Wrap each bagel individually in plastic wrap and then place them in a freezer-safe bag or container before storing in the freezer. To defrost, simply let them sit at room temperature for a few hours or microwave for a quick thaw.

Gluten-Free Bagels
Ingredients
Dough:
- 2 cups water warm - 480 ml
- ¼ cup whole psyllium husk 25 g
- 2 tablespoons maple syrup or agave syrup 30 ml
- 2 tablespoons olive oil 30 ml
- 2 teaspoons instant yeast 6 g
- ½ cup tapioca starch 60 g
- ½ cup cornstarch 60 g
- 1 cup whole grain rice flour 150 g
- ½ cup corn flour 60 g
- 1 cup + 2 tablespoons sorghum flour or buckwheat flour 140 g
- 2 teaspoons salt 10 g
For boiling:
- Large pot of water about 5 quart, 4.7 liters
- 1 tablespoon baking soda 4 g
Toppings:
- Sesame seeds, poppy seeds, everything bagel seasoning, coarse salt
Instructions
- In a large bowl, whisk warm water, psyllium husk, maple syrup, and olive oil. Let rest for 10 minutes to thicken.
- In another bowl, mix tapioca starch, corn starch, rice flour, corn flour, sorghum flour, instant yeast, and salt.
- Add dry ingredients to wet ingredients. Mix thoroughly to form a smooth dough. It will be slightly sticky.
- Cover the dough bowl with a clean towel. Let it rest in a warm place for about 45 minutes to rise slightly.
Shape the Bagels:
- Divide dough into 8 equal portions.
- With lightly oiled hands, roll each portion into a ball. Poke a hole in the center and shape into a bagel form.
- Place bagels on a baking sheet lined with parchment paper. Cover and let rest for another 20-30 minutes in a warm place.
Boil and Bake:
- Preheat the oven to 425°F (220°C).
- Bring a large pot of water to a gentle boil and add baking soda.
- Boil bagels, 2 at a time, for about 30 seconds on each side.
- Remove with a slotted spoon and place back on the baking sheet.
- Sprinkle bagels with desired toppings.
- Bake for 30 minutes until golden brown.
- Cool on a wire rack covered with kitchen towel, this will ensure your bagels have a soft crust.
Notes
- I recommend weighing the ingredients.
- Room temperature : Gluten-free bagels can be stored at room temperature for 1-2 days in an airtight container or plastic bag.
- Refrigerator : If you want to keep your bagels fresh for longer, you can store them in the refrigerator for up to 5 days. Make sure to wrap them in plastic wrap or seal in an airtight container to prevent them from drying out.
- Freezer : These bagels freeze well and can last for up to 3 months when properly stored. Wrap each bagel individually in plastic wrap and then place them in a freezer-safe bag or container before storing in the freezer. To defrost, simply let them sit at room temperature for a few hours or microwave for a quick thaw.
Nutrition
Gluten-Free Bagels https://jessicainthekitchen.com/gluten-free-bagels/ May 14, 2025
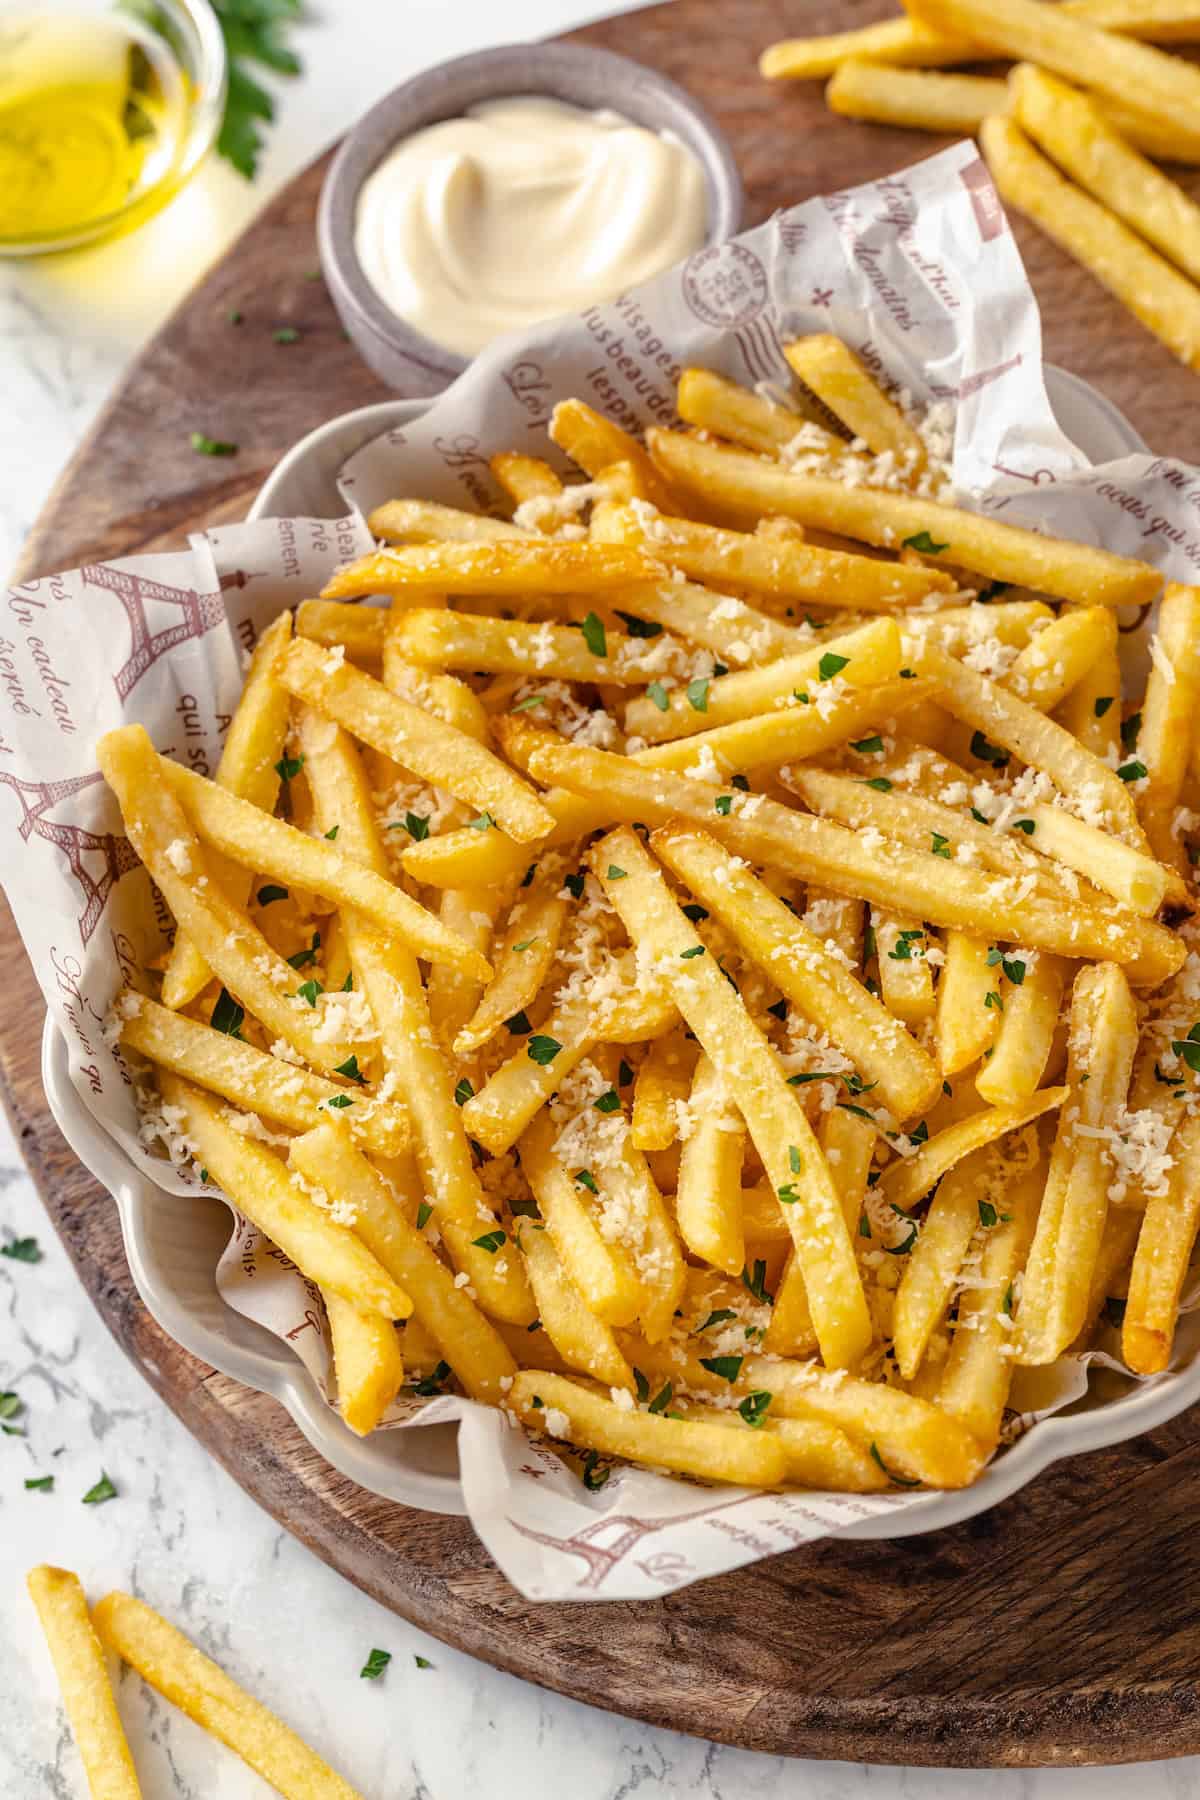
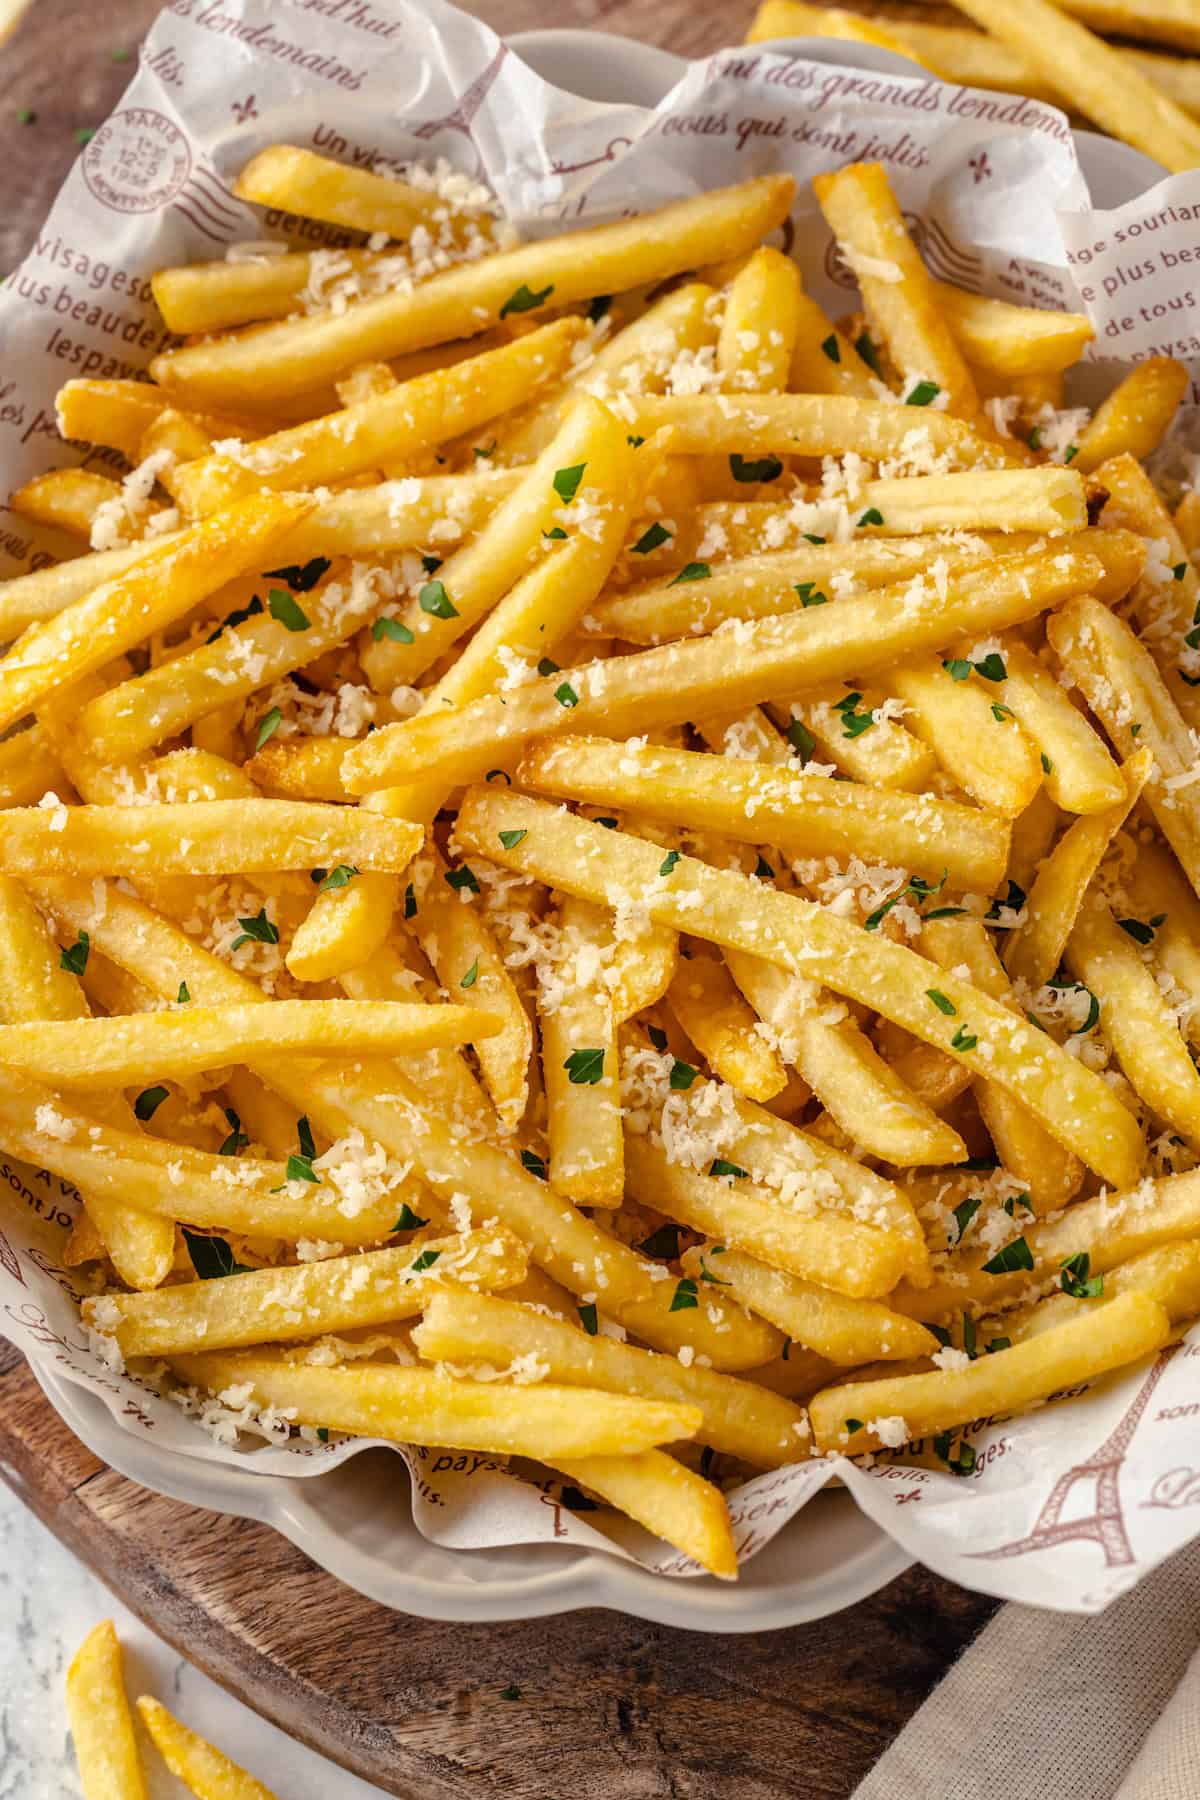
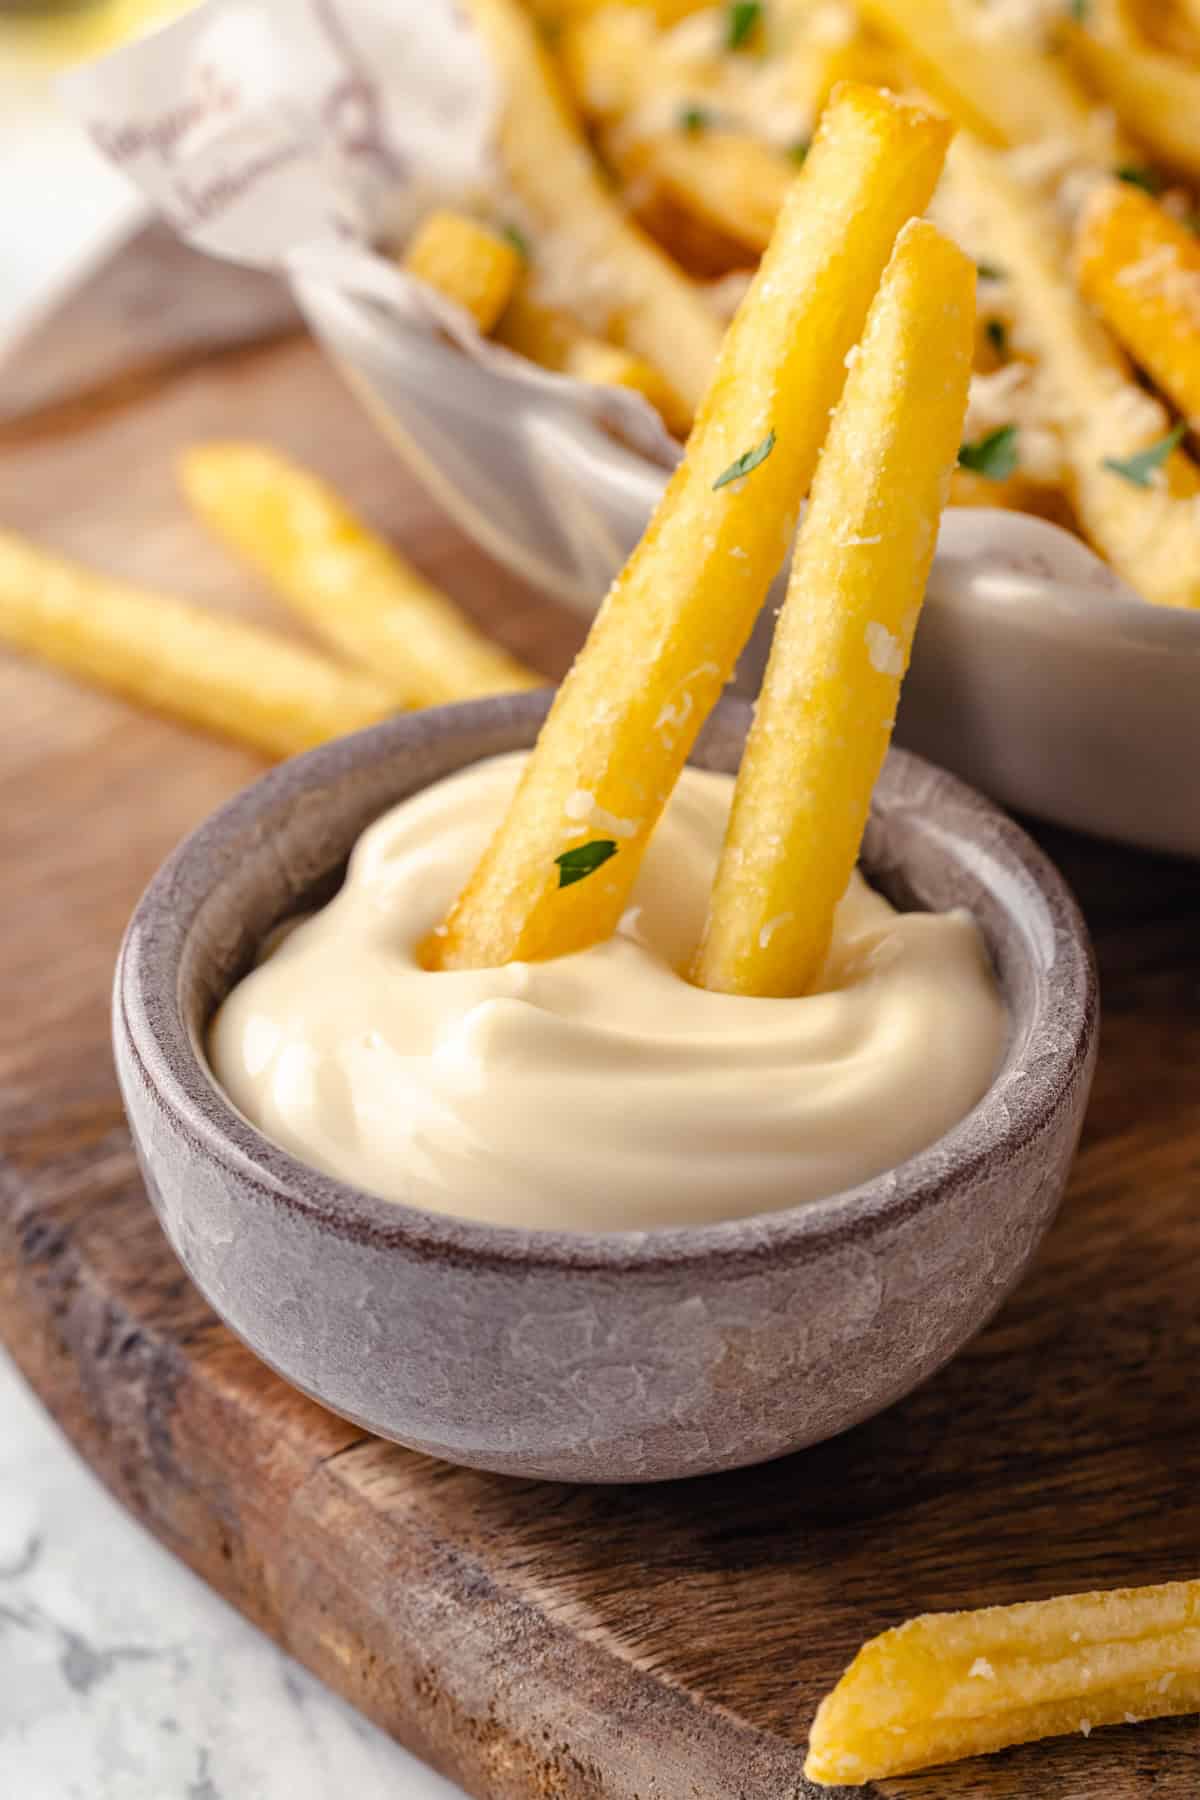
These are the perfect homemade truffle fries! They’re super crispy, they’ve got that fantastic earthy truffle flavour, and lots of vegan Parmesan sprinkled on top. Divine!
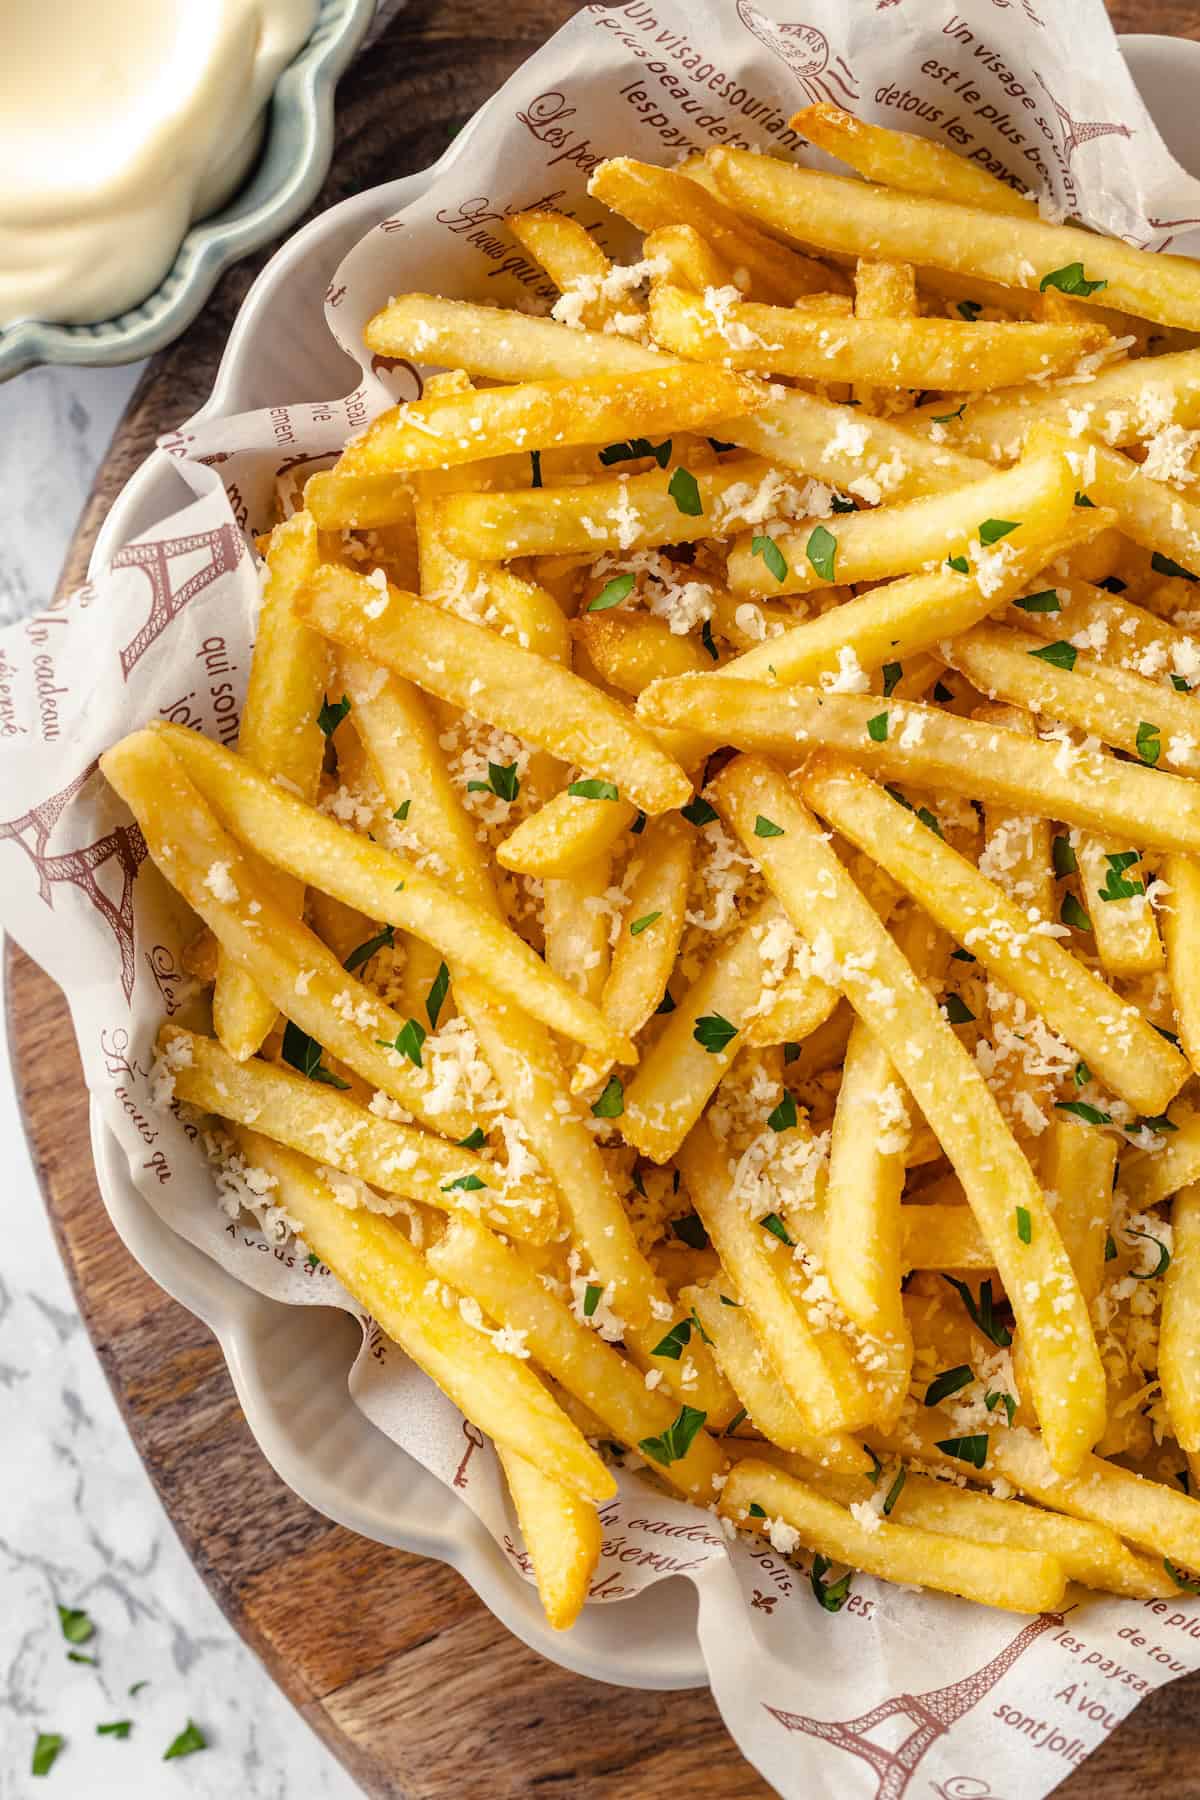
Truffle fries are the fancied up version of fries and ketchup. They’re dressed to the nines and ready to impress! Restaurant versions are showered with Parmesan and I wanted to replicate that same flavour at home—but with Vegan Parmesan . This recipe is every bit as delicious as the kind you find on restaurant menus and perfect for parties, but I love them so much I’ve been making them for Gav and me to enjoy as a movie night snack!
Why These Truffle Fries Are the Best Fries
Truffle fries elevate the traditional fry into a gourmet experience! Here’s why my recipe is going to be your go-to.
- Decadent flavour . The rich, earthy taste of truffles combined with the salty fries and umami Parmesan is a match made in heaven—and I love that we’re able to nail that flavour without the dairy!
- The perfect crispy texture . To really mimic the restaurant versions of this dish, I deep fried the potatoes. I do share a non-fried variation too, but if you want ultra-maximum-super crispiness, deep frying is the way to go.
- Easy to make at home (really!) . Once you get the hang of deep frying, you’ll find that it’s a really easy, quick cooking method. For recipes like truffle fries and Crispy Homemade Falafel , frying gets them cooked fast!
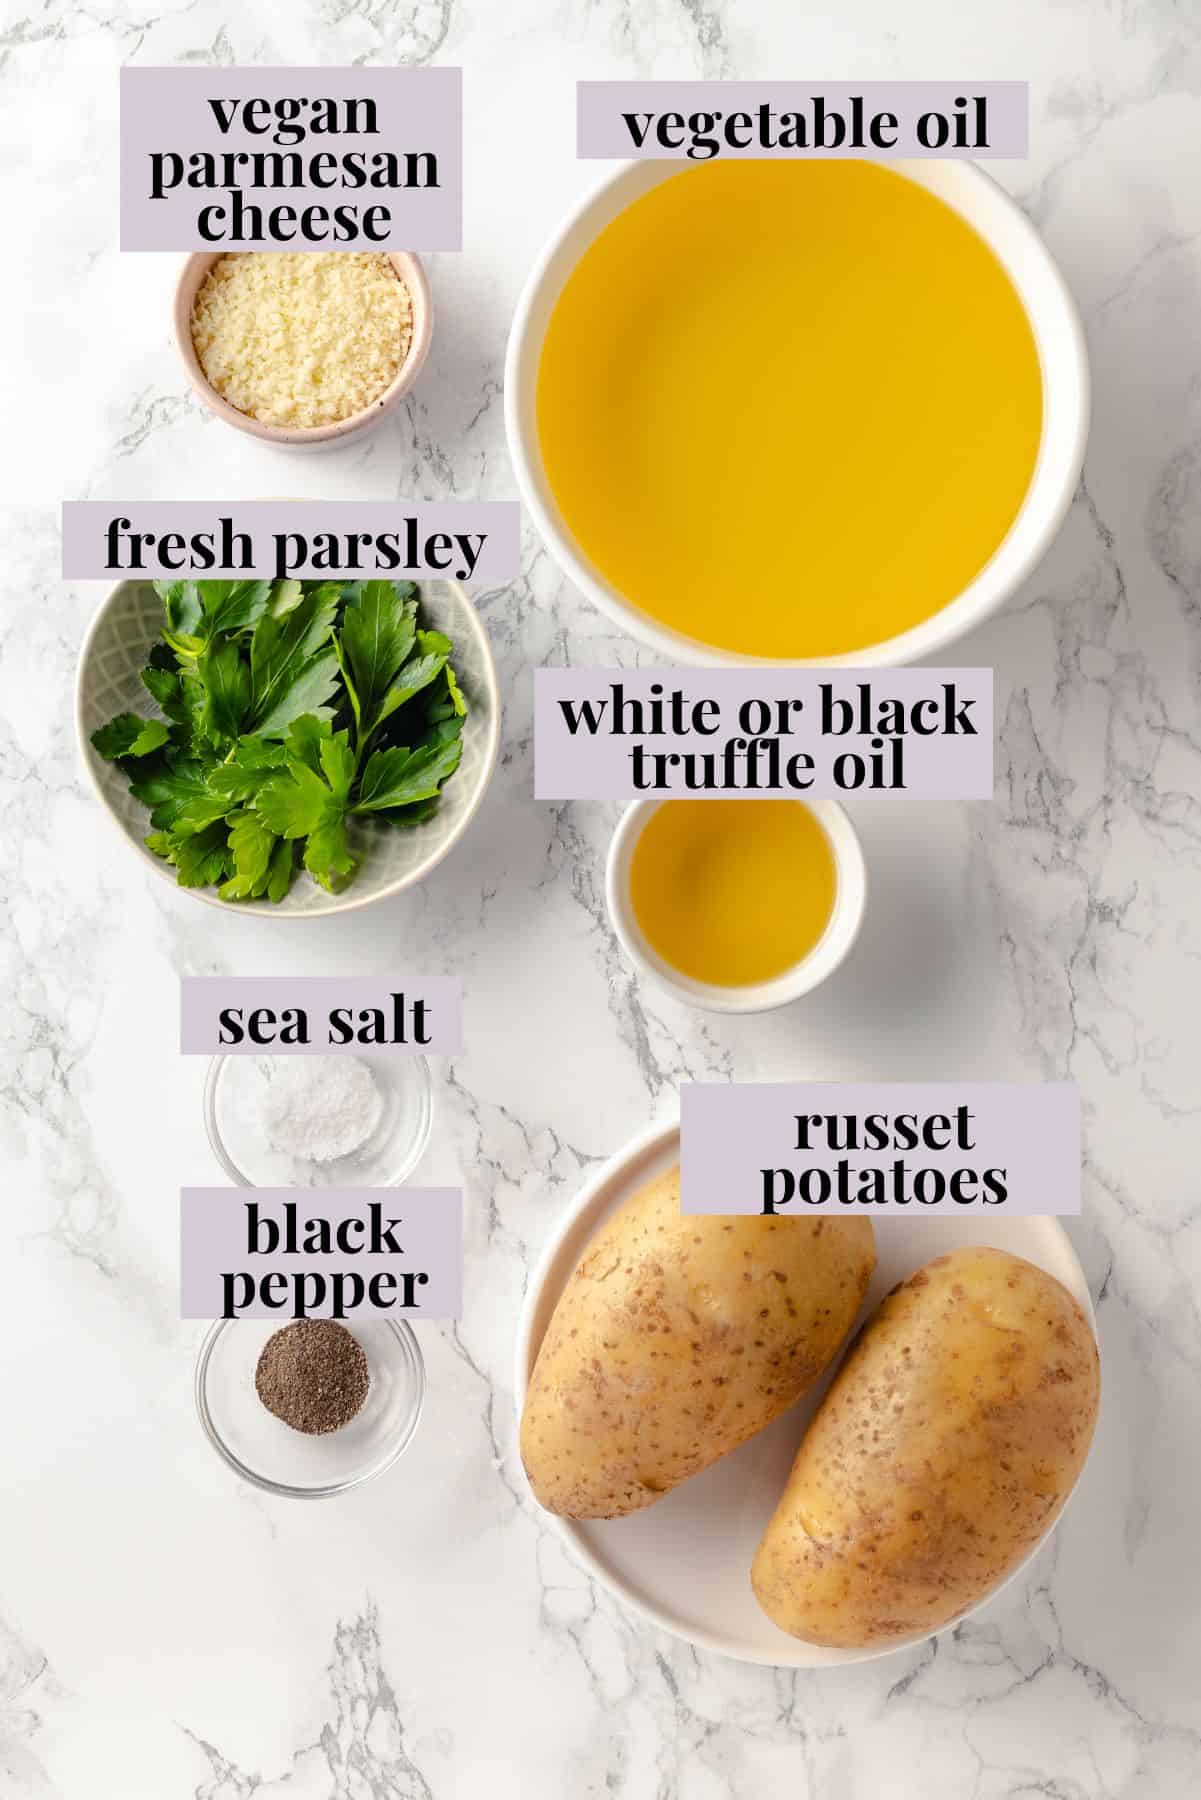
Notes on Ingredients
Choosing the right ingredients is key to making the perfect batch of truffle fries. Scroll down to the recipe card to find the ingredient quantities and recipe instructions.
- Russet potatoes – I like to use russets because they get crispier than other potato varieties.
- Vegetable oil – You’ll need a high smoke point oil for frying the potatoes. Canola or peanut oil also work.
- Truffle oil – Use a good one made with real truffles, not artificial truffle flavouring.
- Vegan Parmesan cheese – You can use homemade vegan Parmesan or store-bought; nutritional yeast is another option.
- Fresh parsley – Finely chopped for a pop of colour and freshness.
- Sea salt and black pepper
For Serving (Optional):
- Truffle aioli – You can make this by combining Vegan Mayo with truffle oil and lemon juice.
- Extra Parmesan
- More chopped parsley
How to Make Truffle Fries
Here’s a visual guide to the process of making these truffle fries.
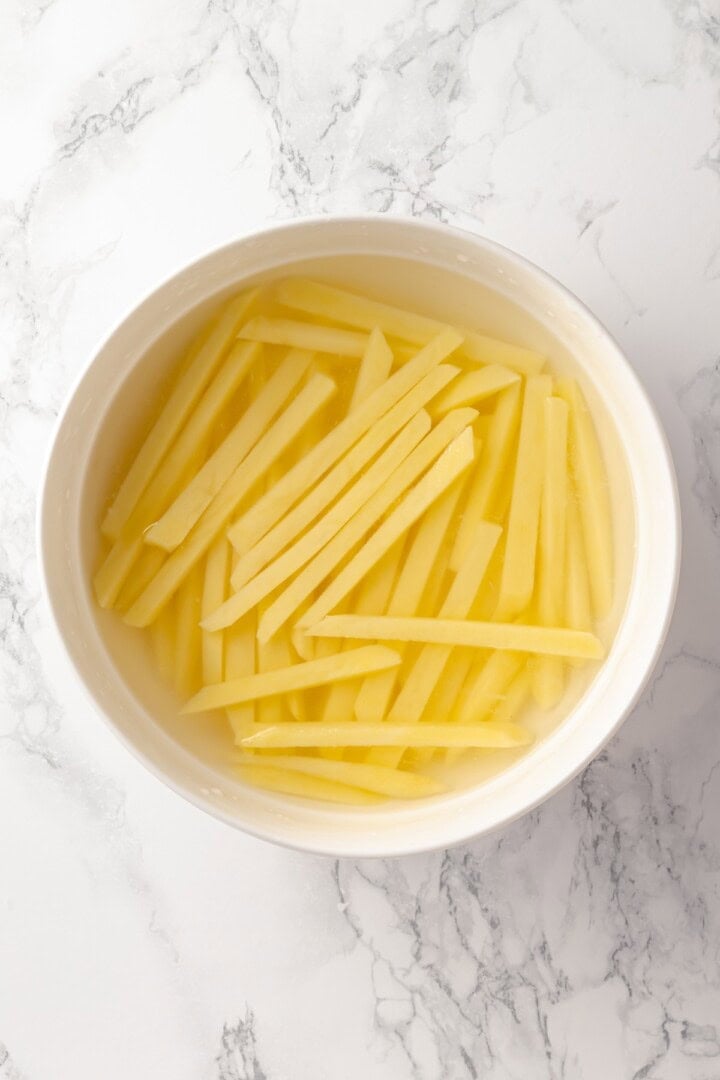
Soak the fries.
- Prep the potatoes . Wash, peel, and cut the potatoes into ¼-inch thick fries. Soak them in cold water for 30 minutes to 2 hours, then drain and pat dry.
- Deep fry the potatoes . Heat the oil in a deep pot until it reaches 350°F. Fry the potatoes in batches for 8-10 minutes, or until they’re golden brown. Remove with a slotted spoon and drain on paper towels.
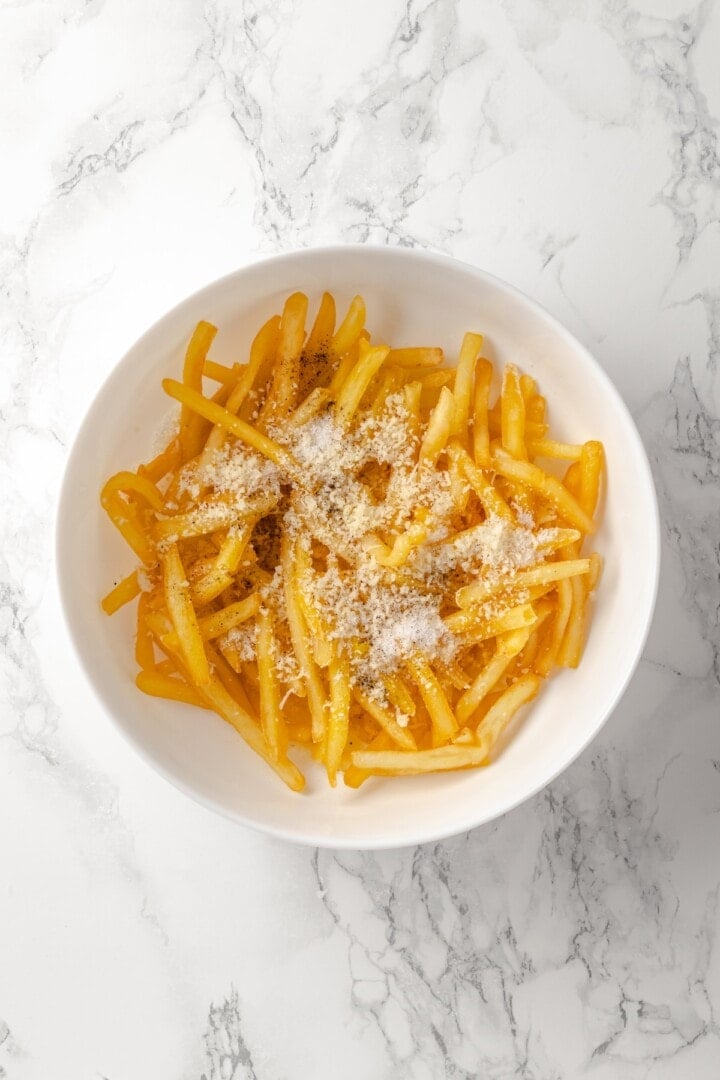
Add truffle oil and Parmesan.
- Season. Place the fries in a bowl and drizzle with truffle oil. Sprinkle with vegan Parmesan, parsley, salt, and pepper, then toss to coat.
- Serve . Plate the truffle fries and serve with your favourite dipping sauce and garnish with extra Parmesan and parsley, if desired.
Tips for Success
- Cut the fries to the same size . This will ensure even cooking and avoid some fries being under or overdone.
- Do not overcrowd the pot . It’s better to cook the fries in batches than to overcrowd them, which will lower the oil temperature and result in soggy fries.
- Dry the potatoes well before frying . Using a paper towel or kitchen towel, pat the cut potatoes dry to remove excess moisture. This will help them crisp up and avoid oil spatters when frying.
- Serve immediately . French fries are best when served hot and crispy right out of the oven or fryer!
Variations
We want the truffle flavour to be the star of the show, so I don’t recommend making big variations to the ingredients. But here are some switches you can make:
- Bake the fries . I share instructions for baking the fries in the recipe card below.
- Use the air fryer . The air fryer also works for this recipe! Start with my Air Fryer Potato Wedges or Air Fryer Shoestring Fries as your base, then add the truffle fry ingredients.
- Start with frozen fries . Cook them as directed on the package for a shortcut to truffle deliciousness.
- Serve with garlic aioli . Add freshly minced or mashed roasted garlic to vegan mayo and serve this with the truffle fries for dipping instead of truffle aioli.
Serving Suggestions
You can serve truffle fries as an appetizer, on their own as a snack, or as a side for things like Quinoa Burgers and Chopped Cheese Sandwiches .
How to Store and Reheat Leftovers
- Refrigerator : While this is definitely a recipe best enjoyed immediately, you can store leftovers in an airtight container in the refrigerator for 2-3 days. I do not recommend freezing this recipe, as the texture and flavour will be compromised.
- Reheating : To reheat fries, it’s best to use an oven, air fryer, or toaster oven rather than a microwave to maintain their crispiness. Preheat your oven to 400°F and spread the fries in a single layer on a baking sheet. Heat for 5-10 minutes, or until warm and crispy.
More French Fry Recipes
- Sweet Potato Fries
- Baked Carrot Fries with Harissa Tahini Dip
- Loaded Nacho Fries
Ingredients
- 2 large russet potatoes , or Yukon Gold for a creamier texture – about 500 g
- 2 cups vegetable oil , for frying or see baking method below – 480 ml
- 2 tablespoons white or black truffle oil , 30 ml
- ¼ cup grated vegan Parmesan cheese , 25 g
- 1 tablespoon finely chopped fresh parsley , 4 g
- ½ teaspoon sea salt , or to taste – 2.5 g
- ½ teaspoon black pepper , 1 g
For Serving (Optional):
- Truffle aioli , mix vegan mayo with truffle oil and lemon juice to taste
- Extra Parmesan
- More chopped parsley
Instructions
- Wash and peel the potatoes.
- Cut into thin fries, about ¼-inch thick. Try to keep them uniform for even cooking.
- Place the cut fries in a bowl of cold water and soak for at least 30 minutes (or up to 2 hours) to remove excess starch.
- Drain and pat the fries completely dry with a clean kitchen towel.
Cooking Option 1: Deep Frying
- In a deep pot or Dutch oven, heat the oil to 350°F (175°C) using a thermometer for accuracy.
- Fry the potatoes in batches for 8-10 minutes until browned.
- Remove with a slotted spoon and drain on a paper towel-lined tray.
Cooking Option 2: Baking
- Preheat to 425°F (218°C). Line a baking sheet with parchment paper.
- For crispier baked fries, you can soak the cut potatoes in water for 30 minutes and dry them thoroughly.
- Toss the dried potatoes with 2 tablespoons of olive oil, salt, and pepper.
- Spread them in a single layer on the baking sheet, avoiding overcrowding.
- Bake for 20-25 minutes, flipping halfway, until crispy and golden.
Season and Finish
- Place the hot fries in a large bowl.
- Drizzle with truffle oil (start with 1 tablespoon and add more if needed).
- Sprinkle with Parmesan, parsley, salt, and pepper. Toss to coat evenly.
- Serve immediately with your favorite dipping sauce, like truffle aioli or garlic aioli. Garnish with extra Parmesan and parsley if desired.
Notes
- Refrigerator : While this is definitely a recipe best enjoyed immediately, you can store leftovers in an airtight container in the refrigerator for 2-3 days. I do not recommend freezing this recipe, as the texture and flavour will be compromised.
- Reheating : To reheat fries, it’s best to use an oven, air fryer , or toaster oven rather than a microwave to maintain their crispiness. Preheat your oven to 400°F and spread the fries in a single layer on a baking sheet. Heat for 5-10 minutes.
