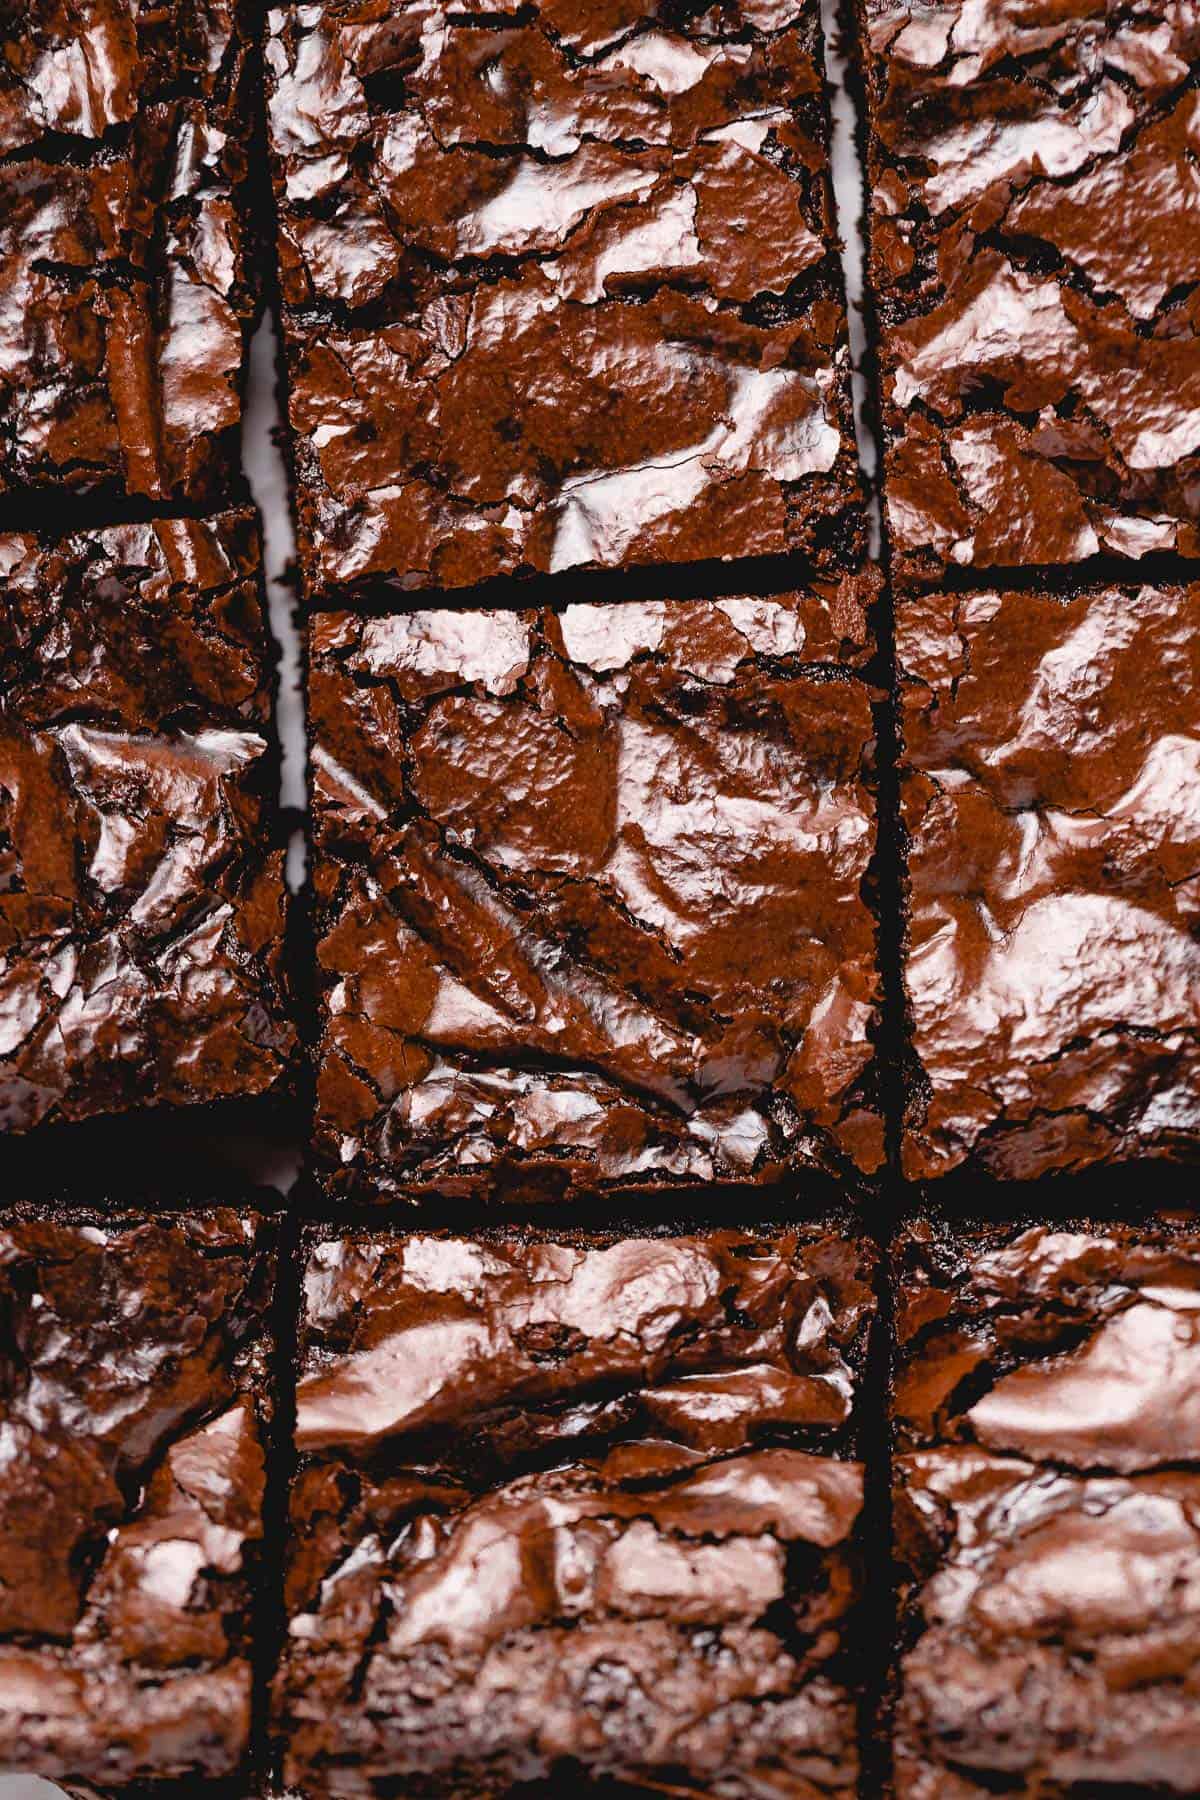
These gluten free brownies are thick, moist, chewy and taste incredible! They only need 10 ingredients, and are perfect for your gluten free and allergy friendly needs! Follow my tips for the best results every time!
Estimated reading time: 7 minutes

Thanks to Bob’s Red Mill for sponsoring this blog post! Thanks so much to you for supporting the brands who support Jessica in the Kitchen! All texts and opinions are my own.
This gluten free brownies recipe has been requested for such a long time and they’re finally here! They’re dairy free, egg free, and vegan! If you or someone in your life has certain allergy needs, these brownies are THE best place to be! Best of all? These are the best gluten free brownies made from scratch that I’ve ever had.
As usual, these gluten free brownies are made with Bob’s Red Mill , my favourite gluten free flour brand! Let me tell you, I’ve been using this flour for years . It’s basically on permanent rotation in our household. Whether you’re making these brownies, or my chocolate mug cake , or even my chocolate cake – this flour will give you the results you desire!!
Notes on the Ingredients:
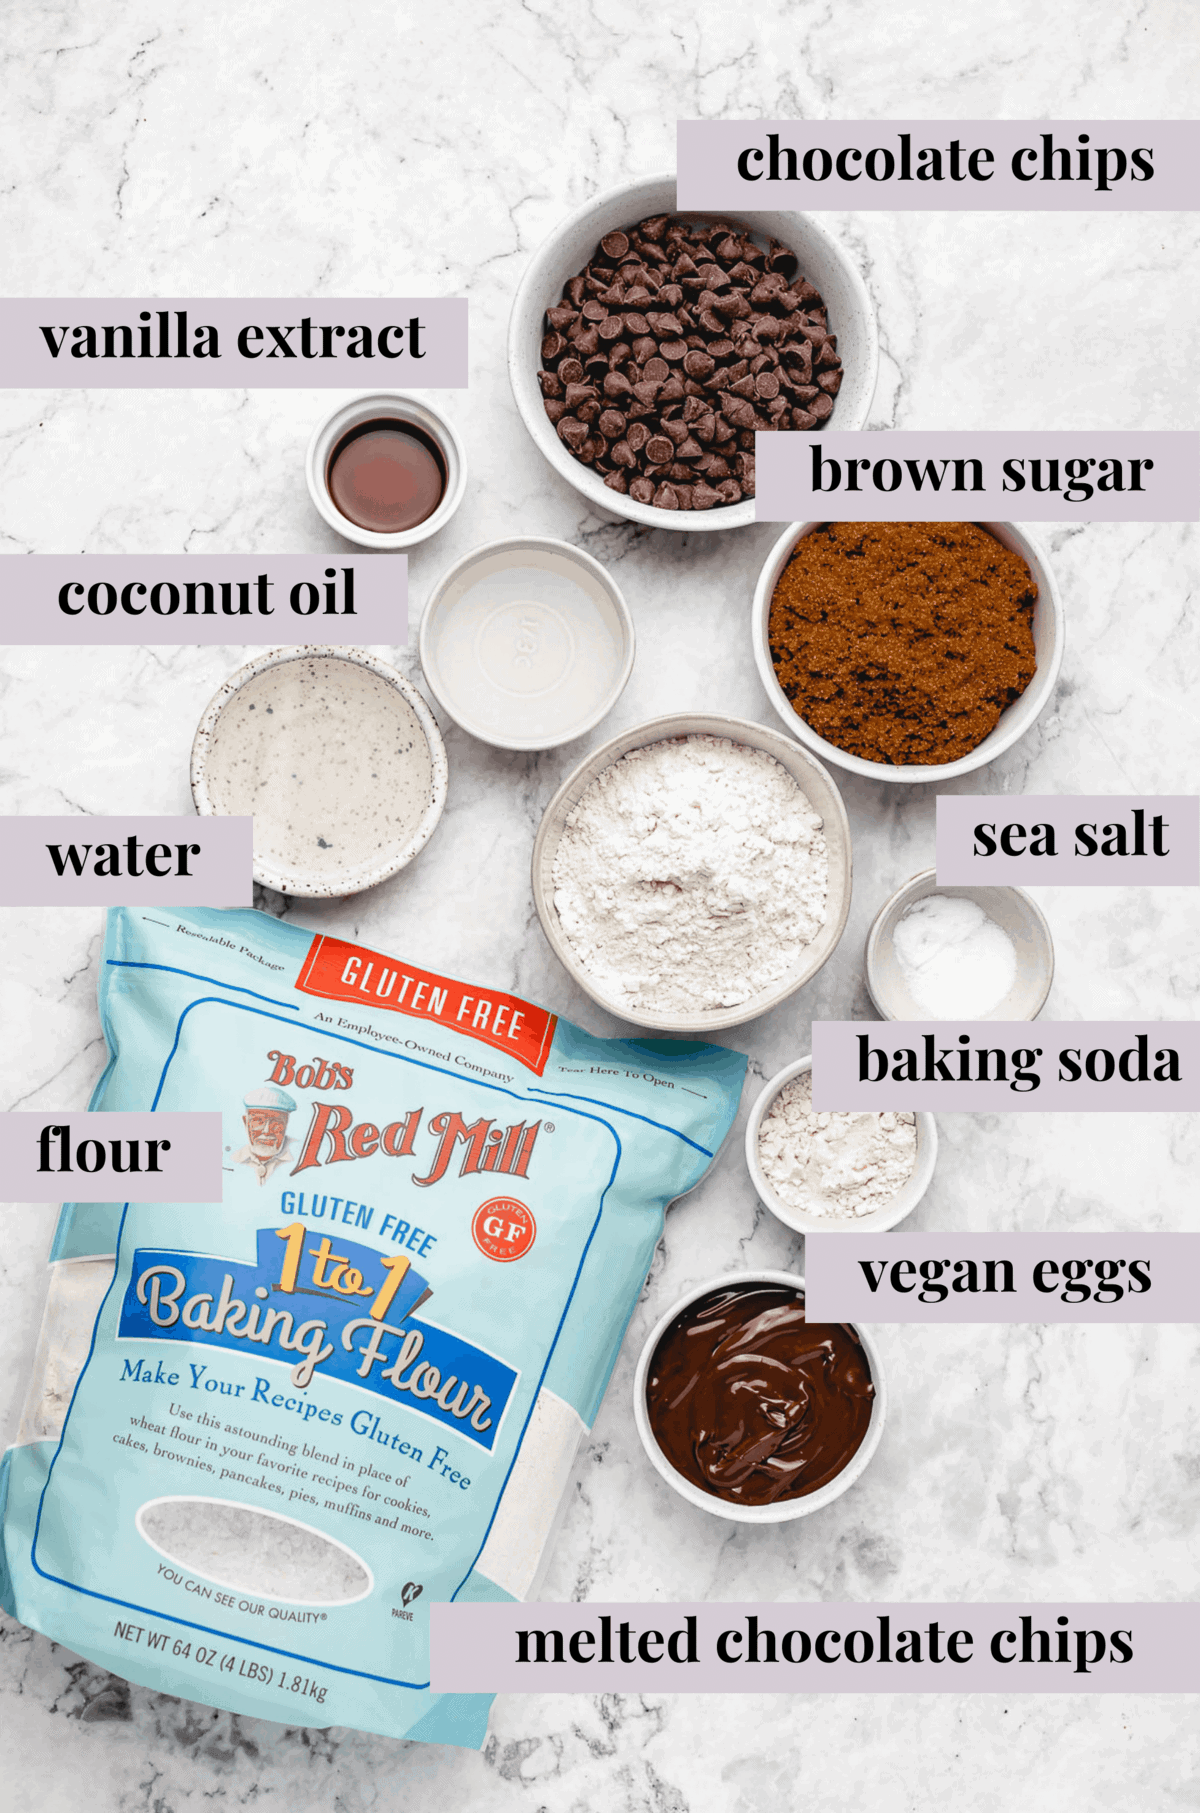
Please scroll to the recipe for the full detailed ingredients and instructions!
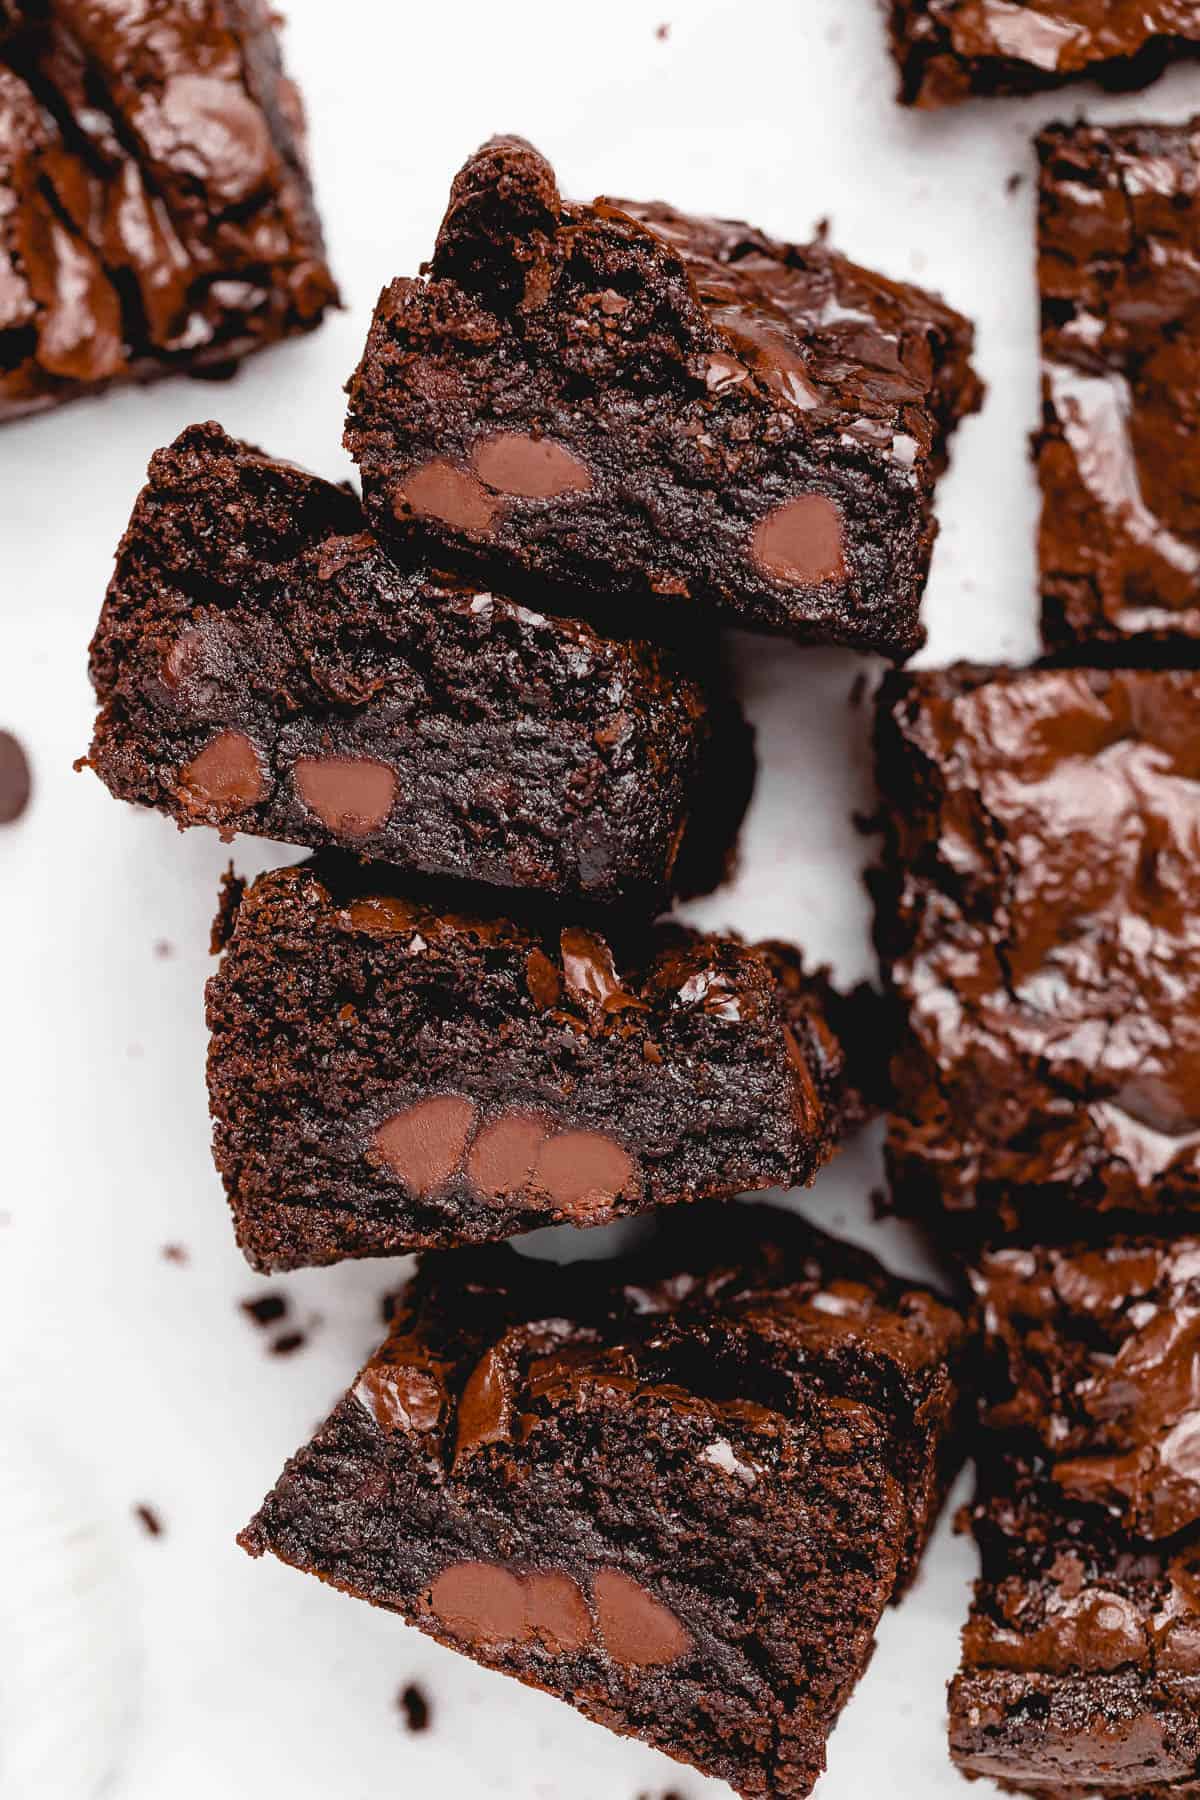
- Chocolate Chips : you’ll need some for melting, and some to mix into the brownie batter for double chocolate brownies!
- Bob’s Red Mill Gluten Free 1-to-1 Baking Flour : Always weigh out your flour for the best results! I love this gluten free flour for the texture and consistent results.
- Sea Salt : I like to use sea salt instead of regular salt. Sea salt granules are bigger than regular salt granules though, so if you want to use regular salt, I recommend reducing the measurement.
- Baking Soda: using a little baking soda gives the brownies a great lift.
- Vegan Eggs: For the best texture, the Bob’s Red Mill Egg Replacer is my go-to. Flax eggs are also a great option, but as there is natural oil in flax seeds, it can produce a slightly “oily on the bottom” results. This doesn’t happen when you’re using the egg replacers. One bag lasts a while, and I just always keep one in the fridge for whenever I’m ready to use it.
- Brown Sugar : white sugar will also work here, and so will pure cane sugar if you prefer.
- Melted Coconut Oil (or any oil): is the substitute for butter in this recipe; it makes for fabulously rich brownies. You don’t have to use any coconut oil. You can use refined coconut oil for no flavour, or any other oil!
- Water: make sure to only add the amount in the recipe. Adding too much water makes the brownies less thick, and less likely to hold together after baking.
- Pure Vanilla Extract: for extra yummy flavor!
How to Make Gluten Free Brownies(Step by Step)
These brownies come together in 6 easy steps. Once you’ve melted the chocolate chips, all you really have to do is mix the rest of the ingredients together, and pop the brownies in the oven to bake. You’re welcome for that wonderful, chocolate-y smell! For the full ingredients and instructions, scroll to the recipe!
Preheat the Oven: Preheat oven to 325°F/160°C.
Melt the Chocolate Chips: Melt chocolate chips in the microwave for a minute, stirring after to see if chips have melted. See full recipe below for complete melting instructions.
Combine Flour, Salt & Baking Soda: In a medium bowl, whisk the flour, salt and baking soda until combined. Set aside.

Mix Wet and Dry Ingredients : In a separate bowl, add the flax eggs, sugar and oil and mix until combined for about 2 minutes. Add the water and the vanilla extract and mix again.
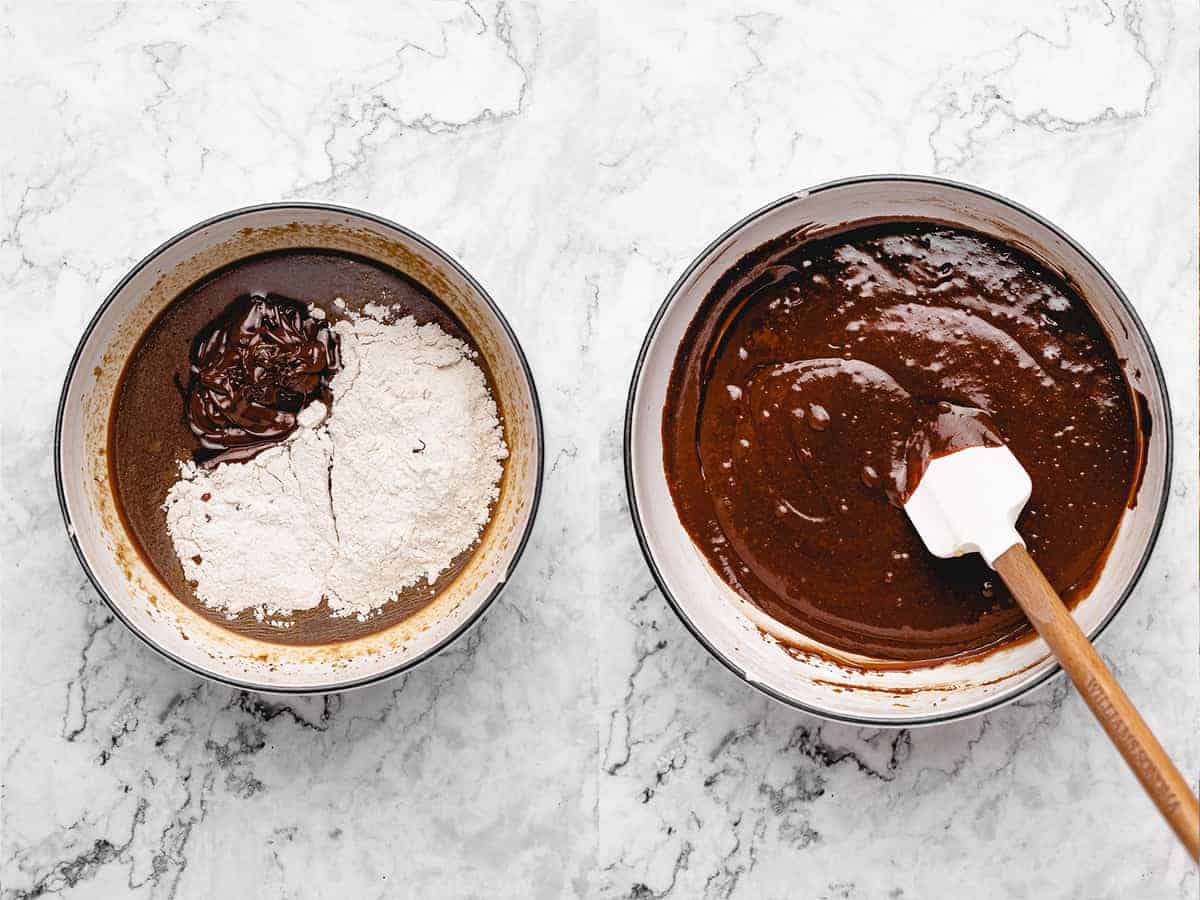
Then add the dry mixture to the wet mixture and melted chocolate chips and stir for about 3 minutes until combined.
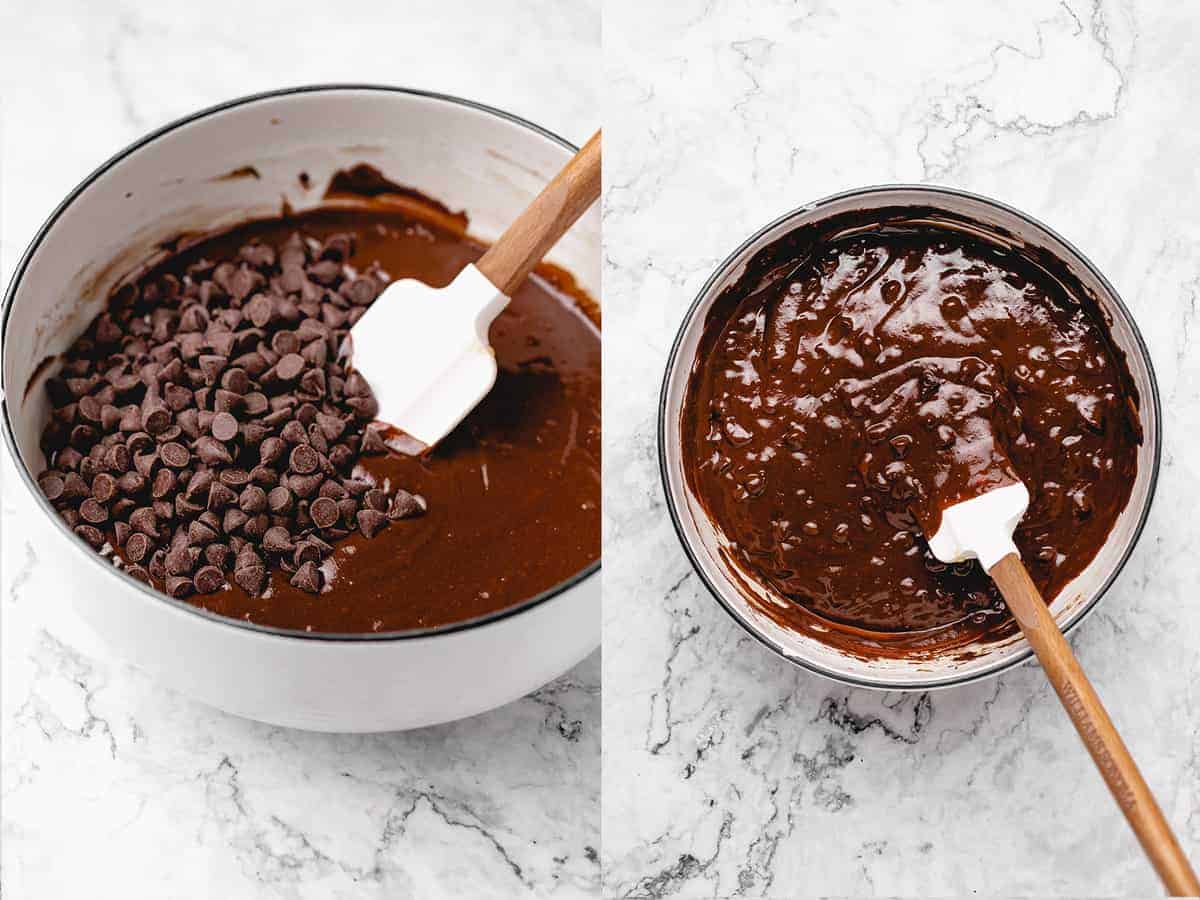
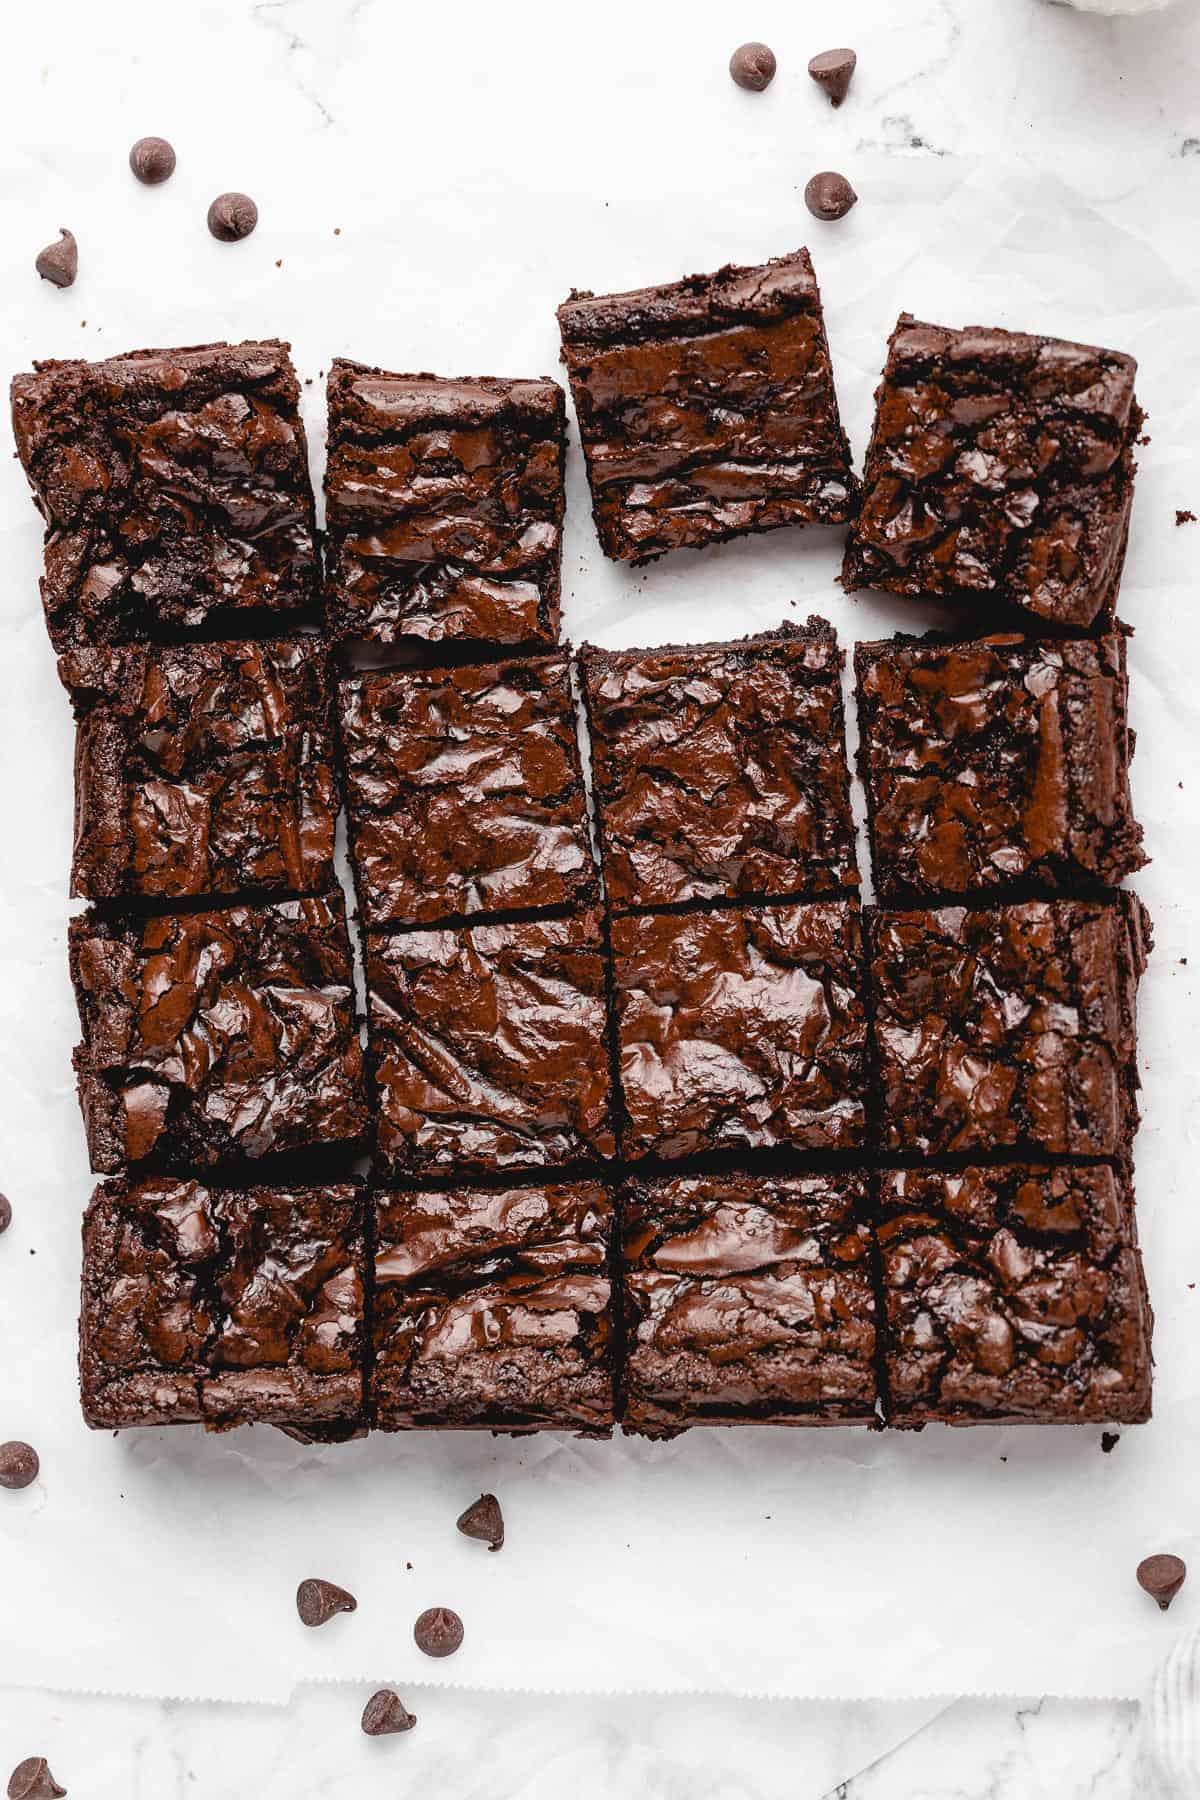
Add Chocolate Chips: Stir in 1 cup chocolate chips. Pour into a greased, parchment lined, or a greased foil-lined 8×8 square pan.
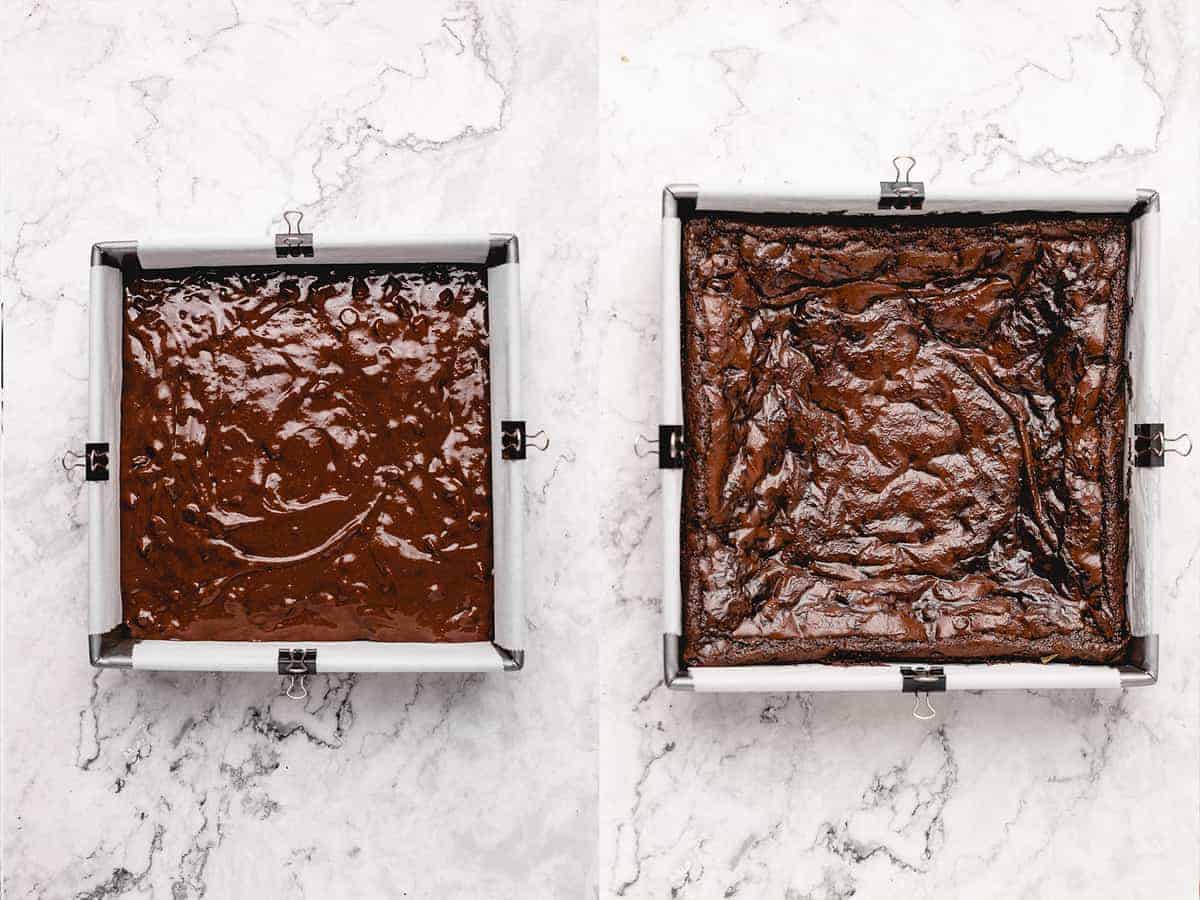
Bake for 35 minutes.
Let Brownies Cool: When finished, remove from the oven and allow to cool completely in a pan on a wire rack. Slice into 9, 12 or 16 slices. Enjoy!
Tips for Success:
- Pan Size: Don’t change the pan size! It’s crucial for the success of the right texture and outcome of brownies.
- Especially for gluten free flour, I always recommended weighing out your flour. If you look on the back of the flour, it actually weights differently than wheat flour, and that’s why it’s extra important to weigh it out. I just use a regular kitchen scale, and get guaranteed results each time. Plus, weighing out my ingredients removes ANY stress from the baking process as to whether you’re “doing it correctly”.
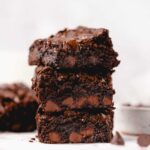
- For Extra Fudgy Brownies: once the brownies have cooled, let them firm up in the fridge for an hour or two. If you’re a fan of really thick, dense brownies (i.e. not cake-like), this is the way to go.
- Also, let the brownies cool before you cut them so that they don’t crumble.
- For the best texture, the egg replacers are my go to. Flax eggs are also a great option, but as there is natural oil in flax seeds, it can produce a slightly “oily on the bottom” results. This doesn’t happen when you’re using the egg replacers. One bag lasts a while, and I just always keep one in the fridge for whenever I’m ready to use it.
- Especially if you’re using an older baking pan, I recommend using parchment paper to line your pan. It makes sticking basically impossible, and allows you to lift the entire brownie out of the pan!
- Now, your chocolate chips. The chocolate chips you use in this recipe can actually make a huge difference on whether your brownies come out cake-y or fudgy! I highly recommend using a semi-sweet or vegan milk chocolate here. It tends to have more cocoa butter/chocolate liquor base, which results in a creamier and fudgier consistency.
- Especially ensure that you weigh out your oil. I can’t tell you how many times I eye-ball oil and it’s way over the actual weight, which can produce an over-oily end product.
- Always check that your baking soda is still fresh before starting!
How to Store Extra Brownies
Extra brownies can be refrigerated for about a week in an airtight container. When you want to enjoy them again, I recommend microwaving them for a couple of seconds so that they’ll be nice and warm.
Can I Freeze Homemade Brownies?
You can totally freeze homemade brownies. They store really well in tightly-sealed freezer bags, or stacked in an airtight container. Once frozen, they will keep for 2-3 months. When you want to eat them again, it’s a good idea to thaw them in the fridge overnight.
Related Recipes
- Chocolate Mug Cake
- Vegan Chocolate Cake
- Almond Flour Brownies
Ingredients
- 1 cup chocolate chips , melted (188g)
- 1 cup Bob’s Red Mill Gluten Free 1-to-1 Baking Flour , (133.75g)
- 1/2 teaspoon sea salt
- 1/4 teaspoon baking soda
- 2 Bob’s Red Mill Egg Replacer* , or flax eggs (see notes below)
- 3/4 cup brown sugar , or cane sugar or coconut sugar (158g)
- 1/3 cup melted coconut oil , or any oil (66g)
- ¼ cup water
- 1 teaspoon pure vanilla extract
- 1 cup chocolate chips , unmelted
Instructions
- Preheat the oven to 325°F/160°C.
- Melt chocolate chips in the microwave for a minute, stirring after to see if chips have melted. If not, microwave in increments of 30 seconds until completely melted. Alternatively, you can melt it over a small pot of boiling water (Not a lot of water in the pot) and put the chocolate chips in a heatproof and melt proof bowl over the pot and stir until melted.
- In a medium bowl, whisk the flour, salt and baking soda until combined. Set aside.
- In a separate bowl, add the egg replacers, sugar and oil and mix until combined for about 2 minutes. Add the water and the vanilla extract and mix.
- Add the dry mixture from earlier to the wet mixture along with the melted chocolate chips and stir for about 3 minutes until combined.
- Stir in 1 cup chocolate chips. Pour into a parchment paper lined 8×8 square pan. Bake for 35 minutes.
- When finished, remove from the oven and allow to cool completely in a pan on a wire rack.
- Slice into 9, 12 or 16 slices. Enjoy!
Notes
- Pan Size: Don’t change the pan size! It’s crucial for the success of the right texture and outcome of brownies.
- Especially for gluten free flour, I always recommended weighing out your flour. If you look on the back of the flour, it actually weights differently than wheat flour, and that’s why it’s extra important to weigh it out. I just use a regular kitchen scale, and get guaranteed results each time. Plus, weighing out my ingredients removes ANY stress from the baking process as to whether you’re “doing it correctly”.
- For Extra Fudgy Brownies: once the brownies have cooled, let them firm up in the fridge for an hour or two. If you’re a fan of really thick, dense brownies (i.e. not cake-like), this is the way to go.
- Also, let the brownies cool before you cut them so that they don’t crumble.
- For the best texture, the egg replacers are my go to . Flax eggs are also a great option, but as there is natural oil in flax seeds, it can produce a slightly “oily on the bottom” results. This doesn’t happen when you’re using the egg replacers. One bag lasts a while, and I just always keep one in the fridge for whenever I’m ready to use it.
- Especially if you’re using an older baking pan, I recommend using parchment paper to line your pan. It makes sticking basically impossible, and allows you to lift the entire brownie out of the pan!
- Now, your chocolate chips. The chocolate chips you use in this recipe can actually make a huge difference on whether your brownies come out cake-y or fudgy! I highly recommend using a semi-sweet or vegan milk chocolate here. It tends to have more cocoa butter/chocolate liquor base, which results in a creamier and fudgier consistency.
- Especially ensure that you weigh out your oil. I can’t tell you how many times I eye-ball oil and it’s way over the actual weight, which can produce an over-oily end product.
- Always check that your baking soda is still fresh before starting!
Gluten Free Brownies (Vegan)
Ingredients
- 1 cup chocolate chips melted (188g)
- 1 cup Bob’s Red Mill Gluten Free 1-to-1 Baking Flour (133.75g)
- 1/2 teaspoon sea salt
- 1/4 teaspoon baking soda
- 2 Bob’s Red Mill Egg Replacer* or flax eggs (see notes below)
- 3/4 cup brown sugar or cane sugar or coconut sugar (158g)
- 1/3 cup melted coconut oil or any oil (66g)
- ¼ cup water
- 1 teaspoon pure vanilla extract
- 1 cup chocolate chips unmelted
Instructions
- Preheat the oven to 325°F/160°C.
- Melt chocolate chips in the microwave for a minute, stirring after to see if chips have melted. If not, microwave in increments of 30 seconds until completely melted. Alternatively, you can melt it over a small pot of boiling water (Not a lot of water in the pot) and put the chocolate chips in a heatproof and melt proof bowl over the pot and stir until melted.
- In a medium bowl, whisk the flour, salt and baking soda until combined. Set aside.
- In a separate bowl, add the egg replacers, sugar and oil and mix until combined for about 2 minutes. Add the water and the vanilla extract and mix.
- Add the dry mixture from earlier to the wet mixture along with the melted chocolate chips and stir for about 3 minutes until combined.
- Stir in 1 cup chocolate chips. Pour into a parchment paper lined 8×8 square pan. Bake for 35 minutes.
- When finished, remove from the oven and allow to cool completely in a pan on a wire rack.
- Slice into 9, 12 or 16 slices. Enjoy!
Video
Notes
- Pan Size: Don’t change the pan size! It’s crucial for the success of the right texture and outcome of brownies.
- Especially for gluten free flour, I always recommended weighing out your flour. If you look on the back of the flour, it actually weights differently than wheat flour, and that’s why it’s extra important to weigh it out. I just use a regular kitchen scale, and get guaranteed results each time. Plus, weighing out my ingredients removes ANY stress from the baking process as to whether you’re “doing it correctly”.
- For Extra Fudgy Brownies: once the brownies have cooled, let them firm up in the fridge for an hour or two. If you’re a fan of really thick, dense brownies (i.e. not cake-like), this is the way to go.
- Also, let the brownies cool before you cut them so that they don’t crumble.
- For the best texture, the egg replacers are my go to . Flax eggs are also a great option, but as there is natural oil in flax seeds, it can produce a slightly “oily on the bottom” results. This doesn’t happen when you’re using the egg replacers. One bag lasts a while, and I just always keep one in the fridge for whenever I’m ready to use it.
- Especially if you’re using an older baking pan, I recommend using parchment paper to line your pan. It makes sticking basically impossible, and allows you to lift the entire brownie out of the pan!
- Now, your chocolate chips. The chocolate chips you use in this recipe can actually make a huge difference on whether your brownies come out cake-y or fudgy! I highly recommend using a semi-sweet or vegan milk chocolate here. It tends to have more cocoa butter/chocolate liquor base, which results in a creamier and fudgier consistency.
- Especially ensure that you weigh out your oil. I can’t tell you how many times I eye-ball oil and it’s way over the actual weight, which can produce an over-oily end product.
- Always check that your baking soda is still fresh before starting!
Nutrition
Gluten Free Brownies (Vegan) https://jessicainthekitchen.com/gluten-free-brownies-vegan/ April 29, 2021
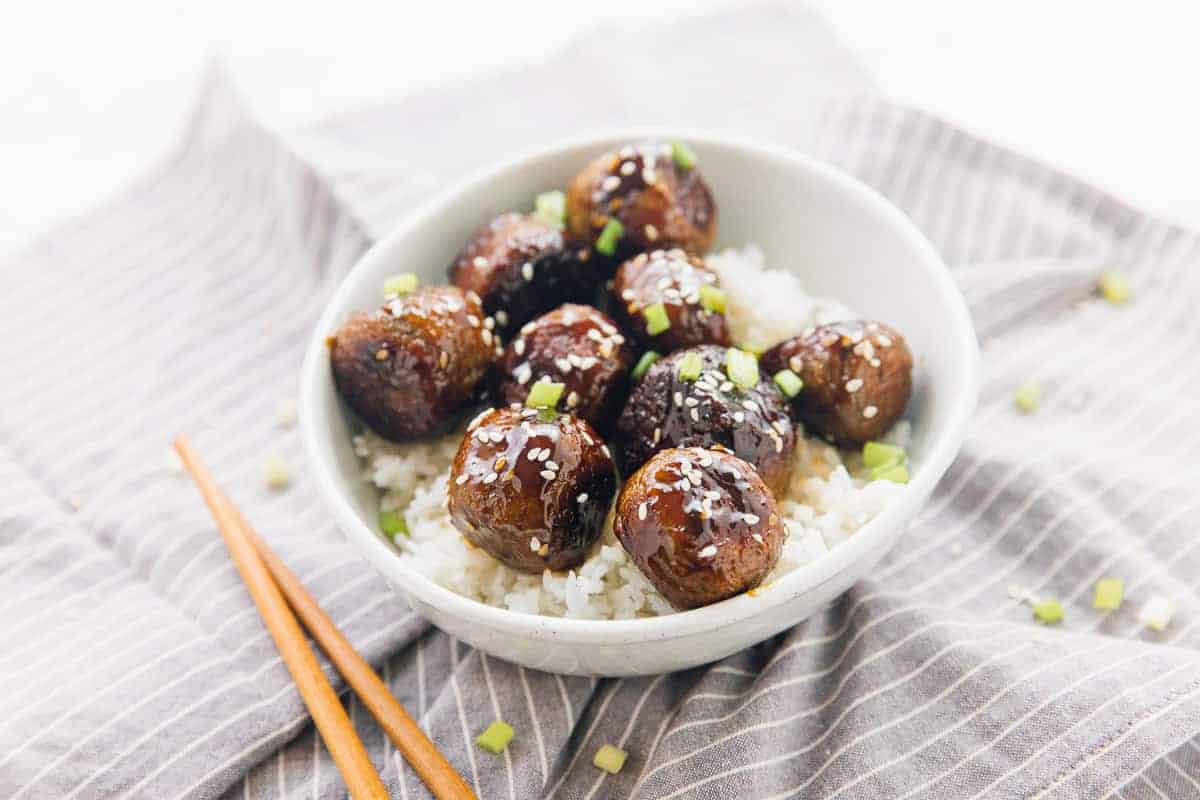
These vegan teriyaki meatballs have the perfect texture and rich, savory flavor! They are incredibly easy to make, coated in a homemade sweet and sticky teriyaki sauce, and great for meal prep.
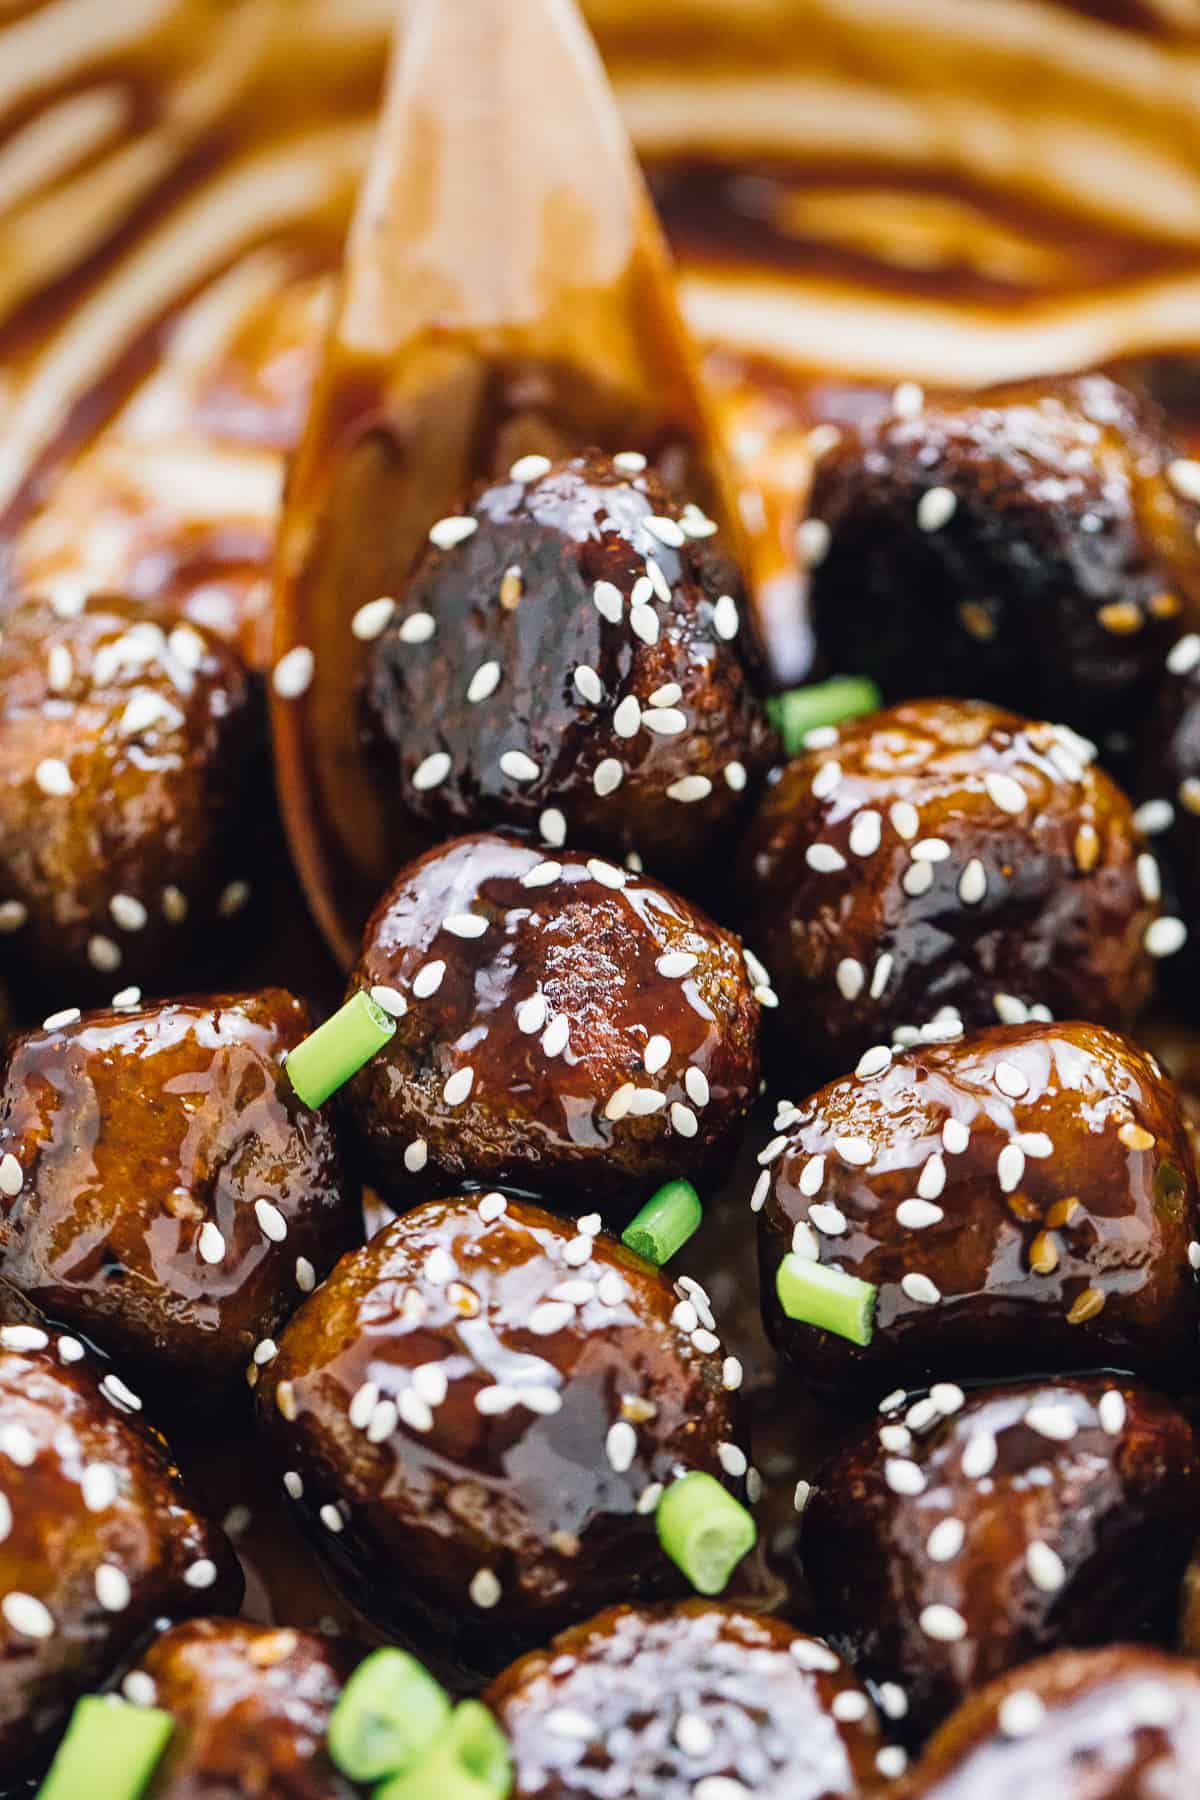
You guys knew I’d be back with another veggie meatballs recipe , didn’t ya? I promise you’re going to love these sweet and sticky vegan teriyaki meatballs. They’re cauliflower meatballs — or vegetarian meatballs, or literally whatever you want to call them — and they’re about to make your next weeknight meal EPIC.
Reasons to Love This Vegan Meatballs Recipe
- Sweet and sticky. I slather these easy meatballs with a thick and syrupy homemade teriyaki sauce. You can repurpose leftover sauce for more dinners, too, like crispy teriyaki tofu .
- The perfect texture. Firm enough to stick a fork in and not fall apart, but still moist on the inside.
- Freezer-friendly. Just freeze without the sauce!
- Meal prep friendly. Make like 40 of these juicy meatless meatballs and add them to everything in life.
Notes on the Ingredients
Scroll down to the recipe card to find the ingredient quantities and recipe instructions.
- Roasted cauliflower — I love roasted cauliflower, and it’s the perfect base for these veggie meatballs. Roast it before ricing it for such a lovely depth of flavour!
- Quinoa — My favorite ancient grain! I love the texture quinoa adds to these vegan meatballs
- Egg substitute — Where there’s meatballs, you need a binder — but how can you make meatballs without eggs? You can use egg replacers ( I prefer Bob’s Red Mill ) or make a flax egg !
- Red onion — I love the slightly sharp bite of red onion. You can use white or yellow onions in a pinch.
- Garlic — Everything is better with garlic, and these Asian-inspired meatballs are no exception. Can you ever use too much?
- Breadcrumbs — Every meatball needs some breadcrumbs! This helps hold everything together without being too dense.
- Coconut oil — You need to brown the “meatballs” before adding the yummy sauce, and I always cook mine in coconut oil for the best char.
For the Homemade Teriyaki Sauce
- Soy sauce — I usually use a light soy sauce or liquid aminos as the base of this sticky-sweet sauce. Choose your fav!
- Sugar — You can use raw brown sugar or coconut sugar for this teriyaki sauce. You just need a little sweetness to balance the sauce.
- Sesame seeds — I love the extra nutty crunch of sesame seeds!
- Cornstarch — To make this luscious sauce stick to the meatballs, I recommend a little cornstarch.
- Rice wine vinegar — If your teriyaki sauce is missing a little tang, this is what you need.
How to Make Vegan Meatballs
This is a quick overview of the steps to make the best vegan meatballs slathered with rich, sticky teriyaki sauce. Scroll down to the recipe card for the full, printable instructions.
- First, make the vegan teriyaki sauce. Mix the soy sauce, brown sugar, cornstarch, water, ground ginger, sesame seeds, and rice wine vinegar. Simmer it all for 5 minutes, and then set the sauce aside until the end.
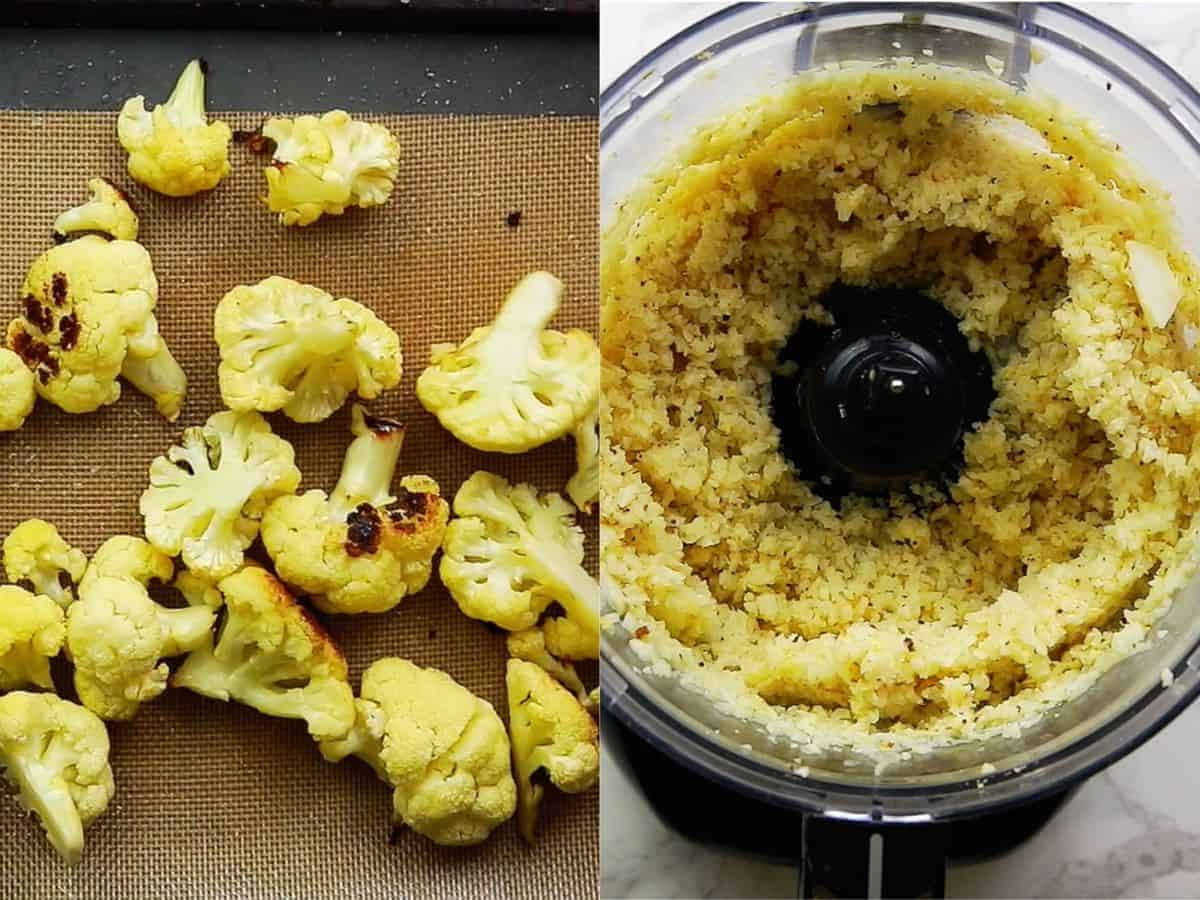
- Prepare the cauliflower base. Next, chop up the cauliflower. Roast it in a little oil at 450ºF for 15-20 minutes, until it’s beautifully golden brown. Pulse the roasted cauliflower in your food processor for a few minutes until it’s completely riced.
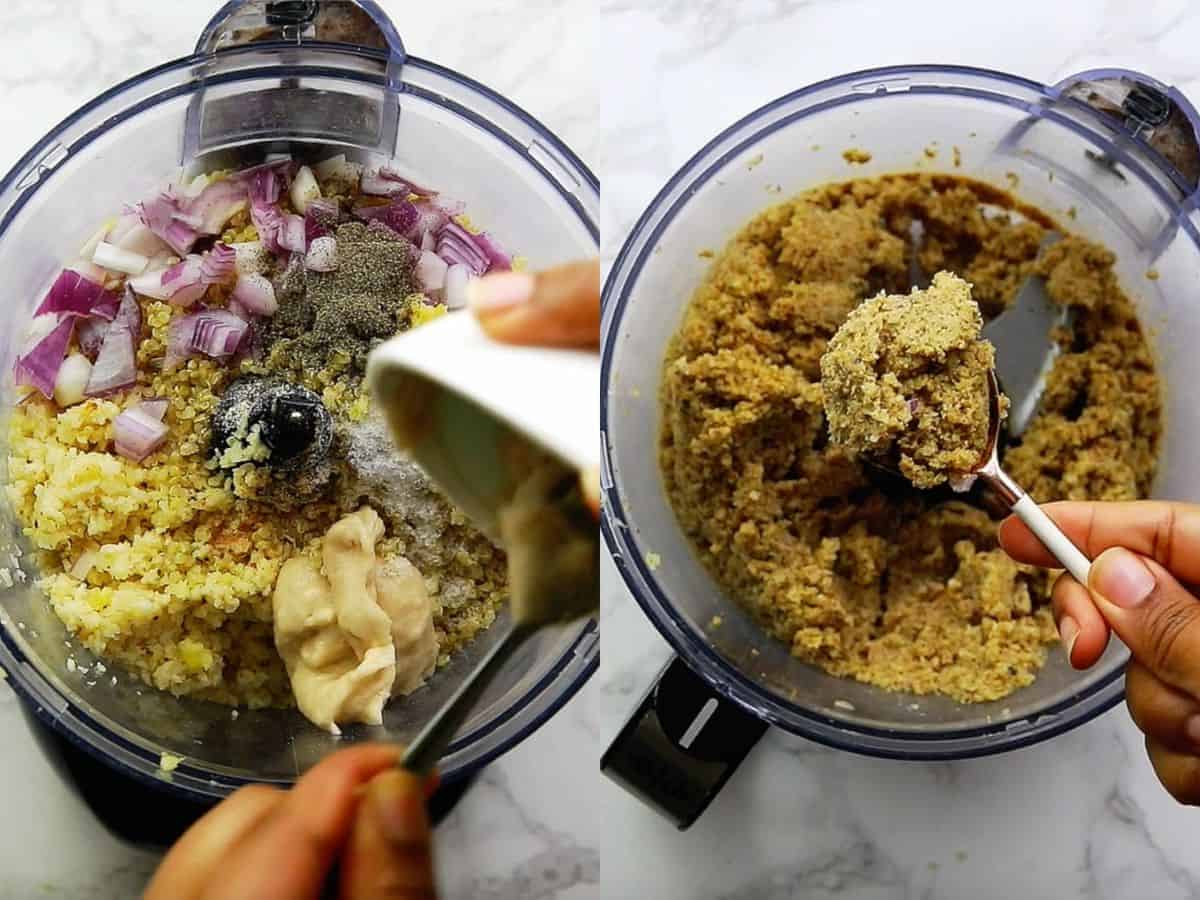
- Add the remaining ingredients. Now, mix your riced roasted cauliflower with the cooked quinoa, egg replacement, red onion, black pepper, salt, garlic, and breadcrumbs. Mix until all of the ingredients are thoroughly combined. This helps the meatballs stay together.
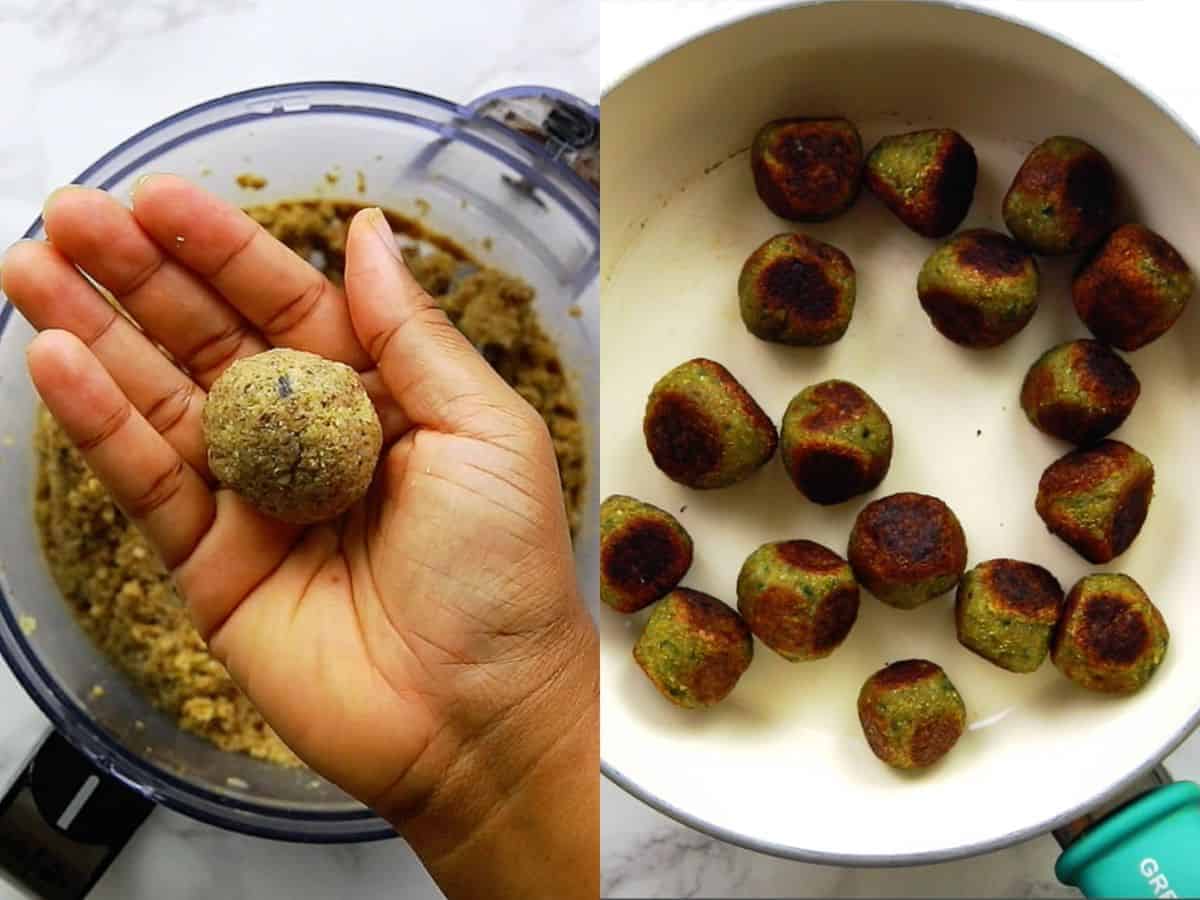
- Shape the meatballs. To make the meatballs, use a tablespoon or scoop to make evenly sized meatballs, then roll them with your hands.
- Brown the meatballs. Cook for a few minutes on all sides, but be sure not to overcrowd the pan! This will lead to steamed veggie meatballs without that golden char.
- Add the teriyaki sauce. When all the meatballs are cooked, put them back in the warm pan (not over the heat) and add the sauce. Mix until everything is coated and delicious!
Feeling Extra? Add Pineapple!
I love boosting the sweet-savory contrast in the teriyaki sauce with fresh, overripe pineapple. Add diced or drained, canned pineapple when you combine the sauce ingredients, and let it simmer and cook down with the sauce. Another delicious option is to serve these saucy meatballs over pineapple fried rice !
- Mix, mix, mix. If your meatballs aren’t staying together, keep mixing! An even distribution of the roasted cauliflower rice, quinoa, and other ingredients will help hold everything in place when you sauté them.
- Don’t crowd the pan. If you add too many meatballs to the sauté pan at once, they’ll still cook, but you won’t get that golden char on the outside. Be sure to leave a little room around each meatball, and sauté them in batches if you need to. You can tent the cooked veggie meatballs with foil to keep them warm.
- Turn off the heat. When you add the sauce, make sure the heat is off and the pan is slightly cooled. Otherwise, the sauce could splatter and/or thicken way too much.
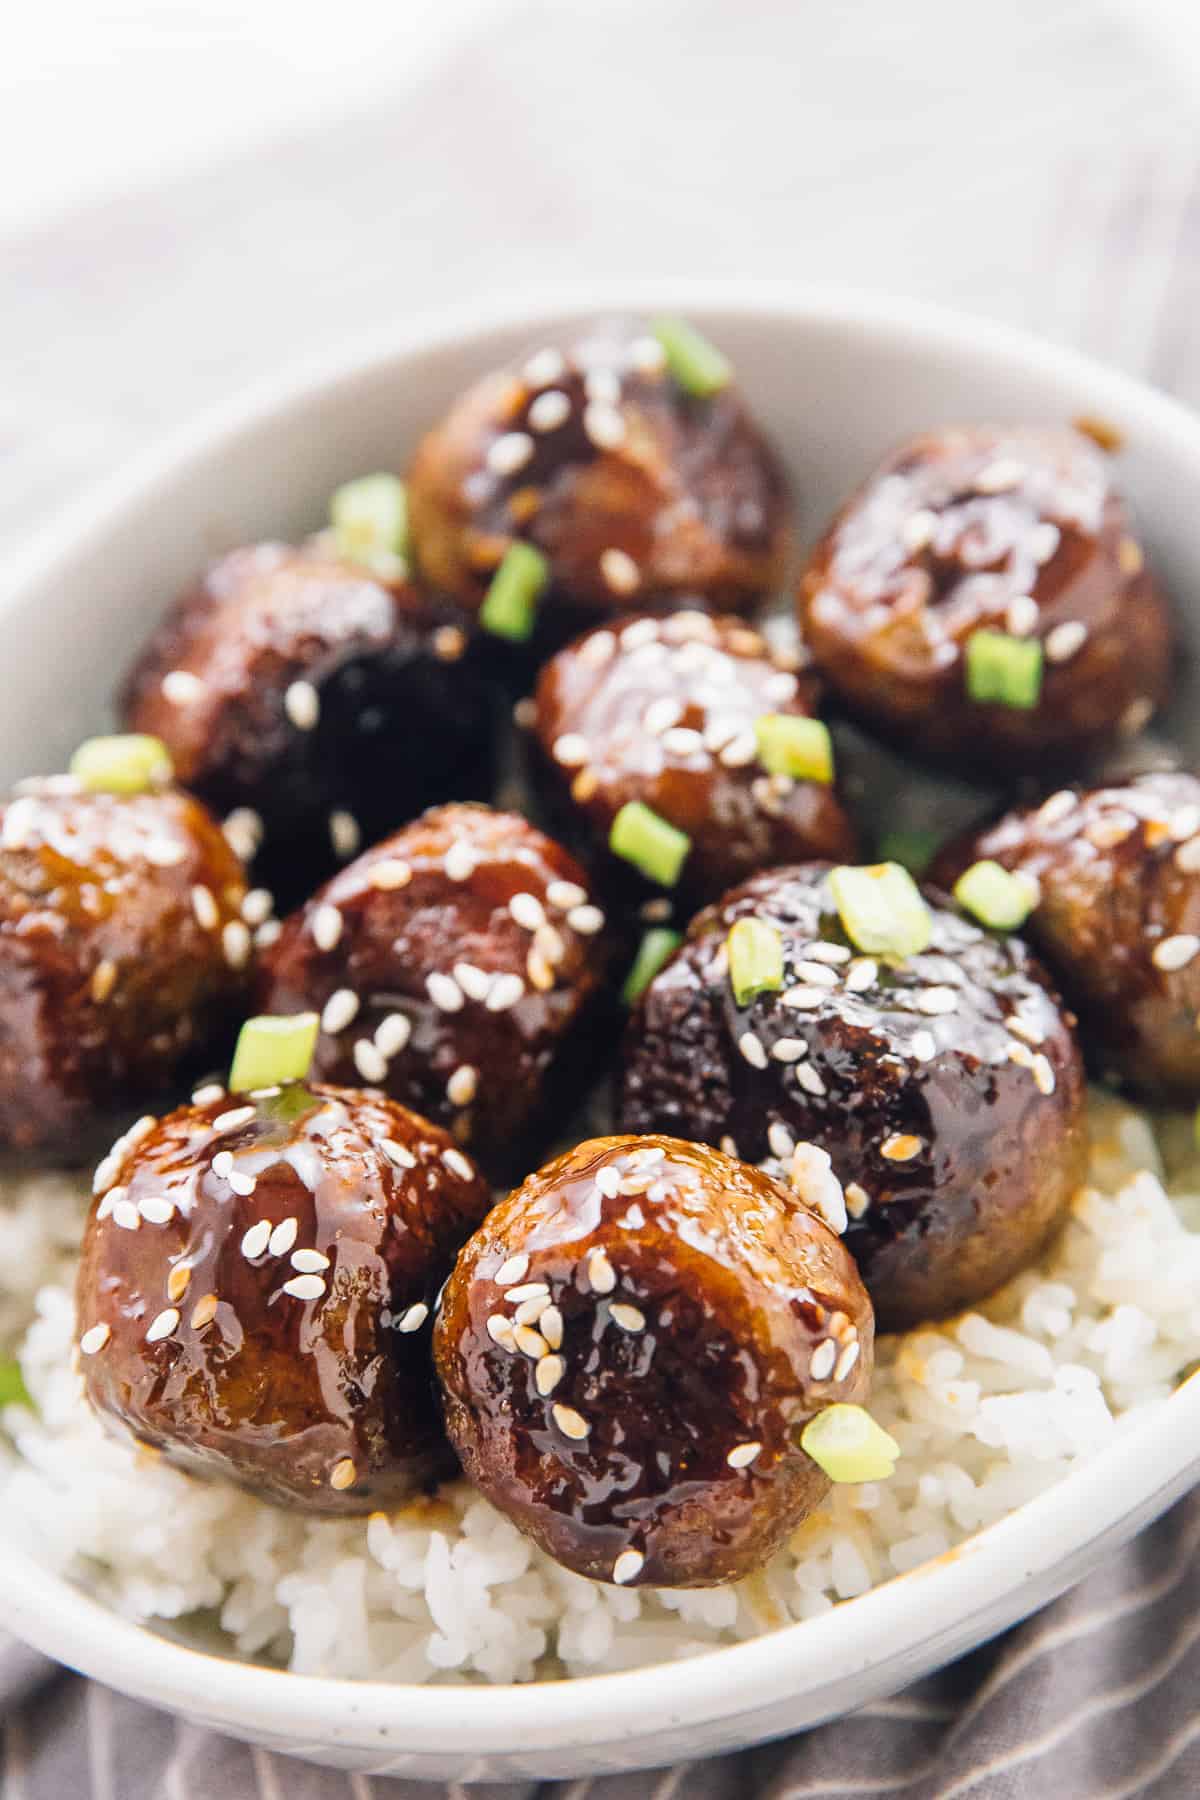
Try These Serving Ideas
There’s nothing better than having teriyaki veggie meatballs pre-made and sitting in your fridge, waiting for you to add them to your favorite vegan meals.
- As an appetizer, with homemade inari sushi and avocado sushi .
- Serve these on top of pasta or sesame noodles .
- With white rice , fried rice , or quinoa.
- Squished down into a hoagie or tucked into dinner rolls for sliders.
- Rolled into pita or lettuce wraps . I think you get the picture!
How to Store and Reheat Leftovers
- Refrigerate. Store any leftover vegan teriyaki meatballs in an airtight container in the fridge for up to 4 days.
- Freeze. You can freeze the cooked or uncooked vegan meatballs for up to 2 months. To freeze the uncooked meatballs, I recommend flash-freezing the meatballs on a baking sheet, then transferring them to a freezer-safe container or bag. For cooked, sauced meatballs, freeze them airtight in the sauce once they’re completely cooled.
- Reheat. Cook any unbaked meatballs right from frozen. To warm up leftovers, reheat the teriyaki meatballs in a saucepan on the stove, in the oven, or using the microwave or air fryer until they’re warmed through.
More Vegan Meatballs Recipes
- Vegan Swedish Meatballs
- Buffalo Quinoa Cauliflower Vegan Meatballs
- Vegan Spaghetti and Meatballs
- Vegan Cranberry Meatballs
Ingredients
Vegan Meatball Ingredients
- 8 ounces roasted cauliflower (instructions below) , (1 cup)
- 1 cup cooked quinoa , (137g)
- 2 Bob’s Red Mill Egg Replacers OR flax eggs , if flax eggs, less one tablespoon of liquid per flax egg
- ½ cup red onion, finely diced , (114g)
- 1/2 teaspoon ground black pepper
- ¾ teaspoon sea salt
- 3 cloves garlic , minced
- 1 cup breadcrumbs , gluten free if needed
- 1 ½ tablespoons coconut oil
Teriyaki Sauce Ingredients
- 1/4 cup light soy sauce or liquid aminos
- ¼ cup raw unrefined brown sugar or coconut sugar
- 1 teaspoon cornstarch + 1 teaspoon water , stirred together
- ½ teaspoon ground ginger
- 2 teaspoons sesame seeds
- 1 tablespoon rice wine vinegar
- ¼ cup water
- chopped scallion , to garnish
Instructions
Teriyaki Sauce
- Mix all the ingredients together, bring to a boil, then to a medium low heat in a sauce pan until completely incorporated, about 5 minutes. Stir occasionally. Set aside until ready to use.
Vegan Meatballs Base
- Preheat oven to 450°F/230°C. Cut the cauliflower’s stem off, and cut into even-sized florets. Drizzle the cauliflower with maybe a teaspoon of oil. Roast the cauliflower for 15-20 minutes in the oven. Remove and allow to cool for a few minutes.
- In a food processor, add the cauliflower and pulse it until it’s completely riced. Remove from the food processor. You only need 1 cup of this for this recipe and 8 ounces should make about 1 cup.
- Add the 1 cup of riced cauliflower and all the other meatball ingredients EXCEPT the coconut oil. You can pulse them or mix them together until they form into a tight ball, combining everything. You want to ensure they are so mixed together that you’re not seeing individual cauliflower or quinoa florets, it’s all one big mixture. That’s how you’ll ensure the meatballs will hold together!
- Heat the coconut oil in a pan over medium high heat. While it’s heating, use a tablespoon measurer to form one raw meatball and shape into a ball with your fingers. You can place them on a plate while the oil heats.
- Add one meatball to test the oil. Cook on one side for about 1-2 minutes, turning on all sides onto fully cooked inside and out, about 4 minutes. You can add as many meatballs as can fit in the pan without overcrowding it, cooking them all for about 4-5 minutes turning on each side, to cook them through.
- Lower/turn the heat off. When the heat has cooled down, add in the sauce. You want to do this because if the pan is too hot, the sauce will spew and the heat can be dangerous while so hot.
- Coat the meatballs in the sauce and then remove the pan from the stove. Serve the meatballs and enjoy!! You can enjoy these vegan meatballs alone, in a nice hoagie or with cauliflower rice or quinoa on the side, you know, for a double down. You could even have them on toothpicks as an appetiser at your Super Bowl party!
Notes
- I strongly recommend using the Bob’s Red Mill Egg Replacer ! It acts just like regular eggs and is really great for binding these vegan meatballs.
- For freezing, freeze these meatballs without the sauce on. Them allow them to thaw, crisp them up again in the pan, and then coat in the sauce. These meatballs will last in your fridge for up to a week (assuming your cauliflower/base ingredients are fresh, of course!).
