Garlic Fries are impossible to resist, especially when they’re loaded with minced garlic, grated vegan Parmesan, and fresh parsley. I share methods for frying and for baking, but either way, they’re crispy and divine!

When you put a plate of fries in front of me, I turn into one of those emojis with heart eyes. Truffle Fries ? Yes! Loaded Nacho Fries ? I’m there! And these garlic fries? I could eat them all day, every day! These fries are for the garlic lovers. (And maybe not the best idea for a first date. But Gav and I have been together long enough that garlic breath is a non-issue.) I add FOUR cloves of garlic, so that pungent, savoury flavour is big and bold.
Why You Need These Garlic Fries in Your Life
These fries are guaranteed to be a hit. Here’s why you’ll love them:
- Two cooking options . Deep frying makes these garlic fries next-level crispy (it’s also great for Crispy Homemade Falafel !), but for me, it’s more of a special occasion cooking method, so I’ve included a baking option too.
- Mega garlicky . We’re not holding back! Rather than using garlic powder for these garlic fries, I used fresh garlic cloves, which makes the garlic flavour a whole lot sassier.
- Cheesy too . Instead of resting on my laurels, I wanted to up the ante even more—plus I totally loved how the vegan Parm tasted in my recipe for truffle fries—so I added cheese to these garlic fries too, making them extra delicious.

Notes on Ingredients
If you’ve made my truffle fries, you’ll find the ingredients are very similar! Scroll down to the recipe card to find the ingredient quantities and recipe instructions.
- Russet potatoes – Russets are starchy and fluffy on the inside; you can also use Yukon Gold potatoes for a creamier option.
- Vegetable oil or olive oil
- Garlic – Mince the garlic very finely or push it through a garlic press.
- Vegan Parmesan cheese – While you can use homemade Vegan Parmesan Cheese , I prefer store-bought because it melts.
- Fresh parsley – Or, for something different, use fresh minced rosemary.
- Sea salt and black pepper
For Serving :
- Garlic aioli – Combine Vegan Mayo + minced garlic + lemon juice.
- Extra Parmesan
- More chopped parsley
How to Make Garlic Fries
As mentioned above, there are two cooking methods for these fries; here’s a quick overview of each.
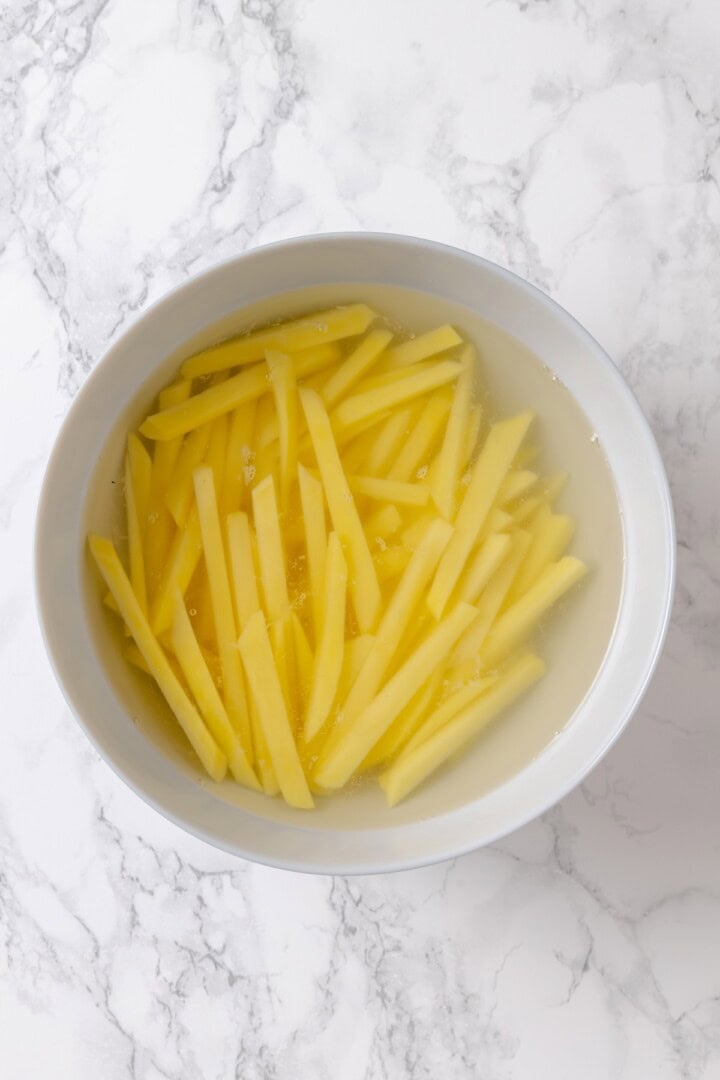
Cut and soak the fries.
- Prep the potatoes . Cut the potatoes into 1/4-inch-thick fries and soak them in a bowl of cold water for 30 minutes. Drain and pat dry.
- Deep fry . Heat the vegetable oil in a deep pot until it reaches 350ºF. Fry the potatoes in batches for 8 to 10 minutes, or until they’re golden and crisp. Transfer to a paper towel-lined sheet pan with a slotted spoon.
- Or bake . Toss the fries with olive oil, salt, and pepper. Spread them into a single layer on a baking sheet and bake at 425ºF for 20 to 25 minutes, flipping halfway through the cooking time.

Cook the garlic.
- Cook the garlic . Warm the garlic in olive oil over low heat for a minute or two; your goal isn’t to brown it, but to cut some of the raw flavour.
- Season . Toss the fries in a bowl with the garlic, vegan Parmesan, parsley, salt, and pepper, then serve with garlic aioli.
Tips for Perfect Homemade Fries
Whether you’re making Air Fryer Shoestring Fries or these garlic fries, these tips will help you make them amazing.
- Make sure they’re cut evenly . It’s not possible to be super precise since potatoes aren’t perfect rectangles, but do make sure your cuts are fairly even so your fries finish cooking at the same time.
- Don’t skip the soaking . It’s especially important if you’re using russet potatoes, which are starchier to begin with. Soaking in cold water gets some of that starch out, which makes your fries crispier.
- Rub them with the oil if you’re baking . I like to use my hands to toss the fries with oil to make sure every bit is well-coated. This helps them get crispy and golden brown.

Serving Suggestions
You can serve these garlic fries as an appetizer or snack, or as a side dish for burgers, sandwiches, and more. I love them with classic Veggie Burgers , and their garlicky flavour makes them amazing with my Vegan Chicken Parm Sandwich !
How to Store and Reheat Leftovers
- Refrigerator : Transfer the garlic fries to an airtight container and refrigerate for up to 4 days. I don’t recommend freezing this recipe.
- To reheat : Place the fries on a baking sheet and heat at 450ºF for a few minutes, until warmed through and re-crisped. They’ll never be as crispy as fresh, but they’ll be good enough!

More Vegan Potato Recipes
- Mashed Potato Casserole
- Loaded Potato Salad
- Garlic Roasted Potatoes
- Loaded Potato Skins
Ingredients
- 2 large russet potatoes , or Yukon Gold for a creamier texture – about 500 g
- 2 cups vegetable oil , for frying or see baking method below – 480 mL
- 1 ½ tablespoons olive oil , for tossing – 22 mL
- 4 cloves garlic , finely minced – 12 g
- ¼ cup grated vegan Parmesan cheese , 25 g
- 1 tablespoon finely chopped fresh parsley , 4 g
- ½ teaspoon sea salt , or to taste – 2.5 g
- ½ teaspoon black pepper , 1 g
For Serving:
- Garlic aioli , vegan mayo + minced garlic + lemon juice to taste
- Extra Parmesan
- More chopped parsley
Instructions
Prep the Potatoes
- Wash and peel the potatoes.
- Cut into thin fries, about ¼-inch thick. Try to keep them uniform for even cooking.
- Place the cut fries in a bowl of cold water and soak for at least 30 minutes (or up to 2 hours) to remove excess starch.
- Drain the potatoes well, then pat them completely dry using a clean kitchen towel or paper towels.
Deep-Frying Method
- In a deep pot or Dutch oven, heat the oil to 350°F (175°C). Use a thermometer for accuracy.
- Fry the potatoes in batches for 8–10 minutes until golden and crisp.
- Remove with a slotted spoon and drain on a paper towel-lined tray.
Baking Method (Alternative)
- Preheat to 425°F (218°C). Line a baking sheet with parchment paper.
- Toss the dried potatoes with 1 ½ tablespoons olive oil, salt, and pepper.
- Spread them in a single layer on the baking sheet, avoiding overcrowding.
- Bake for 20–25 minutes, flipping halfway, until crispy and golden.
Garlic Seasoning
- While the fries are cooking, gently sauté the minced garlic in a small skillet with a splash of olive oil over low heat for 1–2 minutes, just until fragrant. Do not let it brown, as it will taste bitter
- Place the hot fries in a large bowl.
- Add the garlic, vegan Parmesan, parsley, and an extra pinch of salt and pepper. Toss to coat evenly.
Serve & Enjoy
- Serve immediately with garlic aioli or your favorite dipping sauce.
- Garnish with more vegan Parmesan and chopped parsley, if desired.
Notes
- Refrigerator : Transfer the garlic fries to an airtight container and refrigerate for up to 4 days. I don’t recommend freezing this recipe.
- To reheat : Place the fries on a baking sheet and heat at 450ºF for a few minutes, until warmed through and re-crisped. They’ll never be as crispy as fresh, but they’ll be good enough!

Garlic Fries
Ingredients
- 2 large russet potatoes or Yukon Gold for a creamier texture – about 500 g
- 2 cups vegetable oil for frying or see baking method below – 480 mL
- 1 ½ tablespoons olive oil for tossing – 22 mL
- 4 cloves garlic finely minced – 12 g
- ¼ cup grated vegan Parmesan cheese 25 g
- 1 tablespoon finely chopped fresh parsley 4 g
- ½ teaspoon sea salt or to taste – 2.5 g
- ½ teaspoon black pepper 1 g
For Serving:
- Garlic aioli vegan mayo + minced garlic + lemon juice to taste
- Extra Parmesan
- More chopped parsley
Instructions
Prep the Potatoes
- Wash and peel the potatoes.
- Cut into thin fries, about ¼-inch thick. Try to keep them uniform for even cooking.
- Place the cut fries in a bowl of cold water and soak for at least 30 minutes (or up to 2 hours) to remove excess starch.
- Drain the potatoes well, then pat them completely dry using a clean kitchen towel or paper towels.
Deep-Frying Method
- In a deep pot or Dutch oven, heat the oil to 350°F (175°C). Use a thermometer for accuracy.
- Fry the potatoes in batches for 8–10 minutes until golden and crisp.
- Remove with a slotted spoon and drain on a paper towel-lined tray.
Baking Method (Alternative)
- Preheat to 425°F (218°C). Line a baking sheet with parchment paper.
- Toss the dried potatoes with 1 ½ tablespoons olive oil, salt, and pepper.
- Spread them in a single layer on the baking sheet, avoiding overcrowding.
- Bake for 20–25 minutes, flipping halfway, until crispy and golden.
Garlic Seasoning
- While the fries are cooking, gently sauté the minced garlic in a small skillet with a splash of olive oil over low heat for 1–2 minutes, just until fragrant. Do not let it brown, as it will taste bitter
- Place the hot fries in a large bowl.
- Add the garlic, vegan Parmesan, parsley, and an extra pinch of salt and pepper. Toss to coat evenly.
Serve & Enjoy
- Serve immediately with garlic aioli or your favorite dipping sauce.
- Garnish with more vegan Parmesan and chopped parsley, if desired.
Notes
- Refrigerator : Transfer the garlic fries to an airtight container and refrigerate for up to 4 days. I don’t recommend freezing this recipe.
- To reheat : Place the fries on a baking sheet and heat at 450ºF for a few minutes, until warmed through and re-crisped. They’ll never be as crispy as fresh, but they’ll be good enough!
Nutrition
Garlic Fries https://jessicainthekitchen.com/garlic-fries/ August 18, 2025
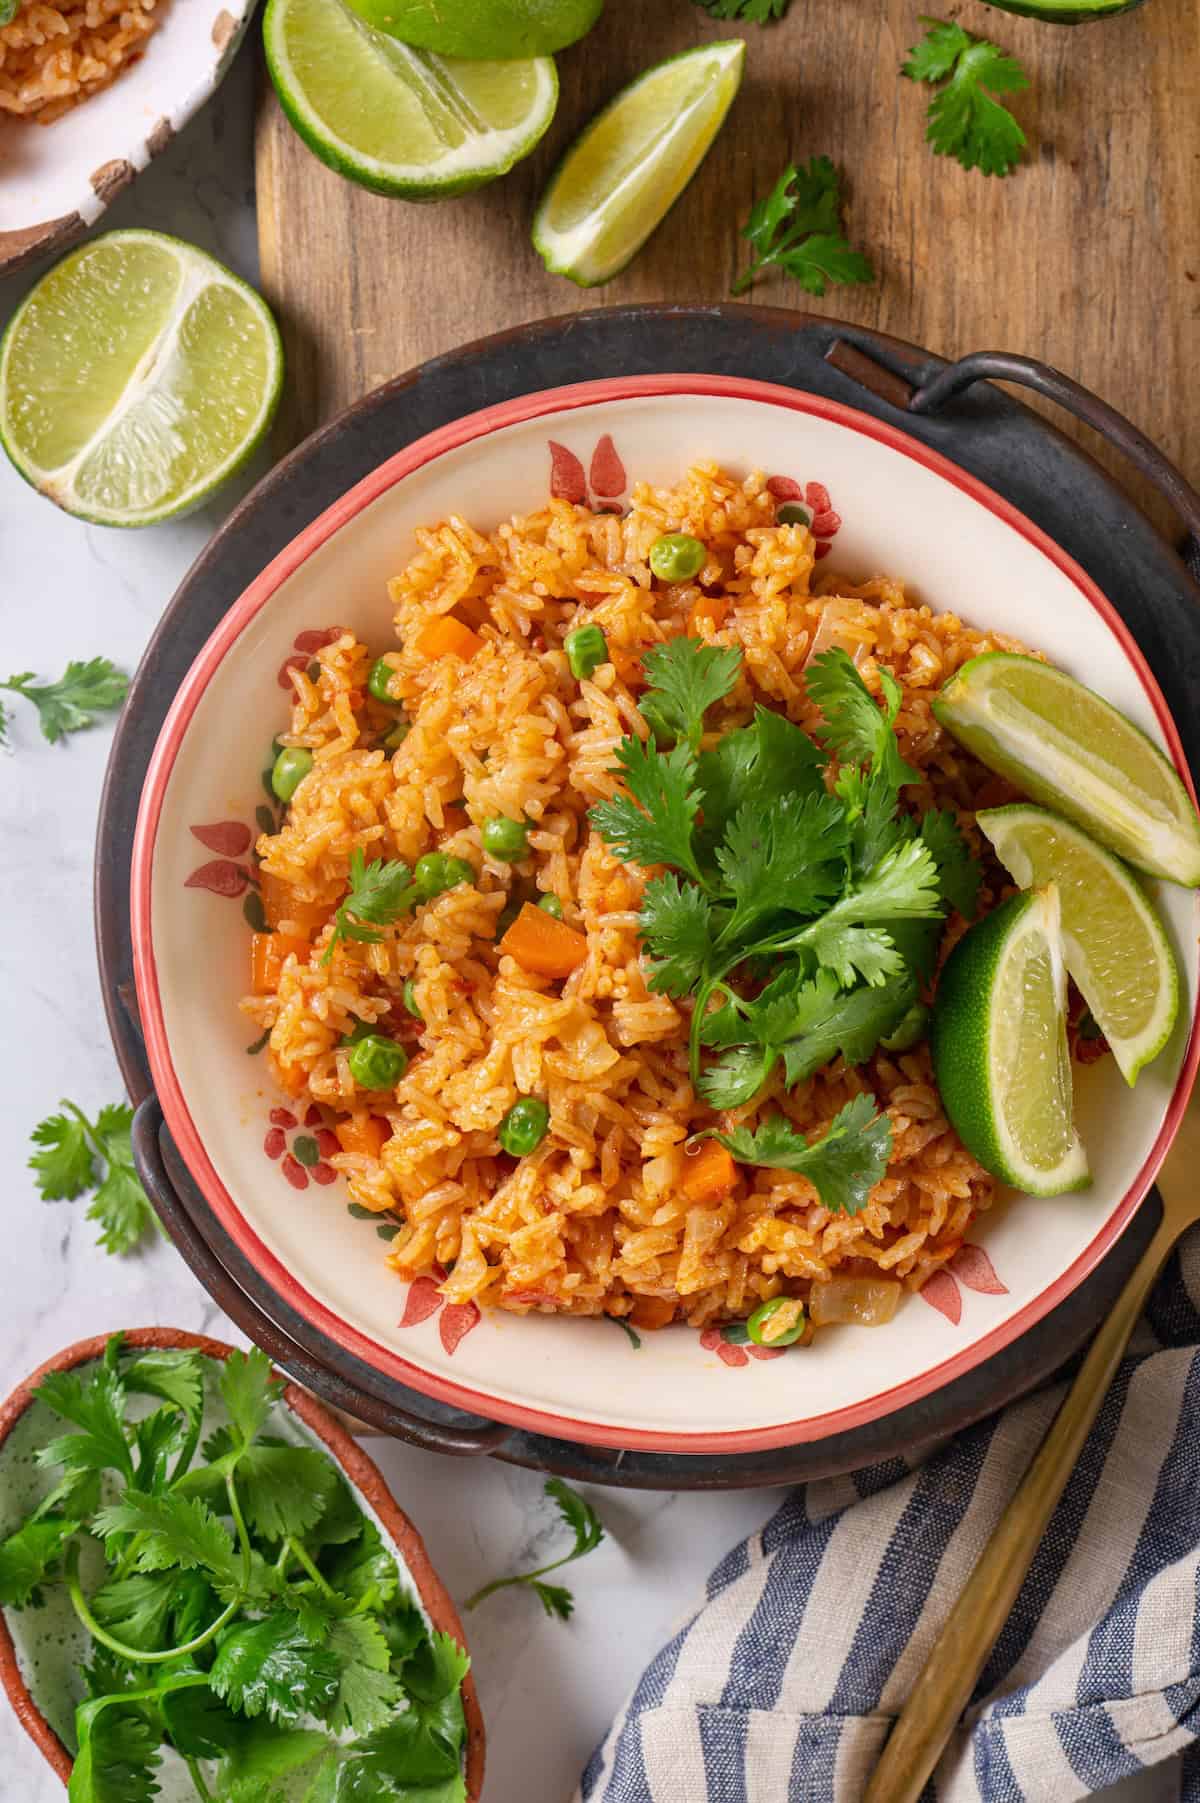
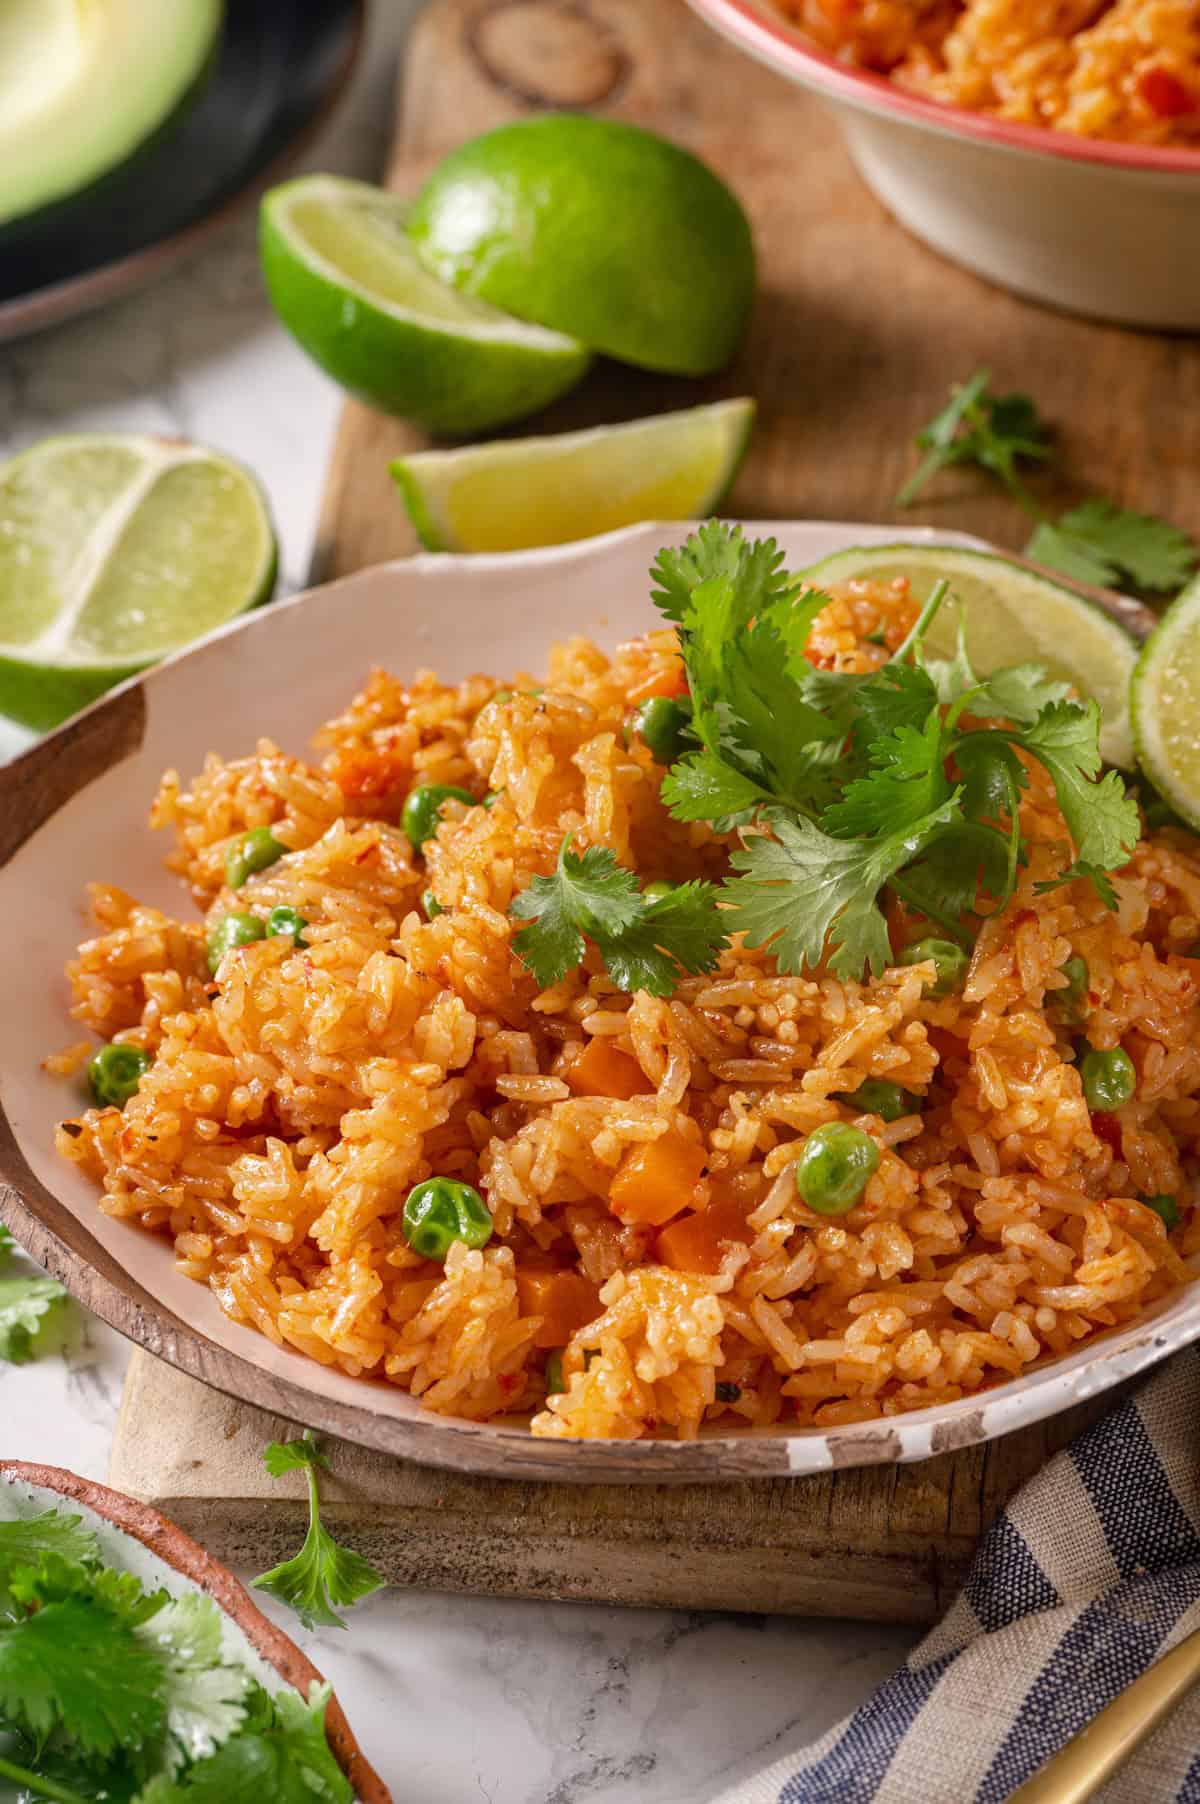
Wondering how to make your tacos or quesadillas a complete meal? The answer is Instant Pot Mexican Rice! The perfect side for all your Tex-Mex faves, it’s perfectly seasoned, full of veggies, and a combination of tomato sauce and fresh lime adds bright flavour.
When you go to a Mexican restaurant and order enchiladas or quesadillas, they almost always give you a scoop of Mexican rice and refried beans on the side. So lately, when I’ve been making us something like Jackfruit Tacos or Vegan Enchiladas for dinner, I add this Instant Pot Mexican rice and homemade refried beans to the plate. It makes dinner feel a little more special, like we’re eating at a restaurant—especially when I add some Mango Mojitos to the table too!
Why This Mexican Rice Will Be Your Go-To Recipe
Taco night will never be the same! And neither will your burrito bowls. Here’s what makes this Mexican rice recipe a win:
- Perfectly cooked, every time . If you often find yourself with soggy, wet rice when you cook it on the stovetop, the Instant Pot is a game-changer. It’s fluffy and perfect!
- So much flavour . With aromatics, spices, cilantro, tomato sauce, and lime, I pack a TON of flavour into this Mexican rice recipe. It’s anything but boring!
- Versatile . There are endless ways to put this recipe to use, from meal prep to parties, and I’ll share some of my favourite pairings later in this post.
Notes on Ingredients
Below you’ll find some notes about the ingredients for this Instant Pot Mexican rice. Scroll down to the recipe card to find the ingredient quantities and recipe instructions.
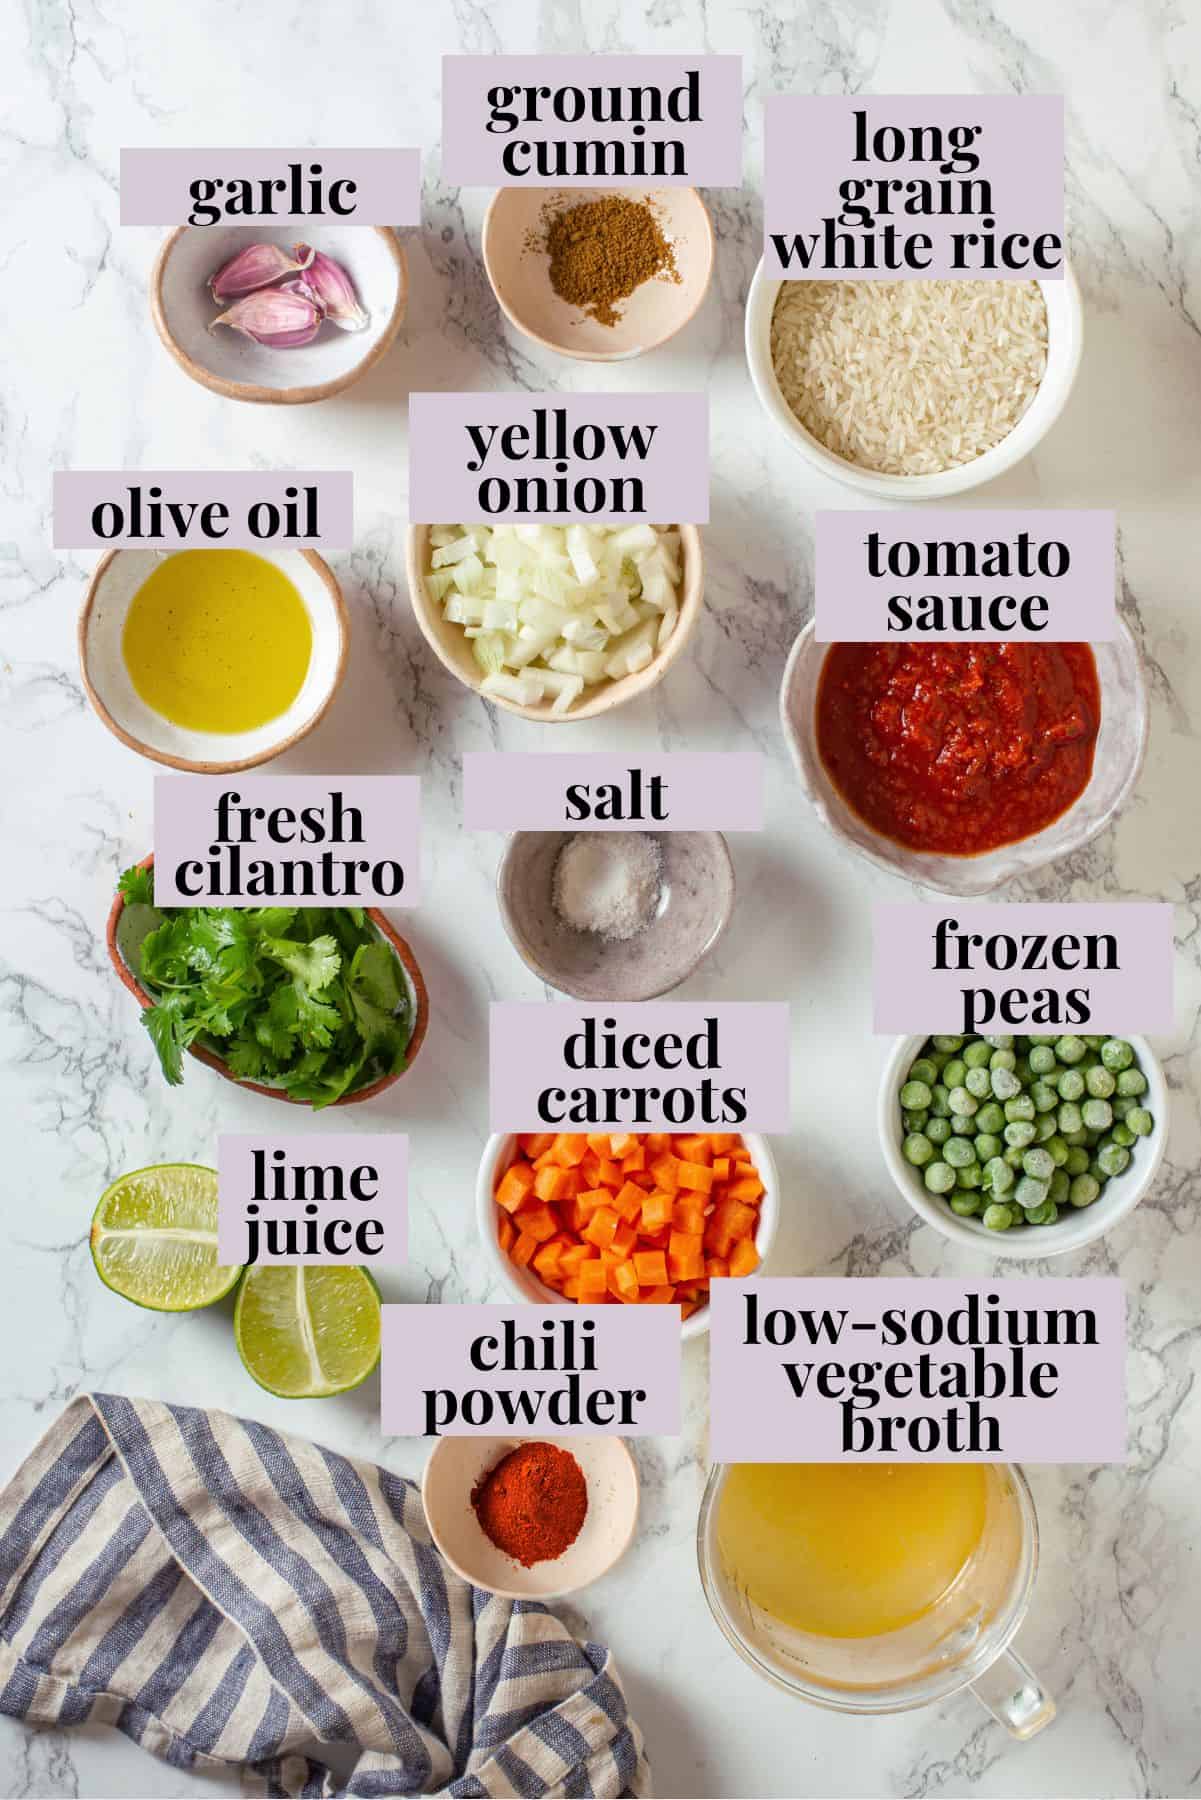
- Olive oil
- Yellow onion and garlic – Aromatics that infuse the rice with flavour as it cooks. You can mince the garlic with a knife or push it through a garlic press.
- Long grain white rice – Don’t substitute another variety! Different types of rice require different cooking times and amounts of liquid, so your results may not be the same.
- Ground cumin, salt, and chili powder
- Tomato sauce – Use the kind that comes in a can, not pasta sauce.
- Low-sodium vegetable broth – I like to use my homemade Vegetable Broth .
- Carrots and frozen peas – Or swap in frozen peas and carrots to save a little prep time.
- Lime
- Cilantro – Not a fan? You can skip it or use parsley.
How to Make Mexican Rice in an Instant Pot
Here’s how easy it is to make Instant Pot Mexican rice!
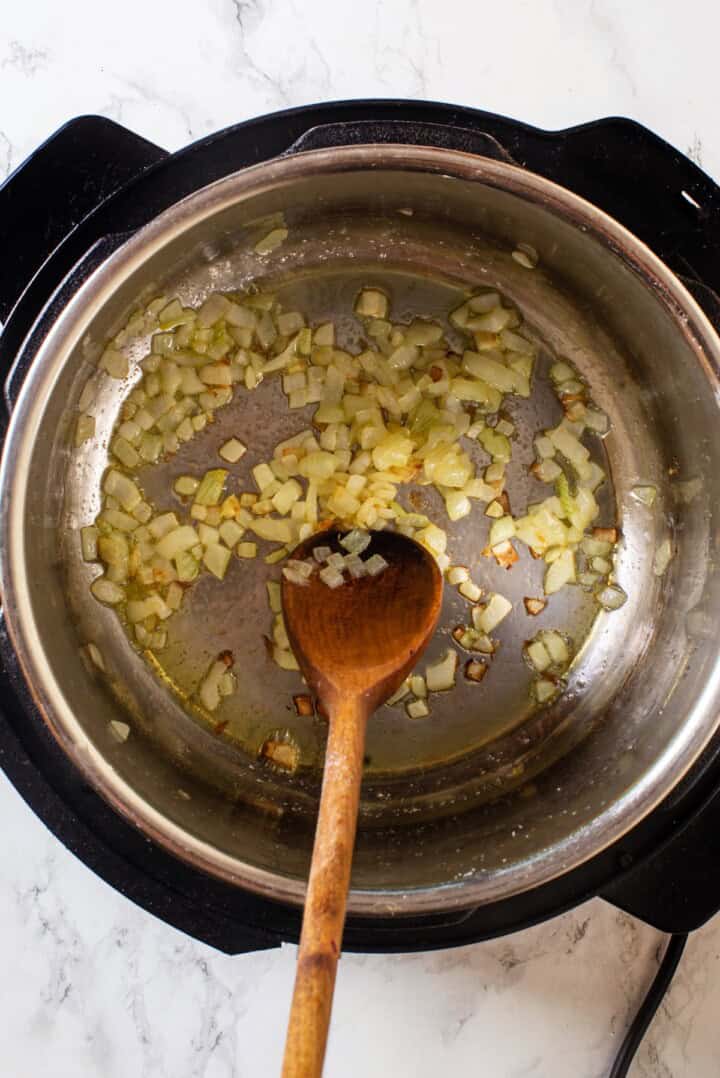
Cook the onion and garlic.
- Sauté the aromatics . Use Sauté mode to cook the onion in the olive oil. Once the onion is translucent, add the garlic and cook for about 30 seconds, or until it’s fragrant.
- Toast the rice. Stir in the rice and cook for 2 to 3 minutes, or until it’s golden and smells a little bit nutty. Stir in the cumin and salt.
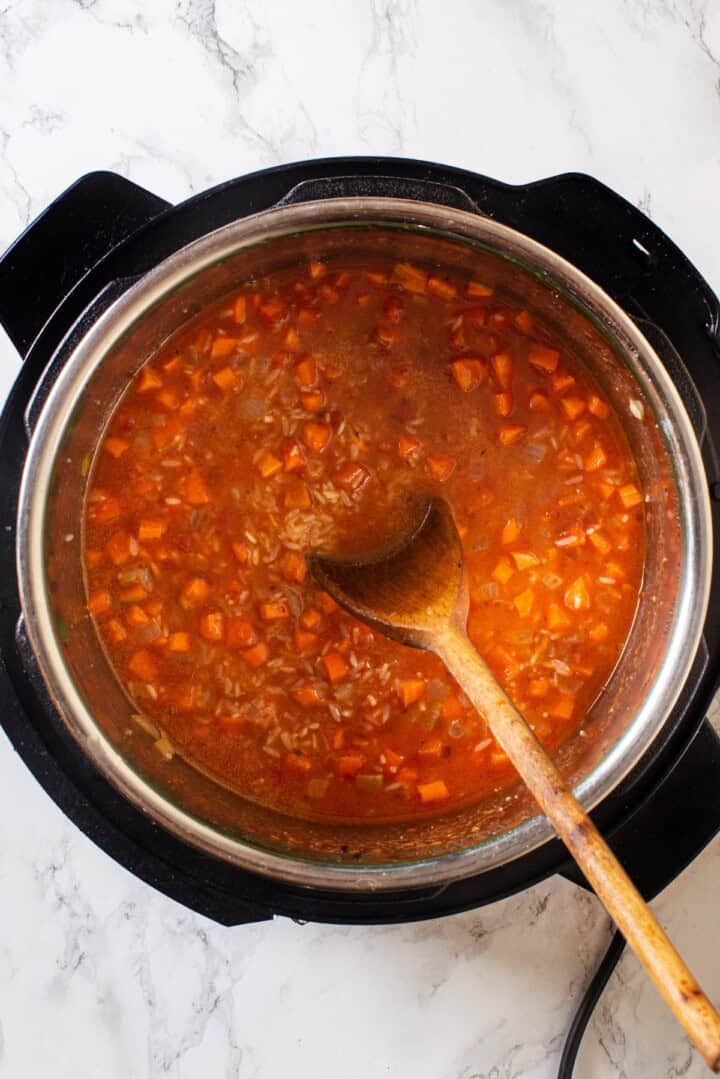
Deglaze the pot.
- Deglaze . Press Cancel, then stir in the tomato sauce, chili powder, broth, and carrots. Scrape up any brown bits at the bottom.
- Pressure cook . Secure the lid and set to Manual (High Pressure). Cook for 4 minutes, then do a natural release for 10 minutes. Do a quick release after 10 minutes have elapsed.
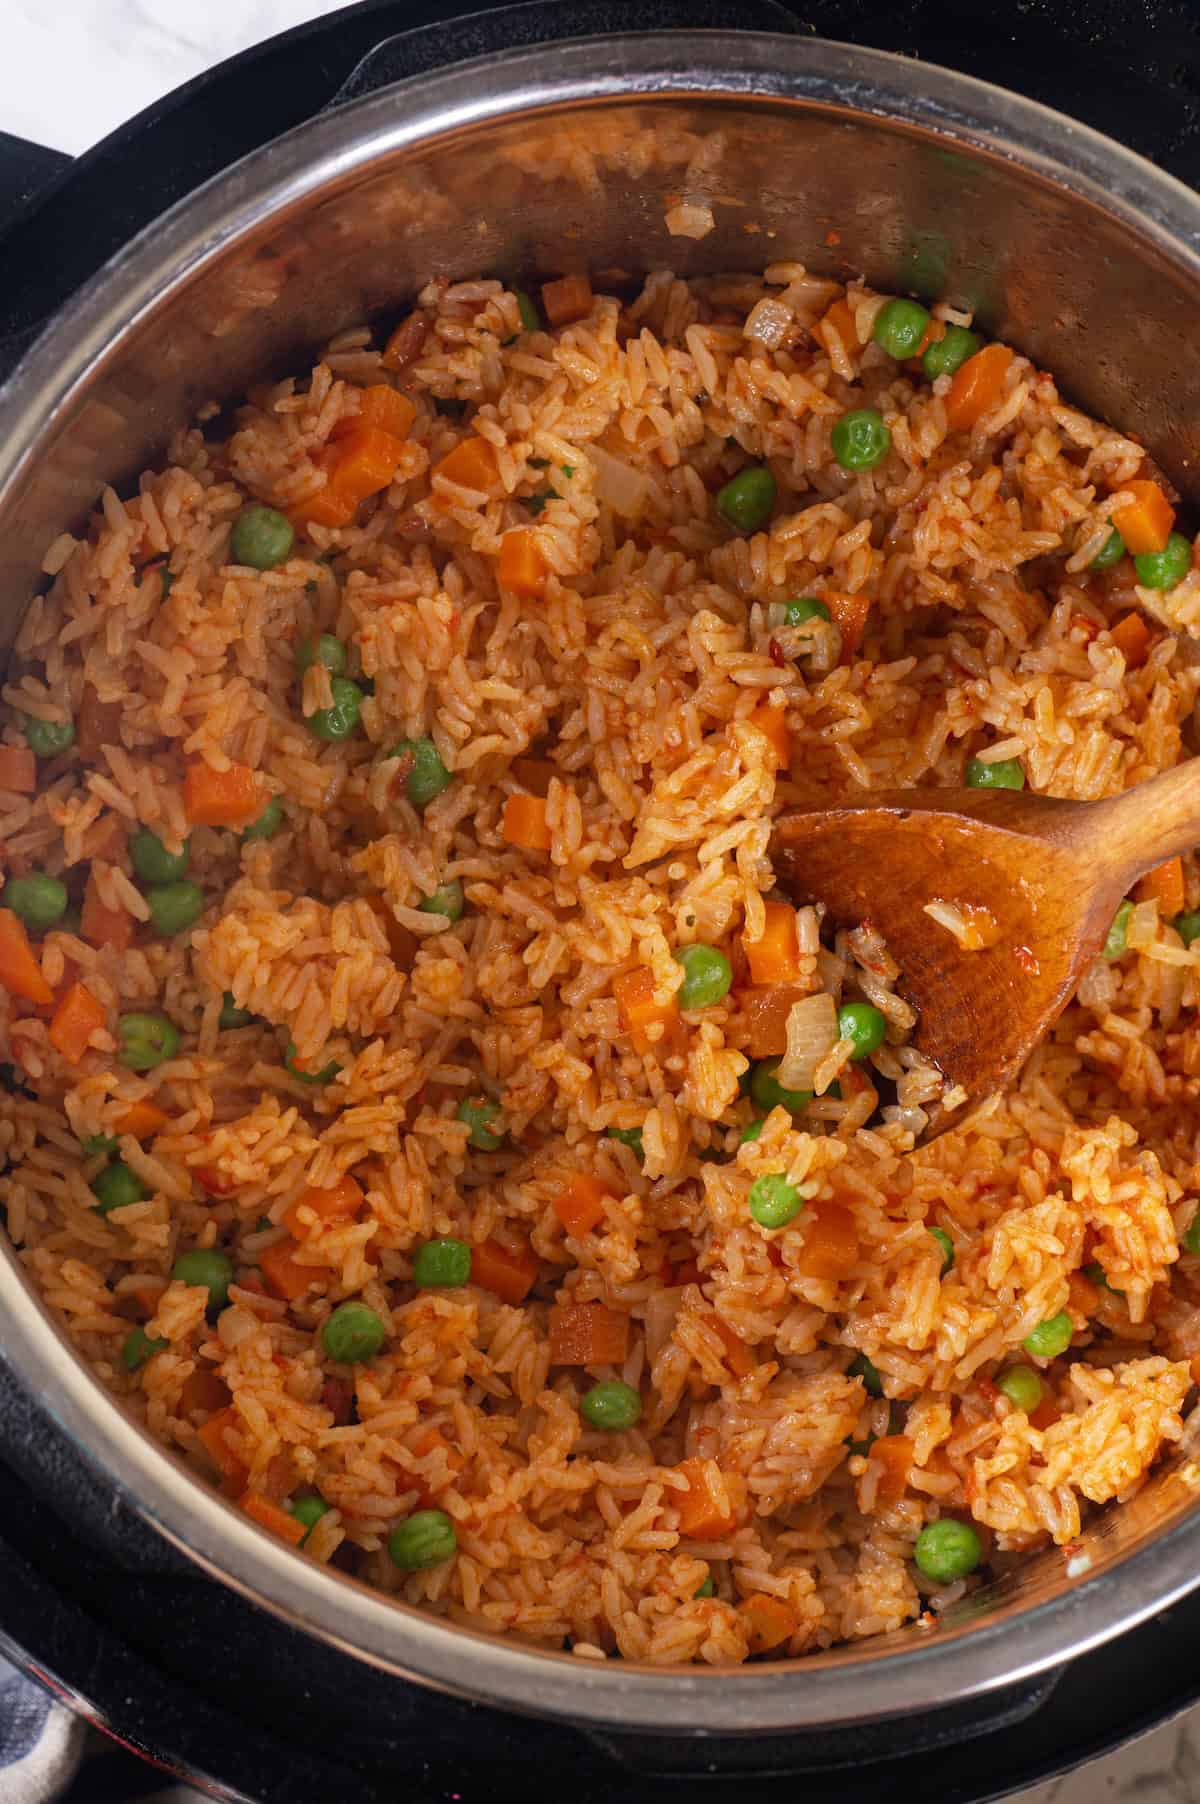
- Add the peas. Stir in the frozen peas and fluff the rice with a fork.
- Finish . Season to taste, then add a squeeze of lime juice and fresh cilantro.
Tips for Perfect Mexican Rice
- Dice the onion small . You don’t want big pieces of onion in your rice, so make sure it’s diced small. Also be sure that it’s diced evenly so it all softens at the same time.
- Don’t skip the deglazing . The acid from the tomato sauce will help loosen any brown bits at the bottom of the Instant Pot. It’s important to take the time to scrape them all up, because a) this incorporates more flavour into your rice, and b) it helps prevent the dreaded burn notice.
- Add the peas right away . As soon as you open the lid, stir in the peas. The heat from the rice will warm them. If you add them too late, they’ll still be cold!
My Favourite Ways to Use and Serve Mexican Rice
Friends, you have SO many options! Here’s some inspiration.
- With tacos, enchiladas, and quesadillas . Like my Vegan Birria Tacos , Black Bean and Corn Quesadillas , and Crispy Cauliflower Tacos with Chipotle Crema . I love having friends over for tacos and margs and this Instant Pot Mexican rice makes an easy side.
- Burrito bowls and burritos . Skip the plain rice and use Mexican rice in your Vegan Burrito Bowls for extra flavour.
- Rice and beans . Make the classic vegetarian dinner tastier by swapping in Mexican rice. This is great for meal prep!
- As a side for other dishes . Like Elotes or Southwestern Tofu Scramble .
How to Store and Reheat Leftovers
- Refrigerator : Transfer leftover Mexican rice to an airtight container and refrigerate for up to 4 days.
- Freezer : You can also freeze leftovers in an airtight container or freezer bag for up to 3 months. Thaw in the refrigerator before reheating.
- To reheat : The best way to warm up leftovers is in the microwave, but you can also transfer them to a pan with a splash of broth, cover, and heat over medium-low until warmed through.
More Vegan Rice Recipes
- Vegan Fried Rice
- Dirty Rice Recipe
- Broccoli Cheese Rice Casserole
- Pineapple Fried Rice
Ingredients
- 2 tablespoons olive oil , 30 mL
- ½ small yellow onion , finely chopped – about 50 g
- 3 cloves garlic , minced – 1 tbsp. / 9 g
- 1 ½ cups long grain white rice , rinsed – 285 g
- ½ teaspoon ground cumin , 1 g
- 1 teaspoon salt , 5 g
- ½ cup canned tomato sauce , 120 mL
- 1 ½ cups low-sodium vegetable broth , 360 mL
- ½ teaspoon chili powder , 2 g
- ¾ cup diced carrots , 100 g
- ½ cup frozen peas , add after cooking – 100 g
- Juice of ½ lime , about 1 tbsp. / 15 mL
- 2 tablespoons chopped fresh cilantro , for garnish – 4 g
Instructions
- Set the Instant Pot to Sauté mode. Once hot, add olive oil and chopped onion. Sauté for 3–4 minutes until translucent. Add garlic and cook for another 30 seconds, stirring often.
- Stir in rinsed rice and sauté for 2–3 minutes until lightly golden. Add cumin and salt. Mix well.
- Press Cancel to stop sautéing. Stir in tomato sauce, chili powder if using, vegetable broth, and diced carrots. Scrape up any brown bits at the bottom of the pot to prevent a burn notice.
- Secure the lid and set the Instant Pot to cook on Manual (High Pressure) for 4 minutes.
- Allow the pressure to release naturally for 10 minutes, then quick release any remaining pressure.
- Stir in the frozen peas immediately after opening the lid so they heat through but stay bright green. Fluff the rice with a fork.
- Taste and adjust seasoning if needed. Serve with a squeeze of lime juice and garnish with fresh cilantro.
Notes
- Refrigerator : Transfer leftover Mexican rice to an airtight container and refrigerate for up to 4 days.
- Freezer : You can also freeze leftovers in an airtight container or freezer bag for up to 3 months. Thaw in the refrigerator before reheating.
- To reheat : The best way to warm up leftovers is in the microwave, but you can also transfer them to a pan with a splash of broth, cover, and heat over medium-low until warned through.
