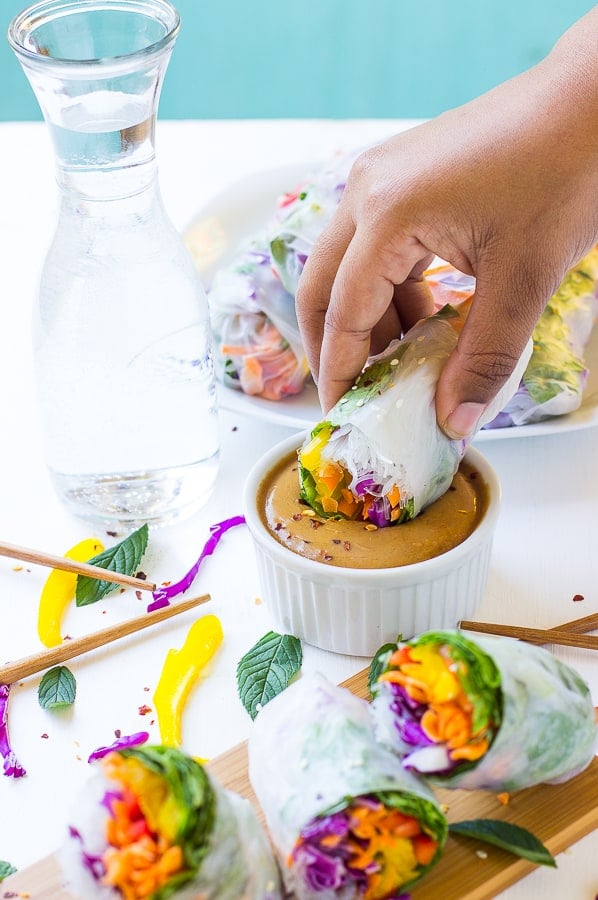
Vietnamese-style fresh summer rolls are colorful, crunchy, and so easy to make! Serve these as a light meal or easy summer appetizer with sweet-spicy homemade peanut sauce for dipping.
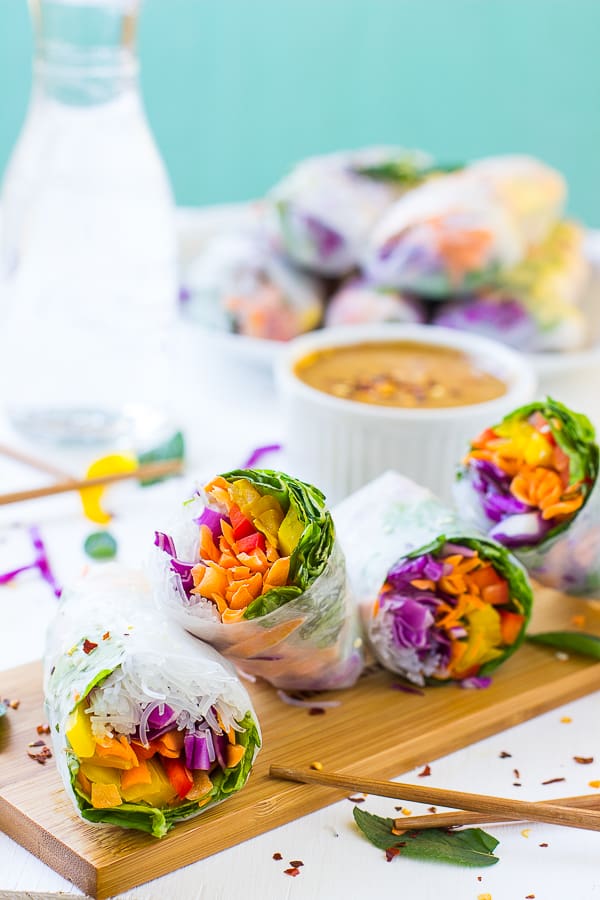
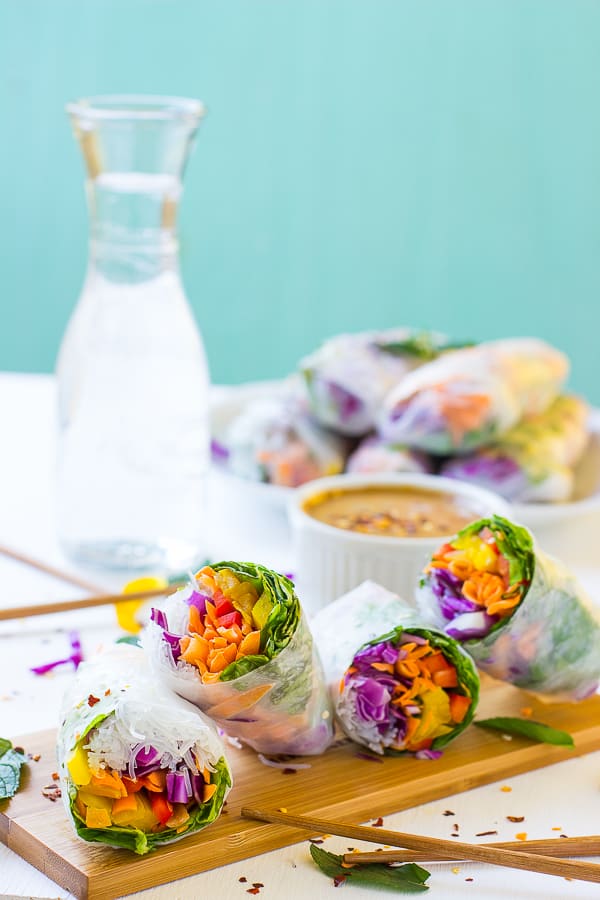
I love a rainbow of veggies. I mean, just look at these fresh summer rolls! Vietnamese-style rice paper rolls are packed with colorful crunch. Everything gets chopped, layered, and rolled up inside a tight little rice paper burrito that’s perfect for dipping. I serve these with my favorite peanut ginger sauce (recipe included below), but you can dip them in anything you’d like.
Why You’ll Love These Fresh Summer Rolls
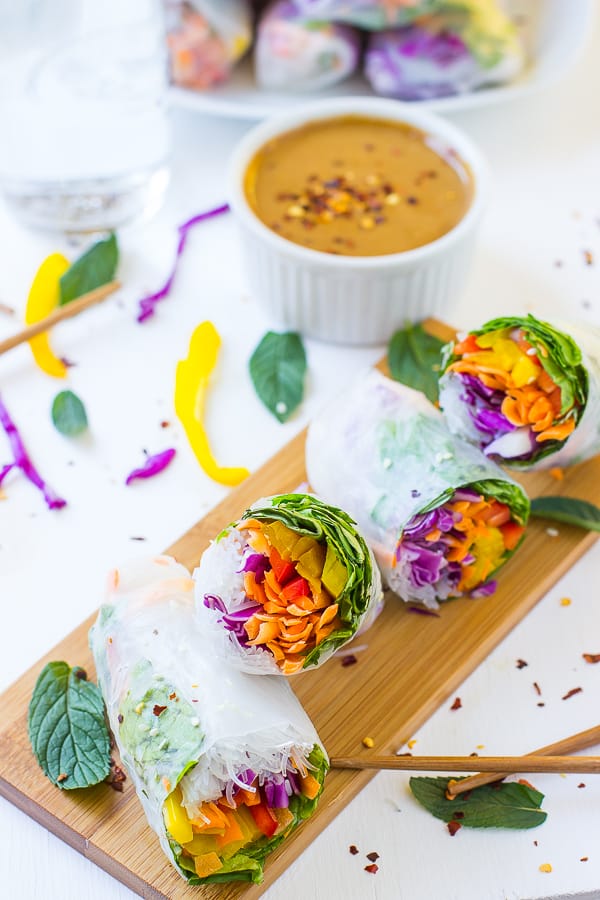
- Fresh and colorful. There’s no better way to eat the rainbow than a stack of fresh summer rolls. I make mine with crisp green lettuce, juicy red peppers, crunchy carrots, and purple cabbage. Of course, it wouldn’t be a summer roll without fresh vermicelli noodles, so you’ll find them in there, too.
- Perfect for summer. I love making fresh summer rolls in the summertime. There’s no cooking involved, and the flavors are delicious, especially when local veggies are in season.
- Versatile. These summer rolls are great for lunch or dinner, or I’ll make a big batch of them to bring out when we have company over. They’re the ultimate light and easy meal, snack, or appetizer. You can even let your guests DIY their rolls.
- Quick. Best of all, Vietnamese summer rolls are quick to assemble with just a few ingredients. Buy julienne (matchstick cut) veggies from your grocery store to save time on chopping!
Ingredient Notes
Fresh summer rolls take minutes to make with ingredients you’ll find in most major grocery stores. I’ll go over the important ingredients with some notes below. Scroll to the recipe card for a printable list with the full amounts you’ll need.
- Rice paper spring roll wrappers – These can be found in the grocery aisle with other Asian ingredients. They may sometimes be labeled “spring roll skins” or simply “spring roll wrappers”. Unlike wheat-based egg roll wrappers, they’re made with rice flour and tapioca starch.
- Vegetables – Choose your own rainbow! I use a combination of thinly sliced carrots, red and yellow bell peppers, purple cabbage, and butter lettuce . Spinach or spring greens will work, too.
- Fresh herbs – I love fresh mint in these rolls. Basil or cilantro are also good options, or you can use any mix of fresh herbs.
- Rice vermicelli noodles – These are long, thin Asian rice noodles. Not to be confused with Italian vermicelli, which is pasta. I usually find rice vermicelli in the same aisle as the rice paper wrappers.
- Peanut Sauce – For dipping. I’ve included the recipe for my homemade Thai peanut sauce . The recipe calls for soy sauce, but you can use liquid aminos , coconut aminos , or tamari if needed.
How to Make Fresh Summer Rolls
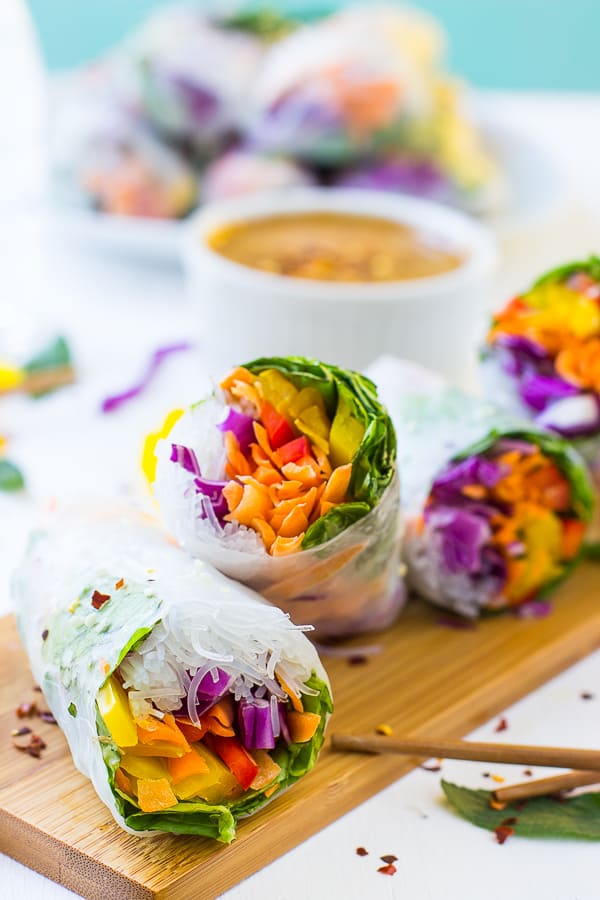
First things first, cut up all your veggies ahead of time so you have a mise en place (everything set out) for filling your rolls. Layer on your ingredients any way you like. I usually group each ingredient rather than mixing everything up, for more visual impact. Then, wrap the rolls tightly. Tight wrapping is key here!
How to Wrap Summer Rolls
Once you’ve filled the middle of your wrapper with vegetables, noodles, and herbs, here’s the best way to wrap your fresh summer rolls:
- Fold the top and bottom of the wrapper over the filling.
- Next, roll tightly from left to right, like a burrito . Place the finished roll on a plate with the seam-side down. The rice paper will be sticky and should stay in place.
- Repeat with the remaining rolls.
Your first few rolls will probably be a little wonky (it happens to me, too!), but after you get the hang of it, you’ll find the process easy… and even a little bit satisfying! Once you’re a rolling pro, you’ll want to make my Summer Fruit Spring Rolls , too.
Easy Peanut Dipping Sauce
I love this peanut ginger sauce and I use it in plenty of recipes, from these fresh summer rolls to my tempeh stir fry and Asian noodle salad . It’s simple to make. Take out a bowl, and whisk together peanut butter, maple syrup, soy sauce, and white or rice vinegar with ground ginger, sesame seeds, red pepper flakes, and a bit of warm water. Once the sauce is smooth, you’re ready to serve.
Tips for Success
Here are some hints and tips for making fresh summer rolls even easier.
- Saving on prep time. If your grocery store has a salad bar, buy the filling ingredients from there to save yourself time slicing and julienning.
- Amping up the protein. You can swap the rice noodles for strips of cooked tofu. Or, add a protein like vegan chicken , crispy tofu , or tempeh to your rolls in addition to the noodles.
- A note on work surfaces. The rice paper wrappers will stick to wood, so you’ll want to use a plastic or silicone board, or a plate for assembly. Otherwise, line a wood cutting board with a damp paper towel.
Serving Suggestions
Fresh summer rolls dipped in spicy peanut sauce are the perfect light snack all on their own. Or, I’ll serve these alongside Thai coconut curry soup or vegan pad see ew to turn them into a meal. I also love the summery flavors of this pineapple fried rice or this quick Asian-inspired quinoa salad .
How to Store
Store fresh summer rolls in an airtight storage container in the refrigerator with a damp paper towel separating them to keep them from drying out. The sauce can also be refrigerated. Both will keep in the fridge for 3 to 4 days, depending on the freshness of the veggies you use. Summer rolls are great for meal prep!
Can These Be Frozen?
No, this isn’t a recipe that will freeze well. If you’re looking for a freezer-friendly Asian appetizer, try my Vegan Potstickers instead!
P.S. Here are some of the items I used to make this recipe if you’d like to use them too:
| WHAT YOU’LL NEED // SHOP MY FAVORITE INGREDIENTS & PREP PRODUCTS |

Ingredients
Fresh Spring Rolls
- 9-10 rice paper
- 1 carrot , julienned
- ¼ cup chopped mint
- 2 cups purple cabbage , (171g ) sliced
- ½ cup red bell pepper , ( 52g ) chopped
- ½ cup yellow bell pepper , ( 52g ) chopped
- 7-8 lettuce leaves
- 5 ounces rice vermicelli noodles , ( 140g ) cooked
Peanut Ginger Sauce
- ½ teaspoon ground ginger
- 1 tablespoon maple syrup
- 2 tablespoon soy sauce , gluten free if needed, or liquid aminos or coconut aminos or tamari
- 1 teaspoon distilled white vinegar
- ½ teaspoon sesame seeds
- ⅓ cup natural peanut butter
- ¼ cup warm water
- ¼ teaspoon crushed red pepper flakes
Instructions
Peanut Ginger Sauce
- Whisk all the ingredients together in a deep bowl until combined. Set aside until ready to use.
Fresh Summer Rolls
- Chop up your veggies and place on a cutting board.
- Prepare the rice paper wrappers as per the instructions on your packaging. I poured water into a large wide bowl. I then dipped the rice papers into the water, until they began to become completely transparent. You want to ensure it’s soft, but not so soft that it can be easily ripped. For my rice papers, this was about 20-30 seconds.
- I then removed from the water and onto a plastic, silicone or ceramic cutting mat (they seemed to stick to my wooden board – if you only have a wooden cutting board, you can lay down a damp paper towel on it) and slightly pat dry.
- Fill your rolls! I placed 2-3 slices of the varying bell peppers, a few slices of julienned carrots, some cabbage, a handful of vermicelli noodles, a sprinkling of mint and a small handful of lettuce (basically 1/10th of the amount I have in total). I lined these up in the centre of the rice paper.
- I rolled the top and bottom of the rolls over the filling, then from left to right. So I rolled the left of the rice paper over the filing, then began to tuck the filling in as I rolled towards the right like a burrito. I continued to roll tightly until finished, then lay them on the folded edges to set on a plate. This took me about 30-45 seconds to do including putting in the filling.
- Serve on a plate with the dipping sauce and enjoy!
Notes
Vietnamese-style fresh summer rolls are colorful, crunchy, and so easy to make! Serve these as a light meal or easy summer appetizer with sweet-spicy homemade peanut sauce for dipping.
I love a rainbow of veggies. I mean, just look at these fresh summer rolls! Vietnamese-style rice paper rolls are packed with colorful crunch. Everything gets chopped, layered, and rolled up inside a tight little rice paper burrito that’s perfect for dipping. I serve these with my favorite peanut ginger sauce (recipe included below), but you can dip them in anything you’d like.
Why You’ll Love These Fresh Summer Rolls
- Fresh and colorful. There’s no better way to eat the rainbow than a stack of fresh summer rolls. I make mine with crisp green lettuce, juicy red peppers, crunchy carrots, and purple cabbage. Of course, it wouldn’t be a summer roll without fresh vermicelli noodles, so you’ll find them in there, too.
- Perfect for summer. I love making fresh summer rolls in the summertime. There’s no cooking involved, and the flavors are delicious, especially when local veggies are in season.
- Versatile. These summer rolls are great for lunch or dinner, or I’ll make a big batch of them to bring out when we have company over. They’re the ultimate light and easy meal, snack, or appetizer. You can even let your guests DIY their rolls.
- Quick. Best of all, Vietnamese summer rolls are quick to assemble with just a few ingredients. Buy julienne (matchstick cut) veggies from your grocery store to save time on chopping!
Ingredient Notes
Fresh summer rolls take minutes to make with ingredients you’ll find in most major grocery stores. I’ll go over the important ingredients with some notes below. Scroll to the recipe card for a printable list with the full amounts you’ll need.
- Rice paper spring roll wrappers – These can be found in the grocery aisle with other Asian ingredients. They may sometimes be labeled “spring roll skins” or simply “spring roll wrappers”. Unlike wheat-based egg roll wrappers, they’re made with rice flour and tapioca starch.
- Vegetables – Choose your own rainbow! I use a combination of thinly sliced carrots, red and yellow bell peppers, purple cabbage, and butter lettuce . Spinach or spring greens will work, too.
- Fresh herbs – I love fresh mint in these rolls. Basil or cilantro are also good options, or you can use any mix of fresh herbs.
- Rice vermicelli noodles – These are long, thin Asian rice noodles. Not to be confused with Italian vermicelli, which is pasta. I usually find rice vermicelli in the same aisle as the rice paper wrappers.
- Peanut Sauce – For dipping. I’ve included the recipe for my homemade Thai peanut sauce . The recipe calls for soy sauce, but you can use liquid aminos , coconut aminos , or tamari if needed.
How to Make Fresh Summer Rolls
First things first, cut up all your veggies ahead of time so you have a mise en place (everything set out) for filling your rolls. Layer on your ingredients any way you like. I usually group each ingredient rather than mixing everything up, for more visual impact. Then, wrap the rolls tightly. Tight wrapping is key here!
How to Wrap Summer Rolls
Once you’ve filled the middle of your wrapper with vegetables, noodles, and herbs, here’s the best way to wrap your fresh summer rolls:
- Fold the top and bottom of the wrapper over the filling.
- Next, roll tightly from left to right, like a burrito . Place the finished roll on a plate with the seam-side down. The rice paper will be sticky and should stay in place.
- Repeat with the remaining rolls.
Your first few rolls will probably be a little wonky (it happens to me, too!), but after you get the hang of it, you’ll find the process easy… and even a little bit satisfying! Once you’re a rolling pro, you’ll want to make my Summer Fruit Spring Rolls , too.
Easy Peanut Dipping Sauce
I love this peanut ginger sauce and I use it in plenty of recipes, from these fresh summer rolls to my tempeh stir fry and Asian noodle salad . It’s simple to make. Take out a bowl, and whisk together peanut butter, maple syrup, soy sauce, and white or rice vinegar with ground ginger, sesame seeds, red pepper flakes, and a bit of warm water. Once the sauce is smooth, you’re ready to serve.
Tips for Success
Here are some hints and tips for making fresh summer rolls even easier.
- Saving on prep time. If your grocery store has a salad bar, buy the filling ingredients from there to save yourself time slicing and julienning.
- Amping up the protein. You can swap the rice noodles for strips of cooked tofu. Or, add a protein like vegan chicken , crispy tofu , or tempeh to your rolls in addition to the noodles.
- A note on work surfaces. The rice paper wrappers will stick to wood, so you’ll want to use a plastic or silicone board, or a plate for assembly. Otherwise, line a wood cutting board with a damp paper towel.
Serving Suggestions
Fresh summer rolls dipped in spicy peanut sauce are the perfect light snack all on their own. Or, I’ll serve these alongside Thai coconut curry soup or vegan pad see ew to turn them into a meal. I also love the summery flavors of this pineapple fried rice or this quick Asian-inspired quinoa salad .
How to Store
Store fresh summer rolls in an airtight storage container in the refrigerator with a damp paper towel separating them to keep them from drying out. The sauce can also be refrigerated. Both will keep in the fridge for 3 to 4 days, depending on the freshness of the veggies you use. Summer rolls are great for meal prep!
Can These Be Frozen?
No, this isn’t a recipe that will freeze well. If you’re looking for a freezer-friendly Asian appetizer, try my Vegan Potstickers instead!
P.S. Here are some of the items I used to make this recipe if you’d like to use them too:
| WHAT YOU’LL NEED // SHOP MY FAVORITE INGREDIENTS & PREP PRODUCTS |
Ingredients
Fresh Spring Rolls
- 9-10 rice paper
- 1 carrot , julienned
- ¼ cup chopped mint
- 2 cups purple cabbage , (171g ) sliced
- ½ cup red bell pepper , ( 52g ) chopped
- ½ cup yellow bell pepper , ( 52g ) chopped
- 7-8 lettuce leaves
- 5 ounces rice vermicelli noodles , ( 140g ) cooked
Peanut Ginger Sauce
- ½ teaspoon ground ginger
- 1 tablespoon maple syrup
- 2 tablespoon soy sauce , gluten free if needed, or liquid aminos or coconut aminos or tamari
- 1 teaspoon distilled white vinegar
- ½ teaspoon sesame seeds
- ⅓ cup natural peanut butter
- ¼ cup warm water
- ¼ teaspoon crushed red pepper flakes
Instructions
Peanut Ginger Sauce
- Whisk all the ingredients together in a deep bowl until combined. Set aside until ready to use.
Fresh Summer Rolls
- Chop up your veggies and place on a cutting board.
- Prepare the rice paper wrappers as per the instructions on your packaging. I poured water into a large wide bowl. I then dipped the rice papers into the water, until they began to become completely transparent. You want to ensure it’s soft, but not so soft that it can be easily ripped. For my rice papers, this was about 20-30 seconds.
- I then removed from the water and onto a plastic, silicone or ceramic cutting mat (they seemed to stick to my wooden board – if you only have a wooden cutting board, you can lay down a damp paper towel on it) and slightly pat dry.
- Fill your rolls! I placed 2-3 slices of the varying bell peppers, a few slices of julienned carrots, some cabbage, a handful of vermicelli noodles, a sprinkling of mint and a small handful of lettuce (basically 1/10th of the amount I have in total). I lined these up in the centre of the rice paper.
- I rolled the top and bottom of the rolls over the filling, then from left to right. So I rolled the left of the rice paper over the filing, then began to tuck the filling in as I rolled towards the right like a burrito. I continued to roll tightly until finished, then lay them on the folded edges to set on a plate. This took me about 30-45 seconds to do including putting in the filling.
- Serve on a plate with the dipping sauce and enjoy!
Notes
Fresh Summer Rolls with Peanut Ginger Sauce
Ingredients
Fresh Spring Rolls
- 9-10 rice paper
- 1 carrot julienned
- ¼ cup chopped mint
- 2 cups purple cabbage (171g ) sliced
- ½ cup red bell pepper ( 52g ) chopped
- ½ cup yellow bell pepper ( 52g ) chopped
- 7-8 lettuce leaves
- 5 ounces rice vermicelli noodles ( 140g ) cooked
Peanut Ginger Sauce
- ½ teaspoon ground ginger
- 1 tablespoon maple syrup
- 2 tablespoon soy sauce gluten free if needed, or liquid aminos or coconut aminos or tamari
- 1 teaspoon distilled white vinegar
- ½ teaspoon sesame seeds
- ⅓ cup natural peanut butter
- ¼ cup warm water
- ¼ teaspoon crushed red pepper flakes
Instructions
Peanut Ginger Sauce
- Whisk all the ingredients together in a deep bowl until combined. Set aside until ready to use.
Fresh Summer Rolls
- Chop up your veggies and place on a cutting board.
- Prepare the rice paper wrappers as per the instructions on your packaging. I poured water into a large wide bowl. I then dipped the rice papers into the water, until they began to become completely transparent. You want to ensure it’s soft, but not so soft that it can be easily ripped. For my rice papers, this was about 20-30 seconds.
- I then removed from the water and onto a plastic, silicone or ceramic cutting mat (they seemed to stick to my wooden board - if you only have a wooden cutting board, you can lay down a damp paper towel on it) and slightly pat dry.
- Fill your rolls! I placed 2-3 slices of the varying bell peppers, a few slices of julienned carrots, some cabbage, a handful of vermicelli noodles, a sprinkling of mint and a small handful of lettuce (basically 1/10th of the amount I have in total). I lined these up in the centre of the rice paper.
- I rolled the top and bottom of the rolls over the filling, then from left to right. So I rolled the left of the rice paper over the filing, then began to tuck the filling in as I rolled towards the right like a burrito. I continued to roll tightly until finished, then lay them on the folded edges to set on a plate. This took me about 30-45 seconds to do including putting in the filling.
- Serve on a plate with the dipping sauce and enjoy!
Video
Notes
Nutrition
Fresh Summer Rolls with Peanut Ginger Sauce https://jessicainthekitchen.com/fresh-spring-rolls-with-peanut-ginger-sauce/ April 11, 2017
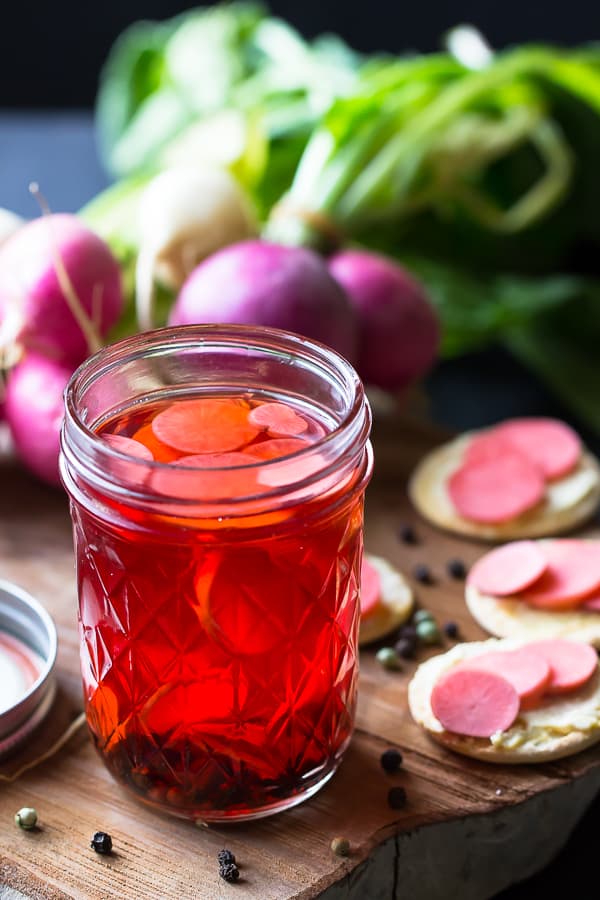
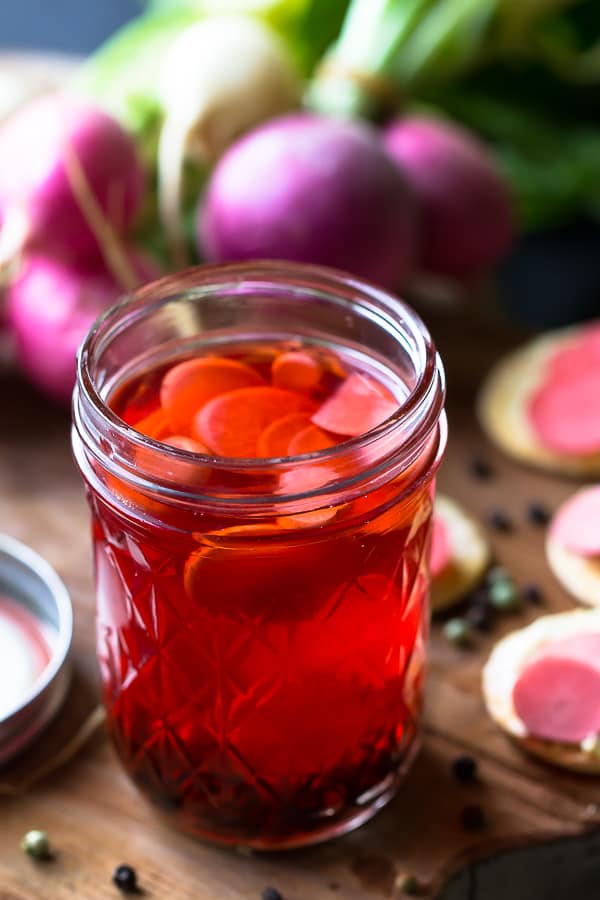
These Quick Pickled Radishes are so easy to make and are delicious crunchy and spicy bites that can go on everything from sandwiches to salads to tacos!
Some vegetables like cucumbers, carrots, and bell peppers are fantastic on their own, pure and simple, with nothing else added. They can instantly enhance other dishes without any effort on your part. That doesn’t mean they’ve reached their full flavor potential yet. Have you ever had any of those veggies pickled?
Cucumbers are the classic pickle, spiked with mustard seed, garlic, and dill; shredded carrots are a classic accompaniment on Bahn mi sandwiches, tangy and bright to cut through the rich fillings; bell peppers soften while their natural sweetness intensifies. The same transformation happens to these radishes. They get even spicier, retain their crunch, and go with EVERYTHING. Once you have a batch on hand, you won’t be able to resist dipping into it for every meal.
Why You’ll Love These Easy Pickled Radishes
If you’re not crazy about raw radishes, I’d implore you to give them a second chance. They’re like a whole different vegetable given the right treatment. Here’s why you’ll fall in love:
- No experience necessary. These pickled radishes are so simple to make, they barely need a recipe. You’ll have the formula memorized in no time
- Quick-pickled for instant gratification. Quick-pickling is different from traditional ( lacto-fermentation ) pickling because it doesn’t require you to do proper canning, which seals the jars in boiling hot water. Plus, they’re ready to eat in minutes, not weeks or months!
- Zero allergens. These pickles are for everyone! They’re vegan, gluten-free, soy-free, sugar-free, nut-free, keto, and paleo.
- Only 4 ingredients, not including water or salt. Even if your pantry is bare, there’s a good chance you can whip up a batch without hitting the grocery store.
Notes on Ingredients
Please note that this is important information on the ingredients and instructions and the FULL recipe with amounts and details can be found DOWN BELOW (scroll to it) in the recipe card.
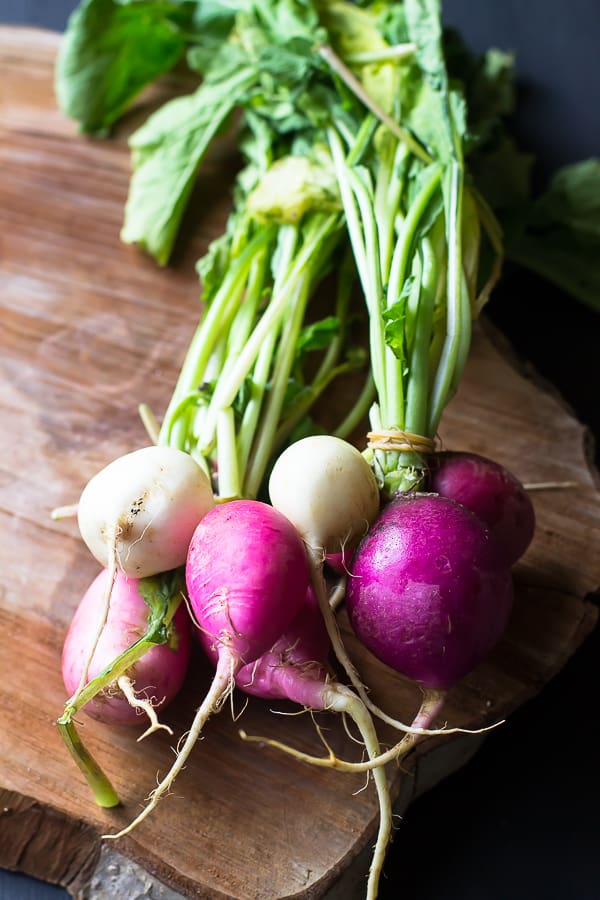
- Radishes – Watermelon radishes are especially beautiful, but you can use any type you prefer.
- White vinegar – Rice vinegar or apple cider vinegar are good substitutes in a pinch.
- Water
- Maple syrup – 100% grade B is a must for the best earthy, woodsy, and sweet flavor.
- Salt
- Peppercorns – I used a mixture for color. Plain black is more common and just as tasty.
How to Make Quick Pickled Radishes
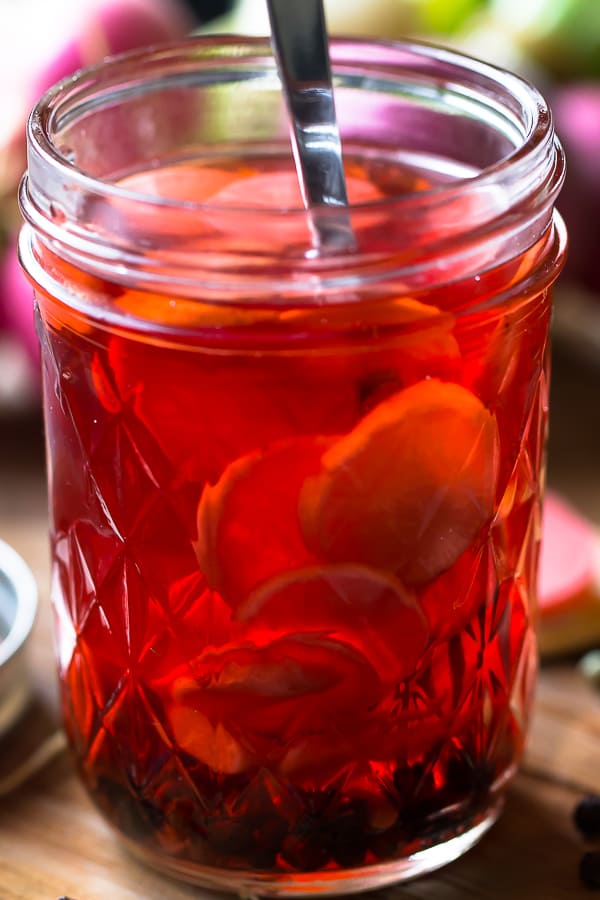
Prepare your radishes. Wash and using a mandolin to slice very thin circles. You could also use a sharp chef’s knife.
Place the cut radishes in a glass jar.
In a small pan, combine the remaining ingredients except for the peppercorns. Bring to a boil, stir periodically, then remove from heat.
Let the mixture cool for a few minutes. Pour the hot mixture over the radishes in the jar. Add the peppercorns and stir everything together.
Allow to cool to room temperature before serving . They can be served immediately but taste much better after a day of the flavors marrying together in the fridge.
Tips for Success
You can easily master this recipe on the first try. If you’re still daunted by the idea of pickling, here are a few quick tips to guarantee success:
- Use a mandoline for the thinnest, most consistent slices. You can use a very sharp knife too, but it does take more time and skill.
- To make this recipe sugar-free, you can use sugar-free maple syrup or simply omit it.
- The longer you keep them, the more flavorful they become. These pickles are delicious right away, as soon as they cool, but your patience will be rewarded if you can wait!
- Since they’re quick pickled, they must be kept in the fridge, not out on the shelf at room temperature. If you want to preserve them longer to store them in your pantry, it’s important to learn how to properly can vegetables.
- Don’t throw out that brine! You can re-use it for the next batch.
Flavor Variations
Consider this recipe just the start of your pickling adventure. It’s a simple formula that can easily be customized for any specific meals, preferences, or cravings. Here are a few ideas to get started:
- Garlic dill: add sliced garlic cloves and fresh dill
- Curry: add curry powder or paste
- Garden: add sliced carrots and zucchini
- Spicy: add sliced jalapenos, crushed red pepper, hot sauce, or horseradish
- Sweet heat: add minced habanero and double the amount of maple syrup
- Floral: add dried lavender and a few drops of rose water
What To Serve With Radish Pickles
Anywhere you’d use a conventional pickled cucumber, you can use pickled radishes! They’re great snacks to nibble on when you’re craving salt, but don’t fill up when you could also use them in:
- Sandwiches and wraps
- Salads
- Buddha Bowls
- Pizza
- Buffalo cauliflower wings
- Tacos
- Sushi
- Chili
- Avocado toast
- Bloody Mary
How Long Will Quick Pickled Vegetables Last?
These quick-pickled radishes will last in an airtight glass jar in the fridge for up to 8 weeks. They’ll be crisper earlier, gradually becoming softer in texture over time. I don’t recommend freezing them because the radishes will get downright mushy when thawed.
More Vegan Vegetable Sides:
- Candied Yams
- Sticky Sesame Shiitake Mushrooms
- Air Fryer Asparagus
- Balsamic Roasted Vegetables
- Maple Roasted Brussels Sprouts with Apples and Pecans
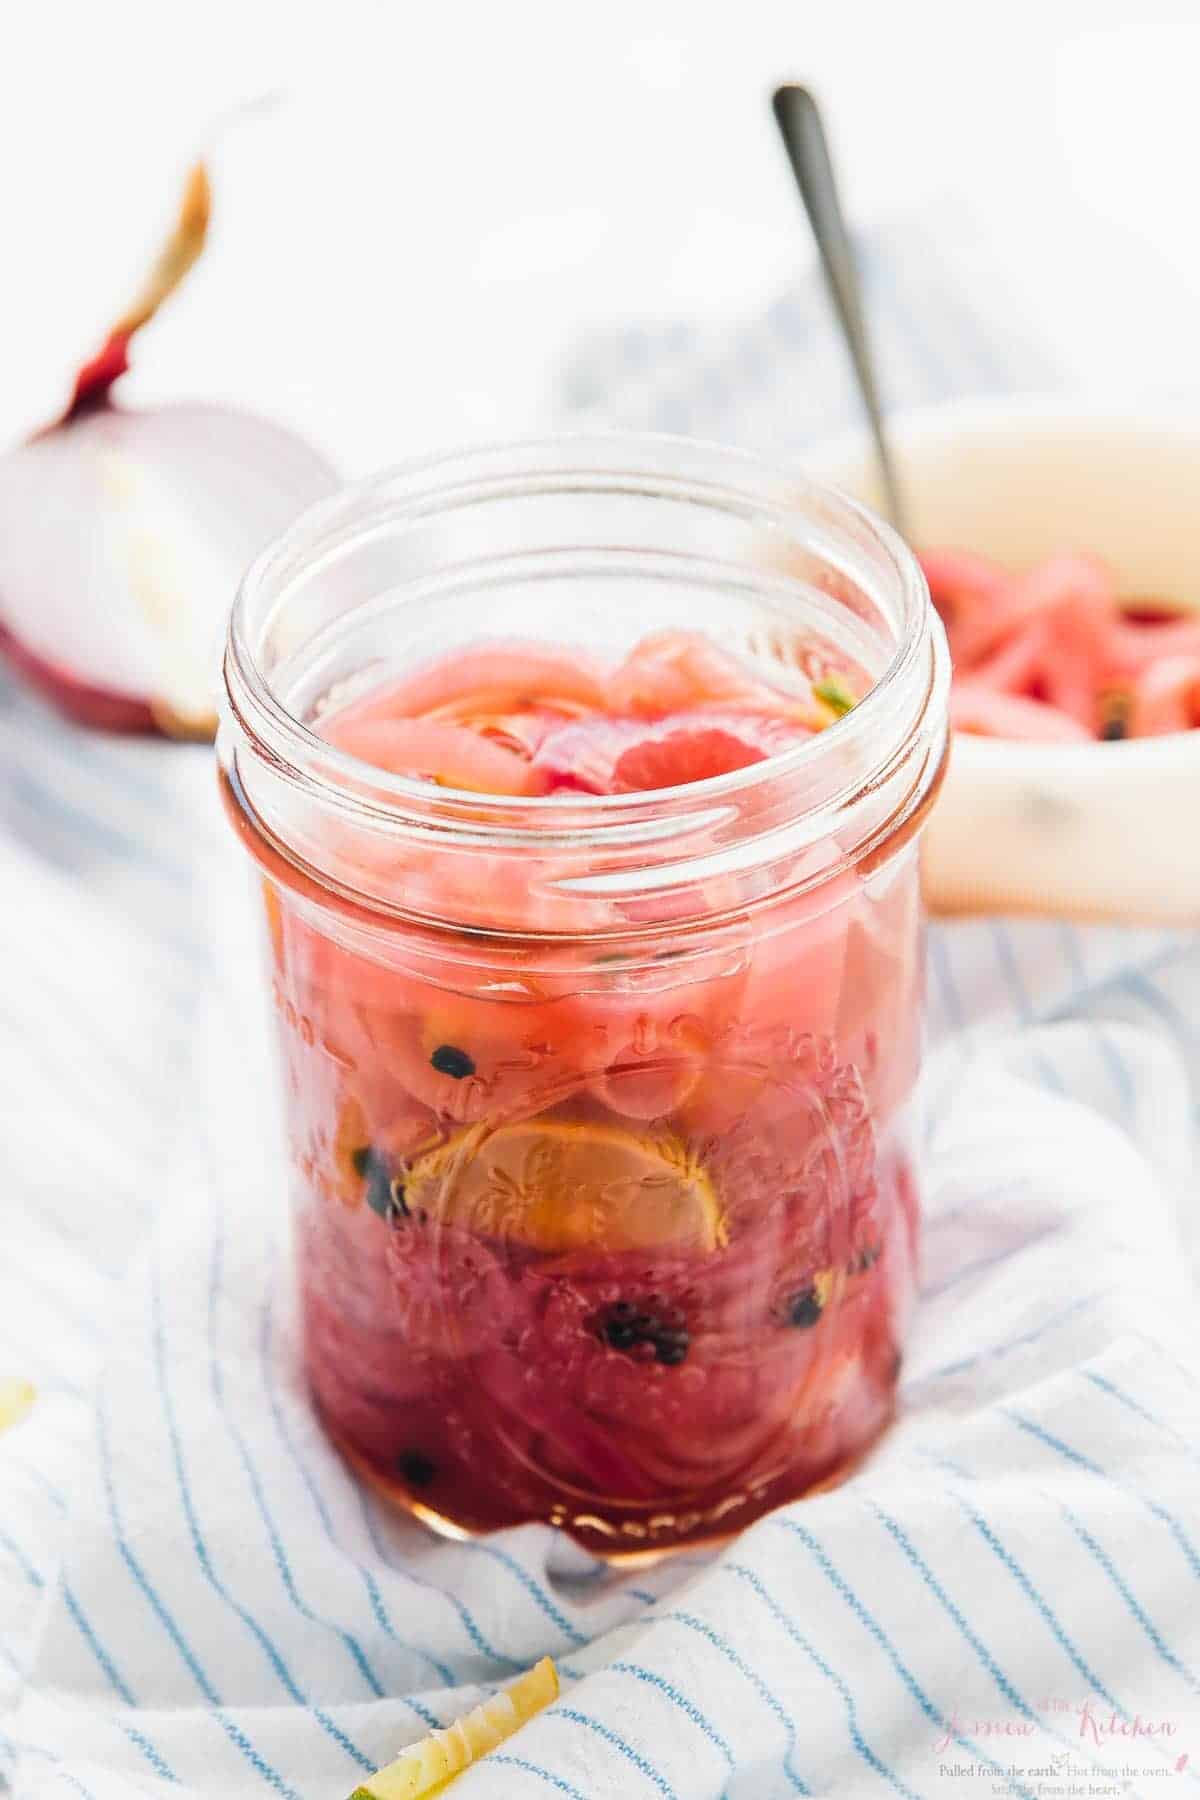
Quick Pickled Onions
Ingredients
Quick Pickled Radishes
- 1 bunch radishes , sliced thinly preferably with a mandolin
- 1 cup white vinegar
- 1 cup water
- 3 tablespoons maple syrup
- 2 teaspoons salt
- 1 tablespoon peppercorns , I used mixed peppercorns
Instructions
Quick Pickled Radishes
- Prepare your radishes by washing them, slicing off the tops and wispy bottoms, and using a mandolin to slice very thin circles. You could also use a sharp chef’s knife.
- Add the circles to a canning jar such as a Ball jar.
- In a small pan, add the vinegar, water maple syrup and salt. Bring to a boil, stirring, then remove from heat.
- Let the mixture cool for a few minutes so that’s it’s no longer boiling hot, then pour the hot mixture over the radishes in the jar. Add the peppercorns and stir everything together with a fork or spoon.
- Allow to cool to room temperature before serving. They can be served immediately but taste much better after a day of the flavors marrying together in the fridge.
- Enjoy!
Notes
- Use a mandoline for the thinnest, most consistent slices. You can use a very sharp knife too, but it does take more time and skill.
- To make this recipe sugar-free, you can use sugar-free maple syrup or simply omit it.
- The longer you keep them, the more flavorful they become. These pickles are delicious right away, as soon as they cool, but your patience will be rewarded if you can wait!
- Since they’re quick pickled, they must be kept in the fridge, not out on the shelf at room temperature. If you want to preserve them longer to store them in your pantry, it’s important to learn how to properly can
- Don’t throw out that brine! You can re-use it for the next batch.
