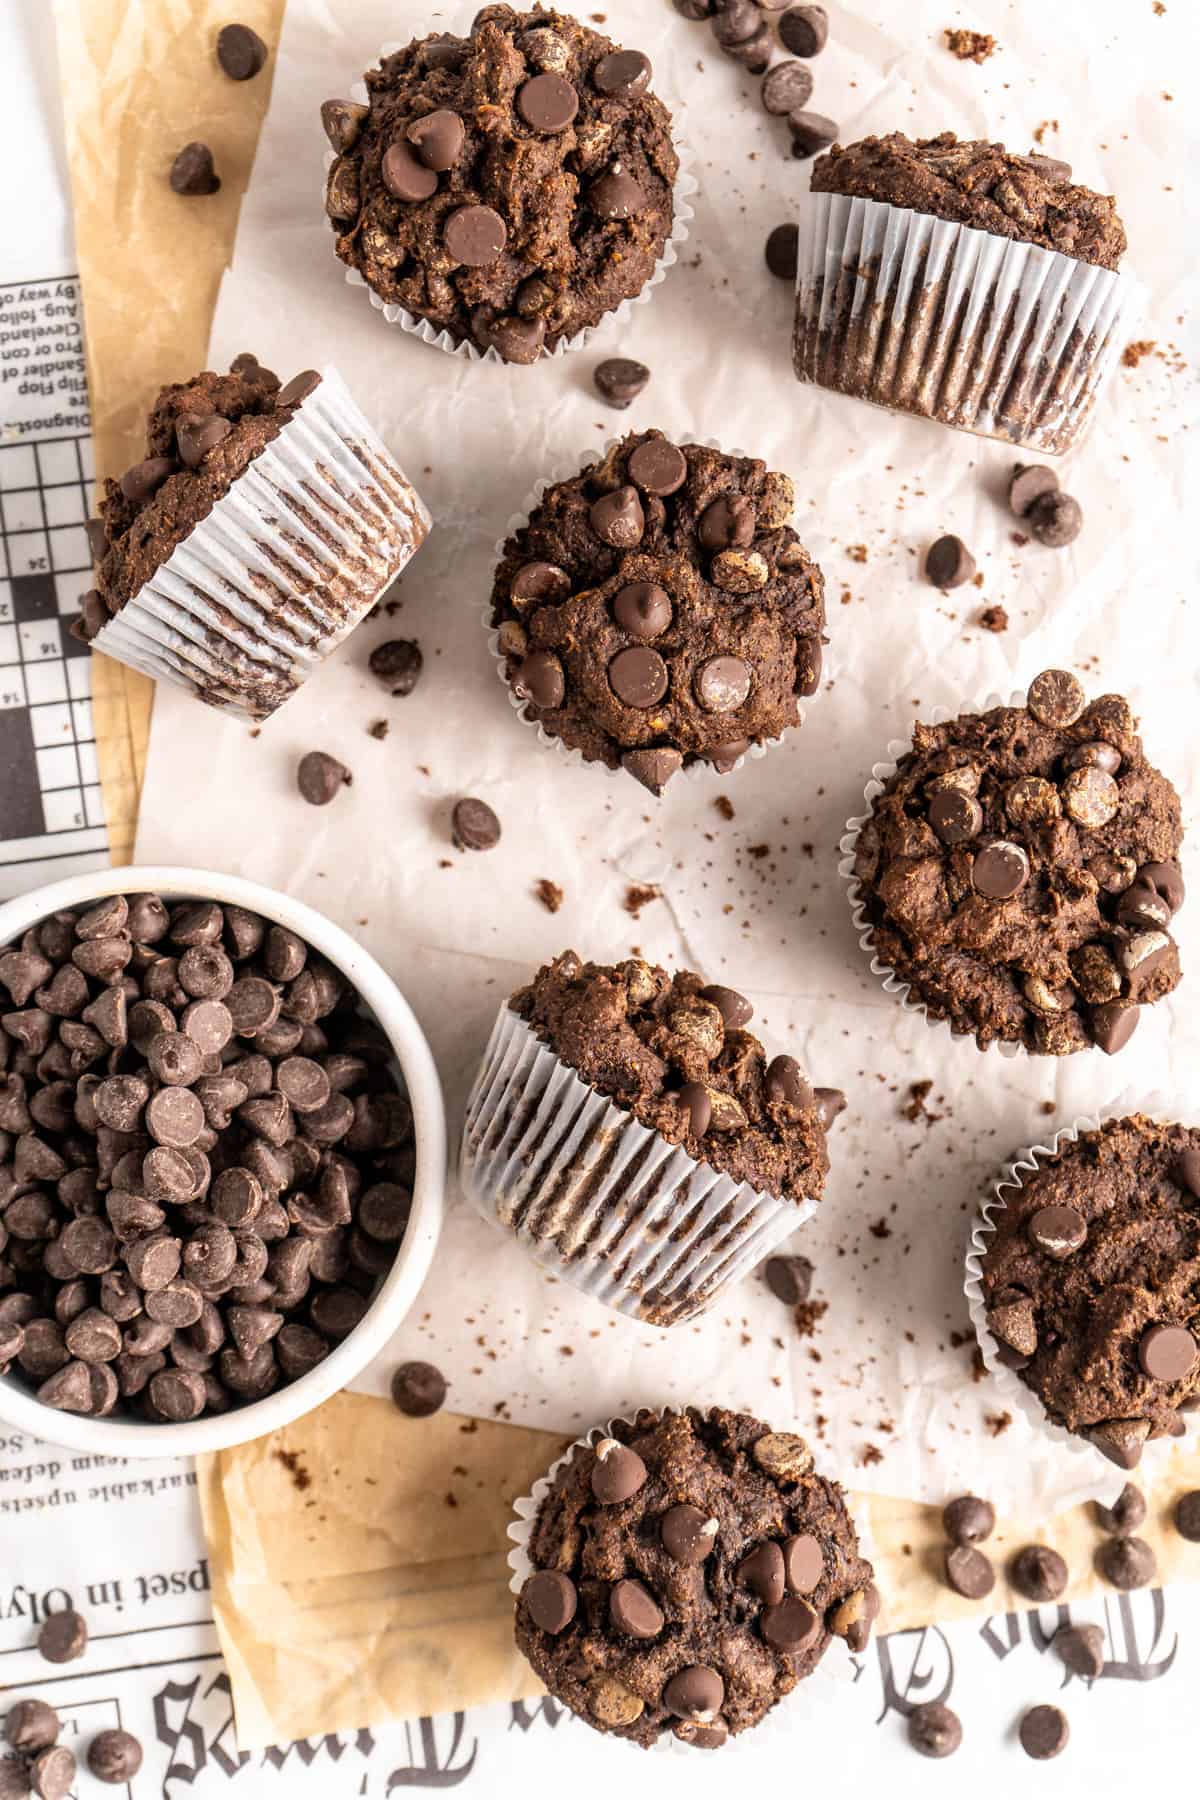
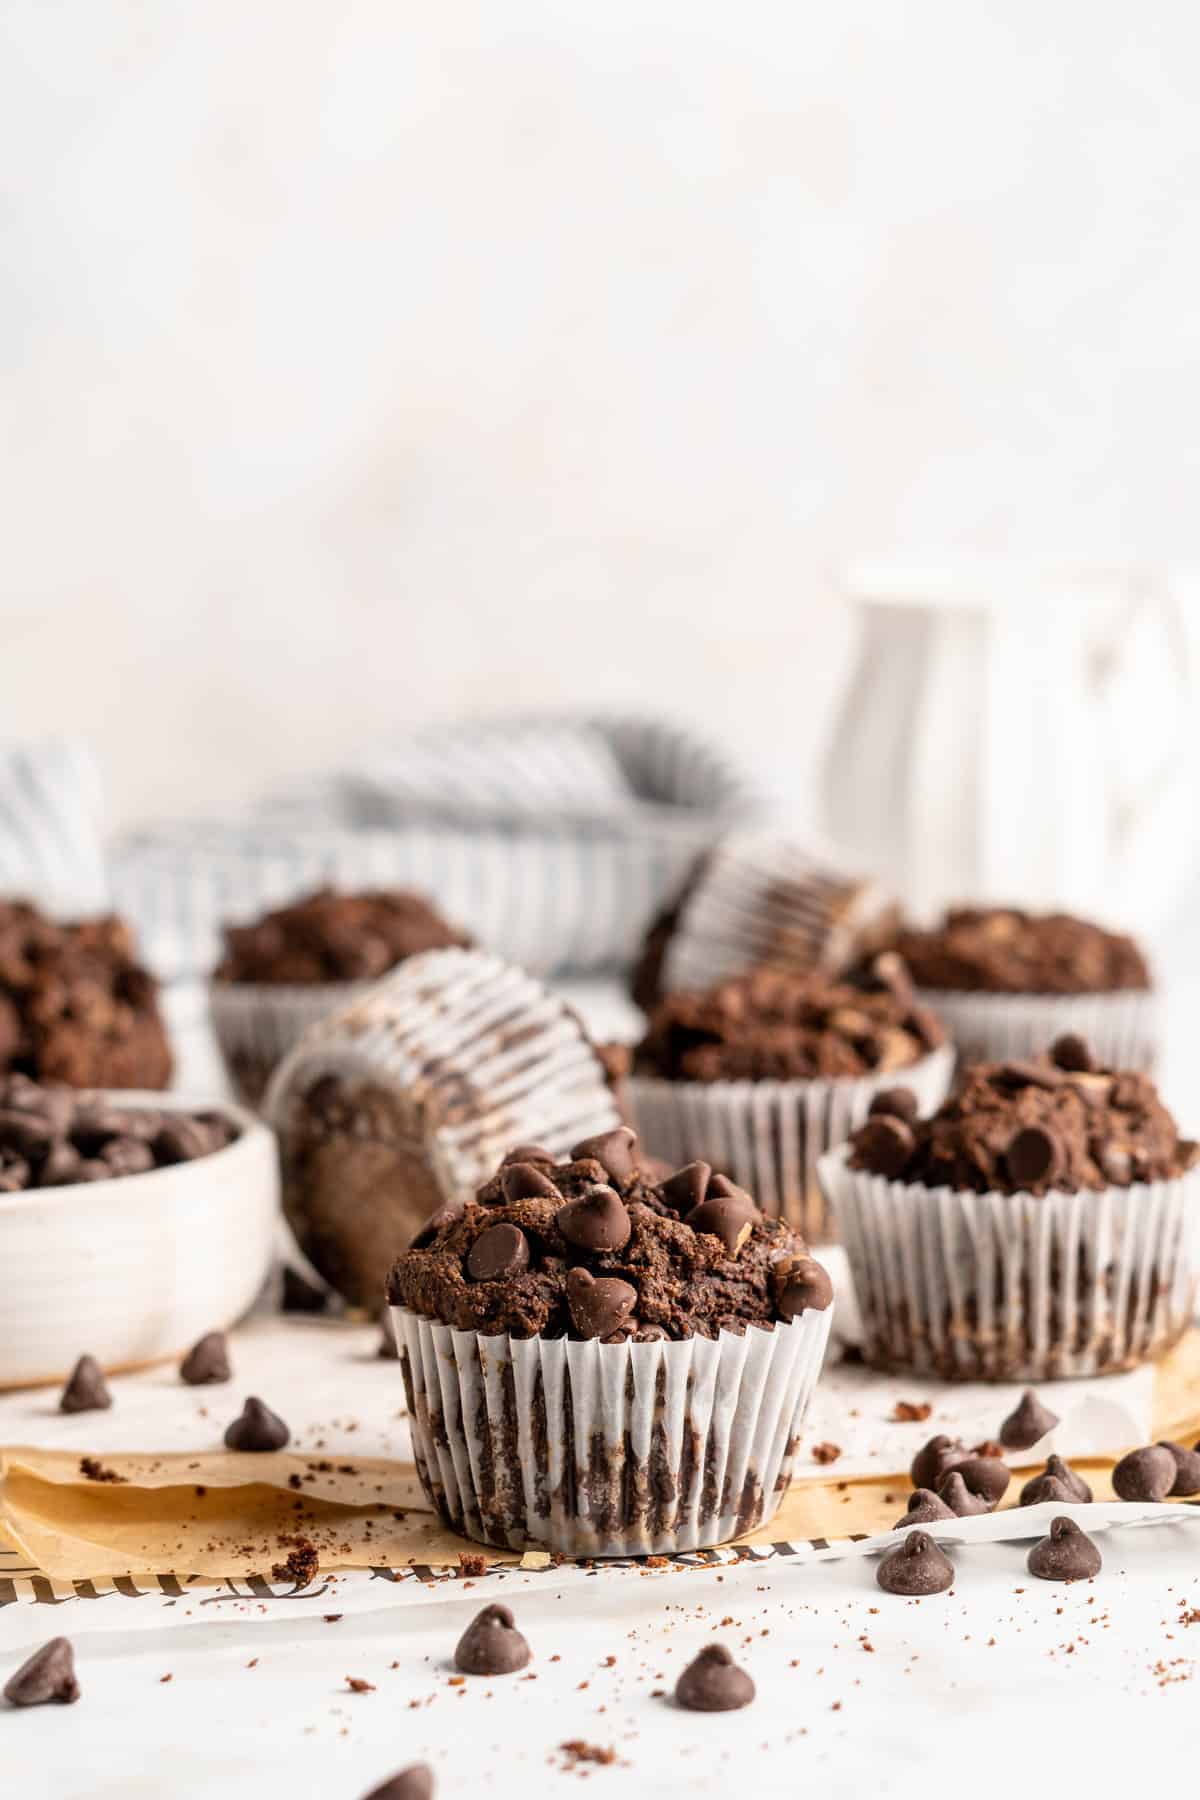
These vegan double chocolate banana muffins are moist, soft, and bursting with rich cocoa flavor and chocolate chips. I make these muffins gluten-free with oat flour and sweeten them only with banana and maple syrup.
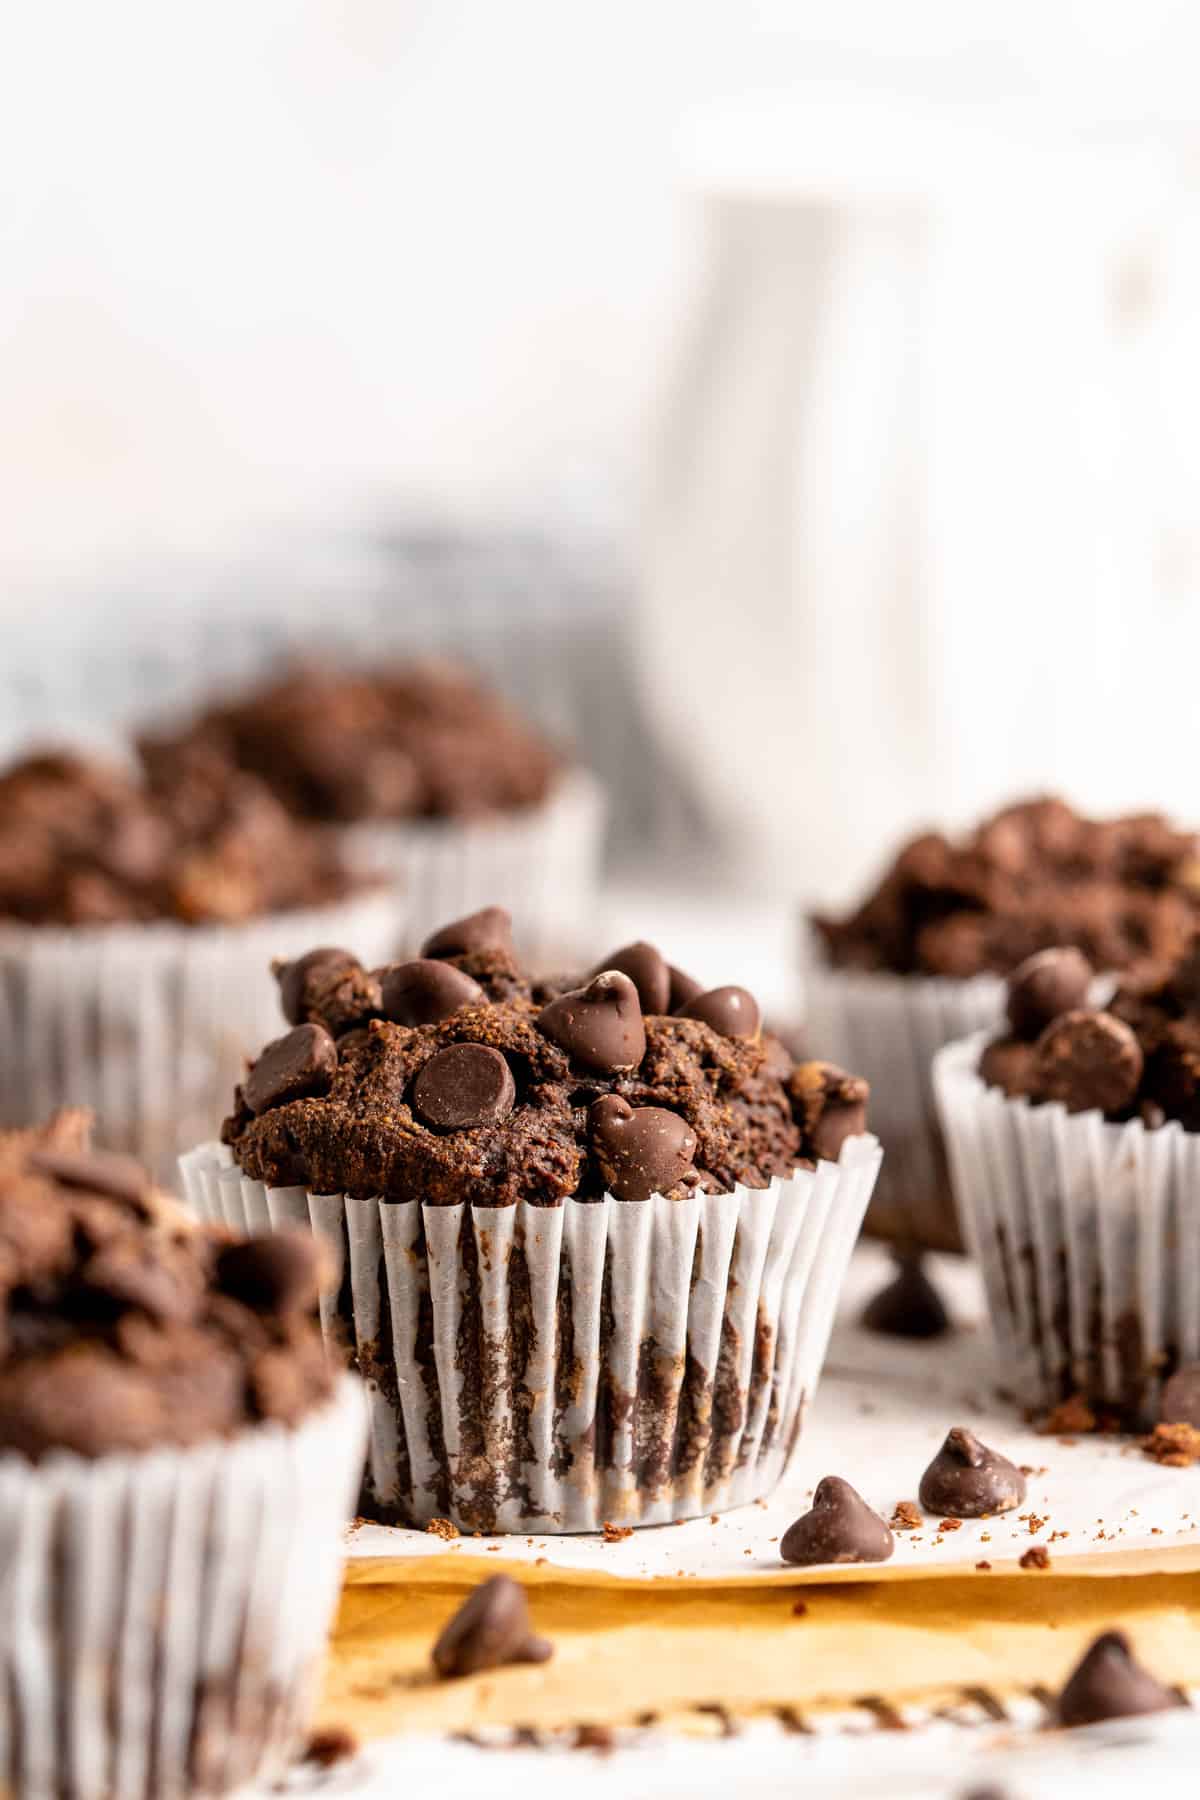
Whenever I make my chocolate banana muffins to share, I’m always hit with, “Wait, these are vegan?!” and “These are gluten-free?!” The answers are yes and YES. These vegan chocolate banana muffins are dairy-free and sweetened with maple syrup and ripe bananas, and made gluten-free with oat flour. They remind me of my chocolate banana bread , and they’re just as soft, moist, and easy to make for an on-the-go breakfast or snack.
Why I Know You’ll Love These Chocolate Banana Muffins
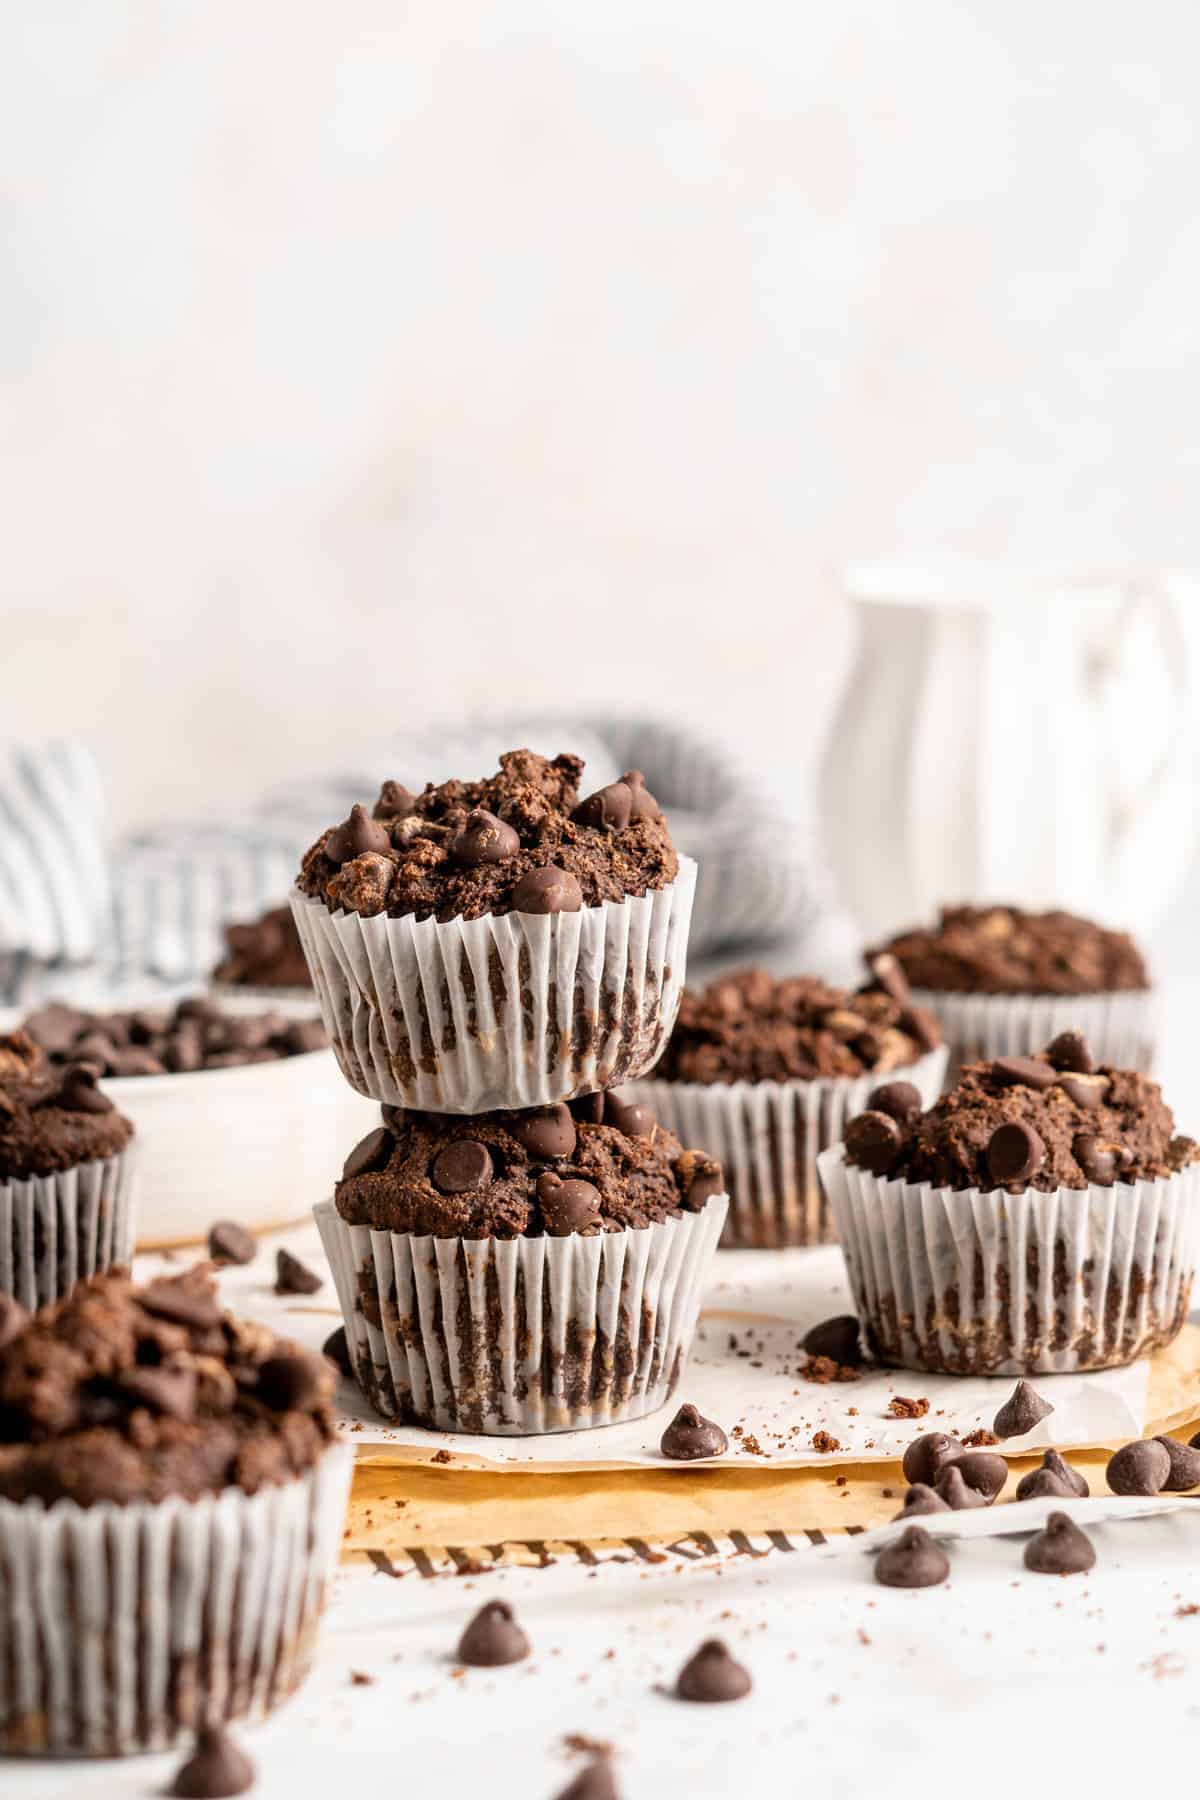
- Irresistible texture. The muffins are moist, fluffy, and soft, with a rich chocolate flavor thanks to cocoa powder and chocolate chips.
- Vegan & gluten-free. If I use stevia-sweetened chocolate chips, these muffins are refined sugar-free, too!
- Easy to make. Whisk the dry and wet ingredients separately, combine them, and then bake your muffins! These chocolate banana muffins are quick to whip up any day of the week.
- Customizable. Add chopped walnuts instead of the chocolate chips, or go half-and-half for a little added crunch.
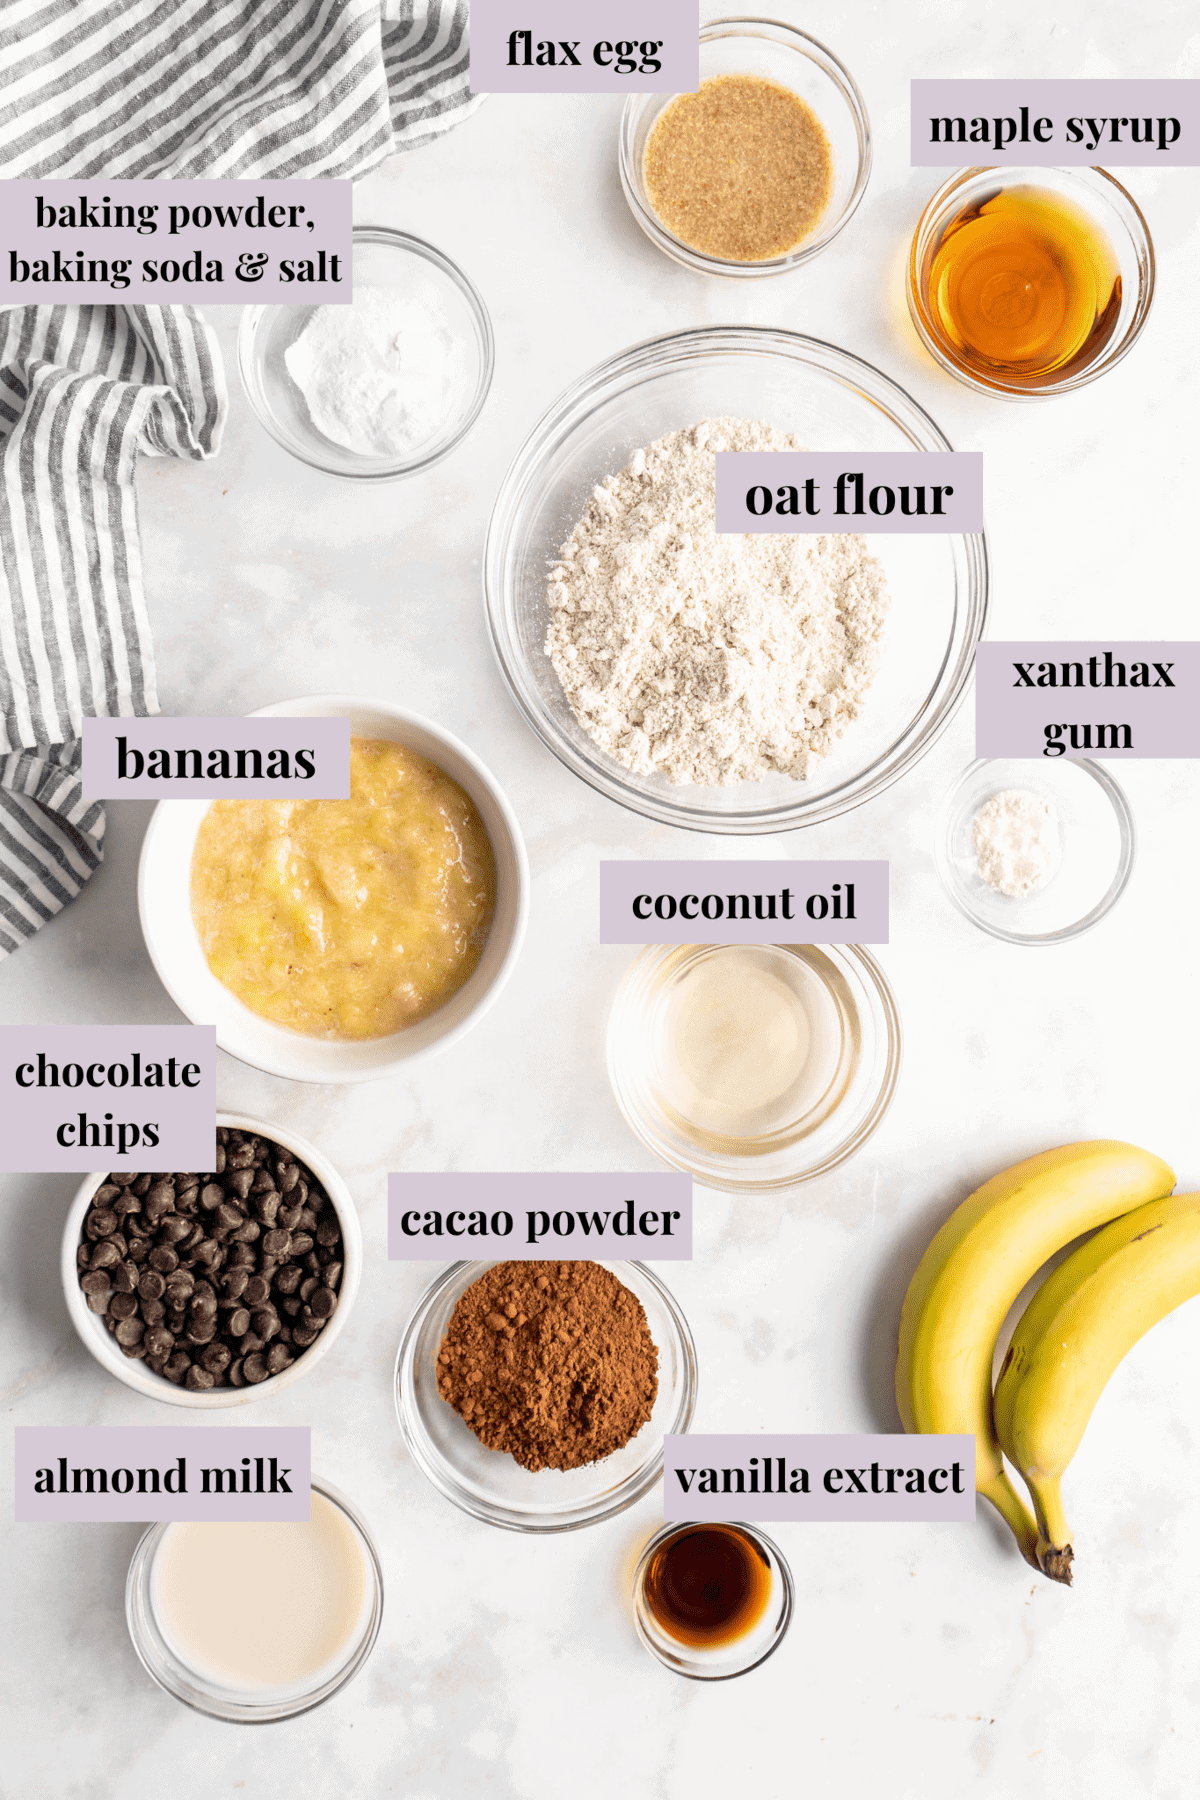
Notes on Ingredients
Please note that this is important information on the ingredients and instructions, and the FULL recipe with amounts and details can be found DOWN BELOW (scroll to it) in the recipe card.
- Gluten-free oat flour – For this recipe, I chose oat flour because of its light texture and subtle oat flavor.
- Xanthan gum – Xanthan gum imitates gluten in gluten-free baking recipes by binding and adding volume to the batter. You’ll find it in the baking aisle at most grocery stores, or it can be ordered online. Don’t skip it—it’s essential to the success of these chocolate muffins!
- Baking powder, baking soda, and salt – Check the expiration date on your leavening. If it’s expired, I recommend buying fresh so that the muffins rise properly.
- Cocoa powder – Either Dutch process or natural cocoa powder can be used for this recipe.
- Flax egg – This is a vegan egg substitute made from flax seeds and water. See my quick tutorial on how to make a flax egg for details.
- Maple syrup – You could also use brown sugar if you’re not making your muffins free from refined sugar.
- Coconut oil – My favorite oil for baking. You could use another neutral-flavored vegetable oil if you prefer.
- Vanilla extract – Or an equal amount of vanilla paste. You could also use pure vanilla bean if you’d like.
- Ripe bananas – These muffins are a great way to use up old, overripe bananas. The banana in this recipe is subtle in flavor and more of a binder for the other ingredients. It also adds moisture. If you’re looking for a more distinct, banana-bread-like flavor, you might like this vegan banana bread instead.
- Unsweetened almond milk – Or another dairy-free milk of your choosing.
- Chocolate chips – Make sure they’re refined sugar-free and vegan as needed.
The Secret to Moist Muffins
Every muffin recipe is different, but for these double chocolate banana muffins, it’s the coconut oil and banana that make them super moist. Coconut oil is always my favorite for vegan baking because it yields such a tender, moist crumb.
Apart from using the right ingredients, the best way to ensure your muffins come out soft and moist is to not overmix the batter and not overbake them.
How to Make Double Chocolate Banana Muffins
Here are the steps showing how to make these easy gluten-free and vegan chocolate banana muffins from scratch.
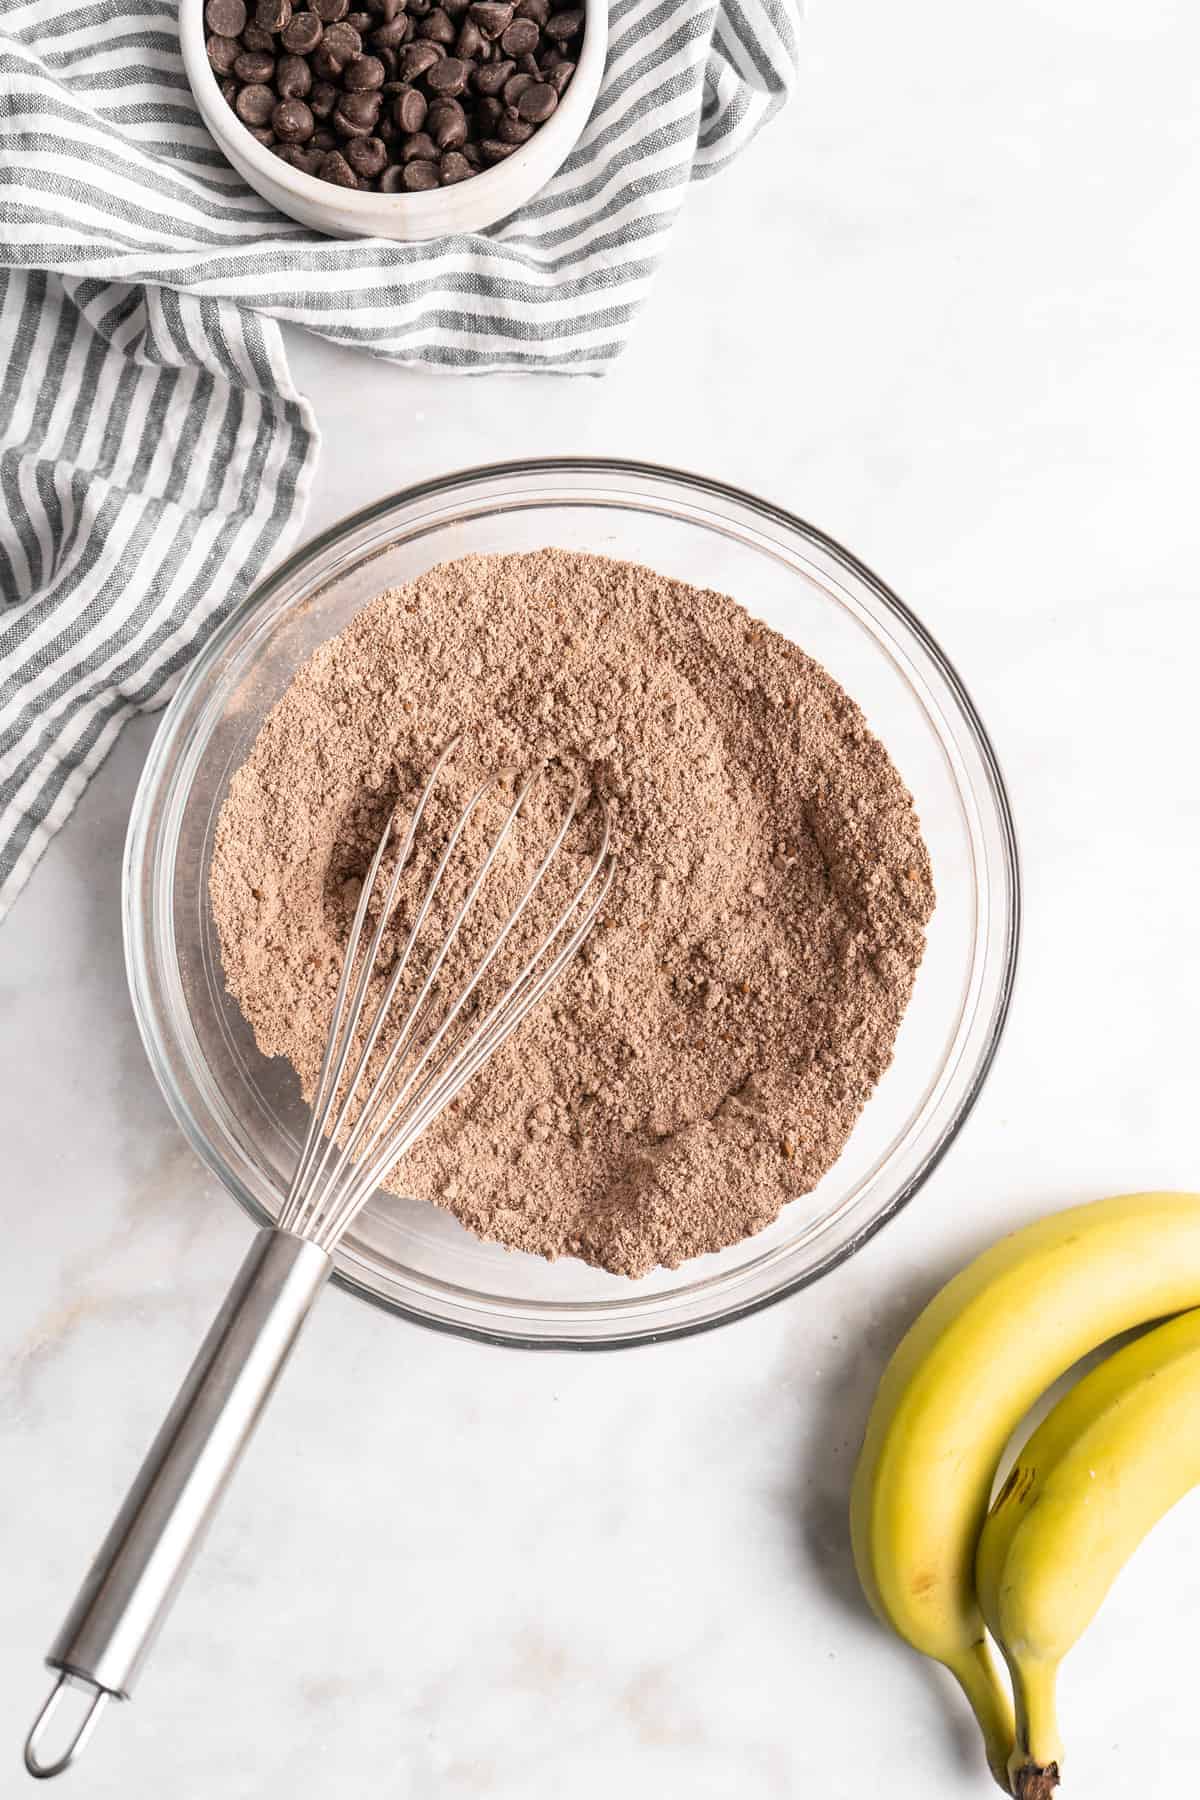
Whisk the dry ingredients.
- Prepare. Preheat the oven to 350ºF and prepare a muffin tin with muffin liners or by coating it lightly with coconut oil, then dusting with sifted cocoa powder, shaking off the excess.
- Mix dry ingredients. In a small bowl, whisk the flour, baking powder, baking soda, xanthan gum, sea salt, and cocoa powder.
- Mix wet ingredients. Whisk the flax eggs, maple syrup, and coconut oil in a medium bowl for about a minute, or until incorporated. Add the vanilla extract, mashed bananas, and almond milk and stir for another minute.
Combine and mix the batter.
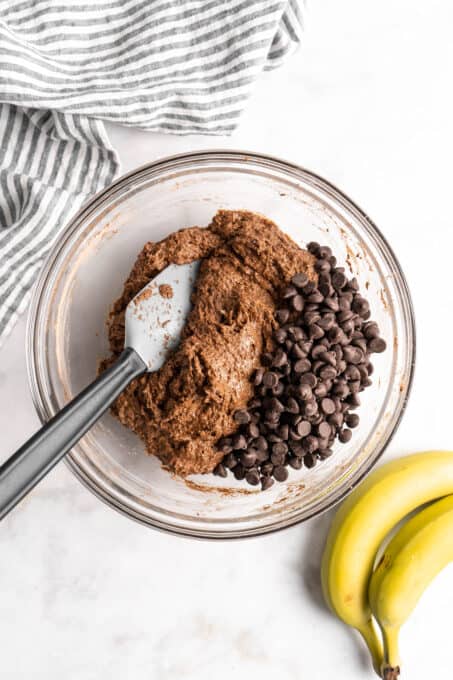
- Combine wet and dry ingredients. Stir the dry ingredients into the wet ingredients, scraping down the sides as needed. Do not over-mix. Fold in the chocolate chips.
- Fill the muffin tin. Divide the muffin batter into the muffin tin holders; I usually make 10 larger muffins, but you can also do 12 smaller muffins. Add a few more chocolate chips on the tops if you’d like.
- Bake. Place the muffin tin in the oven and bake for 20 to 23 minutes. Cool for 5 minutes, then slide a butter knife around the edges of the muffins and carefully remove them. Let them finish cooling on a wire rack.
Tips for Bakery-Style Muffins
- Not a fan of bananas? As mentioned above, these don’t have a very pronounced banana flavour, but if you’re baking these for someone who’s just not a fan of banana at all, you can use less-ripe bananas. They’ll still act as a binder and add moisture to the recipe, but they won’t have as strong a flavour as ripe bananas.
- Choosing chocolate chips. Dark chocolate is my prefered choice, but you can also use stevia-sweetened chocolate like Lily’s Dark Chocolate Baking Chips to make these refined-sugar-free.
- Testing for doneness. The muffins should spring back when you gently press them in the center if they’re done.
How to Store
- At room temperature. Store these muffins in an airtight container on the countertop for up to 4 days.
- Freeze. You can freeze these double chocolate banana muffins for up to 3 months in an airtight container or freezer bag. Let them thaw at room temperature before serving, or warm them up in the microwave.

More Vegan Muffin Recipes
- Vegan Pumpkin Muffins
- Banana Oatmeal Muffins
- Carrot Cake Muffins
- Pumpkin Banana Muffins
- Pumpkin Chocolate Chip Muffins
Ingredients
- 4.5 ounces gluten free oat flour , (127g)/1 ¼ cups raw oats – I grind up oats in a blender
- ½ teaspoon xanthan gum
- 1 ½ teaspoon baking powder
- ½ teaspoon baking soda
- ¼ teaspoon sea salt
- ¼ cup cocoa powder , sifted 20g
- 1 flax egg
- ⅓ cup maple syrup , 84g
- ¼ cup coconut oil , melted, 56g
- 1 teaspoon vanilla extract , liquid or gel or ½ of a vanilla bean, scraped
- ¾ cup mashed bananas , very ripe bananas
- ⅓ cup dairy free milk , any kind works
- ¾ cup vegan chocolate chips , plus a few extra for on top*
Instructions
- Preheat the oven to 350°F/180°C. Prepare a muffin tin or line with cupcake liners. If preparing the actual tin, using parchment paper, rub the insides of a muffin tin holders lightly with coconut oil, then sift cocoa powder over to coat insides and shake off the excess in and on top of the tin. So essentially, flouring and buttering like you would a cake pan. Set aside.
- In a small bowl, whisk the flour mix, baking powder, baking soda, xanthan gum, sea salt and cocoa powder to combine.
- In a medium bowl, add the flax eggs, maple syrup and the coconut oil. Whisk together for about 1 minute until incorporated. Add the vanilla extract/bean, the mashed bananas and the almond milk. Mix together for about 1 minute until bananas are completely incorporated. Add the dry ingredients to the wet and mix again, scraping the sides and ensuring everything is combined. Do not over mix.
- Fold in the chocolate chips. The batter should be very thick.
- Spoon the batter into the muffin tin holders. I like to do 10 larger muffins, but you could also do 12 normal sized muffins. Add a few extra chocolate chips on top if you’d like, it makes them prettier!
- Bake the muffins for 20 to 23 minutes. I’ve done both times and prefer 23 minutes. Remove from oven and let cool for 5 minutes, then using a butter knife or a toothpick, slide around the edges of the muffins and remove. Place on a cooling rack to cool completely. Enjoy!
Notes
These vegan double chocolate banana muffins are moist, soft, and bursting with rich cocoa flavor and chocolate chips. I make these muffins gluten-free with oat flour and sweeten them only with banana and maple syrup.
Whenever I make my chocolate banana muffins to share, I’m always hit with, “Wait, these are vegan?!” and “These are gluten-free?!” The answers are yes and YES. These vegan chocolate banana muffins are dairy-free and sweetened with maple syrup and ripe bananas, and made gluten-free with oat flour. They remind me of my chocolate banana bread , and they’re just as soft, moist, and easy to make for an on-the-go breakfast or snack.
Why I Know You’ll Love These Chocolate Banana Muffins
- Irresistible texture. The muffins are moist, fluffy, and soft, with a rich chocolate flavor thanks to cocoa powder and chocolate chips.
- Vegan & gluten-free. If I use stevia-sweetened chocolate chips, these muffins are refined sugar-free, too!
- Easy to make. Whisk the dry and wet ingredients separately, combine them, and then bake your muffins! These chocolate banana muffins are quick to whip up any day of the week.
- Customizable. Add chopped walnuts instead of the chocolate chips, or go half-and-half for a little added crunch.
Notes on Ingredients
Please note that this is important information on the ingredients and instructions, and the FULL recipe with amounts and details can be found DOWN BELOW (scroll to it) in the recipe card.
- Gluten-free oat flour – For this recipe, I chose oat flour because of its light texture and subtle oat flavor.
- Xanthan gum – Xanthan gum imitates gluten in gluten-free baking recipes by binding and adding volume to the batter. You’ll find it in the baking aisle at most grocery stores, or it can be ordered online. Don’t skip it—it’s essential to the success of these chocolate muffins!
- Baking powder, baking soda, and salt – Check the expiration date on your leavening. If it’s expired, I recommend buying fresh so that the muffins rise properly.
- Cocoa powder – Either Dutch process or natural cocoa powder can be used for this recipe.
- Flax egg – This is a vegan egg substitute made from flax seeds and water. See my quick tutorial on how to make a flax egg for details.
- Maple syrup – You could also use brown sugar if you’re not making your muffins free from refined sugar.
- Coconut oil – My favorite oil for baking. You could use another neutral-flavored vegetable oil if you prefer.
- Vanilla extract – Or an equal amount of vanilla paste. You could also use pure vanilla bean if you’d like.
- Ripe bananas – These muffins are a great way to use up old, overripe bananas. The banana in this recipe is subtle in flavor and more of a binder for the other ingredients. It also adds moisture. If you’re looking for a more distinct, banana-bread-like flavor, you might like this vegan banana bread instead.
- Unsweetened almond milk – Or another dairy-free milk of your choosing.
- Chocolate chips – Make sure they’re refined sugar-free and vegan as needed.
The Secret to Moist Muffins
Every muffin recipe is different, but for these double chocolate banana muffins, it’s the coconut oil and banana that make them super moist. Coconut oil is always my favorite for vegan baking because it yields such a tender, moist crumb.
Apart from using the right ingredients, the best way to ensure your muffins come out soft and moist is to not overmix the batter and not overbake them.
How to Make Double Chocolate Banana Muffins
Here are the steps showing how to make these easy gluten-free and vegan chocolate banana muffins from scratch.
Whisk the dry ingredients.
- Prepare. Preheat the oven to 350ºF and prepare a muffin tin with muffin liners or by coating it lightly with coconut oil, then dusting with sifted cocoa powder, shaking off the excess.
- Mix dry ingredients. In a small bowl, whisk the flour, baking powder, baking soda, xanthan gum, sea salt, and cocoa powder.
- Mix wet ingredients. Whisk the flax eggs, maple syrup, and coconut oil in a medium bowl for about a minute, or until incorporated. Add the vanilla extract, mashed bananas, and almond milk and stir for another minute.
Combine and mix the batter.
- Combine wet and dry ingredients. Stir the dry ingredients into the wet ingredients, scraping down the sides as needed. Do not over-mix. Fold in the chocolate chips.
- Fill the muffin tin. Divide the muffin batter into the muffin tin holders; I usually make 10 larger muffins, but you can also do 12 smaller muffins. Add a few more chocolate chips on the tops if you’d like.
- Bake. Place the muffin tin in the oven and bake for 20 to 23 minutes. Cool for 5 minutes, then slide a butter knife around the edges of the muffins and carefully remove them. Let them finish cooling on a wire rack.
Tips for Bakery-Style Muffins
- Not a fan of bananas? As mentioned above, these don’t have a very pronounced banana flavour, but if you’re baking these for someone who’s just not a fan of banana at all, you can use less-ripe bananas. They’ll still act as a binder and add moisture to the recipe, but they won’t have as strong a flavour as ripe bananas.
- Choosing chocolate chips. Dark chocolate is my prefered choice, but you can also use stevia-sweetened chocolate like Lily’s Dark Chocolate Baking Chips to make these refined-sugar-free.
- Testing for doneness. The muffins should spring back when you gently press them in the center if they’re done.
How to Store
- At room temperature. Store these muffins in an airtight container on the countertop for up to 4 days.
- Freeze. You can freeze these double chocolate banana muffins for up to 3 months in an airtight container or freezer bag. Let them thaw at room temperature before serving, or warm them up in the microwave.
More Vegan Muffin Recipes
- Vegan Pumpkin Muffins
- Banana Oatmeal Muffins
- Carrot Cake Muffins
- Pumpkin Banana Muffins
- Pumpkin Chocolate Chip Muffins
Ingredients
- 4.5 ounces gluten free oat flour , (127g)/1 ¼ cups raw oats – I grind up oats in a blender
- ½ teaspoon xanthan gum
- 1 ½ teaspoon baking powder
- ½ teaspoon baking soda
- ¼ teaspoon sea salt
- ¼ cup cocoa powder , sifted 20g
- 1 flax egg
- ⅓ cup maple syrup , 84g
- ¼ cup coconut oil , melted, 56g
- 1 teaspoon vanilla extract , liquid or gel or ½ of a vanilla bean, scraped
- ¾ cup mashed bananas , very ripe bananas
- ⅓ cup dairy free milk , any kind works
- ¾ cup vegan chocolate chips , plus a few extra for on top*
Instructions
- Preheat the oven to 350°F/180°C. Prepare a muffin tin or line with cupcake liners. If preparing the actual tin, using parchment paper, rub the insides of a muffin tin holders lightly with coconut oil, then sift cocoa powder over to coat insides and shake off the excess in and on top of the tin. So essentially, flouring and buttering like you would a cake pan. Set aside.
- In a small bowl, whisk the flour mix, baking powder, baking soda, xanthan gum, sea salt and cocoa powder to combine.
- In a medium bowl, add the flax eggs, maple syrup and the coconut oil. Whisk together for about 1 minute until incorporated. Add the vanilla extract/bean, the mashed bananas and the almond milk. Mix together for about 1 minute until bananas are completely incorporated. Add the dry ingredients to the wet and mix again, scraping the sides and ensuring everything is combined. Do not over mix.
- Fold in the chocolate chips. The batter should be very thick.
- Spoon the batter into the muffin tin holders. I like to do 10 larger muffins, but you could also do 12 normal sized muffins. Add a few extra chocolate chips on top if you’d like, it makes them prettier!
- Bake the muffins for 20 to 23 minutes. I’ve done both times and prefer 23 minutes. Remove from oven and let cool for 5 minutes, then using a butter knife or a toothpick, slide around the edges of the muffins and remove. Place on a cooling rack to cool completely. Enjoy!
Notes

Double Chocolate Banana Muffins (Vegan & Gluten Free)
Ingredients
- 4.5 ounces gluten free oat flour (127g)/1 ¼ cups raw oats - I grind up oats in a blender
- ½ teaspoon xanthan gum
- 1 ½ teaspoon baking powder
- ½ teaspoon baking soda
- ¼ teaspoon sea salt
- ¼ cup cocoa powder sifted 20g
- 1 flax egg
- ⅓ cup maple syrup 84g
- ¼ cup coconut oil melted, 56g
- 1 teaspoon vanilla extract liquid or gel or ½ of a vanilla bean, scraped
- ¾ cup mashed bananas very ripe bananas
- ⅓ cup dairy free milk any kind works
- ¾ cup vegan chocolate chips plus a few extra for on top*
Instructions
- Preheat the oven to 350°F/180°C. Prepare a muffin tin or line with cupcake liners. If preparing the actual tin, using parchment paper, rub the insides of a muffin tin holders lightly with coconut oil, then sift cocoa powder over to coat insides and shake off the excess in and on top of the tin. So essentially, flouring and buttering like you would a cake pan. Set aside.
- In a small bowl, whisk the flour mix, baking powder, baking soda, xanthan gum, sea salt and cocoa powder to combine.
- In a medium bowl, add the flax eggs, maple syrup and the coconut oil. Whisk together for about 1 minute until incorporated. Add the vanilla extract/bean, the mashed bananas and the almond milk. Mix together for about 1 minute until bananas are completely incorporated. Add the dry ingredients to the wet and mix again, scraping the sides and ensuring everything is combined. Do not over mix.
- Fold in the chocolate chips. The batter should be very thick.
- Spoon the batter into the muffin tin holders. I like to do 10 larger muffins, but you could also do 12 normal sized muffins. Add a few extra chocolate chips on top if you’d like, it makes them prettier!
- Bake the muffins for 20 to 23 minutes. I’ve done both times and prefer 23 minutes. Remove from oven and let cool for 5 minutes, then using a butter knife or a toothpick, slide around the edges of the muffins and remove. Place on a cooling rack to cool completely. Enjoy!
Video
Notes
Nutrition
Double Chocolate Banana Muffins (Vegan & Gluten Free) https://jessicainthekitchen.com/double-chocolate-banana-muffins-vegan-gluten-free-healthy/ March 21, 2022
Caramelized onions add something special to so many different meals! I’ll show you how to caramelize onions the right way, for onions that are sweet, dark, and jammy.
Caramelized onions are one of my favourite things to add to everything from pizza and burgers to a frittata . They take the meal to the next level! Unfortunately, a lot of recipes have you rushing the process—and let’s be honest here, you’re not going to caramelize onions by cooking them over medium-high heat for 10 minutes. Sautéed onions are just fine, but caramelized onions? Well, they’re pretty much magical. Once you know how to caramelize onions, the world is your oyster.
What’s the Secret to Caramelized Onions?
- Low and slow cooking. Caramelized onions take patience and time. Luckily, you’ll be rewarded in the end with sweet, jammy onions to add to ALL THE THINGS.
- Perfectly browned. As you slowly cook the onions, they soften and sweeten. The colour darkens and the flavour becomes more complex, similar to roasting garlic .
- Make a big batch. Now, not everyone has 45 minutes to make caramelized onions for a weeknight dinner. I get it! The good news is that you can make a big batch of caramelized onions and keep them in the fridge to use throughout the week. You can also freeze caramelized onions, and they’re just as delicious when thawed and reheated.
Notes on Ingredients
Please note that this is important information on the ingredients and instructions, and the FULL recipe with amounts and details can be found DOWN BELOW (scroll to it) in the recipe card.
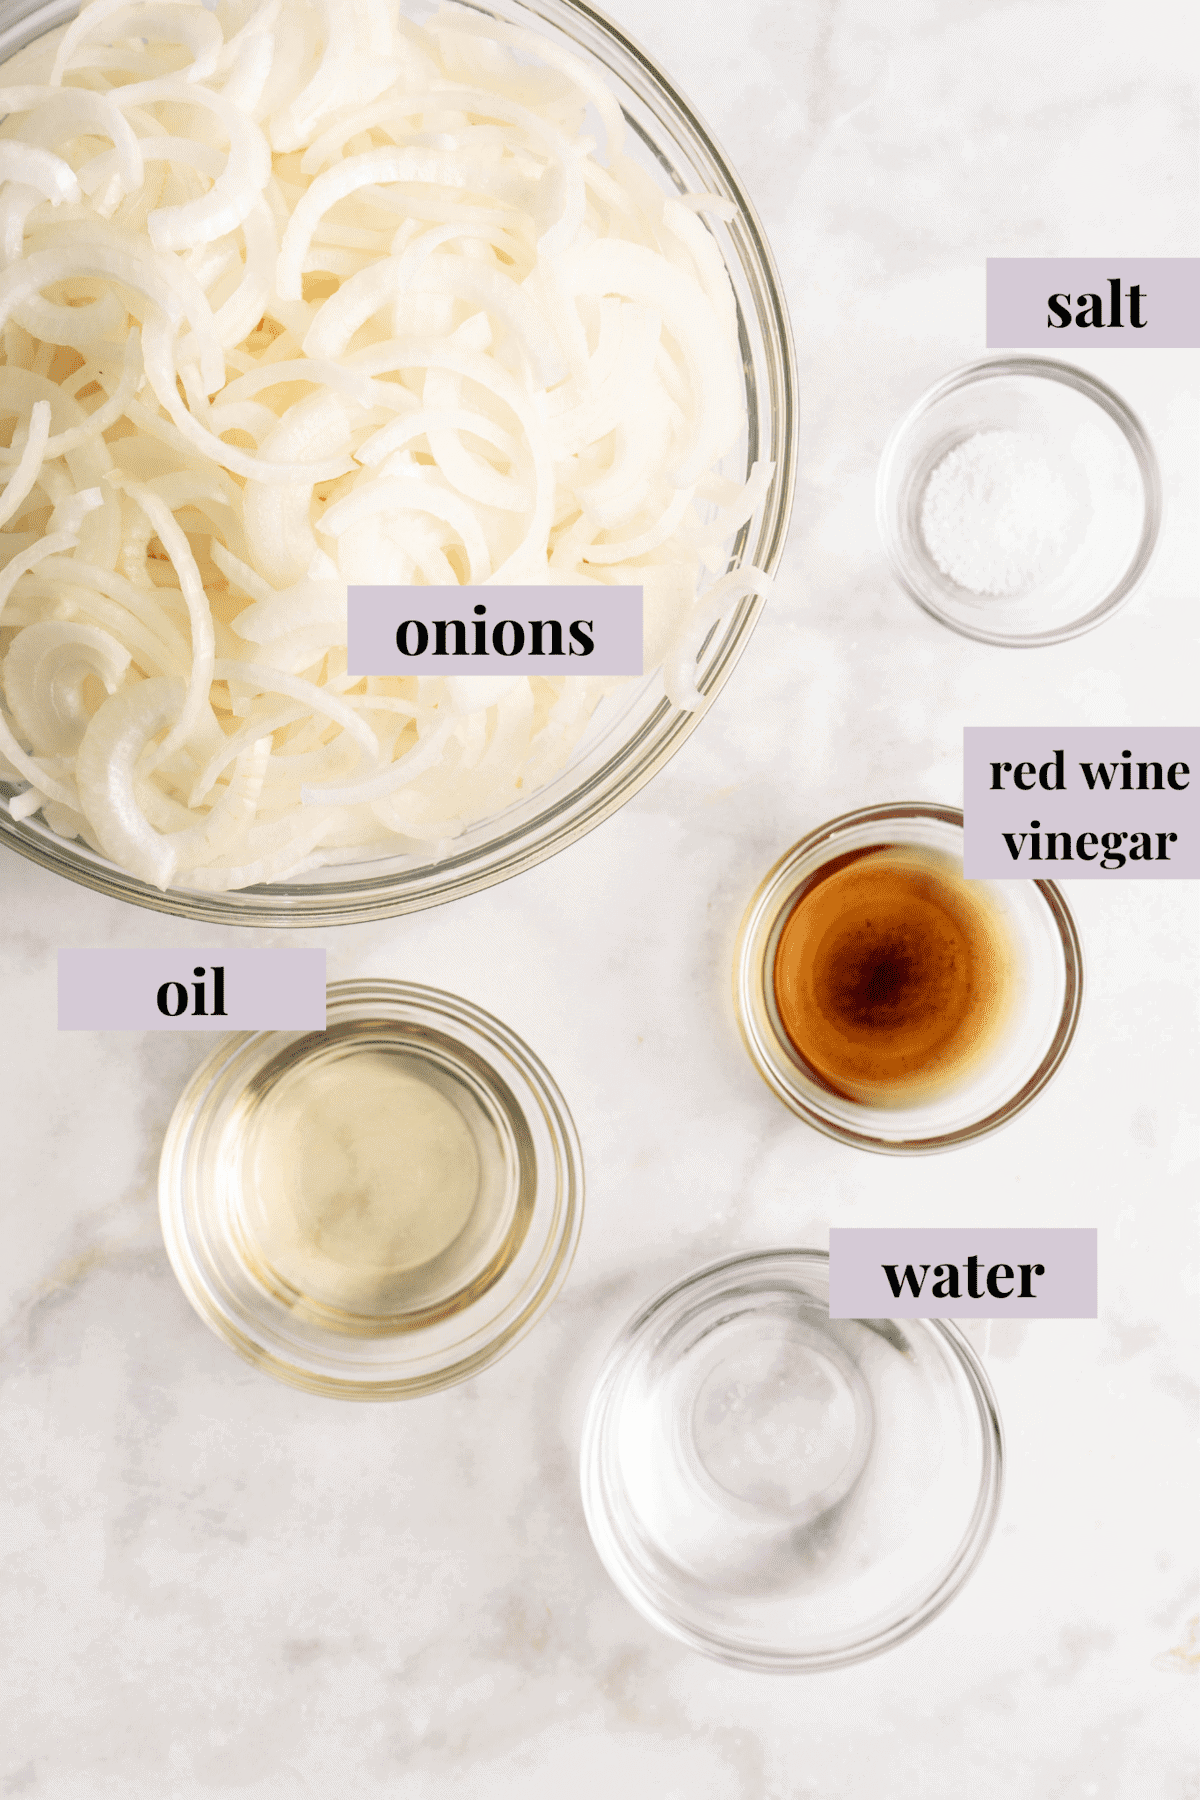
- Oil – I usually use olive oil, but another neutral-flavored cooking oil will work.
- Onions – You can do it without them! When caramelizing onions, the type of onion matters. See below. You’ll want to slice the onions thinly, making sure they’re uniform in size.
- Red wine vinegar or red wine – Vinegar is optional, but I like to add it to season the onions and brighten the flavor in addition to sea salt.
What Onions Are Better for Caramelizing?
Yellow onions are the best and most common choice for caramelized onions. They’re what I used in this recipe. Yellow onions are naturally a bit sweet and readily available, and they also won’t turn to mush when cooked for longer periods of time.
You can also caramelize white, red, and sweet onions and shallots, too. Softer onions may need less time to cook.
How to Caramelize Onions
Once you have the time and the ingredients listed above, you’re ready to make caramelized onions! Here’s the only tutorial you’ll need on how to caramelize onions, step-by-step.
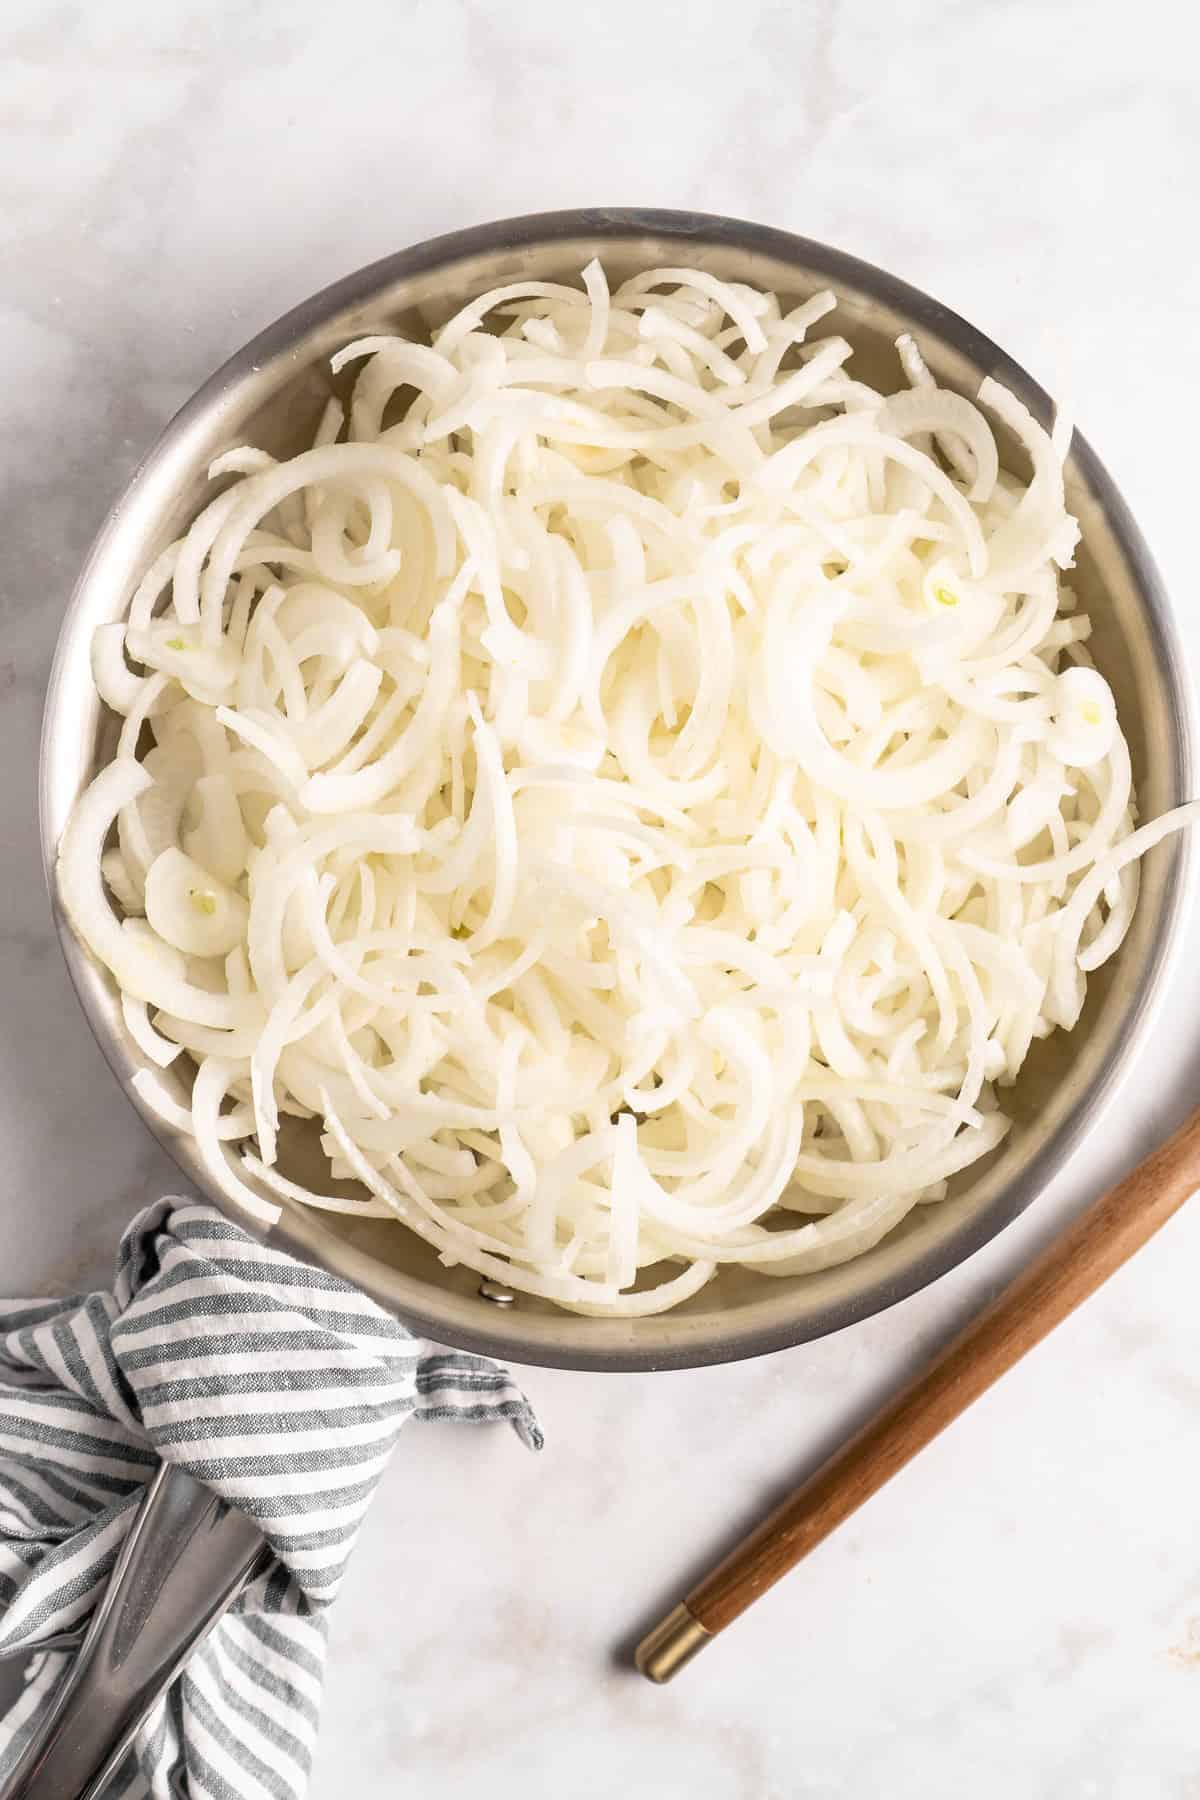
Slice the onions.
- Heat the oil. Set a large, heavy skillet over medium heat and add the oil.
- Add the onions. Place the onions in the skillet and stir them to ensure they’re all coated with the oil. Stir in a pinch of salt.
- Sauté. Cook the onions over medium heat for 5 to 8 minutes, or until they’re translucent. Reduce the heat to medium-low.
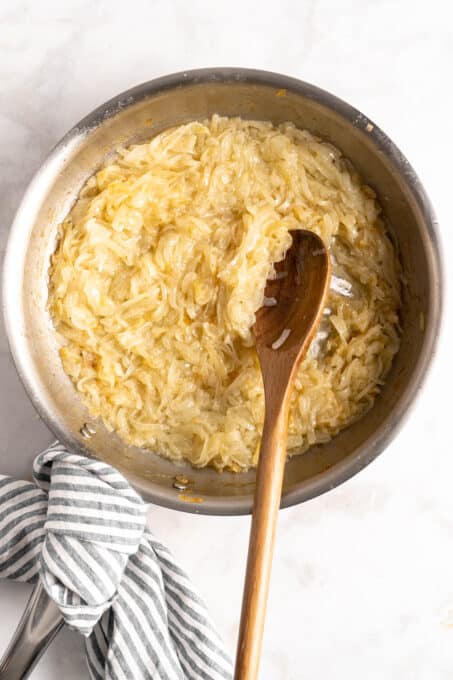
Keep cooking.
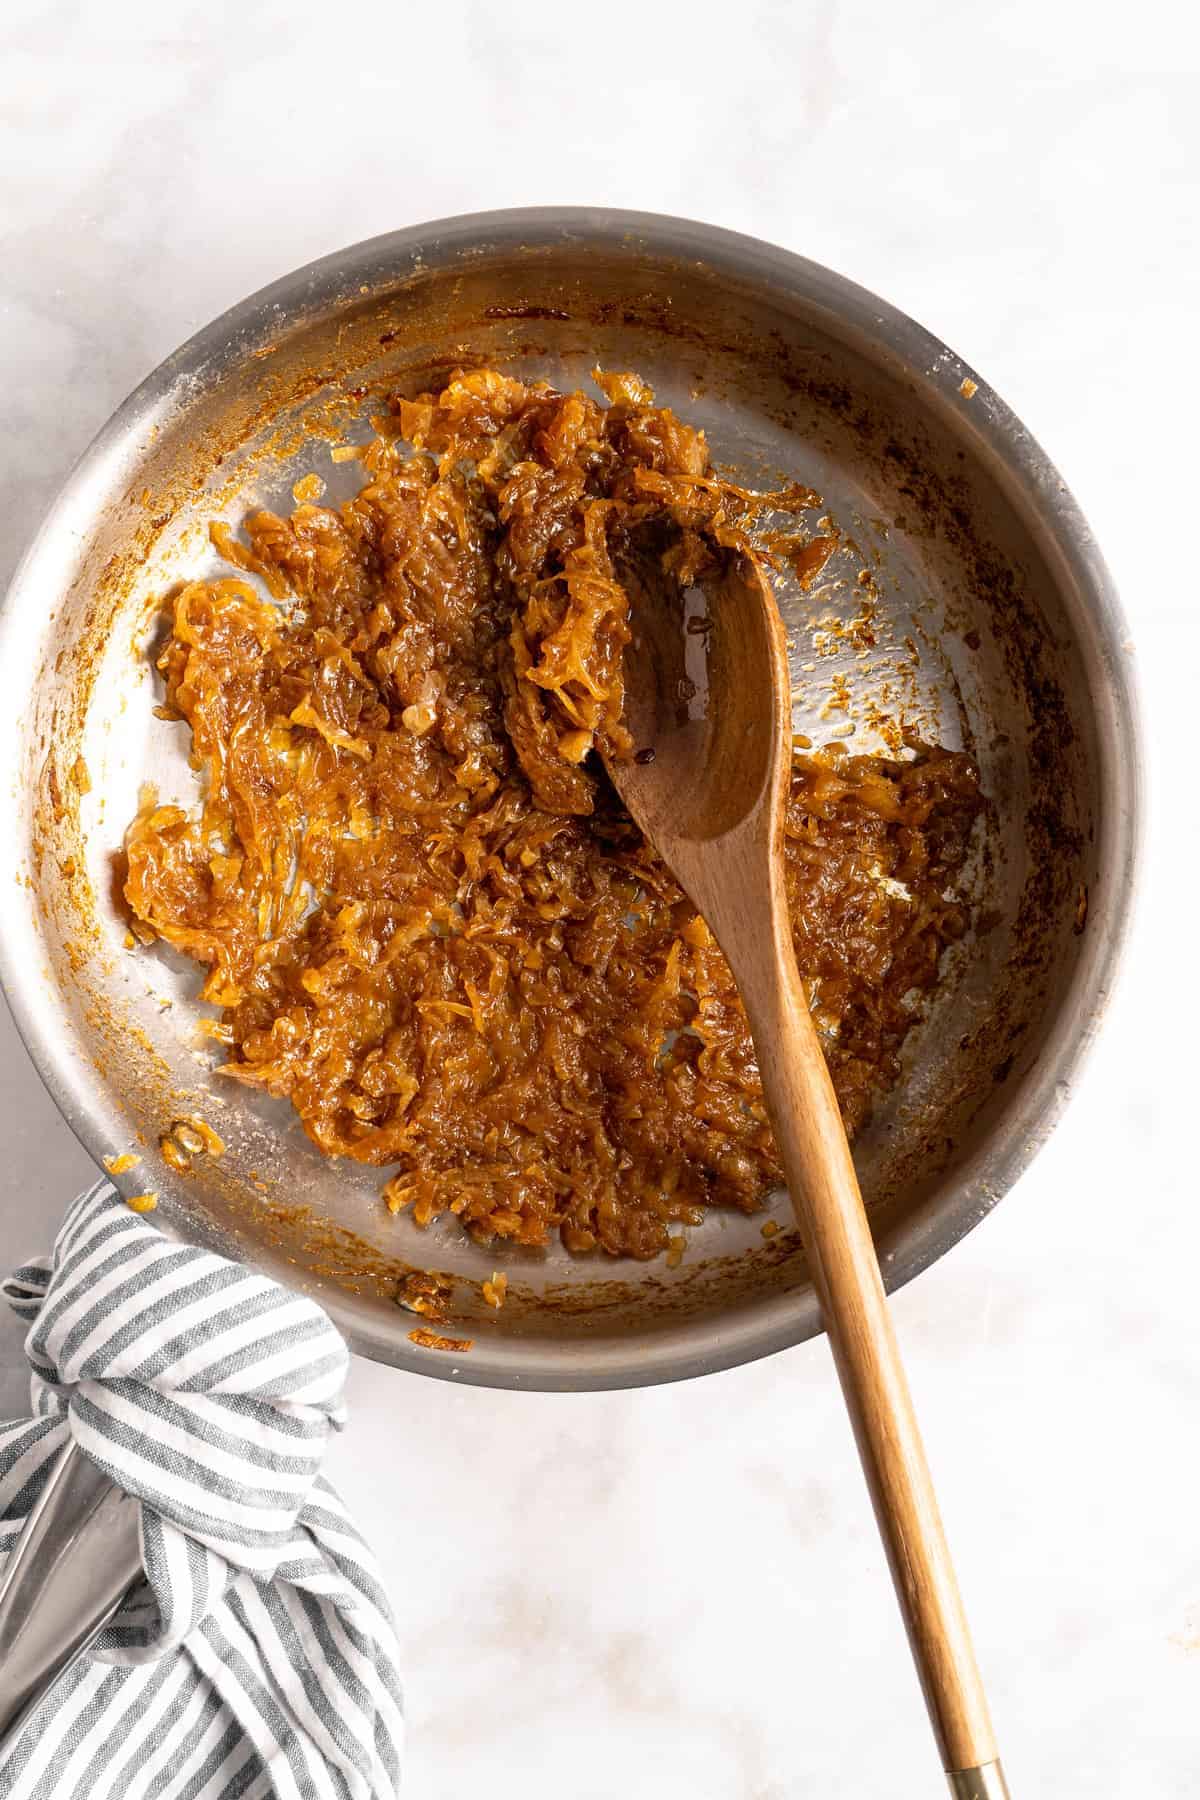
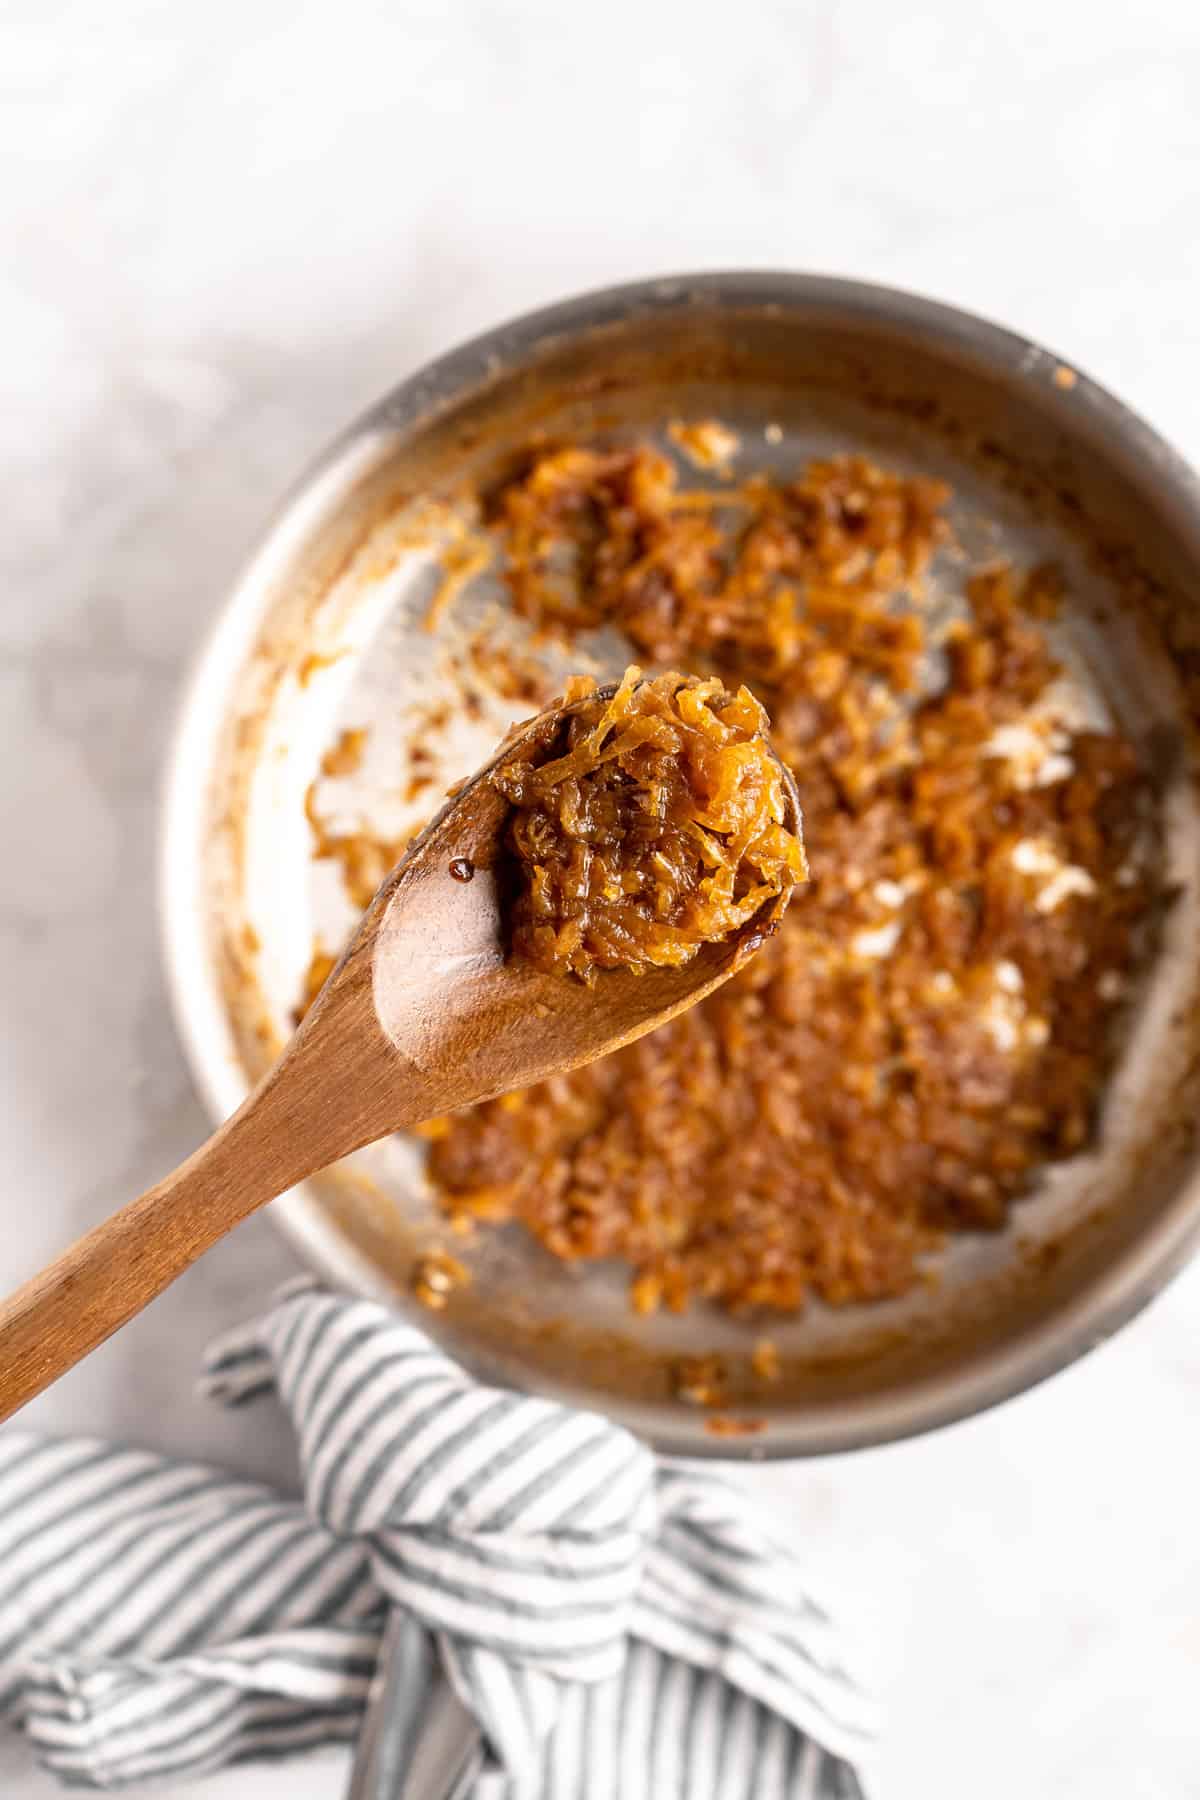
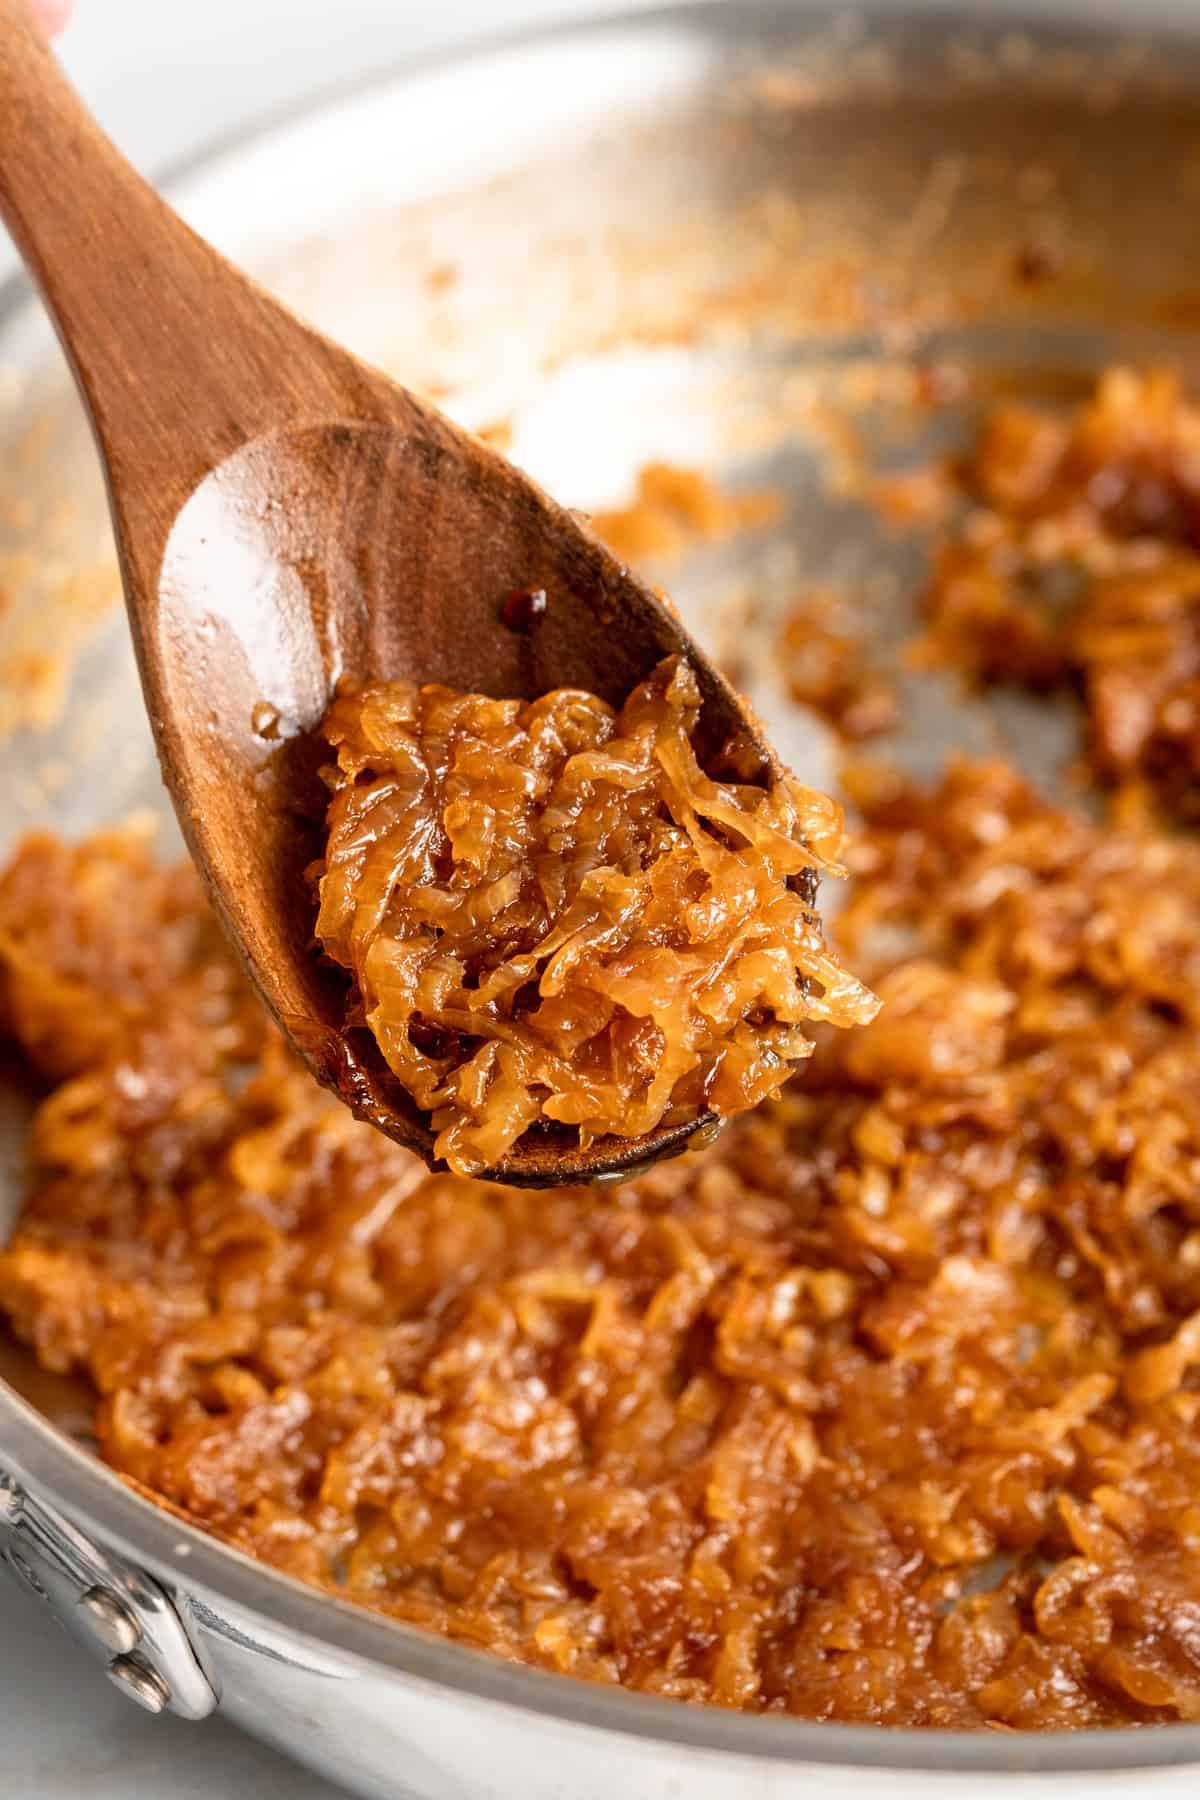
- Now, we wait. Or, wait and stir . Let the onions cook until they reach your desired depth of colour—this should take about 30 minutes, but it can vary depending on your stove and the colour or texture you’re after. Stir occasionally, and if the onions begin to get dry, add a splash of water to keep them moist and deglaze the pan.
- Finish. Just before the onions are done, add a splash of red wine vinegar to deglaze the pan and add flavour. Remove the pan from the stovetop and use the onions immediately or let them cool before storing.
Recipe Tips
- Cut the onions evenly. If your onion slices vary in thickness, they won’t cook evenly or be done at the same time.
- Scrape and deglaze the pan. When the onions begin to brown, they’ll start to leave a fond (the technical term for the little browned bits) on the bottom of the pan. Scrape this fond when it forms (a splash of water will help release it) and swirl it back into the onions. This helps give your onions that deep, dark colour and adds so much flavour!
- Use a large, wide pan. This allows the onions to spread out and cook evenly.
It’s not necessary. Covering the onions while they cook traps the steam, which can help them soften more quickly. However, I prefer to leave them uncovered, firstly, so I can keep an eye on them, and secondly, so the onions don’t turn out watery.
If you’d like, you can sprinkle a small amount (about 1 teaspoon) of sugar over the onions while they cook to help them caramelize.
Ways to Use Caramelized Onions
I mentioned it earlier, but a great way to prepare these onions is to cook a big batch at once so you can store them to add to meals and recipes. Here are my favourite ways to put caramelized onions to use:
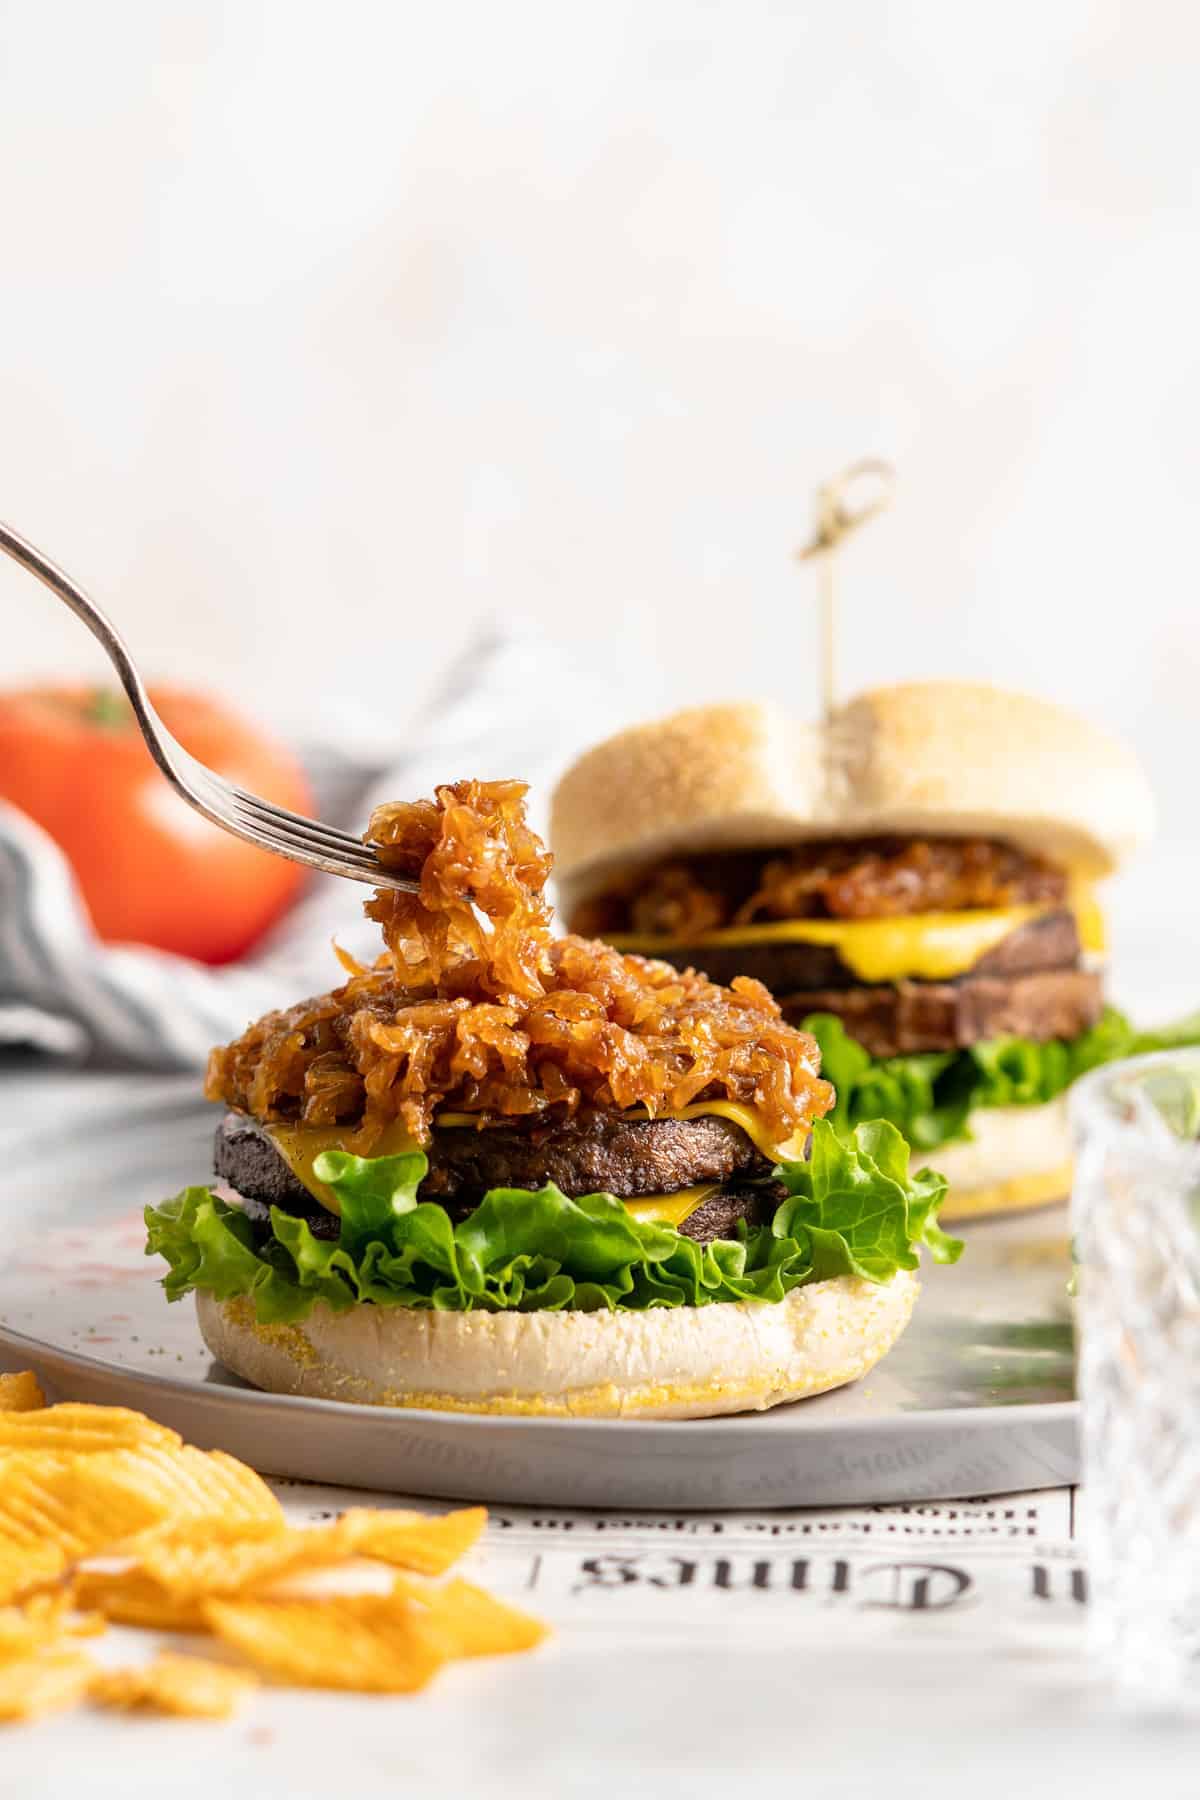
- Use them as a topping for burgers.
- Make them into caramelized onion dip.
- Use them to add flavour to pasta sauce .
- Add a spoonful to hummus before serving.
- Layer them with vegan cheese and bread for an epic grilled cheese sandwich.
- Top BBQ chickpea tacos with a spoonful of caramelized onions.
- Spread them onto pieces of toasted baguette.
- Have onions already caramelized to make a quick French onion soup .
How to Store Caramelized Onions
- Refrigerate. You can store caramelized onions in an airtight container in the refrigerator for up to a week.
- Freeze. You can freeze caramelized onions for up to 3 months. Freeze them flat in a freezer bag or place them in an airtight container. Let them thaw in the refrigerator before using.
More Cooking Basics
- How to Make Balsamic Glaze
- Crispy Roasted Chickpeas
- Homemade Marinara Sauce
- How to Make Vegetable Broth
Ingredients
- 2-3 tablespoons oil
- 1 lb onions , about 5 large yellow onions, sliced
- ½ teaspoon sea salt
- water , see instructions
- 2 tablespoons red wine vinegar or red wine , optional
Instructions
- In a large pan over medium heat, heat the oil.
- Add the onion slices and stir together to ensure the onions are fully coated. Add a pinch of salt and stir again.
- Saute the onions for about 5-8 minutes until the onions begin to slowly become translucent. Reduce the heat to medium low.
- Continue to stir onions every now and then. If/when the onions begin to get dry, add a splash of water (about 2 tablespoons of water a time) to deglaze the pan and ensure onions don’t stick.
- While stirring, ensure you’re always scraping the fond off the bottom and swirling it back into the onions! This gives it beautiful flavour. Continue to scrape for about 30 more minutes until the onions are the colour and texture you desire.
- In the last few minutes, add a splash of red wine vinegar for a flavour burst, swirling it into the onions. Remove from the stove and allow to cool.
- Serve immediately or store in a tupperwater container in your fridge for up to a week. Enjoy!
