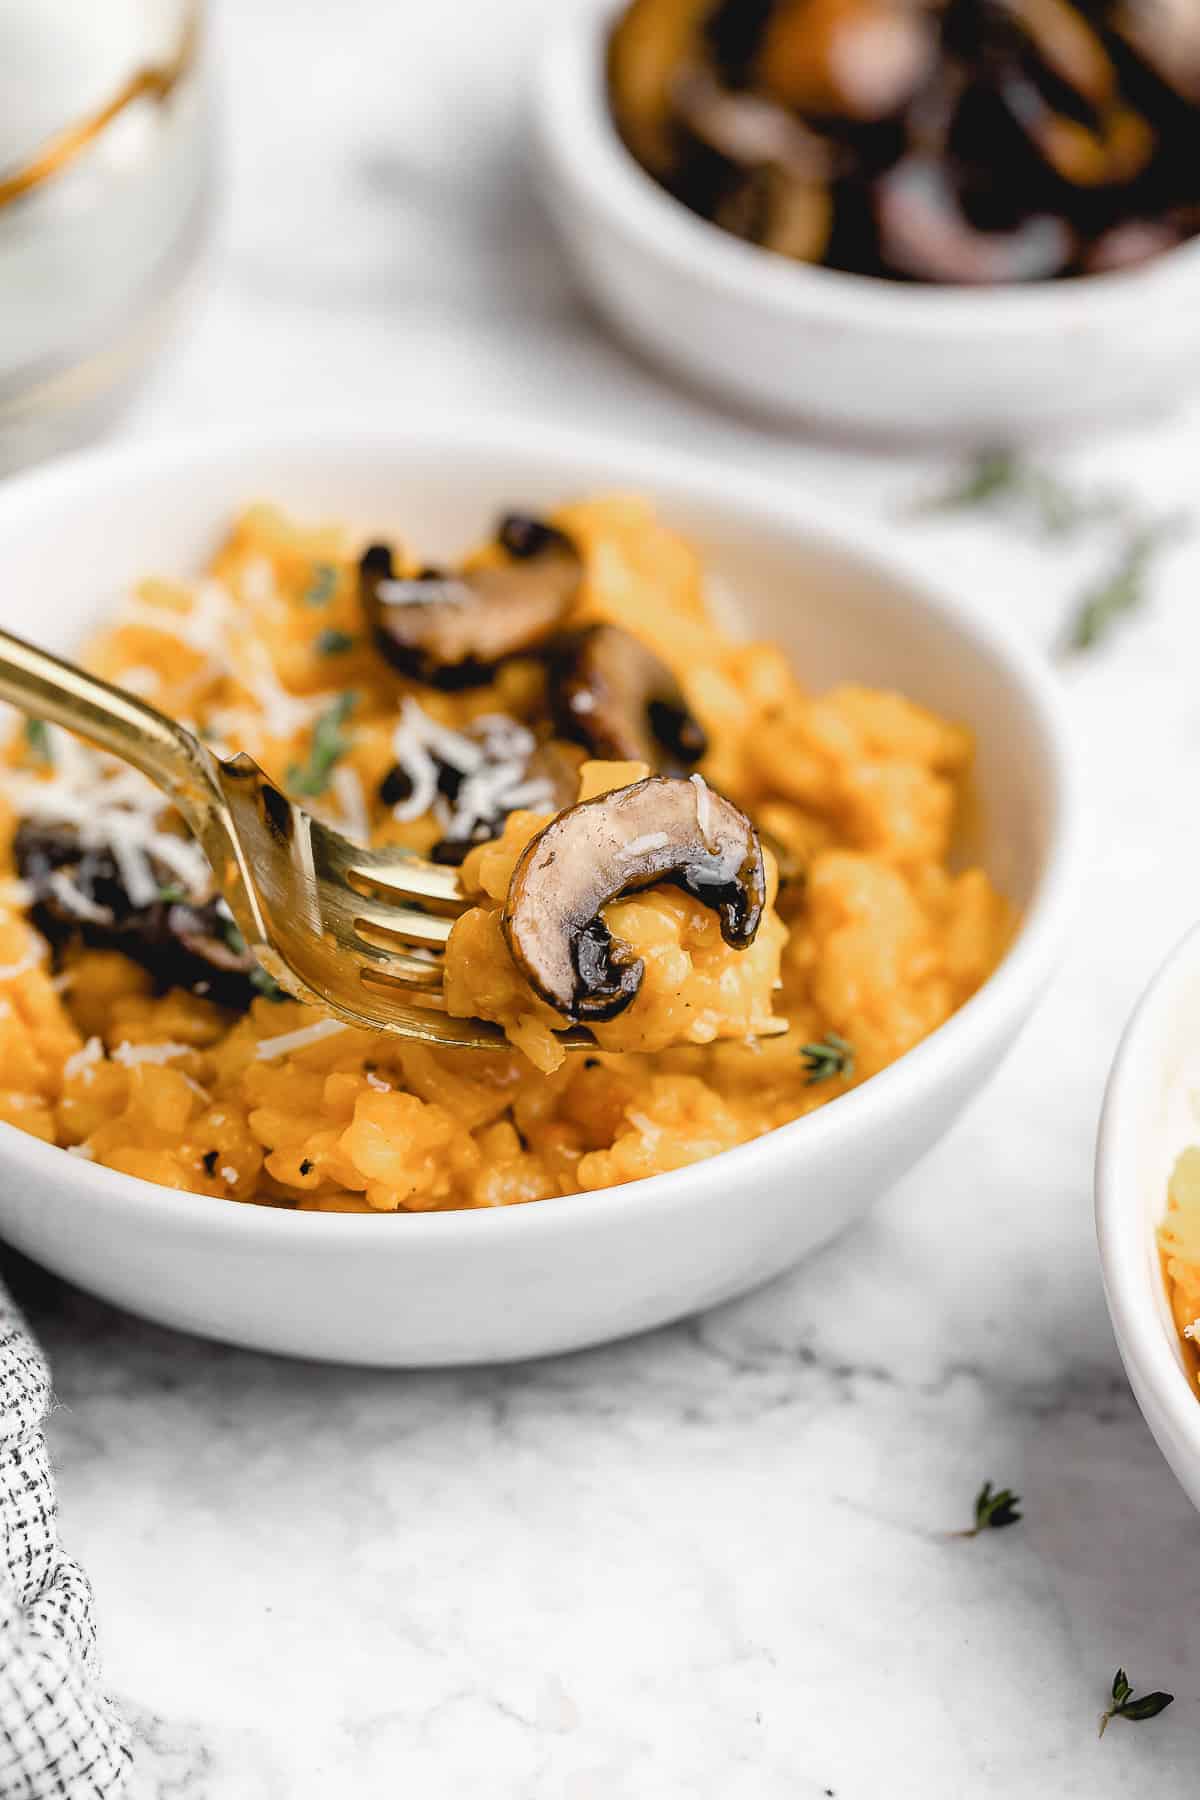
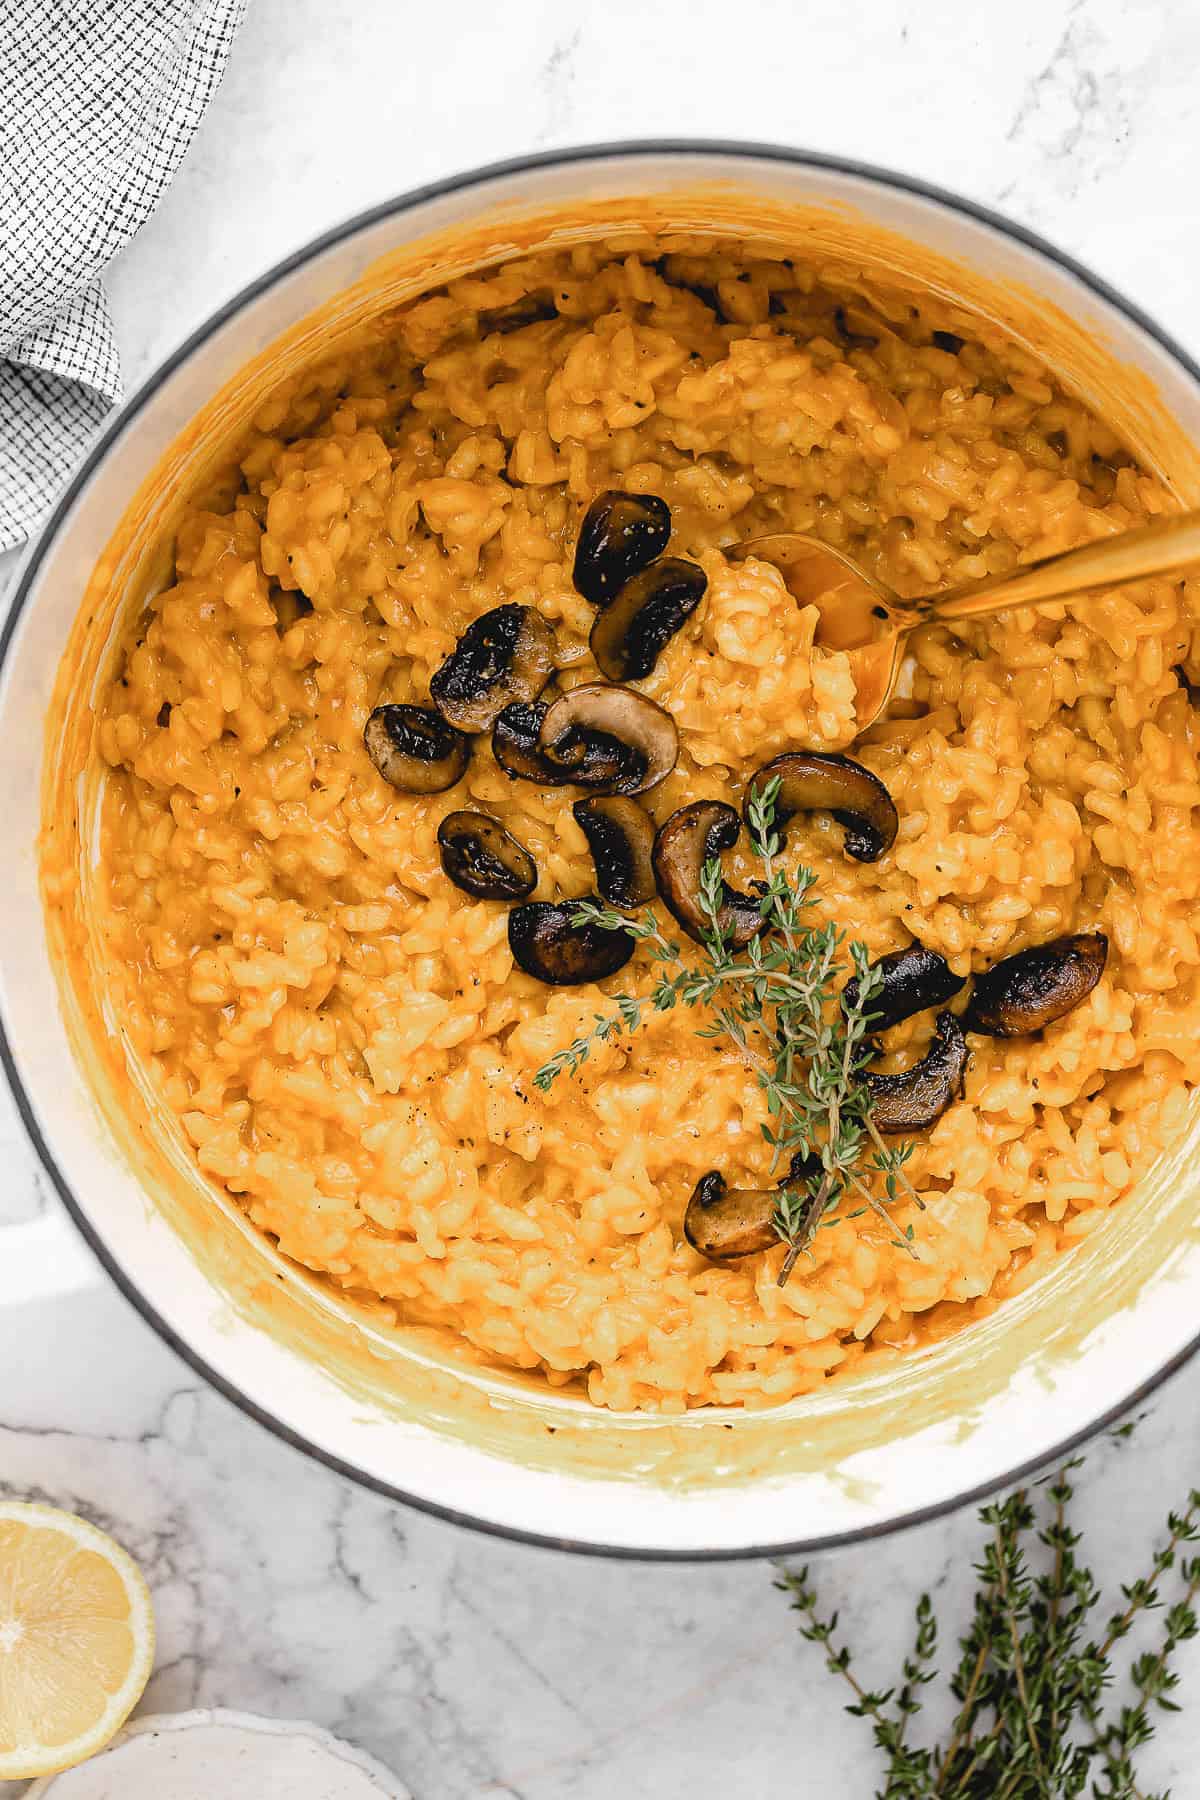
Creamy mushroom risotto is a classic Italian comfort food dish, and it’s so much easier to make than you’d think. This homemade vegan risotto is packed with caramelized mushrooms and is oh-so-good!
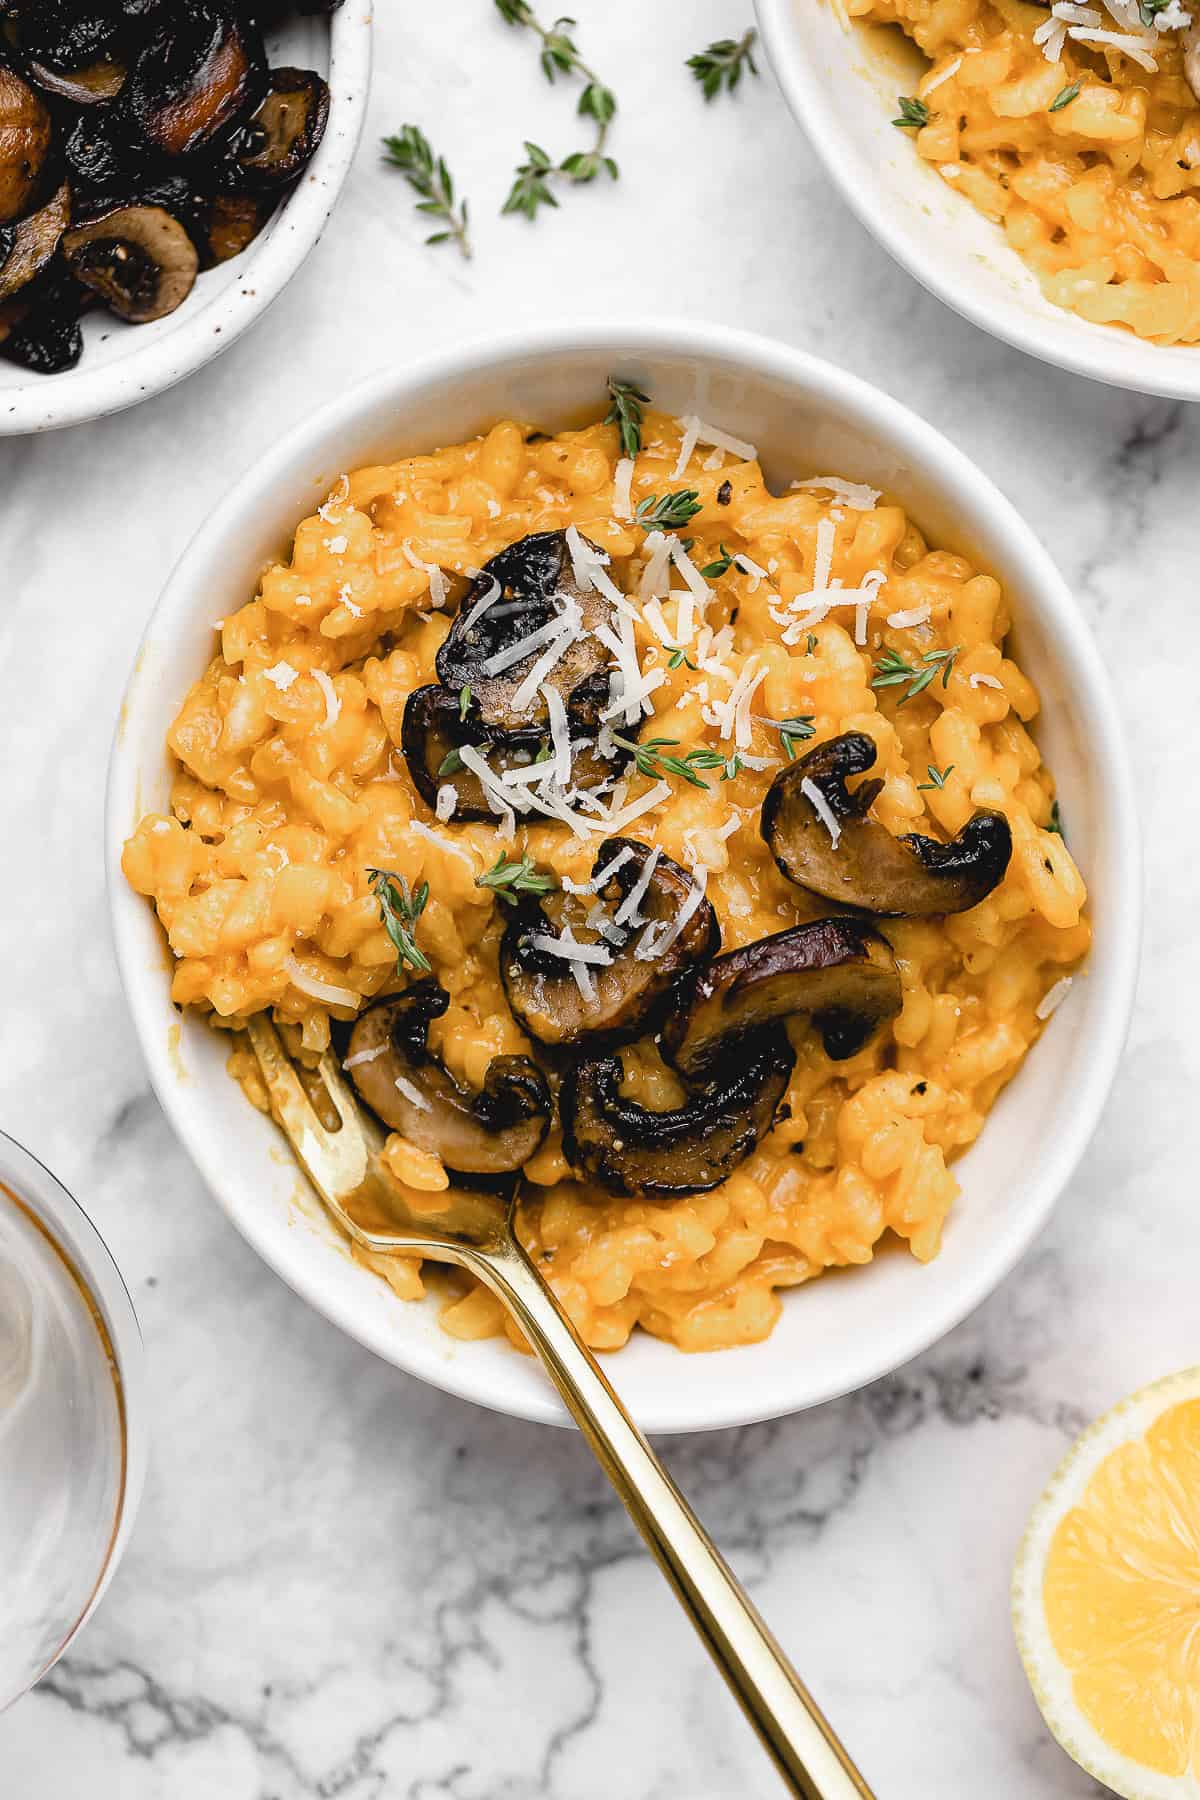
This homemade vegan mushroom risotto is rich, savory, buttery… fill in the blank with your favorite culinary adjective. If you’ve never had it before, risotto is an Italian rice dish that is cooked in broth until it is rich and creamy. Mix it in with some vegan Parmesan cheese and caramelized mushrooms, and you’ve got yourself a truly comforting dinner. Serve it as a side dish, or enjoy it as you would a bowl of pasta. As long as you try it, it really doesn’t matter!
About This Vegan Mushroom Risotto Recipe
- You can taste the effort you put into it . Risotto is a dish that requires time and patience, it’s true. But, give it that, and it’ll reward you with the best rice dish you’ve ever had.
- The technique for vegan risotto is simple. Sauté the onions and garlic, add the rice, then add wine and broth, ladle by ladle. Stir in high-quality vegan butter and Parmesan, a little lemon juice, and you’re done! I’ll walk you through the details.
- Pure comfort food . A bowl of creamy rice will warm you up from the inside out, it’ll stick to your ribs, and the seasoning will cure all of your savory cravings. Promise.
Notes on Ingredients
Scroll down to the recipe card to find the ingredient quantities and recipe instructions.
- Oil – Use the cooking oil of your choice! Olive oil, canola oil, avocado oil, etc.
- Rice – I generally stick to using arborio rice, but carnaroli rice will also work well.
- Onion – I like to slice up a white onion, but yellow onions are good too.
- Garlic – Minced or finely diced.
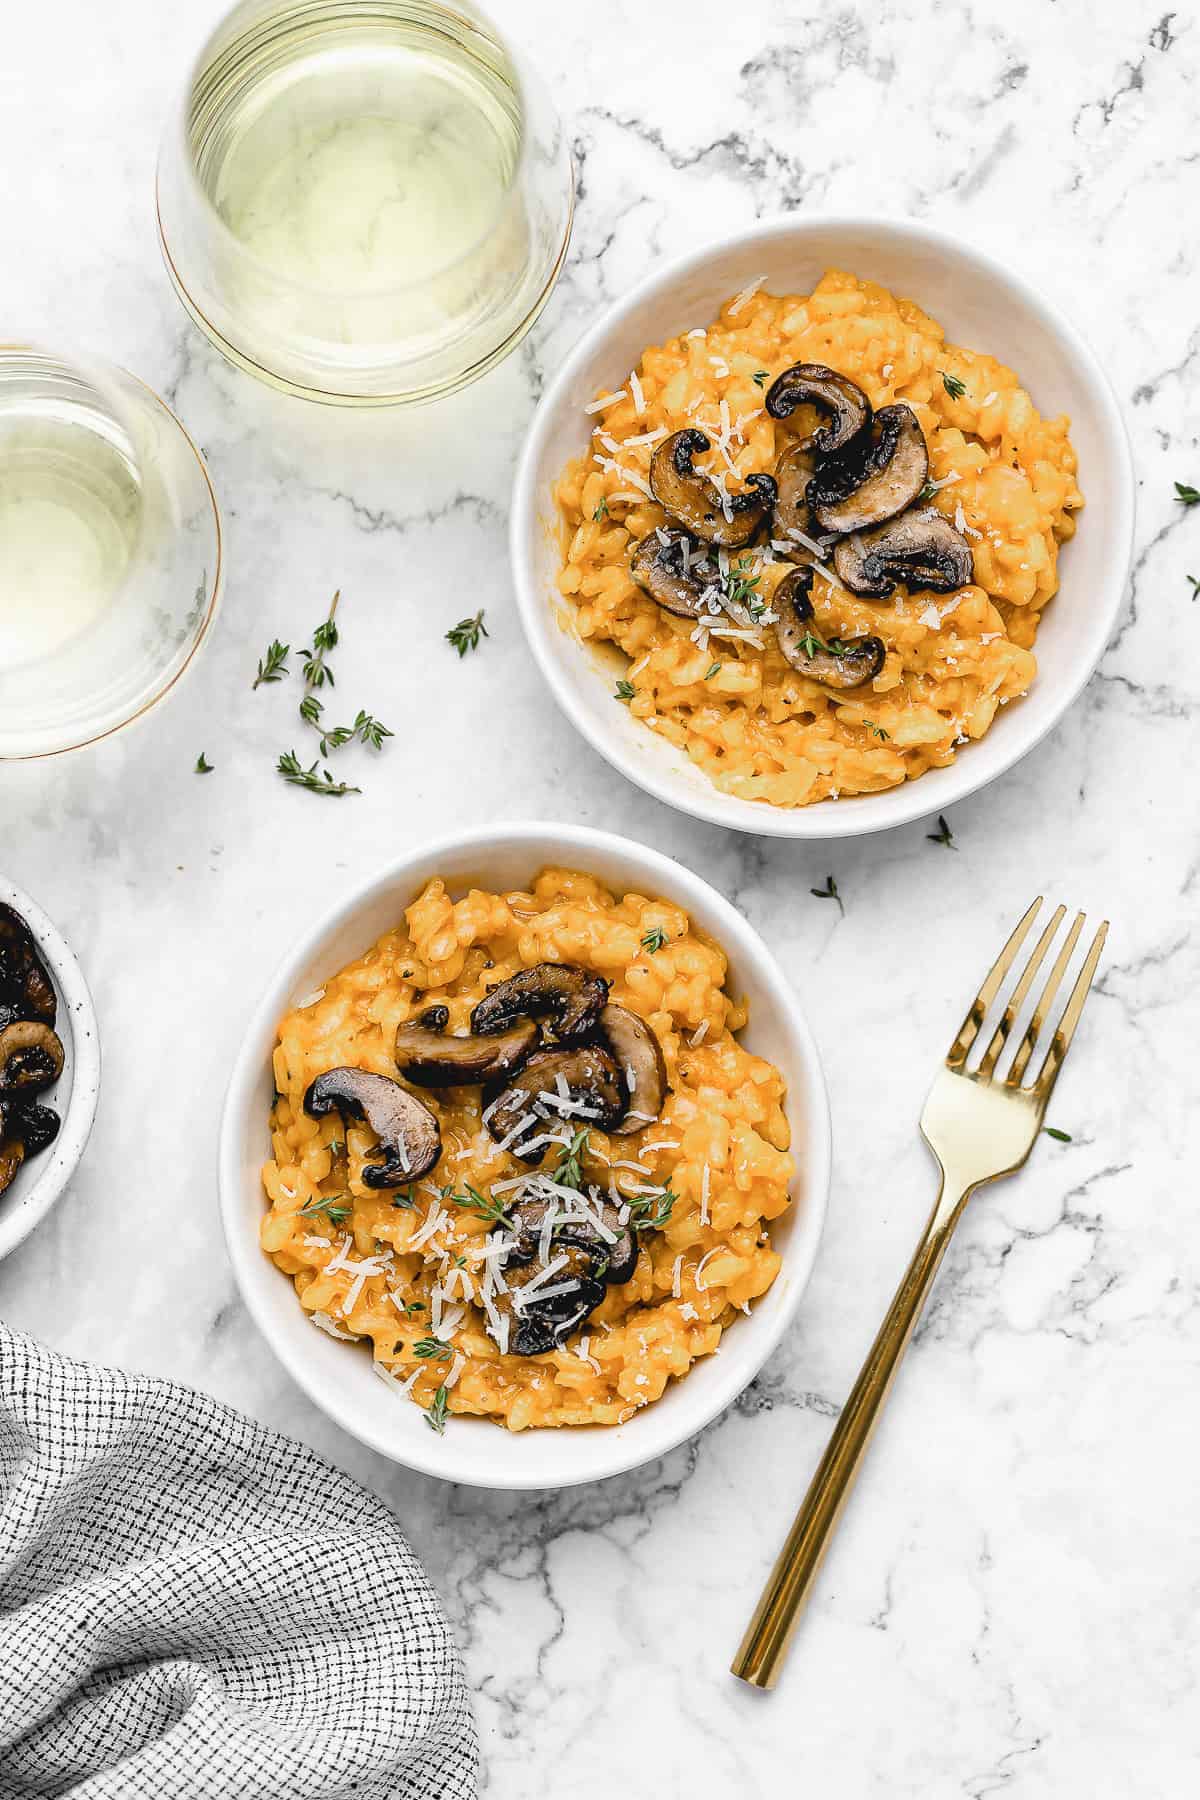
- Dry white wine – I used Sauvignon Blanc for this vegan mushroom risotto.
- Broth – Since it’s vegan risotto, we’ll obviously use vegetable broth . The amount used varies slightly depending on how creamy you want the risotto (see tips below).
- Seasoning – Use a mix of sea salt and freshly ground black pepper.
- Cheese – Gather up some vegan Parmesan cheese—it can be homemade or store-bought. (I used my homemade Parmesan, but Violife makes an amazing vegan Parmesan cheese block.)
- Vegan butter – My favorite vegan butter is Miyokos.
- More seasoning/garnish – Lemon juice or lime juice.
Caramelized Mushrooms
- Mushrooms – Any kind—shiitake would be great here, but I used baby bella. Cleaned and sliced, stems removed.
- Vegan butter – Oil works as a substitute if you like.
- Garnish – Sea salt to taste. You could also boost the flavors with herbs, like dried or fresh thyme.
How to Make Vegan Mushroom Risotto
Making risotto might not be as quick as spaghetti and meatballs , but this traditional Italian dish is worth every minute. My advice? Put a cooking show on, or some French music, and really get into it! You’ll have a blast, and in 40 minutes, you’ll have an elegant dinner to enjoy for your efforts, too. Let’s get cooking.

Heat the broth.
- Warm the broth. First, heat the vegetable broth in a small pan. Set the broth aside, but keep it warm, so it doesn’t reduce the heat of the risotto and affect the texture of the dish.
- Sauté the onion. Meanwhile, sauté the onion with garlic and oil over medium-high heat. Reduce heat, and cook until the onions are translucent and the garlic is fragrant, about 5 minutes.
- Add the rice . Now, stir in the arborio rice and let it toast for 3 minutes, until the edges become slightly translucent. Deglaze the pan with white wine, stirring to allow the rice to absorb the wine.
Add more broth, a little at a time.
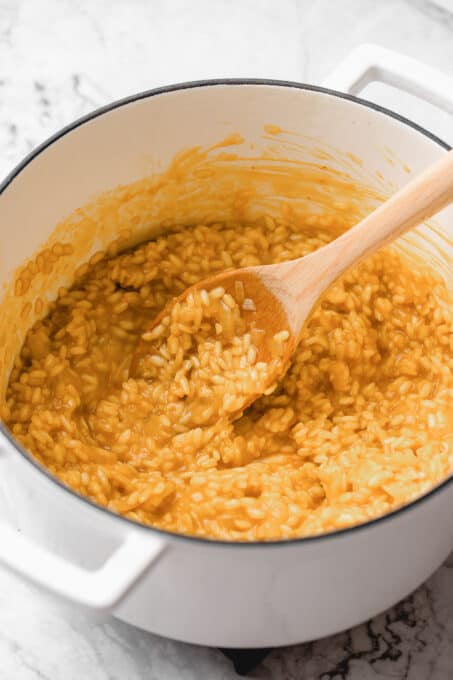
- Combine with broth. Once the wine is completely absorbed, add a ladleful (about ¼ cup) of the still-warm broth. Swirl and allow the rice to absorb the broth completely. Repeat, ladle by ladle, until each is completely absorbed, stirring and swirling to help the rice absorb evenly.
- Taste test the rice. After about 12 minutes of cooking, taste your rice. Careful, it’s hot! From there, add ladle by ladle, and when you reach 3 cups in, taste the rice after each ladle. You want your rice to be al dente.
- Season the risotto. Turn off the heat. Stir in the sea salt, black pepper, vegan butter, vegan Parmesan, and the lemon or lime juice. Remove the risotto from the stove while you cook the mushrooms.
Cook the Mushrooms
Add mushrooms and butter to the pan.
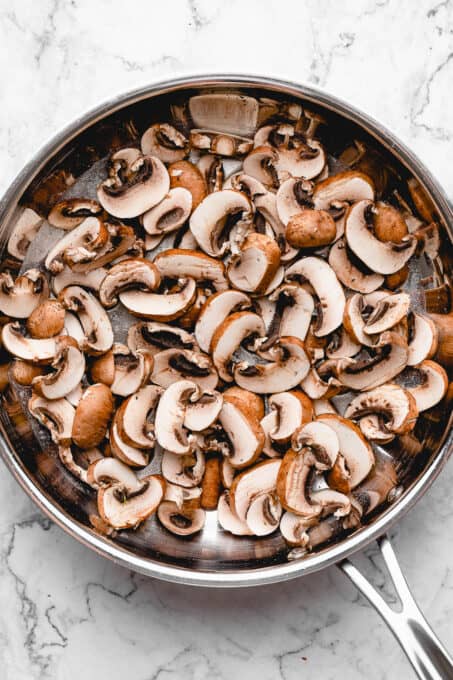
- Cook the mushrooms . Melt vegan butter in a pan over medium-high heat. Add the sliced mushrooms and toss them with the butter. Cook the mushrooms for 3-5 minutes until they begin to caramelize.
- Season the mushrooms. Flip, and cook for another 3-5 minutes, or until the other side is caramelized, too. Lastly, season the mushrooms with sea salt.
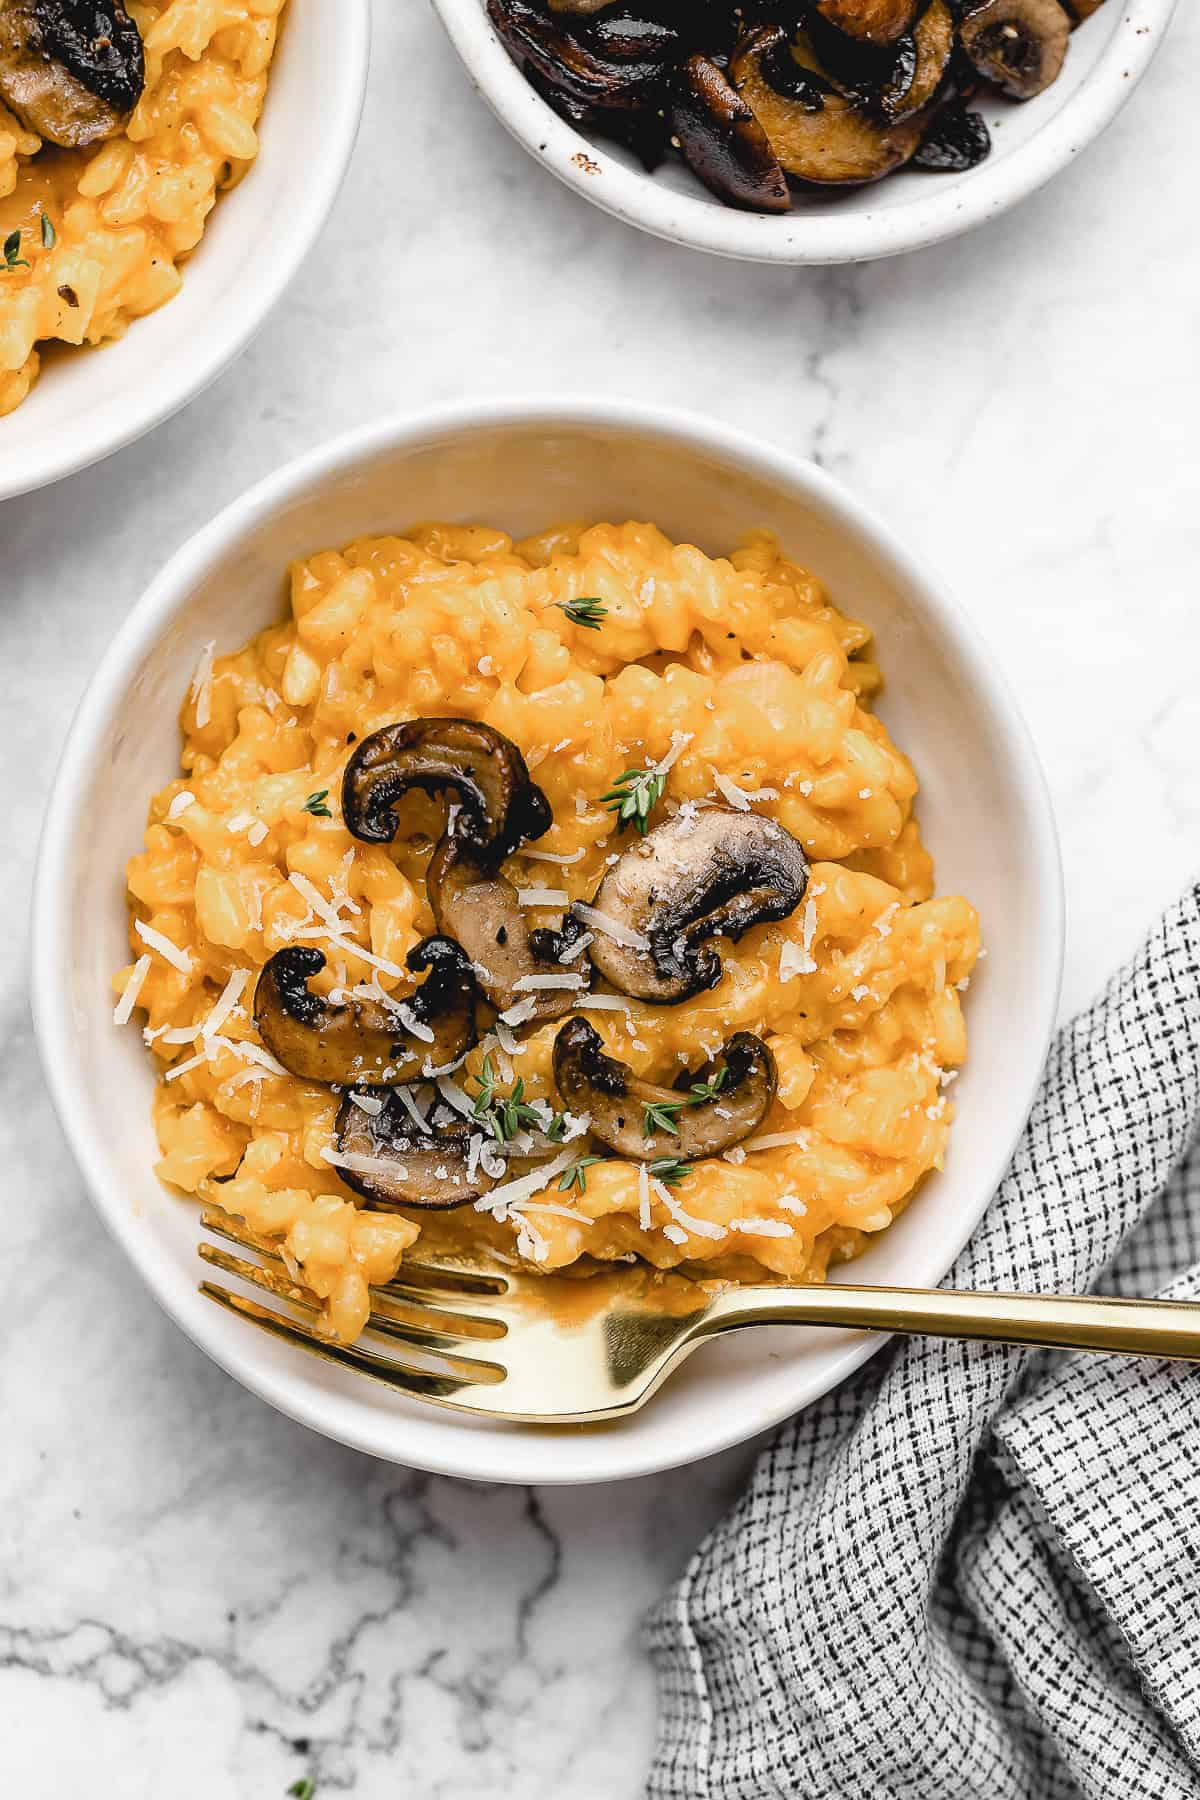
- Serve and enjoy. Stir the mushrooms into the risotto, or serve them on top of each bowl. Serve immediately with extra vegan Parmesan cheese. Enjoy!
Tips for the Best Vegan Risotto
- Don’t multi-task . You’re going to want to give this vegan mushroom risotto a lot of love and attention. Slow and steady wins the race here!
- How should I handle the heat while cooking? If your heat seems too high and every time the broth hits the pot, it’s sizzling and evaporating, lower the heat slightly. You want it hot, but not so hot that the rice doesn’t cook properly. I found medium to be the best temperature for mine.
- How much broth should I use? The first time I made this vegan mushroom risotto, I used 4 cups of broth. The second time, I changed nothing ingredient-wise and only used 3 ½ cups, and it came out creamier. I figure that’s because I let the rice soak up the broth properly after each time.
- Don’t overcook . Taste test after 12 minutes of cooking, and every few minutes after that, so you know when your risotto is al dente and creamy. Al dente (Italian for “to the tooth”) means that the rice is tender but still a little chewy.
- Make it in the Instant Pot! If you own a mutlicooker, make vegan Instant Pot mushroom risotto . It’s practically hands-free.
What to Serve With Vegan Mushroom Risotto
- With extra Parmesan . Cook it into the risotto, and then sprinkle some extra on top! Cheesy, creamy rice is totally irresistible.
- With more vegetables. Don’t feel like you have to stick to just mushrooms here. Roasted (or steamed) asparagus is a welcome addition, as are broccoli, chopped peppers, etc.
- Alongside a protein-packed dinner . A great vegan option would be something like this baked tofu or vegan chicken . Don’t forget a side of fluffy vegan garlic Parmesan dinner rolls .
How to Store and Reheat Leftovers
- Refrigerate. If you have leftovers (that’s a big if, my friends), they can easily be stored in the fridge for 3-4 days in an airtight container.
- Reheat. The best way to reheat your vegan mushroom risotto is to put it back in a pan on the stovetop, add a little extra vegetable broth, and heat until it reaches the desired temperature.
More Vegan Side Dishes
- Vegan Biscuits
- Vegan Cornbread
- Garlic Roasted Potatoes
- Mashed Cauliflower
- Grilled Maple Mustard Brussels Sprouts
Ingredients
Risotto
- 1 tablespoon oil of choice
- 1 cup arborio rice
- 1/2 large white onion
- 3 cloves garlic , minced or finely diced
- ½ cup dry white wine , I used Sauvignon Blanc
- 3-4 cups vegetable broth*
- 1/2 teaspoon sea salt
- 1/2 teaspoon freshly ground black pepper
- 2-3 tablespoons vegan Parmesan cheese , homemade or store-bought**
- 1 tablespoon vegan butter***
- 1 tablespoon lemon juice or lime juice
Caramelized Mushrooms
- 8 ounces mushrooms , any kind (shiitake would be great here, I used baby bella), cleaned and sliced, stems removed
- 1-2 tablespoons vegan butter or oil
- sea salt to taste
Instructions
Risotto
- Heat the vegetable broth in a small pan and set aside. Keep warm, you want to keep this warm so that it doesn’t reduce the heat of the risotto and mess with the texture of the dish.
- In a pan over medium high heat, heat the oil. Add in the onion and the garlic, stirring to combine. Reduce heat to medium and cook until the onions are translucent and the garlic is fragrant, about 5 minutes.
- Add in the arborio rice, and stir. Allow the rice to toast for about 3 minutes, until the edges become slightly translucent. Add in the white wine to deglaze the pan. Stir and allow the rice to absorb the wine.
- When the wine is completely absorbed, add in about a ladle or 1/4 cup of the still warm vegetable broth. The pan should be warm enough for the rice to absorb the rice in a few minutes. Swirl and allow the rice to absorb the broth completely.
- Repeat, ladle by ladle (easier to scoop), until each is completely absorbed, stirring and swirling to help the rice absorb evenly. After about 12 minutes of cooking, taste your rice. Careful, it’s hot! From there, add ladle by ladle and when you reach 3 cups in, taste the rice after each ladle. You want your rice to be al dente or whichever texture you desire.
- After the rice has reached al dente, turn off the heat. Add in the sea salt, black pepper, vegan butter, vegan parmesan, and the lemon or lime juice. Stir to combine completely and let it all absorb in with the residual heat, for about 3 minutes. Remove from the stove.
- You can stir the mushrooms in the risotto, or serve them on top of each individually served risotto. Serve immediately with additional vegan parmesan cheese and mushrooms. Enjoy!
Caramelised Mushrooms
- In a pan over medium high heat, melt the vegan butter. Swirl around the pan.
- Add in the slices of mushroom, stirring to combine in the butter. Let the mushrooms sit for about 3-5 minutes until they begin to caramelize. Flip and repeat for about 3-5 minutes until the other side is caramelized too.
- Season with sea salt to taste and serve with or on top of risotto. Enjoy!
Notes

Creamy Vegan Mushroom Risotto
Ingredients
Risotto
- 1 tablespoon oil of choice
- 1 cup arborio rice
- 1/2 large white onion
- 3 cloves garlic minced or finely diced
- ½ cup dry white wine I used Sauvignon Blanc
- 3-4 cups vegetable broth*
- 1/2 teaspoon sea salt
- 1/2 teaspoon freshly ground black pepper
- 2-3 tablespoons vegan Parmesan cheese homemade or store-bought**
- 1 tablespoon vegan butter***
- 1 tablespoon lemon juice or lime juice
Caramelized Mushrooms
- 8 ounces mushrooms any kind (shiitake would be great here, I used baby bella), cleaned and sliced, stems removed
- 1-2 tablespoons vegan butter or oil
- sea salt to taste
Instructions
Risotto
- Heat the vegetable broth in a small pan and set aside. Keep warm, you want to keep this warm so that it doesn’t reduce the heat of the risotto and mess with the texture of the dish.
- In a pan over medium high heat, heat the oil. Add in the onion and the garlic, stirring to combine. Reduce heat to medium and cook until the onions are translucent and the garlic is fragrant, about 5 minutes.
- Add in the arborio rice, and stir. Allow the rice to toast for about 3 minutes, until the edges become slightly translucent. Add in the white wine to deglaze the pan. Stir and allow the rice to absorb the wine.
- When the wine is completely absorbed, add in about a ladle or 1/4 cup of the still warm vegetable broth. The pan should be warm enough for the rice to absorb the rice in a few minutes. Swirl and allow the rice to absorb the broth completely.
- Repeat, ladle by ladle (easier to scoop), until each is completely absorbed, stirring and swirling to help the rice absorb evenly. After about 12 minutes of cooking, taste your rice. Careful, it’s hot! From there, add ladle by ladle and when you reach 3 cups in, taste the rice after each ladle. You want your rice to be al dente or whichever texture you desire.
- After the rice has reached al dente, turn off the heat. Add in the sea salt, black pepper, vegan butter, vegan parmesan, and the lemon or lime juice. Stir to combine completely and let it all absorb in with the residual heat, for about 3 minutes. Remove from the stove.
- You can stir the mushrooms in the risotto, or serve them on top of each individually served risotto. Serve immediately with additional vegan parmesan cheese and mushrooms. Enjoy!
Caramelised Mushrooms
- In a pan over medium high heat, melt the vegan butter. Swirl around the pan.
- Add in the slices of mushroom, stirring to combine in the butter. Let the mushrooms sit for about 3-5 minutes until they begin to caramelize. Flip and repeat for about 3-5 minutes until the other side is caramelized too.
- Season with sea salt to taste and serve with or on top of risotto. Enjoy!
Video
Notes
Nutrition
Creamy Vegan Mushroom Risotto https://jessicainthekitchen.com/creamy-mushroom-risotto-vegan-gf/ July 16, 2021
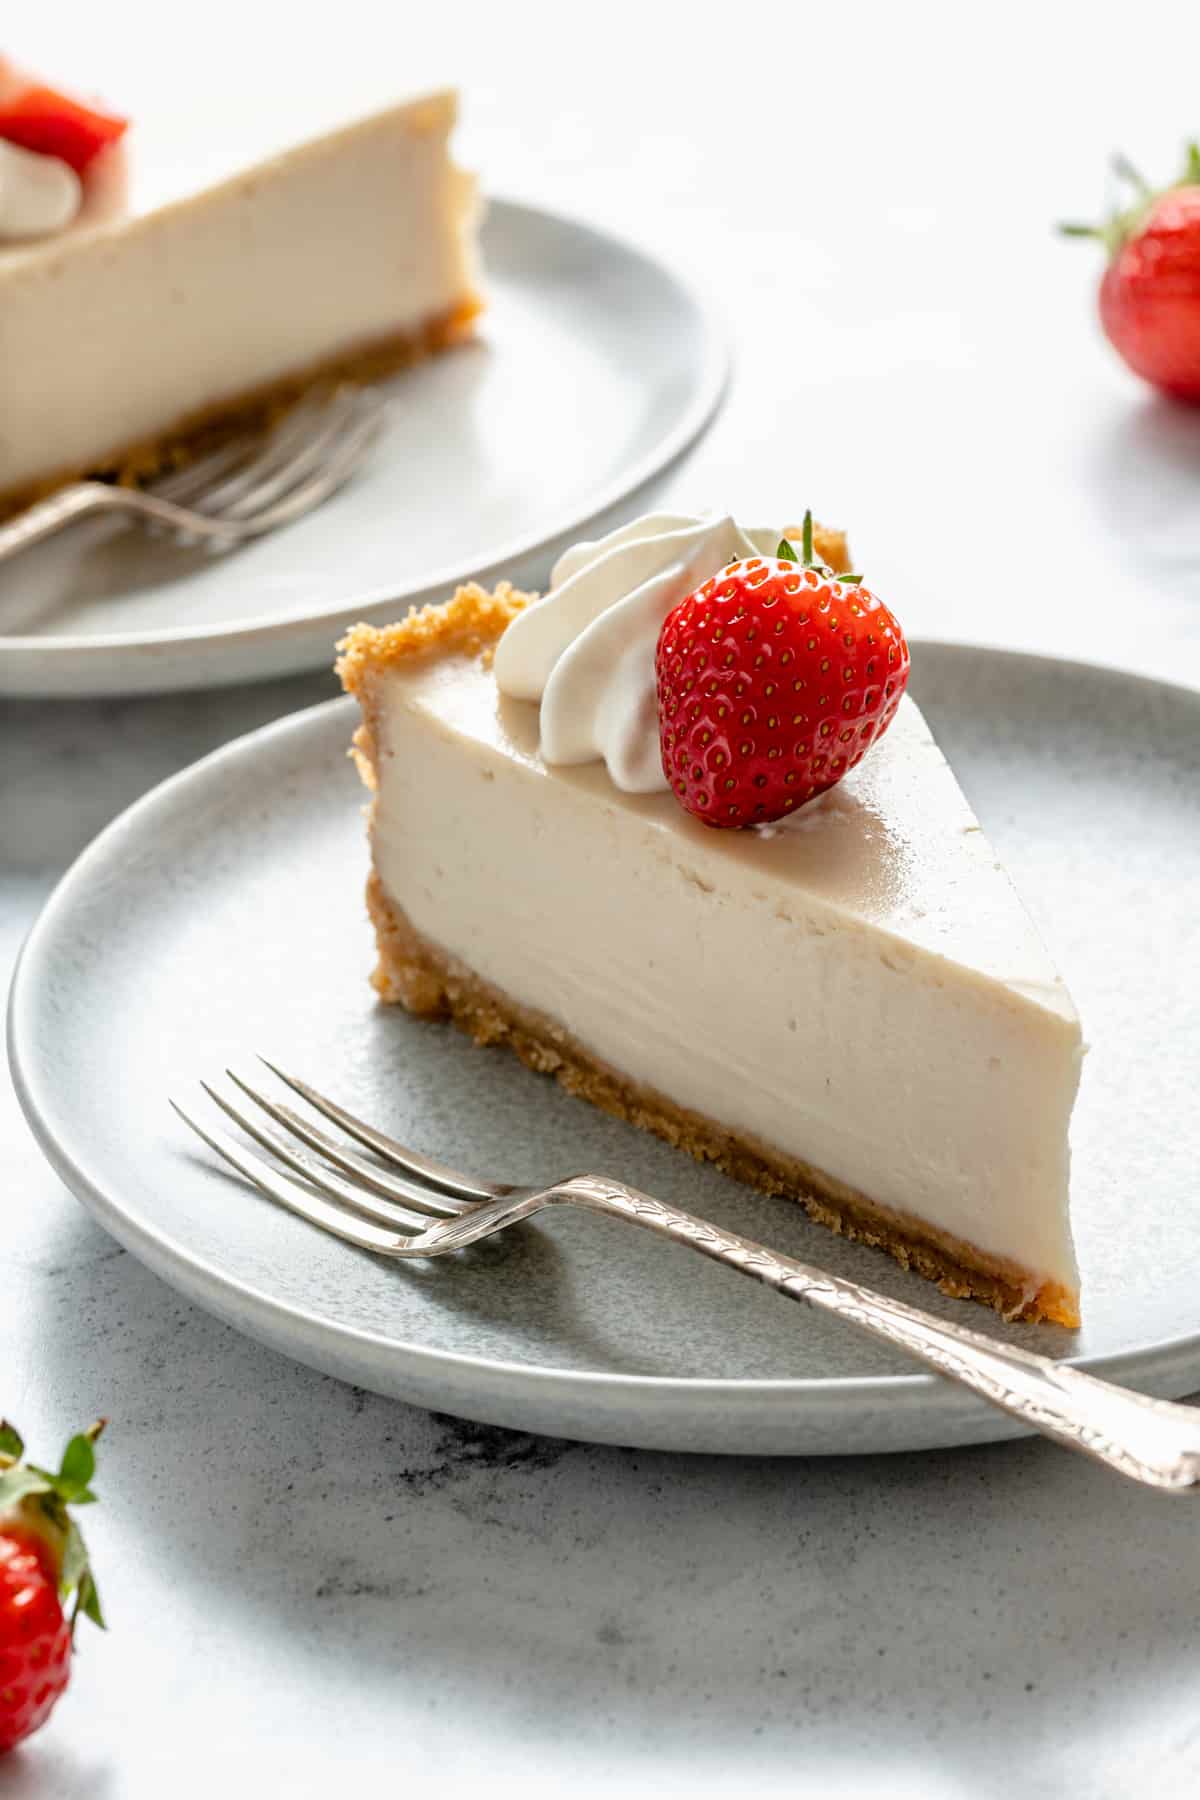
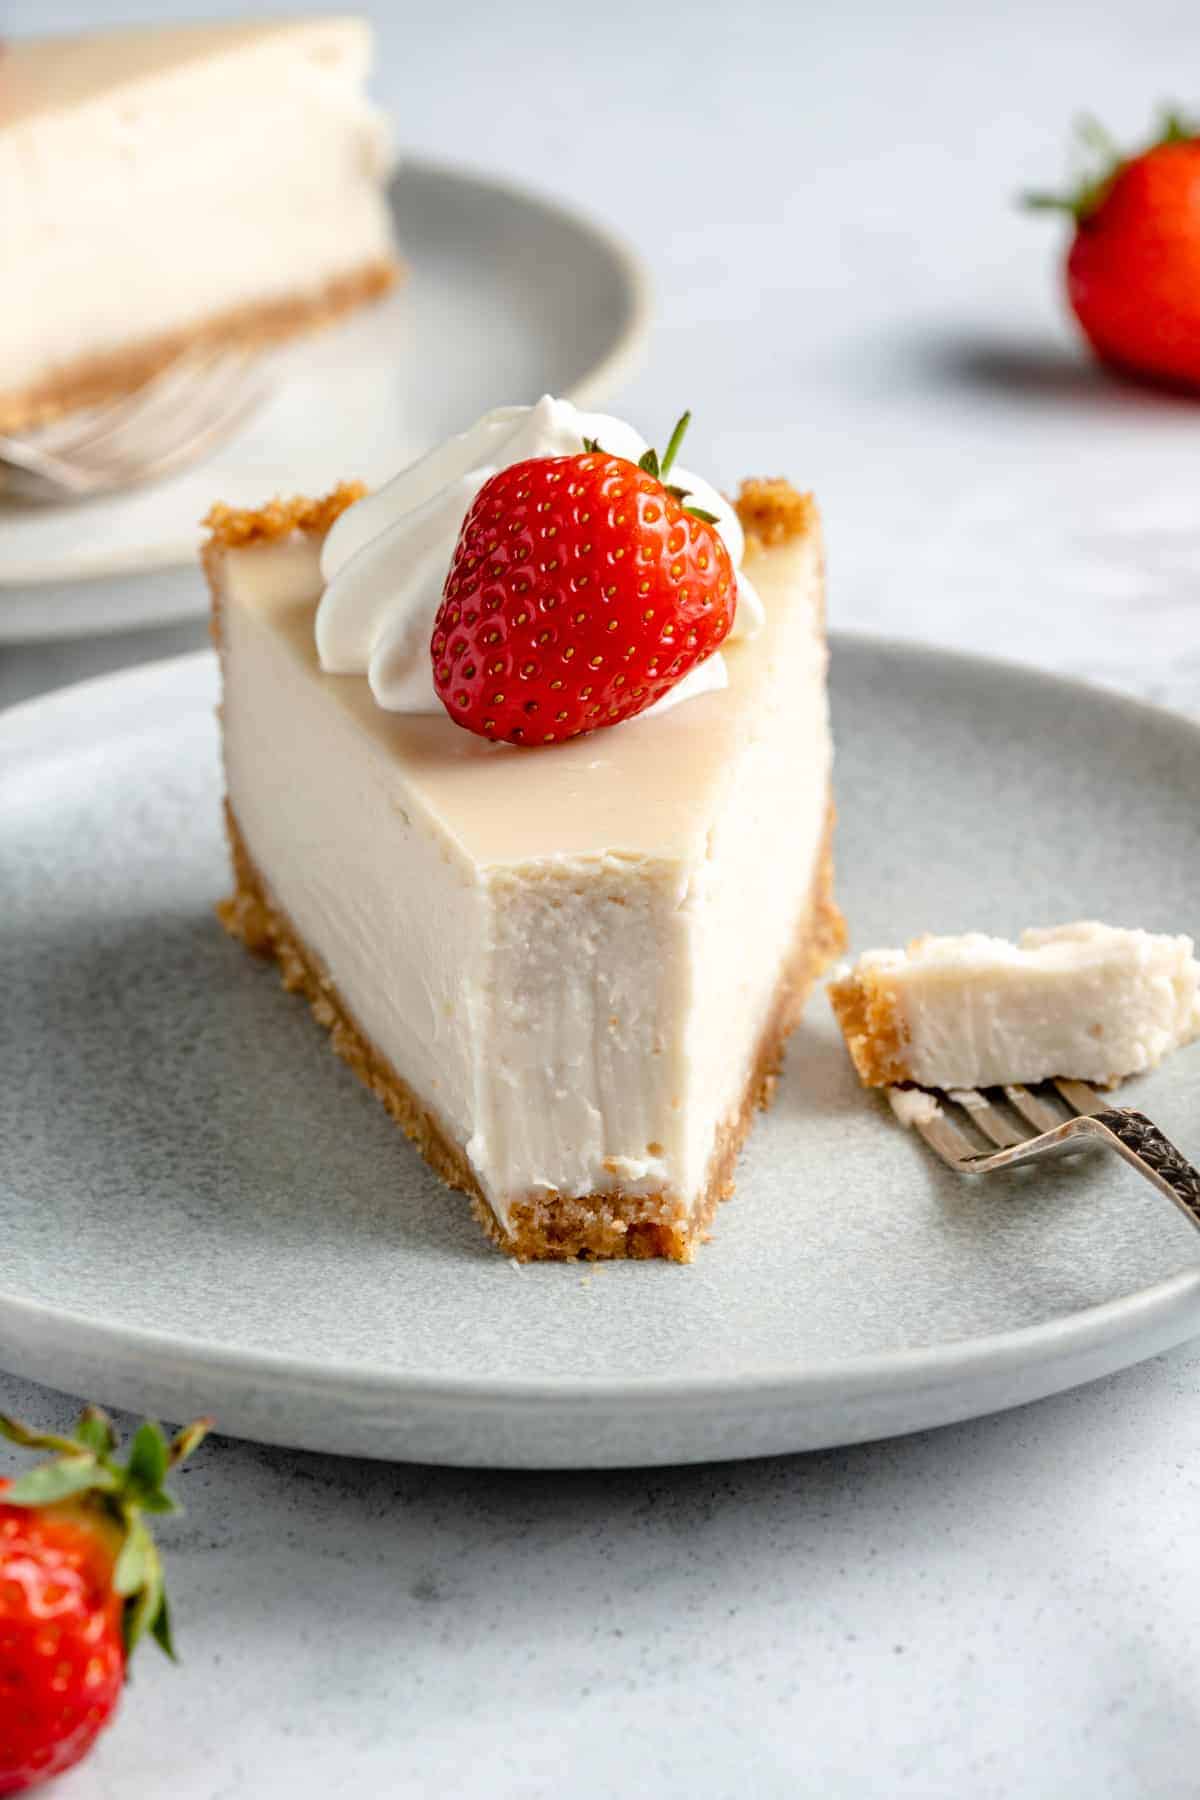
Creamy Vegan Cheesecake is baked, made with simply ingredients and tastes identical to regular cheesecake. It is an elegant dessert that will always please a crowd, but it’s also casual enough for an after-dinner weeknight dessert. So, whether you’re vegan or not, this rich vanilla cheesecake is not to be missed.
I don’t know about you, but I love, love, love cheesecakes. Yes, that’s right. Love times three. They are one of my favourite desserts of all time. But cheesecakes – like this Creamy Vegan Cheesecake recipe that I’m introducing you to today – are deserving of such love! Now, this is not the first cheesecake we’ve done on this blog. Remember Pumpkin Cheesecake ? While these are totally tasty (and worth a try if you haven’t made them yet!), they aren’t baked cheesecakes. Vegan baked cheesecakes are like the queens of vegan cheesecakes. The texture is absolutely incredible and reminds me so much of the cheesecake I loved before going vegan. Plus after you master this base, you can easily customise it with more toppings to fit your tastes!
What Makes this Vegan Cheesecake So Good?
The word ‘cheesecake’ and the word ‘good’ just go together. It’s simply a fact that cheesecakes (if made correctly) are amazing.
But, in fairness, there are a LOT of cheesecake recipes making their way around the internet. So… what makes this specific one good?
- It’s Simple: Well, the process is a little tricky, but there’s a step-by-step guide that will break it all down – so no worries there! What I meant was, there are only 9 ingredients in this whole recipe, most of which are probably in your kitchen/pantry right now.
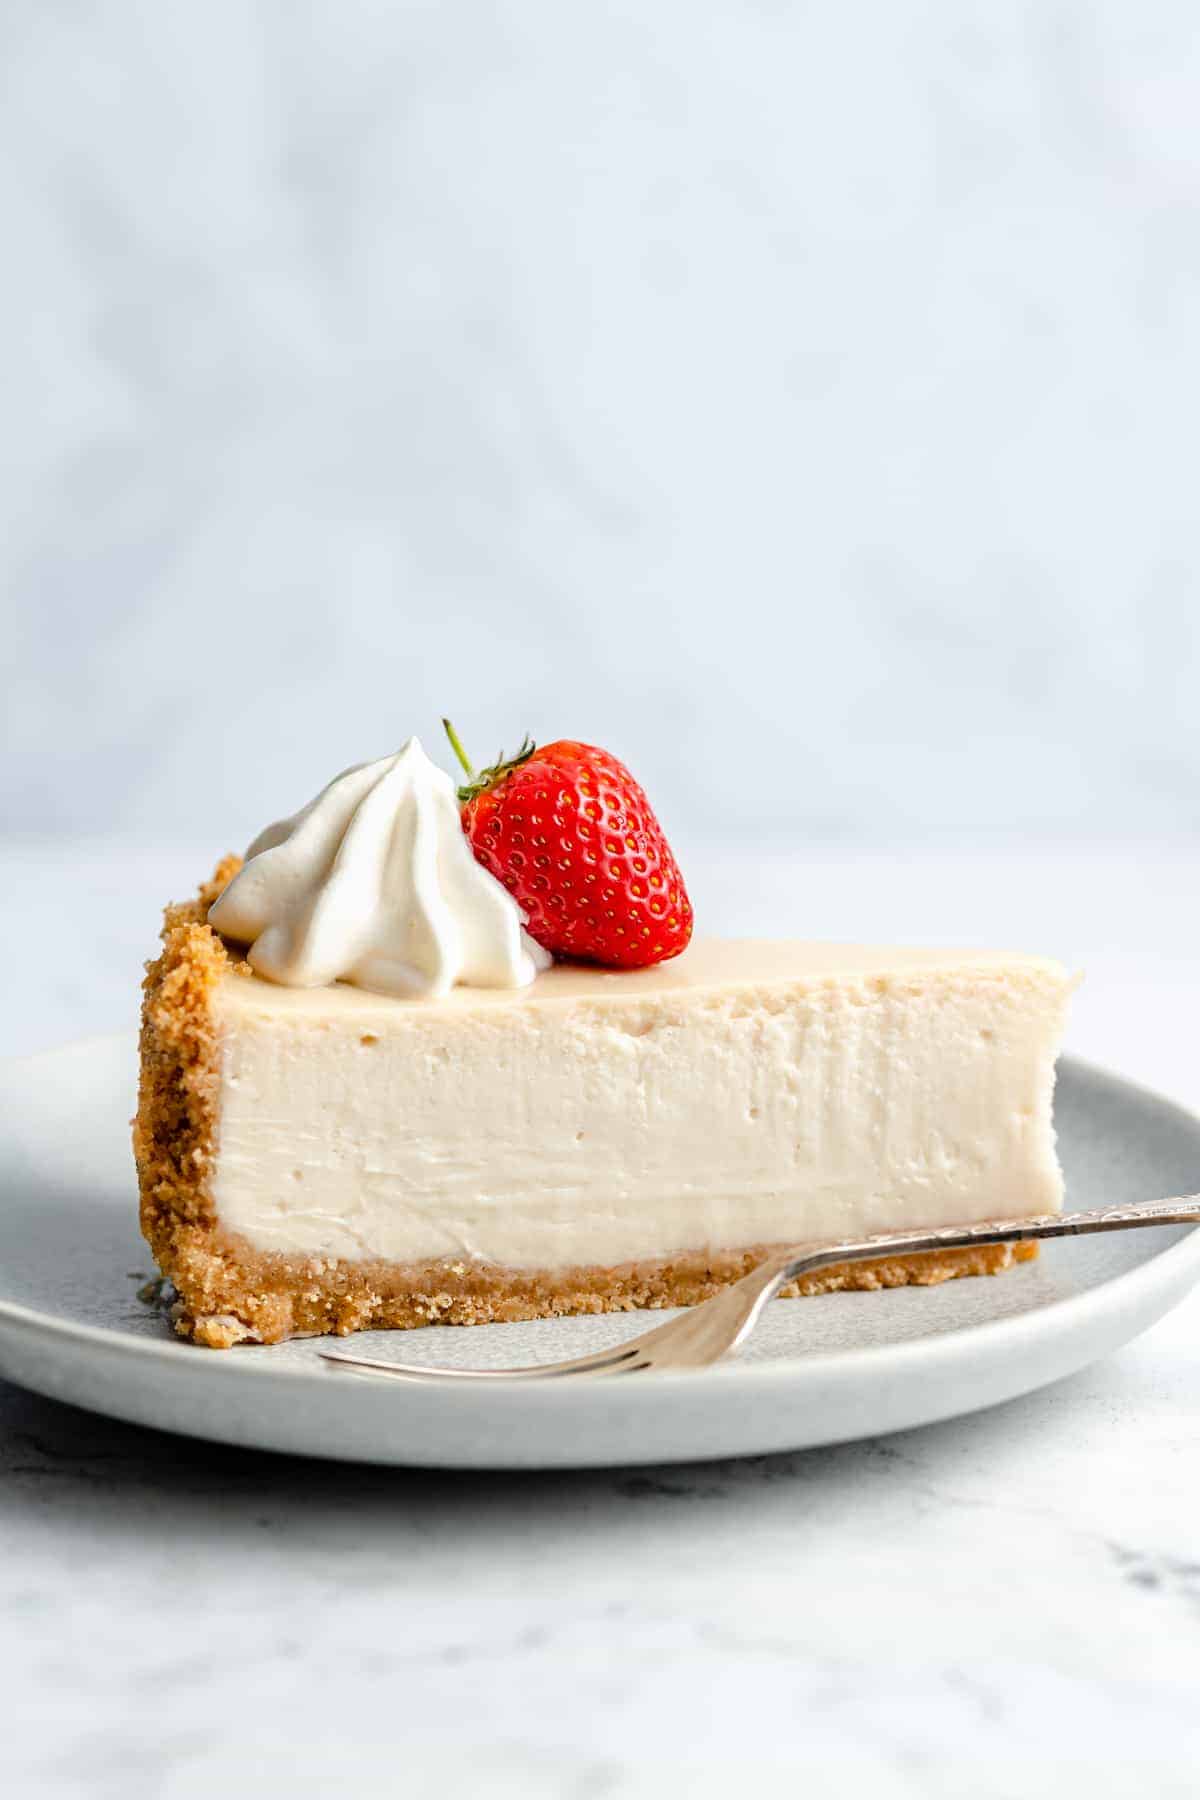
- It’s Rich and Creamy: You might have seen ‘vegan’ and thought that this can’t taste like an authentic cheesecake. But it does. It really, truly does. The cheesecake filling is so creamy and velvety, and the crust is slightly crispy, firm, and a touch crumbly. In other words, if I put a ‘traditional’ cheesecake in front of you, next to this one, you wouldn’t be able to tell the difference!
- It’s Customizable: I already kind of touched on this, but I wanted to mention it again! I love that this cake is flavorful and sweet all on its own, but can also be adjusted with bolder flavors. Feel free to add fresh fruit, homemade sauces, and more. (See serving suggestions below for ideas!)
Notes on Ingredients
I could talk about cheesecakes forever, but I’ll cut myself off here because we’ve got a dessert to make!
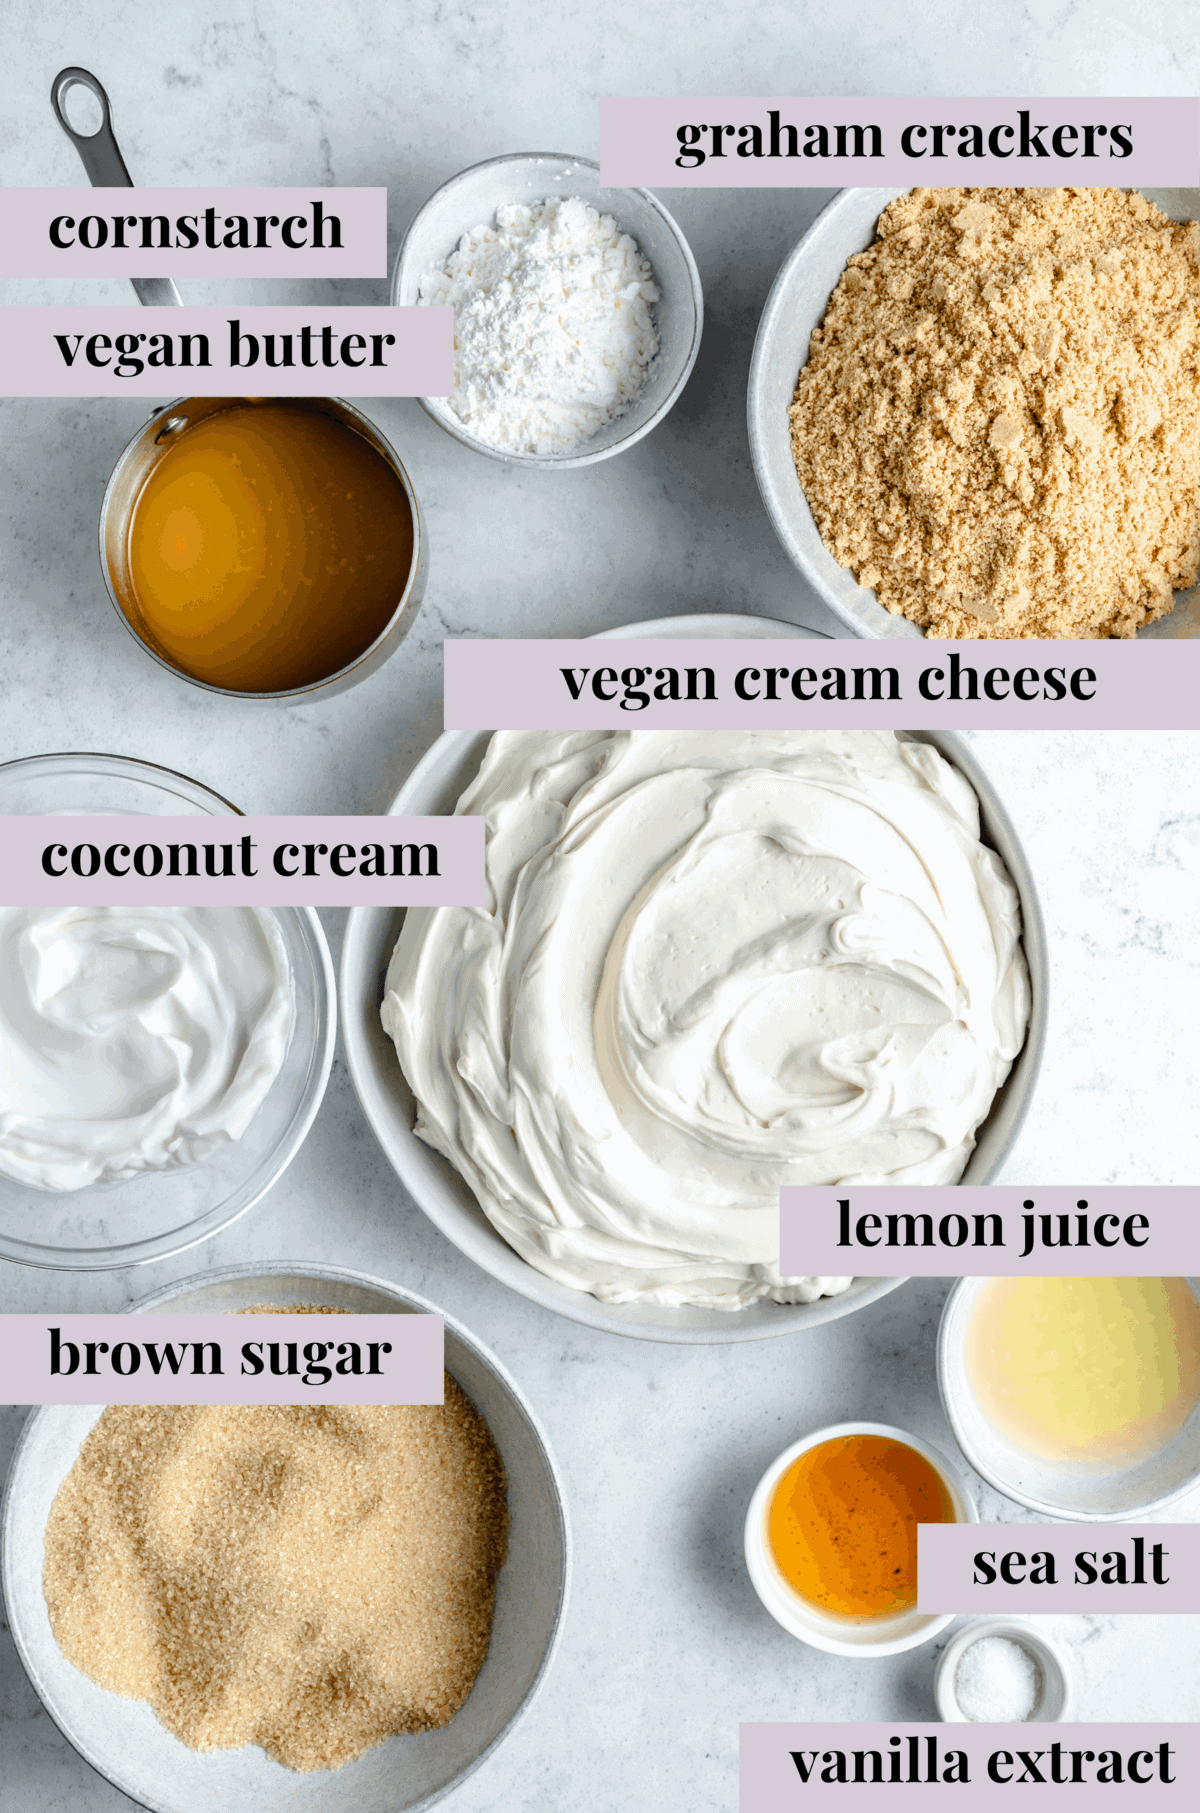
Let’s go over cheesecake ingredients for a minute. Like I mentioned above, there are only 9, and they’re pretty standard:
For the Crust
- Graham Crackers: You can also use digestive biscuits if you can’t find vegan graham crackers – I used digestive biscuits. We’re making a quintessential cheesecake crust!
- Brown Sugar: Feel free to add an extra tablespoon if you prefer a much sweeter crust.
- Vegan Butter: Salted or unsalted is fine, melted.
- Salt: Add a pinch of sea salt if you’re using unsalted butter.
For the Filling
- Vegan Cream Cheese: Let it come to room temperature before starting, and use blocks of cream cheese rather than a spread (although if you can only find a plain spread, that will work too but the cheesecake might crack (just cover it with toppings!).
- Brown Sugar: White granulated sugar can be used as a substitute, but I prefer to use brown sugar.
- Cornstarch: this acts as an egg replacer and helps to keep the cheesecake nice and firm.
- Coconut Cream: the thick white part from the can (you do not taste the coconut flavour at all)
- Vanilla Extract: To add some sweetness!
- Lemon Juice: if you love that incredible cheesecake tang, don’t skip this (don’t skip it anyway!). Freshly squeezed or freshly squeezed bottle is best here.
- Sea Salt: To enhance the sweetness. Highly recommend cutting this amount down if you’re using table salt.
How to Make Vegan Cheesecake
Okay, here’s where the real magic happens. I’m not going to lie to you, making a cheesecake takes some time and effort, but it’s so worth it.
First you’ll form the crust, then you’ll form the cheesecake’s filling, and finally you’ll put it all together to bake. That’s a bit of an oversimplification, but you’ll see what I mean:
Preheat the Oven: Adjust an oven rack to the lower-middle position and preheat the oven to 350°F/180°C.
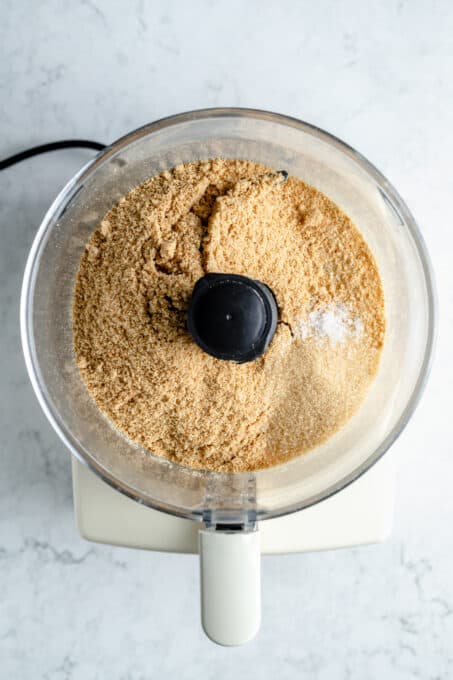
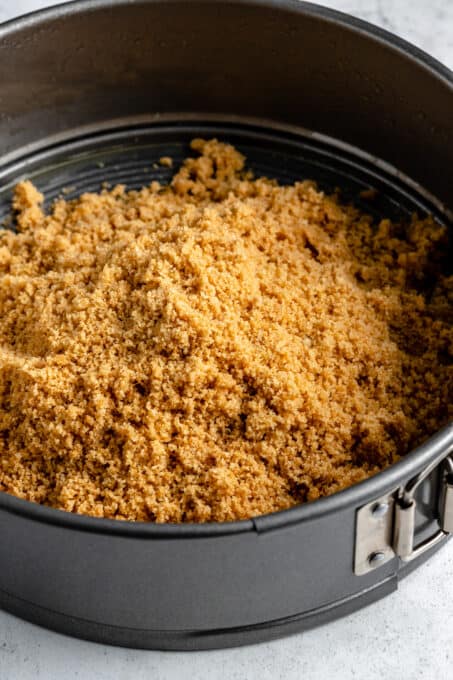
Form the Graham Cracker Crust: In a food processor, process the graham crackers/digestive biscuits and the sugar until you have fine crumbs. Add the butter while pulsing, bit by bit, for about 10 1-second pulses.
Press the Crust into the Pan: Transfer the crumb mixture to a sprayed/ buttered 9-inch springform pan and press evenly into the bottom. If desired, you could also line the pan with parchment paper but it is not necessary. Pack the crumbs into the base of the springform pan, and also slightly up the sides.
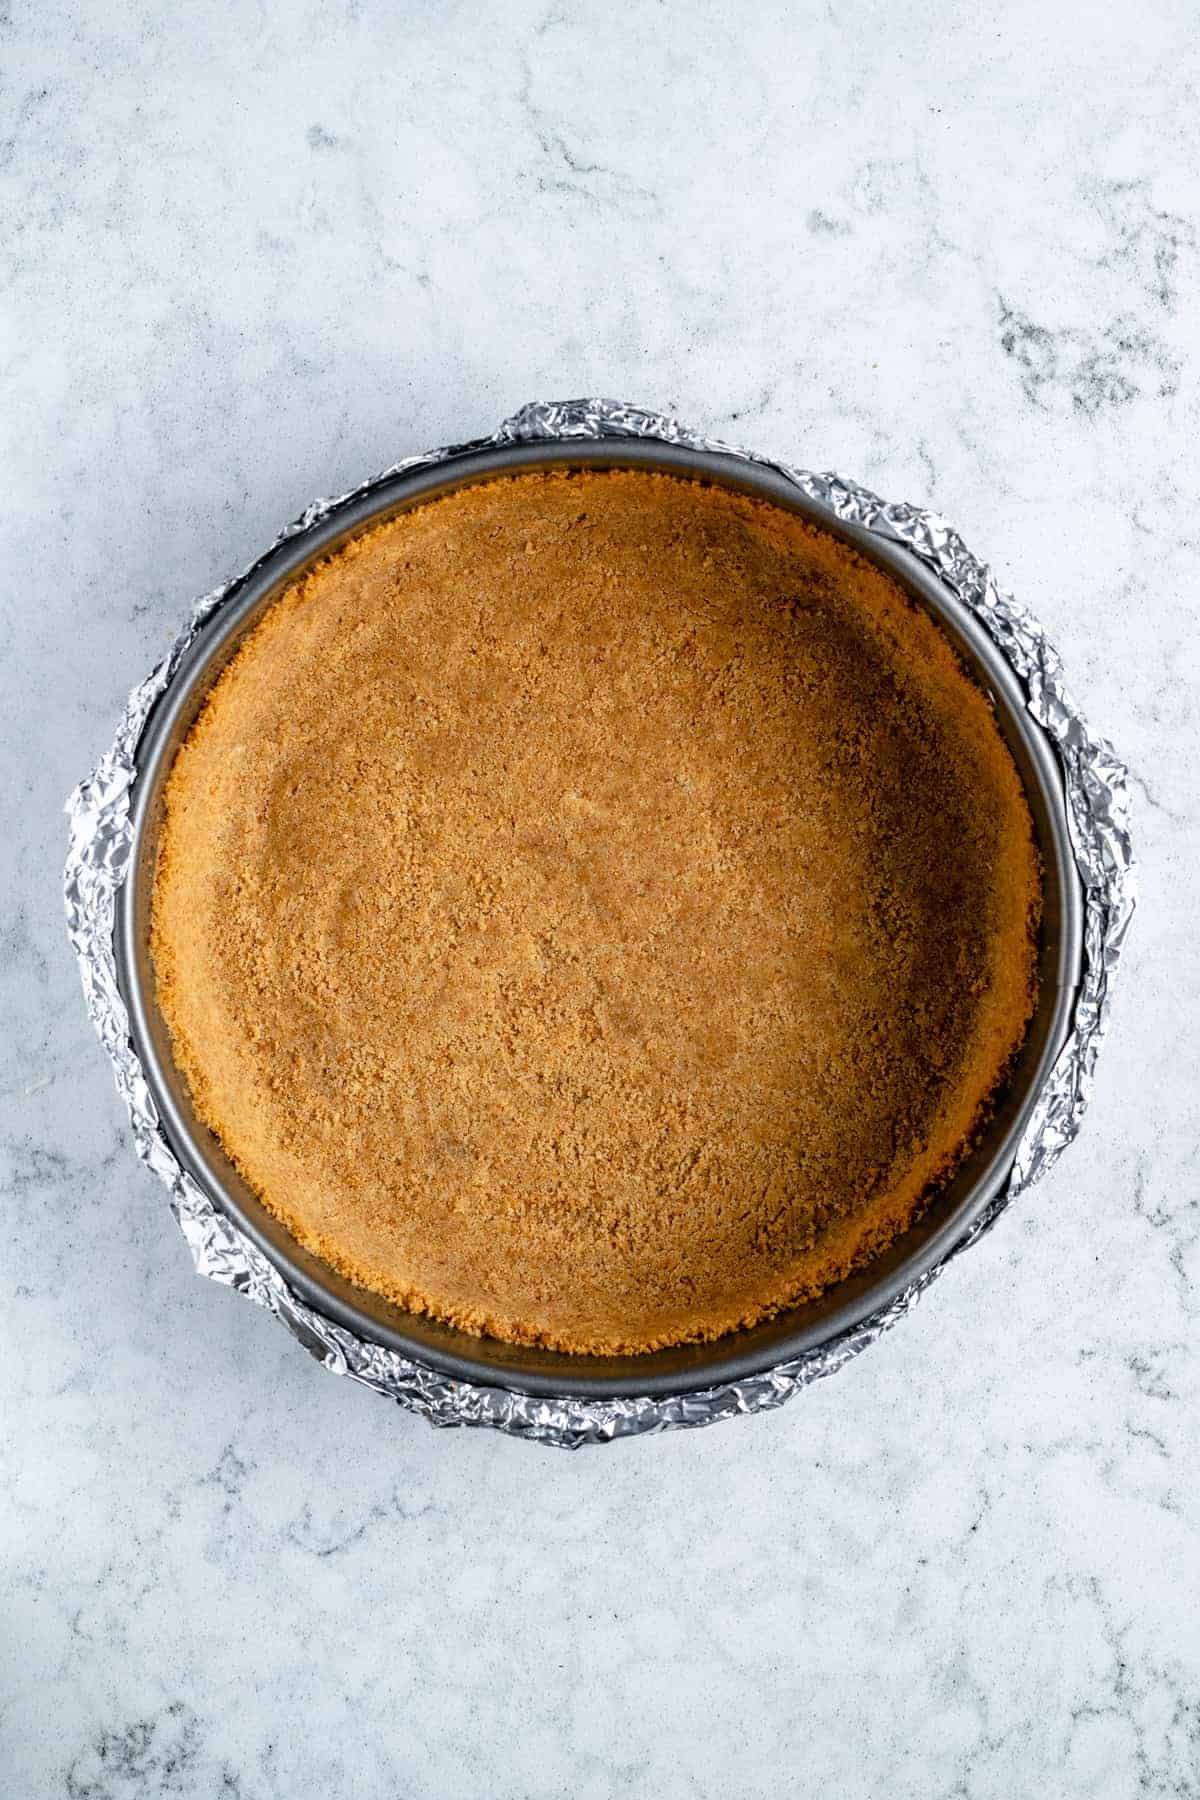
Bake the Crust: Bake for 10 minutes, until fragrant and golden brown. Remove from the oven, and cool on a wire rack to room temperature. Once cooled, wrap in aluminum foil, ensuring that the foil goes all the way up the sides and around the pan (this is for the water bath).
Adjust the Oven: Change the temperature to 325°F/165°C.
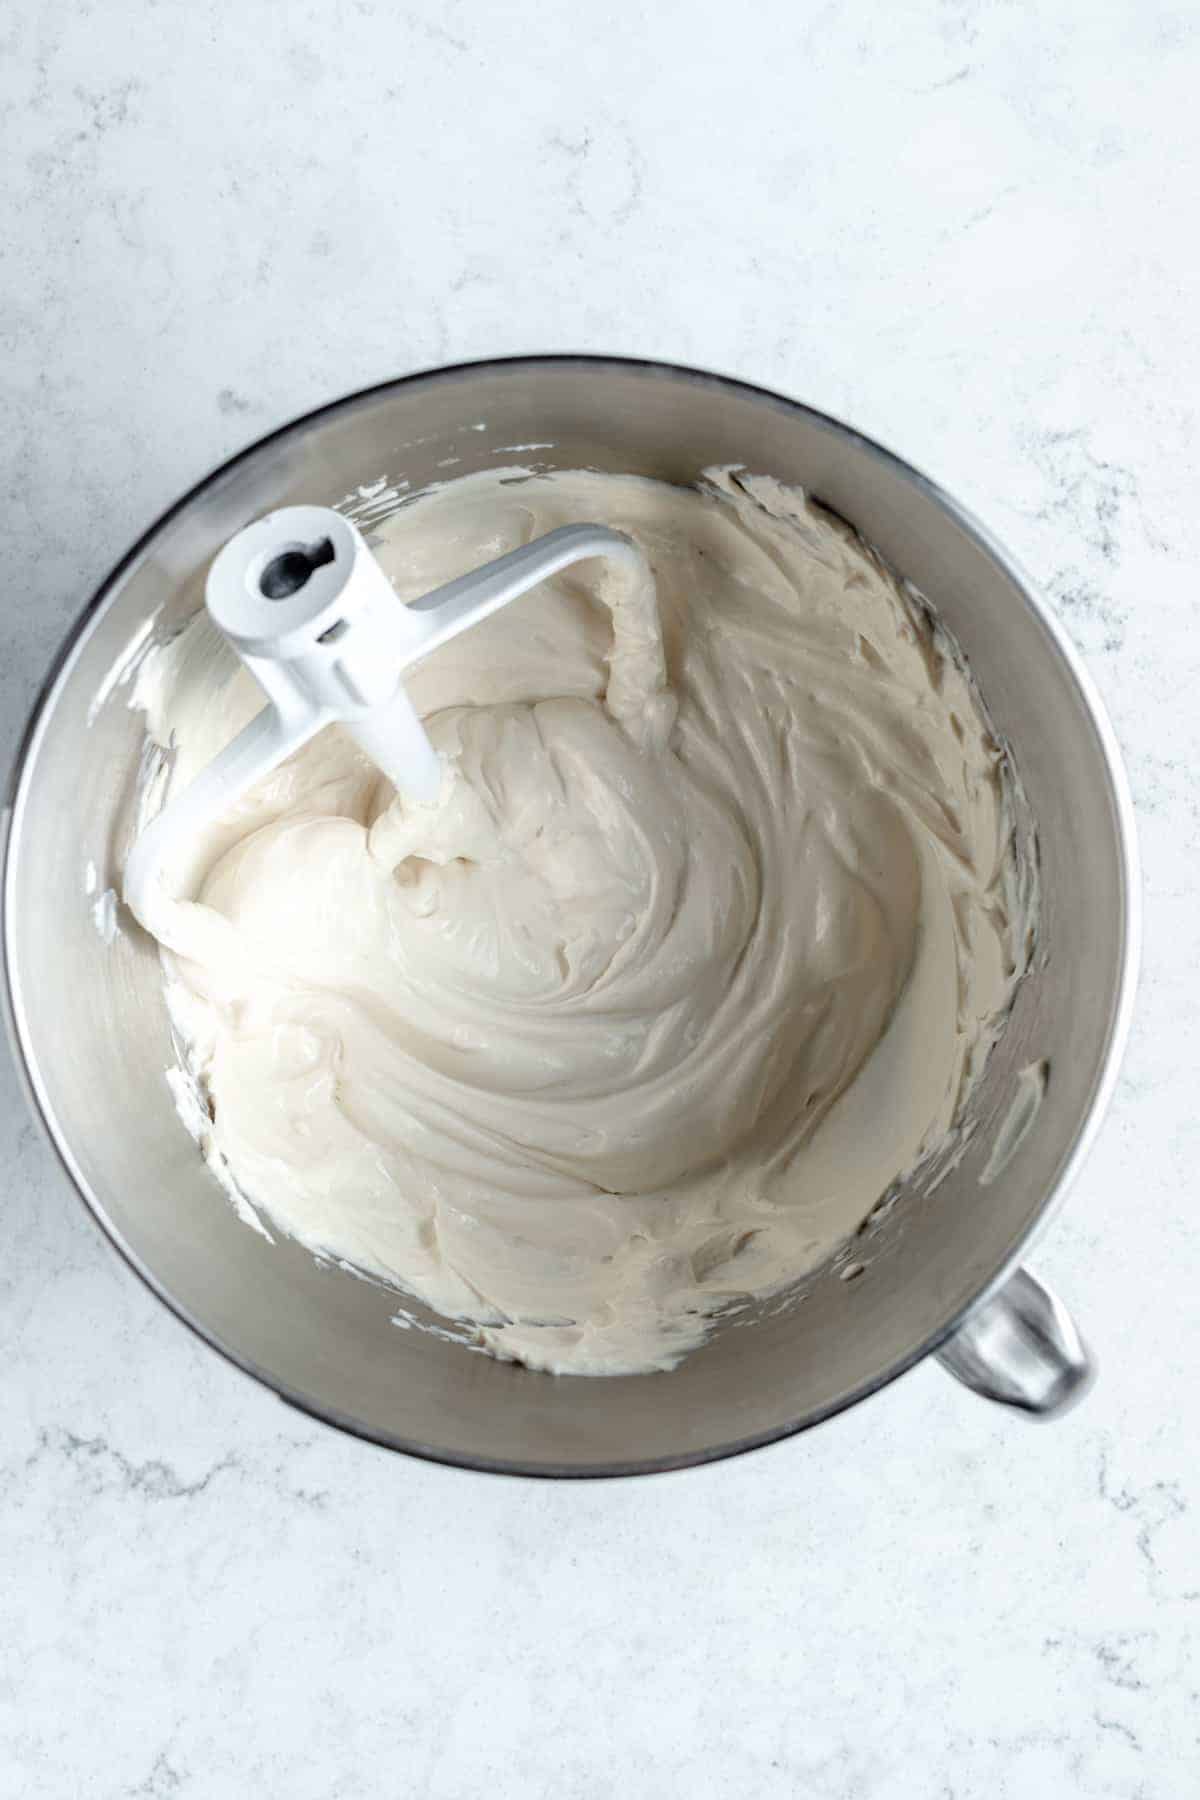
Combine Ingredients for the Filling: In a bowl of a stand mixer, beat the cream cheese to break it up and soften it slightly, about 10 seconds. With the machine running, add the sugar mixture in a slow stream; and beat until combined, creamy and smooth – about 3 minutes on low. Scrape down the sides of the bowl as needed.
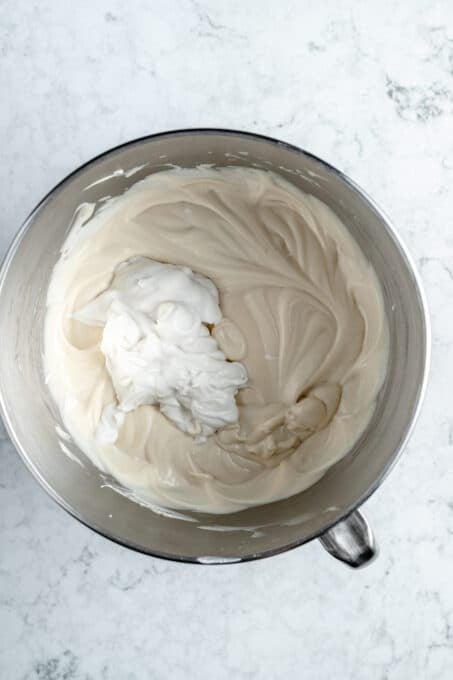
Mix in Cornstarch and Coconut Cream: Add the cornstarch mix and the coconut cream, incorporating for about 15 seconds each. Scrape the bowl after each addition. Add the lemon juice, vanilla and salt and mix to combine.
Prepare the Water Bath: Give the bowl a final scrape and pour the mixture into the prepared springform pan. Place the foil wrapped pan into a roasting pan or really any oven safe pan large enough to fit it. Pour boiling hot water in the pan and at least half way on the sides of the pan.
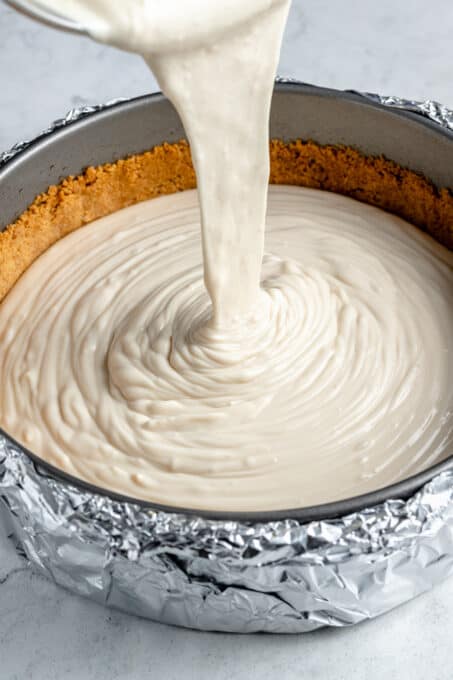
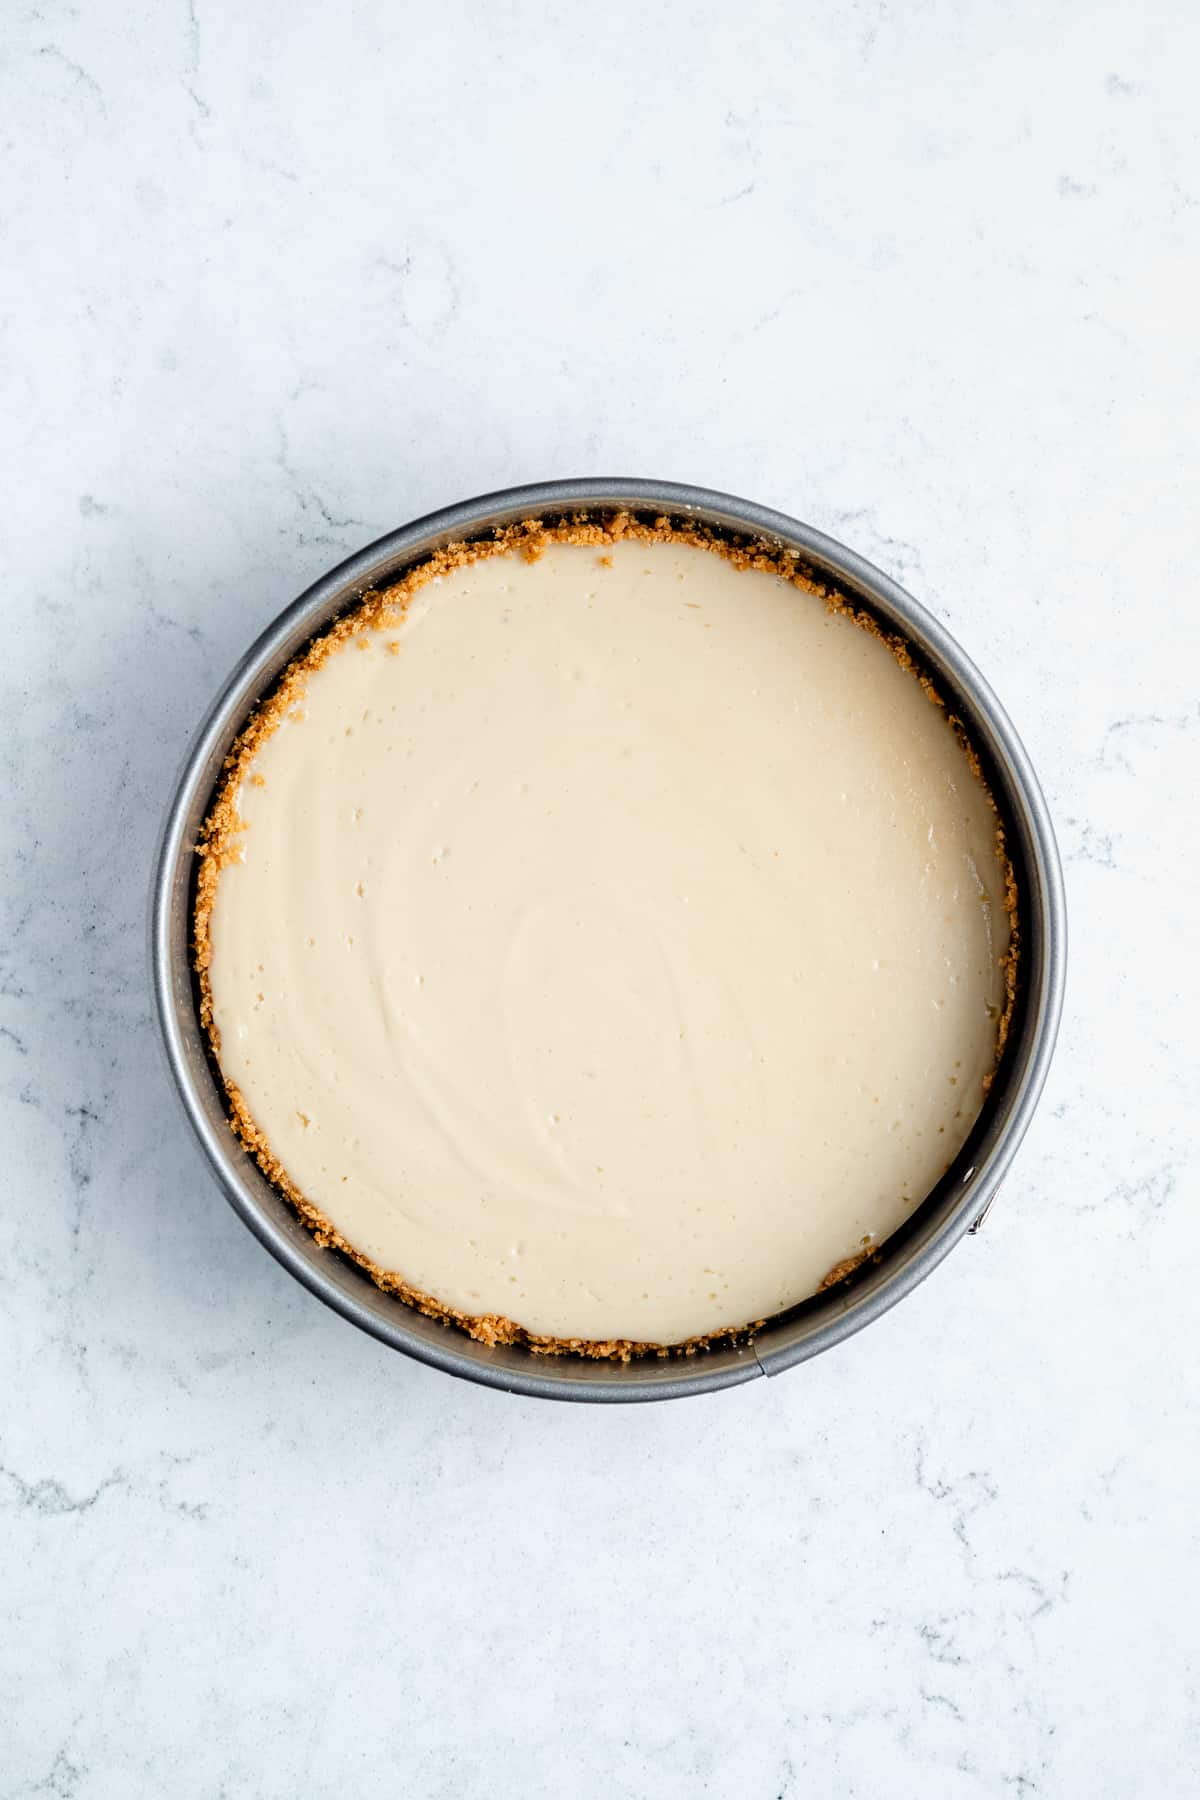
Bake the Cheesecake: Place gently into the oven on the middle rack. Bake until the center jiggles slightly, the sides start to puff, and the surface is no longer shiny, about 70 to 75 minutes and no longer.
Let the Cake Cool in the Oven: Turn off the oven and prop the door of the oven open with a potholder or wooden spoon to allow some heat to escape. Allow the cake to cool in the oven for about an hour.
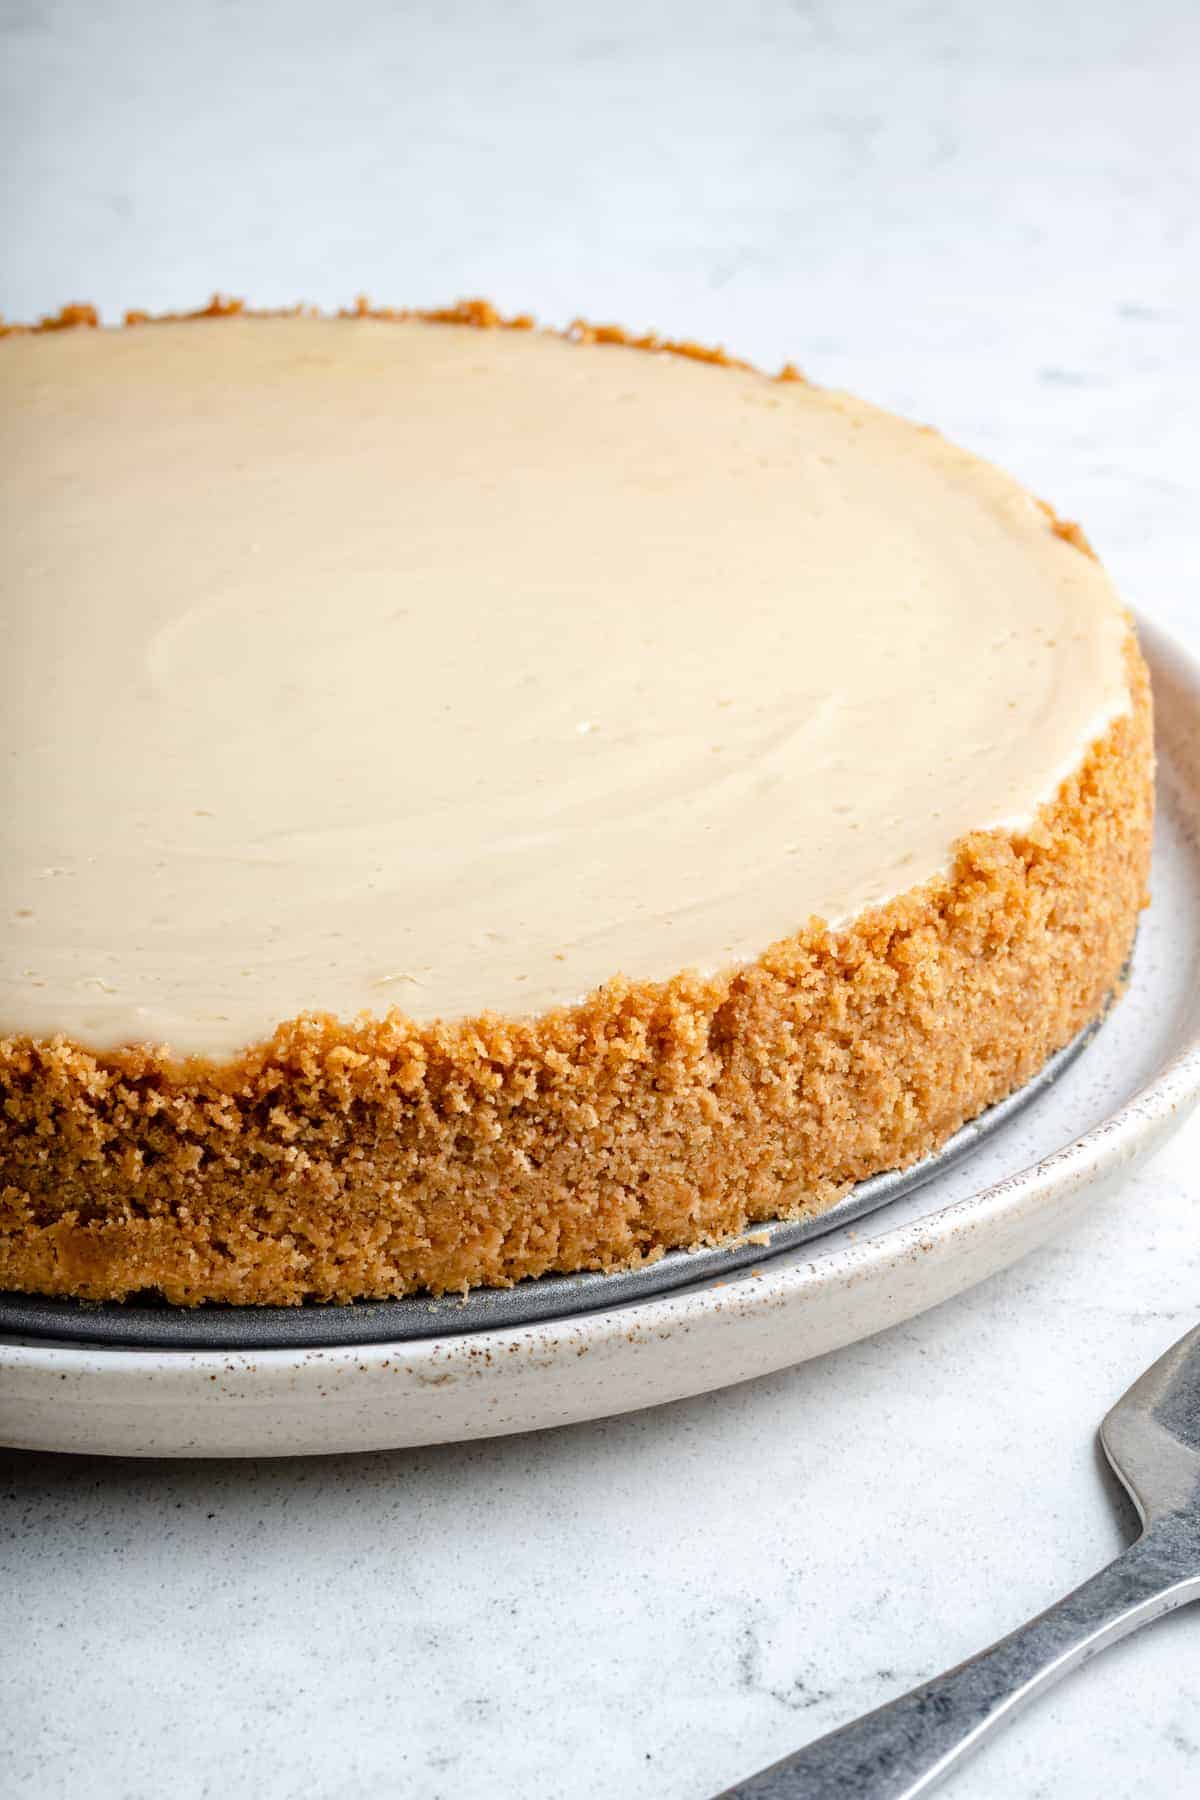
Remove the Cake from the Pan: Transfer the springform pan to a wire rack and run a small paring knife around the edges of the pan to loosen the cake. Let it sit at room temperature for anywhere between 1-3 hours to cool completely. After that, place the cheesecake in the fridge to set for at least 6 hours (overnight is even better!).
Tips for Success
Making cheesecake is complicated, as you can see, so I’ve got some substitutions and overall tips that can help you out before you start:
- How to Get the Coconut Cream: You’ll need 2 cans of full fat coconut milk in the fridge to extract the coconut cream (if you can find coconut cream itself, that’s even better!).
- How to Extract the Coconut Cream: Leave the cans in the fridge for overnight, or at least 12 hours (don’t shake them), then open and scoop off the thick white coconut cream part only.
- What to Do with the Leftover Coconut Water and Cream: You can use the coconut water in smoothies or drink it! If you have extra leftover coconut cream, you can add it to smoothies, curries, to a pasta sauce, and anything you want an extra creamy addition!
- Let ALL Ingredients Come to Room Temp: Bring all ingredients to room temperature, including the separated coconut cream already scooped out of the can. This will mean it’ll probably get thin again but that’s okay since it’s already separated from the coconut water, and that’s all we really wanted. Bringing the ingredients to room temperature also helps to mitigate developing cracks.
- A Cream Substitution to Keep in Mind: You can sub ½ cup of the coconut cream for vegan yogurt. (Instead of asking you to buy a whole host of ingredients, I figured it would make more sense to just grab two cans of coconut milk.)
- If You’re Using Digestive Biscuits: Break them up a little bit before putting them in your food processor to help it blend.
- Refrigerate the Cheesecake After Cooling: If you try to serve it immediately, it will be too soft, and probably will not hold. Chilling it in the fridge (overnight, if possible) will help the cake set and firm up a little.
- What to do if your cheesecake crust cracks: Cracks happen. When we tested this, and tested, and tested, ours didn’t (as you can see in the photos!). But sometimes you forget to bring the cheesecake to room temperature, or over beat, or your oven is wonky. Cracks aren’t that big of a deal for a still beautiful, and still delicious homemade cheesecake. But here’s where to do if it does. You can try to use a hot knife (dipped in boiling water for 15 seconds then wiped clean) and gently spread the top over to try and cover the crack. OR, Cover it with a sauce (such as a cooled fruit sauce or my Caramel Sauce ), or with sliced fruit.
Serving Suggestions
Once you have the cheesecake done (finally) what should you serve with it/on it? There are a couple of different ways you could go about this. Here are my thoughts:
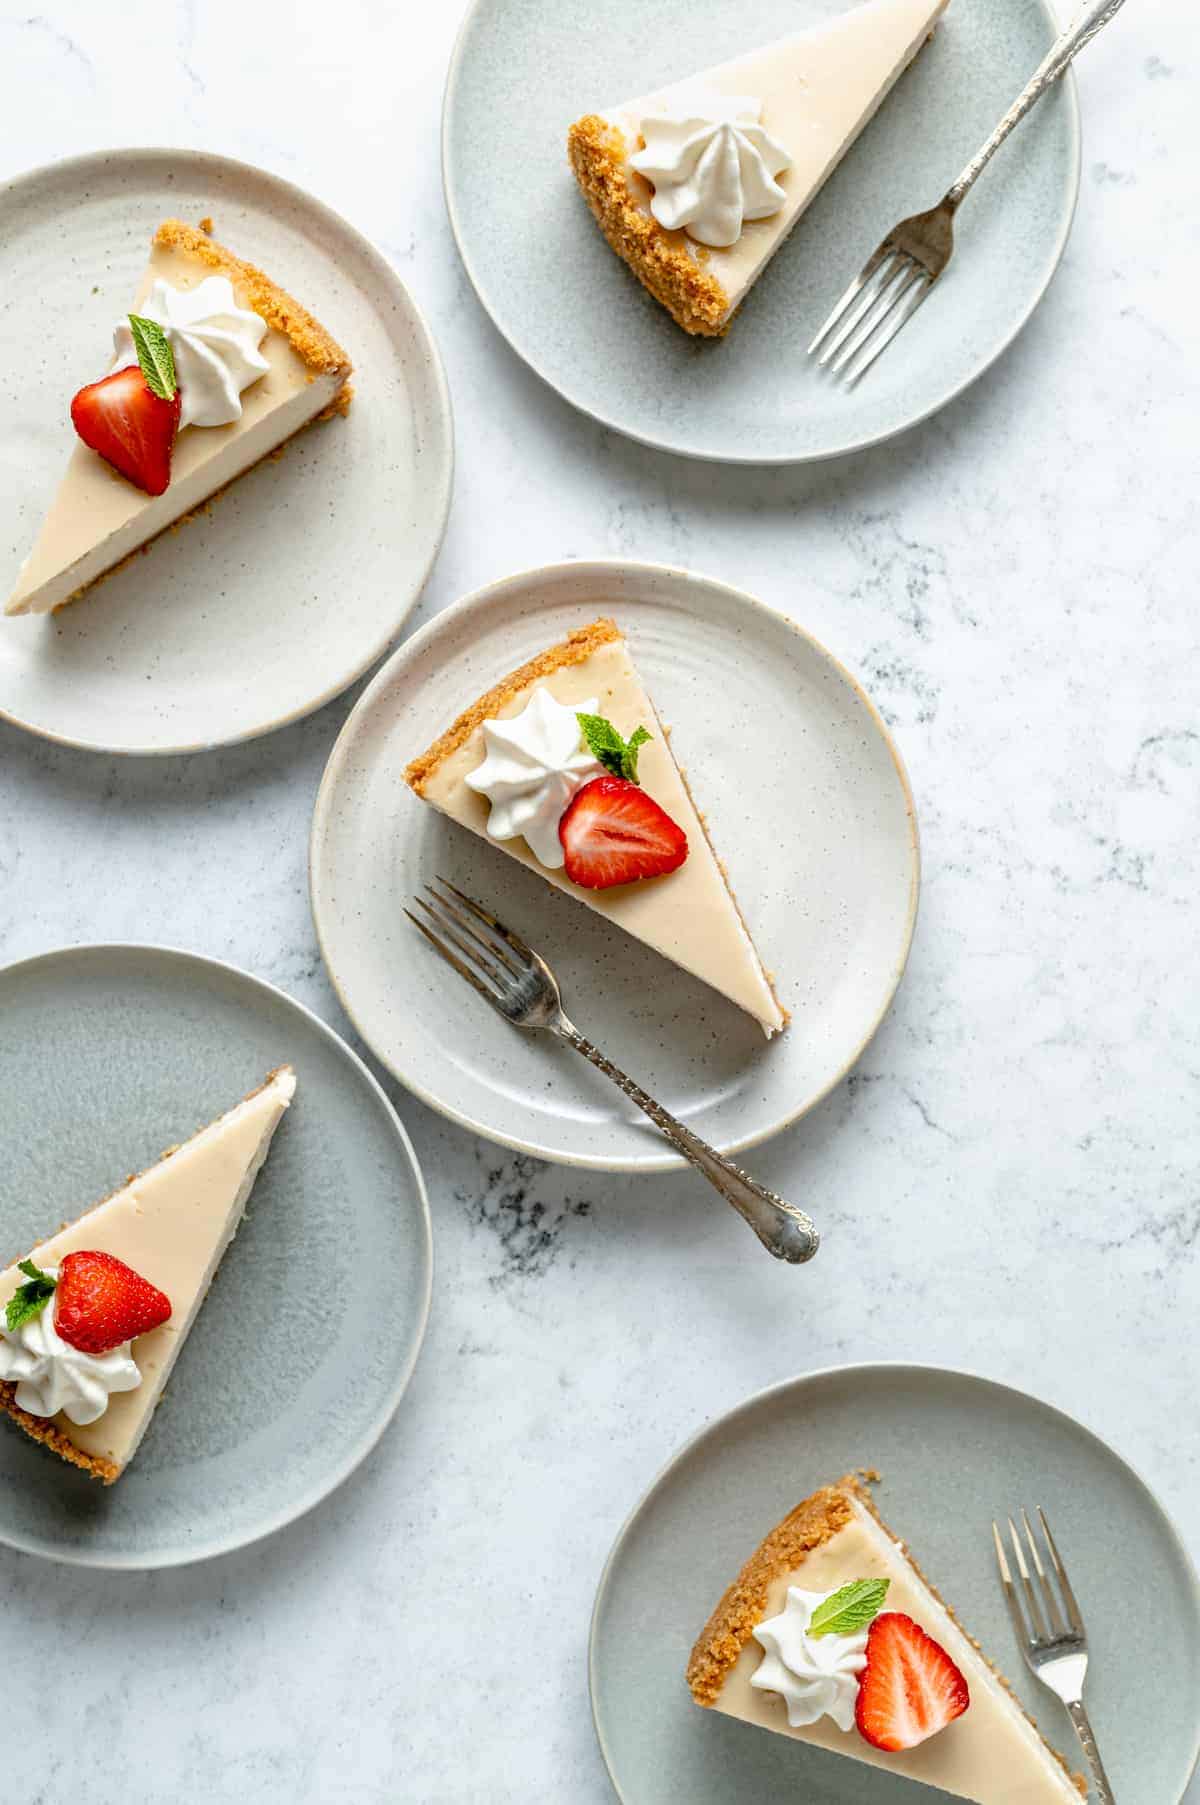
- With Fruit: I love to serve this vegan cheesecake with a strawberry on top. I think fresh fruit pairs perfectly with the rich yet subtle vanilla flavor. You can also serve a slice with raspberries, blueberries, or other sliced fruit, if desired.
- With Caramel Sauce: A drizzle of my vegan caramel sauce would taste amazing on vanilla cheesecake. You could also do chocolate sauce, or try a homemade raspberry sauce if you’re a big fan of fruit.
- With Whipped Cream: This Coconut Whipped Cream recipe is one of my go-to toppings when I’ve got something sweet on the table!
How to Store Homemade Cheesecake
Place your vegan cheesecake into an airtight container in your fridge to store properly! You could also wrap foil around it, or a reusable wrap/seal. It should keep in the fridge properly for 4-5 days – but I doubt it will take you that long to get to it!
Can I Freeze This?
You can! I like to freeze individual slices of vegan cheesecake in airtight containers so that I can save a sweet treat for when I need it. These slices generally keep for 3-4 months. Make sure you let them thaw overnight in the fridge or even for 1 hour on the counter before eating again.
Ingredients
For the 10" Crust
- 12 ounces graham crackers , or 340g, use digestive biscuits if you can’t find Graham crackers – I used digestive biscuits
- 4 tablespoons brown sugar , add another tbsp if you prefer a much sweeter crust
- 8 tablespoons vegan butter , or 112g, melted (salted or unsalted is fine)
- pinch of sea salt , if using unsalted butter
For the Filling
- 32 ounces vegan cream cheese , I used 4 8-ounces blocks (32 ounces/907g total)
- 1 ¼ cups brown sugar , (250g)
- 5 tablespoons cornstarch , (37.5g)
- 1 ⅓ cups full fat coconut cream , only the white part from the can (⅓ of this is stirred together with the cornstarch)
- 2 teaspoons vanilla extract
- 3 tablespoons fresh lemon juice
- ¼ teaspoon sea salt
Instructions
For the Crust
- Adjust an oven rack to the lower-middle position and preheat the oven to 350 degrees Fahrenheit/180C.
- In a food processor, process the graham crackers/digestive biscuits and the sugar until you have fine crumbs. Add the butter while pulsing, bit by bit, for about 10 1-second pulses.
- Transfer the crumb mixture to a sprayed/ buttered 9-inch springform pan and press evenly into the bottom. If desired, you could also line the pan with parchment paper but it is not necessary. Pack the crumbs into the base of the springform pan, and also slightly up the sides.
- Bake for 10 minutes, until fragrant and golden brown. Remove from the oven, and cool on a wire rack to room temperature. Once cooled, wrap in aluminum foil, ensuring that the foil goes all the way up the sides and around the pan (this is for the water bath).
For the Filling
- Change the temperature to 325°Fahrenheit/165°Celsius.
- In a bowl of a stand mixer, beat the cream cheese to break it up and soften it slightly, about 10 seconds. With the machine running, add the sugar mixture in a slow stream; and beat until combined, creamy and smooth – about 3 minutes on low. Scrape down the sides of the bowl as needed.
- In a small separate bowl, mix that ⅓ cup of the coconut cream with the cornstarch, stirring completely until the cornstarch is dissolved.
- Add that cornstarch mix and the remaining 1 cup coconut cream into the mixer, incorporating for about 15 seconds each. Scrape the bowl after each addition.
- Add the lemon juice, vanilla and salt and mix to combine.
- Give the bowl a final scrape and pour the mixture into the prepared springform pan. Place the foil wrapped pan into a roasting pan or really any oven safe pan large enough to fit it. Pour boiling hot water in the pan and at least half way on the sides of the pan.
- Place gently into the oven on the middle rack. Bake until the center jiggles slightly, the sides start to puff, and the surface is no longer shiny, about 70 to 75 minutes and no longer. Turn off the oven and prop the door of the oven open with a potholder or wooden spoon to allow some heat to escape. Allow the cake to cool in the oven for about an hour.
- Transfer the springform pan to a wire rack and run a small paring knife around the edges of the pan to loosen the cake. Let it sit at room temperature for anywhere between 1-3 hours to cool completely. After that, place the cheesecake in the fridge to set for at least 6 hours (overnight is even better!).
- Top with your favorite toppings, slice and enjoy! Place the cheesecake into an airtight container in your fridge to store properly! You could also wrap foil around it, or a reusable wrap/seal.
Notes
- How to Get the Coconut Cream: You’ll need 2 cans of full fat coconut milk in the fridge to extract the coconut cream (if you can find coconut cream itself, that’s even better!).
- How to Extract the Coconut Cream: Leave the cans in the fridge for overnight, or at least 12 hours (don’t shake them), then open and scoop off the thick white coconut cream part only.
- What to Do with the Leftover Coconut Water and Cream: You can use the coconut water in smoothies or drink it! If you have extra leftover coconut cream, you can add it to smoothies, curries, to a pasta sauce, and anything you want an extra creamy addition!
- Let ALL Ingredients Come to Room Temp: Bring all ingredients to room temperature, including the separated coconut cream already scooped out of the can. This will mean it’ll probably get thin again but that’s okay since it’s already separated from the coconut water, and that’s all we really wanted. Bringing the ingredients to room temperature also helps to mitigate developing cracks.
- A Cream Substitution to Keep in Mind: You can sub ½ cup of the coconut cream for vegan yogurt. (Instead of asking you to buy a whole host of ingredients, I figured it would make more sense to just grab two cans of coconut milk.)
- If You’re Using Digestive Biscuits: Break them up a little bit before putting them in your food processor to help it blend.
- Refrigerate the Cheesecake After Cooling: If you try to serve it immediately, it will be too soft, and probably will not hold. Chilling it in the fridge (overnight, if possible) will help the cake set and firm up a little.
- What to do if your cheesecake crust cracks: Cracks happen. When we tested this, and tested, and tested, ours didn’t (as you can see in the photos!). But sometimes you forget to bring the cheesecake to room temperature, or over beat, or your oven is wonky. Cracks aren’t that big of a deal for a still beautiful, and still delicious homemade cheesecake. But here’s where to do if it does. You can try to use a hot knife (dipped in boiling water for 15 seconds then wiped clean) and gently spread the top over to try and cover the crack. OR, Cover it with a sauce (such as a cooled fruit sauce or my Caramel Sauce ), or with sliced fruit.
More Vegan Dessert Ideas
On the search for more easy vegan dessert recipes? If so, these are a few of my favorites:
- Vanilla Cake with Buttercream Frosting
- Chocolate Sheet Cake
- Vegan Brownies
- Pecan Pie
- Vegan Ice Cream
