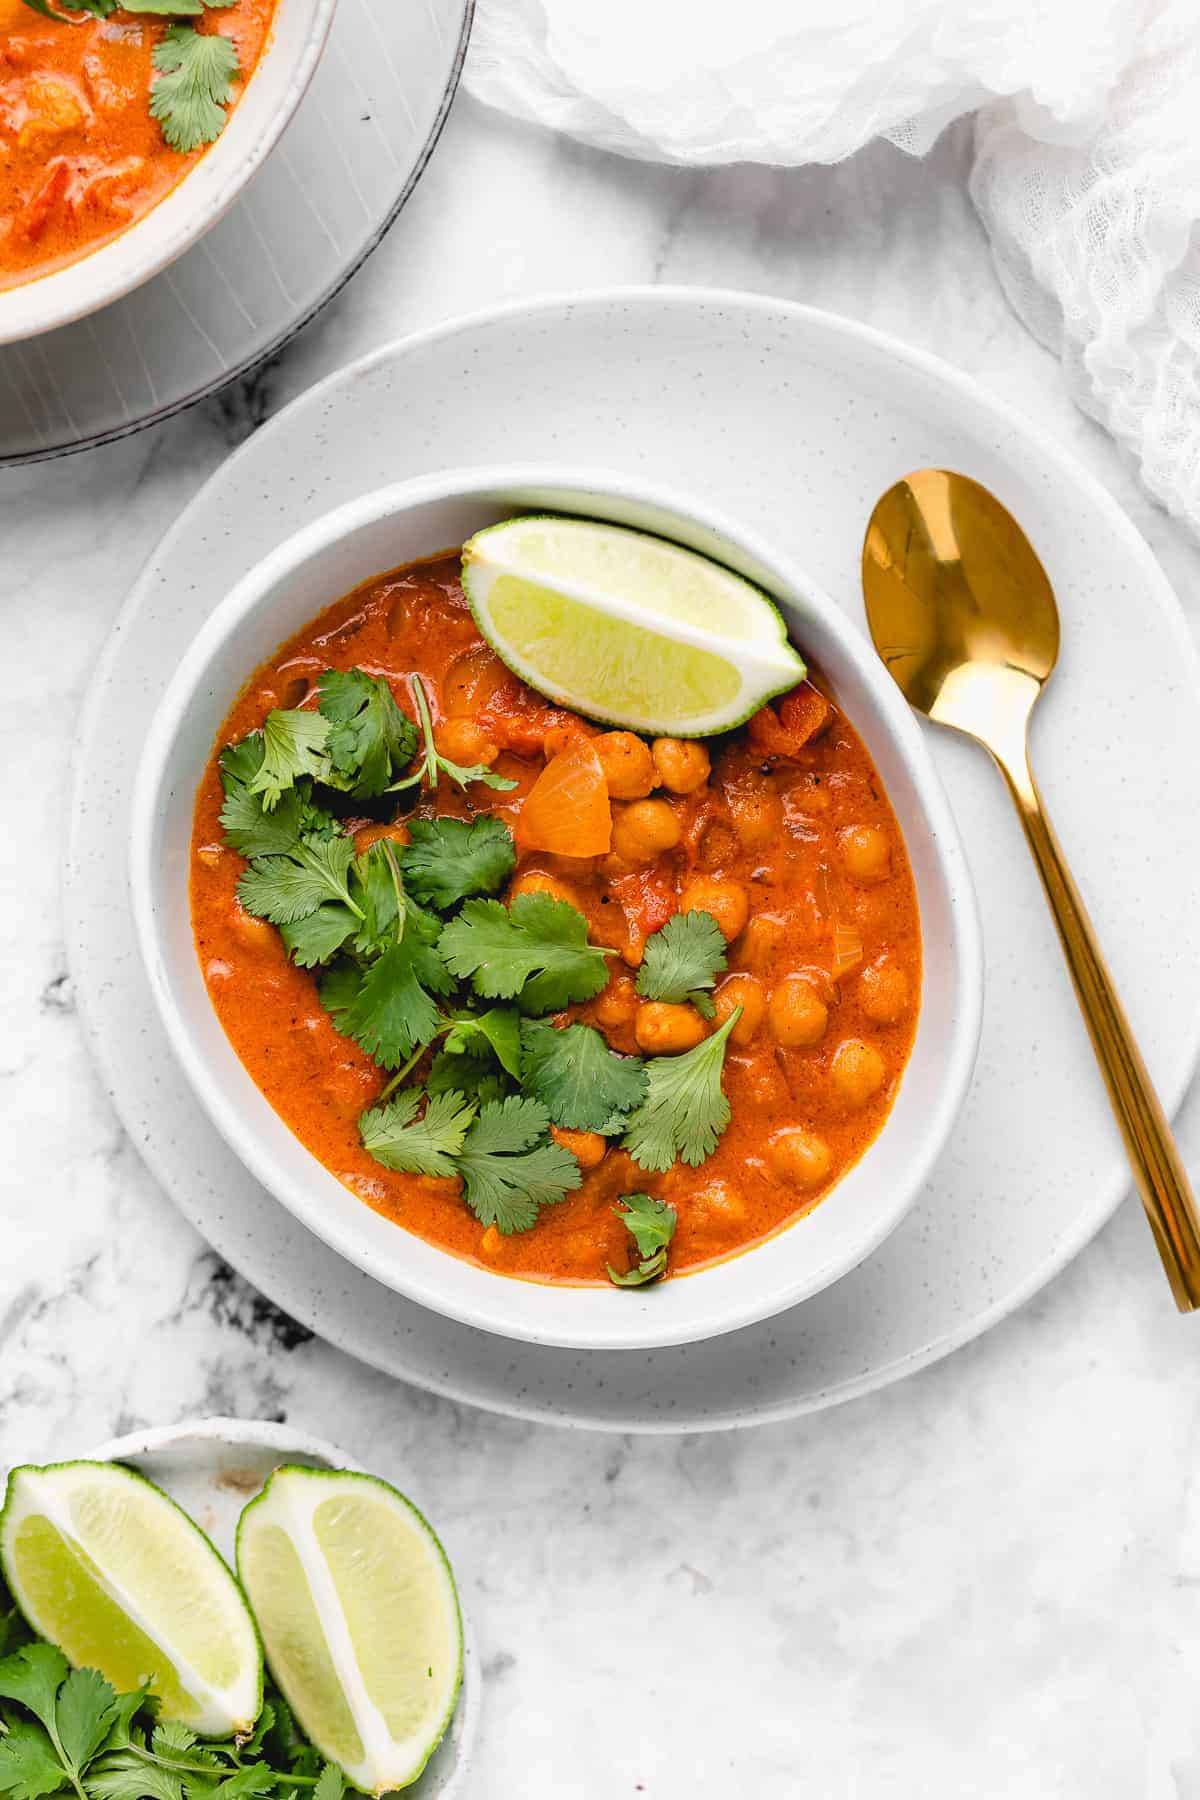
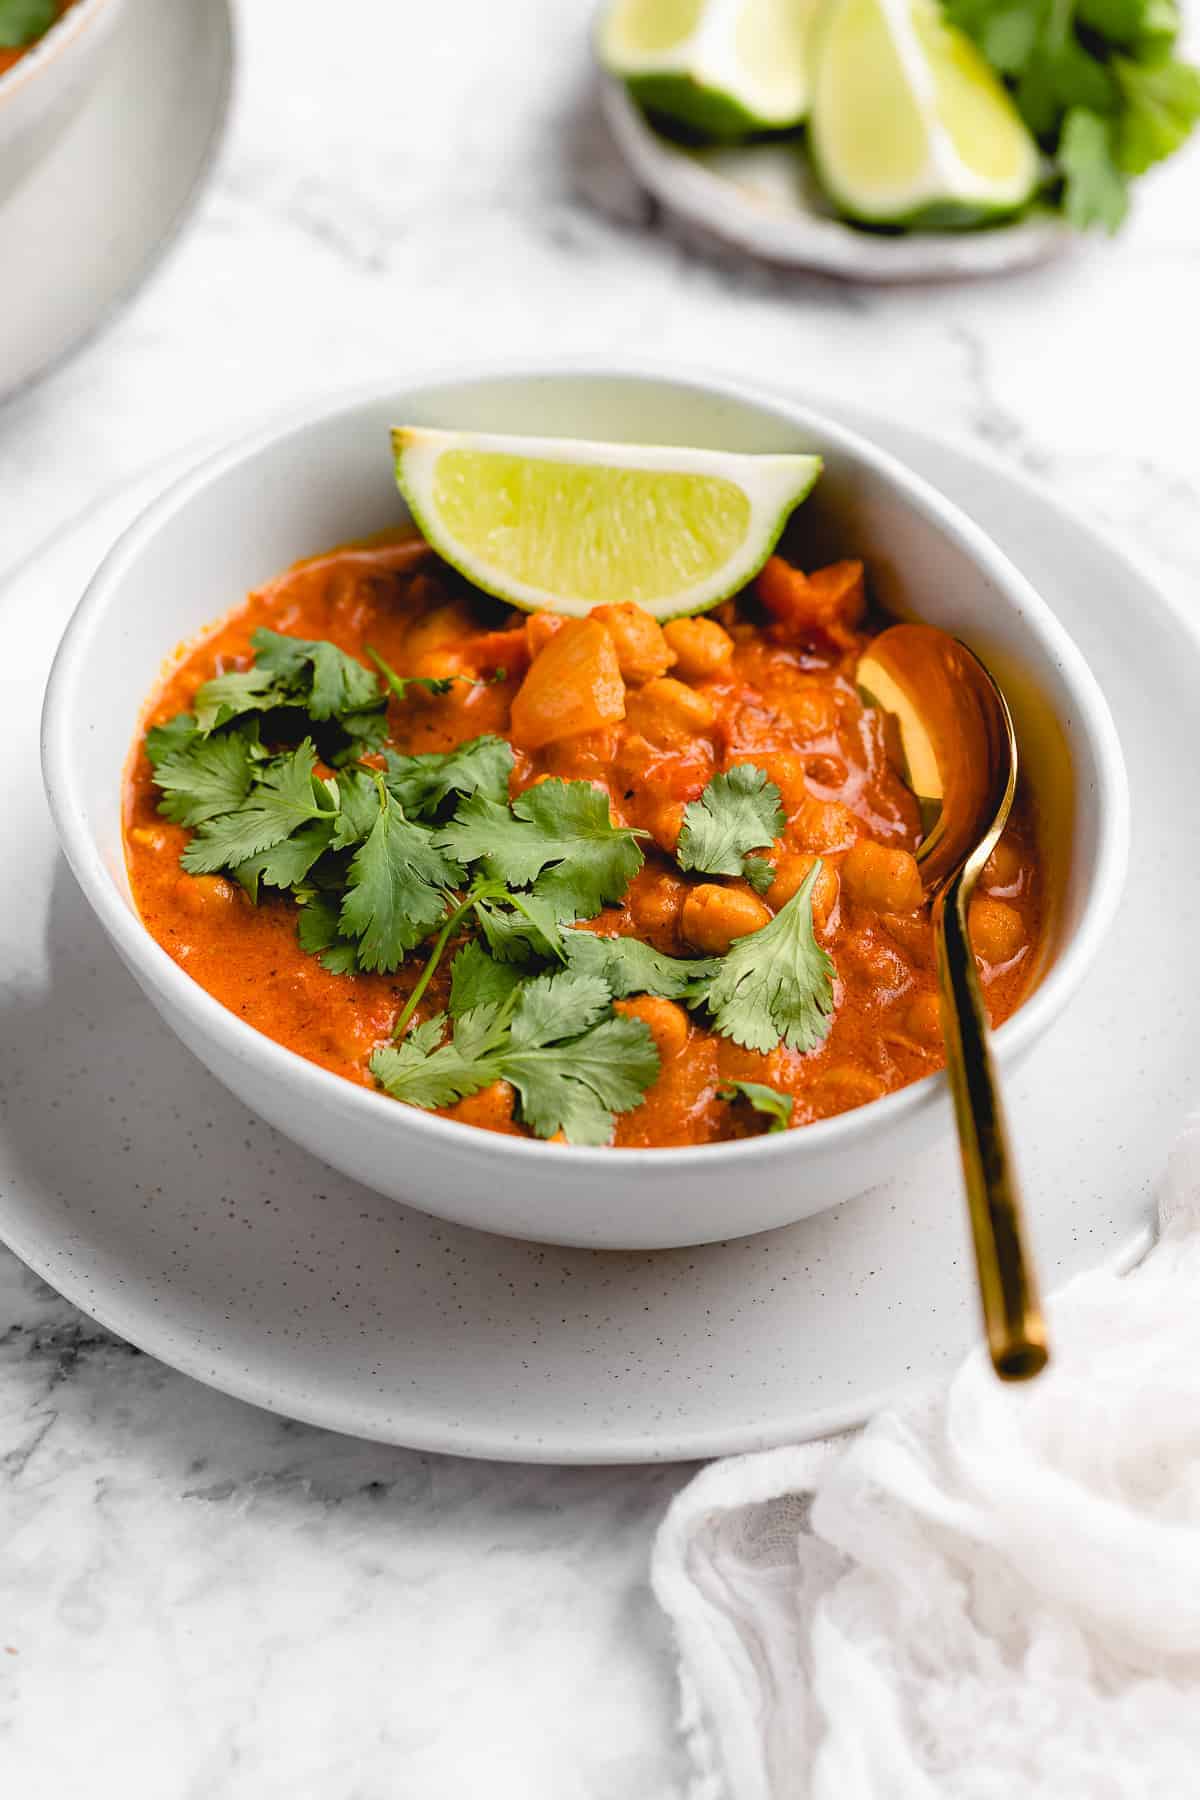
This Creamy Vegan Coconut Chickpea Curry is the BEST curry recipe I’ve ever tried! All made in one pot, this easy vegan curry is incredibly flavorful, perfect for meal prep, budget-friendly, and one of our go-to weeknight dinner s!
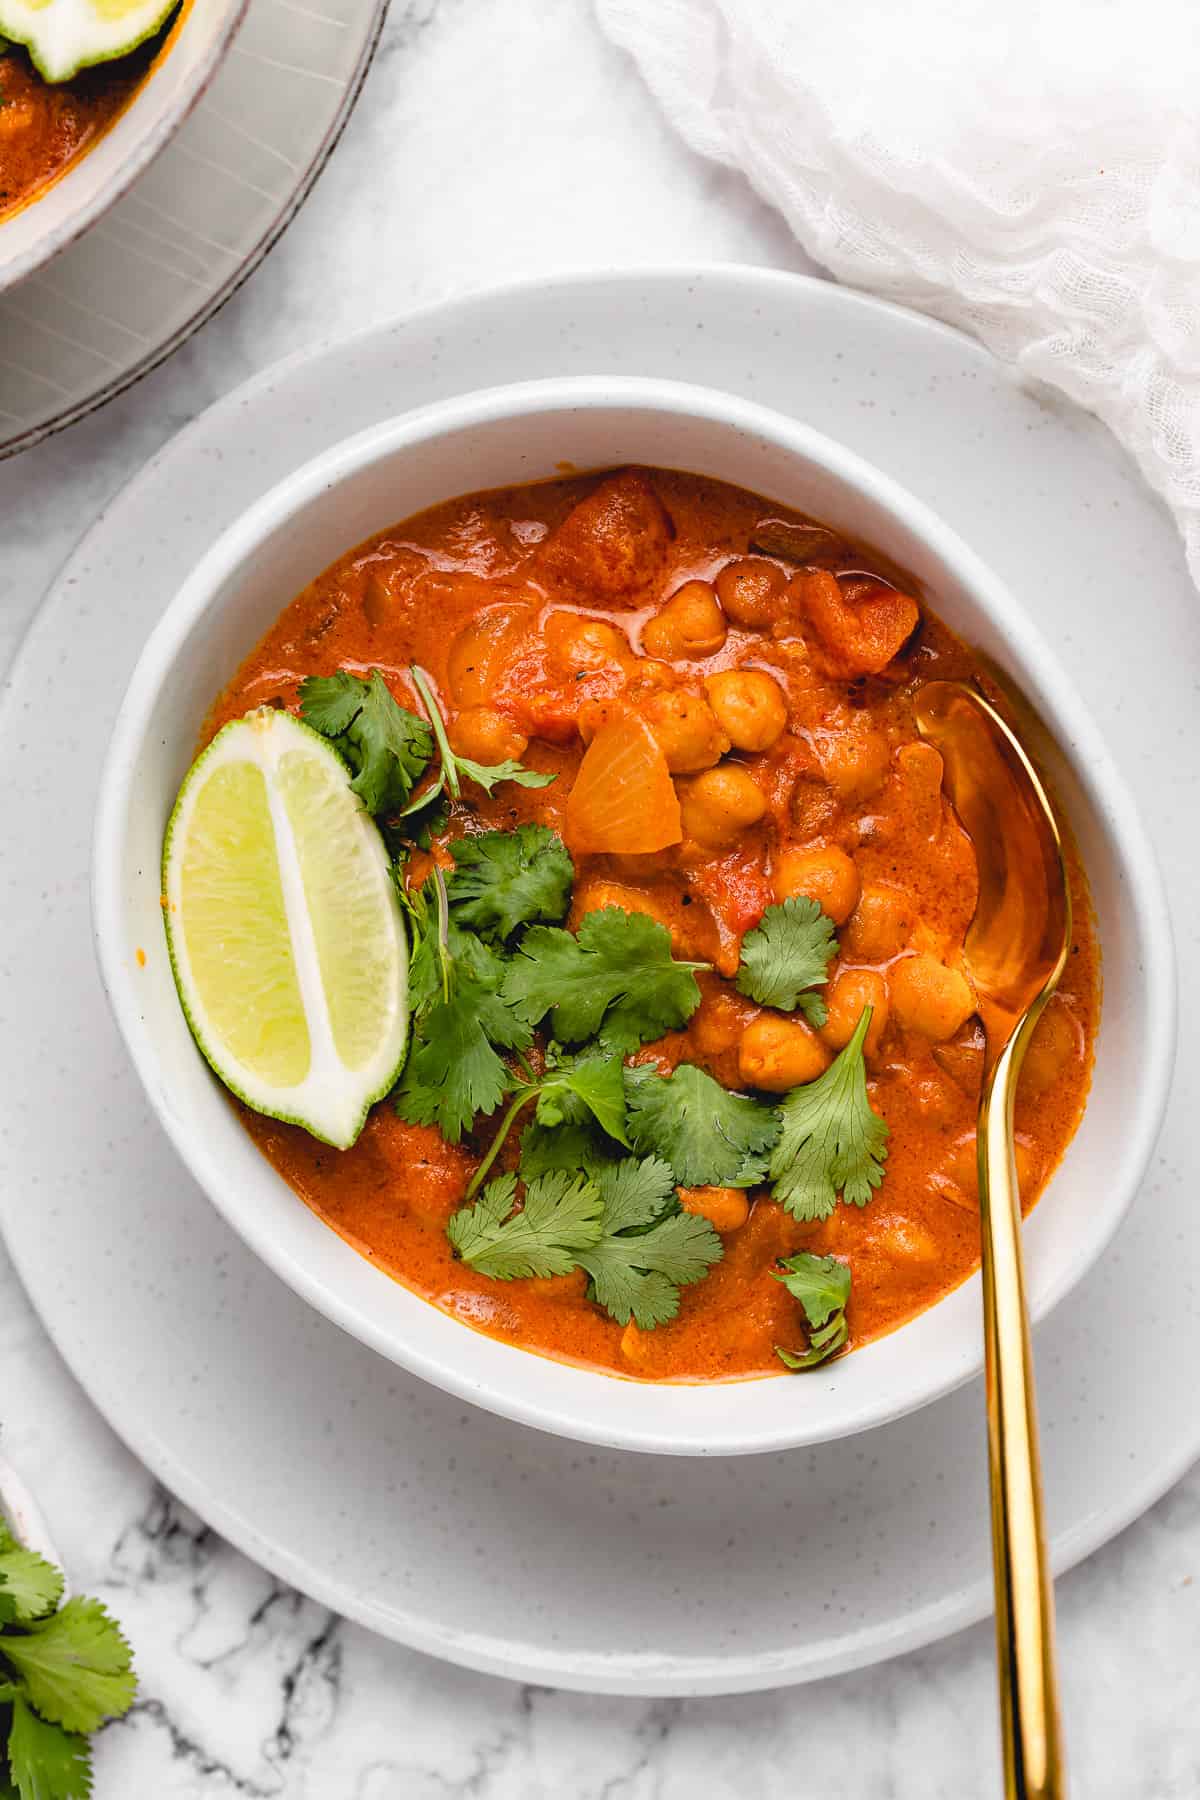
The best kind of recipes are the ones that you keep making over and over again, until you finally realize – this is one of my favorite recipes. That’s this Vegan Coconut Chickpea Curry. Without a doubt it is our FAVOURITE recipe. We always have all the ingredients in our pantry and it’s incredibly easy to make. Everybody always comes back for seconds!
What Makes this Chickpea Curry So Good?
- It’s packed with flavor: While the cooking process itself is simple, the flavors are out of this world. You’ll definitely feel like you’re eating something that took all day to make (except it didn’t!).
- Quick & easy to make: You’ll only need one pot and 45 minutes to make this vegan dinner. The most effort required is when you prep the ingredients.
- A meal prep super star: You’ll have leftovers last for days! This recipe is perfect for meal prep, too.
Notes on the Ingredients
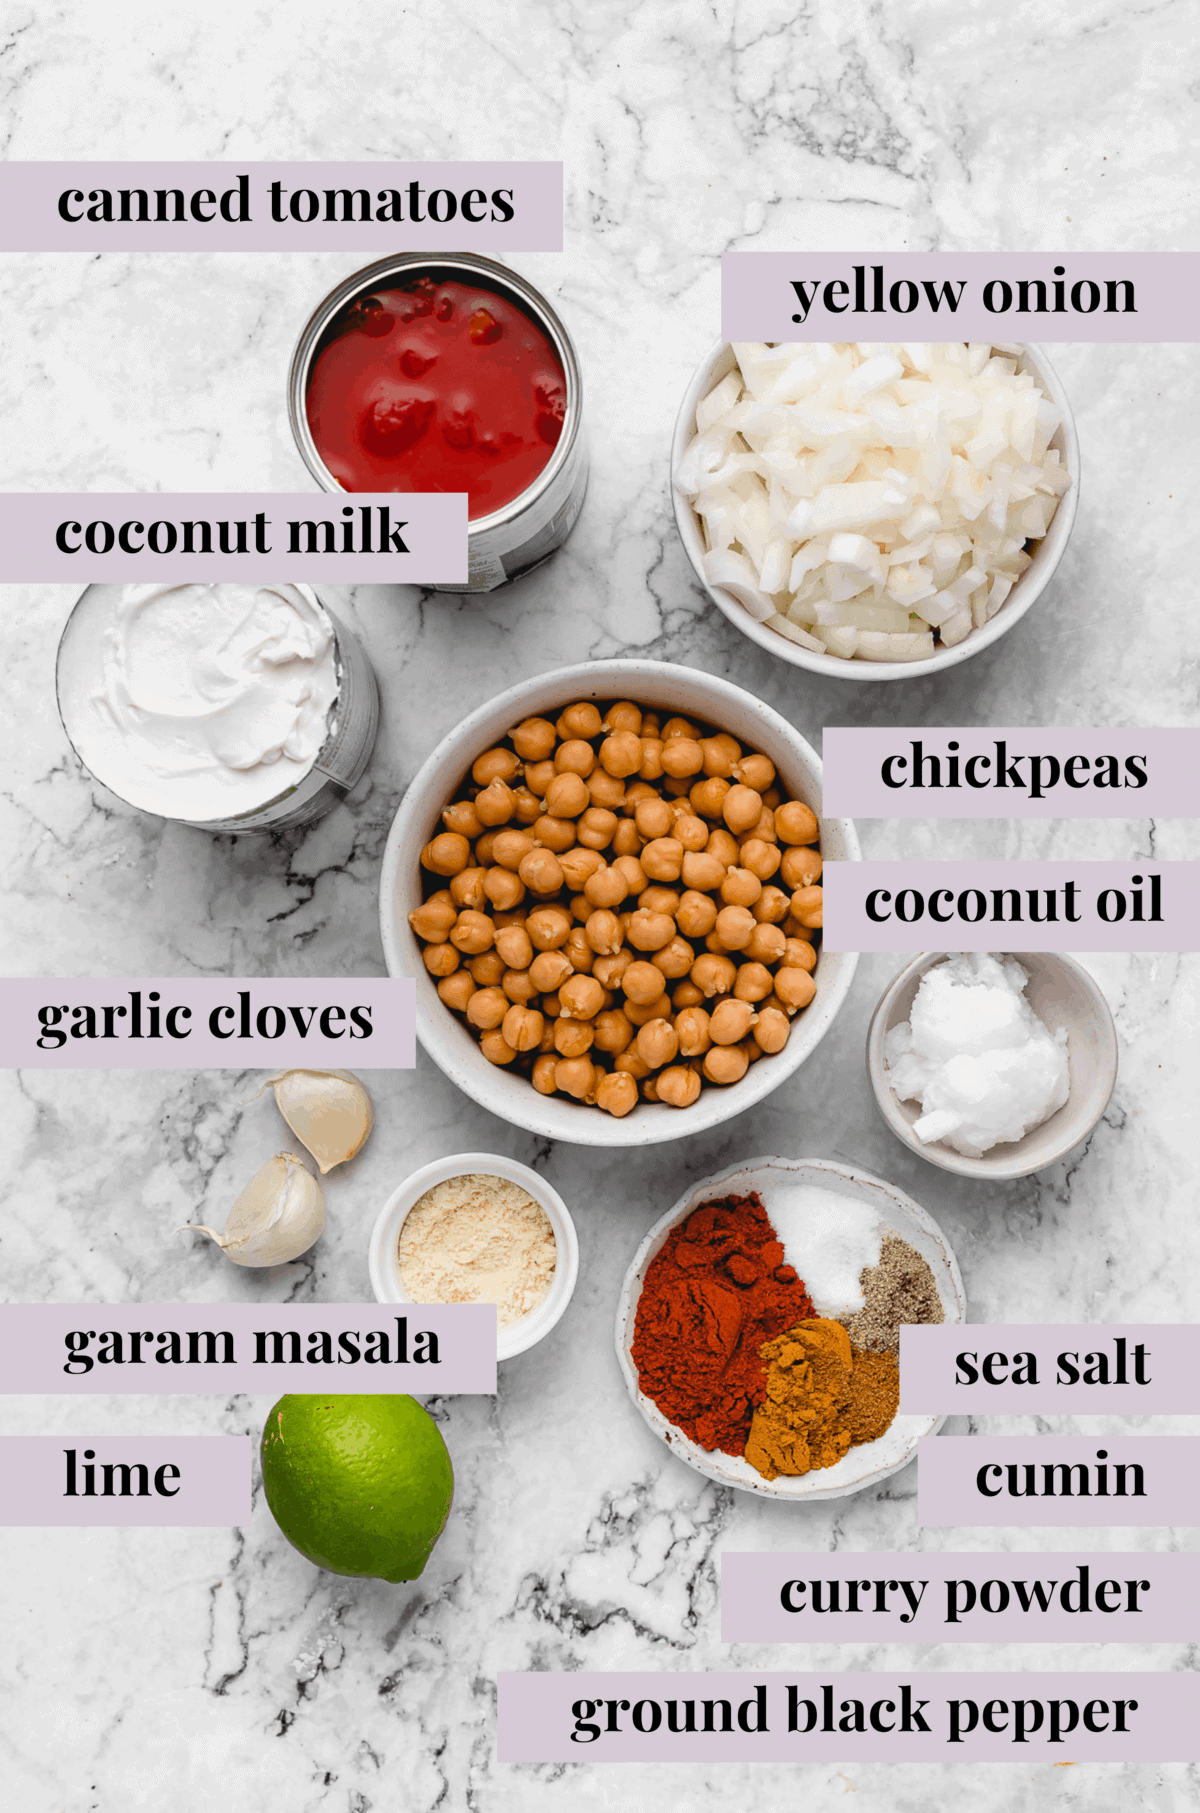
Though we usually have everything we need for this recipe on our pantry shelves, you may have to run to the store for a few odds and ends. Totally worth it, though! Here’s a list of all the essentials:
- Chickpeas – Chickpeas are the star here. They add fiber, texture and make the curry a filling, protein packed meal. I wouldn’t recommend substituting this since it’s the base. Also make sure to drain and rinse them.
- Tomatoes, Onion and Garlic – These veggies are the base of your curry and really add a depth of flavor. If you don’t like tomatoes, you won’t distinctly taste them. However, you can substitute the tomatoes with pumpkin puree, a butternut squash puree or something of the sort. The curry won’t taste exactly the same, but it will give it that beautiful creamy texture!
- Coconut Milk – Coconut milk adds the creaminess to this curry and is what makes the sauce so smooth. I recommend using full fat canned coconut milk.
- Coconut Flour – This is optional, but it will thicken up the curry a little bit. You can also use regular flour.
- Coconut Oil – The oil is for sautéing the onions and tomatoes.
- Garam Masala – This is the main seasoning blend in this recipe! If you can’t find it, you can make your own .
- Additional Seasonings – These extra seasonings (sea salt, ground black pepper, curry powder , cumin and garlic) are simple and compliment the Garam Masala.
- Lime – Ah yes, our other star ingredient! Lime juice adds a subtle citrus note that brings everything together in such a delightful way. Don’t skip it!
How to Make Vegan Coconut Chickpea Curry
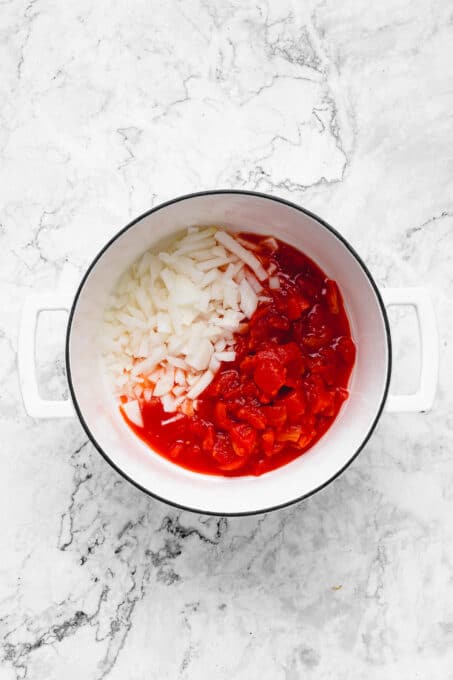
Heat the Oil: In a deep pot over medium-high heat, add the coconut oil. Add in the Onions and Tomatoes: Grind some sea salt and ground black pepper over the mixture and stir together. Lower heat to medium and allow to cook down until juices of the tomatoes are naturally released and onions are soft, about 10 minutes. I’ve found that this step really helps to develop the flavors of the dish and break them all down for the seasonings later.
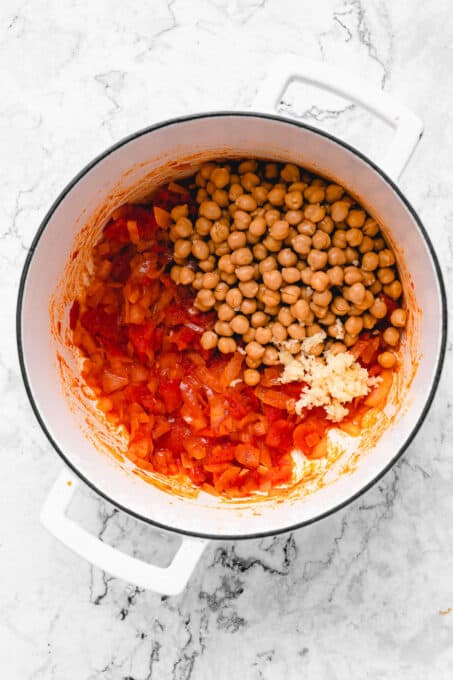
Add in the Chickpeas: Also mix in the garlic, garam masala, curry powder and cumin. Stir to combine.
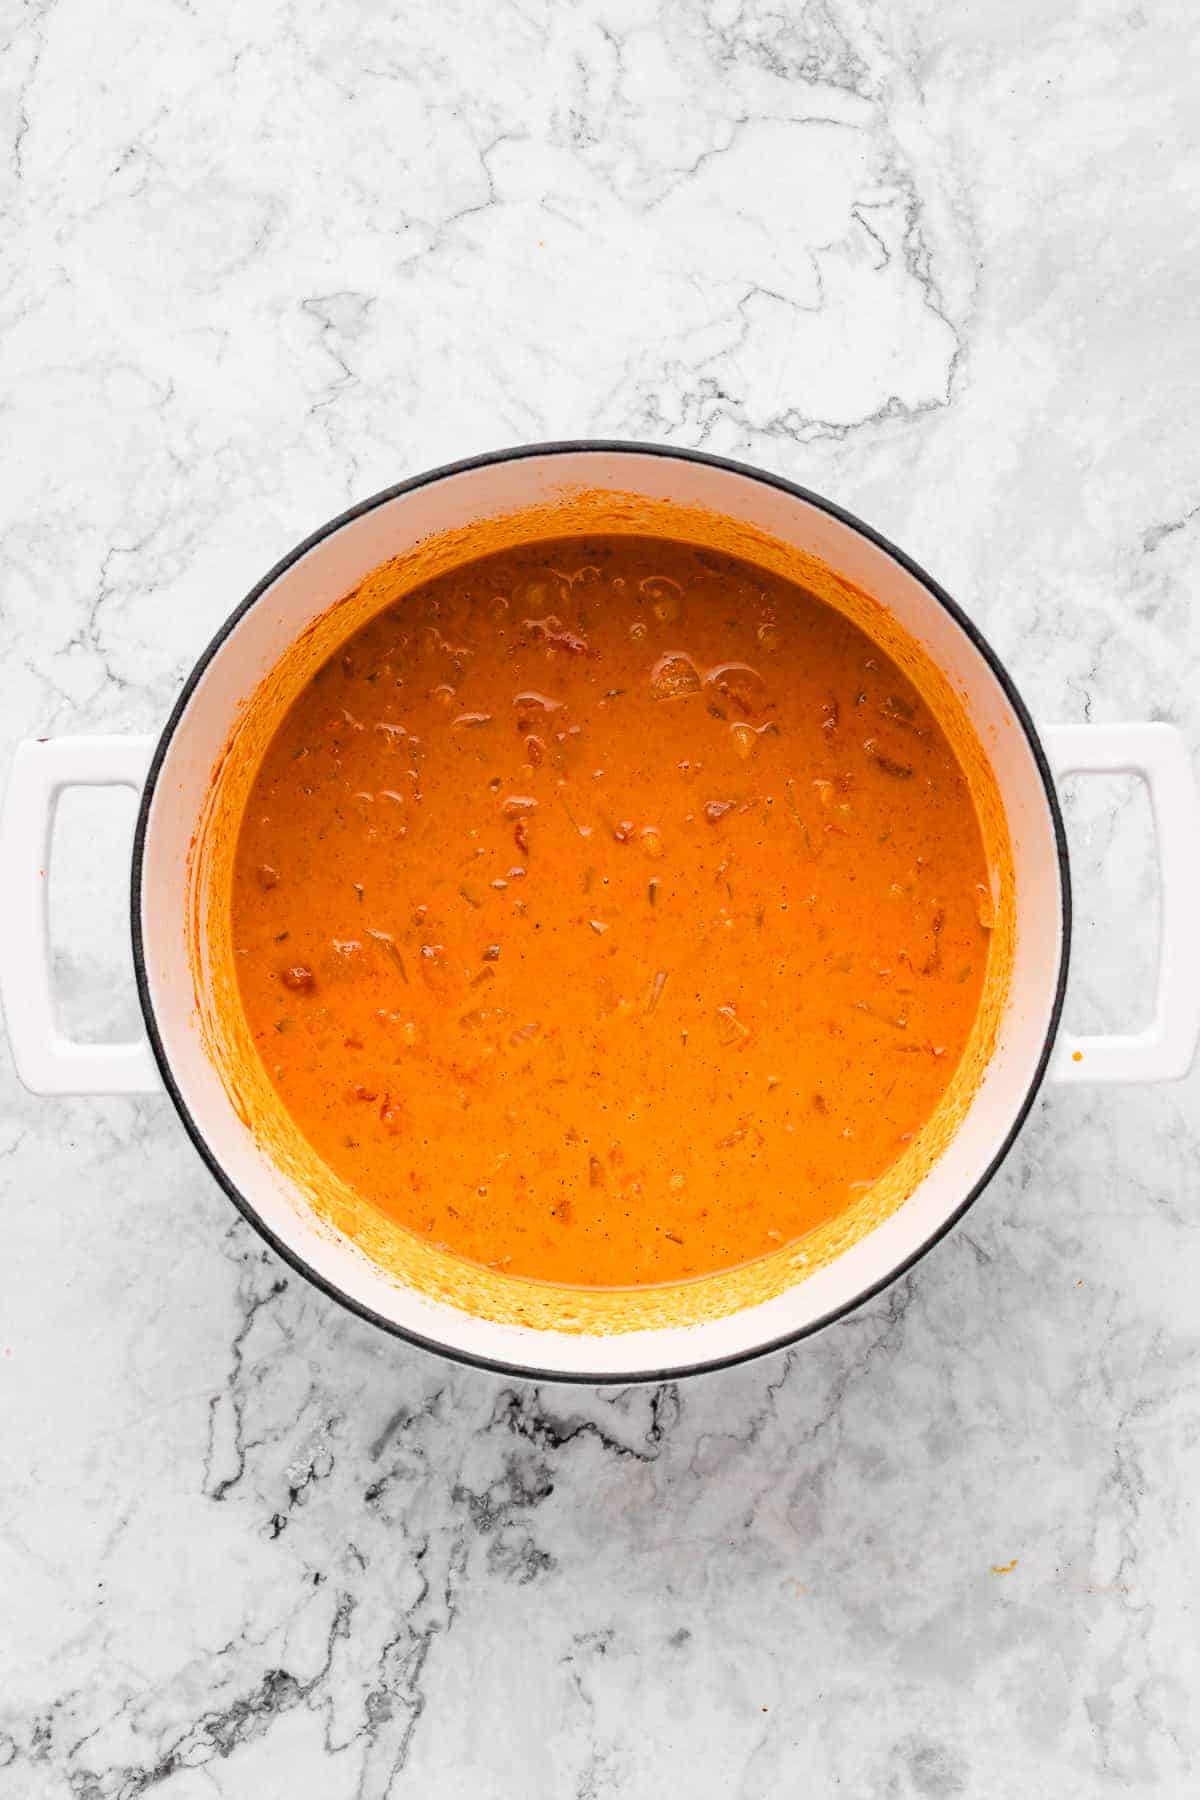
Add in the Coconut Milk and Stir Again: Add in the coconut flour (or any flour, optional) which helps to slightly thicken the curry. Bring the curry to a boil, and then reduce to medium-low so that the mixture continues to simmer for 10 to 12 more minutes.
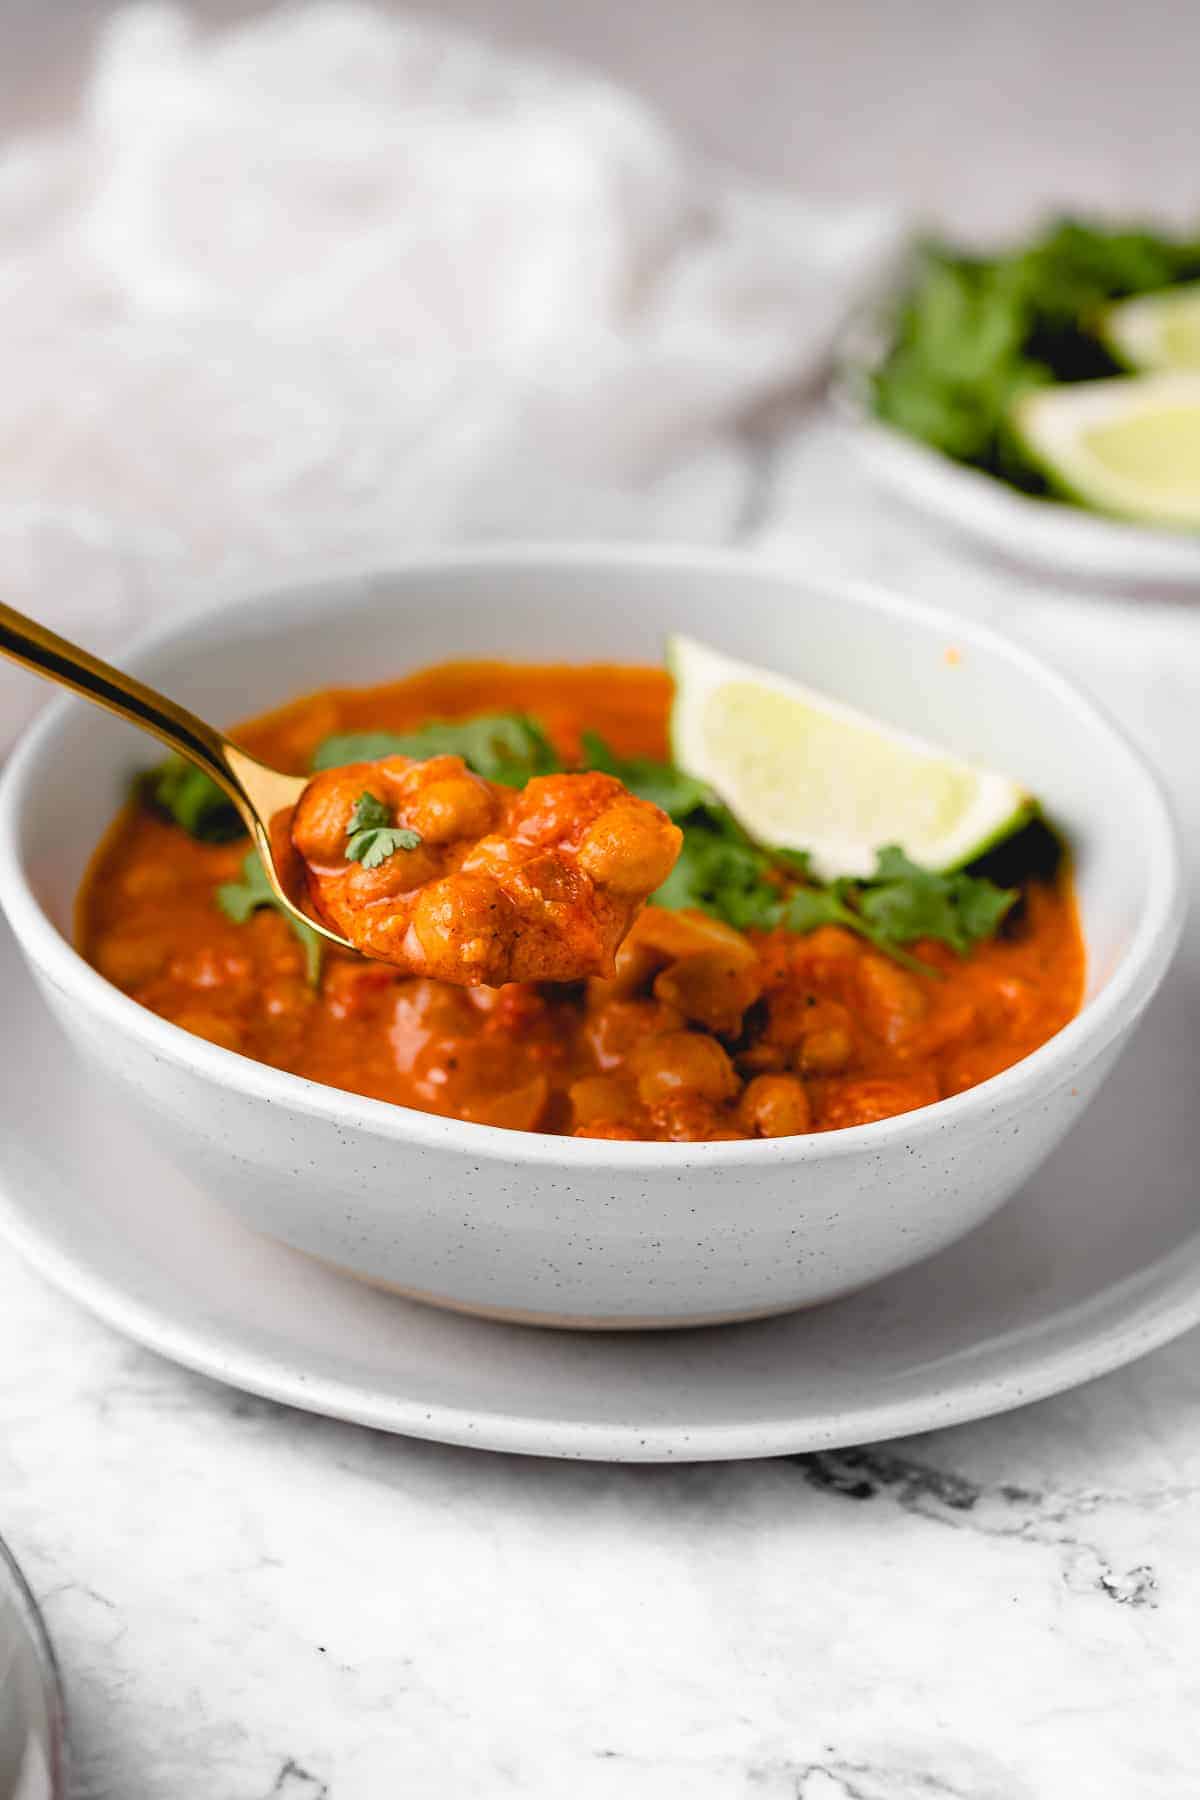
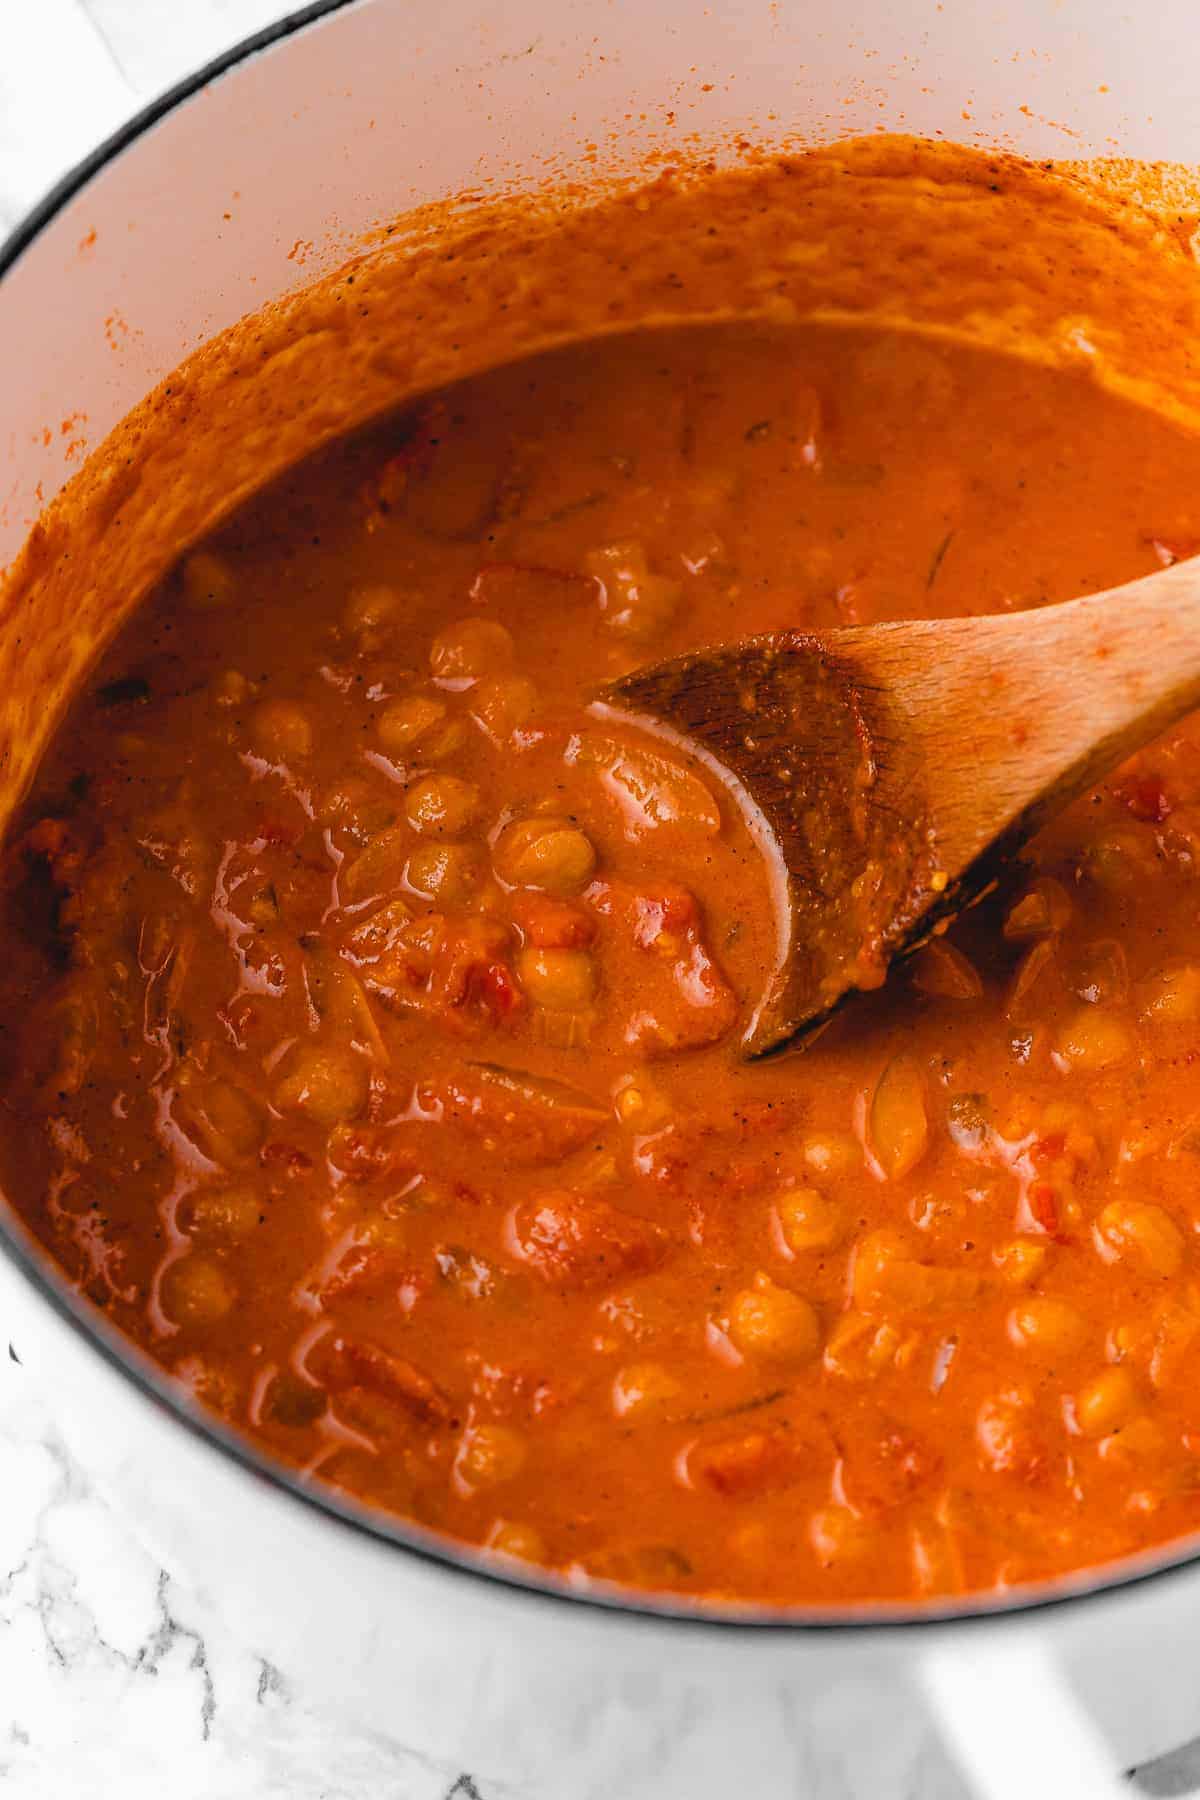
Serve and Enjoy: Taste the curry and season with salt and pepper if you desire. Remove the curry from the heat and squeeze a lime lightly over the top of the curry, stirring to combine. Don’t skip this step!! Allow to cool slightly and then serve. Enjoy!
Tips for Success
As far as vegan dinner ideas go, this one is pretty easy! Chickpea curry will take you 45 minutes tops to prepare and plate, and you’ll have fun doing it too – there’s a lot of room for culinary creativity. Here are some tips that will help you get the best results with your curry:
- Always use the lime . If there’s one tip I always mention for this recipe, it is to always use the lime. It really brings out the layers of flavor in the dish and is an essential part of the recipe!
- Follow the instruction times . Sautéing the veggies makes a real difference to the end product, so I recommend just setting a time and avoiding any temptation to rush this recipe. You will be rewarded.
- Try not to use light coconut milk. This will reduce the richness and creaminess of the curry. It’s okay to do so if you are looking to cut down on fat content, but just be aware of the flavor/texture changes that will occur.
- Make it your own . This is one of those dishes that once you follow the base ingredients well, you can make the dish your own. Add in sweet potatoes, bell peppers, spinach, broccoli, cauliflower, carrots… it’s up to you. Just taste as you go along and adjust the seasonings for the additions! I love using up extra veggies and adding them into this dish.
- Can I substitute the tomatoes? If you’re not a tomato fan, you won’t taste them. They blend right in and help with the thickness of the curry and all that flavour. If you’re allergic, you can in fact substitute them with pumpkin puree, or a butternut squash puree or something of the sort. It won’t taste exactly the same, but will give it that beautiful creamy texture!
Serving Suggestions
Once you have a pot of coconut chickpea curry, what should you serve with it? A great question. There are many options, but here are just a few ideas:
- Vegetables: As I mentioned above, throw whatever vegetables you like into this curry. Carrots, sweet potato, peppers, you name it – whatever you can think of will make a great add-in!
- Rice: My go-to is Basmati rice, but you can use regular white rice, brown rice, rice noodles, etc. You could even make some cauliflower rice !
- Bread: If you’re not a big fan of rice, try some naan bread ! It’s perfect for sopping up all of that extra curry sauce, and it’s so easy to make.
How to Store and Reheat Leftovers
This coconut curry can be refrigerated in an airtight container for 3-4 days. To reheat, simply microwave for 30-40 seconds, or heat a pot on low on the stovetop and cook the curry until it is warmed through again. You may want to add in some more coconut milk or water if the sauce is too thick.
Can I Freeze Extras?
Sure can! Freeze extra curry in an airtight container for 2-3 months. Pro Tip: store the curry in single servings so that you can thaw one-person lunches or dinners in the fridge throughout the week/month!
Ingredients
- 2 tablespoons coconut oil
- 1 medium red onion or yellow onion , diced
- 14 ounces fresh or canned tomatoes , diced (400g)
- sea salt & ground black pepper , to taste
- 16 ounces canned chickpeas , drained & rinsed (454g)
- 3 garlic cloves , minced
- 1 ½ tablespoons garam masala – I use this one
- 1 teaspoon curry powder I use this one
- ¼ teaspoon cumin
- 13.5 ounces canned coconut milk* , (383g)
- 2 teaspoons coconut flour , OPTIONAL**
- 1 small lime , juice of
Instructions
- In a deep pot over medium-high heat, add the coconut oil.
- Add in the onions and tomatoes. Grind some sea salt and ground black pepper over the mixture and stir together. Lower heat to medium and allow to cook down until juices of the tomatoes are naturally released and onions are soft, about 10 minutes.
- Add in the chickpeas, garlic, garam masala , curry powder and cumin. Stir to combine.
- Add in the coconut milk and stir again. Add in the coconut flour which helps to slightly thicken the curry. Bring the curry to a boil, and then reduce to medium-low so that the mixture continues to simmer for 10 to 12 more minutes.
- Taste the curry and season with salt and pepper if you desire. Remove the curry from the heat and squeeze a lime lightly over the top of the curry, stirring to combine. Don’t skip this step!! Allow to cool slightly and then serve. Enjoy!
Notes
More Vegan Curry Recipes
- Thai Red Curry with Tofu
- Thai Green Curry
- Sweet Potato Curry
- Red Lentil Curry
- Cauliflower and Potato Curry (Aloo Gobi)
This Creamy Vegan Coconut Chickpea Curry is the BEST curry recipe I’ve ever tried! All made in one pot, this easy vegan curry is incredibly flavorful, perfect for meal prep, budget-friendly, and one of our go-to weeknight dinner s!
The best kind of recipes are the ones that you keep making over and over again, until you finally realize – this is one of my favorite recipes. That’s this Vegan Coconut Chickpea Curry. Without a doubt it is our FAVOURITE recipe. We always have all the ingredients in our pantry and it’s incredibly easy to make. Everybody always comes back for seconds!
What Makes this Chickpea Curry So Good?
- It’s packed with flavor: While the cooking process itself is simple, the flavors are out of this world. You’ll definitely feel like you’re eating something that took all day to make (except it didn’t!).
- Quick & easy to make: You’ll only need one pot and 45 minutes to make this vegan dinner. The most effort required is when you prep the ingredients.
- A meal prep super star: You’ll have leftovers last for days! This recipe is perfect for meal prep, too.
Notes on the Ingredients
Though we usually have everything we need for this recipe on our pantry shelves, you may have to run to the store for a few odds and ends. Totally worth it, though! Here’s a list of all the essentials:
- Chickpeas – Chickpeas are the star here. They add fiber, texture and make the curry a filling, protein packed meal. I wouldn’t recommend substituting this since it’s the base. Also make sure to drain and rinse them.
- Tomatoes, Onion and Garlic – These veggies are the base of your curry and really add a depth of flavor. If you don’t like tomatoes, you won’t distinctly taste them. However, you can substitute the tomatoes with pumpkin puree, a butternut squash puree or something of the sort. The curry won’t taste exactly the same, but it will give it that beautiful creamy texture!
- Coconut Milk – Coconut milk adds the creaminess to this curry and is what makes the sauce so smooth. I recommend using full fat canned coconut milk.
- Coconut Flour – This is optional, but it will thicken up the curry a little bit. You can also use regular flour.
- Coconut Oil – The oil is for sautéing the onions and tomatoes.
- Garam Masala – This is the main seasoning blend in this recipe! If you can’t find it, you can make your own .
- Additional Seasonings – These extra seasonings (sea salt, ground black pepper, curry powder , cumin and garlic) are simple and compliment the Garam Masala.
- Lime – Ah yes, our other star ingredient! Lime juice adds a subtle citrus note that brings everything together in such a delightful way. Don’t skip it!
How to Make Vegan Coconut Chickpea Curry
Heat the Oil: In a deep pot over medium-high heat, add the coconut oil. Add in the Onions and Tomatoes: Grind some sea salt and ground black pepper over the mixture and stir together. Lower heat to medium and allow to cook down until juices of the tomatoes are naturally released and onions are soft, about 10 minutes. I’ve found that this step really helps to develop the flavors of the dish and break them all down for the seasonings later.
Add in the Chickpeas: Also mix in the garlic, garam masala, curry powder and cumin. Stir to combine.
Add in the Coconut Milk and Stir Again: Add in the coconut flour (or any flour, optional) which helps to slightly thicken the curry. Bring the curry to a boil, and then reduce to medium-low so that the mixture continues to simmer for 10 to 12 more minutes.
Serve and Enjoy: Taste the curry and season with salt and pepper if you desire. Remove the curry from the heat and squeeze a lime lightly over the top of the curry, stirring to combine. Don’t skip this step!! Allow to cool slightly and then serve. Enjoy!
Tips for Success
As far as vegan dinner ideas go, this one is pretty easy! Chickpea curry will take you 45 minutes tops to prepare and plate, and you’ll have fun doing it too – there’s a lot of room for culinary creativity. Here are some tips that will help you get the best results with your curry:
- Always use the lime . If there’s one tip I always mention for this recipe, it is to always use the lime. It really brings out the layers of flavor in the dish and is an essential part of the recipe!
- Follow the instruction times . Sautéing the veggies makes a real difference to the end product, so I recommend just setting a time and avoiding any temptation to rush this recipe. You will be rewarded.
- Try not to use light coconut milk. This will reduce the richness and creaminess of the curry. It’s okay to do so if you are looking to cut down on fat content, but just be aware of the flavor/texture changes that will occur.
- Make it your own . This is one of those dishes that once you follow the base ingredients well, you can make the dish your own. Add in sweet potatoes, bell peppers, spinach, broccoli, cauliflower, carrots… it’s up to you. Just taste as you go along and adjust the seasonings for the additions! I love using up extra veggies and adding them into this dish.
- Can I substitute the tomatoes? If you’re not a tomato fan, you won’t taste them. They blend right in and help with the thickness of the curry and all that flavour. If you’re allergic, you can in fact substitute them with pumpkin puree, or a butternut squash puree or something of the sort. It won’t taste exactly the same, but will give it that beautiful creamy texture!
Serving Suggestions
Once you have a pot of coconut chickpea curry, what should you serve with it? A great question. There are many options, but here are just a few ideas:
- Vegetables: As I mentioned above, throw whatever vegetables you like into this curry. Carrots, sweet potato, peppers, you name it – whatever you can think of will make a great add-in!
- Rice: My go-to is Basmati rice, but you can use regular white rice, brown rice, rice noodles, etc. You could even make some cauliflower rice !
- Bread: If you’re not a big fan of rice, try some naan bread ! It’s perfect for sopping up all of that extra curry sauce, and it’s so easy to make.
How to Store and Reheat Leftovers
This coconut curry can be refrigerated in an airtight container for 3-4 days. To reheat, simply microwave for 30-40 seconds, or heat a pot on low on the stovetop and cook the curry until it is warmed through again. You may want to add in some more coconut milk or water if the sauce is too thick.
Can I Freeze Extras?
Sure can! Freeze extra curry in an airtight container for 2-3 months. Pro Tip: store the curry in single servings so that you can thaw one-person lunches or dinners in the fridge throughout the week/month!
Ingredients
- 2 tablespoons coconut oil
- 1 medium red onion or yellow onion , diced
- 14 ounces fresh or canned tomatoes , diced (400g)
- sea salt & ground black pepper , to taste
- 16 ounces canned chickpeas , drained & rinsed (454g)
- 3 garlic cloves , minced
- 1 ½ tablespoons garam masala – I use this one
- 1 teaspoon curry powder I use this one
- ¼ teaspoon cumin
- 13.5 ounces canned coconut milk* , (383g)
- 2 teaspoons coconut flour , OPTIONAL**
- 1 small lime , juice of
Instructions
- In a deep pot over medium-high heat, add the coconut oil.
- Add in the onions and tomatoes. Grind some sea salt and ground black pepper over the mixture and stir together. Lower heat to medium and allow to cook down until juices of the tomatoes are naturally released and onions are soft, about 10 minutes.
- Add in the chickpeas, garlic, garam masala , curry powder and cumin. Stir to combine.
- Add in the coconut milk and stir again. Add in the coconut flour which helps to slightly thicken the curry. Bring the curry to a boil, and then reduce to medium-low so that the mixture continues to simmer for 10 to 12 more minutes.
- Taste the curry and season with salt and pepper if you desire. Remove the curry from the heat and squeeze a lime lightly over the top of the curry, stirring to combine. Don’t skip this step!! Allow to cool slightly and then serve. Enjoy!
Notes
More Vegan Curry Recipes
- Thai Red Curry with Tofu
- Thai Green Curry
- Sweet Potato Curry
- Red Lentil Curry
- Cauliflower and Potato Curry (Aloo Gobi)

Creamy Coconut Chickpea Curry
Ingredients
- 2 tablespoons coconut oil
- 1 medium red onion or yellow onion diced
- 14 ounces fresh or canned tomatoes diced (400g)
- sea salt & ground black pepper to taste
- 16 ounces canned chickpeas drained & rinsed (454g)
- 3 garlic cloves minced
- 1 ½ tablespoons garam masala - I use this one
- 1 teaspoon curry powder I use this one
- ¼ teaspoon cumin
- 13.5 ounces canned coconut milk* (383g)
- 2 teaspoons coconut flour OPTIONAL**
- 1 small lime juice of
Instructions
- In a deep pot over medium-high heat, add the coconut oil.
- Add in the onions and tomatoes. Grind some sea salt and ground black pepper over the mixture and stir together. Lower heat to medium and allow to cook down until juices of the tomatoes are naturally released and onions are soft, about 10 minutes.
- Add in the chickpeas, garlic, garam masala , curry powder and cumin. Stir to combine.
- Add in the coconut milk and stir again. Add in the coconut flour which helps to slightly thicken the curry. Bring the curry to a boil, and then reduce to medium-low so that the mixture continues to simmer for 10 to 12 more minutes.
- Taste the curry and season with salt and pepper if you desire. Remove the curry from the heat and squeeze a lime lightly over the top of the curry, stirring to combine. Don’t skip this step!! Allow to cool slightly and then serve. Enjoy!
Video
Notes
Nutrition
Creamy Coconut Chickpea Curry https://jessicainthekitchen.com/coconut-chickpea-curry-recipe/ July 27, 2021
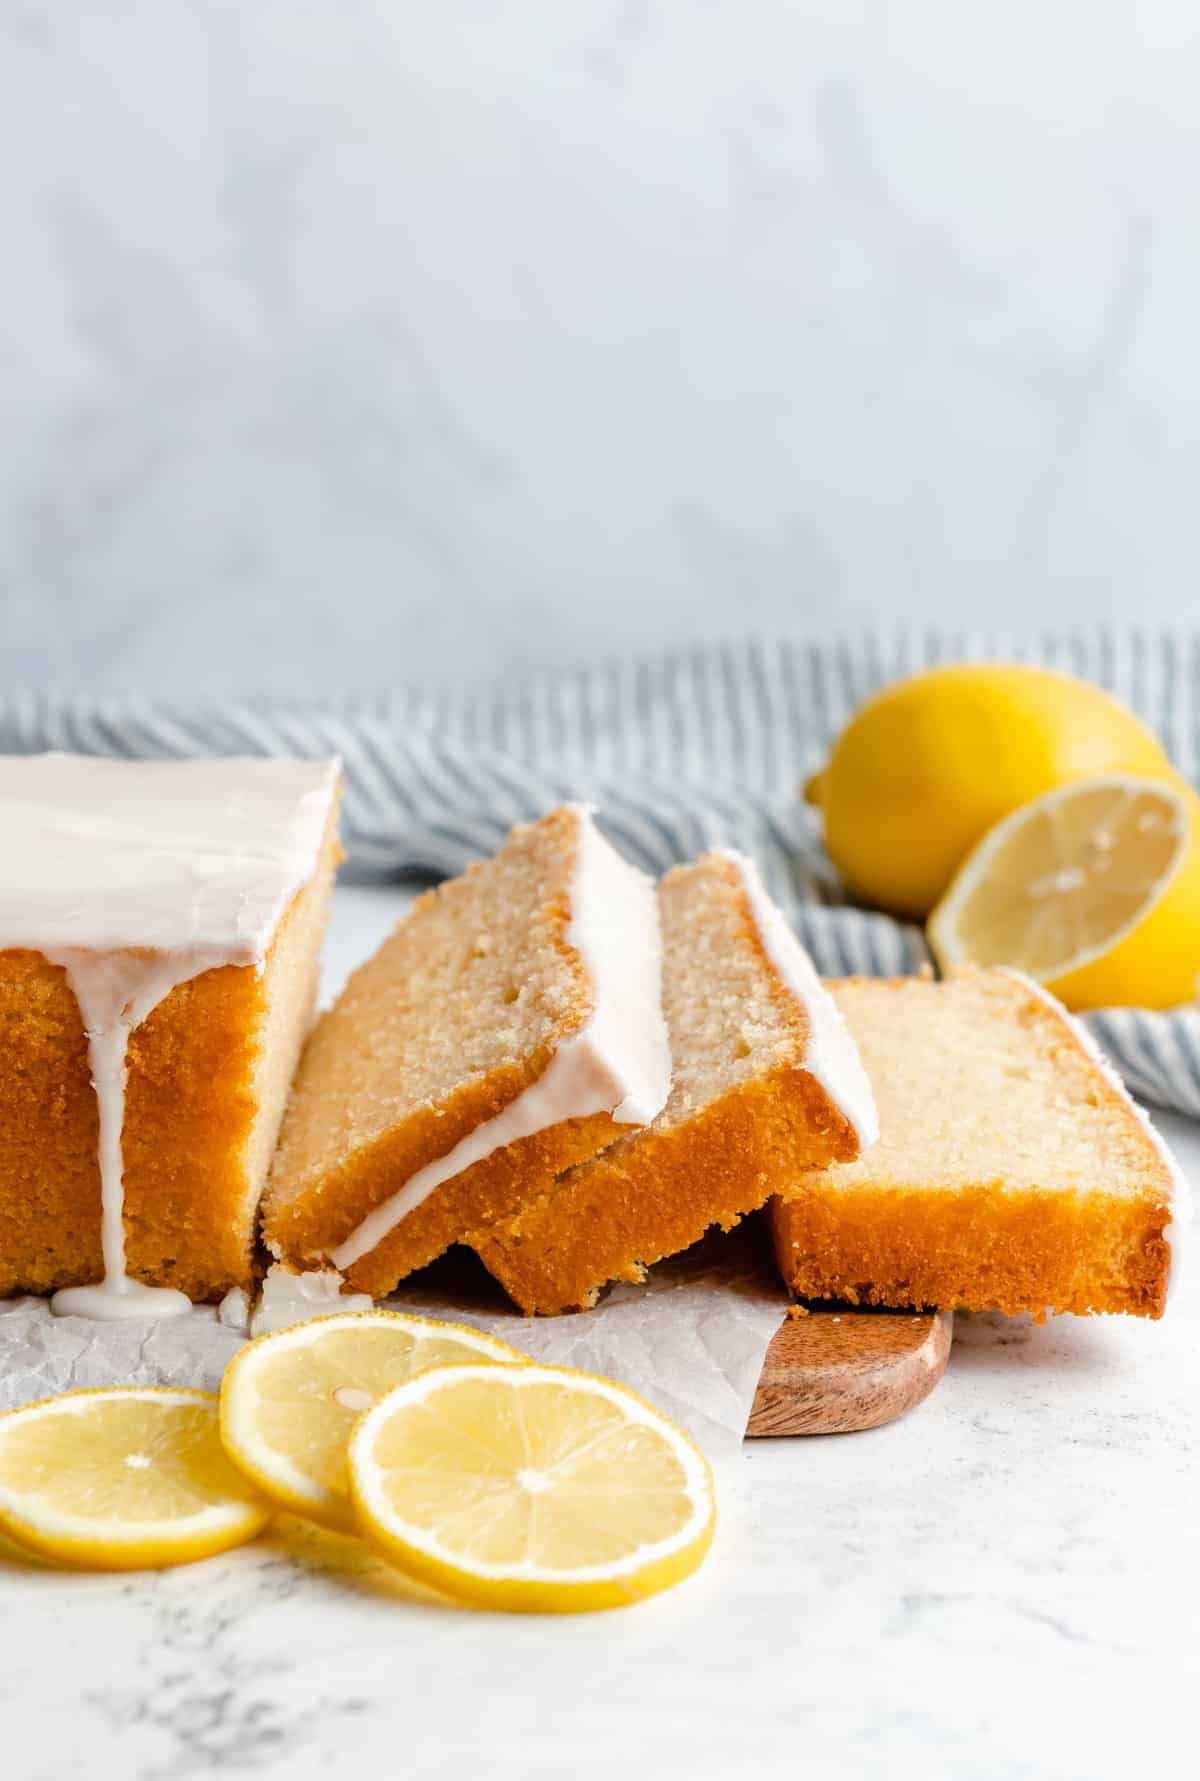
This vegan lemon loaf is a moist, flavourful lemon pound cake inspired by the Starbucks version! It’s packed with fresh lemon zest, topped with a citrusy vanilla glaze. Sweeten up breakfast or enjoy a slice with coffee or tea in the afternoon.
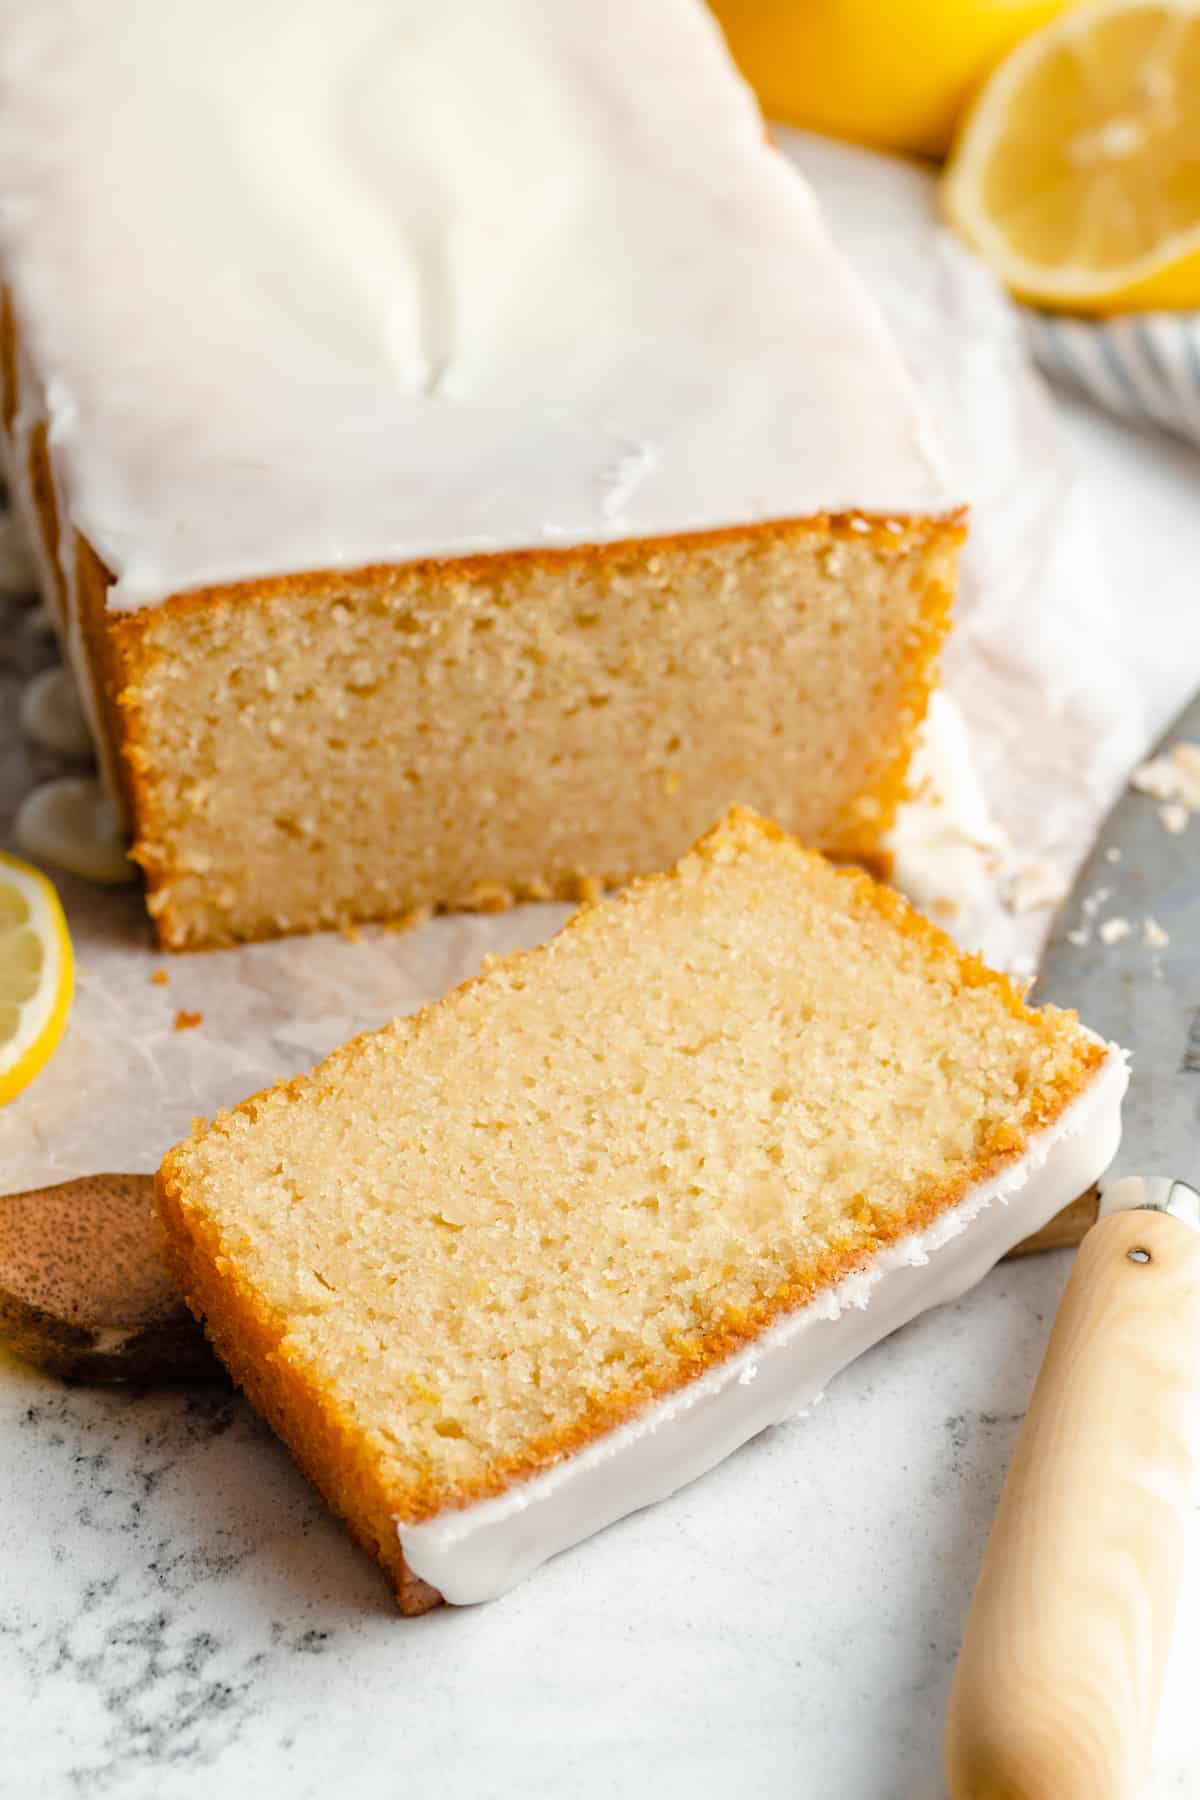
I love baking with lemon, whether it’s a lemon blueberry bread or lemon bars . This lemon loaf recipe is basically a glazed pound cake, a lot like the Starbucks lemon loaf, made vegan! It’s just as soft, tender, and flavourful as a classic lemon pound cake, and it’s also super easy to make. The cake itself is moist and spongy, and the simple glaze is tangy and sweet. Prepping both components won’t take you more than 15 minutes at most. I just know you’ll enjoy this vegan lemon loaf as much as I do.
About This Homemade Lemon Loaf Recipe
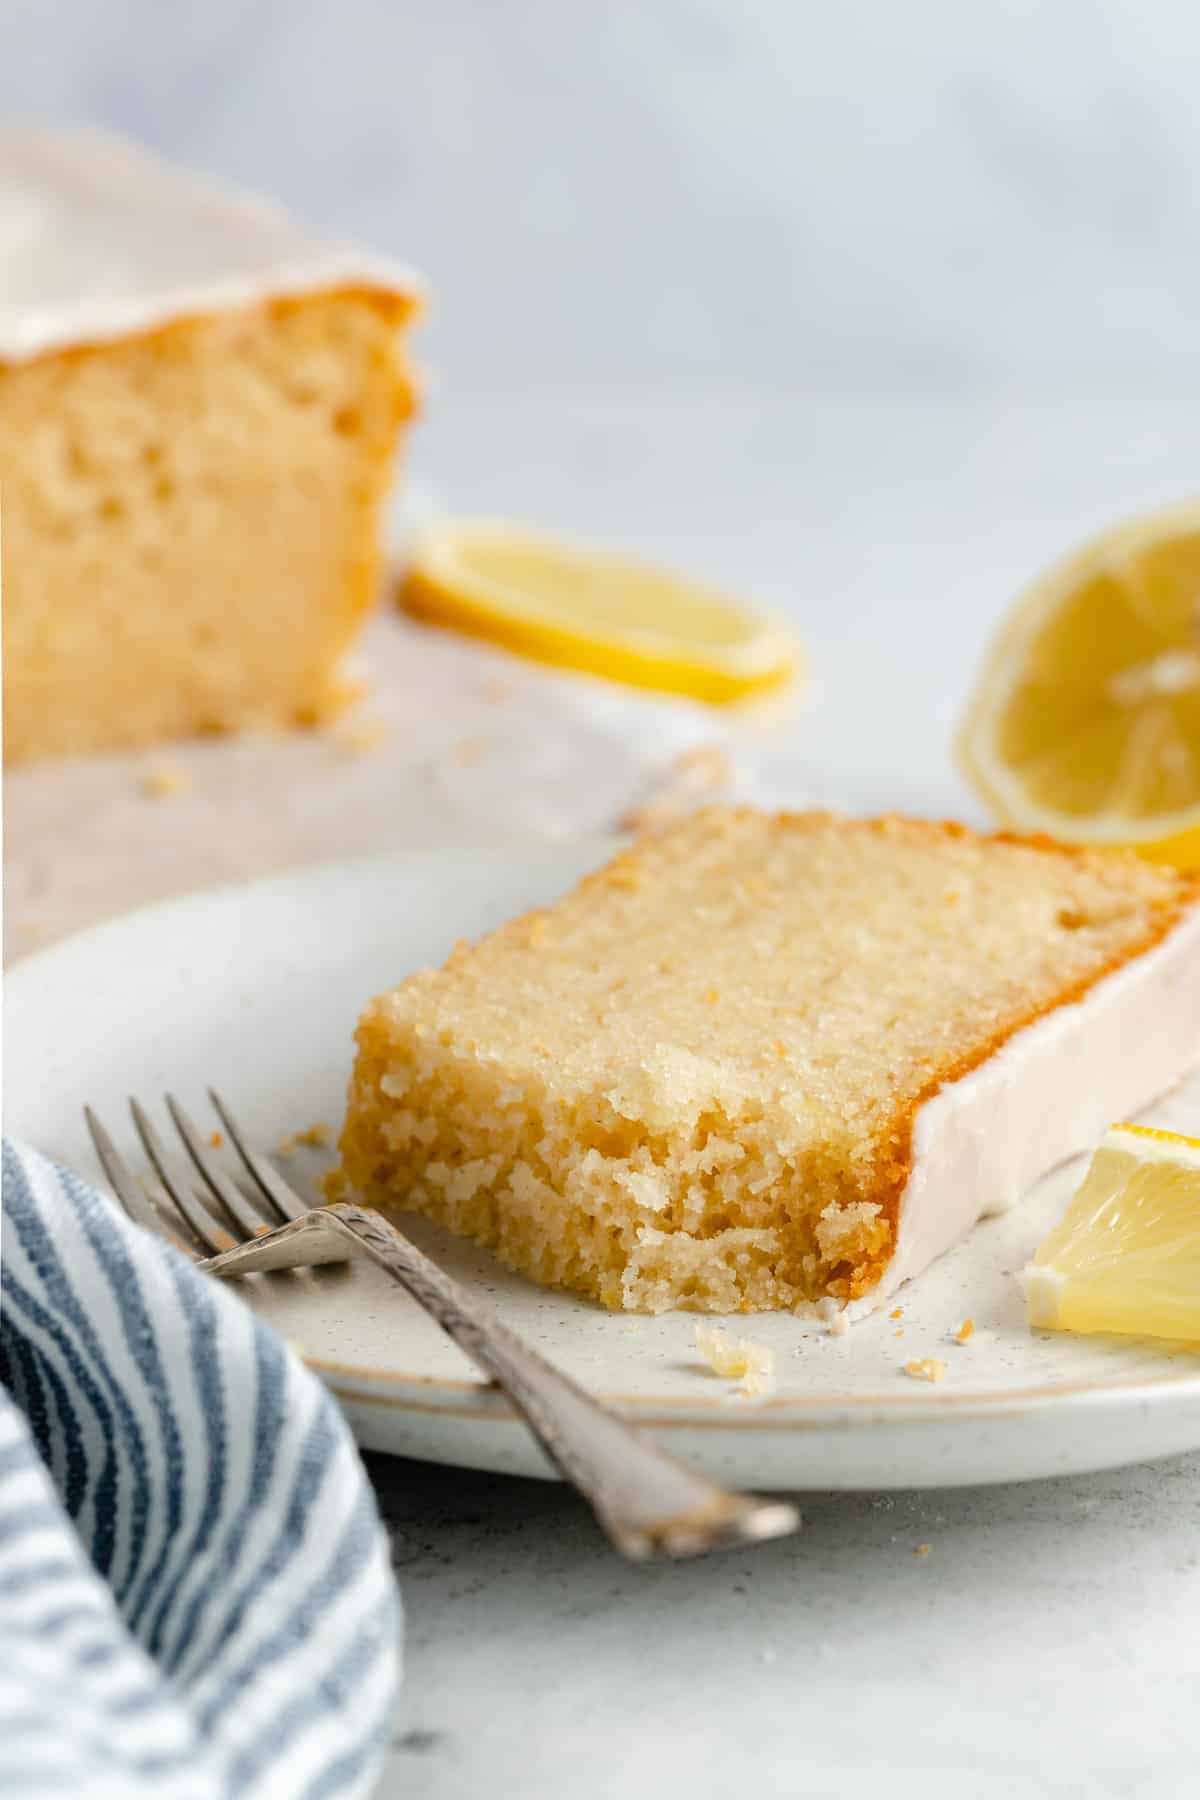
- Moist and tender. This lemon loaf is as soft and citrusy as ever, even though it’s made without eggs or dairy.
- Easy to make. I love that a lemon loaf falls somewhere between a lemon cake and a quick bread. It bakes up similarly to a banana bread , without yeast and with very little mixing.
- Any occasion. This moist vegan lemon loaf looks gorgeous on an Easter brunch table, and it’s easy enough for everyday baking, no matter the season. Serve it as a sweet breakfast, with a matcha latte for a midday snack, or as dessert (or all 3, just an idea!).
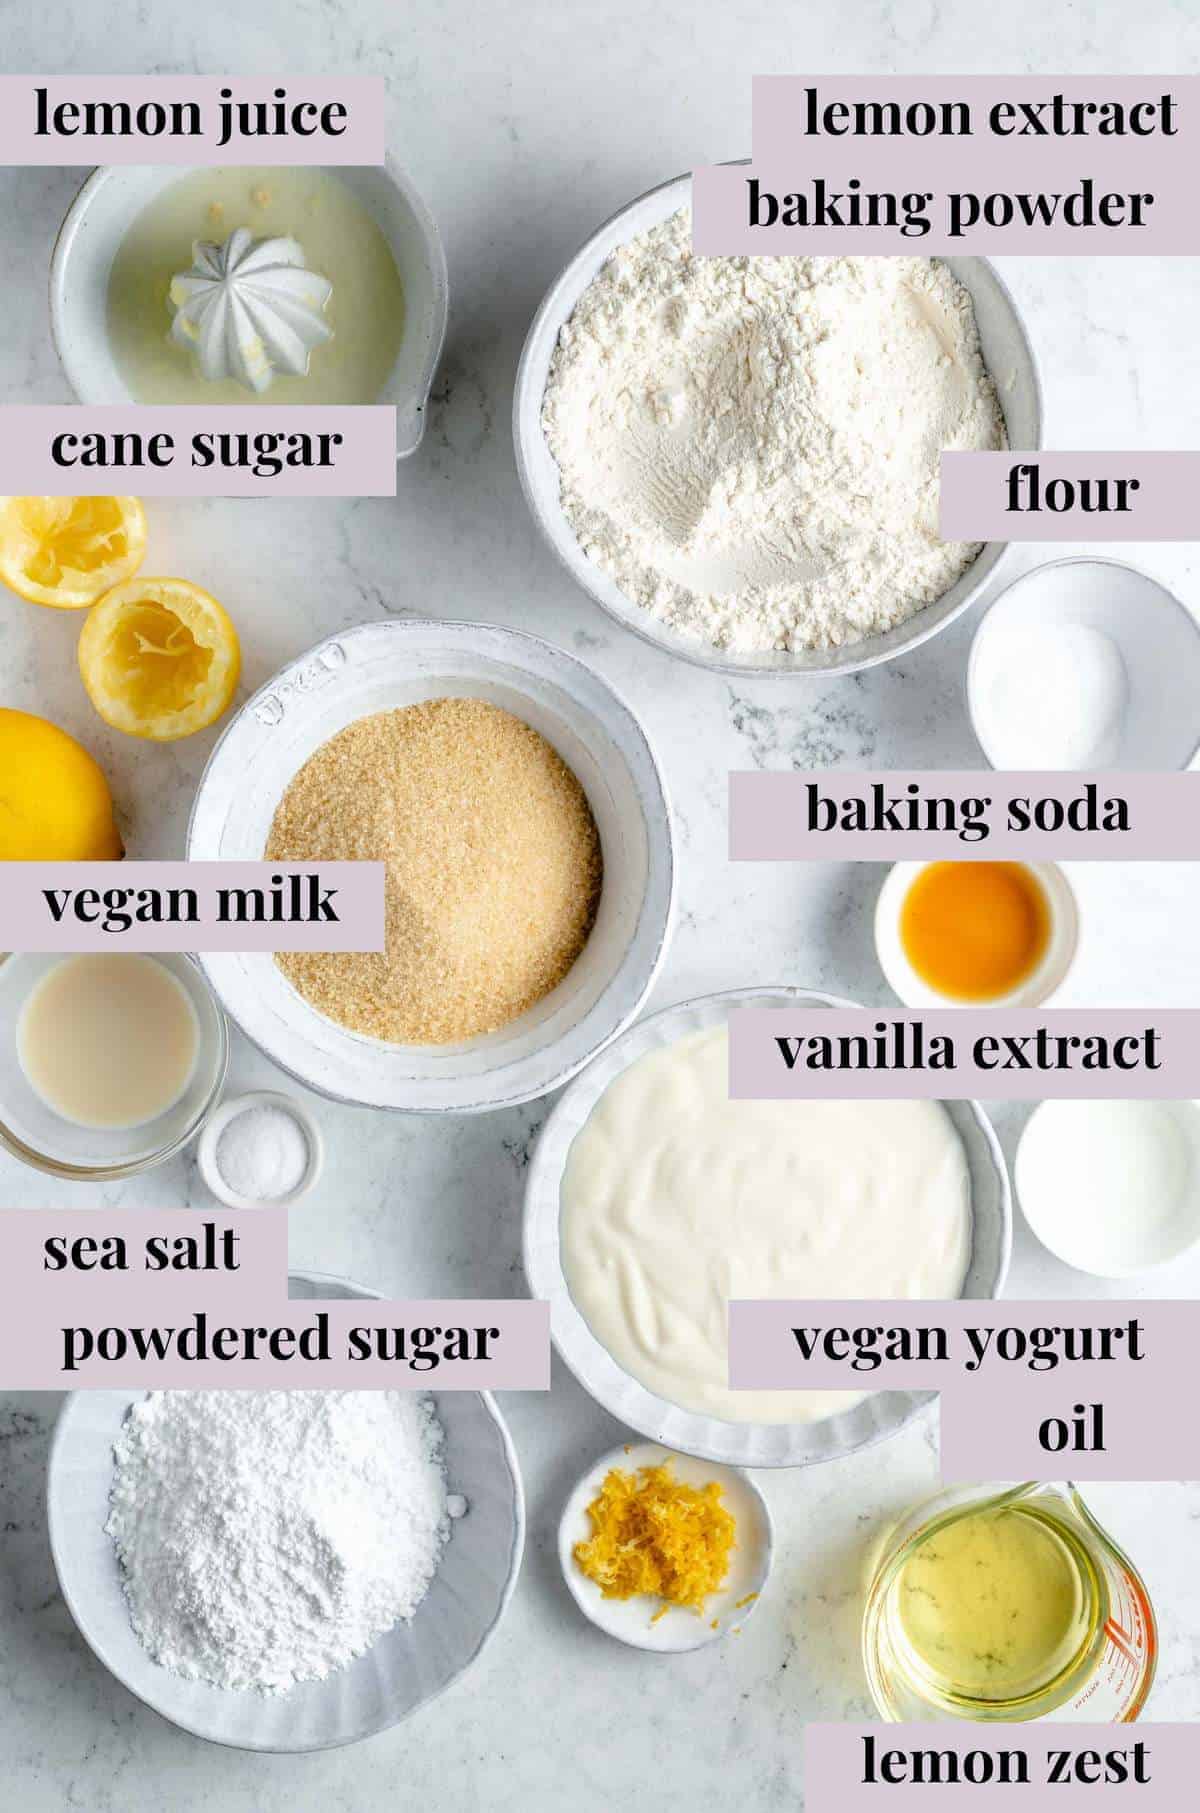
Notes on Ingredients
Here are the ingredients you’ll need to round up for this lemon loaf recipe. Please note that this is important information on the ingredients and instructions, and the FULL recipe with amounts and details can be found DOWN BELOW (scroll to it) in the recipe card.
- Sugar – I like to use cane sugar in this lemon loaf, but granulated sugar will also work just fine.
- Oil – This adds great moisture to the cake, and helps to keep the flavour focused on the lemon, which is why I don’t use melted vegan butter here.
- Lemon Extract – For extra tangy lemon flavour. Don’t skip this – this really gives it that lemon-y flavour.
- Vanilla Extract – Or an equal amount of vanilla bean paste if you’d prefer to use that instead.
- Lemon – You’ll need both the zest and the juice from two lemons. Zest first, then juice!
- Yogurt – Regular vegan yogurt, plain and unsweetened. Bring the yogurt to room temperature.
- Flour – I always mix in all-purpose flour, but you could use a 1:1 gluten-free baking flour to make this loaf gluten-free.
- Baking Powder and Baking Soda – To help your loaf cake rise tall. Make sure that both leavenings are fresh and not expired.
- Salt – I like to use sea salt. Remember that if you’re using table salt, you’ll need to reduce the amount since the granules are smaller than sea salt.
For the Glaze
- Powdered Sugar – If you’d prefer not to glaze the loaf, you can dust the top with powdered sugar instead.
- Milk – Use whatever vegan milk (soy, almond, coconut, etc.) that you like.
- Lemon Juice – For extra zesty flavor. Lemon extract works, too.

How to Make a Vegan Lemon Loaf (Step-by-Step)
When you have your ingredients ready, these are the steps to prepare your vegan lemon loaf from scratch.
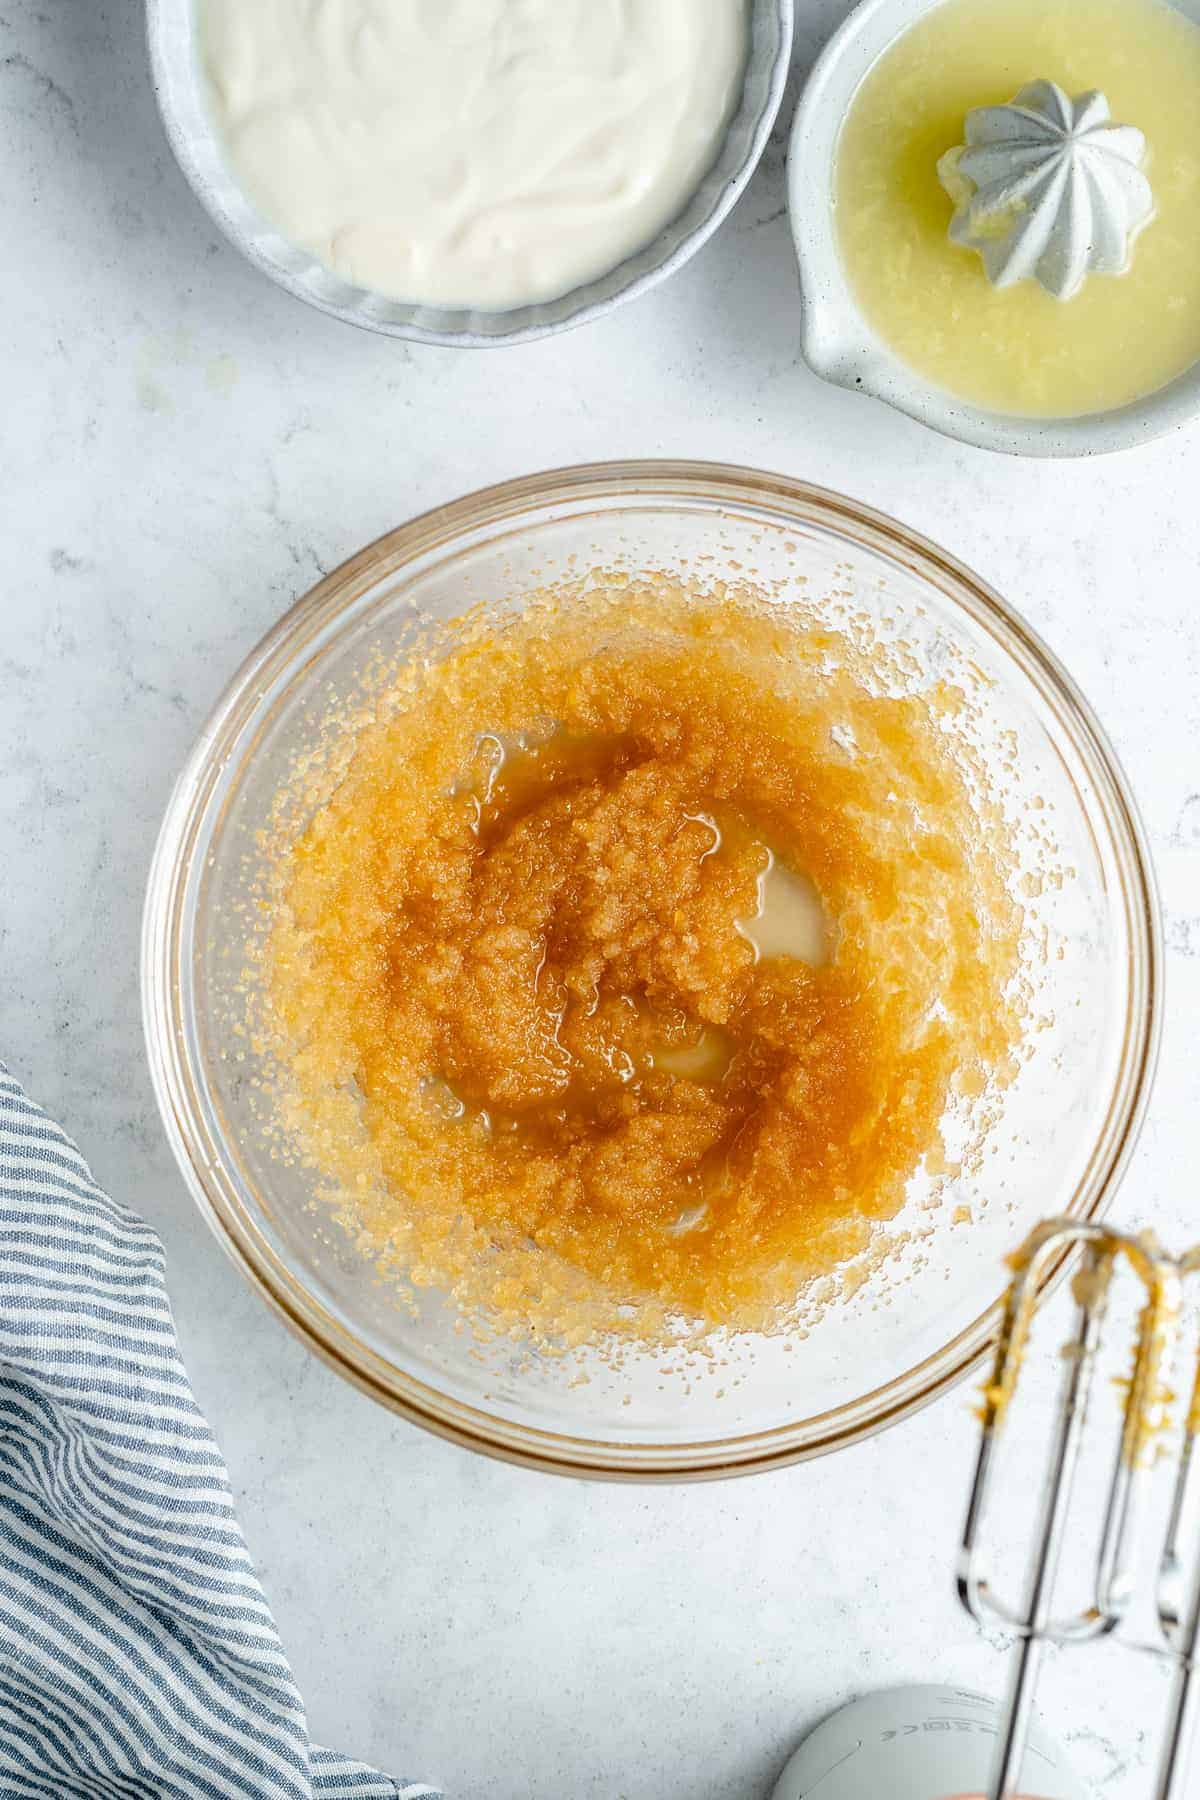
Cream the wet ingredients.
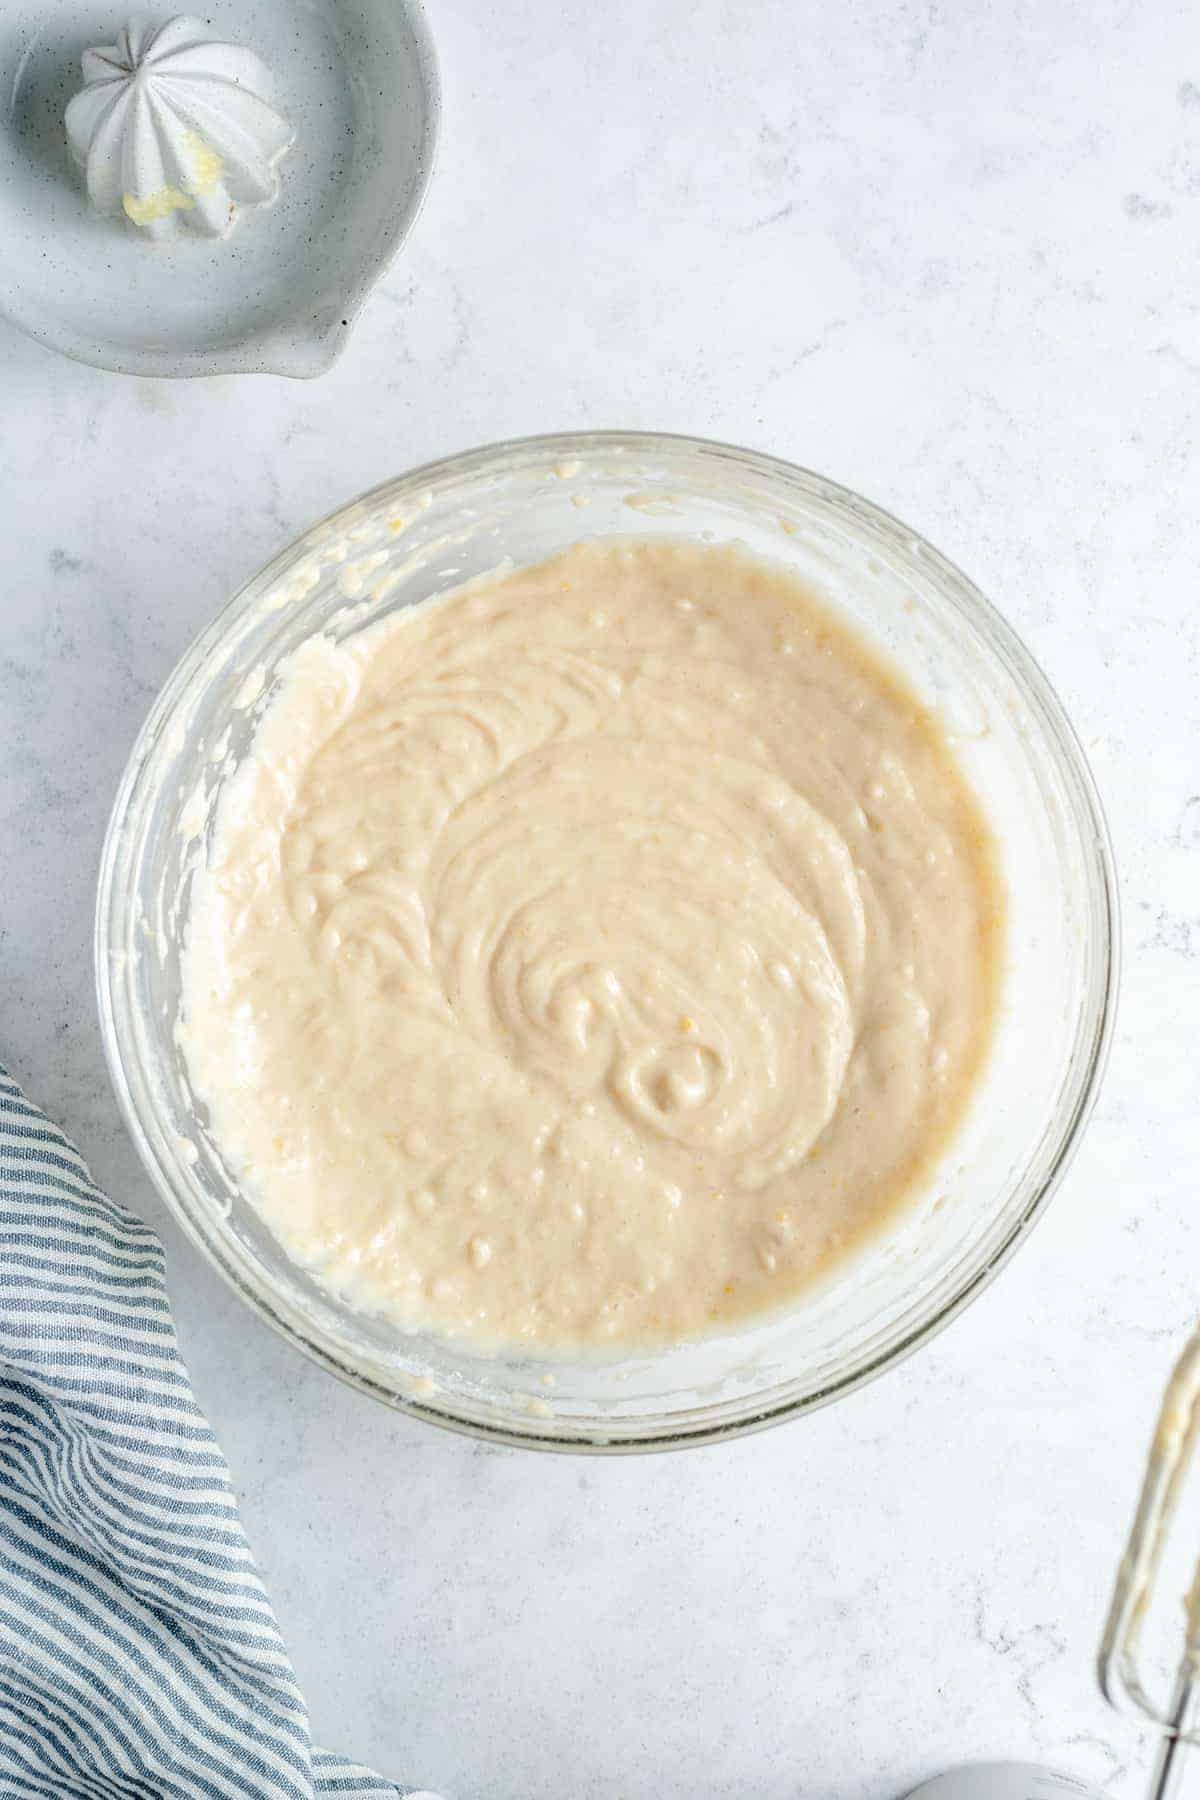
- Combine the wet ingredients. Cream the sugar, oil, lemon extract, vanilla extract, and lemon zest together until well-incorporated. Then, whisk in the vegan yogurt and lemon juice.
Mix in the dry ingredients.
- Add the dry ingredients. Now, in a separate bowl, whisk the flour, baking powder, baking soda, and salt. Add the dry mixture to the wet ingredients and mix until just incorporated. Spread the batter evenly into a greased loaf pan.
- Bake. Bake the lemon loaf on the middle rack at 350ºF for 55-60 minutes. When a toothpick stuck into the center of the loaf comes out clean, remove it from the oven. Let it cool in the pan for 10 minutes, then move the loaf to a wire rack. It’ll need to cool completely to room temperature before you add the glaze.
Add the Lemon Glaze
Once you’ve got the loaf cooling, you can get started on the glaze! It takes less than 5 minutes to whip together.
Combine the glaze ingredients.
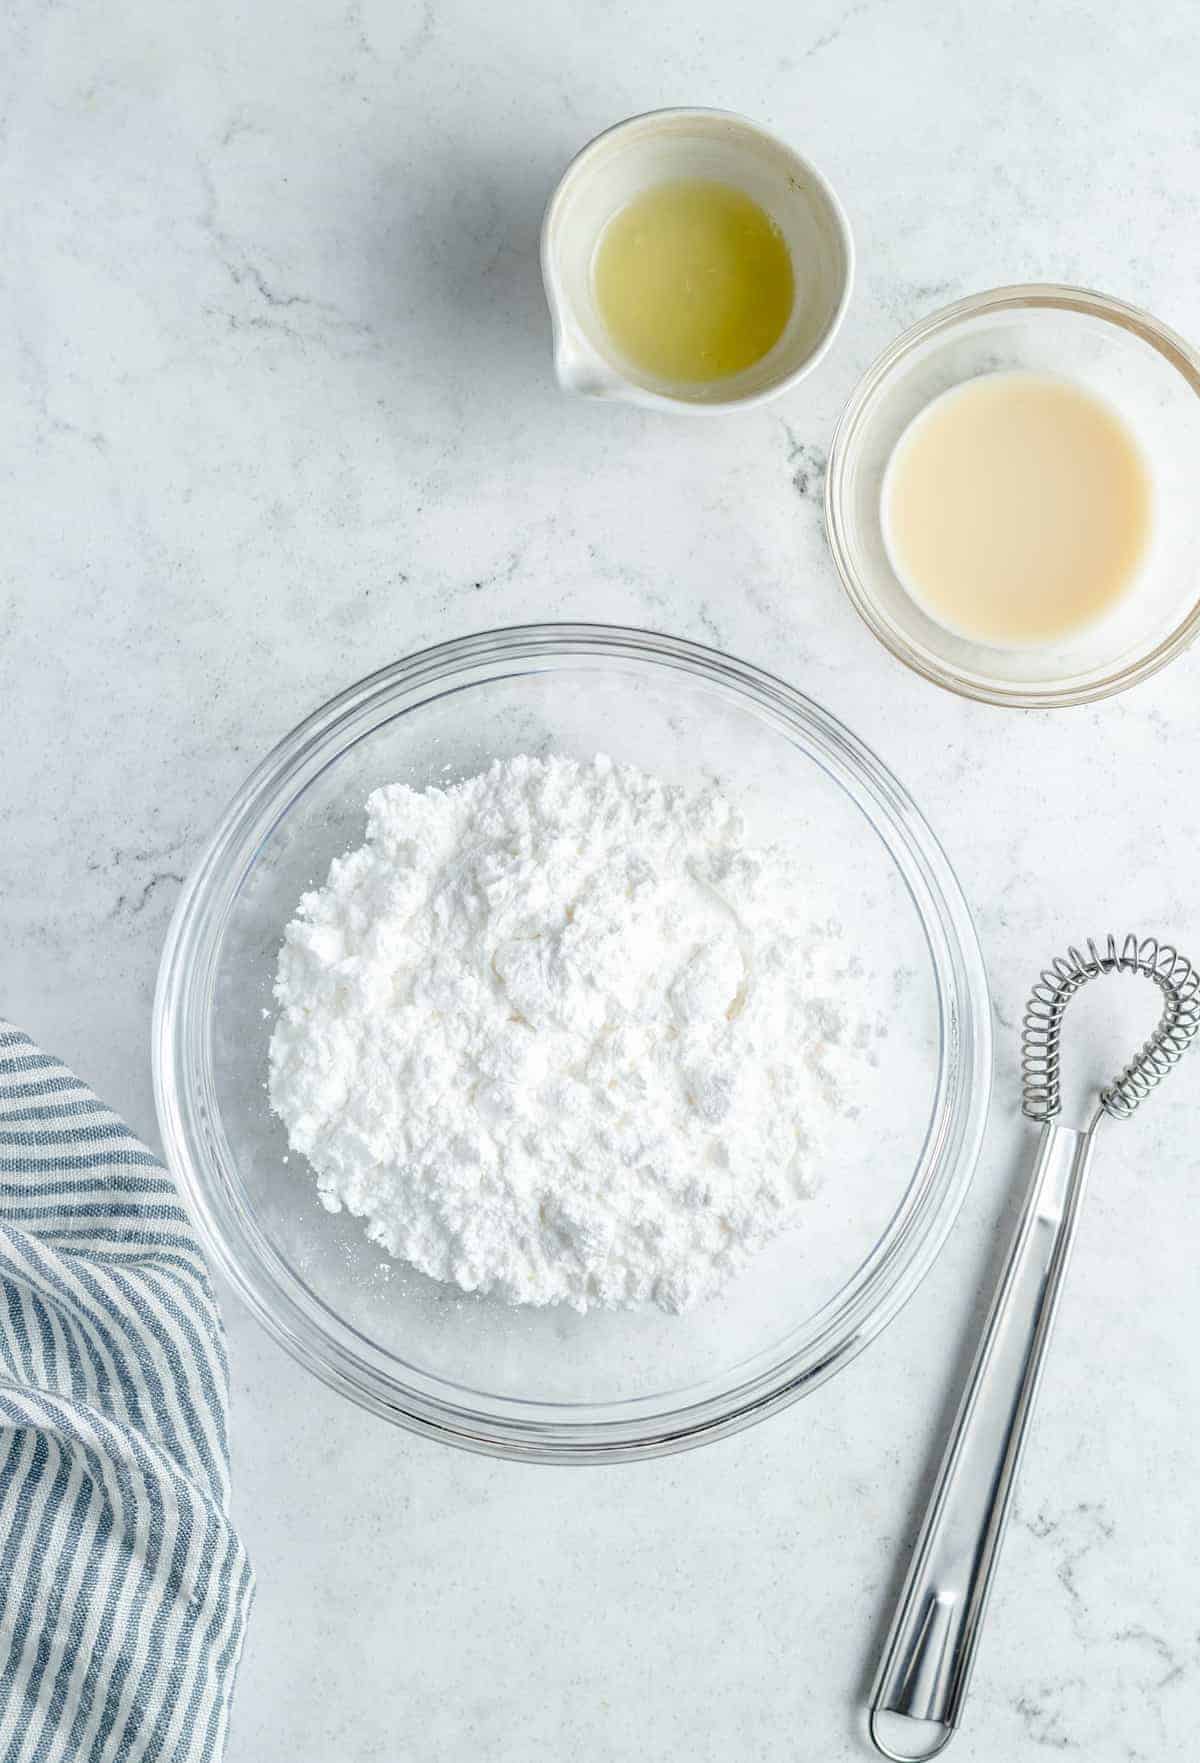
- Combine the ingredients. Whisk the powdered sugar with vegan milk and lemon juice until smooth. Feel free to thicken the glaze with more powdered sugar, or thin out with more milk or lemon juice (depending on which flavor you prefer).
- Glaze the loaf. Drizzle or spread the glaze on top of the cooled lemon loaf.
Tips for a Successful Lemon Loaf
- Use room-temperature ingredients. All of the ingredients, but especially the yogurt, should be at room temperature so that they combine evenly into the batter.
- No stand mixer? Not a problem. You can mix the batter by hand; it just takes a little longer.
- How to tell when a lemon loaf is done: Bake your loaf cake until a toothpick comes out clean, or with a few moist crumbs attached.
- Let the loaf cool before icing: If the lemon loaf is too warm, the icing will become runny and thus messy. If you let the cake cool completely, though, you’ll have more control over how the glaze settles.
- Make the glaze ahead. Prepare the glaze in advance and store it in your fridge for up to 2 days, if needed. Use any leftovers to drizzle over lemon poppyseed muffins !
How to Store
- Refrigerate the glazed loaf. While the unglazed lemon loaf keeps at room temperature, the best way to store the glazed loaf is in an airtight container in the fridge. It should stay fresh for 3-4 days, and tastes great cold or at room temperature. This also helps to soften it up beautifully.
- Freeze. Freeze this lemon loaf cake in an airtight container, and it will keep for 1-2 months. I would recommend freezing your cake without icing, though, because it tastes better if you add fresh glaze once it’s thawed.
More Vegan Baking Ideas
- Vegan Zucchini Bread
- Vegan Scones
- Banana Oatmeal Muffins
- Strawberry Banana Bread
- Vegan Chocolate Chip Cookies
Ingredients
For the Loaf Cake**
- 1 cup cane sugar , (200g) or any granulated sugar
- ½ cup oil , (100g, if using coconut oil ensure it’s melted)
- 1 teaspoon lemon extract
- 1 teaspoon vanilla extract , or paste
- 2 teaspoons lemon zest , (from two lemons)
- 1 cup vegan yogurt , (plain and unsweetened)
- ⅓ cup lemon juice , (from two lemons)
- 2 cups all-purpose flour , (240g, sifted)
- 2 teaspoons baking powder
- ¼ teaspoon baking soda
- ¾ teaspoon sea salt
For the Lemon Glaze
- 1 cup powdered sugar
- 1 tablespoon vegan milk
- 1 tablespoon lemon juice
Instructions
For the Loaf Cake
- Preheat the oven to 350°F/180°C. Spray a 9×5 loaf pan with an oil spray to prepare it. Set aside.
- In a large mixing bowl or bowl of a stand mixer, add the sugar, oil, lemon extract, vanilla extract and lemon zest. Mix together with a whisk for about 3 minutes on low speed or via hand until all fully incorporated.
- Add in the vegan yogurt and the lemon juice and whisk for 30 seconds until fully incorporated. Scrape down the sides.
- In a small bowl, mix the flour, baking powder and sea salt. Add to the wet ingredients and mix for about a minute on low speed until just incorporated. Scrape down the sides again. Pour the batter into the loaf pan and use your spatula to smooth down the top.
- Bake the lemon loaf on the middle shelf of your oven for 55-60 minutes, until a toothpick comes out clean or with barely any crumbs.
- Remove from the oven and allow to cool for 10 minutes in the pan. Transfer the bread to a wire rack by placing the wire rack on top of the bread, then holding the sides of the pan and flipping it over and removing the pan. Hold the sides of the bread to turn right side up. You can also turn the pan over into your hand, and then flip right side up and place on a wire rack.
- Allow the bread to cool completely. Drizzle on the lemon glaze, ensuring to spread it down the sides too. Slice as desired. Enjoy!
For the Lemon Glaze
- Mix together the powdered sugar, vegan milk and lemon juice until fully combined. Feel free to thicken if desired with more powdered sugar or thin out with more milk or lemon juice depending on which flavor you prefer. You can store this in your fridge for 2 days.
Notes
- Do I Need a Stand Mixer? Nope! You can do everything by hand if you like, it just takes longer. But, at the same time, it’s a good workout!
- How to Tell When Your Loaf is Done: Bake your loaf cake until a toothpick comes out clean, or with barely any crumbs on it.
- Let the Loaf Cool Before Icing: If the lemon loaf is too warm, the icing will become runny and thus messy. If you let the cake cool completely, though, you’ll have more control over how the glaze settles.
- Can I Make the Glaze Ahead? Sure! You can store it in your fridge up to 2 days ahead of time, if needed.
- Weighing Out – I highly recommend as usual if you’re baking to use a scale instead of just scooping (it can be highly inaccurate and lead to a dough that’s too dry or too wet)! You’ll get far better results every time. This is my favourite scale (affiliate link) and it ranges $10-$11: GreaterGoods Scale
