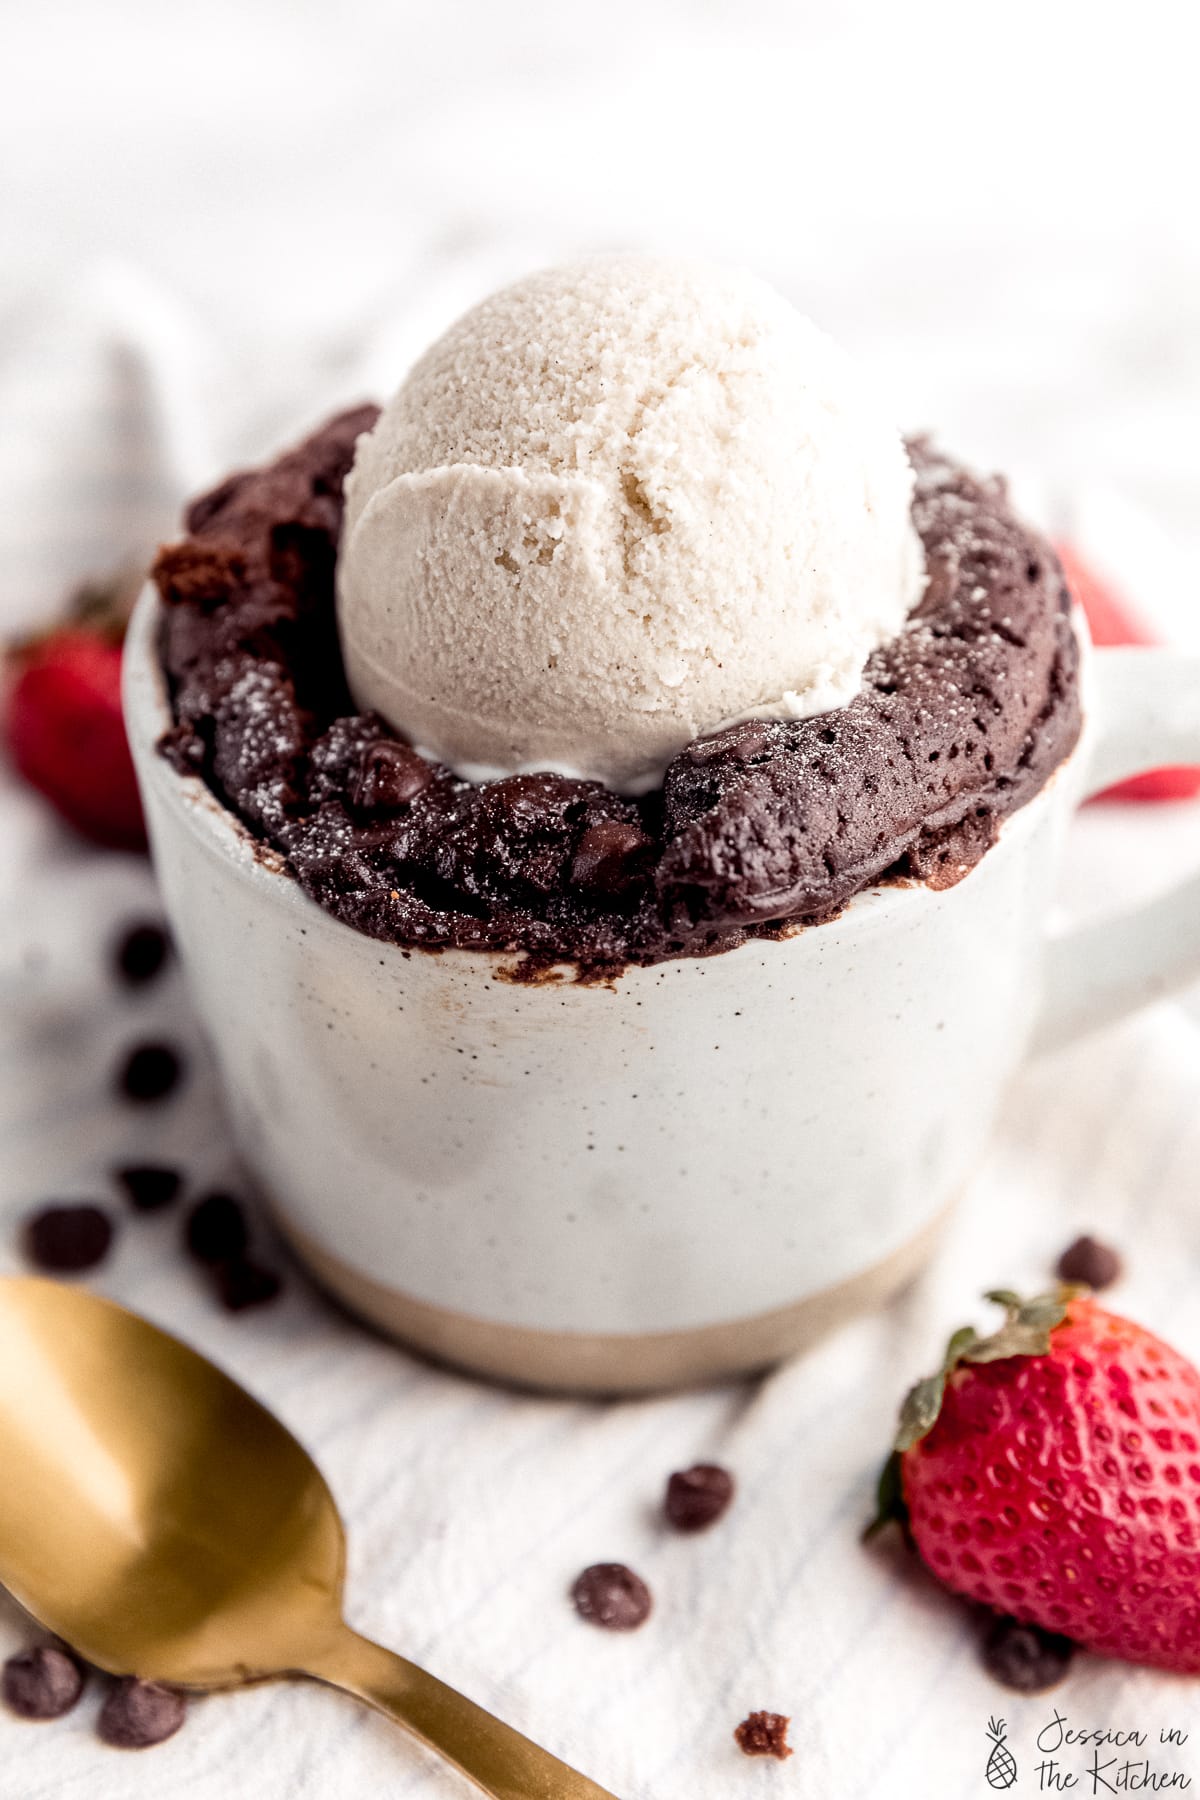
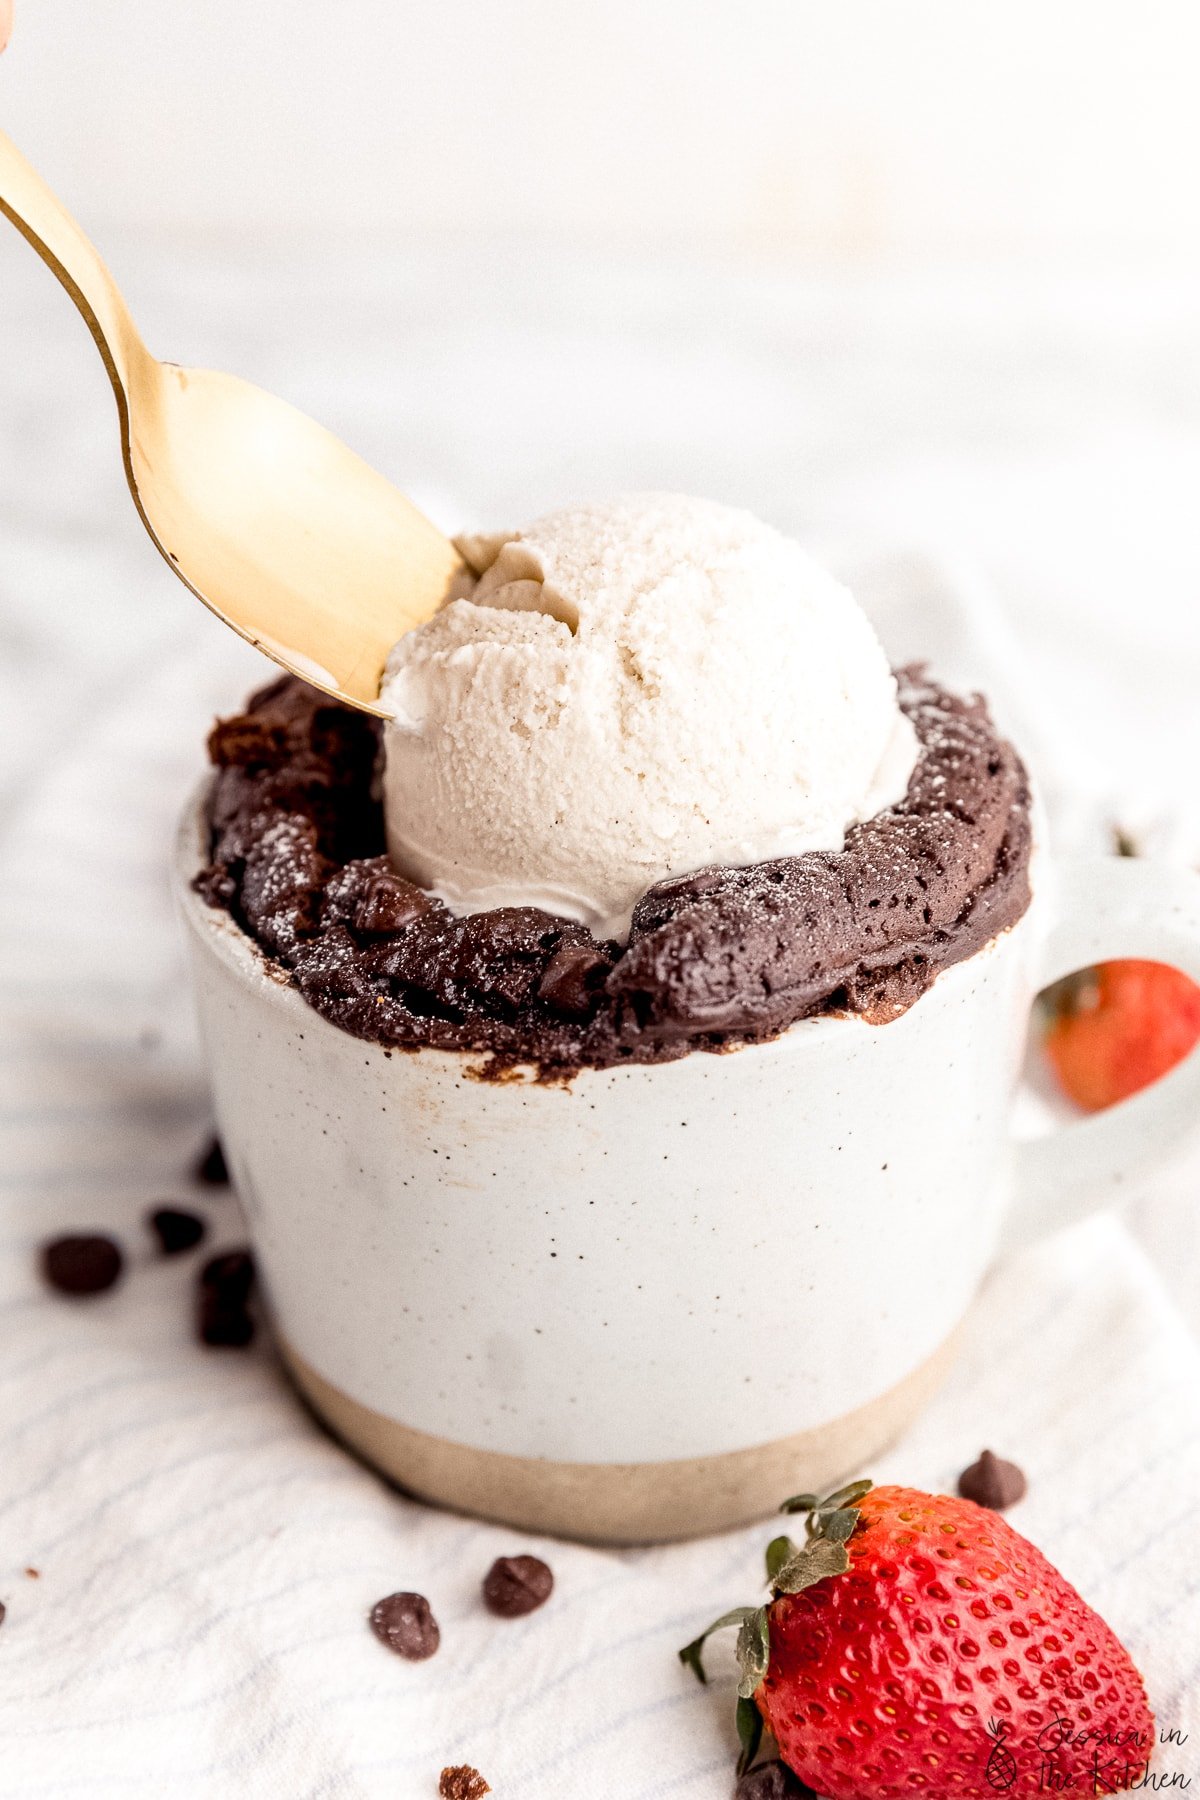
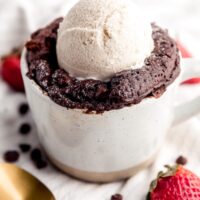
This Chocolate Mug Cake (Vegan) will totally blow you away! It’s vegan and made with very easy pantry ingredients in under 5 minutes start to finish. It has an incredible chocolate-y flavour that’s so addictive!
When I first came out with my Vegan Chocolate Cake , I didn’t realise how popular it would become! It’s been incredible seeing all your reviews and photos, and it let me know that I will definitely be coming with even more classics.
You know mug cakes are my thing. For my Vegan Banana Bread , I made my Banana Bread Mug Cake . For my Salted Tahini Chocolate Chip Cookies , I made my tahini chocolate chip mug cake . Now drum roll please presenting my Vegan Chocolate Mug Cake ! It’s for me, the perfect single size version of my chocolate cake! I can’t count how many times I’ve eaten this (I’ll just say it’s for testing!) so know for sure that you’ll LOVE IT!
What is a mug cake?
In case you don’t know, a mug cake is exactly what it sounds like. A quick single-serving cake that’s usually whipped up in your mug and cooked quickly in it too. It usually takes about a minute to two minutes to make, and the result is a fully cooked, delicious and moist mini cake. I’ve made one before that’s the #1 search result for vegan brownie mug cake , so be sure to check that one out too.
Needless to say – mug cakes are incredibly convenient and so tasty! You usually only want a single serving anyway, and the overall time is always less than 5 minutes to make!
Best tips for making mug cakes
Making a mug cake is pretty much foolproof, but these few tips help to make a big difference. I’ve tested mug cakes over 2 dozen times (yes!), and here are the top tips I took away:
- Use a wide short-ish mug (like the one in these photos!). If you have a variety to choose from, using this type of mug means the cake rises higher in a concentrated space. I’ve found this helps with cooking.
- Ensure to stir it all together. Don’t go whisking it for minutes on end, but ensure your entire mug cake is mixed. Since it’s such a small container it can be easy to miss the bottom. Just ensure you incorporate everything. Sometimes I scoop from the bottom up a few times to ensure this.
- Adjust your time based on your microwave. The times I’ve provided should work but yours may need an extra 10 seconds. It’ll cook edges to centre so just check the centre that it’s mostly cooked…BUT:
- BUT, don’t overcook. This will make your mug cake gummy and rubbery and dry. Remember that the mug cake will keep cooking while it’s cooling so it’s better to slightly under bake it .
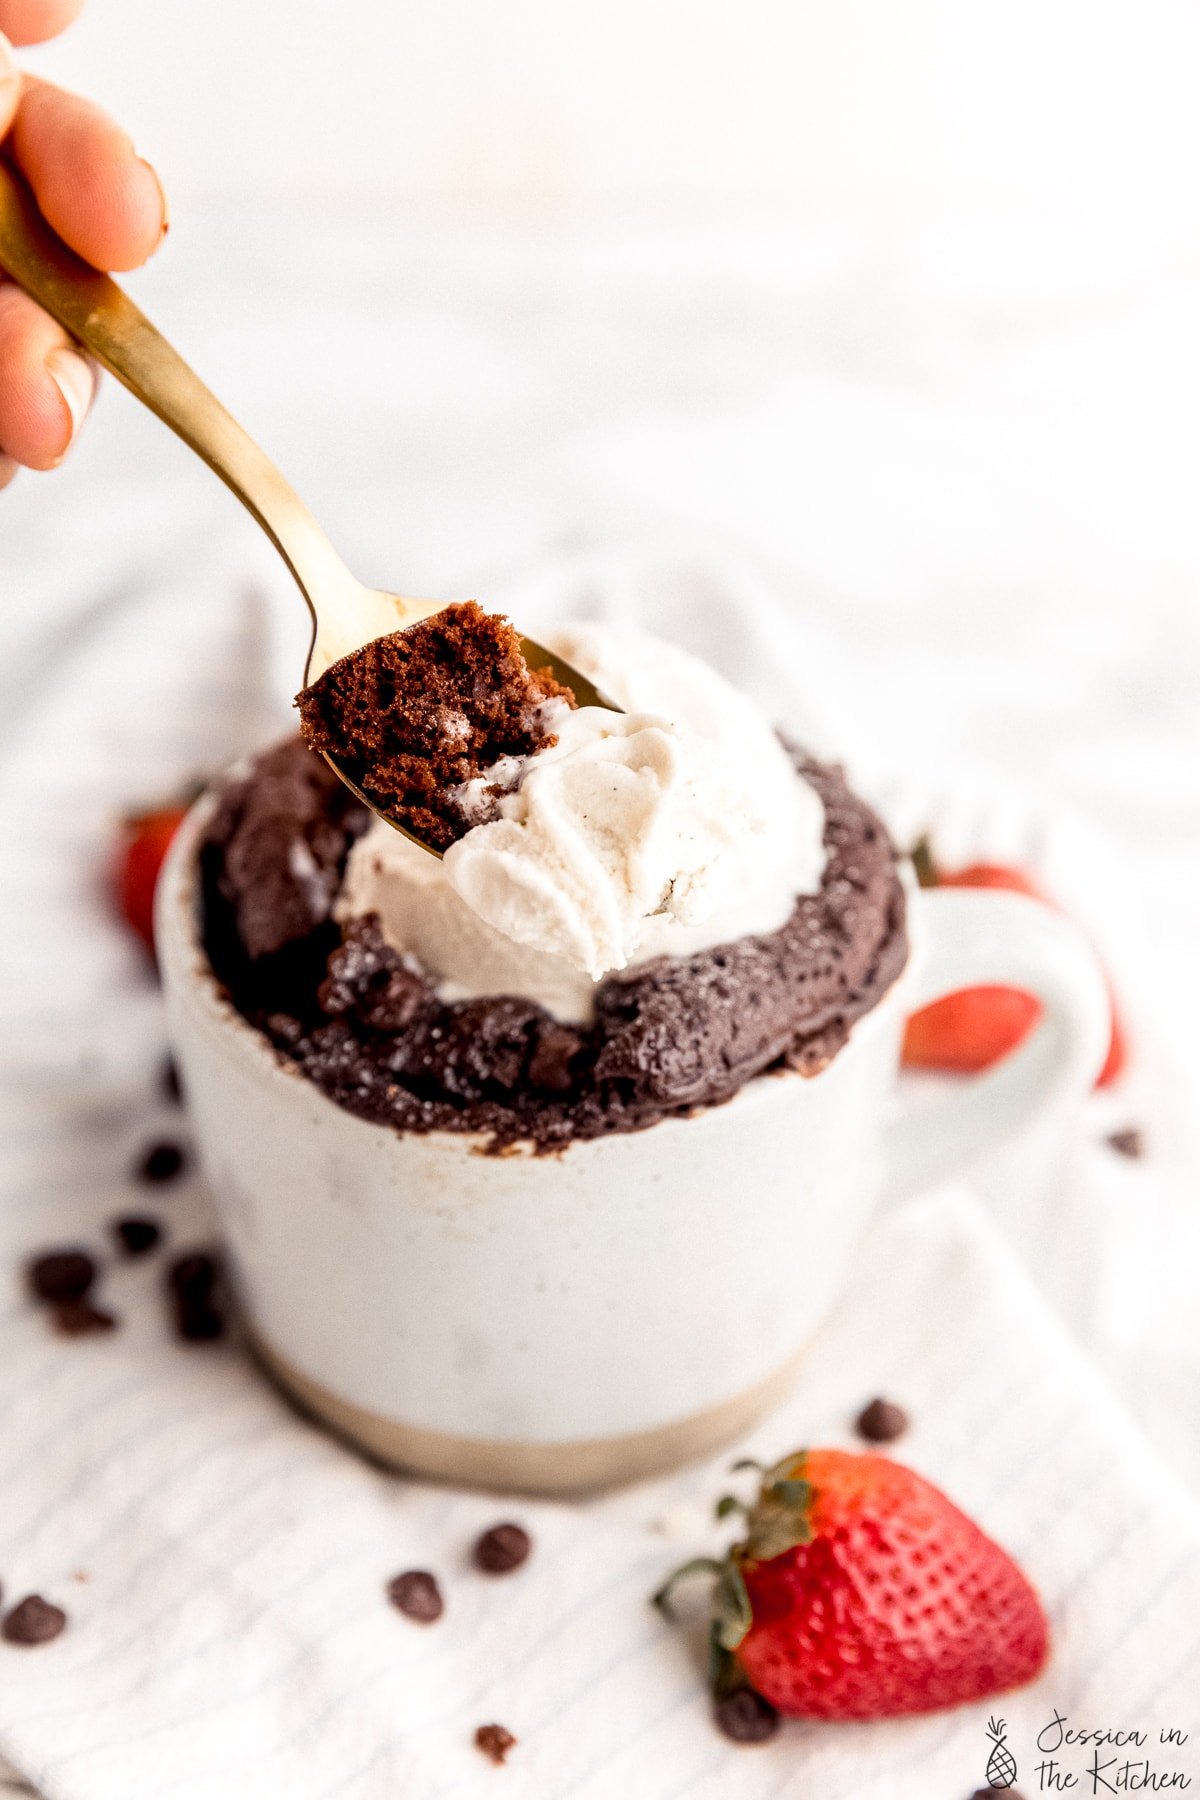
- Let it cool for like 3 to 5 minutes before digging in. It really does make a difference, like how you’d let a cake or brownies cool first!
- I’ve included instructions for baking this in your oven too!
That’s it friends! Whip this up and enjoy so much!!
Other mug cake recipes
- Banana Bread Mug Cake
- Vegan Chocolate Brownie Mug Cake
- Chocolate Chip Tahini Mug Cake
- Pumpkin Butter Mug Cake
Ingredients
- 1 tablespoon oil , (15g) any oil of choice
- 3 tablespoons milk , (45mL) any vegan milk works
- 2 tablespoons granulated sugar , (24g) I use cane sugar, you can use brown or coconut too
- 2 tablespoons unsweetened cocoa powder , (10g)
- 3 tablespoons all purpose flour , (23g) or gluten free flour mix*
- 1/4 teaspoon baking powder , (1.2g)
- 1/8 teaspoon sea salt , (.4g)
- 1/2 teaspoon vanilla extract , (2.5mL)
- 1 tablespoon chocolate chips , (14g)
Instructions
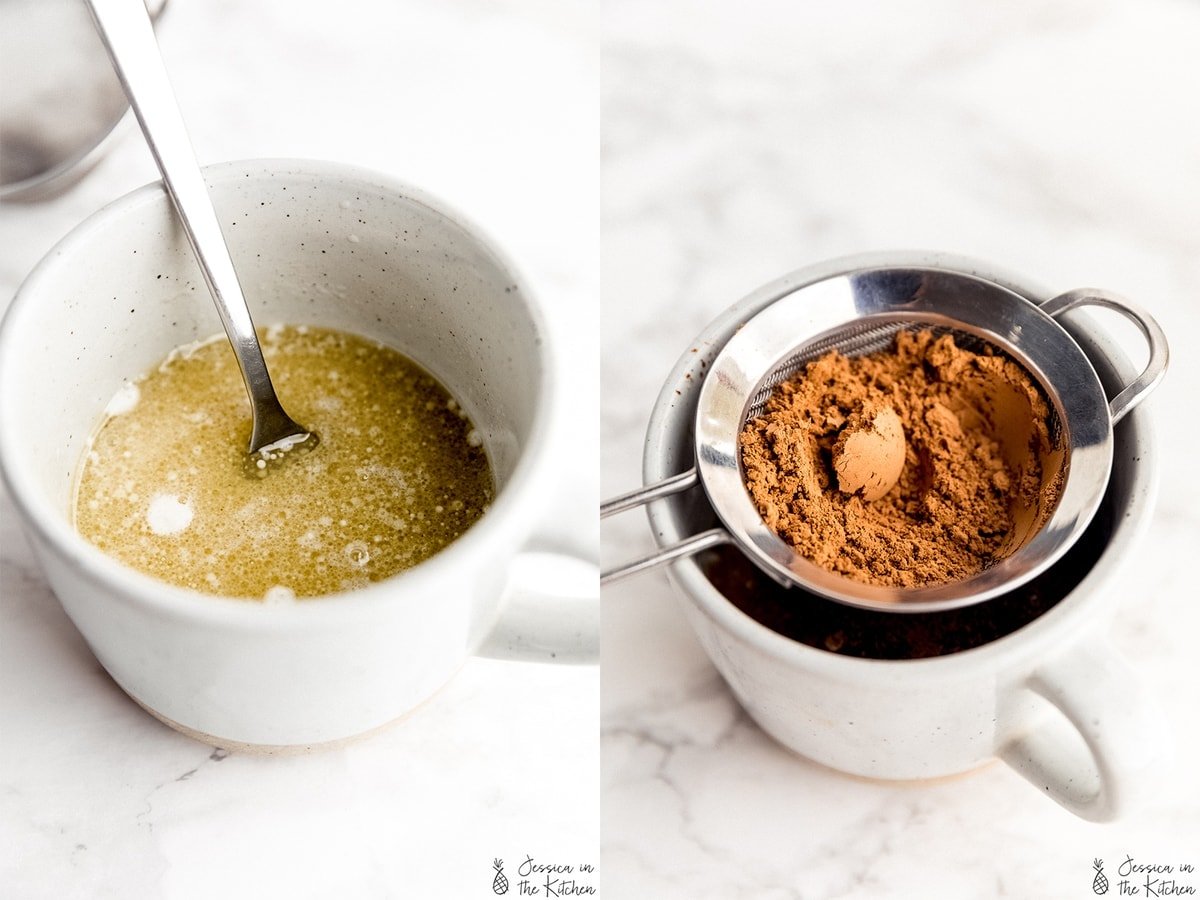
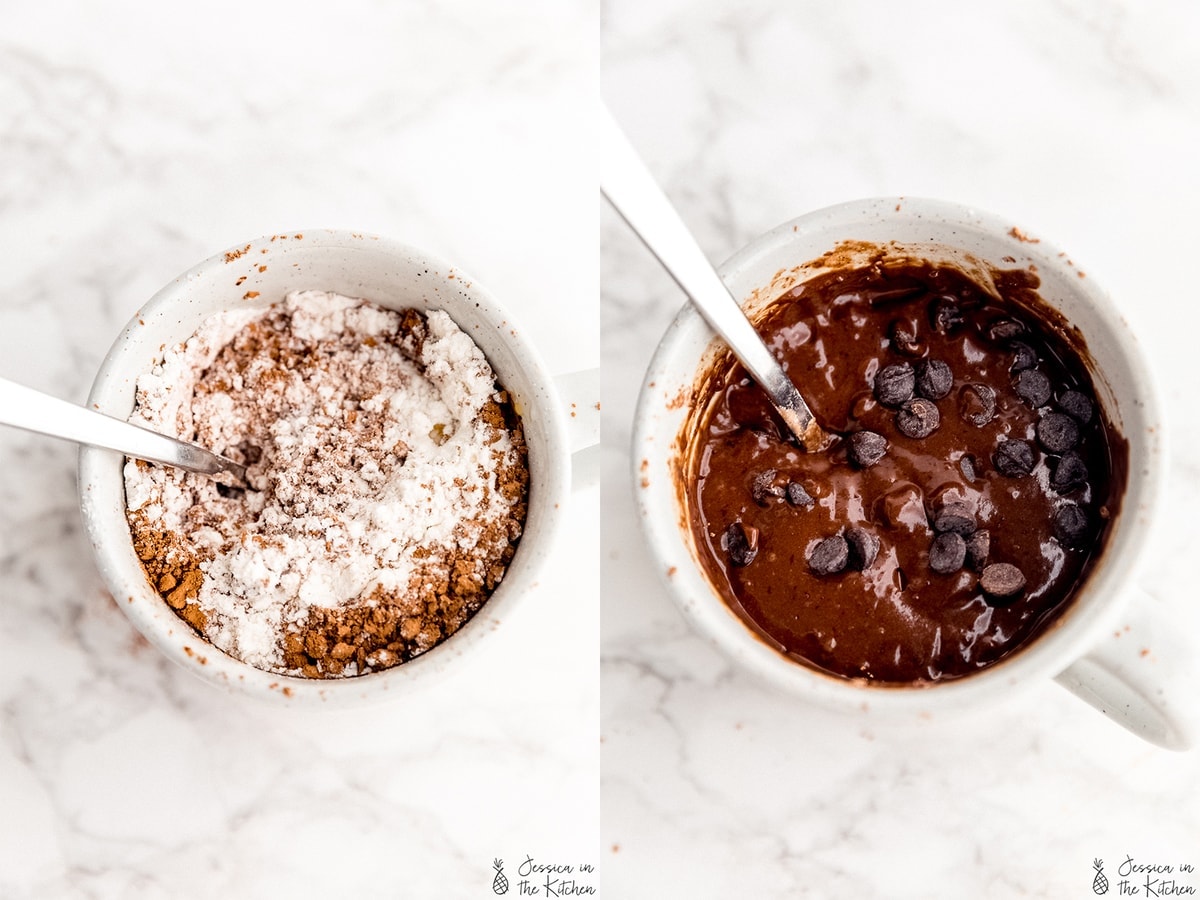
- In a mug, add in the oil, milk, sugar and cocoa powder. Whisk together for about 15 seconds. Add in the flour, baking powder, sea salt and vanilla extract.
- Stir to combine for about 30 more seconds to ensure it’s all incorporated, ensuring you get the bottoms too. Add in the chocolate chips and fold in. Feel free to sprinkle some of them on top.
- Place in your microwave for 65 seconds for an 1100W microwave. The lower the wattage the higher the seconds but I would NOT go over 70 seconds (for 850W or 900W for example). It’s okay if it’s slightly undercooked because it’ll continue to cook while it cools. It’s better for it to be slightly undercooked than overcooked and dry. Remove and let cool for about 3 to 5 minutes. Trust me!
- If making in your oven, preheat oven to 350°F/180°C and bake in about a 3.5-inch ramekin (ensure it’s oven safe) for 25 minutes. Remove and allow to cool for about 5 minutes. Enjoy!
Notes
Best tips for making mug cakes
- Use a wide short-ish mug (like the one in these photos!). If you have a variety to choose from, using this type of mug means the cake rises higher in a concentrated space. I’ve found this helps with cooking.
- Ensure to stir it all together. Don’t go whisking it for minutes on end, but ensure your entire mug cake is mixed. Since it’s such a small container it can be easy to miss the bottom. Just ensure you incorporate everything. Sometimes I scoop from the bottom up a few times to ensure this.
- Adjust your time based on your microwave. The times I’ve provided should work but yours may need an extra 10 seconds. It’ll cook edges to centre so just check the centre that it’s mostly cooked…BUT:
- BUT, don’t overcook. This will make your mug cake gummy and rubbery and dry. Remember that the mug cake will keep cooking while it’s cooling so it’s better to slightly under bake it .
- Let it cool for like 3 to 5 minutes before digging in. It really does make a difference, like how you’d let a cake or brownies cool first!
- I’ve included instructions for baking this in your oven too!
This Chocolate Mug Cake (Vegan) will totally blow you away! It’s vegan and made with very easy pantry ingredients in under 5 minutes start to finish. It has an incredible chocolate-y flavour that’s so addictive!
When I first came out with my Vegan Chocolate Cake , I didn’t realise how popular it would become! It’s been incredible seeing all your reviews and photos, and it let me know that I will definitely be coming with even more classics.
You know mug cakes are my thing. For my Vegan Banana Bread , I made my Banana Bread Mug Cake . For my Salted Tahini Chocolate Chip Cookies , I made my tahini chocolate chip mug cake . Now drum roll please presenting my Vegan Chocolate Mug Cake ! It’s for me, the perfect single size version of my chocolate cake! I can’t count how many times I’ve eaten this (I’ll just say it’s for testing!) so know for sure that you’ll LOVE IT!
What is a mug cake?
In case you don’t know, a mug cake is exactly what it sounds like. A quick single-serving cake that’s usually whipped up in your mug and cooked quickly in it too. It usually takes about a minute to two minutes to make, and the result is a fully cooked, delicious and moist mini cake. I’ve made one before that’s the #1 search result for vegan brownie mug cake , so be sure to check that one out too.
Needless to say – mug cakes are incredibly convenient and so tasty! You usually only want a single serving anyway, and the overall time is always less than 5 minutes to make!
Best tips for making mug cakes
Making a mug cake is pretty much foolproof, but these few tips help to make a big difference. I’ve tested mug cakes over 2 dozen times (yes!), and here are the top tips I took away:
- Use a wide short-ish mug (like the one in these photos!). If you have a variety to choose from, using this type of mug means the cake rises higher in a concentrated space. I’ve found this helps with cooking.
- Ensure to stir it all together. Don’t go whisking it for minutes on end, but ensure your entire mug cake is mixed. Since it’s such a small container it can be easy to miss the bottom. Just ensure you incorporate everything. Sometimes I scoop from the bottom up a few times to ensure this.
- Adjust your time based on your microwave. The times I’ve provided should work but yours may need an extra 10 seconds. It’ll cook edges to centre so just check the centre that it’s mostly cooked…BUT:
- BUT, don’t overcook. This will make your mug cake gummy and rubbery and dry. Remember that the mug cake will keep cooking while it’s cooling so it’s better to slightly under bake it .
- Let it cool for like 3 to 5 minutes before digging in. It really does make a difference, like how you’d let a cake or brownies cool first!
- I’ve included instructions for baking this in your oven too!
That’s it friends! Whip this up and enjoy so much!!
Other mug cake recipes
- Banana Bread Mug Cake
- Vegan Chocolate Brownie Mug Cake
- Chocolate Chip Tahini Mug Cake
- Pumpkin Butter Mug Cake
Ingredients
- 1 tablespoon oil , (15g) any oil of choice
- 3 tablespoons milk , (45mL) any vegan milk works
- 2 tablespoons granulated sugar , (24g) I use cane sugar, you can use brown or coconut too
- 2 tablespoons unsweetened cocoa powder , (10g)
- 3 tablespoons all purpose flour , (23g) or gluten free flour mix*
- 1/4 teaspoon baking powder , (1.2g)
- 1/8 teaspoon sea salt , (.4g)
- 1/2 teaspoon vanilla extract , (2.5mL)
- 1 tablespoon chocolate chips , (14g)
Instructions
- In a mug, add in the oil, milk, sugar and cocoa powder. Whisk together for about 15 seconds. Add in the flour, baking powder, sea salt and vanilla extract.
- Stir to combine for about 30 more seconds to ensure it’s all incorporated, ensuring you get the bottoms too. Add in the chocolate chips and fold in. Feel free to sprinkle some of them on top.
- Place in your microwave for 65 seconds for an 1100W microwave. The lower the wattage the higher the seconds but I would NOT go over 70 seconds (for 850W or 900W for example). It’s okay if it’s slightly undercooked because it’ll continue to cook while it cools. It’s better for it to be slightly undercooked than overcooked and dry. Remove and let cool for about 3 to 5 minutes. Trust me!
- If making in your oven, preheat oven to 350°F/180°C and bake in about a 3.5-inch ramekin (ensure it’s oven safe) for 25 minutes. Remove and allow to cool for about 5 minutes. Enjoy!
Notes
Best tips for making mug cakes
- Use a wide short-ish mug (like the one in these photos!). If you have a variety to choose from, using this type of mug means the cake rises higher in a concentrated space. I’ve found this helps with cooking.
- Ensure to stir it all together. Don’t go whisking it for minutes on end, but ensure your entire mug cake is mixed. Since it’s such a small container it can be easy to miss the bottom. Just ensure you incorporate everything. Sometimes I scoop from the bottom up a few times to ensure this.
- Adjust your time based on your microwave. The times I’ve provided should work but yours may need an extra 10 seconds. It’ll cook edges to centre so just check the centre that it’s mostly cooked…BUT:
- BUT, don’t overcook. This will make your mug cake gummy and rubbery and dry. Remember that the mug cake will keep cooking while it’s cooling so it’s better to slightly under bake it .
- Let it cool for like 3 to 5 minutes before digging in. It really does make a difference, like how you’d let a cake or brownies cool first!
- I’ve included instructions for baking this in your oven too!
Chocolate Mug Cake (Vegan)
Ingredients
- 1 tablespoon oil (15g) any oil of choice
- 3 tablespoons milk (45mL) any vegan milk works
- 2 tablespoons granulated sugar (24g) I use cane sugar, you can use brown or coconut too
- 2 tablespoons unsweetened cocoa powder (10g)
- 3 tablespoons all purpose flour (23g) or gluten free flour mix*
- 1/4 teaspoon baking powder (1.2g)
- 1/8 teaspoon sea salt (.4g)
- 1/2 teaspoon vanilla extract (2.5mL)
- 1 tablespoon chocolate chips (14g)
Instructions
- In a mug, add in the oil, milk, sugar and cocoa powder. Whisk together for about 15 seconds. Add in the flour, baking powder, sea salt and vanilla extract.
- Stir to combine for about 30 more seconds to ensure it’s all incorporated, ensuring you get the bottoms too. Add in the chocolate chips and fold in. Feel free to sprinkle some of them on top.
- Place in your microwave for 65 seconds for an 1100W microwave. The lower the wattage the higher the seconds but I would NOT go over 70 seconds (for 850W or 900W for example). It’s okay if it’s slightly undercooked because it’ll continue to cook while it cools. It’s better for it to be slightly undercooked than overcooked and dry. Remove and let cool for about 3 to 5 minutes. Trust me!
- If making in your oven, preheat oven to 350°F/180°C and bake in about a 3.5-inch ramekin (ensure it’s oven safe) for 25 minutes. Remove and allow to cool for about 5 minutes. Enjoy!
Video
Notes
Best tips for making mug cakes
- Use a wide short-ish mug (like the one in these photos!). If you have a variety to choose from, using this type of mug means the cake rises higher in a concentrated space. I’ve found this helps with cooking.
- Ensure to stir it all together. Don’t go whisking it for minutes on end, but ensure your entire mug cake is mixed. Since it’s such a small container it can be easy to miss the bottom. Just ensure you incorporate everything. Sometimes I scoop from the bottom up a few times to ensure this.
- Adjust your time based on your microwave. The times I’ve provided should work but yours may need an extra 10 seconds. It’ll cook edges to centre so just check the centre that it’s mostly cooked…BUT:
- BUT, don’t overcook. This will make your mug cake gummy and rubbery and dry. Remember that the mug cake will keep cooking while it’s cooling so it’s better to slightly under bake it .
- Let it cool for like 3 to 5 minutes before digging in. It really does make a difference, like how you’d let a cake or brownies cool first!
- I’ve included instructions for baking this in your oven too!
Nutrition
Chocolate Mug Cake (Vegan) https://jessicainthekitchen.com/chocolate-mug-cake-vegan/ June 12, 2020
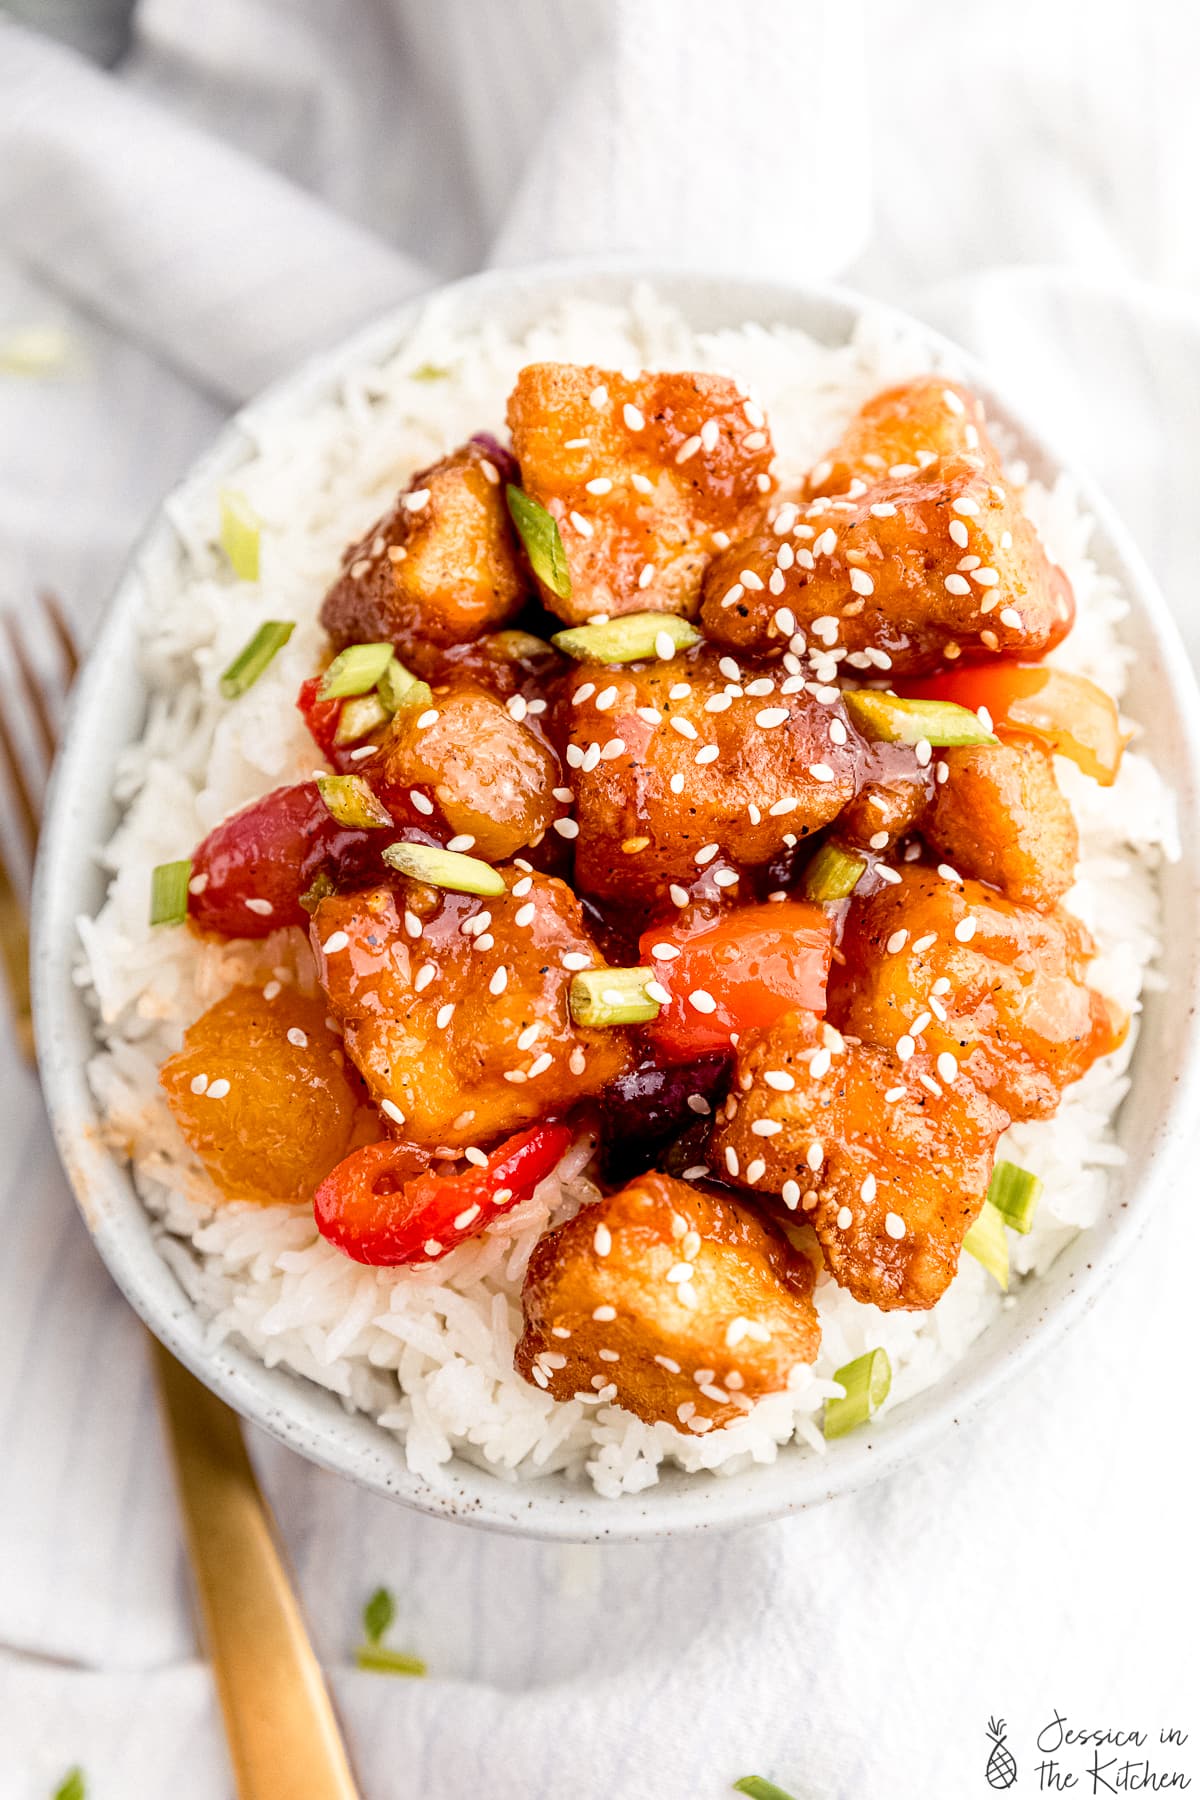
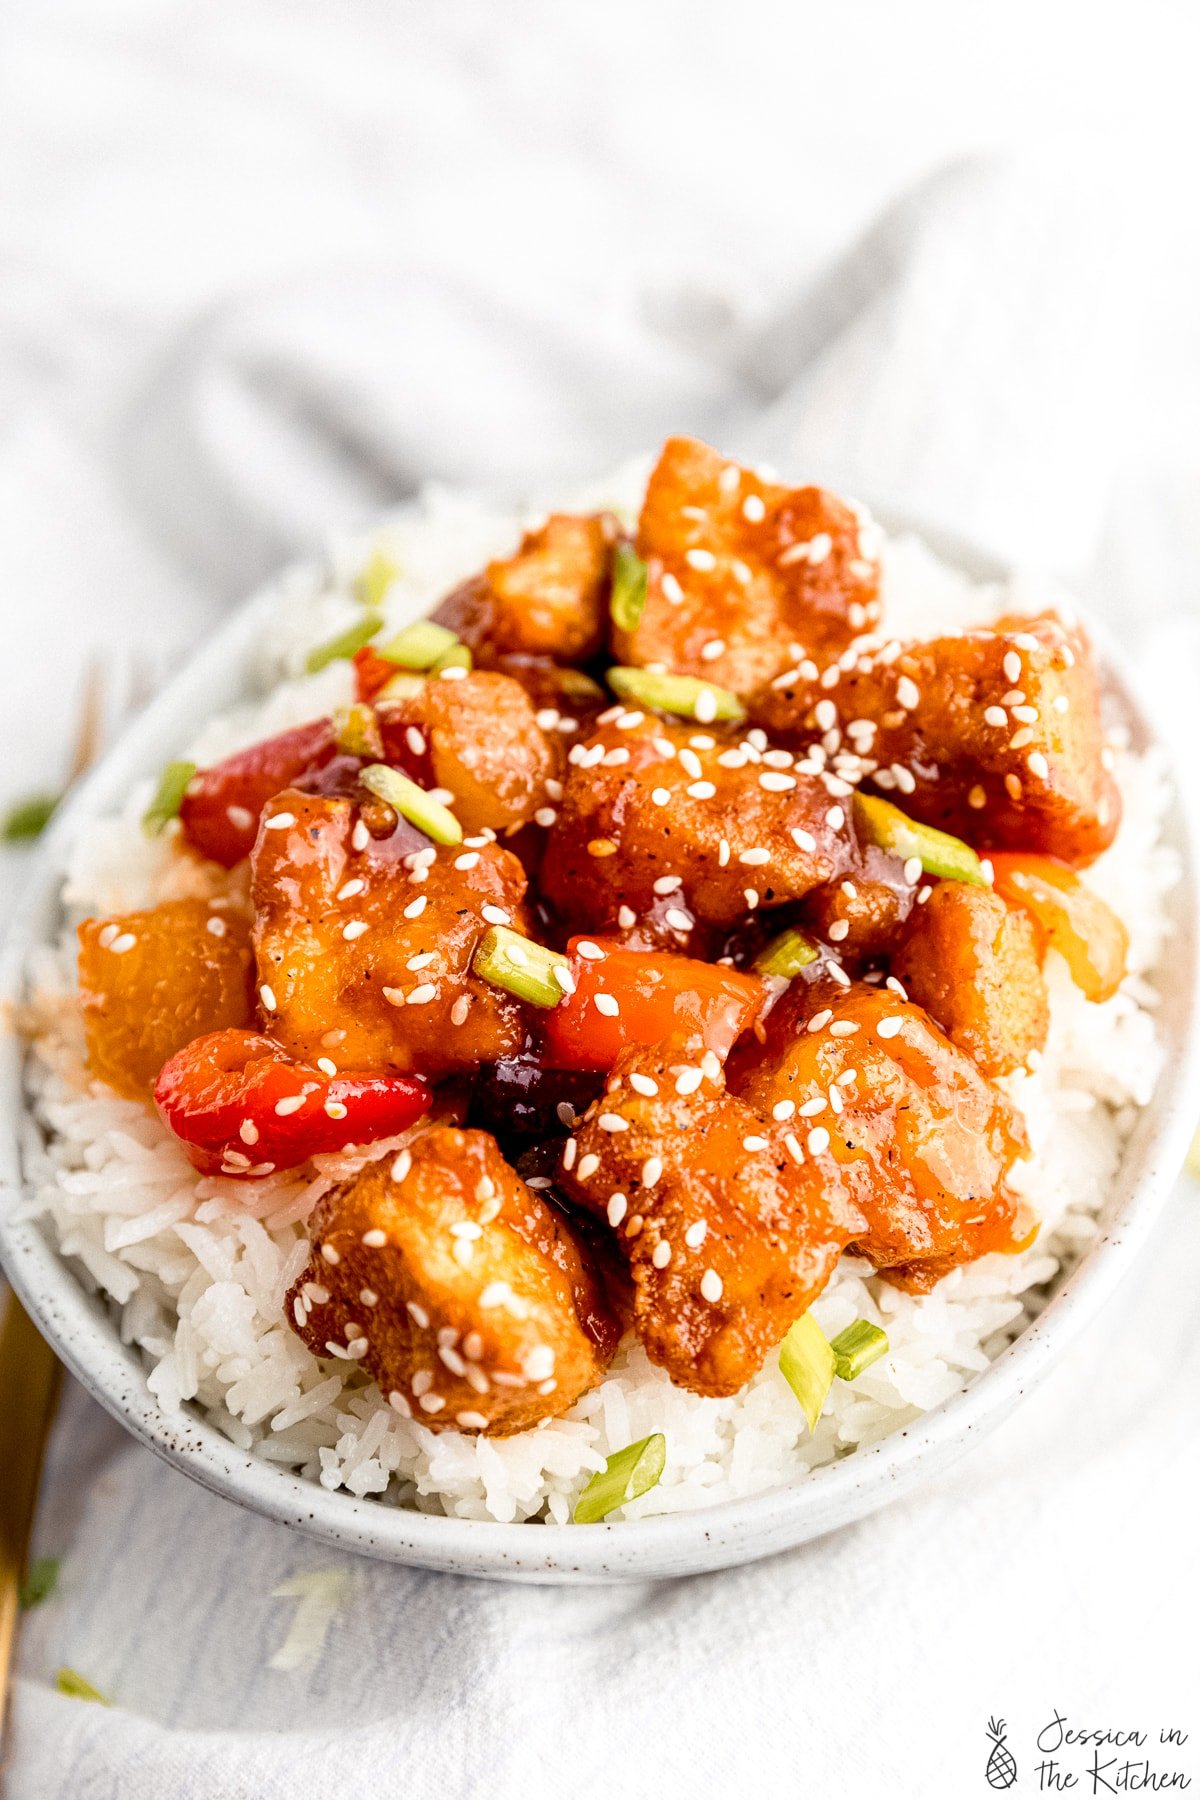
This Sweet and Sour Tofu is one of my favourite comfort foods ever of my favourite takeout! The tofu is crisp with a perfect texture and the sweet and sour sauce is unbelievably delicious! It comes together quickly and tastes amazing as meal prep too!
I’ve been making this sweet and sour sauce since the beginning of ‘Jessiker Bakes’. The first version of JITK, and where I started experimenting with savoury dishes. 10 years later (the sauce was always vegan) I’ve modified it a bit, made the entire dish vegan, and I am finally re-sharing it! I can’t count how many times I’ve made this but it is our #1 go to COMFORT meal.

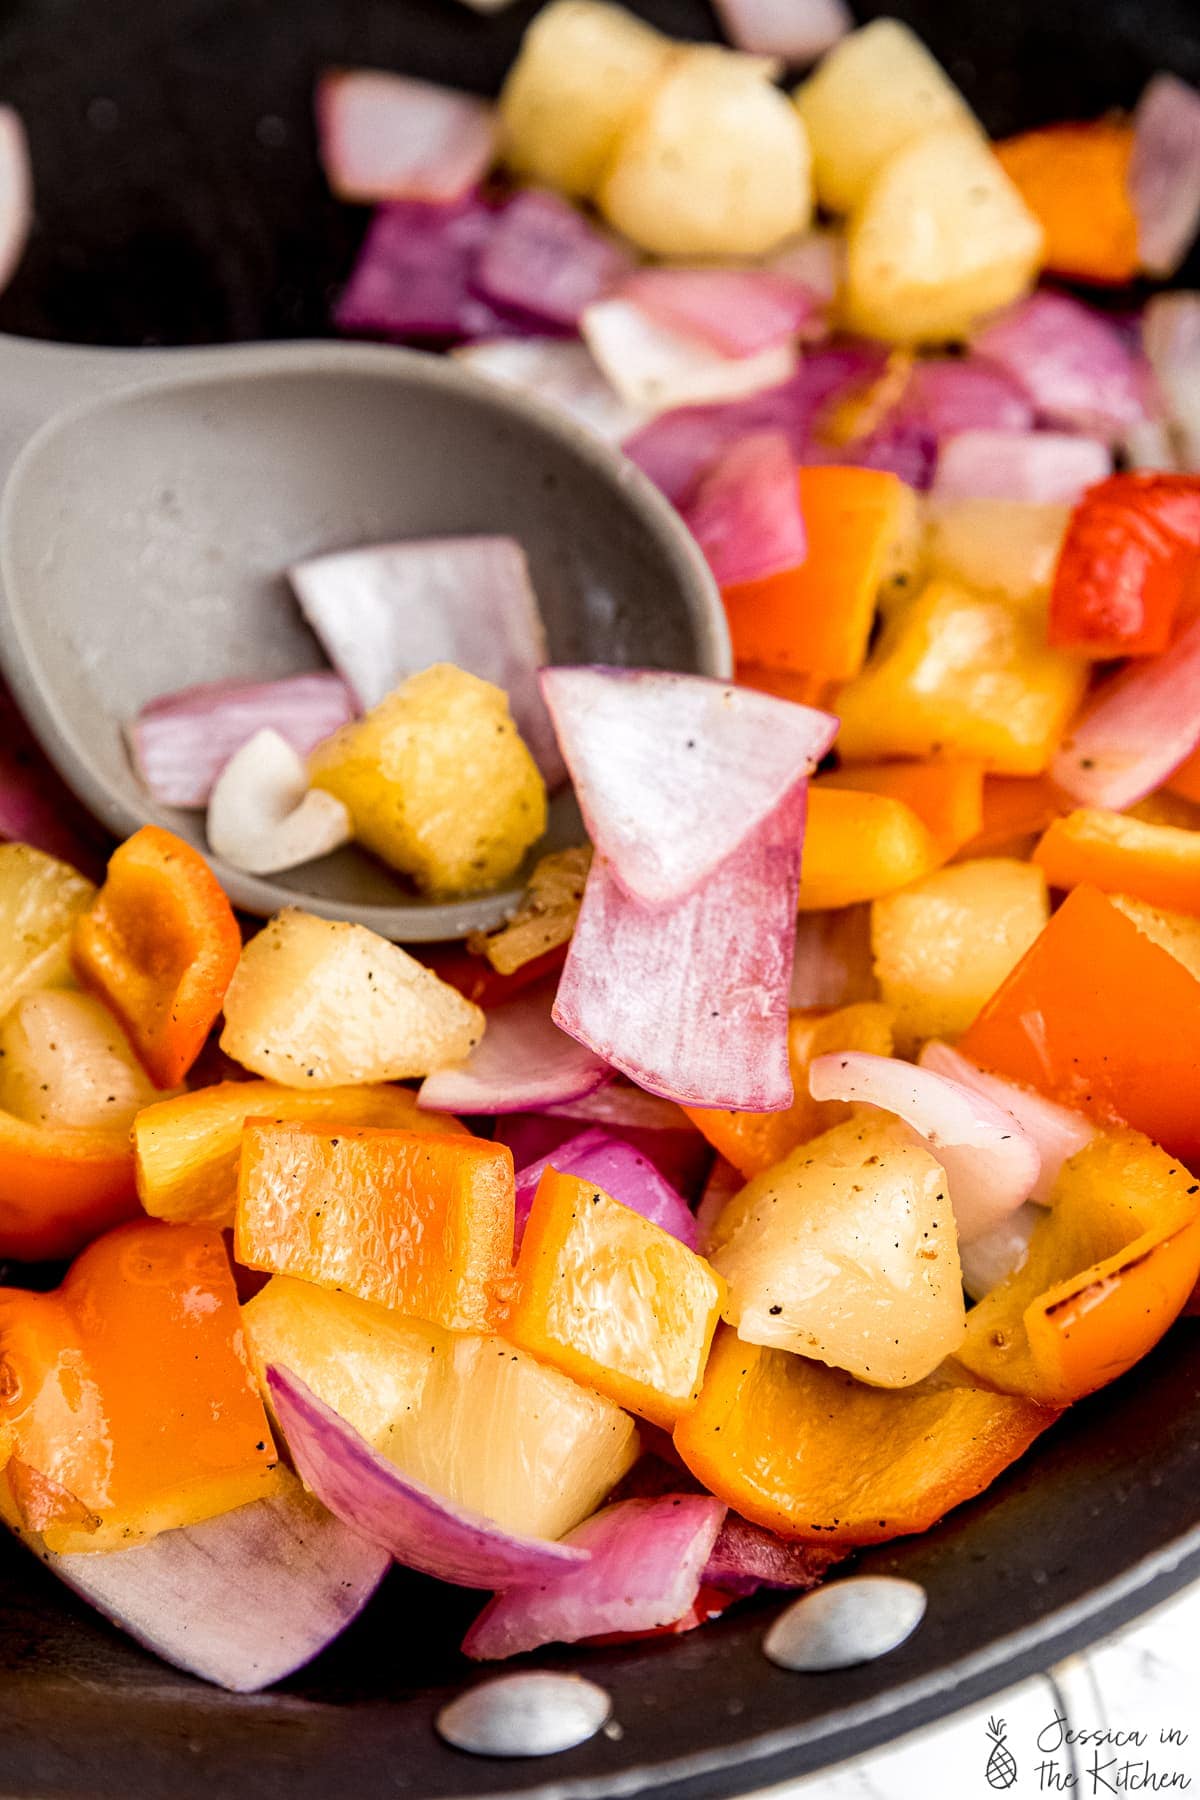
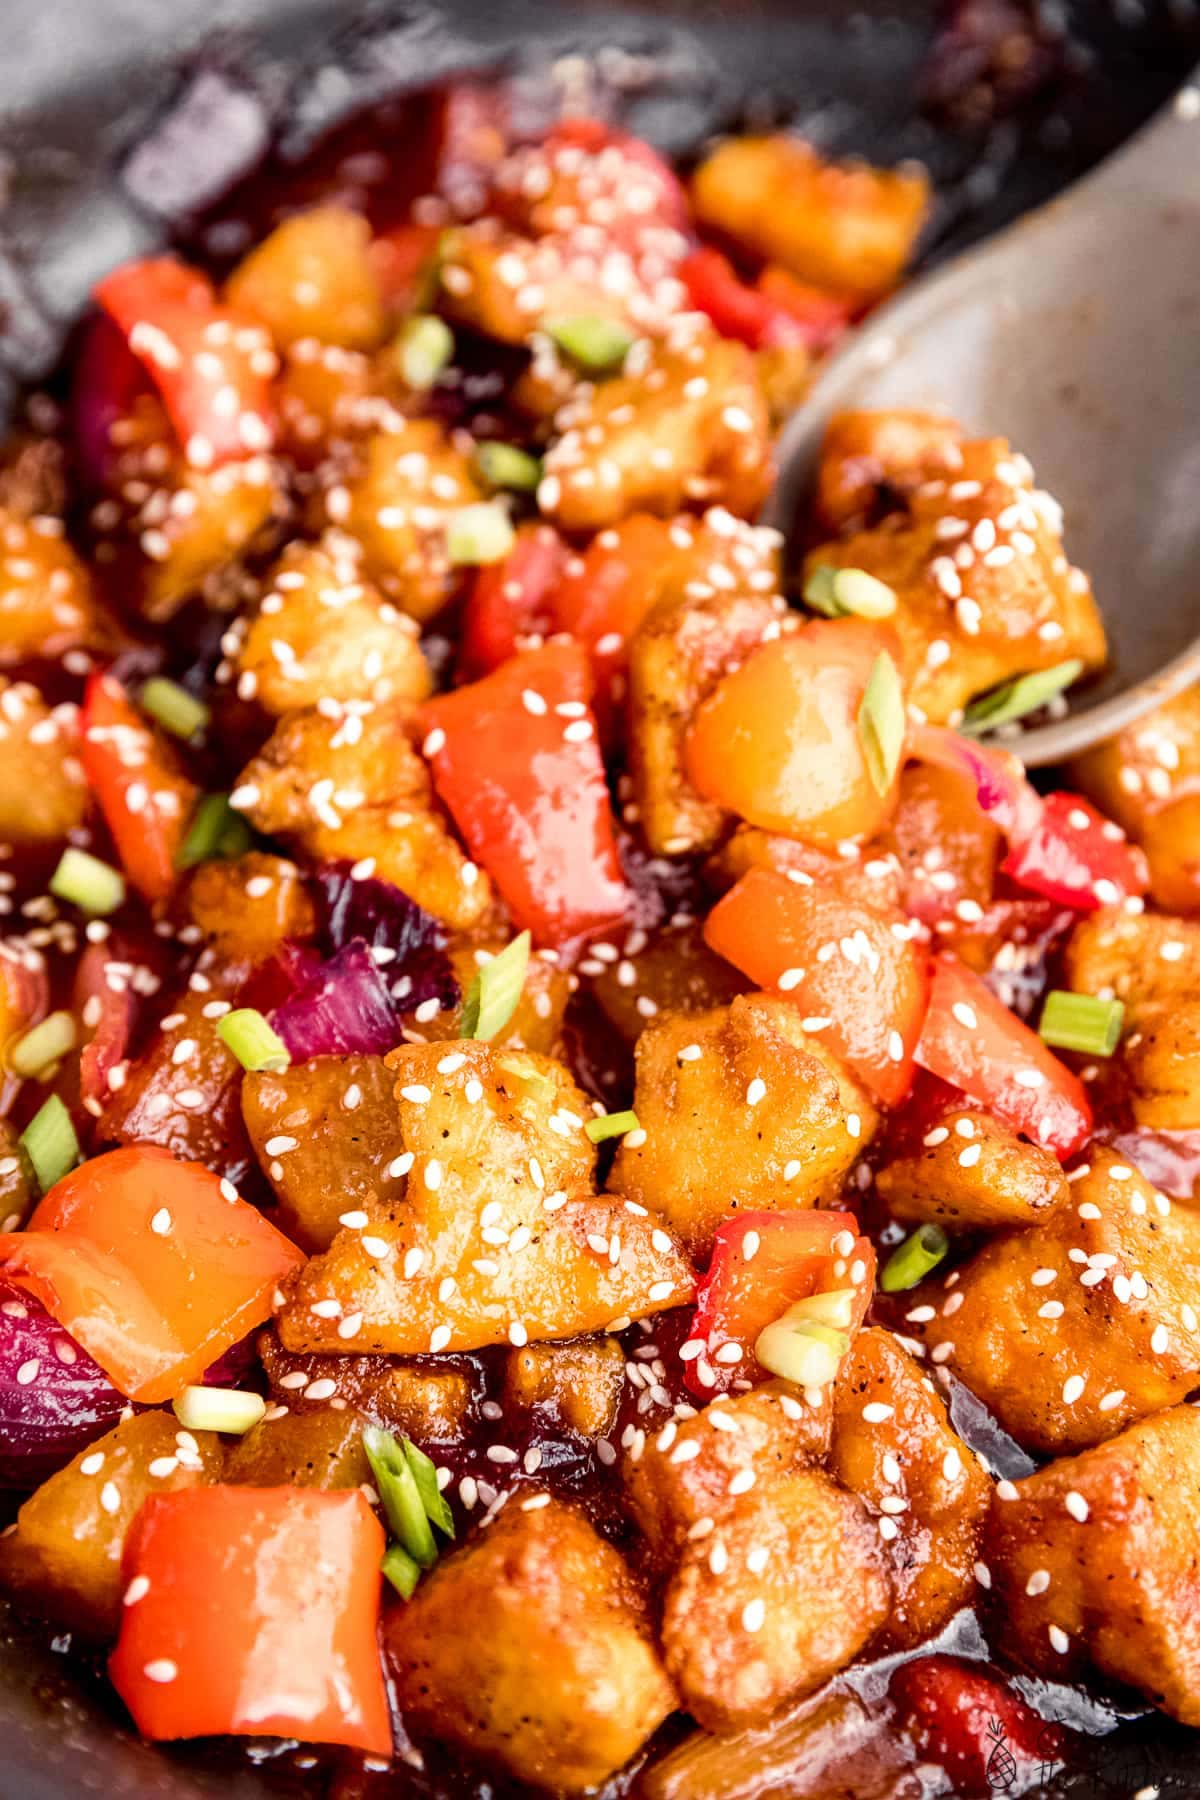
None of my local Asian restaurants make sweet and sour tofu. Which is a bummer, but also motivation to make my own. Let me tell you – it is INCREDIBLE! The first time I made it for a blog recipe, Gav and I finished it all that night. I say that with pride. It embodies all the flavours you would expect from a sweet and sour sauce – sweet, tangy, umami filled and so rich in colour and flavour. It comes with my favourite usual add-ins of bell peppers, onions and pineapples, and of course, crispy tofu.
How to Make Tofu Crispy
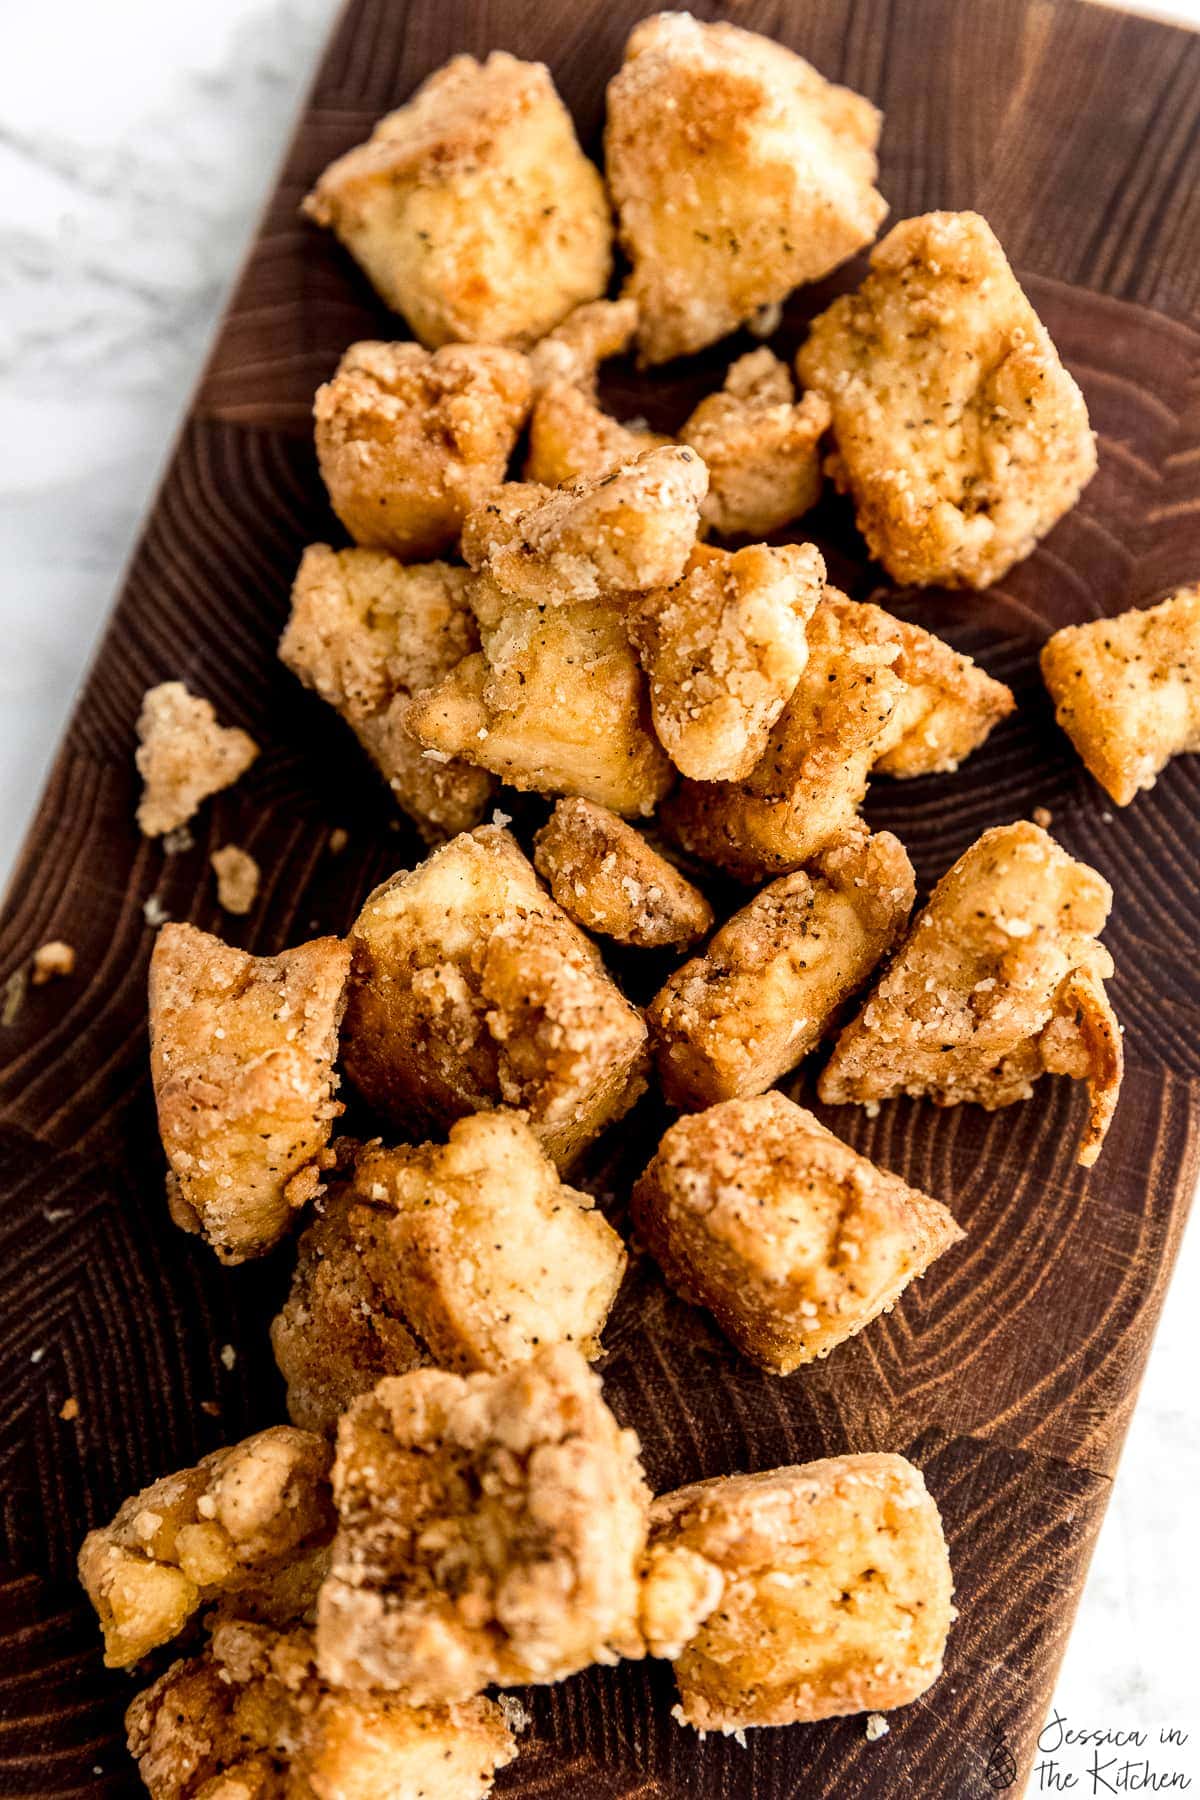
After years of making tofu, I’m proud to say we know how to make it perfectly crispy. The short answer is: cornstarch. I go into full detail in my How to Cook Tofu 101 blog post , and I highly recommend that you read it. Cornstarch crisps up the tofu while wicking out any excess liquid. It’s also gluten free so works well for that.
My second tip is to always, always press your tofu. I also say it in my how to cook tofu 101 blog post, it’s not tofu’s job to have flavour. It’s up to us to season it, in fact, I’m glad it barely has a flavour. It takes on anything you want it to. Removing the liquid from tofu allows it space to absorb all the flavour you want it to have. Those two, plus a nice hot pan to crisp it up in will create perfect tofu for this dish and beyond!
Can’t have tofu?
If you’re allergic to soy, this recipe works perfectly on cauliflower too! Just bread it and crisp it up like in my orange cauliflower dish , then finish it like I do in this recipe in the pan. You could also do this on mushrooms or tempeh.
Related Recipes
- General Tso Tofu
- Sweet and Sticky Orange Cauliflower Bites
- Orange Air Fryer Tofu
- Easy Baked Tofu
- Tofu and Veggie Stir Fry
Ingredients
Crispy Tofu
- 1 (16 ounce) block firm tofu , or extra firm tofu pressed, and torn into 1 to 2 inch pieces*
- 1 tablespoon soy sauce , gluten free if needed, or liquid aminos or tamari
- 1/2 teaspoon garlic powder
- 1/4 teaspoon sea salt
- 1/4 teaspoon ground black pepper
- 1/3 cup cornstarch
- 1/4 cup oil for frying
Sweet and Sour Sauce
- 1/2 medium red onion , chopped
- 1/2 cup chopped/cubed pineapple
- 1 medium bell pepper, chopped
- ⅓ cup sugar , I use cane sugar, you can use brown or any granulated (you could even use ¼ cup sugar)
- 1/4 cup ketchup
- 1/4 cup vinegar , preferably rice or white
- 1/4 cup water , or pineapple juice
- 1 tablespoon soy sauce , gluten free if needed, or liquid aminos or tamari
- 1 teaspoon garlic powder
- 1/2 tablespoon sesame seeds , for garnish
- chopped scallion , for garnish
Instructions
Crispy Tofu
- In a medium-sized bowl place the pressed and torn tofu pieces. Add the soy sauce and toss to coat. Add in the garlic powder, sea salt, ground black pepper and cornstarch and toss to thoroughly combine, ensuring all the tofu pieces are covered with the seasonings and the cornstarch.
- Heat a pan or wok over medium-high heat, and add the oil. When hot, add the tofu and toss to crisp up on all sides until the tofu is cooked and crisped on all sides, about 5 to 8 minutes. Feel free to do this in batches if desired. Remove tofu pieces and set aside.
Sweet and Sour Sauce + Putting it All Together
- In the same pan, lower the heat to over medium-high heat, and add in the onions, pineapples and bell peppers.
- Saute until the onions are translucent and the pineapples are slightly browned, about 5 minutes.
- In a separate bowl, whisk together the sugar, ketchup, vinegar, water, soy sauce, and garlic powder for the sweet and sour sauce and stir together until fully combined.
- Pour in the sauce over the veggies. Bring to a slight boil, then reduce to a simmer for about 5 minutes until the sauce has thickened up. Add back in the crisped up tofu, and stir to combine. Taste test and add more sugar or soy sauce if you desire. Remove from heat until needed.
- Remove from heat and top with sesame seeds and chopped scallions. Serve and enjoy!
