If you like your cookies chewy and chocolatey, my vegan brownie cookies are for you! These fudgy little bites are easy to make with pantry ingredients.

What happens when you combine Vegan Brownies with Vegan Chocolate Chip Cookies ? You get a fabulous batch of brownie cookies! And the other thing that happens is… you can’t stop eating them. (Consider this your warning!) These cookies are rich and fudgy, without any eggs or dairy. I can’t wait for you to make them because I know you’re going to love them too!
Why These Brownie Cookies Are Totally Swoon-Worthy
I think the pictures say it all—you can practically taste and smell the cookies from the photos alone! Here’s why you should make them ASAP.
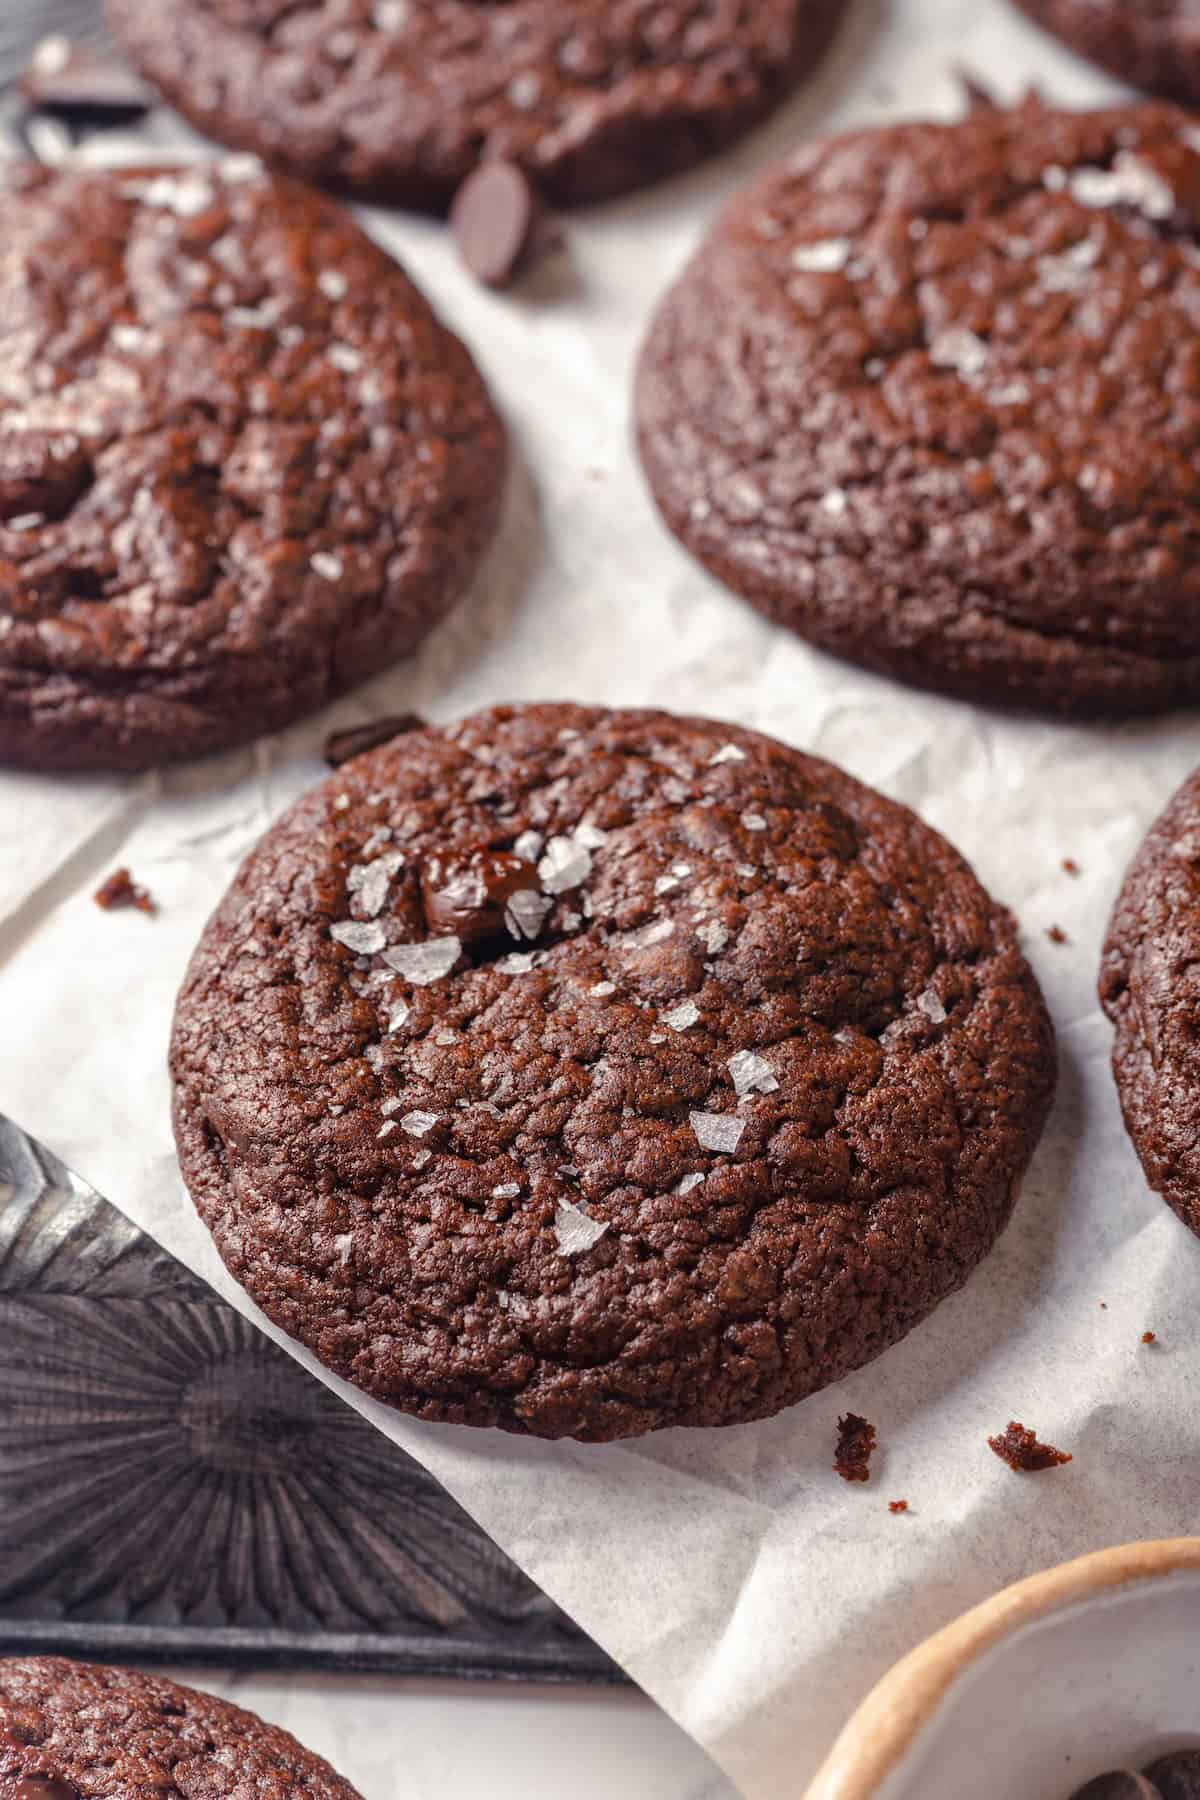
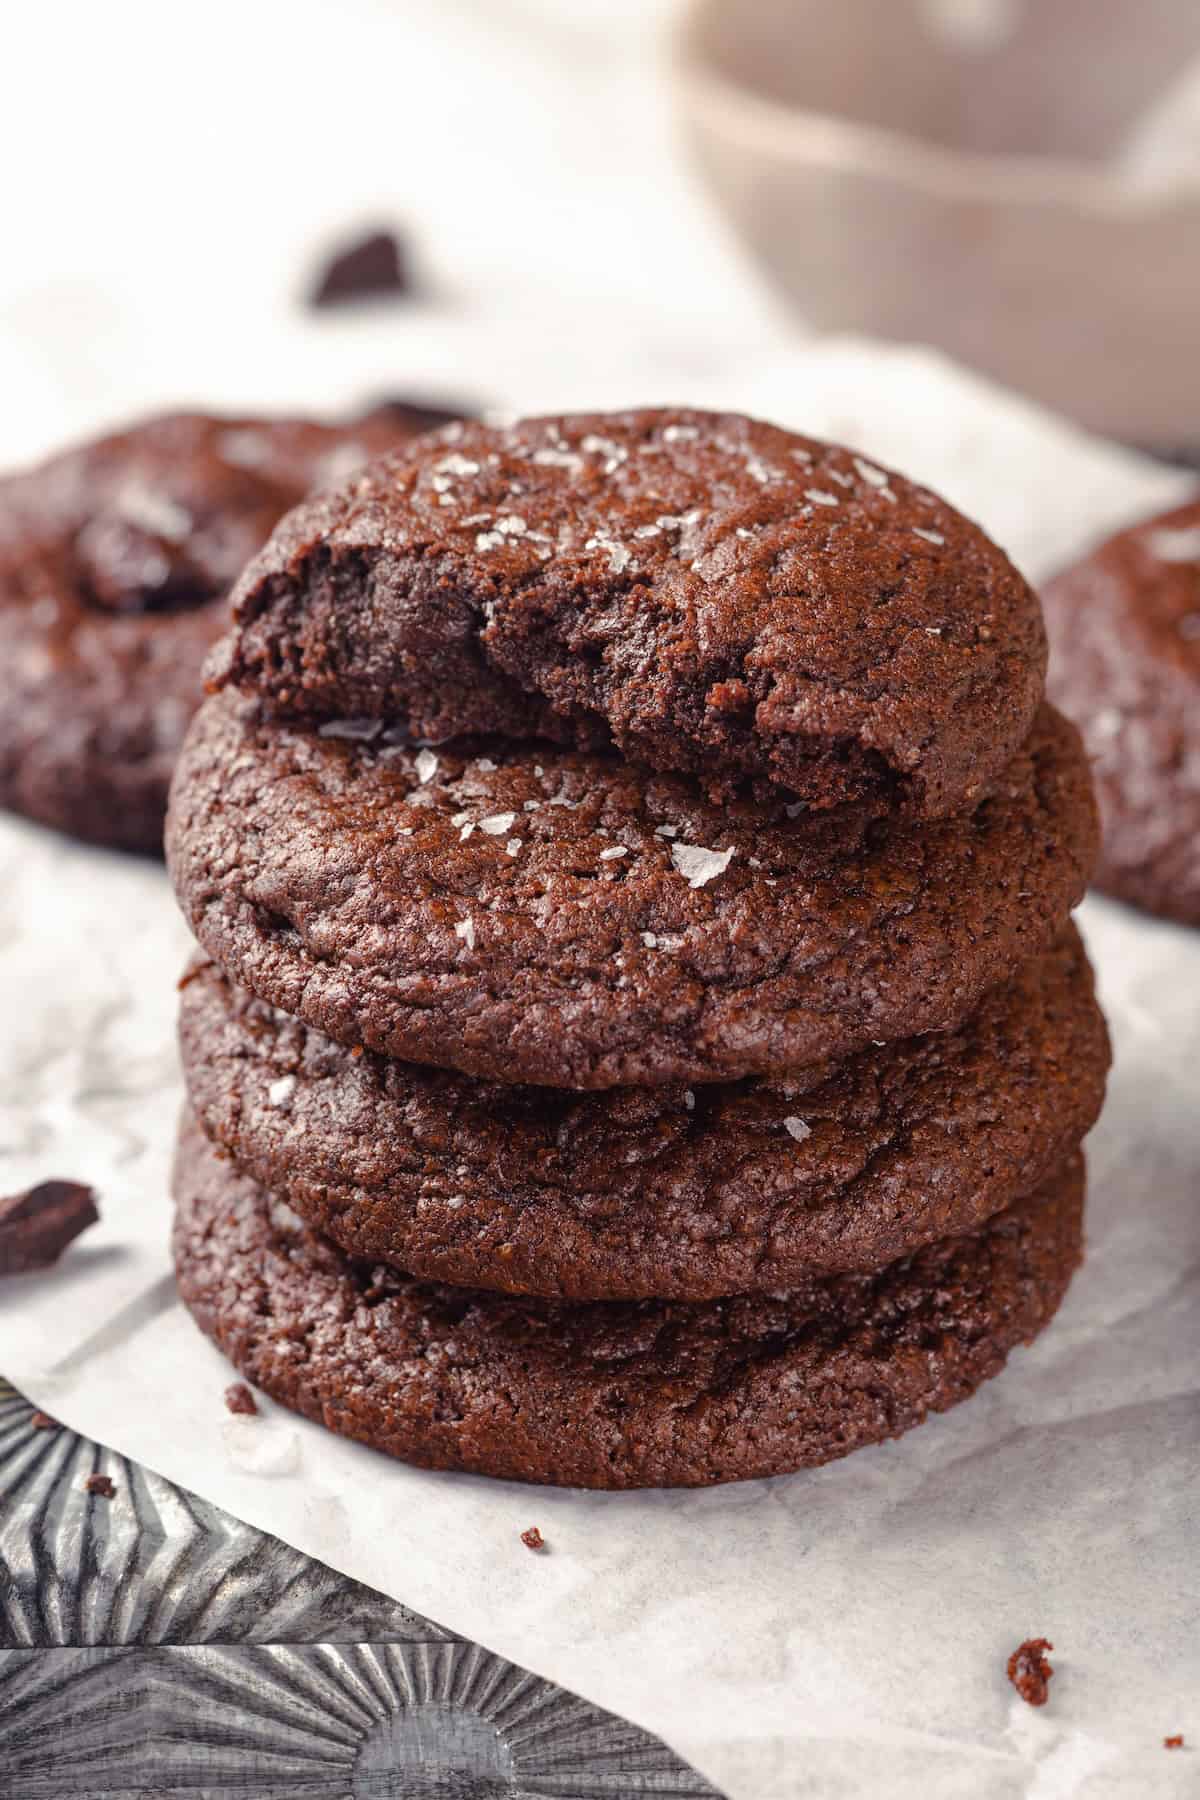
- That texture, though . These cookies are fabulously chewy and fudgy on the inside, with a delightful crisp edge. A little flaky sea salt on top adds some crunchy goodness too.
- Cookies for chocolate lovers . The chocolate is the MAIN event here, not an add-in. With chocolate in the dough and chocolate chips, you get that divine flavour in every bite.
- Easy to make . This recipe relies on simple ingredients and the process of making the brownie cookies is easy too.
Notes on Ingredients
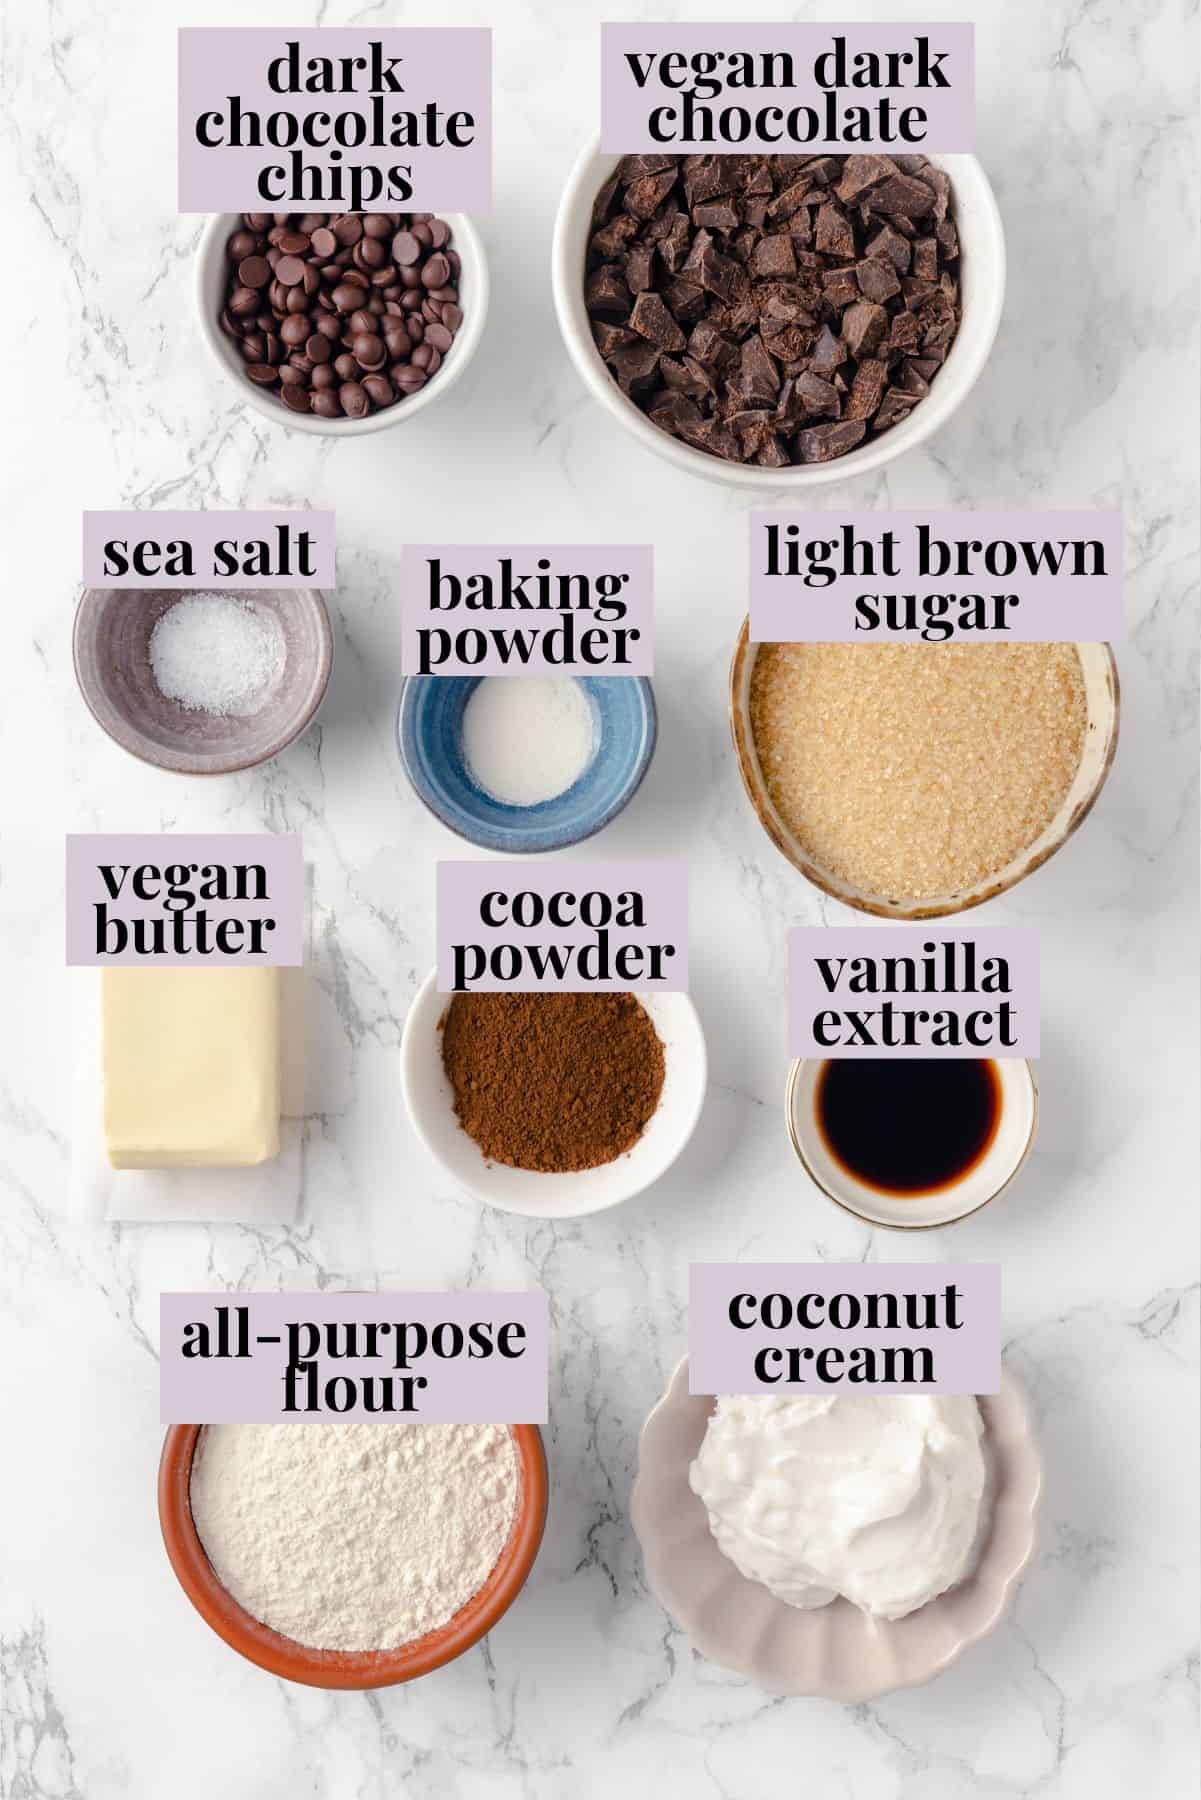
These are the ingredients you’ll need to make my decadent brownie cookies! Scroll down to the recipe card to find the ingredient quantities and recipe instructions.
- Vegan dark chocolate – Use a 70% variety for rich flavour.
- Vegan butter – I love using my Vegan Butter .
- Coconut cream – Taken from the top of canned coconut milk. You can use the liquid that’s left in the can to make smoothies. (This Strawberry Mango Smoothie is a favourite!)
- Light brown sugar – This helps make the cookies chewy.
- Vanilla extract
- All-purpose flour – A gluten-free flour blend can be used as an alternative for gluten-free vegan brownie cookies.
- Cocoa powder
- Baking powder
- Sea salt – I like adding some to the dough and using a flaky sea salt to sprinkle on top too.
- Dark chocolate chips – Or you can use chopped dark chocolate from a bar.
How to Make Brownie Cookies
Follow these simple steps for the perfect fudgy brownie cookies.
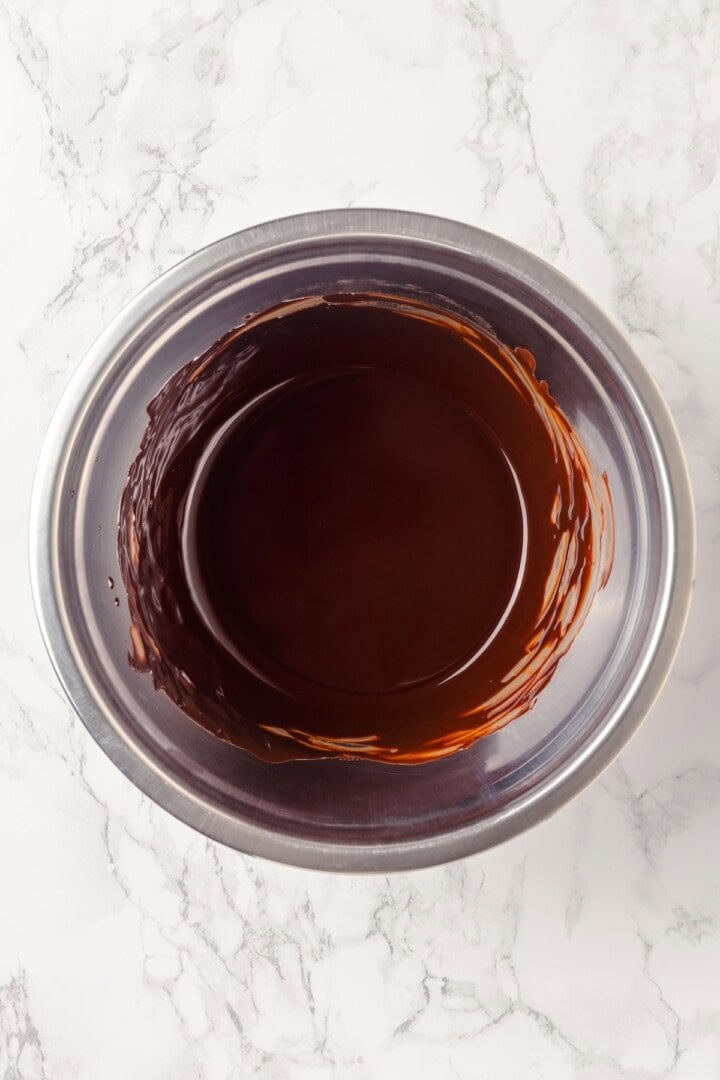
Melt the chocolate and butter.
- Melt the chocolate. Combine the dark chocolate and vegan butter and melt them in a double-boiler or in the microwave. Let the mixture cool to room temperature.
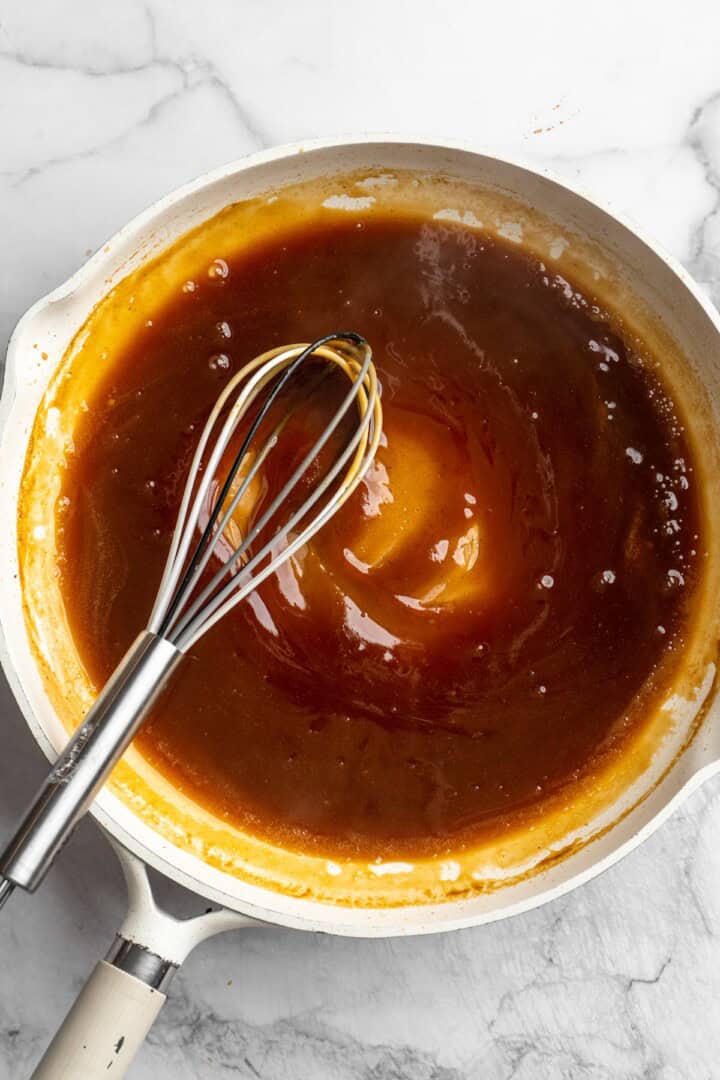
- Mix the sugar and coconut cream. Whisk the light brown sugar, coconut cream, and vanilla in a bowl until the sugar dissolves and the mixture becomes airy.
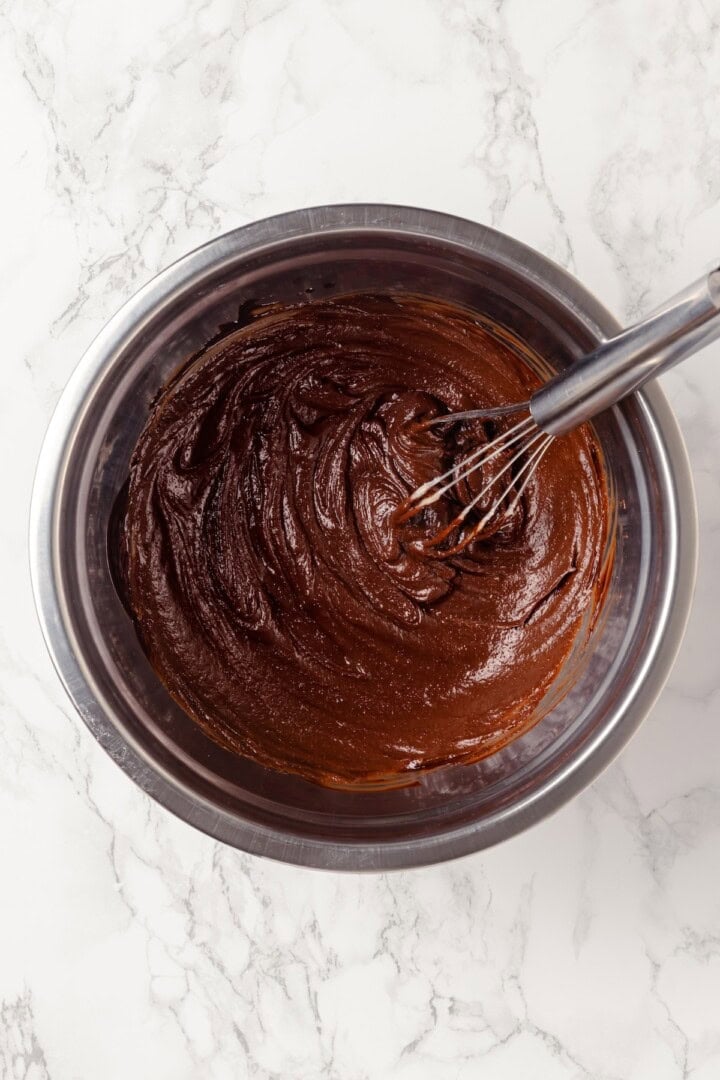
Combine wet ingredients.
- Add the chocolate. Whisk the chocolate into the coconut cream mixture.
- Sift and fold. Sift the flour, cocoa powder, baking powder, and salt into the bowl. Add chocolate chips and fold with a spatula to combine.
- Refrigerate. Cover and chill the dough for 20–30 minutes.
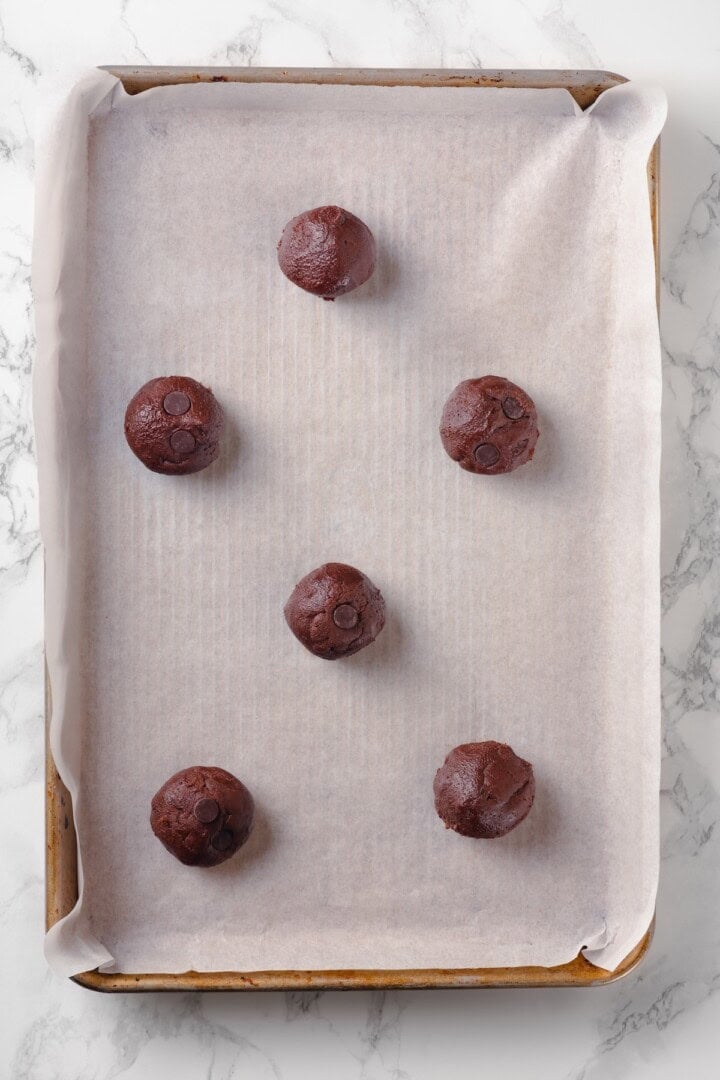
Chill the dough, then roll into balls.
- Prepare. Preheat your oven to 350°F and line two baking sheets with parchment paper.
- Shape and bake. Roll 1 ½ tablespoon-sized dough balls and place them on the sheets with 3-inch spacing. Bake for 10–12 minutes, until the edges are set and the centers are soft. Sprinkle with salt flakes.
- Cool. Let the cookies cool completely on the baking sheets, then serve.
Tips for Success
- Don’t overbake. The cookies might look slightly underdone in the center when you take them out, but they will firm up as they cool. This ensures a perfectly chewy texture.
- Chill the dough. Chilling the dough is essential for achieving the right consistency and preventing the cookies from spreading too much during baking.
- Use a good chocolate. High-quality chocolate makes a big difference in flavour, so choose a variety you’d enjoy eating on its own. (Yes, that means you should definitely eat some of the chocolate to test it before starting this recipe!)

Variations
There are so many ways to put your own spin on these brownie cookies!
- Add nuts . Fold chopped walnuts, pecans, or almonds with the chocolate chips or instead of them.
- Drizzle on some extra decadence . Once the cookies have cooled, drizzle melted chocolate over the tops.
- Use white chocolate chips . Swap the dark chocolate chips for white chocolate for a little visual contrast.
How to Store
- Room temperature : Store these brownie cookies in an airtight container at room temperature for up to 3 days.
- Freezer : Freeze baked cookies in an airtight container or freezer bag for up to 2 months. You can also freeze the dough for up to 2 months; roll it into balls, freeze them on a parchment-lined baking sheet, then transfer them to an airtight container or freezer bag. You can bake directly from frozen, just adding a few minutes to the original baking time.
More Tasty Vegan Cookies
- Kitchen Sink Cookies
- Peanut Butter Cookies
- Gingersnap Molasses Cookies
- Chai Sugar Cookies
- White Chocolate Macadamia Nut Cookies
Ingredients
- 3.5 ounces vegan dark chocolate , 70%, chopped – 100 g
- ¼ cup vegan butter , 60 g
- 4 tablespoons coconut cream , the thick white part from the top of a refrigerated canned full fat coconut milk – 60 ml , or equal amounts thick vegan yogurt* check notes
- ½ cup light brown sugar , 100 g
- ½ teaspoon vanilla extract , 2.5 g
- 1/2 cup +2 tablespoons all-purpose flour , 80 g (add up to 1 tablespoon more flour if needed)
- 1 tablespoon cocoa powder , 6 g
- ¼ teaspoon baking powder , 1 g
- ¼ teaspoon sea salt , 1.5 g
- 3 tablespoons dark chocolate chips , 30 g
Instructions
- In a heatproof bowl, melt the chopped dark chocolate and vegan butter together over a double boiler or in short intervals in the microwave, stirring until smooth. Let it cool to room temperature; this will take about 10 minutes.
- In a medium mixing bowl, whisk together the light brown sugar, coconut cream, and vanilla extract. The mixture should become airy, and the sugar should dissolve completely. This will take about 2 minutes of whisking.
- Pour the melted chocolate mixture into the bowl and whisk again until well combined.
- Sift the all-purpose flour, cocoa powder, baking powder, and salt into the bowl. Add the chocolate chips right away. Gently fold everything together with a spatula until just combined.
- Cover the dough and refrigerate for about 20–30 minutes to make it easier to handle.
- Preheat your oven to 350°F (180°C) and line two baking sheets with parchment paper.
- Scoop out about 1 ½ tablespoons of dough and roll it into balls. Place them on the baking sheet, leaving about 3 inches of space between each for spreading. Bake for 10–12 minutes, until the edges are set but the centers are still soft. Sprinkle with salt flakes while warm.
- Let the cookies rest on the baking sheet until completely cooled. They will be very soft while warm and difficult to move.
Notes
- Room temperature : Store these brownie cookies in an airtight container at room temperature for up to 3 days.
- Make Ahead: You can make these cookies ahead of time in the fridge for up to 2 days of chill time. The dough will get very hard (since the melted chocolate is essentially hardened again) so let it sit at room temperature for about 10 minutes before trying to scoop. I do personally recommend just freezing the cookie into dough balls to avoid having to deal with the hard dough.
- Freezer : Freeze baked cookies in an airtight container or freezer bag for up to 2 months. You can also freeze the dough for up to 2 months; roll it into balls, freeze them on a parchment-lined baking sheet, then transfer them to an airtight container or freezer bag. You can bake directly from frozen, just adding a few minutes to the original baking time.
- *In some cases, coconut cream is super thick on the top of your can of full fat coconut milk. However, in a lot of cases it isn’t and the can will need to be refrigerated first to properly separate the thick creamy fatty part from the milky part. I recommend refrigerating your can for at least an hour up to overnight first to get a nice thick separated part. You can also use thick vegan yogurt instead if you don’t want to have to add any waiting time to making the recipe. The coconut cream will give you the most fudgy texture but the vegan yogurt is very close behind it in texture!

Brownie Cookies
Ingredients
- 3.5 ounces vegan dark chocolate 70%, chopped - 100 g
- ¼ cup vegan butter 60 g
- 4 tablespoons coconut cream the thick white part from the top of a refrigerated canned full fat coconut milk - 60 ml , or equal amounts thick vegan yogurt* check notes
- ½ cup light brown sugar 100 g
- ½ teaspoon vanilla extract 2.5 g
- 1/2 cup +2 tablespoons all-purpose flour 80 g (add up to 1 tablespoon more flour if needed)
- 1 tablespoon cocoa powder 6 g
- ¼ teaspoon baking powder 1 g
- ¼ teaspoon sea salt 1.5 g
- 3 tablespoons dark chocolate chips 30 g
Instructions
- In a heatproof bowl, melt the chopped dark chocolate and vegan butter together over a double boiler or in short intervals in the microwave, stirring until smooth. Let it cool to room temperature; this will take about 10 minutes.
- In a medium mixing bowl, whisk together the light brown sugar, coconut cream, and vanilla extract. The mixture should become airy, and the sugar should dissolve completely. This will take about 2 minutes of whisking.
- Pour the melted chocolate mixture into the bowl and whisk again until well combined.
- Sift the all-purpose flour, cocoa powder, baking powder, and salt into the bowl. Add the chocolate chips right away. Gently fold everything together with a spatula until just combined.
- Cover the dough and refrigerate for about 20–30 minutes to make it easier to handle.
- Preheat your oven to 350°F (180°C) and line two baking sheets with parchment paper.
- Scoop out about 1 ½ tablespoons of dough and roll it into balls. Place them on the baking sheet, leaving about 3 inches of space between each for spreading. Bake for 10–12 minutes, until the edges are set but the centers are still soft. Sprinkle with salt flakes while warm.
- Let the cookies rest on the baking sheet until completely cooled. They will be very soft while warm and difficult to move.
Video
Notes
- Room temperature : Store these brownie cookies in an airtight container at room temperature for up to 3 days.
- Make Ahead: You can make these cookies ahead of time in the fridge for up to 2 days of chill time. The dough will get very hard (since the melted chocolate is essentially hardened again) so let it sit at room temperature for about 10 minutes before trying to scoop. I do personally recommend just freezing the cookie into dough balls to avoid having to deal with the hard dough.
- Freezer : Freeze baked cookies in an airtight container or freezer bag for up to 2 months. You can also freeze the dough for up to 2 months; roll it into balls, freeze them on a parchment-lined baking sheet, then transfer them to an airtight container or freezer bag. You can bake directly from frozen, just adding a few minutes to the original baking time.
- *In some cases, coconut cream is super thick on the top of your can of full fat coconut milk. However, in a lot of cases it isn’t and the can will need to be refrigerated first to properly separate the thick creamy fatty part from the milky part. I recommend refrigerating your can for at least an hour up to overnight first to get a nice thick separated part. You can also use thick vegan yogurt instead if you don’t want to have to add any waiting time to making the recipe. The coconut cream will give you the most fudgy texture but the vegan yogurt is very close behind it in texture!
Nutrition
Brownie Cookies https://jessicainthekitchen.com/brownie-cookies/ April 18, 2025
These sweet and sticky orange cauliflower bites have Chinese takeout vibes—but they swap the chicken with cauliflower and they’re baked, not fried!

Not to pat myself on the back too much, but my cauliflower recipes have kind of been a big deal! These Sticky Sesame Cauliflower Wings were named one of the recipes that “ won 2016 ” and declared “ better than the real thing . ” To say I’m proud is an understatement, and even all these years later, I still adore recipes like this orange cauliflower—not to mention Mango Habanero Cauliflower Wings and Cauliflower Steaks … the list goes on!
Why This Orange Cauliflower Recipe Will Be Your New Fave
You’re going to flip for this orange cauliflower! Here’s why I love it so much:
- Food court flavour . And I mean that in a good way! Who doesn’t love the flavour of orange chicken that most of us grew up sampling on toothpicks in mall food courts!? It’s sticky, sweet, kind of tangy, and citrusy. This orange cauliflower delivers that flavour in a healthier way.
- Crispy coating . As amazing as the sauce is, the batter also contributes to the popularity of my cauliflower wings and bites—it bakes up deliciously crisp and gives it that “chicken-like” breading texture.
- No frying needed . There’s a time and a place for frying (like when you’re making Crispy Homemade Falafel !), but for orange cauliflower, you don’t need it. You can achieve crispy cauliflower perfection in the oven!
Notes on Ingredients
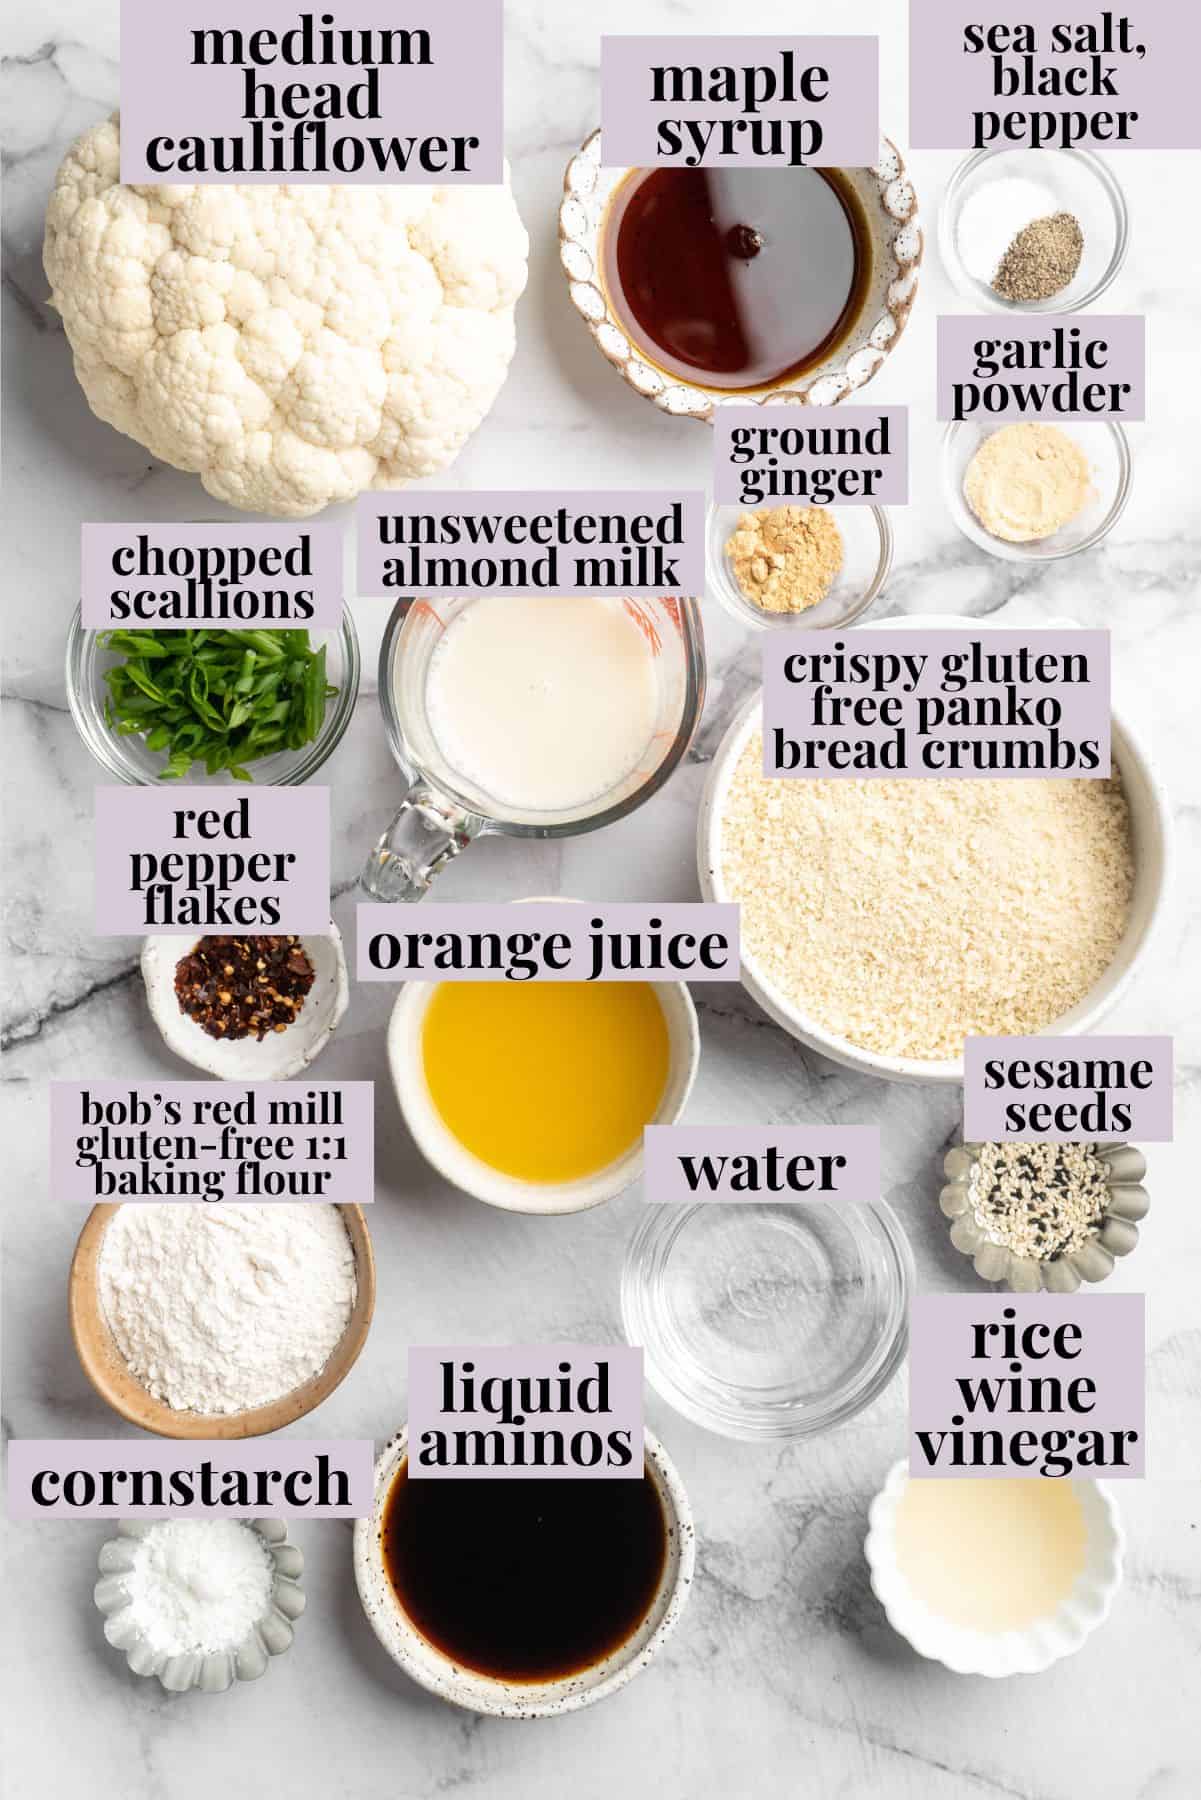
Here’s everything you’ll need to make this flavourful plant-based twist on the classic orange chicken recipe! Scroll down to the recipe card to find the ingredient quantities and recipe instructions.
Cauliflower Bites:
- Cauliflower – Use a medium head of cauliflower.
- Gluten-free 1-to-1 baking flour – Or regular all-purpose flour if you’re not on a gluten-free diet.
- Unsweetened almond milk – You can substitute with any plant-based milk as long as it’s unflavoured and unsweetened.
- Seasonings – Sea salt and ground black pepper, garlic powder for savoury depth, and crushed red pepper flakes.
- Gluten-free panko bread crumbs – Or regular panko if you prefer.
- Sesame seeds and chopped scallions – For garnish.
Orange Sauce:
- Water
- Orange juice – Although you can use bottled, I think freshly squeezed orange juice has a better flavour.
- Maple syrup – For natural sweetness. If you’d like, you can swap in vegan honey or date syrup .
- Ground ginger and garlic powder – For a combination of warmth and savoury flavour in the sauce.
- Liquid aminos – Or a low-sodium soy sauce.
- Rice wine vinegar – Balances the sweet flavour with acidity. Be sure to use unseasoned rice vinegar, which is unsweetened.
- Cornstarch – To thicken the sauce.
How to Make Orange Cauliflower
This simple step-by-step guide will show you how to make crispy, flavourful orange cauliflower at home!

Cut the cauliflower into florets.
- Prepare . Preheat your oven to 450°F and line a baking sheet with a silicone mat or greased foil. Cut cauliflower into bite-sized florets.
- Make the batter . Whisk the flour, almond milk, and seasonings in a bowl. Set the panko in another bowl.
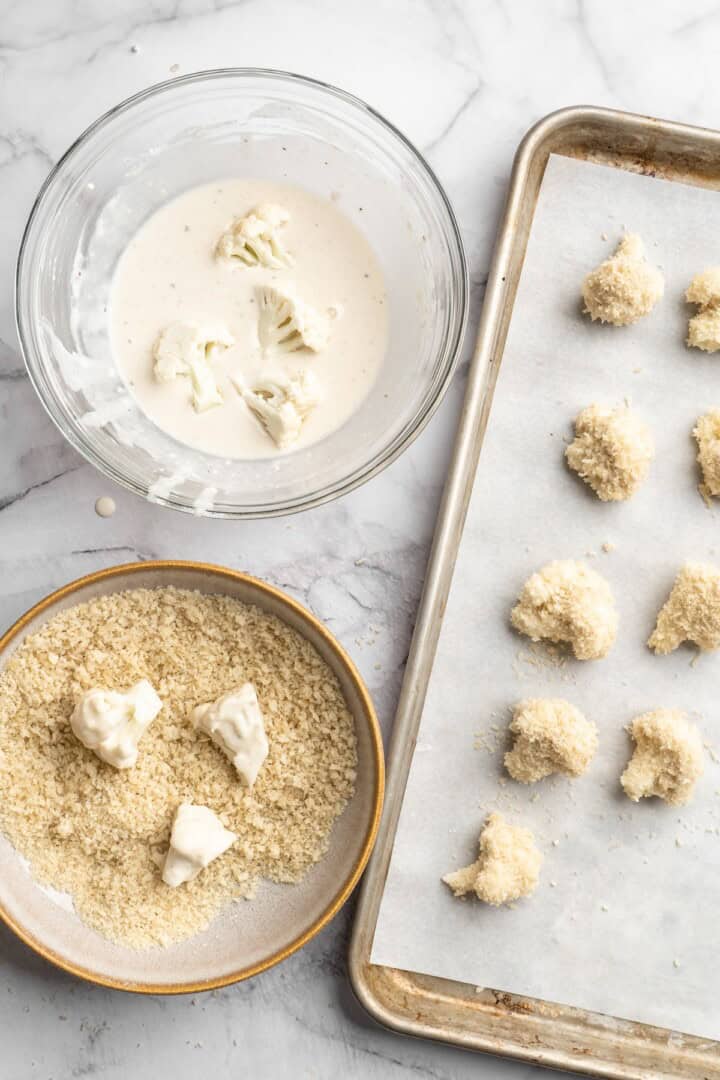
Dredge the cauliflower.
- Dredge the cauliflower . Dip the cauliflower in the batter, shake off any excess, then coat in the panko and place on the baking sheet.
- Bake . Cook the cauliflower in the oven for 22 minutes, or until crispy and golden.
Make the orange sauce.
- Make the sauce . While the cauliflower bakes, heat all the sauce ingredients except the cornstarch slurry in a pan over high heat. Once it comes to a boil, let it cook for 1 minute, then reduce to medium-low and whisk in the slurry. Simmer until the sauce thickens.
- Toss the cauliflower in the sauce . Remove the cauliflower from the oven. Stir the florets into the sauce, return them to the pan, then bake for 5 minutes more.
- Serve . Garnish with sesame seeds and scallions and serve.

Tips for Success
- Use a high smoke point oil . Don’t use olive oil to grease the baking sheet; it will burn the bottoms of your bites. If you’re using a silicone mat, you don’t need to grease it at all, but otherwise, you will need a high smoke point oil like canola, peanut, or vegetable oil.
- Make sure the cauliflower is dry . The batter will only adhere to the cauliflower if the florets are completely dry, so pat the cauliflower dry after washing to make sure there are no water droplets clinging to the florets.
- Adjust the recipe to use frozen cauliflower . Fresh cauliflower is best, but if you have frozen on hand, you can use that too. Bake the cauliflower for 15 minutes in a 425ºF oven. Remove and drain off the excess liquid in a strainer. Toss the cauliflower with a few tablespoons of flour, coating lightly to soak up any liquid. Then, proceed with the recipe as written.

Serving Suggestions
You can serve orange cauliflower as a party appetizer with toothpicks, or pile them onto a bowl of fluffy Instant Pot Jasmine Rice. They’d also be divine paired with Vegan Fried Rice , which is another lighter version of a takeout favourite!
How to Store and Reheat Leftovers
- Refrigerator : Although they’re best right out of the oven, you can store orange cauliflower in an airtight container in your fridge for up to 4 days. I don’t recommend freezing this recipe.
- To reheat : Preheat oven to 375°F, place the cauliflower on a baking sheet and bake for about 10 minutes until heated through.

More Vegan Cauliflower Recipes
- Cauliflower Gnocchi
- Cauliflower Fried Rice
- Butter Cauliflower
- Cauliflower Pizza Bites
- Cauliflower Mac and Cheese
Ingredients
Cauliflower Bites
- 1 medium cauliflower
- ½ cup Bob’s Red Mill Gluten Free 1-to-1 Baking Flour , 60 g
- ½ cup unsweetened almond milk , 120 g
- ¼ teaspoon sea salt , 1.5 g
- ½ teaspoon ground black pepper , 1 g
- ½ teaspoon garlic powder , 1.5 g
- ¼ teaspoon crushed red pepper flakes , ½ if you want it very spicy, leave out if you don’t like spice, 0.5 g
- 1 cup crispy gluten free panko bread crumbs , seasoned with salt and pepper OR brown rice cereal puffs crushed and seasoned*, 50 g
- sesame seeds and chopped scallions , to garnish
Orange Sauce
- ½ cup water , 120g
- ½ cup orange juice , 120 g
- 2 tablespoons maple syrup , 40 g
- ¼ teaspoon ground ginger , 0.5 g
- ¼ teaspoon garlic powder , 0.75 g
- 2 tablespoons liquid aminos/low sodium soy sauce , 30 g
- 2 tablespoons rice wine vinegar , 30 g
- 1 tablespoons cornstarch + 1 tablespoon water , stirred together until cornstarch is dissolved, 8 g cornstarch + 15 g water
Instructions
- Preheat oven to 450°F/230°C. Prepare a baking sheet by lining it with a silicone baking sheet or greased foil.
- Remove florets from the cauliflower (aka don’t use the stem). Chop the cauliflower into smaller pieces to resemble the size of bites.
- In a separate bowl, whisk the gluten free flour, almond milk, salt, ground black pepper, garlic powder and crushed red pepper flakes in a bowl to make the batter.
- In another separate bowl, place the breadcrumbs. Line it up beside the batter bowl.
- Toss the cauliflower in the batter mixture one at a time, shaking off excess batter. Do not soak. Then, dip the cauliflower into the breadcrumbs to coat completely, then place onto the baking sheet. Repeat until all of the bites are coated.
- Bake for 22 minutes. Please ensure your oven is completely preheated and hot. While baking, prepare the ingredients for the sauce (see below).
- Remove from oven. Toss the bites in the sauce then using tongs or even just a large spoon, coating completely. Remove from pot and place back on the baking sheet. Bake for another 5 minutes for the sauce to soak into the bites.
- Remove from oven and serve immediately with sesame seeds and chopped scallions. Enjoy!
Orange Sauce
- While the bites are baking and have about 5 minutes left, in a pot over high heat, mix all the sauce ingredients, except the cornstarch slurry.
- Bring to a boil and boil for about 1 minute, then reduce heat to medium low. Add in the cornstarch slurry and whisk vigorously until dissolved into the sauce. Let it cook for about 3 to 4 minutes until the sauce begins to thicken. Remove from heat and allow to cool slightly. Taste a little bit to decide if you need more sweetener or more soy sauce.
