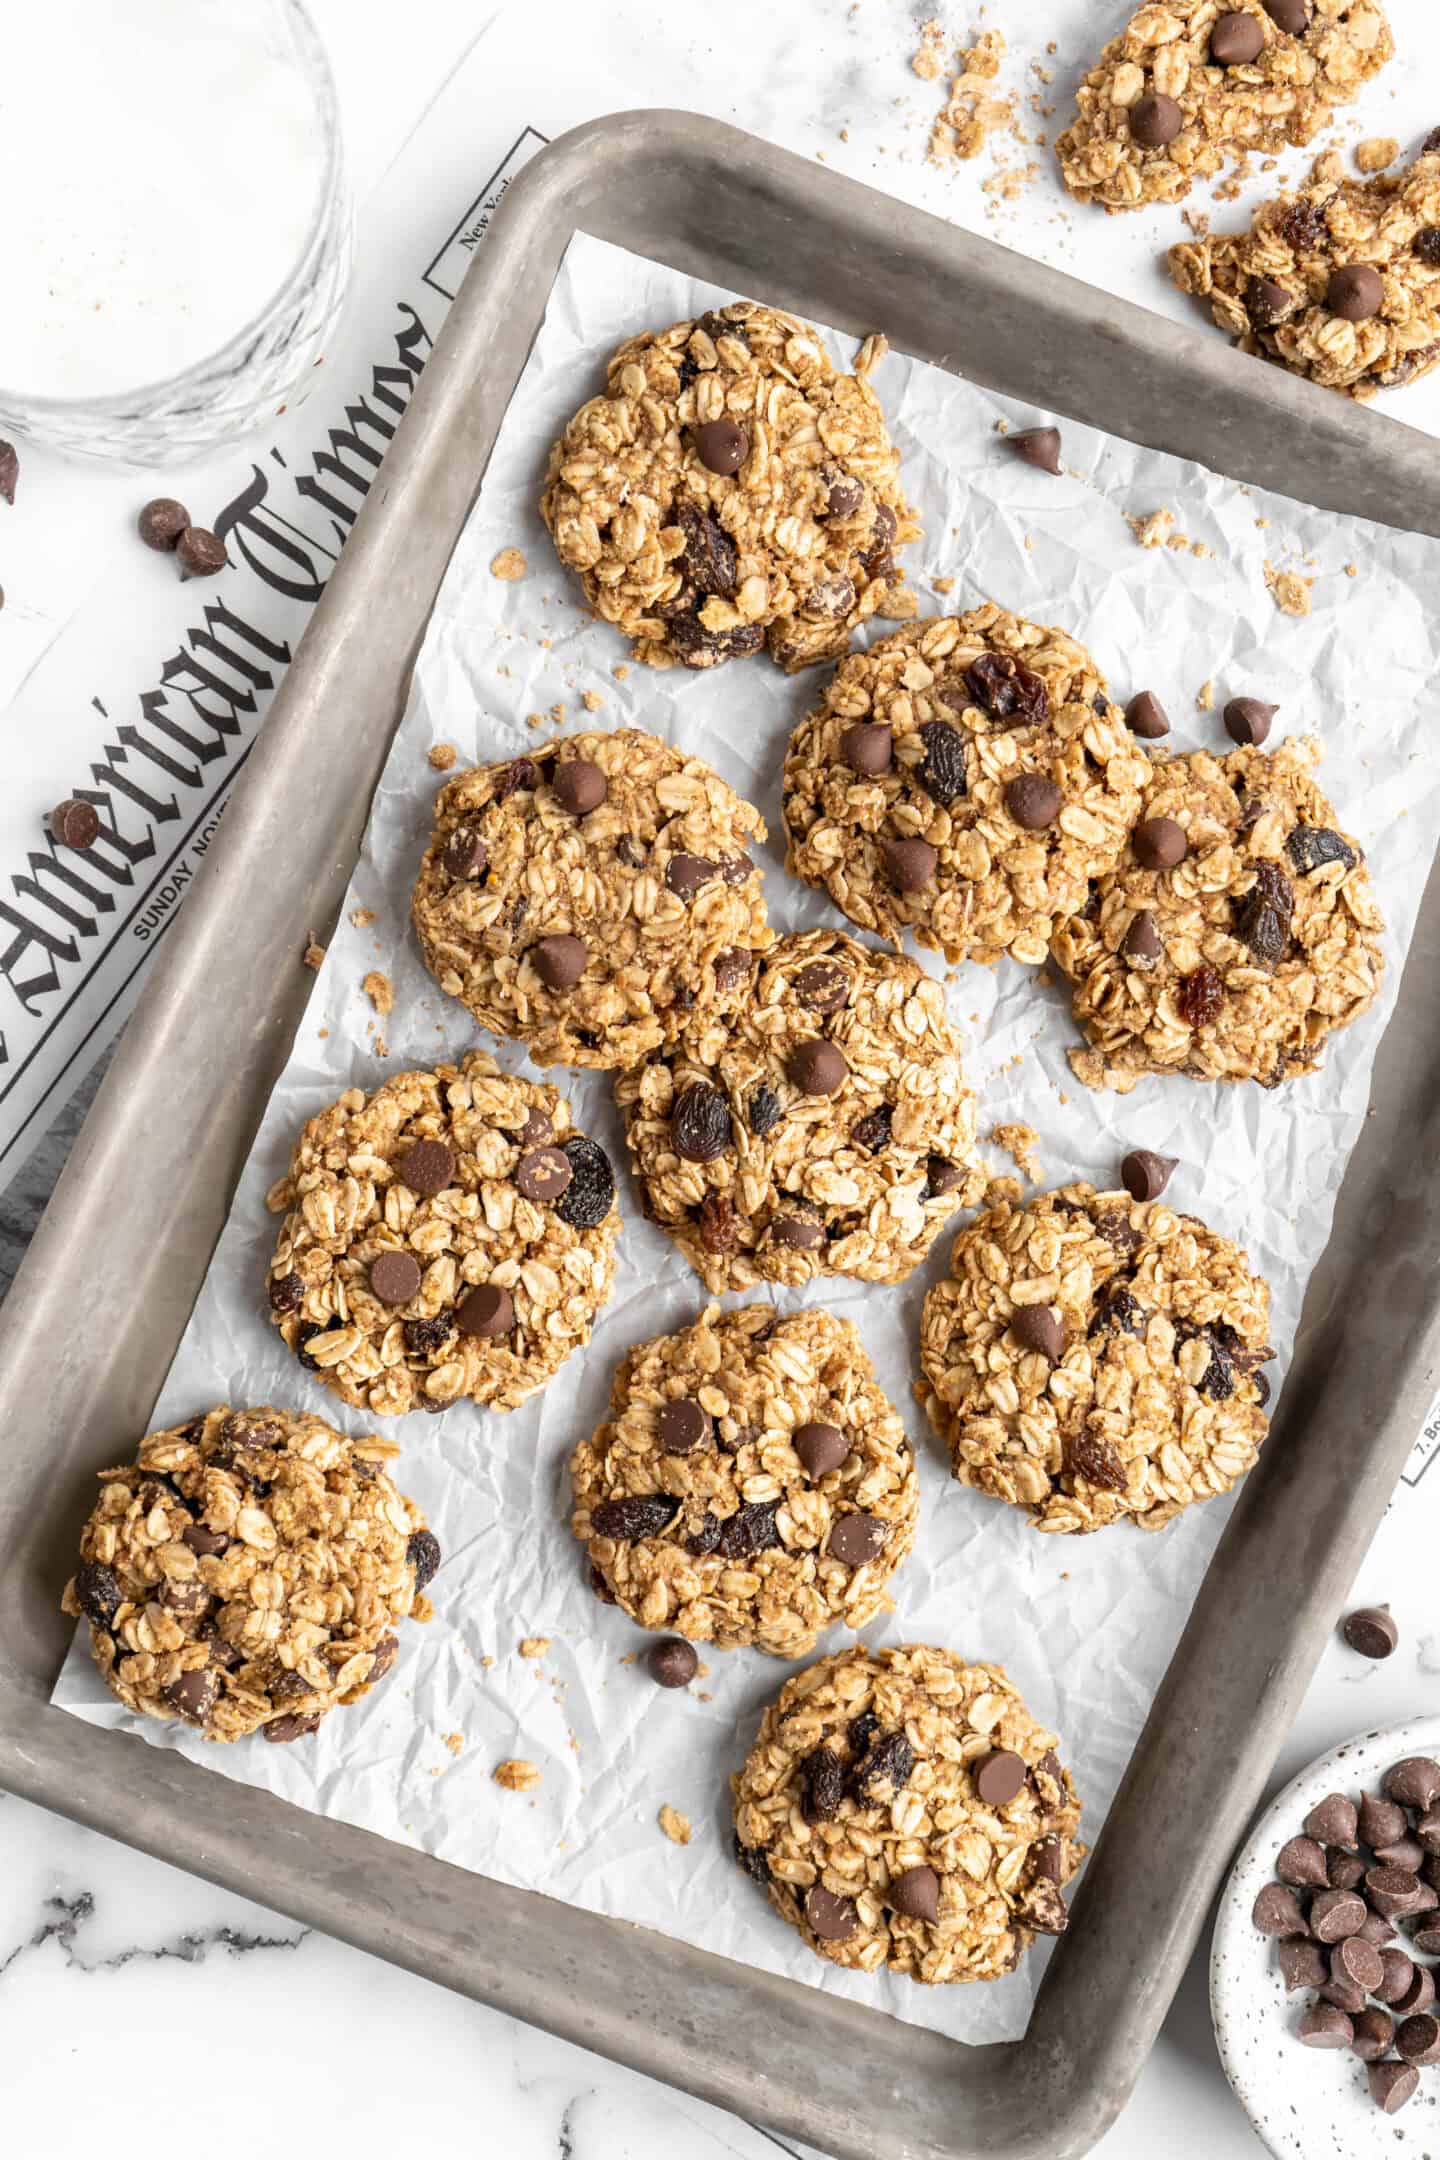
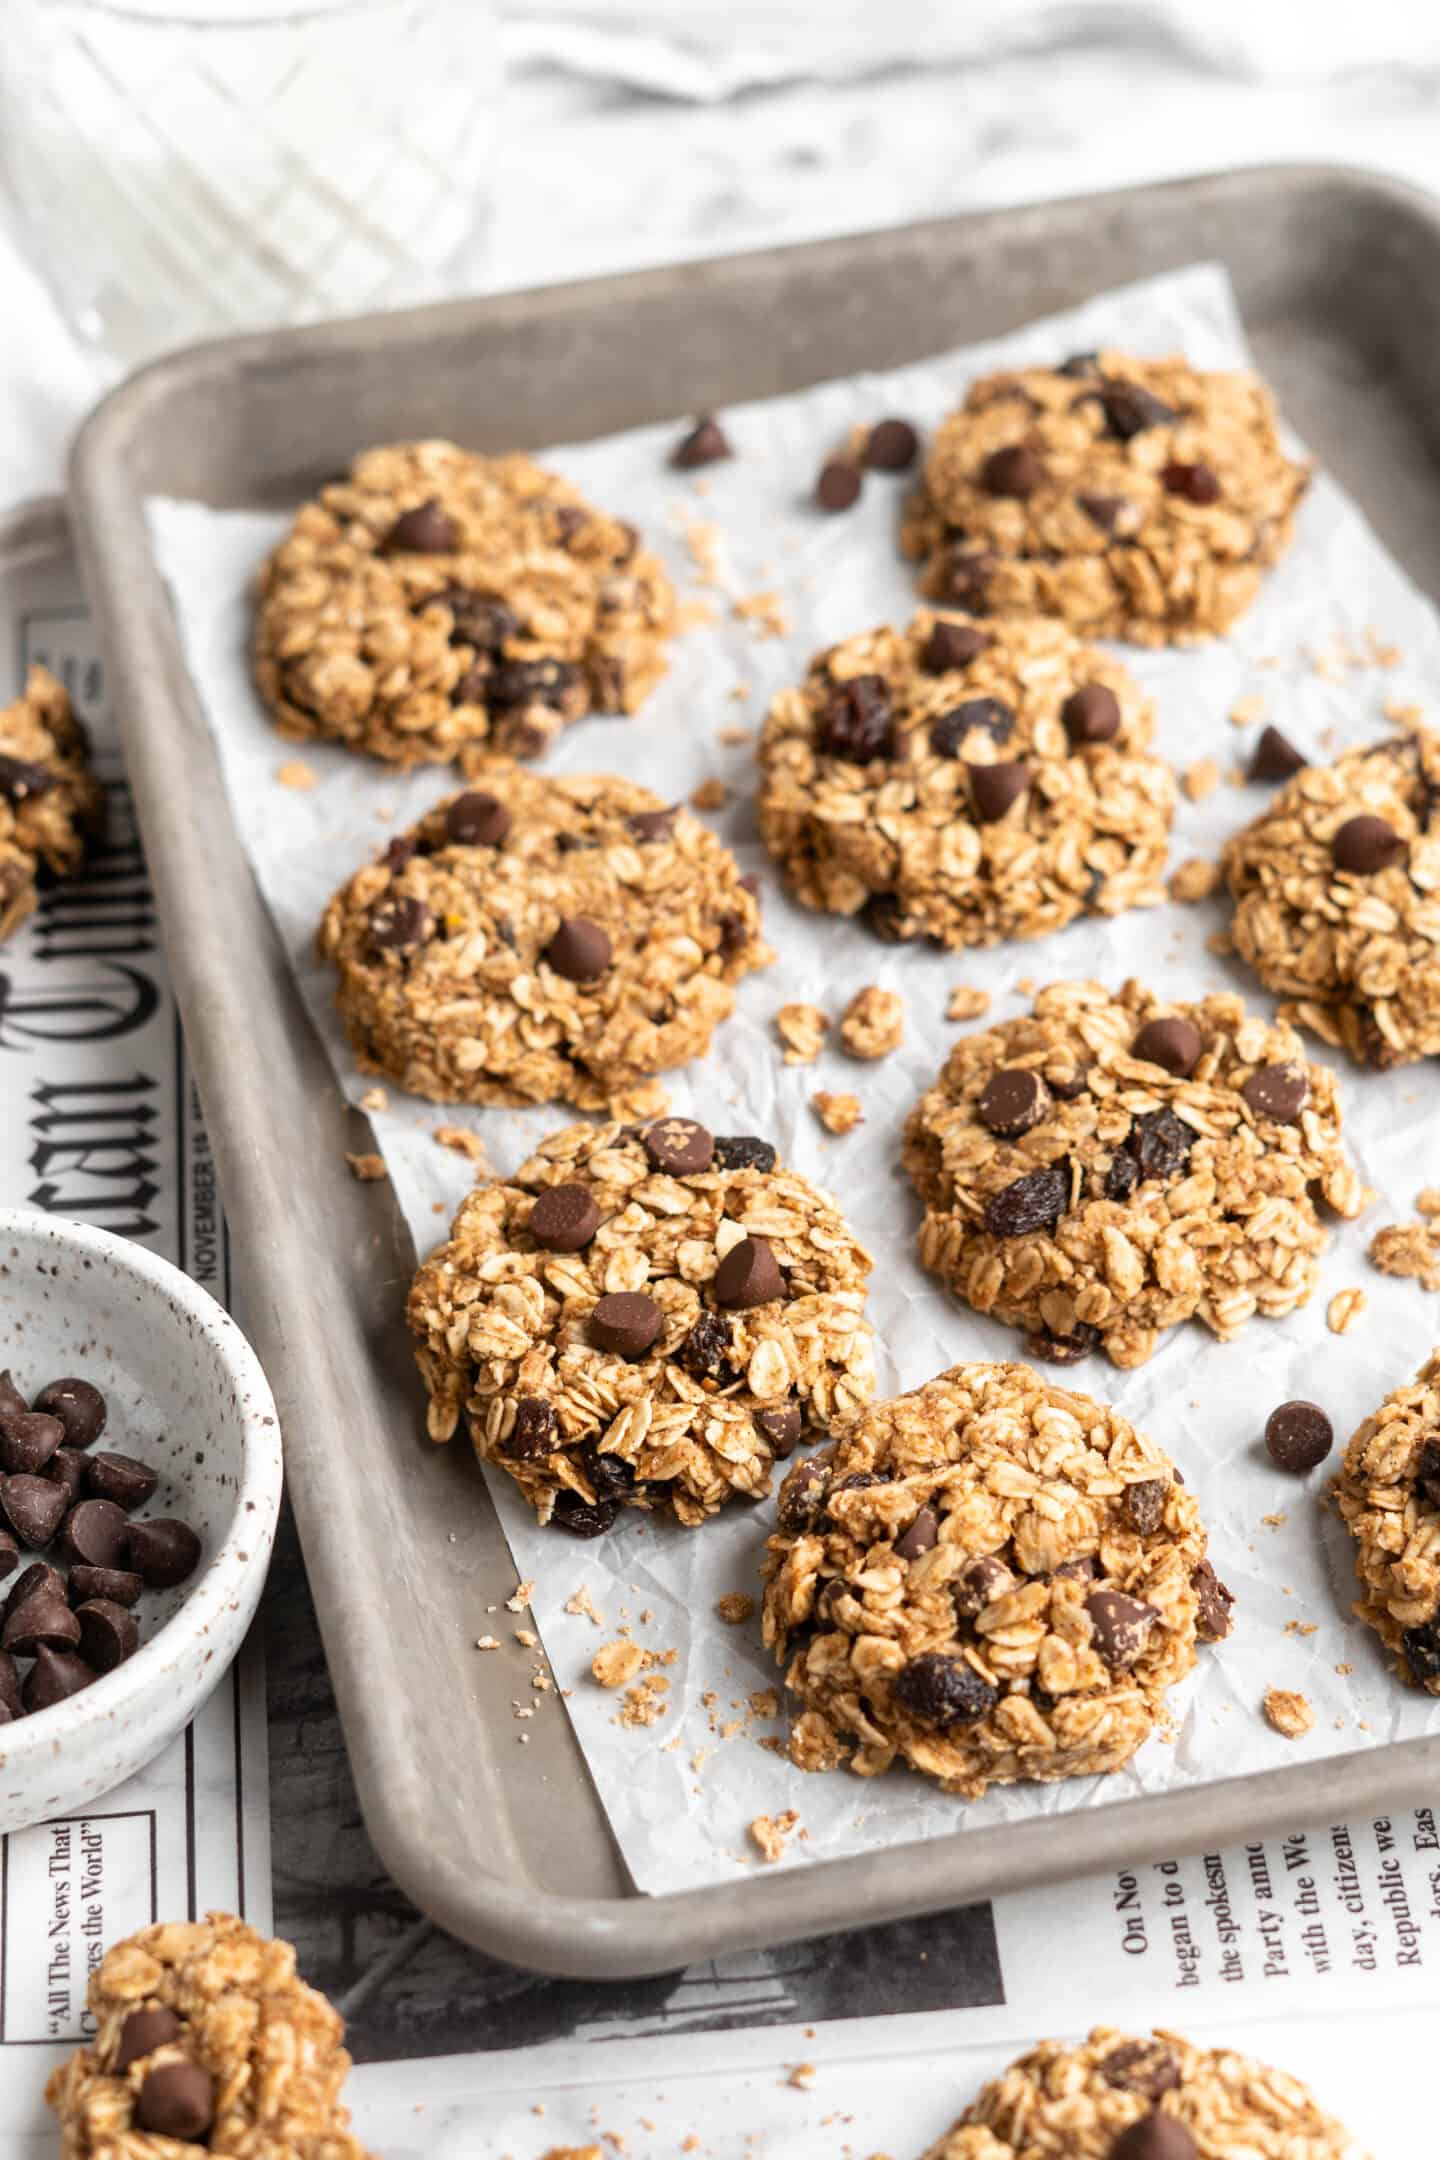
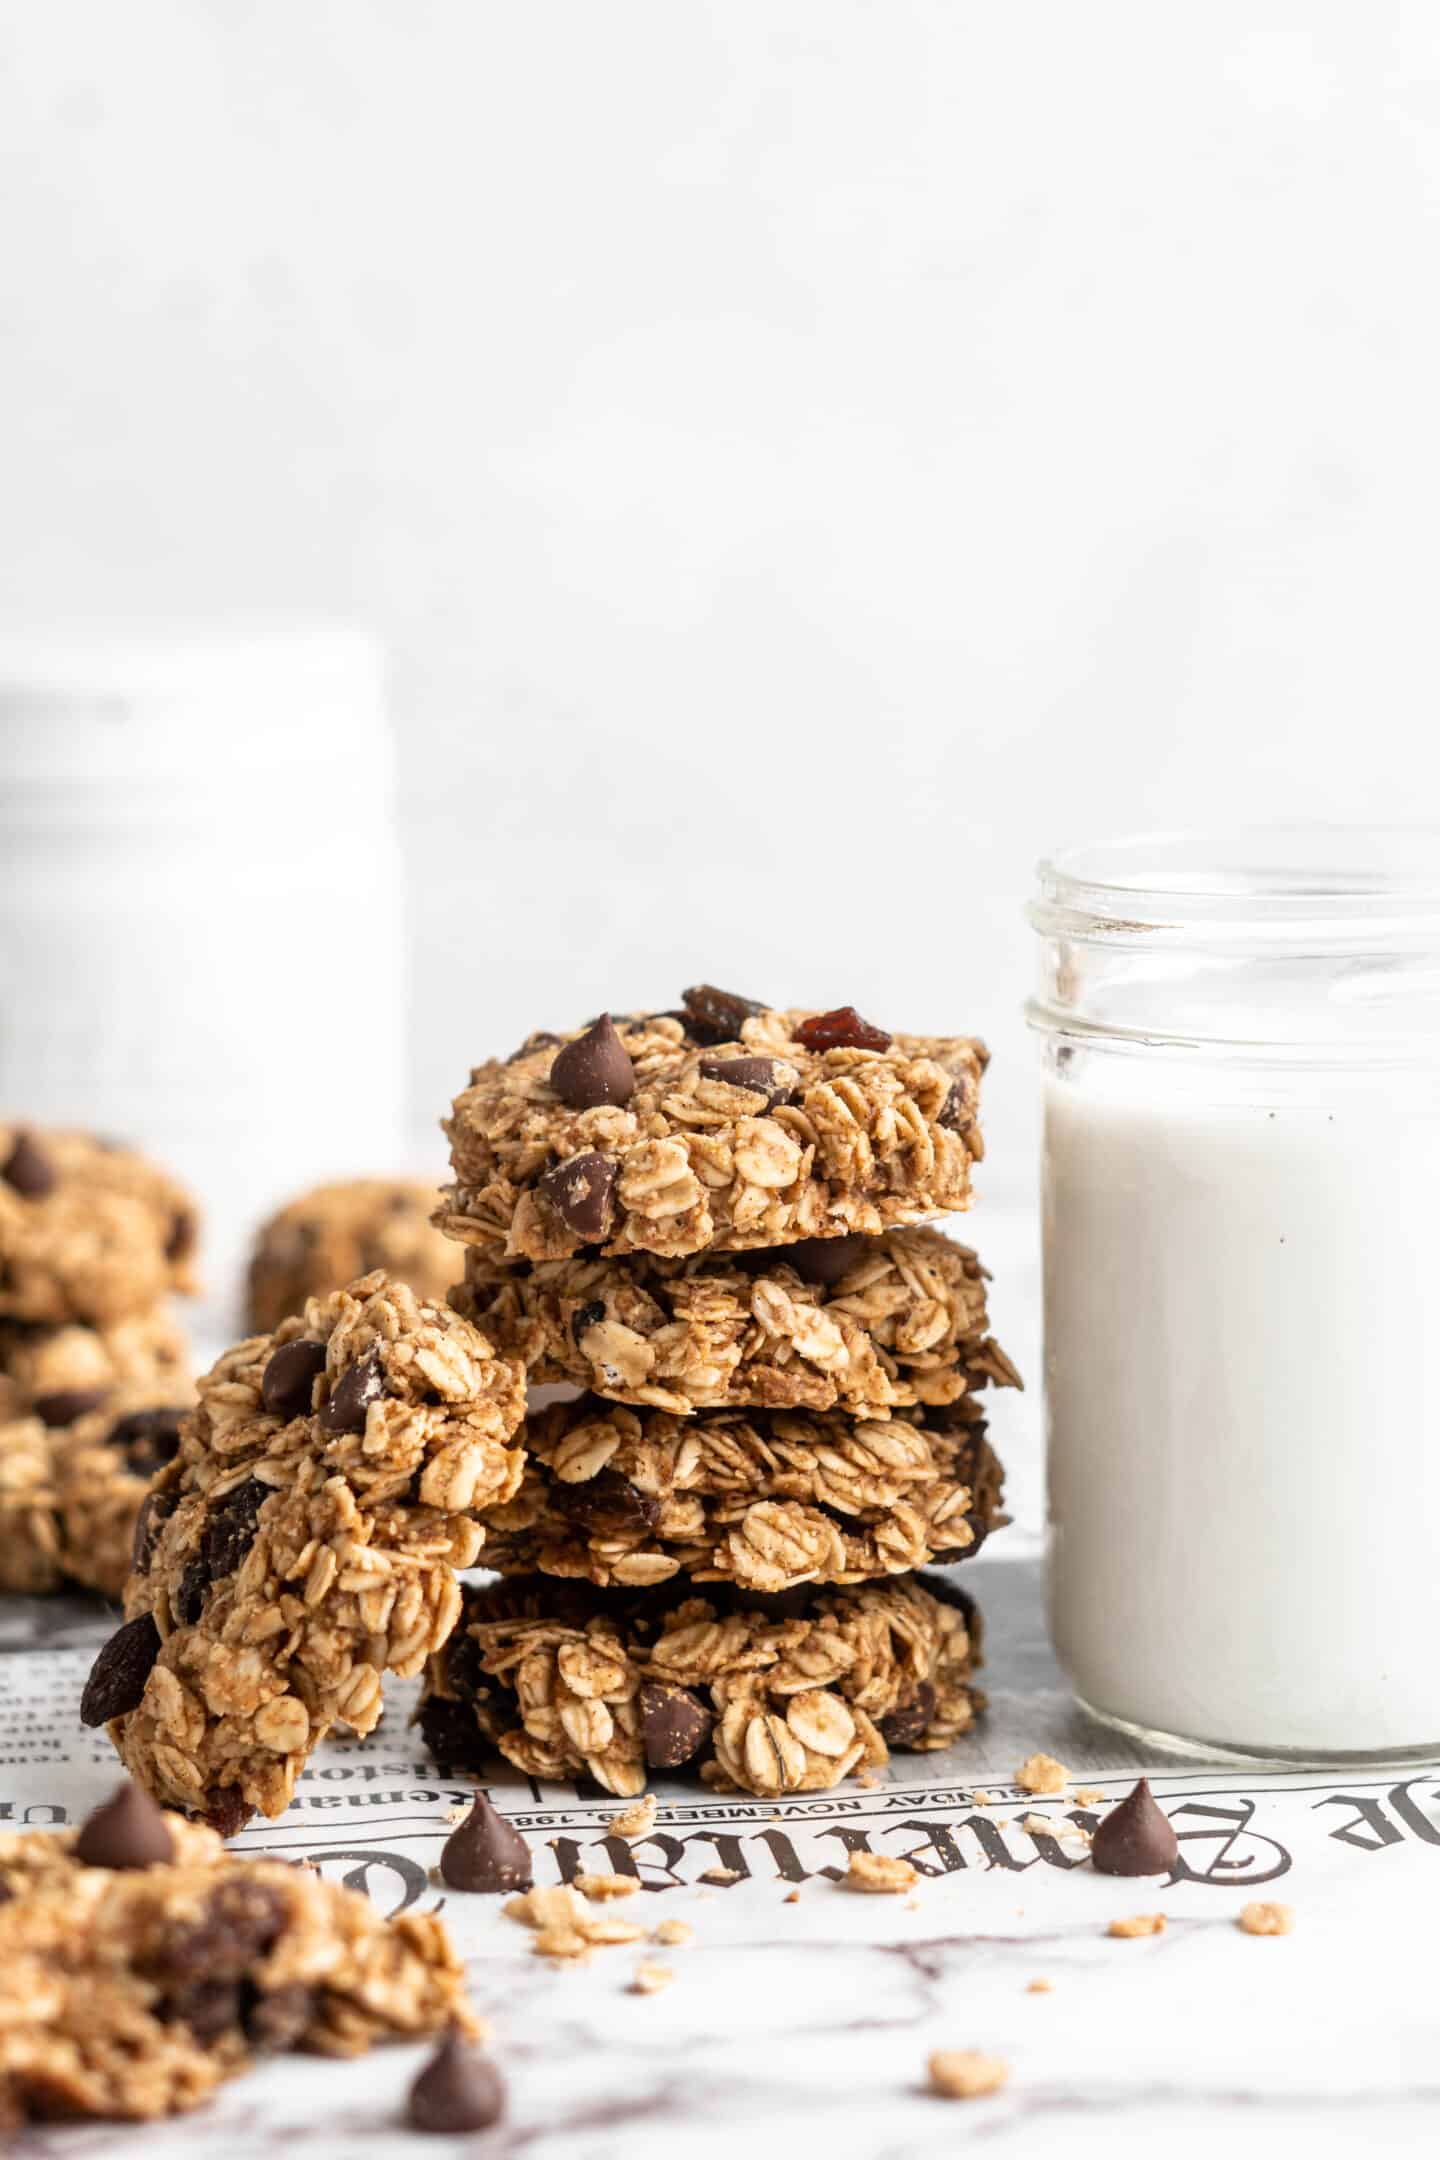
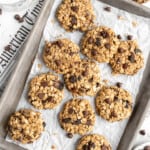
These banana oatmeal cookies may look like dessert, but you can actually have them for breakfast. Loaded with chewy oats, peanut butter, and ripe banana, they’re made in one bowl and naturally gluten-free!
There’s a lot to love about these Banana Oatmeal Cookies.
They’re delightfully chewy, loaded with chocolate chips, and supremely satisfying. Vegan? Gluten-free? Yes and yes! And did I mention that they’re easy to make? Because that, too.
Of course, what’s most exciting about this recipe for Banana Oatmeal Cookies is that you can eat them any time of day—including for breakfast. They’re absolutely packed with protein, whole grains, and fruit. We’ve got all the bases covered, friends.
I know, I sound super excited and giddy, but these are COOKIES we are talking about. In fact, as soon as I let them finish cooling I said to myself, “Sthelf, these are the besffhstt.” (That’s said with half a cookie in my mouth, so…you get my muffled gist.)
For more cookies that you can eat any time of day, be sure to check out my Chewy Trail Mix Cookies , Pumpkin Chocolate Chip Oatmeal Breakfast Cookies , and Rolled Pumpkin Spice Cookies .
Notes on Ingredients
Please note that this is important information on the ingredients and instructions and the FULL recipe with amounts and details can be found DOWN BELOW (scroll to it) in the recipe card.
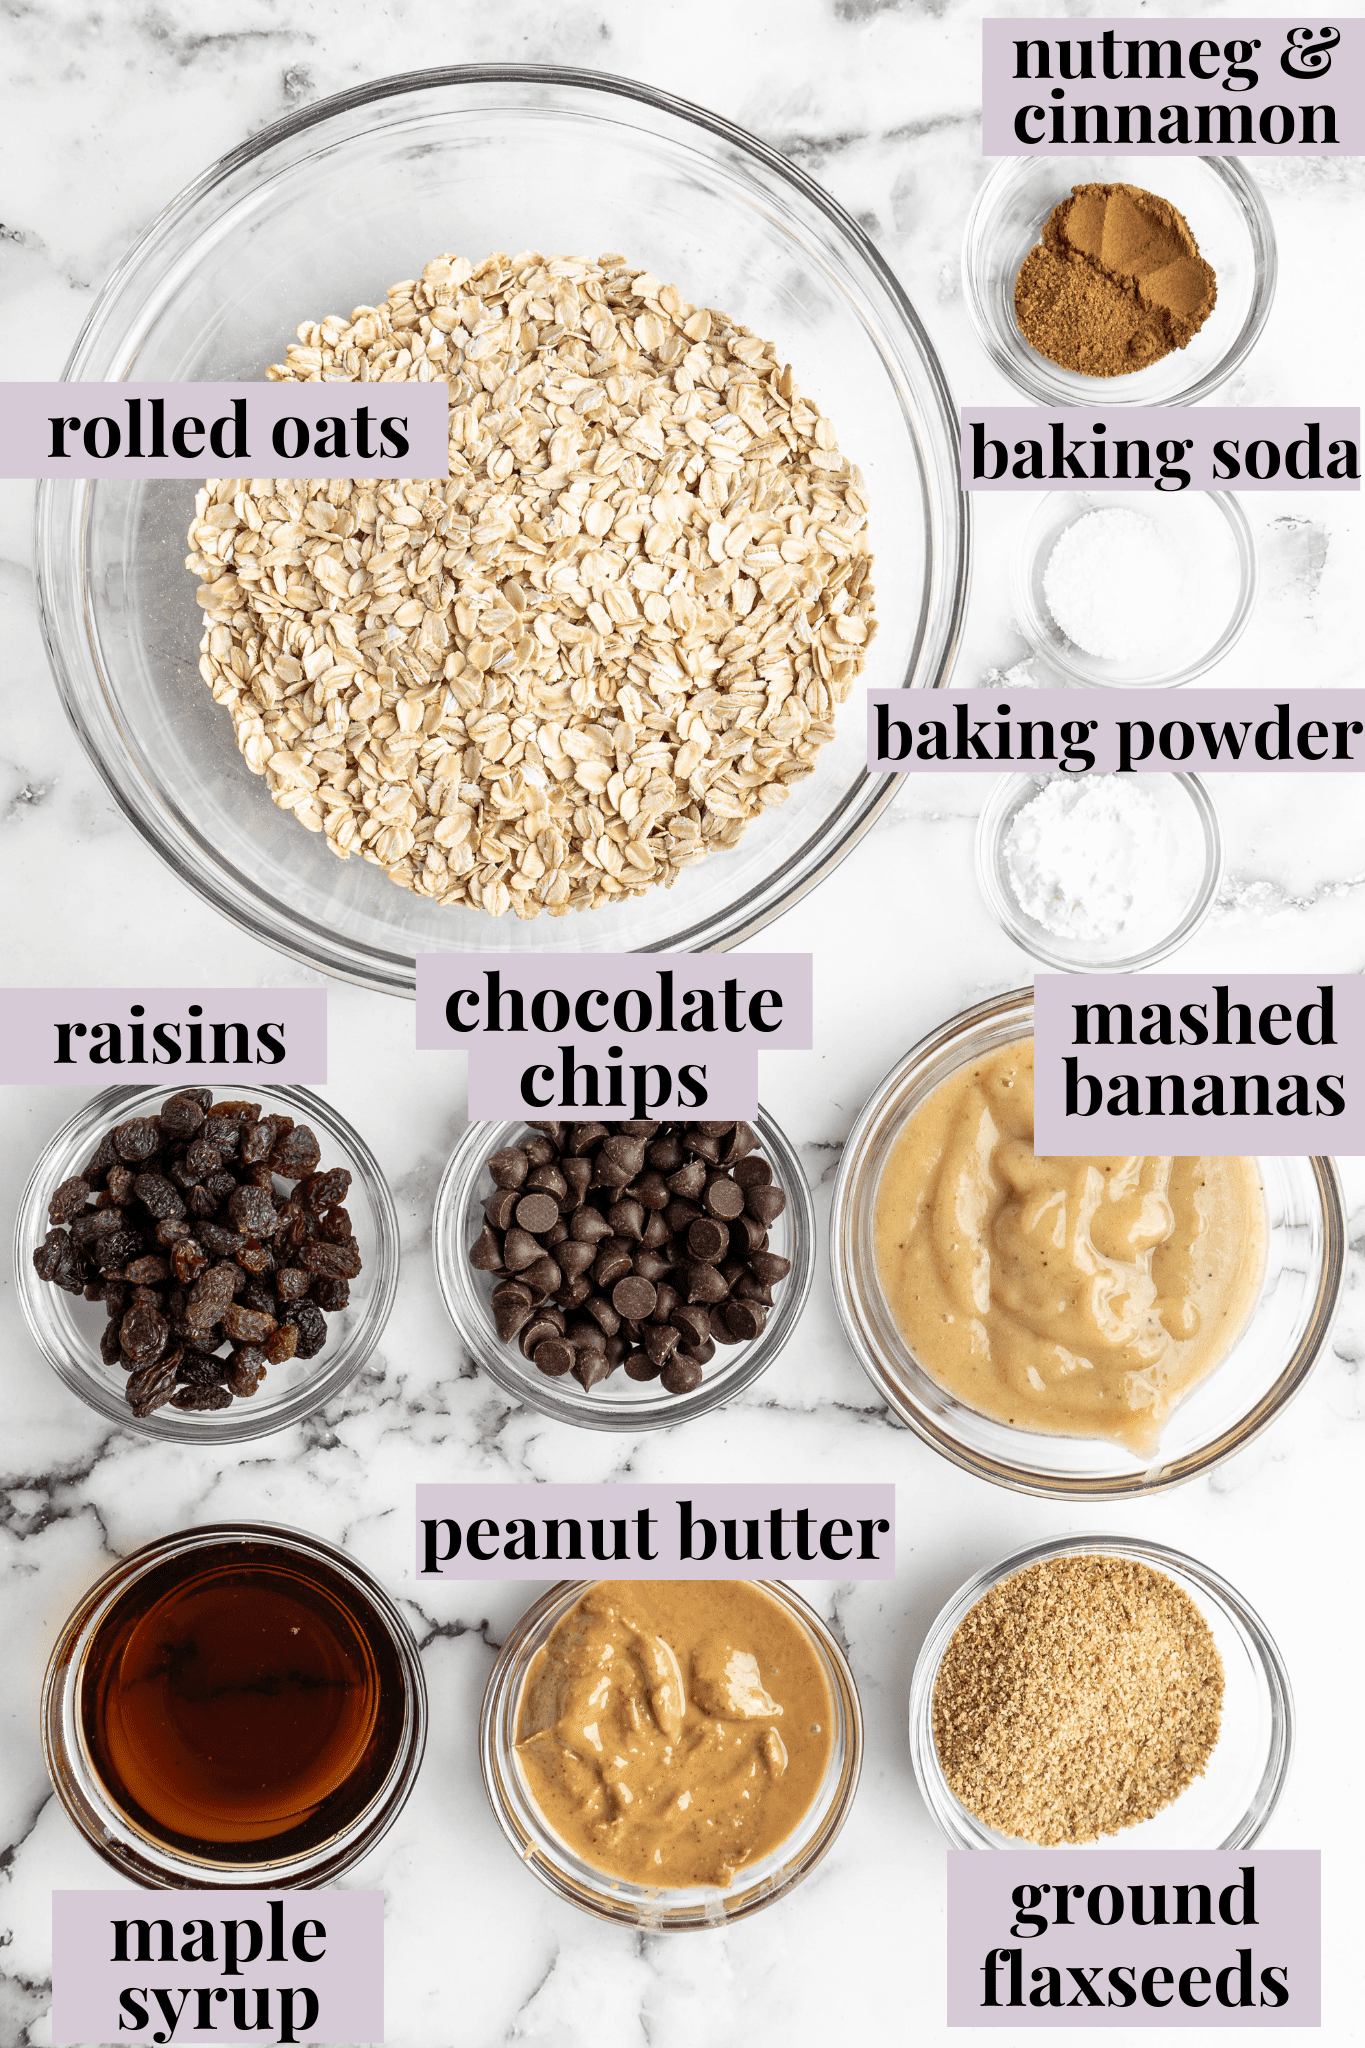
- Rolled oats – These give your Banana Oatmeal Cookies a hearty texture and make them filling enough for a breakfast.
- Sea salt
- Baking powder
- Cinnamon
- Nutmeg
- Ground flaxseeds
- Mashed bananas – The darker the banana, the better! Not only do extra-ripe bananas make the recipe sweeter, they also give the cookies a more pronounced banana flavour.
- Organic peanut butter – Microwave this for 30 seconds so it’s pourable.
- Maple syrup – Agave could be used instead if you prefer.
- Vegan chocolate chips – Or add some crunch with cacao nibs.
- Raisins – Not a fan? Double the chocolate chips or use another add-in.
More Add-In Ideas
These Banana Oatmeal Cookies are incredibly versatile, so feel free to switch things up with any of these add-ins or some ideas of your own!
- Sunflower seeds
- Dried cranberries or blueberries
- Chopped dried apricots
- Chopped nuts
- Pepitas
- Freeze-dried strawberries
- Shredded coconut
How to Make Banana Oatmeal Cookies
Since this is a one-bowl recipe, it’s easy to make and easy to clean up afterwards! Here’s what you’ll need to do.
Prepare . Preheat your oven to 325°F/165°C. Line a baking sheet with a silicone baking mat or parchment paper.
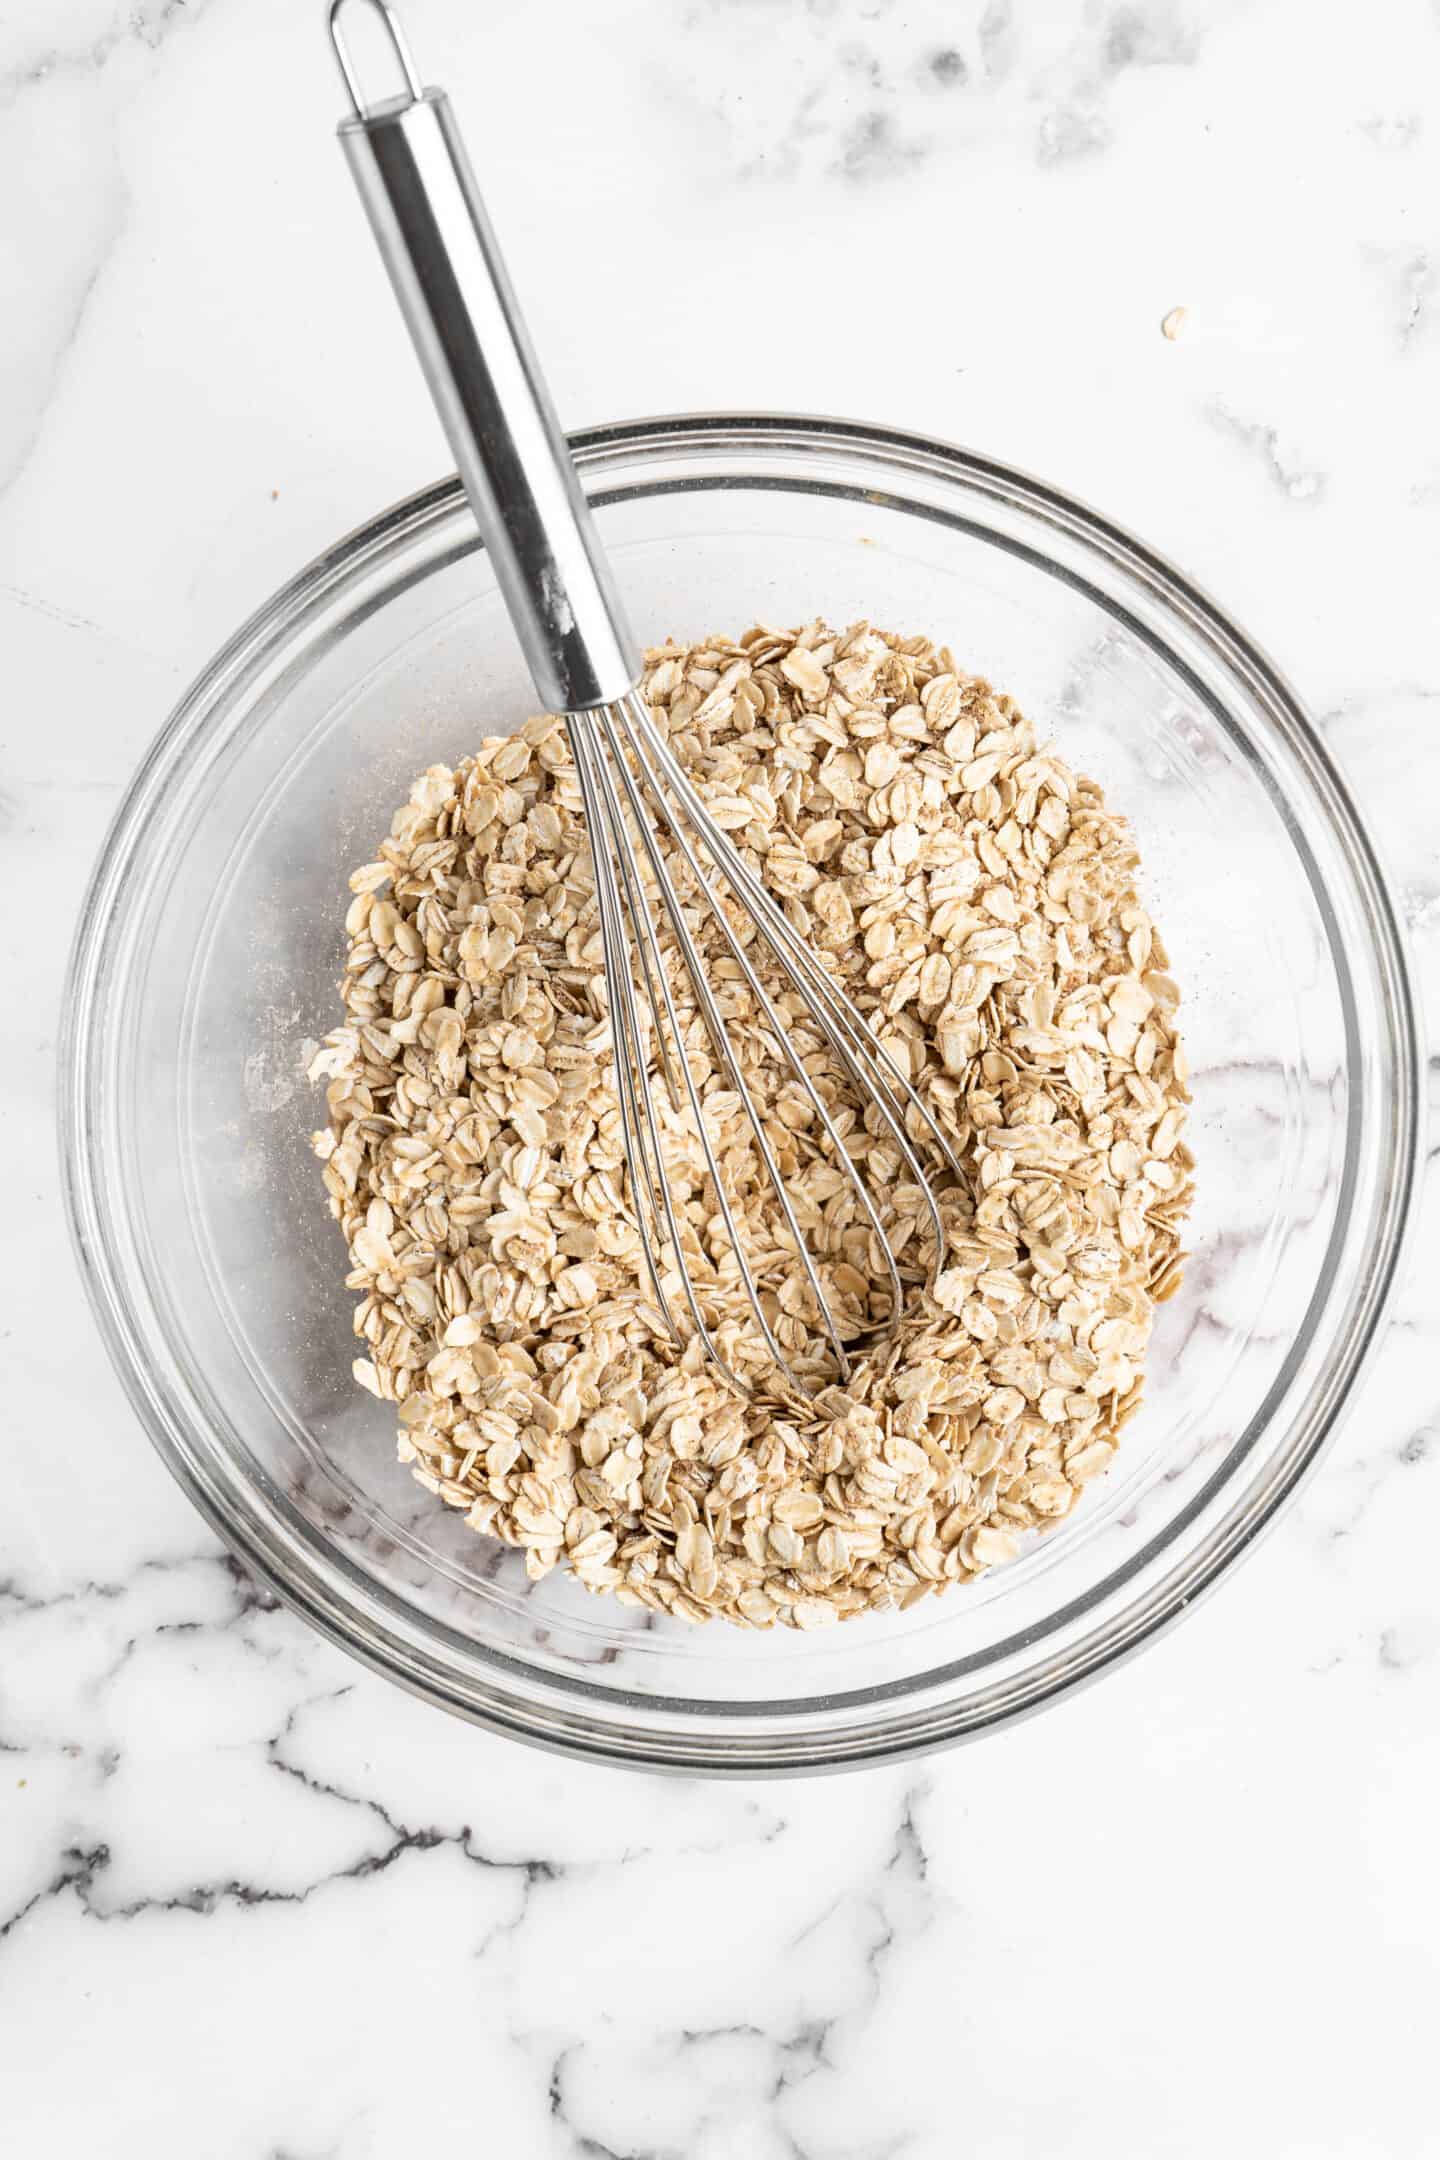
Make the cookie dough. Stir the dry ingredients together, then add the wet ingredients and stir for about 30 seconds until you’ve got a sticky, thick dough. Fold in your add-ins.
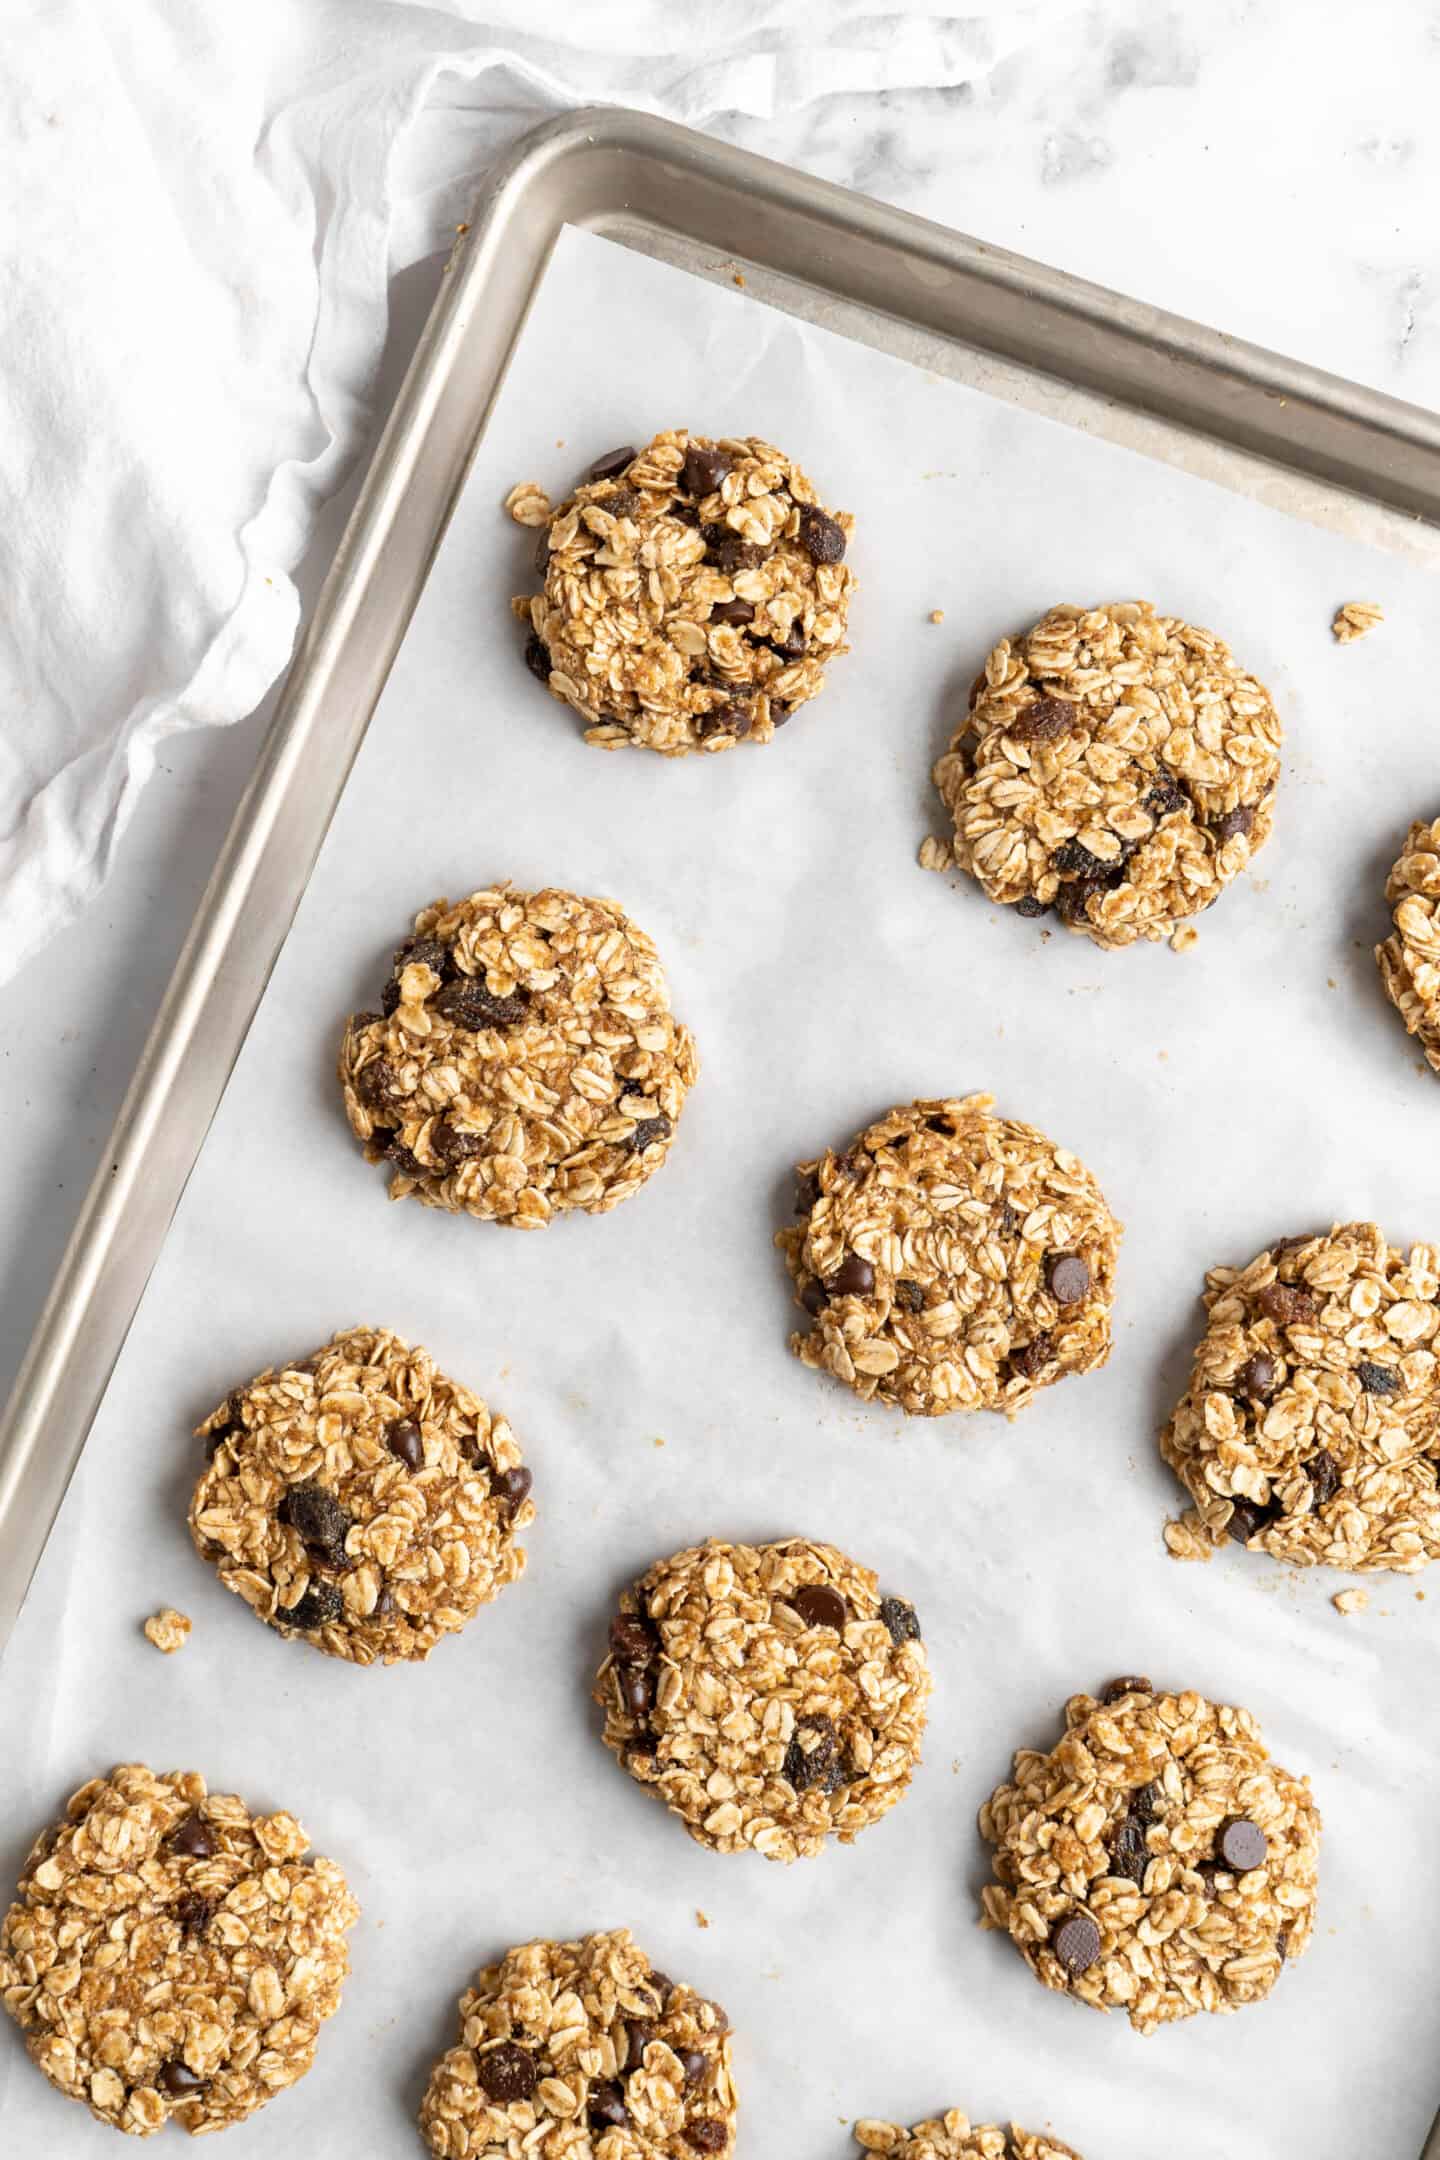
Form the cookies . Use about 3 tablespoons of dough for each cookie and form them on the prepared baking sheet, with space between each. (Don’t worry, these cookies don’t spread much.)
Bake . Place the baking sheet on the top rack of the oven and bake for 12 to 15 minutes, or until the cookies are puffy and the tops are golden brown.
Cool . Let the cookies cool for 5 minutes on the pan, then carefully transfer them to a wire rack to finish cooling.
What Is a Silicone Mat?
A silicone baking mat is a thin non-stick surface made of—you guessed it—silicone! They provide an eco-friendly alternative to parchment paper because they can be used multiple times (simply wash with warm soapy water after each use). Silicone mats are heat resistant up to 480°F, and they help to insulate your baked goods, resulting in more even baking.
I think, other than measuring cups and spoons, my silicone baking mat is my most-used kitchen tool. In addition to using it for cookies, I use it for roasting veggies, baking bread—basically, any time I use a sheet pan, I use a silicone mat.
Tips for Success
Here are some of my best hints and tips for perfect Banana Oatmeal Cookies!
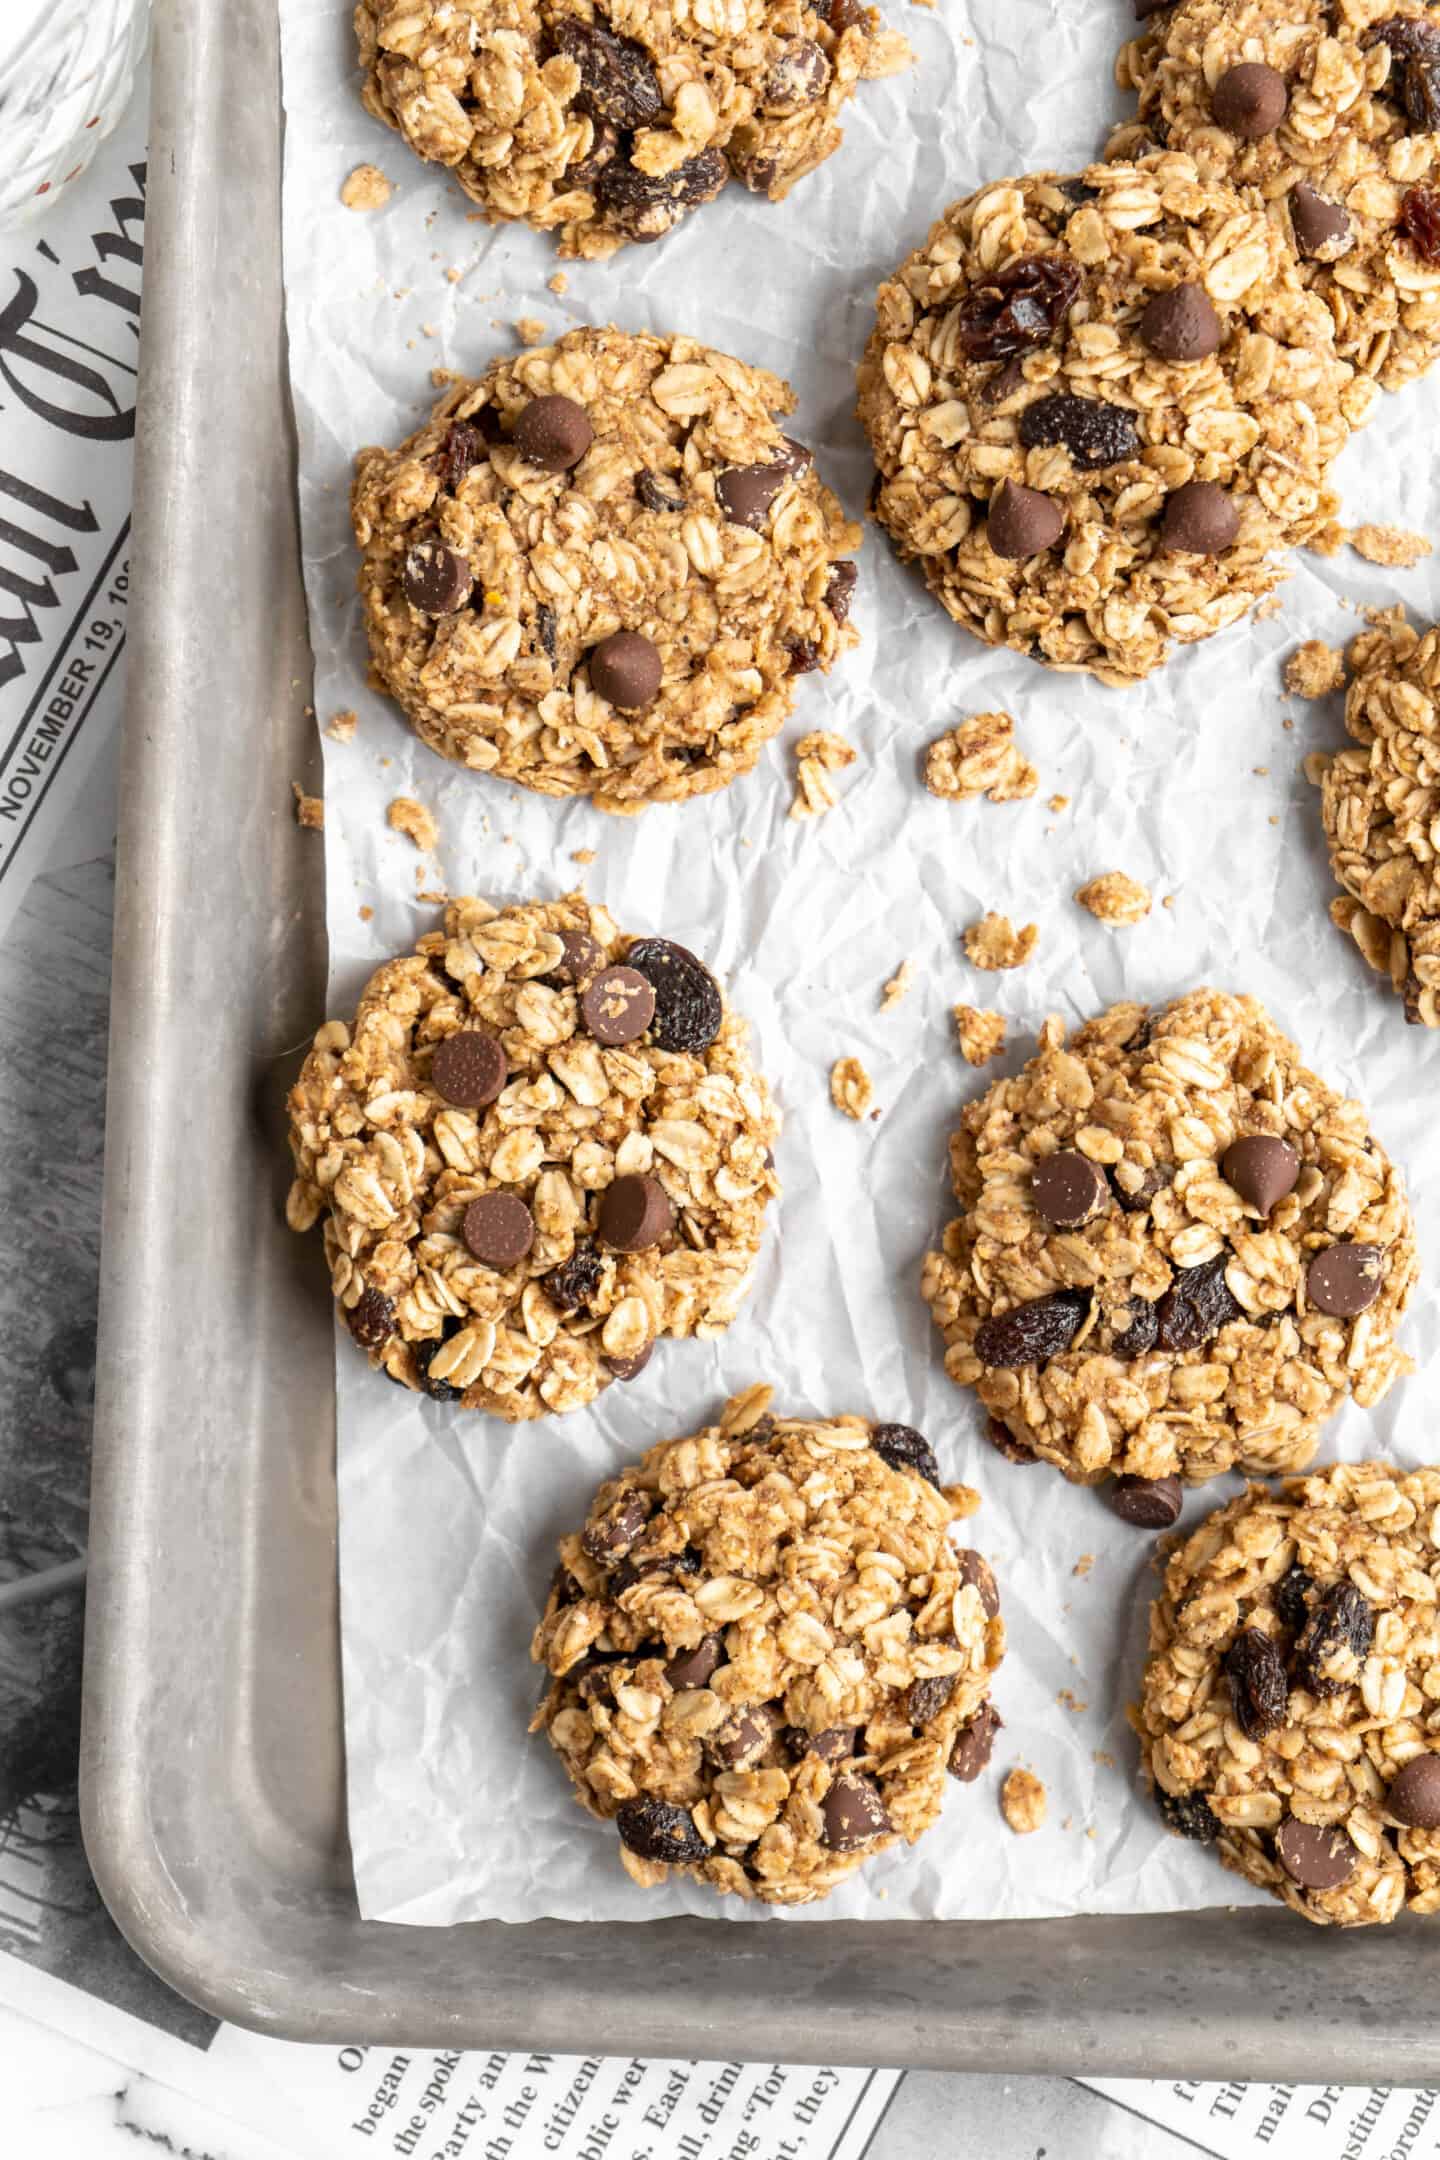
- Add some chocolate chips and raisins to the top . The secret to bakery-style cookies at home is to reserve some of the chocolate chips and raisins and press them into the tops of the cookies before baking, rather than adding them all to the batter. It doesn’t change the flavour, but does give them more visual appeal!
- Don’t over-bake. Remember, they’ll continue baking from the residual heat on the baking sheet, so it’s okay if the centers are still a little bit soft when you pull the cookies out of the oven.
- Be patient. It’s hard to resist warm cookies fresh out of the oven, but these cookies need cooling time to firm up.
How to Store
These Banana Oatmeal Cookies are best enjoyed fresh, but will keep in an airtight container in the refrigerator for 3 to 5 days.
Can This Recipe Be Frozen?
I love these Banana Oatmeal Cookies for a meal prep breakfast option! Store them in an airtight container with parchment between the layers to keep them from sticking, or pop them in a freezer bag. They’ll keep for up to 3 months in the freezer; thaw them at room temperature or microwave them for a few seconds.
P.S. Here are some of the items I used to make this recipe if you’d like to use them too:
| WHAT YOU’LL NEED // SHOP MY FAVORITE INGREDIENTS & PREP PRODUCTS |

Ingredients
- 2 1/4 cups rolled quick oats
- 1/2 teaspoon sea salt
- 1 teaspoon baking powder
- 1/2 teaspoon cinnamon
- 1/2 teaspoon nutmeg
- 1/4 cup ground flaxseeds
- 1/2 cup mashed bananas , very ripe
- 1/4 cup organic peanut butter , microwave for 30 seconds
- 1/4 cup maple syrup
- 1/4 cup vegan chocolate chips
- 1/4 cup raisins
- optional: sunflower seeds , cranberries and other nuts
Instructions
- Preheat the oven to 325 ° F/ 165° C.
- Line a baking sheet with a SILPAT or other silicone baking mat.
- Mix all the dry ingredients together, then add in the wet ingredients in order.
- Use a wooden spoon or spatula and stir together until together, stirring for about 30 seconds so as to incorporate everything but not over mix. The batter should be sticky and thick.
- Using a little less than 3 tablespoons for each cookie, form dough firmly into cookies, and place on baking mat. Leave a little space between each cookie (they won’t spread out while baking but will puff up just a little bit).
- Bake for 12-15 minutes on the top rack of your oven until tops are golden brown.
- Allow to cool for 5 minutes on baking mat then transfer to a wire rack to cool completely. Enjoy!
Notes
These banana oatmeal cookies may look like dessert, but you can actually have them for breakfast. Loaded with chewy oats, peanut butter, and ripe banana, they’re made in one bowl and naturally gluten-free!
There’s a lot to love about these Banana Oatmeal Cookies.
They’re delightfully chewy, loaded with chocolate chips, and supremely satisfying. Vegan? Gluten-free? Yes and yes! And did I mention that they’re easy to make? Because that, too.
Of course, what’s most exciting about this recipe for Banana Oatmeal Cookies is that you can eat them any time of day—including for breakfast. They’re absolutely packed with protein, whole grains, and fruit. We’ve got all the bases covered, friends.
I know, I sound super excited and giddy, but these are COOKIES we are talking about. In fact, as soon as I let them finish cooling I said to myself, “Sthelf, these are the besffhstt.” (That’s said with half a cookie in my mouth, so…you get my muffled gist.)
For more cookies that you can eat any time of day, be sure to check out my Chewy Trail Mix Cookies , Pumpkin Chocolate Chip Oatmeal Breakfast Cookies , and Rolled Pumpkin Spice Cookies .
Notes on Ingredients
Please note that this is important information on the ingredients and instructions and the FULL recipe with amounts and details can be found DOWN BELOW (scroll to it) in the recipe card.
- Rolled oats – These give your Banana Oatmeal Cookies a hearty texture and make them filling enough for a breakfast.
- Sea salt
- Baking powder
- Cinnamon
- Nutmeg
- Ground flaxseeds
- Mashed bananas – The darker the banana, the better! Not only do extra-ripe bananas make the recipe sweeter, they also give the cookies a more pronounced banana flavour.
- Organic peanut butter – Microwave this for 30 seconds so it’s pourable.
- Maple syrup – Agave could be used instead if you prefer.
- Vegan chocolate chips – Or add some crunch with cacao nibs.
- Raisins – Not a fan? Double the chocolate chips or use another add-in.
More Add-In Ideas
These Banana Oatmeal Cookies are incredibly versatile, so feel free to switch things up with any of these add-ins or some ideas of your own!
- Sunflower seeds
- Dried cranberries or blueberries
- Chopped dried apricots
- Chopped nuts
- Pepitas
- Freeze-dried strawberries
- Shredded coconut
How to Make Banana Oatmeal Cookies
Since this is a one-bowl recipe, it’s easy to make and easy to clean up afterwards! Here’s what you’ll need to do.
Prepare . Preheat your oven to 325°F/165°C. Line a baking sheet with a silicone baking mat or parchment paper.
Make the cookie dough. Stir the dry ingredients together, then add the wet ingredients and stir for about 30 seconds until you’ve got a sticky, thick dough. Fold in your add-ins.
Form the cookies . Use about 3 tablespoons of dough for each cookie and form them on the prepared baking sheet, with space between each. (Don’t worry, these cookies don’t spread much.)
Bake . Place the baking sheet on the top rack of the oven and bake for 12 to 15 minutes, or until the cookies are puffy and the tops are golden brown.
Cool . Let the cookies cool for 5 minutes on the pan, then carefully transfer them to a wire rack to finish cooling.
What Is a Silicone Mat?
A silicone baking mat is a thin non-stick surface made of—you guessed it—silicone! They provide an eco-friendly alternative to parchment paper because they can be used multiple times (simply wash with warm soapy water after each use). Silicone mats are heat resistant up to 480°F, and they help to insulate your baked goods, resulting in more even baking.
I think, other than measuring cups and spoons, my silicone baking mat is my most-used kitchen tool. In addition to using it for cookies, I use it for roasting veggies, baking bread—basically, any time I use a sheet pan, I use a silicone mat.
Tips for Success
Here are some of my best hints and tips for perfect Banana Oatmeal Cookies!
- Add some chocolate chips and raisins to the top . The secret to bakery-style cookies at home is to reserve some of the chocolate chips and raisins and press them into the tops of the cookies before baking, rather than adding them all to the batter. It doesn’t change the flavour, but does give them more visual appeal!
- Don’t over-bake. Remember, they’ll continue baking from the residual heat on the baking sheet, so it’s okay if the centers are still a little bit soft when you pull the cookies out of the oven.
- Be patient. It’s hard to resist warm cookies fresh out of the oven, but these cookies need cooling time to firm up.
How to Store
These Banana Oatmeal Cookies are best enjoyed fresh, but will keep in an airtight container in the refrigerator for 3 to 5 days.
Can This Recipe Be Frozen?
I love these Banana Oatmeal Cookies for a meal prep breakfast option! Store them in an airtight container with parchment between the layers to keep them from sticking, or pop them in a freezer bag. They’ll keep for up to 3 months in the freezer; thaw them at room temperature or microwave them for a few seconds.
P.S. Here are some of the items I used to make this recipe if you’d like to use them too:
| WHAT YOU’LL NEED // SHOP MY FAVORITE INGREDIENTS & PREP PRODUCTS |
Ingredients
- 2 1/4 cups rolled quick oats
- 1/2 teaspoon sea salt
- 1 teaspoon baking powder
- 1/2 teaspoon cinnamon
- 1/2 teaspoon nutmeg
- 1/4 cup ground flaxseeds
- 1/2 cup mashed bananas , very ripe
- 1/4 cup organic peanut butter , microwave for 30 seconds
- 1/4 cup maple syrup
- 1/4 cup vegan chocolate chips
- 1/4 cup raisins
- optional: sunflower seeds , cranberries and other nuts
Instructions
- Preheat the oven to 325 ° F/ 165° C.
- Line a baking sheet with a SILPAT or other silicone baking mat.
- Mix all the dry ingredients together, then add in the wet ingredients in order.
- Use a wooden spoon or spatula and stir together until together, stirring for about 30 seconds so as to incorporate everything but not over mix. The batter should be sticky and thick.
- Using a little less than 3 tablespoons for each cookie, form dough firmly into cookies, and place on baking mat. Leave a little space between each cookie (they won’t spread out while baking but will puff up just a little bit).
- Bake for 12-15 minutes on the top rack of your oven until tops are golden brown.
- Allow to cool for 5 minutes on baking mat then transfer to a wire rack to cool completely. Enjoy!
Notes
Banana Oatmeal Cookies
Ingredients
- 2 1/4 cups rolled quick oats
- 1/2 teaspoon sea salt
- 1 teaspoon baking powder
- 1/2 teaspoon cinnamon
- 1/2 teaspoon nutmeg
- 1/4 cup ground flaxseeds
- 1/2 cup mashed bananas very ripe
- 1/4 cup organic peanut butter microwave for 30 seconds
- 1/4 cup maple syrup
- 1/4 cup vegan chocolate chips
- 1/4 cup raisins
- optional: sunflower seeds cranberries and other nuts
Instructions
- Preheat the oven to 325 ° F/ 165° C.
- Line a baking sheet with a SILPAT or other silicone baking mat.
- Mix all the dry ingredients together, then add in the wet ingredients in order.
- Use a wooden spoon or spatula and stir together until together, stirring for about 30 seconds so as to incorporate everything but not over mix. The batter should be sticky and thick.
- Using a little less than 3 tablespoons for each cookie, form dough firmly into cookies, and place on baking mat. Leave a little space between each cookie (they won’t spread out while baking but will puff up just a little bit).
- Bake for 12-15 minutes on the top rack of your oven until tops are golden brown.
- Allow to cool for 5 minutes on baking mat then transfer to a wire rack to cool completely. Enjoy!
Notes
Nutrition
Banana Oatmeal Cookies https://jessicainthekitchen.com/breakfast-cookies/ August 3, 2022
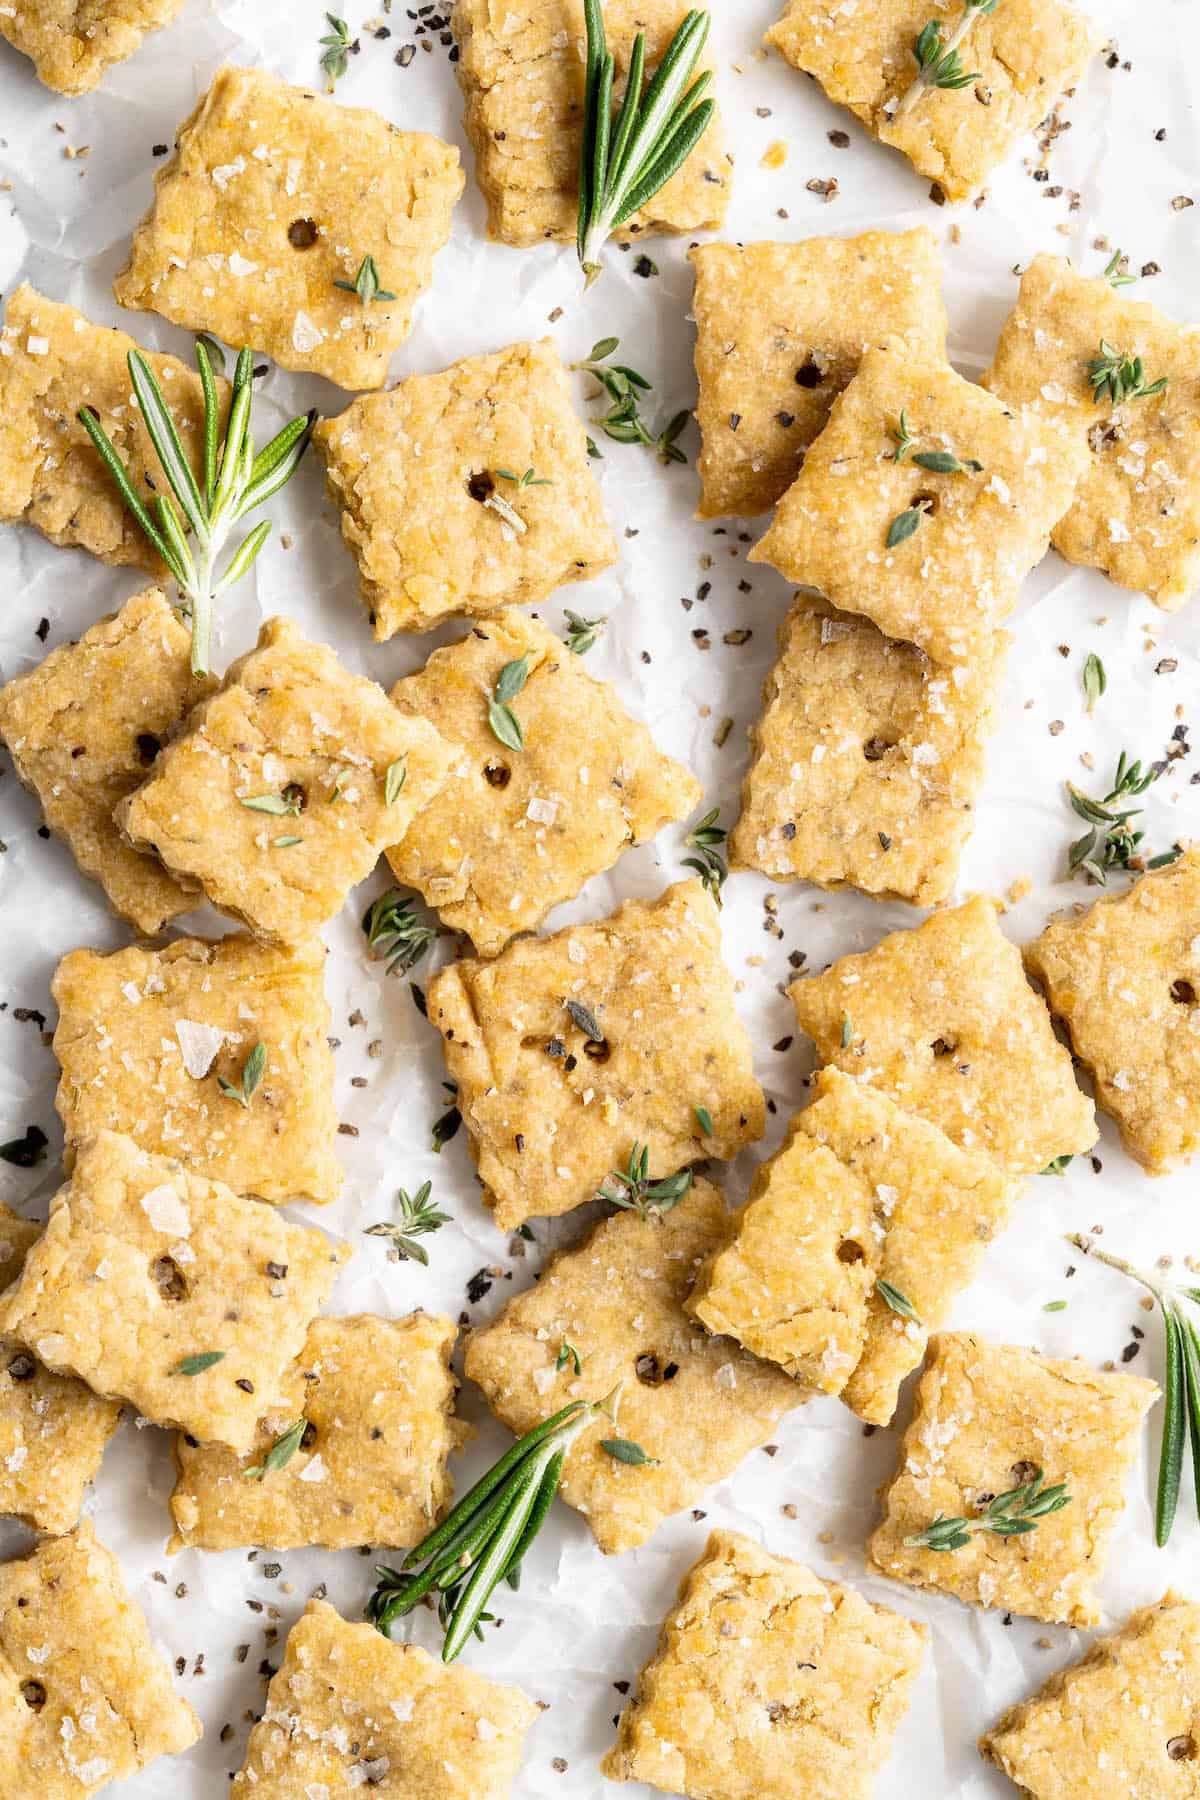
These Vegan Cheez-Its are everything you love about the classic cheese crackers, minus the cheese! Easy to make, highly snackable, and full of that irresistibly cheesy flavour.
Attention snack lovers! I’ve got a treat for you today! If you love snacks that are crispy, crunchy, and cheesy, then these Vegan Cheez-Its are going to be your new fave. (Bonus: They won’t even turn your fingers orange when you eat them!) You won’t believe how much cheesy flavour we pack into these little vegan cheese crackers.
The secret? Nutritional yeast !
Yep, good ol’ nooch is the key ingredient here, which means you get loads of cheesiness, with some added nutrition, too.
To class things up a bit, I’ve added rosemary for some herbaceous flavour, but you can definitely skip that if you want the traditional Cheez-It experience here.
If you’ve never made homemade crackers before, it’s easier than you might expect. Just make a dough, roll it out super thin, cut the crackers, then bake them to crispy perfection. I cut basic squares here, but you can use small cookie cutters to create shapes, too—just pat together the scraps, roll them out again, and keep cutting.
(Want some more vegan snack ideas? I’ve got ’em! Here’s Three Ways To Make Kale Chips .
Notes on Ingredients
Please note that this is important information on the ingredients and instructions and the FULL recipe with amounts and details can be found DOWN BELOW (scroll to it) in the recipe card.
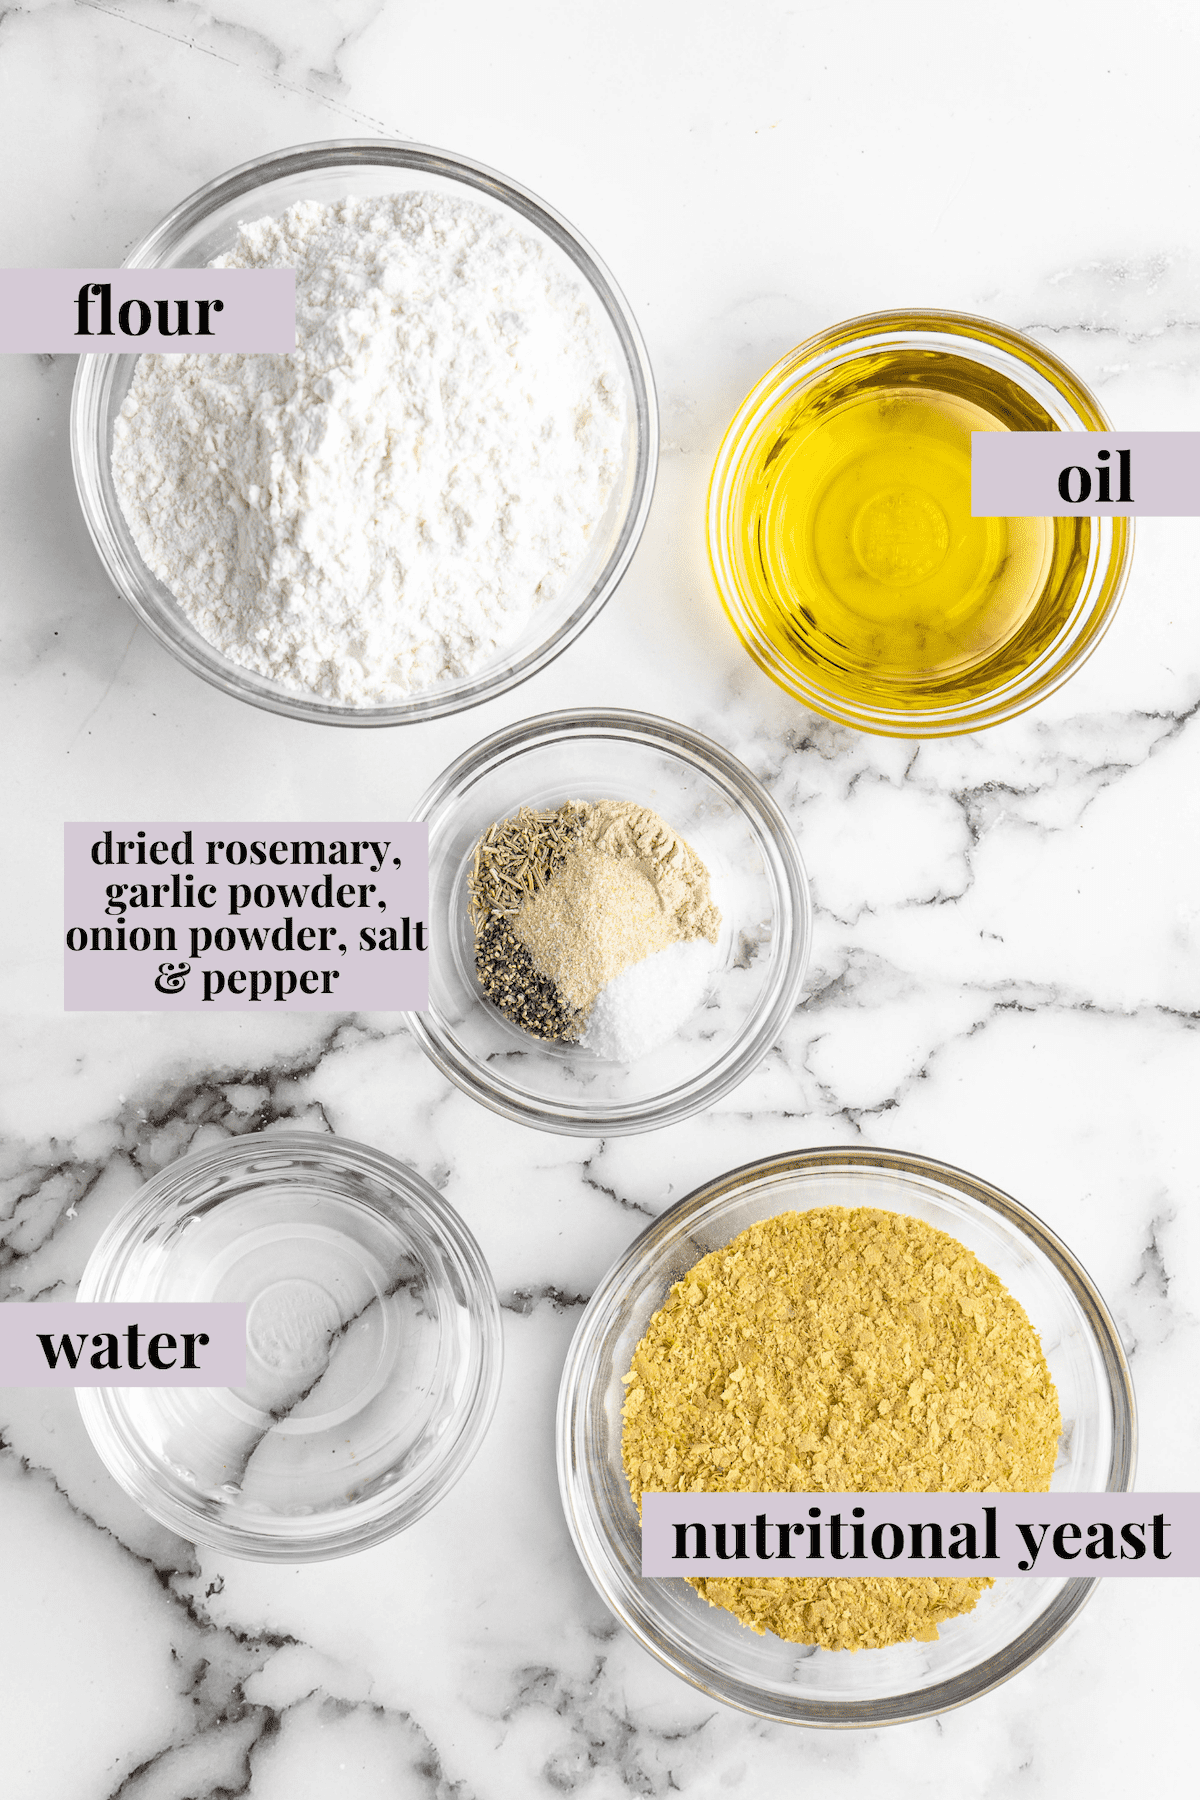
- Nutritional yeast – You can usually find this with the spices at the grocery store; if yours has a bulk section, you might be able to find it there, too.
- All-purpose flour – I used an all-purpose gluten-free baking flour (AKA a measure-for-measure substitute), but if you’re not on a gluten-free diet, regular (wheat) all-purpose flour is just fine.
- Ground black pepper
- Dried rosemary
- Sea salt
- Garlic powder
- Onion powder
- Ice cold water – Pour some water into a glass with ice cubes; once the water is chilled, measure out what you need for the recipe and discard the ice.
- Olive oil
Does nutritional yeast really taste like cheese?
Yes and no. It’s not exactly like cheese, but it does have a cheesy flavour, although it also has a note of nuttiness to it, which reminds me of an aged Parmesan. In fact, I use it to make my favourite vegan Parmesan !
How to Make Vegan Cheez-Its
These vegan cheese crackers take just 30 minutes to make, so you can whip them up whenever you’re craving a crispy, cheesy snack. Here’s what you’ll need to do.
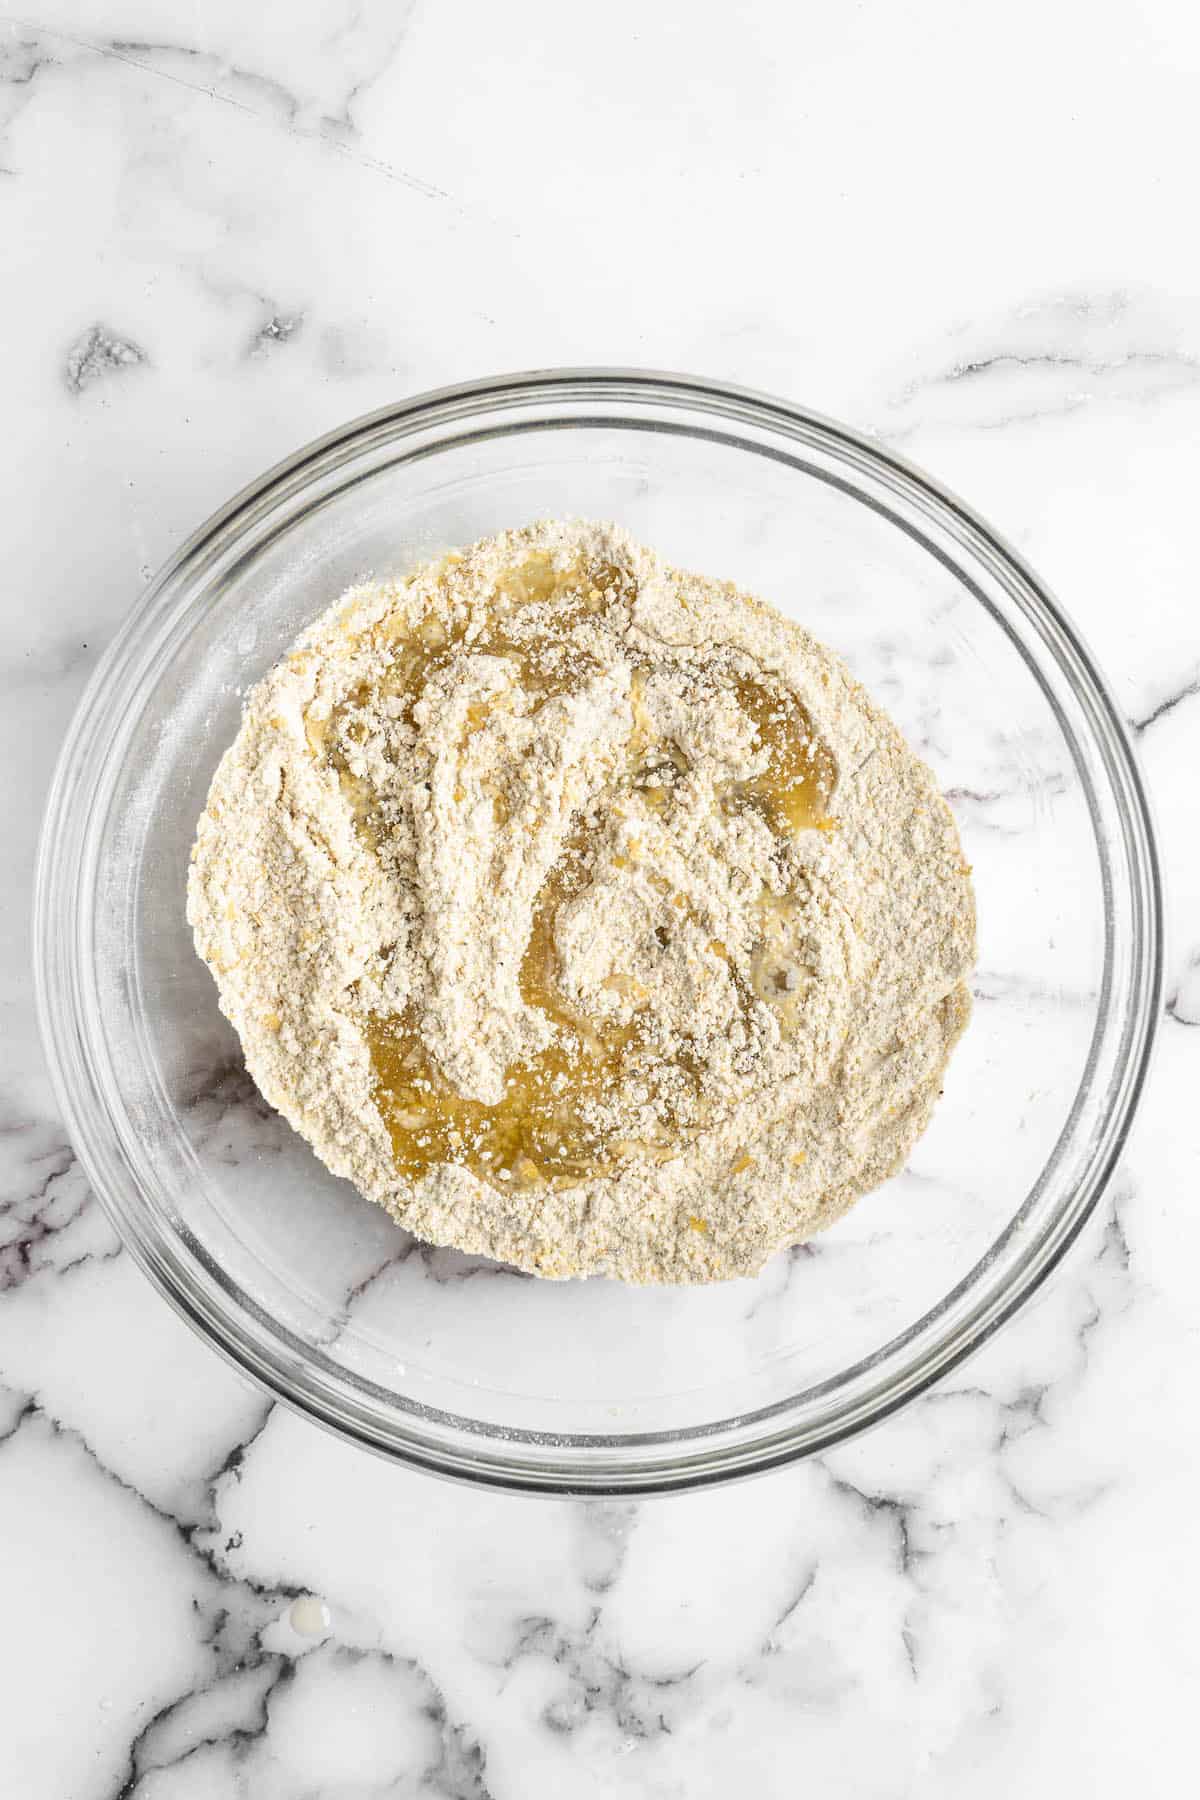
Form the dough. Whisk together the dry ingredients in a large mixing bowl. Add the olive oil and ice water and use your hands to mix everything together until pea-sized crumbs form. Then, press the mixture together to form a dough. Knead for 2 minutes.
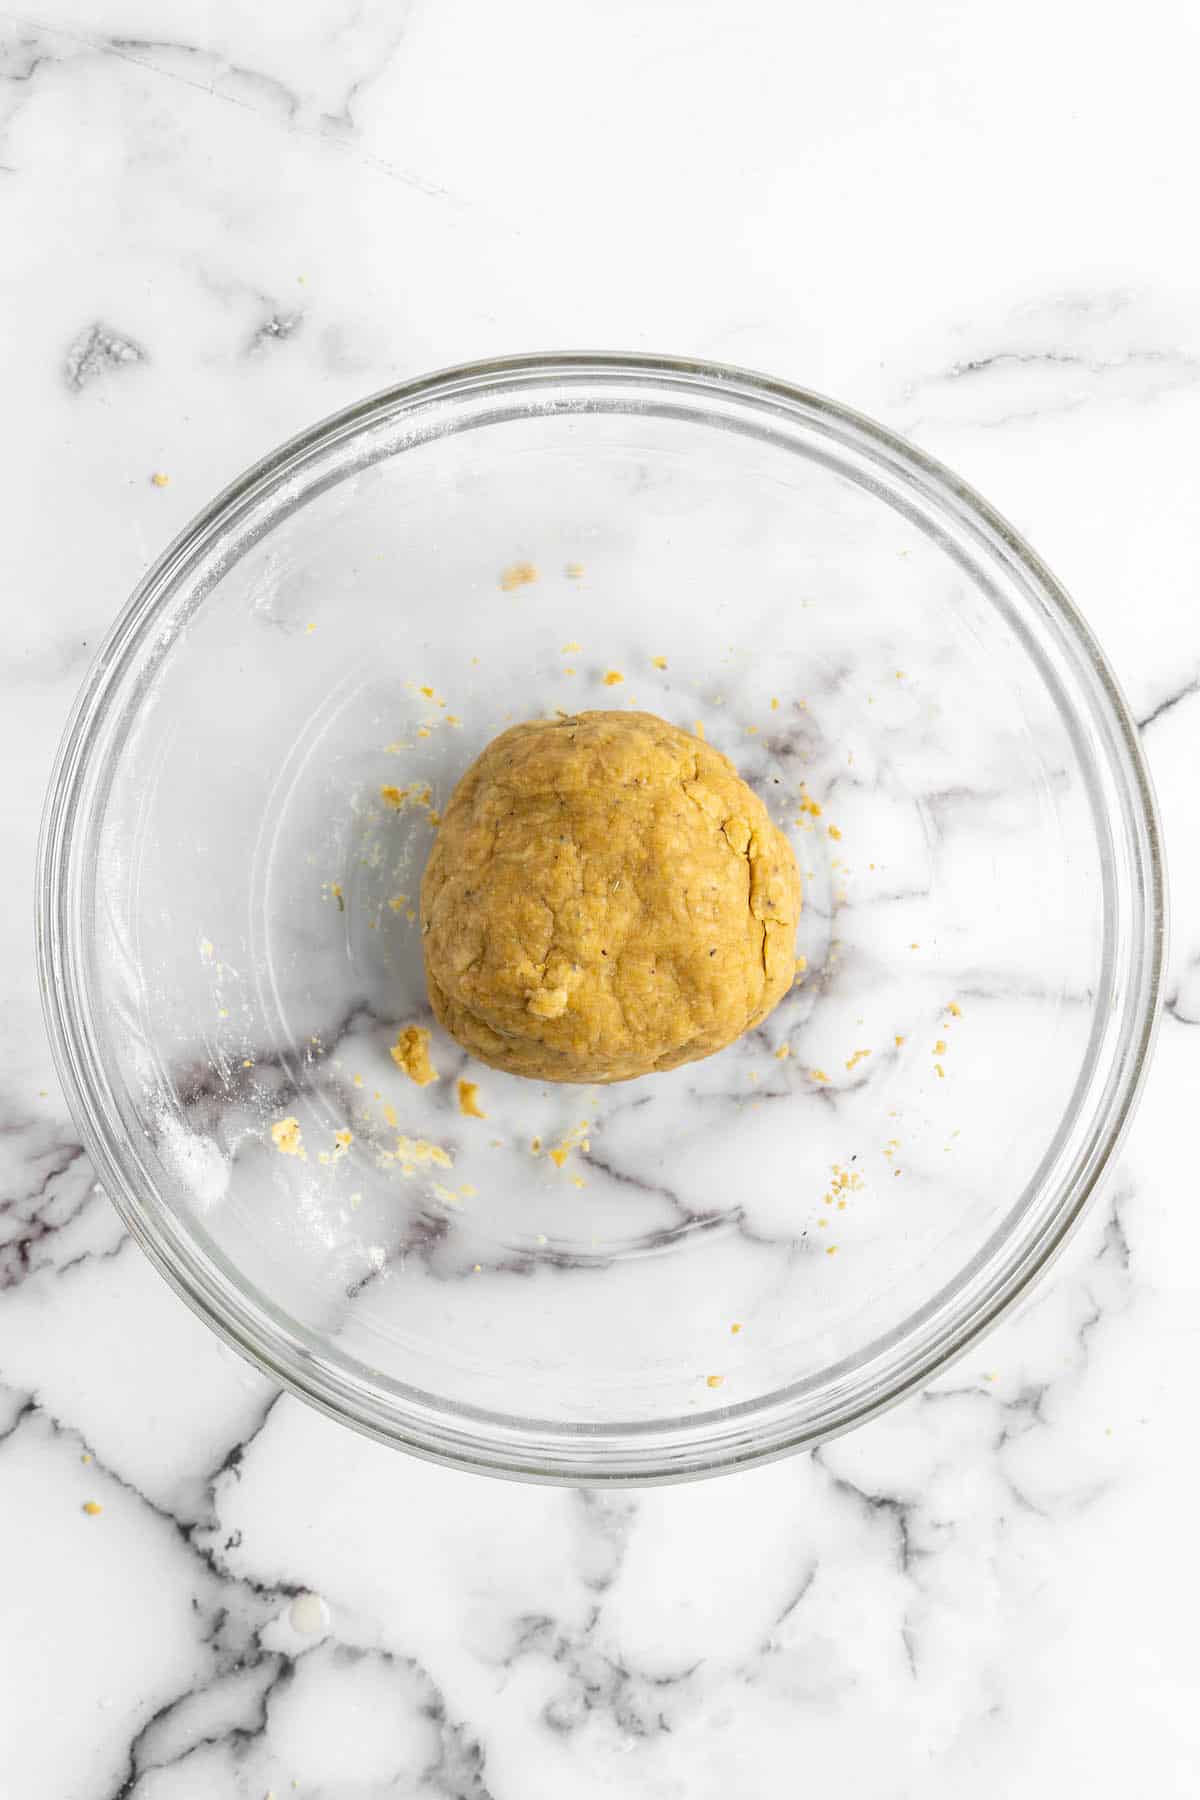
Chill . Form the dough into a ball and wrap it in plastic wrap, then freeze it for 10 minutes. Begin preheating your oven to 400°F/200°C.
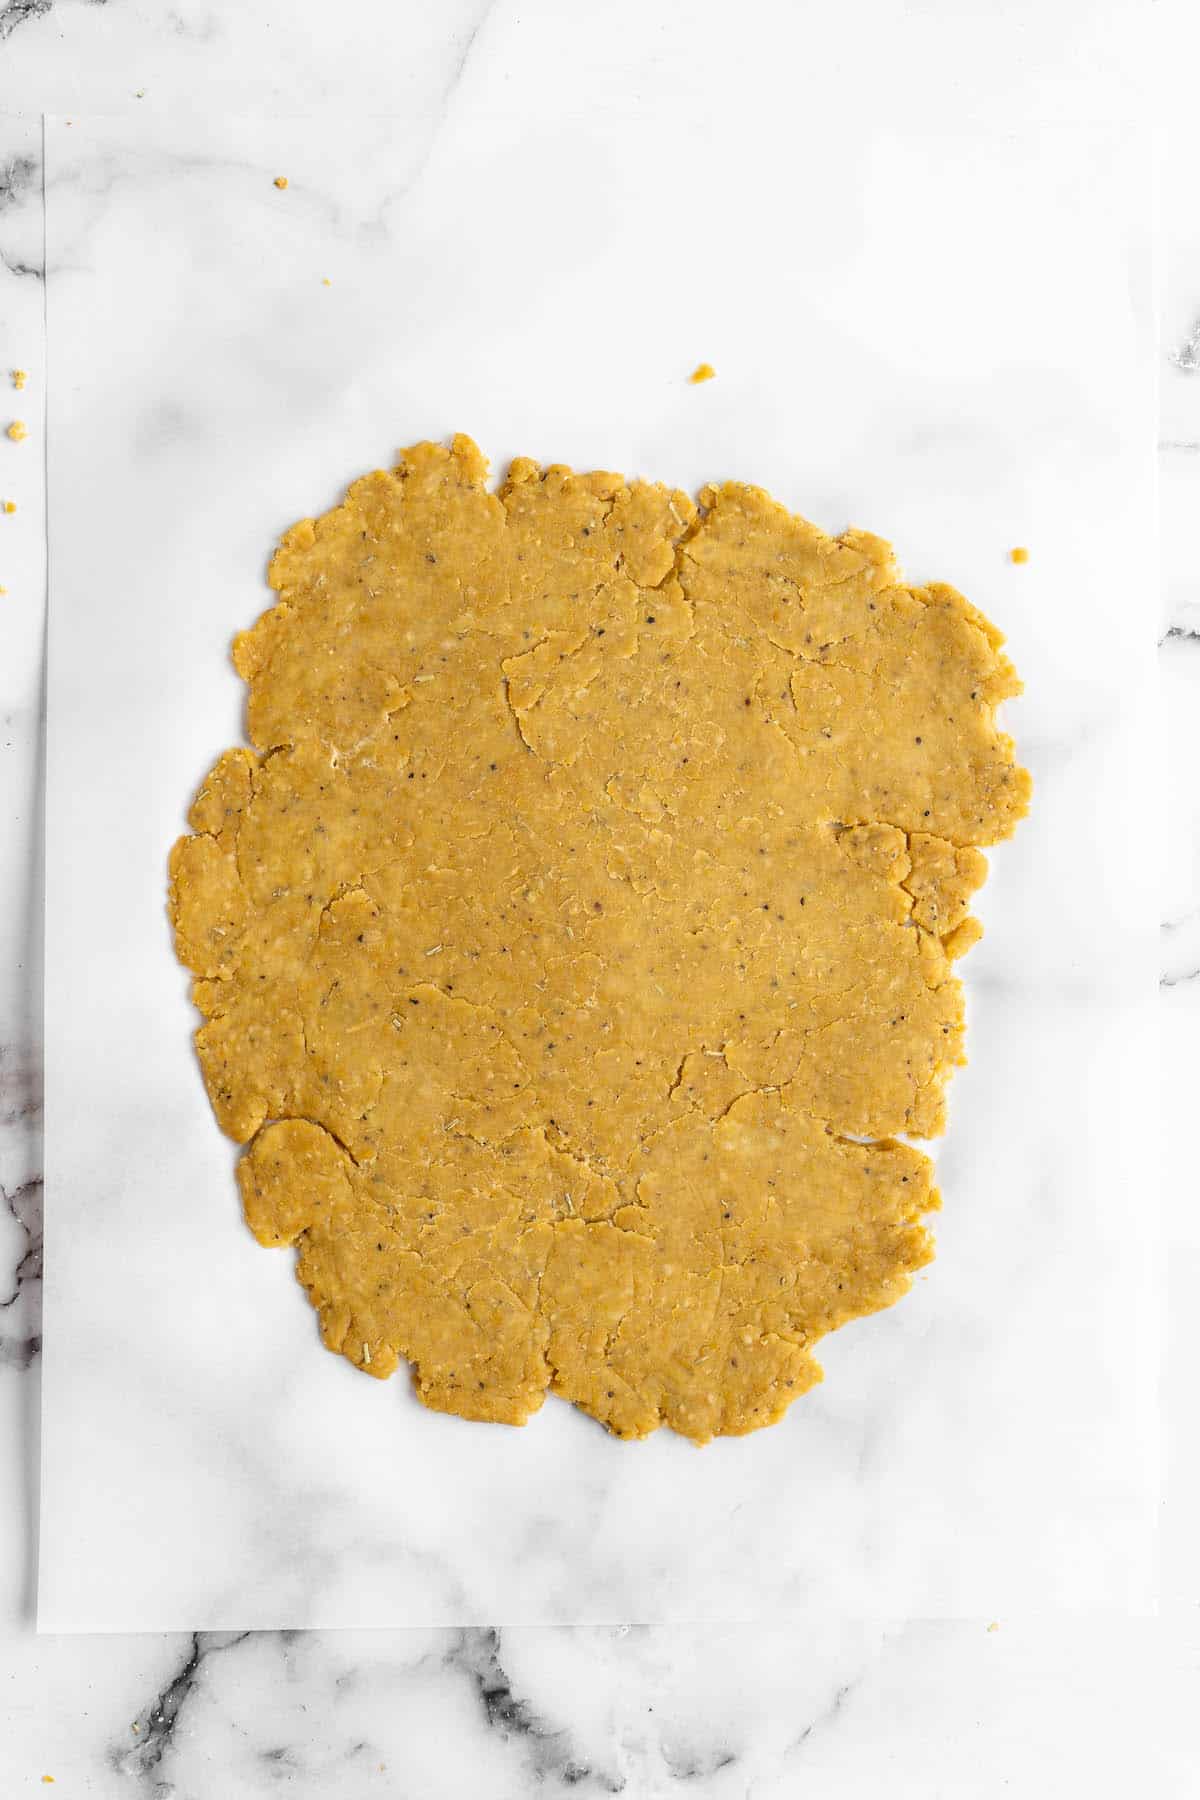
Roll out the dough . Unwrap the dough and place it on a piece of parchment paper. Roll it out to 1/8-inch thick.
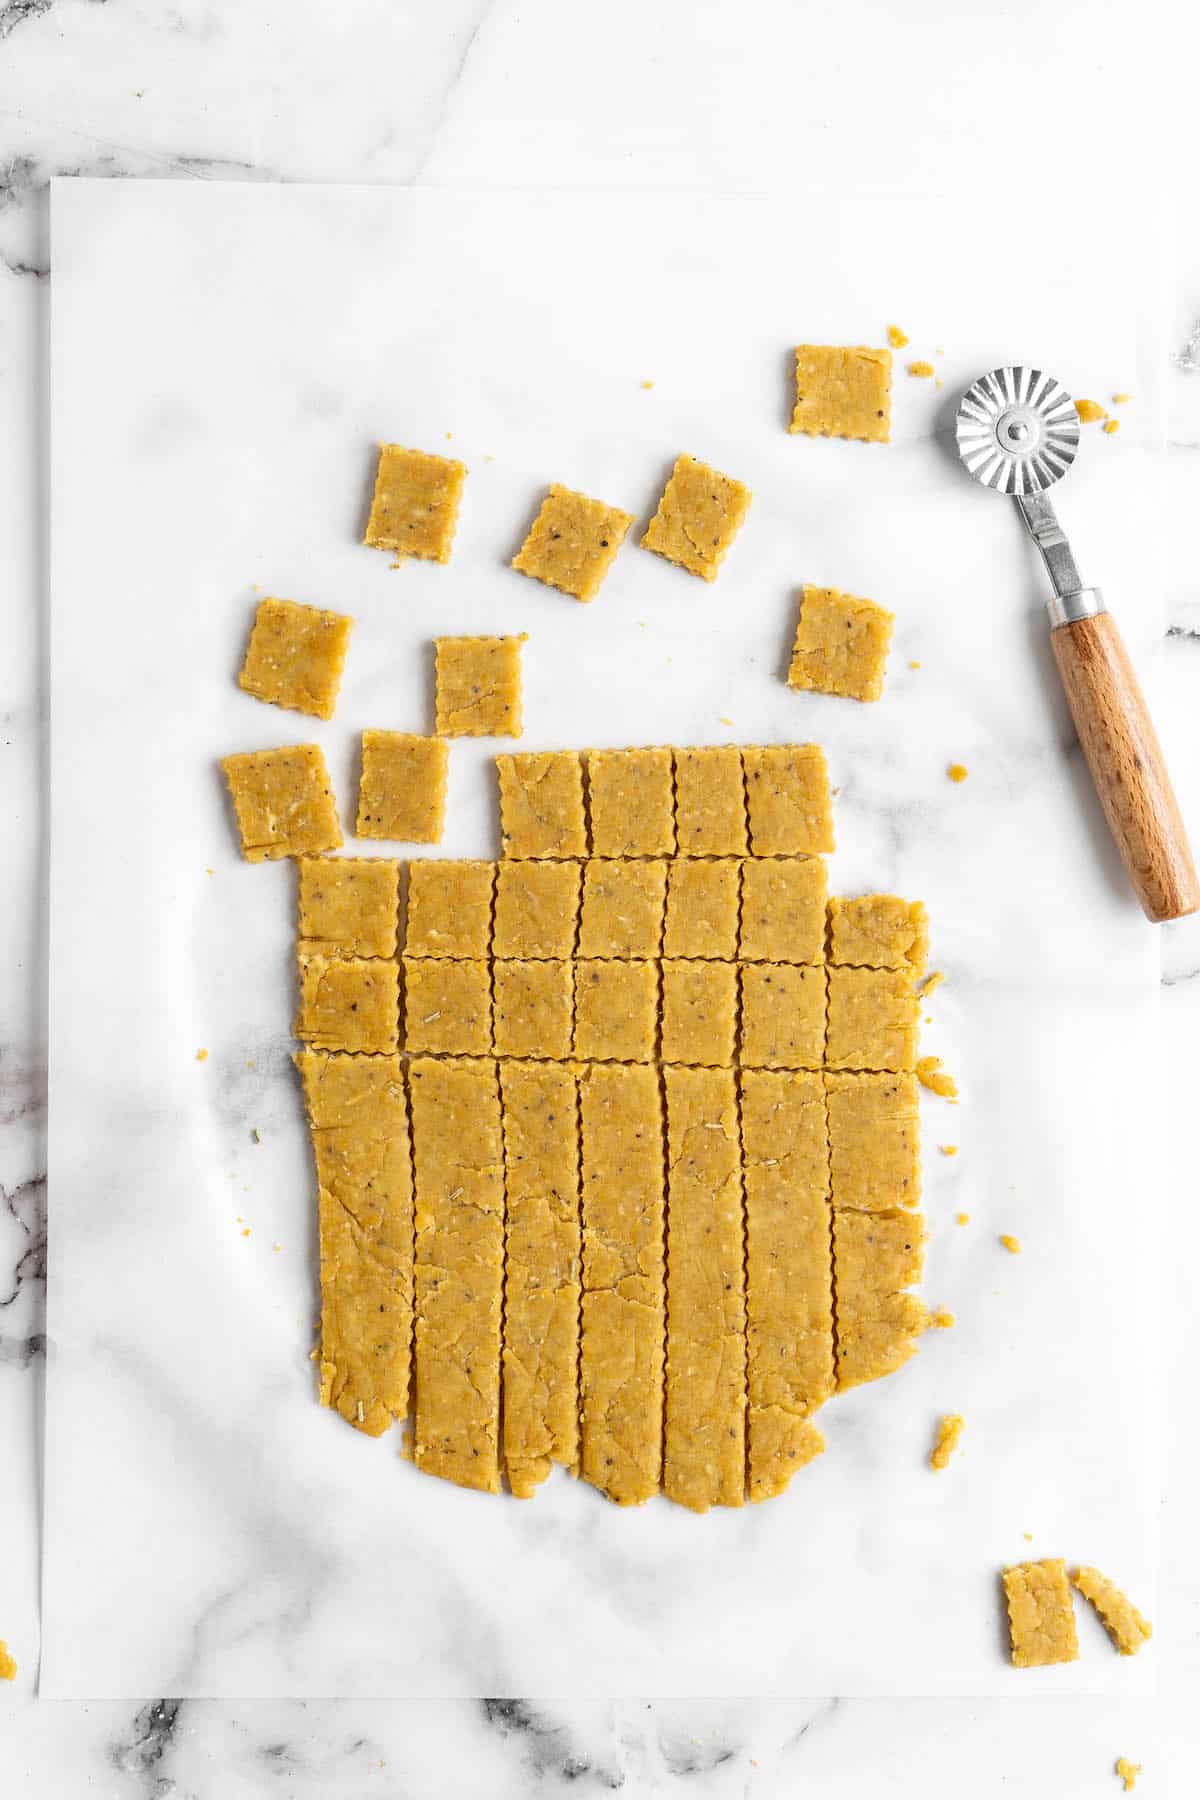
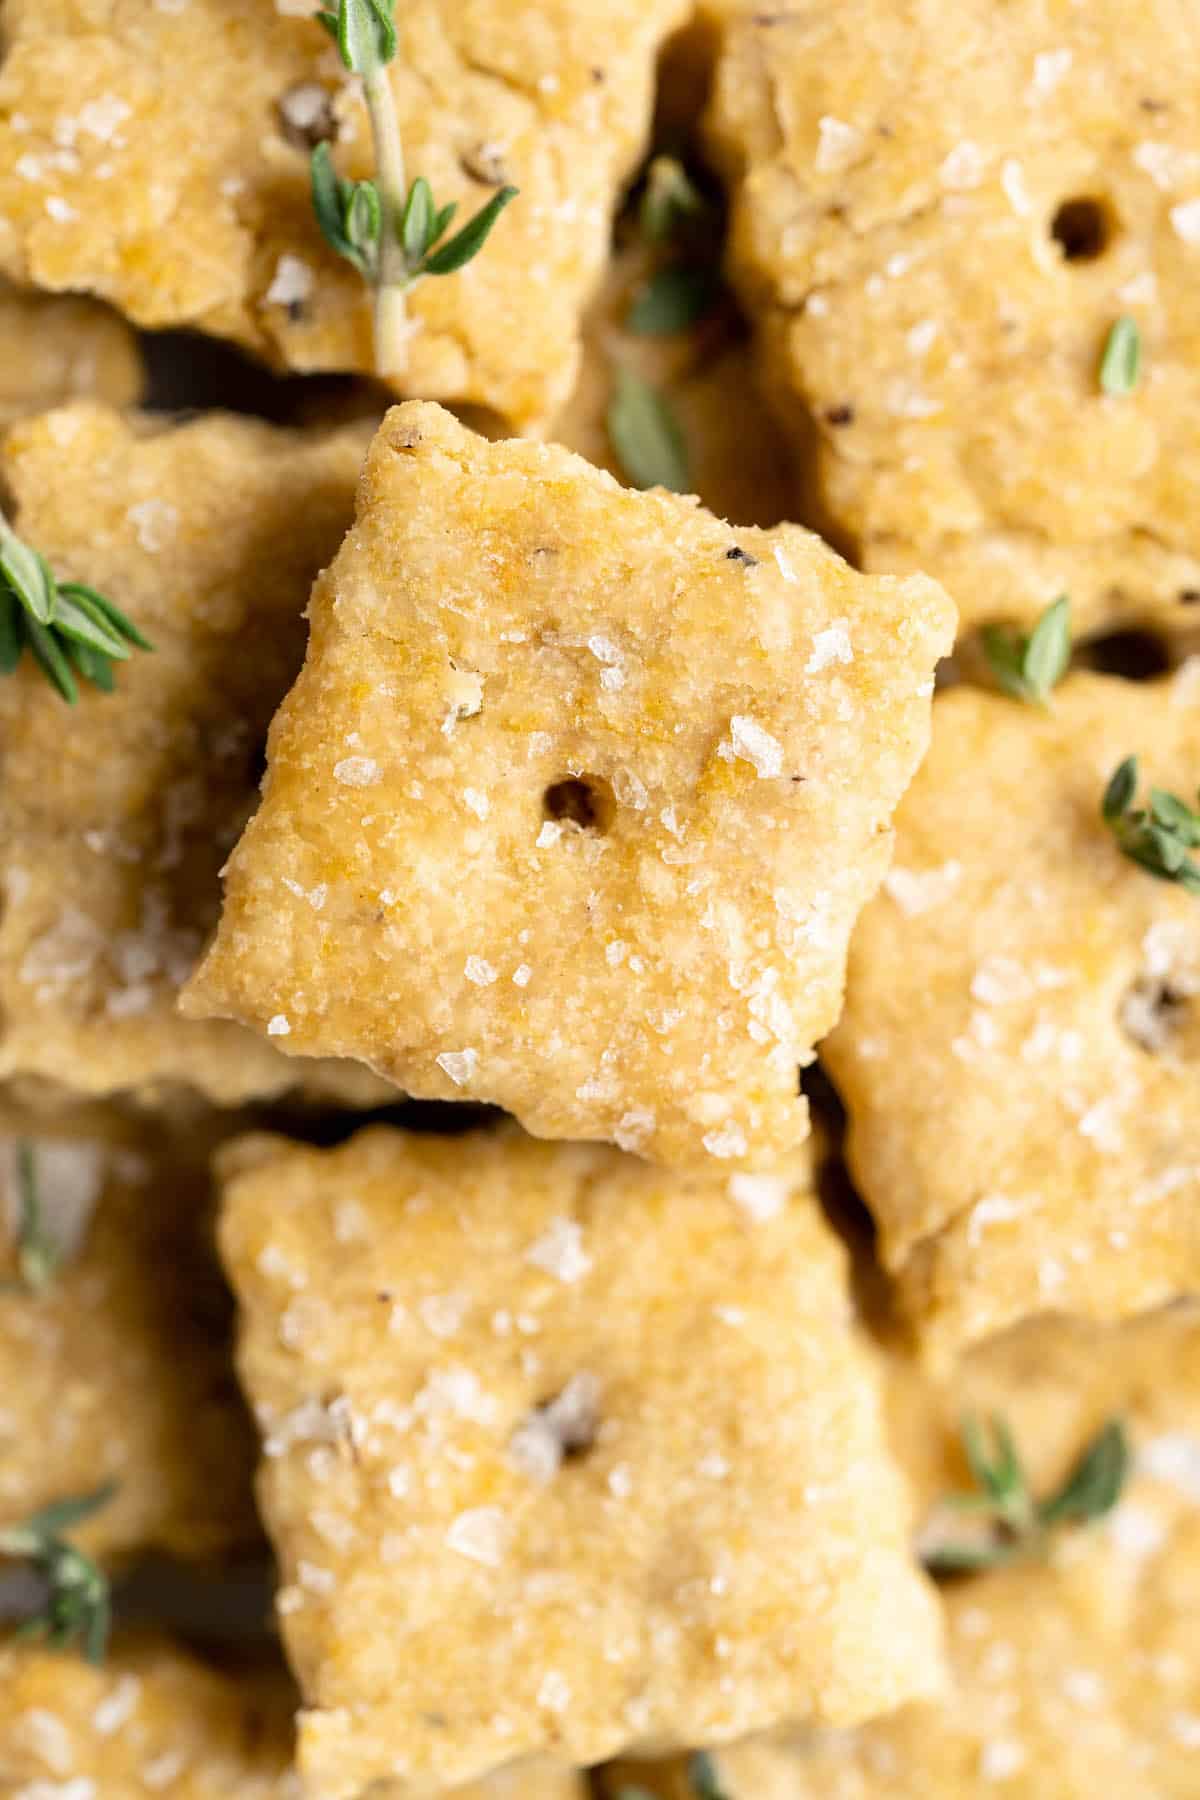
Form the crackers . Use a knife or a pastry cutter to cut the crackers into 1-inch squares and poke a hole into the center of each. Place them on a parchment-lined baking sheet and sprinkle them with salt.
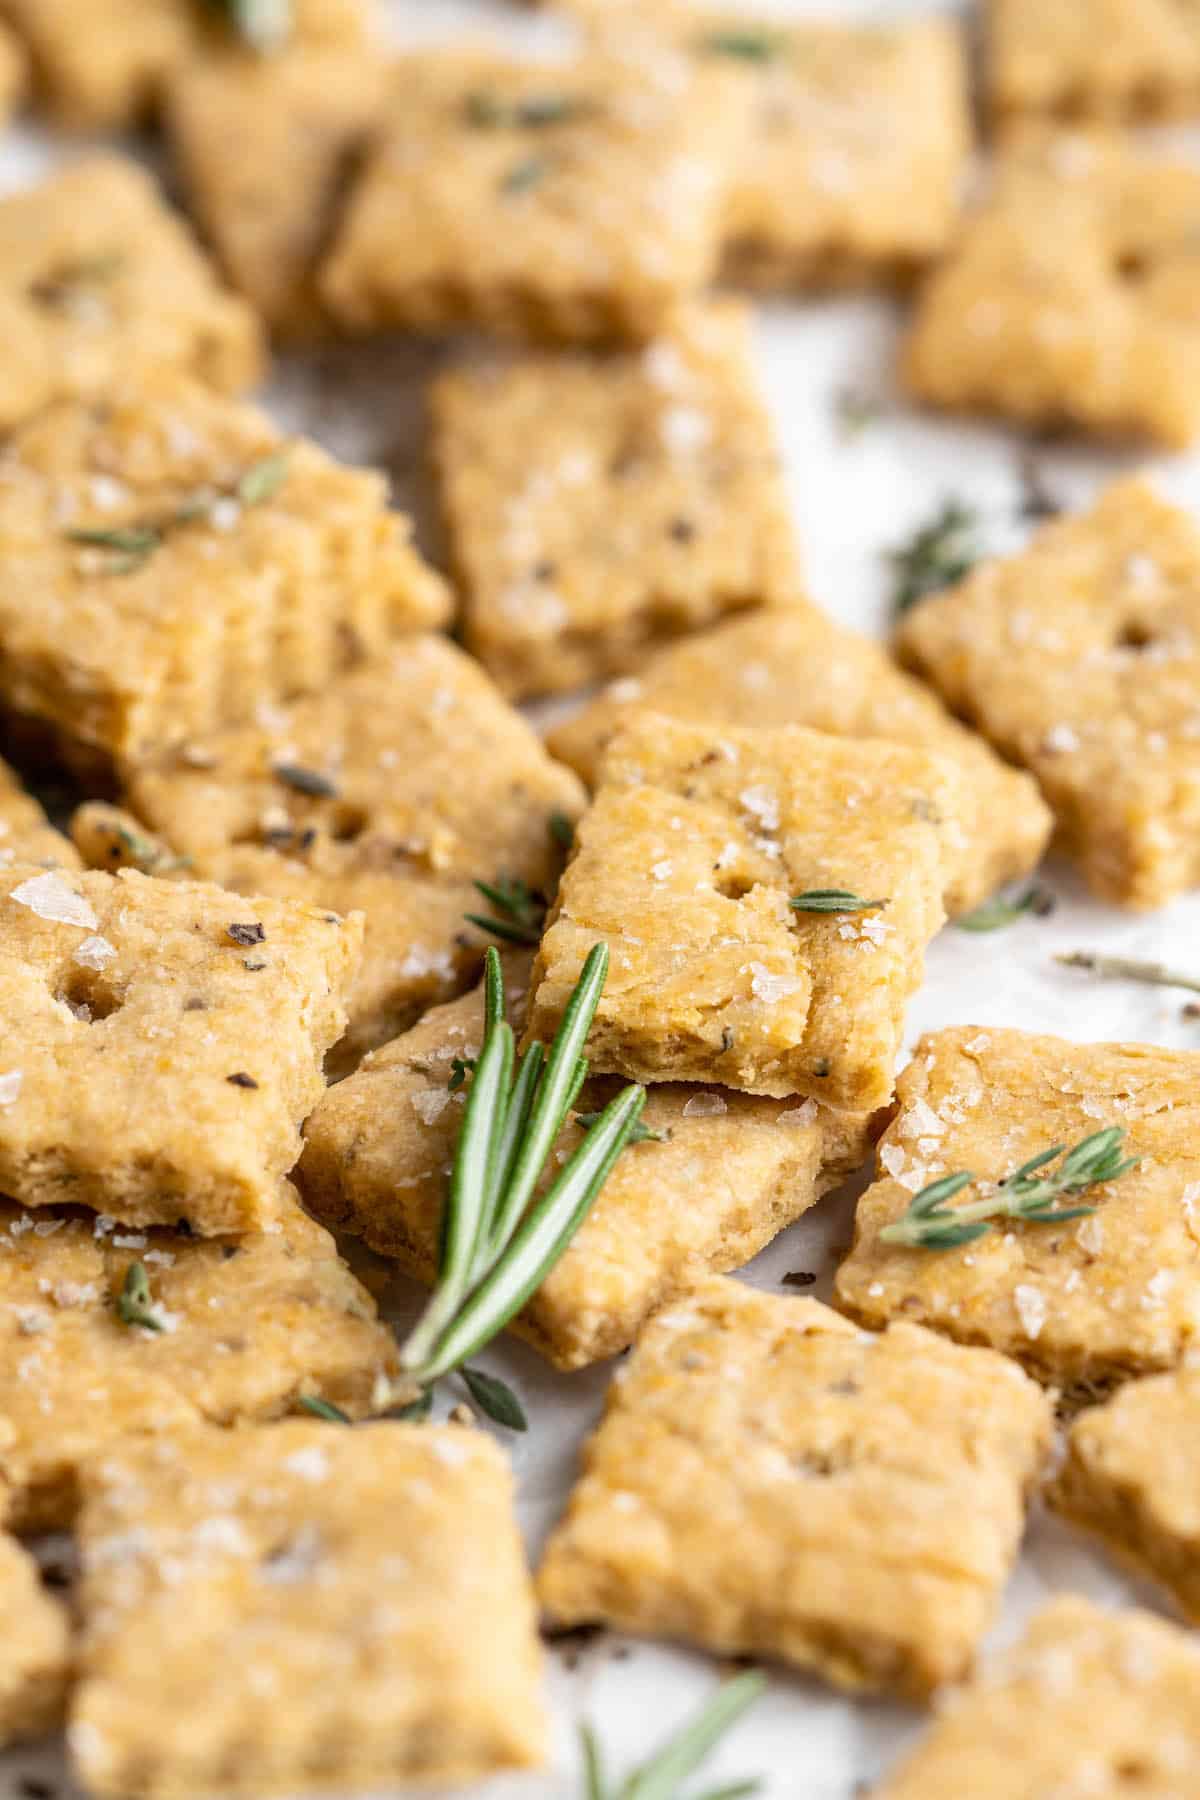
Bake . Place the baking sheet in the oven and bake for 10 to 12 minutes.
Cool . Let your vegan Cheez-Its cool completely on the baking sheet before serving. As they cool, they’ll get crispier!
Tips for Success
I have some hints and tips to help you make sure your vegan Cheez-Its turn out delicious!
- Measure the ingredients with a kitchen scale . You won’t have to wash as many measuring spoons and cups, and you’ll be certain to have the right proportions.
- Expect a crumbly dough . But if it won’t come together, you can add another tablespoon of water.
- Roll out the dough evenly . It should be 1/8-inch all around, from the center to the edges. If different spots have different thicknesses, your crackers will all finish baking at different times, or some will be doughy on the inside.
Variations
I love the flavour of rosemary in these vegan cheese crackers, but thyme is lovely too. Try smoked paprika or sprinkle the tops of the crackers with everything bagel seasoning. There’s a lot of room to experiment with vegan Cheez-Its as long as you don’t change the dough or overall proportions of the recipe.

How to Store
Store your homemade Vegan Cheez-Its in a sealed airtight container at room temperature. They’ll keep for about a week.
Ingredients
- ½ cup Bob’s Red Mill Nutritional Yeast , 30 g
- 1 cup Bob’s Red Mill Gluten Free All Purpose Baking Flour* , 148 g
- ½ teaspoon freshly ground black pepper , (1.15g) optional
- ½ teaspoon dried rosemary , (1g) optional
- ½ teaspoon sea salt , (2.8g)
- ½ teaspoon garlic powder , (1g)
- ½ teaspoon onion powder , (1g)
- ¼ cup ice cold water , + 1 tablespoon ( 74 mL) if it is looking crumbly
- ¼ cup olive oil , (60mL) or vegan butter, slightly softened
Instructions
- In a large bowl, add all the dry ingredients and stir together. Pour in the olive oil and the ice water and using your hands, mix together into pea sized crumbs until the liquid is incorporated, and then form together with your hands until a dough comes together.
- The dough may look a bit dry and crumbly at first. It can take a while to absorb the liquid. You can add about a tablespoon of water to the dough if after a minute it’s still dry and hard to use.
- Knead the dough together for about two minutes. Wrap the dough with cling wrap and place in the freezer for about 10 minutes while you preheat your oven to 400°F/200°C.
- Remove the dough and using a rolling pin , roll the dough on a parchment paper to less than a ⅛ inch aka, as thin as you can. This will guarantee a nice crispy and flaky cracker. Try and roll it as even as possible as well to ensure the crackers bake evenly.
- Using a knife or a pastry cutter, cut the crackers into 1 inch squares, up and down the dough.
- Poke a decorative hole into each cracker. Remove the crackers one by one and place on a lined parchment, or separate them on the same parchment (I find putting them on a different one much easier), ensuring they aren’t touching. Sprinkle with extra sea salt on top.
- Bake the crackers for 10-12 minutes. If they aren’t totally even, some may bake faster than others at the 10 minute mark, and others will take the full 12 minutes to bake.
- Remove from the oven and let cool completely. If they aren’t crispy as soon as they come out of the oven they will crisp up once cooled. Serve and enjoy!
