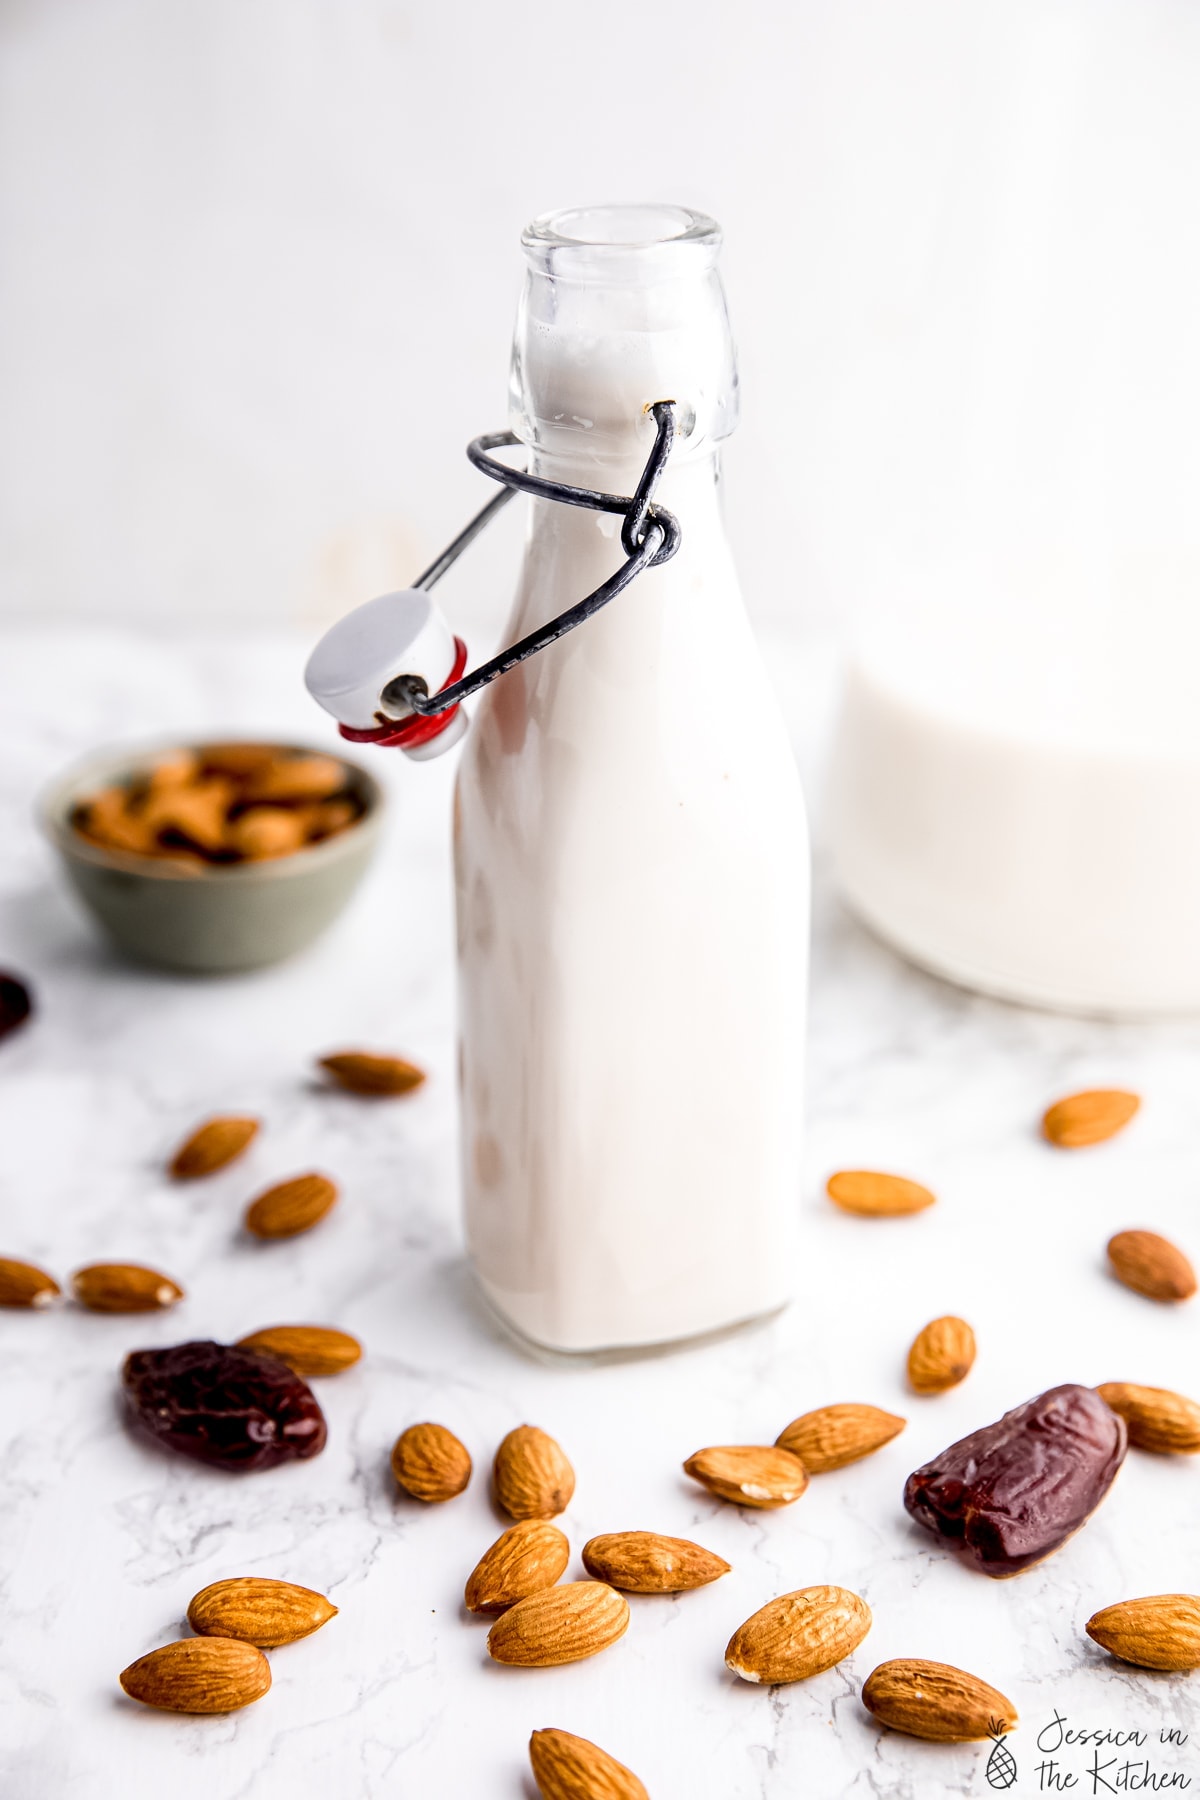
Here’s how to make almond milk at home, step-by-step! It’s smooth, creamy, and you can easily customise it to your tastes.
It’s so hard to choose my favourite plant-based milk, but for sure almond milk ranks near the top! I adore Cashew Milk and Coconut Milk, but the flavour of almond milk is incredible, and when you make it at home, you can get it quite creamy, much creamier than the store-bought versions.
Why This Homemade Almond Milk Recipe Is My Go-To
Once I learned how to make almond milk, I switched entirely to homemade. Here’s why I love this recipe:
- Very few ingredients . The ingredients to make this almond milk are SO simple and actually pretty flexible too! Use any sweetener you like and add the vanilla extract or leave it out.
- Tested and perfected . I’ve been making almond milk at home for a few years now and in that time, I’ve perfected my recipe—it’s just the right amount of sweet and creamy.
- So easy to make . Once you start making your own plant milks, you’ll never go back to store-bought! It’s just a matter of blending and straining.
Notes on Ingredients
The ingredient list is short and sweet! Scroll down to the recipe card to find the ingredient quantities and recipe instructions.
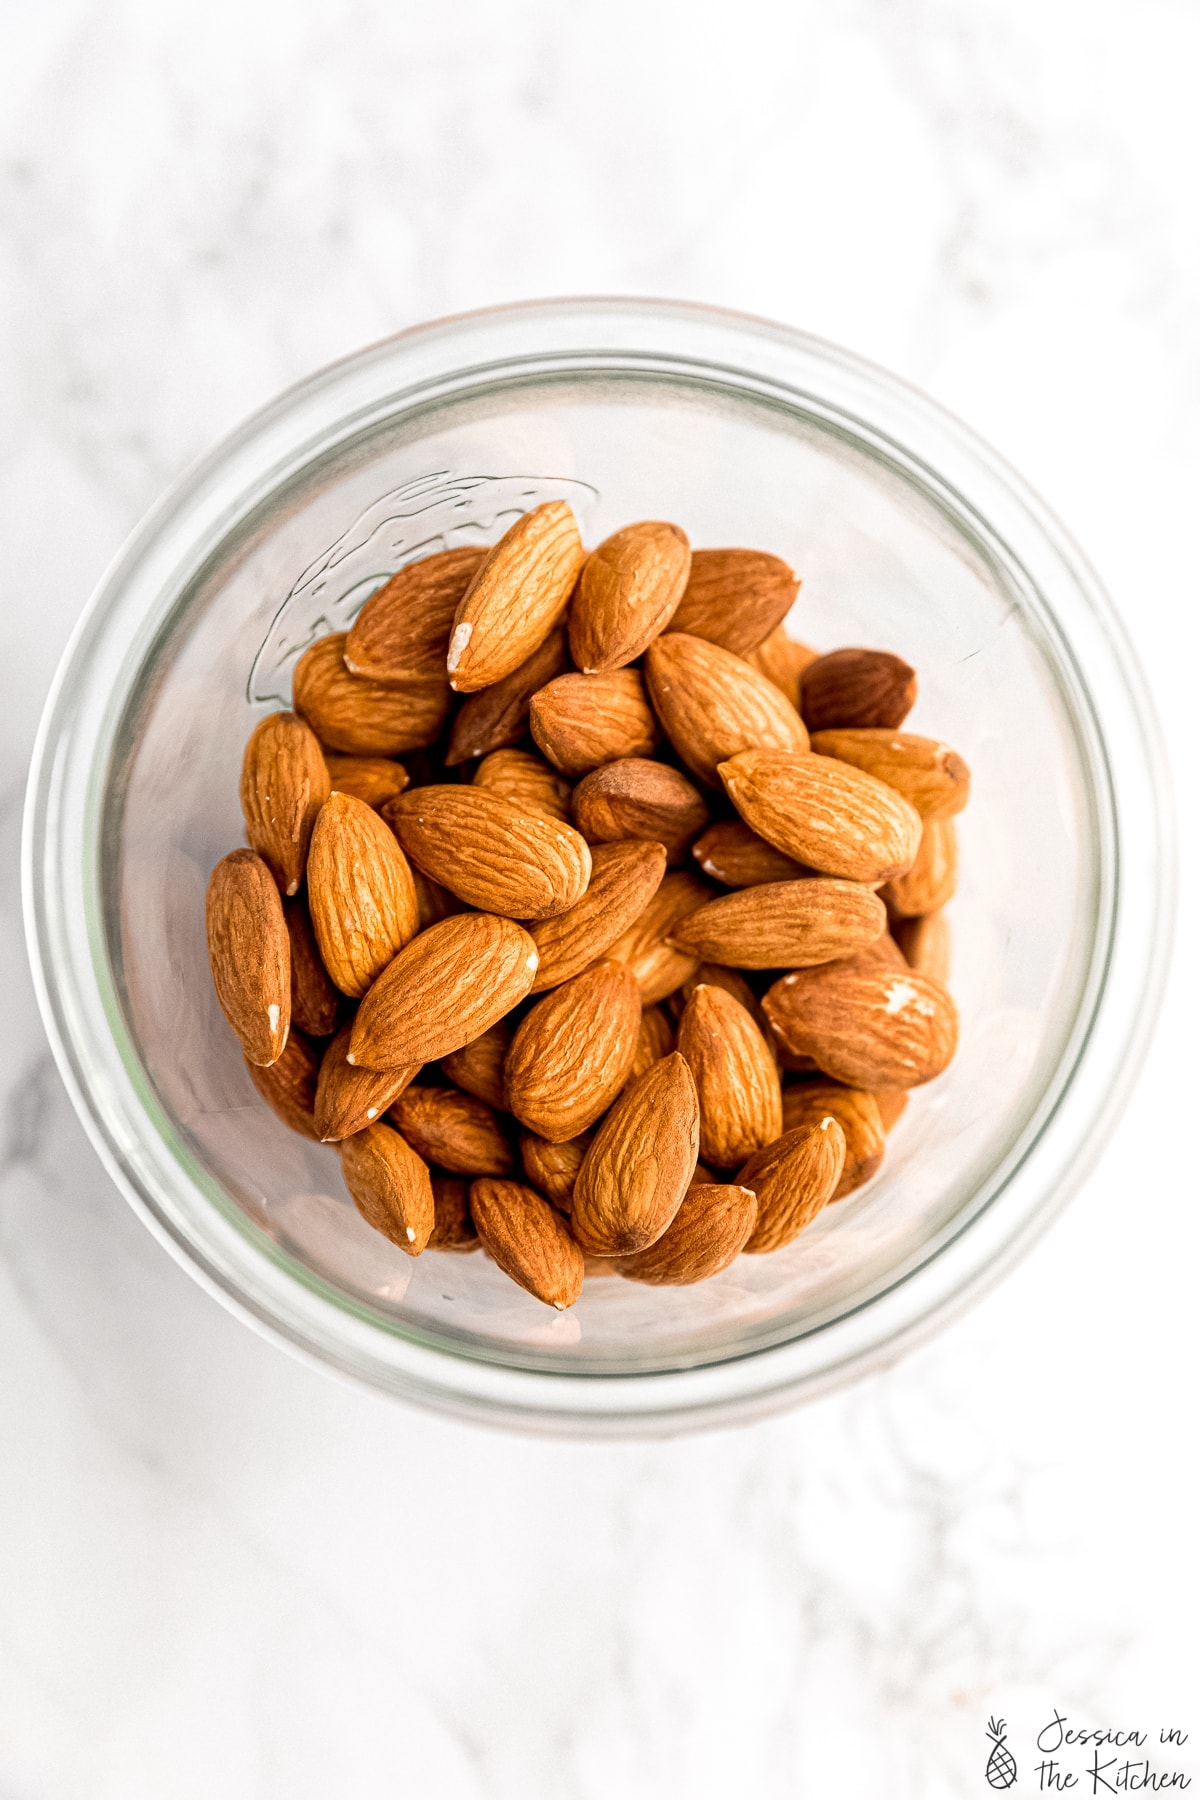
- Almonds – Start with raw almonds, not roasted or salted.
- Sweetener – You can use soaked pitted dates, maple syrup, date syrup , agave, or another liquid sweetener. Alternatively, you can make it unsweetened, which is a good idea if you plan on using your almond milk in savoury recipes.
- Sea salt – Sea salt enhances the natural flavour and helps to balance out the sweetness. If you plan to make this unsweetened, reduce the salt by half, or taste it first before adding salt.
- Vanilla extract – This really boosts the flavour! If you’re using vanilla bean or vanilla paste and want those beautiful flecks, I recommend adding this after you strain the milk, then blending one last time. Leave out the extract if you’re using this milk in recipes.
- Water – You want to use filtered water for the best flavour.
How to Make Almond Milk
The full instructions for this recipe are below; this is just a quick visual overview.
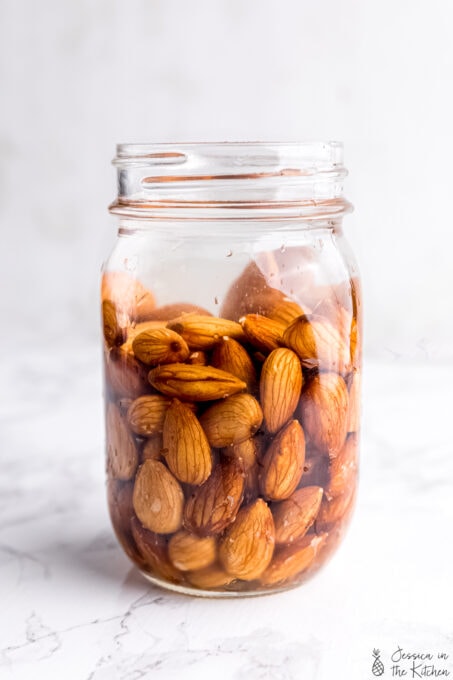
Soak the almonds.
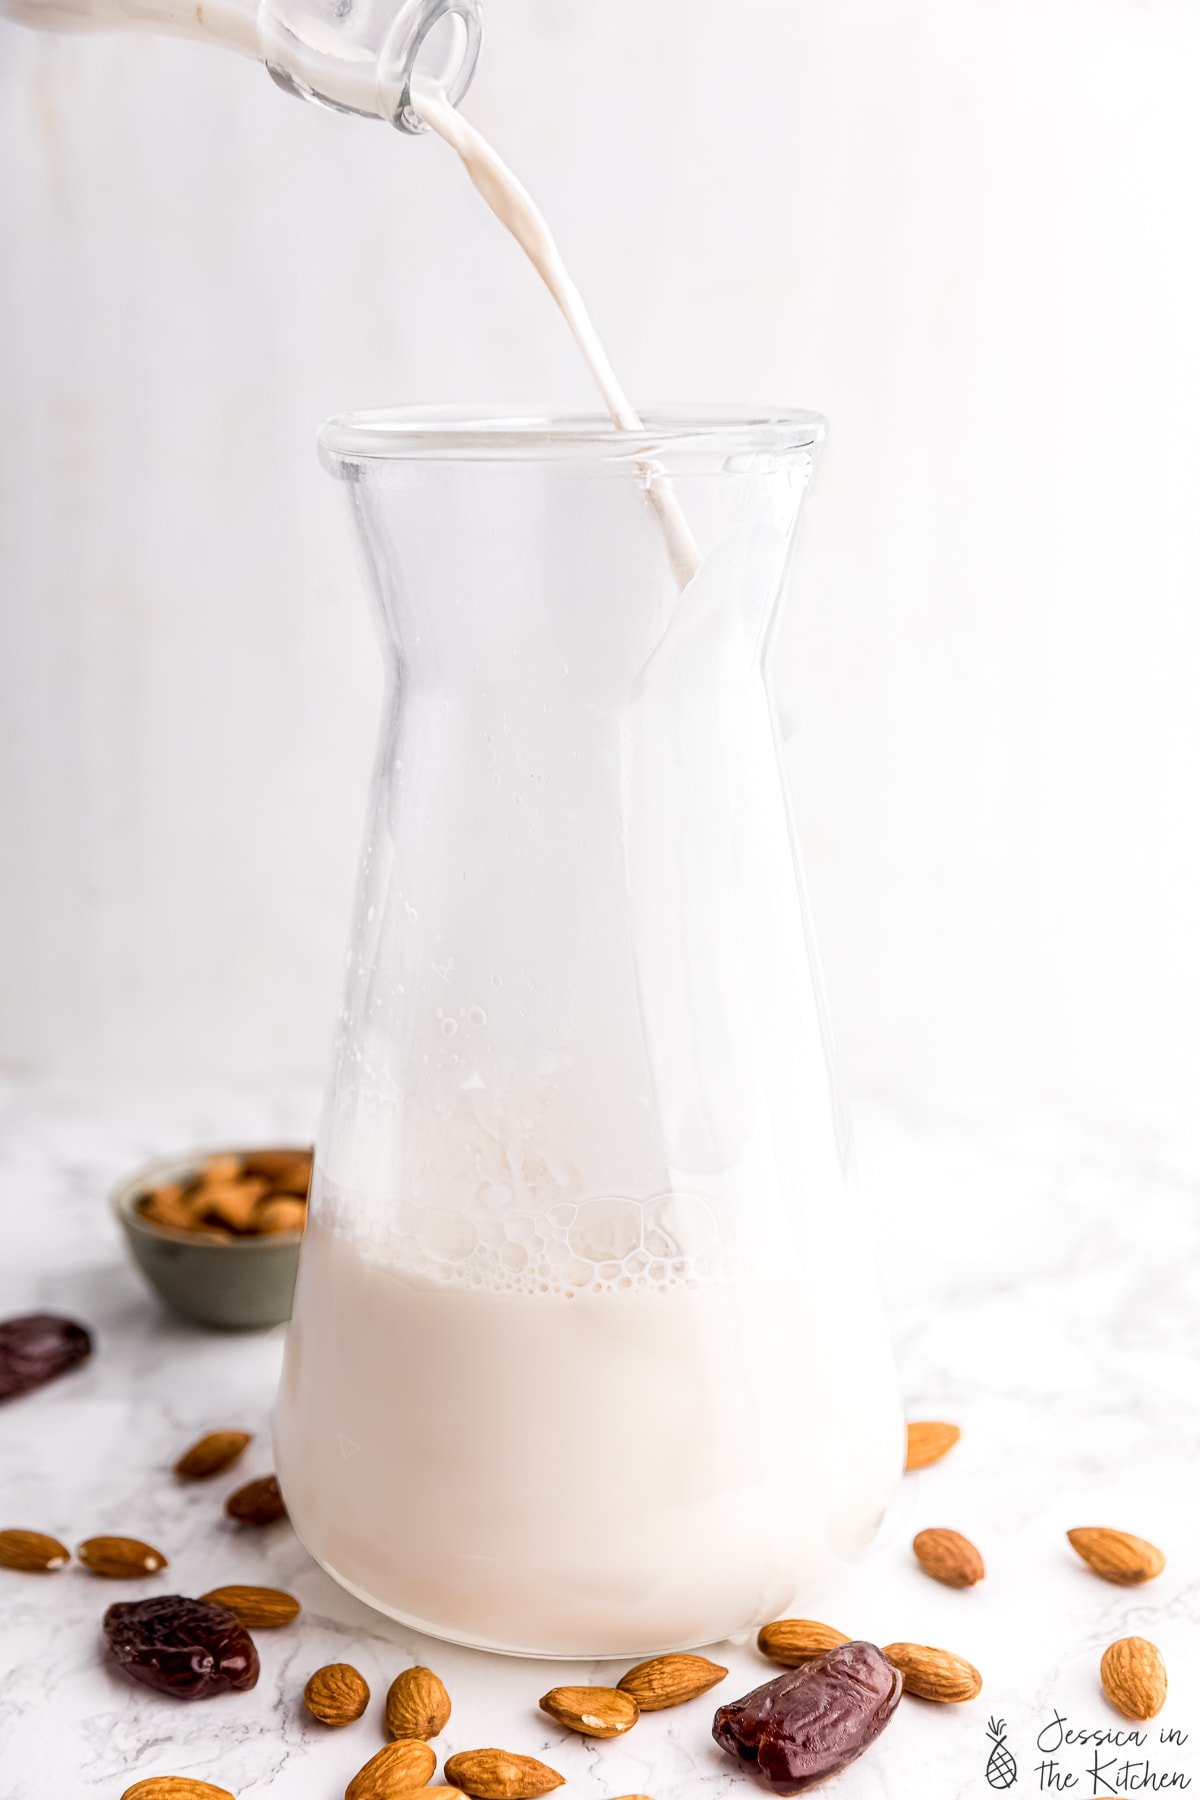
- Blend . Add the soaked almonds, water, sweetener, sea salt, and vanilla extract to a high-speed blender . Blend on high for about 2 minutes, until the mixture is smooth and creamy.
- Strain . Pour the milk through a nut milk bag to catch the solids; squeeze to extract as much of the almond milk as possible.
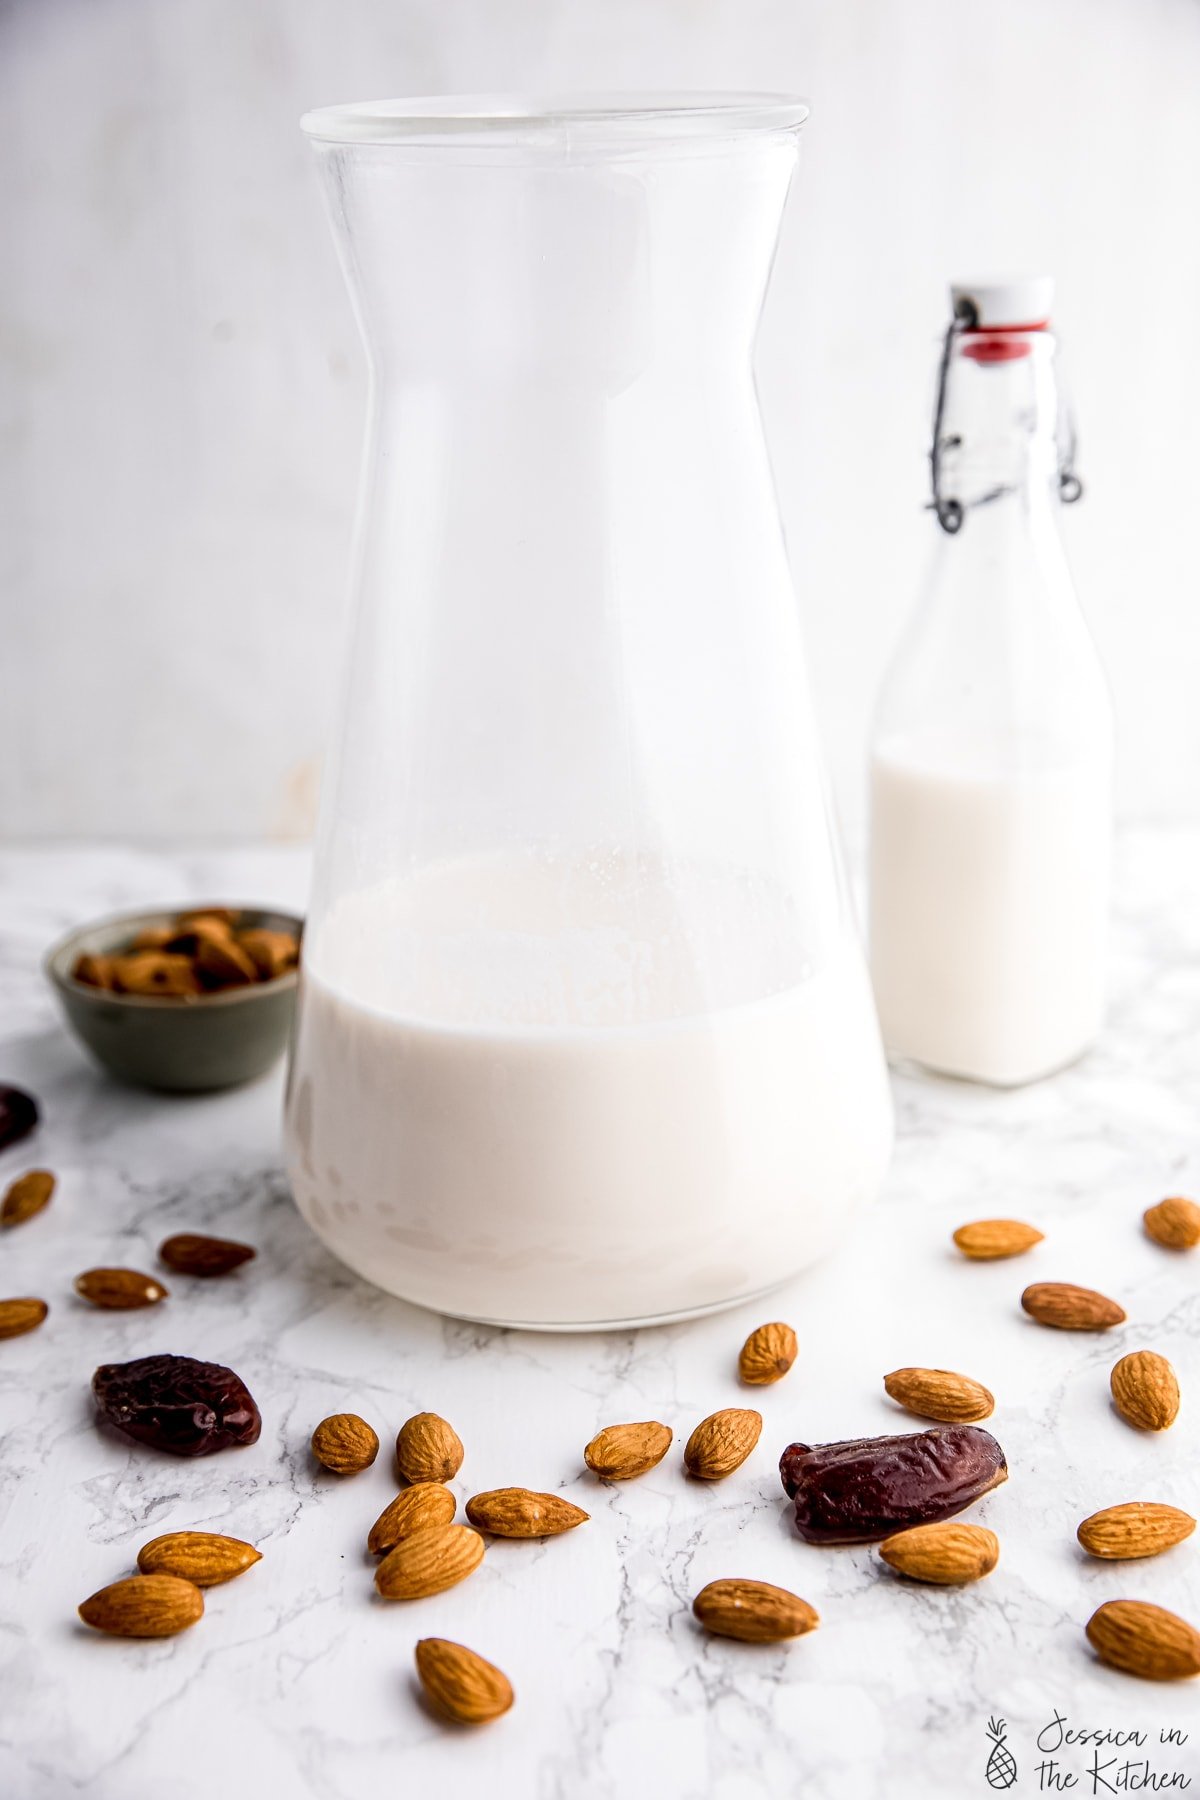
- Use or store . Transfer the milk to a bottle or jar and use it right away or refrigerate it for later.
Tips for Success
- Don’t skip the straining . You want to strain the almond milk after you blend it so your milk is smooth and tasty and doesn’t have any grit left behind. This is the nut milk bag that I use!
- And don’t toss out the pulp . You can reuse your almond pulp, which is what remains after straining. Use it in this energy bites recipe, in your smoothies, in brownies, cookies, etc. You can also dry it out and use it as almond meal!
- Adjust the thickness . You can add more or less water to adjust the consistency of this recipe.
How to Use Homemade Almond Milk
Now that you know how to make almond milk, let’s talk about using it! You can use this recipe anywhere you need vegan milk. It tastes incredible in everything from your morning coffee or matcha , to cereal or oats , or even cakes ! The subtle vanilla flavour and sweetness also make it divine for sipping as-is, especially when it’s warmed up a bit.
How to Store
Transfer the almond milk to an airtight glass bottle or jar and refrigerate for up to 4 days. Shake before each use.
More Vegan Milk Recipes
- Korean Strawberry Milk
- How to Make Banana Milk
- Homemade Oat Milk Creamer
- Vegan Condensed Milk
- Vegan Buttermilk
Ingredients
- 1 cup raw almonds , soaked overnight, drained and rinsed, 140 g
- 3.5 cups to 4 cups filtered cold water , 840 – 960 g
- ¼ teaspoon sea salt , 1.5 g
- 1 or 2 tablespoons maple syrup or agave nectar or 2 or 3 soaked pitted dates , 20 – 40 g
- ½ tablespoon vanilla extract , 7.5 g
Instructions
- In a high-speed blender, add the soaked almonds, filtered cold water, sweetener, sea salt and vanilla extract. Blend on high for about 2 minutes or until the mixture is completely blended out and the nut milk is smooth and creamy.
- Line a large jar or container with a nut milk bag. Pour the almond milk into the nut bag and strain it through. Squeeze the bag to remove as much liquid as possible. You can use the pulp in smoothies, cookies or other baked goods.
- Transfer the almond milk into an airtight glass bottle or jar. Shake before use and enjoy! It lasts about 4 days in the fridge.
Almond Milk
Ingredients
- 1 cup raw almonds soaked overnight, drained and rinsed, 140 g
- 3.5 cups to 4 cups filtered cold water 840 - 960 g
- ¼ teaspoon sea salt 1.5 g
- 1 or 2 tablespoons maple syrup or agave nectar or 2 or 3 soaked pitted dates 20 - 40 g
- ½ tablespoon vanilla extract 7.5 g
Instructions
- In a high-speed blender, add the soaked almonds, filtered cold water, sweetener, sea salt and vanilla extract. Blend on high for about 2 minutes or until the mixture is completely blended out and the nut milk is smooth and creamy.
- Line a large jar or container with a nut milk bag. Pour the almond milk into the nut bag and strain it through. Squeeze the bag to remove as much liquid as possible. You can use the pulp in smoothies, cookies or other baked goods.
- Transfer the almond milk into an airtight glass bottle or jar. Shake before use and enjoy! It lasts about 4 days in the fridge.
Nutrition
Almond Milk https://jessicainthekitchen.com/how-to-make-almond-milk-smooth-creamy/ April 11, 2025
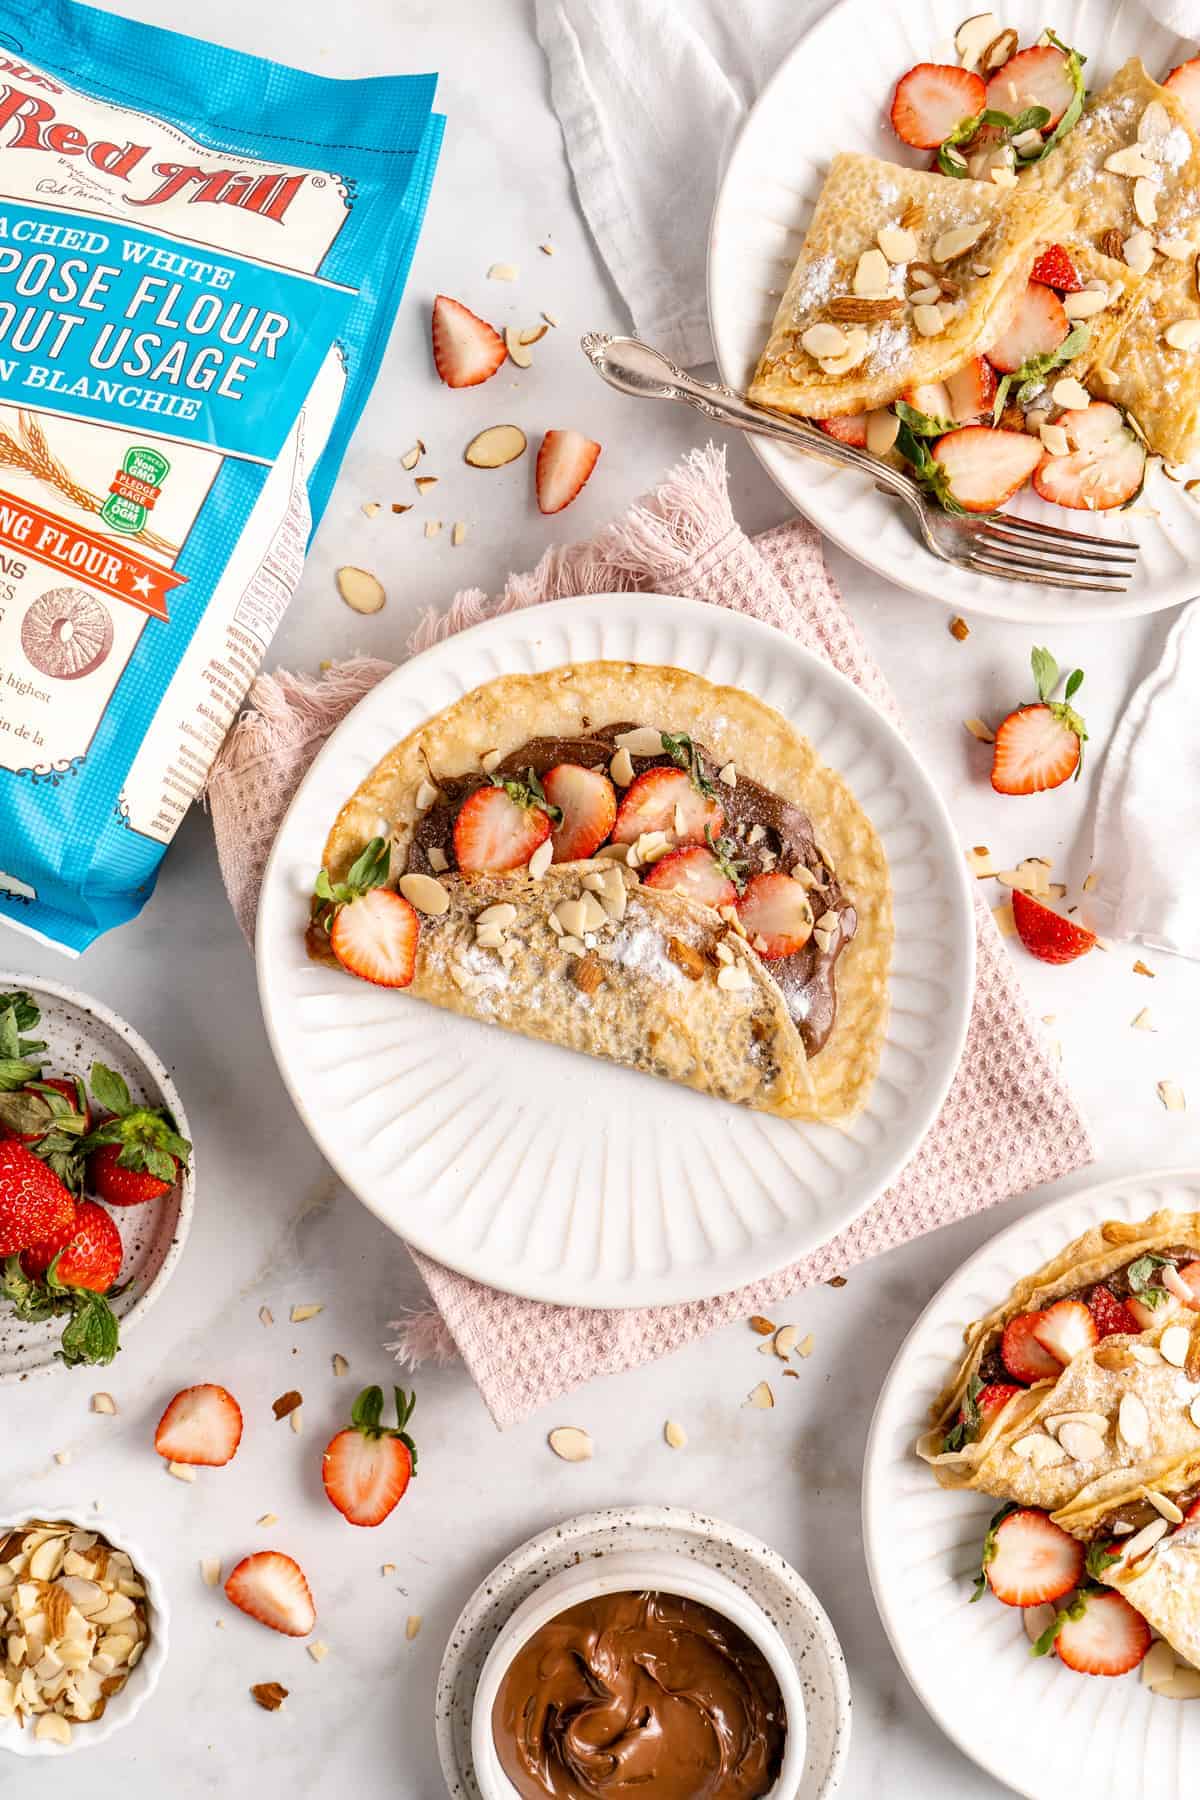
These vegan crepes are absolute perfection even without the eggs and dairy. Use them with sweet or savoury fillings, they’re delicious either way!

Eggs are one of the primary ingredients in crepes, so you may wonder how it’s possible to make them vegan. I’m happy to report that you can definitely make crepes without eggs (AND without an egg substitute ) and they are incredible! I am so in love with the texture—and I know they will be a favourite for you too.
Why You’re Going to Adore These Vegan Crepes
I am so excited for you to try this recipe! Here’s what makes it so amazing.
- Thin and delicate . Unlike pancakes , which you want thick and fluffy, crepes are meant to be thin so they can be rolled and folded. This recipe nails that texture!
- Easy to make . There’s always a bit of a learning curve with crepes (does the first crepe you make ever turn out perfect?!), but once you get the hang of it, they are so much easier to make than you would think.
- Versatile . These vegan crepes can go sweet or savoury, and the filling options are practically endless. Keep it simple with fruit and coconut whipped cream , or try some of the ideas below.
Notes on Ingredients
You only need 5 ingredients to make these vegan crepes! Scroll down to the recipe card to find the ingredient quantities and recipe instructions.
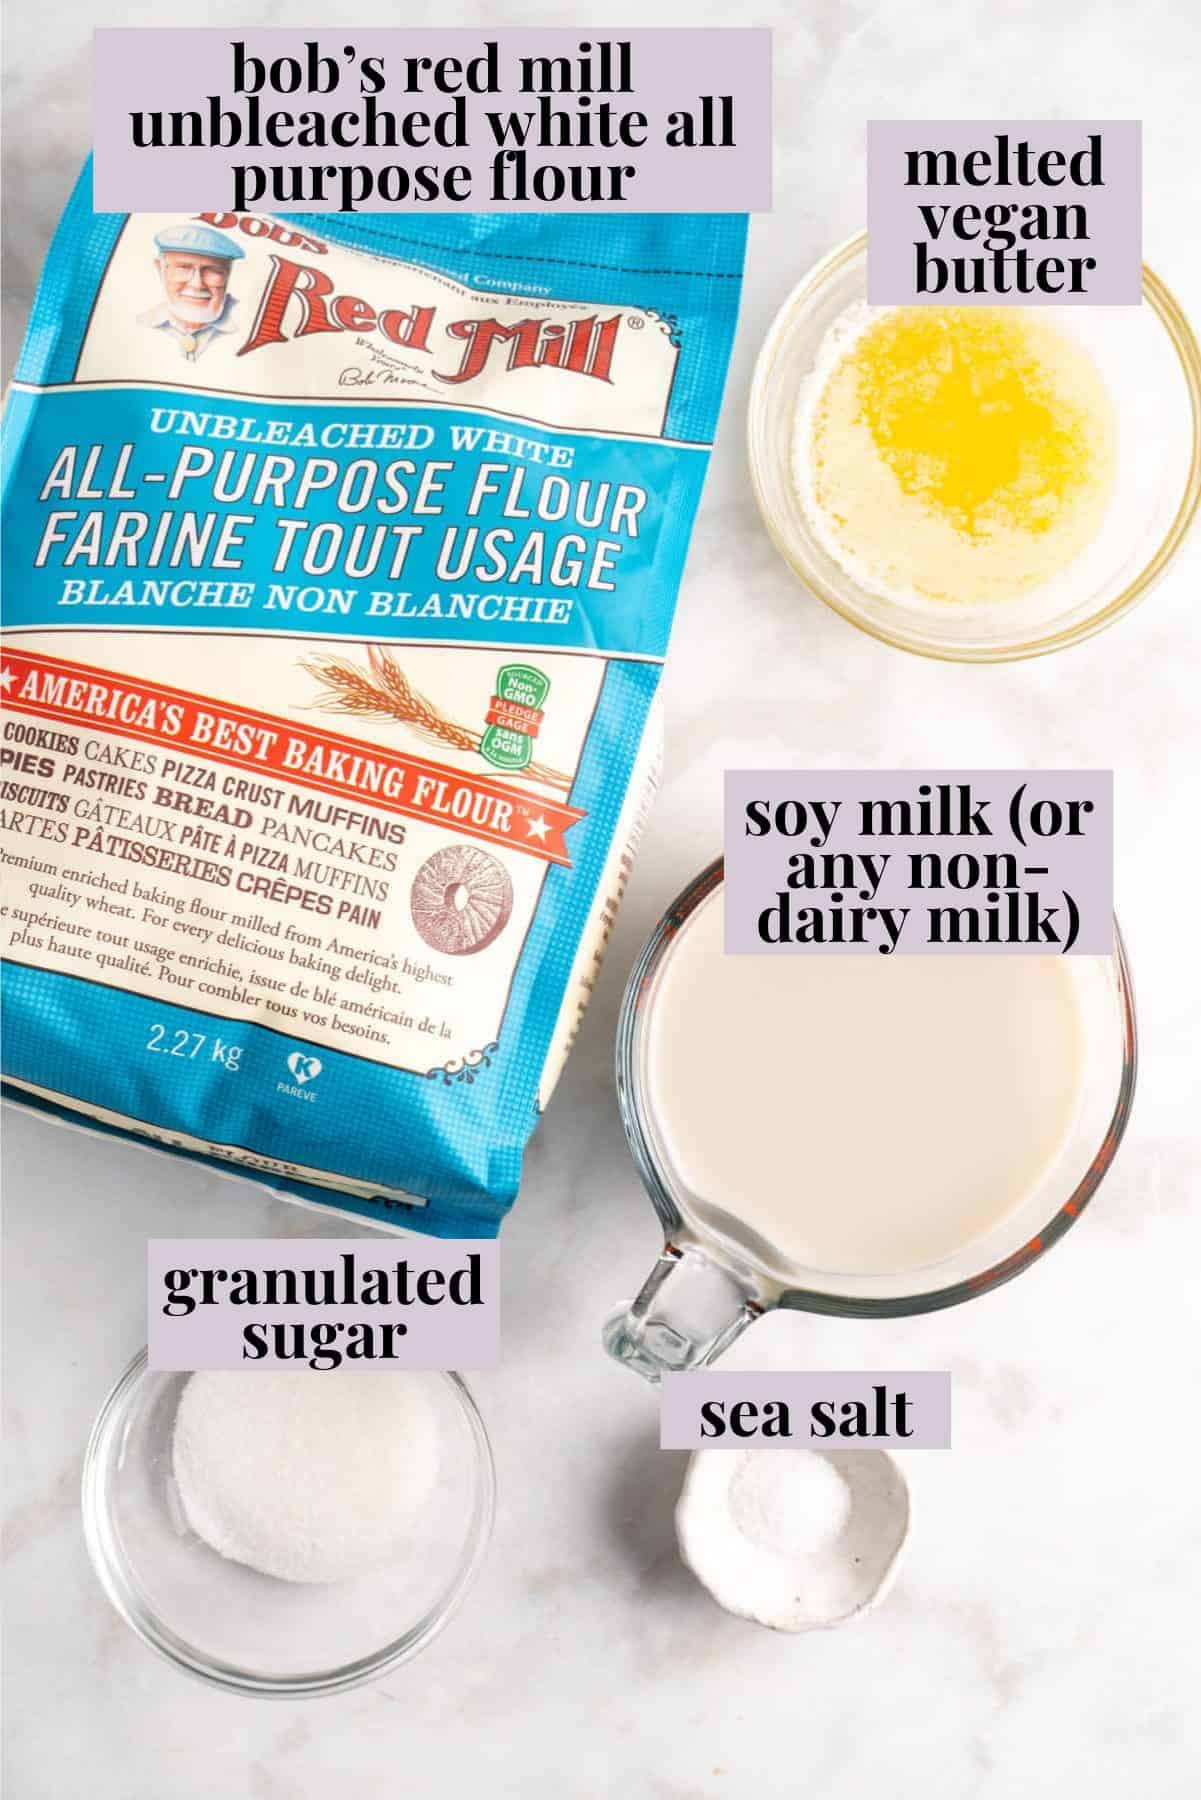
- S oy milk or another vegan milk – Any vegan milk works but I love soy milk for its protein content and thickness.
- All-purpose flour – I like to sift my flour first to make sure it’s light and airy.
- Sea salt – To balance the flavours.
- Granulated sugar – This adds a subtle sweetness to the crepes and helps with texture.
- Vegan butter or oil – This gives the crepes the necessary fat for the right texture and ease to cook and flip. I love using my vegan butter .
How to Make Vegan Crepes
You’ll find the complete instructions for making vegan crepes in the recipe card. This is just a quick visual overview!
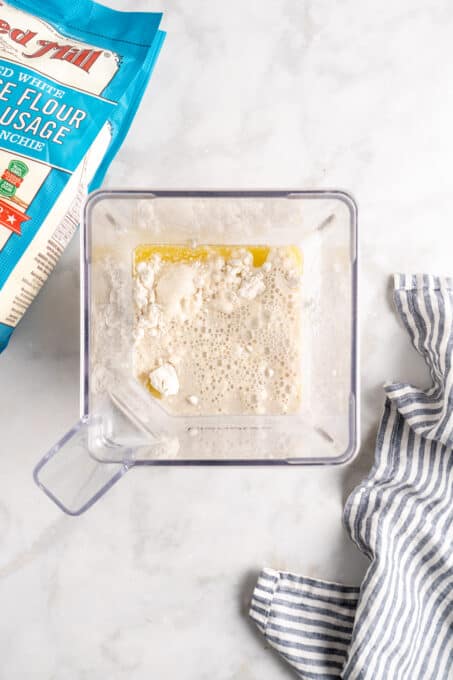
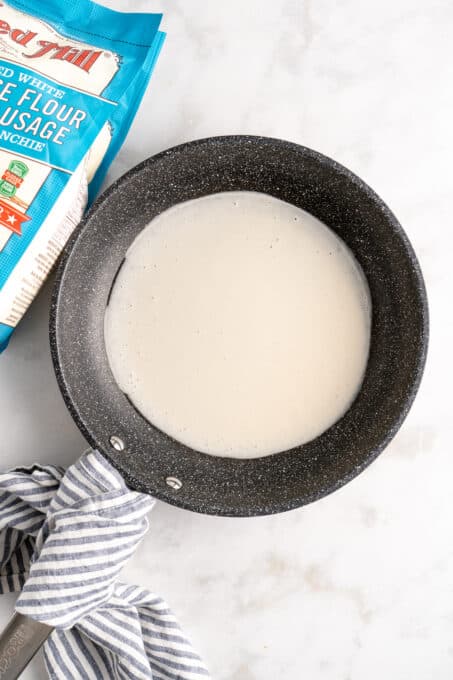
Combine ingredients inblender.
- Blend . Combine the milk, flour, sea salt, sugar, and vegan butter in a blender and blend until smooth.
- Rest . Cover and let the crepe batter rest for 30 minutes.
- Preheat your pan . Grease a pan set over medium heat. (If you have a crepe pan, use that! Otherwise, an 8- or 10-inch skillet is fine.)
Pour into pan.
- Add the batter . Pour ⅓ cup of batter into the pan. As you’re pouring, tilt the pan in a circle to distribute the batter evenly.
- Cook . Let the crepe cook for a minute or two, until dry to the touch. Use a spatula to loosen the crepe around all the sides, then carefully flip. Cook for 30 to 40 seconds on the other side. Repeat with the remaining batter.
Tips for Success
- Don’t skip letting the batter rest . This step helps the gluten to relax, giving your vegan crepes the perfect texture.
- Reduce the sugar for savoury crepes . If you want to use these crepes for a savoury dish, reduce the sugar to ½ teaspoon.
- Adjust the heat as needed . Sometimes near the end of the cooking process, as the pan heats up, you may need to reduce the heat a bit. If your crepes start getting very dark on the bottoms before they’re totally set and ready to flip, it’s a sign that the heat is too high.
Serving Suggestions
You can serve crepes folded into halves or quarters, or rolled up. Here are some of my favourite fillings:
- Hazelnut spread and strawberries . Slather the hazelnut spread onto the crepe and top with sliced strawberries and a dusting of powdered sugar.
- Jam . Keep it simple and spread your favourite jam onto the crepes. This Vegan Lemon Curd would be delicious too!
- Mushrooms and pesto . For a savoury version, fill your crepes with Garlic Mushrooms and Parsley Pesto .
- Apples and cinnamon . Fill your crepes with apple pie filling or sautéed apples and cinnamon, then top with Candied Pecans for crunch.

How to Store and Reheat Leftovers
- Refrigerator: Store any leftover crepes in an airtight container in the fridge for up to 3 days. I like to put parchment paper between the layers just to ensure they don’t stick to each other.
- Freezer: To freeze, place parchment paper between each crepe to prevent sticking and store them in an airtight container or freezer bag. They can be kept in the freezer for up to 2 months.
- To reheat : Warm the crepes in a skillet over low heat for 1-2 minutes on each side, or microwave them for 20-30 seconds.
More Vegan Brunch Recipes
- Easy Vegan Quiche
- Cinnamon Roll French Toast
- Pumpkin Banana Muffins
- Low Carb Vegan Waffles
- Buckwheat Pancakes

Ingredients
- 1 ¼ cup soy milk , or any non dairy milk, room temperature, 300 grams
- 1 cup Bob’s Red Mill Unbleached White All Purpose Flour , 120 grams
- ¼ teaspoon sea salt , 1.5 grams
- 1 tablespoon granulated sugar , white sugar, brown sugar or cane sugar works fine, 12.5 grams
- 2 tablespoons melted vegan butter , or oil + extra for the griddle/pan, 28 grams
Instructions
- In a high speed blender, add the milk, flour, sea salt, sugar and vegan butter. Blend for a minute until everything is fully melted.
- Cover and let the batter rest for 30 mins at room temperature. This helps the glutens to relax.
- Grease an 8” to 10” pan lightly over medium heat. Use a pan with a thin bottom or a flat bottom pan (like a thin griddle pan).
- Scoop ⅓ cup batter and pour the batter into the pan. As you’re pouring, tilt the pan in a circle – which makes it much easier to spread the batter than pouring it all down, then tilting. Tilt it in an even thin circle and place the pan back on the heat.
- Allow to cook for about 1 to 2 minutes – it’ll depend on your medium heat and the batter. The crepe should look fully cooked through and be dry to the touch. Using your spatula, release around the edges of the crepe. I like to use my finger to get under a bit too, then slide your spatula under and flip the crepe.
- Cook on the other side for about 30-40 seconds then remove to a plate.
- Repeat for all the crepes – makes about 4-5 crepes.
- Fill half of each crepe with your preferred topping – I like to do like a vegan hazelnut spread and strawberries. Close in half, then in half again till it forms a triangle.
- Top with a drizzle of hazelnut spread and more strawberries and lots of powdered sugar. Enjoy!
Notes
- Refrigerator: Store any leftover crepes in an airtight container in the fridge for up to 3 days. I like to put parchment paper between the layers just to ensure they don’t stick to each other.
- Freezer: To freeze, place parchment paper between each crepe to prevent sticking and store them in an airtight container or freezer bag. They can be kept in the freezer for up to 2 months.
- To reheat : Warm the crepes in a skillet over low heat for 1-2 minutes on each side, or microwave them for about 20-30 seconds.
