These air fryer smashed potatoes are the perfect side dish. They’re crispy on the outside, tender and fluffy on the inside, and quick and easy to make.

Potatoes are one of my favorite side dishes. They complement so many different meals, and add a salty, hearty element to the table. And this recipe for air fryer smashed potatoes is absolutely one of the best potato dishes I’ve found. It’s so easy to make, with just three ingredients, and takes less than 45 minutes.
I recommend making some vegan ranch dressing or roasted strawberry barbecue sauce to dip these crunchy potatoes into, but they’re pretty fantastic all by themselves, too. And did I mention that they’re vegan? If you need a new side dish in your cooking rotation, look no further!
Notes on Ingredients
Here are the ingredients that you need to make these crispy air fryer smashed potatoes. The recipe card at the bottom of the article has the exact amounts for each ingredient.
- Baby potatoes – You want to use baby potatoes that are quite small, or bigger ones that are cut in half. Make sure they’re thoroughly washed and dried.
- Flaky sea salt
- Olive oil
- Pesto – This is an optional garnish.
- Shredded vegan cheese – Also an optional garnish.
How to Make Air Fryer Smashed Potatoes
Here’s how to make these quick and easy crunchy potatoes.
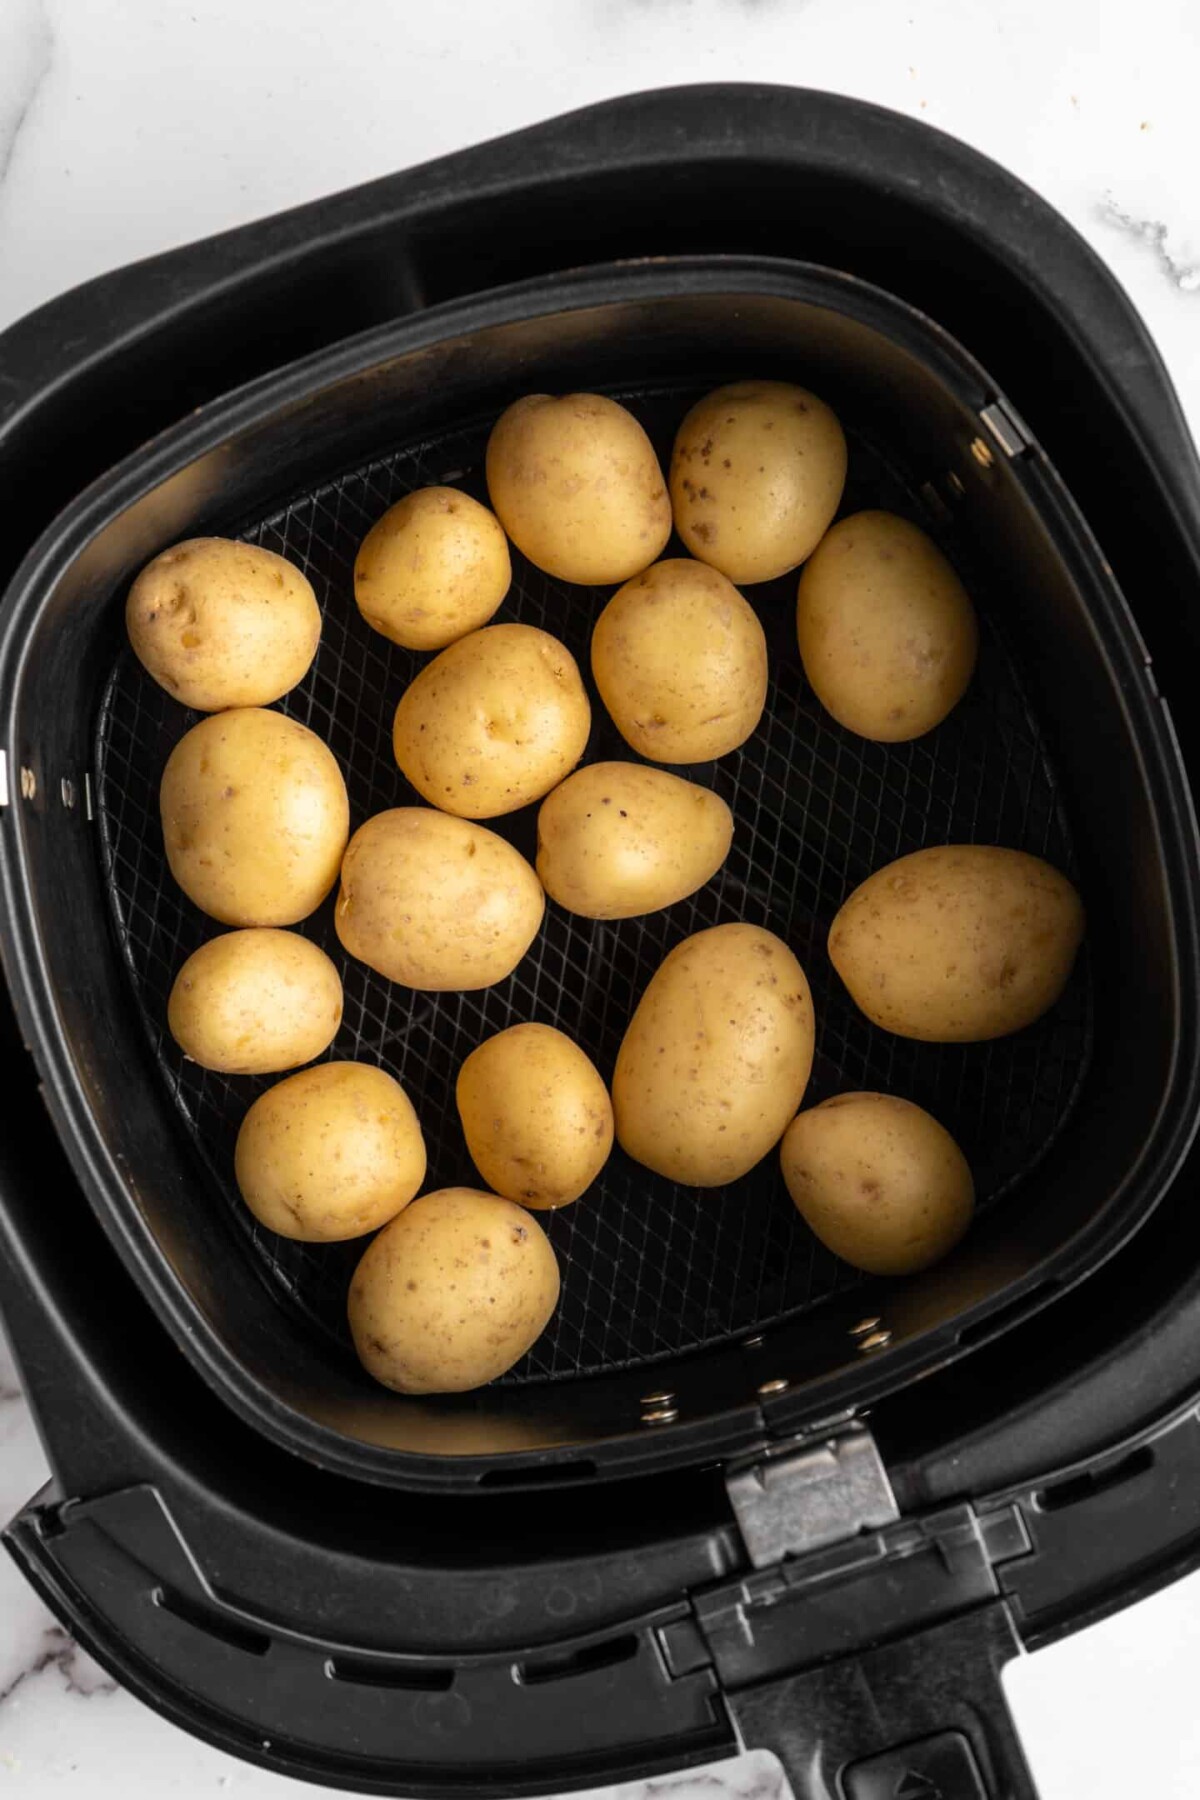
- Cook the potatoes. Place the potatoes in the air fryer and cook at 400F until cooked all the way through. This should take about 20 minutes.
- Smash. Remove the potatoes from the air fryer and place them on a baking sheet. Smash them with the bottom side of a glass, breaking the skin and leaving the potatoes flat.

- Add the olive oil. Drizzle the olive oil over both sides of the smashed potatoes, making sure to coat them thoroughly.

- Season. Return the potatoes to the air fryer, then season with salt.
- Finish cooking. Cook at 400F for 8 minutes, then remove the potatoes. Top with the optional garnishes, then eat while hot.

Tips for Success
Here are a few of my favorite tricks and tips for making the best air fryer potatoes.
- Use good potatoes. Potatoes have a long shelf life, but after a certain point they start to get a little soft. Soft potatoes are still good to use for many different recipes, but I don’t recommend using them for smashed potatoes. In order to get the perfect crunch on this recipe, use potatoes that are still fully firm.
- Don’t crowd. When you return the smashed potatoes to the air fryer basket, make sure they’re not crowded. You don’t want the potatoes to be touching, or else air won’t be able to circulate around them, and they won’t get crispy. You may have to cook the smashed potatoes in batches, but trust me: it will be worth it.
- Don’t skimp on the salt. If there’s one food that can take a heavy dose of salt, it’s potatoes. How many times have you had a french fry that had too much salt? Probably not many times. But we’ve all had countless experiences with fries that aren’t seasoned enough. The same is true with smashed potatoes. They’ll taste a little bland if you don’t give them enough salt, but they’ll pop with flavor if you season them strongly.

Serving Suggestions
I’m a fan of serving these crispy potatoes alongside a hearty, warm dinner. Here are a few of my favorite dishes to serve them with.
- Vegan meatloaf
- Vegan wellington
- Vegan turkey roast
- Vegan pumpkin chili
- Easy grillable veggie burgers
How to Store Air Fryer Smashed Potatoes
You can store these potatoes in an airtight container in the fridge for up to 5 days. However, they’ll lose their crisp pretty quickly, so I don’t recommend making a large batch just to have leftovers. You can reheat the potatoes in an air fryer set to 400F for 3 minutes.
Can I Freeze This Recipe?
Yes, you can freeze air fryer smashed potatoes in an airtight container for up to 3 months but, like putting them in the fridge, they’ll lose some of their crispiness. Reheat straight from the freezer, in a 400F air fryer for 5 minutes.

More Air Fryer Recipes
If you want to make sure that your air fryer is being put to use, try out one of my other favorite air fryer recipes.
- Crispy air fryer tofu
- Air fryer asparagus
- Air fryer baked sweet potatoes
- Air fryer orange tofu

Ingredients
- 1 lbs baby potatoes , small, or cut in half if bigger, washed and patted dry
- ½ – 1 tsp flaky sea salt , for topping
- 1 ½ – 2 tbsp olive oil
- pesto , optional
- shredded vegan cheese , optional
Instructions
- Add your potatoes into the base of your air fryer.
- Air fry at 400°F for 20 minutes until cooked through.
- Remove potatoes and place on a large baking sheet. Using the bottom of a class, smash the potatoes slightly.
- Drizzle with the olive oil all over both sides of the potatoes. You want to really coat them in oil!
- Add the potatoes back into the air fryer, leaving enough space so they don’t touch (you may have to do multiple rounds but it’s worth it!). Sprinkle with sea salt all over.
- Air fry again at 400°F for 8 minutes. Remove and serve with any dip, or top with pesto, shredded vegan cheese, or more sea salt, and enjoy!
Notes

Air Fryer Smashed Potatoes
Ingredients
- 1 lbs baby potatoes small, or cut in half if bigger, washed and patted dry
- ½ - 1 tsp flaky sea salt for topping
- 1 ½ - 2 tbsp olive oil
- pesto optional
- shredded vegan cheese optional
Instructions
- Add your potatoes into the base of your air fryer.
- Air fry at 400°F for 20 minutes until cooked through.
- Remove potatoes and place on a large baking sheet. Using the bottom of a class, smash the potatoes slightly.
- Drizzle with the olive oil all over both sides of the potatoes. You want to really coat them in oil!
- Add the potatoes back into the air fryer, leaving enough space so they don’t touch (you may have to do multiple rounds but it’s worth it!). Sprinkle with sea salt all over.
- Air fry again at 400°F for 8 minutes. Remove and serve with any dip, or top with pesto, shredded vegan cheese, or more sea salt, and enjoy!
Video
Notes
Nutrition
Air Fryer Smashed Potatoes https://jessicainthekitchen.com/air-fryer-smashed-potatoes/ May 4, 2023
Learn how to make vegetable broth with veggie scraps. It’s flavourful, easy, cost-effective, and freezer-friendly!

So many recipes call for vegetable broth, but if you usually rely on store-bought cartons or bouillon cubes, you’re missing out! The first time I tried homemade vegetable broth I was blown away by the depth of flavour— and by how much money I was saving by making it myself. Best part? You can use kitchen scraps to make it!
Whenever you’re cutting up an onion and you have a bit you don’t use, throw it in a zipped freezer bag and into the freezer. Toss in the leafy tops of carrots and celery, papery garlic peels, extra herbs, mushroom stems. Over time, you’ll accumulate lots of veggie scraps that would’ve otherwise gone into the trash, and when your bag is full, you can use them to make vegetable broth.
Once you have your collection of scraps, you’ll also want to add celery, onion, carrot, and garlic for that classic vegetable broth flavour, then you simmer everything away until the liquid is infused with all that veggie goodness.
What Is the Difference Between Vegetable Stock and Vegetable Broth?
When we’re talking about vegetable stock vs. vegetable broth (as opposed to animal-based stocks and broths), the only difference is that vegetable stock is seasoned with salt and pepper, while vegetable broth is not. So if you add the optional salt to this recipe, you’ve got stock!
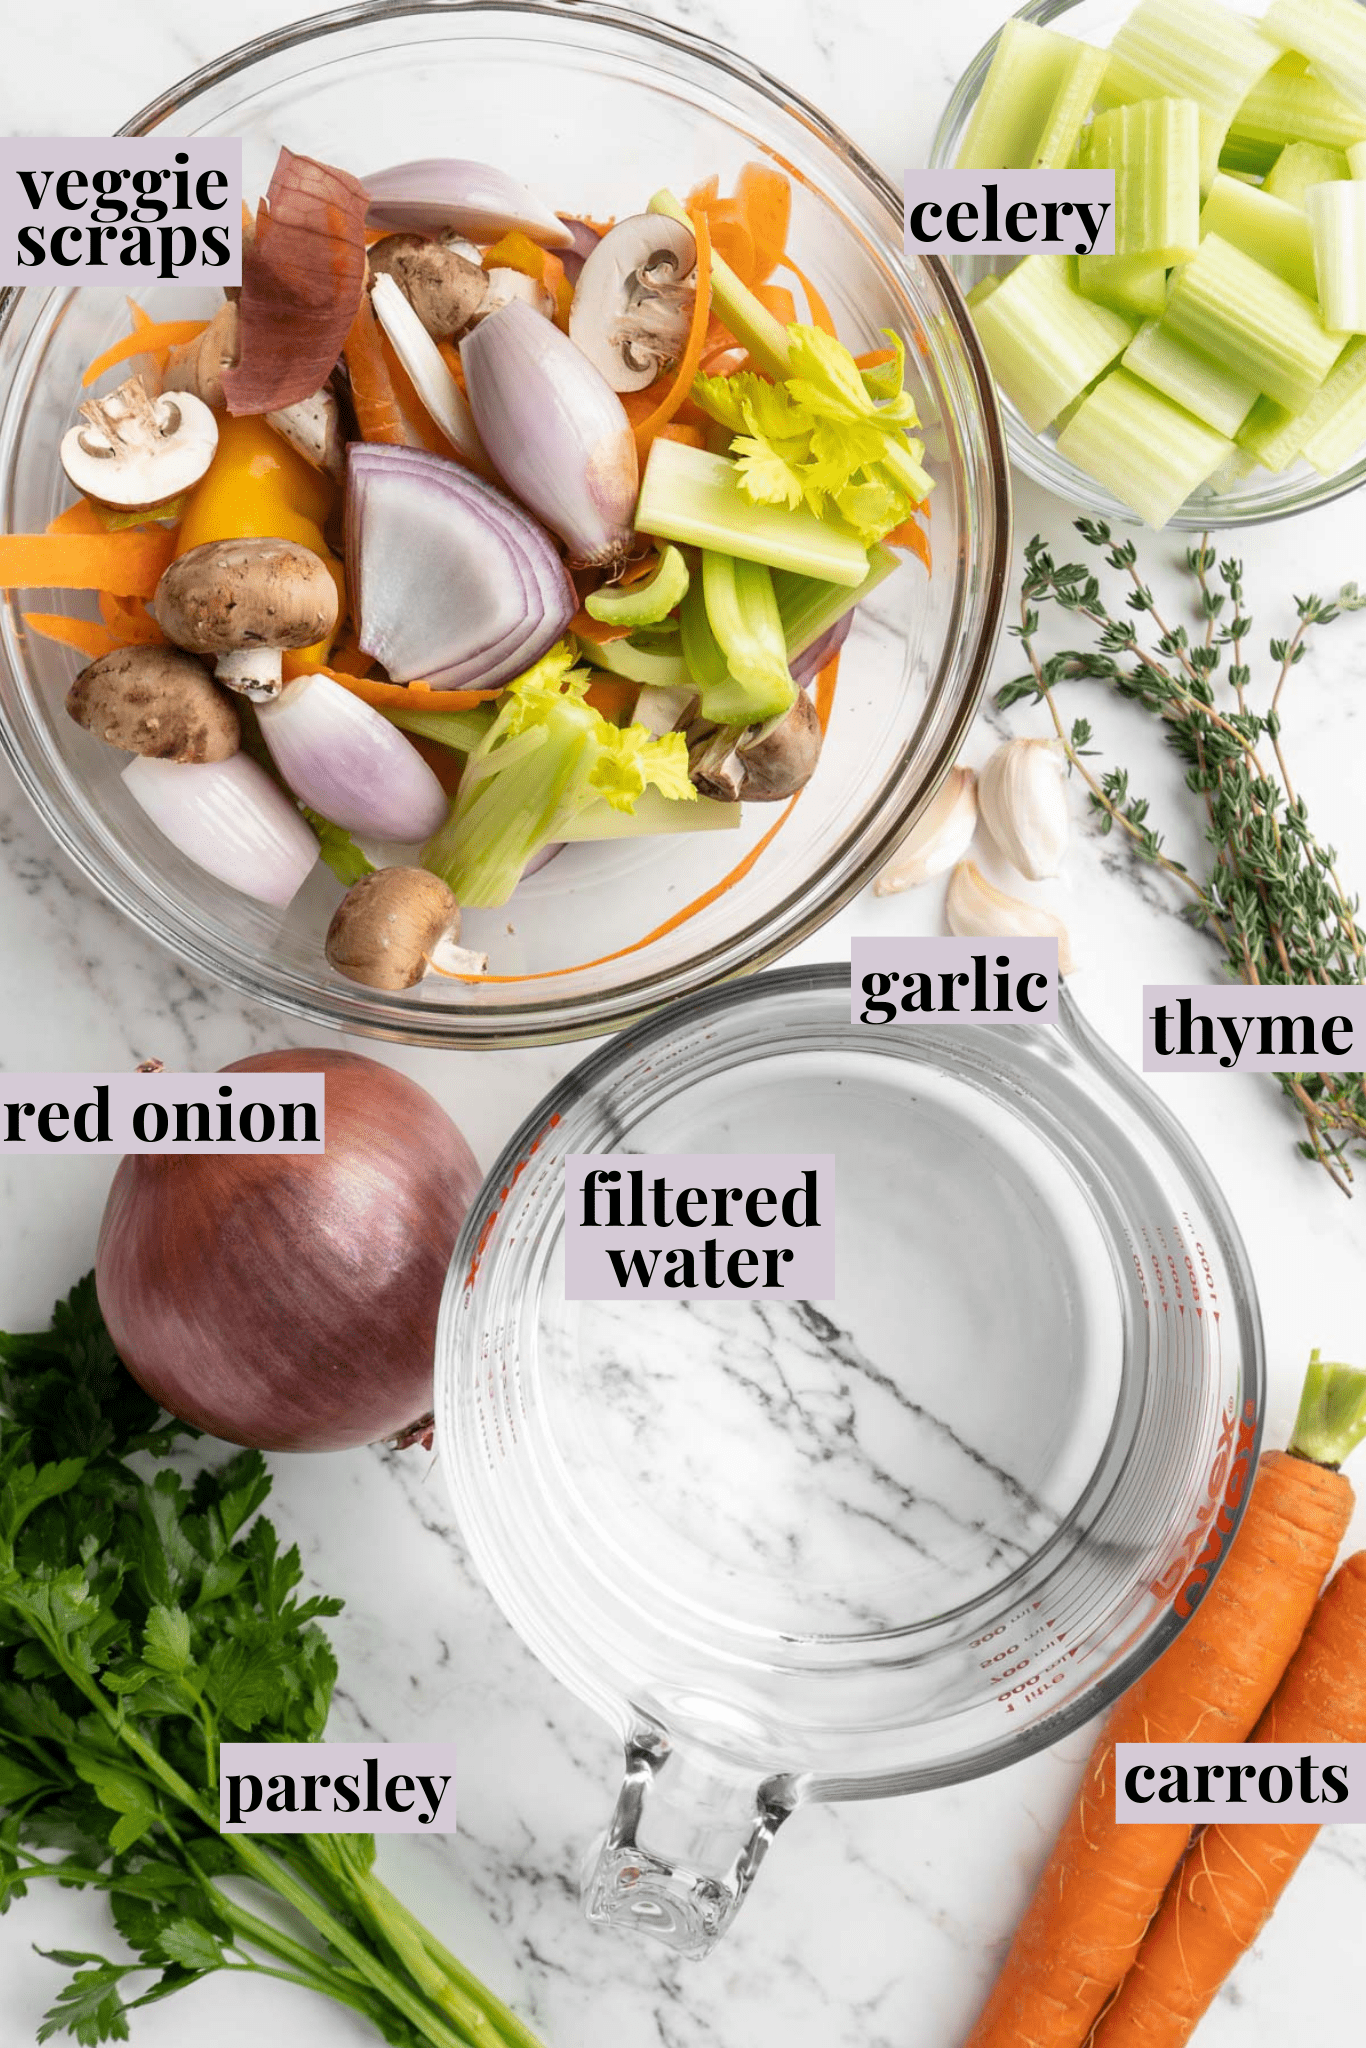
Notes on Ingredients
Scroll down to the recipe card to find the ingredient quantities and recipe instructions.
- Celery – Chopping the celery (and carrots) exposes more of their surface area to the liquid, which means you’ll get more flavour in your vegetable broth.
- Carrots
- Red onions – Yellow onions work too, or use leeks and shallots.
- Garlic – I like to add a lot, but you can use less!
- Thyme
- Parsley
- Frozen veggie scraps
- Filtered water – Filtered water will help ensure your broth doesn’t have any off flavours.
Optional Add-Ins
- Mushrooms – Any kind you have on hand! This is a great way to use the tough stems of shiitakes.
- Bell peppers
- Salt
- Peppercorns
- Chili pepper or scotch bonnet pepper – I like adding a hot pepper for depth.
- Liquid aminos – This adds umami to the broth.
What Not to Put in Vegetable Broth
Leave out broccoli, cauliflower, Brussels sprouts, kale, and other cruciferous vegetables, as they will make your broth bitter. I would also leave out potatoes; they’ll make your broth cloudy. And, it goes without saying, don’t add any vegetables that are spoiled!
How to Make Vegetable Broth With Veggie Scraps
I love making a batch of vegetable broth over the weekend so I can use it in my cooking all week long. Because it’s largely hands-off, I can let the broth simmer away while I do other things around the house!
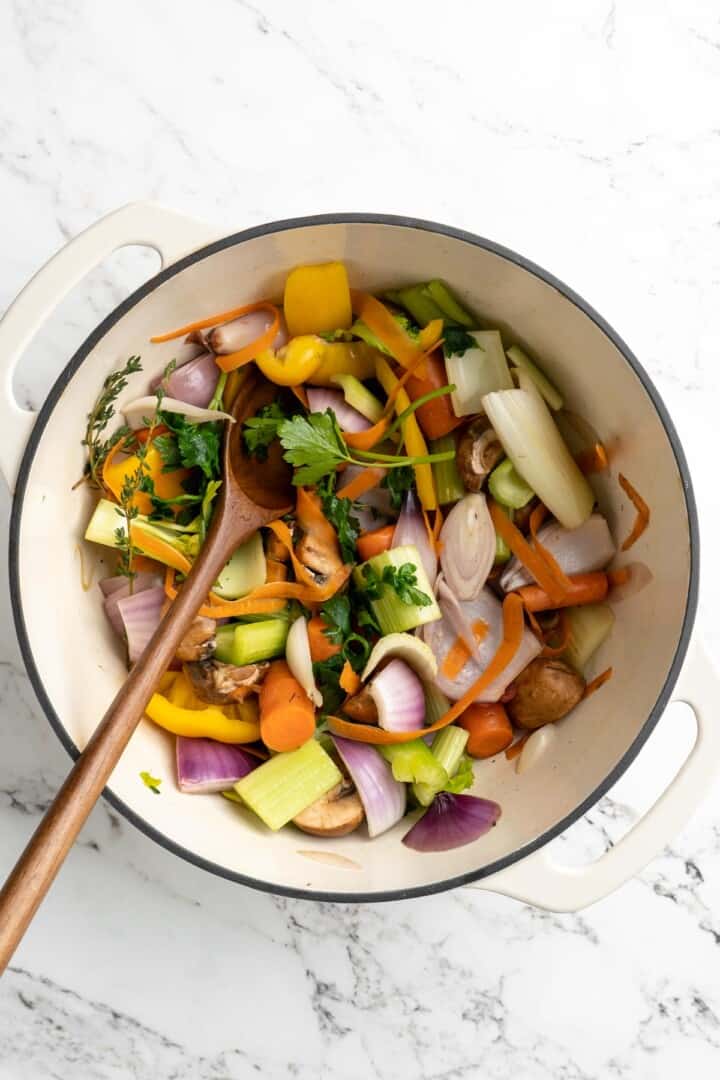
Sweat the ingredients. Place all of the ingredients except the water in a pot set over high heat. Let the heat sweat the ingredients for about 3 minutes. Add any of the optional ingredients, then stir in the water. Bring the mixture to a boil.
Simmer. Reduce the heat to a simmer and cook the vegetable broth for 1 hour.
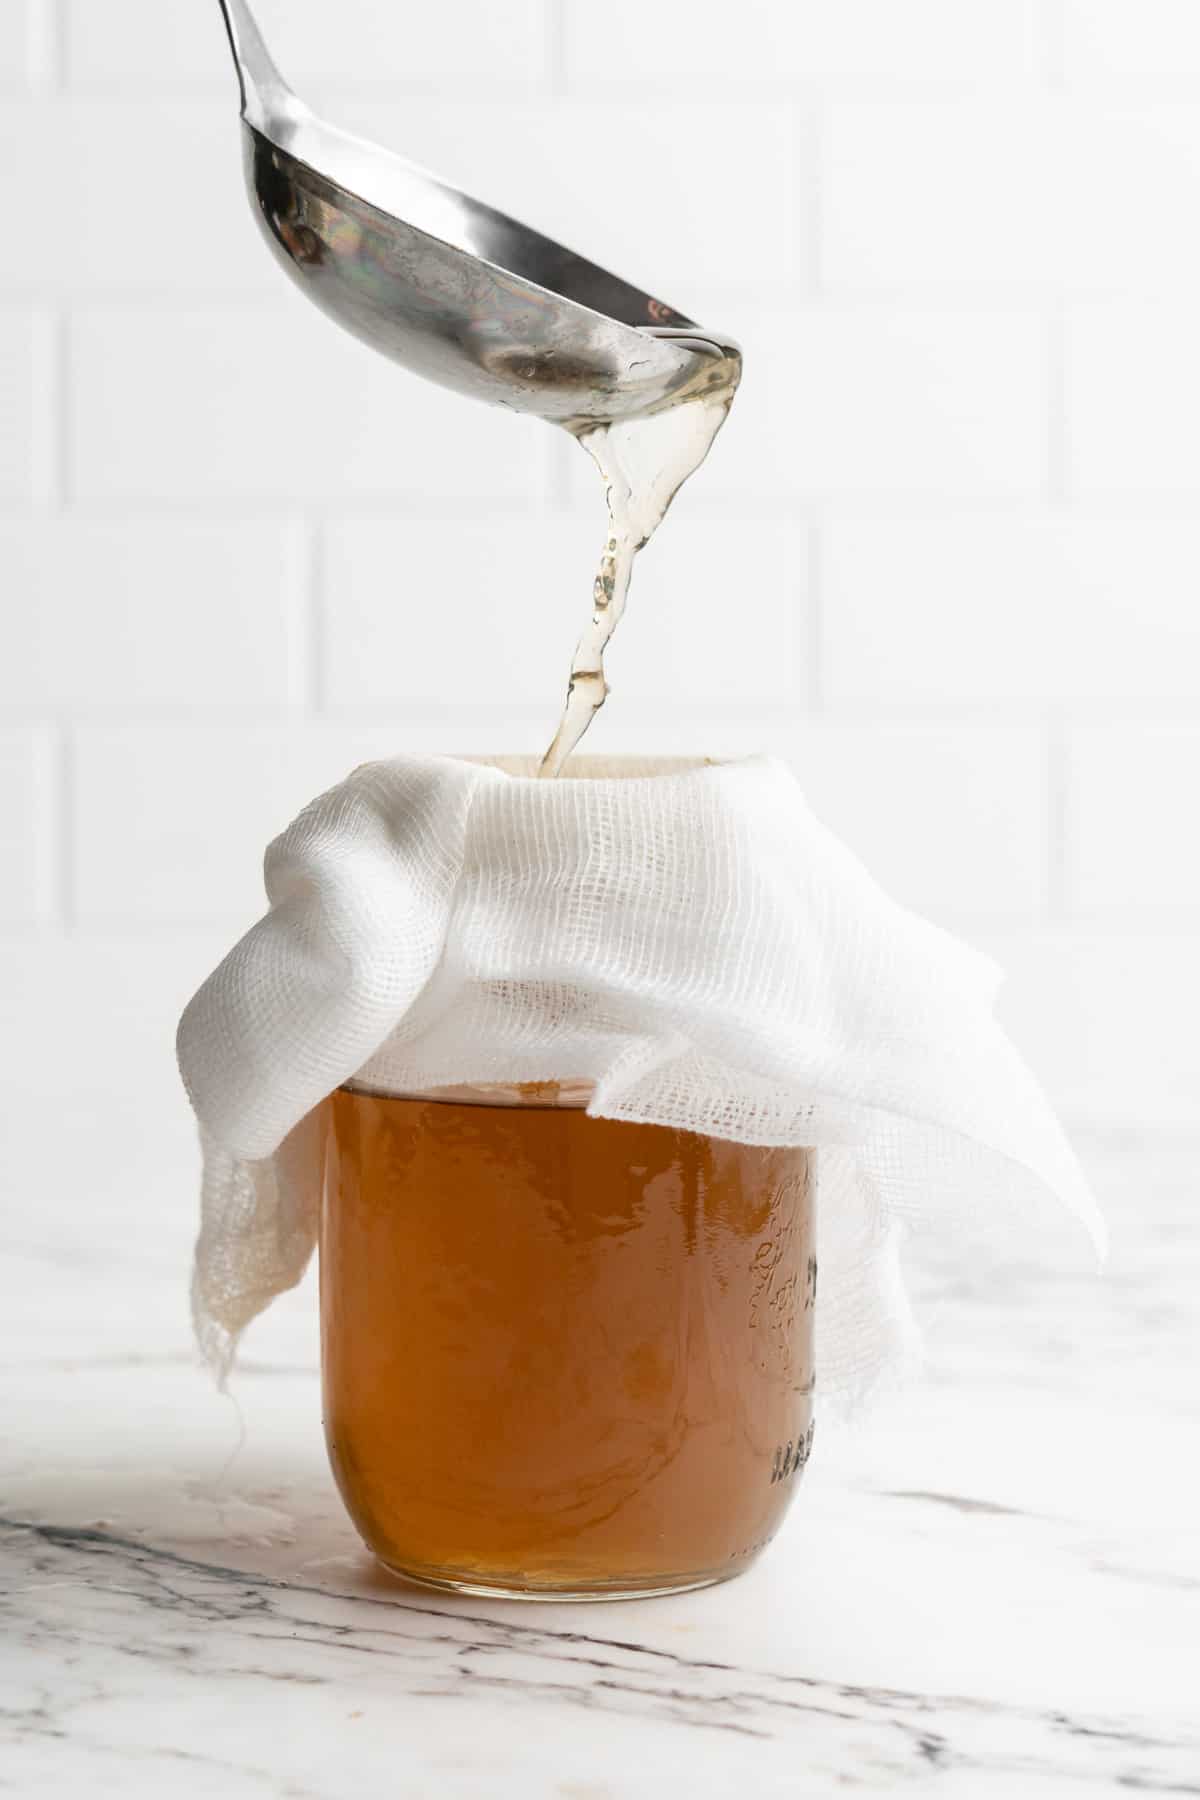
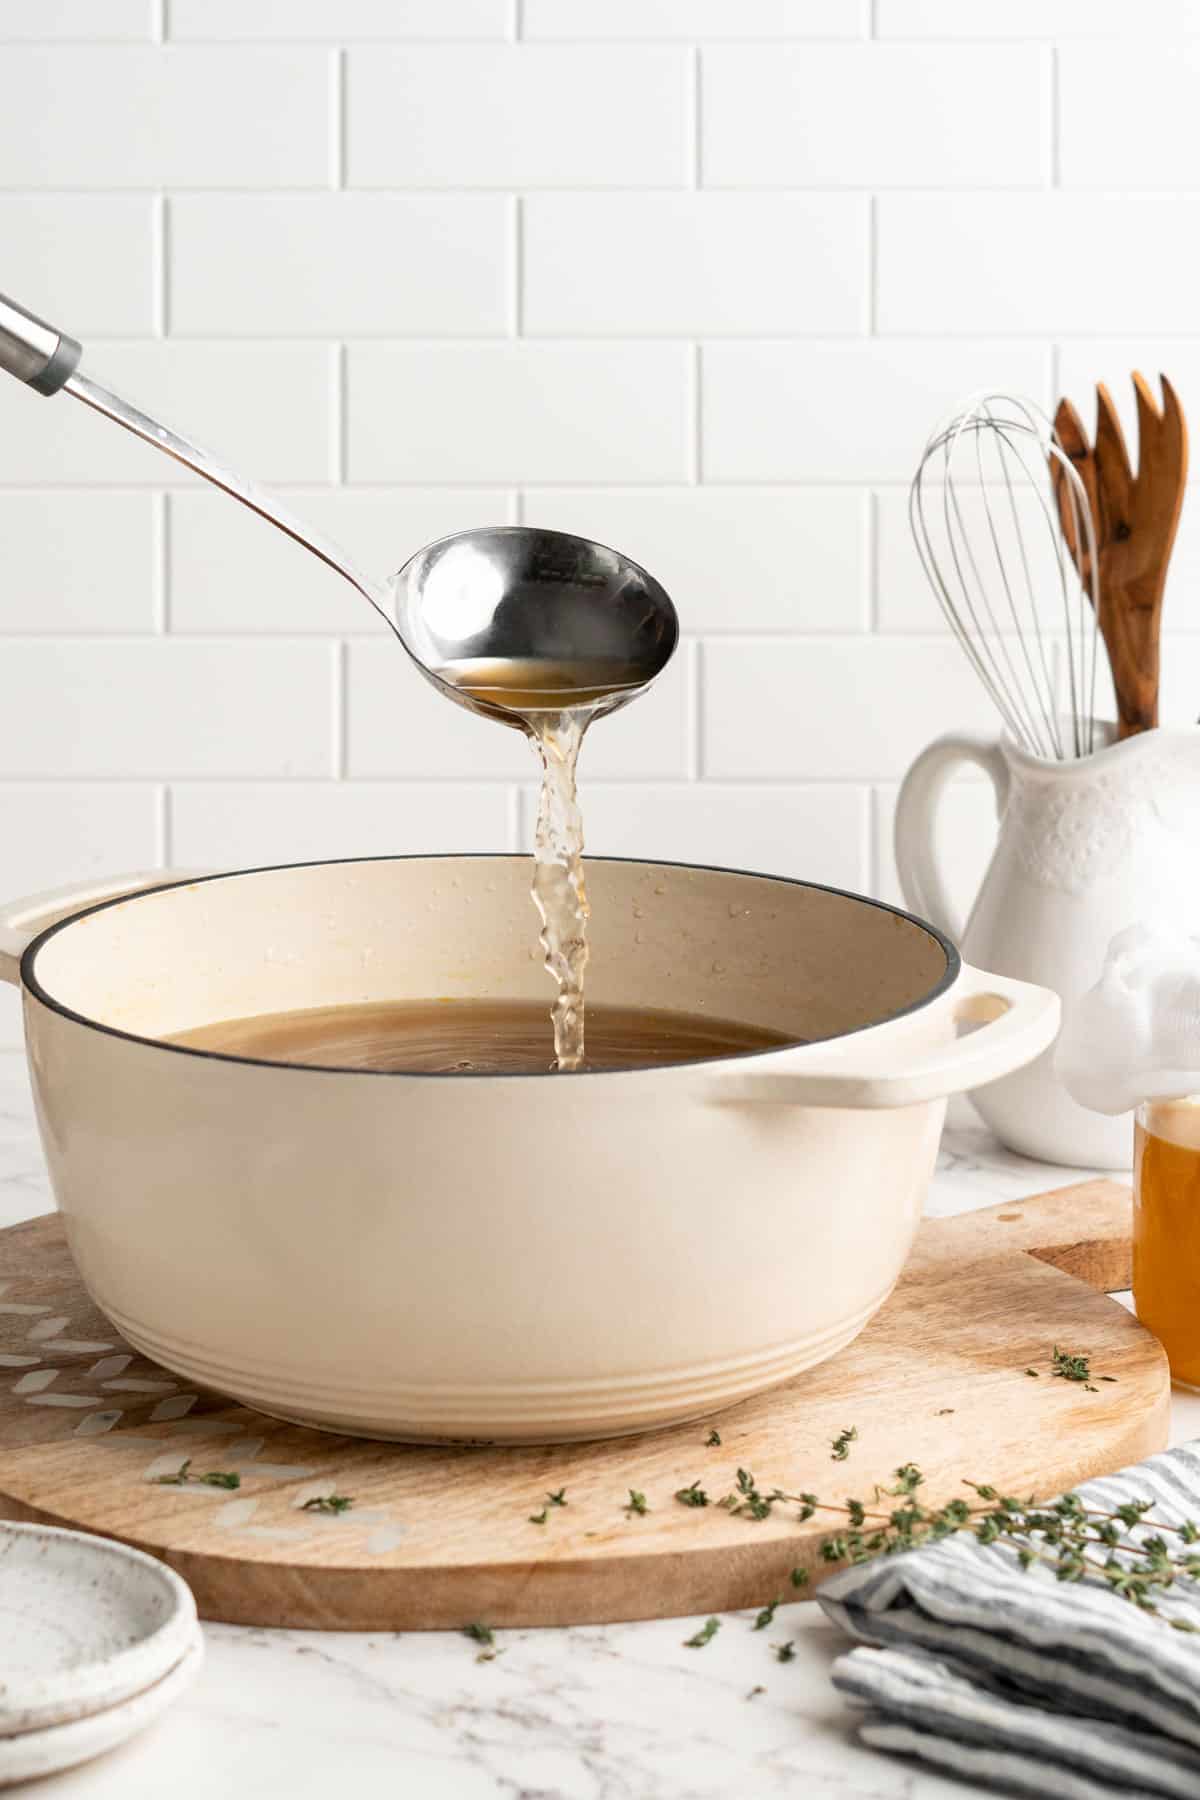
Cool and store. Remove the pot from the heat and allow the broth to cool. Place a layer of cheesecloth or a very thin towel on top of your jars or storage containers and pour the broth into them, discarding the vegetables caught in the cheesecloth. Add the liquid aminos, if using.
Tips for Success
Here are some tips to help you make sure your homemade vegetable broth turns out perfect.
- Don’t add too much salt. You’ll probably be using your broth in a recipe, and odds are that recipe will have you adding salt as well. So you don’t want to start with a broth that’s overly salty!
- Make concentrated broth. For even more flavour, you can use 10 cups of water instead of 12.
- No cheesecloth? No problem! Just pour the broth into a fine mesh strainer set over a large bowl. Then, discard the solids and divide the broth into containers for storage.
Variations
The best part about homemade vegetable broth is that it’s so versatile. Here are some ways to customize this recipe:
- Make mushroom broth by swapping the frozen veggie scraps for 6 cups of mushroom stems/scraps—or simply use fresh mushrooms.
- Add turmeric for a golden colour, nutritional yeast , and some smoked paprika for a vegan chicken broth substitute.
- Try adding shiitake stems, sliced ginger root, and kombu for an Asian-inspired broth perfect for making miso soup.
- Save corn cobs after removing the corn and simmer them in the broth. This makes a delicious base for corn soup!
Uses for Vegetable Broth
I use this vegetable broth several times a week! Naturally, it’s great in soups like my Vegetable Minestrone Soup and Roasted Cauliflower Soup . I also use it as a cooking liquid for quinoa and rice, for making Creamy Vegan Mushroom Risotto , and as a base for Vegan Gravy .
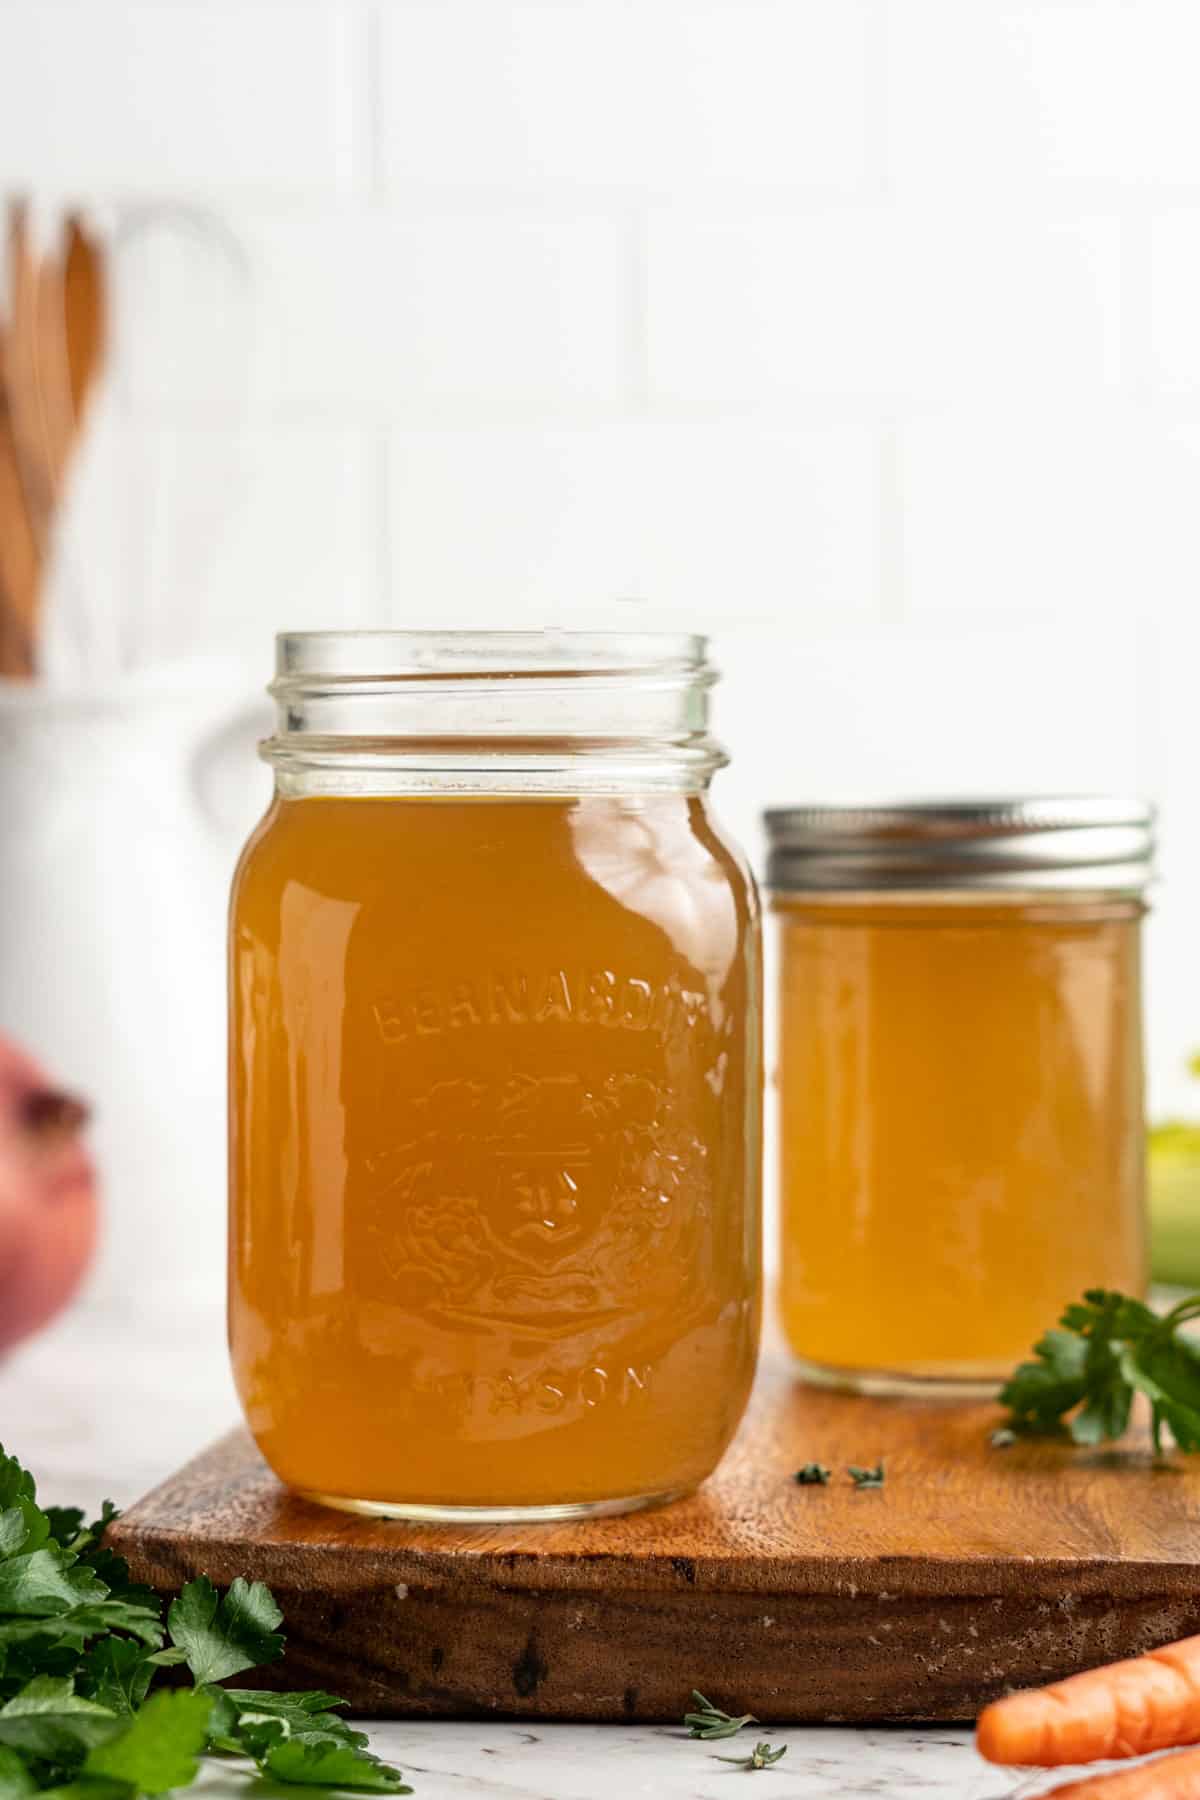
How to Store
Vegetable broth can be stored in the refrigerator for up to a week in an airtight container or jar.
Can This Recipe Be Frozen?
To freeze, allow the broth to cool completely and then divide into freezer-safe containers or ice cube trays. Once frozen, transfer cubes to a freezer bag for easy storage. Thaw in the fridge overnight before using.
More Kitchen Basics
- How to Make Banana Milk (Vegan, Paleo, 5 Minutes!)
- How to Make Peanut Butter
- How to Cook Lentils
Ingredients
How to Make Vegetable Broth with Veggie Scraps
- 3 stalks celery , chopped
- 2-3 medium carrots , chopped
- 1 to 2 red onions , or leeks or shallots, or all if you have
- 3 to 5 cloves garlic , you can lessen, I love adding garlic
- Few sprigs thyme
- A big handful parsley
- 2-3 cups of frozen veggie scraps , this is in addition to the above vegetables
- 10-12 cups filtered water
Optional, but recommended if you have them
- Mushrooms
- Bell peppers
- 1/2 teaspoon salt
- 10 peppercorns
- 1 chili pepper or scotch bonnet pepper , helps to deepen flavours
Umami additions
- 1/4 cup liquid aminos , or coconut aminos or low sodium soy sauce
Instructions
How to Make Vegetable Broth with Veggie Scraps
- In a pot over high heat, add all the ingredients except the water. Let the heat sweat the ingredients for about 3 minutes to help bring out flavours. If adding in extra ingredients, add them now. Pour in all the water and stir. I use 12 cups, but you can use 10 cups if you want an even more concentrated broth.
- Bring to a boil, then reduce to a simmer for 1 hour.
- Remove from heat and allow to cool.
- Select the containers you’ll be storing broth in (I like clear large glass jars). Place a layer of cheese cloth or a very thin towel on top and pour into jars to catch liquid and strain vegetables.
- At this point, I stir in equal amounts of liquid aminos (totalling 1/4 cup) in the jars. I end up with two jars, so I stir in 2 tablespoons into each. After sitting for a day the flavours will deepen even more.
- Store in fridge for up to a week. See notes for freezing instructions. Enjoy!
