Last month I was invited to the Pinterest HQ! I had a blast in their fun office and learned 10 top tips for content creators that I knew I had to share with you!
Remember this video on Instagram?! That’s from when I was invited to the Pinterest HQ last month in San Francisco. I got a lovely tour by Lauren, the sweetest and most energetic person ever who is Pinterest’s Community Marketing Manager. It was so nice meeting her in person since we had just had a phone meeting the week before about inviting me to join Pinterest’s Creator Collective!! I’m definitely really excited about what’s to come from being a part of this group and will be sharing with you guys of course!
I got some beautiful swag from Pinterest, some amazing vegan and tourist attraction recommendations from Lauren and I learned a lot of useful and helpful tips for content creators that I really wanted to share with you guys. I love that Pinterest works if you’re a food blogger, wedding photographer, DIY-er, architect, fashion editor…the list goes on for the uses! Even if you aren’t sharing your business and you’re using Pinterest solely for a home project or fun, I hope these tips give you some great insight on our side of the world! I actually always use Pinterest first as my own search engine since I’m such an enormously visual person. We’re all creators at heart though, right?!
https://www.instagram.com/p/Bg2ba8-H3k2/?taken-by=jessicainthekitchen
First of all, I should give you a brief explanation of Pinterest , just in case you’re like my dad and joined just last month to follow me (thanks dad!!). Pinterest is an amazing platform to help you discover and do what you love. When you share your ideas onto Pinterest, it helps spark creativity with millions of Pinners from around the world and gets them excited to try new things.
10 tips for Content Creators that I Learned at Pinterest HQ
- Get a Business account ! It’s free, it gives you amazing analytics and gives you access to other pro tools. This is the first step in being a great content creator on Pinterest and really taking advantage of all it has to offer you. While you’re doing that, remember to claim your website. This ensures Pinterest recognises all of your content and gives you attribution throughout Pinterest for it. Also your profile looks so cool !
- The first five pins you save each day will be prioritised for distribution. Major pro tip. That also means that you should save your pin to the most relevant board first since that Pin will get distribution priority. Saving to irrelevant boards won’t help and may hurt the distribution of your Pins.
- You also won’t get dinged for having a lot of Pins! Just aim to keep your content well organized in relevant boards (see tip #6), and save your ideas regularly, rather than all at once. It’s even okay to have multiple Pins that lead to the same webpage. In fact, it can be beneficial to save a variety of images that might appeal to different types of Pinners. Just make sure to add unique descriptions that are specific to each Pin—it’ll improve your SEO.
- USE HASHTAGS ! Yes! Use up to 20 hashtags that describe the content in the Pin. Hashtags should act as broad search terms, not niche humor (#springfashion is great, #ilookterribleinhats is not). So if you’re food blogger like me for example, use these tips for your recipes: Describe the main ingredients of the dish – How to cook it – What events it should be served at and specific hashtags like #cleaneating, for example!
- Name your boards wisely . Make sure your board names are specific and relevant to your audience (and contain good keywords in the description and name). Avoid adding extra spaces between letters . Since people are actually searching for these words, great board names makes it easier for them to find your board. While you’re doing that, ensure you create at least 5 boards that are cohesive and specific.
- While you’re doing that – organise your boards with the new feature sections . I actually discovered exactly how to do this after I saw a reader of mine re-pin my recipe to her sections! Sections help to take boards deeper by organising it into sections. So, for my reader, she had a board called “vegan recipes” and in it she had “vegan meatz” “vegan salads” “desserts” and so on! Makes sense right? This will not only help you as a Pinterest user, but also as a content creator to keep everything beautifully organised. Again, reading Pinterest’s blog post on this will keep you 100% up to date, and then you can share this with your readers so they’re up to date too!
- The ideal aspect ratio is 2:3. Or, 600x900px—square 600×600 works well too. Pins longer than 1260px will get truncated. Pinterest actually optimises for Pins that fit within the preferred aspect ratios. I also love this short video on Pinterest’s blog that reminds us creators about some great basics to be implementing into our pins.
- Start saving to Pinterest around 45 days early . This means you can start saving and planning Pins for upcoming trends, seasons and holidays. This is because people use Pinterest to plan their life in advance so being in advance will help you too! Think of how early you start to plan your own Thanksgiving, or Christmas gifts! This makes so much sense – when we were decorating for our first Christmas at home, I was definitely searching way before Christmas because I was so excited. This means that you should definitely design for Pinterest first since it’s probably earlier than you’ll be posting on other social media platforms. That means designing for the aspect ratio above again, keeping things very visual and pinning lots of great content!
- Really tap into Pinterest Analytics! https://analytics.pinterest.com is a real hub for finding out some key information about your Pinterest page, your blog, and how Pinterest users interact with both. You can see information for impressions, click throughs to your site, your most popular pins broken down and so much more. When I was going through my Analytics with Lauren, I found out that users can actually upload photos that they took of your recipes to the post (see above)! I saw dozens on readers pictures that I had never seen before. Not only was it fun to see, it was useful to know what readers really loved. Real life example: I used that information to create my Vegan Butter Chicken post. It’s now the fastest growing post on Jessica in the Kitchen, which is insane!
- Read Pinterest’s blog – it is insanely useful. Honestly, Pinterest’s business blog and Newsroom blog have a plethora of information just waiting for you to discover. It’ll help you as a content creator to find out Pinterest’s Top 100 Trends to Pin for 2018, and learn about new features, such as that you can now reorder your pins! I would definitely add it to your weekly reading list. You’ll know first about trends, new information and everything else to do with Pinterest updates there.
MORE FUN TIPS – PLACES FOR INSPIRATION
Pinterest’s Business blog
Pinterest’s Top 100 Trends to try in 2018
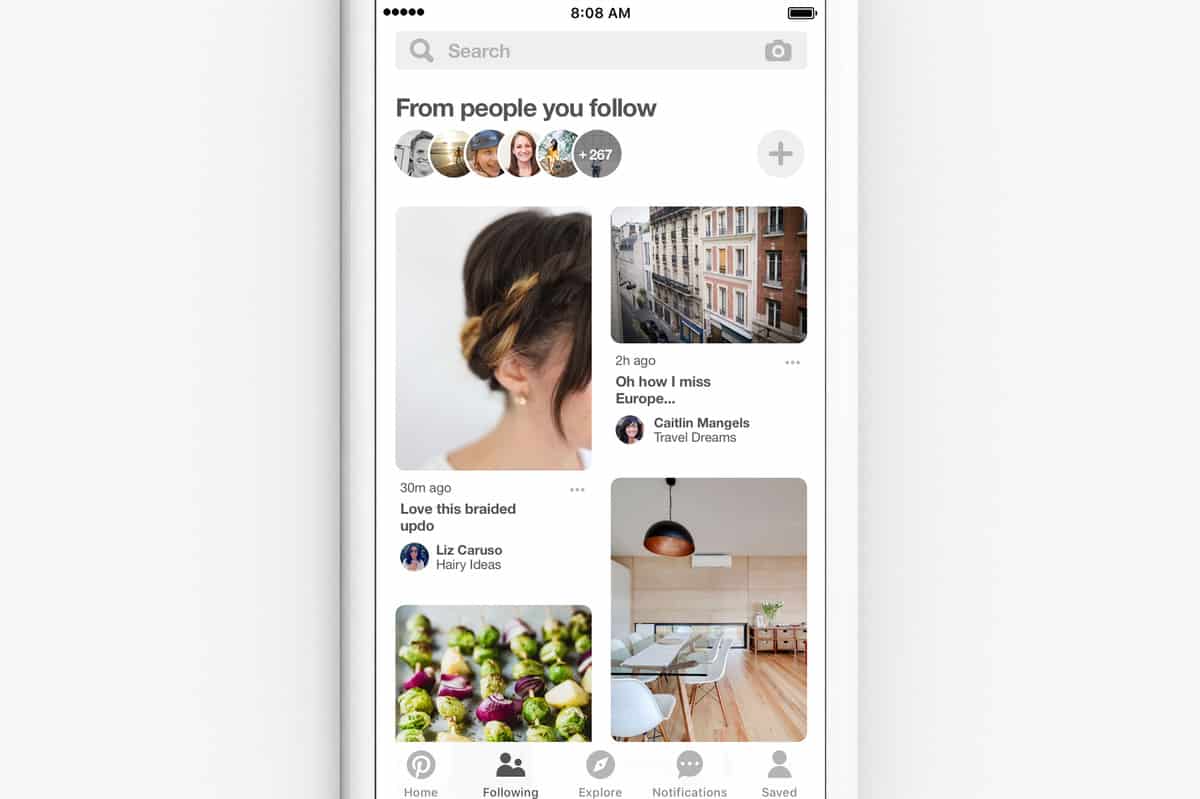
The Following Tab inside Pinterest – it’s new, btw! It’s a great way to discover new ideas and to see what people and brands who you’re following are sharing! You can curate it so that it’s only those who share your taste, too!
<span data-mce-type=”bookmark” style=”display: inline-block; width: 0px; overflow: hidden; line-height: 0;” class=”mce_SELRES_start”></span>
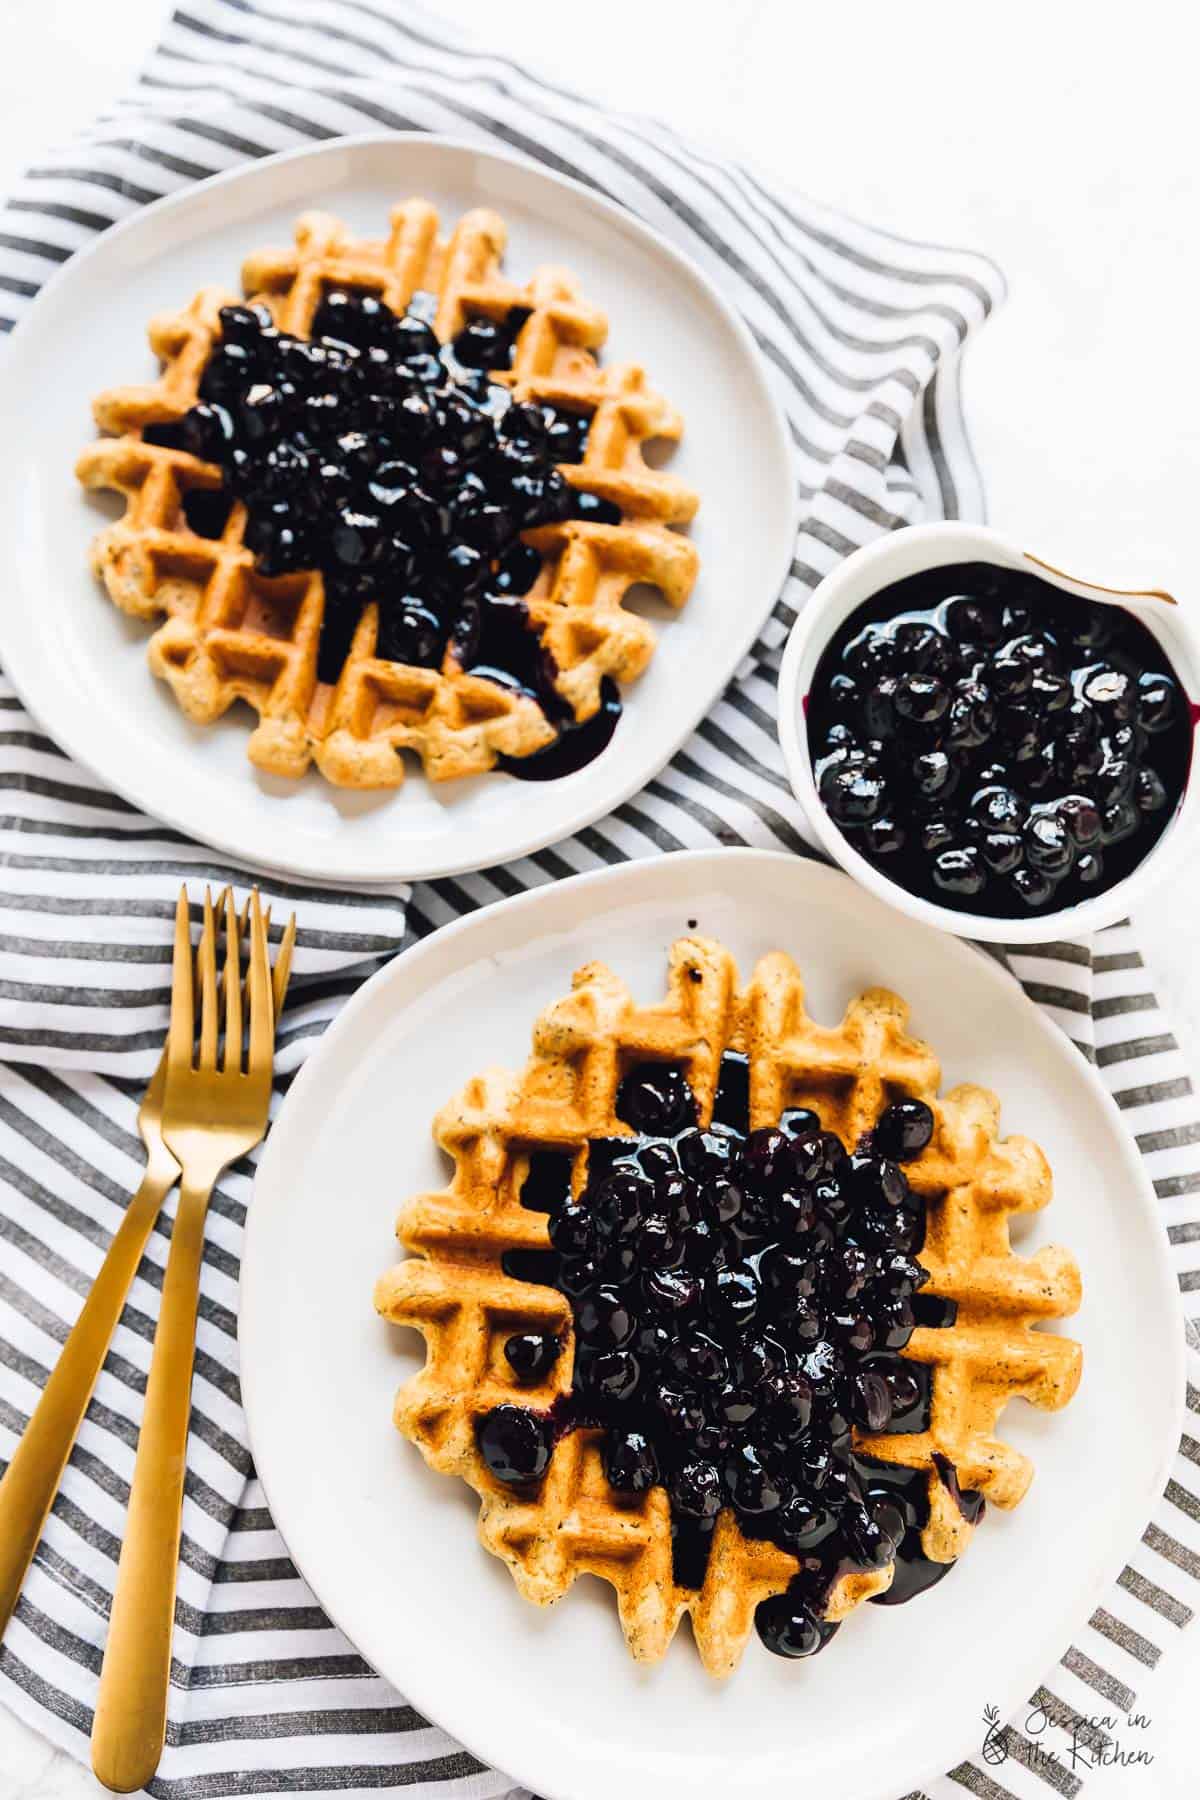
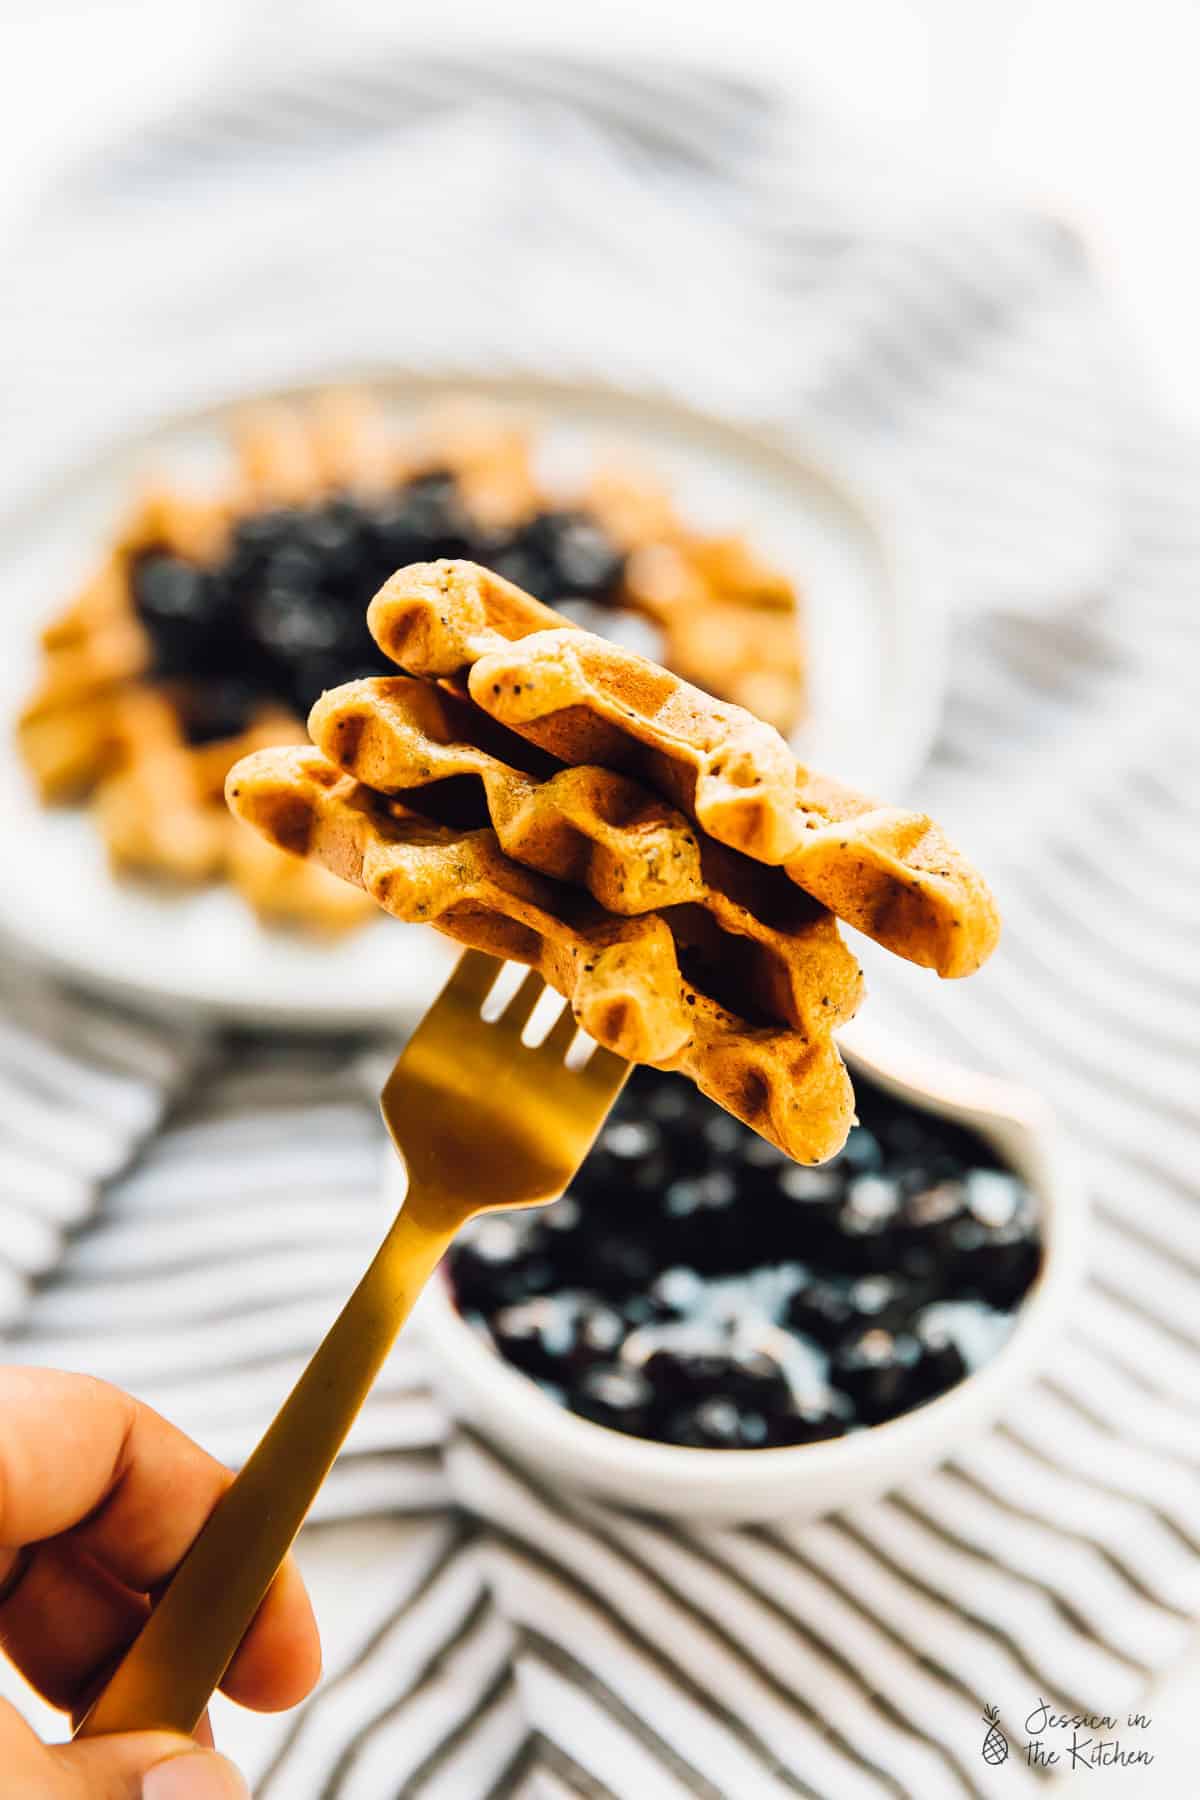
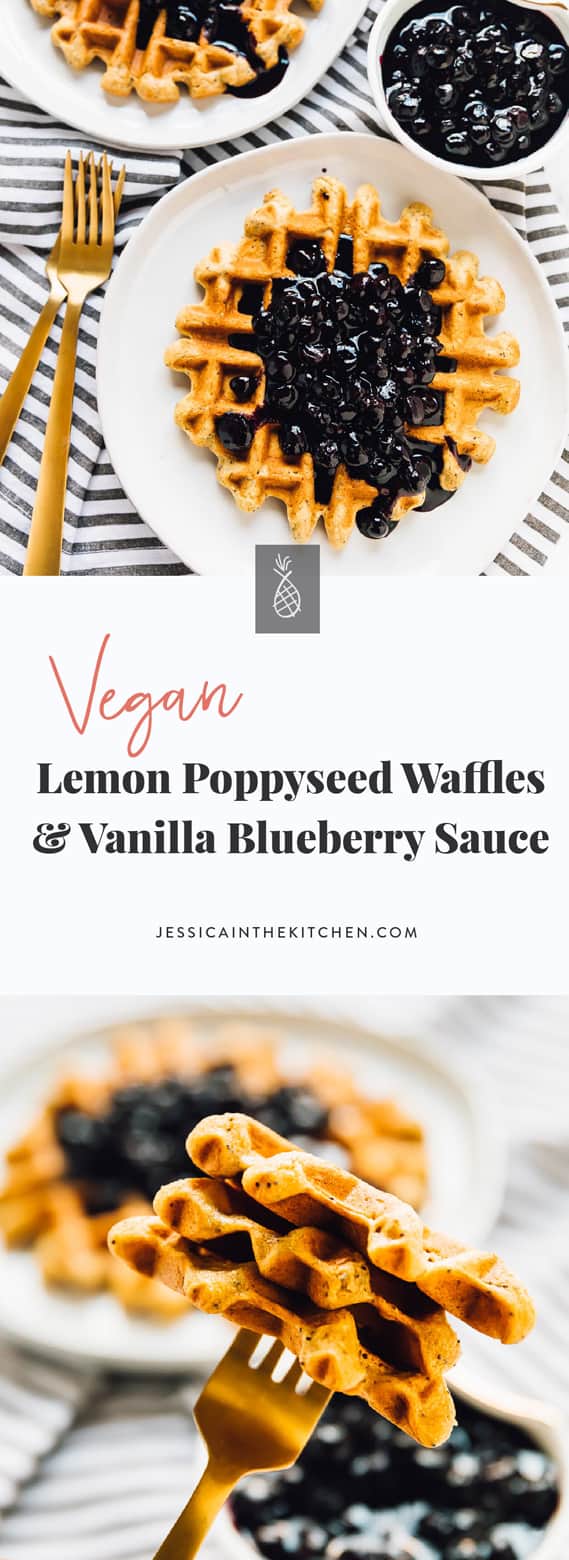
These Lemon Poppyseed Waffles are bursting with flavour! They’re drizzled with a divine vanilla blueberry sauce, and are vegan and gluten free!
Okay, so the question of the century: are you a waffle lover, or a pancake lover?
Personally? I love both. If I had to choose, I would definitely choose waffles. I love the texture differences and the fact that you can get both a fluffy and slightly crisp breakfast in one. Texture dreams completed, basically. I realised I haven’t made a waffle recipe for you guys in quite a while, so I made these Lemon Poppyseed Waffles with Vanilla Blueberry Sauce for you. Oh, yes, it’s just as amazing as it sounds. Also, they are vegan and gluten free. Christmas just came early.
Let’s break down the waffles, then the vanilla blueberry sauce that you’re about to put onto everything possible. I’ve been wanting to tweak my waffle recipe for a while, and I really pulled off quite something with these. I wanted a gluten free waffle that doesn’t ‘taste’ gluten free, and a vegan waffle that should not be ever identified as ‘vegan’ in taste. To do that, I used a mix of oat flour and gluten free flour, which really diversifies the texture, and I also kept the ingredients incredibly simple. The texture is unbelievably close to the kind of waffles you’d have at a restaurant, and the kind you’re going to want for breakfast every morning.
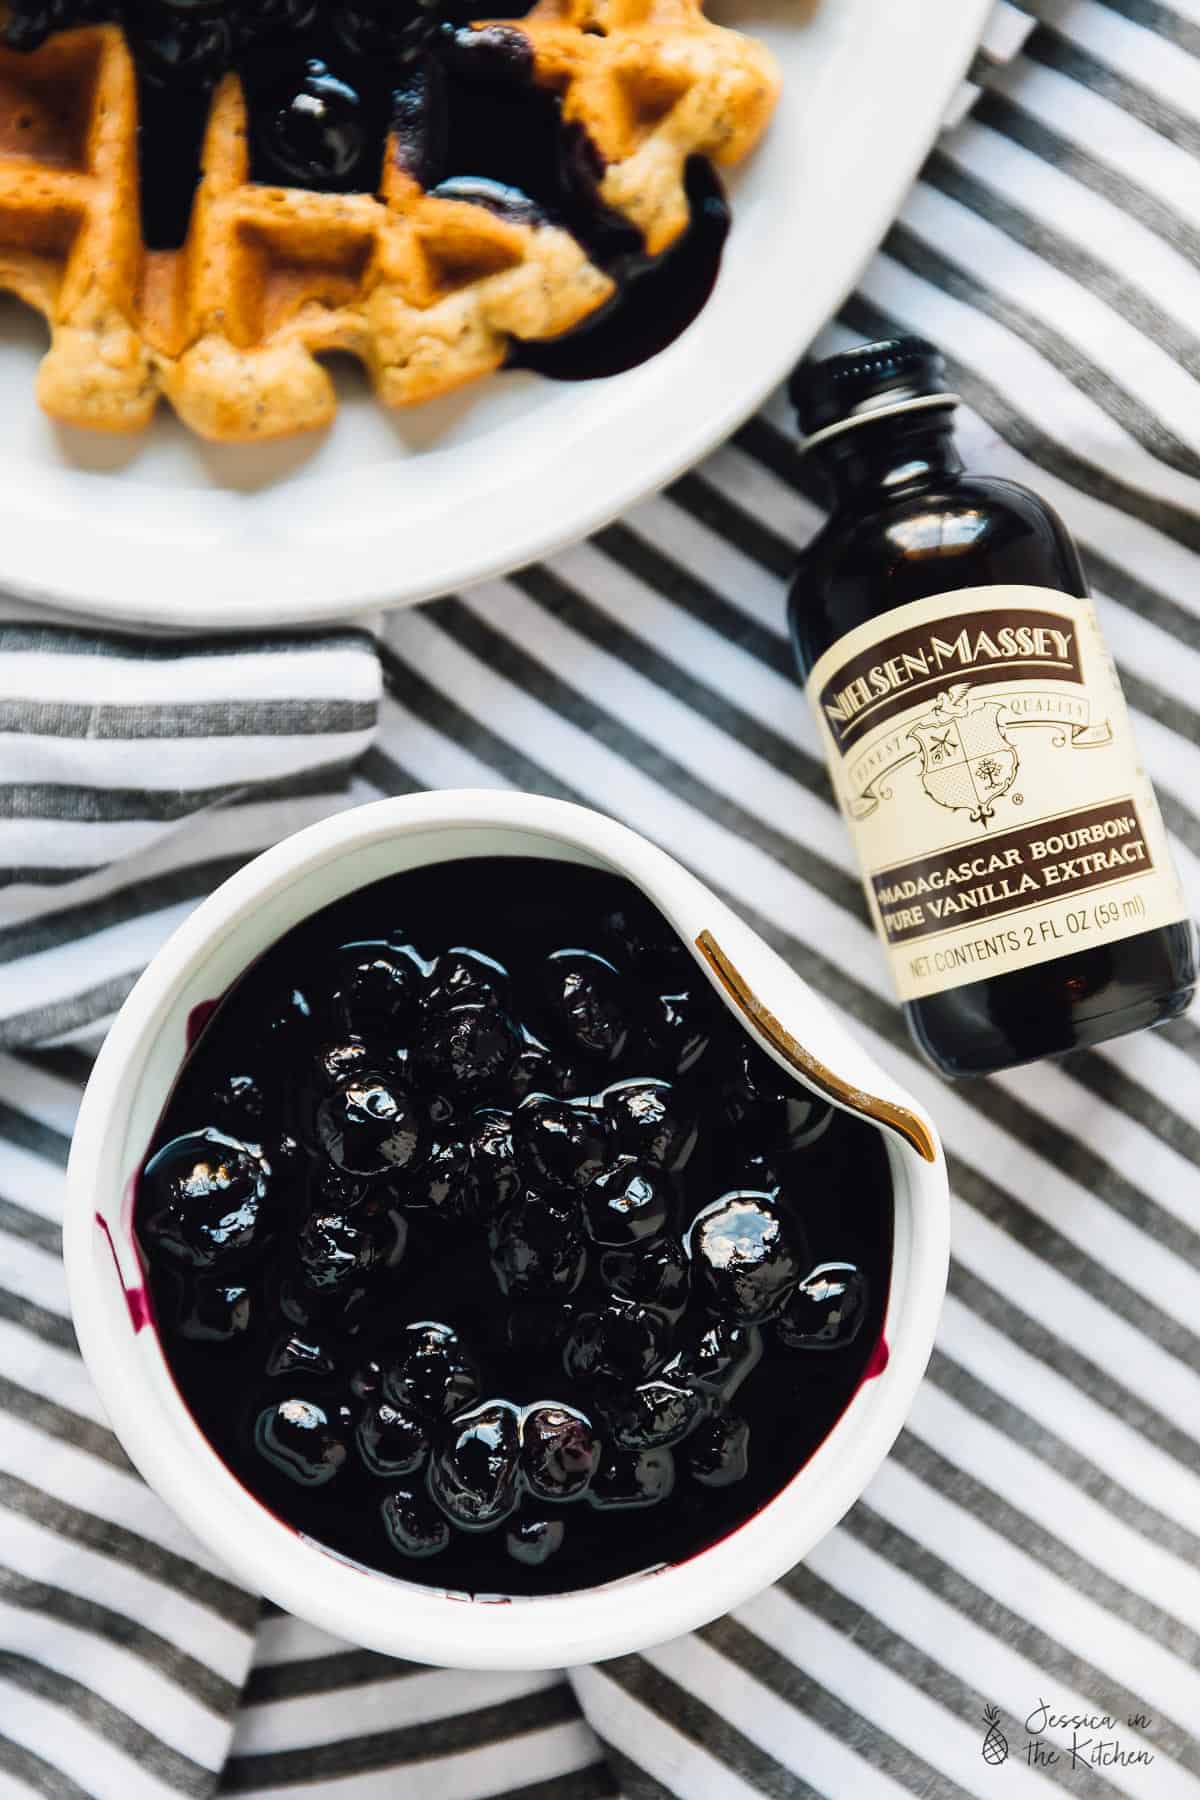
Of course since we’re in the heart of spring, and everyone loves spring flavours, I wanted to add that to these waffles. For this recipe, I used Nielsen-Massey’s Pure Lemon Extract to bump up the waffle flavour with a divinely lemon-y flavour that really took it over the top. I also used Nielsen-Massey’s Madagascar Bourbon Pure Vanilla Extract , because waffles need vanilla extract friends, and they need the best ones.

You guys already know that if I stand behind a product, it’s because I love and believe in it. Back in my baking days, I only used Nielsen-Massey’s Madagascar Bourbon Pure Vanilla Extract . I specifically remember ordering the largest size they had on their website, waiting excitedly for it to arrive, and then taking care of it like it was my child. It kind of was.
All Nielsen-Massey’s products are all-natural, GMO-free, certified gluten-free, certified Kosher, and allergen-free, so know that they work perfectly with our little family over here on JITK.
After the bottle finished? I ordered more, and well, true story, I kept the bottle. It was just too pretty to toss and so I literally kept the bottle until I moved out of my parents’ house. So, needless to say, I love Nielsen-Massey’s products , and the high quality that they put into their vanilla-cultivation process and to craft their all-natural pure flavours.

Let’s take you for a little, super eye-opening history lesson. Have you ever wondered, “Where does vanilla come from?”
All vanilla is grown within 10-20 degrees of the equator and most vanilla beans available today come from Madagascar, Mexico and Tahiti. The entire vanilla-cultivation process, from planting to market, can take from five to six years. Following harvest, beans must be cured before use. Then, for two weeks, farmers spread the beans in the hot sun during the day and wrap them in blankets to sweat at night. The beans are conditioned on racks for an additional two weeks, and finally, beans are aged for 6 to 8 months in wooden boxes to allow the complex flavour notes to emerge.
Nielsen-Massey also uses as few ingredients as possible when producing their pure vanilla extracts to create the highest-quality product available. This process leads to why their products are pretty much perfect. I specifically chose the Madagascar Bourbon Pure Vanilla Extract since not only was it the very first Vanilla Extract I tried almost 10 years ago, but also because vanilla from Madagascar has a sweet, creamy flavour with velvety after-tones and makes for an excellent “all-purpose” vanilla, perfect for any sweet or savoury recipe. That means it was the perfect choice for these waffles.
Now that blueberry sauce! I’ve been making it for years, and decided I wanted to re-share it with you guys. It gets slightly thick, enough to coat your waffles, and has the most divine Vanilla flavour. Since blueberries and lemon pair so well, I also used both Nielsen-Massey’s Madagascar Bourbon Pure Vanilla Extract and their Pure Lemon Extract in the sauce. P.S. – if you sneak some of this, it’s pretty obvious since the blueberries turn your tongue blue. Take it from someone caught in the act of sneaking more blueberry sauce, you know, just saying.
Now, the Pure Lemon Extract. To craft all-natural pure flavours, Nielsen-Massey starts with premium ingredients sourced from around the world. Made from California lemon oil and rounded out with peel notes, their Pure Lemon Extract is a fantastic “helper” ingredient to have on hand for the times a splash of citrus is needed. Nielsen-Massey uses a proprietary process to gently extract the delicate flavour without losing any of the sweetness or richness of the original ingredient. This process means that’s why with only a teaspoon and a half of lemon extract, you get those divinely subtle notes throughout the entire waffle recipe!
I hope you enjoy the waffles friends! Happy eating!
P.S friends – make sure you follow Nielsen-Massey on social media for even more recipe inspiration!!
Ingredients
Vegan Lemon Poppyseed Waffles
- 1 cup oats, ground into a flour (or oat flour) , 87g
- 1 ¼ cups all purpose gluten free flour mix , 185g
- ½ teaspoon baking soda , 2.4g
- 1 ½ teaspoons baking powder , 7.2g
- ¾ teaspoon sea salt , 4.2g
- 1 tablespoon poppy seeds , 9.3g
- 1 ½ cups unsweetened almond milk , 360ml
- 2 teaspoons apple cider vinegar , or white vinegar, 10ml
- ¼ cup unmelted melted vegan butter , 44g
- 1 ½ teaspoons Nielsen-Massey Pure Lemon Extract , 7.5ml
- ½ teaspoon Nielsen-Massey Madagascar Bourbon Pure Vanilla Extract , 2.5ml
- 2 tablespoons maple syrup , 30ml
Vanilla Blueberry Sauce
- 3 cups frozen blueberries , 420g
- 1 teaspoon Nielsen-Massey Madagascar Bourbon Pure Vanilla Extract , 5ml
- 1 teaspoon Nielsen-Massey Pure Lemon Extract , 5ml
- ½ cup organic brown sugar , or coconut sugar , 96g
- 2 teaspoons cornstarch , + 2 teaspoons water, mixed together, 6.66
Instructions
Vegan Lemon Poppyseed Waffles
- Mix the almond milk and apple cider vinegar together. Let sit for at least 3 minutes to create a vegan buttermilk.
- In a large bowl, mix the oat flour, gluten free flour, baking soda, baking powder, sea salt and poppy seeds together. Set aside.
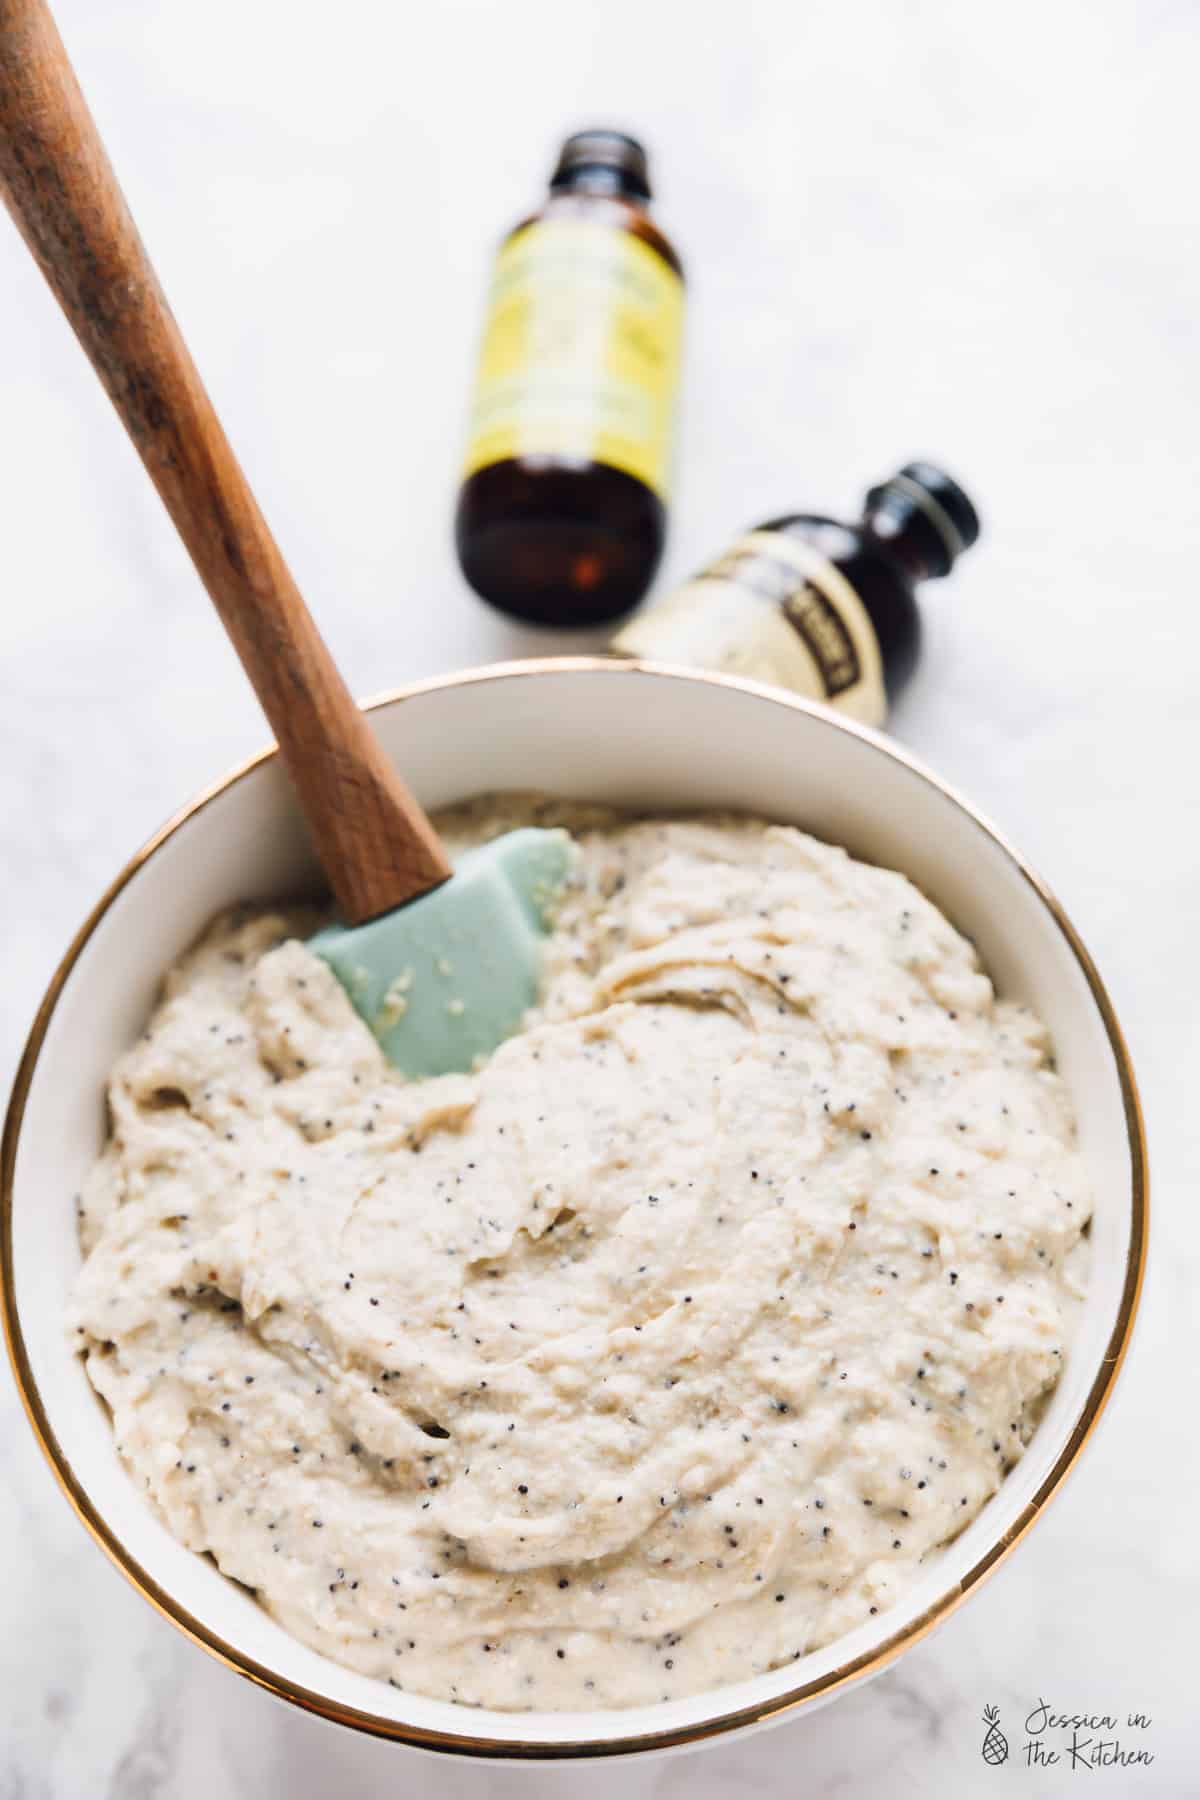
- In a smaller bowl, mix all the vegan buttermilk, the melted vegan butter, the maple syrup and the Nielsen-Massey Madagascar Bourbon Pure Vanilla Extract and Nielsen-Massey Pure Lemon Extract.
- Pour the wet ingredients into the dry and mix until combined.
- Preheat your waffle iron in the meantime and grease according to manufacturer’s settings. I set mine two dials before max because I like mine crisp but also very fluffy. Using a ½ cup/125ml measuring cup, scoop out some batter and pour/spread into the middle of the greased waffle maker. You don’t need to push it to the edges. Close and let cook until the steam has COMPLETELY finished to rise from the waffle maker. Otherwise the waffle will fall apart. Don’t open it before the steam is finished! Remove each waffle and place on a baking sheet in your oven or toaster oven on “warm” or 200F/95C to keep warm and crispy until finished with the entire batter. Continue with the rest of the batter.
- While the waffles are being made, you can prepare your Vanilla Blueberry Sauce.
Vanilla Blueberry Sauce
- Add all the ingredients to a pot over high heat. Bring the ingredients to a boil until blueberries begin to pop, and then reduce to a lower heat for 10 minutes, until the sauce begins to thicken. Feel free to add more cornstarch slurry if you want your sauce much thicker.
- Serve the waffles with the vanilla blueberry sauce and enjoy!
